

Page 1

Color profile: Generic CMYK printer profile
Reverse of front cover
fold-out
Composite Default screen
Im port ant note — em ergency calls
The e3250 is not designed for making emergency
calls when the mains pow er fails. So you should
make alt ernat ive arrangem ent s for access to
Emergency Services.
(This means that you should also have a basic
phone that does not need m ains power, connected
to your line so that you can make calls during a
power failure.)
If you need help …
The Binatone Help Line is available from 9.00 am to
5.00 p m, M ond ay to Friday, o n
01 325 30 4 473
Unpacking your e32 5 0
In t he box are:
■ th e cordless handset (up t o six, dep ending on
wh ich e32 50 system you have b ought)
■
th e base unit
■
rechargeable bat teries and a bat tery
compart ment cover for each hand set
■
a telephone line cable fo r t he b ase unit
■
a mains power lead and adapter fo r t he b ase
unit
■
up to five charger pods, each with a separate
mains pow er lead and adapt er.
Keep th e packaging m aterials in a safe place in
case you later need t o transport t he unit .
Keep your sales (t ill) receipt, which is your
guarant ee.
E:\Binatone2003\e3400\e3400.vp
11 March 2003 10:09:02
Page 2
y
Color profile: Generic CMYK printer profile
Front cover fold-out
Composite Default screen
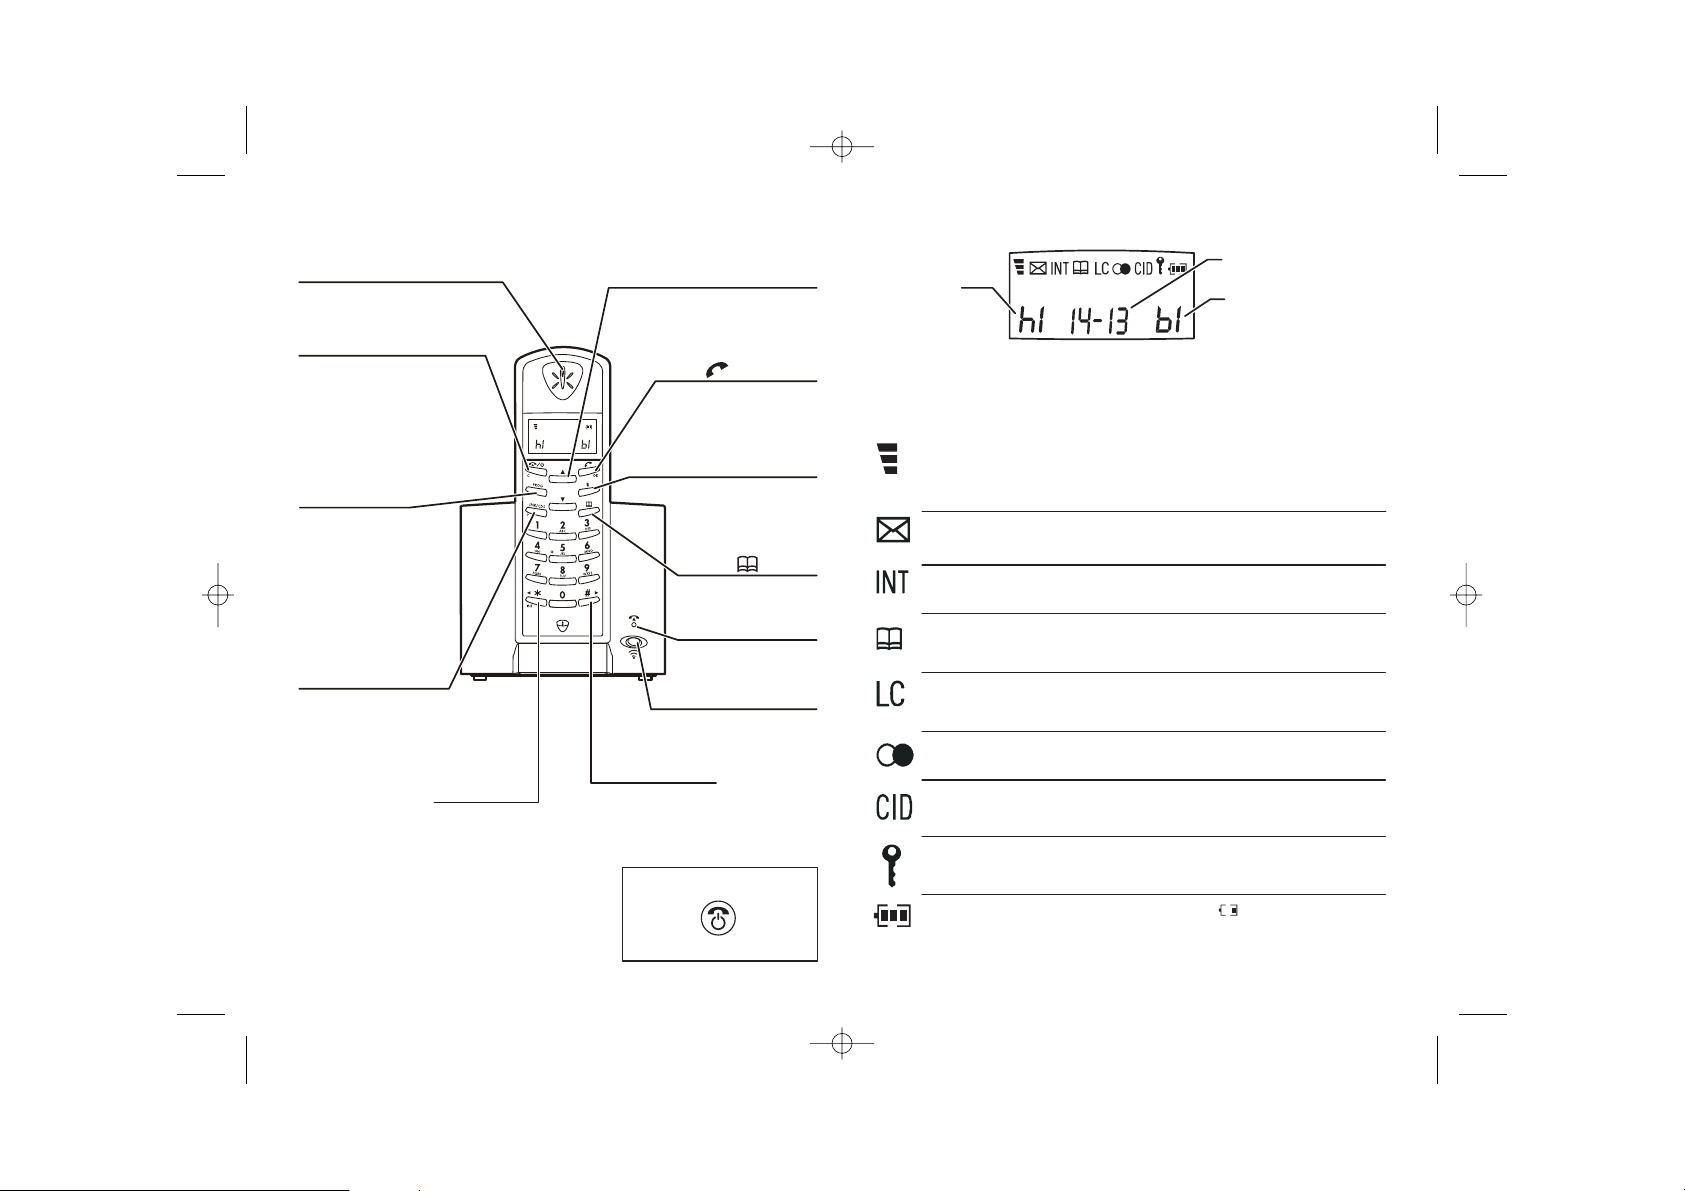
W her e t o find it
EARPIECE
Don’t hold th is
while the h andset is ringing — the
ringing get s louder as it continues.
HANG UP / C (Cancel) but ton
Press to hang u p at t he end of a call.
Press for to lock t he
keypad; or fo r to tur n t he
hand set on and off.
Whil e dialli ng or p rog ramm in g,
press br iefly t o delete d igit s from
th e display; or p ressand h old to
clear th e display.
PROG but ton
Press to start pro gram ming .
Press during a call t o make
a not e of a num ber in t he
No tebo ok.
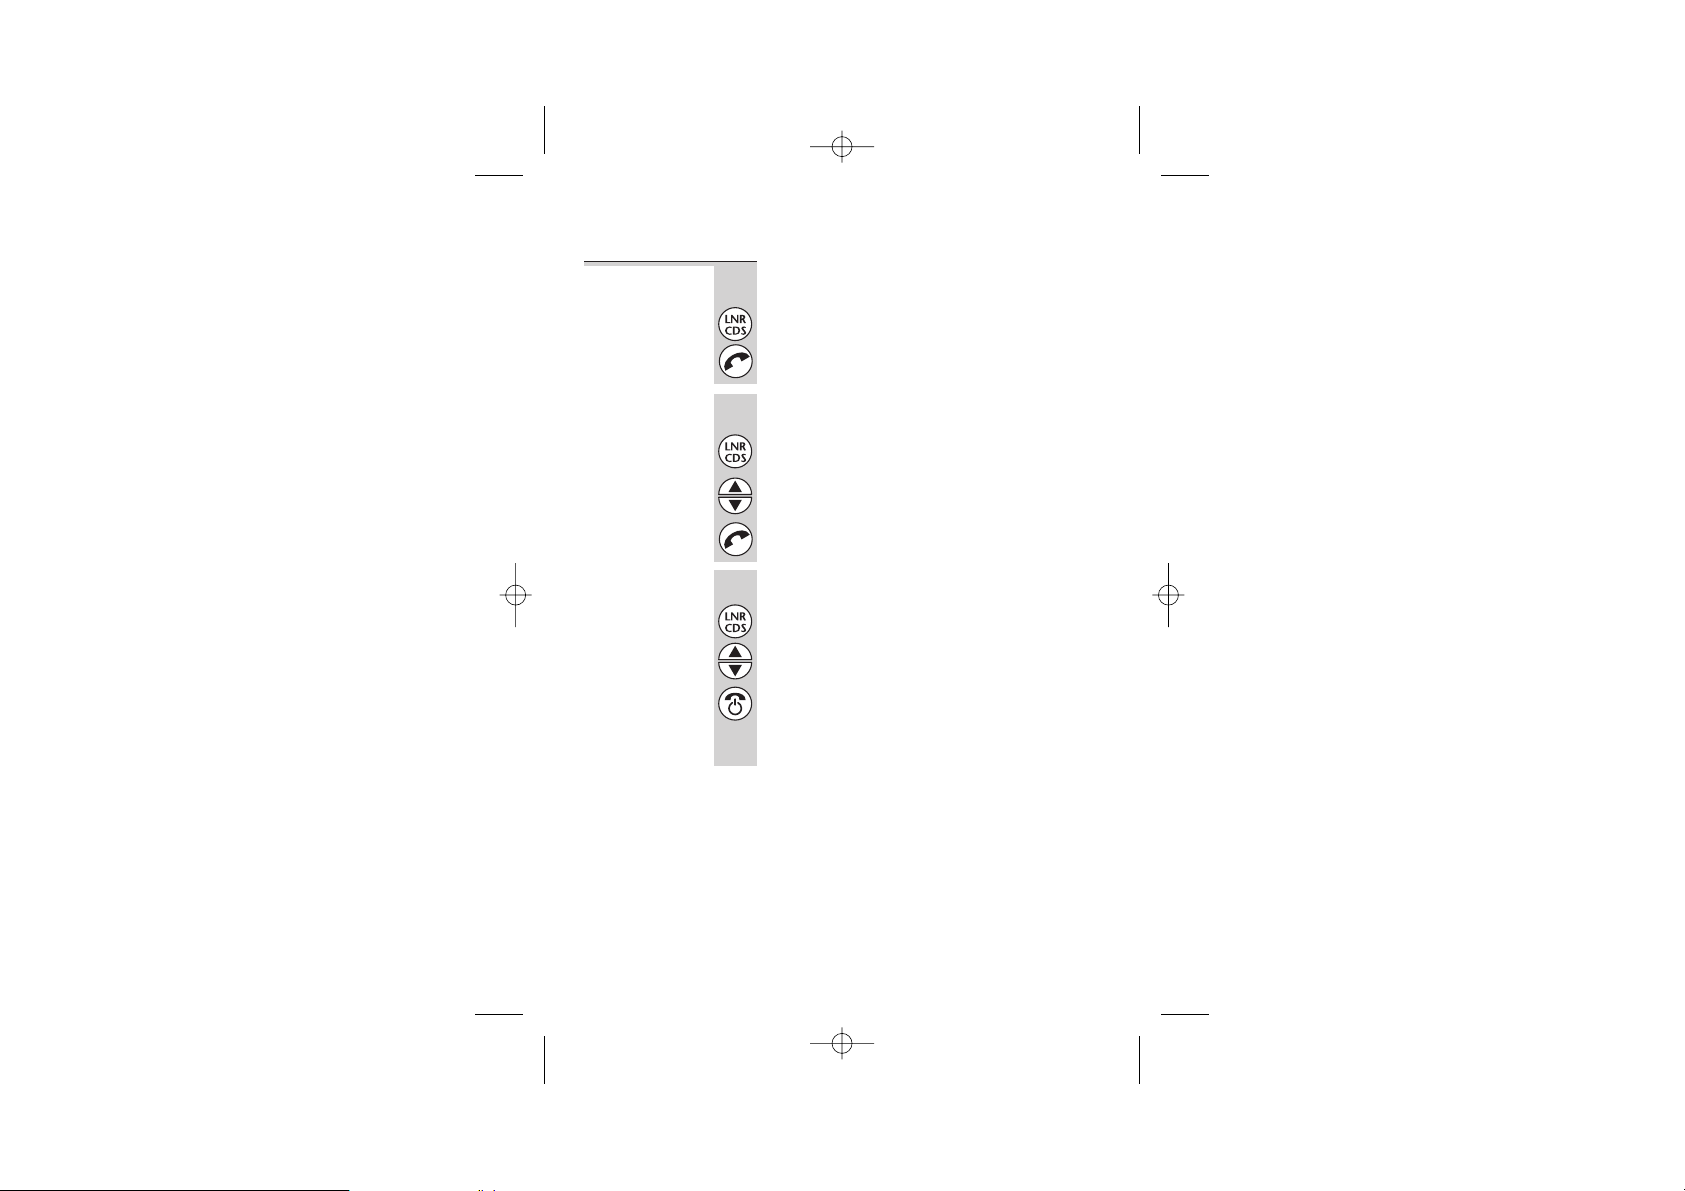
LNR/ CDS/ PAUSE butto n
Press ONCE to m ake a repeat call
to one o f t he last five num bers
you dialled.
Press TWICE to see a list o f Caller
Display reco rds.
Press to generat e pauses w hen
using t he pho ne on a PBX.
Before you can use the handset to make calls
you will need to fit and fully charge the
batteries, as described on pages 4 and 5.
Please read the notes on pages 2 and 3
before you install the base unit.
too close to your ear
1 second
3 seconds
IN T ( ) but ton✱
Press to make an
int ercom call.
UP and D OW N b utt ons▲▼
Press during a call t o adjust the v olum e
in t he earpiece.
Press to m ove thr ough t he list o f stor ed
num bers or Caller D isplay r ecords.
PHONE / OK button
Press to beg in o r answer a
telep hon e call.
Press w hile p rog ramm ing t o
conf irm you r selection .
R (Recall) butt on
You m ay need th is
dur ing a call if your
e
325 0 is conn ected to a
PBX, or if you use BT’s
Select Services.
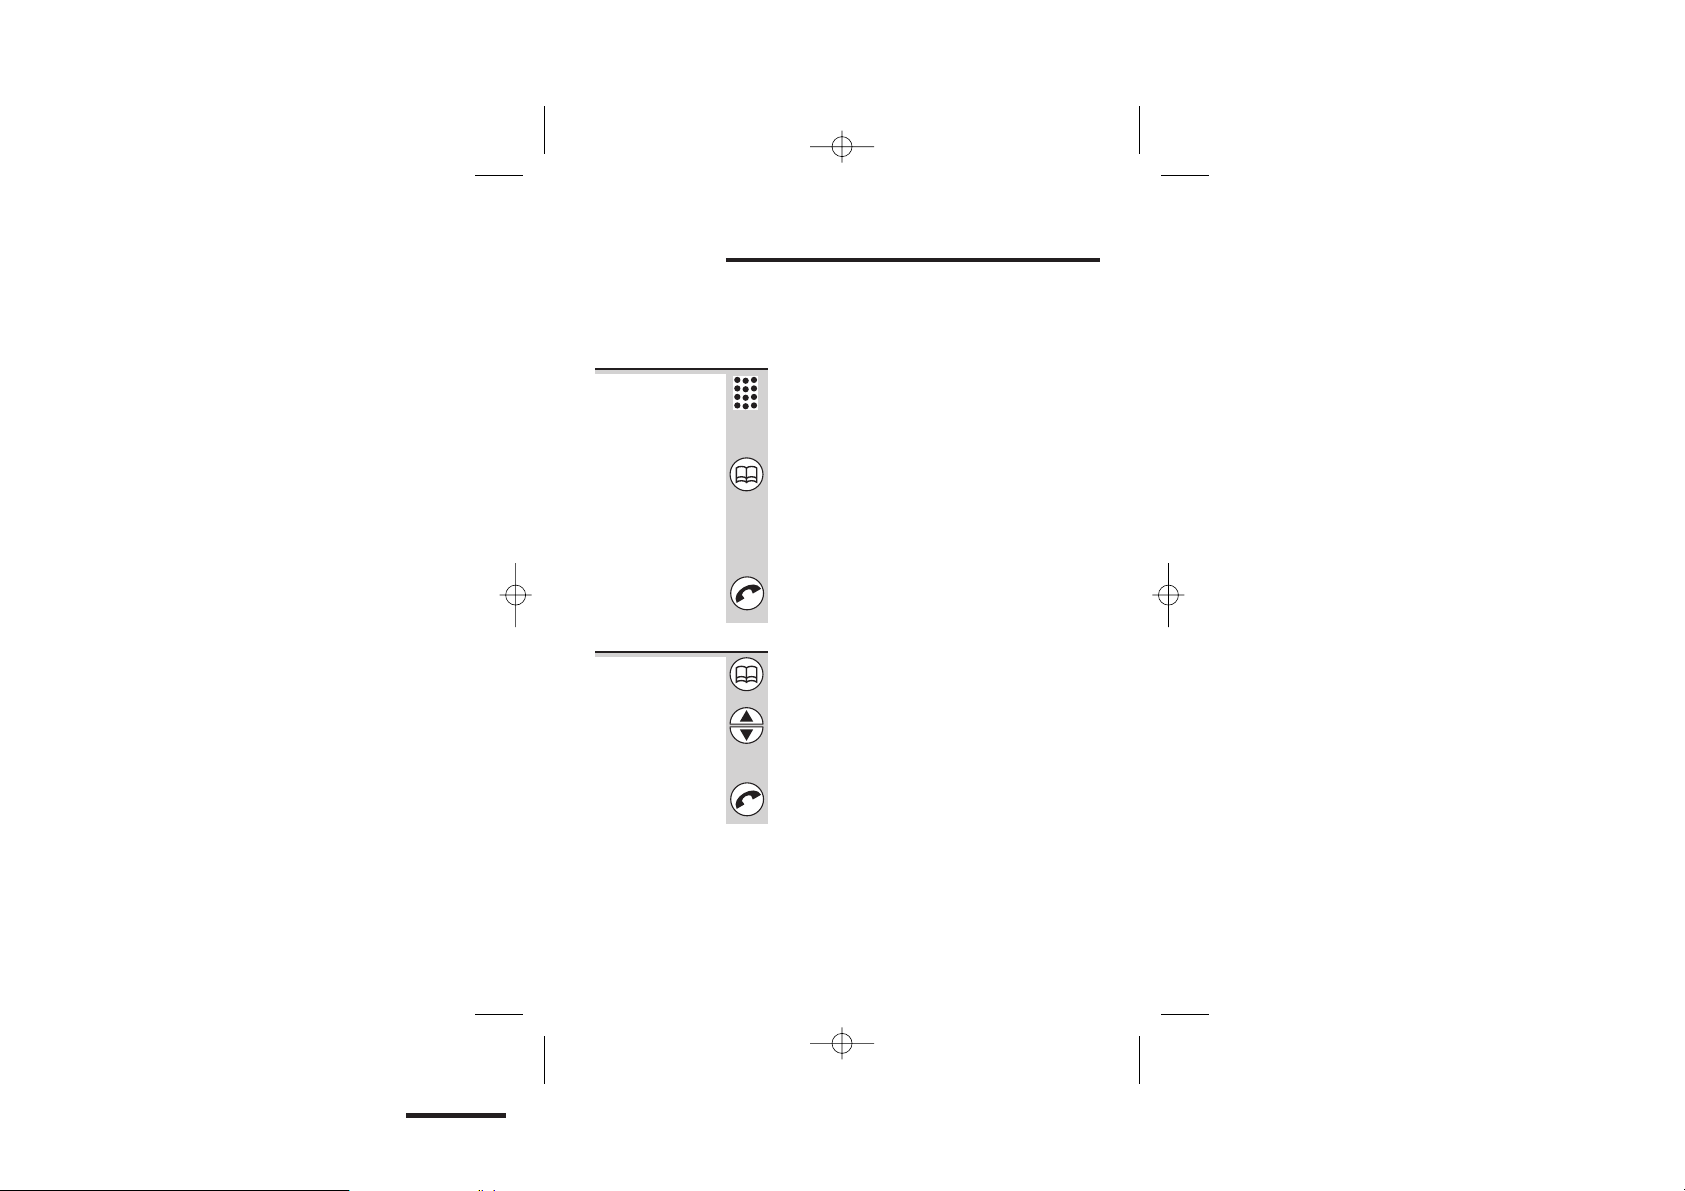
M EMORY butt on
Press to store n um bers in
mem ory and to make
calls to sto red n um bers.
IN USE light
This comes on wh en any
of t he handsets registered
to th is base is on an
extern al call.
HAND SET LOCATOR butt on
Press to m ake all registered
hand sets rin g, (useful if
you've forg ot ten wh ere you
SCROLL ( ) but tons✱
When a long nu mb er
(m ore t han 1 6 d igit s) is
shown on th e display,
press t hese to scroll along
th e dig its.
put a handset).
#
If t he di splay i s blank
Press th e but ton
to swit ch the handset on
Symbols on t he display
The handset’s
number ( 1 if you
have a single system,
1, 2 or 3 if you have
a Twin or Triple
system)
The duration o f each call is shown on the display from 2 0 seconds
after you press th e PHON E button for a line, unt il 5 seconds after
you end t he call.
W hat t he symbols m ean
Signal
level
New call
Int ercom
call
M emory/
stor e
Indirect
network
Redialling
Caller
Display
Keypad
locked
Battery
charge
level
This shows the streng th of t he sign al bet ween the handset
and base unit . It flashes wh ile t he h andset is tryin g to
establish a radi o li nk .
while you’re on a call, m ove closer t o t he base unit
This appears when you m issed in com ing calls (even if yo u
do not u se Caller Display).
This flashes while your handset is ringin g for an int ercom call,
and com es on steadily when th e call’s conn ected .
This com es on w hen you’re sto rin g n um bers in m emo ry, and
wh en yo u’ re m aking calls to stor ed n um bers.
This appears when t he handset is dialling a no n-local
num ber via an alt ernat ive netwo rk.pro vid er’s
This appears when you’re using Last N um ber Redial.
This appears when you’re checking, or d iallin g from, th e list
of Caller Display records.
This appears when t he keypad is locked, or wh en
When th is shows ‘n early em pt y’ ( ), pu t th e hand set onto
th e base unit or charg er pod as soon as possible, t o ch arge
th e bat teries. Wh ile t he b att eries are being charg ed, th is
s
mb ol blinks.
The t ime is show n if you’ve
set the handset’s clock
The base unit’s number (1 ,
unless you have registered
your hand set to m ore t han
one base unit)
to t he b ase unit If t his symbol flashes
has been turned on.Call Barring
.
E:\Binatone2003\e3400\e3400_07.vp
11 March 2003 10:09:39
Page 3

Color profile: Generic CMYK printer profile
Composite Default screen
Cont ents
Read these notes first 3
Choo sing a site for t he base un it and
charger po d 3
Radio sign als betw een handset and
base unit 3
M ains pow er connect ion 3
Installation and set-up 4
Before you start 6
Electrical safety 6
Int erference 6
‘O ut of range’ w arning 6
Switching on and off 7
To swit ch t he hand set on and off 7
To lock th e keypad 7
M aking and answering calls 8
To m ake a call 8
To answer a call 8
To end a call 8
Earp iece volum e 8
Last N um ber Red ial (LNR) 9
M emory dialling 10
To store a n um ber 10
To m ake a mem ory call 10
Chain dialling 11
To change a stored nu mber 11
To delet e a stored numb er 11
To use the not ebo ok 12
To store an LNR number in m em ory
13
Caller Display 14
To check Caller Display records 14
To return a call 15
To delet e Caller Display record s 15
To store a Caller Display num ber in
memor y 15
Using a mult i-hand set system 16
To m ake an int ercom call 16
To answer an int ercom call 17
To end an in tercom call 1 7
To transfer a call 17
To shuttle betw een t wo calls 18
To set up a th ree-way conf erence
18
New Call t on e 19
To pag e all handsets from t he
base unit 19
To regi ster a new handset to your
base unit 20
To de-register a handset 21
To select a base unit 21
To regi ster to a di fferent brand of
base unit 22
Cust omising your handset 23
General points 23
Auto -answer 23
Ringer volum e and melo dy 24
Key ton e 24
Direct Call 2 5
To clear all m emories 26
To reset th e handset 26
Continued overleaf…
Binatone Help Line: 0132 5 3 04 473 1
E:\Binatone2003\e3400\e3400_07.vp
11 March 2003 10:11:53
Page 4

Color profile: Generic CMYK printer profile
Composite Default screen
Contents
Cust omising your base unit 27
General points 27
Em ergen cy num bers 27
Ringer volum e and melo dy 28
Call barr ing 28
Date and t im e 30
To clear all Caller Display m em ories
31
To reset th e base unit 31
Indirect N etw ork 32
To set th e net work access co de 32
To set additi onal ‘lo cal’ d ialling cod es
33
To turn Ind irect N etw ork on and off
33
Troubleshootin g 34
Cleaning and care 40
Declaration of conformity 40
Guarant ee and service 41
While th e unit is under Guarant ee
41
After th e Guarant ee has exp ired 41
Technical details 42
Connection and condit ions for use
You can connect your e325 0 t o a direct exchang e line (DEL) — a line
connected t o a local exchange, with it s own p ho ne num ber; to an
extension socket co nn ected to a DEL; or to an extension on an
approved com patib le PBX. Do not con nect t he e3250 as an extension
to a payp ho ne.
The ringer equivalence numbers ( REN s) of all instruments (p hones,
fax m achines, etc.) conn ected to an exchang e lin e must not add up to
more than 4 — otherw ise, one o r m ore of th em may not ring and / or
answer calls correct ly. The e32 50 has a REN o f 1, and m ost o ther
telep hones have a REN of 1 unless m arked oth erwise.
2
E:\Binatone2003\e3400\e3400_07.vp
11 March 2003 10:11:53
Page 5

Color profile: Generic CMYK printer profile
Composite Default screen
Read t hese not es first
Choosing a
sit e for the
base unit and
char ger pod
Radio signals
bet ween
handset a nd
base unit
M ains pow er
connection
The base unit and charger p od (s) should each b e placed
on a level surface, in a position w here:
th e mains adapt er plug w ill reach an easily accessible
■
230 -V AC swit ched m ains supply socket — never tr y
to lengt hen the mains pow er cable
th e base unit ’s t elephone cable w ill reach your t ele
■
ph one line socket or extension socket (th e charg er
pod d oes not h ave a teleph on e lin e connection)
it is not clo se t o another t eleph on e — t his can cause
■
radio interference
it is not clo se t o a sink, b ath or show er, or anyw h ere
■
else where it m ig ht g et wet
■ it is not close to oth er electrical equipment — frid ges,
washing m achines, microw ave ovens, fluorescent
light s, TVs etc.
To use you r handset and b ase unit together, you must
be able to establish a radio link between th em. Be
aware t hat:
■
Any larg e metal object — like a refrigerator, a m irror
or a filin g cabinet — betw een t he handset and t he
base unit m ay block t he radio signal.
■
Ot her solid st ructures, like walls, m ay reduce the
signal strengt h.
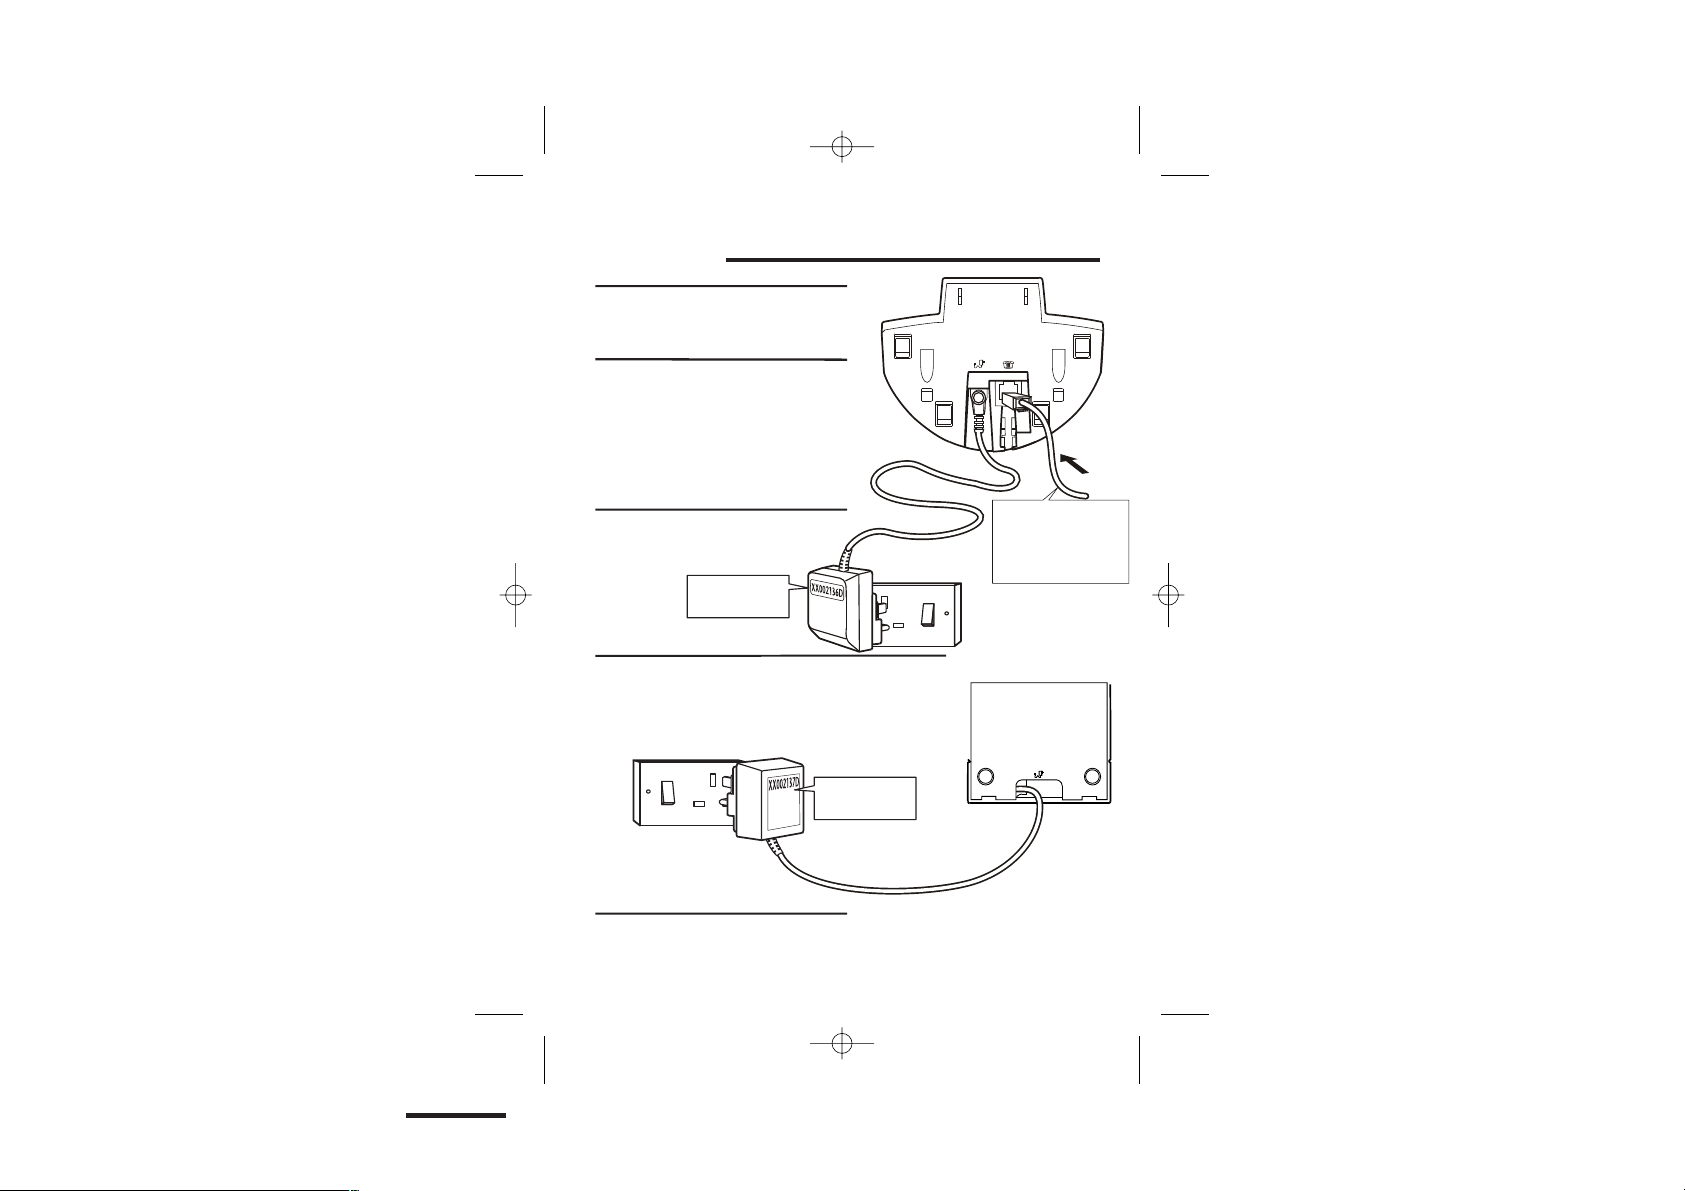
IM PORTAN T —
■
The e3250 base unit m ust be used w it h mains
adapt er, p art no . XX002136D, supplied with t he
unit.
■
The e3250 charger pod m ust be used w it h m ains
adapt er, p art no . XX002137D, supp lied w it h t he unit .
Using any ot her adapt er w ill result in non-comp liance
with EN60950, and w ill invalidat e any appro val given t o
th is apparat us.
Binatone Help Line: 0132 5 3 04 473 3
E:\Binatone2003\e3400\e3400_07.vp
11 March 2003 10:11:53
Page 6
Color profile: Generic CMYK printer profile
Composite Default screen
Installat ion and set-up
Choose a suit able sit e for t he
1
base un it See page 3
Connect t he main s pow er lead
2
and t he t elephone line cor d int o
t he under side of t he base unit
Plug t he m ains ada pt er in t o a
3
23 0 V AC, 5 0 Hz main s socket ,
wit h t he swit ch on t he socket
set t o OFF
If you h ave one or more charg er pods …
4
Plug the mains adapt er into a 230 V AC,
50 H z m ains socket, with the switch on
the socket set to OFF
Sw it ch on at t he m ai ns socket ( s)
5
See the note
on page 3
See the note
on page 3
4
E:\Binatone2003\e3400\e3400_07.vp
11 March 2003 10:11:54
Use t he t elephone lin e
cord suppl ied w ith yo ur
325 0 - d o n ot use any
e
ot her t elepho ne lin e
cord
Page 7

p
Color profile: Generic CMYK printer profile
Composite Default screen
Fit a b at ter y pack in each handset
6
A. Plug in the
connector
B. Tuck t he w ires in
and lay t he b att ery
pack in the
compart ment
C. Fit the battery
compart ment
cover, sliding it int o
place and pressing
BLACK RED
Charge the bat ter ies f or 1 5 hours
7
firmly to make sure
it is secure
Before you use the handset for the
first time, it is import ant to charge
the batteries fully.
The hand set ‘b eeps’ w hen it ’s correctly
in position on th e charg ing cradle.
The ba ttery
level sym bol
blinks
Leave the handset on t he charg ing
cradle for 15 h ours.
The BATTERY ICON will go up one ba r every ha lf
hour w hen cha rging an empty ba ttery. Remove
and refit bat tery if you thin k BATTERY ICON is not
showing correct charg e level even a fter charg ing.
Connect t he base un it to t he t el eph one line
8
Switch off pow er at the mains socket
Insert t he t elephone line plug into
the socket as shown
Switch mains pow er back on
M ake sure the ma ins socket is
swit ched on if you wa nt to use
the ph one — it will not w ork
wit hout electrical pow er
NO TE: the charger pod does not have
a connection to t he t ele
The Char ge
light comes
on.
Use the plug to
raise the shutter
before pushing
it into t he socket
hone lin e.
Binatone Help Line: 0132 5 3 04 473 5
E:\Binatone2003\e3400\e3400_07.vp
11 March 2003 10:11:56
Page 8

Color profile: Generic CMYK printer profile
Composite Default screen
Before you star t
Elect r ical
saf et y
DO NO T let the base unit or ch arger pod get wet.
◆
Elect rical equipm ent can cause serious injury if used
wh ile you are w et or standing in water.
If t he b ase unit (or the charger p od ) ever falls int o
◆
wat er, DO NOT retrieve it u nt il you have un plugged the
power lead from t he m ains and t he t eleph one line plu g
from th e telepho ne socket; th en p ull it out by the
unplugg ed cables.
NEVER use your e32 50 outd oors during a thun derstorm
◆
— unplug t he b ase unit from the telephone line and t he
mains so cket w h en t here are storm s in your area.
Damage caused by light ning is not covered b y t he
guarantee.
Int er ference If t he sound q uality get s worse as you m ove around
wh ile o n a call, this is probably caused by int erference
between th e handset and the b ase unit, perh aps
because you are t oo near t o anot her phone or oth er
electrical equipm ent.
M ove t o a d ifferent position t o clear the in terference.
If you d o n ot m ove, your call m ay b e cut off.
Radio interference in the environment m ay occasionally
!
cause a short break in the link betw een t he handset
and t he base unit w hile you are on a call. The
handset’s display will flash briefly, while the unit
autom atically rest ores the link.
‘Out of ra ng e’
warning
If you hear a warning t one durin g a call, and / or the
sound in the earpiece becom es faint or d istorted, yo u
may be goin g out of range of the base unit. M ove
nearer to the base unit w ithin 20 seconds, until t he
to ne stop s. Ot herwise, you r call may be cut o ff.
6
E:\Binatone2003\e3400\e3400_07.vp
11 March 2003 10:11:56
Page 9
Color profile: Generic CMYK printer profile
Composite Default screen
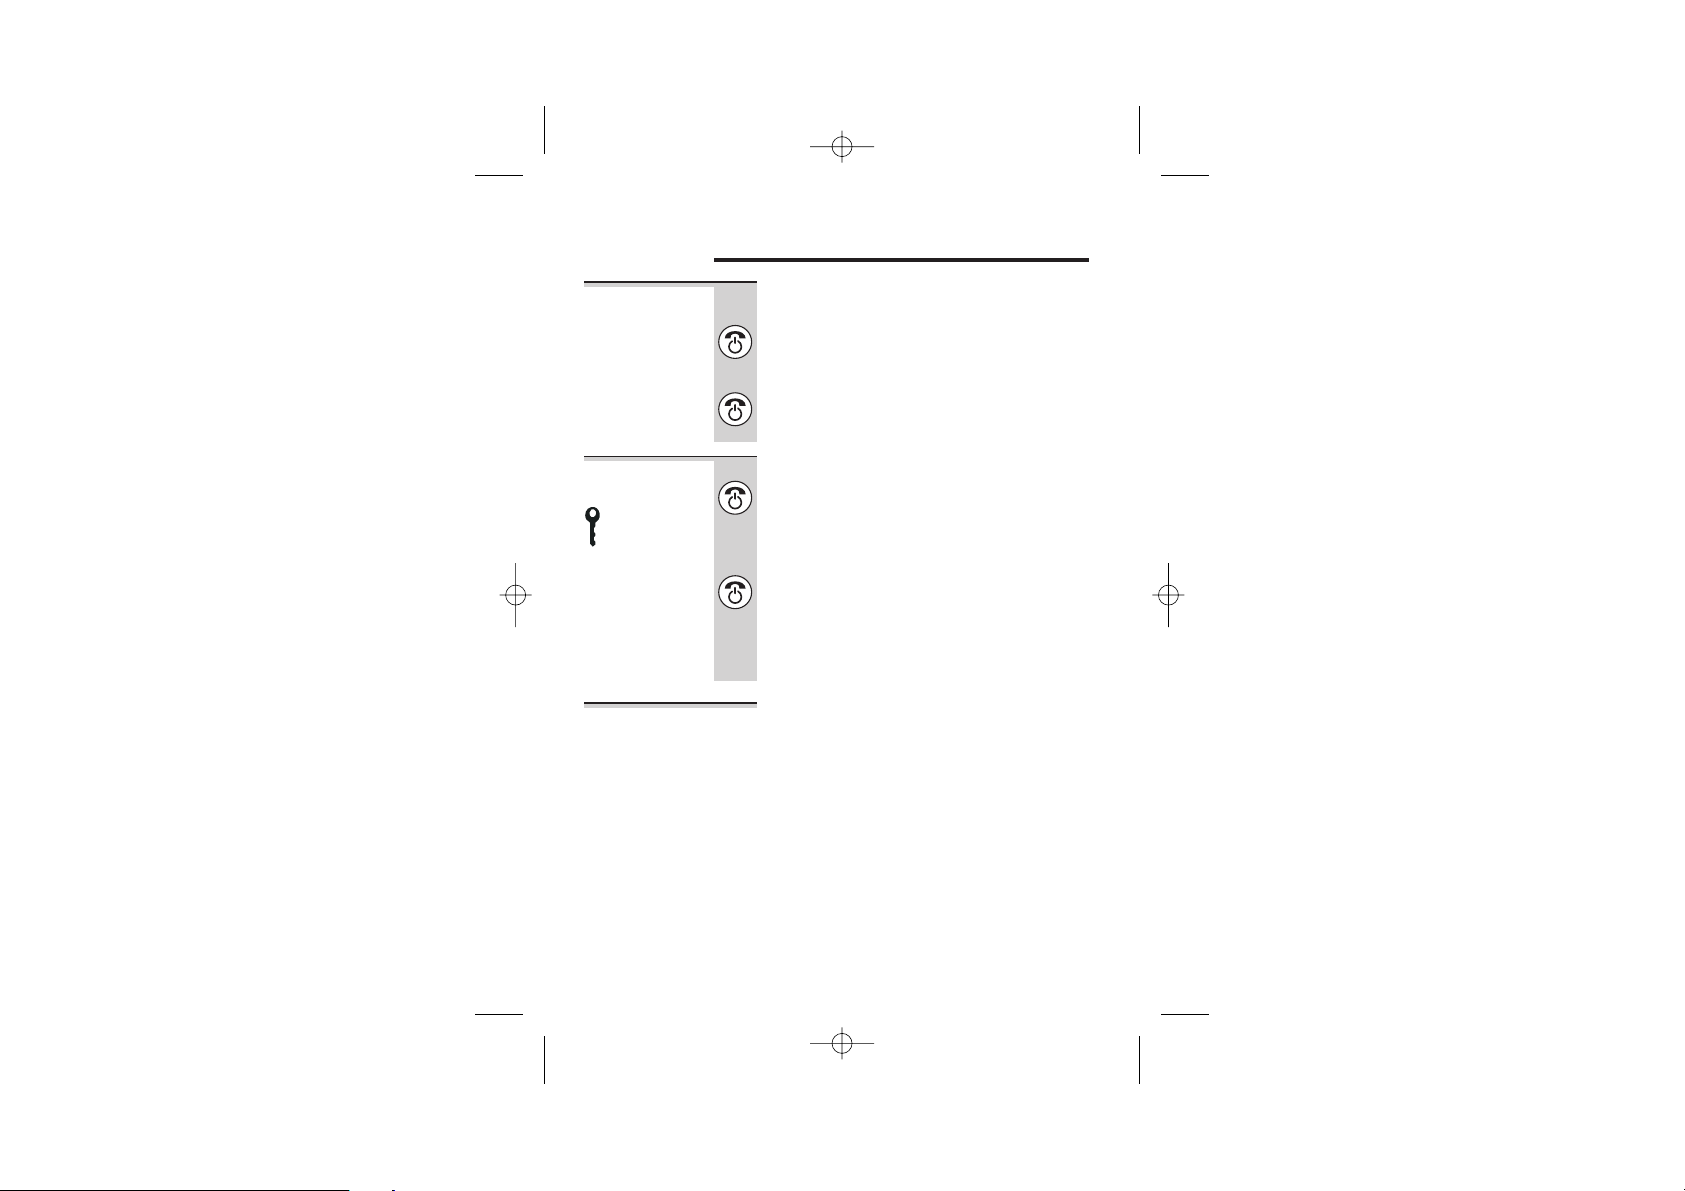
Sw it ching on and off
To swit ch the
handset on
and off
To lock t he
keypad
Not es
To switch t he handset off and save batt ery
power:
◗
◗
◗
◗
◗
Press the HANG UP/ C butt on and hold it for
3 seconds until the display goes blank
To swit ch th e hand set back on:
Briefly press t he HANG UP/ C button
To lock t he keyp ad:
Press the HANG UP/ C butt on and hold it for
1 second until the ‘key’ symbol and a group
of dashes appear on the display
To un lock th e keypad:
Press the HANG UP/ C butt on and hold it for
1 second until the ‘key’ symbol disappears
from the display
Or simply replace the handset on the base
unit or charger pod
■
When the handset is switched off, it can’ t be used for
making calls, including em ergency calls.
■
When the handset is switched off, it w on ’t r ing for
inco ming calls, bu t the base unit w ill still rin g. To
answer a call w hen t he handset is swit ched off, yo u
need t o switch it back on . Rem emb er t hat it m ay t ake
a few mo m ent s for t he h andset to re-establish a radio
link with t he base un it .
Binatone Help Line: 0132 5 3 04 473 7
E:\Binatone2003\e3400\e3400_07.vp
11 March 2003 10:11:56
Page 10
Color profile: Generic CMYK printer profile
Composite Default screen
M aking and answ ering calls
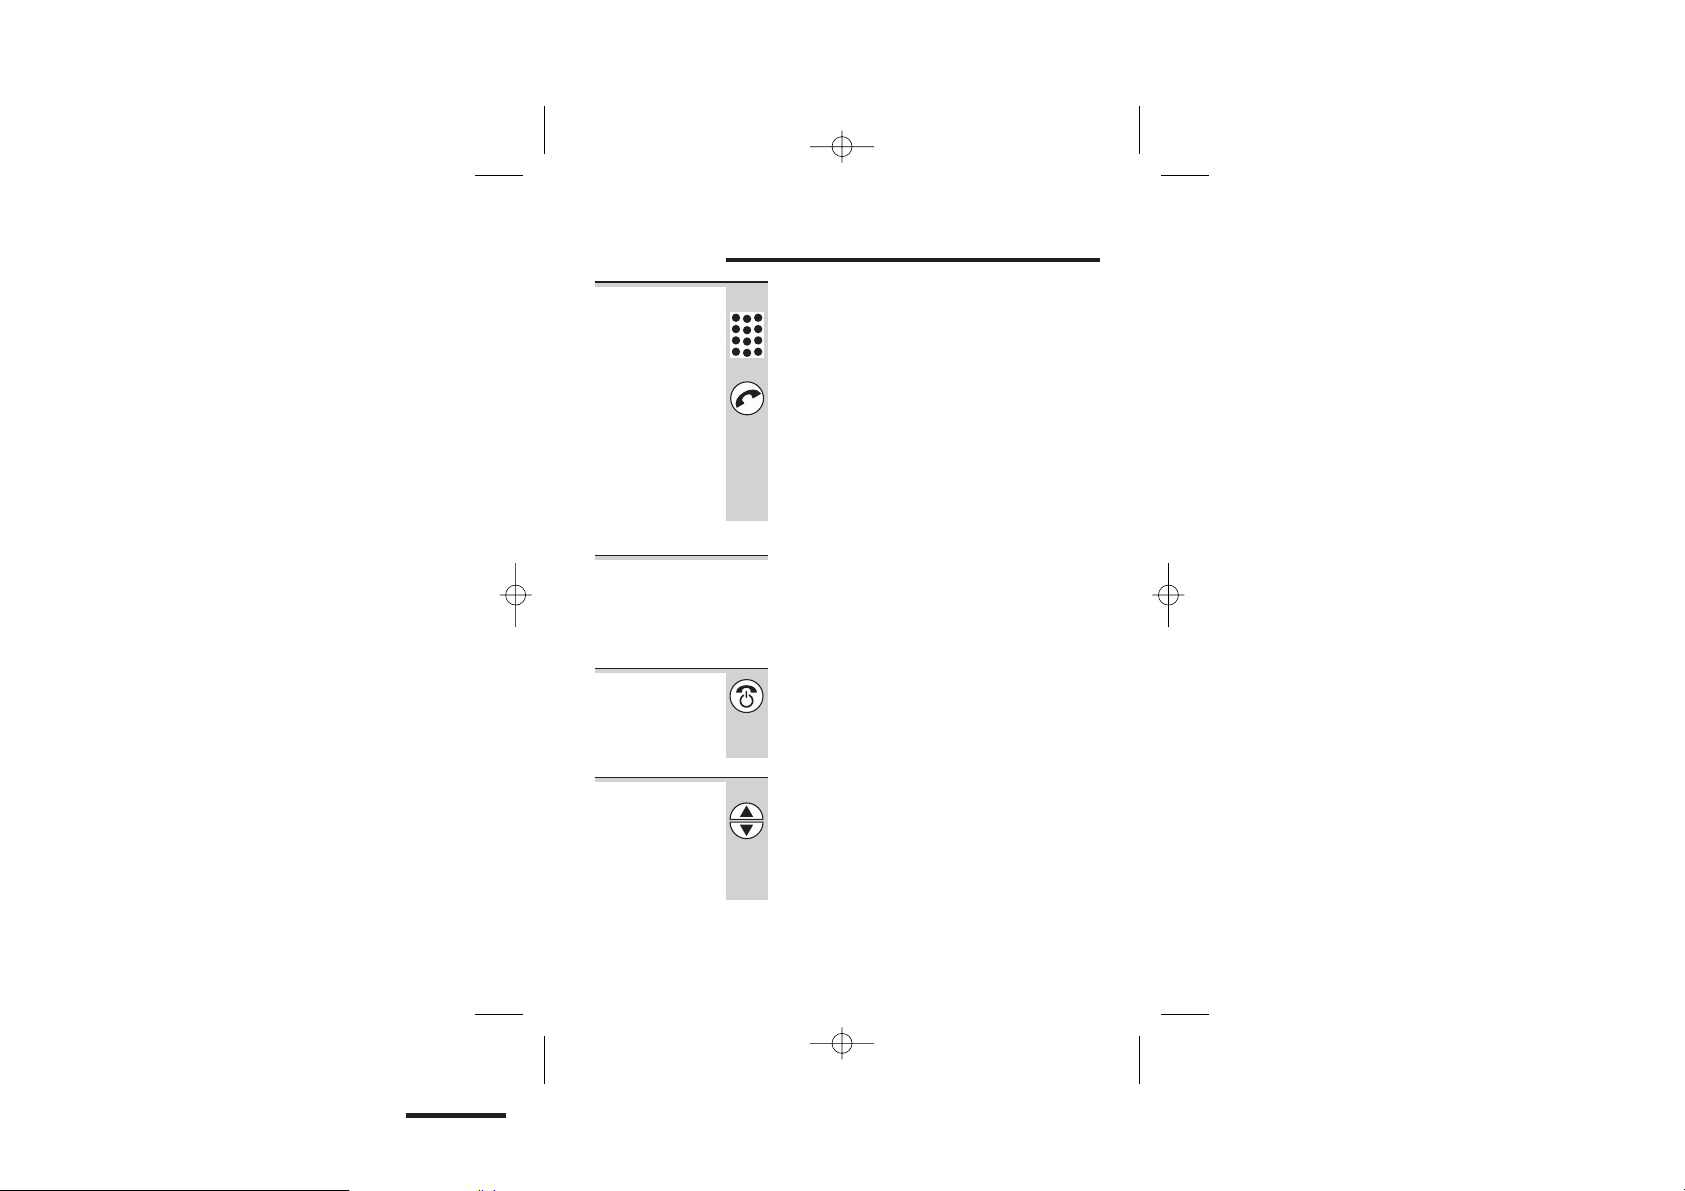
To make a call
1 Key in the telephone number
If you m ake a mistake, press t he HANG UP/ C
butt on to clear d ig it s one by one from the display.
2 Press the PHONE butt on
(You can d ial t he num b er after you press t he
PHONE button t o get Dial tone if you prefer,
but you wo n’ t be able to correct any m istakes
if you d o it this way.)
If you w ant t o u se the Indirect Netw ork
featur e, turn to p age 32 for mo re in formation.
To answ er a
call
To end a call
Earpiece
volume
When there’s an in com in g call, call flashes on the
display; and th e base unit and handset ring (t he
hand set rin gs softly at first, th en g ets louder).
Press any button to answer t he call
◗
◗
◗
◗
Press the HANG UP/ C butt on so that t he
PHONE light on the base unit goes out
Or simply replace the handset on the base
unit or charger pod
During a call, to adjust t he volum e in the earpiece:
Press the ▲ or ▼ button
There are th ree volum e levels, shown by bars
on th e rig ht -h and side of th e display. After you
end your call, th e earpiece volum e w ill stay at
th e level you have set.
8
E:\Binatone2003\e3400\e3400_07.vp
11 March 2003 10:11:56
Page 11
Color profile: Generic CMYK printer profile
Composite Default screen
Making and answering calls
Last Number
Redial ( LNR)
Notes
To m ake a repeat call t o t he last numb er yo u
dialled (u p to 24 digits):
1 Press the LNR/ CDS but ton
2 Press the PHONE butt on
To m ake a repeat call to on e of th e the last five
numb ers you d ialled :
1 Press the LNR/ CDS but ton
2 Press the ▲ or ▼ button if necessary until
the number you want is displayed
3 Press the PHONE butt on
To clear a number from t he Last Num ber
Redial (LNR) memo ries:
1 Press the LNR/ CDS but ton, t hen the ▲ or ▼
button until the num ber you want t o delete
is displayed
2 Press and hold t he HANG UP/ C button until
you hear a tone;
OR press and hold the HANG UP/ C button
for 5 seconds to clear all five LNR memories
■
Only num bers you’ve dialled m anually w ill be stored
in th e LNR memories; not num b ers you’ ve dialled
from memory o r from t he Caller Display list.
■
Nu m bers you’ve d ialled more t han on ce will b e
stored only once.
■
Each time you dial a num ber, it clears the oldest one
from th e LNR memories; so you don’t need to clear
numb ers manu ally unless you want to.
Binatone Help Line: 0132 5 3 04 473 9
E:\Binatone2003\e3400\e3400_07.vp
11 March 2003 10:11:56
Page 12
Color profile: Generic CMYK printer profile
Composite Default screen
M emor y dialling
You can store up to 20 phone nu mbers in mem ory.
Each num ber can have up t o 24 digit s. The 20 memory
locations are num bered 01 to 20.
To stor e a
num b er
To make a
memor y call
1 Key in the phone num ber
If you m ake a mistake, press t he HANG UP/ C
butt on t o clear one dig it at a time from t he
display.
2 Press and hold t he M EM ORY button for at
least a second
The ph on e numb er appears on t he display,
with t he first fr ee mem ory location t o th e left of
it. To store it in a different location, use the ▲
or ▼ b ut t on to m ove to the on e you prefer.
3 Press the PHONE butt on to confirm
1 Press the M EMORY button briefly
Two dashes flash on the left side of t he d isplay
2 Either press the ▲ or ▼ button t o find t he
number you w ant ;
or key in a tw o-dig it memory location
number ( 01 to 20) using t he numbered keys
3 Press the PHONE butt on
10
E:\Binatone2003\e3400\e3400_07.vp
11 March 2003 10:11:56
Page 13
Color profile: Generic CMYK printer profile
Composite Default screen
Memory dialling
Chain dial ling You can store part of a number (for example, the lon g-
To change a
distance dialling cod e) in m emory, and use any co m
bin ation of mem ory and m anual dialling t o make a call.
1 Press the PROG button
-
st or ed
num b er
2 Press the M EMORY button
3 Press the ▲ or ▼ button unt il the number
you want t o change is displayed
4 Press the HANG UP/ C butt on to d elete
digit s one by one; t hen key in the new digits
5 Press the PHONE butt on
To del et e a
1 Press the M EMORY button
st or ed
num b er
2 Press the ▲ or ▼ button unt il the number
you want t o delete is displayed
3 Press and hold t he HANG UP/ C button until
you hear a tone and the number disappears
from the display;
OR press and hold the HANG UP/ C button
for 5 seconds to clear all 20 memories
Binatone Help Line: 0132 5 3 04 473 11
E:\Binatone2003\e3400\e3400_07.vp
11 March 2003 10:11:57
Page 14

Color profile: Generic CMYK printer profile
Composite Default screen
Memory dialling
To use t he
not ebook
You can sto re a nu mber in m emory while you
are busy on a call.
1 Press the PROG button
2 Press the M EMORY button
3 Press the ▲ or ▼ button to find a free
mem ory location;
OR key in a mem ory location num ber using
the numbered keys
4 Key in the phone num ber you want t o store
5 Press the PHONE butt on to confirm
Note: If you w ant t o quit th e noteb ook withou t
storing a nu mber, press the H ANG UP/ C but to n
for one second .
12
E:\Binatone2003\e3400\e3400_07.vp
11 March 2003 10:11:57
Page 15

Color profile: Generic CMYK printer profile
Composite Default screen
Memory dialling
To stor e an
LNR num ber
in m em or y
You can mo ve a numb er from t he Last Num ber
Redial (LNR) memo ries (see page 9) t o a mo re
perm anent mem or y lo cation.
1 Press the LNR/ CDS but ton
2 Press the ▲ or ▼ button if necessary until
the number you want is displayed
3 Press and hold t he M EM ORY button for
one second
The display shows a free m emory locat ion . You
can press t he ▲ or ▼ button t o select a
dif ferent free location if you wish (only free
location s are displayed).
4 Press the PHONE butt on to store the
number
Binatone Help Line: 0132 5 3 04 473 13
E:\Binatone2003\e3400\e3400_07.vp
11 March 2003 10:11:57
Page 16

Color profile: Generic CMYK printer profile
Composite Default screen
Caller Display
If you subscribe to t his featu re from yo ur service p rovider,
you can see t he p hone num bers of your callers on the
display, before you answer. If a caller w it hholds th eir
numb er b y diallin g 141 , or if they are callin g from a
netwo rk t hat does not t ransmit t he num ber, no nu mber
will b e show n o n th e display wh en t he phone ring s.
The e3250 will store the num bers of th e last 10 callers
(w het her o r n ot you answered the call) so you can call
th em back lat er. Wh en all 10 Caller Display memories
are full, t he next incom ing n um ber will overw rit e t he
old est one. If t he n um b er w as w it hheld or unavailable,
no record w ill be sto red.
If you’ve got new Caller Display record s, th e sym bol
is sh ow n on the display.
To check
Caller D isplay
records
1 Press the LNR/ CDS but ton TW ICE
The most recent caller’s num b er is shown on
th e display.
2 Press the STAR (✱) but ton t o switch
between the num ber, and the t ime/ date of
the call
If t he n um ber had more t han 13 digits, you’ll
see th e first 13 digit s of t he num b er w hen you
press th e ✱ but t on on ce; press it again t o see
th e time/date.
3 Press the ▲ or ▼ button to scroll through
the records
Once you’ ve checked all t he records, the CID
sym bol d isappears from t he display.
14
E:\Binatone2003\e3400\e3400_07.vp
11 March 2003 10:11:57
Page 17

Color profile: Generic CMYK printer profile
Composite Default screen
Caller Display
To ret ur n a
call
To del et e
Caller D isplay
records
To stor e a
Caller D isplay
num b er in
memor y
To ring back som eone who’ s called you:
1 Follow steps 1 to 3 on page 1 4 t o disp lay the
number
2 Press the PHONE butt on to d ial the num ber
To d elete a Caller Display record:
1 Follow steps 1 to 3 on page 1 4 t o disp lay the
number
2 Press and hold t he HANG UP/ C button until
you hear a tone;
OR press and hold the HANG UP/ C button
for 5 seconds to clear all 10 records
To m ove a Caller Display record t o a m ore
perm anent mem or y lo cation:
1 Follow steps 1 to 3 on page 1 4 t o disp lay the
number
2 Press and hold t he M EM ORY button for
one second
The display shows t he first free mem ory
location . You can press th e ▲ or ▼ butto n to
select a different free location if you w ish ( only
free locations are displayed).
3 Press the PHONE butt on to store the
number
Binatone Help Line: 0132 5 3 04 473 15
E:\Binatone2003\e3400\e3400_07.vp
11 March 2003 10:11:57
Page 18

Color profile: Generic CMYK printer profile
Composite Default screen
Using a mult i-handset syst em
If you have an e3250 mult i-handset system, you already
have up t o six handsets registered to yo ur base unit . You
can reg ister add it ional h andsets — altoget her, up t o six
hand sets per base u nit. Wit h t wo or m ore handsets
registered, yo u can:
make intercom calls fro m on e hand set to anoth er
■
transfer an out side call from one handset t o another
■
shuttle b etween an outside call and an in tercom call
■
set up a th ree-way conference call
■
Each hand set’s num ber (h1 t o h6) is show n on its
display.
Only one handset can be connected to the out side
!
line at once. If you t ry to make a call while another
handset is already on the line, you’ll hear Busy tone.
Some of t he instructions in this section tell you to
!
press a b utt on ‘for one second’. This means that you
should press t he butt on and hold it dow n for a
mom ent unt il the display changes, you hear a t one,
or you are connected to another call.
To make an
intercom call
1 Press the INT ( ✱) butt on for one second
INT app ears on you r h andset’ s display, w it h the
numb ers of all other registered hand sets.
2 Key in a handset number; or press9 t o call
all other registered handsets
The ot her hand set rin gs, and the INT symb ol
flashes on its display. Wh en t he o th er handset
user answers, yo u w ill be conn ected.
16
E:\Binatone2003\e3400\e3400_07.vp
11 March 2003 10:11:57
Page 19

Color profile: Generic CMYK printer profile
Composite Default screen
Using a multi-handset system
To answ er an
intercom call
To end
an int ercom
call
To t ransfer a
call
The rin ging tune for int ercom calls is different fr om t hat
for outside calls. When someone m akes an intercom call
to you INT appears on yo ur hand set’s display, with t he
numb er of t he handset calling you.
Press any button to answer t he call
◗
◗
◗
Press the HANG UP/ C butt on
Or simply replace the handset on the base
unit or charger pod
When you have m ade or answered an outside
call, t o transfer it to anot her handset:
1 Press the INT ( ✱) butt on for one second
then key in t he number of the other handset
The outside call is put on hold and the oth er
hand set rin gs. When t he oth er handset user
answers, you can speak to h er/ him .
If t he oth er user do es no t answer, you can get
back t o t he out side call at any time b y pressing
and holding t he I NT (✱) butto n ag ain.
2 Press the HANG UP/ C butt on to hang up
and t ransfer t he call
You can press t he H ANG UP/ C t o t ransfer t he
out side call before t he other h andset answers
your intercom call. If t he user hasn ’t answered
after 30 second s, th e out side call will come
back t o you and your hand set will ring.
Binatone Help Line: 0132 5 3 04 473 17
E:\Binatone2003\e3400\e3400_07.vp
11 March 2003 10:11:57
Page 20

Color profile: Generic CMYK printer profile
Composite Default screen
Using a multi-handset system
To shut t le
bet ween t w o
calls
To set up a
t hr ee-way
conf erence
When you have bot h an outside call and an
int ercom call in progress, you can shuttle from
one to the ot her, like this:
◗
◗
◗
◗
Press the INT ( ✱) butt on for one second to
speak to each in t urn, put ting t he ot her on
hold
You can transfer the outside call t o t he other
hand set by pressing t he HANG UP/ C button
wh ile you’ re connect ed to the in tercom call
If you p ress t he HANG UP/ C butt on w hile
you’re co nn ected to t he out side call, yo u w ill
disconnect it.
When you have bot h an outside call and an
int ercom call in progress, you can set up a
th ree-way conference call, like t his:
Press the # ( HASH) but ton for one second
To suspend t he other h andset user from t he
conference call:
Press the # ( HASH) but ton for one second
You remain connected to the outside call. If th e
ot her u ser h as no t hung up , you can bring
her/ h im b ack int o th e conference b y p ressin g
th e # (HASH) butt on again .
OR, to dro p out of t he conference call, leavin g
th e ot her user conn ected to t he out side call:
Press the HANG UP/ C butt on
18
E:\Binatone2003\e3400\e3400_07.vp
11 March 2003 10:11:57
Page 21

Color profile: Generic CMYK printer profile
Composite Default screen
Using a multi-handset system
New Call t one When you are on an in tercom call and an
out side call co mes in, you w ill hear N ew Call
to ne over you r conversation t o t ell you th at
som eon e is calling you.
To answer t he out side call and end t he
int ercom call:
Press the R button briefly
OR, to answer the ou tside call and put the
int ercom call on hold (so you can later use
shutt le, conference or transfer):
Press the INT ( ✱) butt on for one second
To m ake all registered hand sets rin g (t his is
useful if you’ve forg ot ten w here you p ut a
hand set):
Press the HANDSET LOCATOR but ton on
the base unit
Handsets ring for up to 30 seconds. To stop t he
ringin g befo re this time:
Press the HANDSET LOCATOR but ton again;
or press any butt on on any handset
To page all
handset s
from t he
base unit
◗
◗
◗
◗
◗
Binatone Help Line: 0132 5 3 04 473 19
E:\Binatone2003\e3400\e3400_07.vp
11 March 2003 10:11:57
Page 22

Color profile: Generic CMYK printer profile
Composite Default screen
Using a multi-handset system
To regist er a
new handset
t o your base
uni t
The hand set(s) sup plied w ith your b ase unit should not
need t o be registered; only addit ional ones you h ave
bought separately.
Each hand set can b e registered t o up to four base
units, numbered 1 t o 4.
1 Press and hold t he HANDSET LOCATOR
button on t he base unit unt il you hear
Regist ration t one ( slow ‘beeps’)
You now have 30 seconds in w hich t o register
th e handset.
2 On t he handset, press the PROG butt on
then key in 1 6 follow ed by the base unit
number
If t his is th e first base unit you’re registering t o,
its num ber is 1.
3 Key in 000 0 ( the base unit’s PIN code)
4 Press the PHONE butt on
The display shows t he handset n um bers w hich
are still free on the base unit .
5 (Optional) Key in a hand set number
If you d on’t key in a num ber at t his poin t, the
hand set will be registered w it h the lowest free
numb er.
The hand set beeps t o confirm registration.
20
E:\Binatone2003\e3400\e3400_07.vp
11 March 2003 10:11:57
Page 23

Color profile: Generic CMYK printer profile
Composite Default screen
Using a multi-handset system
To de-reg ister
a h andset
To select a
base unit
You m ay need to do t his in order to replace a
fault y h andset.
1 Press the PROG button t hen 2 6
The display shows t he num bers of all handset
registered t o t he base un it .
2 Key in the number of the handset to be
de-reg istered
The display flashes, and the handset is
de-registered.
If your h andset is registered to more t han on e
base unit , it w ill aut om atically select t he o ne
with w hich it can best set up a rad io link
(usually t he nearest one). Or you can select a
base unit m anually.
You don’t need t his function if you have only
one base unit .
1 Press the PROG button t hen 1 7
2 Use the ▲ or ▼ b utt ons to select a base unit
Base un it s are num bered 1 to 4. If you select 0,
your handset w ill autom atically select the base
unit th at gives th e stron gest connection.
3 Press the PHONE butt on to confirm
Binatone Help Line: 0132 5 3 04 473 21
E:\Binatone2003\e3400\e3400_07.vp
11 March 2003 10:11:57
Page 24

Color profile: Generic CMYK printer profile
Composite Default screen
Using a multi-handset system
To regist er t o
a d if f er ent
br and of base
uni t
Your e32 50 can b e registered t o any GAP-com p atib le
base unit ; or your can register ot her GAP-co mpatible
hand sets t o your e3250 base un it . But w e do not
guarant ee t hat all features or display messages will
be available using other manufacturers’ equipment.
1 Follow t he instructions in th e base unit’ s User Guide to
put th e base unit in to reg istration m od e (for exam ple,
step 1 on page 20) .
2 Follow t he instructions in th e handset’s User Guid e to
register th e handset (for example, steps 2 t o 5 on
page 20).
If you need to enter a PIN co de for t he base unit , refer
to the base unit’s User Guid e.
If you have problems, contact the Binatone Help Line
for more advice.
22
E:\Binatone2003\e3400\e3400_07.vp
11 March 2003 10:11:57
Page 25

Color profile: Generic CMYK printer profile
Composite Default screen
Cust om ising your handset
Gener al point s You can custom ise the sett in gs of your e3250 handset,
using a menu w hich is show n on th e hand set’s display.
Please note t hat :
If you d on’t p ress any butt on for about 2 5 seconds,
■
th e handset w ill time out and t he display w ill ret urn
to standby mo de.
When you con firm any setting you have made, you’ll
■
hear a confirm ation tone. If you m ake a mistake,
you’ll hear a warning tone.
At t he end of each set of steps, you can ret urn t he
■
hand set to stand by mode by eit her:
— replacing the handset on t he base un it
— pr essing and h old in g th e HANG UP/ C button
Aut o-answ er When a call com es in , you n eed t o p ress any butto n t o
answer it . O r yo u can set auto-answer — so, if th e
hand set is in p lace on the base u nit , you simply lift it t o
answer t he call, withou t pressing any butt on .
1 Press the PROG button t hen 1 5
2 Use the ▲ or ▼ b utt on to set:
0 fo r aut o-answer off
1 fo r aut o-answer on
3 Press the PHONE butt on to confirm
Binatone Help Line: 0132 5 3 04 473 23
E:\Binatone2003\e3400\e3400_07.vp
11 March 2003 10:11:57
Page 26

Color profile: Generic CMYK printer profile
Composite Default screen
Customising your handset
Ringer volume
and m el ody
The hand set has eight ring er volum e levels, including 0
for off; and eight ringer m elodies. With the volum e set
to 0, th e handset w ill not ring for an incom ing call, but
th e display will show call or th e phon e number.
To change t he volum e:
1 Press the PROG button t hen 1 1 1
2 Use the ▲ or ▼ b utt on to change the
volume
3 Press the PHONE butt on to confirm
To change t he m elody:
1 Press the PROG button t hen 1 1 2
2 Use the ▲ or ▼ b utt on to change the
melody
3 Press the PHONE butt on to confirm
Key t on e No rm ally, w henever you press a butto n o n th e hand set,
you hear a ‘beep’ t on e. Yo u can tu rn these tones off if
you prefer.
1 Press the PROG button t hen 1 1 3
2 Use the ▲ or ▼ b utt ons to set :
0 fo r key t on e off
1 fo r key t on e on
3 Press the PHONE butt on to confirm
24
E:\Binatone2003\e3400\e3400_07.vp
11 March 2003 10:11:57
Page 27

Color profile: Generic CMYK printer profile
Composite Default screen
Customising your handset
Dir ect Call With Direct Call t urned on, when you press any key
except t he PROG butt on , t he handset will aut omat ically
make a call to a numb er yo u h ave pro gramm ed in. This
featur e is sometim es called babysitter’s call.
Wit h Direct Call turned on, it is not possible t o make
!
emergency calls, unless you have programmed an
emergency numb er such as 999 as the Direct Call
number. But remem ber that the numb er you have
programm ed will be dialled automatically when any
key is pressed.
Before you can t urn Direct Call on, you mu st
program th e telep hone num ber.
1 Press the PROG button t hen 1 3
2 Key in the number
You can press t he H ANG UP/ C butto n to clear
dig it s one b y one; or press and hold t he
HANG UP/ C b ut t on to clear t he Direct Call
numb er complet ely.
3 Press the PHONE butt on to confirm
To turn Direct Call on and off:
1 Press the PROG button t hen 1 2
2 Use the ▲ or ▼ b utt ons to set :
0 fo r Direct Call off
1 fo r Direct Call on
3 Press the PHONE butt on to confirm
While Direct Call is turned on, the display show s and
th e Dir ect Call number. Yo u can answer calls as normal.
Binatone Help Line: 0132 5 3 04 473 25
E:\Binatone2003\e3400\e3400_07.vp
11 March 2003 10:11:57
Page 28

Color profile: Generic CMYK printer profile
Composite Default screen
Customising your handset
To clear all
memories
To reset the
handset
This is a w ay of clearing all stored numb ers at
once, from th e m emo ry location s and t he Last
Nu m ber Redial m emo ries. If you have set a
Direct Call num b er, it w ill be cleared too.
1 Press the PROG button t hen 1 9
2 Press the PHONE butt on to confirm
No te: Caller ID memories are cleared by
resett in g th e base unit (see page 31).
When you reset the handset, yo u return all it s setting s
to their defaults, as follow s:
■ r ing er vo lum e 7
■ r ing er m elody 4
■ key tone on
■ In direct Netw ork off (see page 3 2)
■ auto-answer off
■
select base un it autom atic (best co nnectio n)
1 Press the PROG button t hen 1 0
2 Press the PHONE butt on to confirm
26
E:\Binatone2003\e3400\e3400_07.vp
11 March 2003 10:11:57
Page 29

Color profile: Generic CMYK printer profile
Composite Default screen
Cust om ising your base unit
Gener al point s You can custom ise the sett in gs of your e3250 base unit ,
using a menu w hich is show n on th e hand set’s display.
Please note t hat :
If you d on’t p ress any butt on for about 2 5 seconds,
■
th e handset w ill time out and t he display w ill ret urn
to standby mo de.
When you con firm any setting you have made, you’ll
■
hear a confirm ation tone. If you m ake a mistake,
you’ll hear a warning tone.
At t he end of each set of steps, you can ret urn t he
■
hand set to stand by mode by eit her:
— replacing the handset on t he base un it
— pr essing and h old in g th e HANG UP/ C button
Emergency
num b er s
These two nu mbers can be dialled even w hen call
barring is set ( see page 28).
1 Press the PROG button t hen 2 2 3 1
2 Key in the first emergency number
3 Press the PHONE butt on to confirm
4 Press 2 3 2
5 Key in the second em ergency number
6 Press the PHONE butt on to confirm
Binatone Help Line: 0132 5 3 04 473 27
E:\Binatone2003\e3400\e3400_07.vp
11 March 2003 10:11:57
Page 30

Color profile: Generic CMYK printer profile
Composite Default screen
Customising your base unit
Ringer volume
and m el ody
The base unit has eight ringer volume levels, in clud in g
0 fo r off; and eight ringer m elodies. With t he volume set
to 0, th e base unit w ill not rin g for an in com in g call.
To change t he volum e:
1 Press the PROG button t hen 2 1 1
2 Use the ▲ or ▼ b utt on to change the
volume
3 Press the PHONE butt on to confirm
To change t he m elody:
1 Press the PROG button t hen 2 1 2
2 Use the ▲ or ▼ b utt on to change the
melody
3 Press the PHONE butt on to confirm
Call bar r in g You can set call b arring for in dividual handsets registered
to your b ase unit. There are two kinds of call barring:
■
You can bar calls to up t o two specific numbers
(w hich can be diallin g codes) w it h u p to eight digit s
each. Wit h th is opt io n, you need to program in th e
numb ers first, t hen t urn t he b arrin g on and off.
■
You can bar cert ain types of call — no outside calls,
or no int ernational calls.
When either kin d of call barring is turn ed on, you may
not b e able to make a call, and you may see a ‘key’
sym bol on t he display.
28
E:\Binatone2003\e3400\e3400_07.vp
11 March 2003 10:11:58
Page 31

Color profile: Generic CMYK printer profile
Composite Default screen
To b ar calls t o specif ic num bers
1 Press the PROG button t hen 2 2 2
2 Key in the handset number ( 1 t o 6 )
3 Press 1 1
4 Key in the first barred number
5 Press the PHONE butt on to confirm
6 Press 2 2
7 Key in the handset number ( 1 t o 6 )
8 Press 1 2
9 Key in the second barred number
10 Press t he PHONE butt on to confirm
Customising your base unit
To t urn specific number b ar ring ON
and OFF:
1 Press the PROG button t hen 2 2 2
2 Key in the handset number ( 1 t o 6 )
3 Press 0 t hen use the ▲ or ▼ button t o set:
0 fo r call barring OFF
1 fo r call barring ON
4 Press the PHONE butt on to confirm
Binatone Help Line: 0132 5 3 04 473 29
E:\Binatone2003\e3400\e3400_07.vp
11 March 2003 10:11:58
Page 32

Color profile: Generic CMYK printer profile
Composite Default screen
Customising your base unit
To t urn barr ing of cer t ai n t ypes of call
ON and OFF
1 Press the PROG button t hen 2 2 1
2 Key in the handset number ( 1 to 6 )
3 Use the ▲ or ▼ b utt on to set:
0 no o ut side calls (int ercom calls only)
1 no int ernat ion al calls
2 all calls allowed (call barring OFF)
4 Press the PHONE butt on to confirm
Dat e and t i me You need t o set th e dat e and time if t hey are to
be show n correctly on the handsets’ displays
and stored with Caller Display records.
1 Press the PROG button t hen 2 3
2 Key in the dat e as a six-digit number
…for example, 131002 for 13 Oct ob er 2002,
020 303 fo r 2 M arch 2003.
3 Press the PHONE butt on to confirm
4 Key in the tim e as a four-digit number
…for example, 0830 for 8:30 am, 1406 for
2:06 p m.
5 Press the PHONE butt on to confirm
30
E:\Binatone2003\e3400\e3400_07.vp
11 March 2003 10:11:58
Page 33

Color profile: Generic CMYK printer profile
Composite Default screen
Customising your base unit
To clear all
Caller D isplay
memories
To reset the
base unit
This is a w ay of clearing all stored numb ers
from th e Caller Display memo ries.
1 Press the PROG button t hen 2 9
2 Press the PHONE butt on to confirm
When you reset the base unit , you retu rn all it s set ting s
to their defaults, as follow s:
■ r ing er vo lum e 7
■ r ing er m elody 4
■ key tone on
■ call barring n one
■ Caller Display m emories emp ty
■ In direct Netw ork codes none (see page 32 )
1 Press the PROG button t hen 2 0
2 Press the PHONE butt on to confirm
Binatone Help Line: 0132 5 3 04 473 31
E:\Binatone2003\e3400\e3400_07.vp
11 March 2003 10:11:58
Page 34

Color profile: Generic CMYK printer profile
Composite Default screen
Indirect Netw ork
You can use th is feature if you m ake some of you r calls
via a different n etw ork from t he one t hat supplies your
exchang e lin e. By using indirect access t o an alternative
netwo rk, you may b e able to save money on lon gdistance and int ernat ional calls. When you subscribe t o
an alternative net work pro vid er, t hey w ill send you a
network access code
To route calls over the alternative net w ork, you need to
key in th e access code each time you make a call. Your
e3250 can do t his autom atically w hen you dial a lon g-
distance or int ernat ion al nu m ber (beg innin g with 0),
eith er m anually or fro m m emo ry.
For local calls (n um bers not beg innin g with 0), t he
e3250 w ill not dial the netw ork access code; so th ese
calls will be rout ed over your local network. You can
also set t w o ‘local’ dialling codes, beginn ing w it h 0, for
wh ich the netw ork access code wo n’ t be d ialled.
The net work access code and t he additional ‘ local’
dialling codes are set on the base unit, and app ly t o all
registered handsets. But you need t o t urn t he Indirect
Net w ork feature on and off on individual handsets.
To set t he
1 Press the PROG button t hen 2 4 0
net wor k
access code
2 Key in the net work access code ( up t o six
digit s)
3 Press the PHONE butt on to confirm
32
E:\Binatone2003\e3400\e3400_07.vp
11 March 2003 10:11:58
Page 35

Color profile: Generic CMYK printer profile
Composite Default screen
Indirect Network
To set
addit ional
‘local’ diall ing
codes
To t ur n
Indirect
Net w ork on
and off
1 Press the PROG button t hen 2 4 1
2 Key in the first dialling code ( up to 6 digits)
3 Press the PHONE butt on to confirm
4 Press 4 2
5 Key in the second dialling code (up t o 6 digit s)
6 Press the PHONE butt on to confirm
You need to d o t his on each handset.
1 Press the PROG button t hen 1 4
2 Use the ▲ or ▼ b utt ons to set :
0 fo r In direct Net work off
1 fo r In direct Net work on
3 Press the PHONE butt on to confirm
When you m ake a call, the handset w ill dial the net w ork
access code wh en yo u d ial a num ber beginn ing w it h 0,
except w hen it ’s to one of t he ‘ local’ co des you have set.
When a call is routed via Indirect N et work, LC is shown
on th e display.
Note — for Indirect N et work to work, you must dial
!
the phone num ber (or select it from m emory, LNR
mem ory or Caller Display mem ory) b ef or e you press
the PHONE butt on for an outside line.
Binatone Help Line: 0132 5 3 04 473 33
E:\Binatone2003\e3400\e3400_07.vp
11 March 2003 10:11:58
Page 36

Color profile: Generic CMYK printer profile
Composite Default screen
Troubleshoot ing
The e3250 must be serviced by t rained engineers.
!
NEVER attem pt any repairs or adjustments yourself
— you could m ake the problem worse and invalidat e
the Guarant ee.
ALW AYS check
first that:
“I cannot m ake
or answer calls.”
34
you have follow ed all t he steps listed on pages 4 and
■
5 t o install and set up your e3250
all connectors are firm ly inserted in th eir sockets
■
mains power is switched on at t he socket
■
th e handset’s batteries are correctly and securely
■
installed , and are not run dow n
Everyd ay use
If t he h andset’ s display is blank, it m ay be swit ched off.
Press t he H ANG UP/ C but ton to swit ch it back on.
Check t hat the base unit ’ s mains power adapter is
plugg ed in and p ower is switched on. The base un it
needs main s pow er for n ormal operation of t he p ho ne
— not just for charg ing th e batteries.
M ake sure yo u’ re using t he t elephone line cable that
was supplied w it h your e3250 . Oth er t elephone line
cables mig ht n ot w ork.
M ove t he hand set closer to t he base un it .
Check t he Batt ery Level sym bo l on t he display. If it is
low , r eplace the handset on t he base un it or charg er
pod t o recharg e the batteries.
Switch off pow er at t he m ains socket, w ait fo r a few
seconds and t hen switch back on. This may solve t he
problem.
E:\Binatone2003\e3400\e3400_07.vp
11 March 2003 10:11:58
Page 37

Color profile: Generic CMYK printer profile
Composite Default screen
Troubleshooting
“I cannot m ake
a call.”
“When I press
keys, nothing
happens.”
“When I key in a
number, it
appears on t he
display, but I
can’t m ake an
outside call.”
“The phone
does not ring”
The hand set’s keypad may be locked (see page 7).
Unlock it before yo u m ake a call.
Call barring to specific numbers may h ave been set
and turned on (see page 29 ).
Barring of certain types of call (in ternational, or all
out side calls) m ay have been turned on (see page 30).
M ake sure t he batt eries are fit ted in you r h andset. If t he
Battery Level symbol on the d isplay show s ‘low ’ ,
recharge th e bat teries.
Try m oving the handset closer t o th e base unit .
Try a different position for t he base un it — som ew here
hig her if p ossible, or furth er from oth er electrical
equipm ent .
Call barring to specific numbers may h ave been set
and turned on (see page 29 ).
Barring of certain types of call (in ternational, or all
out side calls) m ay have been turned on (see page 30).
Check t hat the base unit ’ s mains power adapter is
plugg ed in and p ow er is sw it ched on . The b ase unit
needs main s pow er for n ormal operation of t he p ho ne
— not just for charg ing th e batteries.
M ake sure yo u’ re using t he t elephone line cable that
was supplied w it h your e3250 . Oth er t elephone line
cables mig ht n ot w ork.
Check t hat the total REN value of all equip ment
connected t o your telep hone line is no more t han 4 (see
page 2). Disconnect o ne or m ore telephones and see
wh eth er t hat helps.
Binatone Help Line: 0132 5 3 04 473 35
E:\Binatone2003\e3400\e3400_07.vp
11 March 2003 10:11:58
Page 38

Color profile: Generic CMYK printer profile
Composite Default screen
Troubleshooting
“M y call was cut
off when I w ent
out of range.
Now I can’t use
my handset.”
“There is int er
ference and
noise on the
line.”
“I hear ‘beeps’
from my
handset w hile
I’m on a call.”
“The Caller
Display feature
isn’t working.”
“When I try to
make a call, I
hear Busy
tone.”
M ove t he hand set closer to t he base un it before you t ry
again to m ake a call.
M ove t he hand set closer to t he base un it , or t o a
-
dif ferent p osition.
Try m oving the base unit so t hat it ’s not near other
electrical equipm ent , such as a television or a
com puter.
You’ll get t he b est results if yo u site the base unit as
high as possible. For example, in a t w o-storey house,
th e first-floor landing is an id eal place fo r t he b ase un it.
You m ay be going out of rang e of the base unit . M ove
closer, or yo ur call m ay be cu t off.
Check t he Batt ery Level sym bo l on t he display. If it is
low , r echarge the batteries.
You need to subscribe to the Caller Display featu re from
BT or you r service provid er.
The caller m ay have wit hheld their num ber by dialling
141 . Or t hey m ay be calling from a net w ork th at d oes
not t ransm it the Caller ID (for examp le, it m ay b e an
int ernational call) .
If you’re using a e3250 Twin syst em , or have extra
hand sets registered t o your base unit , check t hat
anot her hand set isn’t already in use on a call.
36
E:\Binatone2003\e3400\e3400_07.vp
11 March 2003 10:11:58
Page 39

Color profile: Generic CMYK printer profile
Composite Default screen
Troubleshooting
“The volum e in
the earpiece is
low when I’m
on a call.”
“I can’t transfer
a call.”
“The handset‘s
battery pack is
running low
wit hin an
hour or two.”
“I t ry t o
recharge t he
batteries, but I
still get a
warning that
they are low.”
M ake sure yo u’ re holding t he earpiece correctly over
your ear.
Adjust the volum e using the ▲ or ▼ butt on .
Using a m ult i-handset syst em
M ake sure t he other h andset is in range of t he b ase unit.
M ake sure yo u’ re diallin g th e correct n um ber for t he
ot her h and set (1 to 6, or 9 fo r all registered handsets).
Batt er ies
Before you first used the handset, yo u shou ld have left it
on th e base unit or charger p od fo r up to 15 hours to
charge th e bat teries fully.
You may need t o replace the battery p ack (see below ).
Clean the bat tery charging contacts w it h a dry clot h.
Check the connections betw een t he b ase unit and th e
mains pow er socket.
You need to replace the batter y pack. To find out how
to ob tain a rep lacement, call t he Binatone Spares
Departm ent o n 01325 304 473, b etween 9.00 am and
5.00 p m, M ond ay to Friday.
Dispose of used bat teries safely — never b urn t hem,
or put t hem w h ere they could get p unctured.
Binatone Help Line: 0132 5 3 04 473 37
E:\Binatone2003\e3400\e3400_07.vp
11 March 2003 10:11:58
Page 40

Color profile: Generic CMYK printer profile
Composite Default screen
Troubleshooting
Indirect Net work
“The Indirect
Netw ork feat ure
isn’t working.”
You m ust subscribe to an alt ernative netw ork
provider before you can use this featu re.
If you have more than one registered hand set, you need
to turn t he feature on for each one individually, as well
as sett in g th e net work access code on t he base un it .
When making a call, yo u m ust dial the nu mber (or
select th e number from m em ory, LNR mem ory or Caller
Display m em ory) b efore you p ress th e PHON E butto n
for an outside line.
PBX use
“The Recall
function doesn’t
seem to work.”
“Last Number
Redial and/ or
mem ory dialling
don’t w ork on
You m ay need to p ress and hold t he R bu tton for a
coup le of seconds, rather t han pressing it briefly. Try th is
and see if it w orks.
When you first make a call, press t he LNR/ CDS/ P
butt on fo r a pause bet ween the outside line access
code (e.g. 9) and th e telepho ne n um ber. You should
later be able to redial the nu m ber.
a PBX.”
When storing numbers in m emory, you can in clude t he
outside line access code (e.g. 9) with each n um ber.
If your PBX requires you to w ait for a second Dial tone
before dialling t he telephone nu mber, press the
LNR/ CDS/ P butto n for a pause betw een t he access
code and th e numb er.
38
E:\Binatone2003\e3400\e3400_07.vp
11 March 2003 10:11:58
Page 41

Color profile: Generic CMYK printer profile
Composite Default screen
You can also set up your e3250 so th at it automatically
inserts a 2-second pause after you dial th e out side line
access code, as follow s:
1 Press the PROG button t hen 2 5 0
2 Key in the line access code (up to four digit s)
3 Press the PHONE butt on to confirm
If the fault per sist s …
Disconnect all other inst rum ent s connect ed t o th e
same line as the e325 0 and see whet her you can m ake
a call.
Disconnect the base unit from t he telephone lin e and
plug a different phone in to t he m aster telephone
socket . Try m aking a call. If this works, th e lin e is OK.
If t he call does not w ork, and yo u are using a t wo-way
socket adapter, rem ove it and p lug a t eleph one
dir ectly into the socket. If the call n ow w orks, the
adapt er m ay be fault y.
If you cann ot m ake a call, t he fault may be on t he
exchange line. Con tact t he service provid er (the BT
engineers on 1 51, or your cable com pany).
If you still cannot id ent ify th e cause of the prob lem ,
contact the Binatone Help Line on 01325 30 4 473.
Troubleshooting
Binatone Help Line: 0132 5 3 04 473 39
E:\Binatone2003\e3400\e3400_07.vp
11 March 2003 10:11:58
Page 42

Color profile: Generic CMYK printer profile
Composite Default screen
Cleaning and car e
Do not clean any p art of your e325 0 w ith benzene,
◆
th inner or oth er solvent chemicals — t his may cause
perm anent damage w hich is not covered by th e
Guarant ee. When necessary, clean it wit h a damp
cloth.
Keep your e32 50 away from hot, humid condit ions or
◆
strong sunlight , and don’t let it get wet.
Every effort has been m ade t o ensure hig h standards of
◆
reliabilit y for your e3250. How ever, if somet hing does
go wron g, please do not try to repair it yourself —
consult yo ur sup plier or t he Binatone Help Line.
Declarat ion of conf ormit y
The Binatone e3250 com p lies with the essent ial
protective requirements and ob jectives of:
■ EC R& TTE D irect ive 19 99/ 5/ EC
■
EC Low Voltage Directive 73/ 23/ EEC
■
EC EMC D irect ive 89 / 33 6/ EEC
and conform s to the fo llowing relevant h armonised
standard s:
■
Radio: EN 3014 06
■
EM C: EN 30148 9
■
Safet y: EN 60950, EN 41003
■
Ot her: I-CTR 3 7
Binatone Telecom plc operates a policy of continuous product
improvement, and so reserves the right to make changes to the
product and functions without notice.
40
E:\Binatone2003\e3400\e3400_07.vp
11 March 2003 10:11:58
Page 43

Color profile: Generic CMYK printer profile
Composite Default screen
Guarantee and service
The Binatone e3250 is guaranteed for 12 month s
from th e dat e of purchase. The Guarantee does not
cover d amage by misuse o r negligence, or b y excessive
volt ages — for example, fault s on t he telephone lin e, or
light ning .
If you t hink yo ur e3250 has developed a fault , please
retu rn it to t he shop w here you bought it .
Binatone Help Line: 01325 304 473 41
E:\Binatone2003\e3300\e3300_07.vp
11 March 2003 10:11:58
Page 44

Color profile: Generic CMYK printer profile
Composite Default screen
Technical det ails
Standard Digital En hanced Cord less
Frequency range 1.88 t o 1 .9 GHz (band w idt h = 20 M Hz)
Channel bandw idth 1.728 M Hz
Operating range up to 300 m ou tdoo rs; up to 50 m
Operating tim e standb y: 8 0 h ours app rox.
Temperat ure range Op erating 0 ºC to 40 ºC
Electrical pow er
(N iCd) recharg eable batt ery pack
Telecom m uni catio ns (DECT)
ind oors
talkin g: 7 h ours approx.
battery charg e time: 15 h ours
Sto rage -2 0 ºC to 60 ºC
Handset — 3 .6 V 300 mAH N ickel Cadi um
Base unit/charger pod — in pu t 230 V AC, 50 Hz; outp ut
AC 9 V, 300 m A; m ains adapter part num bers XX00213 6D
(base unit ) and XX002137 D (charger pod)
Port specification The port (con nect ed t o t he main s
power sup ply) is a SELV port w it h respect t o EN41003.
The port (con nect ed t o t he telephon e lin e) is a TNV
port wi th respect t o EN 41003.
PBX compatibilit y Timed break recall: 100 m s (short
press); 2 50 ms (lo ng press).
Pause lengt h (using th e LNR/ CDS/ P butt on ): 3 seconds.
Sign allin g t ype: DTM F (dual-t on e m ult ifr equency), also
called t on e dialling .
Net work connection Thi s equipment i s inten ded to be
used in th e UK only. O perat ion on ot her coun tr ies’ PSTN
term ination p oin ts canno t be g uarant eed.
42
E:\Binatone2003\e3400\e3400_07.vp
11 March 2003 10:11:58
Page 45

Color profile: Generic CMYK printer profile
Composite Default screen
Index
A an swer ing a call, 8
answering an intercom call,
17
auto-an swer, 23
B b abysitter’s call (Direct
Call), 25
batt eries
charging the hand set’s
battery, 5
fit ti ng th e bat tery pack, 5
C call barring, 28–30
specific numbers, 29
typ es of call, 30
Caller Display, 14–15
checking records, 14
deleting record s, 15, 31
retu rning calls, 15
storin g LN R nu mb ers in
mem ory, 15
chain dialling, 11
cleaning and care, 40
conference calls, 18
connection and condit ions
for use, 2
cust omisation
base unit , 27–31
hand set, 23 –26
D d ate an d t ime setting, 30
de-reg ister ing handsets, 21
Direct Call, 25
E earpiece volume, 8
electrical pow er, 4, 42
emerg ency calls, 25, 2 7
emerg ency numbers, 27
ending a call, 8
G guarantee, 41
H H AND SET LOCATOR but ton,
19–20
I In direct N etwork, 32–33
‘lo cal’ d iallin g codes, 33
network access code, 3 2
tu rnin g on and o ff, 33
installation, 4–5
intercom calls, 16–17
interferen ce, 3, 6
K key t one, 24
L Last N umber Redial, 9
on a PBX, 38
storin g LN R nu mb ers in
mem ory, 13
locking the keypad, 7
M making a call, 8
mem ory dialling, 10–13
chain dialli ng , 11
deleting nu mb ers, 11, 26
not ebook, 1 2
storin g and d iallin g
num bers, 1 0
mult i-handset use, 16–22
Binatone Help Line: 0132 5 3 04 473 43
E:\Binatone2003\e3400\e3400_07.vp
11 March 2003 10:11:59
Page 46

Color profile: Generic CMYK printer profile
Composite Default screen
Index
N N ew Call tone, 19
notebook, 1 2
O ‘O ut of rang e’ war ning, 6
P paging handsets, 19
pause, 38, 4 2
PBX compatibilit y, 42
problems, 34–39
R radio signals, 3, 7
recall type, 42
registering handsets, 20,
22
REN (ringer equivalence
number), 2
resetting th e base unit, 31
resetting th e handset, 26
ringer volume an d melody
base unit , 28
hand set, 24
S selecting a b ase unit , 2 1
service information, 4 1
shuttling bet ween calls, 18
signalling, 42
site for t he base unit , 3
site for t he charger pod , 3
swit ching on and off, 7
T three-w ay conference, 1 8
tim e setting , 30
tran sferring calls, 1 7
troubleshooting, 34–39
44
E:\Binatone2003\e3400\e3400_07.vp
11 March 2003 10:11:59
 Loading...