

Page 1
RR70P
Radio-réveil numérique PLL
FR
Rev 0
Page 2
1ˊConfiguration de l'appareil
Quand l'appareil est mis en marche pour la première fois, la fonction de mise à jour
automatique démarrera automatiquement et l'affichage des fréquences indiquera la valeur
reçue et les deux derniers chiffres indiqueront l'emplacement dans la mémoire. Appuyez sur
n'importe quelle touche pour interrompre cette fonction.
Remarque : Lorsque l'appareil est mis en marche pour la première fois, la fonction de mise
à jour automatique démarrera automatiquement au bout de 3 à 10 minutes. Une fois cette
opération terminée, l'appareil pourra enregistrer jusqu'à 20 stations de radio locales.
x La date et l'heure affichent la valeur par défaut de 0:00.
x L'heure de l'alarme affiche la valeur par défaut de 0:00.
x La radio est éteinte.
2ˊDescription générale
1) Radio FM par DTS (Digital Tuning System) avec technologie PLL
2) Écran LCD négatif avec rétroéclairage bleu et fonction de commande de variateur de lumière
3) Format d'affichage de l'heure 12/24 (sélectionné par l'utilisateur)
4) Possibilité de choisir entre la radio et une sonnerie pour l'alarme
5) Alarme à augmentation progressive de la sonnerie en 4 niveaux
6) 20 stations de radio préréglables
7) Fonctions de recherche automatique haut/bas
8) Fonction d'enregistrement automatique en mémoire (AMS)
9) Fonction de minuterie de variation automatique de la luminosité (sélectionnée par l'utilisateur)
1
Page 3

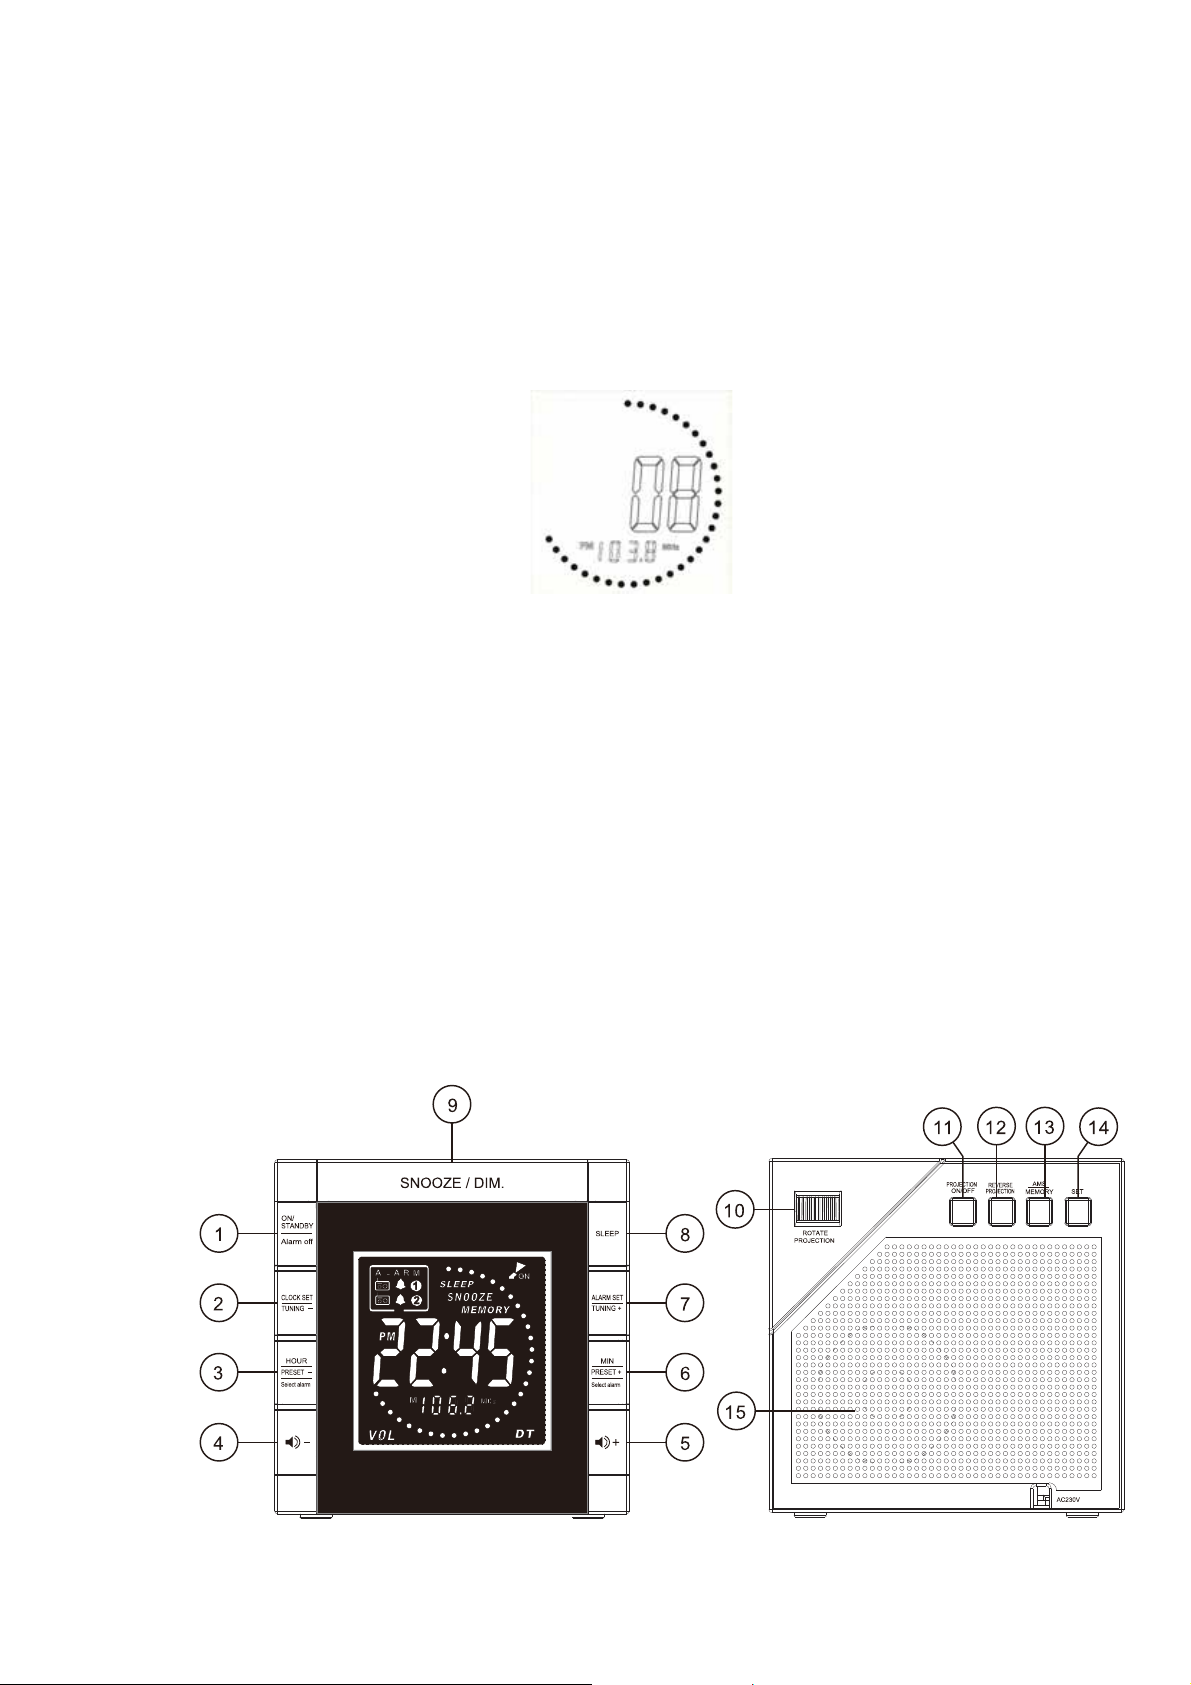
Liste des fonctions :
1) Marche/Veille radio / Alarme désactivée
2) Démarrage réglage horloge / Recherche de
station « - »
3) Réglage « Heures » / Station préréglée « - » /
Sélectionner Alarme
4) Réglage du volume « - »
5) Réglage du volume « + »
6) Réglage « Minutes » / Station préréglée « + »
/ Sélectionner Alarme
7) Configuration de l'alarme / Recherche de
station « + »
8) Touche Sommeil
9) Temporisation / Variateur de luminosité
10) Réglage de l'angle de projection de
l'affichage
11) Marche/Arrêt projection
12) Projection inversée
13) Mémoire stations de radio / AMS
(Auto Mémoire Search)
14) Configuration – Date, format
12/24, minuterie variateur
luminosité « DT »
15) Haut-parleur
Réglages de base de votre appareil
Appuyez une fois sur [Clock set] pour régler l'horloge.
1 Réglage de l'horloge
x En mode de veille, appuyez sur [Clock set] pendant 3 secondes. Le chiffre principal du milieu clignote
et affiche 0:00
x Appuyez sur [Hour], puis sur [Min] pour régler l'heure.
x Après avoir confirmé, appuyez à nouveau sur [Clock set]. L'appareil commencera à afficher un point
toutes les deux secondes.
.
x
2 Réglage de la date
En mode de veille, appuyez sur [Set] à l'arrière de l'appareil. Le chiffre principal du milieu indique 0.00 et clignote.
x
Appuyez sur [Volume + ] / [Volume - ] pour régler la date du jour.
x
Après avoir confirmé, appuyez sur [Set] pour passer au réglage du mois.
Comme pour la date du jour, appuyez sur [Volume + ] ou [Volume -] pour régler le mois.
x
x
Appuyez une fois sur la touche Set pour passer à la sélection du format d'horloge (12/24).
Si vous n'appuyez sur aucune touche pendant 15 secondes, le réglage en cours sera confirmé et l'appareil passera
x
automatiquement en mode de veille.
3 Réglage du format d'horloge
x Une fois la date réglée ou si vous appuyez trois fois sur [Set], les deux derniers numéros du chiffre
principal du milieu indiqueront « 24 ».
x Appuyez sur [Volume + ] pour confirmer l'utilisation du format 24 heures.
x Appuyez sur [Volume - ] pour confirmer l'utilisation du format 12 heures.
x Appuyez une fois sur [Set] pour confirmer le réglage affiché et pour passer au réglage de la minuterie du
variateur de luminosité (DT).
x Si vous n'appuyez s ur aucune touche pendant 15 secondes, le réglage en cours sera confirmé et l'appareil
passera automatiquement en mode de fonctionnement automatique.
2
Page 4
Si vous n'appuyez sur aucune touche pendant 15 secondes, l'appareil repassera automatiquement en
mode de fonctionnement automatique.
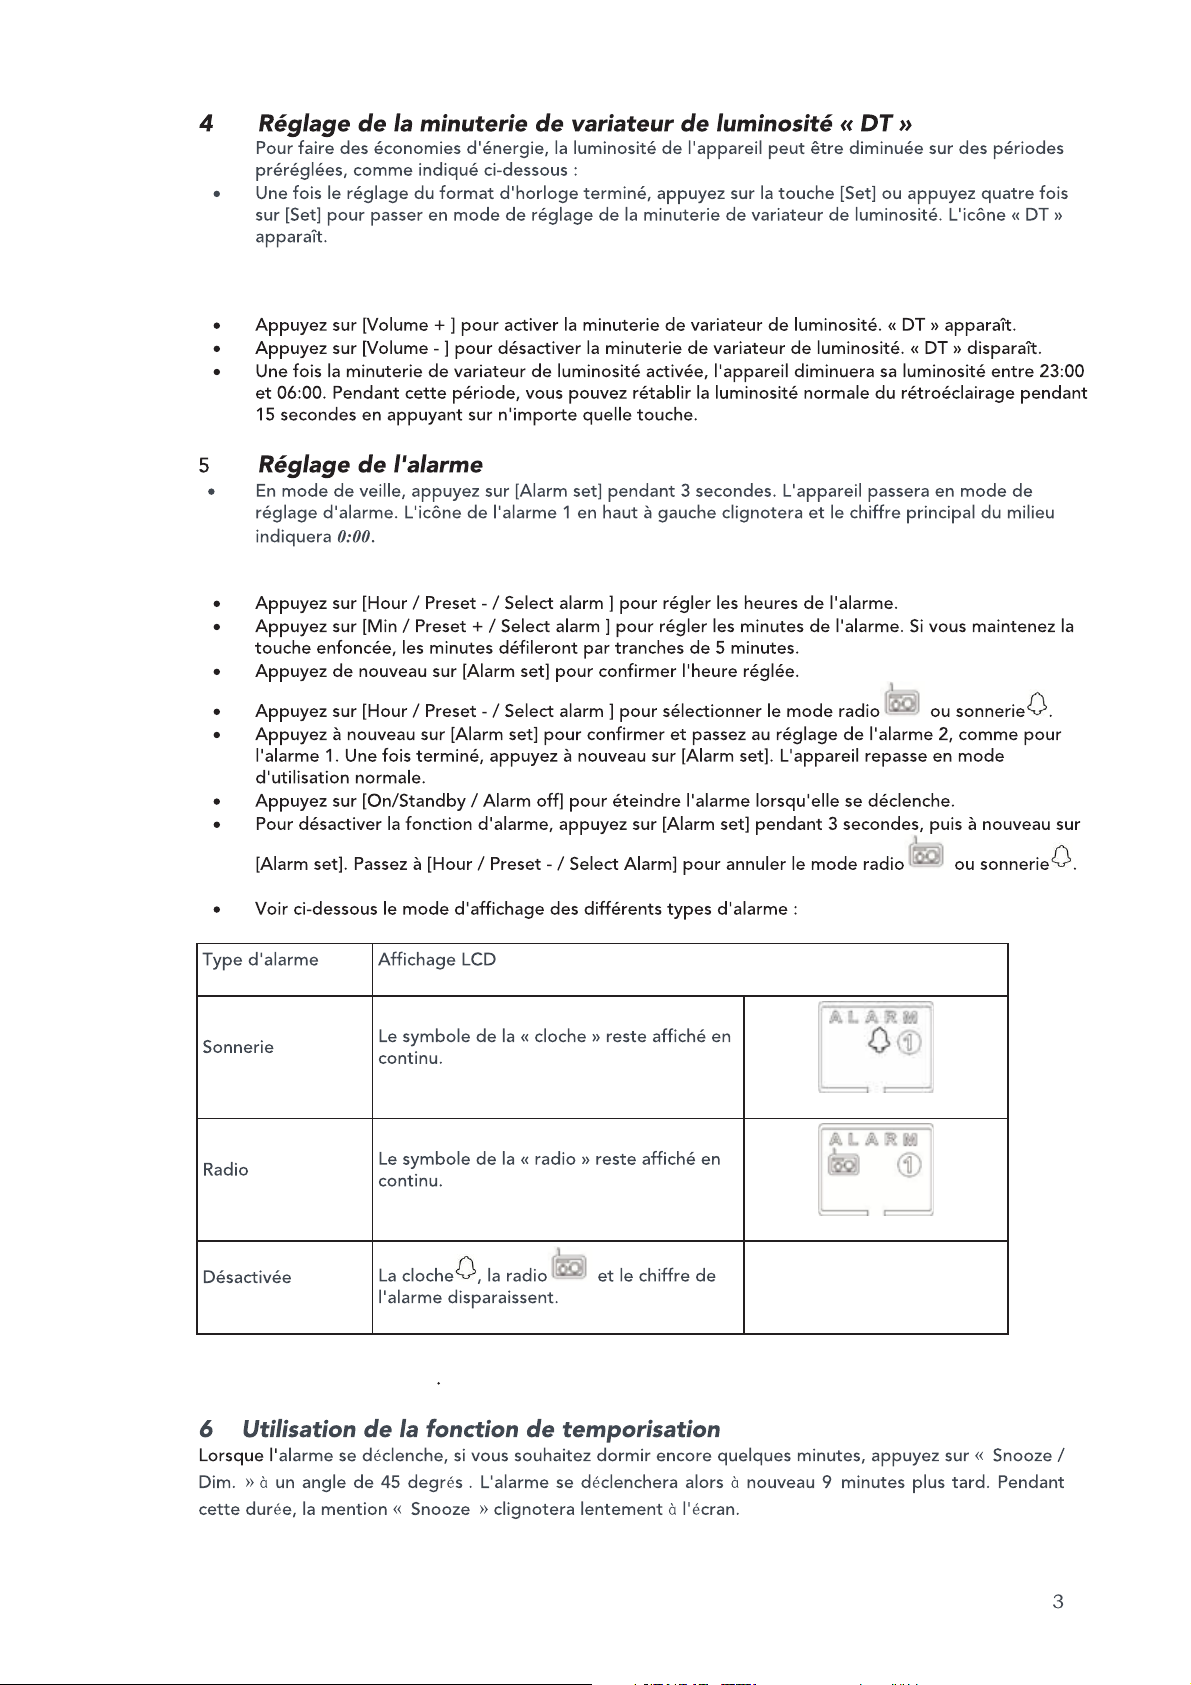
Page 5
ʳ
7 Écouter la radio FM
Lorsque vous appuyez sur On/Standby, l'icône de la FM et le chiffre de la fréquence s'affichera sous
les chiffres principaux du milieu. Rechercher une station vers le haut/bas
1ˊ Lorsque la radio est en marche, maintenez enfoncée la touche [Tuning +] pour rechercher la
station de radio suivante en faisant défiler la fréquence de réception vers le haut. Appuyez
une fois sur la touche pour augmenter par incréments de 0,1 MHz.
2ˊ Maintenez enfoncée la touche [Tuning -] pour rechercher la station de radio suivante en faisant
défiler la fréquence de réception vers le bas. Appuyez une fois sur la touche pour diminuer par
incréments de 0,1 MHz.
7.1 Enregistrer une station dans la mémoire
1ˊ Lorsque la radio est allumée et qu'elle reçoit une station, appuyez sur la touche « MEMORY ».
La mention « MEMORY » clignote à l'écran. Appuyez sur la touche « Preset +/- » pour
sélectionner le numéro sous lequel vous souhaitez enregistrer la station actuelle, à l'aide des
deux derniers chiffres du milieu, puis appuyez à nouveau sur la touche « MEMORY » pour
enregistrer la station dans la mémoire de votre choix.
7.2 Rappel des mémoires préréglées
1ˊ Lorsque la radio est allumée, appuyez une fois sur la touche [Preset +/-] pour sélectionner le
numéro 1 à 20 de la mémoire préréglée. Les deux derniers chiffres du milieu afficheront
chacun différentes valeurs et fréquences. Après les avoir sélectionnés, appuyez sur la même
touche pour confirmer ou attendez 3 secondes. La station passera automatiquement à la
fréquence sélectionnée et diffusera la radio correspondante. Les chiffres du milieu
repasseront à l'horloge et la fréquence restera sur la station sélectionnée.
4
Page 6

7.3 Utilisation de l'AMS
1ˊ Après avoir allumé la radio, maintenez enfoncée la touche « AMS | MEMORY » pendant 3
secondes pour activer le mode AMS.
2ˊ La radio fera défiler automatiquement toutes les stations et les enregistrera jusqu'à ce que
toutes les fréquences aient été scannées ou que toutes les stations en mémoire aient été
enregistrées. Après cela, la radio quittera automatiquement ce mode.
Lorsque la fonction AMS est activée, les stations préalablement enregistrées en mémoire seront
remplacées par les nouvelles stations détectées.
8 Réglage du volume
Lors que la radio est allumée et que vous appuyez sur la touche de Volume +/-, la mention
« VOL » s'affiche et les deux derniers numéros du chiffre principal du milieu indiquent le niveau
de volume.
8.1 Appuyez sur [Volume +] pour augmenter le volume.
8.2 Appuyez sur [Volume -] pour diminuer le volume.
5
Page 7

9 Variateur de luminosité
À tout moment, sauf quand l'alarme est active, vous pouvez modifier la luminosité du
rétroéclairage en appuyant sur la touche « Snooze / Dim. » de la façon suivante :
Luminosité élevée
Luminosité moyenne
Luminosité faible
10 Utilisation de la minuterie de sommeil
À tout moment, si vous appuyez sur la touche « Sleep », l'appareil activera la minuterie de
sommeil et commencera à effectuer le décompte, à partir de la valeur sélectionnée. La valeur
par défaut est de 120 minutes et s'affichera à la place du chiffre principal du milieu, avec la
mention [Sleep]. Chaque fois que vous appuyez sur la touche « Sleep », la valeur diminue de
5 minutes, jusqu'à ce que « OFF » apparaisse et que la radio s'éteigne.
11 Projection active
12 Remplacement des piles de secours de l'horloge
13 Caractéristiques de base :
Cet appareil a été conçu et fabriqué de façon à garantir votre sécurité personnelle, lorsque celui-ci est utilisé
de la façon indiquée. Cependant, une mauvaise utilisation peut éventuellement entraîner un choc électrique
ou un risque d'incendie. Veuillez lire soigneusement toutes les instructions de sécurité et le mode d'emploi
avant l'installation et l'utilisation, et conservez ces instructions à portée de la main, pour pouvoir vous y
référer ultérieurement. Notez bien tous les avertissements qui figurent dans ces instructions et sur l'appareil.
>>>>>>>
11.1 Si vous souhaitez projeter l'heure sur un mur ou au plafond, appuyez une fois sur la
touche « Projection On/Off » pour activer ou désactiver la fonction. L'icône de
projection apparaîtra ou disparaîtra de l'écran.
11.2 Appuyez sur « Reverse projection » pour changer l'angle de projection de 180 degrés.
11.3 Tournez la molette « Rotate projection » afin de régler l'angle de projection, pour une
lecture plus aisée.
12.1 Insérez 2 piles AAA, en vérifiant que la polarité (+ et – à l'extrémité des piles)
correspond au dessin situé près du compartiment à piles. Fermez le capot du
compartiment.
Remarques : Lorsqu'elles sont usées, ne jetez pas les piles dans les déchets ménagers
(conformez-vous à votre législation locale).
13.1 Sortie : 0,5 W
13.2 Plage de fréquences radio FM : 87,5 à 108 MHz
13.3 Entrée : CA 230 V ~ 50 Hz
13.4 Stations préréglées : 20
13.5 Minuterie de variateur de luminosité par défaut : Activée de 23:00 à 06:00
Consignes de sécurité importantes à lire très attentivement
6
Page 8

Fabriqué en Chine
Page 9
Page 10

Page 11
Setup
When switching on the alarm, the automatic update function means the radio will automatically
search for radio stations within three minutes. The screen shows the digits and station numbers.
Once complete, the unit will store its maximum of 20 radio stations as preset stations.
General Functions
1) FM radio by Digital Tuning System (DTS)
2) Negative LCD display with blue backlight and dimmer control
3) 12/24-hour clock display
4) Alarm signal can be set to radio or beeping sound
5) Beep sounds can be set to ascend (increase in volume from quiet to loud)
6) 20 preset radio stations
7) Automatic/manual search up/down
8) A.M.S.(automatic memory store) function
9) Automatic dimmer timer
1
Page 12

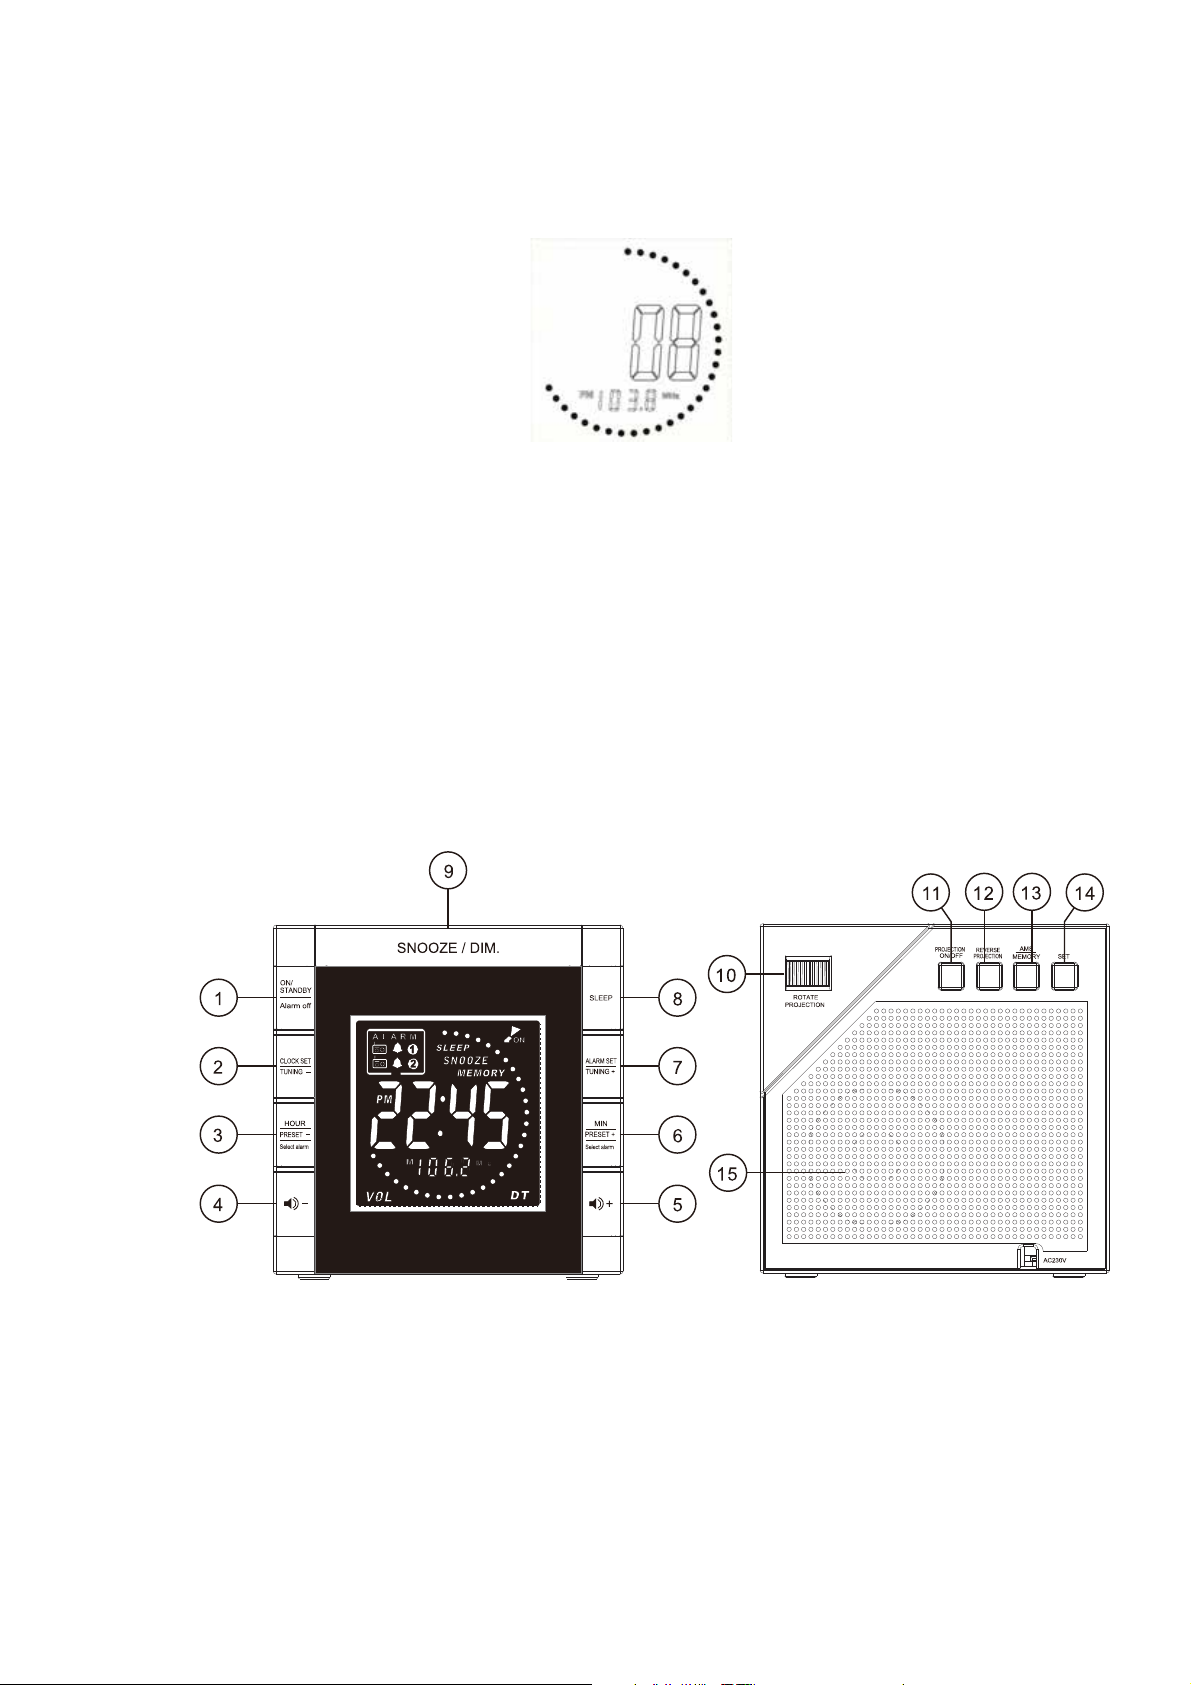
Key functions:
1) radio on/standby/alarm off
2) clock setup/tuning -
3) set hour/station -/select alarm
4) volume -
5) volume +
6) minute/station +/select alarm
7) set alarm/tuning +
8) sleep button
9) snooze/dimmer control
10) adjust rotation
11) projection on/off
12) flip projection upside-down
13) radio station memory/AMS (AutoMemory Search)
14) SET: function setup – date, 12/24hour clock, dimmer timer (DT)
15) speaker
1. Set the clock
x In standby mode, press [2] for 3 seconds. The display will flash and show 0:00.
x Set the time by pressing [3] to set the hour and [6] to set the minute.
x Press [2] again to confirm the time. The unit will start to show the passing of every two seconds through
the dot indicator.
2. Set the date
x In standby mode, press [14] on the back. The display will flash and show 0:00.
x Press [14], “Year” will flash. Set the year by pressing [4]/[5], e.g. 2015, 2016, etc.
x After the year has been set, press [14]. “Month” will flash. Set the month by pressing [4]/[5], e.g. 1, 2, up
to 12.
x After the month has been set, press [14]. “Day” will flash. Set the day by pressing [4]/[5], e.g. d01, d02,
up to d031.
x The date will be set and be automatically confirmed if the user does not press any buttons for 15
seconds.
3. Set clock format
x Press [14] and hold until “Year” flashes in the display.
x Press [14] 3 more times.
x 12/24H will flash. Now you can adjust the time format:
x Press [5] for 12H (12-hour format).
x Press [4] for 24H (24-hour format).
x The clock format will be set and be automatically confirmed if the user does not press any buttons for
15 seconds.
4. Set a dimmer timer (DT)
The display backlight can be set to automatically dim at night time, from 23:00 to 06:00, in order to save
energy.
Set as below:
x Press [14] and hold for 15 seconds until “Year” flashes in the display. Press [14] 4 more times.
x “DT” will flash.
x Press [5] to activate the dimmer timer. The display will show “DT”. When the dimmer timer is activated,
the display backlight will be set to automatically dim at night time, from 23:00 to 06:00.
x Press [4] to deactivate the dimmer timer. The display will show “DT”, and the display will not dim at
night.
5. Set alarm
x In standby mode, press [7] for 3 seconds. The unit will go to alarm setup, the “alarm 1” icon in the upper
left corner will flash and the main digit will show 0:00.
x Press [3] to set the alarm hour.
x Press [6] to set the alarm minute.
x Press [7] again to confirm the time of the alarm.
2
Page 13
x With the alarm time set, press [3/6] to select whether the alarm should start the radio or a beep
sound.
x Press [7] again to confirm and proceed to set alarm 2.
x Repeat all the steps above exactly as when setting alarm 1.
x Press [7] again to confirm the settings for alarm 2.
x Disable alarm function:
x Press and hold [7] for 3 seconds, then press [7] once more.
The display will flash “Alarm 1” or “Alarm 2”. Press [3/ 6] to turn off
confirm.
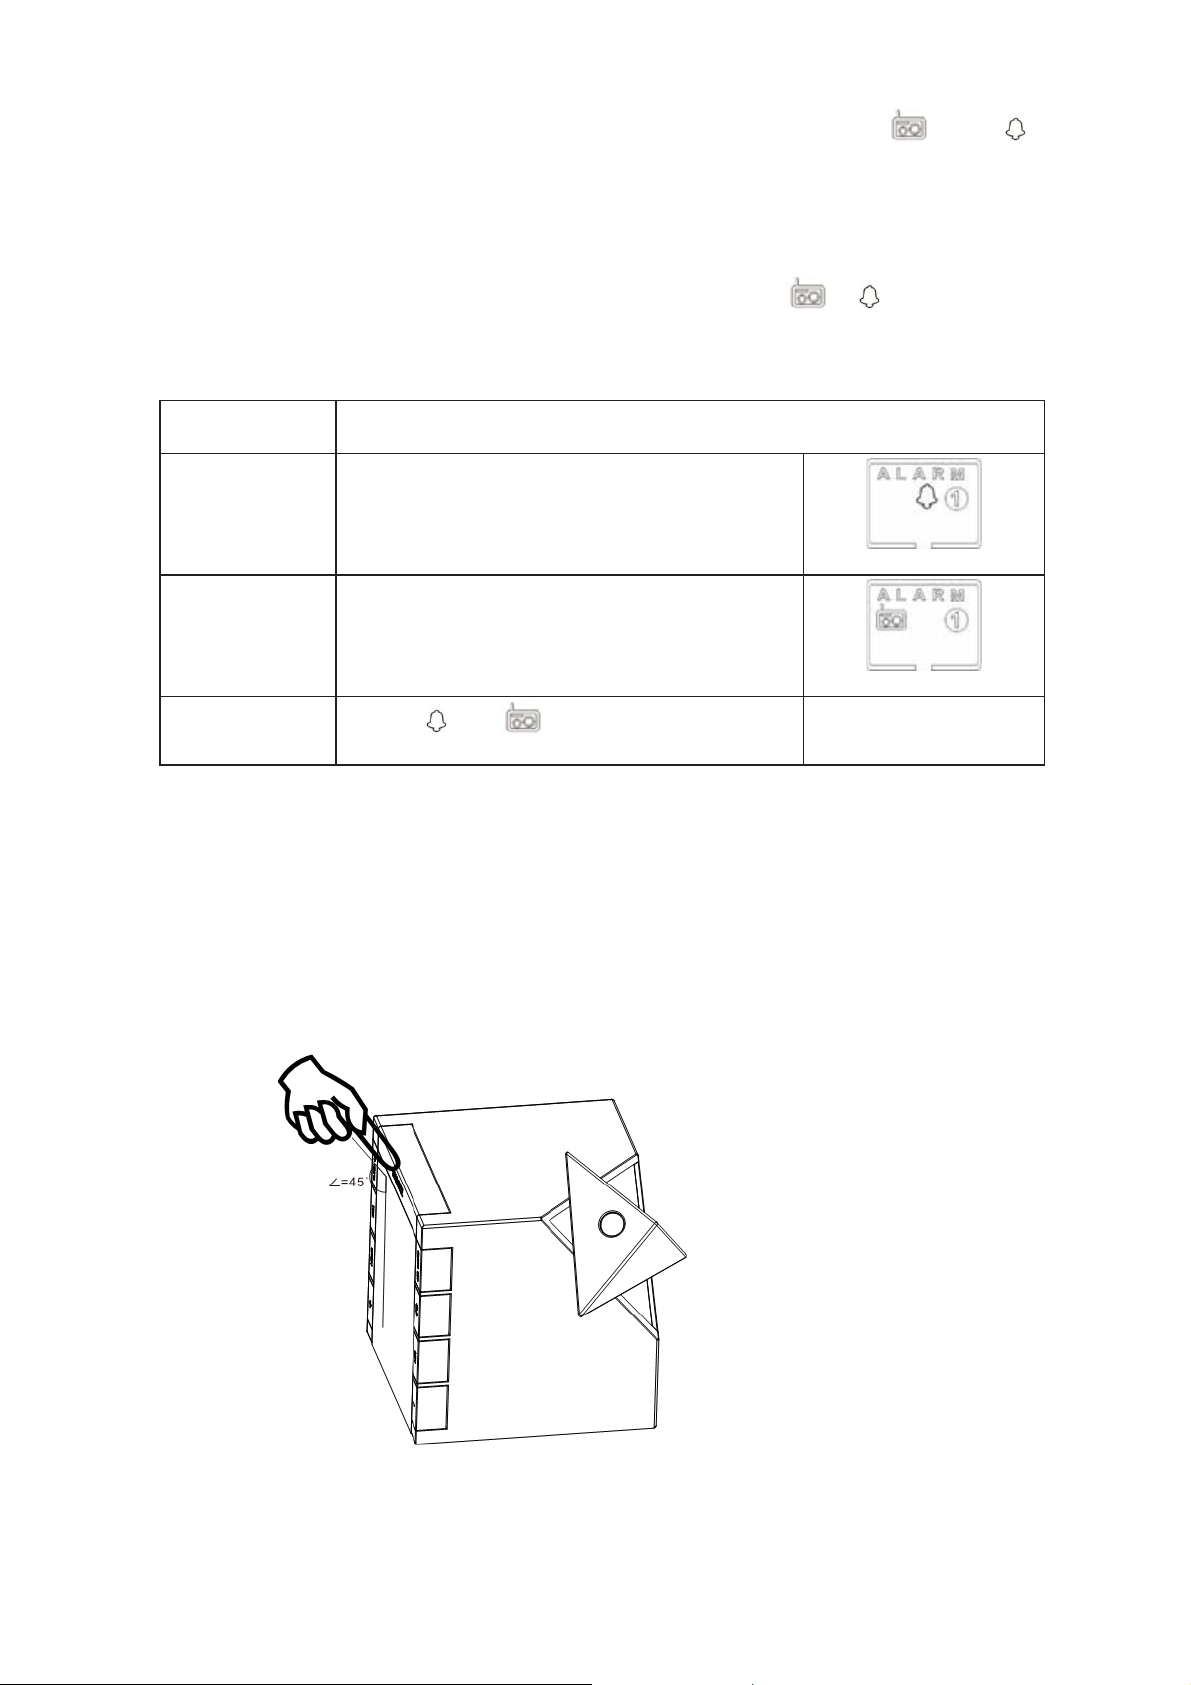
x Output format as below:
ut LCD display
Outp
Beep sound Display shows bell symbol
Radio output Display shows radio symbol
Disabled
If no ke
y is pressed for 15 seconds, the system will go back to normal mode
All the bell , radio and alarm symbols are gone
or and press [7] again to
.
6. Use the snooze function
When the alarm is ringing, press [9] “SNOOZE/Dimmer”. The display will flash “SNOOZE”. The alarm will
stop, but ring again every 9 minutes. Press [1] to completely turn off the alarm.
7. Listen to FM radio
x For radio mode, press [1]. The display will show FM and the current frequency in digits, e.g. FM92.6
MHz.
3
Page 14

x When the radio is on, you can adjust the signal by pressing [2 / 7] to tune up or down by 0.1 MHz and
search for the next station.
7.1 Store a station to memory – as a preset station
x While already in radio mode, press [13]. Press [3/6] to select the preset station number, e.g. P01, P02….
P20. The display will flash MEMORY and the chosen program station, for example P01 (or whichever
program number was chosen – P01… P20). Press [2/7] to select the channel. Finally, press [13] to
confirm and save this station to the preset stations.
7.2 Return to preset station
x When radio mode is on, press [3/6] to select the desired preset station number, P01, P02, to P20. The
display will then show MEMORY, the preset station number (P01 or whichever preset station number is
chosen), and the FM frequency.
x Once the preset station has been selected and confirmed or you have waited for 3 seconds, the display
will show the current time and FM frequency.
7.3 AMS
x With radio mode on, press and hold [13] for 3 seconds to activate AMS mode.
x The radio will automatically scan the frequency and save the preset station to memory, with a total of up
to 20 different radio stations. Once AMS finishes scanning and stops automatically, it will return to preset
station no. P01. The display will show the current time and FM frequency.
the AMS function is activated, the newly found stations will replace the preset
When
stations that have been previously stored in the memory.
8. Volume control
x With the radio on, press [5/4] for volume +/-. The display will show the volume level, 00 ~ 15, from
minimum to maximum sound level.
x Press [5] to increase the sound volume level.
x Press [4] to decrease the sound volume level.
9. Dimmer control (display digit light)
x Press [9] to control the brightness of digits on the display.
x There are 3 levels: Brightness, dim light and dark.
High level (brightness)
Mid. level (dim light)
Low level (dark)
4
Page 15

10. Sleep mode timer
x Press [8] to activate sleep mode.
x It will start to count down from the default 120 minutes. The radio will turn off after 120 minutes (or set
time). Press [8] again to set the timer for when the radio will turn itself off (note: every press reduces the
sleep timer by 5 minutes, and if reduced to zero, OFF will be displayed).
>>>>>>>
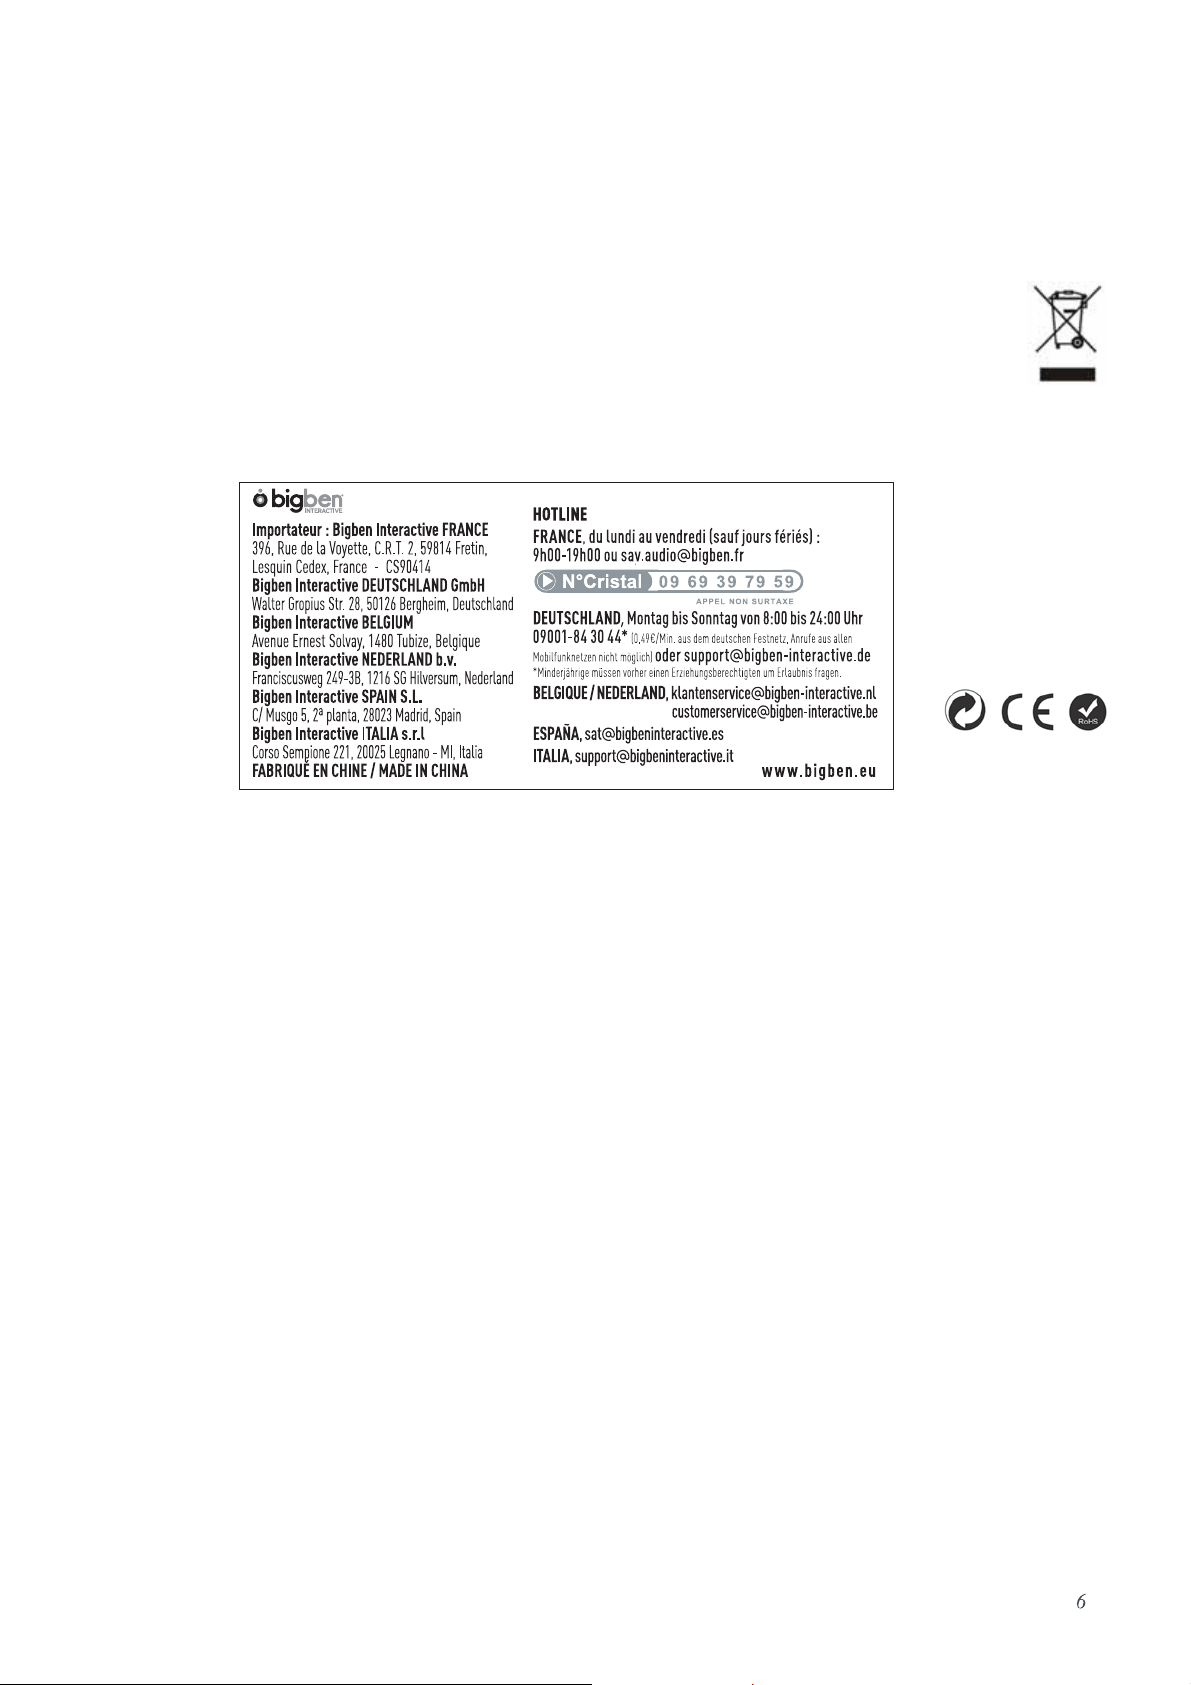
11. Projection display
x Press [11] to turn the projector on/off. The projector icon will be shown in the display when the projector
is on.
x Press [12] to flip the projection by 180 degrees.
x Use the tuning knob [10] to rotate the projection angle in 90-degree amounts.
12. Replace clock backup batteries
x Insert 2 AAA batteries. Check the polarity (+ and – at ends of the battery) and follow the instructions on
the diagram near the battery compartment. Close the compartment door.
NOTE: Please make sure you properly dispose of batteries (see your local regulations).
13. Basic specifications:
Output: 0.5W
FM range: 87.5 ~ 108 MHz
Input: AC~ 230V, 50Hz
Station preset: 20
Default dimmer timer: ON for 23:00 – 06:00
Important safety instructions, please read carefully
This unit has been designed and manufactured in such a way as to ensure personal safety, provided it is
used as directed. However, improper use can result in potential electrical shock or fire hazards. Please read
all safety and operating instructions carefully before installation and use. Keep these instructions handy for
future reference. Take special note of all the warnings contained in these instructions and on the unit.
x Do not dispose of electrical appliances in the standard household waste.
x Bring such appliances to a collection point.
x Some parts contained in these appliances may be hazardous to human or animal health.
Imported by BIGBEN INTERACTIVE SA
396, Rue de la Voyette
CRT2 - FRETIN
CS 90414
59814 LESQUIN Cedex - France
www.bigben.eu
5
Page 16
Meaning of the dustbin symbol
Protect our environment: do not dispose of electrical equipment in the domestic waste.
Please return any electrical equipment that you will no longer use to the collection points provided for their disposal.
This helps avoid the potential negative effects of incorrect disposal on the environment and human health.
This will contribute to the recycling and other forms of reutilisation of electrical and electronic equipment.
Information concerning where the equipment can be disposed of can be obtained from your local authority
Made in China
Page 17
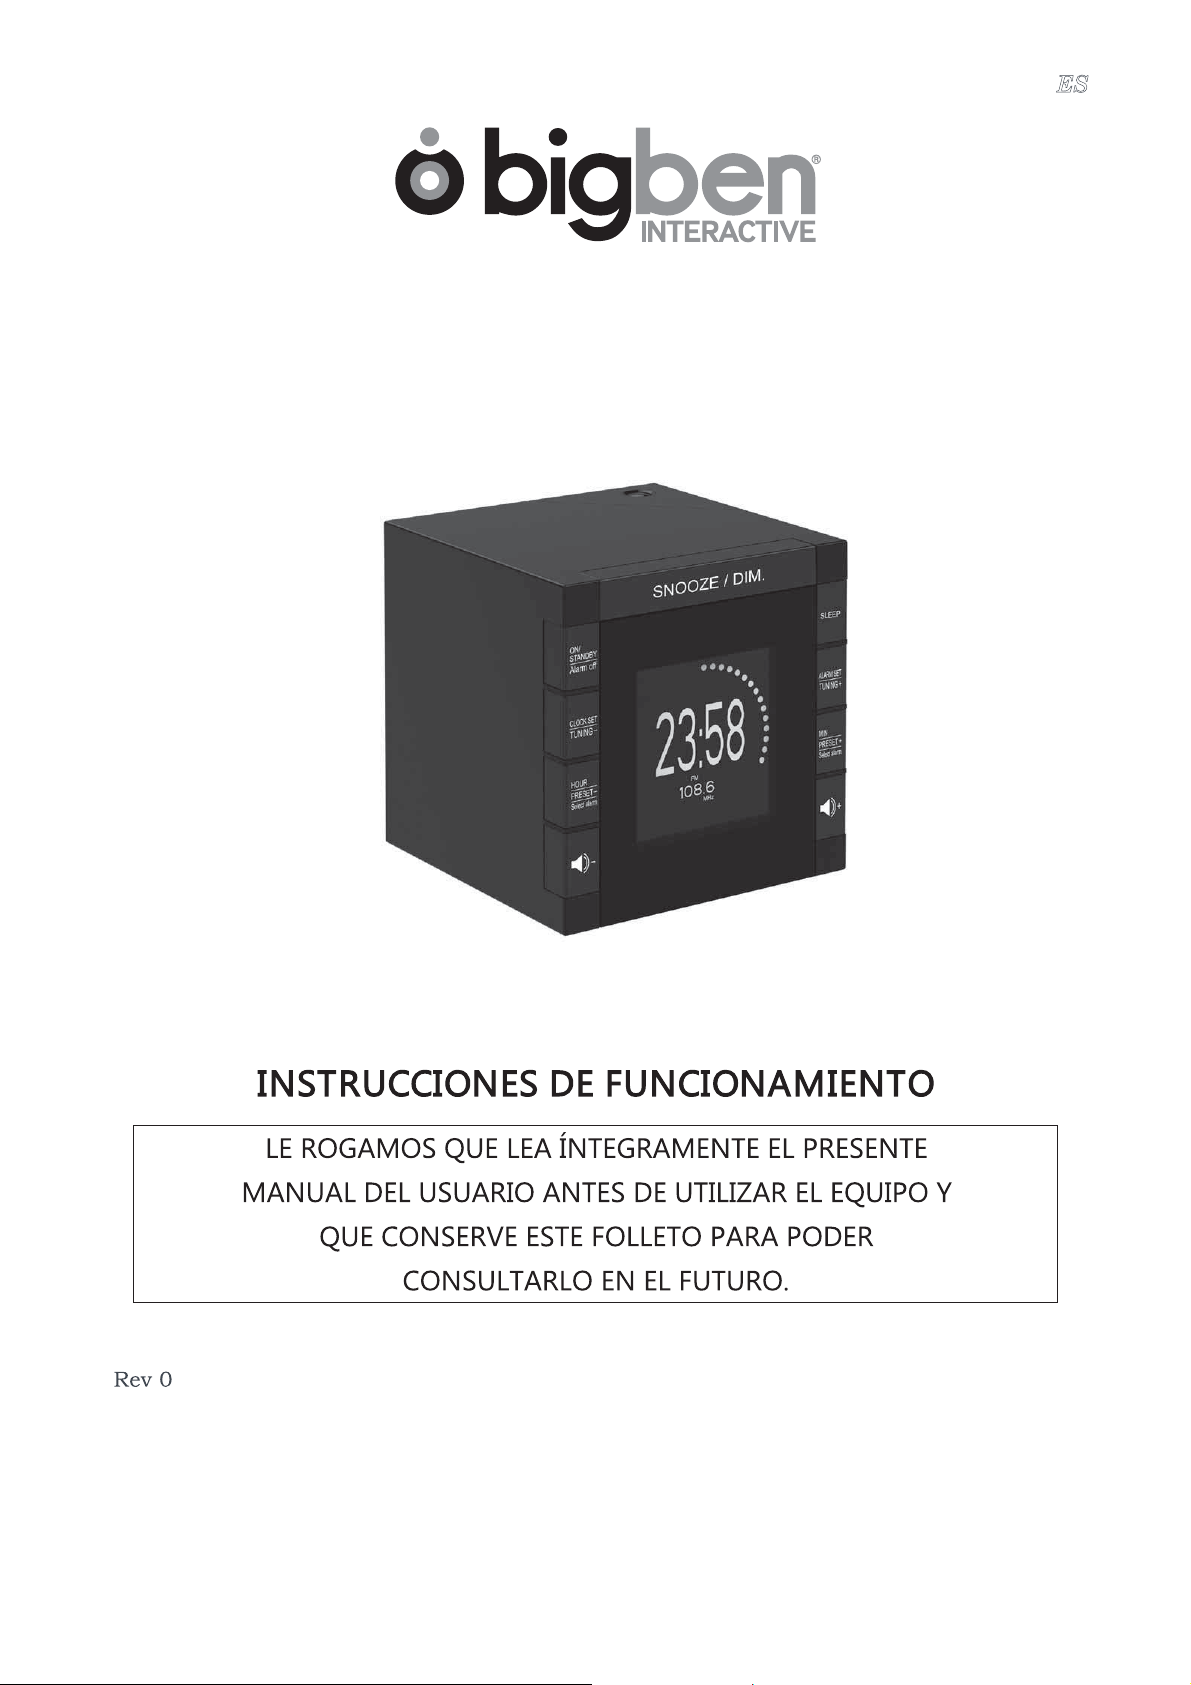
RR70P
Reloj despertador digital con PLL
ES
Page 18

1ˊPuesta en marcha del equipo
Cuando se conecta el equipo por primera vez, se pondrá en marcha la función de actualización
automática. En los dígitos de la frecuencia se verá el valor de la emisora localizada y en los dos
últimos dígitos principales se verá el lugar que ésta ocupa en la memoria. Pulse cualquier tecla
para detener esta función.
Nota: Cuando se conecta el equipo por primera vez, se pondrá en marcha la función de
actualización automática en 3~10 minutos. Una vez realizada, el equipo almacenará un
máximo de 20 emisoras locales de radio
x La fecha y el reloj se encontrarán por defecto en 0:00
x La hora de las alarmas se encontrará por defecto en 00:00
x La radio se encontrará apagada
2ˊDescripción general
1) Radio FM con sistema de sintonización digital y tecnología PLL
2) Pantalla LCD de tipo negativo con retroiluminación azul y función de ajuste del brillo
3) Reloj con formato de 12/24 horas (seleccionable por el usuario)
4) La alarma se puede ajustar para que suene con un zumbido o con la radio
5) La alarma de zumbido tiene 4 niveles de ajuste ascendente, para que suene con mayor rapidez
6) Memorización de 20 emisoras
7) Función de búsqueda automática de emisoras anteriores o posteriores
8) Función de memorización automática
9) Función de temporizador de brillo atenuado automático seleccionable por el usuario
1
Page 19

Lista de funciones:
1) Botón radio ON/STANDBY / Alarm Off
2) Botón CLOCK SET / TUNING-
3) Botón HOUR / PRESET- / Select alarm
4) Control del volumen-
5) Control del volumen+
6) Botón MIN / PRESET+ / Select alarm
7) Botón ALARM SET / TUNING+
8) Botón SLEEP
9) Botón SNOOZE / DIM.
10) Mando ROTATE PROJECTION
11) Botón PROJECTION ON/OFF
12) Botón REVERSE PROJECTION
13) Botón AMS / MEMORY
14) Botón SET
15) Altavoz
Configuración básica del equipo
Pulse una vez [CLOCK SET] para comenzar a configurar el reloj
1 Ajuste del reloj
x En el modo STANDBY, pulse [CLOCK SET] durante 3 segundos. Los dígitos principales de la pantalla
parpadearán y mostrarán 0:00
x Ajuste las horas con [HOUR] y los minutos con [MIN]
x Una vez confirmados, pulse de nuevo [CLOCK SET]. El equipo comenzará a mostrar un punto cada
dos segundos
2 Ajuste de la fecha
En el modo STANDBY, pulse [SET] en la parte trasera. En los dígitos principales se verá 0.00 parpadeando
Pulse el control de volumen [+] o [-] para ajustar la fecha
x
x
Una vez confirmado, pulse de nuevo [SET] para cambiar el ajuste del mes
x
Haga lo mismo que con la fecha, pulsando el control del volumen [+] o [-] para fijar el mes
Pulse una vez el control del volumen [+] o [-] para ir a la selección de formato del reloj (12/24)
x
x
Si no se pulsa ningún botón en 15 segundos, el ajuste actual se confirma y se pasa automáticamente al modo
standby
3 Ajuste del formato del reloj
x Una vez terminado el ajuste de la fecha o después de pulsar [SET] tres veces, en los dos últimos dígitos
principales de la pantalla se verá «24»
x Pulse el control del volumen [+] para confirmar el formato de 24 horas
x Pulse el control del volumen [-] para confirmar el formato de 12 horas
x Pulse una vez [SET] para confirmar el ajuste actual y pasar a la configuración del temporizador d e brillo
atenuado (DT).
x Si no se pulsa ningún botón en 15 segundos, el ajuste actual se confirma y se pasa automáticamente al modo
standby.
4 Ajuste del temporizador de brillo atenuado (DT)
Para ahorrar energía, el equipo puede atenuar el brillo de forma automática durante un periodo de
tiempo preestablecido. Dicho ajuste se realiza de la siguiente manera:
2
Page 20

x Para pasar al modo de ajuste del temporizador de brillo atenuado, tiene que pulsar «SET» después de
haber terminado de elegir el formato del reloj, o bien pulsar «SET» cuatro veces si no estaba
realizando ese ajuste. En la pantalla aparecerá el icono «DT».
x Pulse el control del volumen [+] para seleccionar el temporizador de brillo atenuado. Se verá «DT»
x Pulse el control del volumen [-] para seleccionar el temporizador de brillo atenuado. «DT»
desaparecerá
x Una vez que el temporizador de brillo atenuado se encuentra activado, el brillo se atenuará de forma
automática entre las 23:00 y las 06:00. Durante ese horario, pulse cualquier tecla para activar la
retroiluminación durante 15 segundos.
5 Programación de la alarma
x En el modo STANDBY, pulse [ALARM SET] durante 3 segundos. El equipo irá a la configuración de la
alarma, el icono de la alarma 1 aparecerá parpadeando en la esquina superior izquierda de la pantalla,
y los dígitos principales mostrarán 0:00
x Pulse [HOUR / PRESET- / Select alarm] para introducir la hora de la alarma
x Pulse [MIN / PRESET+ / Select alarm] para introducir los minutos de la alarma. Si mantiene pulsada
esta tecla, avanzará de 5 en 5 minutos
x Pulse de nuevo [ALARM SET] para confirmar el ajuste
x Pulse [HOUR / PRESET- / Select alarm] para seleccionar como despertador el sonido de la radio o
un pitido
x Pulse de nuevo [ALARM SET] para confirmar e ir a la configuración de la alarma 2, donde debe seguir
los mismos pasos que con la alarma 1. Pulse de nuevo [ALARM SET] para que el equipo vuelva al
modo standby.
x Pulse [ON/STANDBY / Alarm off] para apagar la alarma cuando suene.
x Para desactivar la función de alarma, pulse [ALARM SET] durante 3 segundos y, a continuación, pulse
de nuevo [ALARM SET]. Pulse [HOUR / PRESET- / Select alarm] para cancelar el despertador con
sonido de radio
/ bip
3
Page 21

Si no se pulsa ningún botón en 15 segundos, el equipo pasa automáticamente al modo de funcionamiento
normal.
Page 22

la pantalla LCD se verá «MEMORY» parpadeando. Elija con el botón «PRESET+» o «PRESET-»
el lugar de la memoria en que quiere guardar esa emisora, que se verá en los dos últimos
dígitos principales. A continuación, pulse de nuevo el botón «AMS / MEMORY» para
confirmar la memorización.
7.2 Escuchar una emisora guardada
1ˊ Con la radio encendida, pulse [PRESET+] o [PRESET-] para seleccionar el número de memoria
en que está guardada la frecuencia deseada (de 1 a 20). En la pantalla se verá el número de la
memoria en los dos últimos dígitos principales y, debajo, la frecuencia. Una vez haya llegado
a la memoria deseada, pulse el mismo botón o espere 3 segundos para recuperar
automáticamente esa emisora guardada. En los dígitos principales se volverá a ver la hora.
7.3 Uso de la función de memorización automática (AMS)
1ˊ Cuando la radio esté encendida, mantenga pulsado el botón «AMS / MEMORY» durante 3
segundos para activar el modo AMS de memorización automática.
2ˊ La radio realizará una búsqueda automática hasta que localice todas las emisoras y las guarde
y, a continuación, saldrá automáticamente de esta función.
Cuando se activa la función AMS, las nuevas emisoras de radio encontradas reemplazarán a las que
había anteriormente en la memoria.
8 Control del nivel de volumen
Con la radio en funcionamiento, pulse el control del volumen [+] o [-]. En la pantalla se verá el
icono [VOL] y también el nivel de volumen
8.1 Pulse el botón del volumen [+] para subir el volumen
8.2 Pulse el botón del volumen [-] para bajar el volumen
5
Page 23

9 Ajuste del brillo
Puede pulsar el botón SNOOZE/DIM. en cualquier momento (excepto con la alarma activa) para
cambiar la intensidad de la retroiluminación según los siguientes pasos:
Nivel alto
Nivel medio
Nivel bajo
10 Uso del temporizador de apagado (SLEEP)
Puede pulsar en cualquier momento el botón SLEEP para activar el temporizador de apagado y
comenzar la cuenta atrás según el tiempo seleccionado, que por defecto es de 120 minutos. En
los dígitos principales de la pantalla aparecerán los minutos con el icono «SLEEP». Cada vez que
se apriete el botón, se restarán 5 minutos, hasta quedar desactivada la función y aparecer
«OFF» en la pantalla.
11 Proyección activa de la pantalla
12 Sustitución de las pilas de reserva para el reloj
13 Características técnicas básicas:
Este equipo ha sido diseñado y fabricado para garantizar su seguridad personal siempre que se use del
modo indicado. El uso indebido puede provocar electrocución o peligro de incendio. Le rogamos que lea
atentamente todas las instrucciones de seguridad y funcionamiento antes de instalar y utilizar el equipo y
que guarde dichas instrucciones a mano para poder consultarlas en el futuro. Tenga especialmente en
cuenta todas las advertencias incluidas en las instrucciones y en el propio equipo.
>>>>>>>
11.1 Si desea proyectar la hora, pulse el botón «PROJECTION ON/OFF» una vez para activar
la función y otra vez para desactivarla. Según lo que elija, el icono PROJECTION
aparecerá o desaparecerá
11.2 Pulse «REVERSE PROJECTION» para modificar el ángulo de proyección 180 grados
11.3 Gire la rueda «ROTATE PROJECTION» para ajustar el ángulo de proyección y que la
lectura resulte cómoda
12.1 Introduzca 2 pilas de tipo AAA asegurándose de respetar la polaridad (los extremos + y
– de las pilas) según el dibujo que encontrará junto al compartimento de las pilas. Cierre
la tapa del compartimento
Nota: asegúrese de desechar las pilas usadas del modo adecuado (ver la normativa local)
13.1 Potencia de salida: 0,5 W
13.2 Rango de frecuencias FM: 87.5 ~ 108 MHz
13.3 Potencia de entrada: CA~ 230 V, 50 Hz
13.4 Memorización de emisoras: 20
13.5 Temporizador de brillo atenuado por defecto: activo de 23:00 a 06:00
Instrucciones de seguridad importantes. Por favor, léalas con atención
x No tire los aparatos eléctricos o electrónicos a la basura normal. Llévelos a un punto
6
Page 24

Fabricado en China
Page 25

N. modello RR70P
Radiosveglia a due modalità con radio PLL
Page 26

Page 27

Impostazione
Quando si accende l’unità, la funzione di ricerca automatica inizierà a cercare le emittenti radio
per 3 minuti. Sul display vengono visualizzati i numeri e le frequenze delle emittenti.
Una volta terminata questa operazione, sarà possibile memorizzare un massimo di 20
emittenti radio
Funzionamento generale
1) Radio FM con DTS (Digital Tuning System)
2) Display LCD negativo con retroilluminazione blu e regolazione della luminosità
3) Formato visualizzazione orologio 12/24 ore
4) Il suono della sveglia può essere impostato sulla radio o sul segnale acustico
5) Segnali acustici ascendenti (dal volume più basso al volume più alto)
6) 20 emittenti radio preimpostate
7) Ricerca automatica/manuale avanti/indietro
8) Funzione AMS (memorizzazione automatica)
9) Funzione timer dimmer automatica
1
Page 28

Elenco dei tasti
1) Accensione radio / Standby / Disattivazione
sveglia
2) Tasto impostazione orologio / Sintonizzazione
“-”
3) Impostazione ora / Stazione preimp. -/
Selezione sveglia
4) Regolazione volume “-”
5) Regolazione volume “+”
6) Impostazione minuti / Stazione preimp. +/
Selezione sveglia
7) Impostazione sveglia / Sintonizzazione “+”
8) Tasto Sleep (spegnimento automatico)
9) Snooze (ritardo sveglia) / Controllo dimmer (a
45 gradi)
10) Regolazione della rotazione della
proiezione
11) Attivazione / Disattivazione
proiezione
12) Visualizza proiezione rovesciata
13) Tasto memoria emittenti radio /
AMS (ricerca e memorizzazione
automatiche)
14) Tasto SET: configurazione: data,
12/24 ore, timer dimmer “DT”
15) Altoparlante
1. Impostazione dell’orologio
x In modalità standby, premere il tasto [2] per 3 secondi: verrà visualizzata l’indicazione lampeggiante
0:00.
x Regolare l’orario premendo il tasto [3] per le ore e il tasto [6] per i minuti.
x Premere di nuovo il tasto [2] per confermare l’orario impostato. L’unità mostra il trascorrere dei secondi
(due secondi per ogni punto LED).
2. Impostazione della data
In modalità standby, premere il tasto [14] presente sul retro dell’unità: verrà visualizzata
l’indicazione lampeggiante 0.00.
x Premendo il tasto [14], l’anno inizierà a lampeggiare; regolare l’anno premendo i tasti [4] / [5]
(per es., 2014, 2015, … ecc.).
x Dopo avere confermato l’anno, premere il tasto [14]: il mese inizierà a lampeggiare; regolare il
mese premendo ii tasti [4] / [5] (per es., 1, 2, … 12).
x Dopo avere confermato il mese, premere il tasto [14]: il giorno inizierà a lampeggiare; regolare
il giorno premendo i tasti [4] / [5] (per es., g01, g02, g03, … g031).
x Se l’utente non preme alcun tasto per 15 secondi, la data verrà impostata e confermata
automaticamente.
3. Impostazione del formato dell’ora
x Premere e tenere premuto il tasto [14] fino a quando l’anno inizia a lampeggiare.
x Premere per 3 volte il tasto [14].
x La dicitura “12/24H” lampeggia. Regolare quindi il formato dell’ora.
x “12H” (formato 12 ore): premere il tasto [5].
x “24H” (formato 24 ore): premere il tasto [4].
x Se l’utente non preme alcun tasto per 15 secondi, la data verrà impostata e confermata
automaticamente.
4. Impostazione di un timer dimmer (“DT”)
Per risparmiare energia, la retroilluminazione del display può essere regolata automaticamente durante
le ore notturne (dalle 23.00 alle 6.00).
Per impostare la funzione dimmer, attenersi alle seguenti istruzioni.
x Premere e tenere premuto il tasto [14] per 15 secondi fino a quando l’ann o inizia a lampeggiare.
Premere per 4 volte il tasto [14].
x La dicitura “DT” inizia a lampeggiare.
x Premere il tasto [5] per selezionare l’orario della funzione di mmer. Sul display viene visual izzata la
2
Page 29

dicitura “DT”. Quando viene impostato il timer dimmer, la retroilluminazione del display si regola
automaticamente durante le ore notturne (dalle 23.00 alle 6.00).
x Premere il tasto [4] per disabilitare questa funzione. La dicitura “DT” scomparirà dal display e la
retroilluminazione non verrà regolata durante le ore notturne.
5. Impostazione della sveglia
x In modalità standby, premere per 3 secondi il tasto [7]: il dispositivo entra nella funzione di
configurazione della sveglia, l’icona della sveglia 1 nell’angolo in alto a sinistra lampeggia e sul display
viene visualizzata l’indicazione 0:00.
x Premere il tasto [3] per impostare l’ora della sveglia.
x Premere il tasto [6] per impostare i minuti della sveglia.
x Premere di nuovo il tasto [7] per confermare le impostazioni della sveglia.
x Una volta impostata una sveglia, premere il tasto [3] o il tasto [6] per selezionare la
segnale acustico.
x Premere di nuovo il tasto [7] per confermare. Passare quindi all’impostazione della sveglia 2.
x Ripetere gli stessi passaggi effettuati per l’impostazione della sveglia 1.
x Premere di nuovo il tasto [7] per confermare l’impostazione della sveglia 2.
x Per disabilitare la funzione sveglia:
premere per 3 secondi il tasto [7] e poi premere nuovamente il tasto [7].
Le indicazioni relative alla sveglia 1 o alla sveglia 2 lampeggiano: premere il tasto [3] o il tasto [6] per
disattivare
x Le opzioni audio della sveglia sono indicate nella tabella sottostante.
Opzione audio
svegli
a
Segnale acustico
Radio
Disabilita
o e premere di nuovo il tasto [7] per confermare.
Display LCD
Sul display viene visualizzato il simbolo di
una campanella
Sul display viene visualizzato il simbolo della
radio
Vengono cancellati tutti i dati impostati per
segnalazione acustica , radio e
sveglia
radio o il
Se non vi
ene premuto alcun tasto per 15 secondi, il sistema torna alla modalità automatica
.
3
Page 30

6. Utilizzo della funzione snooze (ritardo sveglia)
Quando suona una sveglia, premere il tasto [9] “SNOOZE/Dimmer” fino a un’angolazione di 45 gradi. Sullo
schermo verrà visualizzata l’indicazione lampeggiante “SNOOZE”. La sveglia verrà ripetuta ogni 9 minuti.
Per disattivare la sveglia, premere il tasto [1].
7. Ascolto della radio FM
In modalità radio, premere il tasto [1] per accendere la radio. Sul display verranno
visualizzate la dicitura “FM” e la frequenza in cifre (per es., “FM 92.6 MHz”).
Quando la radio è accesa, per regolare la sintonizzazione premere il tasto [2] o il tasto [7] per
andare avanti o indietro di 0,1 MHz e cercare un’altra emittente.
7.1 Memorizzazione di un’emittente
1ˊ In modalità radio, premere il tasto [13]. Premere il tasto [3] o il tasto [6] per selezionare
l’emittente preimpostata (per es., P01, P02,… P20). Le indicazioni “MEMORY” e l’emittente del
programma “P01” (o di un altro programma da P01 a P20) lampeggeran no. Premere il tasto [2]
o il tasto [7] per selezionare il canale. Premere il tasto [13] per confermare l’emittente.
7.2 Selezione delle emittenti memorizzate
In modalità radio, premere il tasto [3] o il tasto [6] per selezionare un’emittente preimpostata da
P01 a P20. Sul display verranno visualizzati la scritta “MEMORY”, il numero dell’emittente (per
es., “P01”), e la frequenza FM.
Dopo avere selezionato il canale preimpostato e avere confermato o atteso per 3 seco ndi, sul
display verranno visualizzati l’orario e la frequenza FM scelti.
4
Page 31

7.3 Ricerca e memorizzazione automatiche tramite AMS
1. In modalità radio, premere e tenere premuto per 3 secondi il tasto [13] per attivare la modalità AMS.
2. La radio effettua la scansione automatica della banda di frequenza e memorizza fino a 20 emittenti
radio. Quando il sistema AMS ha terminato la ricerca e si interrompe automaticamente, tornerà al
canale preimpostato P01. Sul display verranno visualizzati l’orario e la frequenza FM scelti.
Attenzione: quando si avvia la funzione AMS, le nuove emittenti trovate sostituiscono quelle
precedentemente memorizzate.
8. Regolazione del volume
Con la radio accesa, premere il tasto [5] o il tasto [4] per aumentare o diminuire il volume
(+/-): sul display viene visualizzato il livello del volume 00 ~ 15 (dal livello minimo al
livello massimo).
1. Premere il tasto [5] per aumentare il livello del volume.
2. Premere il tasto [4] per ridurre il livello del volume.
9. Regolazione della luminosità (illuminazione delle cifre sul display)
Premere il tasto [9] per regolare la luminosità delle cifre sul display.
Sono previsti 3 livelli: luminoso, luce dim e scuro.
Livello elevato (luminoso)
Livello medio (luce dim)
Livello basso (scuro)
5
Page 32

10. Timer modalità Sleep (spegnimento automatico)
Premere il tasto [8] per attivare la modalità Sleep.
L’unità inizierà il conto alla rovescia da 120 minuti. La radio si spegnerà dopo 120 minuti (o al
momento presente). Premere di nuovo il tasto [8] per ridurre il tempo di spegnimento della
radio (attenzione: ogni volta che viene premuto il tasto, il tempo si riduce di 5 minuti).
>>>>>>>
11. Visualizzazione della proiezione
1. Premere il tasto [11] per accendere/spegnere il proiettore. L’icona del proiettore verrà visualizzata
quando questo è acceso.
2. Premendo il tasto [12] l’angolo di proiezione può essere impostato su 180 gradi (cifre proiettate in
modo rovesciato).
3. Ruotando la manopola [10] è possibile regolare l’ang olo di proiezione a 90 gradi.
12. Sostituzione delle batterie di riserva dell’orologio
1. Inserire 2 batterie di tipo AAA. Attenersi alle polarità (+ e -) indicate nel disegno presente accanto al
vano batterie. Chiudere il coperchio del vano batterie.
Attenzione: assicurarsi di smaltire le batterie in modo adeguato (conformemente alle
normative localmente vigenti).
13. Specifiche tecniche di base
Uscita: 0,5 W
Gamma di frequenza FM: 87.5 ~ 108 MHz
Alimentazione: CA~ 230 V, 50 Hz
Capacità memoria emittenti predefinite: 20
Dimmer timer preimpostato: attivo dalle ore 23.00 alle ore 6.00
Istruzioni importanti sulla sicurezza: si prega di leggere attentamente
La presente unità è stata progettata per un utilizzo in modo corretto e realizzata conformemente a tutte le
norme di sicurezza previste. Un utilizzo improprio, tuttavia, potrebbe causare scosse elettriche o incendi.
Leggere attentamente tutte le istruzioni di sicurezza e operative prima di installare e usare l’unità.
Conservare queste istruzioni per consultazioni future. Prestare particolare attenzione alle avvertenze
riportate nelle presenti istruzioni e sull’unità.
x Non gettare gli apparecchi elettrici ed elettronici tra i rifiuti indifferenziati.
x Depositare o consegnare gli apparecchi presso un apposito punto di raccolta.
x Alcuni componenti contenuti in questi apparecchi possono essere pericolosi per la salute e per l’ambiente.
Importato da BIGBEN INTERACTIVE SA
396, Rue de la Voyette
CRT2 – FRETIN
CS 90414
F-59818 LESQUIN Cedex (Francia)
www.bigben.eu
6
Page 33

Prodotto in Cina
Page 34

PT
RR70P
Rádio relógio digital PLL
Page 35

1ˊConfiguração do dispositivo
Quando a unidade é ligada pela primeira vez, a função de atualização automática inicia
automaticamente e o dígito de frequência mostra o valor da pesquisa e os últimos dois dígitos
do dígito principal mostram a localização da memória; prima qualquer tecla para terminar esta
função.
Nota: quando a unidade é ligada pela primeira vez, a função de atualização automática
inicia automaticamente dentro de um período de 3 a 10 minutos. Uma vez iniciado, o
dispositivo pode armazenar um máximo de 20 estações de rádio locais
x A data e hora padrão estão definidas para 0:00
x A hora padrão do alarme está definida para 00:00
x O rádio está desligado
2ˊDescrição geral
1) Rádio FM por sistema de sintonização digital DTS (Digital Tuning System) com tecnologia PLL
2) Ecrã LCD negativo com luz traseira azul e regulador da intensidade da luz
3) Formato de exibição do relógio de 12/24 horas (o modo é selecionado pelo utilizador)
4) A saída do alarme pode ser definida para rádio ou sinal sonoro
5) O alarme crescente para os sons do sinal sonoro disponibiliza uma velocidade progressiva em 4
níveis
6) 20 estações de rádio predefinidas
7) Contém funções de pesquisa automática/manual para cima/baixo
8) Contém a funcionalidade de armazenamento de memória automática AMS (Automatic Memory
Store)
9) Função de temporizador de regulador da intensidade da luz automático selecionável pelo
utilizador
1
Page 36

Lista de botões:
1) Ligar rádio/Standby/Desligar alarme
2) Exibir Configuração/Sintonização do relógio botão
3) Definir “Hora”/Predefinição da estação /Selecionar alarme
4) Controlo de volume “-”
5) Controlo de volume “+”
6) Posição dos minutos/Pesquisa predefinida +/
Selecionar alarme
7) Configuração do alarme/Sintonização da
estação “+”
8) Botão de suspensão
9) Controlo do snooze /Regulador da
intensidade da luz
10) Ajuste de ângulo da apresentação
de projeção
11) Projeção ligada/desligada
12) Apresentação do reverso da
projeção
13) Botão da memória de estação de
rádio/do armazenamento de
memória automática (AMS)
14) Configuração de função – Data,
definição de formato da hora
(12/24), Temporizador do regulador
da intensidade da luz “DT” (Dimmer
Timer)
15) Altifalante
Como configurar o seu dispositivo (Básico)
Prima [Config. do relógio] uma vez para iniciar a configuração do relógio
1 Configuração do relógio
x No modo standby, prima [Config. do relógio] durante 3 segundos; o dígito principal fica intermitente
e mostra 0:00
x Prima [Hora] e [Minutos] para ajustar a hora
x Quando obter a confirmação, prima novamente [Config. do relógio] e o dispositivo mostra cada dois
segundos por ponto
2
Page 37

2 Configuração da data
No modo standby, prima [Config.] na parte traseira; o dígito principal mostra 0.00 e fica intermitente
Prima [Volume + ] / [Volume - ] para definir a data
x
x
Após a confirmação, prima [Config.] para alterar para a definição do mês
x
Como no caso da data, prima [Volume + ] ou [Volume -] para definir o mês
Prima o botão [Volume + ] ou [Volume -] uma vez para selecionar o formato das horas do relógio (12/24)
x
x
Se passarem 15 segundos sem que nenhum botão seja premido, a definição atual é confirmada e o dispositivo volta
automaticamente ao modo standby.
3 Configuração do formato do relógio
x Quando termina a configuração da data ou quando prime o botão [Config.] três vezes, os últimos dois
dígitos mostram “24”.
x Prima [Volume +] para confirmar o formato de 24 horas
x Prima [Volume -] para confirmar o formato de 12 horas
x Prima [Config.] uma vez para confirmar a definição atual e alterar para a configuração do temporizador do
regulador da intensidade da luz (DT).
x Se passar em 15 segundos sem que nenhum botão seja premido, a definição atual é confirmada e o
dispositivo volta automaticamente ao modo de execução automática.
4 Configuração do temporizador do regulador da intensidade da luz (DT)
Para poupar bateria, o dispositivo pode ter o regulador de intensidade da luz como predefinição;
configure-o seguindo os passos abaixo:
x Quando terminar a configuração do formato das horas, prima o botão “Config.” ou prima “Config.”
quatro vezes para passar ao modo de configuração do “temporizador do regulador da intensidade da
luz”; o ícone “DT” é mostrado
x Prima [Volume +] para selecionar o temporizador do regulador da intensidade da luz como ligado; o
ícone “DT” é mostrado
x Prima [Volume -] para desligar o temporizador do regulador de intensidade da luz; o “DT” desaparece
x Uma vez que o temporizador do regulador de intensidade da luz esteja ligado, o dispositivo inicia a
regulação de intensidade da luz automaticamente entre as 23:00 e as 06:00; durante esse período de
tempo, prima durante 15 segundos qualquer botão para ativar a luz traseira e aumentar a sua
luminosidade.
5 Configuração do alarme
x No modo standby, prima [Config. do alarme] durante 3 segundos para que o dispositivo passe para a
configuração do alarme; o ícone do alarme 1 no canto superior esquerdo fica intermitente e o dígito
principal mostra 0:00
x Prima [Hora/Predefinição -/Selecionar alarme] para definir as horas do alarme
x Prima [Min/Predefinição +/Selecionar alarme] para definir os minutos do alarme; mantenha o botão
premido e os dígitos avançam de 5 em 5 minutos
x Prima [Config. do alarme] novamente para confirmar a definição do alarme
x Prima [Hora/Predefinição -/Selecionar alarme] para selecionar a saída de rádio e o sinal sonoro
x Prima [Config. do alarme] novamente para confirmar a ação e passe para a configuração do alarme 2,
x Prima [Ligar rádio/Standby/Desligar alarme] para desligar o alarme quando este estiver a tocar
x Desative a função de alarme, prima [Config. do alarme] durante 3 segundos e, em seguida, prima
igual à configuração do alarme 1; quando a configuração estiver completa, prima o botão [Config. do
alarme] outra vez e o dispositivo volta ao modo de execução
[Config. do alarme] novamente; prima [Hora/Predefinição -/Selecionar alarme] para cancelar a/o
3
Page 38

Page 39

1ˊ Quando o rádio estiver ligado, mantenha premido o botão [Sintonização +] para procurar a
próxima estação de rádio ao percorrer a frequência recebida na direção para cima; prima uma
vez para aumentar um 0,1 MHz de cada vez
2ˊ Mantenha premido o botão [Sintonização -] para procurar a próxima estação de rádio ao
percorrer a frequência recebida na direção para baixo; prima uma vez para diminuir um 0,1
MHz de cada vez
7.1 Envio da estação para a memória
1ˊ No modo de rádio, ao receber uma estação, prima o botão “Mem” e o símbolo “Memória”
no ecrã LCD fica intermitente; prima a tecla “Predefinição +/-” para selecionar que
localização deve ser mostrada nos últimos dois dígitos do dígito principal; prima o botão
“Mem” novamente para guardar a estação atual na memória selecionada.
7.2 Recuperação da memória predefinida
1ˊ Quando o rádio estiver ligado, prima o botão [Predefinição +/-] uma vez para selecionar o
número da memória predefinida (entre 1 e 20) e os dois últimos dois dígitos do dígito
principal mostram um valor e uma frequência diferente para mostrar o valor apresentado;
uma vez selecionado o número, prima o mesmo botão para confirmar ou aguarde 3
segundos; a estação muda automaticamente para a frequência selecionada. Ao reproduzir a
estação correta, o dígito principal volta a mostrar a hora do relógio, enquanto a frequência
permanece na estação selecionada.
7.3 Utilização do armazenamento de memória automática (AMS)
1ˊ Quando o rádio estiver ligado Mantenha premido o botão “Mem / AMS” durante 3 segundos
para ativar o modo AMS.
2ˊ Neste momento, o rádio pesquisa automaticamente a estação de rádio e guarda aquelas que
foram pesquisadas, até que todas as frequências sejam pesquisadas ou sejam guardadas
todas as estações na memória; a saída desde modo ocorre automaticamente.
Quando a função AMS está ativa, as memórias guardadas são substituídas pela nova estação de
rádio resultante da pesquisa.
8 Controlo do nível de saída de som
Quando o rádio está a ser executado, se premir “Volume +/-”, o ícone “Vol” é mostrado e os
dois últimos dígitos do dígito principal mostram o nível de volume
5
Page 40

8.1 Prima [Volume +] para aumentar a saída de som.
8.2 Prima [Volume -] para diminuir a saída de som.
9 Controlo do regulador de intensidade da luz
Prima em qualquer altura, exceto quando o alarme estiver ativo, o botão “Snooze/Regulador de
intensidade da luz” para alterar a luminosidade para um dos modos que se seguem:
Nível alto
Nível médio
Nível baixo
10 Utilização do temporizador de sono
Prima em qualquer momento o botão “Sono” e o dispositivo ativa o temporizador de sono e
inicia uma contagem decrescente a partir de um dado valor - o valor predefinido é de 120
minutos e é mostrado no dígito principal com o ícone [Sono]; cada vez que prime o botão, o
tempo é reduzido de 5 em 5 minutos até aparecer “Desligado” no ecrã e o dispositivo ficar
desligado.
>>>>>>>
11 Ativação da apresentação de projeção
11.1 Quando desejar projetar um dado tempo, prima o botão “Projeção ligada/desligada”
uma vez para ativar/desativar a projeção; o ícone de projeção aparece ou desaparece
11.2 Prima “Reverter projeção” para alterar o ângulo da projeção para 180 graus
11.3 Prima o botão “Rodar projeção” para ajustar o ângulo de projeção para uma leitura
confortável
12 Substituição das pilhas do relógio
12.1 Insira 2 pilhas AAA, certificando-se de que a sua polaridade (terminações + e -) está de
acordo com as indicações no compartimento das pilhas. Feche a porta do
compartimento.
Nota: Certifique-se de que elimina devidamente as pilhas (consulte as regulamentações
locais)
13 Especificações básicas:
13.1 Saída: 0,5 W
13.2 Banda FM: 87,5 a 108 MHz
13.3 Entrada: CA 230V, 50 Hz
13.4 Estações predefinidas: 20
13.5 Temporizador do regulador de intensidade da luz: Ligado para a duração de tempo
entre as 23:00 e as 06:00
Instruções de segurança importantes. Leia-as atentamente.
Esta unidade foi concebida e fabricada de modo a garantir a sua segurança pessoal, quando usada de
forma correta. Contudo, o seu uso incorreto pode resultar em potencial choque elétrico ou perigo de
incêndio. Leia atentamente as instruções de segurança e funcionamento antes da configuração e utilização
6
Page 41

Fabricado na China
Page 42

Modell Nr. RR70P
PLL-Uhrenradio mit zwei Weckzeiten
Page 43

Page 44

Auspacken und Aufbau
Bei ersten Einschalten des Gerätes wird die automatische Update-Funktion nach 3 Minuten einen
automatischen Sendersuchlauf starten. Das Display zeigt die Frequenzen und die
Senderspeichernummern an.
Nachdem dies beendet ist, sind bis zu 20 Sender im Senderspeicher gespeichert.
Allgemeiner Betrieb
1) FM-Radio mit Digital Tuning System (DTS)
2) LCD-Negativdisplay mit blauer Hintergrundbeleuchtung und Helligkeitsregelung
3) 12/24-Stunden-Anzeige je nach Einstellung
4) Wahlweise Radio oder Signalton als Wecksignal
5) Wecksignal mit steigender Lautstärke (von der niedrigsten bis zur höchsten Stufe)
6) Senderspeicher für 20 Sender
7) Automatische/manuelle Senderwahl
8) Automatische Senderspeicherung
9) Automatischer Dimmer-Timer
1
Page 45

Erläuterung der Tasten:
1) Radio ein/Standby/Wecker aus
2) Uhrzeiteinstellung/Senderwahl-Taste
3) Einstellung der Stunde/ Senderspeicher /Weckzeit auswählen
4) Lautstärkenregler “-“
5) Lautstärkenregler “+”
6) Einstellung der Minute /Senderspeicher +/
Weckzeit auswählen
7) Weckzeiteinstellung / Senderwahl +
8) Sleep-Taste (Einschlaffunktion)
9) Snooze-Taste (Schlummerfunktion) / Helligkeit
der Hintergrundbeleuchtung
10) Änderung des Projektionswinkels
11) Projektion ein/aus
12) Projektion seitenverkehrt anzeigen
13) Senderspeicher / AMS-Taste
(Automatische Speichersuche)
14) EINSTELLEN :
Funktionseinstellung – Datum,
12/24-Stundenanzeige, DimmerTimer ("DT")
15) Lautsprecher
1. Einstellung der Uhrzeit
x Betätigen Sie im Standby-Modus 3 Sekunden lang die [2]-Taste. Die Hauptziffern blinken auf und
zeigen 0:00 an.
x Nehmen Sie die Uhrzeiteinstellung (“Time”) vor, indem Sie die [3 ]-Taste zur Einstellung der Stunde
bzw. die [6]-Taste zur Einstellung der Minute betätigen.
x Betätigen Sie nochmals die [2]-Taste, um die Uhrzeiteingabe zu bestätigen. Das Gerät zeigt daraufhin
die Uhrzeit an, wobei der Punkt alle zwei Sekunden blinkt.
2. Einstellung des Datums
Betätigen Sie im Standby-Modus die [14]-Taste auf der Rückseite. Die Hauptziffern blinken auf
und zeigen 0.00 an.
x Betätigen Sie die [14]-Taste. Das Kalenderjahr (“Year”) blinkt auf. Nehmen Sie die Einstellung
mithilfe der [4]- / [5]-Tasten vor (z. B. 2014, 2014…etc.).
x Nach Einstellung des Jahres betätigen Sie die [14]-Taste erneut. Der Kalendermonat
(“Month”) blinkt auf. Nehmen sie die Einstellung mithilfe der [4]- / [5]-Tasten ein (z. B. 1,
2,…,12).
x Nach Einstellung des Monats betätigen Sie die [14]-Taste erneut. Der Kalendertag (“Day”)
blinkt auf. Nehmen Sie die Einstellung mithilfe der [4]- / [5]-Tasten vor (z. B. d01, d02,
d03……d031).
x Wenn 15 Sekunden lang keine Eingabe erfolgt, wird das Datum automatisch eingestellt und
bestätigt.
3. Einstellung des Uhrzeitformats
x Betätigen Sie die [14]-Taste und halten Sie sie gedrückt, bis das Jahr aufblinkt.
x Betätigen Sie die [14]-Taste 3 weitere Male.
x "12/24H" blinkt nun auf. Stellen Sie das Uhrzeitformat ein:
x 12H (12-Stunden-Anzeige) : [5]-Taste
x 24H (24-Stunden-Anzeige) : [4]-Taste] .
x Wenn 15 Sekunden lang keine Eingabe erfolgt, wird das Datum automatisch eingestellt und
bestätigt.
4. Einstellung des Dimmer-Timers (“DT”)
Um Energie zu sparen, kann die Hintergrundbeleuchtung des Displays zu einer voreingestellten Zeit
(während der Nachtstunden, von 23:00 bis 06:00 Uhr) abgeschwächt werden.
2
Page 46

Die Einstellung verläuft wie folgt:
x Betätigen Sie die [14]-Taste und halten Sie sie 15 Sekunden lang gedrückt, bis das Jahr aufblinkt.
Betätigen Sie die [14]-Taste 4 weitere Male.
x Die Anzeige “DT” blinkt auf.
x Betätigen Sie die [5]-Taste, um den Dimmer-Timer zu aktivieren. Die Anzeige “DT” erscheint auf dem
Display. Bei aktiviertem Dimmer-Timer (DM) wird die Hintergrundbeleuchtung nachts (von 23:00 bis
06:00 Uhr) automatisch abgeschwächt.
x Betätigen Sie die [4]-Taste, um den Dimmer-Timer zu deaktivieren. Die Anzeige “DT” wird aus dem
Display verschwinden und die Hintergrundbeleuchtung wird während der Nachtstunden normal
eingeschaltet bleiben.
5. Einstellung der Weckzeit
x Betätigen Sie im Standby-Modus 3 Sekunden lang die [7]-Taste. Die Weckzeiteinstellung wird gestartet.
Das Symbol für die erste Weckzeit (Alarm 1) erscheint links oben im Display und die Hauptziffern im
Display werden als 0:00 angezeigt.
x Betätigen Sie die [3]-Taste, um die Stunde der Weckzeit einzustellen.
x Betätigen Sie die [6]-Taste, um die Minute der Weckzeit einzustellen.
x Betätigen Sie nochmals die [7]-Taste, um die Einstellung der Weckzeit zu bestätigen.
x Nach Einstellung der Weckzeit betätigen Sie die [3/6]-Tasten zur Einstellung des Wecksignals
Radio oder Signalton).
(
x Betätigen Sie nochmals die [7]-Taste, um dies zu bestätigen und nehmen Sie die Einstellung der zweiten
Weckzeit (Alarm 2) vor.
x Wiederholen Sie sämtliche Schritte wie bei der Einstellung von Alarm 1.
x Betätigen Sie nochmals die [7]-Taste, um die Einstellung von Alarm 2 zu bestätigen.
x Deaktivierung der Weckfunktion:
Betätigen Sie die [7]-Taste 3 Sekunden lang und betätigen Sie anschließend nochmals die [7]-Taste.
Die Symbole für Alarm 1 oder Alarm 2 blinken auf. Betätigen Sie die [3/ 6]-Tasten, um ´ oder
auszuschalten und betätigen Sie nochmals die [7]-Taste zur Bestätigung.
x Erläuterung der Display-Anzeigen:
Anzeige: LCD-Display
Signalton Display zeigt Glockensymbol
Radiobetrieb Display zeigt Radiosymbol
Deaktivieren
enn 15 Sekunden lang keine Taste betätigt wurde, kehrt das Gerät in den automatischen Betriebsmodus
W
zurück.
.
Glocken
Ziffern für Weckzeiten verschwinden
- und Radio -Symbole und
6. Benutzung der Schlummerfunktion
Wenn das Alarmsignal ertönt, betätigen Sie die [9]-Taste (“SNOOZE/Dimmer”) . Das Display zeigt
daraufhin “SNOOZE” an. Das Wecksignal wird nun alle 9 Minuten ertönen. Zum Ausschalten des
Wecksignals betätigen Sie die [1]-Taste.
3
Page 47

7. Radioempfang
Betätigen Sie die [1]-Taste, um das Radio einzuschalten. Das Display zeigt nun “FM “ an,
gefolgt von den Ziffern für die Frequenz (z. B. FM92,6 MHz).
Während des Radiobetriebs können Sie Einstellungen zur Verbesserung des Empfangs
vornehmen oder einen anderen Sender einstellen. Betätigen Sie hierzu die [2 / 7]-Tasten, um die
Frequenz in 0,1-MHz-Schritten zu ändern bzw. um den nächsten Sender zu suchen.
7.1 Speicherung eines Senders im Senderspeicher
1ˊ Betätigen Sie während des R adiobetriebs die [13]-T aste. Betätige n Sie di e [3/6]-Tasten, um de n
Senderspeicherplatz zu wählen (z. B. P01, P02…. P20). Die Anzeige ”MEMORY” und die
Senderspeichernummer “P01” (bzw. eine andere Nummer zwischen P01… P20) blinken auf.
Betätigen Sie die [2/7]-Tasten, um die Frequenz zu wählen. Betätigen Sie schließlich die [13]Taste, um die Speicherung des Senders zu bestätigen.
7.2 Abruf von gespeicherten Sendern
Betätigen Sie während des Radiobetriebs die [3/6]-Taste, um die Senderspeichernummer für
den gewünschten Sender (P01…….P20) zu wählen. Das Display zeigt daraufhin “MEMORY”
und die betreffende Senderspeichernummer (z. B. “P01” sowie die dazugehörige FM-Frequenz.
Nachdem ein gespeicherter Kanal gewählt und bestätigt wurde (bzw. nach 3 Sekunden Warten
ohne Bestätigung) wird die aktuelle Uhrzeit und die FM-Frequenz angezeigt.
4
Page 48

7.3 Automatischer Sendersuchlauf (AMS)
1. Halten Sie während des Radiobetriebs die [13]-Taste 3 Sekunden lang gedrückt, um den
automatischen Sendersuchlauf zu aktivieren.
2. Das Gerät wird daraufhin den Frequenzbereich scannen und bis z u 20 Sender abspeichern. Nach
Beendigung des automatischen Sendersuchlaufs stellt sich das Gerät automatisch auf den Kanal
P01 ein. Im Display erscheinen die aktuelle Uhrzeit und die FM-Frequenz.
Bei Aktivierung des automatischen Sendersuchlaufs werden die neu gefundenen Sender
die zuvor gespeicherten Sender überschreiben.
8. Lautstärkenregler
Betätigen Sie während des Radiobetriebs die [5/4]-Tasten zur Einstellung der Lautstärke
von Stufe 00 ~ 15.
1. Betätigen Sie die [5]-Taste, um die Lautstärke zu erhöhen.
2. Betätigen Sie die [4]-Taste, um die Lautstärke zu senken.
9. Helligkeit der Hintergrundbeleuchtung
Betätigen Sie die [9]-Taste, um die Helligkeit der Display-Hintergrundbeleuchtung zu regeln.
Es gibt 3 Stufen: Hoch (hell leuchtend), Mittel (schwach leuchtend) und Niedrig (dunkel).
Hoch (hell leuchtend)
Mittel (schwach leuchtend)
Niedrig (dunkel)
5
Page 49

10. Einschlaf-Timer
Betätigen Sie die [8]-Taste, um den Einschlafmodus zu aktivieren.
Daraufhin beginnt ein Countdown mit einer Standarddauer von 120 Minuten. Das Radio wird
sich nach 120 Minuten (bzw. nach der jeweils angezeigten Zeit) ausschalten. Betätigen Sie
die [8]-Taste erneut, um die Ausschaltzeit zu verkürzen (Hinweis: Jede Tastenbetätigung
verkürzt die Ausschaltzeit um 5 Minuten).
>>>>>>>
11. Projektionsdisplay
1. Betätigen Sie die [11]-Taste, um die Projektionsfunktion ein- bzw. auszuschalten. Bei eingeschalteter
Projektionsfunktion erscheint das Projektorsymbol im Display.
2. Betätigen Sie die [12]-Taste, um den Projektionswinkel um 180° zu drehen (die Ziffern erscheinen
daraufhin anders herum).
3. Mit dem Senderwahlknopf [10] (“Rotate Projection”) können Sie den Projektionswinkel auf 90° ändern.
12. Austausch der Backup-Batterien für die Uhrzeit
1. Legen Sie 2 AAA-Batterien ein. Überprüfen Sie die Polarität (+ und - an den Enden der Batterie) und
beachten Sie die Zeichnung am Batteriefach. Schließen Sie das Batteriefach.
Hinweis: Bitte achten Sie darauf, dass Sie die Batterien ordnungsgemäß entsorgen
(gemäß den örtlichen Bestimmungen).
13. Technische Daten
Ausgangsleistung: 0,5 W
FM-Frequenzbereich: 87,5-108 MHz
Eingang: AC 230V, 50Hz
Senderspeicher: 20
Standard-Timer für Hintergrundbeleuchtung: aktiv von 23:00 – 06:00 Uhr
Wichtige Sicherheitshinweise, bitte sorgfältig lesen
Bei ordnungsgemäßer Verwendung ist die Gefahr eines Personen- oder Sachschadens nahezu
ausgeschlossen. Bei unsachgemäßer Verwendung besteht jedoch Stromstoß- und Feuergefahr. Bitte lesen
Sie vor Anschluss und Nutzung des Gerätes sämtliche Hinweise zu Sicherheit und Betrieb und bewahren
Sie diese Betriebsanleitung zu Nachschlagezwecken auf. Bitte beachten Sie sämtliche Warnungen dieser
Betriebsanleitung und am Gerät selbst.
x Bitte entsorgen Sie elektrische und elektronische Geräte nicht als Hausmüll.
x Bringen Sie sie zu einer entsprechenden Sammelstelle.
x Einige Komponenten in diesen Geräten können gesundheits- und umweltschädlich sein.
Importiert von BIGBEN INTERACTIVE SA
396, Rue de la Voyette
CRT2 – FRETIN
CS 90414
59814 LESQUIN Cedex - France
www.bigben.eu
6
Page 50

Made in China
Page 51

Modelnummer RR70P
PLL-klokradio met twee alarmen
Page 52

Page 53

Instelprocedure
Als u het alarm inschakelt, zoekt de updatefunctie automatisch 3 minuten lang naar radiozenders.
Het scherm geeft de cijfers en de zendernummers weer.
Als de eenheid klaar is, zijn er maximaal 20 radiozenders opgeslagen.
Algemene functies
1) FM-radio met Digital Tuning System (DTS)
2) Negatief LCD-scherm met blauwe schermverlichting en dimregeling
3) Optionele 12/24-uursweergave
4) Alarm kan worden ingesteld op radio of zoemer
5) Steeds harder wordende alarmzoemer
6) 20 voorkeuzezenders
7) Automatisch/handmatig omhoog/omlaag zoeken
8) Functie voor A.M.S. (automatische geheugenopslag)
9) Automatische dimtimerfunctie
1
Page 54

Lijst toetsen:
1) Radio aan/stand-by/alarm uit
2) Clock Setup/Tuning - knop
3) Uren instellen/voorkeuzezender -/alarm
selecteren
4) Volumeregeling -
5) Volumeregeling +
6) Minuten/voorkeuzezender zoeken +/alarm
selecteren
7) Alarm instellen/tuning +
8) Sleep-knop
9) Sluimeren/dimregeling (indrukken)
10) Draaiknop
11) Projectie aan/uit
12) Projectie spiegelen
13) Radiozendergeheugen/AMS (Auto
Memory Search)-knop
14) SET: Functie instellen: datum,
12/24 uur, dimtimer DT
15) Luidspreker
1. De klok instellen
x Druk in standby-modus 3 seconden op [2]. De melding 0:00 in grote cijfers gaat knipperen.
x Stel de tijd in door op [3] te drukken voor uren. Druk op [6] voor minuten.
x Druk nogmaals op [2] om de tijd te bevestigen. De eenheid gaat elke twee seconden naar de volgende
stip.
2. De datum instellen
Druk in standby-modus op [14] op de achterzijde. De melding 0.00 in grote cijfers gaat knipperen.
x Druk op [14]. Het kalenderjaar gaat knipperen. Pas de jaren aan door op [4]/[5] te drukken:
2014, 2014, enzovoort.
x Nadat u het jaar heeft bevestigd, drukt u op [14]. De kalendermaand gaat knipperen. Stel de
maand in door op [4]/[5] te drukken: 1, 2... 12.
x Nadat u de maand heeft bevestigd, drukt u op [14]. De kalenderdag gaat knipperen. Stel de
dag in door op [4]/[5] te drukken: d01, d02, d03... d031.
x Als de gebruiker 15 seconden geen toets indrukt, wordt de datum ingesteld en automatisch
bevestigd.
3. De klokindeling instellen
x Houd [14] vast totdat het jaar gaat knipperen.
x Druk 3 keer op [14].
x De melding 12/24H gaat knipperen. Stel de tijdsindeling in:
x 12H (12-uursindeling): druk op [5].
x 24H (24-uursindeling): druk op [4].
x Als de gebruiker 15 seconden geen toets indrukt, wordt de datum ingesteld en automatisch
bevestigd.
4. Een dimtimer DT instellen
Om energie te besparen, kan de schermverlichting 's nachts (van 23:00 tot 06:00) automatisch worden
gedimd.
De instelling werkt als volgt:
x Houd [14] 15 seconden vast totdat het jaar gaat knipperen. Druk 4 keer op [14].
x De melding DT gaat knipperen:
x Druk op [5] om de dimmertijd te selecteren. Op het scherm wordt de melding DT weergegeven. Als u de
dimmertijd (DM) inschakelt, wordt de schermverlichting 's nachts van 23:00 tot 06:00 automatisch
gedimd.
2
Page 55

x Druk op [4] om de dimmertijd uit te schakelen. De melding DT verdwijnt van het scherm. 's Nachts wordt
het scherm niet meer gedimd.
5. Alarm instellen
x Druk in standby-modus 3 seconden op [7]. Het apparaat gaat naar de alarminstelprocedure. Het
symbool van alarm 1 linksboven gaat knipperen en de melding 0:00 wordt in grote cijfers weergegeven.
x Druk op [3] om de uren van het alarm in te stellen.
x Druk op [6] om de minuten van het alarm in te stellen.
x Druk nogmaals op [7] om de ingestelde alarmtijd te bevestigen.
x Als de alarmtijd is ingesteld, drukt u op [3/6] om het alarm op
x Druk nogmaals op [7] om te bevestigen en naar de instelling van alarm 2 te gaan.
x Herhaal dezelfde stappen als bij de instelling van alarm 1.
x Druk nogmaals op [7] om de instelling van alarm 2 te bevestigen
x Alarmfunctie uitschakelen:
Druk 3 seconden op [7]. Druk nogmaals op [7].
Alarm 1 of alarm 2 gaat knipperen: druk op [3/6] en schakel
bevestigen.
x De weergave is als volgt:
Weergave LCD-scherm
Zoemer Scherm geeft belsymbool weer
Radioweergave Scherm geeft radiosymbool weer
Uitschakelen
Het belsymbool
en de alarmtijd worden gewist.
, het radiosymbool
radio of zoemer in te stellen.
of uit. Druk nogmaals op [7] om te
Als er 15 seco
nden geen knop is ingedrukt, gaat het systeem terug naar de automatische modus.
6. Gebruik sluimerfunctie
Als het alarm afgaat, drukt u op [9] (de SNOOZE/Dimmer-knop). Op het scherm knippert de melding
SNOOZE. Het alarm gaat elke 9 minuten opnieuw af. Om het alarm uit te schakelen, drukt u op [1].
3
Page 56

7. FM-radio beluisteren
Radiomodus: druk op [1] om de radio in te schakelen. Het scherm geeft de melding FM en
de frequentie in cijfers weer, bijvoorbeeld FM92.6 Mhz.
Als de radio aan is en u het radiosignaal wilt instellen, drukt u op [2/7] om de volgende zender te
zoeke
n in op- of neerwaartse stappen van 0
7.1
Zenders in geheugen opslaan
1ˊ
Druk in radiomodus op [13]. Druk op [3/6] om de voorkeuzezender te selecteren, bijvoorbeeld
P01, P02... P20. De melding MEMORY en de voorkeuzezender P01 (of een ander
programmanummer, zoals P01… P20) gaan knipperen. Druk op [2/7] om de zender te
selecteren. Druk op [13] om de voorkeuzezender te bevestigen.
,1 Mhz.
7.2 Voorkeuzezenders oproepen
In radiomodus drukt u op [3/6] om de voorkeuzezender P01... P20 te selecteren. Het scherm
geeft de melding MEMORY, het nummer van de voorkeuzezender (bijvoorbeeld P01) en de FMfrequentie weer.
Zodra u de voorkeuzezender heeft geselecteerd en heeft bevestigd of 3 seconden heeft
gewacht, geeft het scherm de huidige tijd en de FM-frequentie weer.
7.3 AMS
1. In radiomodus houdt u [13] 3 seconden vast om AMS-modus te activeren.
2. De radio gaat automatisch de frequentie scannen om maximaal 20 radiozenders in het geheugen op
4
Page 57

te slaan. Zodra AMS klaar is met scannen en automatisch stopt, keert de eenheid terug naar
voorkeuzezender P01. Het scherm geeft de huidige tijd en de FM-frequentie weer.
Als de AMS-functie start, worden de opgeslagen geheugens v
ervangen door de gescande zenders.
8. Vo
lumeregeling
Als de radio aan is, drukt u op [5/4] om het volume te
scherm geeft de volumeniveaus 00-15 weer, van minimaal naar maximaal.
1. Druk op [5] om het volume te verhogen.
2. Druk op [4] om het volume te verlage
verhogen of te verlagen. Het
n.
5
Page 58

9. Dimregeling (helderheid cijfers op scherm)
Druk op [9] om
Er zijn 3
de helderheid van de cijfers op het scherm te regelen.
niveaus: helderheid, dimlicht en donker.
Hoog niveau (helderheid)
0. Slaapstandtimer
1
Druk op [8] om de slaapstand te activeren.
De eenheid begint af te tellen, beginnend bij de standaardinstelling 120 minuten. De radio
wordt uitgeschakeld na 120 minuten (of de huidige tijd). Druk nogmaals op [8] om de
uitschakeltijd van de radio te verkorten (opmerking: bij elke druk op de knop wordt de tijd met
5 minuten verkort, totdat de instelling OFF is).
11. Projectie
1. Druk op [11] om de projector in/uit te schakelen. Als de projector aan is, wordt op het scherm het
proj
ectorsym
2. Druk op [12]. De hoek van de geprojecteerde cijfers kan 180 graden (onderste
3. Draai aan knop [10] (projectie draaien) om de cijfers in een h oek van 90 grade
bool weergegeven.
12. Reservebatterijen klok vervangen
1. Plaat
s 2 AAA-batterijen. Controleer de polariteit (+ en - aan de uiteinden van de batterij) en volg de
tekeni
ng bij het batterijcompartiment. Sluit de compartimentdeur.
Opmerking: Gooi de batterijen op de juiste wijze weg (zie de plaatselijke regelgeving).
13. Basisspecificaties:
Uitgangsvermogen: 0,5 W
FM-bereik: 87,5 ~ 108 MHz
Ingangsspanning: AC 230 V, 50 Hz
Voorkeuzezenders: 20
Standaarddimtimer: AAN 23:00 – 06:00
Belangrijke veiligheidsinstructie: zorgvuldig doorlezen
Deze eenheid is zodanig ontworpen en geproduceerd, dat uw persoonl ijke veiligheid is gegarandeerd zolang
u de eenheid volgens de aanwijzingen gebruikt. Een onjuist gebruik kan echter leiden tot elektrische
schokken of brandgevaar. Lees alle veiligheids- en bedieningsinstructies zorgvuldig door vóór installatie en
gebruik, en bewaar deze instructies voor uw administratie. Let vooral op alle waarschuwingen in deze
instructies en op de eenheid.
Gemiddeld niv
Laag niveau (d
eau (dimlicht)
onker)
>>>>>>>
boven) worden gedraaid.
n te projecteren.
x Gooi elektrische en elektronische apparaten niet in een normale vuilnisbak.
x Breng ze naar een verzamelpunt.
x Sommige onderdelen in deze apparatuur kunnen gevaarlijk zijn voor de gezondheid en het milieu.
6
Page 59

Made in China
 Loading...