

Page 1
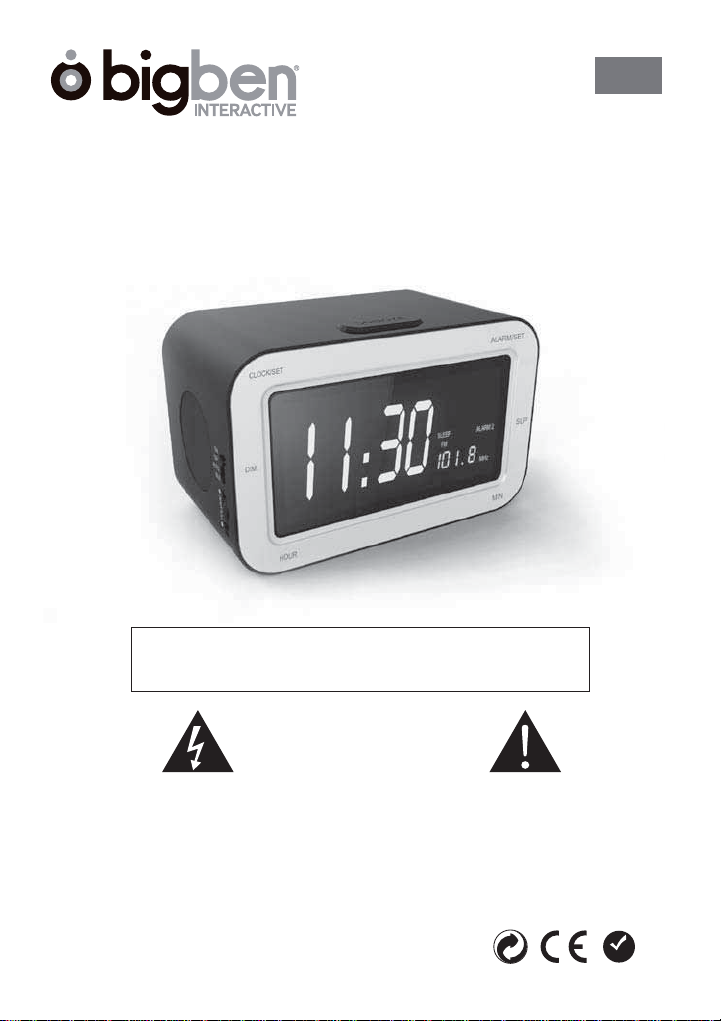
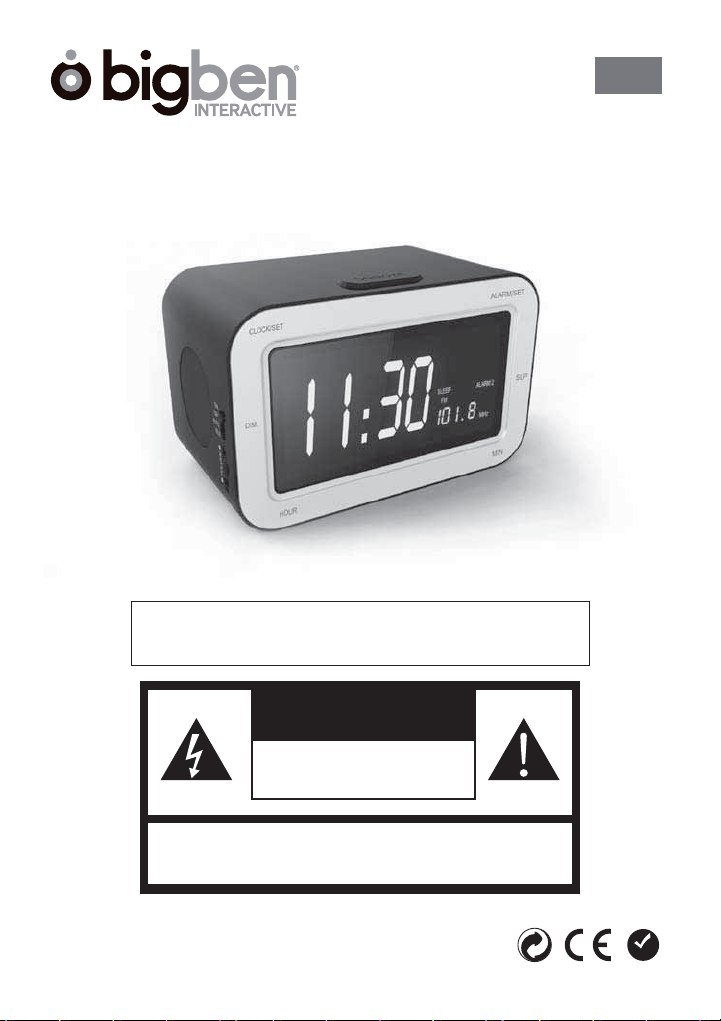
RADIO REVEIL
RR30
MODE D’EMPLOI
LISEZ COMPLÈTEMENT CE MANUEL D’UTILISATION AVANT
D’UTILISER CET APPAREIL ET CONSERVEZ CE LIVRET POUR
VOUS Y RÉFÉRER ULTÉRIEUREMENT.
FR
RISQUE DE CHOC ELECTRIQUE
AVERTISSEMENT : Pour éviter tout risque de choc électrique, ne tentez pas d’ouvrir l’appareil.
En cas de dysfonctionnement, faites appel à un réparateur professionnel. De même, n’
exposez pas cet appareil à l’eau et à l’humidité.
Rev 1
ATTENTION
NE PAS OUVRIR
1
RoHS
Page 2
CAUTION
RISK OF ELECTRIC
SHOCK
DO NOT OPEN
PRECAUTIONS D’UTILISATION
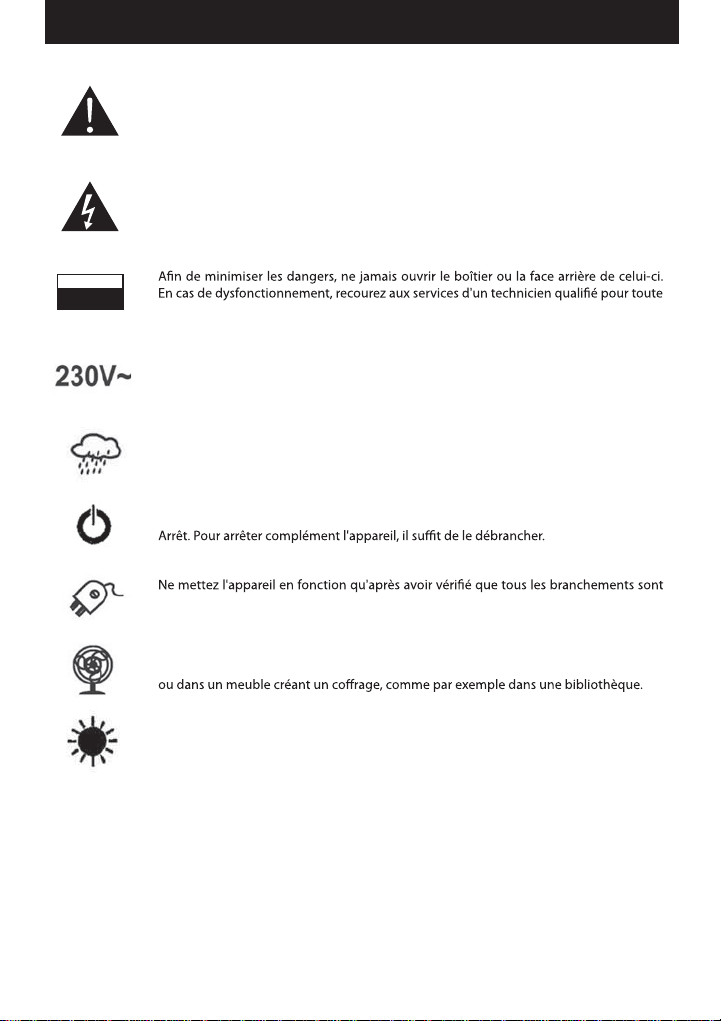
Le symbole du point d'exclamation inscrit au sein d'un triangle équilatéral constitue
une mise en garde destinée à alerter l'utilisateur quant à la présence d'instructions
d'emploi et d'entretien importantes dans la documentation accompagnant le produit.
Le symbole de l'éclair à pointe de èche inscrit au sein d'un triangle équilatéral
constitue une mise en garde destinée à alerter l'utilisateur quant à la présence de
tensions électriques secteur à l'intérieur du produit, qui peuvent engendrer un risque
d'électrocution.
réparation. Cet appareil ne contient pas de pièces échangeables par l'utilisateur.
Cet appareil a été conçu en vue d'une alimentation électrique en 230 volts / 50 Hertz.
Débranchez le cordon d'alimentation si cet appareil doit être inutilisé pendant une
période prolongée.
Cet appareil ne doit en aucun cas être exposé à des conditions humides ou à la pluie.
L'interrupteur Marche/Arrêt de cet appareil agit sur le circuit secondaire de l'appareil,
et il ne met donc pas l'appareil totalement hors tension lorsqu'il est placé en position
corrects.
Cet appareil doit impérativement être placé dans un endroit convenablement ventilé.
Par exemple, il ne doit jamais être positionné à proximité de rideaux, sur la moquette
L'appareil ne doit absolument pas être exposé au rayonnement direct du soleil ou à des
sources de chaleur.
2
Page 3
Alimentation
Secteur
Branchez la prise située à l’arrière du produit sur votre installation secteur (220V).
“00:00” clignote.
Pile de sauvegarde
Pour éviter de perdre vos réglages si une coupure de courant survenait, placez une pile 9 volts (non
plus longue utilisation.
Notes:
programmée.
-Durant une coupure de courant, l’alarme ne foncitonnera que si la touche de sélection BUZZER / AUTO /
STANDBY / ON est sur BUZZER ou AUTO .
- La sauvegarde a une autonomie de 8 heures. Si la coupure de courant dure plus longtemps, vous
perdrez vos réglages y compris l’heure de réveil.
-Utilisez des piles neuves de la taille et du type requis.
-Lorsque vos piles sont usées, ne les mettez pas au feu et ne les enterrez pas. Respectez la chaîne du
recyclage des piles.
produits qui endommagerait l’appareil.
Horloge
Réglage de l’heure
Maintenez appuyée la touche CLOCK SET et appuyez sur HOUR pour régler l’heure actuelle. Appuyez
ensuite sur MINUTE pour ajuster les minutes.
Ecouter la radio
Sélection des ondes
Positionnez la touche de sélection BUZZER / AUTO / STANDBY / ON sur ON.
Sélection d’une station
Ajustez les fréquences grace à la touche TUNING
Vous pouvez étendre l’antenne pour une meilleure réception FM.
Pour une meilleure réception des ondes AM, déplacez légèrement l’appareil sur lui-même.
Eteindre la radio
Positionnez la touche de sélection BUZZER / AUTO / STANDBY / ON sur STANDBY pour éteindre la radio.
Notes:
-N’oubliez pas de positionner la touche de sélection BUZZER / AUTO / STANDBY / ON sur BUZZER ou AUTO
pour vous réveiller à l’heure que vous aurez programmée...
- Ajustez le VOLUME sinon vous n’entendrez pas votre réveil.
- Consultez le chapitre ‘Utilisation de l’alarme’ pour plus de détails.
3
Page 4
Utilisation de l’alarme
deux heures distinctes.
Réglage de l’alarme
1. Positionnez la touche AL1 / AL2 / AL1+2 sur AL1 pour régler la première alarme ou sur AL2 pour
2. Positionnez la touche BUZZER / AUTO / STANDBY / ON sur BUZZER ou AUTO . Consultez le chapitre “Se
réveiller avec la Radio ou le Buzzer” pour plus de détails.
3. Maintenez appuyée la touche ALARM SET et appuyez sur HOUR pour ajuster l’heure de votre réveil
et/ou sur MINUTE pour ajuster les minutes de l’heure de réveil souhaitée.
2. Maintenez appuyée la touche ALARM SET pour voir l’heure de l’alarme sélectionnée.
AL1 / AL2 / AL1+2.
Options de l’alarme
Sélectionnez AL1 pour activer la première alarme.
Sélectionnez AL2 pour activer la deuxième alarme.
Sélectionnez AL1+AL2 pour activer les deux alarmes.
Notes:
-L’alarme ne sonnera pas si ON ou STANDBY
-L’alarme ne sonnera pas si la prise secteur n’est pas branchée.
Se réveiller avec le Buzzer (sonnerie)
1. La touche de sélection BUZZER / AUTO / STANDBY / ON doit être sur BUZZER.
2. L’heure de réveil doit être réglée (voir le chapitre ‘Réglage de l’alarme’).
La sonnerie s’enclenchera à l’heure programmée.
Se réveiller avec la radio
1. Placez la touche de sélection BUZZER / AUTO / STANDBY / ON sur AUTO.
2. Réglez l’heure de réveil.
3. Ajustez le VOLUME
La radio s’enclenchera à l’heure programmée.
Arrêtez l’alarme
Appuyez sur ALARM / SLEEP / STANDBY pour arrêter la sonnerie ou la radio. L’alarme reste active et sonnera
le jour suivant à l’heure programmée.
4
Page 5
Désactiver l’alarme
de sélection BUZZER / AUTO / STANDBY / ON sur STANDBY.
Fonction Snooze
Cette fonction permet de reporter l’alarme en cours de fonctionnement de 9 minutes.
annuler cette fonction, il vous faut mettre l’alarme sur STANDBY.
S’endormir avec la radio
1. Placez la touche de sélection BUZZER / AUTO / STANDBY / ON sur BUZZER, STANDBY ou AUTO.
2. Appuyez sur SLEEP
3. Maintenez la touche SLEEP et appuyez sur MINUTE pour ajuster les minutes avant l’extinction de la
radio.
4. Maintenez la touche SLEEP et appuyez sur HOUR pour augmenter ou réduire d’une heure.
Note: La durée maximale de la fonction est de 1 heure et 59 minutes.
Désactiver la fonction Sleep
Pour éteindre la radio avant que la durée ne soit atteinte, utilisez la touche ALARM / SLEEP / STANDBY.
Alimentation: Secteur 230V / 50Hz
Sauvegarde : Pile 9V (non fournie – option pour sauvegarde de l’heure de réveil)
Haut-parleur : 8 Ohm - 1W
Puissance en sortie : 2 x 0.5W
Fréquences : FM: 88-108 MHz // AM: 520-1620KHz
Ne pas éliminer les appareils électriques et
électroniques dans les déchets ménagers.
tLes apporter à un point de collecte.
t Certaines pièces contenues dans ces appareils peuvent
être dangereuses pour la santé et pour l'environnement.
Importé par BIGBEN INTERACTIVE SA
396, Rue de la Voyette
CRT2 – FRETIN
CS 90414
59814 LESQUIN Cedex - France
www.bigben.eu
Fabriqué en Chine
RoHS
5
Page 6

RR30
GB
Rev 1
OPERATING INSTRUCTIONS
PLEASE READ THIS USER MANUAL COMPLETELY BEFORE
OPERATING THIS UNIT AND RETAIN THIS BOOKLET FOR
FUTURE REFERENCE.
RoHS
6
Page 7
WARNING
TO PREVENT FIRE OR SHOCK HAZARD DO NOT EXPOSE THIS APPLIANCE TO RAIN OR MOISTURE.
CAUTION
RISK OF ELECTRIC SHOCK
DO NOT OPEN
WARNING: SHOCK HAZARD-DO NOT OPEN
LIGHTNING FLASH WITH ARROWHEAD SYMBOL-
within an equilateral triangle, is intended to alert
the user to the presence of uninsulated dangerous
voltage within the products enclosure
of sucient magnitude to constiude a risk of electric
shock to persons.
that may be
EXCLAMATION POINT- within an equilateral
triangle, is used to indicate that a specific
component shall be replaced only by the
component specied in that documentation
for safety reason.
7
Page 8

SAFETY INSTRUCTIONS
1. READ INSTRUCTIONS - All the safety and operating instructions should be read before the
appliance is operated.
2. RETAIN INSTRUCTIONS - The safety and operating instruction should be retained for future
reference.
3. HEED WARNINGS - All warnings on the appliance and in
adhered to.
4. FOLLOW INSTRUCTIONS - All operating instructions should be followed.
5. WATER AND MOISTURE - The appliance should not be used near water, for example, near a bathtub,
washbowl, kitchen sink, laundrytub. swimming
6. VENTILATION - The appliance should be situated so that its location or position does not interfere
with its proper ventilation. Do not place on bed, sofa, rug or similar surface that may block the
ventilation openings, in a built-in installation, such as a bookcase or cabinet that may impede the
7. HEAT - The appliance should be situated away from heat sources such as radiators, stoves, or other
3. POWER SOURCE - The appliance should be connected to power supply only of the type described in
the operating instructions or as marked on the appliance.
9. GROUNDING - Precautions should be taken to ensure that the grounding means of an appliance is
not defeated.
10. POWER CORD PROTECTION - Power supply cords should be routed so that they are not likely to be
walked on or pinched by items placed upon or against them.
11. POWER LINES - An outdoor antenna should be located away from power lines.
12. OBJECT and LIQUID ENTRY - Care should be taken so that objects do not fall and liquids are not
spilled into the enclosure through openings.
13. ESD WARNING - The display does not function properly or no reaction to operation of any the
seconds.
14. DAMAGE REQUIRING SERVICE -
when:
a. The power-supply cord or plug has been damaged.
b. Objects have fallen into, or liquid has been spilled into the appliance enclosure.
c. The appliance has been exposed to rain.
d. The appliance has been dropped, or the enclosure damaged.
e. The appliance does not appear to operate normally.
15. SERVICING - The user should not attempt to service the appliance beyond that described in the user
the operating instructions should be
pool or in a wet basement.
STANDBY
8
Page 9
Power Supply
Connecting AC power
display.
Installing a battery
Installing a battery
To keep the clock running for up to eight hours during an AC power failure, insert a 9-volt battery(not
supplied) in the battery compartment. For the longest life, we recommend you use an alkaline battery.
Notes:
t The display does not light when the alarm clock radio is operating only on battery power but the clock
time remains in memory.
t "During an AC power failure, the alarm could be set only when the BUZZER / AUTO / STANDBY / ON
switch is set to BUZZER or AUTO" (No wake up).
t"Qrolonged power failure can drain the battery.
Battery notes:
tUse only fresh batteries of the required size and recommended type.
t%JTQPTFPGPMECatteries promptly and properly. Do not burn or bury them.
tIf you do not plan to use the alarm clock radio for a month or longer, remove the batteries. Batteries can
leak chemicals that can damage electronic parts.
Using your clock
Setting the clock time
Press and Hold CLOCK SET and press HOUR to adjust the hour and press MINUTE to adjust the minutes
until the correct time is shown on the display.
Notes: The clock is shown in a 24 hour format.
Listening to the radio
Selecting radio
Tuning to a station
Adjust the TUNING control until you reach the desired station. The display shows the current radio
frequency.
Slide BUZZER / AUTO / STANDBY / ON to STANDBY
Notes:
t When done, remember to slide BUZZER / AUTO / STANDBY / ON to BUZZER or AUTO so the buzzer alarm, or
radio will sound at the preset alarm time.
tAdjust the VOLUME control so the alarm is loud enough to wake you up.
tRefer to “using the alarm” for details.
9
Page 10

Using the alarm
Setting alarm time
1. Slide the AL1 / AL2 / AL1+2 switch on the left side of the unit to AL1 to set ALARM 1 time or to AL2
to set ALARM 2 time. The display will show ALARM 1 or ALARM 2 according to your selection.
2. Slide the BUZZER / AUTO / STANDBY / ON switch on left side of the alarm clock radio to BUZZER or AUTO.
Refer to “Waking to Buzzer, or Radio” for details.
3. Hold ALARM SET
alarm time is displayed for the selected alarm.
and press HOUR to adjust hour or press MINUTE to adjust minutes until the desired
Checking alarm time
1. Slide the AL1 / AL2 / AL1+2 switch on the left side of the alarm clock radio to AL1 or AL2.
2. Hold down ALARM SET to view selected alarm time.
Selecting alarm options
Slide the AL1 / AL2 / AL1+2 switch on the left side of the unit to AL1 to activate ALARM 1, AL2 to
activate ALARM 2 or AL1+2 to activate both alarms.
Notes:
alarm will not sound if the BUZZER / AUTO / STANDBY / ON switch is set to ON or STANDBY.
tThe
tThe alarm will not sound when the clock radio is disconnected from AC power and powered by the
backup battery only.
Waking up to a buzzer alarm
1. Slide the BUZZER / AUTO / STANDBY / ON switch to BUZZER for the buzzer alarm.
2. Set the alarm time. Refer to “setting alarm time” for details.
The alarm buzzer will sound at the preset alarm time.
Waking up to radio
1. Slide the BUZZER / AUTO / STANDBY / ON switch to AUTO.
2. Set the alarm time. Refer to “setting alarm time” for details.
3. Adjust the VOLUME control to a setting loud enough to wake you up at the preset time.
The radio will turn on at the preset alarm time.
Stopping an alarm
Press ALARM / SLEEP / STANDBY to stop the buzzer, or radio alarm. The alarm will sound again the next day
at the preset alarm time.
Deactivating alarms
Slide the BUZZER / AUTO / STANDBY / ON switch to STANDBY to deactivate all alarms.
Snooze
When the alarm sounds at the preset time, press SNOOZE to enter snooze mode. The alarm will sound
again after nine minutes.
10
Page 11
Sleep to radio
1. Slide the AM / FM switch to AM or FM to sleep to the desired radio band to sleep to radio.
2. Slide the BUZZER / AUTO / STANDBY / ON switch to BUZZER, STANDBY or AUTO.
3. Press SLEEP. “059” and the SLEEP icon appear on the display.
4. Hold SLEEP and press MINUTE to adjust the sleep minutes.
5. Hold SLEEP and press HOUR to increase or decrease by one hour.
Note: The maximum sleep time is 1:59.
Deactivating sleep time
Power source:
Speaker:
Output power:
Frequency range:
AC 230V / 50Hz DC9V battery (optional – for clock backup)
8ohm 1W
0.5W X 2
FM: 88-108 MHz AM: 520-1620KHz
Don’t throw the electrical and electronical
appliances into the usual dustbin.
tBring them to a collecting point.
tSome parts contained in these appliances may be
dangerous for health and environment.
Imported by BIGBEN INTERACTIVE SA
396, Rue de la Voyette
CRT2 - FRETIN
CS 90414
59814 LESQUIN Cedex - France
www.bigben.eu
ALARM / SLEEP / STANDBY button.
Made in China
RoHS
11
Page 12

RR30
INSTRUCCIONES DE FUNCIONAMIENTO
LE ROGAMOS QUE LEA ÍNTEGRAMENTE EL PRESENTE
MANUAL DEL USUARIO ANTES DE UTILIZAR EL EQUIPO Y
QUE CONSERVE ESTE FOLLETO PARA PODER
CONSULTARLO EN EL FUTURO.
SP
Rev 1
CAUTION
RISK OF ELECTRIC SHOCK
DO NOT OPEN
WARNING: SHOCK HAZARE-DO NOT OPEN
12
Page 13

PRECAUCIONES DE USO
El símbolo del punto de exclamación dentro de un triángulo equilátero constituye
una advertencia destinada a avisar al usuario de la presencia de instrucciones de uso y
mantenimiento importantes en la documentación que acompaña al producto.
El símbolo del re lámpago con punta de echa dentro de un triángulo equilátero
constituye una advertencia destinada a avisar al usuario de la presencia de tensiones
eléctricas dentro del producto, que pueden
provocar un riesgo de electrocución.
CAUTION
RISK OF ELECTRIC
SHOCK
DO NOT OPEN
Para minimizar los peligros, no abra nunca la caja o la parte posterior de ésta. En caso
reparación. Este aparato no contiene piezas intercambiables por el usuario.
Este aparato ha sido diseñado para una alimentación eléctrica de 230 voltios / 50 Hertz.
Conecte el cable de alimentación si no se utiliza este aparato durante un período
prolongado.
Este aparato no deberá estar expuesto en ningún caso a condiciones húmedas o a la
lluvia.
tanto, sólo desconectará totalmente el aparato cuando esté en posición Stop.
Basta con desconectar el aparato para detenerlo completamente.
Encienda el aparato sólo después de haber comprobado que todas las conexiones son
correctas.
Este aparato deberá estar colocado en un lugar bien ventilado. Por ejemplo, no deberá
estar nunca colocado cerca de cortinas, sobre la moqueta o en un mueble que cree un
encofrado, como por ejemplo en una librería.
El aparato no deberá estar expuesto en ningún caso a los rayos directos del sol o a
fuentes de calor.
13
Page 14
Alimentaçion del sector
Puede conectar el cable a la toma correspondiente y al enchufe de pared.
Asegúrese de qu’el cable no está desnudo
“00:00” aparece.
Pilas
Para evitar perder sus arreglos si un corte de corriente sobrevenía, coloque una pila 9 voltios (no
una utilización más larga.
N.B. :
- En el momento de un corte de corriente, su despertador sonará bien a la hora programada.
- Durante un apagón de corriente alterna, la alarma podría ser puesta sólo cuando el BUZZER / AUTO /
STANDBY / ON interruptor es puesto a BUZZER O AUTO.
- La salvaguardia tiene una autonomía de 8 horas. Si el corte de corriente dura más tiempo, usted pierde
su arreglos incluso la hora de despertador.
- Utilice pilas nuevas del corte y del tipo requerido.
- Cuando sus pilas son gastadas, no las ponga en el fuego y no las entierre. Respete la cadena del
reciclaje de las pilas.
de productos que dañaría el aparato.
L’hora (formatto 24 horas)
Pulsa CLOCK SET y HOUR para arreglar l’horas.
Repetir estos pasos para arreglar los minutos.
Modo Radio
Pulse BUZZER / AUTO / STANDBY / ON en ON.
Elija su emisora con TUNING.
Para detener la radio, ponga la tecla de selección en STANDBY.
N.B.:
La antena le permite obtener una mejor recepción de las ondas FM.
Cuenta con una antena interna para las ondas AM. Puede girar ligeramente el aparato o colocarlo cerca
de una ventana para una mejor recepción.
-Per utilizar il despertador, ponga la tecla de seleccion BUZZER / AUTO / STANDBY / ON en BUZZER o AUTO.
- Ajuste el VOLUME para entender su despertador.
Utilizar l’alarm
dos distintos.
Arreglar l’alarm 1 y 2
1. Seleccione AL1 / AL2 / AL1+2 para arreglar l’hora de su despertador.
2. Ponga la tecla BUZZER / AUTO / STANDBY / ON en BUZZER o AUTO.
3. Pulsa ALARM SET y HOUR para arreglar l’hora de su despertador y MINUTE para arreglar los minutos.
14
Page 15

Comprobación de la hora de despertador
Seleccione l’alarm con AL1 / AL2 / AL1+2.
Pulsa la tecla ALARM SET para abere l’hora de su despertador.
Opciones
Seleccione AL1 para activar la primera alarma.
Seleccione AL2 para activar la segunda alarma.
Seleccione AL1+AL2 para activar ambas alarmas.
N.B. :
- La alarma no puede sonar si u STANDBY se es enganchado.
- La alarma no puede sonar si el aparato no es conectado.
Con il buzzer…
1. Pulsa la tecla de selecion en BUZZER.
2. Arregla l’alarma.
Il despertador toca a l’hora programada.
Con la radio...
1. Pulsa la tecla de selecion en AUTO.
2. Arregla l’alarma.
3. Ajuste el VOLUME para entender su despertador.
4. Il despertador toca con la radio a l’hora programada.
Para detener l’alarma…
Pulsa ALARM / SLEEP / STANDBY. L’alarma toca a la hora programada el día siguiente.
Pulsa la tecla de selecion BUZZER / AUTO / STANDBY / ON en STANDBY para detener l’alarma y no
ser despertado el día siguiente.
Snooze
Esta función permite volver a llevar la alarma en curso de funcionamiento de 9 minutos.
Le basta con apretar en el toque mientras que la alarma acaba de resonar para activar la función. Para
anular esta función, debe poner la alarma sobre STANDBY.
Dormirse con la radio
1. Seleccione BUZZER, STANDBY o AUTO.
2. Pulsa la tecla SLEEP. "059 " y " SLEEP " se exhiben.
3. Mantenga SLEEP y MINUTE para ajustar los minutos antes de la extinción de la radio.
4. Mantenga SLEEP y HOUR para aumentar o
N.B.: La duración máxima del function es de la 1 hora y 59 minutos.
Para detener SLEEP, usa la tecla ALARM / SLEEP / STANDBY.
Alimentación: Sector 230V / 50Hz
Salvaguardia : Pila 9V (no proporcionada – opción para salvaguardia de la hora de despertador)
Altavoz : 8 Ohm - 1W
Potencia : 2 x 0.5W
Emisora : FM: 88-108 MHz
reducirse de la una hora.
15
Page 16
No tire los aparatos eléctricos o electrónicos a la basura normal.
tLlévelos a un punto de recogida para este material,
ya que algunas piezas de estos aparatos pueden ser
dañinos para la salud o el medio ambiente.
Importado por BIGBEN INTERACTIVE SA
396, Rue de la Voyette
CRT2 - FRETIN
CS 90414
59814 LESQUIN Cedex - Francia
www.bigben.eu
Fabricado en China
RoHS
16
Page 17

RR30
ISTRUZIONI D‘USO
PRIMA DI UTILIZZARE L’APPARECCHIO, LEGGERE PER
INTERO IL PRESENTE MANUALE E CONSERVARLO PER
CONSULTAZIONI FUTURE.
IT
Rev 1
CAUTION
RISK OF ELECTRIC SHOCK
DO NOT OPEN
WARNING: SHOCK HAZARE-DO NOT OPEN
17
Page 18
PRECAUZIONI PER L'USO
Il simbolo con il punto esclamativo all'interno di un triangolo equilatero costituisce
un'avvertenza destinata ad avvisare l'utilizzatore della presenza di istruzioni importanti
per l'uso e la manutenzione nella documentazione che accompagna il prodotto.
CAUTION
RISK OF ELECTRIC
SHOCK
DO NOT OPEN
Il simbolo con il lampo
e la freccia all'interno di un triangolo equilatero costituisce
un'avvertenza destinata ad avvisare l'utilizzatore della presenza di tensioni elettriche
all'interno del prodotto, che possono provocare scosse elettriche.
Per ridurre al minimo i rischi, non aprire mai l'involucro o il suo lato posteriore. In caso
di cattivo funzionamento, fare appello a un tecnico abilitato per le riparazioni. Questo
apparecchio non contiene pezzi che possano essere sostituiti dall'utilizzat
Questo apparecchio è stato progettato per un'alimentazione elettri
ore.
ca a 230 volt / 50
Hertz. Staccare il cavo di alimentazione se l'apparecchio non viene utilizzato per un
lungo periodo.
Questo apparecchio non deve essere esposto in nessun caso a situazioni umide o alla
pioggia.
L'interruttore On/STANDBY di questo apparecchio agisc e sul circuito secondario
dell'apparecchio e non lo mette quindi completamente fuori tensione quando è in
posizione S TANDBY. Per disattivare completamente l'apparecchio, basta scollegarlo dalla
presa di corrente.
Mettere l'apparecchio in funzione solo dopo
aver controllato che tutti i collegamenti
siano corretti.
Questo apparecchio deve essere riposto imperativamente in un luogo correttamente
ventilato. Ad esempio, non deve essere mai essere messo vicino a tende, sulla
moquette o in un
mobile che funga da copertura, come ad esempio in una libreria.
L'apparecchio non deve essere assolutamente esposto ai raggi diretti del sole o a fonti
di calore.
18
Page 19

Alimentazione del settore
Collegare la presa sul retro del prodotto sul sistema (220).
"00:00" lampeggiante.
Batteria di backup
da 9 volt (non fornito).
Si consiglia di batterie alcaline per un uso più prolungato.
N.B. :
- Durante un guasto di alimentazione, l'allarme può essere impostato solo quando il BUZZER / AUTO /
STANDBY / ON è impostato su BUZZER o AUTO.
- La batteria di backup ha una autonomia de 8 ore. Se l’interruzione di alimentazione è piu lunga, l’
alarme non sona.
- Usare delle pile nuove e dello stesso tipo.
- Quando le pile sono vuote, non metterle nello fuoco. Non metterle nelle terra.
- Se non usa lo svegliarsi durant un certo tempo, rimuovere le pile.
L’ora (24 ore)
Premere CLOCK SET e HOUR per regolare l’ora.
Repetere questo per regolare i minuti.
Modo Radio
Premere BUZZER / AUTO / STANDBY / ON su ON.
Scegliere la stazione.
Per fermare la radio, selezzione STANDBY.
N.B.:
E' prevista un'antenna interna per le onde AM. Potete quindi girare leggermente l'apparecchio o
-Per usare l’alarme, selezionne BUZZER o AUTO.
-Regolare il VOLUME per ascoltare l’alarme.
Alarme
Regolare Alarm1 e Alarm2
1. Selezionne AL1 / AL2 / AL1+2 per regolare l’ora del’alarme.
2. Selezione BUZZER o AUTO.
3. Premere ALARM SET e HOUR per regolare l’ora poi premere ALARM SET e MINUTE per regolare i
minuti.
Controllato l'orario della sveglia
Selezionne l’alarme con AL1 / AL2 / AL1+2.
Premere ALARM SET per vedere l’ora programata.
19
Page 20

Opzioni
Selezione AL1 per attivare la prima alarma.
Selezionne AL2 per attivare la secunda alarma.
Selezionne AL1+AL2 per attivare le due alarme.
N.B. :
- Premere ALARM 1 e/o ALARM 2 per controllare le alarme.
- L’alarme non puo sonare se il dispositivo è su STANDBY.
- L’alarme non puo sonara se il dispositivo non e collegato.
Con il buzzer…
1. Selezionne BUZZER.
2. Regolare l’ora dell’alarme.
Il dispositivo sona a l’ora programata.
Con la radio...
1. Selezionne AUTO.
2. Regolare l’ora dell’alarme.
3. Regolare il VOLUME.
4. Il dispositivo sona a l’ora programata.
Per fermare l’alarme…
Premere ALARM / SLEEP / STANDBY. L’alarme sona a l’ora programata il giorno dopo.
Selezione STANDBY per fermare l’alarme e che il dispositivo non sona il giorno dopo.
Snooze
Questa funzione permette de riportere di 9 minuti l’alarme.
Se vuole fermare la funzione, selezionne STANDBY.
Dormirse con la radio
1. Selezionne BUZZER, STANDBY o AUTO.
2. Premere SLEEP. "059 " e " SLEEP " apparace.
3. Premere SLEEP e MINUTE per regolare i minuti.
4. Premere SLEEP e HOUR per aumentare o reducire di un’ora.
N.B.: La durazione di questa funzione e 1 ora e 59 minuti massima.
Per fermare la funzione SLEEP, selezionne STANDBY.
Caratteristiche tecniche
Alimentazione: Settore 230V / 50Hz
Backup : Pila 9V (non fornita – opzione per gardare l’ora dell’alarme)
Altoparlanto: 8 Ohm - 1W
Potenzia : 2 x 0.5W
Frequenze : FM: 88-108 MHz
20
Page 21

tDepositarFHMJBQQBrecDIJQrFTTPVOBQpositPQVOtPEJraccPMUB
tAMDVOJcompPOFOUJcoOtFOVUJJORVFTUJBQQBrecDIJpPTTPOP
FTTFrFpericPMPTJpFSMBTBMVtFFpFSM’ambieOte
Importato da BIGBEN INTERACTIVE SA
396, Rue de la Voyette
CRT2 - FRETIN
CS 90414
59814 LESQUIN Cedex - Francia
www.bigben.eu
Prodotto in Cina
RoHS
21
RoHS
Page 22
PT
RR30
INSTRUÇÕES DE FUNCIONAMENTO
LEIA TODO O MANUAL DE UTILIZADOR ANTES DE
TRABALHAR COM ESTA UNIDADE E GUARDE O FOLHETO
PARA REFERÊNCIA FUTURA.
Rev 1
CAUTION
RISK OF ELECTRIC SHOCK
DO NOT OPEN
WARNING: SHOCK HAZARE-DO NOT OPEN
RoHS
22
Page 23

PRECAUÇÕES DE UTILIZAÇÃO
O símbolo do ponto de exclamação inscrito num triângulo equilateral é um aviso
para alertar o utilizador da presença de instruções de utilização e de manutenção
importantes na documentação que acompanha o produto.
O
símbolo da faísca com na ponta uma seta inscrito num triângulo equilateral é um
aviso para alertar o utilizador da presença de tensões eléctricas no interior do produto,
que podem provocar um risco de electrocussão.
CAUTION
RISK OF ELECTRIC
SHOCK
DO NOT OPEN
Para minimizar os perigos, nunca abrir a caixa ou a parte traseira do mesmo. No caso
de disfunção, recorrer aos serviços de um técnico qualicado para proceder a qualquer
reparação. Este aparelho não contém
nenhuma peça reparável pelo utilizador.
Este aparelho foi concebido para uma alimentação eléctrica de 230 volts / 50 Hertz.
Desligar o cabo de alimentação eléctrica se este aparelho tiver de car inutilizado por
um período prolongado.
Este aparelho não deve de forma alguma ficar exposto a condições húmidas ou à
chuva.
O interruptor Ligar/Desligar deste aparelho actua no circuito secundário do aparelho,
e portanto não põe o apare
lho totalmente fora de tensão quando fica colocado na
posição Desligar. Para desligar completamente o aparelho, basta desligá-lo.
Apenas colocar o aparelho em funcionamento após ter vericado se todas as ligações
estão correctas.
Este aparelho deve obrigatoriamente ser colo c ado num lugar convenientemente
ventilado. Por exemplo, nunca deve car em proximidade de cortinas, na alcatifa ou
num móvel criando uma cofragem, como por exemplo numa biblioteca.
O aparelho nã
o deve de forma alguma estar exposto a irradiação directa do sol ou a
fontes de calor.
23
Page 24

ALIMENTAÇÃO
Alimentação Cabo
Bateria reserva
Inserir una pilha de tamanhos 9V no compartimento.
Tirar as pilhas quando estas não estão a ser utilizadas no aparelho durante um longo período.
NOTA:
Utilizar sempre pilhas com uma única marca. Nunca misturar diferentes marcas
Para utilizar a bateria por pilha, é favor desligar o cabo
-Durante um fracasso de poder, o alarma pode ser estabelecido só quando BUZZER / AUTO / STANDBY /
ON comutador é estabelecida na BUZZER ou AUTO.
-O alarme soará se a campainha está ativo ou de carro.
- O backup tem uma autonomia de 8 horas. Se a queda de energia dura mais tempo, você perde sua
L’HORA
Uma vez que o seu funcionamento dispositivo, prima CLOCK SET para um segundo e HOUR* o MIN.
*Formato 24 horas.
RADIO
OPERAÇÃO GENERAL
1. Seleccionar as frequências desejadas utilizando o selector TUNING.
2. Ajustar o
VOLUME PARA UMA MELHOR RECEPÇÃO
3. Orientar a antena para uma melhor recepção.
Desligue o botão de seleção em STANDBY para desligar o rádio.
Nota:
BUZZER o AUTO.
- Ajuste o volume de outra forma você não vai ouvir o seu despertador.
L’ALARM
Prima AL1 / AL2 / AL1+2
graças às teclas HOUR e MIN.
Desligue o botão de seleção em BUZZER o AUTO.
2. Segure o botão SET ALARM para ver a hora do alarme seleccionado.
24
AL1 / AL2 / AL1 2.
Page 25
Opções
Seleccionar AL1 alarme para ativar o alarme primeiro.
Seleccionar AL2 para ativar o alarme segundo.
Seleccionar AL1 + AL2 para ativar os dois alarmes.
Buzzer
1. Seleccionar BUZZER.
Radio
1. Seleccionar as frequências desejadas utilizando o selector TUNING.
2. Seleccionar AUTO.
4. Ajuste o volume de outra forma você não vai ouvir o seu despertador.
Pressione ALARM / SLEEP / STANDBY para parar o alarme ou rádio.
O alarme permanece ativo e vai tocar no dia seguinte à hora prevista.
Seleccionar STANDBY para desactivar o alarme.
Snooze
Enquanto o alarme toca, prima SNOOZE para ver o despertar de 9 minutos.
Quando estes 9 minutos decorridos, o alarme toca novamente.
Você deve pressionar STANDBY para desactivar a função Snooze.
Sleep
1. Seleccionar BUZZER, STANDBY o AUTO.
2. Prima SLEEP. “059” e “SLEEP ” aparecem.
3. Prima SLEEP e MINUTE para ajustar los minutos.
4. Prima SLEEP e HOUR para aumentar ou diminuir uma hora.
Nota: Máxima 1 hora e 59 minutos.
Para desactivar a função Sleep, seleccionar STANDBY.
Alimentação: 230V / 50Hz
Bateria reserva : Pilha 9V - não fornecido
Altifalante : 8 Ohm - 1W - 2 x 0.5W
Radio : FM: 88-108 MHz // AM: 520-1620KHz
tNão deite fora os aparelhos elétricos e eletrónicos no caixote de lixo normal.
tEntregue-os no ponto de recolha.
tAlgumas partes deste aparelho podem ser perigosas
para a saúde e para o ambiente.
Fabricado na China
25
RoHS
Page 26

Importado pela BIGBEN INTERACTIVE SA
396, Rue de la Voyette
CRT2 - FRETIN
CS 90414
59814 LESQUIN Cedex - França
www.bigben.eu
26
Page 27

RR30
BEDIENUNGSANLEITUNG
Bi e lesen Sie diese Betriebsanleitung vor Gebrauch des
Produktes sorgfäl g durch und bewahren Sie sie anschließend
zu Nachschlagezwecken auf.
DE
Rev 1
GEFAHR EINES ELEKTROSCHOCKS
ACHTUNG
NICHT ÖFFNEN
RoHS
27
Page 28

SICHERHEITSHINWEISE FÜR DEN BENUTZER
Das Ausrufezeichen im gleichschenkligen Dreieck ist ein Warnzeichen, das den
Benutzer auf wichtige, diesem Produkt beigefügte Bedienungs- und
Der Blitz mit der Pfeilspitze im gleichschenkligen Dreieck ist ein Warnzeichen, das
den Benutzer auf gefährliche Stromspannungen im Gerät aufmerksam macht, die
die Gefahr eines Elektroschocks bergen.
CAUTION
RISK OF ELECTRIC
SHOCK
DO NOT OPEN
Um Gefahren auf ein Minimum zu reduzieren, das Gehäuse oder die Rückseite
Benutzer austauschbaren Teile.
Dieses Gerät ist auf eine Stromversorgung mit 230 Volt / 50 Hertz ausgelegt. Ziehen Sie
das Netzanschlusskabel heraus, wenn das Gerät über längere Zeit nicht benutzt wird.
Dieses Gerät darf unter keinen Umständen feuchten Umgebungsbedingungen oder
Regen ausgesetzt werden.
Er schaltet das Gerät also nicht völlig spannungsfrei. Um das Gerät spannungsfrei
zu schalten, ziehen Sie bitte den Netzstecker.
Das Gerät erst einschalten, wenn Sie sich vergewissert haben, dass alle Anschlüsse
korrekt sind.
Dieses Gerät darf nur an einem ausreichend belüfteten Platz aufgestellt werden. Es
darf z. B. nicht in der Nähe von Vorhängen, auf einem Teppich oder in einem zu
engen Möbelstück (wie z. B. einem Bücherschrank) aufgestellt werden.
Das Gerät darf unter keinen Umständen direktem Sonnenlicht oder Wärmequellen
ausgesetzt werden.
28
Page 29

Stromversorgung:
Anschluss an das Stromnetz:
4DIMJFFO4JFEBT4USPNLBCFMBOFJOF4UBOEBSE4UFDLEPTFBO/BDI"OTDIMVTTEFS4USPNWFSTPSHVOH
CMJOLUEJF"O[FJHFiwBVGEFN%JTQMBZBVG
Einlegen der Batterie:
Damit die Uhr bei einem Stromausfall bis zu 8 Stunden lang weiter läuft, können Sie
eine 9-Volt-Batterie (nicht mitgeliefert) in das Batteriefach einlegen. Die längste Laufzeit
erzielen Sie mit alkalischen Batterien.
Hinweise:
t%BT%JTQMBZMFVDIUFUOJDIUXFOOEBT6ISFOSBEJPMFEJHMJDICBUteriebetrieben wird, aber die Uhrzeit
CMFJCUHFTQFJDIFSU
t&JOWFSMÊOHFSUFS4USPNBVTGBMMLBOOEB[VGàISFOEBTTEJF#BUUerie leer wird.
Hinweise zum Batteriebetrieb:
t#FOVU[FO4JFBVTTDIMJFMJDIOFVF#BUUFSJFOEFSFOUTQSFDIFOEFO(SÚFVOEEFTFNQGPIMFOFO5ZQT
t"MUF#BUUFSJFONàTTFOTPGPSUVOEBVGWPSHFTDISJFCFOF8FJTFFOUTPSHUXFSEFO#BUUFSJFOEàSGFOOJDIU
WFSCSBOOUPEFSWFSHSBCFOXFSEFO
t8FOO4JFCFBCTJDIUJHFOEBT6ISFOSBEJPGàSEJF%BVFSFJOFT.POBUTPEFSMÊOHFSOJDIU[VWFSXFOEFO
TPMMUFOEJF#BUUFSJFOFOUGFSOUXFSEFO"VT#BUUFSJFOLÚOOFO$hemikalien austreten, welche die
FMFLUSPOJTDIFO5FJMFCFTDIÊEJHFOLÚOOFO
Benutzung der Uhr
Einstellung der Uhrzeit
%SàDLFOVOEIBMUFO4JFEJF5BTUFCLOCK SETVOECFUÊUJHFO4JFBOTDIMJFFOEEJF5BTUFHOUR, um die
Stunden einzustellen, sowie MINUTEVNEJF.JOVUFOFJO[VTUFMMFOCJTEJFLPSSFLUF6IS[FJUJN%JTQMBZ
BOHF[FJHUXJSE#FUÊUJHFO4JFFJONBMEJF5BTUFCLOCK SET, um die eingestellte Uhrzeit zu bestätigen.
Hinweise: Die Uhrzeit wird im 24-Stunden-Format angezeigt.
Radioempfang
Einschalten des Radios
#FUÊUJHFO4JFFJONBMEJF5BTUFON/STANDBY . Das Radio schaltet sich daraufhin ein.
Wahl des Wellenbereichs
#FUÊUJHFO4JFCFJFJOHFTDIBMUFUFN3BEJPEJF5BTUFBAND/MODE, um den
8FMMFOCFSFJDI(AM/FM) zu wählen.
Senderwahl
Halten Sie die +TUNING-5BTUF4FLVOEFOMBOHHFESàDLU%FSOÊDITUF4FOEFSXJSEBVUPNBtisch gesucht.
#FUÊUJHFO4JFFJONBMEJF5BTUFTUNING-VNEJF'SFRVFO[[VS&JOTUFMMVOHEFTHFXàOTDIUFO
Senders um 1 Schritt nach oben bzw. nach unten zu ändern.
Ausschalten des Radios
#FUÊUJHFO4JFFJONBMEJF5BTUFON/STANDBY . Das Radio schaltet sich daraufhin aus.
Benutzung der Weckfunktion”.
29
Page 30

Benutzung der Weckfunktion
Ihr Uhrenradio verfügt über ein Dual-Alarm-System, das Ihnen die Einstellung von 2 Weckzeiten ermöglicht.
Einstellung der Weckzeit (im Standby-Betrieb)
1.Betätigen Sie einmal die Taste “
Betätigen Sie die Tasten
einmal die Taste
Symbol “
2. Betätigen Sie zur Bestätigung anschließend die Taste “
angezeigt und das Gerät ist jetzt bereit zur Einstellung von “
3. Zur Einstellung von
Weckzeit einzustellen. Betätigen Sie einmal die Taste
Radioweckerfunktion oder mit dem Symbol “
4. Das Display zeigt nun, dass
BAND/MODE
” die Weckfunktion per Summton zu wählen.
BUZZ
ALARM 2 betätigen Sie die Tasten HOUR undMIN, um die gewünschte
ALARM/SET
”. Das Display wird blinken und ALARM 1 anzeigen.
HOUR undMIN, um die gewünschte Weckzeit einzustellen. Betätigen Sie
, um mit “ON” die Radioweckerfunktion oder mit dem
ALARM/SET”. “ALARM 1” wird nun
ALARM 2”.
BAND/MODE, um mit “ON” die
” die Weckfunktion per Summton zu wählen.
BUZZ
ALARM 1 + ALARM 2
aktiviert sind.
Überprüfung der Weckzeit
Betätigen Sie einmal die Taste “ALARM/SET”. Die Weckzeiten ALARM 1 oder
ALARM 1 + ALARM 2 erscheinen im Display.
Hinweis:
Die Weckfunktion funktioniert nicht, wenn das Uhrenradio nicht an die Steckdose angeschlossen ist
und nur mit der Backup-Batterie betrieben wird.
Wecken mit Summton
1. Betätigen Sie einmal die Taste “ALARM/SET”, um sich zu vergewissern, dass ALARM 1 oder
ALARM 2 mit dem Symbol BUZZ angezeigt wird. In diesem Fall erfolgt das Wecken per Summton.
Weckfunktion mit Radio
1. Betätigen Sie einmal die Taste “ALARM/SET”, um sich zu vergewissern, dass ALARM 1
oder
ALARM 2
mit dem Symbol “ON” angezeigt wird. In diesem Fall erfolgt das Wecken per Radio.
Einen Alarm stoppen
Betätigen Sie die Taste ALARM SLEEP / OFF, um den Summton oder die Radiowiedergabe
zu beenden. Die Weckfunktion wird sich am nächsten Tag zur eingestellten Weckzeit wiederholen.
Weckzeiten deaktivieren
Betätigen Sie einmal die Taste “ALARM/SET” . Die Weckzeit ALARM 1 wird angezeigt. Betätigen Sie
einmal die Taste
eingestellte Weckzeit. Das Deaktivieren der Weckzeit
dem gleichen Verfahren wie bei
BAND/MODE
, um das Symbol “
ALARM 1
.
” zu wählen. Hiermit annullieren Sie die
OFF
ALARM 2 verläuft nach
Schlummerfunktion
Wenn die Weckfunktion zur eingestellten Uhrzeit ausgeführt wird, können Sie die Taste SNOOZE
betätigen, um die Schlummerfunktion zu aktivieren.
Die Weckfunktion wird nach 10 Minuten erneut ertönen.
30
Page 31
Einschlaf-Funktion mit Radio
Einstellung der Einschlafzeit.
Der Einschlaf-Timer ermöglicht ein automatisches Abschalten des Radios, wenn Sie beabsichtigen,
bei eingeschaltetem Radio einzuschlafen.
Benutzung des Einschlaf-Timers:
1. Betätigen Sie einmal die Taste
SLEEP-Symbol im Display. Wenn das Radio ausgeschaltet ist, schaltet es sich automatisch ein.
2. Betätigen Sie einmal die Taste
der Einschlafzeit einzustellen.
Hinweis: Die maximale Einschlafzeit beträgt 120 Minuten.
SLEEP
. Daraufhin erscheinen die Anzeige “120” Minuten und das
SLEEP , um die Anzahl Minuten auf die gewünschte Länge
Einschlafzeit deaktivieren
Zum Ausschalten des Radios noch vor Ablauf der Einschlafzeit betätigen
Sie die
ALARM SLEEP / OFF
-Taste.
Technische Daten
Stromversorgung: AC 230V / 50Hz DC 9V-Batterie (optional – als Backup für die Uhrzeit)
Lautsprecher: 8 Ohm, 1W
Ausgangsleistung: 2 x 0,5W
Frequenzbereich: FM: 87,5 – 108 MHz
AM: 522 – 1656 KHz
Bitte entsorgen Sie elektrische und elektronische Geräte nicht in den Hausmüll.
tBringen Sie sie zu einer entsprechenden Sammelstelle.
tEinige Komponenten in diesen Geräten können
gesundheits- und umweltschädlich sein.
Importiert von BIGBEN INTERACTIVE SA
396, Rue de la Voyette
CRT2 - FRETIN
CS 90414
59814 LESQUIN Cedex - Frankreich
www.bigben.eu
Made in China
RoHS
31
Page 32

RR30
VEILIGHEIDSINSTRUCTIES
LEES DEZE GEBRUIKSAANWIJZING VOLLEDIG DOOR
ALVORENS DEZE EENHEID TE BEDIENEN, EN BEWAAR DIT
BOEKJE VOOR UW ADMINISTRATIE.
NL
Rev 1
RISICO OP ELEKTRISCHE SCHOK
OPGELET
NIET OPENEN
RoHS
32
Page 33

VOORZORGEN BIJ HET GEBRUIK
Het symbool van het uitroepteken in een gelijkzijdige driehoek is een
waarschuwingsteken om de aandacht van de gebruiker te vestigen op de
aanwezigheid van belangrijke gebruiks- en onderhoudsaanwijzingen in de
documentatie die bij het product zit.
Het symbool van de bliksem met het pijltje in een gelijkzijdige driehoek is
een waarschuwingsteken om de aandacht van de gebruiker te vestigen op de
aanwezigheid van elektrische netspanning in het product zelf, die een risico op
elektrische schokken zou kunnen veroorzaken.
CAUTION
RISK OF ELECTRIC
SHOCK
DO NOT OPEN
Om de gevaren te beperken, mag u nooit de kast of de achterkant ervan openmaken.
Doe bij storing een beroep op een vak
man voor elke reparatie. Dit toestel bevat geen
onderdelen die de gebruiker kan vervangen.
Dit toestel werd ontworpen voor een elektrische voeding van 230 volt / 50 Hertz. Trek
de stekker uit het stopcontact als dit toestel langere tijd niet wordt gebruikt.
Dit toestel mag onder geen enkel beding blootgesteld worden aan vocht of regen.
De schakelaar aan/uit van dit toestel werkt op het secundaire circuit van het toestel;
het neemt de spanning dus niet volledig van het toestel wanneer het in de stand ‘uit’
wordt gezet. Om het toestel volledig uit te schakelen, moet u de stekker dus uit het
stopcontact halen.
Zet het toestel niet in werking als u niet hebt gecontroleerd of alle aansluitingen juist
zijn.
Dit toestel moet verplicht in een ruimte komen te staan met voldoende
verluchting. Zo
mag het bijvoorbeeld niet in de buurt van gordijnen, op vast kamerbreed tapijt of in
een gesloten meubel zoals een boekenkast geplaatst worden..
Het toestel mag onder geen enkel beding blootgesteld worden aan rechtstreeks
zonlicht of een warmtebron.
33
Page 34

Netvoeding
Voeding snoer
U kunt uw draagbare radio/cd-speler aansluiten met de juiste aansluiting op het stopcontact.
Controleer of de draadjes in het snoer niet blootliggen.
Batterij back-up
Om te voorkomen dat uw instellingen te verliezen als er een stroomstoring optreedt, plaats een 9 volt
batterij (niet meegeleverd) in het compartiment voor dit doel. Wij adviseren alkaline batterijen voor
langer gebruik.
Opmerkingen:
- Tijdens een stroomstoring, wordt het display niet werken, maar je alarm zal goed geluid op het
geplande time.
- Tijdens een AC stroom uitvalt kan het alarm worden ingesteld wanneer de BUZZER / AUTO / STANDBY /
ON-schakelaar is ingesteld op BUZZER of AUTO
- De back-up autonomie van 8 uur. Als de stroomuitval langer duurt, verliest u uw instellingen, inclusief
alarm tijd.
Klok
Zodra uw apparaat, drukt u op CLOCK SET en bevestig met HOUR of MIN voor een tweede.
(Formaat 24 uur.)
Radio
1. Kies de stand op ON.
2.
Voor een betere ontvangst…
Richt de antenne voor een betere ontvangst.
Richt het toestel voor een betere AM-ontvangst.
Kies de stand BUZZER / AUTO / STANDBY / ON op STANDBY het uitschakelen van de radio.
Opmerkingen:
- Vergeet niet om de selectie SET toets BUZZER / AUTO / STANDBY / ON op BUZZER of AUTO of
om u wakker te worden nu dat je hebt gepland ...
- Regel het VOLUME.
TUNING.
Alarm
Druk op AL1 / AL2 / AL1+2 voor de instelling, kunt u de uren en minuten, dankzij de toetsen HOUR of
MIN.
Kies de stand BUZZER / AUTO / STANDBY / ON op BUZZER of AUTO.
Drukt u op ALARM SET en bevestig met HOUR of MIN voor de alarmtijd.
Controle van de alarm tijd
1. Selecteer het alarm dat u wilt controleren dank aan de toets selectie AL1 / AL2 / AL1 2.
2. Houd de ALARM SET knop om de alarmtijd geselecteerd.
34
Page 35

Opties
Selecteer het alarm AL1 naar het eerste alarm te activeren.
Selecteer het alarm AL2 naar het tweede alarm te activeren.
Selecteer AL1 + AL2 de twee alarmen te activeren.
Opmerkingen:
- Het alarm zal niet afgaan wanneer ON of STANDBY is geselecteerd.
- U kunt de activatie van uw alarm in het bekijken van de "ALARM 1 en / of" ALARM 2 "op de display.
- Het alarm zal niet afgaan wanneer het stopcontact niet is aangesloten.
Buzzer
- Kies de stand BUZZER / AUTO / STANDBY / ON op BUZZER.
- Stel de alarmtijd.
De ringtone van start gaan op het geplande tijdstip.
Radio
1. Selecteer AUTO.
2. Stel de alarmtijd.
3. Regel het VOLUME.
De radio van start gaan op het geplande tijdstip.
Het alarm stoppen
Selecteer STANDBY voor het alarm of radio stoppen.
Het alarm blijft actief en zal de volgende dag ring op het geplande tijdstip.
Alarm STANDBY
Om het alarm te stoppen niet overgaat de volgende dag, stelt de selectietoets BUZZER / AUTO / STANDBY/
ON op STANDBY.
Snooze
Terwijl uw alarm ringen (hetzij via de iPod, radio, enz..) Druk op deze toets om het ontwaken van 9
. Zodra deze 9 minuten verstreken, gaat het alarm opnieuw. U moet de druk op POWER ON /
minuten
STANDBY om u de Snooze functie.
Sleep
1. Selecteer AUTO.
2. Druk op SLEEP. “059” / “SLEEP” ze verschijnen op het scherm.
3. Drukt u op SLEEP en bevestig met MIN voor de radio wordt uitgeschakeld.
4. Druk u op SLEEP en bevestig met HOUR te verhogen of te verlagen een uur.
De maximale functie is 1 uur en 59 minuten.
Sleep STANDBY
Om het functie te stoppen, selecteer ALARM / SLEEP / STANDBY.
Netvoeding: 230V / 50Hz
Back up : 1 x 9V - niet bijgeleverd
Luidspreker : 8 Ohm - 1W - 2 x 0.5W
Radio : FM: 88-108 MHz // AM: 520-1620KHz
35
Page 36

tGoPJFMFLUSJTDIFFOFMFLUSPOJTDIFBQQBSBUFOOJFUJOFFOOPSNBMFWVJMOJTCBL.
tBSFOHzFOBBSFFOWFS[BNFMQVOU.
tSPNNJHFPOEFSEFMFOJOEFzFBQQBSBUVVSLVOOFOHFWBBSMJKL
[JKOWoPSEFHFzPOEIFJEFOIFUNJMJFV.
Geïmporteerd door BIGBEN INTERACTIVE SA
396, Rue de la Voyette
CRT2 - FRETIN
CS 90414
59814 LESQUIN Cedex - Frankrijk
www.bigben.eu
Made in China
RoHS
36
 Loading...