

Page 1
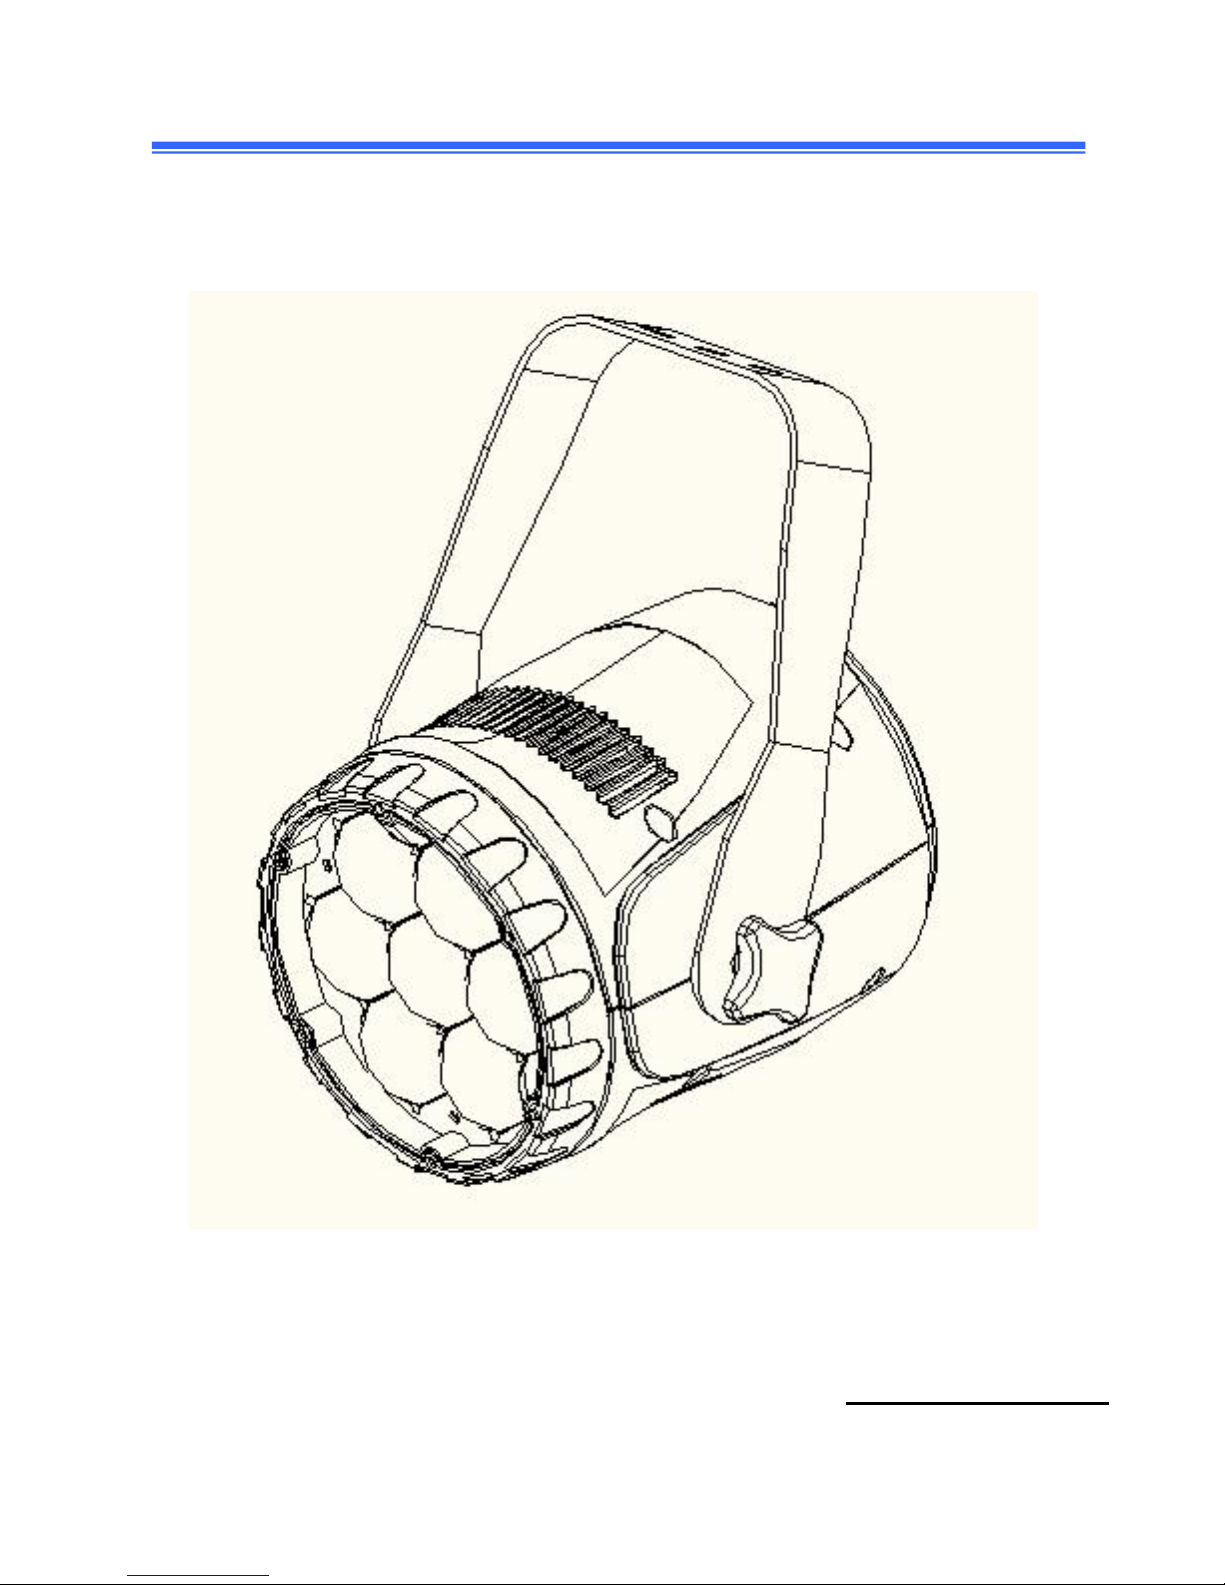
7*4in1 Osram 15w beam zoom par
User manual
Please
rea
d the
instru
ctions
carefully before use
Page 2

2
TABLE OF CONTENTS
1. S
afety Ins tructions
........................................................................................2
2. Tec hnical Specifications
...............................................................................4
3. How To Control The Unit
...........................................................................5
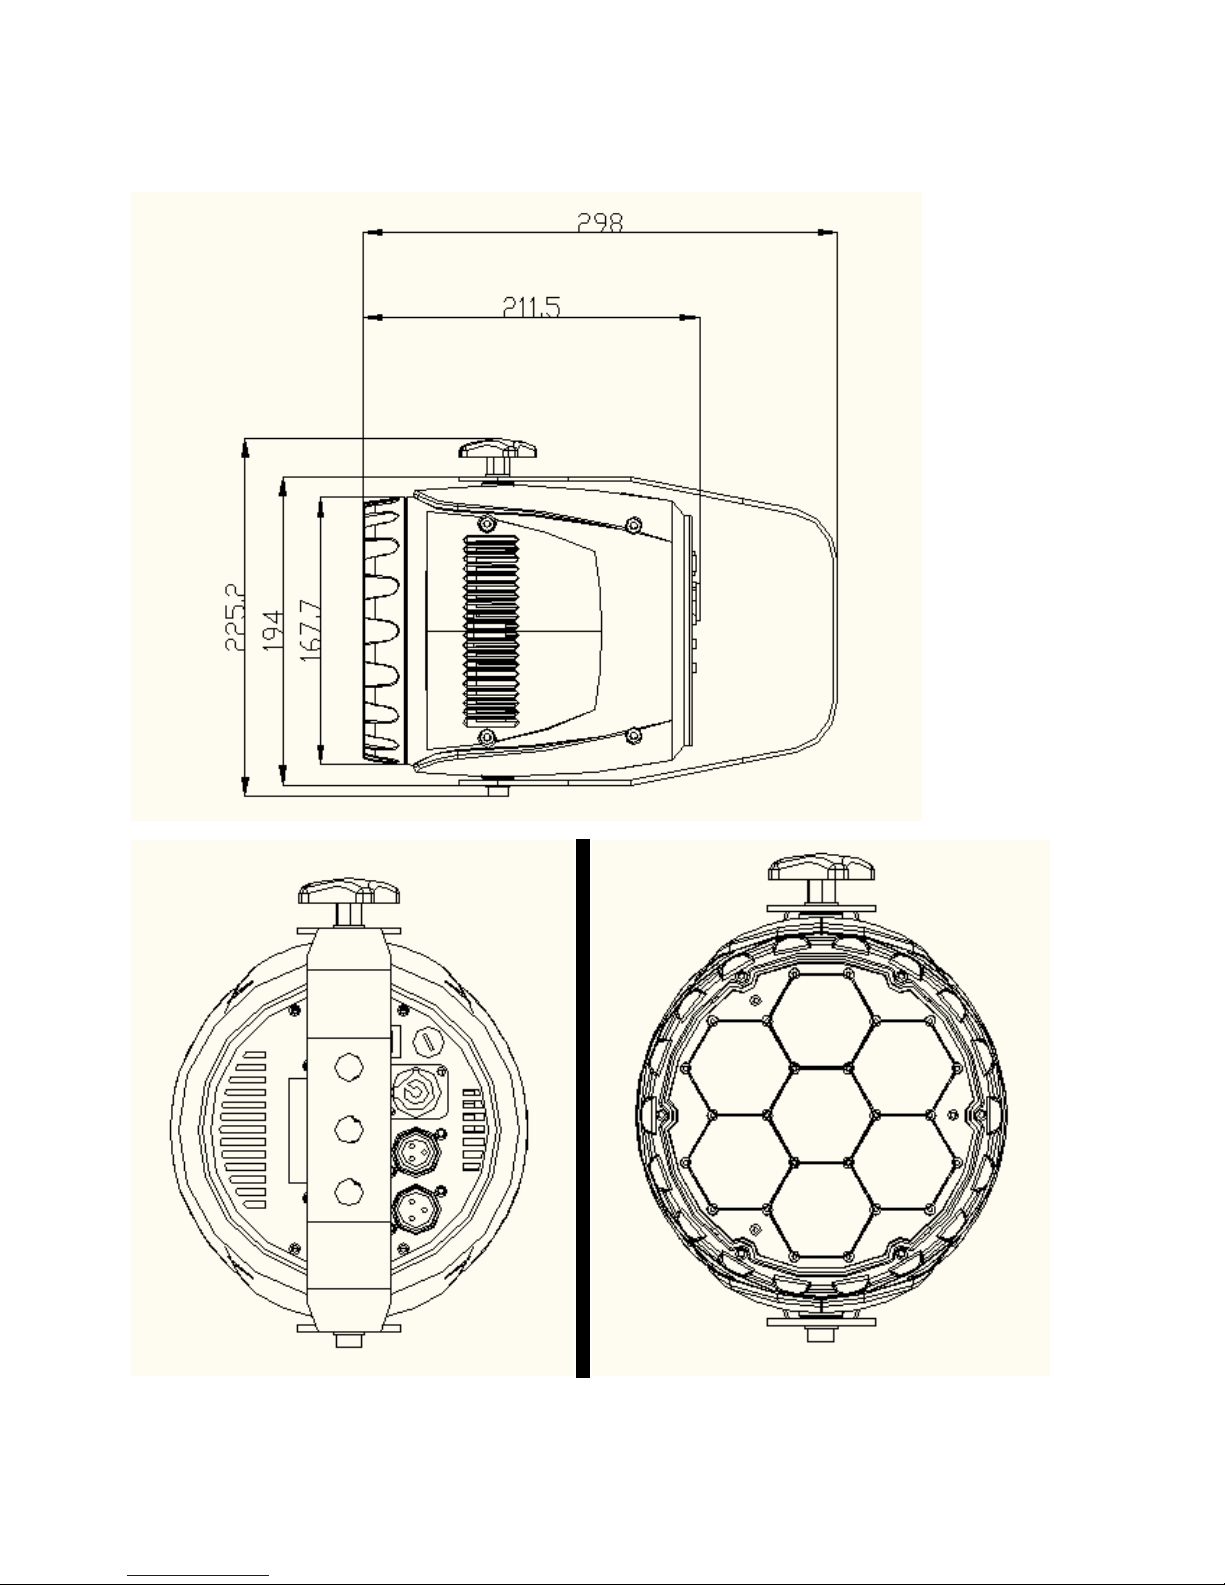
4.SHAPE
......................................................................................................... 8
5. Trouble shooting
..........................................................................................9
6. Fixture Cleaning
........................................................................................ 10
statement
The product has well capability and intact packing when leave
factory. All of the user should comply with warning item and manual, any
misuse cause of the damages are not included in our guarantee, and
also can not be responsible for any malfunction & problem owing to
ignore the manual.
1. S
afety Instructions
Please keep this User Guide for future consultation. If you sell the unit to another
user, be sure that they also receive this instruction booklet.
Unpack and check carefully there is no transportation damage before using
the unit.
Before operating, ensure that the voltage and frequency of power
Page 3

3
supply match the power requirements of the unit.
It’s important to ground the yellow/green conductor to earth in order
to avoid electric shock.
The unit is for indoor use only. Use only in a dry location.
The unit must be installed in a location with adequate ventilation, at
least 50cm from adjacent surfaces. Be sure that no ventilation slots are
blocked.
Disconnect main power before replacement or servicing.
Make sure there are no flammable materials close to the unit while operating as
it is fire hazard.
Use safety cable when fixes this unit. DO NOT handle the unit by taking its head
only, but always by taking its base.
Maximum ambient temperature is Ta: 40℃. DO NOT operate it where the
temperature is higher than this Unit surface temperature may reach up to 85℃.
DO NOT touch the housing bare-hand during its operation. Turn off the power
and allow about 15 minutes for the unit to cool down before replacing or serving.
In the event of serious operating problem, stop using the unit
immediately.Never try to repair the unit by yourself. Repairs carried out by
unskilled people can lead to damage or malfunction. Please contact the
nearest authorized technical assistance center. Always use the same type
spare parts.
DO NOT touch any wire during operation as high voltage might be causing
electric shock.
Warning:
To prevent or reduce the risk of electrical shock or fire, do not expose the unit to
rain or moisture.
DO NOT open the unit within five minutes after switching off.
Page 4

4
The housing, the lenses, or the ultraviolet filter must be replaced
if they are visibly damaged.
Caution:
There are no user serviceable parts inside the unit. DO NOT open the housing
or attempt any repairs yourself. In the unlikely event your unit may require
service, please contact your nearest dealer.
Installation:
The unit should be mounted via its screw holes on the bracket. Always ensure that
the unit is firmly fixed to avoid vibration and slipping while operating.
And make sure that the structure to which you are attaching the unit is secure
and is able to support a weight of 10 times of the unit’s weight. Also always use a
safety cable that can hold 12 times of the weight of the unit when installing the
fixture.
The equipment must be fixed by professionals. And it must be fixed at a place
where is out of the touch of people and has no one pass by or under it.
2. Technical Specifications
Light Sources: led 7*4in1 15w
Power Consumption: 100W
Zoom angel:7-60 degree
Power Voltage: AC100-240V, 50/60Hz
Packing Dimension:440*350*360mm
Net Weight: 5kg
Gross Weight:5.5kg
Control
DMX Channel: 12 Channel
Control Modes: DMX512
Page 5
5
Construction
Display: Digital Display Panel
Data In/Out socket: 3-pin
Protection Rating: IP20
3. How To Controlit
The
DM
X512 is
wid
ely used
in intellig
ent
lighting
con
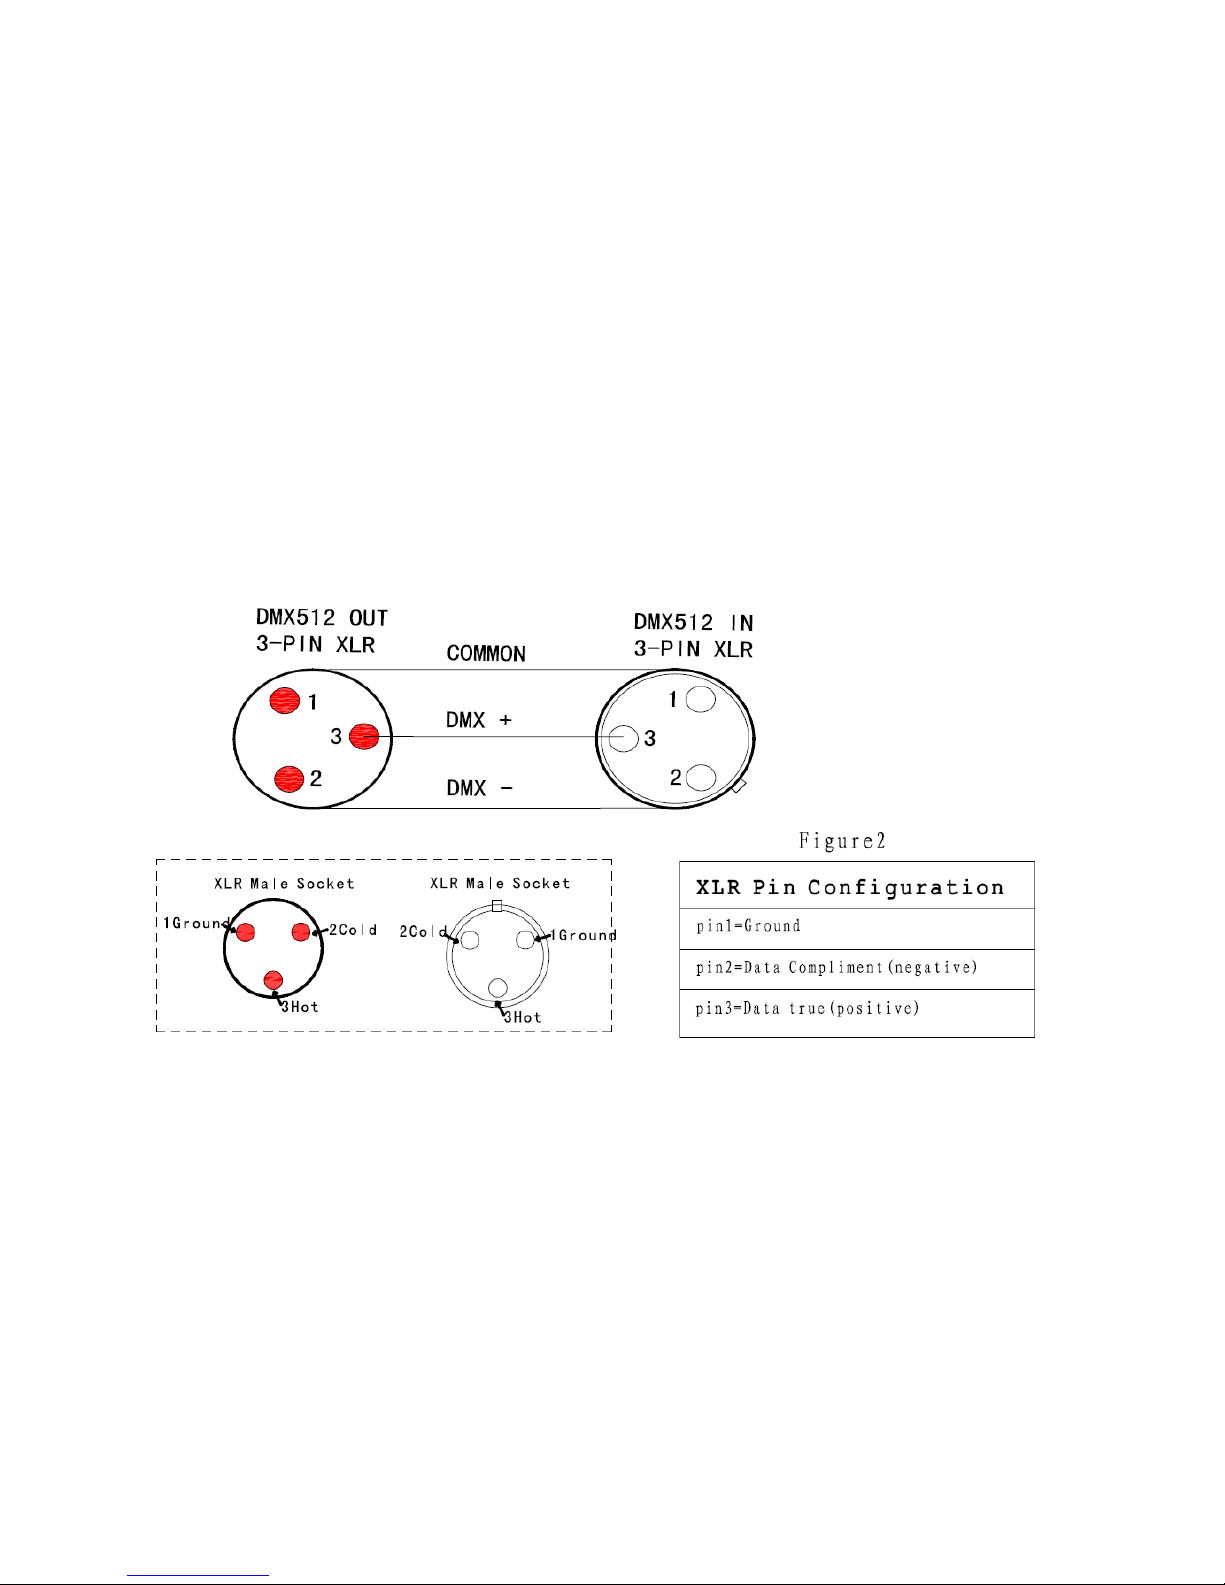
trol,with a DMX 512
controller.connect several lights together,dmx in and dmx out,
3
pin
XLR
connec tors:
Pin
1: GND,
Pin
2:
Negative signal (-), Pin
3: Pos
itive si
gna
l
(+)
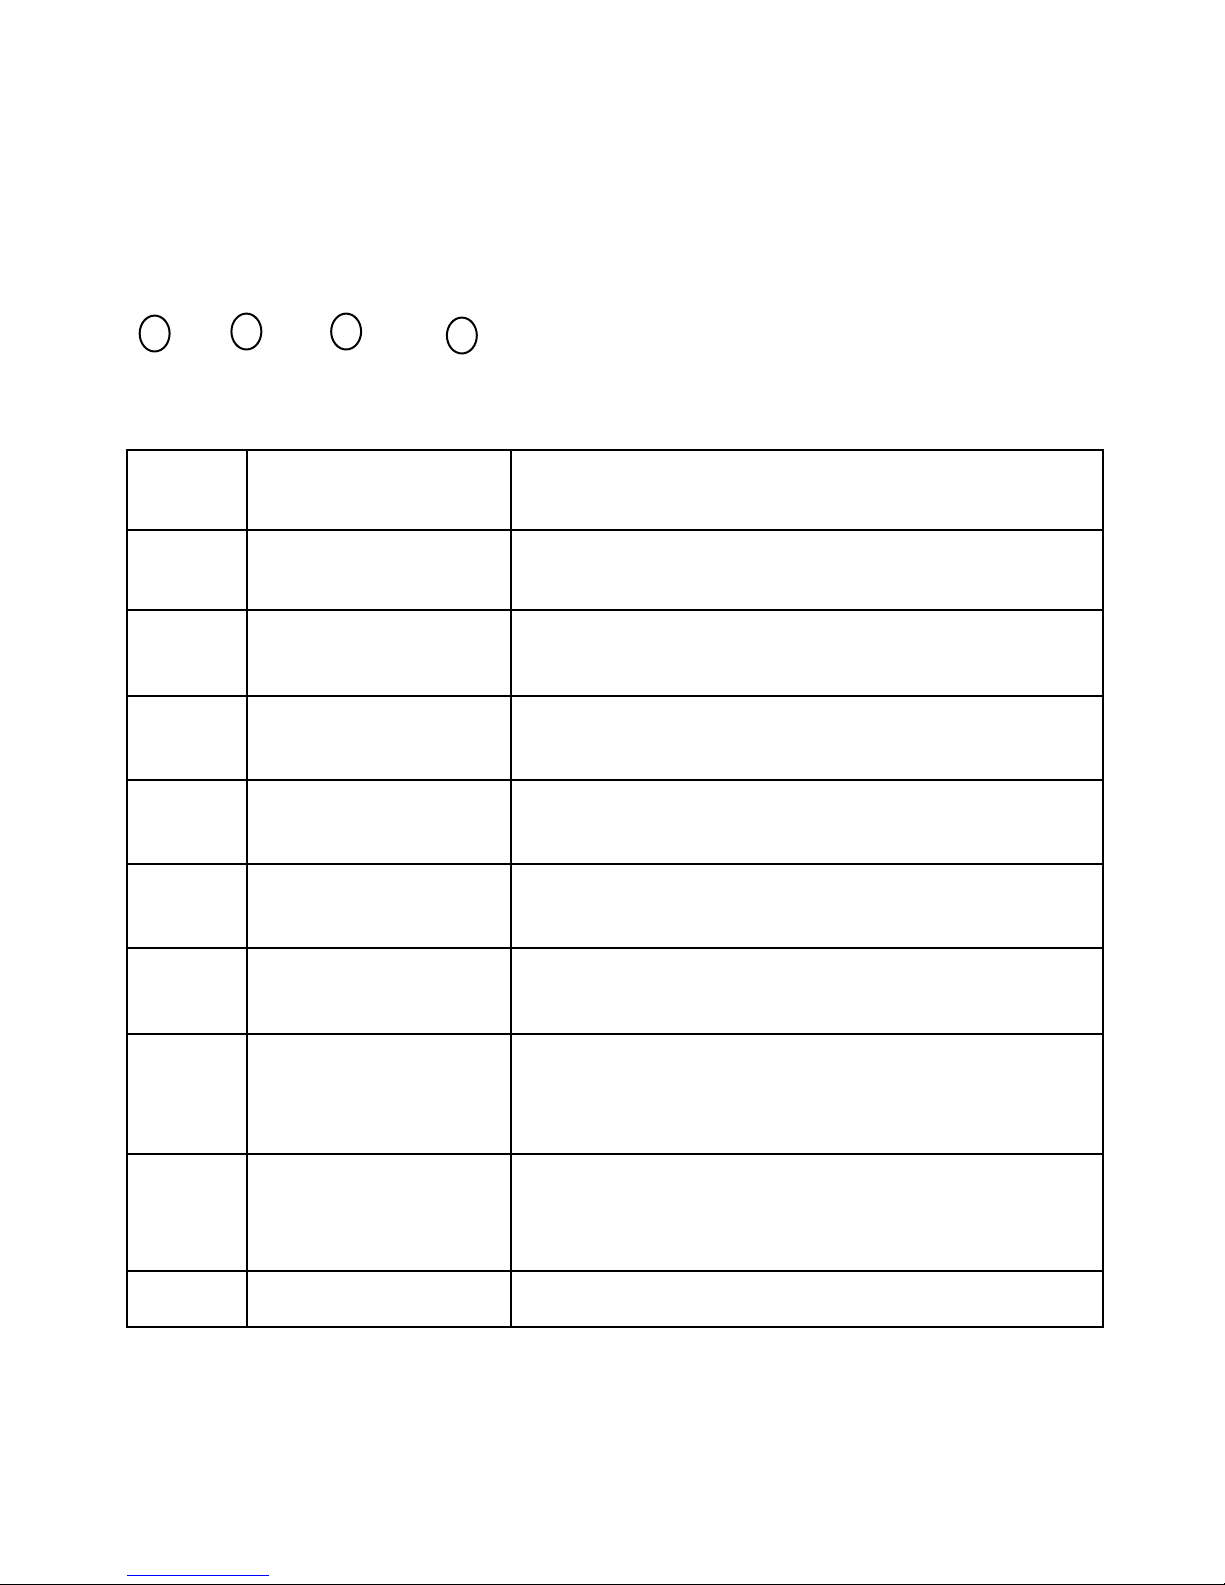
Display:
MENU To select the programming functions
DOWN To go backward in the selected functions
uP To go forward in the selected functions
ENTER To confirm the selected functions
Set DMX Ad d res s Cod e
Page 6
6
1 Press "Menu" to "Set DMX Address",and press"ENTER" keys to enter into
2 Show "Set DMX Address DMX Address:001",Press the "UP and DOWN"
keys to amended
3 Press "ENTER"keys to save and Exit,Press the"MENU"Keys does not save and
Exit
Menu Up Down Enter
Menu
Funcation
D001
DMX addr set 001
Press up and down button to set the addr
code, press Enter button to save
R255
Red brightness
adjustment
Press up and down button to set the
brightness , press Enter button to save
G255
Green brightness
adjustment
Press up and down button to set the
brightness , press Enter button to save
B255
Blue brightness
adjustment
Press up and down button to set the
brightness , press Enter button to save
H255
Blue brightness
adjustment
Press up and down button to set the
brightness , press Enter button to save
Pr01
Built-in program set
01
Press up and down button to choose the
program , press Enter button to save
SP01
Built-in
program speed set
16
Press up and down button to choose the
program speed , press Enter button to save
TEST
Test mode
Press up and down button to choose Music
or Auto Run mode
Reset
Reset
Press Enter button to reset the fixture
Page 7
7
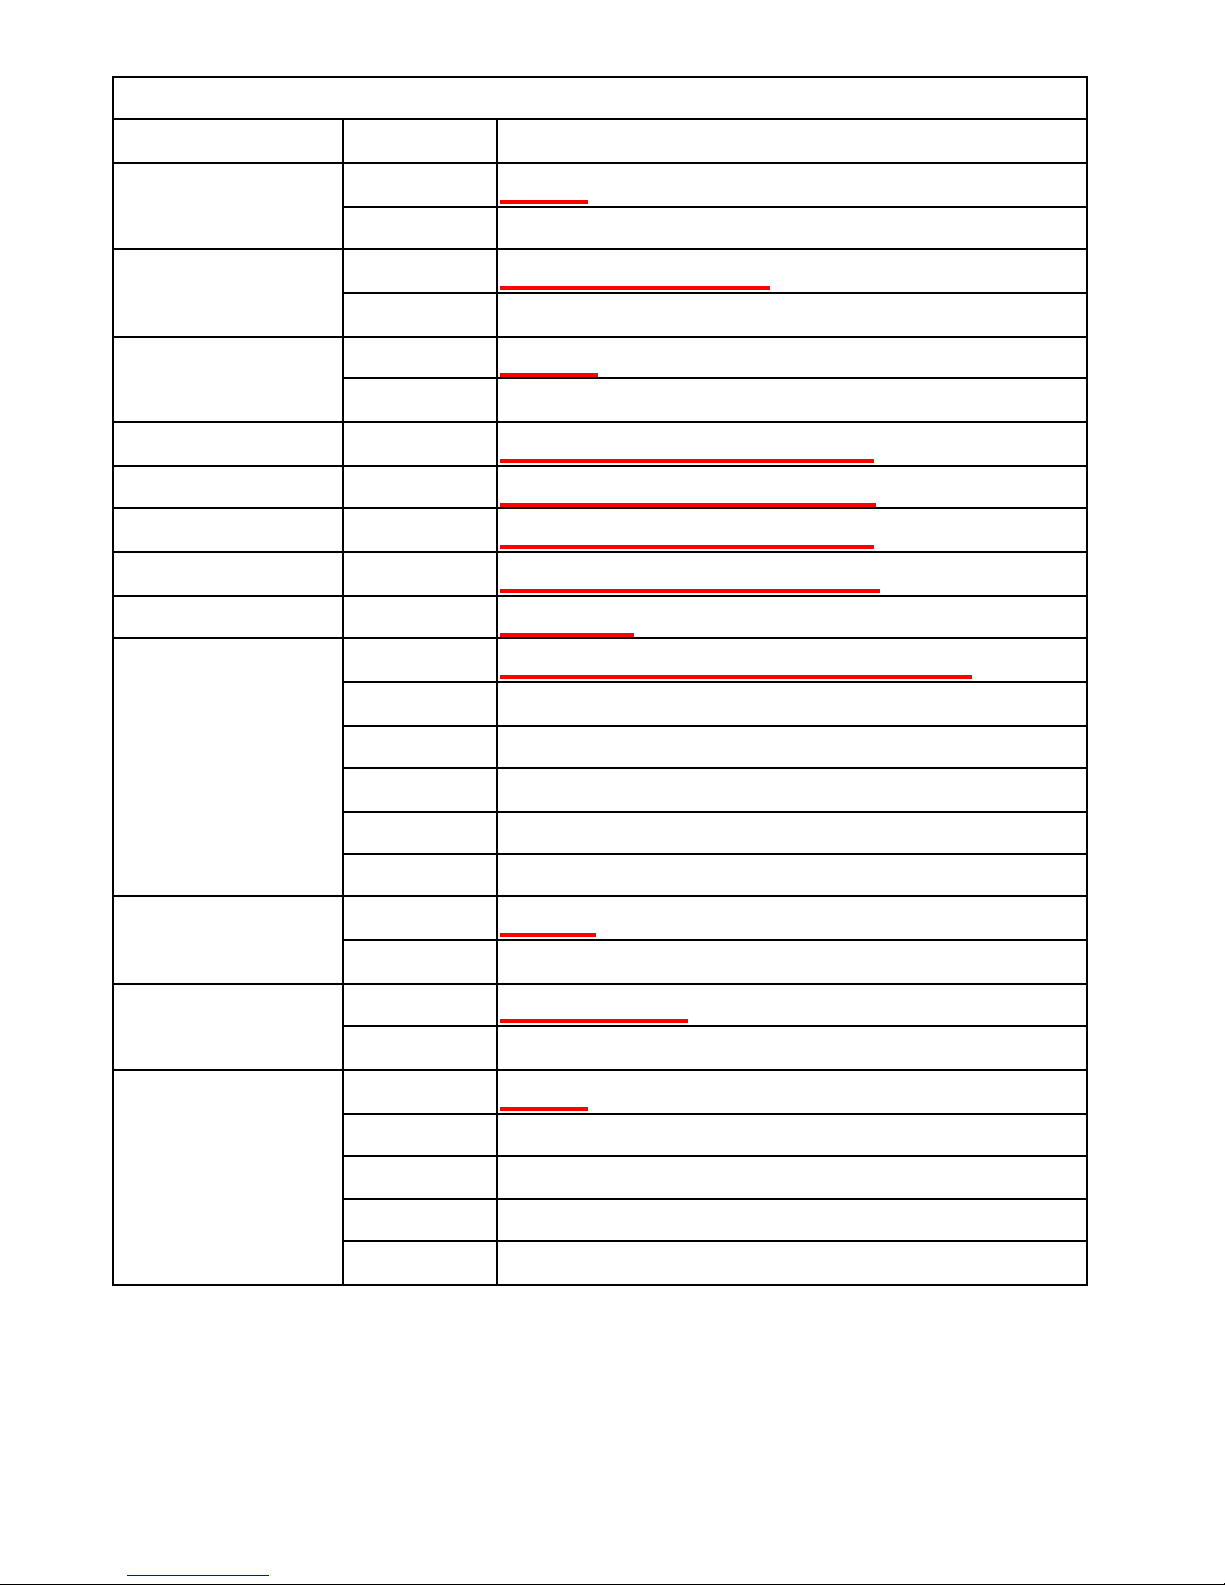
DMX channel´s functions and their values (12 DMX channels):
Mode/Channel
Value
Function
1
0-255
Zoom
From narrow to wide
2
0-255
Dimmer intensity:
Intensity 0 to 100%
3
0-255
strobe
Strobe effect slow to fast
4
0-255
R dimming slow to fast
5
0-255
G dimming slow to fast
6
0-255
B dimming slow to fast
7
0-255
W dimming slow to fast
8
0-255
Rainbow
9
Music mode or Auto Run mode
0-60
Show the effect from CH1-CH8
61-120
Jump change
121-180
Gradual change
181-244
Jump change,gradual change, strobe
245-255
Music mode
10
Speed
0-255
Fast to slow
11
Zoom speed
0-255
Fast to slow
12
Reset
0-64
No funcation
65-128
Auto run
129-192
Music mode
193-255
Reset
Page 8
8
4.SHAPE
Page 9

9
5. Trouble shooting
F
ollow
ing are a few co
mmon pr
obl ems
that may
occu
r d
uring op era
tion. Here are
some sugges
tions for
easy
troub
leshooting
:
A. The un
it
does no
t work, no li
ght and the fan does no
t work
1. Check
the
connec t
ion of p
ower and ma
in fu
se.
2.
M
easure
the m
ains
volt
age on
the main
connector.
3. Check
the power on
LED.
B. Not responding to DMX con
troll
er
1.
DMX
LED shou
ld be
on.
If not,
check
DMX
connectors, cables
to
see
if link
pr
ope
rly.
2.
If the DMX LED is on
and no response to
the ch
annel, check
the addr
ess
s
etti
ngs and
DMX polarity.
3.
If
you have inter
mittent DMX
signa
l pr
obl ems, check
the p
ins on connectors
or on
PCB
of the unit or
the
previous
one.
4. Try
to
use another
DMX controller.
5. Check
if the DMX cab
les run nea
r or run alongside to high
voltage cables
that
may
cause damage
or in
terference
to DMX inter
face
circuit.
C. One
of
the channels is
no
t work
ing wel
l
1. The stepper
motor might be
da maged
or
the cable connec ted
to the
PCB is
br
oken.
2.
The
m
otor’
s dr
ive IC
on
the PCB migh
t be out of
co
ndition.
Page 10

10
6. Fixture Cleaning
The cleaning o
f internal
and external optical lenses a
nd/or mirr
ors mus
t be carr
ied
ou
t p
eriodica
lly to optimize light output.
Clea
ning fr
equency depends on
the
environment
in which the f
ixture operates: damp, sm
oky o
r partic
ul a
rly dirty
s
urr
ounding can cause greater
accumulation of di rt
on
the unit’
s optics.
Clean
with soft
clo
th
using normal glass
cleaning
fluid.
Always
dry the
parts caref
ully.
Clean
the
externa
l optics at
least every 20 days. Clean
the in
terna
l optics at
least every 30/60 days.
 Loading...