

Beurer AS 50 User guide [ml]
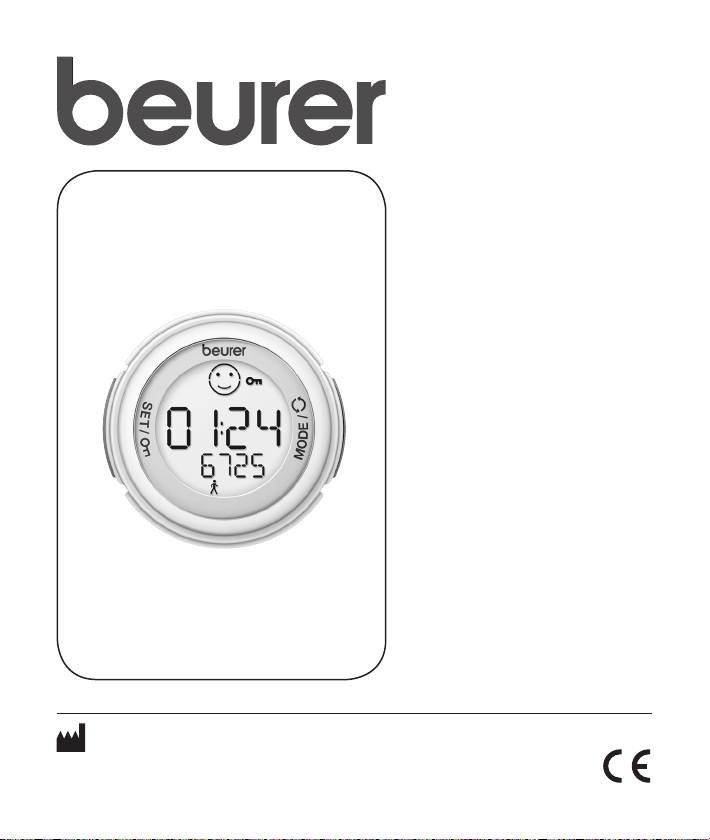
AS 50
D
Aktivitätssensor
Gebrauchsanleitung
G
Activity-sensor
Instruction for Use
Beurer GmbH • Söinger Str. 218 • D-89077 Ulm (Germany)
Tel.: +49 (0)7 31 / 39 89-144 • Fax: +49 (0)7 31 / 39 89-255
www.beurer.de • Mail: kd@beurer.de


TABLE OF CONTENTS
Scope of delivery.............................................................................2
Important Notes ............................................................................... 3
Activity, health and fitness ............................................................. 5
Interesting facts about the activity sensor....................................6
Functions of the activity sensor.....................................................9
Getting started ............................................................................... 10
General operation of the activity sensor.....................................14
Buttons on the activity sensor ..................................................14
Display...................................................................................... 15
Power saving mode..................................................................16
Key lock....................................................................................16
Basic settings ................................................................................17
Overview ..................................................................................17
Recording the activity ................................................................... 20
Overview ..................................................................................20
Display activity data.................................................................. 21
Setting the sensitivity of the device for pace counting.............. 22
Switch off pace measurement .................................................. 23
Storage function ............................................................................ 24
EasyFit software ............................................................................ 25
Technical specifications and batteries........................................26
Frequently asked questions and answers ..................................26
List of abbreviations......................................................................29
Index ...............................................................................................30
G
B
1

SCOPE OF DELIVERY
Activity sensor
Belt clip
Wristband
PC Software EasyFit (CD)
and PC interface cable (USB)
In addition:
Operating instructions
2
IMPORTANT NOTES
Please carefully read through these operating instructions, keep it for
future reference and also make it available to others. Pay attention to
all information in these operating instructions!
Activity
Did you know that walking at least 10,000 paces or exercising for
half an hour daily (depending on the person's health condition,
less for older persons, more for children) is good for your health?
The activity sensor is designed as a running sensor. It measures
your paces when you walk or jog and displays your daily amount
of exercise.
Application
The activity sensor is only intended for private use.
The activity sensor may only be used in the manner outlined in the
operating instructions. The manufacturer is not liable for damages
that are caused by improper or incorrect use.
The activity sensor should be temporarily deactivated for specific
activities such as cycling and driving a car to avoid incorrect measurements.
Please refer to the Beurer HR Monitors to record the training and
measure the pulse of any other kind of sport. As both the EasyFitcompatible Beurer HR Monitors as well as the Beurer Activity
Sensor can transmit the values to the EasyFit Software, comprehensive evaluations are possible for all your physical activities.
G
B
3
Cleaning and care
From time to time, clean the activity sensor carefully with soapy water. Do not put the device in water. In addition, once in a while the
back of the device in particular should be wiped with a damp cloth.
Repair, Accessories and Disposal
Prior to use, you have to ensure that the activity sensor is free of
damage. If in doubt, do not use the activity sensor and consult
your sales representative or the customer service address provided.
Repairs may only be conducted by customer service or authorized
dealers. Please do not in any case attempt to repair the device! In
the case of complaints, please consult your dealer or the service
address. If you have a complaint, please replace the battery beforehand.
Use the device only with the original accessories of Beurer.
Avoid contact with sunscreen or the like since these can cause
damage to the imprint or plastic components.
The warranty expires if the screws are unscrewed or due to im-
proper use.
Please dispose the activity sensor and used batteries
of the device in accordance with Waste Electric and
Electronic Equipment 2002/96/EC - WEEE. For inquiries, please contact the municipal authority responsible
for disposal in your area.
4
ACTIVITY, HEALTH AND FITNESS
Exercise is a prerequisite for healthy living. Physical activity keeps
you fit and reduces the risk of cardiovascular diseases. If you exercise, it also helps you to reduce weight and you will find that it stabilizes your psychological well-being.
Physical activities refer to all energy consuming exercises. A significant share includes daily activities such as walking, cycling, climbing
stairs and housework. The Beurer Activity Sensor is useful for assessing and recording your daily physical activity objectively. In this
way it can also motivate you to increase your exercise in everyday
life. At least 7,000 - 10,000 paces or 30 minutes exercise a day
would be ideal (Source: acc. to WHO, Dr. Catrine Tudor-Locke, Dr.
David R. Bassett jr.).
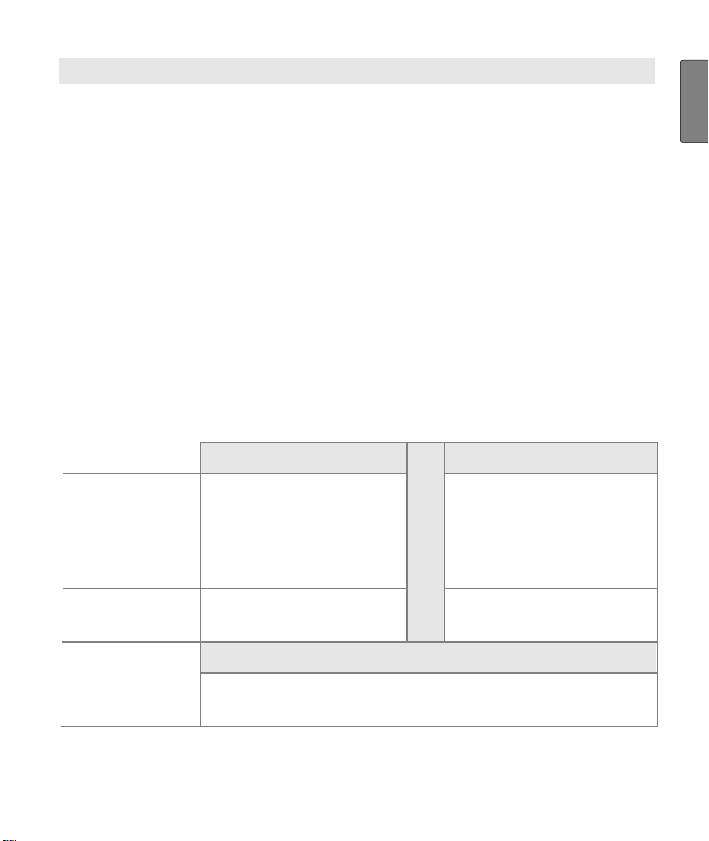
Physical activity recommendations for adults (based on the WHO
recommendations, 2002):
Average intensity High intensity
Description For example:
Dancing, gardening,
housework or brisk
walking
Activity time 30 minutes a day, 5
days a week
AND
Muscle build-
up
8-10 exercises with 8-12 repetitions each, 2 days a
week
For example:
Running, aerobics,
competitive sports
OR
such as football
20 minutes a day, 3
days a week
G
B
5

INTERESTING FACTS ABOUT THE ACTIVITY SENSOR
This activity sensor enables you to check your daily amount of exercise. It gives you an overview of your daily physical activity, determines the number of your paces and thus calculates your calorie
consumption.
The activity sensor has a dual display function which can show you,
for example, the time and number of paces simultaneously. You can
specify your typical pace length with the basic settings, so that the
activity sensor is able to calculate your activity data from the walking/running speed. Depending on what type of exercise person you
are or what type of activity you do - slow, gentle movements or quick
hard movements - the sensitivity of the activity sensor can be adjusted in five steps.
Reward system
Your activity sensor has a "reward system", which gives a continual
assessment of your ongoing daily activities. The reward system is
divided into three activity levels. Depending on the level, the device
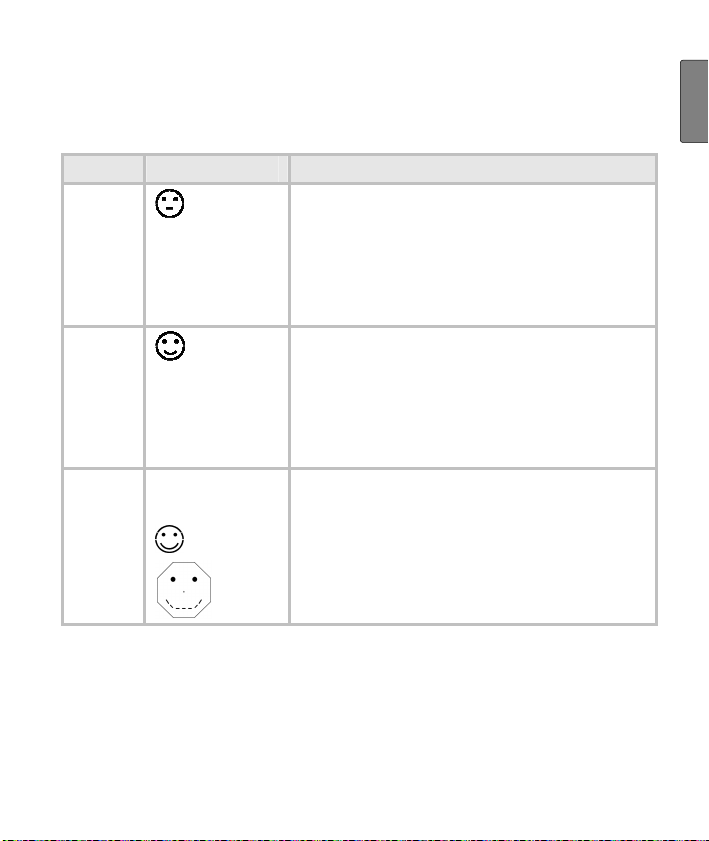
shows the corresponding symbol.
The following table shows the three levels of activity. The levels are
based either on the number of paces or the duration of the activity. In
turn, the number of paces are divided into two types of activities:
"Quick walking": more than 90 paces per minute
"Normal walking": less than 90 paces per minute
During the walking period it is possible to take breaks of 2 minutes
each which do not interrupt the evaluation.
Example: You have been walking quickly for 5 minutes in one go
and now want to cross a road. You have to wait at the traffic lights
for approx. 2 minutes before you can cross it. You then walk quickly
again for 5 minutes in one go. Your activity sensor now shows you
6
an activity time of 10 minutes. Even though you had a break of 2
minutes at the traffic lights and did not walk for 10 minutes in one go,
you have reached the next activity level.
Level Symbol Activity
1
3.333 paces "quick walking" and
"normal walking" or
10 minutes "quick walking" in one go.
A break of up to 2 minutes is possible.
G
B
2
another 3.333 paces "quick walking"
and "normal walking" or
another 10 minutes "quick walking" in
one go. A break of up to 2 minutes is
possible.
3
Alternatively
and
yet another 3.333 paces "quick walk-
ing" and "normal walking" or
yet another 10 minutes "quick walk-
ing" in one go. A break of up to 2
minutes is possible.
7

Analysis of the Training
You can transmit your training data via your activity sensor's PC
interface (mini-USB on the side of the device) and evaluate it there.
The required accessories, consisting of a CD with the PC software
EasyFit and a communication cable, are included in the scope of
supply.
The PC software
sor and offers a variety of evaluation options. In addition, EasyFit
provides useful calendar and administrative functions, which also
support optimal training over longer periods of time. Using the software, you can also control and monitor your weight management.
EasyFit controls data transfer from the activity sen-
8
FUNCTIONS OF THE ACTIVITY SENSOR
Activity functions
Number of paces
Total time of activity
Reward system
Calorie consumption in [kcal]
(based on the walking/running
speed)
Fat burning in [g]
(based on the walking/running
speed)
Automatic deletion and storage
of the activity values every day
at 00:00 hours
Storage function for 14 days
Total time of activity
Number of paces
Calorie consumption
Fat burning
Your stored data can only be read out via the EasyFit software. Only the current day's data can be recalled directly on
the activity sensor.
Time functions
Time of day
The date is adjustable and is
transmitted to the PC via the
EasyFit software. The date
is not visible on the display.
Settings
Weight in [kg]
Pace length for walking and
running in [cm]
Sensitivity of the device for
pace counting (5 levels)
G
B
9
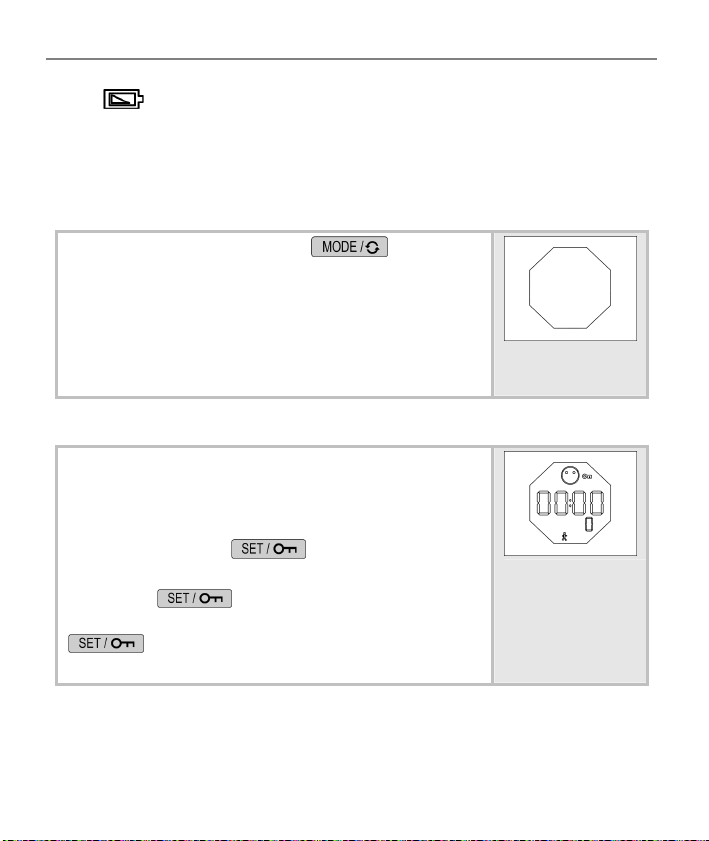
GETTING STARTED
Insert battery/Change battery
If you do not want to insert or change the battery yourself,
please bring it to a watchmaker.
The battery compartment of the activity sensor is located on the back
of the monitor. Place the monitor with the front facing downwards on
a soft surface and insert the battery as follows:
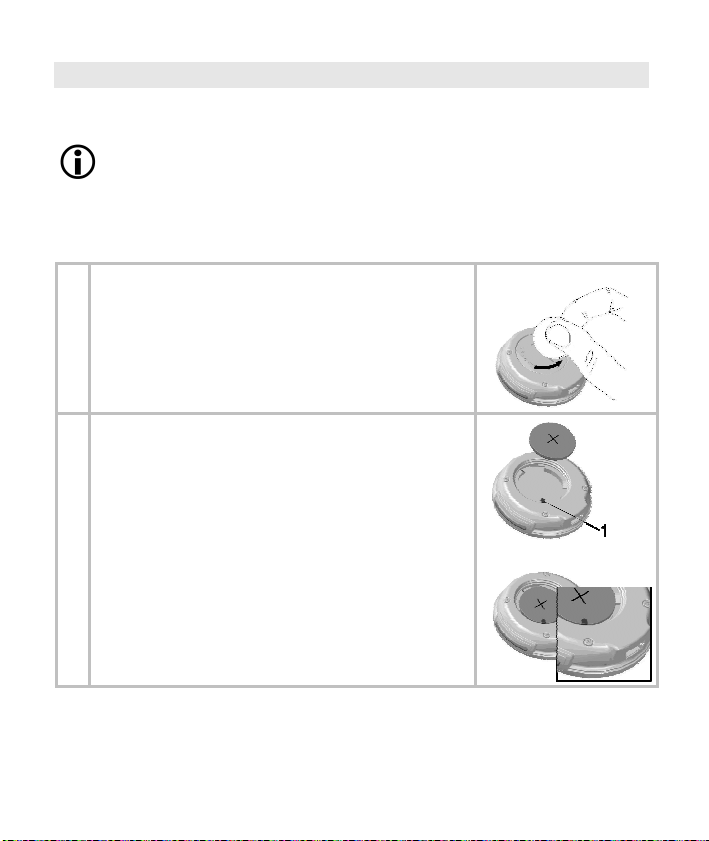
1
Using a coin, turn the lid of the battery
compartment anticlockwise until the lid
comes off.
Remove the battery from the battery compartment with the aid of a pointed, nonmetallic tool, e.g. toothpick.
2
Put the battery into the battery compartment in such a way that the battery is on
top of the spring underneath the clip (1) and
the positive pole (+) faces upwards. Lock
the battery into place.
Check the seal. The seal has to lie flat in
the casing and there must be no visible
damage to it. The impermeability cannot be
guaranteed otherwise.
10
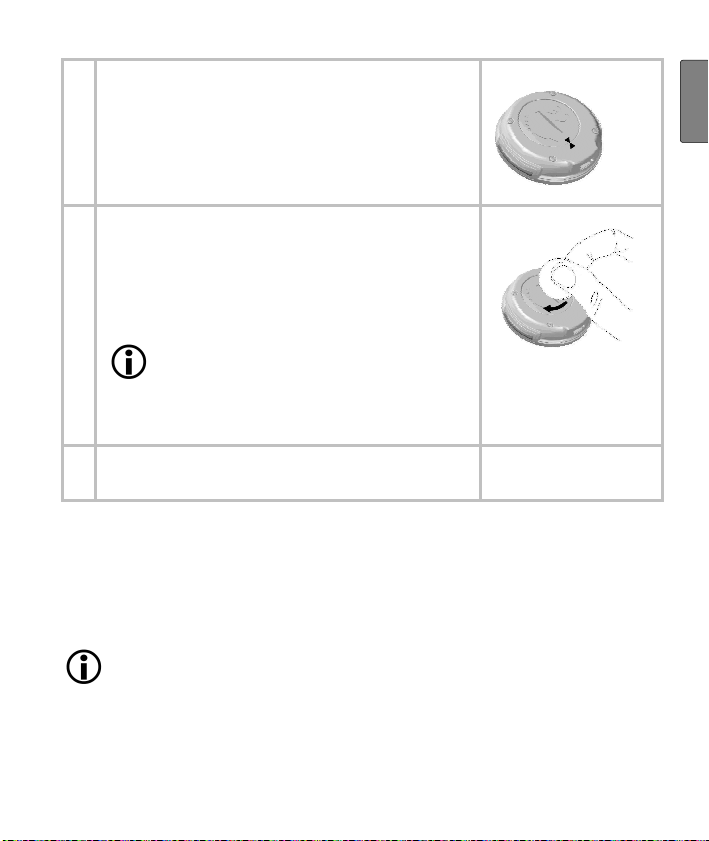
3
Put the lid of the battery compartment into
the battery compartment so that it is flush
with the casing.
Pay attention that the arrow on the lid and
the arrow on the casing point against each
other.
4
To guarantee continued impermeability,
tighten the lid clockwise with the coin until it
stops.
Caution! Do not continue to turn
the lid, if it cannot be turned into
the battery compartment without
resistance. Repeat the process
after changing the position of the
lid. The catch mechanism could
be damaged otherwise.
5
Your activity sensor switches automatically
into the setting menu.
Attaching the activity sensor
There are various possibilities to wear the activity sensor: on your
belt/trouser waistband (recommended wearing method), in your trouser pocket or as a wristwatch.
Pay attention to adjust the sensitivity of the device differently
depending on how it is attached. We recommend wearing the
activity sensor on your belt to get the most accurate results of
the device as possible!
G
B
11
Only change between belt clip and wristband if necessary.
Changing too frequently wears out the material of the wristband.
Wearing the activity sensor on your belt/trouser waistband
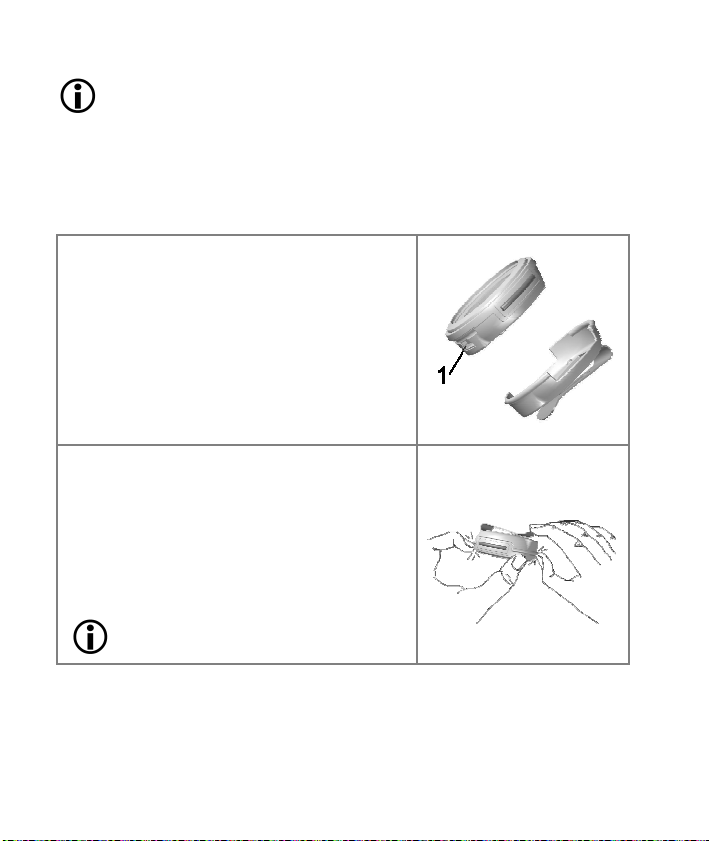
You can attach your activity sensor to your belt or your trouser waistband with the supplied belt clip. To do this, put the activity sensor into
the belt clip as follows:
Put the casing into the belt clip. Pay
attention that the USB connector (1) is
fixed on the side of the clip with the
notch.
The casing has to be firmly and directly
attached to the belt clip, it must not be
loose. Otherwise there is a risk of the
device detaching itself and possibly
getting damaged.
Removing the activity sensor from the
belt clip:
There is a small groove between the
belt clip and the activity sensor. Put
your fingernail into this groove and
press slightly to separate the belt clip
and the activity sensor.
Do not pull on the buttons! Nicht an den Knöpfen ziehen!
12
Carrying the activity sensor in your trouser pocket
Basically you can also carry your activity sensor in your trouser
pocket.
Do not carry the activity sensor in the back pocket of your
trousers to prevent damages to the device or injuries by sitting
on it unintentionally.
Wearing the activity sensor as a wristwatch
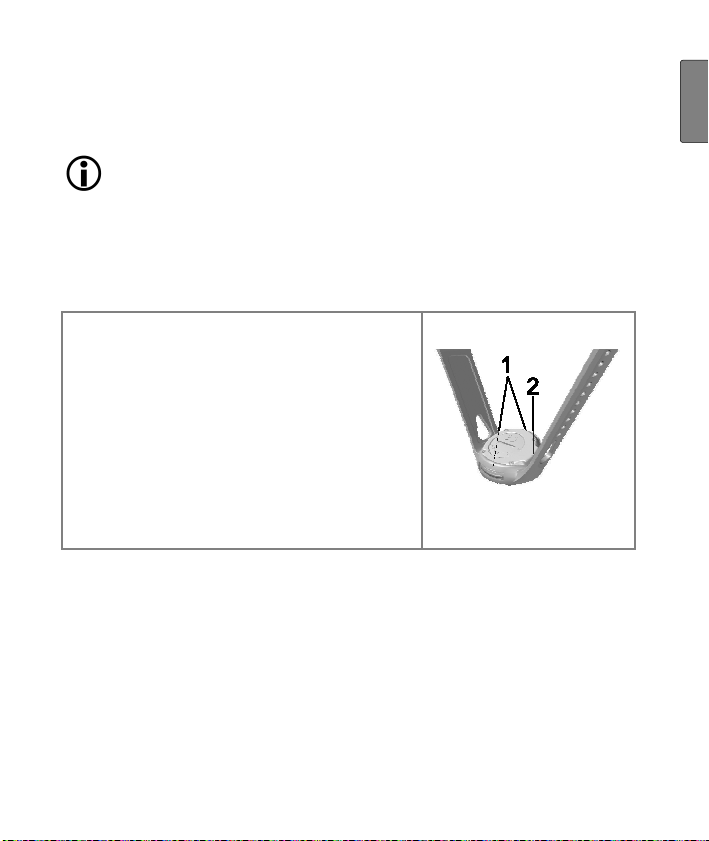
Your activity sensor can be worn on your wrist like a wristwatch. To
do this, please use the wristband supplied. To attach the device to
the wristband proceed as follows:
Put the casing into the wristband. Lift
the bars (1), which enclose the buttons
on the side, carefully over the buttons.
Pay attention to the position of the USB
connector (2).
The casing has to be firmly and directly
attached to the wristband, there must
be no gap. Otherwise, there is a risk of
the activity sensor's casing detaching
itself.
Pace counting on the activity sensor
As soon as you have run at least 10 paces in one go, the number of
paces and the activity time are updated on the display. These initial
paces are taken into account for pace counting.
G
B
13
GENERAL OPERATION OF THE ACTIVITY SENSOR
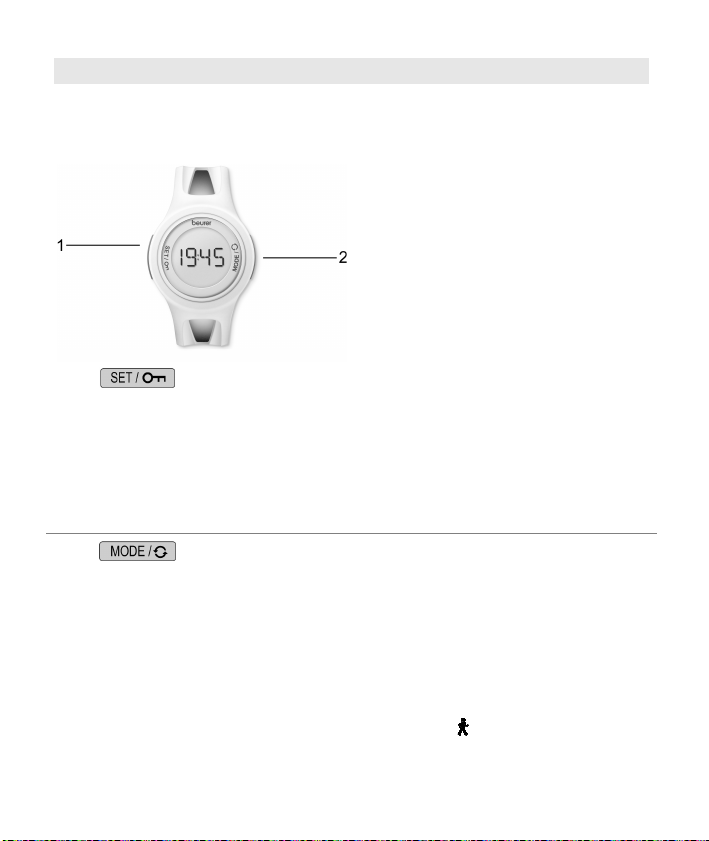
Buttons on the activity sensor
1
Switches between the different settings in the
setting menu.
By pressing the button for 5 seconds, the key
lock is activated.
By pressing the button for 5 seconds, the key
lock is deactivated.
2
Sets values. Keep pressed to accelerate input
of the values.
Switches between the displays of the activity
values.
Pressing the button for 5 seconds in the activity
menu (Display: Activity time - Total number of
paces) switches the pace counter off (no symbol) and on again (symbol
).
14
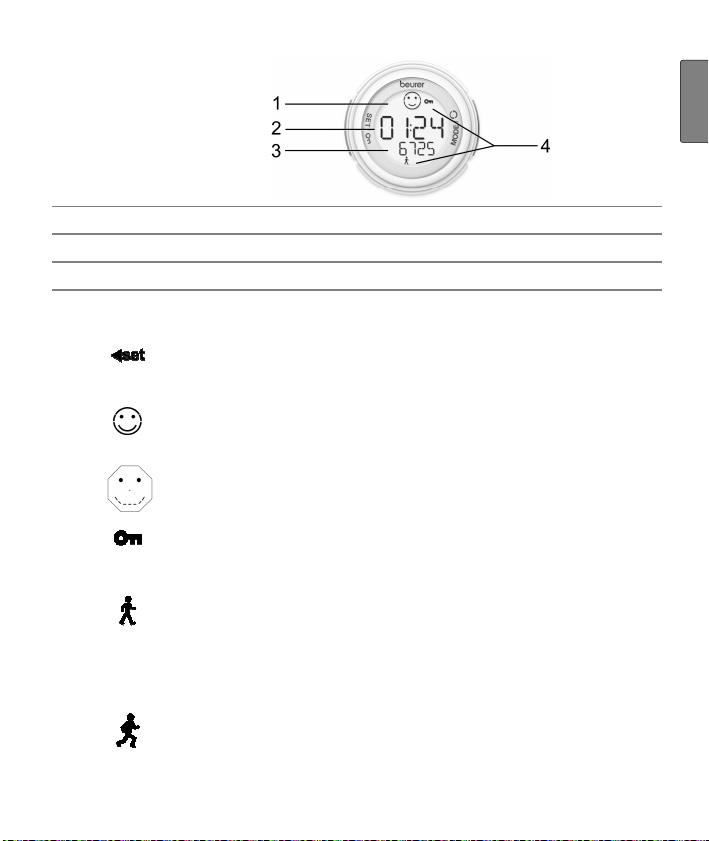
Display
1
Top line
2
Middle line
3
Bottom line
4
Symbols:
Switches between the different setting displays in the
setting menu (arrow flashing).
Symbols of the reward system, they change depending
on the activity level (once a new activity level has been
reached, the symbol flashes for 1 minute). Once the
highest activity level has been reached, the display
switches between the big and the small Smiley. Press
any button to stop the display switching.
Key lock is activated.
Man walking icon. This symbol is displayed if the time for
"normal walking" (less than 90 paces per minute) is
longer that the time for "quick walking" (more than 90
paces per minute) or the number of paces for "normal
walking" is bigger than 50% of the total paces.
Man running icon. This symbol is displayed if the time for
"quick walking" (more than 90 paces per minute) is
longer that the time for "normal walking" (less than 90
paces per minute) or the number of paces for "quick
walking" is bigger than 50% of the total paces.
15
G
B
To continue getting exact results, the battery has to be
replaced as soon as possible after this symbol has been
displayed.
An explanation of the display abbreviations can be found in the list of
abbreviates at the end of the operating instructions.
Power saving mode
In time display press the button for
approx. 5 sec. to switch on the power saving
mode. The display of the activity sensor is
switched off in this mode to increase the battery
life. Only the display is switched off, the functions
(e.g. pace counting) are still working. Press any
button for approx. 5 sec. to reactivate the display.
Key lock
If the activity sensor is not operated for approx. 3
minutes, then it will automatically activate the key
lock. Only the buttons are switched off, the functions (e.g. pace counting) are still activated
though. Press the
seconds to reactivate the buttons.
Press the
to activate the key lock manually. Press the
button again for approx. 5 seconds to
deactivate the key lock.
button for approx. 5 seconds
button for approx. 5
16
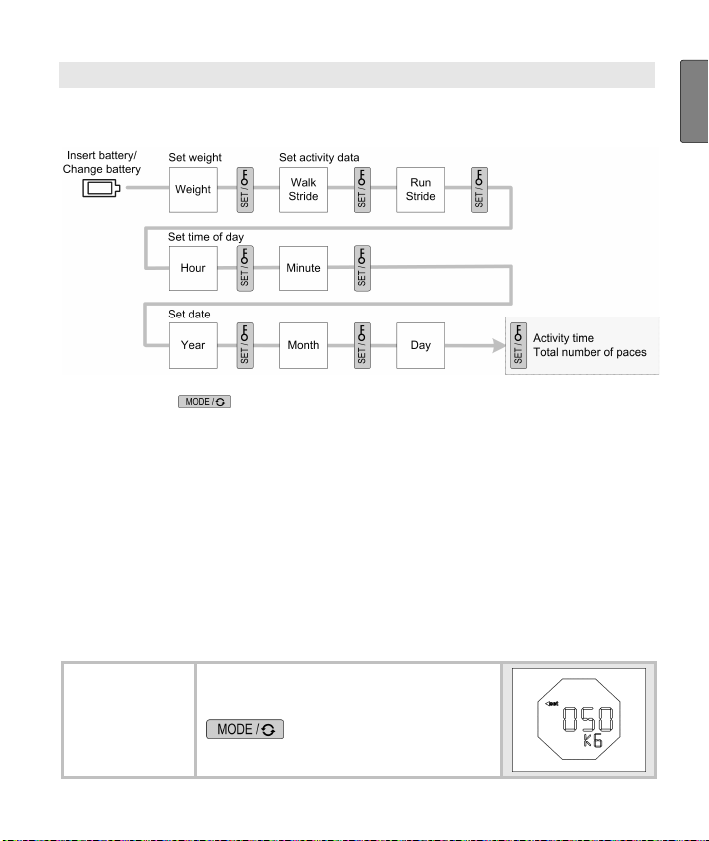
BASIC SETTINGS
Overview
Adjust values with .
Short press = single entry, press and hold = accelerates the entry.
In the setting menu you can:
Enter your personal weight. The activity sensor uses it to calculate
your calorie consumption and your fat burning during physical activity!
Specify the basic functions of the activity sensor.
Set the time and the date.
After inserting the battery (see chapter "Insert battery/Change battery") you automatically get into the setting menu.
Set weight
KG is displayed.
Please select your
weight (20-200 kg).
G
B
17
Set activity data
An important presetting is to enter
your individual pace length as
accurately as possible.
Run or walk a distance where
you know the exact length (reference distance). For example
the 100 meter track in the athletics stadium.
Count the paces you require for
it.
Divide the reference distance
by the number of paces, and
you will get the stride length
(e.g. 100 m / 125 paces = 0.8
m = 80 cm).
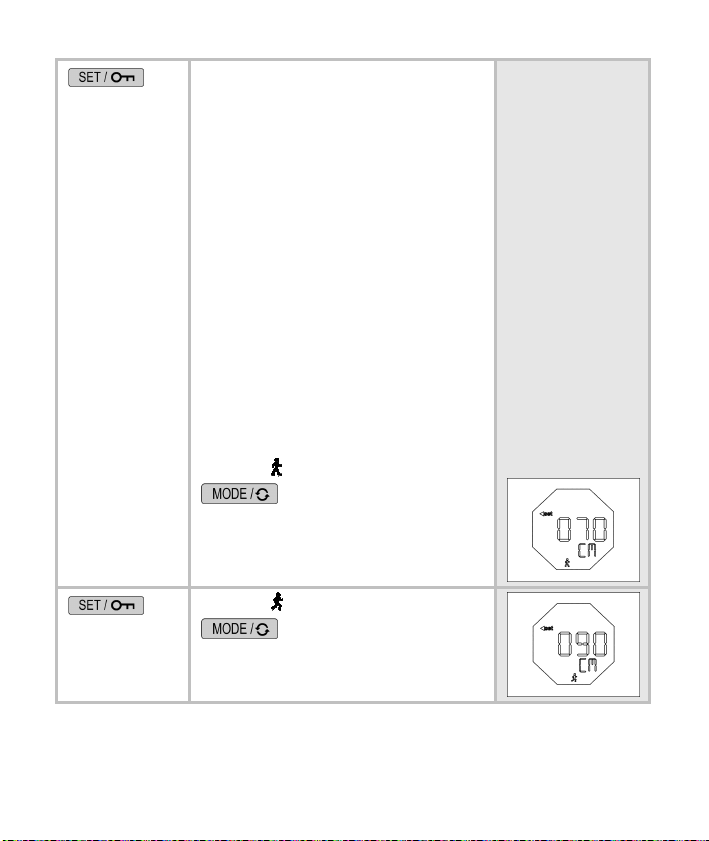
CM and are displayed.
Set your pace length for
slow walking (20-250 cm).
CM and are displayed.
Set your pace length for
quick walking (20-250 cm).
18
 Loading...