

Page 1

IT
IT
Italiano
EN
FR
ES
DE
RU
SV
GR
English
Français
Español
Deutsch
Pусский
Svenska
Ελληνικά
2
Page 2
ALWAYS KEEP THIS MANUAL WITH YOUR FIREARM. INCLUDE IT WITH
THE FIREARM WHEN IT CHANGES OWNERSHIP.
WARNING: FIREARMS CAN BE DANGEROUS AND CAN POTENTIALLY
CAUSE SERIOUS INJURY, DAMAGE TO PROPERTY OR DEATH, IF HANDLED
IMPROPERLY. THE FOLLOWING SAFETY RULES ARE AN IMPORTANT
REMINDER THAT FIREARM SAFETY IS YOUR RESPONSIBILITY.
!
WARNING: Always ensure that the safety is fully engaged until ready to fi re.
NOTICE: The Manufacturer and/or its Local Offi cial Distributors assume no
liability for product malfunction or for physical injury or property damage resulting
in whole or in part from criminal or negligent use of the product, improper or
careless handling, unauthorised modifi cations, use of defective, improper, hand-
loaded, reloaded or remanufactured ammunition, customer misuse or neglect
of the product, or other factors beyond manufacturer's direct and immediate
control.
In addition to the Basic Safety Rules, there are other Safety Rules pertaining to
the loading, unloading, disassembly, assembly and use of this fi rearm, located
throughout this manual.
WARNING: READ THE ENTIRE MANUAL CAREFULLY BEFORE USING THIS
FIREARM. MAKE SURE THAT ANY PERSON USING OR HAVING ACCESS
TO THIS FIREARM READS AND UNDERSTANDS THIS ENTIRE MANUAL
PRIOR TO USE OR ACCESS.
NOTICE: As the interchangeable barrel of this shotgun has a serial number
different from that stamped on the receiver, it may be necessary, when referring
to the gun, to specify also the serial number of the barrel/s.
WE RECOMMEND THE USE OF ORIGINAL BERETTA SPARE PARTS
AND ACCESSORIES. THE USE OF OTHER MANUFACTURER'S SPARE
PARTS AND ACCESSORIES COULD CAUSE MALFUNCTIONS AND/
OR BREAKAGES THAT WILL NOT BE COVERED BY THE BERETTA
WARRANTY.
!
!
EN
!
!
3
Page 3
EN
BASIC SAFETY RULES
CAUTION: READ THIS MANUAL CAREFULLY BEFORE USING THE
SHOTGUN.
CAUTION: FIREARMS CAN BE DANGEROUS AND CAN POTENTIALLY
CAUSE SERIOUS INJURY, DAMAGE TO PROPERTY OR DEATH, IF HANDLED
IMPROPERLY. THE FOLLOWING SAFETY RULES ARE AN IMPORTANT
REMINDER THAT FIREARM SAFETY IS YOUR RESPONSIBILITY.
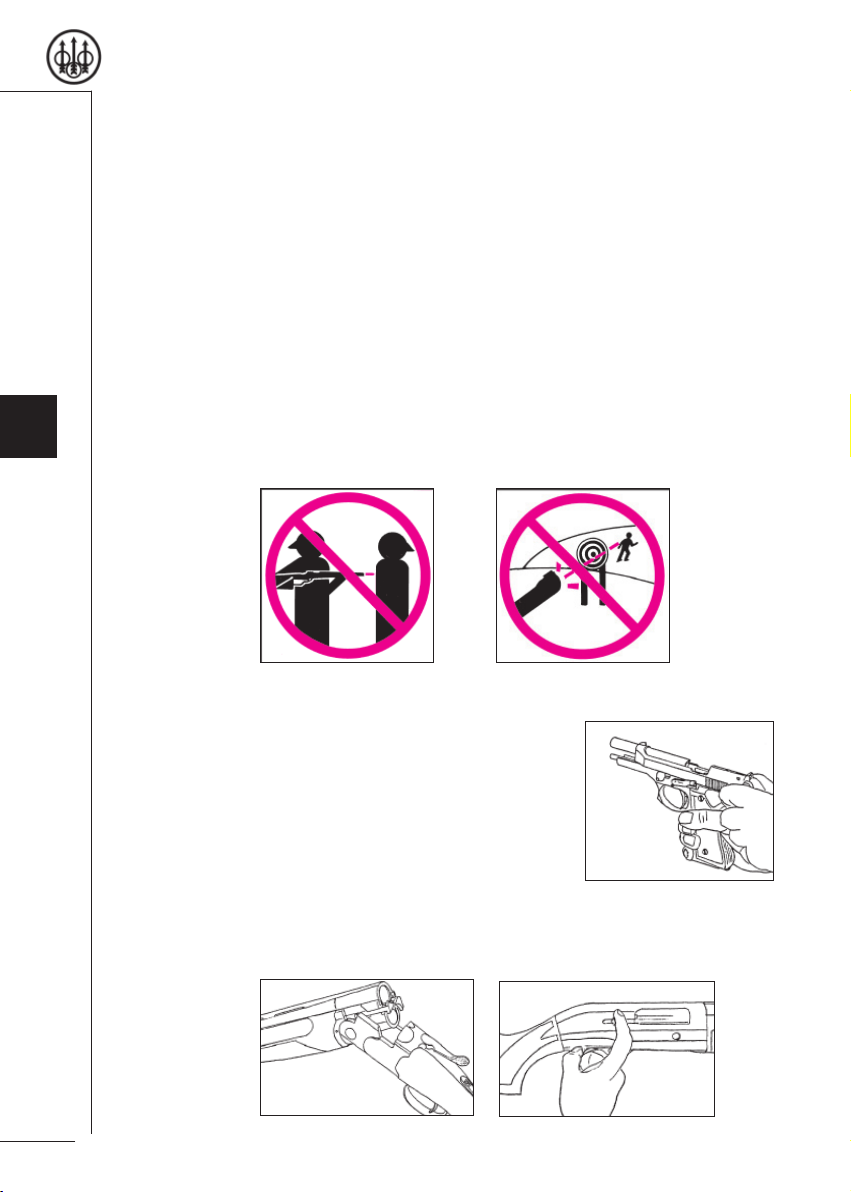
1. NEVER POINT A FIREARM AT SOMETHING THAT IS NOT SAFE TO
SHOOT.
Never let the muzzle of a fi rearm point at any part of your body or at another
person. This is especially important when loading or unloading the fi rearm.
When you are shooting at a target, know what is behind it. Some bullets
can travel over a mile. If you miss your target or if the bullet penetrates
the target, it is your responsibility to ensure that the shot does not cause
unintended injury or damage.
2. ALWAYS TREAT A FIREARM AS IF IT WERE LOADED.
Never assume that a fi rearm is unloaded. The only
certain way to ensure there are no cartridges in
a fi rearm is to open the chamber and visually
and physically examine the inside to see if a
round is present. Removing or unloading the
magazine will not guarantee that a fi rearm is
unloaded or cannot fi re. Shotguns and rifl es can
be checked by cycling or removing all rounds and
by then opening and inspecting the chamber so that a visual inspection of
the chamber for any remaining rounds can be made.
4
Page 4

3. STORE YOUR FIREARM SO THAT CHILDREN CANNOT GAIN ACCESS
TO IT.
It is your responsibility to ensure that children under the age of 18 or other
unauthorised persons do not gain access to your fi rearm. To reduce the
risk of accidents involving children, unload your fi rearm, lock it and
store the ammunition in a separate locked location. Please note that
devices intended to prevent accidents - for example, cable locks, chamber
plugs, etc., - may not prevent use or misuse of your fi rearm by a determined
person. Firearm storage in a steel gun safe may be more appropriate
to reduce the likelihood of intentional misuse of a fi rearm by a child or
unauthorised person.
4. NEVER SHOOT AT WATER OR AT A HARD SURFACE.
Shooting at the surface of water or at a rock or other
hard surface increases the chance of ricochets or
fragmentation of the bullet or shot, which can result
in the projectile striking an unintended or peripheral
target.
EN
5. KNOW THE SAFETY FEATURES OF THE FIREARM YOU ARE USING,
BUT REMEMBER: SAFETY DEVICES ARE NOT A SUBSTITUTE FOR
SAFE HANDLING PROCEDURES.
Never rely solely on a safety device to prevent an accident. It is imperative
that you know and use the safety features of the particular fi rearm you
are handling, but accidents can best be prevented by following the safe
handling procedures described in these safety rules and elsewhere in the
product manual. To further familiarise yourself with the proper use of this
or other fi rearms, take a Firearms Safety Course taught by an expert in
fi rearms use and safety procedures.
6. PROPERLY MAINTAIN YOUR FIREARM.
Store and carry your fi rearm so that dirt or lint
does not accumulate in the working parts. Clean
and oil your fi rearm, following the instructions
provided in this manual, after each use to prevent
corrosion, damage to the barrel or accumulation of
impurities which can prevent use of the fi rearm in an
emergency. Always check the bore and chamber(s)
prior to loading to ensure that they are clean and
free from obstructions. Firing with an obstruction
5
Page 5
EN
in the barrel or chamber can rupture the barrel and injure you or others
nearby. In the event you hear an unusual noise when shooting, stop fi ring
immediately, engage the manual safety and unload the fi rearm. Make sure
the chamber and barrel are free from any obstruction, like a bullet blocked
inside the barrel due to defective or improper ammunition.
7. USE PROPER AMMUNITION.
Only use factory-loaded, new ammunition manufactured to industry
specifi cations: CIP (Europe and elsewhere), SAAMI® (U.S.A.). Be certain
that each round you use is in the proper calibre or gauge and type for the
particular fi rearm. The calibre or gauge of the fi rearm is clearly marked
on the barrels of shotguns and on the slide or barrel of pistols. The use
of reloaded or remanufactured ammunition can increase the likelihood of
excessive cartridge pressures, case-head ruptures or other defects in the
ammunition that can cause damage to your fi rearm and injury to yourself
or others nearby.
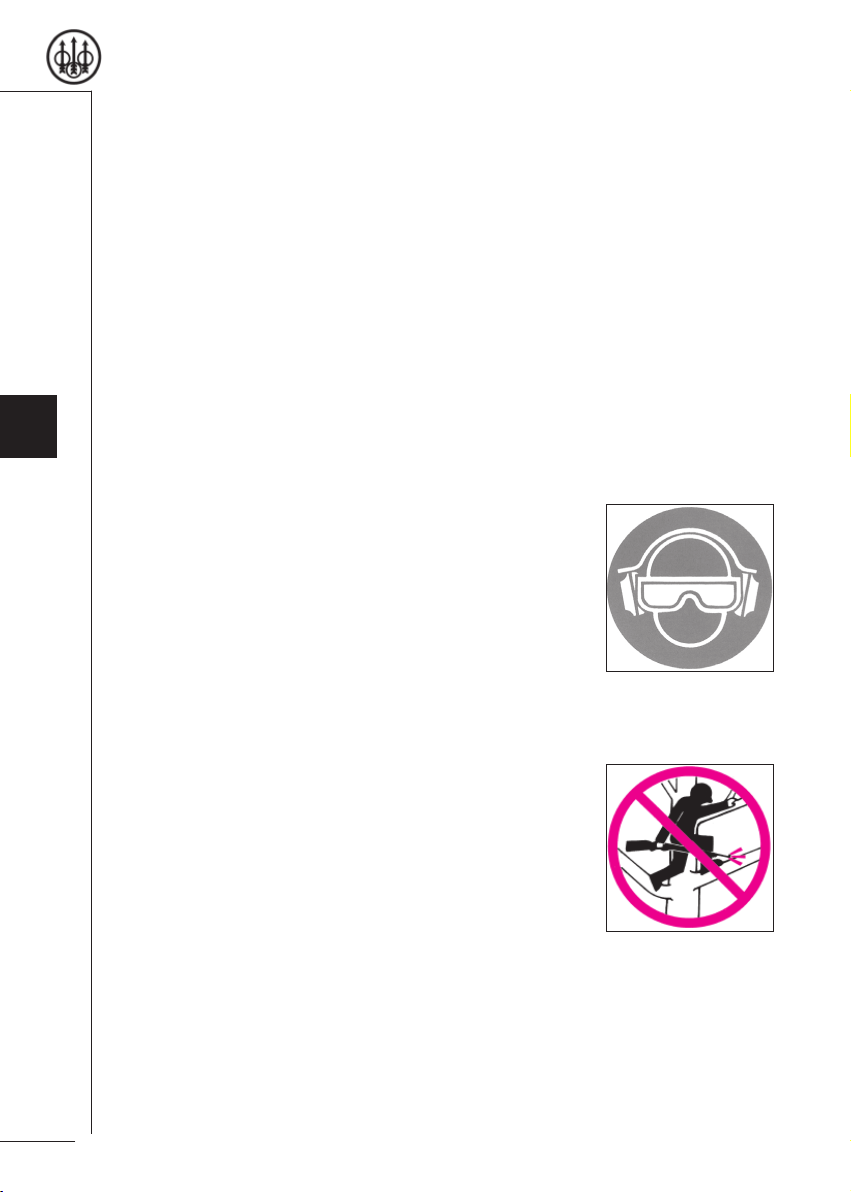
8. ALWAYS WEAR PROTECTIVE GLASSES AND EARPLUGS WHEN
SHOOTING.
The chance that gas, gunpowder or metal fragments
will blow back and injure a shooter who is fi ring a gun
is rare, but the injury that can be sustained in such
circumstances can be severe, including the possible
loss of eyesight. A shooter must always wear impact
resistant shooting glasses when fi ring any fi rearm.
Noise-reducing earplugs or headphones will reduce
the risk of damage to hearing caused by prolonged
shooting activity.
9. NEVER CLIMB A TREE, FENCE OR OBSTRUCTION WITH A LOADED
FIREARM.
Open and empty the chamber(s) of your fi rearm
and engage the manual safety before climbing or
descending a tree or before climbing a fence or
jumping over a ditch or other obstruction. Never
pull or push a loaded fi rearm toward yourself or
another person. Always unload a fi rearm, visually
and physically check to see that the magazine,
loading mechanism and chamber are unloaded, and
action is open before handing it to another person.
Never take a fi rearm from another person unless it is unloaded, visually and
physically checked to confi rm it is unloaded, and the action is open.
6
Page 6
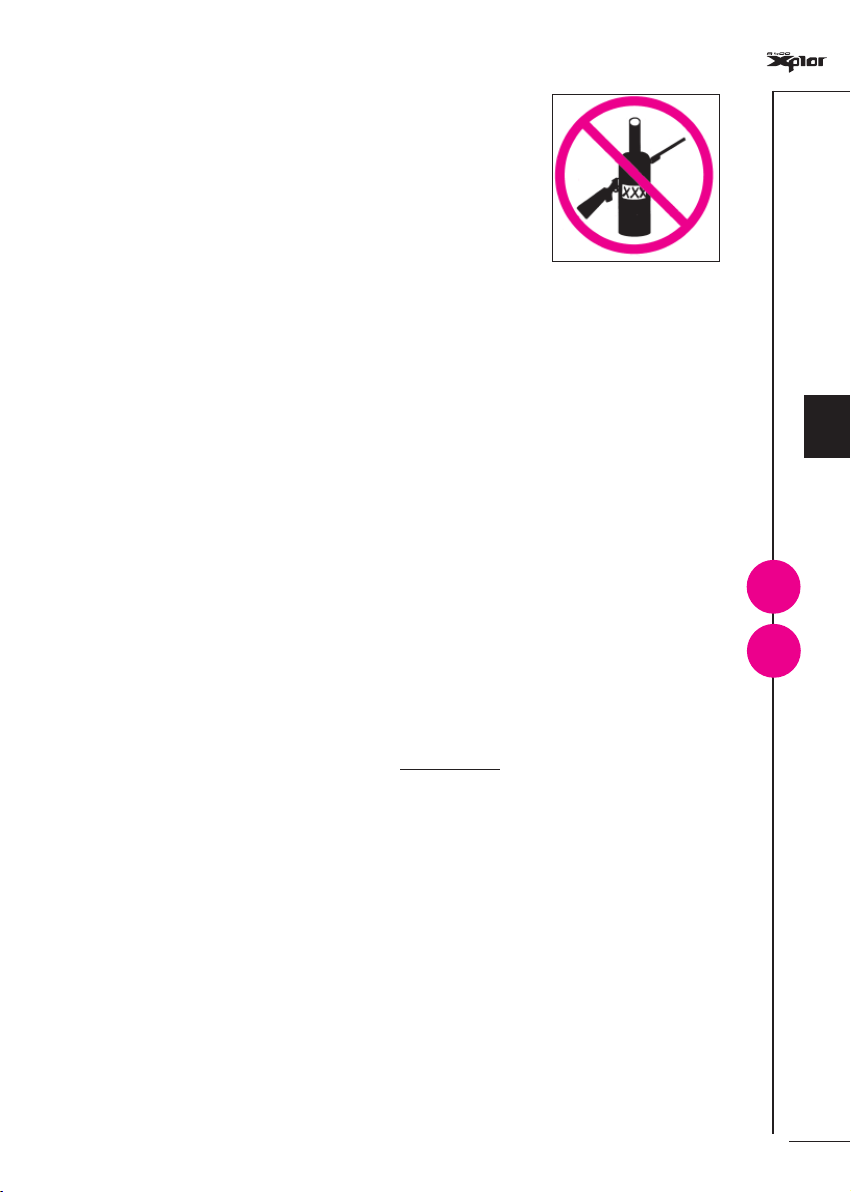
10. AVOID ALCOHOLIC BEVERAGES OR JUDGEMENT/REFLEX IMPAIRING MEDICATION WHEN
SHOOTING.
Do not drink and shoot. If you take medication that
can impair motor reactions or judgement, do not
handle a fi rearm while you are under the infl uence
of the medication.
11. NEVER TRANSPORT A LOADED FIREARM.
Unload a fi rearm before putting it in a vehicle (chamber empty, magazine
empty). Hunters and target shooters should load their fi rearm only at their
destination, and only when they are ready to shoot. If you carry a fi rearm
for self-protection, leaving the chamber unloaded can reduce the chance of
an unintentional discharge.
12. LEAD WARNING.
Discharging fi rearms in poorly ventilated areas, cleaning fi rearms, or
handling ammunition may result in exposure to lead and other substances
known to cause birth defects, reproductive harm, and other serious physical
injury. Have adequate ventilation at all times. Wash hands thoroughly after
exposure.
CAUTION: It is YOUR responsibility to know and abide by Federal, State and
Local laws governing the sale, transportation and use of fi rearms in your area.
WARNING: This fi rearm has the capability of taking your life or the life of
someone else! Always be extremely careful with your fi rearm. An accident is
almost always the result of not following basic fi rearm safety rules.
Especially for U.S. consumers:
For information about Firearm Safety Courses in your area, please visit the
National Rifl e Association’s web site at www.nra.org.
EN
!
!
7
Page 7

EN
NOMENCLATURE
A Receiver
A1 Trigger
A2 Safety button
A3 Trigger guard
A4 Trigger guard retaining pin
A5 Breech bolt release button
A6 Carrier
A7 Carrier stop push button
A8 Loading gate
A9 Ejection port/cartridge chamber
A10 Cut-off
B Breech bolt assembly
B1 Cocking handle
B2 Two lugs locking head
B3 Operating rods with sleeve
C Barrel
C1 Barrel breech
C2 Indexing lugs
C3 Locking shoulders
C4 Gas cylinder
C5 Piston with elastic seal
C6 Exhaust valve assembly
C7 Optimachoke
C8 Choke tube spanner
C9 Front sight
C10 Top rib
C11 Muzzle
D Stock
D1 Recoil pad
D2 Kick Off
E Fore-end
E1 Fore-end fl ange with exhaust port
F Magazine tube
G Front swivel
H Fore-end cap
device
®
HP choke tube
8
Page 8

Contents
BASIC SAFETY RULES 4
NOMENCLATURE 8
DESCRIPTION 10
DATA AND TECHNICAL CHARACTERISTICS 15
OBSTRUCTION / CHOKE TUBES CONDITION CHECK 16
ASSEMBLY OF PACKAGED FIREARM 16
LOAD CHECK 19
AMMUNITION 20
HOW TO LOAD THE FIREARM 21
HOW TO USE THE CUT-OFF DEVICE 23
HOW TO UNLOAD THE SHOTGUN 24
DISASSEMBLY 25
®
BERETTA OPTIMACHOKE
ROUTINE MAINTENANCE 29
SPECIAL MAINTENANCE 31
REASSEMBLY 31
STOCK DROP AND CAST MODIFICATION 33
STORAGE 35
HP CHOKE TUBES 26
EN
9
Page 9

EN
DESCRIPTION
In 1960, one of the world's fi rst semi-automatic gas operated fi eld shotgun was
created: the Beretta mod. 60. Since then, building on the experience and skills
acquired in designing and constructing this reliable operating system, Beretta is
pleased to present its new A400 Xplor series.
Developed from the versatile Beretta gas operated, self-cleaning system, the
advanced design of the new A400 Xplor uses an exclusive exhaust valve that
allows the shotgun to “fi re” a broad range of ammunition. In combination with the
rotating head of the breech bolt, the new system further reduces the already low
recoil felt, directing the recoil force directly in line with the shoulder of the shooter.
This minimises recoil of the fi rearm on fi ring and lends additional stability to the
rifl e in fi ring subsequent rounds.
In the new semi-automatic A400 Xplor, Beretta has thought of every detail in
the design phase, with the utmost attention to comfort, design and maintenance
requirements. The new parts design, the minimal number of components,
the new materials and new anti-recoil devices make the A400 Xplor the new
standard for future generations of semi-automatic shotgun.
DESIGNED FOR PERFORMANCE AND COMFORT
Every detail, from the greatest to the very smallest, has been the object of
careful study and assessment in order to attain two key objectives: visual appeal
and superior performance. The ellipse motif and the Beretta logo, interpreted
artistically on the back of the fore-end, is uniformly yet discreetly discernible on
the main parts, giving the shotgun a futuristic, state of the art design.
10
The receiver: The ergonomically rounded back of the light alloy receiver fi ts
smoothly into the stock, enabling rapid and instinctive target acquisition.
Constructed using a special aluminium alloy, the A400 Xplor has undergone
a colored anodic oxidation process that protects the fi rearm from rusting and
scratching.
The cocking handle has been resized to minimise effort in the manual breech
bolt opening phase.
The trigger guard, in heavy duty polymer, has an innovative new texture. Its
new semi-square shape makes fi nger positioning easier. The rounded shape
and absence of sharp corners have been designed for more rapid, more secure
trigger grip. The use of a technopolymer ensures that the colour will remain in the
parts traditionally subject to rubbing while at the same time enhancing sensitivity
of touch in cold climates. The opening of the trigger guard is bigger so the trigger
is accessible even to a gloved hand.
The cut-off and breech bolt release button have been resized, with contours
designed for fast, safe and reliable operation, with maximum noise reduction
during fi ring.
Page 10

The trigger mecchanism has been redesigned. The new stainless steel carrier
withstands rust and wear and offers more sturdiness in the execution of its vital
function.
The safety button, also newly designed, now offers a wider surface for easier
operation. For accidental engaging or disengaging, the safety is protected and
topped by a protruding edge that also enhances its appearance.
The trigger is chrome-plated for ultimate rust protection. Its silver colour sets it
apart from the other parts of the shotgun.
The fore-end has long, slender contours that add to the harmony of the A400
Xplor’s overall design. Combined with the design of the gas fl ange, the front
section of the fi rearm is absolutely unique. The new checkering, created using
sophisticated laser technology, wraps around and provides a more secure grip
even in bad weather conditions, while the surface remains pleasant to the touch.
The artistic interpretation of the Beretta logo can be seen at the back. The length
of the fore-end has been revisited to make hand positioning easier, thereby
improving the handling and swinging of the shotgun. The cap has a new polymer
structure that makes it very lightweight, weather and rust-resistant.
The stock has also been totally reconceived to provide superior comfort and a
secure grip to ensure the highest performance during fi ring. Made of fi ne walnut
carefully selected for its colour characteristics, design and resistant fi nish, its
grip contour is designed to optimally accommodate the hand of the user with
a top ambidextrous fi nger rest, a characteristic only found in the fi nest hunting
guns. The underside of the grip is fl ush with the stock, creating an unparalleled
effect of continuity and harmony. The grip is optimised thanks to the doublesided “diamond-cut” laser checkering, chosen for its appearance and for its
exclusive slip-proof qualities.
EN
To ensure reduced recoil felt, the ultra-light recoil pad offers an ideal support
surface made of technopolymer foam, for enhanced recoil absorption.
REDUCED NUMBER OF COMPONENTS
The Beretta semi-automatic A400 Xplor is characterised by a particularly small
number of assemblies. The shotgun is composed of fi ve main assembly groups
which can be fi eld stripped by the user, for quick and easy disassembly. A fi rearm
that can be easily taken apart is also easier to clean. Easy cleaning encourages
to perform more careful maintenance on the fi rearm ensuring long-term reliability.
11
Page 11

EN
ROTATING BOLT HEAD LOCK
The Beretta semi-automatic A400 Xplor has a breech bolt with a rotating head
with two lugs that operate the lock of the barrel breech. The long breech has two
indexing lugs and a large support surface that make it possible to eliminate the
movement of the barrel when fi ring, thereby increasing precision. The breech
bolt body is connected with the two operating rods and therefore is guided and
activated symmetrically, with components sliding more smoothly as a result, for
easier disassembly and reassembly of the breech bolt unit.
GAS-OPERATED SYSTEM WITH EXHAUST VALVE
The exclusive gas-operated system, patented by Beretta, with
a self-cleaning cylinder and piston, has a self-cleaning exhaust
valve, so that excess pressure caused by the most powerful
cartridges can be decreased automatically: as a result, the shotgun
without any adjustment or intervention can shoot cartridges from
70 mm (2
version can fi re from 70 mm (2
Supermagnum 89 mm (3 1/2 in) /64 g (2 1/4 oz) loads.
Beretta recommends: To immediately obtain superior fi rearm performance and
optimum cartridges versatility from your A400 Xplor, fi re some medium power
cartridges fi rst (32g/1
The semi-automatic gas-operated A400 Xplor has also been optimised to ensure
lower gas dispersal. As a result, the system has a self-cleaning feature that
further minimises maintenance and signifi cantly reduces the stress to which the
operating parts are subjected to at higher charges, thereby ensuring the greatest
possible service life of the fi rearm.
The new piston has been designed to constantly clean out gunpowder residue
in the cylinder, increasing the effi ciency of the fi rearm and reducing the need for
maintenance. The elastic piston seal has a rough fi nish to optimise cleaning.
3
/4 in) /24 g (7/8 oz), to 76 mm (3 in) /57 g (2 oz). The “UNICO”
1
/8 oz).
3
/4 in) /24 g (7/8 oz) cartridges to the powerful
12
SHOTGUN ASSEMBLY WARNING: In order to prevent damage to the elastic
!
piston seal, fi rst insert the piston into the chamber cylinder and then insert the
magazine tube cap shaft through the piston hole.
The valve unit is connected to the barrel, making assembly and disassembly of
the barrel itself easier.
SUPER RESISTANT RECEIVER
Completely and precisely machined from a solid block of special light alloy
aluminium, it has moveable parts in steel, polymers, high quality light alloys,
assembled with particular care, checked and polished to ensure exceptional
operation. All metal parts are protected by special fi nishes against wear, and tear
and rusting. The length of the receiver is shorter in the semi-automatic versions
of the A400 Xplor series, to minimise bulkiness of the fi rearm and obtain easy
Page 12

handling in the narrow spaces, even when using long barrels.
The safety button can be reversed for left-handed shooters.
OPTIMA-BORE® HP BARREL/OPTIMACHOKE® HP
TUBES
In alloy steel, made with the exclusive cold hammering process to ensure
perfect concentricity, the barrel of the new Beretta semi-automatic A400 Xplor
is exceptionally robust and lightweight at the same time. Designed for use with
steel shot cartridges, it has a new Optima-Bore® HP (High Performance) internal
profi le with a lengthened forcing cone for enhanced pattern distribution and
reduced felt recoil. The bore is chrome plated to ensure the longest life and
resistance to rust, wear and tear and to increase the shot velocity, while it is deep
blued on the exterior.
The new Beretta Optimachoke® HP (High Performance) internal choke tubes are
designed to reduce shot deformation and to enhance shot pattern distribution
and concentration. Made in high performance nickel plated steel, the Beretta
Optimachoke® HP choke tubes ensure the highest protection against rust and
resistance to use of steel shot.
The attention that Beretta pays systematically to reduce the recoil reached new
heights with the A400 Xplor.
The A400 Xplor is the only semi-automatic shotgun in the world to be equipped
(depending on the specifi c model or by request) with three anti-recoil devices.
The combination of the three devices results in an unprecedented shooting
experience.
EN
KICK OFF DEVICE RECOIL ABSORPTION
The Beretta Kick Off system (supplied with the Kick Off version of the A400 Xplor)
has been created to further attenuate the recoil sensation of the fi rearm on fi ring.
Thanks to the Kick Off device, the recoil force gradually disperses through two
hydraulic (oil) dampers inserted on the inside of the stock with evident comfort
for the shooter. At the same time, vibrations and movement reporting of the
barrel are signifi cantly reduced on shooting. Longevity, reliability and handling of
the fi rearm are guaranteed.
PATENTED KICK OFF3 DEVICE FOR RECOIL
ABSORPTION
KICK OFF3 is the very latest innovation in the effective and noticeable reduction
of recoil, developed by the Kick Off design team at Beretta. The KICK OFF3 is
located inside the stock bolt tube and works during the fi nal backward travel
phase of the breech bolt during the operating cycle, for impact attenuation and
shock reduction.
13
Page 13

EN
BERETTA’S INNOVATIVE MICROCORE RECOIL PAD
The most exciting new feature of the A400 Xplor is the special Beretta Microcore
recoil pad, providing unparalleled recoil energy absorption capacity. Thanks to
the open-cell technopolymer foam, in response to pressure during fi ring, the
recoil pad immediately begins to gently relax without expanding or warping. The
material was specially formulated by Beretta after years of careful testing and
observation on shooting fi elds around the world.
The stock is designed to accept interchangeable recoil pads without the need
for adjustment. By using different sized pads, the length of pull can be varied.
CUT-OFF
The cut-off is positioned on the left side of the receiver: it can be activated using
one hand with the breech bolt locked. If the cut-off is accidentally engaged it will
disengage automatically in the feeding phase after fi ring.
DROP AND CAST SPACERS
Between the stock and the receiver is a technopolymer spacer and inside the
stock is a stainless steel plate that can be used to change the drop and cast of
the stock by simply modifying the assembly confi guration. A set of additional
spacers is also provided to further change the drop by replacing the spacer pair.
MAGAZINE CAPACITY
The magazine has a two-round capacity*, in line with current hunting regulations
in many countries, made possible by the insertion of a reducer. This reducer
restricts fi rearm use to no more than three rounds (two in the magazine, and one
in the cartridge chamber). This device is fi tted by Beretta during manufacture
and assembly of the A400 Xplor. In certain specifi c areas, hunting is only
authorised with fi rearms of not more than two rounds. To use the A400 Xplor in
these regions, the magazine capacity must be limited to a single shot with the
provided reducer plug (operation to be performed by a competent gunsmith).
14
* see “Ammunition”.
ACCESSORIES
The Beretta A400 Xplor shotgun comes in a case that contains the fi rearm and a
complete range of accessories for personalising and cleaning the fi rearm.
WARNING: There are many special Beretta parts and accessories to personalise
your fi rearm. To request this extensive line of parts and accessories, please
contact your local Beretta dealer.
Page 14
DATA AND TECHNICAL
CHARACTERISTICS
Gauge 12
Cartridge chamber 70 mm (2
depending on the version
Operation Semi-automatic, with exhaust valve
Locking system Rotating head breech bolt
Receiver Light alloy
Barrel Alloy steel, fully chromed bore
Rib Ventilated
Front sight Metal bead
Safety Button-operated, on trigger guard
Magazine* Limited to two rounds
Stock Walnut, with ambidextrous fi nger rest. Beretta
Microcore Recoil pad. Adjustable drop. Cast-on,
cast-off. Available with Kick off and Kick off³. Kick
off³ is standard on the “UNICO” version.
3
/4”, 3”) and 89 mm (23/
”
, 3”, 31/2),
4
EN
15
Page 15

EN
OBSTRUCTION /
CHOKE TUBES CONDITION CHECK
Check the barrel to ensure there are no obstructions in the chamber and bore.
This is extremely important because serious injury can result to the user or to
nearby persons if a cartridge is fi red in an obstructed barrel or chamber.
Check the inside of the barrel prior to completely assembling the fi rearm and
before use; if the fi rearm is already assembled the following procedure should
be followed:
• Follow the instructions in the “Disassembly” section and remove the barrel
from the shotgun.
• After removing the barrel, look right through the barrel from the rear and make
sure there are no obstructions, even minor ones.
• If an obstruction in the barrel is detected, a competent gunsmith must remove
the obstruction. Inspect again the shotgun before it can be fi red.
• Remount the barrel, following the instructions set out in the “Reassembly”
section.
CHECKING THE CONDITION OF THE CHOKE TUBES
• Always check the appearance and cleaning of the choke tubes before using
the shotgun.
• Check correct tightness in the barrel with the spanner provided.
• Never use choke tubes that show signs of defects, warping or incrustation.
• Make sure that the choke tube inserted is appropriate for the intended use and
shot type to be used (steel or lead). See “Ammunition” chapter.
16
ASSEMBLY OF PACKAGED FIREARM
CAUTION: THIS FIREARM HAS THE CAPABILITY OF TAKING YOUR LIFE
OR THE LIFE OF SOMEONE ELSE! ALWAYS BE VERY CAREFUL WHEN
HANDLING YOUR FIREARM. AN ACCIDENT IS NEARLY ALWAYS THE
RESULT OF FAILURE TO COMPLY WITH SAFETY RULES, OR INCORRECT
USE.
WARNING: Beretta assumes no liability for any injury or damage to property
!
resulting from improper or careless handling, or intentional or accidental fi ring
of the shotgun.
WARNING: All assembly, disassembly and maintenance procedures should be
carried out with the fi rearm unloaded (cartridge chamber, receiver and magazine
!
empty). Inspect the fi rearm by looking through the ejection port, the loading gate
and the chamber.
Page 16

WARNING: During assembly, disassembly and maintenance procedures, never
point a fi rearm at someone or at hard or fl at surfaces. Always treat the fi rearm as
if it were loaded (See points 1, 2 and 4 of the BASIC SAFETY RULES).
The Beretta semi-automatic A400 Xplor comes with barrel and stock-receiverfore-end assembly packaged separately.
Mount the barrel onto the stock-receiver-fore-end assembly as described
below:
NOTICE: It is advisable to carry out the assembly operations over a table to
catch components should they drop.
CAUTION: In the unlikely event that the breech bolt assembly is in the unlocked
(OPEN) position, do not press the release button and keep your fi nger away
from the ejection port.
When the release button is pressed, the breech bolt is pushed forward by the
recoil spring, until it is stopped at the ejection port by the cocking handle, with the
likelihood of damage to both parts.
• Check the barrel. The barrel and cartridge chamber must be clean and free
from obstructions (see “Checking for obstructions”).
• Check that the choke tube is inserted in the barrel and tightened correctly,
clean and in good condition (see “Checking the condition of the choke tubes”).
• Unscrew the front cap of the fore-end in an anticlockwise direction (Fig. 1).
• Pull the fore-end right out (Fig. 2).
• Check that the piston is positioned inside the gas cylinder of the barrel (Fig.
3). If the piston is mounted on the magazine tube, remove it (Fig. 4) and insert
it into the cylinder of the barrel, making sure to tighten the elastic seal with the
fi ngers to facilitate insertion of the piston into the cylinder (Fig. 5).
!
!
!
EN
CAUTION: In order to prevent damage to the elastic piston seal, fi rst insert the
piston into the chamber cylinder and then insert the magazine tube cap shaft
through the piston hole.
• Check that the carrier stop push button is pressed all the way down. Otherwise,
push it down (Fig. 6).
• Use the cocking handle to retract the breech bolt until it snaps into the unlocked
position (Fig. 7).
CAUTION: When the release button is pressed, the breech bolt is pushed
forward by the recoil spring, until it is stopped at the ejection port by the cocking
handle, with the likelihood of damage to both parts.
• Insert the barrel into the receiver, ensuring that the magazine tube cap shaft
enters the piston hole as well as the gas cylinder hole with the valve assembly
(Fig. 10,11,12).
• Push it all the way into the receiver until it stops.
!
!
17
Page 17

EN
• Slide the fore-end into place over the gas cylinder / the valve assembly and
magazine tube (Fig. 13). checking for the correct centering on the receiver
face. The fore-end is in the correct position when it is fully against the receiver
(Fig. 14).
• Tighten the front cap of the fore-end all the way (Fig. 15).
• Keep your fi ngers away from the ejection port, press the breech bolt release
button and gently guide the breech bolt to lock (Fig. 16).
CAUTION: When pressing the release button to close the breech bolt, be sure to
not accidentally engage the cut-off lever. If this occurs, the breech bolt will be kept
!
open by the cut-off lever. In this case, close the breech bolt while disengaging the
cut-off lever. Keep the fi ngers away from the ejection port (Fig. 17).
• Keeping the breech bolt retracted 2 cm, pull the trigger to decock the hammer
(Fig. 18).
WARNING: The safety can only be engaged with the hammer cocked. The
hammer is cocked by pulling back the breech bolt. When the safety button shows
!
the red ring, the SAFETY IS DISENGAGED, so the fi rearm is ready for use.
When the red ring is not visible on the safety button, the SAFETY IS ENGAGED.
WARNING: Store your fi rearm so that children or other persons not familiar
with fi rearms cannot gain access to it. To reduce the risk of accidents involving
!
children, unload your fi rearm and lock it away. Store the ammunition in a separate
locked location. (See point 3 of the BASIC SAFETY RULES.)
18
Page 18

LOAD CHECK
At various points in this manual, you will be requested to inspect the ejection
port, the loading gate, and the cartridge chamber of your Beretta semi-automatic
A400 Xplor to ensure that it is unloaded. This should become second nature to
you, as should the following precautions:
• Never assume that the gun is unloaded.
• Never point or push the gun toward yourself or another person.
• Always inspect the ejection port, the loading gate and the cartridge chamber to
make sure they are empty. The cartridge chamber is the portion of the barrel
into which the cartridge is inserted (Fig. 19).
• Pull back the breech bolt to lock it into the open position and engage the safety
before handing the shotgun to another person.
• Never take from or give the shotgun to another person unless the breech bolt
has been opened and the ejection port, loading gate and cartridge chamber
have been inspected to ensure they are completely empty.
Inspect the ejection port, the loading gate and cartridge chamber as indicated
below:
CAUTION: Keep your fi nger off the trigger and keep the barrel pointed in a safe
direction.
• Check that the carrier stop push button is pressed all the way down. Otherwise,
push it down (Fig. 6).
• Use the cocking handle to to retract the breech bolt until it snaps into the open
position (Fig. 7).
• Engage the manual safety by pressing the safety button to hide the red ring
(Fig. 8).
• Inspect the fi rearm by looking through the ejection port, the feeding gate and
the cartridge chamber. They must be empty. Check that there are no cartridges
in the magazine tube. If there are, unload the fi rearm as indicated in “How to
unload the fi rearm”.
• Press the breech bolt release button and gently guide it to the locked position
(Fig. 16).
• Disengage the safety (Fig. 9) (red ring visible) and hold the breech bolt back 2
cm, pull the trigger, to decock the hammer (Fig. 18).
EN
!
CAUTION: When the safety button shows the red ring, the SAFETY IS
DISENGAGED, so the fi rearm is ready for use. When the red ring is not visible
on the safety button, the SAFETY IS ENGAGED.
!
19
Page 19

EN
AMMUNITION
WARNING: Beretta assumes no liability for physical injury or property damage
resulting from the use of defective, improper, hand-loaded, reloaded or
!
remanufactured ammunition. Serious damage or injury, even death, may be
caused from the use of ammunition that is not suitable, loaded with force, or
loaded with obstructions in the barrel.
The Beretta A400 Xplor semi-automatic shotgun has different cartridge
chambers, depending on the version. The shotgun does not require
adjustments or interventions to shoot from 70 mm (2 3/4 in) /24 g (7/8 oz), to
76 mm (3 in) /57 g (2 oz) cartridges.
The “UNICO” version without any adjustments or interventions can shoot from
70 mm (2 3/4 in) /24 g (7/8 oz) to the powerful Supermagnum 89 mm (3 in.) /64 g
(2 1/4 oz) loads.
Beretta recommends: To immediately obtain superior fi rearm performance and
optimum cartdridge versatility from your A400 Xplor, fi re some medium power
cartridges fi rst (32g / 1 1/8 oz).
20
CAUTION: The Beretta semi-automatic A400 Xplor has an Optima-Bore
barrel and Optimachoke® HP choke tubes that make it possible to fi re High
!
Performance steel shot ammunition. Follow the instructions for use of choke
tubes appropriate for the use of steel shot, as set out in the “Steel shot” section.
You will fi nd the markings for the gauge and chamber length for your shotgun on
the side of the barrel (Fig. 20). Every A400 Xplor has been tested with special
proof test ammunition at 1320 bar with high performance steel shot. These tests
guarantee the ability to shoot either ordinary or HP steel shot (usually higher
than 3.5 mm of diameter) which cause higher pressure in the barrel.
CAUTION: Never use cartridges that do not correspond to the indicators on the
barrel.
!
CAUTION: Only use cartridges with a length equal to or less than the chamber
length indicated on the barrel.
!
CAUTION: To avoid using improper ammunition, always check the characteristics
stamped on the cartridge box and on the cartridge. Be sure to use the right
!
cartridge gauge and length for your fi rearm.
STEEL SHOT
All Beretta barrels, as well as the “SP” (Steel Proof) Beretta choke tubes,
are designed for use with factory steel shot cartridges loaded to international
standard specifi cations. When steel shot cartridges are fi red, the best results
are obtained by using open chokes (C0000/CL, 0000/IC, 000/M). Full choke
constrictions (0/F, 00/M) when using steel shot, do not increase pattern density
®
HP
Page 20

and will distort normal pattern density, accelerating wear and tear. The use of
reloaded or remanufactured ammunition can increase the likelihood of excessive
pressure, case rupture or other defects in the ammunition.
MAGAZINE CAPACITY
The magazine of the A400 Xplor has a capacity limited to 2 shots, in line with the
current hunting regulations in many countries, due to the insertion of a reducer.
This reducer restricts fi rearm use to no more than three rounds (two in the
magazine, and one in the cartridge chamber).
This device is fi tted by Beretta during manufacture and assembly of the A400
Xplor.
WARNING: Wholesalers, dealers or gunsmiths are not authorised to carry out
any Warranty repair or adjustment on behalf of the Manufacturer (unless they
are a Repair Point authorised by the Manufacturer and/or by its Local Offi cial
Distributors).
HOW TO LOAD THE FIREARM
WARNING: Before loading the fi rearm, it is a good idea to practice the following
handling procedures without the use of ammunition. Never handle a loaded
fi rearm until you are fully familiar with the loading procedures. Always inspect the
ejection port, the loading gate and the cartridge chamber to make sure they are
empty. Check that there are no cartridges in the magazine tube. Before loading
the fi rearm, ensure that the safety is engaged. Always keep the fi rearm pointed
in a safe direction. (See points 1, 2 and 4 of the BASIC SAFETY RULES.)
!
EN
!
WARNING: Always check the barrel before loading the fi rearm to make sure that
it is clean and free of possible obstructions (see: “Checking for obstructions”).
WARNING: Check the conditions and correct tightness of the choke tubes in the
barrel. Never use the shotgun without the choke tube inserted (see. “Checking
the condition of the choke tubes”).
WARNING: The shooter and all bystanders must always wear protective eyewear and ear protection during shooting. Residue from gunpowder, lubricant or
metal fragments may be projected backwards and cause injury. Noise-reducing
earplugs or earmuffs will reduce the risk of damage to hearing caused by
prolonged shooting activity.
CAUTION: Always keep your fi nger off the trigger and avoid contact of other
objects with the trigger if you don't intend to fi re.
!
!
!
!
21
Page 21

EN
• Check that the carrier stop push button is pressed all the way down. Otherwise,
push it down (Fig. 6).
• Use the cocking handle to retract the breech bolt until it snaps into the open
position (Fig. 7).
• Engage the manual safety by pressing the safety button to hide the red ring
(Fig. 8).
CAUTION: The safety can only beengaged with the hammer in the cocked
position. The hammer is cocked by pulling back the breech bolt. When the safety
!
button shows the red ring, the SAFETY IS DISENGAGED, so the fi rearm is
ready for use. When the red ring is not visible on the safety button, the SAFETY
IS ENGAGED.
WARNING: The manual safety is merely a mechanical device and is in no way a
substitute for the Basic Safety Rules of fi rearm handling (Fig. 21).
!
• Introduce the fi rst cartridge into the cartridge chamber through the ejection
port (Fig. 22).
• Keeping your hands away from the ejection port, press the release button and
guide the breech bolt to lock.
WARNING: The fi rearm is now loaded and ready to fi re after the manual safety
is disengaged. Always keep your fi nger off the trigger and avoid contact with
!
the trigger by other objects if you don't intend to fi re. Never point a fi rearm at
something that is not safe to shoot. (See points 1, 2 and 4 of the BASIC SAFETY
RULES).
22
WARNING: Beretta assumes no liability for any injury or property damage
!
resulting from improper or careless handling or intentional or accidental fi ring of
the shotgun.
CAUTION: If the breech bolt remains in the open position, check that the cut-off
is not inadvertently engaged. Keep your hands away from the ejection port and
!
disengage the cut-off (Fig. 17).
• Move the carrier to insert the cartridges into the magazine through the loading
gate to hook onto the cartridge retaining tooth (Fig. 23).
• To fi re, disengage the safety (Fig. 9) (red ring visible) and pull the trigger.
• After fi ring the fi rst round, release the trigger to set up the shotgun for the next
round.
• The shotgun will fi re the cartridge in the chamber fi rst, and then it will
automatically introduce the cartridge from the magazine tube into the chamber.
WARNING: After pulling the trigger, if the shotgun doesn't fi re, engage the
!
safety, wait at least one minute and unload the shotgun as described in the
corresponding section.
Never attempt to reuse or fi re ammunition that did not fi re the fi rst time. Dispose
Page 22

of unfi red or damaged ammunition properly, in accordance with the ammunition
manufacturer’s recommendations.
WARNING: If another cartridge is fi red into an obstructed barrel, damage and
very serious injury may occur.
If you do not plan to fi re a second shot, engage the safety (red ring not visible)
keeping the fi rearm pointed in a safe direction and the fi ngers away from the
trigger. If you have fi nished fi ring, unload the shotgun as indicated in: “How to
unload the shotgun”.
• When the last round has been fi red, the breech bolt remains open, showing
that the magazine is empty (Fig. 24).
• Engage the safety (Fig. 8) (red ring not visible) and if necessary, reload the
shotgun according to the instructions given previously.
WARNING: Always unload the fi rearm immediately after fi ring is completed.
Never store a loaded fi rearm. To store the shotgun, see: “Storage”.
HOW TO USE THE CUT-OFF DEVICE
The cut-off device enables a live round to be extracted from the cartridge
chamber and for the breech bolt to be locked open as a safety measure or for
the round to be replaced in the chamber without feeding a new round from the
magazine.
WARNING: Firearm loaded with cartridge in the chamber and safety engaged.
Never point a fi rearm at something that is not safe to shoot. (See points 1, 2 and
4 of the BASIC SAFETY RULES.)
• Ensure that the safety is engaged (Fig. 8). The red ring of the safety is not
visible.
• Engage the cut-off device pressing the lever on the left side of the receiver
(round part) (Fig. 25).
• Pull the breech bolt back to the end stop using the handle. In this phase, the
live cartridge is extracted from the cartridge chamber and ejected through the
ejection port (Fig. 26), the breech bolt stops on the carrier locked by the cut-off
device. Feeding from the magazine is blocked.
• Once safety conditions are restored, insert the extracted loaded cartridge (Fig.
21) or other desired cartridge type into the chamber.
• Keeping the fi ngers away from the ejection port, disengage the cut-off to
release the breech bolt so that it locks (Fig. 17).
!
EN
!
!
WARNING: The fi rearm is loaded and ready to fi re after the manual safety is
disengaged. Check that the safety is correctly engaged. Never point a fi rearm at
something that is not safe to shoot. (See points 1, 2 and 4 of the BASIC SAFETY
RULES).
• To fi re, disengage the safety (Fig. 9) (red ring visible) and pull the trigger.
!
23
Page 23

EN
CAUTION: For correct functioning of the shotgun, the cut-off is to be used as
described. In particular, it should be remembered that the breech bolt, held open
!
by the cut-off device, must be closed, operating solely on the cut-off device itself.
HOW TO UNLOAD THE SHOTGUN
WARNING: The fi rearm is loaded and ready to fi re. Always keep your fi nger off
the trigger and avoid contact with the trigger by other objects if you don't intend
!
to fi re. Never point the fi rearm at someone or at hard, fl at surfaces. (See points
1, 2 and 4 of the BASIC SAFETY RULES.)
• Keeping the fi rearm pointed in a safe direction, check that the safety is
engaged (Fig. 8) (red ring not visible).
• Engage the cut-off (Fig. 25), pull back the breech bolt to extract and expel the
live cartridge from the chamber (Fig. 26).
• Keeping the fi ngers away from the ejection port, disengage the cut-off to
release the breech bolt so that it locks (Fig. 17).
• Raise the carrier, push the cartridge lightly into the magazine tube and at the
same time press down the release button, guiding the cartridges out of the
magazine tube.
• After checking the magazine tube and the receiver are empty, keeping the
shotgun pointed in a safe direction, disengage the safety (Fig. 9) (red ring
visible).
• Keeping the breech bolt pulled back 2 cm, pull the trigger, thereby decocking
the hammer (Fig. 18).
24
Page 24

FIELD STRIPPING
WARNING: Always check that the shotgun is unloaded (empty cartridge chamber,
empty receiver, empty magazine). Inspect the fi rearm by looking through the
ejection port, the loading gate and the chamber. If it is not empty, unload it as
instructed in the relevant section. Check that the hammer is decocked.
WARNING: Never point the fi rearm at someone or at hard, fl at surfaces. Always
treat the shotgun as if it were loaded. (See points 1, 2 and 4 of the BASIC
SAFETY RULES.)
NOTICE: It is advisable to carry out the disassembly operations over a table to
catch components should they drop.
!
!
!
BARREL
• Check that the carrier stop push button is pressed all the way down. If it is not,
push it all the way down (Fig. 6).
• Pull the breech bolt all the way back so that it remains open (Fig. 7).
• Unscrew the front cap of fore-end in an anticlockwise direction (Fig. 27).
• Holding the shotgun by the barrel, pull the fore-end straight out toward the
muzzle (Fig. 28).
• Pull the barrel out of the stock-receiver assembly while holding the piston
inside the gas cylinder (Fig. 29).
NOTICE: NEVER STRIP the spring of the valve or the valve retaining nut. The
valve device is self-cleaning and requires no maintenance. If necessary, contact
a competent gunsmith.
BREECH BOLT ASSEMBLY
(Breech bolt, operating rods with sleeve, recoil spring, and piston stop.)
WARNING: The breech bolt assembly need only to be disassembled in order to
clean its components.
• Keeping the index or middle fi nger of the left hand on the cocking handle,
press the release button and allow the breech bolt to move forward slowly until
it stops (Fig. 31).
• Press the head of the breech bolt until the groove on its neck corresponds to
the edge of the bolt body (Fig. 32).
• Keeping the head depressed in this position, extract the cocking handle from
the breech bolt, pulling forcefully (Fig. 33).
• Over a fl at surface, with the ejection port pointed upwards, pull forward on the
breech bolt assembly, the operating rods with sleeve, the recoil spring, and the
spring holder, to force the breech bolt out from the receiver (Fig. 34 and 35).
EN
!
!
25
Page 25

TRIGGER PLATE
NOTICE: The trigger plate only needs to be disassembled in order to clean the
trigger mechanism.
!
• Engage the safety (the hammer is cocked) (Fig. 8).
• Press the carrier stop push button, if it has not already been pressed (Fig. 6).
• Remove the trigger guard retaining pin by pressing with a pin punch or an awl
(Fig. 36).
• Keeping the release button pushed all the way down, remove the trigger plate
from the receiver using the trigger guard as a lever, fi rst in the direction of the
barrel and then outward (Fig. 37).
EN
BERETTA OPTIMACHOKE® HP TUBES
Beretta Optimachoke® HP (High Performance) tubes are built in high resistance
steel to ensure a long life and rust protection and are designed to withstand the
use of steel shot. They can also shoot High Performance steel ammunitions.
NOTICE: The Optima-Bore
Optimachoke® HP tubes. Other types of interchangeable Beretta choke tubes
are not appropriate for use with Optima-Bore® HP barrels and these will alter the
shot pattern distribution.
!
®
HP barrel of the A400 Xplor can only mount
26
Page 26

Beretta Optimachoke® HP tubes
Beretta markings American
Designation
0 (*) F (Full) SP (Steel Proof)
00 (**)
000 (***) M (Modifi ed) SP (Steel Proof) III
0000 (****)
C0000 (C****) CL (Cylinder) SP (Steel Proof) IIIII
(1)
Not recommended for steel shot.
Optimachoke® is a registered trademark of Fabbrica d’Armi Pietro Beretta S.p.A.
IM (Improved
Modifi ed)
IC (Improved
Cylinder)
Compatibility of
choke tubes with
steel shot
SP (Steel Proof)
SP (Steel Proof) IIII
Notches
on the
(1)
(1)
rim
I
II
CHECKING THE CONDITION OF THE CHOKE TUBES
• Always check the appearance and cleaning of the choke tubes before using
the shotgun.
• Check correct tightness in the barrel with the spanner provided.
• Never use choke tubes that show signs of defects, warping or incrustation.
• Make sure that the choke tube inserted is appropriate for the intended use and
shot type to be used (steel or lead). See “Ammunition” chapter.
EN
REMOVAL OF CHOKE TUBE
WARNING: Always check that the shotgun is unloaded (empty cartridge
chamber, empty receiver, empty magazine). Inspect the fi rearm by looking
through the ejection port, the loading gate and the chamber. If it is not empty,
unload it as instructed in the relevant section.
WARNING: Never look directly through the barrel from the muzzle and do not
replace the choke with the shotgun loaded even with the safety engaged.
CAUTION: The safety can only be inserted with the hammer cocked. The hammer
is cocked by pulling back the breech bolt. When the safety button shows the red
ring, the SAFETY IS DISENGAGED, so the fi rearm is ready for use. When the
red ring is not visible on the safety button, the SAFETY IS ENGAGED.
• Unscrew the choke tube, in an anticlockwise direction, with the spanner
provided (Fig. 38).
• Remove the choke tube from the muzzle of the barrel (Fig. 39).
!
!
!
27
Page 27

CLEANING OF CHOKE TUBES AND ITS HOUSING
WARNING: Always check that the shotgun is unloaded (empty cartridge chamber,
empty receiver, empty magazine). Inspect the fi rearm by looking through the
!
ejection port, the loading gate and the chamber. If it is not empty, unload it as
instructed in the relevant section. Check that the hammer is decocked.
WARNING: Never look directly through the barrel from the muzzle and do not
replace the choke with the shotgun loaded even with the safety engaged.
!
• Clean the choke housing thoroughly using, if necessary, a brush swab soaked
with Beretta Gun Oil. Dry with a soft cloth.
• Check that the choke is perfectly clean inside and outside.
• Apply a thin fi lm of Beretta Gun Oil on the barrel thread and choke tube.
EN
INSERTION OF CHOKE TUBES
CAUTION: Always check that the shotgun is unloaded (empty cartridge chamber,
empty receiver, empty magazine). Inspect the fi rearm by looking through the
!
ejection port, the loading gate and the chamber. If it is not empty, unload it as
instructed in the relevant section. Check that the hammer is decocked.
CAUTION: Never look directly through the barrel from the muzzle and do not
replace the choke with the shotgun loaded even with the safety engaged.
!
CAUTION: Check that the choke tube is in pristine condition (not damaged) prior
to installing it.
!
• Make sure that the barrel thread and choke tube are perfectly clean and lightly
oiled.
• Install the desired choke tube.
• Manually screw the choke tube clockwise into the barrel. Use the Beretta
spanner provided to tighten the choke tube until it is fully lowered into its seat
in the barrel. Forcefully tighten it manually.
• Remove the spanner from the barrel.
CAUTION: Periodically check that the choke tube is tightened correctly,
ensuring that the shotgun is unloaded (empty cartridge chamber, empty receiver
!
and empty magazine) and breech bolt in the open position. If necessary, fi rmly
tighten the choke tube with the Beretta spanner. Correct tightening of the choke
tube will avoid the occurrence of shotgun damage or injury.
28
CAUTION: The choke must be kept correctly tightened in the barrel at all times,
even during storage and cleaning. Cleaning the barrel without the choke tube
!
installed may lead to dirt becoming lodged in the barrel thread and preventing
the choke tube from screwing in properly, or to the formation of rust or obstruction
in the barrel.
Page 28

WARNING: Never shoot the choke barrel without inserting a choke tube.
Shooting without a choke tube in the barrel is very dangerous, as residues of
lead or debris may become lodged in the thread creating an obstruction within
the barrel. Also, not using a choke tube will damage the threading of the barrel
irreparably and result in irregular shot spread.
Do not alter or modify an existing fi xed choke Beretta barrel for the use of
interchangeable choke tubes. The barrel wall thickness would be too thin to
safely contain the pressure levels generated by shooting.
ROUTINE MAINTENANCE
Clean and lubricate your shotgun any time combustion residue, grease or dirt is
deposited in any of the mechanisms. Cleaning and lubrication of the fi rearm after
each use is the best way of ensuring that the components are protected against
combustion corrosion or rusting from use in humid or salty environments.
At the end of a shooting day, carry out the Routine Maintenance as indicated
below.
WARNING: Always check that the shotgun is unloaded (empty cartridge chamber,
empty receiver, empty magazine). Inspect the fi rearm by looking through the
ejection port, the loading gate and the chamber. If it is not empty, unload it as
instructed in the relevant section. Check that the hammer is decocked.
WARNING: Never point the fi rearm at someone or at hard, fl at surfaces. Always
treat the shotgun as if it were loaded. (See points 1, 2 and 4 of the BASIC
SAFETY RULES).
!
EN
!
!
NOTICE: For Routine Maintenance, simply disassemble it following the
procedures described in the relevant section.
BARREL
• Carefully clean the inside of the barrel with a soft cloth (fl annel) to remove any
combustion residue. If necessary, use a bronze brush or a cloth soaked with
Beretta Gun Oil.
• Thoroughly clean the locking shoulders on the barrel breech.
• Pull a soft, clean, dry cloth through the barrel.
• Lightly lubricate the barrel with a soft clean cloth soaked with Beretta Gun Oil.
• Check the barrel. The barrel and cartridge chamber must be clean and free
from obstructions.
CAUTION: Excess oil or grease obstructing the barrel, even partially, is very
dangerous when fi ring and may cause damage to the shotgun and serious injury
to the shooter and to bystanders. Never spray or apply oil to the cartridges. Use
lubricants properly. You are responsible for the proper care and maintenance of
your fi rearm.
!
!
29
Page 29

EN
GAS CYLINDER, PISTON, MAGAZINE TUBE
CAUTION: Use of Magnum and Super Magnum cartridges results in high
combustion gas emissions.
!
The particular composition of the powders of some Super Magnum ammunition
can leave consistent deposits of combustion residue. The parts of the shotgun
where this problem is most likely to arise are the gas cylinder, the piston and
elastic piston seal and the magazine tube.
• Spray the piston, elastic piston seal and magazine tube and clean with Beretta
Gun Oil.
• Ensure that the piston glides freely on the magazine tube.
• To clean the walls of the gas cylinder, spray the walls with Beretta Gun Oil and
clean thoroughly with a bronze brush.
• After removing any combustion residue, clean the inside of the gas cylinder
with a clean cloth.
NOTICE: The components specifi ed above must not be lubricated.
!
EXHAUST VALVE ASSEMBLY
NOTICE: NEVER DISASSEMBLE the exhaust valve assembly. If necessary,
contact a competent gunsmith.
!
30
Page 30

SPECIAL MAINTENANCE
Depending on the conditions of use of the fi rearm, and at the end of
the hunting season, Beretta recommends you carry out the following
extraordinary maintenance operations in order to keep the shotgun in
perfect working order.
BREECH BOLT ASSEMBLY
(Breech bolt, operating rods with sleeve, recoil spring, and piston stop).
• Spray the parts and clean with Beretta Gun Oil.
• Thoroughly dry with a soft cloth and lightly lubricate.
TRIGGER PLATE
• Thoroughly clean the parts with a soft cloth.
• Lightly lubricate all the metal components and the trigger plate retaining pin.
RECEIVER
• Proceed as indicated for the breech bolt. Clean thoroughly with a soft cloth
and lubricate the internal breech bolt guides.
CAUTION: Do not attempt to carry out repairs to any fi rearm without proper
knowledge or training. Do not alter parts or use substitute parts not manufactured
by Beretta. Any alterations or adjustments that may be necessary to the operating
mechanism should be performed by the Manufacturer or by its Local Authorised
Distributor.
REASSEMBLY
WARNING: Always check that the shotgun is unloaded (empty cartridge
chamber, empty receiver, empty magazine). Inspect the fi rearm by looking
through the ejection port, the loading gate and the chamber. If it is not empty,
unload it as instructed in the relevant section.
WARNING: Never point the fi rearm at someone or at hard, fl at surfaces. Always
treat the shotgun as if it were loaded. (See points 1, 2 and 4 of the BASIC
SAFETY RULES).
EN
!
!
!
31
Page 31

EN
TRIGGER PLATE (Fig. 39)
• Work in reverse order to assembly, taking care to ensure that the hammer
is cocked, the safety is engaged and the carrier stop push button is pressed
down.
• Keeping the release button pressed well down, make the rear part of the trigger
plate adhere precisely to the receiver and push fi rmly towards the stock, as far
as it will go.
• Rotate the trigger plate until it is inserted in its housing in the receiver.
• Insert the trigger guard retaining pin only when the hole of the trigger guard is
centred on the receiver.
BREECH BOLT ASSEMBLY (Fig. 35)
(Breech bolt, operating rods with sleeve, recoil spring, and piston stop).
• Working on a fl at surface with the ejection port turned up, mount the breech
bolt assembly, operating rods with sleeve, recoil spring and piston stop on the
magazine tube (Fig. 34).
• Push the operating rods with sleeve all the way in to insert the breech bolt into
the receiver.
• Press the head of the breech bolt until the groove on its neck corresponds to
the edge of the bolt body (Fig. 32).
• Keeping the head pressed down in this position, insert the cocking handle on
the breech bolt. Fasten it into position by hitting it fi rmly (Fig. 33).
32
BARREL
• Check the barrel. The barrel and cartridge chamber must be clean and free
from obstructions.
• Insert the piston into the gas cylinder of the barrel, tightening the elastic seal
with the fi ngers to make it easier to install the piston in the cylinder (Fig. 5).
• Check that the carrier stop push button is pressed all the way down. If it is not,
push it all the way down (Fig. 6).
• Pull the breech bolt all the way back so that it remains open (Fig. 7).
CAUTION: When the release button is pressed, the breech bolt is pushed
forward by the recoil spring, until it is stopped at the ejection port by the cocking
!
handle, with the likelihood of damage to both parts.
• Insert the barrel into the receiver, ensuring that the magazine tube enters the
piston hole as well as that of the gas cylinder and the valve assembly (Fig.
10,11,12).
• Push it all the way into the receiver until it stops.
Page 32

• Slide the fore-end into place over the gas cylinder / the valve assembly and
magazine tube (Fig. 13). checking for the correct centering on the receiver
face. The fore-end is in the correct position when it is fully against the receiver
(Fig. 14).
• Screw the fore-end cap on tightly (Fig. 15).
• Keep your fi ngers away from the ejection port, press the breech bolt release
button and gently guide the breech bolt to lock (Fig. 16).
CAUTION: When pressing the release button to close the breech bolt, be sure
to not accidentally engage the cut-off lever. If this occurs, the breech bolt will be
kept open by the cut-off lever. In this case, lock the breech bolt while disengaging
the cut-off lever. Keep the fi ngers away from the ejection port (Fig. 17).
• Keeping the breech bolt pulled back 2 cm, pull the trigger, thereby decocking
the hammer (Fig. 18).
WARNING: Store your fi rearm so that children or other persons not familiar
with fi rearms cannot gain access to it. To reduce the risk of accidents involving
children, unload your fi rearm and lock it away. Store the ammunition in a separate
locked location. (See point 3 of the BASIC SAFETY RULES).
NOTICE: If the fi rearm will not be used for a long time, keep it lubricated and
disassembled (see the chapters “Maintenance” and “Storage”).
STOCK DROP AND CAST MODIFICATION
WARNING: Always check that the shotgun is unloaded (empty cartridge
chamber, empty receiver, empty magazine). Inspect the fi rearm by looking
through the ejection port, the loading gate and the chamber. If it is not empty,
unload it as instructed in the relevant section.
WARNING: Never point the fi rearm at someone or at hard, fl at surfaces. Always
treat the shotgun as if it were loaded. (See points 1, 2 and 4 of the BASIC
SAFETY RULES).
The Beretta semi-automatic A400 Xplor has a pre-set factory stock cast-off
setting (for right-handed shooters) with 55 or 60 mm drop.
The components which govern the drop and the cast are (see Fig. 40):
the drop-cast front spacer, made of reinforced technopolymer fi breglass.
the stock steel plate.
!
EN
!
!
!
!
Both the front spacer and the plate are designed to secure two different
drops, each with a cast-off or a cast-on (for left-handed shooters) depending on
how they are assembled. A set of additional spacers is also provided to further
change the drop by replacing the spacer pair.
33
Page 33

EN
REPLACING THE STOCK DROP AND CAST SPACERS
NOTICE: The right-hand cast is designated by the initials DX. The left-hand cast
is designated by the initials SX. The drop and cast of the front spacer and
!
plate must always be synchronised.
WARNING: Stock drop and cast modifi cation must be carried out by a competent
gunsmith. Failure to comply with these instructions can lead to damage to
!
property or injury to persons
REQUIRED TOOLS
1 Philips and 1 fl at-head screwdriver.
1 Torque wrench T15
1 Hexagonal spanner, 6 mm.
1 Tube spanner, 13 mm.
1 Torque wrench (previously mentioned) with a 13-mm pipe extension.
FIELD STRIPPING
• Use the Phillips screwdriver to remove the two screws sunk into the stock.
• Remove the Beretta Microcore recoil pad from the stock or Kick Off (Only for
Kick Off versions).
• (Only for Kick Off versions) Remove the Kick Off recoil absorption device by
unscrewing the special screws using a Torx T15 screwdriver.
• Use the 13-mm tube spanner to completely unscrew the retaining nut of the
stock and remove the nut, spring washer and plate .
• Separate the stock from the receiver and remove the plate .
34
Page 34

REASSEMBLY
• Centre the front spacer on the stock bolt tube. Make sure that the indicator
showing the desired drop and cast (“C-60-DX” in the diagram) is visible on the
spacer.
• Reposition the stock. Place the rear plate inside the stock. Make sure that
the same marking is visible on the plates.
• Use the 13-mm tube spanner to insert the retaining nut of the stock and spring
washer and tighten down with tightening torque 1.6 - 1.8 Kgm (Kilogrammeters). The use of a proper dynamometric spanner is recommended.
• (Only for Kick Off versions) Insert the Kick Off recoil absorption device into the
stock and tighten with the special screws using a Torx T15 screwdriver.
• (Only for the Kick Off versions) Mount the Beretta Microcore recoil pad into the
Kick Off holes (Only for the Kick Off versions) or onto the stock. Tighten the
screws using the Phillips screwdriver.
STORAGE
WARNING: To reduce the risk of accidents involving children or unauthorised
persons, keep your fi rearm locked away and store the ammunition in a separate
locked location!
NOTICE: Store the fi rearm disassembled (barrel/fore-end and receiver/stock)
in the supplied case. Before storage, always check the condition of the shotgun
and its case. Ensure that they are perfectly dry.
Moisture and water drops can damage the shotgun.
EN
!
!
NOTICE: Do not store the shotgun in a leather or fabric case. These materials
attract moisture, even though they may appear to be perfectly dry.
!
35
Page 35

IT
IT
EN
FR
ES
NOTES
DE
RU
SV
GR
36
Page 36

NOTES
IT
IT
EN
FR
ES
37
DE
RU
SV
GR
Page 37

IT
IT
EN
FR
ES
NOTES
DE
RU
SV
GR
38
Page 38

NOTES
IT
IT
EN
FR
ES
39
DE
RU
SV
GR
 Loading...