


Wireless Navigator
User’s Manual
Welcome

Copyright
Copyright 2005 by BenQ Corporation. All rights reserved. No part of this publication may
be reproduced, transmitted, transcribed, stored in a retrieval system or translated into any
language or computer language, in any form or by any means, electronic, mechanical, magnetic, optical, chemical, manual or otherwise, without the prior written permission of this
company.
Disclaimer
BenQ Corporation makes no representations or warranties, either expressed or implied,
with respect to the contents hereof and specifically disclaims any warranties, merchantability
or fitness for any particular purpose. Further, BenQ Corporation reserves the right to revise
this publication and to make changes from time to time in the contents hereof without obligation of this company to notify any person of such revision or changes.
Licensing
SOFTWARE PRODUCT: BenQ Desktop/Notebook Software (Drivers and associated Applications) for Wireless Presentation
SOFTWARE LICENSE AGREEMENT FOR BenQ SYSTEMS PRODUCTS:
IMPORTANT READ CAREFULLY: This BenQ Systems Software License Agreement ("SLA")
is a legal agreement between you (either an individual or a single entity) and BenQ Systems
for the BenQ software product identified above, which includes computer software and
associated media and printed materials, and may include "online" or electronic documentation ("SOFTWARE PRODUCT' or "SOFTWARE"). By installing, copying, or otherwise
using the SOFTWARE PRODUCT, you agree to be bound by the terms of the SLA.
Soft Product License
The SOFTWARE PRODUCT is protected by copyright laws and international copyright
treaties, as well as other intellectual property laws and treaties. The SOFTWARE PRODUCT
is licensed, not sold.
1. Grant of license
This SLA grants you the rights to install, use, access, run, or otherwise interact with ("RUN")
the SOFTWARE on the computers in conjunction with the hardware product which it is
designed to work with. The SOFTWARE PRODUCT may be installed, accessed, displayed,
run, shared or used concurrently on or from different computers.
2. Description of other rights and limitations
(a) You may not modify, reverse engineer, decompile, or disassemble the SOFTWARE
PRODUCT.
(b) The SOFTWARE PRODUCT is licensed as a single product. Its components parts may
not be separated for use.
(c) You may not sub-license, rent or lease the SOFTWARE PRODUCT.
Copyright2

(d) You may permanently transfer all of your rights under this SLA, provided you retain no
copies, you transfer all of the SOFTWARE PRODUCT and the associated hardware (including all component parts, the media and printed materials, any upgrades, this SLA), and the
recipient agrees to the terms of the SLA.
Te r m i n a t i o n .
Without Prejudice to any other rights BenQ may terminate this SLA if you fail to comply
with the terms and conditions of this SLA. In such event, you must destroy all copies of the
SOFTWARE PRODUCT and all of its components parts.
3. Copyright.
All rights, title and interest, including all copyrights and other intellectual property and proprietary rights, in and to the SOFTWARE PRODUCT (including but not limited to any
images, photographs, animations, video, audio, music, text, and "applets," incorporated into
the SOFTWARE PRODUCT), the accompanying printed materials, and any copies of the
SOFTWARE PRODUCT, are owned by BenQ or its suppliers. The SOFTWARE PRODUCT
is protected by copyright laws and international treaty provisions. Therefore, you must treat
the SOFTWARE PRODUCT like any other copyrighted material. You may not copy SOFTWARE or the printed materials accompanying the SOFTWARE.
Limited warranty:
BenQ warrants that (a) the SOFTWARE PRODUCT will perform substantially in accordance with the accompanying written materials for a period of ninety (90) days from the
date of receipt, and (b) any hardware accompanying the SOFTWARE PRODUCT will be free
from defects in materials and workmanship under normal use and service for a period of
six(6) months from the date of receipt.
Customer remedies.
BenQ's and its suppliers' entire liability and your exclusive remedy for a breach of the limited
warranty set forth above shall be, at BenQ's option, either (a) return of the price paid, or (b)
repair or replacement of the SOFTWARE PRODUCT or hardware that does not meet
BenQ's Limited Warranty and which is returned to BenQ with a copy of your receipt. This
Limited Warranty is void if failure of the SOFTWARE PRODUCT or hardware has resulted
from accident, abuse, misapplication or modification. Any replacement SOFTWARE
PRODUCT or hardware will be warranted for the remainder of the original warranty period
or thirty (30) days, whichever is longer.
No other warranties.
To the maximum extent permitted by applicable law, BenQ and its suppliers disclaim all
other warranties, either express or implied, including, but not limited to, implied warranties
of merchantability and fitness for a particular purpose, with regard to the software product,
and any accompanying hardware.
No liability for damages.
To the maximum extent permitted by applicable law, in no event shall BenQ or its suppliers
be liable for any direct, special, incidental, indirect, consequential or punitive damages
whatsoever (including, without limitation, damages for loss of business profits, business
interruption, loss of business information, or any other pecuniary loss) arising out of the use
of or inability to use the software product or accompanying hardware, even if BenQ has been
advised of the possibility of such damages. If the foregoing limitation is held to be unenforceable for whatever reason and benq shall be held liable to you for any matter arising out
of or relating to your use of the software, whether based in contract, tort, strict liability or
otherwise, BenQ's maximum liability to you for all events, acts or omissions shall not
exceed, in the aggregate, an amount equal to the fees paid by you for the software.
Licensing 3

Table of Contents
Overview .................................................................. 5
System Requirements ........................................................... 5
Software Installation and Setup .............................. 6
BenQ Wireless Software Installation - Notebooks ............. 6
Wireless Navigator Custom Software Installation .............8
Making Presentations .............................................. 12
Overview ...............................................................................12
Part One: Wireless Configuration ....................................... 12
Part Two: Using the Wireless Navigator Application ........15
Options .................................................................................16
Starting and Controlling the Presentation .......................... 18
Controlling Projector Access ............................................... 20
Disconnecting from the Projector ....................................... 21
Collaborative Presentations .................................... 22
Collaborative Presentations .................................................22
Software Uninstallation ........................................... 23
Uninstalling the Wireless Navigator Software Driver ........ 23
Troubleshooting ...................................................... 24
General Q&A ........................................................................ 24
Client Notebook and Tablet PCs ......................................... 25
Table of Contents4

Overview
System Requirements
In order to completely create and display presentations using BenQ Wireless Navigator it is
necessary to have a notebook or Tablet PC and a projector with Wireless Navigator. The
corresponding system requirements are listed below:
Notebook or Tablet PC Specifications
Windows 2000 or XP (Home, Pro and Tablet PC editions)
32 MB of RAM
50 MB hard drive
CD-ROM drive
Embedded/Add-on Wireless capability (802.11b compatible)*
*The Wireless Navigator software has been tested to be compatible with different wireless
client cards as below. Ensure you have installed the latest driver when using the wireless card.
Wireless Card Type Vendor Model Wireless Standard
Embedded Atheros HP WLAN a/b/g
W500
Embedded Centrino Intel 802.11b
PC Card Netgear MA511 802.11b
PC Card Netgear MA521 802.11b
PC Card Netgear WG511T 802.11a/b/g
PC Card Dlink Airplus 650+ 802.11b
PC Card Linksys WPC54GS 802.11a/b/g
PC Card US Robotics USR2210 802.11b
PC Card SpeedStream
(Siemens)
PC Card D-Link DWL-650+ 802.11b
PC Card Xircom (Intel) CWE-1130 802.11b
PC Card TrendNet TEW-221PC 802.11b
PC Card US Robotics USR2210 802.11b
PC Card Dell TrueMobile 1150 1150 PC Card 802.11b
PC Card Cisco AiroNet 350 802.11b
USB Adapter Linksys WUSB12 802.11b
USB Adapter ASUS* WL161 802.11b
SS1021 802.11b
802.11a/b/g
Projector
A compatible projector with BenQ Wireless Navigator embedded software
Overview 5
Software Installation and Setup
Pre-installation Check
1. Check that your system meets the system requirements for operating system and hardware requirements described under “System Requirements” in the “Overview” chapter.
2. Ensure you have sufficient privileges to install software.
3. Ensure you have uninstalled any previously installed BenQ Wireless Navigator
software.
4. Close any other applications being run.
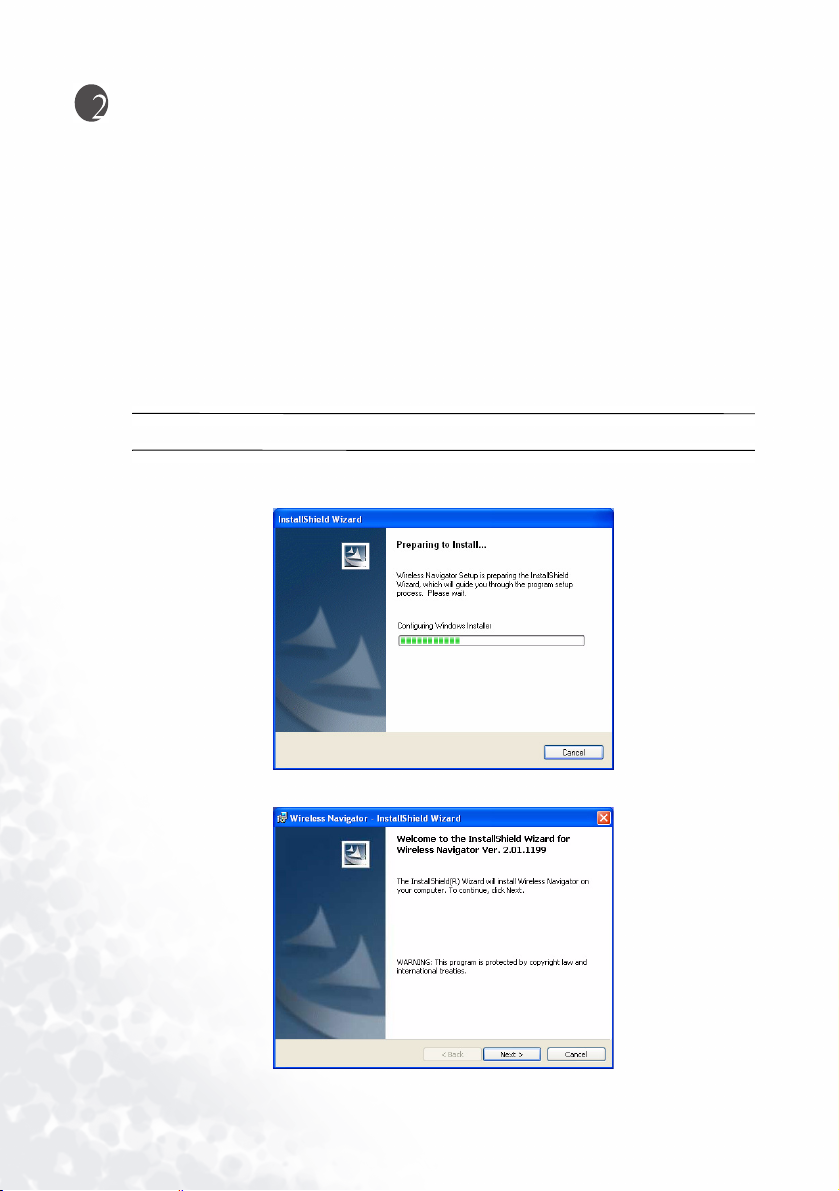
BenQ Wireless Software Installation - Notebooks
1. Insert the CD in the notebook or desktop’s CD-ROM drive.
The Setup program may auto-run on some systems after inserting the CD.
2. If installation does not begin automatically, browse the CD using Windows Explorer
and double-click Setup.exe to begin installation.
3. The InstallShield Wizard will guide you through the installation process.
Software Installation and Setup6
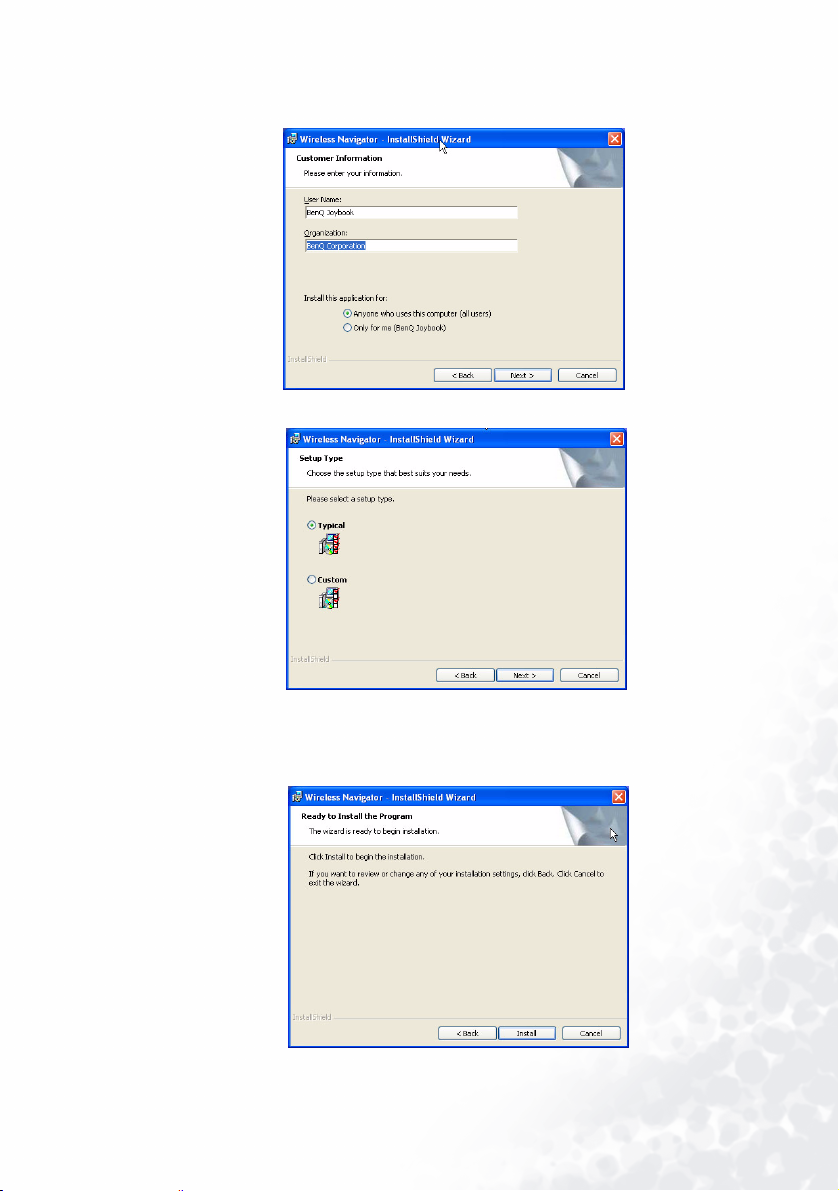
4. Required information that must be entered before the installation process can
proceed.
5. As shown above, you may choose either a typical or custom installation. The Typical
option will install Wireless Navigator into a default folder under Program Files. The
Custom option will let you choose the software features and location.
6. Typical Installation: Review settings at this point before beginning installation.
Software Installation and Setup 7
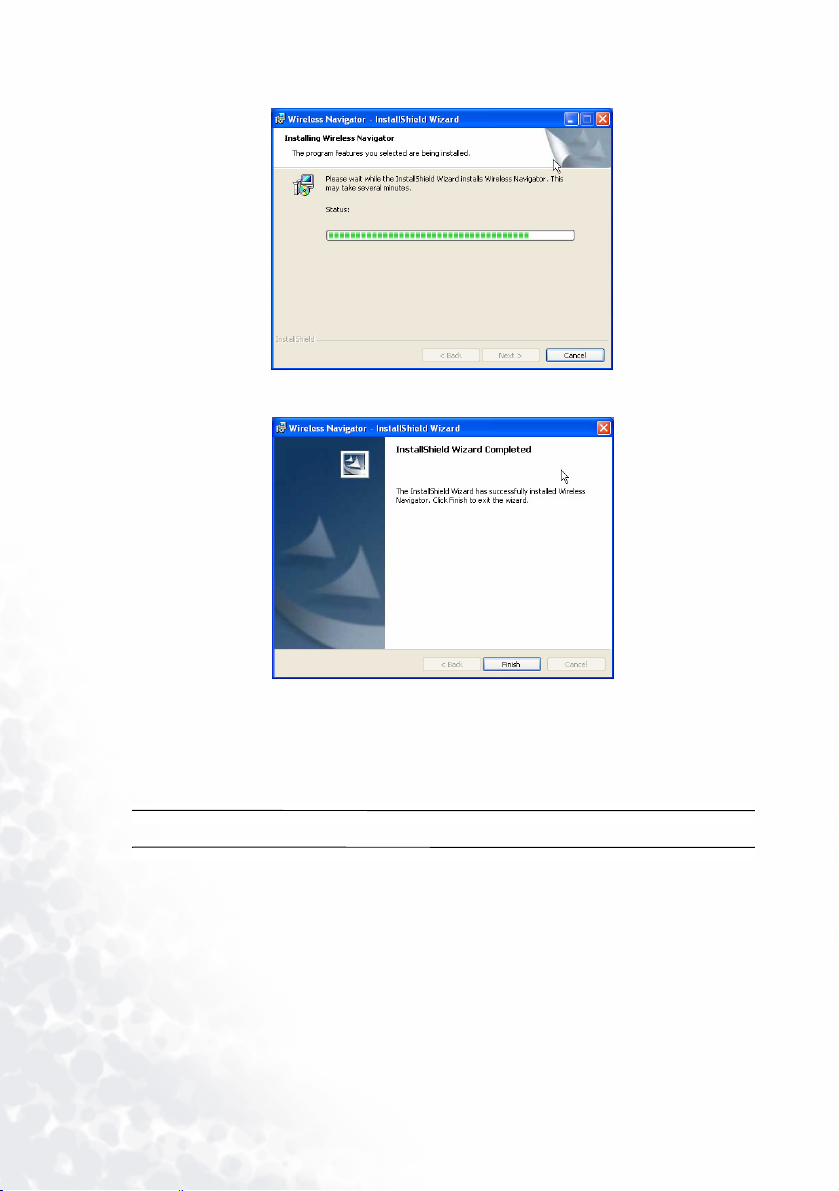
7. Installation of Wireless Navigator has completed. Click Finish to complete setup.
8. Restart your notebook.
Wireless Navigator Custom Software Installation
1. Insert the CD in the notebook or desktop’s CD-ROM drive.
The Setup program may auto-run on some systems after inserting the CD.
Software Installation and Setup8

2. If installation does not begin automatically, browse the CD using Windows Explorer
and double-click Setup.exe to begin installation.
3. The InstallShield Wizard will guide you though the installation process.
Software Installation and Setup 9

4. Required information must be entered before the installation process can proceed.
5. As shown above, you may choose from either a typical or custom installation. Custom
lets you decide which features of the application are installed and in which location.
6. Wireless Navigator will install into a default folder under Program Files. If you wish to
install the software elsewhere, you may do so at this point in the installation process.
Software Installation and Setup10
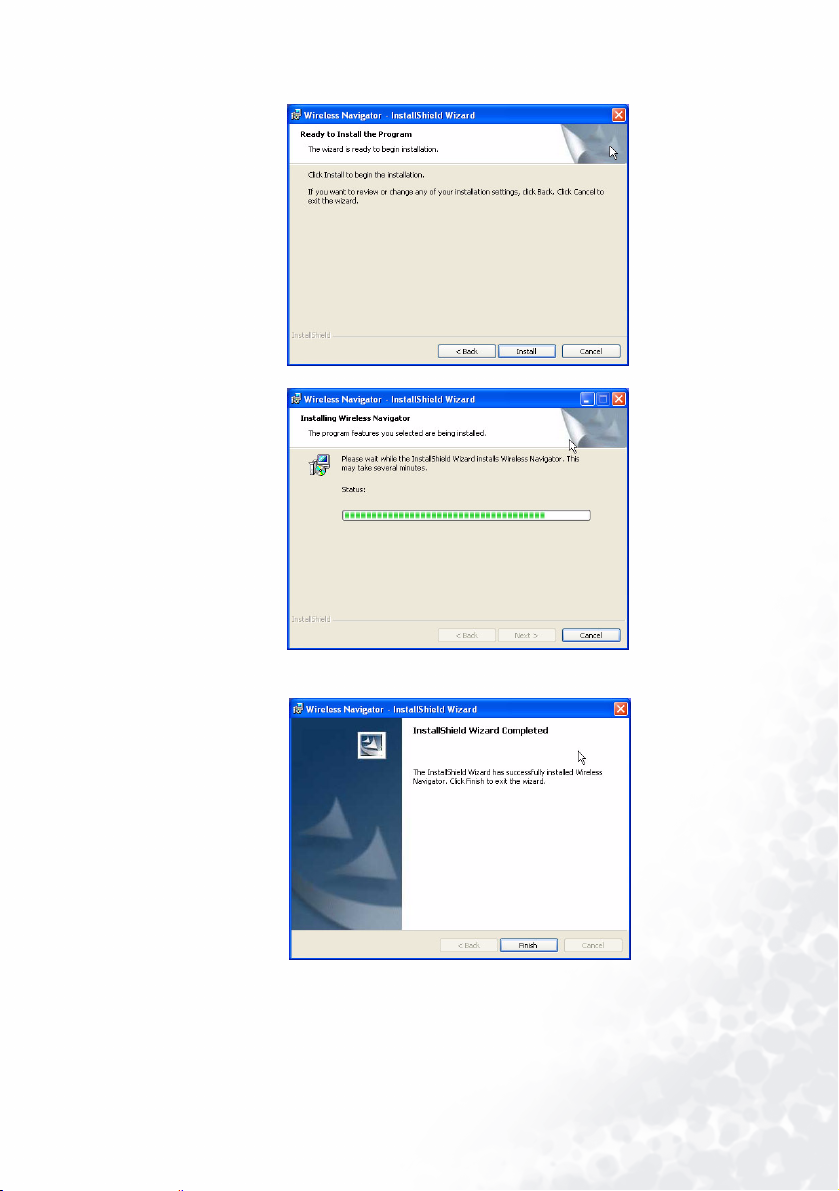
7. Review settings at this point before beginning installation
8. Installation of Wireless Navigator has completed. Click Finish to complete setup.
Software Installation and Setup 11

Making Presentations
Overview
Notebook presentations are made from existing PowerPoint presentations or from other
applications such as Adobe Acrobat, Microsoft Word, Microsoft Excel, and so forth basically anything from the screen of your notebook.
The process takes two steps:
1. Wireless configuration of the notebook.
2. Using the Wireless Navigator application to connect to the projector and deliver
presentations.
Part One: Wireless Configuration
You can connect to the projector and send images wirelessly in two 802.11b modes: Ad Hoc
or Infrastructure.
Ad Hoc mode allows multiple wireless users to connect to a projector with 802.11b
wireless-enabled PCs using a point-to-point connection.
Infrastructure mode enables users to access a network projector. To use Infrastructure
mode, you need a wireless 802.11b access point and one or more 802.11b
wireless-enabled PCs.
Configuring the Network Settings on Your Notebook or PC
Step 1 - Use Windows XP Zero Config
Ensure that you are at the Wireless Presenter screen on the Projector OSD.
Right-click on Wireless Connection icon in System Tray and click View Available
Wireless Networks.
Making Presentations12

Click on the SSID that matches the Wireless Projector’s SSID and click Connect.
Wait for Windows to configure the wireless network (~30s)
Launch Wireless Navigator application.
Click on the desired projector, then click Connect (or simply double-click on the
projector name) to start presenting.
Step 2 – Use Wireless Navigator
Ensure that you are at the Wireless Navigator screen on the Projector OSD.
Launch Wireless Navigator application.
Making Presentations 13

If the desired projector is shown with a green or amber icon, click on the projector and
then click Connect (or simply double-click on the projector name) to start presenting.
Otherwise, click Other Projector and enter in projector information
Click Connect. The wireless utility will take you a few minutes to configure your
notebook, connect you to the projector and start presenting, when your notebook is
configured for the first time.
Configuring the Network Settings on Your Windows 2000 Notebook or
PC
Before connecting to the projector, you need to make sure the network card settings for your
notebook, PC, or handheld device network card match the settings you entered for the
projector. The projector on boot-up displays the wireless settings it is currently configured
with - infrastructure or ad hoc, with or without encryption.
1. From the Start menu click the Control Panel icon.
2. Click the Network and Internet Connections.
On some Windows systems, you can right-click My Network Places or Network
Neighborhood on the desktop and select Properties.
3. Right-click the Wireless Network Connection icon and select Properties.
4. Click Configure under the name of the wireless card on the General tab.
Making Presentations14
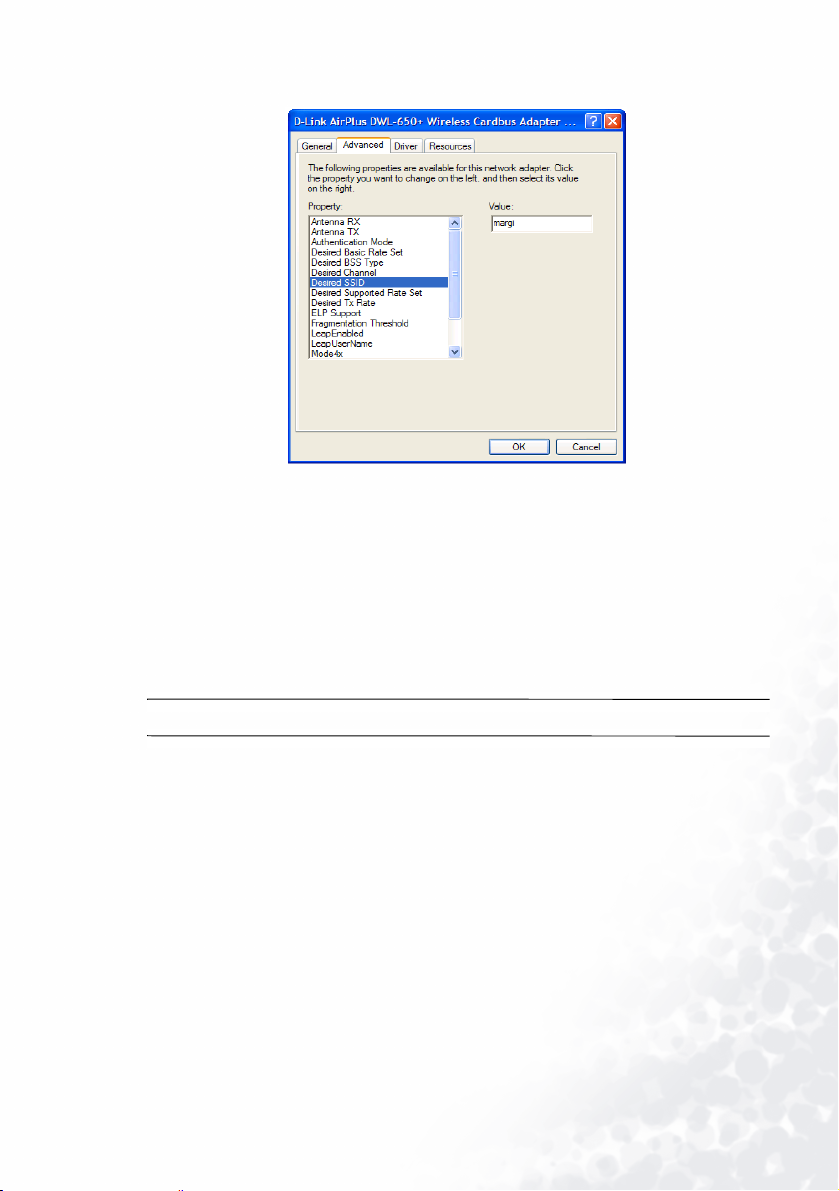
5. Click the Advanced tab. You will see a screen similar to this:
6. Set the SSID to match the name as shown on the projector.
7. Set Mode to Infrastructure/Ad Hoc as shown on the projector boot screen.
If Ad Hoc is selected, you will need to enter the Channel as shown on the projector.
8. Make sure WEP Encryption is enabled or disabled as shown on the projector. If
encryption is enabled, you need to contact the system administrator to enter the WEP
(Wireless Encryption Protocol) key.
9. Click OK.
10. Right-click the Wireless Network Connection icon and select Properties.
11. Double-click TCP/IP. If Infrastructure mode is selected, you may need to set the IP,
Subnet Mask and Gateway addresses.
Contact the system administrator to obtain the necessary settings.
In Ad Hoc mode, ensure that “Obtain an IP address automatically” and “Obtain DNS server
address automatically” are selected. Click the Advanced button and check that DHCP is
enabled.
Part Two: Using the Wireless Navigator Application
Starting the Wireless Navigator Application
After you have configured your wireless network using the information from the earlier in
this chapter, perform the following steps to configure your notebook presentation.
Making Presentations 15
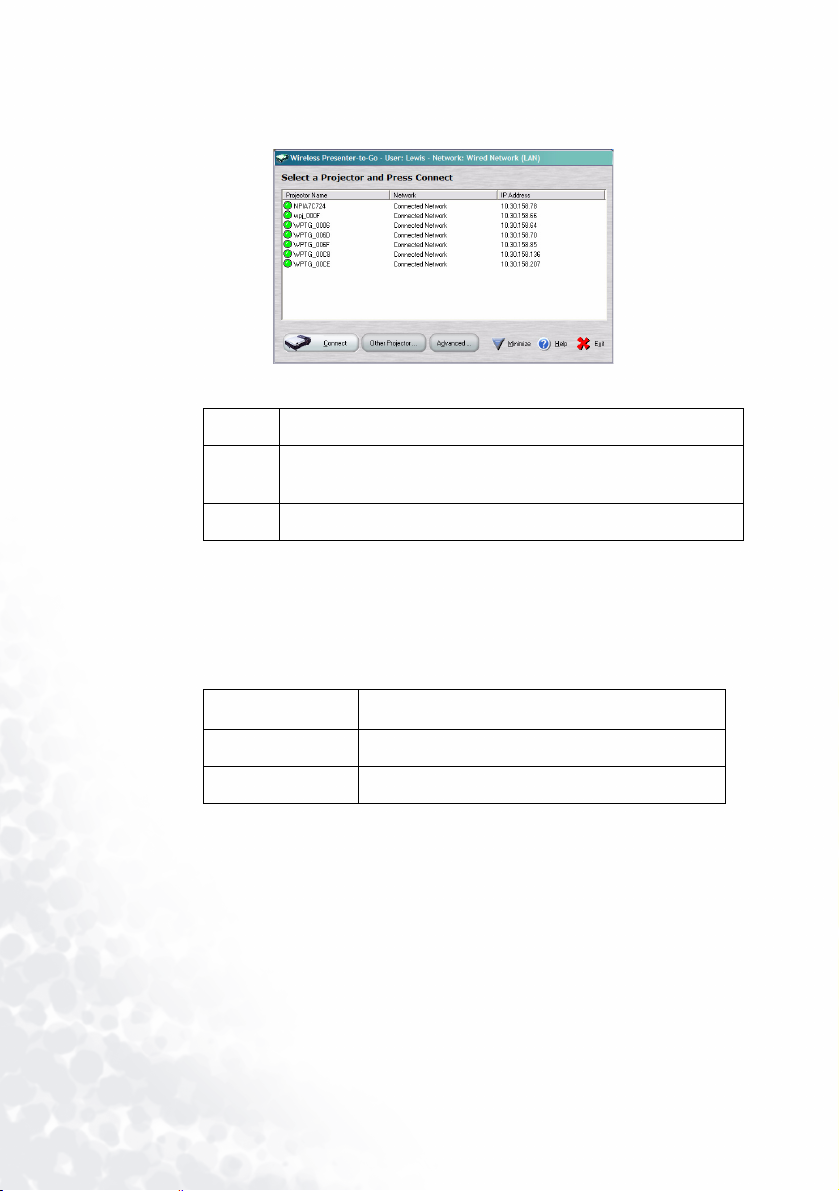
1. Double-click on the Wireless Navigator Panel icon on your desktop or from the Start
button select Programs > BenQ Wireless Navigator > BenQ Wireless Navigator. The
Projector Selection window opens.
Each projector has a colored button designating it as:
Green Ready.
Yellow Accessible but on another network. It can be used for a
presentation but will need to be configured.
Red Currently not accessible.
The list shows accessible projectors and all previously used projectors.
2. Select a projector from the list and click Connect.
Options
The Projector Selection window has two options:
Option Description
Other Projector Lets you add a new projector to the list
Advanced Lets you configure the projector.
Making Presentations16
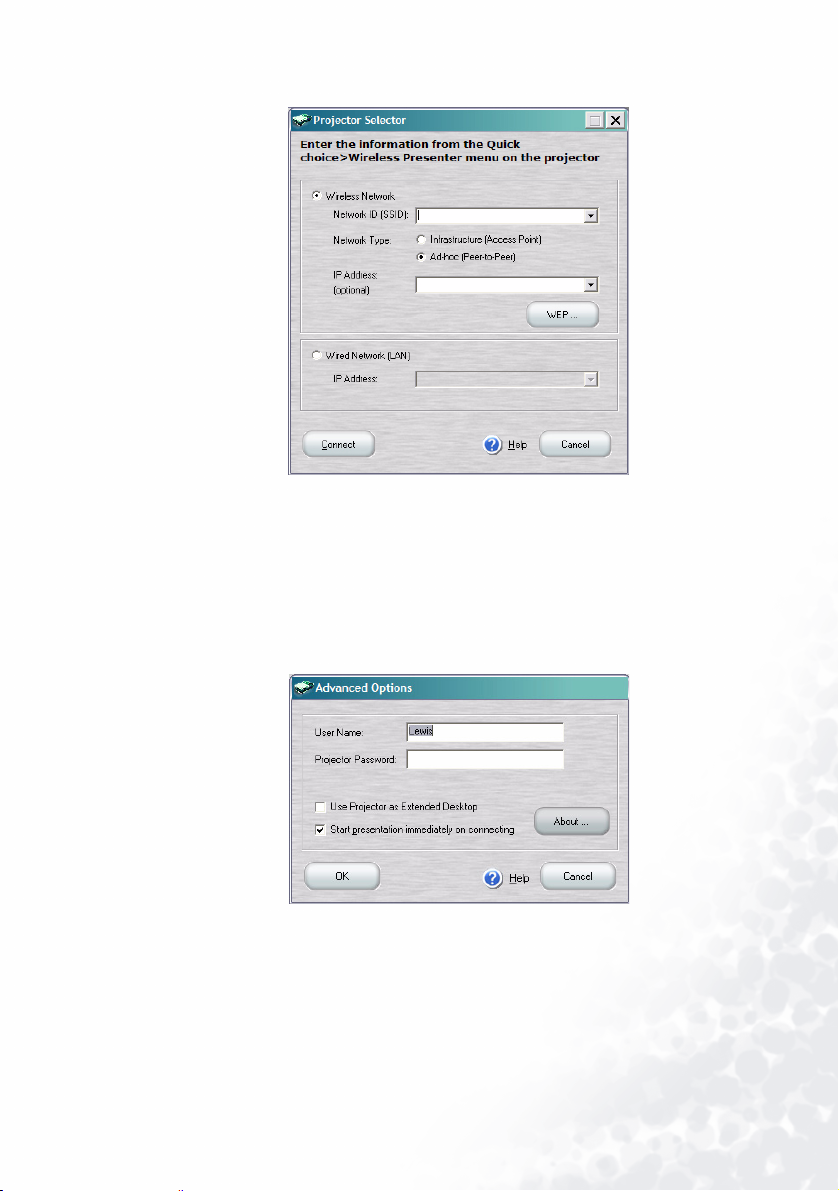
When you click the Other Projector button, the following screen appears:
This window lets you add a new projector to the list of projectors.
1. Select the wireless or wired projector location depending on how the new projector is
connected.
When you boot up the new projector you may see default settings or none at all. Contact
your systems administrator for network configurations.
2. Click Connect to connect to the new projector.
When you click the Advanced button on the Projector Selection window the following
Settings window appears:
Making Presentations 17
Select one of the following options to configure the projector.
Option Description
User name and Password Enter or confirm logon information.
Use Projector as Extended Desktop Lets the user select a second screen
for viewing from the projector while he
or she can view other applications
from the same PC privately on their
desktop.
By default, this feature remains as
selected for the next use. You must
re-enter the Advanced options and
deselect this feature if you do not
wish to use it in the future.
Start Presentation immediately on
connecting
Displays your notebook screen on the
projector.
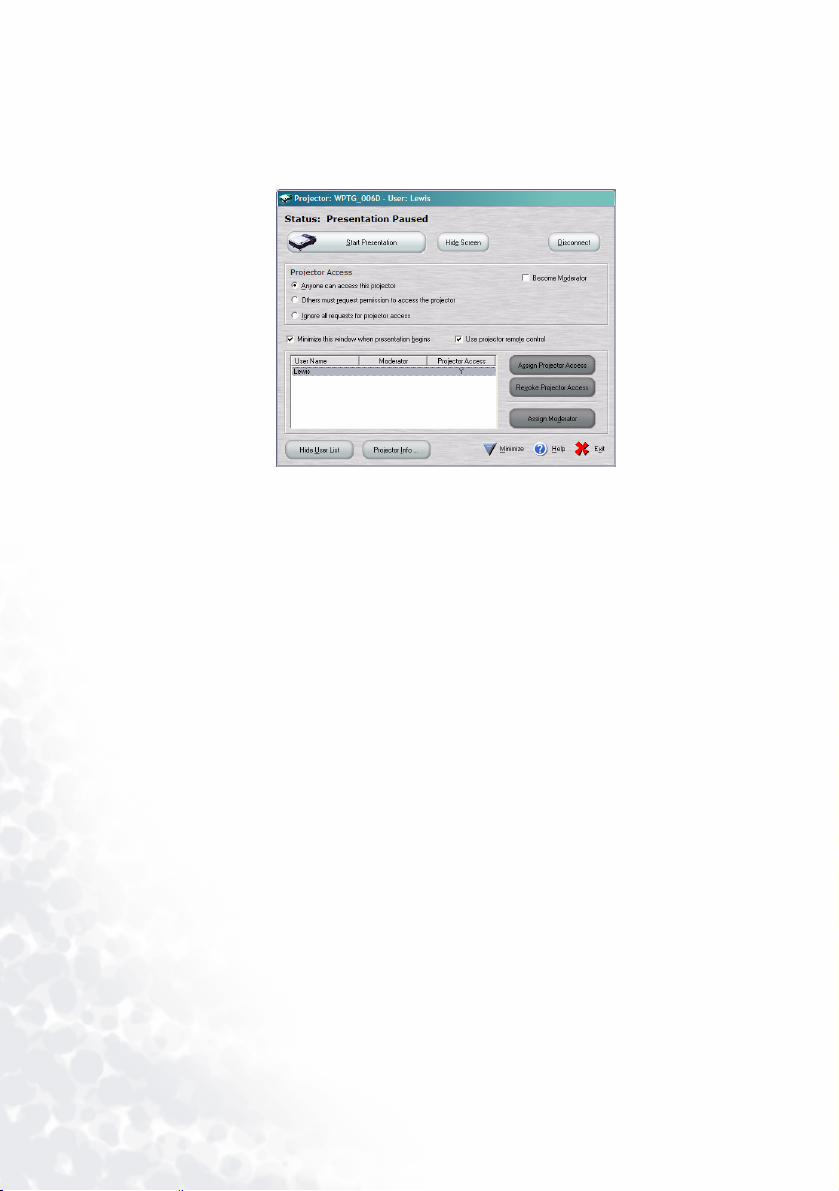
Starting and Controlling the Presentation
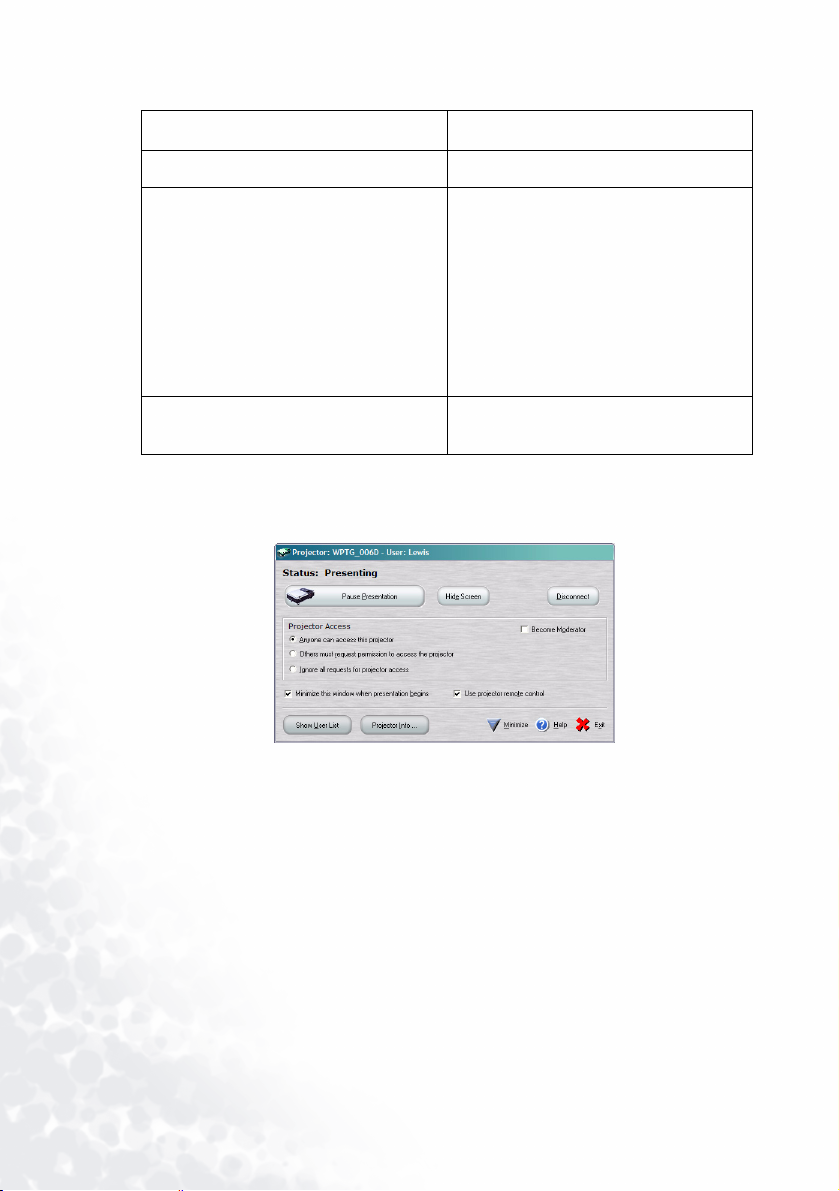
Once the connection with a projector has been made, the Projector Control window opens.
Making Presentations18

The Projector Access button has three states:
Button Name Description
Start Presentation Appears if no other users are logged
on to the projector. Click the button to
display your notebook screen and
begin your presentation.
Pause Presentation Stops the screen you are displaying.
After clicking it, the button says “Start
Presentation.”
Request Projector Access Appears when another user is logged
on to the projector. Click the Request
Projector Access button to request
permission to display your screen. If
the request is granted, this button
changes to Start Presentation. Click
Start Presentation to display your
screen.
Options
Click the Show User List button to see a list of users connected to the projector.
Click the Hide Screen button to blank the screen (there is no image on the projector).
Use the Hide this window when presentation begins option if you want to hide this
window.
The Projector Info button shows information about the projector you are connected to
like the following example:
Making Presentations 19
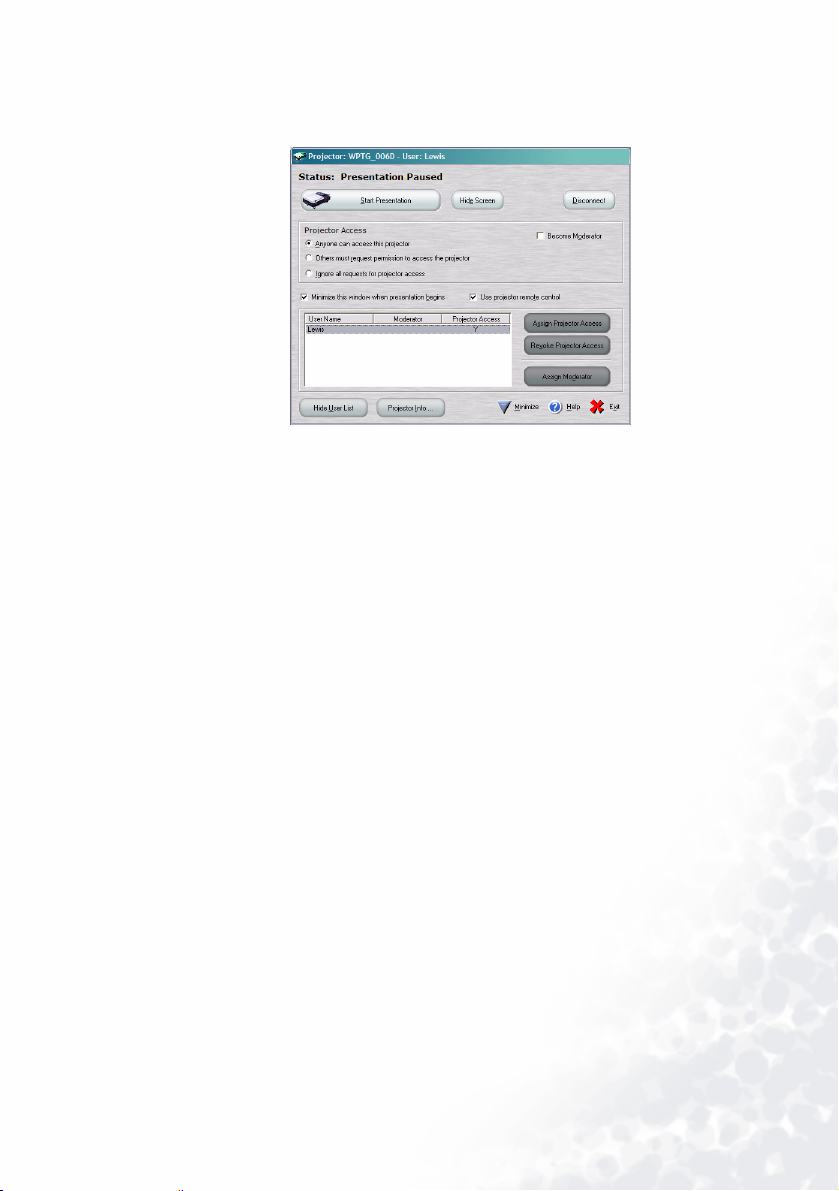
Controlling Projector Access
Select one of the following options to set projector access by other users.
Wireless Navigator provides three different ways for groups to collaborate during a
presentation and supports 802.11b enabled notebooks, tablets, and pocket PCs.
‘Anyone can access this projector’ allows for access to the projector by any user who
clicks ‘Start Presentation’. The new user then overrides the curent user. Ideal for small,
highly interactive department meetings.
‘Others must request permission to access the projector’ allows the current user to
approve or deny requests for access. Ideal for more formal meetings.
‘Become Moderator’ and you may ‘assign’ or ‘revoke’ projector access by meeting
participants. You may also assign the role of moderator to another user or ‘Ignore all
requests for projector access’ so that you may give your presentation uninterrupted.
Only when the user disconnects from the projector or selects from one of the two
options above, can other users access the projector.
Become a Moderator
Become Moderator – This is the superuser mode. To become the Moderator, you must
currently have projector access. As moderator, you can grant projector access to users, pass
access to another user and revoke access from any user, without giving up control of the
projector. They may also pass moderatorship to another user.
This option is available to you:
1. If you are the first person to access the projector. or
2. No one else is currently connected as moderator and you have presentation access.
Controlling Users Connected to the Projector
Making Presentations20
1. Click the Show User List button if you want to view users who are connected to this
projector. From this screen you can grant or revoke access if you are the moderator.
The moderator role can also be assigned from this screen.
2. Click on any user name to assign or revoke access or assign a moderator.
Disconnecting from the Projector
Click the Disconnect button to disconnect from the current projector. This will return
you to the projector list.
‘Exit’ closes the application.
Making Presentations 21

Collaborative Presentations
Collaborative Presentations
Wireless Software provides three different ways for groups to collaborate during a
presentation and supports 802.11b enabled notebooks and tablet devices.
‘Anyone can access this projector’ allows for access to the projector by any user who
clicks ‘Start Presentation’. The new user then overrides the curent user. Ideal for small,
highly interactive department meetings.
‘Others must request permission to access the projector’ allows the current user to
approve or deny requests for access. Ideal for more formal meetings.
‘Become Moderator’ and you may ‘assign’ or ‘revoke’ projector access by meeting
participants. You may also assign the role of moderator to another user or ‘Ignore all
requests for projector access’ so that you may give your presentation uninterrupted.
Only when the user disconnects from the projector or selects from one of the two
options above, can other users access the projector.
Become a Moderator
Become Moderator – This is the superuser mode. To become the Moderator, you must
currently have projector access. As moderator, you can grant projector access to users, pass
access to another user and revoke access from any user, without giving up control of the
projector. They may also pass moderatorship to another user.
This option is available to you:
1. If you are the first person to access the projector. or
2. No one else is currently connected as moderator and you have presentation access.
Controlling Users Connected to the Projector
1. Click the Show User List button if you want to view users who are connected to this
projector. From this screen you can grant or revoke access if you are the moderator.
The moderator role can also be assigned from this screen.
2. Click on any user name to assign or revoke access or assign a moderator.
Collaborative Presentations22

Software Uninstallation
Uninstalling the Wireless Navigator Software Driver
When updating PC software versions, it is recommended that you remove the old software
drivers prior to installing the new version. Follow the procedure below to remove the
software drivers.
1. Open Add or Remove Programs in Control Panel.
2. Click Change or Remove Programs, and then select Wireless Navigator to remove.
Click the Remove button.
3. Click on the Remove button in the pop-up Wireless Navigator window to remove
Wireless Presenter software.
4. Click Change/Remove or Remove.
5. Click on ‘Yes, I want to restart my computer.” Ensure all applications are closed.
6. Click Finish.
Software Uninstallation 23

Troubleshooting
General Q&A
What do I need to make a wireless presentation?
You will need a BenQ Projector with the wireless option and a wireless enabled notebook,
tablet PC or desk PC.
What kinds of client devices are supported?
The following devices are supported
- Wireless (802.11b) enabled notebooks and tablet PCs running Windows 2000 or XP.
What are the system requirements on the client-side?
- Notebooks and tablet PCs - Windows 2000 or XP with 802.11b (embedded or via wireless
Lan card).
Which wireless cards are supported?
Projector Side - Strongly suggest using BenQ CF card XI 835 - Wireless cards supporting
802.11b (with ad-hoc and infrastructure support). No guarantee for supporting all other
brand CF cards.
PC Side-Strongly suggest using BenQ Joybook series -embedded wireless card supporting
802.11b (with ad-hoc and infrastructure support). No guarantee for supporting all other
brand wireless cards.
Is there a specific order in which I should turn on the devices?
It's probably best to turn the projector on first so that you can see the projector boot-up
screen, which displays IP information. Then turn on and connect your client-side device to
the projector's wireless network and launch the BenQ Wireless Navigator application.
Are all applications supported?
-On notebooks and tablet PCs, Most of the applications are supported, including
PowerPoint and its associated animations and transitions. But not comment to use MPEG
and any other movie alike files in full screen.
I cannot see the projector.
Check that your client device and the projector are both connected to the wireless
network.
Ensure that the wireless card is inserted into the projector & displays a solid green
light.
Check if the projector is displaying IP information. If not, restart the projector.
Check if the client device shows the wireless network seen on the projector screen
as available. If not, make sure that the wireless card is inserted/turned on and
displays a solid green light.
Troubleshooting24

Client Notebook and Tablet PCs
What are the software components are installed on my notebook or tablet PC
during installation of Wireless Navigator?
Presenter navigator - This application enables you to connect your wireless notebook or
tablet PC to the projector.
I see a blank/blue screen after connecting/clicking the "Start Presentation"
button
This indicates that extended desktop is on, and your projector is behaving as a second
monitor. You can drag and drop application windows to the projector screen. To turn this
feature off, you must first disconnect from the projector, then click "Advanced" and uncheck
the box that says "Use projector as extended desktop".
What do the different color icons next to the projectors listed in the Presenter
panel signify?
Your computer caches recently accessed projectors. Green indicates that the projector is on
the same network as your client device and is available for selection. Amber indicates that
this projector is on an alternate network, which is also available. Red indicates that this
projector is on a network that is not currently accessible.
The projector I want to use is not in the list in the Presenter panel, can I add it
by manually?
Yes, just click the button that says "Other Projector°K".and Enter in the projector
information you see on the boot-up screen, and click OK to connect to the projector.
How do I change username and password based on the projector information?
In the Presenter panel, click the button that says "Advanced Options" and enter in the new
username and password.
What is Extended Desktop mode?
In Extended Desktop mode, the projector behaves as a second monitor. You can drag and
drop new application windows from your primary display to the projector. You can make
the projector your primary display as well. Additionally, you can use the multiple monitor
support built into PowerPoint to send the slideshow to the projector, while having other
application windows displayed on the primary display.
Does Wireless Navigator support animations & transitions in PowerPoint?
Yes, there is full support for PowerPoint animations and transitions.
Is audio from the projector supported?
Currently there is no support for audio from the projector wirelessly.
Why is there no image on the projector screen or the colors are distorted?
Please ensure that the resolution is set to 1024 x 768 and color depth to 24 or 32-bit
Troubleshooting 25

Can multiple notebooks and tablet PCs access the projector? How does collaboration work?
Yes, multiple notebooks, tablet PCs and desk PCs can access the projector simultaneously.
However, only one video signal can be sent to the projector at a time. Collaboration works
through the client software and lets users access the projector seamlessly. For more
information, refer to the Collaboration section in your user manual.
Troubleshooting26
 Loading...