

Page 1

TL320C
Transparent Cabinet
User Manual
Page 2

Disclaimer
BenQ Corporation makes no representations or warranties, either expressed or
implied, with respect to the contents of this document. BenQ Corporation reserves the
right to revise this publication and to make changes from time to time in the contents
thereof without obligation to notify any person of such revision or changes.
Copyright
Copyright 2014 BenQ Corporation. All rights reserved. No part of this publication may
be reproduced, transmitted, transcribed, stored in a retrieval system or translated into
any language or computer language, in any form or by any means, electronic, mechanical,
magnetic, optical, chemical, manual or otherwise, without the prior written permission
of BenQ Corporation.
Page 3

Table of Contents 3
Table of Contents
Disclaimer.............................................................................. 2
Copyright............................................................................... 2
Important safety instructions............................................ 4
Safety precautions and maintenance ........................................... 4
Packing list............................................................................. 5
Overview ............................................................................... 6
Using the cabinet ................................................................. 7
Front view ......................................................................................... 7
Back view with metal cover .......................................................... 7
Back view without metal cover.................................................... 8
Back View without PMMA cover................................................. 8
Back cover open .............................................................................. 8
Connecting power cord.............................................................. 10
Connecting HDMI cable.............................................................. 11
Connecting VGA cable................................................................ 12
Inserting a USB device................................................................. 13
Inserting an SD card..................................................................... 14
Using the remote control ................................................ 15
The OSD (On-Screen Display) menu ........................... 16
Preference menu........................................................................... 16
Function set menu........................................................................ 17
Time set menu .............................................................................. 17
Screen set menu ........................................................................... 17
Product specification......................................................... 18
Supported file formats................................................................. 19
Support resoluion......................................................................... 19
Page 4

Important safety instructions4
Important safety instructions
Safety precautions and maintenance
Use of control, adjustments, or procedures other than those specified in this
documentation may result in exposure to shock, electrical hazards and/or
mechanical hazards.
• Please read this user manual before operating this transparent cabinet. Keep this manual
in a safe place for future reference.
• Always place the transparent cabinet on a flat surface during operation.
• Do not place inflammables near the transparent cabinet
• Do not put any object on the transparent cabinet that might crash it.
• Do not place liquids near or on the cabinet. Liquids spilled into the transparent cabinet
will void your warranty.
• Do not wipe out the surface of transparent cabinet with any corrosive.
• Do not scratch the surface of transparent cabinet with any sharp objection.
• Avoid putting volatile matter nearby the cabinet.
• Do not tear down the cabinet without any authorized engineer.
Page 5
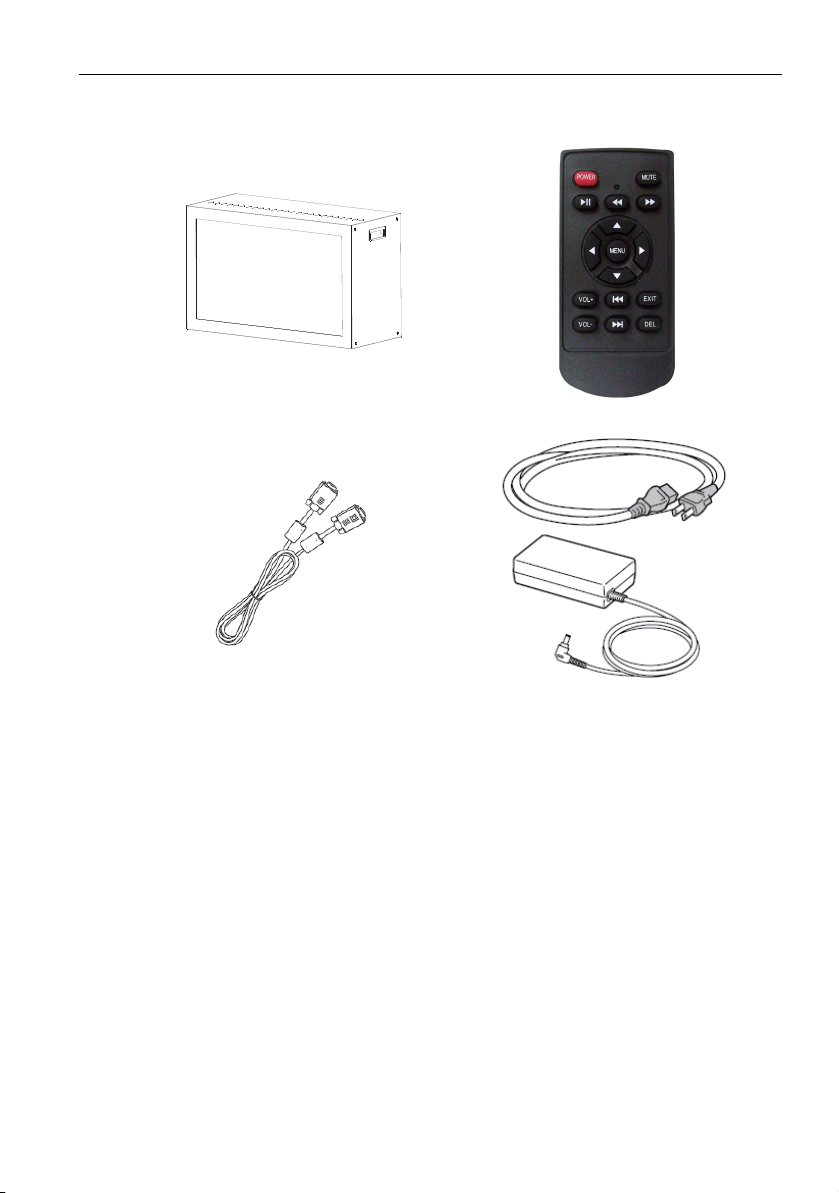
Packing list
Packing list 5
Transparent cabinet x 1 Remote controller x 1 with battery
VGA cord x 1 Adaptor with power cord x 1
Page 6
Overview6
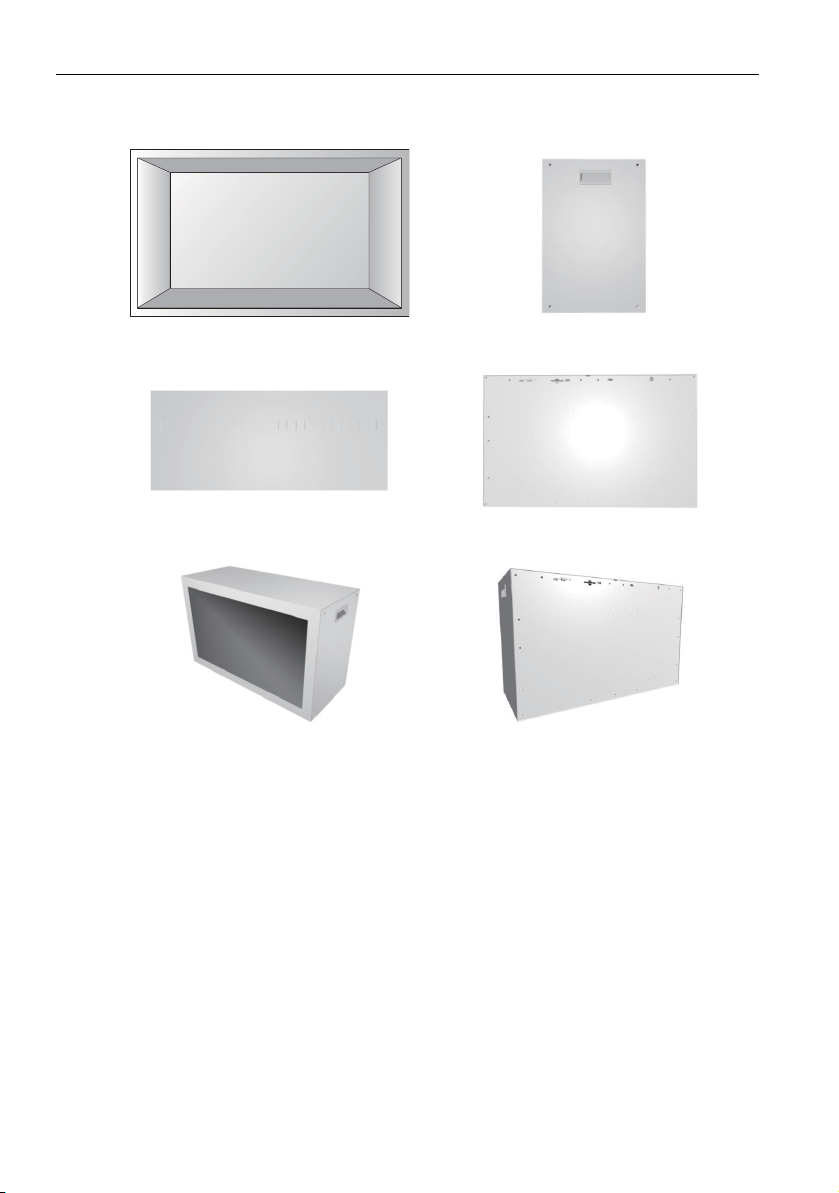
Overview
Front view Side view
Top view Back view
Front diagonal view Back diagonal view
Page 7

Using the cabinet
123
4
6
7
5
8
9
10
11
12
456
7891011
12
Front view
Using the cabinet 7
2
1
3
Back view with metal cover
No. Name
LCD panel
Grip
Case _front
No. Name
Metal cover
HDMI
VGA connector
SD slot
USB connector
IR port
Power DC in
Speaker
Ve nt
Page 8

Using the cabinet8
13
14
13
14
Back view without metal cover
Back View without PMMA cover
No. Name
Bolt
PMMA cover
Back cover open
1. Unscrew the metal back cover
2. Take off the metal cover
Page 9

Using the cabinet 9
3. Rotate the bolt and take off the back
PMMA cover
Page 10

Using the cabinet10
Adaptor
Connecting power cord
1. Plug in the AC adapter, and connect the AC adapter to the back of the cabinet as
shown.
Page 11

Using the cabinet 11
Connecting HDMI cable
1. Plug one end of the HDMI cable into the jack of device. Be sure it clicks into place.
2. Plug the other end of the HDMI cable into the cabinet
3. Ensure that all cable plugs are firmly fitted to the equipment jacks.
HDMI
5
HDMI
Page 12

Using the cabinet12
Connecting VGA cable
1. Plug one end of the VGA cable into the jack of PC device.
2. Plug the other end of the VGA cable into the cabinet
3. Ensure that all cable plugs are firmly fitted to the equipment jacks.
Page 13

Inserting a USB device
1. Insert the USB device in to USB port.
2. Select the source by OSD.
Using the cabinet 13
Page 14

Using the cabinet14
Inserting an SD card
1. Insert the SD card in to SD card slot.
2. Select the source via OSD.
SD
2GB
Page 15

Using the remote control
Using the remote control 15
Turns the display on or off.
Turns on or off the mute function.
Fast forwards playback.
Fast rewinds playback.
Starts/resumes/pauses playback. Switches to the OSD menu.
Turns up the volume. Goes to the next item.
Turns down the volume. Goes back to the previous item.
Returns to the previous menu or
closes the OSD menu when the OSD
menu is on.
Directional arrows for selecting a
desired item.
Cancels the selected item.
Page 16

The OSD (On-Screen Display) menu16
The OSD (On-Screen Display) menu
Press to switch to the OSD menu.
Menu name
Preference
Function Set
Time Set
Screen
Options/functions
OSD Language, Repeat Mode, Play Log,
Power Resume, Photo Slide mode,
Photo Slide time, Marquee, Marquee
Color, Marquee Back Color, Play Type,
No Device Off, Change Password, Input
Source, USB Copy
Insert Adv(min), Insert Adv Num, Picture
Rotate, Show Taibiao, Marquee Speed,
VGA Auto Adjust
Year, Month, Date, Hour, Minute, Show
Time, Adjust Time, Timer Mode, On
Time, Off Time, Volum e
Brightness, Contrast, Color, Sharpness,
Noise Reduction, Video Mode, Color
Temp eratur e
Preference menu
Name Description
OSD Language Sets your preferred language for the OSD menu.
Repeat Mode Sets the repeat mode of playback.
Play Log Sets automatic data logging.
Power Resume Sets automatic playback resuming when powered on.
Photo Slide mode Sets transition effects of slides.
Photo Slide time Sets the timing to play slides.
Play Type Sets the desired file to play.
No Device Off Sets automatic power off with absence of memory devices.
Change Password Sets the password.
Input Source Sets the input singal source.
USB Copy Duplicates files in the USB port to the other device.
See page
16
17
17
17
Page 17

The OSD (On-Screen Display) menu 17
Function set menu
Name Description
Picture Rotate Sets to rotate the picture.
Show Taibiao Reveals the serial number of the system.
VGA Auto Adjust Sets automatic adjustment of the the display.
Time set menu
Use the remote control to select from TIME SET to adjust system time or TIMER
SETS to set timers.
Time set
Name Description
Yea r
Month
Date
Hour
Minute
Show Time Sets time display variations.
Adjust Time Adjusts the time difference.
Timer set
Sets the current date and time with items such as Date,
Month, Year, Hour, Minute.
Name Description
Timer Mode Sets the basis of the timer to power on.
On Time Sets the time to powe on.
Off Time Sets the time to power off.
Vol ume Sets the system volume when power on.
Screen set menu
Name Description
Brightness
Contrast Sets the property value for contrast adjustment of the display.
Color Sets the property value for color adjustment of the display.
Sharpness
Noise Reduction
Video Mode Sets the property value for aspect ratio of the display.
Color Temperature Adjusts the color temperature.
Sets the property value for brightness adjustment of the
display.
Sets the property value for sharpness adjustment of the
display.
Sets to reduce electrical image noise caused by different
media players.
Page 18

Product specification18
Product specification
Item Specifications
Model name TL320C
Screen size 32 inch (diagonal)
Resolution 1366 x 768 (Pixel)
Display Area 697.685 (H) x 392.256(V)
LCD Transparent
Display 32”
Input Connectivity VGA/USB/SD/HDMI
Speaker Inside (Top) 2W*2
Power
Cabinet
Environmental
Conditions
Contrast Ratio 4000:1
Brightness 250 nits
View angle 178° (H); 178° (V)
Color Gamut 72 (%)
Surface Treatment Haze 2%, 3H
OSD Language English/Simplified Chinese
Input AC 110-240V, 50Hz
Power Consumption < 150W
Light source LED
Dimension 813.5 x 511.0 x 336.7 mm
Weight 30 KG
Material SECC
Surface Treatment Painting in white color
Operating Temperature 0 ~ 50°C
Operating Humidity 10% ~ 90%
Page 19

Product specification 19
Supported file formats
Format Extension Resolution
JPEG .jpg Max 15360x8640 pixels
Picture
Video
BMP .bmp Max 9600x6400 pixels
PNG .png Max 9600x6400 pixels
MPEG-1 .mpg
MPEG-2 .mpg
.avi
MPEG-4
H.264 .mp4
RM .rm
RMVB .rmvb
M-JPEG
DivX .avi
FLV .flv
.mp4
.wmv
.asf
1080p
.avi
.mov
Support resoluion
Timing Mode Resolution
640x480@60Hz
VGA
SVGA
XGA
WXGA 1360x768@60Hz
Video
640x480@72Hz
640x480@75Hz
800x600@60Hz
800x600@72Hz
800x600@75Hz
1024x768@60Hz
1024x768@70Hz
1024x768@75Hz
720p
1080p
480i
480p
720p
1080i
 Loading...