

Page 1
USE / MAINTENANCE
Page 2

Uso • Manutenzione
Use • Maintenance
Usage • Entretien
Gebrauch • Wartung
Uso • Manutención
Utilização • Manutenção
Использование • Техобслуживание
±ñ‡óç
• Óõíô‡ñçóç
3”
3,5”
Page 3

2
Indice
Norme di sicurezza ......................... 4
Presentazione .................................. 30
Descrizione tecnica ......................... 32
Garanzia ......................................... 38
Montaggio ....................................... 40
Sicura dell’arma .............................. 52
Caricamento .................................... 52
Sostituzione cartuccia ..................... 62
Scaricamento dell’arma ................... 68
Inconvenienti e rimedi .................... 74
Munizioni da usare ......................... 78
Manutenzione ................................. 80
Smontaggio dell’arma ...................... 84
Montaggio dell’arma ....................... 98
Accessori e regolazioni .................. 108
Index
Basic safety rules ............................. 4
Foreword ......................................... 30
Technical description ...................... 32
Warranty ......................................... 38
Assembly ......................................... 40
Gun safety catch ............................. 52
Loading ........................................... 52
Cartridge replacement ..................... 62
Unloading ....................................... 68
Troubleshooting ................................ 74
Choice of ammunition ..................... 78
Maintenance ................................... 80
Shotgun stripping ............................ 84
Shotgun assembly ............................ 98
Accessories and adjustments .......... 108
Table des matières
Normes de sécurité ......................... 4
Présentation .................................... 30
Fonctionnement .............................. 32
Garantie .......................................... 38
Assemblage ..................................... 40
Sûreté de l’arme .............................. 52
Chargement ..................................... 52
Remplacement de la cartouche ....... 62
Déchargement de l’arme ................. 68
Inconvénients et solutions ............... 74
Munitions à utiliser .......................... 78
Entretien .......................................... 80
Démontage de l’arme ...................... 84
Assemblage de l’arme ..................... 98
Accessoires et réglages .................. 108
Inhaltsverzeichnis
Sicherheitsvorschriften .................... 4
Vorstellung ...................................... 30
Funktionsweise ................................ 32
Garantie .......................................... 38
Zusammenbauen ............................. 40
Sicherung der Waffe ........................ 52
Laden .............................................. 52
Auswechseln der Patrone ................ 62
Entladen der Waffe .......................... 68
Funktionsstörungen und Abhilfe ...... 74
Zu verwendende Munition .............. 78
Wartung .......................................... 80
Zerlegen der Waffe .......................... 84
Zusammenbauen der Waffe ............. 98
Zubehör und Einstellmöglichkeiten ... 108
Dati soggetti a modifiche senza
impegno di preavviso.
SALVO DIVERSE E SPECIFICHE INDICAZIONI,
IL TESTO E LE ILLUSTRAZIONI DEL PRESENTE
MANUALE HANNO SEMPRE COME RIFERI
-
MENTO LA VERSIONE DESTRA IN CALIBRO
12 DEL FUCILE DESCRITTO.
Data subject to modifications without
notice.
UNLESS YOU ARE GIVEN SEPARATE AND
SPECIFIC INSTRUCTIONS
, THE TEXTS AND ILLU-
STRATIONS CONTAINED IN THIS OWNER’S
MANUAL ALWAYS REFER TO THE RIGHT HAND
12-GAUGE VERSION OF THE SPECIFIED SHOT-
GUN.
Données passibles de modifications
sans obligation de préavis.
SAUF INDICATIONS CONTRAIRES ET SPECIFI-
QUES, LE TEXTE ET LES ILLUSTRATIONS CON-
TENUS DANS CE MANUEL SE REFERENT
TOUJOURS A LA VERSION DE DROITE EN
CALIBRE
12 DU FUSIL DECRIT.
Die Angaben können ohne
Vorankündigung geändert werden.
ANDERE UND SPEZIFISCHE HINWEISE AUSGE-
NOMMEN, BEZIEHEN SICH DIESER TEXT UND
DIE
ILLUSTRATIONEN DES VORLIEGENDEN
HANDBUCHES IMMER AUF DEN RECHTS-
HÄNDIGEN GEBRAUCH UND AUF DAS KALI-
BER 12 DER BESCHRIEBENEN WAFFE.
Page 4

3
Índice
Normas de seguridad ...................... 5
Presentación .................................... 31
Funcionamiento .............................. 33
Garantía .......................................... 39
Montaje ........................................... 41
Seguro del arma .............................. 53
Carga .............................................. 53
Sustitución del cartucho .................. 63
Descarga del arma .......................... 69
Inconvenientes y soluciones ............ 75
Municiones para usar ...................... 79
Mantenimiento ................................ 81
Desmontaje del arma ...................... 85
Montaje del arma ............................ 99
Accesorios y regulaciones .............. 109
Índice
Regras de segurança ........................ 5
Apresentação .................................. 31
Funcionamento ............................... 33
Garantia .......................................... 39
Montagem ....................................... 41
Patilha de segurança da arma .......... 53
Carregamento .................................. 53
Substituição do cartucho ................. 63
Descarregamento da arma ............... 69
Problemas e soluções ...................... 75
Munições a utilizar .......................... 79
Manutenção .................................... 81
Desmontagem da arma ................... 85
Montagem da arma ......................... 99
Acessórios e regulações ................. 109
Cодержание
Меры безопасности ...................... 5
Общие сведения ........................... 31
Техническое описание .................. 33
Гарантийные обязательства ........ 39
Первая сборка .............................. 41
Предохранительные устройства ... 53
Заряжание .................................... 53
Замена патрона ............................ 63
Разряжание ................................... 69
Возможные неисправности
и их устранение ............................ 75
Рекомендуемые боеприпасы ....... 79
Техническое обслуживание ......... 81
Порядок разборки ружья ............ 85
Порядок сборки ружья ................ 99
Регулировка и
аксессуары .................................. 109
¶ÂÚȯfiÌÂÓ·
∫·ÓfiÓ˜ ·ÛÊ·Ï›·˜ ....................... 5
¶·ÚÔ˘Û›·ÛË ................................... 31
§ÂÈÙÔ˘ÚÁ›· ..................................... 33
∂ÁÁ‡ËÛË ......................................... 39
™˘Ó·ÚÌÔÏfiÁËÛË ............................. 41
∞ÛÊ¿ÏÂÈ· ÙÔ˘ fiÏÔ˘ ..................... 53
∂У¤ЪБВИВ˜ Б¤МИЫЛ˜ ......................... 53
∞УЩИО·Щ¿ЫЩ·ЫЛ К˘ЫИББИФ‡ ............. 63
∂У¤ЪБВИВ˜ ·ФБ¤МИЫЛ˜ ................... 69
¶ÚÔ‚Ï‹Ì·Ù· Î·È Ï‡ÛÂȘ ................. 75
∏ ВИПФБ‹ ЩˆУ К˘ЫИББИТУ .............. 79
™˘ÓÙ‹ÚËÛË ...................................... 81
∞ÔÛ˘Ó·ÚÌÔÏfiÁËÛË ÙÔ˘ fiÏÔ˘ .... 85
™˘Ó·ÚÌÔÏfiÁËÛË ÙÔ˘ fiÏÔ˘ ........... 99
∞ÍÂÛÔ˘¿Ú Î·È Ú˘ıÌ›ÛÂȘ ............... 109
Datos sujetos a cambios sin
compromiso de previo aviso.
EXCEPTO INDICACIONES ESPECÍFICAS DIFE-
RENTES, EL TEXTO Y LAS ILUSTRACIONES DEL
PRESENTE MANUAL TIENEN SIEMPRE COMO
REFERENCIA LA VERSIÓN DERECHA EN EL
CALIBRE
12 DEL FUSIL DETALLADO.
Dados sujeitos a alteração sem aviso
prévio.
SALVO INDICAÇÕES ESPECÍFICAS EM CON-
TRÁRIO, O TEXTO E AS ILUSTRAÇÕES DO
PRESENTE MANUAL REFEREM
-SE SEMPRE À
VERSÃO DIREITA DE CALIBRE
12 DA ESPIN-
GARDA DESCRITA.
Все нижеприведённые данные
могут быть изменены без
предварительного извещения.
ЗА ИСКЛЮЧЕНИЕМ ОСОБО ОГОВОРЕННЫХ
СЛУЧАЕВ ТЕКСТ И ИЛЛЮСТРАЦИИ,
СОДЕРЖАЩИЕСЯ В НАСТОЯЩЕМ
РУКОВОДСТВЕ, ОТНОСЯТСЯ К ПРАВОРУКОМУ
ВАРИАНТУ 12 КАЛИБРА ОПИСЫВАЕМОГО
РУЖЬЯ.
ŸÏ· Ù· ·Ó·ÊÂÚfiÌÂÓ· ÛÙÔȯ›· ‰‡Ó·ÓÙ·È
Ó· ÙÚÔÔÔÈËıÔ‡Ó ¯ˆÚ›˜ ˘Ô¯Ú¤ˆÛË
ÚÔÂȉÔÔ›ËÛ˘.
∞¡ ¢∂¡ ¢π∂À∫ƒπ¡π∑∂∆∞π ¢π∞º√ƒ∂∆π∫∞, ∆√
∫∂πª∂¡√ ∫∞π √π ∂π∫√¡∂™ ∆√À ¶∞ƒ√¡∆√™
∂°Ã∂πƒπ¢π√À ∞¡∞º∂ƒ√¡∆∞π ™∆∏¡
¶∞ƒ∞§§∞°∏ °π∞ ¢∂•π√Ã∂πƒ∂™
¢π∞ª∂∆ƒ∏ª∞∆√™ 12 ∆√À
¶∂ƒπ°ƒ∞º√ª∂¡√À ¶Àƒ√µ√§√À √¶§√À.
Page 5

4
NORME DI SICUREZZA
AVVERTENZA: SI PREGA DI LEGGE-
RE IL PRESENTE MANUALE PRIMA
DI MANEGGIARE L’ARMA.
AVVERTENZA: SE MANEGGIATE
NON CORRETTAMENTE, LE ARMI
DA FUOCO POSSONO ESSERE PERICOLOSE, NONCHÈ POTENZIALE
CAUSA DI GRAVI ED IRREPARABILI
DANNI. LE NORME DI SICUREZZA
QUI RIPORTATE VOGLIONO ESSERE UN IMPORTANTE RICHIAMO
ALLA RESPONSABILITÀ CHE RICADE SUI POSSESSORI E GLI UTILIZZATORI DI ARMI DA FUOCO.
BASIC SAFETY RULES
WARNING: PLEASE READ THIS
MANUAL BEFORE HANDLING
YOUR FIREARM.
WARNING: FIREARMS CAN BE
DANGEROUS AND CAN POTENTIALLY CAUSE SERIOUS INJURY,
DAMAGE TO PROPERTY OR
DEATH, IF HANDLED IMPROPERLY.
THE FOLLOWING SAFETY RULES
ARE AN IMPORTANT REMINDER
THAT FIREARM SAFETY IS YOUR
RESPONSIBILITY.
NORMES DE SECURITE
REMARQUE: NOUS VOUS PRIONS
DE LIRE ATTENTIVEMENT CE MANUEL AVANT DE MANIPULER VOTRE ARME.
REMARQUE: SI ELLES SONT MANI-
PULÉES DE FAÇON ERRONÉE, LES
ARMES À FEU PEUVENT ÊTRE DANGEREUSES ET REPRÉSENTER UNE
SOURCE POTENTIELLE D’ACCIDENTS GRAVES, VOIRE IRRÉPARABLES. LES NORMES DE SÉCURITÉ
REPORTÉES DANS CE MANUEL REPRÉSENTENT UN RAPPEL IMPORTANT CONCERNANT LA RESPONSABILITÉ DES PROPRIÉTAIRES ET DES
UTILISATEURS D’ARMES À FEU.
SICHERHEITSVORSCHRIFTEN
HINWEIS: BITTE LESEN SIE DAS
VORLIEGENDE HANDBUCH VOR
DER HANDHABUNG IHRER WAFFE
AUFMERKSAM.
HINWEIS: BEI NICHT KORREKTER
HANDHABUNG KÖNNEN FEUERWAFFEN GEFÄHRLICH SEIN SOWIE
POTENTIELL SCHWERE UND IRREPARABLE SCHÄDEN VERURSACHEN.
DIE IN DIESER ANLEITUNG AUFGEFÜHRTEN SICHERHEITSVORSCHRIFTEN SOLLEN INSBESONDERE
AUF DIE VERANTWORTUNG VERWEISEN, DIE DIE EIGENTÜMER UND
BENUTZER VON FEUERWAFFEN
TRAGEN.
Page 6

5
NORMAS DE SEGURIDAD
ADVERTENCIA: SE RUEGA LEER EL
PRESENTE MANUAL ANTES DE MANEJAR SU ARMA.
ADVERTENCIA: SI SE MANEJA EL
ARMA DE MODO INCORRECTO,
LAS ARMAS DE FUEGO PUEDEN SER
PELIGROSAS, ADEMÁS DE SER UNA
POTENCIAL CAUSA DE DAÑOS
GRAVES IRREPARABLES. LAS NORMAS DE SEGURIDAD QUE SE DETALLAN EN ESTE MANUAL TIENEN
POR OBJETO SER UN LLAMADO
IMPORTANTE A LA RESPONSABILIDAD QUE RECAE EN LOS POSESORES Y LOS USUARIOS DE ARMAS DE
FUEGO.
REGRAS DE SEGURANÇA
ADVERTÊNCIA: LER ATENTAMENTE
O PRESENTE MANUAL ANTES DE
MANUSEAR A ARMA.
ADVERTÊNCIA: SE MANUSEADAS
INCORRECTAMENTE, AS ARMAS DE
FOGO PODEM SER PERIGOSAS E
POTENCIAIS CAUSAS DE DANOS
GRAVES E IRREMEDIÁVEIS. AS REGRAS DE SEGURANÇA AQUI REFERIDAS TÊM POR OBJECTO REFORÇAR A RESPONSABILIDADE DOS
DETENTORES E UTILIZADORES DE
ARMAS DE FOGO.
МЕРЫ БЕЗОПАСНОСТИ
ВНИМАНИЕ: ПРОСИМ ИЗУЧИТЬ
НАСТОЯЩЕЕ РУКОВОДСТВО
ПЕРЕД НАЧАЛОМ ЭКСПЛУАТАЦИИ
ВАШЕГО РУЖЬЯ.
ПОМНИТЕ! ГЛАВНАЯ ЦЕЛЬ МЕР
БЕЗОПАСНОСТИ, ИЗЛОЖЕННЫХ В
НАСТОЯЩЕМ РУКОВОДСТВЕ, ПРИЗВАТЬ ВЛАДЕЛЬЦЕВ
ОГНЕСТРЕЛЬНОГО ОРУЖИЯ К
ОСТОРОЖНОМУ ОБРАЩЕНИЮ С
НИМ И НАПОМНИТЬ, ЧТО
ОТВЕТСТВЕННОСТЬ ЗА
ПРИМЕНЕНИЕ ОГНЕСТРЕЛЬНОГО
ОРУЖИЯ ЛЕЖИТ НА ТЕХ, КТО ИМ
ВЛАДЕЕТ И ПОЛЬЗУЕТСЯ.
∫∞¡√¡∂™ ∞™º∞§∂π∞™
¶ƒ√∂π¢√¶√π∏™∏: ¶∞ƒ∞∫∞§∂π™∆∂ ¡∞
¢π∞µ∞™∂∆∂ ∆√ ¶∞ƒ√¡ ∂°Ã∂πƒπ¢π√
¶ƒπ¡ Ã∏™πª√¶√π∏™∂∆∂ ∆√ √¶§√
™∞™.
¶ƒ√∂π¢√¶√π∏™∏: ∆∞ ¶Àƒ√µ√§∞
√¶§∞, ∞¡ ¢∂¡ Ã∏™πª√¶√π√À¡∆∞π
™ø™∆∞, ª¶√ƒ√À¡ ¡∞ °π¡√À¡
∂¶π∫π¡¢À¡∞ ∫∞π ¡∞ ¶ƒ√∫∞§∂™√À¡
™√µ∞ƒ∂™ ∫π ∞¡∂¶∞¡√ƒ£ø∆∂™
µ§∞µ∂™. √π ∫∞¡√¡∂™ ∞™º∞§∂π∞™
¶√À ¶∞ƒ√À™π∞∑√¡∆∞π ™∆√ ¶∞ƒ√¡
∂°Ã∂πƒπ¢π√ ∂Ã√À¡ ø™ ™∆√Ã√ ¡∞
À¶∂¡£Àªπ™√À¡ ∆√ ∞π™£∏ª∞
∂À£À¡∏™ ¶√À ¶ƒ∂¶∂π ¡∞ ¢π∂¶∂π
∆√À™ ∫∞∆√Ã√À™ ∫∞π ∆√À™ Ã∏™∆∂™
∆ø¡ ¶Àƒ√µ√§ø¡ √¶§ø¡.
Page 7
6
1. NON PUNTARE MAI L’ARMA
CONTRO UNA DIREZIONE CHE
NON SIA PIÙ CHE SICURA.
Non puntare mai la canna dell’arma
contro sé stessi o contro un’altra persona. Questo è di basilare importanza
quando si carica o scarica l’arma.
Quando ci si accinge a sparare ad un
bersaglio, accertarsi di cosa vi sia dietro di esso. I proiettili possono superare 1,5 km di distanza. Se si manca il
bersaglio o se il proiettile lo trapassa,
dovete accertarvi che lo sparo non
abbia causato danni o lesioni a qualcuno.
1. NEVER POINT A FIREARM AT
SOMETHING THAT IS NOT SAFE
TO SHOOT.
Never let the muzzle of a firearm
point at any part of your body or at
another person. This is especially
important when loading or unloading
the firearm. When you are shooting at
a target, know what is behind it. Some
bullets can travel over a mile. If you
miss your target or if the bullet penetrates the target, it is your responsibility to ensure that the shot does not
cause unintended injury or damage.
1. NE POINTEZ JAMAIS VOTRE ARME DANS UNE DIRECTION QUI
NE SOIT PAS TOTALEMENT SURE.
Ne pointez jamais le canon de l’arme
contre vous-mêmes ou contre une autre personne. Cette prescription revêt
une importance fondamentale lorsque
vous chargez ou déchargez votre
arme. Avant de tirer contre une cible,
vérifiez avec attention ce qui se trouve
derrière cette cible. Les projectiles
peuvent dépasser une distance de 1,5
km. Si vous manquez la cible ou si le
projectile la transperce, vous devez
vous assurer que le coup de feu n’a
pas causé de dommages ou de blessures à quelqu’un.
1. NIE DIE WAFFE IN EINE RICHTUNG HALTEN, DIE NICHT
KOMPLETT SICHER IST.
Den Lauf der Waffe nie auf sich selbst
richten oder auf eine andere Person.
Dies ist von grundlegender Wichtigkeit
beim Laden und Entladen der Waffe.
Wenn man auf ein Ziel schießen
möchte, prüfen, was sich dahinter befindet. Die Projektils können eine Entfernung von mehr als 1,5 km überwinden. Falls man das Ziel verfehlt, oder
das Projektil es durchschießt, sicherstellen, dass der Schuss niemandem
Schaden oder Verletzungen zugeführt
hat.
Page 8

7
1. NUNCA APUNTE EL ARMA
CONTRA UNA DIRECCIÓN QUE
NO SEA MÁS QUE SEGURA.
Nunca apunte el cañón del arma contra sí mismo o contra otra persona.
Esto es de básica importancia cuando
se carga o descarga el arma.
Cuando se apresta a disparar a un
blanco, cerciorarse de lo que puede
haber detrás del mismo. Los proyectiles pueden superar 1,5 km de distancia. Si se erra el blanco o si el proyectil lo traspasa, debe cerciorarse de que
el disparo no haya causado daños o
lesiones a alguien.
1. NUNCA APONTAR A ARMA NUMA DIRECÇÃO QUE NÃO SEJA
TOTALMENTE SEGURA.
Nunca apontar o cano da arma a si
próprio ou a outra pessoa. Isto é de
importância fundamental durante o
carregamento/descarregamento da
arma. Antes de disparar sobre um
alvo, verificar o que se encontra por
trás do mesmo. Os projécteis podem
ultrapassar 1,5 km de distância. Se
falhar o alvo ou se o projéctil atravessar o mesmo, certificar-se de que o
disparo não provocou danos ou lesões a ninguém.
1. ВСЕГДА ДЕРЖИТЕ РУЖЬЁ
ТОЛЬКО В БЕЗОПАСНОМ
НАПРАВЛЕНИИ.
Никогда не направляйте ствол ружья
на себя или на других людей.
Неукоснительно придерживайтесь
этих правил во время заряжания и
разряжания ружья.
Перед производством выстрела
обратите внимание на то, что
находится за целью. Ружейные
снаряды могут представлять опасность
на расстоянии свыше 1,5 км. Если
снаряд прошёл мимо цели или пробил
её насквозь, убедитесь, что он не нанёс
ранения человеку.
1. ª∏ ™∆ƒ∂º∂∆∂ ¶√∆∂ ∆√ √¶§√ ™∂
∫∞∆∂À£À¡™∏ ¶√À ¢∂¡ ∂π¡∞π
∞¶√§À∆ø™ ∞™º∞§∏™.
ªË ÛÙÚ¤ÊÂÙ ÔÙ¤ ÙËÓ Î¿ÓÓË ÙÔ˘ fiÏÔ˘
ÚÔ˜ ÙÔ Ì¤ÚÔ˜ Û·˜ ‹ ÚÔ˜ ¿ÏÏÔ˘˜
·ÓıÚÒÔ˘˜. ∞˘Ùfi ¤¯ÂÈ ÙÂÚ¿ÛÙÈ· ÛËÌ·Û›·
fiЩ·У БВМ›˙ВЩВ ‹ ·‰ВИ¿˙ВЩВ ЩФ fiПФ.
ŸЩ·У ВЩФИМ¿˙ВЫЩВ У· ˘ЪФ‚ФП‹ЫВЩВ ЫВ
О¿ФИФ ЫЩfi¯Ф, ‚В‚·ИˆıВ›ЩВ ЩИ ˘¿Ъ¯ВИ
›Ыˆ ЩФ˘. ∆· ЫО¿БИ· МФЪФ‡У У·
КЩ¿ЫФ˘У ЫВ ·fiЫЩ·ЫЛ ¿Уˆ ЩФ˘ 1,5 km.
∂¿У ·ЫЩФ¯‹ЫВЩВ ‹ Щ· ЫО¿БИ·
‰И·ВЪ¿ЫФ˘У ЩФ ЫЩfi¯Ф, Ъ¤ВИ У· В›ЫЩВ
‚¤‚·ИФИ fiЩИ ‰ВУ ı· ЪФО·П¤ЫФ˘У ˙ЛМИ¤˜ ‹
ЩЪ·˘М·ЩИЫМФ‡˜.
Page 9

8
2. MANEGGIARE SEMPRE L’ARMA
COME SE FOSSE CARICA.
Mai dare per scontato che l’arma sia
scarica. L’unico modo sicuro per
accertarsi che l’arma abbia la camera
vuota è quello di aprirla e verificare
visivamente e fisicamente che non vi
siano presenti proiettili.
Rimuovere o scaricare il serbatoio
non significa che l’arma sia scarica o
non possa sparare. Fucili e carabine
possono essere controllati rimuovendo tutti i proiettili e successivamente
aprendo ed ispezionando la camera
di scoppio in modo tale da poter effettuare un’ispezione completa ed assicurarsi che non vi siano rimasti colpi
all’interno.
2. ALWAYS TREAT A FIREARM AS IF
IT WERE LOADED.
Never assume that a firearm is unloaded. The only certain way to ensure
that a firearm has the chamber empty
is to open the chamber and visually
and physically examine the inside to
see if a round is present.
Removing or unloading the magazine
will not guarantee that a firearm is
unloaded or cannot fire. Shotguns and
rifles can be checked by removing all
rounds and by then opening and
inspecting the chamber so that a visual
inspection of the chamber for any
remaining rounds can be made.
2. MANIPULEZ TOUJOURS VOTRE
ARME COMME SI ELLE ETAIT
CHARGEE.
Ne donnez jamais pour sûr que l’arme soit déchargée. La seule façon
pour s’assurer que la chambre de l’arme soit vide est de l’ouvrir et de vérifier visuellement et physiquement l’absence de projectiles.
Retirer ou décharger le magasin ne
signifie pas que l’arme est déchargée
ou qu’elle ne peut pas faire feu. Les
fusils et les carabines peuvent être
contrôlés en retirant tous les projectiles, puis en ouvrant et en vérifiant la
chambre d’explosion de façon à pouvoir effectuer une inspection complète
et s’assurer qu’aucune balle ne soit
restée à l’intérieur.
2. DIE WAFFE IMMER SO HANDHABEN, ALS WÄRE SIE GELADEN.
Nie davon ausgehen, dass die Waffe
sicherlich entladen ist. Die einzige
Weise, um sicher zu sein, dass die
Waffe leere Patronenlager hat, besteht
darin, diese zu öffnen und visuell und
physisch zu prüfen, dass keine Projektils vorhanden sind.
Das Magazin entfernen oder entladen,
bedeutet nicht, dass die Waffe nicht
geladen ist oder nicht schießen kann.
Gewehre und Karabiner können überprüft werden, indem man alle Projektils entfernt und daraufhin das Patronenlager öffnet und überprüft, hierdurch kann man eine vollständige Kontrolle durchführen und sicherstellen,
dass keine Schüsse übrig geblieben
sind.
Page 10

9
2. MANEJAR SIEMPRE EL ARMA
COMO SI ESTUVIESE CARGADA.
Nunca dar por sentado que el arma
está descargada. El único modo seguro para asegurarse de que el arma tenga la cámara vacía es el de abrir y
comprobar visualmente y físicamente
que no hay proyectiles presentes.
Quitar o descargar el almacén no quiere decir que el arma esté descargada o
no pueda disparar. Fusiles y carabinas
se pueden controlar quitando todos los
proyectiles y luego abriendo e inspeccionando la cámara de explosión
de modo tal que se pueda efectuar una
inspección completa y cerciorar de
que no han quedado disparos en su
interior.
2. TRATAR SEMPRE A ARMA COMO
SE ESTIVESSE CARREGADA.
Nunca dar como garantido que a
arma está descarregada. A única forma segura de se certificar que a câmara da arma está vazia é abri-la e verificar física e visualmente se há projécteis no seu interior.
A remoção ou descarga do depósito
não significa que a arma está descarregada ou que não possa disparar. As
espingardas e carabinas podem ser
verificadas removendo todos os projécteis e, de seguida, abrindo e inspeccionando a câmara de modo a
poder efectuar uma inspecção completa e assegurar-se que não ficaram
projécteis no seu interior.
2. ВСЕГДА ОБРАЩАЙТЕСЬ С
РУЖЬЁМ, КАК С ЗАРЯЖЕННЫМ.
Никогда не предполагайте, что ваше
ружьё разряжено. Единственно
надёжный способ удостовериться в
том, что ружьё разряжено – это
открыть затвор и осмотреть патронник
на предмет отсутствия в нём патрона.
Если вы отсоединили и расснарядили
магазин, это не значит, что ружьё
разряжено и не может выстрелить.
Для того, чтобы привести ружьё в
безопасное состояние необходимо
удалить все патроны из магазина,
отвести затвор назад и осмотреть
патронник на предмет отсутствия в
нём патрона.
2. ¡∞ Ã∂πƒπ∑∂™∆∂ ¶∞¡∆∞ ∆√ √¶§√
™∞¡ ¡∞ ∂π¡∞π °∂ª∞∆√.
¡· ÌËÓ ˘Ôı¤ÙÂÙ ÔÙ¤ fiÙÈ ÙÔ fiÏÔ
Â›Ó·È ¿‰ÂÈÔ. Ο µνος σγουρος τρπος
για να βεβαιωθετε τι το πλο χει
δεια θαλµη, εναι να το ανοξετε και
να βεβαιωθετε µε το µτι και την αφ
τι δεν υπρχουν φυσγγια.
∞К·ИЪТУЩ·˜ ‹ ·‰ВИ¿˙ФУЩ·˜ ЩЛУ ·Фı‹ОЛ
‰ВУ ЫЛМ·›УВИ fiЩИ ЩФ fiПФ В›У·И ¿‰ВИФ О·И
‰ВУ МФЪВ› У· ˘ЪФ‚ФП‹ЫВИ. ∆·
ЩФ˘К¤ОИ· О·И ФИ О·Ъ·М›УВ˜ МФЪФ‡У У·
ВПВБ¯ıФ‡У ·К·ИЪТУЩ·˜ fiП· Щ· К˘Ы›ББИ·
О·И ·УФ›БФУЩ·˜ ЫЩЛ Ы˘У¤¯ВИ· ЩФ fiПФ
БИ· У· ВП¤БНВЩВ ЩЛ ı·П¿МЛ ¤ЩЫИ ТЫЩВ У·
О¿УВЩВ ¤У·У П‹ЪЛ ¤ПВБ¯Ф О·И У·
‚В‚·ИˆıВ›ЩВ fiЩИ ‰ВУ ¤¯Ф˘У ·ФМВ›УВИ
К˘Ы›ББИ· ЫЩФ ВЫˆЩВЪИОfi.
Page 11
10
3. CUSTODIRE L’ARMA IN UN
LUOGO SICURO E NON ACCESSIBILE AI BAMBINI.
E’ vostro compito assicurarvi che i
minori o altre persone non autorizzate
non abbiano accesso all’arma. Per
ridurre il rischio di incidenti ai minori,
scaricate l’arma, mettetela sotto chiave e riponete le munizioni in una
separata sede e sempre sotto chiave.
Tenere sempre presente che i dispositivi utilizzati per prevenire incidenti es. lucchetti per armi, chiusure per
camere di scoppio ecc. non sono sufficienti ad impedire che altri possano
utilizzare l’arma o utilizzarla in modo
improprio. La custodia dell’arma in
una cassetta di sicurezza apposita in
acciaio sarebbe l’ideale per ridurre la
probabilità che minori o persone non
autorizzate possano utilizzare l’arma
in modo improprio.
3. STORE YOUR FIREARM SO THAT
CHILDREN CANNOT GAIN
ACCESS TO IT.
It is your responsibility to ensure that
children under the age of 18 or other
unauthorized persons do not gain
access to your firearm. To reduce the
risk of accidents involving children,
unload your firearm, lock it and store
the ammunition in a separate locked
location. Please note that devices
intended to prevent accidents - for
example, cable locks, chamber plugs,
etc, - may not prevent use or misuse of
your firearm by a determined person.
Firearm storage in a steel gun safe may
be more appropriate to reduce the
likelihood of intentional misuse of a
firearm by an unauthorized child or
person.
3. CONSERVEZ VOTRE ARME DANS
UN LIEU SUR ET NON ACCESSIBLE POUR LES ENFANTS.
Vous êtes chargés de vous assurer que
les mineurs ou autres personnes non
autorisées n’aient pas accès à l’arme.
Pour réduire le risque d’accidents envers les mineurs, déchargez l’arme,
fermez-la à clé et rangez les munitions
dans un endroit séparé et toujours
fermé à clé. N’oubliez jamais que les
dispositifs utilisés pour prévenir les
accidents - comme par ex. les cadenas
pour armes, les fermetures pour chambres d’explosion, etc. - ne suffisent pas
à empêcher que d’autres personnes
puissent utiliser l’arme à feu ou l’utiliser de façon impropre. Le rangement
de l’arme dans un étui de sécurité spécial en acier serait l’idéal pour réduire
la probabilité que les mineurs ou les
personnes non autorisées puissent utiliser l’arme de façon impropre.
3. DIE WAFFE AN EINEM SICHEREN
UND FÜR KINDER UNZUGÄNGLICHEN ORT AUFBEWAHREN.
Es ist Ihre Aufgabe sicherzustellen,
dass Minderjährige oder andere nicht
autorisierte Personen keinen Zugriff
auf die Waffe nehmen können. Um
das Unfallrisiko bei Minderjährigen zu
verringern, entladen Sie die Waffe und
lagern Sie sie unter Verschluss, bewahren Sie die Munition an einem anderen Ort und ebenfalls unter Verschluss
auf. Beachten Sie immer, dass die Vorrichtungen zum Unfallschutz - z.B.
Schlösser für Waffen, Verschlüsse für
Patronenlager u.s.w. nicht ausreichend
sind, um zu verhindern, dass andere
die Waffe benutzen oder dass diese
auf unsachgemäße Weise benutzt
wird. Die Verwahrung der Waffe in
einem eigens vorgesehenen Schließfach wäre ideal, um die Wahrscheinlichkeit zu verringern, dass Minderjährige oder nicht autorisierte Personen die Waffen auf unsachgemäße
Weise benutzen.
r
e
g
e
o
t
S
Page 12

11
3. GUARDAR EL ARMA EN UN
LUGAR SEGURO Y NO ACCESIBLE A LOS NIÑOS.
Es su deber cerciorarse de que menores u otras personas no autorizadas no
tengan acceso al arma. Para reducir el
riesgo de accidentes a menores, descargue el arma guárdela bajo llave y
coloque las municiones en otro lugar
separado y siempre bajo llave. Recuerde siempre que los dispositivos
utilizados para prevenir accidentes por ejemplo candados para armas,
cierres para cámaras de explosión etc.
no son suficientes para impedir que
otros puedan utilizar el arma o usarla
de modo impropio. La funda del arma
en una caja de seguridad especial de
acero sería ideal para reducir la posibilidad de que menores o personas no
autorizadas puedan utilizar el arma de
modo impropio.
3. GUARDAR A ARMA EM LOCAL
SEGURO E LONGE DO ALCANCE DE CRIANÇAS.
É seu dever assegurar-se que menores
ou outras pessoas não autorizadas não
tenham acesso à arma. Para minimizar
o risco de acidentes com crianças,
descarregue a arma, guarde-a fechada
à chave e mantenha as munições em
local separado e sempre fechado à
chave. Tenha sempre em conta que os
dispositivos de prevenção de acidentes - por ex. cadeados para armas,
fechaduras para câmaras, etc. são
insuficientes para impedir a utilização
ou utilização incorrecta da arma por
parte de terceiros. A conservação do
estojo da arma num cofre em aço adequado para o efeito seria ideal para
minimizar a probabilidade de a arma
ser utilizada incorrectamente por
menores ou pessoas não autorizadas.
3. ХРАНИТЬ ОРУЖИЕ В
НАДЁЖНОМ И НЕДОСТУПНОМ
ДЛЯ ДЕТЕЙ МЕСТЕ.
Владелец ружья должен принять все
необходимые меры для того, чтобы
несовершеннолетние или иные
посторонние лица не получили
доступа к оружию. В целях сведения к
минимуму риска несчастных случаев с
участием несовершеннолетних
храните оружие и боеприпасы
отдельно в закрытых на ключ сейфах.
Всегда имейте ввиду, что
приспособления, предназначенные
для предотвращения несчастных
случаев, например навесные замки на
ружьё и заглушки для патронника, не
гарантируют от несанкционированного
или нецелевого использования ружья.
Храните оружие в специальном
стальном сейфе. Это самый надёжный
способ избежать использования ружья
не по назначению несовершеннолетними
или посторонними лицами.
3. ¡∞ ºÀ§∞∆∂ ∆√ √¶§√ ™∂
∞™º∞§∂™ ™∏ª∂π√, ª∞∫ƒπ∞ ∞¶√
¶∞π¢π∞.
∂›Ó·È ηı‹ÎÔÓ Û·˜ Ó· ‚‚·Èˆı›Ù fiÙÈ ÔÈ
·У‹ПИОФИ О·И ¿ПП· МЛ ВНФ˘ЫИФ‰ФЩЛМ¤У·
¿ЩФМ· ‰ВУ МФЪФ‡У У· ¤¯Ф˘У
ЪfiЫ‚·ЫЛ ЫЩФ fiПФ. °И· У· МВИТЫВЩВ
ЩФУ О›У‰˘УФ ·Щ˘¯ЛМ¿ЩˆУ БИ· ·УЛП›ОФ˘,
·‰ÂÈ¿ÛÙ ÙÔ fiÏÔ, ÎÏÂȉÒÛÙ ÙÔ Î·È
ЩФФıВЩ‹ЫЩВ Щ· ˘ЪФМ·¯ИО¿ ЫВ
¯ˆЪИЫЩfi ЫЛМВ›Ф О·И ¿УЩ· ОПВИ‰ˆМ¤У·.
¶Ъ¤ВИ У· ¤¯ВЩВ ¿УЩ· ˘fi„Л Ы·˜ fiЩИ
Щ· Ы˘ЫЩ‹М·Щ· Ф˘ ¯ЪЛЫИМФФИФ‡УЩ·И
БИ· ЩЛУ ·ФЩЪФ‹ ·Щ˘¯ЛМ¿ЩˆУ –.¯.
ПФ˘О¤Щ· БИ· fiП·, Щ¿В˜ БИ· ı·П¿МВ˜
ОП.– ‰ВУ ·ЪОФ‡У БИ· У· ВМФ‰›ЫФ˘У ЫВ
¿ППФ˘˜ ЩЛ ¯Ъ‹ЫЛ ‹ ЩЛУ ·О·Щ¿ППЛПЛ
¯Ъ‹ЫЛ ЩФ˘ fiПФ˘. ∏ К‡П·НЛ ЩФ˘ fiПФ˘
ЫВ ВИ‰ИОfi ·ЩЫ¿ПИУФ ВЪМ¿ЪИФ В›У·И Ф
О·П‡ЩВЪФ˜ ЩЪfiФ˜ БИ· У· МВИТЫВЩВ ЩЛУ
Иı·УfiЩЛЩ· ·О·Щ¿ППЛПЛ˜ ¯Ъ‹ЫЛ˜ ЩФ˘
·fi ·ÓËÏ›ÎÔ˘˜ ‹ ÌË ÂÍÔ˘ÛÈÔ‰ÔÙË̤ӷ
¿ÙÔÌ·.
Page 13

12
4. MAI SPARARE CONTRO SPECCHI D’ACQUA O SU SUPERFICI
DURE.
Sparare contro specchi d’acqua, contro una roccia o altre superfici dure
aumenta il rischio di rimbalzi o frammentazioni dei proiettili, che può
voler dire colpire bersagli non voluti o
limitrofi.
4. NEVER SHOOT AT WATER OR AT
A HARD SURFACE.
Shooting at the surface of water or at a
rock or other hard surface increases
the chance of ricochets or fragmentation of the bullet or shot, which can
result in the projectile striking an unintended or peripheral target.
4. NE TIREZ JAMAIS CONTRE UNE
PIECE D’EAU OU CONTRE DES
SURFACES DURES.
Tirer contre des pièces d’eau, contre
une roche ou d’autres surfaces dures
augmente le risque de rebondissements ou de fragmentations des projectiles, ce qui peut vouloir dire atteindre des cibles non souhaitées ou limitrophes.
4. NIE GEGEN WASSERSPIEGEL
ODER AUF HARTE OBERFLÄCHEN SCHIEßEN.
Durch das Schießen auf Wasserspiegel, gegen Felsen oder andere harte
Oberflächen wird das Risiko erhöht,
dass die Projektile rückprallen oder
zersplittern, wodurch ungewollte oder
angrenzende Ziele getroffen werden
könnten.
Page 14

13
4. NUNCA DISPARAR CONTRA
ESPEJOS DE AGUA O SUPERFICIES DURAS.
Disparar contra espejos de agua, contra una roca u otras superficies duras
aumenta el riesgo de rebote o fragmentaciones de los proyectiles, lo cual
puede significar dar en blancos no deseados o limítrofes.
4. NUNCA DISPARAR SOBRE SUPERFÍCIES AQUÁTICAS OU DURAS.
Disparar sobre superfícies aquáticas,
rochas ou outras superfícies duras aumenta o risco de ricochetes ou de
fragmentação dos projécteis, podendo
atingir alvos não desejados ou limítrofes.
4. НИКОГДА НЕ СТРЕЛЯЙТЕ В
ВОДУ ИЛИ ПО ТВЁРДЫМ
ПРЕДМЕТАМ.
Стрельба в воду, по камням или
иным твёрдым поверхностям
увеличивает риск рикошета или
разрушения снаряда, что может
повлечь поражение близлежащих
или непредусмотренных целей.
4. ª∏¡ ¶Àƒ√µ√§∂π∆∂ ∆∏¡
∂¶πº∞¡∂π∞ ∆√À ¡∂ƒ√À ◊ ™∂
™∫§∏ƒ∂™ ∂¶πº∞¡∂π∂™.
¶˘ЪФ‚ФПТУЩ·˜ ЩЛУ ВИК¿УВИ· ЩФ˘
УВЪФ‡, ‚Ъ¿¯Ф˘˜ ‹ ¿ППВ˜ ЫОПЛЪ¤˜
ВИК¿УВИВ˜, ·˘Н¿УВИ Ф О›У‰˘УФ˜
ВНФЫЩЪ·ОИЫМФ‡ ‹ ıЪ˘ММ·ЩИЫМФ‡ ЩˆУ
‚ПЛМ¿ЩˆУ О·И Л Иı·УfiЩЛЩ· У·
¯Щ˘‹ЫВЩВ ·УВИı‡МЛЩФ˘˜ ‹ БВИЩФУИОФ‡˜
ЫЩfi¯Ф˘˜.
Page 15

14
5. CONOSCERE LE CARATTERISTICHE DI SICUREZZA DELL’ARMA
CHE STATE USANDO, TENENDO
PRESENTE CHE I DISPOSITIVI DI
SICUREZZA NON SOSTITUISCONO LE PROCEDURE DI UN
MANEGGIO DELL’ARMA IN
SICUREZZA.
Non affidarsi esclusivamente ai dispositivi di sicurezza al fine di prevenire
incidenti. E’ di assoluta importanza
che conosciate ed osserviate le caratteristiche di sicurezza dell’arma che
state maneggiando; gli incidenti
comunque, possono essere maggiormente evitati se si seguono le procedure di un maneggio sicuro dell’arma,
contenute nelle regole di sicurezza e
all’interno di questo manuale. Per
familiarizzare ulteriormente con l’uso
appropriato di questa o altre armi, si
consiglia di seguire un corso sulla
sicurezza delle armi tenuto da un professionista del settore, esperto in tecniche d’uso e procedure di sicurezza.
5. KNOW THE SAFETY FEATURES
OF THE FIREARM YOU ARE
USING, BUT REMEMBER: SAFETY
DEVICES ARE NOT A SUBSTITUTE
FOR SAFE HANDLING PROCEDURES.
Never rely solely on a safety device to
prevent an accident. It is imperative
that you know and use the safety features of the particular firearm you are
handling, but accidents can best be
prevented by following the safe handling procedures described in these
safety rules and elsewhere in the product manual. To further familiarize
yourself with the proper use of this or
other firearms, take a Firearms Safety
Course taught by an expert in firearms
use and safety procedures.
5. IL EST FONDAMENTAL QUE
VOUS SOYEZ A CONNAISSANCE
DES CARACTERISTIQUES DE
L’ARME QUE VOUS UTILISEZ, EN
TENANT COMPTE DU FAIT QUE
LES DISPOSITIFS DE SECURITE
NE REMPLACENT PAS LES PROCEDURES DE SECURITE CONCERNANT LA MANIPULATION
DE L’ARME.
Ne vous en remettez pas uniquement
aux dispositifs de sécurité pour prévenir les accidents. Il est fondamental
que vous connaissiez et que vous
observiez les caractéristiques de sécurité de l’arme que vous manipulez;
dans tous les cas, les accidents peuvent être évités encore davantage en
suivant les procédures de sécurité concernant la manipulation de l’arme reportées dans les règles de sécurité et à
l’intérieur de ce manuel. Pour familiariser davantage avec cette arme ou
d’autres armes afin de pouvoir les utiliser de façon appropriée, il est conseillé de suivre un cours sur la sécurité
des armes tenu par un professionnel
du secteur, expert dans les techniques
d’utilisation et dans les procédures de
sécurité.
5. DIE SICHERHEITSEIGENSCHAFTEN DER WAFFE KENNEN, DIE
SIE BENUTZEN UND SICH BEWUSST SEIN, DASS DIE SICHERHEITSVORRICHTUNGEN DIE
VORGANGSWEISE EINER KORREKTEN UND SICHEREN HANDHABUNG DER WAFFE NICHT ERSETZEN.
Sich nicht ausschließlich den Sicherheitsvorrichtungen anvertrauen, um
Unfällen vorzubeugen. Es ist unbedingt notwendig, dass Sie die Sicherheitseigenschaften der von Ihnen gehandhabten Waffe kennen und einhalten, die Unfälle können auf jeden Fall
besser vermieden werden, wenn man
die Vorgangsweisen zu einer sicheren
Handhabung der Waffe befolgt, die in
den Sicherheitsregeln und innerhalb
dieses Handbuchs enthalten sind. Um
noch vertrauter mit dem angemessenen Gebrauch dieser oder anderer
Waffen zu sein, wird geraten, einen
Kurs über die Waffensicherheit zu
besuchen, der von einem Fachmann
der Branche gehalten wird, der Experte in Bezug auf Gebrauchstechniken
und Sicherheitsprozeduren ist.
Page 16

15
5. CONOCER LAS CARACTERÍSTICAS DE SEGURIDAD DEL ARMA
QUE ESTÁ USANDO, RECORDANDO QUE LOS DISPOSITIVOS DE SEGURIDAD NO SUSTITUYEN LOS PROCEDIMIENTOS DE UN MANEJO SEGURO
DEL ARMA.
Nunca confíe exclusivamente en los
dispositivos de seguridad para prevenir accidentes. Es de absoluta importancia que conozca y respete las características de seguridad del arma que
está manejando, los accidentes en
cualquier caso, pueden ser en su mayoría evitados si se respetan los procedimientos de un manejo seguro del
arma, contenidos en las reglas de seguridad y dentro de este manual. Para
familiarizar con el uso apropiado de
esta o de otras armas, se recomienda
hacer un curso sobre la seguridad de
las armas, con clases de un profesional del sector, experto en técnicas de
uso y procedimientos de seguridad.
5. CONHECER AS CARACTERÍSTICAS DE SEGURANÇA DA ARMA
QUE ESTÁ A SER UTILIZADA,
TENDO SEMPRE EM CONTA QUE
OS DISPOSITIVOS DE SEGURANÇA NÃO SUBSTITUEM OS
PROCEDIMENTOS PARA O
MANUSEAMENTO DA ARMA EM
SEGURANÇA.
Não confiar exclusivamente nos
dispositivos de segurança para prevenir acidentes. É de extrema importância conhecer e observar as características de segurança da arma que está a
ser manuseada; contudo, os acidentes
podem ser evitados sobretudo através
da implementação dos procedimentos
para um manuseamento seguro da
arma, referidos nas regras de segurança e no presente manual. Para uma
maior familiarização com a utilização
adequada desta e de outras armas,
aconselha-se a seguir um curso sobre
a segurança das armas realizado por
um profissional do sector, especialista
em técnicas de utilização e em procedimentos de segurança.
5. ИЗУЧИТЕ СПОСОБЫ
БЕЗОПАСНОГО ОБРАЩЕНИЯ С
ВАШИМ РУЖЬЁМ. ПОМНИТЕ, ЧТО
НАЛИЧИЕ ПРЕДОХРАНИТЕЛЬНЫХ
УСТРОЙСТВ НЕ ЗАМЕНЯЕТ
НАВЫКОВ БЕЗОПАСНОГО
ОБРАЩЕНИЯ С ОРУЖИЕМ.
Для предотвращения несчастных
случаев не полагайтесь исключительно
на предохранительные устройства.
Крайне важно изучить и соблюдать
правила безопасного обращения с
вашим оружием. Большую часть
несчастных случаев можно
предотвратить, если неукоснительно
придерживаться мер безопасности,
изложенных в настоящем руководстве.
Для дальнейшего совершенствования
ваших навыков по правильному
применению оружия рекомендуем
пройти специальный курс обучения под
руководством опытного инструктора по
стрелковому делу.
5. £∞ ¶ƒ∂¶∂π ¡∞ °¡øƒπ∑∂∆∂ ∆∞
Ã∞ƒ∞∫∆∏ƒπ™∆π∫∞ ∞™º∞§∂π∞™ ∆√À
√¶§√À ¶√À Ã∏™πª√¶√π∂π∆∂,
∂Ã√¡∆∞™ À¶√æ∏ √∆π ∆∞
™À™∆∏ª∞∆∞ ∞™º∞§∂π∞™ ¢∂¡
∞¡∆π∫∞£π™∆√À¡ ∆π™ ¢π∞¢π∫∞™π∂™
∞™º∞§√À™ Ã∂πƒπ™ª√À ∆√À
√¶§√À.
°È· ÙËÓ ·ÔÊ˘Á‹ ÙˆÓ ·Ù˘¯ËÌ¿ÙˆÓ ÌËÓ
ÂÌÈÛÙ‡ÂÛÙ ÌfiÓÔ Ù· Û˘ÛÙ‹Ì·Ù·
·ÛÊ·Ï›·˜. ∂›Ó·È Ôχ ÛËÌ·ÓÙÈÎfi Ó·
БУˆЪ›˙ВЩВ О·И У· ЩЛЪВ›ЩВ Щ·
¯·Ъ·ОЩЛЪИЫЩИО¿ ·ЫК·ПВ›·˜ ЩФ˘ fiПФ˘
Ф˘ ¯ВИЪ›˙ВЫЩВ. ™В О¿ıВ ВЪ›ЩˆЫЛ, Ф
О·П‡ЩВЪФ˜ ЩЪfiФ˜ БИ· ЩЛУ ·ФК˘Б‹
·Ù˘¯ËÌ¿ÙˆÓ Â›Ó·È Ë Ù‹ÚËÛË ÙˆÓ
‰И·‰ИО·ЫИТУ ·ЫК·ПФ‡˜ ¯ВИЪИЫМФ‡ ЩФ˘
fiПФ˘ Ф˘ ЪФ‚П¤Ф˘У ФИ О·УfiУВ˜
·ÛÊ·Ï›·˜ Î·È ÙÔ ·ÚfiÓ ÂÁ¯ÂÈÚ›‰ÈÔ. °È·
У· ВНФИОВИˆıВ›ЩВ О·П‡ЩВЪ· МВ ЩЛ ЫˆЫЩ‹
¯Ъ‹ЫЛ ЩФ˘ ·ЪfiУЩФ˜ ‹ ¿ППˆУ fiПˆУ,
Ы˘УИЫЩ¿Щ·И Л ·Ъ·ОФПФ‡ıЛЫЛ
М·ıЛМ¿ЩˆУ ·ЫК·ПФ‡˜ ¯Ъ‹ЫЛ˜ ЩˆУ
fiПˆУ ·fi В·ББВПМ·Щ›· ЩФ˘ ЩФМ¤·,
ВНВИ‰ИОВ˘М¤УФ ЫЩИ˜ ЩВ¯УИО¤˜ ¯Ъ‹ЫЛ˜ О·И
ЫЩИ˜ ‰И·‰ИО·Ы›В˜ ·ЫК·ПВ›·˜.
Page 17

16
6. CONSERVARE L’ARMA IN MODO
APPROPRIATO.
Custodire l’arma in modo che non si
accumuli sporco o polvere nelle parti
meccaniche. Seguendo le istruzioni
contenute in questo manuale, pulire e
lubrificare l’arma dopo ogni utilizzo
per prevenire corrosione, danni alla
canna o accumulo di impurità che possano impedire all’arma di funzionare in
caso di necessità. Controllare sempre
l’interno e la camera di scoppio prima
di caricare l’arma per accertarsi che
siano puliti e privi di ostruzioni. Sparare quando vi siano ostruzioni nella canna o nella camera di scoppio può causare l’esplosione della canna e ferire
voi o altre persone vicine. Nel caso si
avverta un rumore anomalo durante lo
sparo smettere immediatamente di sparare, mettere la sicura e scaricare l’arma. Accertarsi che la camera e la canna siano libere da eventuali ostruzioni,
come ad es. un proiettile bloccato
all’interno della canna a causa di munizioni difettose o inadatte.
6. PROPERLY MAINTAIN YOUR
FIREARM.
Store and carry your firearm so that
dirt or lint does not accumulate in the
working parts. Clean and oil your
firearm, following the instructions provided in this manual, after each use to
prevent corrosion, damage to the barrel
or accumulation of impurities which
can prevent use of the gun in an emergency. Before loading your firearm,
always check the barrel internal part
and the chamber to ensure that they
are clean and free from obstructions.
Firing with an obstruction in the barrel
or chamber can rupture the barrel and
injure you or others nearby. In the
event you hear an unusual noise when
shooting, stop firing immediately,
engage the manual safety and unload
the firearm. Make sure the chamber
and barrel are free from any obstruction, like a bullet blocked inside the
barrel due to defective or improper
ammunition.
6. CONSERVEZ L’ARME DE FACON
ADEQUATE.
Conservez votre arme de façon à éviter
l’accumulation de saleté ou de poussière dans les parties mécaniques. En
suivant les instructions contenues dans
ce manuel, nettoyez et lubrifiez votre
arme après chaque utilisation afin de
prévenir la corrosion, les dommages
au canon ou l’accumulation d’impuretés qui peuvent empêcher le fonctionnement de l’arme en cas de nécessité. Contrôlez toujours l’intérieur et la
chambre d’explosion avant de charger
l’arme pour vous assurer qu’ils soient
propres et libres de toute obstruction.
Tirer en présence d’obstructions dans
le canon ou dans la chambre d’explosion peut provoquer l’explosion du
canon et vous blesser ou blesser des
personnes se trouvant dans le voisinage. Si vous percevez un bruit anomal
durant le coup de feu, interrompez
immédiatement le tir, enclenchez la
sûreté et déchargez l’arme. Vérifiez
que la chambre et le canon soient
libres de toute obstruction, comme par
exemple un projectile bloqué à l’intérieur du canon à cause de munitions
défectueuses ou inappropriées.
6. DIE WAFFE ANGEMESSEN AUFBEWAHREN.
Die Waffe so aufbewahren, dass sich
kein Schmutz oder Staub in den mechanischen Teilen ansammelt. Indem
man die in diesem Handbuch enthaltenen Anweisungen befolgt, die Waffe
nach jedem Gebrauch reinigen und
schmieren, um Korrosion, Beschädigungen des Laufs sowie das Ansammeln von Unreinheiten vorzubeugen,
die eine Funktion der Waffe im Bedarfsfall verhindern könnten. Das Innere und das Patronenlager immer vor
dem Laden der Waffe kontrollieren, um
sicherzustellen, dass diese sauber und
nicht verstopft sind. Falls bei Verstopfungen im Lauf oder Patronenlager geschossen wird, kann dies die Explosion
des Laufs verursachen und Sie oder
andere Personen in der Nähe könnten
verletzt werden. Sollte man ein anomales Geräusch beim Schießen hören, sofort damit aufhören, die Waffe sichern
und entladen. Sicherstellen, dass keine
Verstopfungen im Lauf oder Patronenlager vorhanden sind, wie beispielsweise ein blockiertes Projektil im Lauf
aufgrund defekter oder ungeeigneter
Munition.
Page 18

17
6. CONSERVAR EL ARMA DE MODO
APROPIADO.
Guardar el arma de modo que no se
acumule suciedad o polvo en las partes mecánicas. Siguiendo las instrucciones contenidas en este manual, limpie y lubrifique el arma después de
cada uso para prevenir corrosión, daños en el cañón o acumulación de impurezas que puedan impedir al arma
su funcionamiento en caso de necesidad. Controlar siempre el interior y la
cámara de explosión antes de cargar el
arma para asegurarse que estén limpias
y exentas de obstrucciones. Disparar
cuando haya obstrucciones en el
cañón o en la cámara de explosión
puede causar la explosión del cañón y
herir a usted o a otras personas que
estén cerca. En el caso de que se advierta un ruido anómalo durante el
disparo interrumpir inmediatamente la
acción, poner el seguro y descargar el
arma. Cerciorarse de que la cámara y
el cañón estén libres de posibles obstrucciones, como por ejemplo un proyectil bloqueado dentro del cañón debido a municiones defectuosas o inadecuadas.
6. CONSERVAR A ARMA DE FORMA
ADEQUADA.
Guardar a arma de modo a não permitir a acumulação de sujidade ou poeiras nas partes mecânicas. Seguindo as
instruções contidas neste manual, limpar e lubrificar a arma após cada utilização, por forma a prevenir a corrosão
e danos no cano ou a acumulação de
impurezas que possam impedir o funcionamento da arma em caso de
necessidade. Verificar sempre o interior
e a câmara antes de carregar a arma
para se certificar que estão limpos e
desobstruídos. Disparar a arma na presença de obstruções no cano ou na
câmara pode causar a explosão do
cano e ferimentos a si ou a outras pessoas próximas de si. Se se ouvir um ruído invulgar durante o disparo, deixar
de disparar imediatamente, travar a
patilha de segurança e descarregar a
arma. Certificar-se de que a câmara e o
cano estão livres de possíveis obstruções, como por exemplo, um projéctil
encravado no interior do cano devido a
munições defeituosas ou inadequadas.
6.
РЕКОМЕНДАЦИИ ПО ПРАВИЛЬНОМУ
ХРАНЕНИЮ ОРУЖИЯ.
Храните оружие таким образом,
чтобы на его подвижной системе не
скапливалась пыль и грязь.
После каждого выхода на охоту
необходимо почистить ружьё, следуя
указаниям настоящего руководства.
Это позволит предотвратить
появление коррозии, повреждений
ствола и скопления грязи, которые
могут вызвать задержки при стрельбе
в самый неподходящий момент. Перед
тем, как зарядить ружьё осмотрите
патронник и убедитесь в его чистоте и
в отсутствии посторонних предметов.
Наличие загрязнений или посторонних
предметов в канале ствола во время
выстрела может привести к разрыву
ствола и причинить травмы стрелку и
окружающим. Если во время стрельбы
вы услышите ненормальный звук,
немедленно прекратите стрельбу,
включите предохранитель и разрядите
ружьё. Осмотрите канал ствола и
патронник на предмет наличия
посторонних предметов, таких как
застрявший в канале ствола снаряд
недоброкачественного или нештатного
боеприпаса.
6. ¢π∞∆∏ƒ∂π∆∂ ∆√ √¶§√ ™ø™∆∞.
∏ К‡П·НЛ ЩФ˘ fiПФ˘ Ъ¤ВИ У· Б›УВЩ·И
¤ЩЫИ ТЫЩВ У· МЛ Ы˘ЫЫˆЪВ‡ВЩ·И ‚ЪˆМИ¿ ‹
ЫОfiУЛ ЫЩ· МЛ¯·УИО¿ ЩФ˘ М¤ЪЛ. ∆ЛЪВ›ЩВ
ЩИ˜ Ф‰ЛБ›В˜ ЩФ˘ ·ЪfiУЩФ˜ ВБ¯ВИЪИ‰›Ф˘
БИ· У· О·ı·Ъ›˙ВЩВ О·И У· П·‰ТУВЩВ ЩФ
fiПФ МВЩ¿ ·fi О¿ıВ ¯Ъ‹ЫЛ БИ· У·
·ФК‡БВЩВ ЩЛ ‰И¿‚ЪˆЫЛ, ˙ЛМИ¤˜ ЫЩЛУ
О¿УУЛ ‹ Ы˘ЫЫТЪВ˘ЫЛ ·О·ı·ЪЫИТУ Ф˘
МФЪФ‡У У· ВМФ‰›ЫФ˘У ЩЛ ¯Ъ‹ЫЛ ЩФ˘
ЫВ ВЪ›ЩˆЫЛ ·У¿БОЛ˜. Ελγχετε πντα
το εσωτερικ και τη θαλµη πριν
γεµσετε το πλο, για να βεβαιωθετε
τι εναι καθαρ και χωρς εµπδια. ∏
¯Ъ‹ЫЛ ЩФ˘ fiПФ˘ МВ ЩЛУ О¿УУЛ ‹ ЩЛ
ı·П¿МЛ ‚Ф˘ПˆМ¤УЛ МФЪВ› У·
ЪФО·П¤ЫВИ ¤ОЪЛНЛ ЩЛ˜ О¿УУЛ˜ О·И ЩФУ
ЩЪ·˘М·ЩИЫМfi ЩФ˘ ¯Ъ‹ЫЩЛ ‹ ¿ППˆУ
·ÓıÚÒˆÓ. ™Â ÂÚ›ÙˆÛË Ô˘
·УЩИПЛКıВ›ЩВ О¿ФИФУ ·УТМ·ПФ ıfiЪ˘‚Ф
fiЩ·У ˘ЪФ‚ФПВ›ЩВ, ЫЩ·М·Щ‹ЫЩВ ·М¤Ыˆ˜
ЩЛ ¯Ъ‹ЫЛ ЩФ˘ fiПФ˘, ‚¿ПЩВ ЩЛУ
·ЫК¿ПВИ· О·И ·‰ВИ¿ЫЩВ ЩФ. µВ‚·ИˆıВ›ЩВ
fiЩИ Л ı·П¿МЛ О·И Л О¿УУЛ ‰ВУ
·ЪФ˘ЫИ¿˙Ф˘У ВМfi‰И·, fiˆ˜ БИ·
·Ъ¿‰ВИБМ· К˘Ы›ББИФ МПФО·ЪИЫМ¤УФ
ЫЩФ ВЫˆЩВЪИОfi ЩЛ˜ О¿УУЛ˜ ПfiБˆ
ВП·ЩЩˆМ·ЩИОТУ ‹ ·О·Щ¿ППЛПˆУ
˘ЪФМ·¯ИОТУ.
Page 19

18
7. UTILIZZARE MUNIZIONI
APPROPRIATE.
Utilizzare solo munizioni di fabbrica,
nuove munizioni realizzate secondo
le seguenti specifiche industriali: CIP
(Europa e altri paesi), SAAMI®
(U.S.A.). Assicurarsi che i proiettili siano del calibro o del tipo adatti all’arma utilizzata. Il calibro dell’arma è
contrassegnato chiaramente sulla canna del fucile o sul carrello o canna
della pistola. L’utilizzo di munizioni
ricaricate o ricostruite può aumentare
la probabilità di pressione eccessiva
sulla cartuccia, esplosione del fondello o altri difetti delle munizioni che
possano causare danni all’arma e ferire voi o altre persone vicine.
7. USE PROPER AMMUNITION.
Only use factory-loaded, new ammunition manufactured to industry specifications: CIP (Europe and elsewhere),
SAAMI® (U.S.A.). Be certain that each
round you use is in the proper caliber
or gauge and type for the particular
firearm. The caliber or gauge of the
firearm is clearly marked on the barrels of shotguns and on the slide or
barrel of pistols. The use of reloaded
or remanufactured ammunition can
increase the likelihood of excessive
cartridge pressures, case-head ruptures
or other defects in the ammunition
that can cause damage to your firearm
and injury to yourself or others nearby.
7. UTILISEZ DES MUNITIONS
APPROPRIEES.
Utilisez toujours des munitions de
marque de fabrique, nouvelles munitions réalisées selon les spécifications
industrielles suivantes: CIP (Europe et
autres pays), SAAMI® (U.S.A.). Contrôlez que les projectiles soient du
calibre ou du type appropriés à l’arme
utilisée. Le calibre de l’arme est indiqué clairement sur le canon du fusil
ou sur le chariot ou sur le canon du
pistolet. L’emploi de munitions rechargées ou reconstruites peut augmenter la probabilité de pression
excessive sur la cartouche, d’explosion du culot ou d’autres défauts des
munitions qui peuvent endommager
l’arme et vous blesser ou blesser les
personnes qui se trouvent près de vous.
7. ANGEMESSENE MUNITIONEN
VERWENDEN.
Nur neue Fabrikmunitionen verwenden, die gemäß der nachfolgenden
Industriespezifikationen verwirklicht
wurden: CIP (Europa und andere Länder), SAAMI® (U.S.A.). Sicherstellen,
dass die Projektils für das Kaliber und
die Typologie der verwendeten Waffe
geeignet sind. Das Kaliber der Waffe
ist deutlich auf dem Gewehrlauf oder
dem Schlitten oder dem Pistolenlauf
angegeben. Die Verwendung von wieder geladenen oder nachgebauten
Munitionen kann die Wahrscheinlichkeit eines übermäßigen Drucks auf die
Patrone, die Explosion des Hülsenbodens oder anderer Defekte der Munitionen erhöhen, durch die die Waffe
Schaden erleiden kann und Sie oder
andere Personen in der Nähe verletzt
werden können.
Page 20

19
7. UTILICE MUNICIONES APROPIADAS.
Utilice sólo municiones de fábrica,
nuevas realizadas según los siguientes
requisitos específicos industriales: CIP
(Europa y otros países), SAAMI®
(U.S.A.). Cerciorarse de que los proyectiles sean del calibre o del tipo
adecuado al arma que se utiliza. El
calibre del arma está indicado claramente en el cañón del fusil o en el
tubo o cañón de la pistola. El uso de
municiones recargadas o reconstruidas
puede aumentar la probabilidad de
presión excesiva en el cartucho, explosión del culote u otros defectos de
las municiones que pueden causar
daños al arma y herir a usted o a personas que están cerca.
7. UTILIZAR MUNIÇÕES
ADEQUADAS.
Utilizar apenas munições de fábrica,
munições novas produzidas de acordo
com as seguintes especificações industriais: CIP (Europa e outros países),
SAAMI® (E.U.A.). Certifique-se de que
os projécteis são do calibre e tipo adequados à arma utilizada. O calibre da
arma está claramente indicado no
cano da espingarda ou no carregador
ou cano da pistola. A utilização de
munições recarregadas ou reconstruídas pode aumentar a probabilidade de
exercer pressão excessiva sobre o cartucho, explosão da base ou outros defeitos das munições que possam causar danos na arma e ferimentos a si ou
a outras pessoas próximas de si.
7. ИСПОЛЬЗУЙТЕ ТОЛЬКО
ШТАТНЫЕ БОЕПРИПАСЫ.
Используйте только боеприпасы
заводского изготовления с
неистёкшим сроком годности и
соответствующие требованиям CIP
(Европа и другие страны), SAAMI®
(США). Удостоверьтесь в том, что
калибр и тип патрона соответствуют
вашему ружью. Калибр указан на
стволе ружья. Применение
самостоятельно заряженных или
перезаряженных патронов может
вызвать повышенное давление в
гильзе и привести к разрыву её донца
и другим нежелательным явлениям,
которые способны повредить ружьё и
нанести увечья стрелку или
окружающим.
7. Ã∏™πª√¶√π∂π∆∂ ∫∞∆∞§§∏§∞
¶Àƒ√ª∞Ãπ∫∞.
ГЪЛЫИМФФИВ›ЩВ МfiУФ О·ИУФ‡ЪБИ·
˘ЪФМ·¯ИО¿ ВЪБФЫЩ·Ы›Ф˘ Ф˘
·ÓÙ·ÔÎÚ›ÓÔÓÙ·È ÛÙȘ ·ÎfiÏÔ˘ı˜
ЪФ‰И·БЪ·К¤˜: CIP (∂˘ЪТЛ О·И ¿ППВ˜
¯ТЪВ˜), SAAMI® (U.S.A.). µВ‚·ИˆıВ›ЩВ
fiЩИ Щ· К˘Ы›ББИ· ¤¯Ф˘У ЩФ ЫˆЫЩfi
‰И·М¤ЩЪЛМ· О·И В›У·И О·Щ¿ППЛП· БИ· ЩФУ
Щ‡Ф ЩФ˘ fiПФ˘ Ф˘ ¯ЪЛЫИМФФИВ›ЩВ. ∆Ф
‰И·М¤ЩЪЛМ· ЩФ˘ fiПФ˘ ·У·БЪ¿КВЩ·И
В˘ОЪИУТ˜ ЫЩЛУ О¿УУЛ ЩФ˘ ЩФ˘КВОИФ‡ О
ЫЩФ ОПВ›ЫЩЪФ ‹ ЫЩЛУ О¿УУЛ ЩФ˘
ИЫЩФПИФ‡. ∏ ¯Ъ‹ЫЛ Н·У·БВМИЫМ¤УˆУ ‹
·Ó·Î·Ù·Û΢·ÛÌ¤ÓˆÓ ˘ÚÔÌ·¯ÈÎÒÓ
МФЪВ› У· ·˘Н‹ЫВИ ЩЛУ Иı·УfiЩЛЩ·
˘ВЪ‚ФПИО‹˜ ›ВЫЛ˜ ЫЩФ К˘Ы›ББИФ,
¤ОЪЛНЛ˜ ЩФ˘ О·„Ф˘ПИФ‡ ‹ ¿ПП·
ВП·ЩЩТМ·Щ· ЩˆУ ˘ЪФМ·¯ИОТУ Ф˘
МФЪФ‡У У· ЪФО·П¤ЫФ˘У ‚П¿‚В˜
˙ЛМИ¤˜ ЫЩФ fiПФ О·И ЩЪ·˘М·ЩИЫМФ‡˜ ЩФ˘
¯Ъ‹ЫЩЛ ‹ ¿ППˆУ ·УıЪТˆУ.
Page 21
20
8. INDOSSARE SEMPRE OCCHIALI
DI PROTEZIONE E TAPPI PER LE
ORECCHIE QUANDO SI SPARA.
La probabilità che gas, polvere da
sparo o frammenti metallici colpiscano e feriscano il tiratore mentre spara,
è remota, ma nell’evenienza che questo succeda, i danni possono essere
gravi, inclusa la possibilità di perdere
la vista. Quando spara, il tiratore deve
sempre indossare occhiali di protezione ad alta resistenza. Tappi per le
orecchie o altri tipi di protezione di
alta qualità aiutano a ridurre il rischio
di danni provocati dallo sparo.
8. ALWAYS WEAR PROTECTIVE
GLASSES AND EARPLUGS WHEN
SHOOTING.
The chance that gas, gunpowder or
metal fragments will blow back and
injure a shooter who is firing a gun is
rare, but the injury that can be sustained in such circumstances can be severe, including the possible loss of eyesight. A shooter must always wear
impact resistant shooting glasses when
firing any firearm. Earplugs or other
high-quality hearing protectors help
reduce the chance of hearing damage
from shooting.
8. PORTEZ TOUJOURS DES LUNETTES DE PROTECTION ET DES
BOUCHONS POUR LES OREILLES LORSQUE VOUS TIREZ.
La probabilité que des gaz, des poudres ou des fragments métalliques
atteignent et blessent le tireur après le
coup de feu est rare, mais dans l’hypothèse que cela s’avère, les blessures
peuvent être graves, y compris la possibilité de perdre la vue. Lorsque vous
tirez, vous devez toujours porter des
lunettes de protection à haute résistance. Les bouchons pour les oreilles et
autres types de protection de haute
qualité contribuent à réduire le risque
de blessures provoquées par le tir.
8. BEIM SCHIEßEN IMMER SCHUTZBRILLE UND OHRENSTÖPSEL TRAGEN.
Die Wahrscheinlichkeit, dass der Schütze beim Schießen von Gas, Schießpulver oder Metallfragmenten getroffen
wird, ist gering, doch falls dies passieren sollte, können schwerwiegende
Schäden verursacht werden, bis zum
Verlust des Sehvermögens. Beim
Schießen muss der Schütze immer eine
hochwiderstandsfähige Schutzbrille
tragen. Ohrenstöpsel oder andere
hochwertige Schutzvorrichtungen helfen, das Risiko von durch das Schießen
verursachten Schäden zu verringern.
Page 22

21
8. LLEVAR SIEMPRE GAFAS DE PROTECCIÓN Y TAPONES PARA LOS
OÍDOS CUANDO SE DISPARA.
La probabilidad de que gas, pólvora o
fragmentos metálicos golpeen y hieran
al tirador mientras dispara, es remota,
pero ante la posibilidad de que ello
suceda, los daños pueden ser graves,
incluso la posibilidad de perder la
vista. Cuando dispara, el tirador debe
siempre llevar gafas de protección de
alta resistencia. Tapones para los oídos
u otros tipos de protección de alta calidad ayudan a reducir el riesgo de
daños provocados por el disparo.
8. UTILIZAR SEMPRE ÓCULOS DE
PROTECÇÃO E TAMPÕES AUDITIVOS PARA DISPARAR.
A probabilidade de o gás, a pólvora ou
fragmentos metálicos atingirem ou ferirem o atirador enquanto dispara é
remota, mas na eventualidade de isso
acontecer, os danos podem ser graves,
incluindo a possibilidade de perder a
visão. Quando dispara, o atirador deve sempre utilizar óculos de protecção
de alta resistência. Os tampões auditivos ou outros tipos de protecção de
alta qualidade ajudam a minimizar o
risco de danos provocados pelo disparo.
8. ВО ВРЕМЯ СТРЕЛЬБЫ
ПОЛЬЗУЙТЕСЬ ЗАЩИТНЫМИ
ОЧКАМИ И НАУШНИКАМИ.
Вероятность прорыва пороховых газов
или частиц металла во время выстрела
крайне низка, однако необходимо
учитывать, что в этом случае стрелок
может получить тяжёлые травмы
вплоть до потери зрения. Поэтому во
время стрельбы рекомендуется
надевать высокопрочные защитные
очки. Вкладыши для ушей или другие
надёжные средства защиты позволяют
снизить вредное воздействие звука
выстрела на органы слуха.
8. Ã∏™πª√¶√π∂π∆∂ ¶∞¡∆∞ °À∞§π∞
¶ƒ√™∆∞™π∞™ ∫∞π ø∆√∞™¶π¢∂™
√∆∞¡ ¶Àƒ√µ√§∂π∆∂.
∏ Иı·УfiЩЛЩВ˜ ЩЪ·˘М·ЩИЫМФ‡ ЩФ˘
ЫОФВ˘Щ‹ ·fi ·¤ЪИ·, ˘Ъ›ЩИ‰· ‹
МВЩ·ППИО¿ ıЪ·‡ЫМ·Щ· В›У·И ВП¿¯ИЫЩВ˜,
ˆЫЩfiЫФ ЫВ ВЪ›ЩˆЫЛ Ф˘ Ы˘М‚В› О¿ЩИ
Щ¤ЩФИФ Ф ЩЪ·˘М·ЩИЫМfi˜ МФЪВ› У· В›У·И
ЫФ‚·Ъfi˜ ·ОfiМЛ О·И МВ Иı·УfiЩЛЩ·
·ÒÏÂÈ·˜ Ù˘ fiÚ·Û˘. ŸÙ·Ó
˘ÚÔ‚ÔÏ›ÙÂ, ı· Ъ¤ВИ У·
¯ЪЛЫИМФФИВ›ЩВ ¿УЩ· Б˘·ПИ¿
ЪФЫЩ·Ы›·˜ ˘„ЛП‹˜ ·УЩФ¯‹˜. √И
ˆЩФ·Ы›‰В˜ ‹ ¿ПП· ЪФЫЩ·ЩВ˘ЩИО¿
˘„ЛП‹˜ ФИfiЩЛЩ·˜ БИ· ЩЛУ ·ОФ‹ ‚ФЛıФ‡У
ЫЩЛ МВ›ˆЫЛ ЩˆУ ‚П·‚ТУ Ф˘ ЪФО·ПВ› Л
ВО˘ЪЫФОЪfiЩЛЫЛ.
Page 23
22
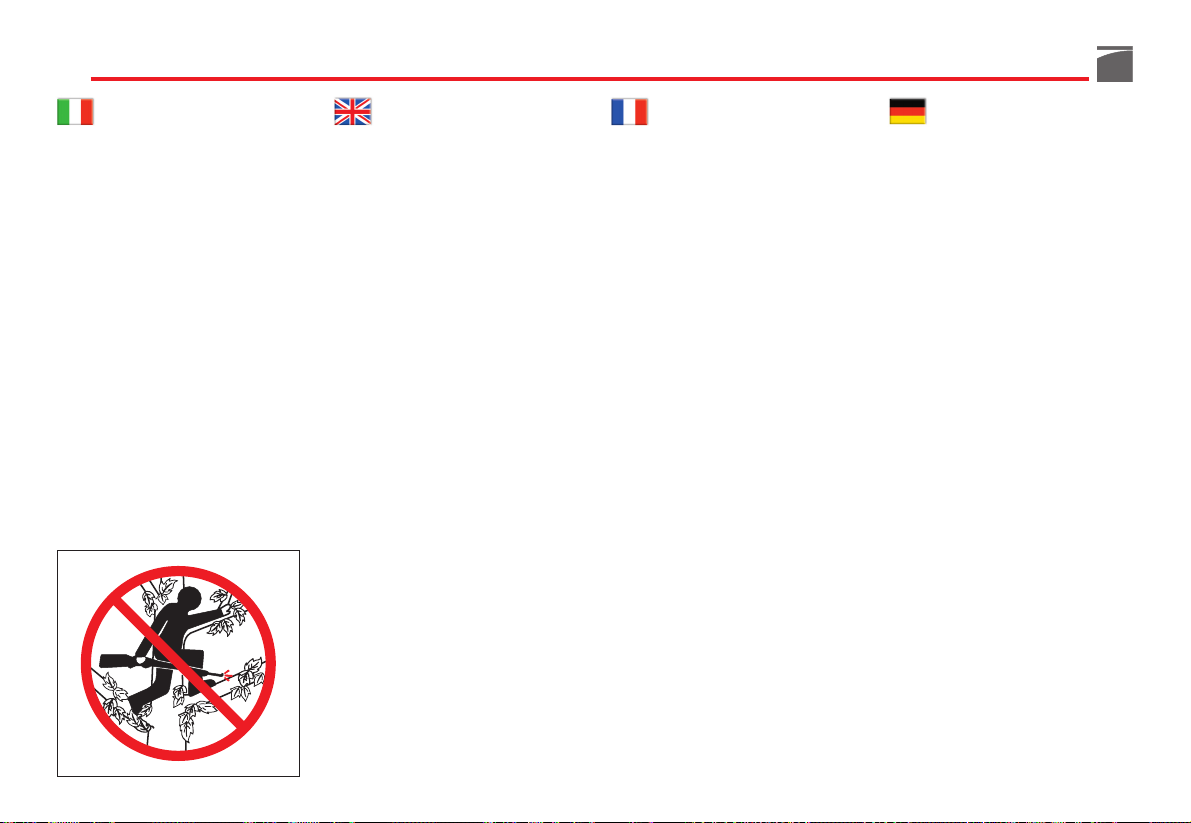
9. NON ARRAMPICARSI MAI SU
ALBERI, RECINZIONI O OSTACOLI CON L’ARMA CARICA.
Aprire e svuotare la camera dell’arma
e mettere la sicura prima di arrampicarsi o scendere da alberi o prima di
scavalcare recinti o saltare fossati o
altri ostacoli. Non tirare o spingere
l’arma verso se stessi o verso un’altra
persona. Scaricare sempre l’arma e
controllare visivamente e fisicamente
che il serbatoio, il meccanismo di
ricarica e la camera siano scarichi e
che l’arma abbia l’otturatore aperto
prima di darla in mano ad un’altra
persona. Non prendere mai un’arma
da un’altra persona a meno che non
sia scarica, controllata fisicamente e
visivamente per accertarsi che sia
effettivamente scarica e comunque
prendere l'arma solo se aperta.
9. NEVER CLIMB A TREE, FENCE OR
OBSTRUCTION WITH A LOADED FIREARM.
Open and empty the chamber of your
firearm and engage the manual safety
catch before climbing or descending a
tree or before climbing a fence or
jumping over a ditch or other obstruction. Never pull or push a loaded
firearm toward yourself or another
person. Always unload the firearm,
visually and physically check to see
that the magazine, loading mechanism and chamber are unloaded and
that the bolt is open before handing
the firearm to another person. Never
take a firearm from another person
unless it is unloaded, visually and
physically checked to confirm it is
unloaded, and the action is open.
9. NE GRIMPEZ JAMAIS SUR LES
ARBRES, LES CLOTURES OU LES
OBSTACLES AVEC L’ARME CHARGEE.
Ouvrez et videz la chambre de l’arme
et enclenchez la sûreté avant de grimper ou de descendre des arbres ou
avant de sauter les clôtures ou les fossés ou autres obstacles. Ne tirez pas et
ne poussez pas l’arme contre vousmême ou contre une autre personne.
Déchargez toujours l’arme et contrôlez
visuellement et physiquement que le
magasin, le mécanisme de recharge et
la chambre soient déchargés et que
l’arme ait l'obturateur ouvert avant de
la remettre dans les mains d’un tiers.
Ne prenez jamais une arme d’une autre personne si elle n’est pas déchargée
et si vous ne l’avez pas contrôlée visuellement et physiquement pour vous
assurer qu’elle soit effectivement déchargée et, d’autre part, prenez l'arme
seulement si celui-ci est ouverte.
9. MIT GELADENER WAFFE NIE AUF
BÄUME, ZÄUNE ODER HINDERNISSE KLETTERN.
Bevor man auf Bäume klettert oder
über Zäune oder über Gräben und
andere Hindernisse springt, das Patronenlager der Waffe öffnen und entleeren. Die Waffe nicht gegen sich
selbst oder eine andere Person drücken
oder ziehen. Die Waffe immer entladen und visuell und physisch kontrollieren, dass das Magazin, das Aufladesystem und das Patronenlager entladen
sind und dass der Verschluss geöffnet
ist, bevor man die Waffe einer anderen
Person übergibt. Nie die Waffe einer
anderen Person nehmen, es sei denn
sie ist entladen und wurde physisch
und visuell überprüft, um sicherzustellen, dass sie tatsächlich nicht geladen
ist, und nur nehmen, wenn sie geöffnet
ist.
Page 24

23
9. NO SE TREPE NUNCA A LOS ÁRBOLES, PROTECCIONES U OBSTÁCULOS CON EL ARMA CARGADA.
Abra y vacíe la cámara del arma y
ponga el seguro antes de treparse o de
bajar de árboles o antes de salvar una
empalizada o saltar un foso u otros
obstáculos. No tire ni empuje el arma
hacia sí mismo o hacia otra persona.
Descargue siempre el arma y controle
visualmente y físicamente que el almacén, el mecanismo de recarga y la
cámara estén descargados y que el
arma tenga el obturador abierto antes
de ponerla en manos de otra persona.
Nunca tome un arma de otra persona
excepto que la misma esté descargada, haya sido controlada físicamente y
visualmente para asegurarse que esté
efectivamente descargada y de cualquier modo tomar el arma sólo si está
abierta.
9. NUNCA SUBIR A UMA ÁRVORE,
OU SALTAR UMA VALA OU
OBSTÁCULOS COM A ARMA
CARREGADA.
Abrir e esvaziar a câmara da arma e
travar a patilha de segurança antes de
subir ou descer de uma árvore ou antes de saltar uma vala, uma cerca ou
outros obstáculos. Não puxar nem empurrar a arma em direcção a si ou a
outra pessoa. Descarregar sempre a arma e verificar física e visualmente que
o depósito, o mecanismo de recarga e
a câmara estão descarregados e que a
arma tenha o obturador aberto antes
de a entregar a outra pessoa. Nunca
pegar numa arma de outra pessoa sem
ter sido descarregada e verificada física e visualmente para confirmar se
está efectivamente descarregada e, em
todo o caso, pegar na arma apenas se
estiver aberta.
9. ЗАПРЕЩАЕТСЯ ЗАЛАЗИТЬ НА
ДЕРЕВЬЯ, ПЕРЕЛАЗИТЬ ЧЕРЕЗ
ИЗГОРОДИ ИЛИ ИНЫЕ
ПРЕПЯТСТВИЯ С ЗАРЯЖЕННЫМ
ОРУЖИЕМ.
Перед тем, как залезть на дерево или
слезть с него, а также перед
преодолением изгородей, канав или
других препятствий необходимо
извлечь патрон из патронника и
поставить ружьё на предохранитель.
Запрещается тянуть ружьё на себя и
толкать им других людей. Перед тем,
как передать кому-либо ваше ружьё,
разрядите его и удостоверьтесь в
отсутствии патрона в магазине, на
лотке подавателя и в патроннике,
затем, не закрывая затвора,
передайте ружьё. Никогда не
принимайте ружьё от кого-либо, если
вы не уверены в том, что оно
разряжено, проверено зрительно и на
ощупь на предмет отсутствия в нём
патронов, и, в любом случае, берите
ружье только когда оно открыто.
9. ª∏ ™∫∞ƒº∞§ø¡∂∆∂ ¶√∆∂ ™∂
¢∂¡∆ƒ∞, ¶∂ƒπºƒ∞•∂π™ ◊
∂ª¶√¢π∞ ª∂ ∆√ √¶§√ °∂ª∞∆√.
Ανοξτε και αδειστε τη θαλµη του
πλου και βλτε την ασφλεια πριν
σκαρφαλ#σετε κατεβετε απ
δντρα, πριν υπερπηδσετε
περιφρξεις πριν πηδσετε πνω
απ τφρους λλα εµπδια. ªËÓ
ÙÚ·‚¿ÙÂ Î·È ÌË ÛÚÒ¯ÓÂÙ ÔÙ¤ ÙÔ
fiÏÔ ÚÔ˜ ÙÔ Ì¤ÚÔ˜ Û·˜ ‹ ÚÔ˜ ¿ÏÏÔ˘˜
·ÓıÚÒÔ˘˜. ∞‰ÂÈ¿˙ÂÙ ¿ÓÙ· ÙÔ fiÏÔ
О·И ВП¤Б¯ВЩВ МВ ЩФ М¿ЩИ О·И ЩЛУ ·К‹ ·У
В›У·И ¿‰ВИ· Л ·Фı‹ОЛ, Ф БВМИЫЩ‹Ъ·˜ О·И
Л ı·П¿МЛ О·И ·У ЩФ fiПФ ¤¯ВИ ЩФ
ОПВ›ЫЩЪФ ·УФИ¯Щfi ЪИУ ЩФ ‰ТЫВЩВ ЫВ
¿ППФУ ¿УıЪˆФ. Μην παρνετε ποτ το
πλο απ λλο τοµο εν δεν το χει
αδεισει και ελγξει µε το µτι και την
αφ για να βεβαιωθε τι εναι δειο
και σε κθε περπτωση να το παρνετε
µνο αν εναι ανοιχτ.
Page 25
24
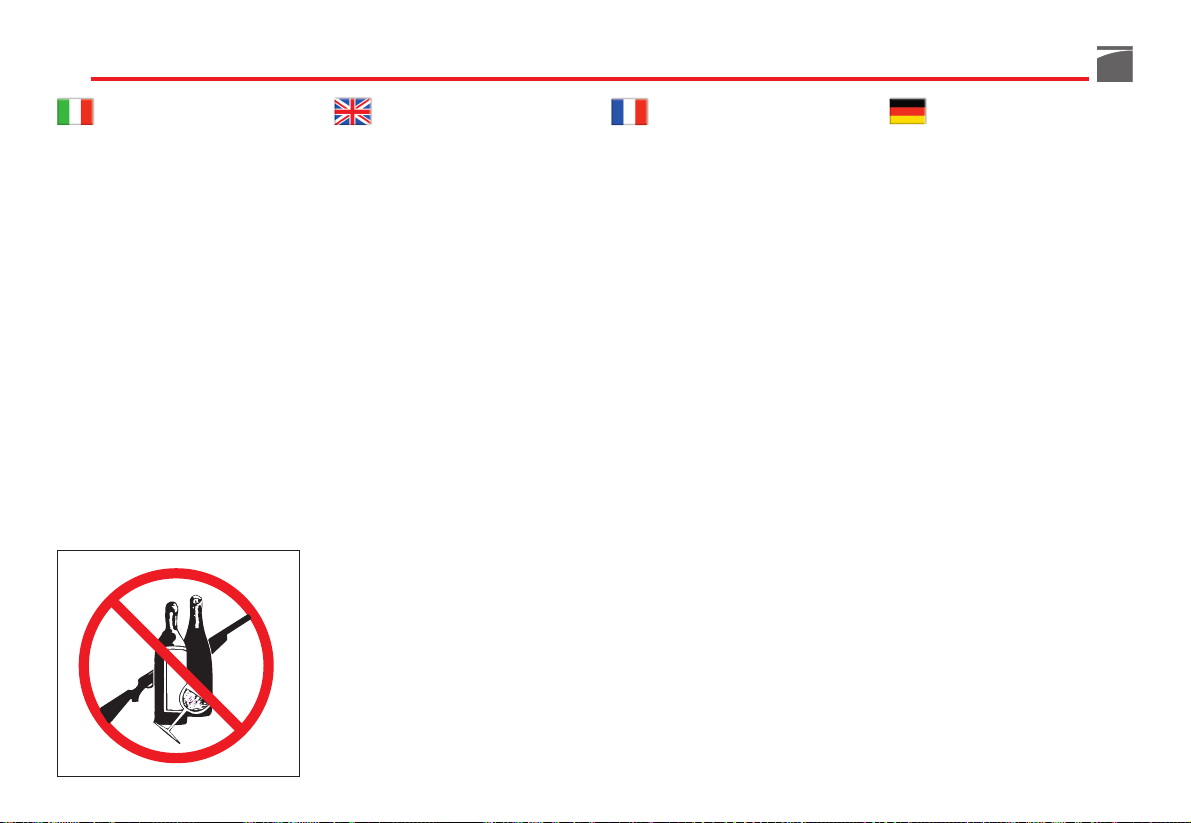
10. EVITARE L’USO DI BEVANDE
ALCOLICHE O MEDICINALI
CHE POSSANO DIMINUIRE I
RIFLESSI E L’AUTOCONTROLLO
MENTRE SI SPARA.
Non bere quando si spara. Se si assumono medicinali che possano diminuire i riflessi o l’autocontrollo, non
maneggiare armi mentre si è sotto l’effetto del medicinale.
10. AVOID ALCOHOLIC BEVERAGES
OR JUDGMENT/REFLEX IMPAIRING MEDICATION WHEN
SHOOTING.
Do not drink and shoot. If you take
medication that can impair motor
reactions or judgment, do not handle
a firearm while you are under the
influence of the medication.
10. EVITEZ DE BOIRE DES BOISSONS ALCOOLIQUES OU D’ASSUMER DES MEDICAMENTS
POUVANT DIMINUER VOS REFLEXES ET VOTRE SELF-CONTROL PENDANT QUE VOUS TIREZ.
Ne buvez pas lorsque vous utilisez
votre arme. Si vous assumez des médicaments pouvant diminuer vos réflexes
ou votre self-control, ne manipulez pas
d’armes tant que vous êtes sous l’effet
du médicament.
10. DIE EINNAHME VON ALKOHOLISCHEN GETRÄNKEN UND
MEDIKAMENTEN VERMEIDEN,
DIE DIE REFLEXE UND DIE SELBSTKONTROLLE BEIM SCHIEßEN
BEEINTRÄCHTIGEN KÖNNTEN.
Beim Schießen nicht trinken. Falls man
Medikamente einnimmt, die die Reflexe oder die Selbstkontrolle beeinträchtigen könnten, keine Waffen handhaben, während man unter Einfluss des
Medikaments ist.
Page 26

25
10. EVITE EL USO DE BEBIDAS ALCOHÓLICAS O MEDICAMENTOS QUE PUEDAN DISMINUIR
LOS REFLEJOS Y EL AUTOCONTROL MIENTRAS SE DISPARA.
No beba cuando dispara. Si se asumen
medicamentos que pueden disminuir
los reflejos o el autocontrol, no maneje armas mientras está bajo el efecto
de los mismos.
10. EVITAR A INGESTÃO DE BEBIDAS ALCOÓLICAS OU MEDICAMENTOS QUE POSSAM
DIMINUIR OS REFLEXOS E O
AUTOCONTROLO DURANTE A
UTILIZAÇÃO DA ARMA.
Não beber enquanto se está a utilizar
a arma. Se estiverem a ser tomados
medicamentos susceptíveis de diminuir os reflexos e o autocontrolo, não
manusear armas enquanto se está sob
o efeito do medicamento.
10. НЕ ДОПУСКАЙТЕ ПРИЁМА
ПЕРЕД СТРЕЛЬБОЙ
АЛКОГОЛЬНЫХ НАПИТКОВ ИЛИ
ЛЕКАРСТВЕННЫХ ПРЕПАРАТОВ,
СНИЖАЮЩИХ СКОРОСТЬ
РЕАКЦИИ И СПОСОБНОСТЬ К
САМОКОНТРОЛЮ.
Не распивайте алкогольные напитки во
время стрельбы. Если вы принимаете
лекарственные препараты, снижающие
скорость реакции и способность к
самоконтролю, не берите в руки оружие
до тех пор, пока их воздействие
полностью не прекратится.
10. ∞¶√º∂À°∂∆∂ ∆∏ Ã∏™∏
∞§∫√√§√ÀÃø¡ ¶√∆ø¡ ◊
º∞ƒª∞∫ø¡ ¶√À ª¶√ƒ√À¡ ¡∞
∂¶∏ƒ∂∞™√À¡ ∆∞
∞¡∆∞¡∞∫§∞™∆π∫∞ ∫∞π ∆√¡
∞À∆√∂§∂°Ã√.
ªËÓ ›ÓÂÙ fiÙ·Ó ˘ÚÔ‚ÔÏ›ÙÂ. ™Â
ÂÚ›ÙˆÛË Ï‹„˘ Ê·ÚÌ¿ÎˆÓ Ô˘
ÌÔÚÔ‡Ó Ó· МВИТЫФ˘У Ù·
·ÓÙ·Ó·ÎÏ·ÛÙÈο ‹ ÙÔÓ ·˘ÙÔ¤ÏÂÁ¯Ô, ÌË
¯ÂÈÚ›˙ÂÛÙ fiÏ· fiÛÔ Â›ÛÙ οو ·fi ÙËÓ
›‰Ú·ÛË ÙÔ˘ Ê·ÚÌ¿ÎÔ˘.
Page 27
26
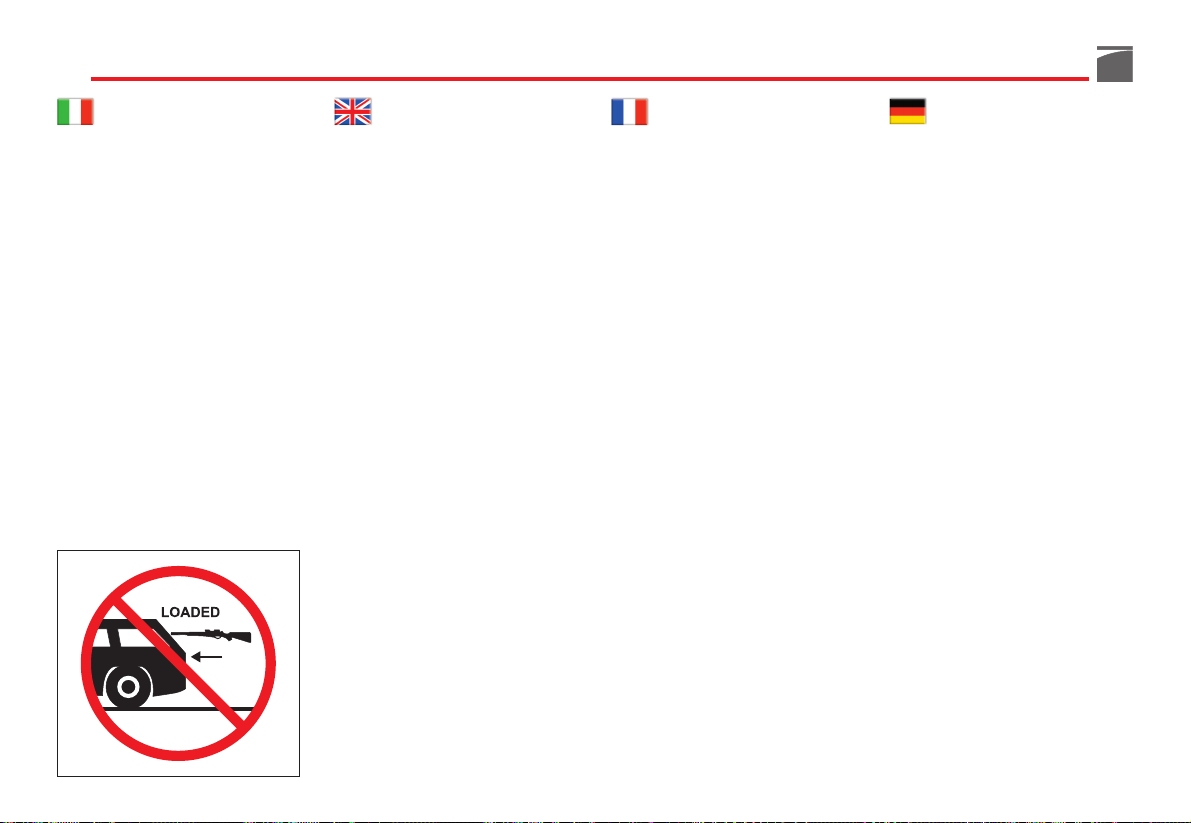
11. NON TRASPORTARE MAI
UN’ARMA CARICA.
Scaricare sempre l’arma prima di
riporla in un veicolo (camera e serbatoio vuoti). Cacciatori e tiratori devono caricare l’arma una volta giunti a
destinazione, e solo quando sono sul
punto di sparare. Se si detiene un
arma per difesa personale, lasciare la
camera scarica riduce la possibilità di
uno sparo involontario.
11. NEVER TRANSPORT A LOADED
FIREARM.
Unload a firearm before putting it in a
vehicle (chamber empty, magazine
empty). Hunters and target shooters
should load their firearm only at their
destination, and only when they are
ready to shoot. If you carry a firearm
for self-protection, leaving the chamber unloaded can reduce the chance
of an unintentional discharge.
11. NE TRANSPORTEZ JAMAIS UNE
ARME CHARGEE.
Déchargez toujours votre arme avant
de la poser dans un véhicule (chambre
et magasin vides). Les chasseurs et les
tireurs doivent charger l’arme lorsqu’ils sont arrivés à destination et seulement lorsqu’ils sont sur le point de
tirer. Si vous détenez une arme pour
votre défense personnelle, laissez la
chambre déchargée pour réduire la
possibilité d’un coup de feu involontaire.
11. NIE EINE GELADENE WAFFE
TRANSPORTIEREN.
Die Waffe immer entladen, bevor man
sie in ein Fahrzeug legt (Patronenlager
und Magazin leer). Jäger und Schützen
müssen die Waffe laden, nachdem sie
am Zielort angekommen sind und der
Moment des Schießens gekommen ist.
Falls man die Waffe zur Selbstverteidigung hält, beachten, dass ein nicht geladenes Patronenlager die Wahrscheinlichkeit eines ungewollten Schusses
reduziert.
Page 28

27
11. NUNCA TRANSPORTE UN ARMA
CARGADA.
Descargue siempre el arma antes de
ponerla en el vehículo (cámara y almacén vacíos). Cargadores y tiradores
deben cargar el arma solo tras haber
llegado a destino, y sólo cuando están
a punto de disparar. Si se tiene un arma
para defensa personal, dejar la cámara
descargada reduce la posibilidad de
disparos involuntarios.
11. NUNCA TRANSPORTAR UMA
ARMA CARREGADA.
Descarregar sempre a arma (câmara e
depósito vazios) antes de a voltar a
colocar num veículo. Os caçadores e
atiradores devem carregar a arma
quando chegam ao destino e só no
momento de disparar. Se se possuir
uma arma de defesa pessoal, deixar a
câmara descarregada para minimizar
o risco de disparo acidental.
11. НЕ ПЕРЕВОЗИТЕ ЗАРЯЖЕННОЕ
ОРУЖИЕ.
Всегда разряжайте ружьё перед тем,
как поместить его в транспортное
средство (при этом патронник и
магазин должны быть пусты).
Охотники и спортсмены должны
заряжать оружие только после
прибытия на место назначения и
непосредственно перед началом
стрельбы. Если вы держите ружьё в
целях самообороны, то отсутствие
патрона в патроннике поможет
избежать случайного выстрела.
11. ª∏ ª∂∆∞º∂ƒ∂∆∂ ¶√∆∂ ∆√
√¶§√ °∂ª∞∆√.
∞‰ВИ¿˙ВЩВ ¿УЩ· ЩФ fiПФ ЪИУ ЩФ
ЩФФıВЩ‹ЫВЩВ ЫВ О¿ФИФ fi¯ЛМ· (ı·П¿МЛ
О·И ·Фı‹ОЛ ОВУ‹). √И О˘УЛБФ› О·И ФИ
ЫОФВ˘Щ¤˜ Ъ¤ВИ У· БВМ›˙Ф˘У ЩФ fiПФ
fiЩ·У КЩ¿УФ˘У ЫЩФУ ЪФФЪИЫМfi ЩФ˘˜ О·И
МfiУФУ fiЩ·У В›У·И ¤ЩФИМФИ У·
˘ЪФ‚ФП‹ЫФ˘У. ∂¿У ¤¯ВЩВ ЩФ fiПФ БИ·
ЪФЫˆИО‹ ¿М˘У·, ·К‹УФУЩ·˜ ЩЛ
ı·П¿МЛ ¿‰ВИ· МВИТУВЩВ ЩЛУ Иı·УfiЩЛЩ·
·ОФ‡ЫИ·˜ ВО˘ЪЫФОЪfiЩЛЫЛ˜.
Page 29

28
12. AVVERTENZE SULL’ESPOSIZIONE AL PIOMBO.
Scaricare l’arma in aree con scarsa
ventilazione, pulire armi o maneggiare munizioni può comportare una
esposizione al piombo e ad altre
sostanze che possono causare danni
alla respirazione, danni all’apparato
riproduttivo ed altri gravi danni fisici.
Sostare sempre in aree con buona
ventilazione. Lavare accuratamente le
mani dopo l’esposizione.
AVVERTENZA: è VOSTRA responsabi-
lità conoscere e rispettare le leggi
locali e statali che regolamentano il
commercio, il trasporto e l’uso delle
armi nel vostro paese.
AVVERTENZA: questa arma può
togliere la vita a voi e agli altri! Siate
sempre estremamente attenti nel maneggiare l’arma. Un incidente è quasi
sempre la conseguenza del mancato
rispetto delle norme di sicurezza dell’arma.
12. LEAD WARNING.
Discharging firearms in poorly ventilated areas, cleaning firearms, or handling ammunition may result in exposure to lead and other substances
known to cause birth defects, reproductive harm, and other serious physical injury. Have adequate ventilation
at all times. Wash hands thoroughly
after exposure.
WARNING: It is YOUR responsibility
to know and abide by Federal, State
and Local laws governing the sale,
transportation and use of firearms in
your area.
WARNING: This firearm has the capa-
bility of taking your life or the life of
someone else! Always be extremely
careful with your firearm. An accident
is almost always the result of not following basic firearm safety rules.
12. AVVERTISSEMENT SUR L’EXPOSITION AU PLOMB.
Décharger l’arme dans des zones à faible ventilation, nettoyer des armes ou
manipuler des munitions peut comporter une exposition au plomb et à
d’autres substances qui peuvent nuire
à la respiration, à l’appareil reproductif
et causer des dommages physiques
graves. Choisissez toujours des zones
bien aérées. Lavez-vous soigneusement les mains après l’exposition.
REMARQUE: vous êtes entièrement
RESPONSABLES de la connaissance et
du respect des lois locales et nationales qui régissent le commerce, le transport et l’usage des armes à feu dans
votre pays.
REMARQUE: cette arme peut tuer une
personne! Soyez toujours extrêmement attentifs lorsque vous la manipulez. Un accident est presque toujours
dû au non respect des normes de sécurité de l’arme.
12. HINWEISE ZUR BLEI-EXPOSITION.
Die Waffe in wenig ventilierten Bereichen entladen, das Reinigen von Waffen und die Handhabung von Munitionen kann eine Exposition gegenüber
Blei und anderen Substanzen mit sich
bringen, die Schäden bei der Respiration, Schäden der Fortpflanzungsorgane und andere schwere körperliche
Schäden verursachen können. Man
sollte sich immer in gut belüfteten Gebieten aufhalten. Die Hände nach der
Exposition akkurat waschen.
HINWEIS: Es liegt in IHRER Verant-
wortung sich über die örtlichen und
staatlichen Gesetze zu informieren, die
den Handel, den Transport und den
Gebrauch von Waffen in Ihrem Land
regeln.
HINWEIS: Diese Waffe kann Ihnen
und anderen das Leben nehmen! Sie
sollten immer sehr vorsichtig beim
Umgang mit Ihrer Waffe sein. Ein
Unfall ist fast immer eine Folge der
Nichtbeachtung der Sicherheitsvorschriften der Waffe.
Page 30

29
12. ADVERTENCIAS SOBRE LA EXPOSICIÓN AL PLOMO.
Descargue el arma en zonas con escaza ventilación, limpiar armas o manejar municiones puede conllevar una
exposición al plomo y a otras sustancias que pueden causar daños a la
respiración, daños al aparato reproductivo y otros graves daños físicos.
Deténgase siempre en zonas con buena ventilación. Lávese muy bien las
manos después de la exposición.
ADVERTENCIA: es SU responsabili-
dad conocer y respetar las leyes locales y estatales que reglamentan el comercio, el transporte y el uso de armas
en su país.
ADVERTENCIA:¡Esta arma puede qui-
tarle la vida a usted y a los demás!
Tenga siempre sumo cuidado al manejar su arma. Un accidente es casi
siempre la consecuencia de la falta de
respeto de las normas de seguridad del
arma.
12. ADVERTÊNCIAS SOBRE A EXPOSIÇÃO AO CHUMBO.
Descarregar a arma em espaços pouco
ventilados, limpar armas ou manusear
munições pode levar à exposição ao
chumbo e a outras substâncias susceptíveis de causar problemas respiratórios, danos ao aparelho reprodutor
e outros danos físicos graves. Permaneçer em espaços bem ventilados.
Lavar cuidadosamente as mãos após a
exposição.
ADVERTÊNCIA: é SUA responsabili-
dade conhecer e respeitar as leis locais
e nacionais que regulamentam a comercialização, o transporte e a utilização de armas no seu país.
ADVERTÊNCIA: esta arma pode tirar a
vida a si e aos outros! Preste sempre
atenção máxima durante a utilização
da sua arma. Um acidente é quase
sempre consequência do incumprimento das regras de segurança da arma.
12.
ПРЕДУПРЕЖДЕНИЕ О ВОЗДЕЙСТВИИ
СВИНЦА.
Во время разряжания и чистки ружья,
а также при обращении с
боеприпасами в плохо проветриваемом
помещении можно подвергнуться
воздействию свинца и других веществ,
пагубно влияющих на органы дыхания,
репродуктивную систему и другие
органы. Всегда находитесь в хорошо
проветриваемом помещении. После
контакта с указанными веществами
обязательно помойте руки.
ВНИМАНИЕ: вы обязаны изучить и
соблюдать законодательство вашего
государства, регулирующее оборот,
транспортировку и применение
оружия.
ПОМНИТЕ! Это ружьё представляет
опасность для вашей жизни и для
жизни окружающих. При обращении
с ружьём проявляйте крайнюю
осторожность. Несчастный случай всегда результат несоблюдения мер
безопасного обращения с оружием.
12. ¶ƒ√∂π¢√¶√π∏™∂π™ °π∞ ∆∏¡
∂∫£∂™∏ ™∆√ ª√§Àµ¢√.
∏ ¯Ú‹ÛË ÙÔ˘ fiÏÔ˘ Û ÛËÌ›· Ì ÂÏÏÈ‹
·ВЪИЫМfi, Ф О·ı·ЪИЫМfi˜ ЩФ˘ ‹ Ф
¯ВИЪИЫМfi˜ ЩˆУ ˘ЪФМ·¯ИОТУ МФЪВ› У·
ЪФО·П¤ЫВИ ¤ОıВЫЛ ЫЩФ МfiП˘‚‰Ф О·И ЫВ
¿ППВ˜ Ф˘Ы›В˜, ФИ ФФ›В˜ МФЪФ‡У У·
ЪФО·П¤ЫФ˘У ·Ó·Ó¢ÛÙÈΤ˜
‰È·Ù·Ú·¯¤˜, ‚Ï¿‚˜ ÛÙÔ Û‡ÛÙËÌ·
·У··Ъ·БˆБ‹˜ О·И ¿ППВ˜ ЫФ‚·Ъ¤˜
ЫˆМ·ЩИО¤˜ ‚П¿‚В˜. ГЪЛЫИМФФИВ›ЩВ ЩФ
fiПФ ¿УЩ· ЫВ ЫЛМВ›· МВ О·Пfi ·ВЪИЫМfi.
¶П¤УВЩВ О·П¿ Щ· ¯¤ЪИ· МВЩ¿ ЩЛУ ¤ОıВЫЛ.
¶ƒ√∂π¢√¶√π∏™∏: Ô ¯Ú‹ÛÙ˘ √º∂π§∂π
У· БУˆЪ›˙ВИ О·И У· ЩЛЪВ› ЩФ˘˜ ЩФИОФ‡˜
О·УФУИЫМФ‡˜ О·И ЩЛ УФМФıВЫ›· Ф˘
‰И¤ВИ ЩФ ВМfiЪИФ, ЩЛ МВЩ·КФЪ¿ О·И ЩЛ
¯Ъ‹ЫЛ ЩˆУ fiПˆУ.
¶ƒ√∂π¢√¶√π∏™∏: Ù· fiÏ· ÌÔÚÔ‡Ó Ó·
·К·ИЪ¤ЫФ˘У ЩЛ ˙ˆ‹ ЩˆУ ·УıЪТˆУ! ¡·
В›ЫЩВ ¿УЩ· И‰И·›ЩВЪ· ЪФЫВОЩИОФ› fiЩ·У
¯ВИЪ›˙ВЫЩВ ЩФ fiПФ Ы·˜. ∆· ·Щ˘¯‹М·Щ·
В›У·И Ы¯В‰fiУ ¿УЩ· ·ФЩ¤ПВЫМ· ЩЛ˜ МЛ
Щ‹ЪЛЫЛ˜ ЩˆУ О·УfiУˆУ ·ЫК·ПВ›·˜ ЩФ˘
fiПФ˘.
Page 31

30
Presentazione
Benelli ha posto numerose pietre
miliari nel processo evolutivo delle
armi da sparo, in particolar modo per
quanto riguarda i semiautomatici a
canna liscia.
Innovazione continua, tecnologia
all’avanguardia, rigidi controlli di qualità, fabbricazione eccellente, orgoglio
in un lavoro fatto a regola d’arte e
costante impegno nel soddisfare le esigenze dell’utente finale - questi gli elementi che permettono al team Benelli
di trasformare idee rivoluzionarie in
armi apprezzate per le loro prestazioni
sul campo, affidabilità balistica e design unico.
L’inventiva di solito viaggia di pari
passo con la semplicità e l’otturatore
inerziale ne è un degno esempio. Il
nostro nuovo semiautomatico ha un’anima inerziale. Un semiautomatico
così innovativo che presenta caratteristiche uniche, oltre ad affidabilità,
facilità d’uso, facile manutenzione, e
Moduli intercambiabili.
Oltre a ciò l’arma presenta un rinculo
ridotto, alta resistenza ai fattori ambientali e molto altro…. dettagli interessanti che scoprirete leggendo il
manuale di manutenzione ma, soprattutto, quando sparerete con il vostro
nuovo fucile Vinci.
Siamo sicuri che questo fucile vi
appassionerà sempre di più, sparo
dopo sparo.
Foreword
Benelli has set a number of milestones
along the firearm evolutionary process, particularly in regards to the
semiautomatic smooth-barrel shotgun.
Incessant innovation, advanced technology, strict quality controls, manufacturing excellence, pride in a job
well done and dedication to meet the
end-user’s needs - these are the elements that allow the Benelli team to
turn revolutionary ideas into guns
appreciated for their on-the-field performance, ballistic reliability and matchless aesthetic design.
Brilliance usually goes hand-in-hand
with simplicity and the inertial bolt is
a fine example of this principle. Our
new semiautomatic is an inertial at
heart! A shotgun so innovative that is
able to offer unparalleled features including reliability, ease-of-use, effortless maintenance, and interchangeable
modular parts.
Additionally, the gun boasts reduced
recoil, maximum resistance to environmental factors and much more...
exciting details that you will discover
as you read the maintenance manual
but -- above all -- as you’ll fire your
new Vinci shotgun.
We know this is a gun that you’ll grow
increasingly fond of, shot after shot.
Présentation
Benelli a posé de nombreuses pierres
milliaires dans le processus évolutif des
armes à feu, et en particulier en ce qui
concerne les fusils semi-automatiques à
canon lisse.
Une innovation continue, une technologie à l’avant-garde, des contrôles de
qualité rigoureux, une fabrication excellente, l’orgueil d’un travail réalisé
dans les règles de l’art et une application constante pour satisfaire les exigences de l’utilisateur final – voilà les éléments qui permettent à l’équipe Benelli
de transformer des idées révolutionnaires dans des armes appréciées pour
leurs performances sur le terrain, leur
fiabilité balistique et leur design unique.
L’imagination va de pair avec la simplicité et l’obturateur inertiel en est un exemple significatif. Notre nouveau fusil
semi-automatique a une âme inertielle.
Un semi-automatique extrêmement
novateur qui présente des caractéristiques uniques, outre à une grande fiabilité, une simplicité d’emploi, un entretien facile et des modules interchangeables.
D’autre part, l’arme présente un recul
réduit, une haute résistance aux facteurs ambiants et tant d’autres caractéristiques... des détails intéressants que
vous découvrirez en lisant le manuel
d’entretien mais, surtout, lorsque vous
tirerez avec votre nouveau fusil Vinci.
Nous sommes certains que ce fusil vous
passionnera toujours davantage, à chaque coup de feu que vous tirerez.
Vorstellung
Benelli hat zahlreiche Meilensteine
beim Entwicklungsprozess der Schusswaffen gelegt, besonders in Bezug auf
die halbautomatischen Gewehre mit
glattem Lauf.
Ständige Innovation, fortschrittliche
Technologie, strenge Qualitätskontrollen,
exzellente Herstellung, wir sind stolz
darauf eine kunstgerechte Arbeit zu leisten und uns konstant dafür einzusetzen,
den Ansprüchen der Endverbraucher
gerecht zu werden - diese Elemente
ermöglichen es dem Benelli-Team bahnbrechende Ideen in geschätzte Waffen
umzusetzen, die wegen ihrer Leistungen
in der Praxis, der ballistischen Zuverlässigkeit und dem einzigartigen Design
geschätzt werden. Erfindungsreichtum
geht gewöhnlich einher mit Einfachheit
und der Inertial - Verschluss ist hierfür
ein leuchtendes Beispiel. Unsere neuen
halbautomatischen Gewehre haben
einen Inertialkern. Ein dermaßen innovatives Gewehr ist nicht nur zuverlässig,
benutzerfreundlich, wartungsfreundlich
sondern hat einzigartige Eigenschaften
und austauschbare Module. Daneben
hat die Waffe einen reduzierten Rückstoss, ist extrem widerstandsfähig gegen
Umweltfaktoren und hat noch viele andere Vorzüge. Interessante Details, die
Sie beim Lesen des Wartungshandbuchs
entdecken werden, aber vor allem wenn
Sie mit Ihres neuen Vinci-Gewehrs
schießen. Wir sind uns sicher, dass Sie
Schuss um Schuss immer begeisterter
von diesem Gewehr sein werden.
Page 32

31
Presentación
Benelli ha puesto numerosas piedras
miliares en el proceso evolutivo de las
armas para disparar, especialmente por
lo que respecta a los semiautomáticos
de cañón liso (fusiles).
Innovación continua, tecnología a la
vanguardia, rígidos controles de calidad, fabricación excelente, orgullo de
un trabajo hecho con maestría y constante dedicación para satisfacer las exigencias del usuario final - estos son los
elementos que permiten al team Benelli, transformar ideas revolucionarias en
armas apreciadas por sus prestaciones
en el campo, fiabilidad balística y
diseño único.
La inventiva suele viajar de la mano
con la sencillez y el obturador inercial
es un digno ejemplo. Nuestro nuevo
semiautomático tiene un ánima inercial. Un semiautomático tan innovador
que presenta características únicas,
además de la fiabilidad, facilidad de
uso, de fácil manutención, y con
Módulos intercambiables.
Además de esto el arma presenta un
retroceso reducido, alta resistencia a
los factores medioambientales y mucho más… detalles interesantes que
descubrirá leyendo el manual de mantenimiento pero, sobre todo, cuando
disparará con su nuevo fusil Vinci.
Estamos seguros que este fusil le apasionará cada vez más, disparo tras
disparo.
Apresentação
A Benelli colocou numerosos marcos
miliários no processo evolutivo das
armas de fogo, nomeadamente no que
diz respeito às semi-automáticas de
cano liso.
Inovação contínua, tecnologia de vanguarda, rígidos controlos de qualidade,
fabrico excelente, orgulho num trabalho feito segundo as regras da arte e
constante empenho na satisfação das
necessidades do utilizador final - são
estes os elementos que permitem à
equipa Benelli transformar ideias revolucionárias em armas apreciadas pelas
suas prestações no campo, fiabilidade
balística e design único.
A inventiva costuma viajar a par e passo com a simplicidade e o obturador
inercial é um digno exemplo disso.
A nossa nova semi-automática tem
uma alma inercial. É uma semi-automática tão inovadora que apresenta
características únicas, além da fiabilidade, facilidade de utilização, fácil
manutenção e módulos intermutáveis.
Além disso, a arma apresenta um recuo reduzido, uma excelente resistência aos factores ambientais e muito
mais…. pormenores interessantes que
descobrirá durante a leitura do manual
de manutenção mas, sobretudo, quando disparar com a sua nova espingarda
Vinci.
Estamos certos de que esta nova espingarda o apaixonará cada vez mais, disparo após disparo.
Общие сведения
Компания Бенелли внесла
существенный вклад в развитие
стрелкового оружия и в особенности в
совершенствование самозарядных
гладкоствольных ружей.
Непрерывный конструкторский поиск,
передовые технологии, тщательный
контроль качества, отличное
изготовление, гордость за работу,
выполненную по всем правилам
искусства, и постоянное стремление
полностью удовлетворить нужды
потребителей -вот слагаемые успеха
команды Бенелли, позволяющие
воплотить революционные разработки в
надёжное оружие, знаменитое своими
незаурядными баллистическими
характеристиками и неповторимым
дизайном.
Гениальные технические решения
всегда отличаются простотой. Яркий
пример тому - инерционный затвор,
являющийся сердцем нашего нового
самозарядного ружья.
Его новаторский характер проявляется
не только в уникальных характеристиках,
но и в высокой надёжности, удобстве
эксплуатации, легкости обслуживания и
взаимозаменяемости блоков. Кроме того,
оно имеет незначительную отдачу,
высокую устойчивость к атмосферному
воздействию и многие другие
особенности, с которыми вы
познакомитесь в ходе изучения
настоящего руководства и особенно когда
начнёте стрелять из вашего нового
Винчи.
Мы уверены в том, что вы полюбите
это ружьё с первого выстрела.
¶·ÚÔ˘Û›·ÛË
∆· ЪФ˚fiУЩ· ЩЛ˜ Benelli ЫЛМ·ЩФ‰ФЩФ‡У
ЩЛУ ВНВПИОЩИО‹ ‰И·‰ИО·Ы›· ЩˆУ
˘ЪФ‚fiПˆУ fiПˆУ, О˘Ъ›ˆ˜ fiЫФУ ·КФЪ¿
Щ· ЛМИ·˘ЩfiМ·Щ· ПВИfiО·УУ·.
Η συνεχς ανανωση, η προηγµνη
τεχνολογα, οι αυστηρο λεγχοι
ποιτητας, η εξαιρετικ κατασκευ και
η χαρ της παραγωγς τλειων
προϊντων µε συνεχ προσπθεια για
την ικανοποηση των αναγκ#ν του
τελικο' χρστη, αποτελο'ν τα στοιχεα
που επιτρπουν στην οµδα της Benelli
να µετατρπει τις επαναστατικς ιδες
σε πλα που κερδζουν µε τις
επιδσεις τους, τη βαλλιστικ τους
αξιοπιστα και το απαρµιλλο design.
∏ ‰ЛМИФ˘ЪБИОfiЩЛЩ· Ы˘У‹ıˆ˜ Ы˘М‚·‰›˙ВИ
МВ ЩЛУ ·ПfiЩЛЩ· О·И ЩФ ·‰Ъ·УВИ·Оfi
ОПВ›ЫЩЪФ ·ФЩВПВ› ‰В›БМ· ·˘Щ‹˜ ЩЛ˜
КИПФЫФК›·˜. ∆Ф У¤Ф М·˜ ЛМИ·˘ЩfiМ·ЩФ
‚·Ы›˙ВЩ·И ЫЩФУ ·‰Ъ·УВИ·Оfi МЛ¯·УИЫМfi.
¶ЪfiОВИЩ·И БИ· ¤У· ЩfiЫФ О·ИУФЩfiМФ
ЛМИ·˘ЩfiМ·ЩФ Ф˘, ВОЩfi˜ ·fi ЩЛУ
·НИФИЫЩ›·, ЩЛУ В˘¯ЪЛЫЩ›·, ЩЛУ ·ПfiЩЛЩ·
Ы˘УЩ‹ЪЛЫЛ˜ О·И Щ· ·УЩ·ПП¿НИМ·
Ы˘ЫЩ‹М·Щ·, ·ЪФ˘ЫИ¿˙ВИ О·И П‹ıФ˜
МФУ·‰ИОТУ ¯·Ъ·ОЩЛЪИЫЩИОТУ.
∆Ф fiПФ ¯·Ъ·ОЩЛЪ›˙ВЩ·И В›ЫЛ˜ ·fi ЩЛ
МВИˆМ¤УЛ ·У¿ОЪФ˘ЫЛ, ЩЛУ ˘„ЛП‹ ·УЩФ¯‹
ЫЩФ˘˜ ·ЩМФЫК·ИЪИОФ‡˜ ·Ъ¿БФУЩВ˜ О·И
ÔÏÏ¿ ¿ÏÏ·.... ÂӉȷʤÚÔ˘Û˜
ÏÂÙÔ̤ÚÂȘ Ô˘ ı· ·Ó·Î·Ï‡„ÂÙÂ
‰È·‚¿˙ÔÓÙ·˜ ÙÔ ÂÁ¯ÂÈÚ›‰ÈÔ Û˘ÓÙ‹ÚËÛ˘
·ПП¿, О˘Ъ›ˆ˜, ˘ЪФ‚ФПТУЩ·˜ МВ ЩФ У¤Ф
Ы·˜ fiПФ Vinci.
∂›Ì·ÛÙ ‚¤‚·ÈÔÈ fiÙÈ, ̤ڷ Ì ÙËÓ Ë̤ڷ,
ı· Ï·ÙÚ¤„ÂÙ ·˘Ùfi ÙÔ fiÏÔ.
Page 33

32
Descrizione tecnica
Il semiautomatico Vinci utilizza un
nuovo Sistema Inerziale che sfrutta l’e-
nergia cinetica del rinculo, nello stesso
modo dei fucili Benelli tradizionali
attualmente disponibili sul mercato.
Il design è del tutto innovativo, e basato su un concetto modulare. Tutte le
parti essenziali sono costituite da
moduli separati da montare con una
sequenza di movimenti molto semplice, senza alcun bisogno di utensili.
Questa è la nuova filosofia Vinci, unica nel suo genere.
Un fucile che nasce dalla semplice
unione dei moduli Affusto, Calcio,
Serbatoio e Canna.
Una vera rivoluzione! Tutte le fasi
necessarie per un corretto funzionamento dell’arma - messa in sicura,
apertura, espulsione e ricarica - in un
unico gruppo.
La massa necessaria al funzionamento
inerziale è concentrata nell’otturatore
rotante, alloggiato all’interno del fodero insieme alla testina di chiusura rotante, l’espulsore e la molla biella, a
formare un unico modulo.
Questo significa notevoli vantaggi in termini di equilibrio, stabilità, affidabilità
nel funzionamento e facilità nel montaggio, smontaggio e manutenzione.
Questa soluzione di tecnica innovativa ridisegna completamente il design
strutturale del fucile, facendo del modulo canna, insieme al fodero, un ele-
Technical description
The Vinci semi-auto shotgun uses a
new Inertia Driven system exploiting
the kinetic energy of the recoil in the
same way as the traditional Benelli
shotguns currently available on the
market.
The design solution, however, is entirely innovative and based on a
modular concept. All the essential
parts are built from separate Modules
that are assembled in a simple
sequence of movements, with no need
for tools whatsoever. This is the new
Vinci philosophy.
One of a kind. A shotgun that comes
from the simple union of the Carriage,
Stock, Magazine and barrel Module.
A true revolution. All the functions
necessary for correct firearm operation
- locking, opening, ejection and re-
loading - in a single Assembly.
The mass necessary to the inertial func-
tion is concentrated in the Oscillating
Bolt housed within the cover, together
with the Rotating Locking Head, Ejector and Recoil Spring, forming a single
Module.
This yields significant advantages in
terms of balance, stability, reliable operation and easy disassembling, assembly and maintenance.
This innovative technical solution
completely reconfigures the shotgun’s
structural architecture, making the Barrel Module, complete with cover, a
Description technique
Le fusil semi-automatique Vinci emploie un Système Inertiel qui exploite
l’énergie cinétique du recul de la même
façon que les fusils Benelli traditionnels
actuellement disponibles sur le marché.
Son design tout à fait nouveau se base
sur un concept modulaire. Toutes les
parties essentielles de l’arme sont constituées de modules séparés qu’il faut
monter en suivant une séquence de
mouvements très simple, sans besoin
d’utiliser des outils. Cela représente la
nouvelle philosophie du fusil Vinci,
unique en son genre.
Un fusil qui naît de la simple union du
Module composé de l’Affût, de la Crosse, du Magasin et du Canon.
Une véritable révolution! Toutes les
phases nécessaires pour le fonctionnement correct de l’arme - mise en sécurité, ouverture, expulsion et recharge en un ensemble unique.
La masse nécessaire au fonctionnement
inertiel se concentre dans l’obturateur
pivotant placé à l’intérieur du fourreau
avec la tête de fermeture pivotante,
l’éjecteur et le ressort de bielle qui forment un module unique.
Cela représente de nombreux avantages en termes d’équilibre, de stabilité,
de fiabilité dans le fonctionnement et
de facilité dans le montage, le démontage et l’entretien.
Cette solution technique novatrice redessine entièrement le design structurel
Technische Beschreibung
Die halbautomatischen Vinci-Gewehre
verwenden das neue Inertialsystem,
das die kinetische Energie des Rückstosses auf die gleiche Weise wie die
traditionellen und derzeit auf dem
Markt zur Verfügung stehenden Benelli
Gewehre ausnutzt.
Das Design ist rundum innovativ und
basiert auf einem modularen Konzept.
Alle wesentlichen Teile bestehen aus
separaten Modulen die in einer sehr
einfachen Reihenfolge und ohne Notwendigkeit von Werkzeugen zu montieren sind. Das ist die neue und in
ihrer Art einzigartige Vinci-Philosophie.
Ein Gewehr, das aus der einfachen
Vereinigung der Module Waffengestell,
Schaft, Magazin und Lauf entsteht.
Eine echte Revolution! Alle notwendigen Phasen für den korrekten Waffenbetrieb - Sicherung, Öffnen, Auswurf
und neues Laden - in einem einzigen
System.
Die zur Inertialfunktionsweise notwendige Masse ist im rotierenden Verschluss konzentriert, der zusammen mit
dem rotierenden Verschlusskopf, dem
Auswerfer und der Rückholfeder innerhalb der Systemhülse positioniert ist,
um ein einziges Modul zu formen.
Dies bringt beachtliche Vorteile in Hinsicht auf Gleichgewicht, Stabilität und
Betriebszuverlässigkeit und Einfachheit
der Montage, Zerlegung und Wartung
mit sich.
Diese innovative technische Lösung
Page 34

33
Descripción técnica
El semiautomático Vinci utiliza un nuevo Sistema Inercial que aprovecha la
energía cinética del retroceso del
mismo modo que los fusiles Benelli
tradicionales actualmente disponibles
en el mercado.
El diseño es totalmente innovador, se
basa en un concepto modular. Todas
las partes esenciales están formadas
por módulos separados para montar
con una secuencia de movimientos
muy sencilla, sin necesidad alguna de
herramientas. Esta es la nueva filosofía
Vinci, única en su género.
Un fusil que nace de la simple unión
de los módulos Afuste, Culata, Almacén y Cañón.
¡
Una verdadera revolución! Todas las
fases necesarias para un funcionamiento correcto del arma - puesta en
seguro, apertura, expulsión y recarga en un Conjunto único.
La masa necesaria para el funcionamiento inercial está concentrada en el
obturador giratorio alojado dentro de
la cubierta junto a la varilla de cierre
rotante, el expulsor y el resorte biela,
que forman un único módulo.
Ello conlleva notables ventajas en
cuanto a equilibrio, estabilidad en el
funcionamiento y facilidad en el montaje y mantenimiento.
Esta solución innovadora rediseña
completamente el diseño estructural
del fusil, haciendo del módulo cañón,
Descrição técnica
A semi-automática Vinci utiliza um
novo Sistema Inercial que aproveita a
energia cinética do recuo do mesmo
modo que as espingardas Benelli tradicionais actualmente disponíveis no
mercado.
Apresenta um design totalmente inovador, baseado num conceito modular.
Todas as partes essenciais são constituídas por módulos separados a montar
com uma sequência de movimentos
muito simples, sem necessidade de
qualquer ferramenta. Esta é a nova filosofia Vinci, única no seu género.
Uma espingarda que nasce da simples
união dos módulos Carreta, Coronha,
Depósito e Cano.
Uma autêntica revolução! Todas as fases necessárias para um correcto funcionamento da arma - bloqueio da patilha de segurança, abertura, ejecção e
recarga - num único conjunto.
A massa necessária ao funcionamento
inercial encontra-se concentrada no
obturador rotativo situado no interior
da bainha, juntamente com a rotativa,
o ejector e a mola da biela, que formam um único módulo.
Isto apresenta significativas vantagens
em termos de equilíbrio, estabilidade,
fiabilidade de funcionamento e facilidade de montagem, desmontagem e
manutenção.
Esta solução de técnica inovadora redesenha completamente o design es-
Техническое описание
В самозарядном ружье Винчи
применена модернизированная
инерционная система, использующая
кинетическую энергию отдачи,
аналогично традиционным ружьям
Бенелли, уже находящимся в продаже.
Однако, самые значительные
изменения коснулись дизайна, в основу
которого был положен модульный
принцип. Все основные части ружья
сгруппированы в отдельные узлы, легко
собирающиеся в единое целое без
помощи каких-либо инструментов. В
этом и заключается новизна и
уникальность конструкторской
концепции ружья Винчи, которое
состоит из четырёх блоков: лафет,
приклад, магазин и ствол.
При этом все детали, обеспечивающие
работу ружья - предохранительное
устройство, запирающий механизм,
выбрасыватель и отражатель,
возвратный механизм - расположены в
одном блоке. Инертная масса,
необходимая для функционирования
системы перезаряжания, сосредоточена
в затворной раме и поворотном затворе,
которые вместе с отражателем и
возвратной пружиной находятся внутри
лафета, образуя таким образом единое
конструктивное целое.
Всё это обеспечивает существенные
преимущества с точки зрения баланса,
устойчивости, надёжности, а также
удобства сборки, разборки и
обслуживания.
Это новаторское техническое решение
∆В¯УИО‹ ВЪИБЪ·К‹
∆Ф ЛМИ·˘ЩfiМ·ЩФ Vinci ¯ЪЛЫИМФФИВ› ¤У·
У¤Ф ·‰Ъ·УВИ·Оfi Ы‡ЫЩЛМ· Ф˘
ВОМВЩ·ППВ‡ВЩ·И ЩЛУ ОИУЛЩИО‹ ВУ¤ЪБВИ·
ЩЛ˜ ·У¿ОЪФ˘ЫЛ˜ fiˆ˜ Щ· ·Ъ·‰ФЫИ·О¿
ЩФ˘К¤ОИ· Benelli Ф˘ О˘ОПФКФЪФ‡У
Ы‹МВЪ· ЫЩЛУ ·БФЪ¿.
∆Ф design В›У·И ·fiП˘Щ· О·ИУФЩfiМФ О·И
‚·Ы›˙ВЩ·И ЫВ Ы˘У·ЪМФПФБФ‡МВУВ˜
МФУ¿‰В˜. ŸП· Щ· ‚·ЫИО¿ М¤ЪЛ
·ФЩВПФ‡УЩ·И ·fi ¯ˆЪИЫЩ¤˜ МФУ¿‰В˜
Ф˘ Ы˘У·ЪМФПФБФ‡УЩ·И МВ МИ· ФП‡
·Ï‹ ÛÂÈÚ¿ ÎÈÓ‹ÛˆÓ, ¯ˆÚ›˜ Ó· ›ӷÈ
·У·БО·›· Л ¯Ъ‹ЫЛ ВЪБ·ПВ›ˆУ. ∞˘Щ‹ В›У·И
Л У¤· О·И МФУ·‰ИО‹ ЫЩФ В›‰Ф˜ ЩЛ˜
КИПФЫФК›· ЩФ˘ Vinci.
ŒÓ· fiÏÔ Ô˘ Û¯ËÌ·Ù›˙ÂÙ·È Ì ÙËÓ ·Ï‹
Û‡Ó‰ÂÛË ÙˆÓ ÌÔÓ¿‰ˆÓ Ù˘ ‚¿Û˘, ÙÔ˘
ÎÔÓÙ·Î›Ô˘, Ù˘ ·Ôı‹Î˘ Î·È Ù˘
οÓÓ˘.
ªÈ· Ú·ÁÌ·ÙÈ΋ ·ӿÛÙ·ÛË! ŸÏ˜ ÔÈ
·У·БО·›В˜ К¿ЫВИ˜ БИ· ЩЛ ЫˆЫЩ‹
ПВИЩФ˘ЪБ›· ЩФ˘ fiПФ˘ – ·ЫК¿ПИЫЛ,
¿УФИБМ·, ·Ф‚ФП‹ О·И Б¤МИЫМ· – ЫВ ¤У·
ВУИ·›Ф Ы‡УФПФ.
∏ ·У·БО·›· М¿˙· БИ· ЩЛУ ·‰Ъ·УВИ·О‹
ПВИЩФ˘ЪБ›· В›У·И Ы˘БОВУЩЪˆМ¤УЛ ЫЩФ
ВЪИЫЩЪВКfiМВУФ ОПВ›ЫЩЪФ Ф˘ В›У·И
ЩФФıВЩЛМ¤УФ ЫЩФ ВЫˆЩВЪИОfi ЩЛ˜
·Фı‹ОЛ˜ М·˙› МВ ЩЛУ ВЪИЫЩЪВКfiМВУЛ
ОВК·П‹ ОПВИ‰ТМ·ЩФ˜, ЩФУ ВНˆЫЩ‹Ъ· О·И
ЩФ ВП·Щ‹ЪИФ Ф˘Ъ¿˜ ОПВ›ЫЩЪФ˘,
Ы¯ЛМ·Щ›˙ФУЩ·˜ МИ· ВУИ·›· МФУ¿‰·.
∞˘Щfi ·Ъ¤¯ВИ ЫЛМ·УЩИО¿ ПВФУВОЩ‹М·Щ·
·fi ¿Ф„Л ИЫФЪЪФ›·˜, ЫЩ·ıВЪfiЩЛЩ·˜,
·НИФИЫЩ›·˜ ПВИЩФ˘ЪБ›·˜ О·И В˘ОФП›·˜
Ы˘У·ЪМФПfiБЛЫЛ˜, П˘Ы›М·ЩФ˜ О·И
Ы˘УЩ‹ЪЛЫЛ˜.
Page 35

34
mento di supporto per l’intero fucile.
Il modulo calcio è alloggiato nella
parte posteriore del fodero tramite un
innesto rapido che consente di personalizzare piega e deviazione a propria
scelta, grazie ad un unico piastrino
intercambiabile e facilmente sostituibile.
Il sistema ad innesto rapido del calcio
non necessita l’utilizzo di utensili: tramite una semplice rotazione manuale
è possibile montarlo e smontarlo facilmente, cambiandolo in base all’uso
dell’arma.
Il calcio è fissato alla canna tramite il
fodero; ciò significa che il concetto
della carcassa è stato superato, dando
origine ad un nuovo elemento che
possiamo definire “affusto”, il quale
svolge una tripla funzione: astina, per
garantire la presa dell’arma; carcassa,
per sostenere il meccanismo di scatto,
infine il sistema di espulsione e incameramento cartucce e il gruppo guardia, come protezione per il grilletto.
L’affusto, così configurato, è collegato
in maniera semplice al modulo canna
senza viti o perni passanti, ma con il
fissaggio della parte frontale tramite
delle alette incorporate in un manicotto scorrevole, mentre il retro è fissato
al piastrino di variazione piega.
Il gruppo scatto è posizionato dentro
l’affusto al livello del gruppo guardia,
mentre nella parte frontale si trova il
modulo serbatoio, collegato al modulo canna tramite semplice rotazione.
support element for the whole shotgun.
The Stock Module is housed in the rear
part of the cover, with a quick insertion
allowing each customer to personalise
the drop and deviation as preferred,
thanks to a single interchangeable, and
easily replaceable, plate.
The quick release system for the stock
does not require any locking tools; by a
simple manual rotation it is possible to
disassemble and assemble it easily,
changing it according to the desired
shotgun use.
The stock is anchored to the barrel by
the cover, meaning that the concept of
the receiver has been overcome, giving
rise to a new element we can call the
carriage, and which is equipped with
triple function: fore-end, to guarantee
shotgun grip; receiver, to hold the
cocking mechanism; and the cartridge
output and raising system and the trigger guard assembly, as trigger protection.
The thus-configured carriage is simply
connected to the Barrel Module, with
no screws or through pins, but simply
by blocking the front by means of lugs
built into a sliding sleeve, and the rear
by anchoring it to the drop change
plate.
The shotgun trigger release unit is positioned inside the carriage, at the level
of the trigger guard assembly, whilst to
the front, a Magazine Module is housed, connected to the Barrel Module by
simple rotation. Assembly and inter-
du fusil, en faisant du module composé
du canon et du fourreau, un élément de
support pour l’ensemble du fusil.
Le module crosse est placé dans la partie arrière du fourreau à travers un enclenchement rapide qui permet de personnaliser la pente et la déviation selon
les goûts, grâce à une plaque unique
interchangeable et facilement remplaçable.
Le dispositif à enclenchement rapide de
la crosse ne requiert pas l’utilisation
d’outils; à travers une simple rotation
manuelle, il est possible de la monter et
de la démonter facilement, en la changeant selon l’usage du fusil.
La crosse est fixée au canon à travers le
fourreau, ce qui signifie que le concept
de la carcasse a été dépassé, donnant
origine à un nouvel élément que nous
pouvons définir l’affût et qui remplit
une triple fonction: celle de devant
pour assurer la prise de l’arme, celle de
carcasse pour soutenir le mécanisme de
détente et enfin celle de système d’expulsion et de logement des cartouches
et le groupe de garde comme protection pour la gâchette.
L’affût, ainsi configuré, est relié de façon simple au module canon, sans vis
ni axe passant, mais avec le fixage de la
partie frontale à travers des ailettes incorporées dans un manchon coulissant,
alors que la partie arrière est fixée à la
plaque de variation de la pente.
Le groupe de détente est positionné à
l’intérieur de l’affût au niveau du grou-
stellt einen Umbruch für das strukturelle Design des Gewehrs dar, indem das
Lauf-Modul zusammen mit der Systemhülse zu einem tragenden Element des
gesamten Gewehrs wird.
Das Schaft-Modul ist im hinteren Teil
der Systemhülse mittels einer Schnellkupplung positioniert, die es ermöglicht, die Senkung und Schränkung
nach Wunsch persönlich einzustellen,
dank einer einzigen austauschbaren
und leicht zu ersetzenden Platte.
Das Schnellkupplungssystem des
Schafts erfordert keinen Einsatz von
Werkzeugen, mittels einer einfachen
manuellen Rotation kann er mit Leichtigkeit montiert und abgenommen und
je nach Waffeneinsatz ausgetauscht
werden.
Der Schaft ist mit der Systemhülse am
Lauf befestigt, das bedeutet, dass das
Konzept des Gehäuses überwunden
wurde, wodurch ein neues System entstanden ist, das wir als Waffengestell
definieren können, dieses hat eine dreifache Funktion: Vorderschaft, um die
Griffigkeit der Waffe zu garantieren,
Gehäuse, um den Auslöse-Mechanismus zu stützen, schließlich das Auswurf- und Einlagerungssystem der
Patronen und die Abzugsgruppe, als
Schutz für den Abzug.
Das so konfigurierte Waffengestell ist auf
einfache Weise ohne Schrauben oder
durchgehende Stifte sondern durch die
Befestigung des frontalen Teils mittels der
in eine Gleitmuffe eingebauten Flügel
mit dem Lauf-Modul verbunden, wäh-
Page 36

35
junto a la cubierta, un elemento de
soporte para todo el fusil.
El modulo culata está alojado en la
parte posterior de la cubierta mediante
una conexión rápida que permite personalizar inclinación y desvío según
su propia elección, gracias a una sola
plaquita intercambiable y fácilmente
sustituible.
El sistema de conexión rápida de la
culata no necesita el uso de herramientas, mediante un sencillo giro manual
es posible montarla y desmontarla fácilmente, cambiándola según el uso
del arma.
La culata está fijada al cañón mediante
la cubierta, ello quiere decir que el
concepto de la carcasa ha sido superado, dando origen a un nuevo elemento
que podemos definir afuste, el cual
desempeña una función triple: varilla,
para garantizar el agarre del arma, carcasa para sostener el mecanismo de
disparo, por último el sistema de expulsión y encapsulado de cartuchos y
el grupo guardamonte, como protección para el gatillo.
El afuste, configurado de este modo,
está conectado de modo sencillo al
Módulo cañón sin tornillos o pernos
pasantes sino con la fijación de la parte delantera por medio de las aletas
incorporadas en un manguito corredizo, mientras el trasero está fijado a las
cuñas de curvatura.
El grupo disparo está colocado dentro
del afuste al nivel del grupo de guar-
trutural da espingarda, tornando o
módulo cano, juntamente com a
bainha, num elemento de apoio para
toda a espingarda.
O módulo coronha encontra-se alojado na parte posterior da bainha através
de um dispositivo de engate rápido
que permite personalizar a inclinação
e o desvio ao seu gosto, graças a uma
única placa intermutável e facilmente
substituível.
O sistema de engate rápido da coronha
dispensa a utilização de ferramentas;
uma simples rotação manual permite
montá-lo e desmontá-lo facilmente,
mudando-o conforme a utilização da
arma.
A coronha é fixada ao cano através da
bainha, o que significa que o conceito
da báscula foi ultrapassado, dando origem a um novo elemento que podemos denominar de carreta, a qual
desempenha uma tripla função: fuste,
para assegurar o aperto da arma;
báscula, para sustentar o mecanismo
de disparo e, por último, o sistema de
ejecção e alojamento de cartuchos e o
grupo guarda-mato, como protecção
do gatilho.
A carreta, assim configurada, está ligada de forma simples ao módulo cano
sem parafusos nem pernos cónicos,
mas a parte frontal está fixada através
das alhetas incorporadas numa manga
deslizante, enquanto que a traseira está
fixada à placa de variação da inclinação.
в корне изменило конструкцию ружья,
основным силовым элементом
которой стал блок, объединяющий
ствол и затворную коробку.
Блок приклада крепится к задней
части затворной коробки при помощи
быстроразъёмного соединения
байонетного типа, которое позволяет
регулировать погиб и отвод приклада
при помощи всего лишь одной
быстросменной пластины.
Такая система не требует использования
каких-либо инструментов: при помощи
простого вращательного движения
можно легко отсоединить и
присоединить приклад, выбрав при этом
тот, который лучше всего подходит к
определённому виду охоты.
Приклад крепится непосредственно к
затворной коробке, составляющему
единое целое со стволом. Таким
образом, понятие "ствольная коробка"
перешло в разряд устаревших, уступив
место новому конструктивному
элементу, который мы по
функциональной аналогии назвали
"лафет".
Действительно, он сочетает в себе
функцию цевья, так как используется
для удержания оружия, и функцию
ствольной коробки, поскольку
конструктивно объединяет ударноспусковой механизм, предохранительную
скобу, систему досылания, запирающий
механизм и отражатель.
Вышеописанная корпусная деталь
крепится к ствольному блоку без
винтовых или штифтовых соединений:
её передняя часть фиксируется при
∞˘Ù‹ Ë Ù¯ÓÈο ηÈÓÔÙfiÌÔ˜ χÛË Ê¤ÚÓÂÈ
ÙËÓ Â·Ó¿ÛÙ·ÛË ÛÙÔ ‰ÔÌÈÎfi Û¯¤‰ÈÔ ÙÔ˘
fiÏÔ˘, ÌÂÙ·ÙÚ¤ÔÓÙ·˜ ÙË ÌÔÓ¿‰· Ù˘
οÓÓ˘, Ì·˙› Ì ÙËÓ ·Ôı‹ÎË, ÛÂ
ÛÙÔÈ¯Â›Ô ÛÙ‹ÚÈ͢ ÁÈ· fiÏÔ ÙÔ fiÏÔ.
∏ МФУ¿‰· ЩФ˘ ОФУЩ·О›Ф˘ ЩФФıВЩВ›Щ·И
ЫЩФ ›Ыˆ М¤ЪФ˜ ЩЛ˜ ·Фı‹ОЛ˜ МВ ¤У·У
Щ·¯˘Ы‡У‰ВЫМФ Ф˘ ВИЩЪ¤ВИ ЩЛ Ъ‡ıМИЫЛ
ОП›ЫЛ˜ О·И ·fiОПИЫЛ˜ Ы‡МКˆУ· МВ ЩИ˜
ЪФЫˆИО¤˜ ЪФЩИМ‹ЫВИ˜, ¯¿ЪЛ ЫЩЛ
МФУ·‰ИО‹ ·УЩ·ПП¿НИМЛ П·О¤Щ· Ф˘
·ÓÙÈηı›ÛÙ·Ù·È Â‡ÎÔÏ·.
∆Ô Û‡ÛÙËÌ· ÙÔ˘ Ù·¯˘Û˘Ó‰¤ÛÌÔ˘ ÙÔ˘
ОФУЩ·О›Ф˘ ‰ВУ ··ИЩВ› ¯Ъ‹ЫЛ ВЪБ·ПВ›ˆУ.
∞ЪОВ› МИ· ·П‹ ВЪИЫЩЪФК‹ МВ ЩФ ¯¤ЪИ
БИ· ЩЛ Ы˘У·ЪМФПfiБЛЫЛ О·И ЩФ П‡ЫИМФ О·И
ЩЛУ ·ПП·Б‹ ЩФ˘ ·У·ПfiБˆ˜ МВ ЩЛ ¯Ъ‹ЫЛ
ЩФ˘ fiПФ˘.
∆Ф ОФУЩ¿ОИ ЫЩВЪВТУВЩ·И ЫЩЛУ О¿УУЛ
М¤Ыˆ ЩЛ˜ ·Фı‹ОЛ˜ О·И ·˘Щfi ЫЛМ·›УВИ
fiЩИ ¤¯ВИ О·Щ·ЪБЛıВ› П¤ФУ Л ¤УУФИ· ЩФ˘
ОФЪМФ‡, ‰ЛМИФ˘ЪБТУЩ·˜ ¤У· У¤Ф
ЫЩФИ¯В›Ф Ф˘ ı· МФЪФ‡Ы·МВ У·
ФУФМ¿ЫФ˘МВ ‚¿ЫЛ О·И ВИЩВПВ› МИ·
ЩЪИП‹ ПВИЩФ˘ЪБ›·: ¿И·˜, БИ· У·
ВН·ЫК·П›˙ВИ ЩФ ОЪ¿ЩЛМ· ЩФ˘ fiПФ˘,
ЫТМ·ЩФ˜, БИ· У· ˘ФЫЩЛЪ›˙ВИ ЩФ
МЛ¯·УИЫМfi ЫО·У‰¿ПЛ˜ О·И, Щ¤ПФ˜,
Ы˘ЫЩ‹М·ЩФ˜ ·Ф‚ФП‹˜ О·И ЩЪФКФ‰ФЫ›·˜
К˘ЫИББ›ˆУ О·И ЫО·У‰·ПФı‹ОЛ˜ БИ· ЩЛУ
ЪФЫЩ·Ы›· ЩЛ˜ ЫО·У‰¿ПЛ˜.
∏ ‚¿ЫЛ МВ ·˘Щ‹У ЩЛ ‰И·МfiЪКˆЫЛ˜
Ы˘У‰¤ВЩ·И МВ ·Пfi ЩЪfiФ МВ ЩЛ МФУ¿‰·
ЩЛ˜ О¿УУЛ˜ ¯ˆЪ›˜ ‚›‰В˜ ‹ ‰И·МВЪВ›˜
В›ЪФ˘˜, ·ПП¿ ЫЩВЪВТУФУЩ·˜ ЩФ ВМЪfi˜
М¤ЪФ˜ М¤Ыˆ ЩˆУ ВУЫˆМ·ЩˆМ¤УˆУ
ВП·ЫМ¿ЩˆУ ЫВ ¤У· Ы˘ЪfiМВУФ Ы‡У‰ВЫМФ,
ВУТ ЩФ ›Ыˆ М¤ЪФ˜ ЫЩВЪВТУВЩ·И ЫЩЛУ
П·О¤Щ· Ъ‡ıМИЫЛ˜ ОП›ЫЛ˜.
Page 37

36
Montaggio e sostituzione sono fasi
molto semplici che non richiedono
l’ausilio di utensili né di attrezzature.
I moduli serbatoio possono essere di
lunghezza diversa e contenere diverse
quantità di cartucce che variano a
secondo dell’utilizzo e delle leggi
vigenti che disciplinano l’uso delle
prolunghe serbatoio.
La grande innovazione tecnologica
del fucile Vinci non consiste solo nella
rivoluzionaria struttura di supporto,
ma anche nel gruppo Carcassa, Tubo
serbatoio, Astina e Canna fissato tramite alette e tappi e nell’assemblaggio
ad innesto rapido di moduli singoli.
Particolare attenzione è stata rivolta
all’ergonomia funzionale dell’affusto,
della manetta, del sistema cut-off che
facilitano l’apertura dell’otturatore e
consentono l’inserimento ambidestro
della leva discesa cartuccia e semplificano lo scaricamento manuale agendo dall’esterno sulla leva fermo cartuccia.
Grazie all’alto livello di perfezione
raggiunto, il funzionamento del fucile
Vinci è garantito dall’ampia gamma di
cartucce standard CIP che mantengono l’energia cinetica necessaria per un
ciclo completo di ricarica automatica.
changing are very simple, with no
need for tools or equipment.
The Magazine Modules can be of
various different lengths, and contain
different quantities of cartridges depending on the intended use and on
legal provisions, thereby avoiding the
use of magazine tube extensions.
The great technological innovation of
the Vinci shotgun does not merely consist of its revolutionary support structure, but also of the Receiver, Magazine
Tube, Fore-end and Barrel unit, fixed
by means of lugs and plugs and featuring a quick-release assembly for the
individual modules.
Careful research has also been carried
out into the ergonomics of the function
of the Carriage, cocking lever and cutoff system, that ease bolt opening,
allowing for ambidextrous application
of the cartridge drop lever and facilitating manual unloading, by acting externally on the cartridge stop latch.
For the high level of perfection featured, Vinci shotgun operation is guaranteed by a wide range of CIP standard cartridges, despite preserving the
kinetic energy needed for complete
automatic reloading.
pe de garde, alors que dans la partie
frontale se trouve le module magasin,
branché au module canon à travers une
simple rotation. Les phases de montage
et de substitution sont extrêmement
simples et ne requièrent pas l’utilisation
d’outils ou d’équipements spéciaux.
Les modules magasin peuvent avoir des
longueurs différentes et contenir des
quantités différentes de cartouches qui
varient selon l’utilisation et les lois en
vigueur qui ne permettent pas l’emploi
des rallonges magasin.
La grande innovation technologique du
fusil Vinci ne consiste pas seulement
dans la structure révolutionnaire de son
support, mais aussi dans le groupe Carcasse, Tube magasin, Devant et Canon
fixé à travers des ailettes et des bouchons et dans l’assemblage à enclenchement rapide de modules individuels.
Une attention particulière a été prêtée à
l’ergonomie fonctionnelle de l’affût, de
la manette, du système cut-off qui facilitent l’ouverture de l’obturateur et permettent l’introduction ambidextre du
levier de descente cartouche et simplifient le déchargement manuel en agissant depuis l’extérieur sur le levier de
blocage cartouche.
Grâce au niveau élevé de perfection
atteint, le fonctionnement du fusil Vinci
est garanti à travers une vaste gamme
de cartouches standard CIP qui maintiennent l’énergie cinétique nécessaire
rend der hintere Teil an der Senkungseinstellungsplatte befestigt ist.
Die Auslösegruppe ist im Waffengestell
in Höhe der Abzugsgruppe positioniert, während das Magazin-Modul im
frontalen Teil angeordnet ist und mit
dem Lauf-Modul über eine einfache
Drehung verbunden wird. Montage
und Auswechseln sind sehr einfache
Phasen, die keinerlei Beihilfe von
Werkzeugen oder Ausrüstungen erfordern.
Die Magazin-Module können unterschiedliche Längen haben und unterschiedliche Patronenmengen enthalten, die von Gebrauch und den geltenden Gesetzen abhängen, welche den
Einsatz von Magazinverlängerungen
nicht erlauben.
Die große technologische Innovation
des Vinci-Gewehrs besteht nicht nur in
der bahnbrechenden Trägerstruktur
sondern auch in der Gruppe Gehäuse,
Magazinrohr, Vorderschaft und Lauf,
die über Flügel und Zapfen befestigt ist
und im Schnell-Kupplungs-Zusammenbau von einzelnen Modulen.
Besondere Aufmerksamkeit wurde der
funktionellen Ergonomie des Waffengestells, des Spannhebels und des CutOff-Systems gewidmet, welche das
Öffnen des Verschlusses erleichtern
und die rechts- und linksseitige Einführung des Patronenfreigabehebels ermöglichen und das manuelle Entladen
erleichtern, indem von außen auf die
Magazinsperrklinke eingewirkt wird.
Dank des hohen Perfektionsniveaus ist
Page 38

37
dia, mientras en la parte delantera se
encuentra el módulo almacén, conectado al módulo cañón mediante un
sencillo giro. Montaje y sustitución
son fases muy sencillas que no requieren el auxilio de herramientas ni utensilios.
Los módulos almacén pueden ser con
largo diferente y contener diferentes
cantidades de cartuchos que varían
según el uso y las leyes vigentes que
no permiten el uso de extensiones del
almacén.
La grande innovación tecnológica del
fusil Vinci no consiste sólo en la revolucionaria estructura de soporte, sino
también en el grupo Carcasa, Tubo
almacén, Varilla y Cañón fijado mediante aletas y tapones y en el ensamblaje de conexión rápida de módulos
separados.
Especial atención se ha dedicado a la
ergonomía funcional del afuste, de la
maneta, del sistema cut-off que facilitan la apertura del obturador y permiten la introducción ambidiestra de la
palanca de bajada cartucho y simplifican la descarga manual accionando
desde el exterior en la palanca de seguro cartucho.
Gracias al alto nivel de perfección alcanzado, el funcionamiento del fusil
Vinci está garantizado por la amplia
gama de cartuchos estándar CIP que
mantienen la energía cinética necesaria para un ciclo completo de recarga
automática.
O grupo de disparo está situado no
interior da carreta ao nível do grupo
guarda-mato, enquanto que o módulo
depósito se encontra na parte frontal,
fixado ao módulo cano através da uma
simples rotação. A montagem e substituição são fases muito simples e sem o
auxílio de quaisquer ferramentas ou
equipamentos.
Os módulos depósito são de comprimento variável e podem conter diversas quantidades de cartuchos que variam de acordo com a utilização e as
leis vigentes que não permitem a utilização de extensões de depósito.
A grande inovação tecnológica da
espingarda Vinci não consiste apenas
na revolucionária estrutura de apoio,
ma também no grupo Báscula, Tubo
depósito, Fuste e Cano fixado através
de alhetas e tampas e na montagem
com engate rápido de módulos individuais.
Prestou-se especial atenção à ergonomia funcional da carreta, da manete e
do sistema cut-off, que facilitam a abertura do obturador e permitem a
actuação ambidextra da alavanca de
descida do cartucho e simplificam o
descarregamento manual agindo sobre
a alavanca de bloqueio do cartucho a
partir do exterior.
Graças ao elevado grau de perfeição
alcançado, o funcionamento da espingarda Vinci é assegurado pela ampla
gama de cartuchos standard CIP, que
mantêm a energia cinética necessária
помощи зацепов, соединяющихся со
скользящей манжетой, а задняя часть
крепится к пластине регулировки
погиба.
Ударно-спусковой механизм находится
внутри лафета, а в передней части
находится блок магазина, который
крепится к ствольному блоку при
помощи простого вращательного
движения. Все операции по сборке и
замене вышеперечисленных блоков
выполняются очень просто и не требуют
использования каких-либо инструментов.
Блок магазина может иметь различную
длину и, соответственно, содержать
различное количество патронов, в
зависимости от национального
законодательства и особенностей охоты.
Таким образом, техническая новизна
модели Винчи состоит не только в
революционной конструкции корпуса
ружья, но и в способе сборки блоков
ружья при помощи быстроразъёмных
соединений.
Особое внимание было уделено
эргономичности элементов удержания,
затворной рукоятки, отсекателя
магазина с тем, чтобы сделать более
удобным открывание затвора,
обеспечить двустороннее управление
рычагом отсекателя магазина и
упростить разряжание ружья при
помощи кнопки ограничителя патрона.
Благодаря техническому совершенству
конструкции, автоматика ружья Винчи
гарантированно работает с широким
ассортиментов охотничьих патронов,
изготовленных в соответствии со
стандартом CIP и развивающих
кинетическую энергию, достаточную
∏ МФУ¿‰· ЩЛ˜ ЫО·У‰¿ПЛ˜ ‚Ъ›ЫОВЩ·И ЫЩФ
ВЫˆЩВЪИОfi ЩЛ˜ ‚¿ЫЛ˜ ЫЩФ ‡„Ф˜ ЩЛ˜
ЫО·У‰·ПФı‹ОЛ˜, ВУТ ЫЩФ ВМЪfi˜ М¤ЪФ˜
‚Ъ›ЫОВЩ·И Л МФУ¿‰· ·Фı‹ОЛ˜ Ф˘
Ы˘У‰¤ВЩ·И МВ ЩЛ МФУ¿‰· ЩЛ˜ О¿УУЛ˜ МВ
МИ· ·Ï‹ ВЪИЫЩЪФК‹. ∏
Û˘Ó·ÚÌÔÏfiÁËÛË Î·È Ë ·ÓÙÈηٿÛÙ·ÛË
Â›Ó·È Ôχ ·Ï¤˜ Î·È ‰ÂÓ ··ÈÙÔ‡Ó ÙË
¯Ú‹ÛË ÂÚÁ·Ï›ˆÓ ‹ ÂÍ·ÚÙËÌ¿ÙˆÓ.
√И МФУ¿‰В˜ ·Фı‹ОЛ˜ МФЪФ‡У У·
¤¯Ф˘У ‰И·КФЪВЩИО¿ М‹ОЛ О·И У·
ВЪИ¤¯Ф˘У ‰И·КФЪВЩИОfi ·ЪИıМfi
К˘ЫИББ›ˆУ ·У·ПfiБˆ˜ МВ ЩЛ ¯Ъ‹ЫЛ О·И
ЩЛУ ИЫ¯‡Ф˘Ы· УФМФıВЫ›· Ф˘ МФЪВ› У·
МЛУ ВИЩЪ¤ВИ ЩЛ ¯Ъ‹ЫЛ ЪФВОЩ¿ЫВˆУ
·Фı‹ОЛ˜.
∏ МВБ¿ПЛ ЩВ¯УФПФБИО‹ О·ИУФЩФМ›· ЩЛ˜
ηڷ̛ӷ˜ Vinci ‰ÂÓ ·ÊÔÚ¿ ÌfiÓÔ ÙËÓ
·ӷÛÙ·ÙÈ΋ ηٷÛ΢‹ ÛÙ‹ÚÈ͢,
·ПП¿ О·И ЩЛ МФУ¿‰· ™ТМ·, ∞Фı‹ОЛ,
¶¿И· О·И ∫¿УУЛ Ф˘ ЫЩЛЪ›˙ВЩ·И МВ
ВП¿ЫМ·Щ· О·И Щ¿В˜, О·ıТ˜ О·И ЩЛ
Ы˘У·ЪМФПfiБЛЫЛ ЩˆУ МВМФУˆМ¤УˆУ
МФУ¿‰ˆУ МВ Щ·¯˘Ы˘У‰¤ЫМФ˘˜.
π‰И·›ЩВЪЛ ЪФЫФ¯‹ ¤¯ВИ ‰ФıВ› ЫЩЛ
ПВИЩФ˘ЪБИО‹ ВЪБФУФМ›· ЩЛ˜ ‚¿ЫЛ˜, ЩФ˘
МФ¯ПФ‡ О·И ЩФ˘ Ы˘ЫЩ‹М·ЩФ˜ cut-off Ф˘
‰ИВ˘ОФП‡УФ˘У ЩФ ¿УФИБМ· ЩФ˘ ОПВ›ЫЩЪФ˘
О·И ВИЩЪ¤Ф˘У ЩЛУ ·МКИ‰¤НИ· ВИЫ·БˆБ‹
ЩФ˘ ·ВПВ˘ıВЪˆЩ‹ О·И ·ПФФИФ‡У ЩФ
¯ВИЪФО›УЛЩФ ¿‰ВИ·ЫМ· ВВУВЪБТУЩ·˜
·fi ¤Нˆ ЫЩФУ ·У·ЫЩФП¤·.
Г¿ЪЛ ЫЩФУ ˘„ЛПfi ‚·ıМfi ЩВПВИfiЩЛЩ·˜, Л
ПВИЩФ˘ЪБ›· ЩЛ˜ О·Ъ·М›У·˜ Vinci
ВН·ЫК·П›˙ВЩ·И МВ ЩЛ МВБ¿ПЛ ФИОИП›·
К˘ЫИББ›ˆУ О·Щ¿ CIP Ф˘ ·Ъ¤¯Ф˘У ЩЛУ
·У·БО·›· ОИУЛЩИО‹ ВУ¤ЪБВИ· БИ· ¤У·У
П‹ЪЛ О‡ОПФ ·˘ЩfiМ·ЩФ˘ БВМ›ЫМ·ЩФ˜.
Εµπεριστατωµνες βαλλιστικς ρευνες
Page 39

38
Approfonditi esperimenti balistici di
laboratorio e specifici test di pratica
confermano che per un corretto funzionamento dell’arma, il valore minimo dell’energia cinetica sviluppato da
una cartuccia calibro 12 deve essere
230 kgm per il modello Vinci e 240
kgm per il modello SuperVinci - valo-
re misurato su canna manometrica a 1
m dalla volata.
In-depth ballistic laboratory experiments, and specific practical tests confirm that for correct firearm function,
the kinetic energy min. value developed by a 12-gauge cartridge should be
230 kgm as for the Vinci model and
240 kgm as for the SuperVinci model -
values measured by manometric barrel
at 1 m from the muzzle.
pour un cycle complet de recharge
automatique.
Des expériences balistiques approfondies de laboratoire et des tests pratiques
spécifiques confirment que pour un
fonctionnement correct de l’arme, la
valeur min. de l’énergie cinétique développée par une cartouche calibre 12
doit être de 230 kgm pour le modèle
Vinci et de 240 kgm pour le modèle
SuperVinci - valeur mesurée avec un
canon manométrique à 1 m de la
volée.
die Funktion des Vinci-Gewehrs von
dem breiten Sortiment an CIP-StandardPatronen gesichert, die die für einen
automatischen Aufladezyklus notwendige kinetische Energie erhalten.
Vertiefte ballistische Laborversuche
und spezifische Praxistests bestätigen,
dass zum korrekten Betrieb der Waffe
der mind. kinetische Energiewert, der
von einer Patrone Kaliber 12 entwickelt
wird, 230 kgm für das Modell Vinci
und 240 kgm für das Modell SuperVinci
betragen muss. Der Wert wurde am
manometrischen Lauf 1 m weit von der
Mündung gemessen.
Garanzia
Le norme di garanzia sono contenute
nello specifico certificato.
La Benelli Armi S.p.A. non si ritiene
responsabile di eventuali danni derivanti dall’uso di munizioni improprie,
da negligenze di manutenzione o da
incidenti dovuti ad imperizia nel maneggio delI’arma.
ATTENZIONE: l’uso di componenti o
parti di ricambio non originali Benelli
annulla la garanzia.
Garantie
Les normes de garantie sont contenues
dans le certificat spécifique.
La société Benelli Armi S.p.A. ne pour-
ra en aucun cas être tenue responsable des éventuels dommages dérivant
de l’emploi de munitions inadéquates,
de négligences dans l’entretien ou
d’accidents dus à une inexpérience
dans la manipulation de l’arme.
ATTENTION: l’usage de composants
ou de pièces détachées non originales
Benelli annule la garantie.
Garantie
Die Garantiebedingungen sind auf
dem Garantieschein angegeben.
Die Firma Benelli Armi S.p.A. ist nicht
für Schäden haftbar, die durch Verwendung nicht geeigneter Munition,
unsachgemäße Wartung oder Unfälle
aufgrund unsachgemäßer Handhabung
der Waffe verursacht werden.
ACHTUNG: Bei Verwendung fabrik-
fremder Teile erlischt der Garantieanspruch.
Warranty
Warranty terms are given in the warranty certificate.
Benelli Armi Spa will not be held
responsible for consequential damage
derived from the use of improper ammunition, lack of maintenance, or from
accidents resulting from misuse of the
arm.
WARNING: the use of non-Benelli ori-
ginals parts on the arm voids the warranty.
Page 40

Гарантийные обязательства
Гарантийные обязательства
содержатся в гарантийном
сертификате.
Предприятие Benelli Armi S.p.A. не несёт
ответственности за ущерб, возникший
в результате использования нештатных
боеприпасов, небрежного обслуживания,
а также за несчастные случаи,
происшедшие по причине неосторожного
обращения с оружием.
ВНИМАНИЕ! Использование
неоригинальных запчастей или
комплектующих влечёт прекращение
гарантийных обязательств.
39
Minuciosos experimentos balísticos de
laboratorio y test específicos de práctica confirman que para un correcto funcionamiento del arma, el valor mínimo
de la energía cinética desarrollado por
un cartucho calibre 12 debe ser de
230 kgm por el modelo Vinci y de 240
kgm por el modelo SuperVinci - valor
medido con cañón manométrico a 1 m
de la voladura.
para um ciclo completo de recarga
automática.
Ensaios balísticos laboratoriais mais
aprofundados e provas práticas específicas confirmam que para um correcto
funcionamento da arma, o valor mínimo da energia cinética desenvolvido
por um cartucho de calibre 12 deve
ser 230 kgm para o modelo Vinci e
240 kgm para o modelo SuperVinci valor medido com cano manométrico
a 1 m a partir da boca.
для осуществления цикла
перезаряжания. Лабораторные
эксперименты и специальные
практические тесты по исследованию
баллистики ружья подтвердили, что для
обеспечения бесперебойной работы
ружья патрон 12 калибра должен
развивать кинетическую энергию 230
кг/м для модели Vinci, и 240 кг/м – для
модели SuperVinci (значение
измеренное на крешерном стволе на
расстоянии 1 м от дульного среза).
εργαστηρου και ειδικς πρακτικς
δοκιµς επιβεβαι#νουν τι, για τη
σωστ λειτουργα του πλου, η
ελχιστη τιµ της κινητικς ενργειας
που αναπτ'σσεται απ φυσγγιο
διαµετρµατος 12 πρπει να εναι 230
kgm για το µοντλο Vinci και 240 kgm
για το µοντλο SuperVinci - τιµ
µετρηµνη σε µανοµετρικ κννη σε
απσταση 1 m απ το στµιο.
Garantía
Las normas de garantía están contenidas en el certificado especial.
Benelli Armi S.p.A. no se considera
responsable de posibles daños derivados del uso de municiones inadecuadas, de negligencias de mantenimiento o de incidentes debido a ineptitud
en el manejo del arma.
ATENCIÓN: El uso de componentes o
partes de repuesto no originales Benelli
anula la garantía.
Garantia
As normas de garantia constam do
certificado específico.
A Benelli Armi S.p.A. não se responsabiliza por eventuais danos decor-
rentes da utilização de munições inadequadas, de negligências na manutenção ou de acidentes resultantes de
imperícia no manuseamento da arma.
ATENÇÃO: a utilização de compo-
nentes ou peças sobresselentes não
originais Benelli anula a garantia.
∂ÁÁ‡ËÛË
√È fiÚÔÈ Ù˘ ÂÁÁ‡ËÛ˘ ·Ó·Ê¤ÚÔÓÙ·È ÛÙÔ
ÂȉÈÎfi ИЫЩФФИЛЩИОfi.
∏ Benelli Armi S.p.A. ‰ÂÓ Ê¤ÚÂÈ Ô˘‰ÂÌ›·
¢ı‡ÓË БИ· Щ˘¯fiУ ‚П¿‚В˜ Ф˘ МФЪФ‡У
У· ЪФОПЛıФ‡У ПfiБˆ ЩЛ˜ ¯Ъ‹ЫЛ˜
·О·Щ¿ППЛПˆУ ˘ЪФМ·¯ИОТУ, ПfiБˆ ЩЛ˜
ВППИФ‡˜ Ы˘УЩ‹ЪЛЫЛ˜ ЩФ˘ fiПФ˘ ‹
ПfiБˆ ·Щ˘¯ЛМ¿ЩˆУ ·fi О·Оfi ¯ВИЪИЫМfi.
¶ƒ√™√Ã∏: H ¯ЪЛЫИМФФ›ЛЫЛ МЛ БУ‹ЫИˆУ
·УЩ·ПП·ОЩИОТУ Benelli ·О˘ЪТУФ˘У ЩЛУ
ВББ‡ЛЫЛ.
Page 41

40
Montaggio
(da fucile imballato)
Componenti confezione (fig. 1):
a) Modulo Affusto/Modulo Tubo Ser-
batoio
b) Modulo Canna/Modulo Otturatore
c) Modulo Calcio
d) Modulo Tubo Serbatoio (solo ver-
sioni M395-M515-M640)
Assembly
(from packaged gun)
Components of the package (fig. 1):
a) Gun Carriage/Magazine tube
Module
b) Barrel/Receiver Module
c) Stock Module
d) Magazine tube Module (only ver-
sions M395-M515-M640)
Assemblage
(fusil emballé)
Parties composant l’emballage (fig. 1):
a) Module Affût/Module Tube Maga-
sin
b) Module Canon/Module Obtura-
teur
c) Module Crosse
d) Module Tube Magasin (seulement
pour versions M395-M515-M640)
Zusammenbauen (des in der
Verpackung enthaltenen Gewehrs)
In der Verpackung enthaltene Teile (Abb. 1):
a) Modul Waffengestell/Modul Maga-
zinrohr
b) Modul Lauf/Modul Verschluss
c) Modul Schaft
d) Modul Magazinrohr (nur Versio-
nen M395-M515-M640)
1
b
d
c a
Page 42

41
Montaje
(de fusil embalado)
Componentes confección (fig. 1):
a) Módulo Afuste/Módulo Tubo Al-
macén
b) Módulo Cañón/Módulo Obturador
c) Módulo Culata
d) Módulo Tubo Almacén (sólo ver-
siones M395-M515-M640)
Montagem
(da espingarda embalada)
Componentes de embalagem (fig. 1):
a) Módulo Carreta/Módulo Tubo De-
pósito
b) Módulo Cano/Módulo Obturador
c) Módulo Coronha
d) Módulo Tubo Depósito (só versões
M395-M515-M640)
Первая сборка ружья
(после распаковки)
Комплектность поставки (рис. 1):
a) Блок лафета/блок магазина
b) Ствольный блок/блок затвора
c) блок приклада
d) Блок магазина (только для
исполнений M395-M515-M640)
™˘Ó·ÚÌÔÏfiÁËÛË
(Û˘Û΢·Ṳ̂ÓÔ˘ fiÏÔ˘)
∏ Û˘Û΢·Û›· ÂÚȤ¯ÂÈ (ÂÈÎ. 1):
·) ªÔÓ¿‰· µ¿Û˘/ªÔÓ¿‰· ∞Ôı‹Î˘
‚) ªÔÓ¿‰· ∫¿ÓÓ˘/ªÔÓ¿‰· ∫Ï›ÛÙÚÔ˘
Á) ªÔÓ¿‰· ÎÔÓÙ·Î›Ô˘
‰) ªÔÓ¿‰· ·Ôı‹Î˘ (ÌfiÓÔ ÂΉfiÛÂȘ
M395-M515-M640)
Page 43

42
Assembly procedure
1) Mount the stock on the barrel,
aligning the white reference dot
with the sight line on the cover
(fig. 2).
2) Insert the stock on the cover up to
the stop, making sure that the bolt
module is correctly positioned inside the barrel module (fig. 3 and
fig. 4).
Procédure d’assemblage
de l’arme
1) Assembler la crosse au canon, en
alignant le point blanc de référen-
ce sur la ligne de mire du fourreau
(fig. 2).
2) Introduire la crosse sur le fourreau
jusqu’à la butée, en s’assurant que
le module obturateur soit correctement positionné à l’intérieur du
module canon (figures 3-4).
Vorgang zum Zusammenbau
der Waffe
1) Den Schaft auf dem Lauf montie-
ren, indem der weiße Bezugspunkt
dem Visier der Systemhülse angepasst wird (Abb. 2).
2) Den Schaft auf der Systemhülse
bis zum Anschlag einsetzen, sicherstellen, dass das Verschlussmodul innerhalb des Laufmoduls
korrekt positioniert ist (Abb. 3-4).
2 3
OK
Procedura di montaggio
dell'arma
1) Montare il calcio sulla canna, alli-
neando il punto bianco di riferi-
mento con la linea di mira del
fodero (fig. 2).
2) Inserire il calcio sul fodero fino a
battuta, assicurandosi che il modulo otturatore sia posizionato
correttamente all’interno del modulo canna (figg. 3-4).
Page 44

43
Procedimiento de montaje
del arma
1) Montar la culata en el cañón, alineando el punto blanco de refe-
rencia con la línea de mira de la
cubierta (fig. 2).
2) Insertar la culata en la cubierta
hasta el tope, controlando que el
módulo obturador se encuentre en
la posición correcta dentro del
módulo cañón (fig. 3-4).
Procedimento de montagem
da arma
1) Montar a coronha no cano, alin-
hando o ponto branco de re-
ferência com a linha de mira da
bainha (fig. 2).
2) Introduzir a coronha na bainha até
ao batente, assegurando-se de que
o módulo obturador fique correctamente posicionado no interior
do módulo cano (figuras 3-4).
Порядок сборки ружья
1) Присоединить приклад к
ствольному блоку, совместив
белую контрольную точку с
прицельной линией на кожухе
затвора (рис. 2).
2) Вставить приклад до упора в
заднюю часть затворной коробки,
удостоверившись в том, что
затвор занимает правильное
положение внутри ствольного
блока (рис. 3-4).
¢È·‰Èηۛ· Û˘Ó·ÚÌÔÏfiÁËÛ˘
ÙÔ˘ fiÏÔ˘
1) ∆ÔÔıÂÙ‹ÛÙ ÙÔ ÎÔÓÙ¿ÎÈ ÛÙËÓ Î¿ÓÓË
¢ı˘ÁÚ·ÌÌ›˙ÔÓÙ·˜ ÙË Ï¢΋
ÎÔ˘ÎΛ‰· ·Ó·ÊÔÚ¿˜ Ì ÙË ÁÚ·ÌÌ‹
ÛÎÔ‡Ûˆ˜ ÙÔ˘ ηχÌÌ·ÙÔ˜ (ÂÈÎ. 2).
2) ¶ЪФЫ·ЪМfiЫЩВ ЩФ ОФУЩ¿ОИ ЫЩФ
О¿П˘ММ· ¤ЩЫИ ТЫЩВ У· ВК·ЪМfiЫВИ О·И
‚В‚·ИˆıВ›ЩВ fiЩИ Л МФУ¿‰· ОПВ›ЫЩЪФ˘
В›У·И ЫˆЫЩ¿ ЩФФıВЩЛМ¤УЛ ЫЩФ
ВЫˆЩВЪИОfi ЩЛ˜ МФУ¿‰·˜ О¿УУЛ˜ (ВИО.
3-4).
NO
4
Page 45

44
3) Qualora il modulo sia posizionato
scorrettamente premere verso il
basso con il pollice il piastrino
battuta-otturatore (fig. 5) per
sbloccare l’aletta superiore e arretrare l’otturatore a fine corsa (fig.
6).
4) Mantenere l’allineamento punto
bianco e linea di mira sul fodero e
ruotare con energia di 90° in senso orario il calcio stesso fino a fine
corsa (fig. 7); (zigrino superiore
calcio allineato a linea di mira
fodero - fig. 8).
3) Whenever the module is incorrec-
tly placed, push the stop-bolt plate
downward using your thumb (fig.
5) in order to unlock the upper lug
and pull the bolt back to the end of
stroke (fig. 6).
4) Keep the white point alignment
and the sight line on the cover and
rotate the stock forcefully by 90°
clockwise until it reaches the end
of the stroke (fig. 7); (stock upper
checkering aligned with the sight
line on the cover - fig. 8).
3) Si le module est positionné de
façon incorrecte, pousser vers le
bas, avec le pouce, la plaque de
butée-obturateur (fig. 5) pour débloquer l’ailette supérieure et faire
reculer l’obturateur jusqu’à sa fin
de course (fig. 6).
4) Maintenir l’alignement du point
blanc et de la ligne de mire sur le
fourreau et tourner énergiquement
de 90° vers la droite la crosse jusqu’à sa fin de course (fig. 7); (finition guillochée supérieure de la
crosse alignée à la ligne de mire
du fourreau - fig. 8).
3) Sollte das Modul nicht korrekt
positioniert sein, die Verschluss-
Anschlagplatte mit dem Daumen
nach unten drücken (Abb. 5), um
den oberen Flügel zu entblocken
und den Verschluss bis zum
Endanschlag zurückzuziehen
(Abb. 6).
4) Die Ausrichtung weißer Punkt und
Visier auf der Systemhülse beibehalten und den Schaft energisch
im Uhrzeigersinn um 90° bis zum
Endanschlag drehen (Abb. 7);
(obere Fischhaut Schaft in Übereinstimmung mit Visier Systemhülse - Abb. 8).
5 6
Page 46

45
3) En caso de que el módulo no esté
en la posición correcta, presionar
hacia abajo con el pulgar la pla-
quita tope-obturador (fig. 5) para
desbloquear la aleta superior y
retroceder el obturador al final de
carrera (fig. 6).
4) Mantener la alineación punto
blanco y línea de mira en la cubierta y girar con energía la culata
de 90° en sentido del reloj hasta el
final de carrera (fig. 7); (picado
superior culata alineado en línea
de mira cubierta - fig. 8).
3) Se o módulo estiver posicionado
incorrectamente, pressionar para
baixo com o polegar a placa
batente-obturador (fig. 5) para
desbloquear a alheta superior e
fazer recuar obturador até ao fim
de curso (fig. 6).
4) Manter o ponto branco alinhado
com a linha de mira da bainha e
rodar energicamente a própria coronha 90° no sentido dos ponteiros do relógio até ao fim de curso
(fig. 7); (estriamento superior da
coronha alinhada com a linha de
mira da bainha - fig. 8).
3) Если затвор занимает неправильное
положение, нажмите пальцем на
демпферную пластину затвора
(рис 5). При этом верхний зацеп
должен высвободиться, что
позволит перевести затвор в
крайнее заднее положение (рис. 6).
4) Выдерживая совмещение белой
точки и прицельной линии на
затворной коробке, энергично
повернуть приклад на 90° по
часовой стрелке до упора. (рис. 7).
В результате насечки на верхней
части шейки приклада должны
совместиться с прицельной линией
на затворной коробке (рис. 8).
3) ™Â ÂÚ›ÙˆÛË Ô˘ Ë ÌÔÓ¿‰· ‰ÂÓ
Â›Ó·È ÛˆÛÙ¿ ÙÔÔıÂÙË̤ÓË, ȤÛÙÂ
ÚÔ˜ Ù· οو Ì ÙÔÓ ·ÓÙ›¯ÂÈÚ· ÙËÓ
ϷΤٷ ÛÙÂÚ¤ˆÛ˘ ÎÏ›ÛÙÚÔ˘ (ÂÈÎ.
5) ÁÈ· Ó· ÂÏ¢ıÂÚˆı› ÙÔ ¿Óˆ
¤Ï·ÛÌ· Î·È ÙÚ·‚‹ÍÙ ٤ÚÌ· ›Ûˆ ÙÔ
ÎÏ›ÛÙÚÔ (ÂÈÎ. 6).
4) ¢И·ЩЛЪ‹ЫЩВ ЩЛУ В˘ı˘БЪ¿ММИЫЛ МВЩ·Н‡
ПВ˘О‹˜ ОФ˘ОО›‰·˜ О·И БЪ·ММ‹˜
ЫОfiВ˘ЫЛ˜ ЩФ˘ О·П‡ММ·ЩФ˜ О·И
Б˘Ъ›ЫЩВ ‰˘У·Щ¿ ‰ВНИfiЫЩЪФК· О·Щ¿
90Ж ЩФ ОФУЩ¿ОИ М¤¯ЪИ Щ¤ЪМ· (ВИО. 7),
(¿Уˆ ·˘П·ОТЫВИ˜ ОФУЩ·О›Ф˘
В˘ı˘БЪ·ММИЫМ¤УВ˜ МВ ЩЛ БЪ·ММ‹
ЫОfiВ˘ЫЛ˜ ЩФ˘ О·П‡ММ·ЩФ˜ - ВИО. 8).
7 8
Page 47

46
5) Prendere l'affusto e accertarsi che
il punto bianco di riferimento per
il montaggio sia ben visibile all'in-
terno dell'asola inferiore posizionata vicino alla matricola (fig. 9).
ATTENZIONE: se il punto bianco è
coperto dal pulsante di montaggio/
smontaggio arma (fig. 10), è sufficien-
te premere a fondo il pulsante stesso e
ruotare in senso antiorario il tappo
serbatoio (fig. 11), fino alla corretta
posizione per il montaggio dell'arma:
punto bianco visibile.
5) Grip the gun carriage and make
sure that the white reference dot for
assembly is well visible through the
lower slot positioned near the complementary serial number (fig. 9).
WARNING: if the white dot is cover-
ed by the assembly/disassembly button (fig. 10), press the button all the
way down and rotate the magazine
tube plug counter clockwise (fig. 11)
until it reaches the correct position for
assembling the gun: white dot visible.
5) Prendre l’affût et vérifier que le
point blanc de référence pour l’assemblage soit bien visible à l’inté-
rieur de la boutonnière inférieure
située près du numéro de matricule (fig. 9).
ATTENTION: si le point blanc de réfé-
rence est couvert par le poussoir de
montage/démontage de l’arme (fig. 10),
il suffit de pousser à fond le poussoir en
question et de tourner dans le sens
opposé des aiguilles d’une montre le
bouchon magasin (fig. 11), jusqu’à la
position correcte pour l’assemblage de
l’arme: point blanc visible.
5) Das Waffengestell nehmen und
sicherstellen, dass der weiße Be-
zugspunkt für die Montage gut
sichtbar innerhalb der unteren
Ausfräsung ist, die nahe der
Matrikel positioniert ist (Abb. 9).
ACHTUNG: Falls der weiße Punkt von
dem Knopf zur Montage/Zerlegung
der Waffe verdeckt sein sollte (Abb. 10),
ist es ausreichend, den Knopf selbst bis
nach unten zu drücken und den Maga-
zin-Zapfen gegen den Uhrzeigersinn zu
drehen (Abb. 11), bis die korrekte Posi-
tion zur Waffenmontage gegeben ist:
sichtbarer weißer Punkt.
9 10
Page 48

47
5) Tomar el afuste y cerciorarse de
que el punto blanco de referencia
para el montaje sea bien visible en
el interior del ojal inferior posicionado cerca de la matrícula (fig. 9).
ATENCIÓN: si el punto blanco está
cubierto por el botón de montaje/
desmontaje del arma (fig. 10), es sufi-
ciente presionar a fondo dicho botón y
girar en sentido contrario al reloj el
tapón del almacén (fig. 11), hasta la
posición correcta para el montaje del
arma: punto blanco visible.
5) Segurar a carreta e certificar-se de
que o ponto branco de referência
para a montagem está bem visível
no interior da ranhura inferior
situada junto ao número de série
(fig. 9).
ATENÇÃO: se o ponto branco estiver
tapado pelo botão de montagem/
desmontagem arma (fig. 10), basta
pressionar a fundo o referido botão e
rodar a tampa depósito (fig. 11) no
sentido contrário ao dos ponteiros do
relógio, até atingir a posição correcta
para a montagem da arma: ponto
branco visível.
5) Взять лафет и удостовериться в
том, что белая контрольная
точка хорошо видна в нижнем
вырезе, находящемся возле
серийного номера (рис. 9).
ВНИМАНИЕ: если белая точка
закрыта кнопкой монтажной
защёлки (рис. 10), достаточно нажать
до упора на эту кнопку и повернуть
против часовой стрелки крышку
магазина (рис. 11) до появления белой
точки в вырезе - теперь все узлы
ружья заняли правильное положение и
можно продолжить сборку.
5) ¶¿ÚÙ ÙË ‚¿ÛË Î·È ‚‚·Èˆı›Ù fiÙÈ Ë
Ï¢΋ ÎÔ˘ÎΛ‰· ·Ó·ÊÔÚ¿˜ ÁÈ· ÙË
Ы˘У·ЪМФПfiБЛЫЛ В›У·И В˘‰И¿ОЪИЩЛ
М¤Ы· ЫЩФ О¿Щˆ ¿УФИБМ· Ô˘
‚Ú›ÛÎÂÙ·È ÎÔÓÙ¿ ÛÙÔÓ ·ÚÈıÌfi ÛÂÈÚ¿˜
(ÂÈÎ. 9).
¶ƒ√™√Ã∏: Â¿Ó Ë Ï¢΋ ÎÔ˘ÎΛ‰·
ηχÙÂÙ·È ·fi ÙÔ ÎÔ˘Ì›
Û˘Ó·ÚÌÔÏfiÁËÛ˘/·ÔÛ˘Ó·ÚÌÔÏfiÁËÛ˘
ÙÔ˘ fiÏÔ˘ (ÂÈÎ. 10), ·ÚΛ Ó· ȤÛÂÙÂ
̤¯ÚÈ Ù¤ÚÌ· ÙÔ ÎÔ˘Ì› Î·È Ó· Á˘Ú›ÛÂÙÂ
·ЪИЫЩВЪfiЫЩЪФК· ЩЛУ Щ¿· ·Фı‹ОЛ˜
(ÂÈÎ. 11) ¤ˆ˜ fiÙÔ˘ ÙÔÔıÂÙËı› ÛˆÛÙ¿
ÁÈ· ÙË Û˘Ó·ÚÌÔÏfiÁËÛË ÙÔ˘ fiÏÔ˘:
Ï¢΋ ÎÔ˘ÎΛ‰· ÔÚ·Ù‹.
11
Page 49

48
6) Accostare l'affusto al modulo canna/otturatore, in posizione verticale, in modo da far combaciare
l'incavo presente sul lato destro
dell'affusto con il punto bianco
presente sul fodero (fig. 12).
7) Mantenere accostati i due moduli
e spingere l'affusto con forza verso
il calcio, possibilmente in appoggio su un piano di contrasto (fig.
13); ruotare, quindi, in senso orario il tappo serbatoio (fig. 14), finché il pulsante di montaggio/
smontaggio arma non si posizioni
come indicato in fig. 15.
6) Bring the gun carriage towards the
Barrel/Receiver Module, in a vertical position so that the groove on
the right side of the gun carriage
aligns with the white dot on the
cover (fig. 12).
7) Keep the two Modules aligned
and push the gun carriage forcefully towards the stock, if possible
while it is resting on a back-up
surface (fig. 13); then, rotate the
magazine tube plug clockwise (fig.
14), until the assembly/disassembly button is positioned as shown
in fig. 15.
6) Rapprocher l’affût au module
canon/obturateur, en position verticale, de façon à ce que l’entaille
située sur le côté droit de l’affût
coïncide avec le point blanc situé
sur le fourreau (fig. 12).
7) Maintenir les deux modules rapprochés l’un de l’autre et pousser
l’affût avec force vers la crosse, appuyée si possible sur un plan d’appui (fig. 13); tourner alors dans le
sens des aiguilles d’une montre le
bouchon magasin (fig. 14), jusqu’à
ce que le poussoir de montage/
démontage de l’arme se positionne
comme indiqué en fig. 15.
6) Das Waffengestell neben dem
Modul Lauf/Verschluss in vertikaler
Stellung positionieren, so dass die
Vertiefung auf der rechten Seite des
Waffengestells mit dem weißen
Punkt auf der Systemhülse übereinstimmt (Abb. 12).
7) Die beiden Module nebeneinander
positioniert halten und das Waffengestell kraftvoll in Richtung Schaft
drücken, möglichst während man
sich auf eine Kontrastfläche stützt
(Abb. 13); dann den Magazin-Zapfen in Uhrzeigersinn drehen (Abb.
14), bis der Knopf zur Waffenmontage/Zerlegung wie in Abb. 15 angezeigt positioniert ist.
12 13
Page 50

49
6) Acercar el afuste al módulo cañón/
obturador, en posición vertical, de
modo que coincida la cavidad presente en el lado derecho del afuste
con el punto blanco presente en la
cubierta (fig. 12).
7) Mantener arrimados los dos módulos y empujar el afuste con fuerza hacia la culata, posiblemente
apoyado en un plano de contraste
(fig. 13); girar luego, en sentido del
reloj el tapón del almacén (fig. 14),
hasta que el pulsador de montaje/
desmontaje del arma se posicione
como indicado en la fig. 15.
6) Aproximar a carreta ao módulo
cano/obturador, na posição vertical, de modo a fazer correspon-
der o entalhe presente no lado
direito da carreta ao ponto branco
situado na bainha (fig. 12).
7) Manter os dois módulos aproximados e empurrar a carreta com força
em direcção à coronha, preferivelmente apoiada numa superfície de
contraste (fig. 13); de seguida, rodar
no sentido dos ponteiros do relógio a tampa depósito (fig. 14), até o
botão de montagem/desmontagem
estar posicionado conforme indicado na fig. 15.
6) Совместить лафет со ствольным
блоком, держа их в вертикальном
положении. При этом вырез на
правой стороне лафета должен
совпасть с белой точкой на
кожухе затвора. (рис. 12).
7) Удерживая оба блока
совмещёнными, энергично сдвинуть
лафет в направлении приклада, по
возможности опираясь на
устойчивую поверхность (рис. 13);
затем повернуть по часовой стрелке
крышку магазина (рис. 14) при этом
кнопка защёлки должна занять
положение, указанное на рис 15.
6) ¶ÏËÛÈ¿ÛÙ ÙË ‚¿ÛË ÛÙË ÌÔÓ¿‰·
οÓÓ˘/ÎÏ›ÛÙÚÔ˘ Û οıÂÙË ı¤ÛË,
¤ÙÛÈ ÒÛÙ ӷ Û˘Ì¤ÛÂÈ Ë ÂÛÔ¯‹ ÛÙË
‰ÂÍÈ¿ ÏÂ˘Ú¿ Ù˘ ‚¿Û˘ Ì ÙË Ï¢΋
ÎÔ˘ÎΛ‰· ÛÙÔ Î¿Ï˘ÌÌ· (ÂÈÎ. 12).
7) ∫Ъ·Щ‹ЫЩВ ЫЩЛ ı¤ЫЛ ·˘Щ‹ ЩИ˜ ‰‡Ф
МФУ¿‰В˜ О·И И¤ЫЩВ ‰˘У·Щ¿ ЩЛ ‚¿ЫЛ
ЪФ˜ ЩФ ОФУЩ¿ОИ, О·Щ¿ ЪФЩ›МЛЫЛ
¿Уˆ ЫВ МИ· ЫЩ·ıВЪ‹ ВИК¿УВИ·
ЫЩ‹ЪИНЛ˜ (ВИО. 13). ™ЩЛ Ы˘У¤¯ВИ·
Б˘Ъ›ЫЩВ ‰ВНИfiЫЩЪФК· ЩЛУ Щ¿·
·Ôı‹Î˘ (ÂÈÎ. 14), ¤ˆ˜ fiÙÔ˘ ÙÔ
ÎÔ˘Ì› Û˘Ó·ÚÌÔÏfiÁËÛ˘/
·ÔÛ˘Ó·ÚÌÔÏfiÁËÛ˘ ÙÔ˘ fiÏÔ˘
‚ÚÂı› ÛÙË ı¤ÛË Ù˘ ÂÈÎ. 15.
14 15
Page 51

50
8) Per accertarsi che tutte le operazioni siano state eseguite correttamente, aprire e richiudere l'otturatore tramite la relativa manetta di
armamento: l'otturatore deve scorrere liberamente all'interno del fodero (fig. 16).
A questo punto il montaggio è completato.
8) To check that all of the operations
have been correctly executed,
open and close the bolt using the
relative cocking lever: the bolt
must freely slide inside the cover
(fig. 16).
Assembly is now completed.
8) Pour vérifier que toutes ces opérations aient été effectuées correctement, ouvrir et refermer l’obturateur à l’aide de la manette d’armement: l’obturateur doit coulisser librement à l’intérieur du fourreau
(fig. 16).
A ce point, l’assemblage est complété.
8) Um sicherzustellen, dass alle Vorgänge korrekt ausgeführt wurden,
den Verschluss mit dem jeweiligen
Spannhebel öffnen und wieder
schließen: der Verschluss muss frei
innerhalb der Systemhülse laufen
(Abb. 16).
Nun ist die Montage abgeschlossen.
16
Page 52

51
8) Para asegurarse de que todas las
operaciones se han realizado correctamente, abra y cierre el obturador mediante la correspondiente
maneta de armado: el obturador
debe deslizarse libremente dentro
de la cubierta, (fig. 16).
Llegados a este punto el montaje está
completo.
8) Para verificar se todas as operações
foram realizadas correctamente,
abrir e voltar a fechar o obturador
através da respectiva manete de
armar: o obturador deve deslizar
livremente no interior da bainha,
(fig. 16).
A montagem está agora concluída.
8) Для того, чтобы удостовериться в
правильности сборки, передёрнуть
затвор при помощи затворной
рукоятки. Затвор должен свободно
перемещаться внутри кожуха. (рис.
16).
Сборка закончена.
8) °И· У· ‚В‚·ИˆıВ›ЩВ fiЩИ fiПВ˜ ФИ
ВУ¤ЪБВИВ˜ ¤¯Ф˘У Б›УВИ ЫˆЫЩ¿,
·ÓÔ›ÍÙÂ Î·È ÎÏ›ÛÙ ÙÔ ÎÏ›ÛÙÚÔ ÌÂ
ÙÔ ÌÔ¯Ïfi Ôϛۈ˜: ÙÔ ÎÏ›ÛÙÚÔ
Ú¤ÂÈ Ó· ÎÈÓÂ›Ù·È ÂχıÂÚ· ̤۷
ÛÙÔ Î¿Ï˘ÌÌ· (ÂÈÎ. 16).
™ЩФ ЫЛМВ›Ф ·˘Щfi Л Ы˘У·ЪМФПfiБЛЫЛ ЩФ˘
fiПФ˘ ¤¯ВИ ФПФОПЛЪˆıВ›.
Page 53

52
Sicura dell'arma
Il pulsante di sicura "a traversino" è
posizionato sulla parte anteriore della
guardia. Per inserire la sicura premere
il pulsante: a sicura inserita non si
deve vedere l'anello rosso che indica
la posizione di sparo (figg. 17-18).
Caricamento
Prima di effettuare qualunque tipo di
intervento sull'arma, accertarsi sempre che camera di scoppio e tubo serbatoio siano completamente vuoti!
(Leggere attentamente le istruzioni di
caricamento e scaricamento dell’arma).
Gun safety catch
The “cross bar” safety catch is position-
ed on the front part of the trigger
guard. To insert the safety catch, press
the button: with the safety catch in-
serted, the red ring which indicates
the firing position must not be visible
(figs. 17-18).
Loading
Before starting any operation on your
shotgun, make sure that the chamber
and the magazine tube are unloaded!
(Carefully read the instructions on gun
loading and unloading).
Sûreté de l’arme
Le bouton de sûreté est situé sur la
partie avant de la garde. Pour enclencher la sûreté, appuyer sur le bouton:
quand la sûreté est enclenchée, la
bague rouge qui indique la position
de tir ne doit pas se voir (figs. 17-18).
Chargement
Avant d’effectuer toute intervention
sur l’arme, vérifiez que la chambre
d’explosion et que le tube magasin
soient entièrement vides! (Lire attenti-
vement les instructions de chargement
et de déchargement de l’arme).
Sicherung der Waffe
Der "stegförmige" -Sicherungsknopf ist
auf der Vorderseite des Abzugsbügels
positioniert. Zum Einsetzen der Sicherung den Knopf drücken: bei einge-
setzter Sicherung darf man den roten
Ring nicht sehen, der die Schussposition anzeigt (Abb. 17-18).
Ladung
Vor sämtlichen Eingriffen, die bei der
Waffe vorgenommen werden, immer
sicherstellen, dass das Patronenlager
und das Magazinrohr vollkommen leer
sind! (Die Anleitungen zur Ladung und
zum Entladen der Waffe aufmerksam
lesen).
17
Page 54

53
Seguro del arma
El pulsador de seguro "de cerrojo" está
posicionado en la parte delantera del
guardamonte. Para introducir el seguro presionar el botón: con el seguro
accionado no se debe ver el anillo
rojo que indica la posición de disparo
(figs. 17-18).
Carga
Antes de efectuar cualquier tipo de
operación en el arma, cerciorarse siempre que la cámara de disparo y el tubo
del almacén estén ¡completamente
vacíos! (Lea atentamente las instruc-
ciones de carga y descarga del arma).
Patilha de segurança da arma
O botão da patilha de segurança
"transversal" está situado na parte
anterior do guarda-mato. Para accionar a patilha de segurança, pressionar
o botão: com a patilha de segurança
accionada, não deve ser visível o anel
vermelho que indica a posição de
disparo (fig. 17-18).
Carregamento
Antes de realizar qualquer tipo de
intervenção na arma, certificar-se sempre de que a câmara e o tubo depósito
estão completamente vazios! (Ler aten-
tamente as instruções de carregamento
e descarregamento da arma).
Предохранительные приспособления
Поперечный штифтовой
предохранитель находится на
передней части спусковой скобы. Для
включения предохранителя нажмите на
кнопку. При включённом
предохранителе красная проточка
закрыта. Открытая красная проточка
соответствует положению "Огонь" (рис.
17-18).
Заряжание
Перед выполнением каких-либо
манипуляций с ружьём убедитесь в
том, что оно полностью разряжено!
(Внимательно изучите указания по
заряжанию и разряжанию ружья).
∞ÛÊ¿ÏÂÈ· ÙÔ˘ fiÏÔ˘
∆Ô ÎÔ˘Ì› Ù˘ ·ÛÊ¿ÏÂÈ·˜ ‚Ú›ÛÎÂÙ·È ÛÙÔ
ÂÌÚfi˜ ̤ÚÔ˜ Ù˘ ÛηӉ·ÏÔı‹Î˘. °È·
Ó· ‚¿ÏÂÙ ÙËÓ ·ÛÊ¿ÏÂÈ·, ȤÛÙ ÙÔ
ÎÔ˘Ì›: ÙÔ fiÏÔ Â›Ó·È ·ÛÊ·ÏÈṲ̂ÓÔ fiÙ·Ó
‰ВУ В›У·И ФЪ·Щfi ЩФ ОfiООИУФ ‰·ОЩ˘П›‰И
Ф˘ ˘Ф‰ВИОУ‡ВИ fiЩИ ЩФ ЩФ˘К¤ОИ В›У·И
¤ЩФИМФ У· ˘ЪФ‚ФП‹ЫВИ (ÂÈÎ. 17-18).
∂У¤ЪБВИВ˜ Б¤МИЫЛ˜
¶ÚÈÓ Ú·ÁÌ·ÙÔÔÈ‹ÛÂÙ ÔÔÈ·‰‹ÔÙÂ
ÂÓ¤ÚÁÂÈ·, ‚‚·Èˆı›Ù fiÙÈ Ë ı·Ï¿ÌË Î·È Ë
·Фı‹ОЛ В›У·И ВУЩВПТ˜ ¿‰ВИ·! (¢È·‚¿ÛÙÂ
ЪФЫВОЩИО¿ ЩИ˜ Ф‰ЛБ›В˜ Ы¯ВЩИО¿ МВ ЩЛ
Б¤МИЫЛ О·И ЩЛУ ·ФБ¤МИЫЛ ЩФ˘ fiПФ˘).
18
Page 55

54
A seconda del modulo serbatoio in
dotazione, della lunghezza delle cartucce e delle norme vigenti in materia, il serbatoio di alimentazione è
predisposto per contenere da un minimo di 1 a un massimo di 9 cartucce,
colpo in canna escluso.
Procedura
di caricamento
ATTENZIONE: l'arma deve essere in
sicura (vedi “Sicura dell'arma”) e con
cane armato (per consentire alla leva
fermo cartuccia di bloccare le cartucce introdotte nel serbatoio).
ATTENZIONE: per maggior sicurezza,
verificare sempre che l'arma sia scarica aprendo l’otturatore. Riportare poi
l'otturatore in chiusura.
Depending on the magazine tube
Module, the length of the cartridges
and the relative regulations in force,
the ammunitions magazine may contain from a minimum of 1 to a maximum of 9 cartridges, excluding the
round in the barrel.
Loading procedure
WARNING: make sure that the gun
safety catch (see “Gun safety catch”) is
engaged and the hammer cocked (so
that the cartridge stop latch can retain
the cartridges as they are inserted in
the magazine).
WARNING: for safety reasons, always
verify if by opening the bolt the shot-
gun is unloaded. Then close the bolt
again.
Selon le module magasin fourni en
dotation, et en fonction de la longueur
des cartouches et des normes en vigueur en la matière, le magasin d’alimentation est prédisposé pour contenir un minimum de 1 à un maximum
de 9 cartouches, exclu le coup dans le
canon.
Procédure
de chargement
ATTENTION: la sûreté de l’arme doit
être enclenchée (voir "Sûreté de l’arme") et le chien armé (pour permettre
au levier de blocage cartouche de bloquer les cartouches introduites dans le
magasin).
ATTENTION: pour plus de sécurité,
vérifiez toujours que votre arme soit
déchargée en ouvrant l’obturateur.
Remettez ensuite l’obturateur dans sa
position de fermeture.
Je nach zur Ausstattung gehörendem
Magazin-Modul, Länge der Patronen
und geltenden einschlägigen Vorschriften ist das Magazin angelegt um zwischen mindestens 1 bis maximal 9
Patronen zu enthalten, Schuss im Lauf
ausgeschlossen.
Ladungsvorgang
ACHTUNG! Die Waffe muss gesichert
(siehe "Sicherung der Waffe") und der
Hahn muss gespannt sein (damit die
Magazinsperrklinke die im Magazin
vorhandenen Patronen blockiert).
ACHTUNG: Zur besseren Sicherheit
öffnen Sie den Verschluss und prüfen,
ob die Waffe entladen ist, danach
schließen Sie den Verschluss wieder.
Page 56

55
Según el módulo almacén de dotación, el largo de los cartuchos y las
normas vigentes en la materia, el almacén de alimentación está colocado
para permitir de un mínimo de 1 a un
máximo de 9 cartuchos, disparo en
cañón excluido.
Procedimiento
de carga
ATENCIÓN: El arma debe estar con
seguro (ver "Seguro del arma") y con
percutor armado (para que la palan-
ca-seguro-cartucho pueda bloquear
los cartuchos introducidos en el almacén).
ATENCIÓN: para mayor seguridad,
controle siempre que el arma esté
descargada abriendo el obturador. Vol-
ver a poner luego el obturador en cierre.
Dependendo do módulo depósito fornecido, do comprimento dos cartuchos e das normas vigentes nesta
matéria, o depósito de alimentação foi
concebido para conter entre um mínimo de 1 e o máximo de 9 cartuchos,
excluindo o projéctil no cano.
Procedimento
de carregamento
ATENÇÃO: a arma deve estar com a
patilha de segurança accionada (ver
"Patilha de segurança da arma") e com
cão armado (para permitir que a ala-
vanca-bloqueio-cartucho bloqueie os
cartuchos introduzidos no depósito).
ATENÇÃO: para maior segurança,
verificar sempre se a arma está descarregada abrindo o obturador. De se-
guida, voltar a colocar o obturador na
posição fechada.
В зависимости от варианта исполнения,
длины патрона и особенностей
национального законодательства
трубчатый магазин может вмещать от
одного до девяти патронов, не считая
патрона в патроннике.
Порядок заряжания
ВНИМАНИЕ: во время заряжания
ружьё должно быть поставлено на
предохранитель (см. раздел
"Предохранительные приспособления"),
а курок взведён (последнее
необходимо для того, чтобы
ограничитель удерживал патроны,
находящиеся в магазине).
ВНИМАНИЕ: для большей безопасности
всегда удостоверяйтесь, в том, что
ваше ружьё разряжено, открыв затвор
и осмотрев патронник. Затем вновь
закройте затвор.
∞У¿ПФБ· МВ ЩЛ ¯ЪЛЫИМФФИФ‡МВУЛ
МФУ¿‰· ·Фı‹ОЛ˜, ЩФ М‹ОФ˜ ЩˆУ
К˘ЫИББ›ˆУ О·И ЩЛУ ИЫ¯‡Ф˘Ы· УФМФıВЫ›·,
Л ·Фı‹ОЛ ЩЪФКФ‰ФЫ›·˜ МФЪВ› У·
ВЪИ¤¯ВИ ·fi 1 ¤ˆ˜ 9 К˘Ы›ББИ·, ВОЩfi˜
ЩФ˘ К˘ЫИББ›Ф˘ ЫЩЛУ О¿УУЛ.
¢È·‰Èηۛ· Á¤ÌÈÛ˘
¶ƒ√™√Ã∏: ∆Ô fiÏÔ Ú¤ÂÈ Ó· ›ӷÈ
·ÛÊ·ÏÈṲ̂ÓÔ (‚Ï. “∞ÛÊ¿ÏÂÈ· ÙÔ˘
fiÏÔ˘”) Î·È Ì ÔÏÈṲ̂ÓÔ ÎfiÎÔÚ· (ÁÈ·
Ó· ÂÈÙÚ¤ÂÈ ÛÙÔÓ ·Ó·ÛÙÔϤ· Ó·
ÌÏÔοÚÂÈ Ù· Ê˘Û›ÁÁÈ· ÛÙËÓ ·Ôı‹ÎË).
¶ƒ√™√Ã∏: ÁÈ· ÌÂÁ·Ï‡ÙÂÚË ·ÛÊ¿ÏÂÈ·,
ÂϤÁ¯ÂÙ ¿ÓÙ· Â¿Ó ÙÔ fiÏÔ Â›Ó·È ¿‰ÂÈÔ
·ÓÔ›ÁÔÓÙ·˜ ÙÔ ÎÏ›ÛÙÚÔ. ∆ÔÔıÂÙ‹ÛÙÂ
ÙÔ ÎÏ›ÛÙÚÔ ЫВ ОПВИЫЩ‹ ı¤ЫЛ.
Page 57

56
1) La leva-discesa-cartuccia deve
presentare il settore marcato in
rosso ben visibile (fig. 19). Se
necessario, portarla nella giusta
posizione premendo il pulsante-
leva-fermo-cartuccia (fig. 20) e
aprendo contemporaneamente a
mano l'otturatore, da riposizionare poi in chiusura.
2) Con otturatore chiuso e cane armato rovesciare l'arma (orientando la canna verso il basso).
3) Infilare una cartuccia a fondo nel
serbatoio (fig. 21) finchè la levafermo-cartuccia aggancia automa-
ticamente la cartuccia, trattenendola (fig. 22).
1) The section of cartridge drop
lever marked in red must be well
visible (fig. 19). If necessary, bring
it into the right position by pressing
the cartridge stop latch button (fig.
20) and simultaneously manually
opening the bolt, which will be
repositioned on closure.
2) With the bolt closed and the hammer cocked, reverse the gun (pointing the barrel downwards).
3) Insert a cartridge into the maga-
zine (fig. 21): push it until it is
retained by the cartridge stop latch
which engages automatically (fig.
22).
1) Le levier de descente cartouche
doit présenter le secteur marqué
en rouge bien visible (fig. 19). Si
nécessaire, positionnez-le correctement en poussant le levier de
blocage cartouche (fig. 20) tout en
ouvrant manuellement l’obtura-
teur, qu’il faudra ensuite remettre
sur sa position de fermeture.
2) Renverser l’arme (en orientant le
canon vers le bas) en s’assurant
que l’obturateur soit fermé et le
chien armé.
3) Introduire une cartouche à fond
dans le magasin (fig. 21) jusqu’à
ce que le levier de blocage cartouche saisisse automatiquement la
cartouche en la retenant (fig. 22).
1) Der rote Punkt auf dem Patronen-
freigabehebel muss deutlich sicht-
bar sein (Abb. 19). Um dies zu bewerkstelligen, muss ggfs. der Maga-
zinsperrklinkenknopf gedrückt
(Abb. 20), und gleichzeitig der Verschluss per Hand geöffnet und wie-
der geschlossen werden.
2) Die Waffe bei geschlossenem Verschluss und gespanntem Hahn umdrehen (indem der Lauf nach unten
gerichtet wird).
3) Eine Patrone tief in das Magazin
einschieben (Abb. 21); die Magazinsperrklinke muss automatisch
hinter der Patrone einrasten und
diese blockieren (Abb. 22).
19 20
Page 58

57
1) La palanca-bajada-cartucho debe
presentar el sector marcado con
rojo bien visible (fig. 19). Si es
necesario, ponerla en la posición
justa presionando el botón-palan-
ca-bloqueo-cartucho (fig. 20) y al
mismo tiempo abriendo con la
mano el obturador, para volver a
su posición luego en el cierre.
2) Con el obturador cerrado y el martillo armado voltear el arma (orientando el cañón hacia abajo).
3) Ensartar un cartucho hasta el fon-
do en el almacén (fig. 21) hasta
que la palanca-bloqueo-cartucho
enganche automáticamente el cartucho, reteniéndolo (fig. 22).
1) A alavanca-descida-cartucho deve
apresentar o sector marcado a ver-
melho bem visível (fig. 19). Se
necessário, colocá-la na posição
correcta pressionando o botão-ala-
vanca-bloqueio-cartucho (fig. 20)
ao mesmo tempo que se abre
manualmente o obturador, que
deverá ser colocado novamente na
posição fechada.
2) Com o obturador fechado e o cão
armado, virar a arma ao contrário
(orientando o cano para baixo).
3) Introduzir um cartucho a fundo no
depósito (fig. 21), de modo que a
alavanca-bloqueio-cartucho enga-
te automaticamente o cartucho,
retendo-o (fig. 22).
1) На кнопке отсекателя магазина
должна отчётливо просматриваться
красная полоска (рис. 19). При
необходимости установите её в
правильное положение, нажав на
кнопку ограничителя (рис. 20) и
открыв одновременно затвор,
который затем снова нужно закрыть.
2) Закрыв затвор и взведя курок,
перевернуть ружьё (при этом ствол
должен быть направлен вниз).
3) Полностью вставить патрон в
магазин (рис. 21). Убедиться в том,
что ограничитель вошёл в
зацепление с патроном и
зафиксировал его (рис. 22).
1) √ ·ÂÏ¢ıÂÚˆÙ‹˜ Ú¤ÂÈ Ó·
‚Ú›ÛÎÂÙ·È Û ı¤ÛË ÌÂ В˘‰И¿ОЪИЩФ ЩФУ
ОfiООИУФ ЩФМ¤· (ÂÈÎ. 19). ∂Ó ·Ó¿ÁÎË,
ÙÔÔıÂÙ‹ÛÙÂ ÙÔÓ ÛÙË ÛˆÛÙ‹ ı¤ÛË
Ȥ˙ÔÓÙ·˜ ÙÔ ÎÔ˘Ì› ÙÔ˘ ·Ó·ÛÙÔϤ·
(ÂÈÎ. 20) Î·È ·ÓÔ›ÁÔÓÙ·˜ Ù·˘ÙÔ¯ÚfiÓˆ˜
Ì ÙÔ ¯¤ÚÈ ÙÔ ÎÏ›ÛÙÚÔ, ÁÈ· Ó· ÙÔ
ÎÏ›ÛÂÙÂ Î·È ¿ÏÈ ÛÙË Û˘Ó¤¯ÂÈ·.
2) ªВ ОПВИЫЩfi ЩФ ОПВ›ЫЩЪФ О·И ЩФУ
ОfiОФЪ· ФПИЫМ¤УФ, ·У·Ф‰ФБ˘Ъ›ЫЩВ
ЩФ fiПФ (ЫЩЪ¤КФУЩ·˜ ЩЛУ О¿УУЛ
ЪФ˜ ЩФ ¿ЩˆМ·).
3) ∆ÔÔıÂÙ‹ÛÙ ¤Ó· Ê˘Û›ÁÁÈ ÛÙÔ
‚¿ıÔ˜ Ù˘ ·Ôı‹Î˘ (ÂÈÎ. 21) ¤ˆ˜
fiÙÔ˘ Ô ·Ó·ÛÙÔϤ·˜ ÙÔ ÌÏÔοÚÂÈ
·˘ÙfiÌ·Ù· Û˘ÁÎÚ·ÙÒÓÙ·˜ ÙÔ (ÂÈÎ.
22).
21 22
Page 59

58
Ripetere l'operazione sino al completo caricamento del serbatoio.
ATTENZIONE: il caricamento del ser-
batoio deve essere effettuato sempre
con il cane armato, per consentire alla
leva-fermo-cartuccia di bloccare le cartucce introdotte nel serbatoio stesso.
A questo punto l'arma non può ancora sparare: si deve introdurre una cartuccia in canna, operando come
segue:
1) Aprire l'otturatore e trattenerlo in
tale posizione mentre si introduce
contemporaneamente una cartuccia in canna attraverso la finestra
di espulsione del bossolo (fig. 23).
Repeat the operation until the magazine is fully loaded.
WARNING: the gun must be loaded
with the hammer cocked so that the
cartridge stop latch can retain the cartridges as they are inserted in the magazine.
At this point the gun still cannot be
fired: a cartridge must be loaded into
the barrel, as follows:
1) Keep the bolt open and in the
same time insert a cartridge into
the barrel through the case ejection port (fig. 23).
Répéter l’opération jusqu’au chargement complet du magasin.
ATTENTION: le chargement du maga-
sin doit toujours être effectué avec le
chien armé, pour permettre au levier
de blocage cartouche de bloquer les
cartouches introduites dans le magasin.
Cependant, à ce point, l’arme ne peut
pas encore tirer: il faut introduire une
cartouche dans le canon, en procédant
comme suit:
1) Ouvrir l’obturateur et le maintenir
dans cette position pendant qu’on
introduit une cartouche dans le
canon à travers la fenêtre d’expulsion de la douille (fig. 23).
Diesen Vorgang bis zum völligen
Laden des Magazins wiederholen.
ACHTUNG: Das Magazin muss mit
gespanntem Hahn geladen werden,
damit die Magazinsperrklinke die
Patronen blockieren kann, die ins
Magazin geschoben werden.
Das Gewehr ist noch nicht schussbereit, denn vorher muss eine Patrone in
das Patronenlager des Laufes eingeführt werden; indem man wie folgt
vorgeht:
1) Den Verschluss öffnen und bei
dieser Verschlussstellung gleichzeitig manuell eine Patrone durch
die Hülsenauswurföffnung stecken
(Abb. 23).
23
Page 60

59
Repetir la operación hasta que quede
completamente cargado el almacén.
ATENCIÓN: la carga del almacén
debe realizarse siempre con el martillo
cargado, para permitir que la palancabloqueo-cartucho bloquee los cartuchos introducidos en el almacén.
Llegados a este punto el arma todavía
no puede disparar: Hay que introducir
un cartucho en el cañón, tras realizar
las siguientes operaciones:
1) Abrir el obturador y retenerlo en
dicha posición mientras al mismo
tiempo se introduce un cartucho
en el cañón mediante la ventana
de expulsión del casquillo (fig. 23).
Repetir a operação até o depósito
estar completamente carregado.
ATENÇÃO: o carregamento do depósi-
to deve ser efectuado sempre com o
cão armado para permitir que a alavanca-bloqueio-cartucho bloqueie os
cartuchos introduzidos no próprio depósito.
A arma ainda não está pronta a disparar: é necessário introduzir um cartucho no cano, procedendo da seguinte forma:
1) Abrir o obturador e mantê-lo nessa
posição enquanto se introduz simultaneamente um cartucho no
cano através da janela de ejecção
do invólucro (fig. 23).
Повторить вышеописанное действие до
полного снаряжения магазина.
ВНИМАНИЕ: снаряжение магазина
должно осуществляться при взведённом
курке с тем, чтобы ограничитель смог
зафиксировать патрон в магазине.
После снаряжения магазина ружьё
ещё не может стрелять. Для этого
нужно дослать патрон в патронник,
действуя следующим образом:
1) Отвести затвор в заднее положение
и, держа его открытым, вставить
патрон в патронник через
гильзовыводящее окно ствольной
коробки (рис. 23).
∂·Ó·Ï¿‚ÂÙ ÙËÓ ÂÓ¤ÚÁÂÈ· ̤¯ÚÈ Ó·
ÁÂÌ›ÛÂÙ ÙËÓ ·Ôı‹ÎË.
¶ƒ√™√Ã∏: ÙÔ Á¤ÌÈÛÌ· Ù˘ ·Ôı‹Î˘
Ú¤ÂÈ Ó· Á›ÓÂÙ·È ¿ÓÙ· Ì ÔÏÈṲ̂ÓÔ
ÎfiÎÔÚ· ÁÈ· Ó· ÂÈÙÚ¤ÂÈ ÛÙÔÓ
·Ó·ÛÙÔϤ· Ó· ÌÏÔοÚÂÈ Ù· Ê˘Û›ÁÁÈ·
ÛÙËÓ ·Ôı‹ÎË.
™ÙÔ ÛËÌÂ›Ô ·˘Ùfi ÙÔ fiÏÔ ‰ÂÓ Â›Ó·È
·ОfiМЛ ¤ЩФИМФ У· ˘ЪФ‚ФП‹ЫВИ: ı·
Ъ¤ВИ У· ‚¿ПВЩВ ¤У· К˘Ы›ББИ ЫЩЛУ
О¿УУЛ ВК·ЪМfi˙ФУЩ·˜ ЩЛУ ·ОfiПФ˘ıЛ
‰И·‰ИО·Ы›·:
1) ∞УФ›НЩВ ЩФ ОПВ›ЫЩЪФ О·И ОЪ·Щ‹ЫЩВ ЩФ
ЫЩЛ ı¤ЫЛ ·˘Щ‹ ЩФФıВЩТУЩ·˜
Щ·˘Щfi¯ЪФУ· ¤У· К˘Ы›ББИ ЫЩЛУ О¿УУЛ
·fi ÙËÓ Ô‹ ·fiÚÚȄ˘ ÙÔ˘ Î¿Ï˘Î·
(ÂÈÎ. 23).
Page 61

60
2) Rilasciare l'otturatore che, scorrendo in avanti, incamera la cartuccia e si arresta nella posizione
di chiusura (fig. 24).
ATTENZIONE: anche se l'arma è in
sicura, durante questa operazione è
opportuno orientare la canna in direzione di sicura prudenza (vedi “Sicura
dell’arma”).
A questo punto l'arma è carica: portando la sicura in posizione di sparo
(anello rosso visibile) l'arma è pronta
a sparare.
2) Release the bolt which, by moving
forward, will push the cartridge
into the chamber and stop in the
closed position (fig. 24).
WARNING: during this operation,
always point the gun in a safe direction, even though the safety catch is
engaged (see “Gun safety catch”).
Now the gun is loaded: when the
safety catch is moved to firing position
(red ring visible), the gun is ready for
use.
2) Relâcher l’obturateur qui, en glissant en avant, emprisonne la cartouche et s’arrête en position de
fermeture (fig. 24).
ATTENTION: même si la sûreté de
l’arme est enclenchée, il est opportun,
durant cette opération, d’orienter le
canon vers une direction qui ne présente aucun danger (voir “Sûreté de
l’arme").
A ce point, l’arme est chargée: en mettant la sûreté en position de tir (bague
rouge visible), l’arme est prête pour
tirer.
2) Den Verschluss freigeben; durch
die Vorwärtsbewegung wird die
Patrone in das Patronenlager befördert, wobei der Verschlussknopf
hinter der Patrone verriegelt (Abb.
24).
ACHTUNG: Bei diesen Ladevorgän-
gen muss der Lauf immer in eine
sichere Richtung gehalten werden,
auch wenn die Waffe gesichert ist
(siehe “Sicherung der Waffe”).
Nun ist die Waffe geladen: nach dem
Entsichern (der rote Ring ist sichtbar)
ist die Waffe schussbereit.
24
Page 62

61
2) Liberar el obturador que, deslizando hacia adelante, encanalando el
cartucho, se detiene en la posición
de cierre (fig. 24).
ATENCIÓN: aún cuando el arma está
en seguro durante esta operación conviene orientar el cañón en dirección
de seguro prudente (véase “Seguro del
arma”).
A partir de este punto el arma está cargada llevando el seguro en posición
de disparo (anillo rojo visible) el arma
está lista para disparar.
2) Libertar o obturador que, ao deslizar para a frente, aloja o cartucho
na câmara e pára na posição fechada (fig. 24).
ATENÇÃO: ainda que a patilha de
segurança esteja accionada, durante
esta operação convém orientar o cano
numa direcção prudente e segura (ver
“Patilha de segurança da arma”).
A arma está agora carregada: ao colocar a patilha de segurança na posição
de disparo (anel vermelho visível), a
arma está pronta a disparar.
2) Отпустить затвор, который,
двигаясь вперёд, дошлёт патрон и
остановится в запертом
положении. (рис. 24).
ВНИМАНИЕ: при выполнении
вышеописанных действий постоянно
держите ствол ружья в безопасном
направлении, несмотря на то, что
ружьё поставлено на предохранитель
(см. раздел “Предохранительные
устройства”).
Теперь ваше ружьё заряжено. После
перевода предохранителя в боевое
положение (красная проточка открыта)
оно готово к выстрелу.
2) ∂ПВ˘ıВЪТЫЩВ ЩФ ОПВ›ЫЩЪФ ЩФ ФФ›Ф,
ВИЫЩЪ¤КФУЩ·˜ ЫЩЛ ı¤ЫЛ ЩФ˘, ı·
ЫЪТНВИ ЩФ К˘Ы›ББИ ЫЩЛ ı·П¿МЛ О·И
ı· ·ОИУЛЩФФИЛıВ› ЫВ ОПВИЫЩ‹ ı¤ЫЛ
(ВИО. 24).
¶ƒ√™√Ã∏: ηٿ ÙË ‰È¿ÚÎÂÈ· Ù˘
ÂÓ¤ÚÁÂÈ·˜ ·˘Ù‹˜, ·ÎfiÌ· ÎÈ ·Ó ÙÔ fiÏÔ
Â›Ó·È ·ÛÊ·ÏÈṲ̂ÓÔ, ηÏfi Â›Ó·È Ó·
ÛÙÚ¤ÊÂÙ ÙËÓ Î¿ÓÓË Û ·fiÏ˘Ù·
·ÛÊ·Ï‹ ηÙ‡ı˘ÓÛË (‚Ï. “∞ÛÊ¿ÏÂÈ· ÙÔ˘
fiÏÔ˘”).
™ЩФ ЫЛМВ›Ф ·˘Щfi ЩФ fiПФ В›У·И БВМ¿ЩФ.
º¤ЪУФУЩ·˜ ЩЛУ ·ЫК¿ПВИ· ЫЩЛУ
О·Щ¿ППЛПЛ ı¤ЫЛ (МВ ФЪ·Щfi ЩФ ОfiООИУФ
‰·¯Щ˘П›‰И), ЩФ ЩФ˘К¤ОИ В›У·И ¤ЩФИМФ У·
˘ЪФ‚ФП‹ЫВИ.
Page 63

62
Sostituzione cartuccia
(Operazione da effettuarsi con arma
in sicura - vedi "Sicura dell'arma" - e
con canna orientata in direzione di
sicura prudenza).
Per sostituire una cartuccia già incamerata, si possono seguire due procedure:
A) introduzione manuale della nuova
cartuccia;
B) azionamento della leva-discesa-
cartuccia.
Cartridge replacement
(This operation must be carried out
with the gun safety catch engaged see “Gun safety catch” and barrel
pointed in a safe direction).
To replace a cartridge in the chamber,
two procedures can be followed:
A) by manual replacement of a new
cartridge;
B) by using the cartridge drop lever.
Remplacement cartouche
(Cette opération doit être effectuée
avec la sûreté enclenchée - voir
"Sûreté de l’arme" et avec le canon
orienté dans une direction qui ne présente aucun danger).
Pour remplacer une cartouche déjà
introduite dans la chambre, il est possible de suivre deux procédures:
A) introduction manuelle de la nou-
velle cartouche;
B) actionnement du levier de descen-
te cartouche.
Auswechseln der Patrone
(Dieser Vorgang ist bei gesicherter
Waffe durchzuführen - siehe "Sicherung der Waffe" - wobei der Lauf in
eine sichere Richtung gehalten werden muss).
Zum Auswechseln einer bereits dem
Patronenlager zugeführten Patrone
können zwei Vorgänge befolgt werden:
A) Manuelle Zuführung der neuen
Patrone;
B) Betätigung des Patronenfreigabe-
hebels.
Page 64

63
Sustitución del cartucho
(Operación que debe realizarse con el
arma en seguro - véase "Seguro del
arma" y con el cañón orientado en
dirección de seguro prudente).
Para cambiar un cartucho que ya está
en la cámara, se pueden seguir dos
procedimientos:
A) introducción manual del nuevo
cartucho;
B) accionamiento de la palanca-baja-
da-cartucho.
Substituição do cartucho
(Operação a efectuar com a patilha de
segurança accionada - ver “Patilha de
segurança da arma" e com o cano
orientado numa direcção prudente e
segura).
A substituição de um cartucho já alojado na câmara pode ser realizada através de dois procedimentos:
A) introdução manual do novo cartu-
cho;
B) accionamento da alavanca-desci-
da-cartucho.
Замена патрона
(во время замены патрона ружьё
должно стоять на предохранителе см. раздел “Предохранительные
устройства”, а ствол должен быть
направлен в безопасную сторону).
Замена патрона, уже досланного в
патронник, может осуществляться
двумя способами:
A) ручная замена патрона;
Б) замена патрона при помощи
отсекателя магазина.
∞УЩИО·Щ¿ЫЩ·ЫЛ К˘ЫИББИФ‡
(√È ВУ¤ЪБВИВ˜ Ú¤ÂÈ Ó·
Ú·ÁÌ·ÙÔÔÈÔ‡ÓÙ·È Ì ÙÔ fiÏÔ
·ÛÊ·ÏÈṲ̂ÓÔ - ‚Ï. “∏ ·ÛÊ¿ÏÂÈ· ÙÔ˘
fiÏÔ˘” Î·È Ì ÙËÓ Î¿ÓÓË ÛÙÚ·Ì̤ÓË ÛÂ
·fiÏ˘Ù· ·ÛÊ·Ï‹ ηÙ‡ı˘ÓÛË).
°È· Ó· ·ÓÙÈηٷÛÙ‹ÛÂÙ ¤Ó· Ê˘Û›ÁÁÈ Ô˘
¤¯ÂÈ ÙÔÔıÂÙËı› ÛÙË ı·Ï¿ÌË, ÌÔÚ›ÙÂ
Ó· ÂÊ·ÚÌfiÛÂÙ ‰‡Ô ‰È·‰Èηۛ˜:
A) ВИЫ·БˆБ‹ У¤Ф˘ К˘ЫИББИФ‡ МВ ЩФ ¯¤ЪИ
B) ¯Ú‹ÛË ·ÂÏ¢ıÂÚˆÙ‹.
Page 65

64
A) - introduzione manuale della cartuccia
1) Appoggiare il calcio sull'anca ed
aprire l'otturatore: la cartuccia in
camera viene estratta ed espulsa
(fig. 25).
2) Introdurre in canna, anche parzialmente, la nuova cartuccia attra-
verso la finestra di espulsione (fig.
26), rilasciando poi l'otturatore.
A) - manual replacement of a new
cartridge
1) Rest the stock on your hip and
open the bolt: the cartridge in the
chamber is extracted and ejected
(fig. 25).
2) Load or partially load the new car-
tridge into the barrel through the
ejection aperture (fig. 26), then
release the bolt.
A) - introduction manuelle de la nouvelle cartouche
1) Appuyez la crosse sur votre han-
che et ouvrez l’obturateur: la cartouche présente dans la chambre
est extraite et expulsée (fig. 25).
2) Introduisez la nouvelle cartouche
dans le canon, même partiellement, à travers la fenêtre d’expul-
sion (fig. 26), et relâchez ensuite
l’obturateur.
A) - Manuelle Zuführung der Patrone
1) Den Schaft an der Hüfte aufstützen
und den Verschluss öffnen: die
Patrone im Patronenlager wird extrahiert und ausgeworfen (Abb. 25).
2) Die neue Patrone auch teilweise
durch die Hülsenauswurföffnung
in den Lauf einsetzen (Abb. 26),
dann den Verschluss loslassen.
25
Page 66

65
A) - introducción manual del nuevo
cartucho
1) Apoyar la culata en la cadera y
abrir el obturador: el cartucho en
la cámara se extrae y expulsa (fig.
25).
2) Introducir en el cañón, aún par-
cialmente, el nuevo cartucho me-
diante la ventana de expulsión
(fig. 26), liberar luego el obturador.
A) - introdução manual do novo cartucho
1) Apoiar a coronha na anca e abrir
o obturador: o cartucho alojado
na câmara é extraído e ejectado
(fig. 25).
2) Introduzir o novo cartucho no cano, até parcialmente, através da
janela de ejecção (fig. 26), libertando de seguida o obturador.
A) - ручная замена патрона
1) Упереть приклад в бедро и
открыть затвор. Патрон будет
выброшен из патронника и
отражён за пределы ствольной
коробки (рис. 25).
2) Вставить новый патрон в
патронник (можно частично) через
гильзовыводящее окно (рис. 26),
затем отпустить затвор.
A) - ВИЫ·БˆБ‹ У¤Ф˘ К˘ЫИББИФ‡ МВ ЩФ
¯¤ЪИ
1) ∞ÎÔ˘Ì‹ÛÙ ÙÔ ÎÔÓÙ¿ÎÈ ÛÙÔ ÌËÚfi ηÈ
·ÓÔ›ÍÙ ÙÔ ÎÏ›ÛÙÚÔ: ÙÔ Ê˘Û›ÁÁÈÔ
ÛÙËÓ Î¿ÓÓË ·Ô‚¿ÏÏÂÙ·È (ÂÈÎ. 25).
2) ∆ÔÔıÂÙ‹ÛÙ ÛÙËÓ Î¿ÓÓË, ¤ÛÙˆ ηÈ
ÂÓ Ì¤ÚÂÈ, ÙÔ Ó¤Ô Ê˘Û›ÁÁÈÔ ·fi ÙËÓ
Ô‹ ·fiÚÚÈ„Ë (ВИО. 26) О·И ЫЩЛ
Ы˘У¤¯ВИ· ВПВ˘ıВЪТЫЩВ ЩФ ОПВ›ЫЩЪФ.
26
Page 67

66
B) - azionamento della leva-discesacartuccia
1) Appoggiare il calcio sull'anca,
premere la leva-discesa-cartuccia
(fig. 27) ed aprire l'otturatore: la
cartuccia in camera viene estratta
ed espulsa (fig. 28).
2) Lasciare libera la manetta: si ottie-
ne così il passaggio rapido di una
cartuccia dal serbatoio alla came-
ra di scoppio.
B) - using the cartridge drop lever
1) Rest the stock on your hip, press
the cartridge drop lever (fig. 27)
and open the bolt: the cartridge in
the chamber is extracted and ejected (fig. 28).
2) Leave the cocking lever free: this
allows a cartridge to rapidly pass
from the magazine tube to the
chamber.
B) - actionnement du levier de descente cartouche
1) Appuyez la crosse sur votre han-
che, appuyez sur le levier de
descente cartouche (fig. 27) et
ouvrez l'obturateur: la cartouche
présente dans la chambre est
extraite et expulsée (fig. 28).
2) Laissez la manette libre: on
obtient ainsi le passage rapide d’une cartouche du magasin à la
chambre d’explosion.
B) - Betätigung des Patronenfreigabehebels
1) Den Schaft an der Hüfte aufstüt-
zen, den Patronenfreigabehebel
betätigen (Abb. 27) und den Ver schluss öffnen: die Patrone im
Patronenlager wird extrahiert und
ausgeworfen (Abb. 28).
2) Den Spannhebel freigeben: so
wechselt die Patrone schnell vom
Magazin in das Patronenlager.
27
Page 68

67
B) - accionamiento de la palanca-bajada-cartucho
1) Apoyar la culata en la cadera, presionar la palanca-bajada-cartucho
(fig. 27) y abrir el obturador: el cartucho en la cámara se extrae y
expulsa (fig. 28).
2) Dejar libre la maneta: se obtiene
de este modo el pasaje rápido de
un cartucho del almacén a la cá-
mara de explosión.
B) - accionamento da alavanca-descida-cartucho
1) Apoiar a coronha na anca, pressionar a alavanca-descida-cartucho (fig. 27) e abrir o obturador: o
cartucho alojado na câmara é
extraído e ejectado (fig. 28).
2) Soltar a manete: obtém-se assim a
passagem rápida de um cartucho
do depósito à câmara.
B) - замена патрона при помощи
отсекателя магазина
1) Упереть приклад в бедро, нажать,
одновременно сместив вниз,
кнопку ограничителя (рис. 27) и
открыть затвор. Патрон будет
выброшен из патронника и
отражён за пределы ствольной
коробки (рис. 28).
2) Отпустить затворную рукоятку.
При этом патрон, находящийся в
магазине досылается в патронник.
B) - ¯Ú‹ÛË ·ÂÏ¢ıÂÚˆÙ‹
1) ∞ÎÔ˘Ì‹ÛÙ ÙÔ ÎÔÓÙ¿ÎÈ ÛÙÔ ÌËÚfi,
ȤÛÙ ÙÔÓ ·ÂÏ¢ıÂÚˆÙ‹ (ÂÈÎ. 27)
Î·È ·ÓÔ›ÍÙ ÙÔ ÎÏ›ÛÙÚÔ: ÙÔ Ê˘Û›ÁÁÈÔ
ÛÙËÓ Î¿ÓÓË ·Ô‚¿ÏÏÂÙ·È (ÂÈÎ. 28).
2) ∞Ê‹ÛÙ ÂχıÂÚÔ ÙÔ ÌÔ¯Ïfi: Ì ÙÔÓ
ÙÚfiÔ ·˘Ùfi ÂÈÙ˘Á¯¿ÓÂÙ·È Ë Ù·¯Â›·
›ÛÔ‰Ô˜ ÂÓfi˜ Ê˘ÛÈÁÁ›Ô˘ ·fi ÙËÓ
·Ôı‹ÎË ÛÙË ı·Ï¿ÌË.
28
Page 69

68
Scaricamento dell’arma
(Operazione da effettuarsi con arma
in sicura - vedi "Sicura dell'arma" - e
con canna orientata in direzione di
sicura prudenza).
Per scaricare l'arma operare come
segue:
1) Inserire la sicura (fig. 29) ed aprire
manualmente l'otturatore: la cartuccia in camera di scoppio viene
estratta ed espulsa (fig. 30).
2) Lasciare la manetta e riportare
l'otturatore in chiusura (fig. 31).
Unloading
(This operation must be carried out
with the gun safety catch engaged see “Gun safety catch” and the barrel
pointed in safe direction).
To unload the gun, proceed as follows:
1) Engage the safety catch (fig. 29)
and manually open the bolt: the
cartridge in the chamber is extract-
ed and ejected (fig. 30).
2) Release the cocking lever and
bring the bolt back into a closed
position (fig. 31).
Déchargement de l’arme
Cette opération doit être effectuée
avec la sûreté enclenchée - voir
"Sûreté de l’arme" et avec le canon
orienté dans une direction qui ne présente aucun danger).
Pour décharger l’arme, procédez comme suit:
1) Enclenchez la sûreté (fig. 29) et
ouvrez manuellement l'obtura-
teur: la cartouche présente dans la
chambre d’explosion est extraite
et expulsée (fig. 30).
2) Relâchez la manette et ramenez
l’obturateur en position de fermeture (fig. 31).
Entladen der Waffe
(Dieser Vorgang ist bei gesichertem
Gewehr durchzuführen - siehe "Sicherung der Waffe" - wobei der Lauf in
eine sichere Richtung gehalten werden muss).
Zum Entladen der Waffe muss wie
folgt vorgegangen werden:
1) Nach Sicherungen (Abb. 29) den
Verschluss manuell öffnen: die in
dem Patronenlager vorhandene
Patrone wird aus der Waffe heraus-
gezogen und ausgeworfen (Abb.
30).
2) Den Spannhebel freilassen und den
Verschluss schließen (Abb. 31).
29 30
Page 70

69
Descarga del arma
Operación que debe realizarse con el
arma en seguro - véase "Seguro del
arma" y con el cañón orientado en
dirección de seguro prudente).
Para descargar el arma realizar las siguientes operaciones:
1) Introducir el seguro (fig. 29) y abrir
manualmente el obturador: el car-
tucho de la cámara de explosión se
extrae y expulsa (fig. 30).
2) Liberar la maneta y volver a colo-
car el obturador en cierre (fig. 31).
Descarregamento da arma
(Operação a efectuar com a patilha
de segurança accionada - ver “Patilha
de segurança da arma" e com o cano
orientado numa direcção prudente e
segura).
Para descarregar a arma, proceder da
seguinte forma:
1) Accionar a patilha de segurança
(fig. 29) e abrir manualmente o
obturador: o cartucho alojado na
câmara é extraído e ejectado (fig.
30).
2) Soltar a manete e voltar a colocar
o obturador na posição fechada
(fig. 31).
Расснаряжение магазина
(во время разряжания ружьё
должно стоять на предохранителе см. раздел “Предохранительные
устройства”, а ствол должен быть
направлен в безопасную сторону).
Для разряжания ружья выполнить
следующие действия:
1) Поставить ружьё на предохранитель
(рис. 29) и отвести затвор в заднее
положение. Патрон будет
выброшен из патронника и
отражён за пределы ствольной
коробки (рис. 30).
2) Отпустить затворную рукоятку и
дать затвору закрыться (рис. 31).
∂У¤ЪБВИВ˜ ·ФБ¤МИЫЛ˜
(√È ВУ¤ЪБВИВ˜ Ú¤ÂÈ Ó·
Ú·ÁÌ·ÙÔÔÈÔ‡ÓÙ·È Ì ÙÔ fiÏÔ
·ÛÊ·ÏÈṲ̂ÓÔ - ‚Ï. “∏ ·ÛÊ¿ÏÂÈ· ÙÔ˘
fiÏÔ˘” Î·È Ì ÙËÓ Î¿ÓÓË ÛÙÚ·Ì̤ÓË ÛÂ
·fiÏ˘Ù· ·ÛÊ·Ï‹ ηÙ‡ı˘ÓÛË).
°И· У· ·‰ВИ¿ЫВЩВ ЩФ fiПФ, ВУВЪБ‹ЫЩВ
fiˆ˜ ВЪИБЪ¿КВЩ·И ·ОФПФ‡ıˆ˜:
1) µ¿ÏÙ ÙËÓ ·ÛÊ¿ÏÂÈ· (ÂÈÎ. 29) ηÈ
·ÓÔ›ÍÙ Ì ÙÔ ¯¤ÚÈ ÙÔ ÎÏ›ÛÙÚÔ: ÙÔ
Ê˘Û›ÁÁÈÔ ÛÙË ı·Ï¿ÌË ·Ô‚¿ÏÏÂÙ·È
(ÂÈÎ. 30).
2) ∂ПВ˘ıВЪТЫЩВ ÙÔ ÌÔ¯Ïfi Î·È ÎÏ›ÛÙÂ
ÙÔ ÎÏ›ÛÙÚÔ (ÂÈÎ. 31).
31
Page 71

70
3) Capovolgere l'arma e, spingendo
l'elevatore indietro verso il basso,
premere e contemporaneamente
tirare indietro la parte posteriore
della leva-fermo-cartuccia (fig.
32).
4) Le cartucce del serbatoio usciranno una ad una.
In alternativa:
1) Inserire la sicura (fig. 29) ed aprire
manualmente l'otturatore: la cartuccia in camera di scoppio viene
estratta ed espulsa (fig. 30).
3) Turn the firearm over and, pushing
the carrier downwards and rearwards, press and at the same time
pull the rear part of the cartridge
stop latch back (fig. 32).
4) The cartridges in the magazine
will come out one at a time.
Alternatively:
1) Insert the safety catch (fig. 29) and
manually open the bolt: the cartridge in the chamber is extracted
and ejected (fig. 30).
3) Renversez l’arme et, en poussant
l'élévateur en arrière vers le bas,
appuyez sur la partie arrière du
levier de blocage cartouche et en
même temps la reculer (fig. 32).
4) Les cartouches du magasin sortent
l’une après l’autre.
En alternative:
1) Enclenchez la sûreté (fig. 29) et
ouvrez manuellement l'obtura-
teur: la cartouche présente dans la
chambre d’explosion est extraite
et expulsée (fig. 30).
3) Die Waffe umdrehen und bei
gleichzeitigem Zurückdrücken des
Ladelöffels nach unten, den hinte-
ren Teil der Magazinsperrklinke
drücken und gleichzeitig zurückziehen (Abb. 32).
4) Die Patronen des Magazins werden nacheinander austreten.
Alternativ hierzu:
1) Nach Sicherungen (Abb. 29) den
Verschluss manuell öffnen: die in
dem Patronenlager vorhandene
Patrone wird aus der Waffe heraus-
gezogen und ausgeworfen (Abb.
30).
32
Page 72

71
3) Voltear el arma y, empujando el
elevador atrás hacia abajo, presio-
nar y al mismo tiempo tirar hacia
atrás la parte posterior de la pa-
lanca-bloqueo-cartucho (fig. 32).
4) Los cartuchos del almacén saldrán
uno a uno.
En alternativa:
1) Introducir el seguro (fig. 29) y abrir
manualmente el obturador: el car-
tucho en la cámara de explosión se
extrae y se expulsa (fig. 30).
3) Virar a arma ao contrário e, em-
purrando o elevador para trás e pa-
ra baixo, pressionar e, ao mesmo
tempo, puxar para trás a parte
posterior da alavanca-bloqueio-
cartucho (fig. 32).
4) Os cartuchos do depósito saem um
a um.
Alternativamente:
1) Accionar a patilha de segurança
(fig. 29) e abrir manualmente o
obturador: o cartucho alojado na
câmara é extraído e ejectado (fig.
30).
3) Перевернуть ружьё и, сместив
вниз лоток подавателя, нажать,
одновременно сдвинув назад,
кнопку ограничителя патрона
(рис. 32).
4) Все патроны по очереди выйдут
из магазина.
Альтернативный вариант:
1) Поставить ружьё на предохранитель
(рис. 29) и отвести затвор в заднее
положение. Патрон будет
выброшен из патронника и
отражён за пределы ствольной
коробки (рис. 30).
3) °˘Ú›ÛÙ ·Ó¿Ô‰· ÙÔ fiÏÔ Î·È,
Ȥ˙ÔÓÙ·˜ ЩЛ БПТЫЫ· ›Ыˆ ЪФ˜ Щ·
οو, ȤÛÙÂ Î·È Ù·˘Ùfi¯ÚÔÓ·
ÙÚ·‚‹ÍÙÂ ÚÔ˜ Ù· ›Ûˆ ÙÔ ›Ûˆ
̤ÚÔ˜ ÙÔ˘ ·Ó·ÛÙÔϤ· (ÂÈÎ. 32).
4) ∆· Ê˘Û›ÁÁÈ· Ù˘ ·Ôı‹Î˘
·ÔÚÚ›ÙÔÓÙ·È ¤Ó·-¤Ó·.
¢И·КФЪВЩИО¿:
1) µ¿ÏÙ ÙËÓ ·ÛÊ¿ÏÂÈ· (ÂÈÎ. 29) ηÈ
·ÓÔ›ÍÙ Ì ÙÔ ¯¤ÚÈ ÙÔ ÎÏ›ÛÙÚÔ: ÙÔ
Ê˘Û›ÁÁÈÔ ÛÙË ı·Ï¿ÌË ·Ô‚¿ÏÏÂÙ·È
(ÂÈÎ. 30).
Page 73

72
2) Lasciare la manetta e riportare
l'otturatore in chiusura (fig. 31).
3) Capovolgere l'arma e, spingendo
l'elevatore verso il basso, premere
(dall'interno dell'affusto) il pulsante-leva-fermo-cartuccia (fig. 33).
4) La cartuccia del serbatoio uscirà,
cadendo nella mano; si deve premere la leva-fermo-cartuccia per
ogni cartuccia che si vuol togliere
dal serbatoio.
AVVERTENZA: l'arma può venir scari-
cata anche ripetendo più volte l'azione descritta al punto "B" del capitolo
"Sostituzione cartuccia".
2) Release the cocking lever and
bring the bolt back into a closed
position (fig. 31).
3) Turn the firearm over and, pushing
the carrier downwards press (from
the inside of the carriage) the cartridge stop latch button (fig. 33).
4) The cartridge will exit from the
magazine, falling into your hand;
the cartridge stop latch must be
pressed for each cartridge to be
removed from the magazine.
NOTE: firearm can also be unloaded
by repeating the operation, as described under point B, of the chapter:
”Cartridge replacement”.
2) Relâchez la manette et ramenez
l’obturateur en position de fermeture (fig. 31).
3) Renversez l’arme et, en poussant
l’élévateur vers le bas, appuyez
(depuis l’intérieur de l’affût) sur le
poussoir levier de blocage cartouche (fig. 33).
4) La cartouche du magasin est expulsée et elle tombe dans la main;
il faut appuyer sur le levier de blocage cartouche pour chaque car-
touche que l’on veut extraire du
magasin.
REMARQUE: l'arme peut être aussi
déchargée en répétant plusieurs fois
l’action décrite au point "B" du chapitre "Remplacement cartouche".
2) Den Spannhebel freilassen und den
Verschluss schließen (Abb. 31).
3) Die Waffe umdrehen und bei gleichzeitigem Drücken des Ladelöffels nach unten (vom Inneren des
Waffengestells aus) den Magazin-
sperrklinkenknopf (Abb. 33)
drücken.
4) Die Magazinpatrone wird herausfallen, in die Hand, für jede aus
dem Magazin zu entleerende
Patrone muss die Magazinsperrklinke gedrückt werden.
HINWEIS: Die Waffe kann auch entla-
den werden, indem man die unter
Punkt “B” des Kapitels “Auswechseln
Patronen” beschriebene Handlung
wiederholt.
33
Page 74

73
2) Soltar la maneta y volver a colocar
el obturador en cierre (fig. 31).
3) Voltear el arma y, empujando el
elevador hacia abajo, presionar
(desde el interior del afuste) el
botón-palanca-bloqueo-cartucho
(fig. 33).
4) El cartucho del almacén saldrá,
cayendo en la mano; hay que presionar la palanca-bloqueo-cartucho para cada cartucho que se
desee quitar del almacén.
ADVERTENCIA: el arma puede des-
cargarse también repitiendo varias veces la acción detallada en el punto "B"
del capítulo "Sustitución cartucho".
2) Soltar a manete e voltar a colocar
o obturador na posição fechada
(fig. 31).
3) Virar a arma ao contrário e, em-
purrando o elevador para baixo,
pressionar (a partir do interior da
carreta) o botão-alavanca-blo-
queio-cartucho (fig. 33).
4) O cartucho do depósito sai, caindo na mão; é necessário pressionar a alavanca-bloqueio-cartucho
para cada cartucho que se deseja
remover do depósito.
ADVERTÊNCIA: a arma também pode
ser descarregada repetindo várias vezes a operação descrita no ponto "B"
do capítulo "Substituição cartucho".
2) Отпустить затворную рукоятку и
дать затвору закрыться (рис. 31).
3) Перевернуть ружьё и, сместив
вниз лоток подавателя, нажать
внутри лафета на рычаг
ограничителя патрона (рис. 33).
4) Патрон выйдет из магазина и
упадёт в руку. При однократном
нажатии на ограничитель из
магазина будет выходить один
патрон.
ВНИМАНИЕ: расснаряжение магазина
может осуществляться путём
многократного повторения действия,
описанного в п. "B" главы "Замена
патрона".
2) ∂ПВ˘ıВЪТЫЩВ ÙÔ ÌÔ¯Ïfi Î·È ÎÏ›ÛÙÂ
ÙÔ ÎÏ›ÛÙÚÔ (ÂÈÎ. 31).
3) °˘Ú›ÛÙ ·Ó¿Ô‰· ÙÔ fiÏÔ Î·È,
И¤˙ФУЩ·˜ ЩЛ БПТЫЫ· ЪФ˜ Щ·
О¿Щˆ, И¤ЫЩВ (·fi ЩФ ВЫˆЩВЪИОfi ЩЛ˜
‚¿Û˘) ÙÔ ÎÔ˘Ì› ÙÔ˘ ·Ó·ÛÙÔϤ·
(ÂÈÎ. 33).
4) ∆Ô Ê˘Û›ÁÁÈÔ Ù˘ ·Ôı‹Î˘
·Ô‚¿ÏÏÂÙ·È Î·È ¤ÊÙÂÈ ÛÙÔ ¯¤ÚÈ
Û·˜. ¶È¤ÛÙ ÙÔ ÎÔ˘Ì› ÙÔ˘
·Ó·ÛÙÔϤ· ÁÈ· οıÂ Ê˘Û›ÁÁÈÔ Ô˘
ı¤ÏÂÙ ӷ ‚Á¿ÏÂÙ ·fi ÙËÓ ·Ôı‹ÎË.
¶ƒ√∂π¢√¶√π∏™∏: ÁÈ· ÙËÓ ·ÔÁ¤ÌÈÛË
ÙÔ˘ fiÏÔ˘ ÌÔÚ›Ù ӷ ·ӷϿ‚ÂÙÂ
ÔÏϤ˜ ÊÔÚ¤˜ ÙË ‰È·‰Èηۛ· ÙÔ˘ ÛËÌ›Ԣ
"B" ÙÔ˘ ÎÂÊ·Ï·›Ô˘ "∞ÓÙÈηٿÛÙ·ÛË
К˘ЫИББИФ‡".
Page 75

74
Inconvenienti
e rimedi
Prima di effettuare qualunque tipo di
intervento sull'arma, accertarsi sempre
che camera di scoppio e tubo serbatoio siano completamente vuoti! (Leg-
gere attentamente le istruzioni di caricamento e scaricamento dell'arma).
Se il fucile non spara:
1) Controllare la sicura: se inserita,
spingere il pulsante nella posizione di fuoco.
2) Controllare che la cartuccia sia in
canna. Se necessario, introdurre
una cartuccia seguendo le istruzioni relative al caricamento.
3) Controllare il meccanismo di spa-
ro. Se necessario, procedere alla
sua pulizia e lubrificazione.
Troubleshooting
Before starting any operation on your
shotgun, make sure that the chamber
and the magazine are unloaded!
(Carefully read the instructions on gun
loading and unloading).
The gun fails to fire:
1) Check the safety catch: if it is
engaged, push the button to the
fire position.
2) Check that there is a cartridge in
the barrel. If necessary, insert a
cartridge following the loading
instructions.
3) Check the firing mechanism. If
necessary, clean and lubricate it.
Inconvénients
et solutions
Avant d’effectuer toute intervention
sur l’arme, vérifiez toujours que la
chambre d’explosion et que le tube
magasin soient entièrement vides! (Lire
attentivement les instructions de chargement et de déchargement de l’arme).
Si le fusil ne tire pas:
1) Contrôlez la sûreté: si elle est en-
clenchée, poussez le poussoir en
position de tir.
2) Vérifiez que la cartouche soit
dans le canon. Si nécessaire, introduisez une cartouche en suivant
les instructions relatives au chargement.
3) Contrôlez le mécanisme de tir. Si
nécessaire, procédez à son nettoyage et à sa lubrification.
Funktionsstörungen
und Abhilfe
Vor jeder Waffenhandhabung sollten
Sie sicherstellen, dass das Patronenlager und das Magazinrohr ihres Gewehrs völlig leer sind! (Bitte lesen Sie
aufmerksam die Anweisungen für das
Laden und das Entladen der Waffe).
Das Gewehr schießt nicht:
1) Die Sicherung überprüfen: falls sie
aktiviert ist, den Knopf auf Feuerbereitschaft bringen.
2) Prüfen, ob eine Patrone im Lauf
ist. Falls nötig, unter Beachtung der
Anweisungen für das Laden eine
Patrone einstecken.
3) Den Schussmechanismus überprü-
fen und, falls nötig, reinigen und
schmieren.
Page 76

75
Inconvenientes
y soluciones
Antes de efectuar cualquier tipo de
operación en el arma, controlar siempre que la cámara de explosión y el
tubo del almacén estén ¡completamente vacíos! (Leer atentamente las instruc-
ciones de carga y descarga del arma).
Si el fusil no dispara:
1) Controlar el seguro: si está intro-
ducido, empujar el botón a la posición de fuego.
2) Controlar que el cartucho esté en
cañón. Si es necesario, introducir
un cartucho siguiendo las instrucciones correspondientes a la carga.
3) Controlar el mecanismo de dispa-
ro. Si es necesario, proceder con la
limpieza y lubricación.
Problemas
e soluções
Antes de realizar qualquer tipo de
intervenção na arma, certificar-se sempre de que a câmara e o tubo depósito
estão completamente vazios! (Ler aten-
tamente as instruções de carregamento
e descarregamento da arma).
Se a espingarda não dispara:
1) Verificar a patilha de segurança:
se estiver accionada, empurrar o
botão para a posição de disparo.
2) Verificar se o cartucho está no
cano. Se necessário, introduzir um
cartucho seguindo as instruções
relativas ao carregamento.
3) Verificar o mecanismo de disparo.
Se necessário, proceder à sua limpeza e lubrificação.
Возможные неисправности
и их устранение
Перед выполнением каких-либо
манипуляций с ружьём убедитесь в
том, что оно полностью разряжено!
(Внимательно изучите указания по
заряжанию и разряжанию ружья).
Если ружьё не стреляет:
1) Проверить предохранитель. Если
предохранитель включён,
перевести его в положение "Огонь".
2) Удостовериться в наличии
патрона в стволе. При
необходимости вставьте патрон в
патронник, следуя указаниям по
заряжанию ружья.
3) Проверить ударно-спусковой
механизм. В случае необходимости
почистить и смазать УСМ.
¶ÚÔ‚Ï‹Ì·Ù·
Î·È Ï‡ÛÂȘ
¶ÚÈÓ Ú·ÁÌ·ÙÔÔÈ‹ÛÂÙ ÔÔÈ·‰‹ÔÙÂ
ÂÓ¤ÚÁÂÈ·, ‚‚·Èˆı›Ù fiÙÈ Ë ı·Ï¿ÌË Î·È Ë
·Фı‹ОЛ В›У·И ВУЩВПТ˜ ¿‰ВИ·! (¢È·‚¿ÛÙÂ
ЪФЫВОЩИО¿ ЩИ˜ Ф‰ЛБ›В˜ Ы¯ВЩИО¿ МВ ЩЛ
Б¤МИЫЛ О·И ЩЛУ ·ФБ¤МИЫЛ ЩФ˘ fiПФ˘).
∞Ó ÙÔ ÙÔ˘Ê¤ÎÈ ‰ÂÓ ˘ÚÔ‚ÔÏ›:
1) ∂ϤÁÍÙ ÙËÓ ·ÛÊ¿ÏÂÈ·: ·У ЩФ fiПФ
В›У·И ·ЫК·ПИЫМ¤УФ, ЫЪТНЩВ ЩФ
ОФ˘М› ЫЩЛ ı¤ЫЛ ‚ФП‹˜.
2) µÂ‚·Èˆı›Ù fiÙÈ ˘¿Ú¯ÂÈ Ê˘Û›ÁÁÈ
ÛÙËÓ Î¿ÓÓË. ∞Ó ‰ÂÓ ˘¿Ú¯ÂÈ,
ÙÔÔıÂÙ‹ÛÙ ÙÔ ·ÎÔÏÔ˘ıÒÓÙ·˜ ÙȘ
·ÓÙ›ÛÙÔȯ˜ Ô‰ËÁ›Â˜ ÁÂÌ›ÛÌ·ÙÔ˜.
3) ∂ϤÁÍÙ ÙÔÓ Ì˯·ÓÈÛÌfi
˘ÚÔ‰fiÙËÛ˘. ∞Ó ¯ÚÂÈ¿˙ÂÙ·È,
ηı·Ú›ÛÙ ÙÔÓ Î·È Ï·‰ÒÛÙ ÙÔÓ.
Page 77

76
Munizionamento
L’automatico Benelli utilizza per il suo
funzionamento l'energia cinetica del
rinculo dell'arma.
Utilizzare sempre cartucce che garantiscano un rinculo sufficiente per
il completo automatismo di riarmo.
AVVERTENZA: all'inizio dell'uso (fu-
cile nuovo) può essere necessario un
breve periodo di rodaggio prima che
l'arma funzioni perfettamente anche
con cariche leggere. In presenza di
problemi di funzionamento, è opportuno sparare a titolo di rodaggio tre o
quattro scatole di cartucce con carica
standard.
Ammunition
The Benelli automatic shotgun uses
the kinetic energy generated by the
recoil to work.
Use always ammunition that is
powerful enough to fully cycle the
action.
NOTE: some breaking-in period may
be required before your new gun
works perfectly with light target loads.
If you experience any initial functioning problems, we recommended firing
three or four boxes of standard hunt-
ing cartridges.
Munitions
Le fusil automatique Benelli utilise
pour son fonctionnement l’énergie
cinétique du recul de l’arme.
Utilisez toujours des cartouches qui
garantissent un recul suffisant pour
l’automatisme complet de réarmement.
REMARQUE: lors des premières utili-
sations (fusil neuf) une période de
rodage peut s’avérer nécessaire avant
que l’arme fonctionne parfaitement,
même avec des charges légères. En
cas de problèmes de fonctionnement,
il est opportun de roder l’arme en
tirant trois ou quatre boîtes de cartouches avec charge standard.
Munitionsbestückung
Die automatischen Benelli Gewehre
nutzen für ihre Funktion die kinetische
Rückstoßenergie der Waffe aus.
Stets Patronen verwenden, die eine
ausreichende Rückstoßkraft für den
kompletten Selbstladevorgang erzeugen.
HINWEIS: Zu Beginn der Benutzung
(Neuwaffen) kann eine "Einschießphase" erforderlich sein, bis die Waffe
auch mit leichter Ladung einwandfrei
funktioniert. Bei Funktionsstörungen
empfiehlt es sich drei oder vier Patronenschachteln mit Standardmunition
zu verschießen.
Page 78

77
Municiones
El automático Benelli utiliza para su
funcionamiento la energía cinética del
retroceso del arma.
Utilizar siempre cartuchos que garantizan un retroceso suficiente para el
completo automatismo de rearme.
ADVERTENCIA: al inicio del uso (fusil
nuevo) puede ser necesario un breve
periodo de rodaje antes de que el arma
funcione perfectamente, también con
cargas ligeras en presencia de problemas de funcionamiento, es conveniente disparar a título de rodaje tres o cuatro cajas de cartuchos con carga están-
dar.
Munições
A espingarda automática Benelli utiliza para o seu funcionamento a energia cinética do recuo da arma.
Utilizar sempre cartuchos que assegurem um recuo suficiente para o
rearmamento totalmente automático.
ADVERTÊNCIA: aquando da primeira
utilização (espingarda nova), poderá
ser necessário um breve período de
rodagem antes de a arma funcionar
perfeitamente, até com cargas ligeiras.
Em caso de problemas de funcionamento, convém disparar a título de
rodagem três ou quatro caixas de cartuchos com carga standard.
БОЕПРИПАСЫ
Система автоматического
перезаряжания Бенелли основана на
использовании кинетической энергии
отдачи ружья.
Используйте только те патроны,
которые обеспечивают отдачу,
достаточную для автоматического
выполнения цикла перезаряжания.
ПРЕДУПРЕЖДЕНИЕ: в начале
эксплуатации нового ружья может
потребоваться определённый период
обкатки, прежде чем ружьё начнёт
бесперебойно работать со слабыми
патронами. В случае возникновения
задержек рекомендуется отстрелять
три-четыре пачки патронов со
стандартным зарядом для
приработки деталей ружья.
º˘Û›ÁÁÈ·
∏ О·Ъ·М›У· Benelli ¯ЪЛЫИМФФИВ› БИ· ЩЛ
ПВИЩФ˘ЪБ›· ЩЛ˜ ЩЛУ ОИУЛЩИО‹ ВУ¤ЪБВИ· ЩЛ˜
·Ó¿ÎÚÔ˘Û˘ ÙÔ˘ fiÏÔ˘.
ГЪЛЫИМФФИВ›ЩВ ¿УЩ· К˘Ы›ББИ· Ф˘
ВББ˘ТУЩ·И В·ЪО‹ ·У¿ОЪФ˘ЫЛ БИ· ЩФУ
П‹ЪЛ ·˘ЩФМ·ЩИЫМfi ЩЛ˜ ФП›ЫВˆ˜.
¶ƒ√∂π¢√¶√π∏™∏: ∞Ó ÙÔ fiÏÔ Â›Ó·È
О·ИУФ‡ЪБИФ, В›У·И Иı·Уfi У· ¯ЪВИ·ЫЩВ›
МИ· Ы‡УЩФМЛ ВЪ›Ф‰Ф ЫЩЪˆЫ›М·ЩФ˜ ЪИУ
·Ъ¯›ЫВИ У· ПВИЩФ˘ЪБВ› ЫЩЛУ ВУЩ¤ПВИ· О·И
МВ ВП·КЪ¤˜ БФМТЫВИ˜. ∞У ВМК·УИЫЩФ‡У
ЪФ‚П‹М·Щ· ПВИЩФ˘ЪБ›·˜, Ы·˜
Ы˘М‚Ф˘ПВ‡Ф˘МВ У· ˘ЪФ‚ФП‹ЫВЩВ ЩЪВИ˜
‹ Щ¤ЫЫВЪИ˜ Ы˘ЫОВ˘·Ы›В˜ К˘ЫИББИТУ
ÛÙ¿ÓÙ·Ú ÁÈ· ÚÔÛ·ÚÌÔÁ‹.
Page 79

78
Munizioni da usare
Nel fucile cal. 12 si possono usare
cartucce con bossolo da 70 mm (2”
3/4), da 76 mm (3”) o da 89 mm (3”
1/2 - solo per modello SuperVinci),
caricate a pallini sia di piombo che di
acciaio.
ATTENZIONE: non usare mai cartuc-
ce con bossolo la cui lunghezza superi quella della camera di scoppio!
La mancata osservanza di questa
regola comporta gravi conseguenze
sia per il tiratore che per l'arma.
I fucili Benelli non richiedono regolazioni per l’utilizzo di qualsiasi munizionamento.
Utilizzare sempre cartucce che garantiscano un rinculo sufficiente al
completo riarmo dell'arma (vedi
paragrafo “Descrizione Tecnica” pag.
32).
Tutti i fucili Benelli sono sottoposti
alla prova forzata di 1370 bar presso
il Banco Nazionale di Prova di Gardone Valtrompia (Brescia).
Choice of ammunition
As for the 12-gauge versions you can
use cartridges with a 70 mm case (2”
3/4), 76 mm case (3”) or 89 mm case
(3” 1/2 - SuperVinci model only),
armed with either lead or steel shots.
WARNING: never use cartridges with
a case longer than the chamber.
Non-compliance to this rule would
have serious consequences for both
the shotgun and the shooter.
No adjustment to the Benelli shotgun
is necessary to fire any of the ammunition listed above.
Always use ammunition that is
powerful enough to fully cycle the
action (see “Technical Description”
paragraph, page 32).
All Benelli shotguns are subjected to
a 1370 bar burst test at the Italian
National Proof House in Gardone
Valtrompia (Brescia).
Munitions à utiliser
Il est possible d’utiliser, dans le fusil
calibre 12, des cartouches avec douil-
le de 70 mm (2” 3/4), de 76 mm (3”)
ou de 89 mm (3” 1/2 - seulement
pour le modèle SuperVinci), à chevro-
tine ou à plombs en acier.
ATTENTION: n’utilisez jamais des
cartouches avec une douille dont la
longueur dépasse celle de la chambre
d’explosion!
La non observation de cette règle
comporte de graves conséquences
pour le tireur et pour l’arme.
Les fusils Benelli ne nécessitent aucun
réglage pour l’utilisation de munitions
différentes.
Utilisez toujours des cartouches qui
garantissent un recul suffisant pour le
réarmement complet de l’arme (voir
paragraphe “Description Technique"
p. 32).
Tous les fusils Benelli sont soumis à
un essai forcé de 1370 bars auprès du
Banc National d’Epreuve des armes
de Gardone Valtrompia (Brescia).
Zu verwendende Munition
Mit dem Gewehrkaliber 12 können
Patronen mit 70 mm Hülsen (2” 3/4),
mit 76 mm Hülsen (3”) oder mit 89
mm Hülsen (3” 1/2 - nur für das
Modell SuperVinci) benutzt werden,
die sowohl mit Blei- als auch mit Stahl-
schrot geladen sein können.
ACHTUNG: Niemals Patronen ver-
wenden, deren Hülsen länger als das
Patronenlager der Waffe ist!
Die Nichteinhaltung dieser Sicherheitsbestimmung kann sowohl für
den Schützen als auch für die Waffe
schlimme Folgen haben!
Die Benelli Gewehre erfordern keine
weiteren Munitionsabstimmungen bei
der Verwendung sämtlicher Munitionsarten.
Stets Patronen verwenden, die eine
ausreichende Rückstoßkraft für den
kompletten Ladevorgang der Waffe
erzeugen (man sehe Abschnitt “Tech-
nische Beschreibung” S. 32).
Alle Benelli-Gewehre werden der
Druckprüfung bei 1370 Bar auf dem
Nationalen Prüfstand in Gardone Valtrompia (Brescia) unterzogen.
Page 80

79
Municiones para usar
En el fusil cal. 12 se pueden usar cartuchos con casquillo de 70 mm (2”
3/4), de 76 mm (3”) o de 89 mm (3”
1/2 - solo por el modelo SuperVinci),
cargue con balines ya sea de plomo
como de acero.
ATENCIÓN: nunca use cartuchos con
casquillo cuya longitud supere la longitud de la cámara de explosión.
La falta de respeto de esta regla conlleva graves consecuencias ya sea para el tirador como para el arma.
Los fusiles Benelli no requieren regulaciones para el uso de cualquier munición.
Utilice siempre cartuchos que garanticen un retroceso suficiente para el
completo rearme del arma (véase
punto “Descripción Técnica” pág. 33).
Todos los fusiles Benelli se someten a
la prueba forzada de 1370 bar en el
Banco Nacional de Prueba de Gardone Valtrompia (Brescia).
Munições a utilizar
Na espingarda de cal. 12 podem ser
utilizados cartuchos com invólucro de
70 mm (2” 3/4), de 76 mm (3”), ou de
89 mm (3” 1/2 - apenas para o modelo
SuperVinci), carregados com esferas
tanto de chumbo como de aço.
ATENÇÃO: não usar nunca cartuchos
com invólucro cujo comprimento
exceda o da câmara!
O incumprimento desta regra acarreta consequências graves tanto para o
atirador como para a arma.
As espingardas Benelli não exigem
regulações para a utilização de quaisquer munições.
Utilizar sempre cartuchos que garantam um recuo suficiente para o rearmamento completo da arma (ver pará-
grafo “Descrição Técnica” pág. 33).
Todas as espingardas Benelli são submetidas ao ensaio forçado de 1370 bar
junto do Laboratório Nacional de Ensaios de Gardone Valtrompia (Brescia).
Штатные боеприпасы
Для ружья 12-го калибра можно
использовать патроны длиной 70 мм
(2” 3/4), 76 мм (3”), или 89 мм (3” 1/2
- только для модели SuperVinci),
снаряжённые как свинцовой, так и
стальной дробью.
ВНИМАНИЕ!: категорически
запрещается использовать патроны,
длина которых больше длины
патронника!
Нарушение этого правила может
повлечь тяжёлые последствия
как для ружья, так и для стрелка.
Ружья Benelli не требуют какой-либо
регулировки в зависимости от
мощности патрона.
Используйте только те патроны,
которые обеспечивают отдачу,
достаточную для автоматического
выполнения цикла перезаряжания
(см. стр. 33 Технического описания).
Все ружья Бенелли подвергаются
повышенному испытанию под
давлением 1370 бар на Национальной
испытательной станции в Гардоне
Вальтромпиа (пров. Брешия).
∏ ВИПФБ‹ ЩˆУ К˘ЫИББИТУ
Το τουφκι διαµ. 12 εναι σε θση να
χρησιµοποισει φυσγγια µε κλυκα
70 mm (2’’ 3/4), 76 mm (3’’) 89 mm (3”
1/2 - µνο για το µοντλο SuperVinci),
µε σκγια µολβδου ατσλινα.
¶ƒ√™√Ã∏: МЛУ ¯ЪЛЫИМФФИ‹ЫВЩВ ÔÙ¤
Ê˘Û›ÁÁÈ ÌÂ Î¿Ï˘Î· Ô˘ ¤¯ÂÈ ÌÂÁ·Ï‡ÙÂÚÔ
Ì‹ÎÔ˜ ·fi ·˘Ùfi Ù˘ ı·Ï¿Ì˘!
∏ ·Ъ·‚›·ЫЛ ЩФ˘ О·УfiУ· ·˘ЩФ‡
ВИК¤ЪВИ ЫФ‚·ЪfiЩ·ЩВ˜ ВИЩТЫВИ˜ ЩfiЫФ
БИ· ЩФУ ЫОФВ˘Щ‹ fiЫФ О·И БИ· ЩФ fiПФ.
∆· ÙÔ˘Ê¤ÎÈ· Benelli ‰ÂÓ ··ÈÙÔ‡Ó
Ú˘ıÌ›ÛÂȘ ÁÈ· ÙË ¯Ú‹ÛË ÔÔÈÔ˘‰‹ÔÙÂ
Ê˘ÛÈÁÁ›Ô˘.
ГЪЛЫИМФФИВ›ЩВ ¿УЩ· К˘Ы›ББИ· Ф˘
ВББ˘ТУЩ·И В·ЪО‹ ·У¿ОЪФ˘ЫЛ БИ· ЩФУ
П‹ЪЛ ·˘ЩФМ·ЩИЫМfi ЩЛ˜ ФП›ЫВˆ˜ (‚Ï.
·Ъ. “∆В¯УИО‹ ВЪИБЪ·К‹” ЫВП. 33).
ŸП· Щ· ЩФ˘К¤ОИ· Benelli ¤¯Ф˘У
‰ФОИМ·ЫЩВ› ЫВ ›ВЫЛ 1370 bar ЫЩФ
πЩ·ПИОfi ∂ıУИОfi ∫¤УЩЪФ ¢ФОИМТУ ЩФ˘
Gardone Valtrompia (Brescia).
Page 81

80
Manutenzione
Prima di effettuare qualunque tipo di
intervento sull'arma, accertarsi sempre
che camera di scoppio e tubo serbatoio siano completamente vuoti! (Leg-
gere attentamente le istruzioni di caricamento e scaricamento dell'arma).
Per l'estrema semplicità costruttiva e
per l'accurata scelta dei materiali, l’automatico Benelli non richiede particolari interventi di manutenzione.
Si consiglia quindi di effettuare:
1) la normale pulizia della canna do-
po l'uso;
2) eliminare con una periodica puli-
zia gli eventuali residui di polvere
(o materiali estranei) dal gruppo di
sparo (cane, grilletto, ecc.) e poi
lubrificarlo;
3) smontare, pulire e lubrificare il
gruppo otturatore, che può essere
soggetto parimenti ai residui sopra
citati;
4) per la buona conservazione dell'arma, si consiglia di tenere lubrificate le parti soggette agli agenti
atmosferici.
Maintenance
Before starting any operation on your
shotgun, make sure that the chamber
and the magazine are unloaded!
(Carefully read the instructions on gun
loading and unloading).
Thanks to its extreme simplicity and
excellent materials, the Benelli Automatic Shotgun requires no special
maintenance.
The following few controls are recom-
mended:
1) normal cleaning of the barrel after
use;
2) the firing mechanism, consisting of
hammer, trigger, etc., may become
clogged with any powder residuals
(or foreign matters). Remove this by
periodical cleaning or lubrication;
3) the bolt assembly may also beco-
me clogged with the same material
and must be periodically dismantled, cleaned and lubricated;
4) to keep the gun in good order,
oiling of the parts subject to atmospheric corrosion is recommended.
Entretien
Avant d’effectuer toute intervention
sur l’arme, vérifiez toujours que la
chambre d’explosion et que le tube
magasin soient entièrement vides! (Lire
attentivement les instructions de chargement et de déchargement de l’arme).
Grâce à son extrême simplicité de
construction et au choix minutieux des
matériaux, le fusil automatique Benelli
ne requiert aucune intervention d’entretien particulière.
Il est donc conseillé d’effectuer:
1) le nettoyage ordinaire du canon
après l’utilisation;
2) éliminer, à travers un nettoyage
périodique, les éventuels résidus
de poudres (ou matières étrangères) du groupe de détente (chien,
gâchette, etc.), puis le lubrifier;
3) démonter, nettoyer et lubrifier le
groupe obturateur, qui peut être
sujet lui aussi aux résidus susmentionnés;
4) pour une bonne conservation de
l’arme, il est conseillé de maintenir
les parties exposées aux agents
atmosphériques toujours lubrifiées.
Wartung
Vor jeder Waffenhandhabung sollten
Sie sicherstellen, dass das Patronenlager und das Magazinrohr Ihres Gewehrs völlig leer sind! (Bitte lesen Sie
aufmerksam die Anweisungen für das
Laden und das Entladen der Waffe).
Aufgrund der extrem einfachen Konstruktion und sorgfältigen Wahl der
Materialien erfordern die Benelli-Automatikgewehre keine besonderen War-
tungsmaßnahmen.
Es wird daher empfohlen:
1) den Lauf nach Gebrauch des Ge-
wehrs regelmäßig zu reinigen;
2) durch regelmäßige Reinigung even-
tuellen Pulverschmauch (oder
andere Fremdmaterialien) von der
Abzugsgruppe (Hahn, Abzug) ent-
fernen und anschließend schmieren.
3) die Verschluss-Gruppe zu zer-
legen, zu reinigen und zu schmieren, da auch in diesem Bereich die
oben erwähnten Verschmutzungen
auftreten können;
4) um das Gewehr immer in gutem
Zustand zu halten, wird empfohlen
die der Witterung ausgesetzten
Teile stets gut geschmiert zu halten.
Page 82

81
Mantenimiento
Antes de efectuar cualquier tipo de
operación en el arma, cerciorarse siempre de que la cámara de explosión y el
tubo del almacén estén ¡completamente vacíos! (Leer atentamente las instruc-
ciones de carga y descarga del arma).
Por la suma sencillez de fabricación y
por la esmerada selección de los materiales, el automático Benelli no re-
quiere operaciones especiales de mantenimiento.
Se recomienda por lo tanto realizar:
1) la limpieza normal del cañón des-
pués del uso;
2) eliminar con una limpieza periódi-
ca los posibles residuos de polvo (o
materiales extraños) del grupo de
disparo (martillo, gatillo, etc.) y luego lubricarlo;
3) desmontar, limpiar y lubricar el gru-
po obturador, que puede estar sujetos igualmente a los residuos arriba
indicados;
4) para una buena conservación del
arma, se recomienda mantener lubricadas las partes sujetas a los
agentes atmosféricos.
Manutenção
Antes de realizar qualquer tipo de
intervenção na arma, certificar-se sempre de que a câmara e o tubo depósito
estão completamente vazios! (Ler aten-
tamente as instruções de carregamento
e descarregamento da arma).
Graças à extrema simplicidade construtiva e à escolha cuidada dos materiais, a espingarda automática Benelli
não requer intervenções especiais de
manutenção.
Aconselha-se, portanto, efectuar:
1) a limpeza normal do cano após a
utilização;
2) eliminar com uma limpeza perió-
dica eventuais resíduos de pólvora
(ou corpos estranhos) do grupo de
disparo (cão, gatilho, etc.) e, seguidamente, proceder à sua lubrificação;
3) desmontar, limpar e lubrificar o
grupo obturador, que também
pode estar sujeito aos resíduos acima referidos;
4) para uma boa conservação da
arma, aconselha-se manter lubrificadas as partes sujeitas aos agen-
tes atmosféricos.
Oбслуживание
Перед выполнением каких-либо
манипуляций с ружьём убедитесь в
том, что оно полностью разряжено!
(Внимательно изучите указания по
заряжанию и разряжанию ружья).
В силу крайней конструктивной
простоты и высокого качества
материалов самозарядные ружья
Бенелли не требуют частого и
сложного обслуживания.
Поэтому рекомендуется выполнять
только нижеуказанные операции по
уходу за ружьём:
1) чистить ствол после каждого
выхода;
2) pегулярно чистить и смазывать
детали ударно-спускового механизма
(курок, спусковой крючок и пр.) для
удаления возможных инородных
тел и остатков порохового нагара;
3) разбирать, чистить и смазывать
затворную группу, которая также
может быть подвержена
вышеуказанным загрязнениям;
4) д ля поддержания ружья в хорошем
состоянии рекомендуется регулярно
смазывать детали, подверженные
атмосферному воздействию.
™˘ÓÙ‹ÚËÛË
¶ÚÈÓ Ú·ÁÌ·ÙÔÔÈ‹ÛÂÙ ÔÔÈ·‰‹ÔÙÂ
ÂÓ¤ÚÁÂÈ·, ‚‚·Èˆı›Ù fiÙÈ Ë ı·Ï¿ÌË Î·È Ë
·Фı‹ОЛ В›У·И ВУЩВПТ˜ ¿‰ВИ·! (¢È·‚¿ÛÙÂ
ЪФЫВОЩИО¿ ЩИ˜ Ф‰ЛБ›В˜ Ы¯ВЩИО¿ МВ ЩЛ
Б¤МИЫЛ О·И ЩЛУ ·ФБ¤МИЫЛ ЩФ˘ fiПФ˘).
§fiБˆ ЩЛ˜ ·ПfiЩЛЩ·˜ ЩЛ˜ О·Щ·ЫОВ˘‹˜
ЩФ˘ О·И ЩЛ˜ ЪФЫВБМ¤УЛ˜ ВИПФБ‹˜ ЩˆУ
˘ПИОТУ, ЩФ ·˘ЩfiМ·ЩФ Benelli ‰ÂÓ ¤¯ÂÈ
·Ó¿ÁÎË È‰È·›ÙÂÚ˘ Û˘ÓÙ‹ÚËÛ˘.
™·˜ ÚÔÙ›ÓÔ˘ÌÂ, ÂÔ̤ӈ˜:
1) Ó· Ú·ÁÌ·ÙÔÔț٠¤Ó·Ó ·Ïfi
ηı·ÚÈÛÌfi ÙÔ˘ fiÏÔ˘ ÌÂÙ¿ ÙËÓ
¯Ú‹ÛË
2) k·ı·Ъ›˙ВЩВ О·И ЫВ Щ·ОЩ¿ ¯ЪФУИО¿
‰И·ЫЩ‹М·Щ·, ЩФУ МЛ¯·УИЫМfi
˘ЪФ‰fiЩЛЫЛ˜ (ОfiОФЪ·˜, ЫО·У‰¿ПЛ
ОЩП.) ¤ЩЫИ ТЫЩВ У· ·ФМ·ОЪ‡УФУЩ·И
Ù˘¯fiÓ Î·Ù¿ÏÔÈ· η‡Ûˆ˜ ‹ ͤӷ
ÛÒÌ·Ù· Î·È ÛÙË Û˘Ó¤¯ÂÈ· ÏÈ·›ÓÂÙÂ
ÙÔ Ì˯·ÓÈÛÌfi.
3) У· ·ФЫ˘У·ЪМФПФБВ›ЩВ, У·
О·ı·Ъ›˙ВЩВ О·И У· П·‰ТУВЩВ ÙÔÓ
Ì˯·ÓÈÛÌfi ÎÏ›ÛÙÚÔ˘ ÁÈ· ÙÔ˘˜
›‰ÈÔ˘˜ ÏfiÁÔ˘˜
4) У· П·‰ТУВЩВ Щ·ОЩИО¿ fiП· Ù·
ÙÌ‹Ì·Ù· ÙÔ˘ fiÏÔ˘ Ô˘ ›ӷÈ
ÂÎÙÂıÂÈ̤ӷ ЫЩФ˘˜ ·ЩМФЫК·ИЪИОФ‡˜
·Ъ¿БФУЩВ˜.
Page 83

82
NB: tutte le canne sono cromate inter-
namente.
NOTA: per la pulizia dello strozzato-
re e della relativa sede leggere attentamente il paragrafo “Strozzatore
interno” pag. 136.
Utilizzare sempre il set di pulizia
(non in dotazione con il fucile) e l'olio
Benelli Armi (fig. 34).
NB: all barrels are internally chrome
plated.
NOTE: for maintenance of the choke
and relative seat, carefully read the
instructions in the “Internal choke”
paragraph, page 136.
Use only Benelli Armi cleaning set
(not equipped with shotgun) and oil
(fig. 34).
N.B.: tous les canons sont chromés à
l’intérieur.
NOTE: pour le nettoyage du choke et
de son logement, lire attentivement le
paragraphe “Choke interne” en p.
136.
Utiliser toujours le set de nettoyage
(qui n’est pas fourni en dotation avec
le fusil) et l’huile Benelli Armi (fig. 34).
NB: Alle Läufe sind innen verchromt.
HINWEIS: Zum Reinigen des Chokes
und des diesbezüglichen Sitzes aufmerksam den Abschnitt “InnenChoke” Seite 136 lesen.
Immer das Reinigungsset verwenden
(nicht im Lieferumfang des Gewehrs
enthalten) sowie Öl von Benelli Armi
(Abb. 34).
34
Page 84

83
Nota: todos los cañones están croma-
dos en su interior.
NOTA: para la limpieza del estrangu-
lador interno y de su correspondiente
alojamiento lea atentamente el punto
“Choke interno” pág. 137.
Utilice siempre el juego de limpieza
(no forma parte de la dotación del
fusil) y el aceite Benelli Armi (fig. 34).
Nota: todos os canos são cromados
no interior.
NOTA: para a limpeza do choke e da
respectiva sede, ler atentamente o
parágrafo “Choke interior” pág. 137.
Utilizar sempre o conjunto de limpeza (não fornecido com a espingarda) e
o óleo Benelli Armi (fig. 34).
ПРИМЕЧАНИЕ: канал ствола
хромирован.
ПРИМЕЧАНИЕ: чистку дульного
устройства и его посадочного места
выполняйте в соответствии с
указаниями раздела “Дульное
устройство”, стр. 137.
Для чистки ружья используйте
только оригинальный набор
принадлежностей (не включён в
стандартную комплектацию) и масло
Бенелли (рис. 34).
™∏ª.: fiПВ˜ ФИ О¿УУВ˜ В›У·И ВЫˆЩВЪИО¿
ÂȯڈÌȈ̤Ó˜.
™∏ª∂πø™∏: ÁÈ· ÙÔÓ Î·ı·ÚÈÛÌfi ÙÔ˘ ÙÛÔÎ
О·И ЩЛ˜ ¤‰Ъ·˜ ЩФ˘, ‰И·‚¿ЫЩВ ЪФЫВОЩИО¿
ЩЛУ ·Ъ¿БЪ·КФ “∂ЫˆЩВЪИОfi ЩЫФО” ЫВП.
137.
ГЪЛЫИМФФИВ›ЩВ ¿УЩ· ЩФ ЫВЩ
О·ı·ЪИЫМФ‡
(‰ÂÓ ÂÚÈÏ·Ì‚¿ÓÔÓÙ·È ÛÙÔÓ
‚·ЫИОfi ВНФПИЫМfi ЩФ˘ ЩФ˘КВОИФ‡)
Î·È ÙÔ
Ï¿‰È Ù˘ Benelli Armi (ÂÈÎ. 34).
Page 85

84
Smontaggio dell’arma
(per manutenzione e pulizia)
Prima di effettuare qualunque tipo di
intervento sull'arma, accertarsi sempre
che camera di scoppio e tubo serbatoio siano completamente vuoti! (Leg-
gere attentamente le istruzioni di caricamento e scaricamento dell'arma).
Procedura di smontaggio
dell’arma
1) Chiudere l'otturatore premendo la
leva-fermo-cartuccia (fig. 35).
Shotgun stripping
(for cleaning and maintenance)
Before starting any operation on your
shotgun, make sure that the chamber
and the magazine tube are unloaded!
(Carefully read the instructions on gun
loading and unloading).
Disassembly procedure
1) Close the bolt by pressing the cartridge stop latch (fig. 35).
Démontage de l’arme
(pour son entretien et son nettoyage)
Avant d’effectuer toute intervention
sur l’arme, vérifiez toujours que la
chambre d’explosion et que le tube
magasin soient entièrement vides! (Lire
attentivement les instructions de chargement et de déchargement de l’arme).
Procédure de démontage
de l’arme
1) Fermer l’obturateur en appuyant
sur le levier de blocage cartouche
(fig. 35).
Zerlegen der Waffe
(für die Reinigung und Wartung)
Vor jeder Waffenhandhabung sollten
Sie sicherstellen, dass das Patronenlager und das Magazinrohr Ihres Gewehrs völlig leer sind! (Bitte lesen Sie
aufmerksam die Anweisungen für das
Laden und das Entladen der Waffe).
Zerlegungsvorgang
der Waffe
1) Den Verschluss schließen, indem
man die Magazinsperrklinke drückt
(Abb. 35).
35
Page 86

85
Desmontaje del arma
(para mantenimiento y limpieza)
Antes de efectuar cualquier tipo de
operación en el arma, cerciorarse siempre de que la cámara de explosión y el
tubo del almacén estén ¡completamente vacíos! (Leer atentamente las instruc-
ciones de carga y descarga del arma).
Procedimiento de
desmontaje del arma
1) Cerrar el obturador presionando la
palanca-bloqueo-cartucho (fig. 35).
Desmontagem da arma
(para efeitos de manutenção e limpeza)
Antes de realizar qualquer tipo de
intervenção na arma, certificar-se sempre de que a câmara e o tubo depósito
estão completamente vazios! (Ler aten-
tamente as instruções de carregamento
e descarregamento da arma).
Procedimento de
desmontagem da arma
1) Fechar o obturador pressionando a
alavanca-bloqueio-cartucho (fig.
35).
Разборка ружья
(для чистки и обслуживания)
Перед выполнением каких-либо
манипуляций с ружьём убедитесь в
том, что оно полностью разряжено!
(Внимательно изучите указания по
заряжанию и разряжанию ружья).
Порядок разборки
ружья
1) Закрыть затвор, нажав на кнопку
ограничителя патрона (рис. 35).
∞ÔÛ˘Ó·ÚÌÔÏfiÁËÛË ÙÔ˘ fiÏÔ˘
(ÁÈ· Û˘ÓÙ‹ÚËÛË Î·È Î·ı·ÚÈÛÌfi)
¶ÚÈÓ Ú·ÁÌ·ÙÔÔÈ‹ÛÂÙ ÔÔÈ·‰‹ÔÙÂ
ÂÓ¤ÚÁÂÈ·, ‚‚·Èˆı›Ù fiÙÈ Ë ı·Ï¿ÌË Î·È Ë
·Фı‹ОЛ В›У·И ВУЩВПТ˜ ¿‰ВИ·! (¢È·‚¿ÛÙÂ
ЪФЫВОЩИО¿ ЩИ˜ Ф‰ЛБ›В˜ Ы¯ВЩИО¿ МВ ЩЛ
Б¤МИЫЛ О·И ЩЛУ ·ФБ¤МИЫЛ ЩФ˘ fiПФ˘).
¢È·‰Èηۛ·
·ÔÛ˘Ó·ÚÌÔÏfiÁËÛ˘ ÙÔ˘ fiÏÔ˘
1) ∫Ï›ÛÙ ÙÔ ÎÏ›ÛÙÚÔ È¤˙ÔÓÙ·˜
ÙÔÓ ·Ó·ÛÙÔϤ· (ÂÈÎ. 35).
Page 87

86
2) Premere il pulsante di montaggio/
smontaggio (fig. 36) e ruotare il
tappo serbatoio in senso antiorario (fig. 37).
3) L'affusto può ora scorrere in avanti, staccandosi dalla canna (fig.
38).
2) Press the assembly/disassembly
button (fig. 36) and rotate the
magazine tube plug counter
clockwise (fig. 37).
3) Now the gun carriage can slide
forward, detaching itself from the
barrel (fig. 38).
2) Appuyer sur le poussoir de monta-
ge/démontage (fig. 36) et tourner
le bouchon magasin dans le sens
opposé des aiguilles d’une montre
(fig. 37).
3) L’affût peut alors coulisser vers l’avant en se détachant du canon
(fig. 38).
2) Den Knopf zur Montage/Zerle-
gung drücken (Abb. 36) und den
Magazinzapfen gegen den Uhrzei-
gersinn drehen (Abb. 37).
3) Das Waffengestell kann nun nach
vorne gleiten und von Lauf getrennt werden (Abb. 38).
36 37
Page 88

87
2) Presionar el botón de montaje/
desmontaje (fig. 36) y girar el tapón
del almacén en sentido contrario
al reloj (fig. 37).
3) El afuste ahora puede deslizar hacia adelante, separándose del cañón (fig. 38).
2) Pressionar o botão de montagem/
desmontagem (fig. 36) e rodar a
tampa depósito no sentido contrá-
rio ao dos ponteiros do relógio
(fig. 37).
3) A carreta pode agora deslizar para
a frente, separando-se do cano
(fig. 38).
2) Нажать на кнопку монтажной
защёлки (рис. 36) и повернуть
крышку магазина против
часовой стрелки (рис. 37).
3) Теперь лафет может свободно
смещаться вперёд, отделяясь от
ствола (рис. 38).
2) ¶È¤ÛÙ ÙÔ ÎÔ˘Ì› Û˘Ó·ÚÌÔÏfiÁËÛ˘/
·ÔÛ˘Ó·ÚÌÔÏfiÁËÛ˘ (ÂÈÎ. 36) ηÈ
Á˘Ú›ÛÙ ÙËÓ Ù¿· Ù˘ ·Ôı‹Î˘
·ЪИЫЩВЪfiЫЩЪФК· (ВИО. 37).
3) ∏ ‚¿ÛË ÌÔÚ› ÙÒÚ· Ó· ÌÂÙ·ÎÈÓËı›
ÚÔ˜ Ù· ÂÌÚfi˜ Î·È Ó· ·ÔÛ·ÛÙ›
·fi ÙËÓ Î¿ÓÓË (ÂÈÎ. 38).
38
Page 89

88
4) Ruotare con decisione il calcio in
senso antiorario di 90° (fig. 39) e
separarlo dalla canna (fig. 40).
5) Premere verso il basso con il polli-
ce il piastrino battuta-otturatore
(fig. 5) per sbloccare l’aletta superiore e arretrare l'otturatore a
fine corsa (fig. 6).
4) Forcefully rotate the stock counter
clockwise 90° (fig. 39) and separate it from the barrel (fig. 40).
5) Push the bolt stop (fig. 5) down-
wards using your thumb to unlock
the upper fin and pull the bolt
back to stroke-end (fig. 6).
4) Tourner de façon décidée la crosse
de 90° dans le sens opposé des
aiguilles d’une montre (fig. 39) et
la séparer du canon (fig. 40).
5) Appuyer vers le bas, avec le pou-
ce, la plaque de butée-obturateur
(fig. 5) pour débloquer l’ailette
supérieure et faire reculer l’obturateur jusqu’à sa fin de course (fig.
6).
4) Den Schaft kraftvoll um 90° gegen
den Uhrzeigersinn drehen (Abb.
39) und ihn vom Lauf trennen
(Abb. 40).
5) Die Platte Anschlag-Verschluss mit
dem Daumen nach unten drücken
(Abb. 5), um den oberen Flügel zu
entblocken und den Verschluss am
Endanschlag zurückzuschieben
(Abb. 6).
39
Page 90

89
4) Girar con decisión la culata en sen-
tido contrario al reloj de 90° (fig.
39) y separarla del cañón (fig. 40).
5) Presionar hacia abajo con el pulgar
la plaquita tope-obturador (fig. 5)
para desbloquear la aleta superior y
retroceder el obturador hasta el final de carrera (fig. 6).
4) Rodar energicamente a coronha
90° no sentido contrário ao dos
ponteiros do relógio (fig. 39) e
separá-la do cano (fig. 40).
5) Com o polegar, pressionar para
baixo a placa batente-obturador
(fig. 5) para desbloquear a alheta
superior e fazer recuar o obturador
até ao fim de curso (fig. 6).
4) Энергично повернуть приклад
против часовой стрелки на 90°
(рис. 39) и отделить его от
ствольного блока (рис. 40).
5) Большим пальцем надавить на
демпферную пластину затвора
(рис. 5). При этом освободится её
верхний выступ, что позволит
затвору занять крайнее заднее
положение (рис. 6).
4) °˘Ú›ÛÙ ‰˘Ó·Ù¿ ÙÔ ÎÔÓÙ¿ÎÈ
·ЪИЫЩВЪfiЫЩЪФК· О·Щ¿ 90Ж (ÂÈÎ. 39)
Î·È ¯ˆÚ›ÛÙ ÙÔ ·fi ÙËÓ Î¿ÓÓË (ÂÈÎ.
40).
5) ¶È¤ÛÙ ÚÔ˜ Ù· οو Ì ÙÔÓ
·ÓÙ›¯ÂÈÚ· ÙËÓ Ï·Î¤Ù· ÛÙÂÚ¤ˆÛ˘
ÎÏ›ÛÙÚÔ˘ (ÂÈÎ. 5) ÁÈ· Ó·
ÂÏ¢ıÂÚˆı› ÙÔ ¿Óˆ ¤Ï·ÛÌ· ηÈ
ÙÚ·‚‹ÍÙ ٤ÚÌ· ›Ûˆ ÙÔ ÎÏ›ÛÙÚÔ
(ÂÈÎ. 6).
40
Page 91

90
6) Estrarre la manetta (fig. 41) e sfila-
re poi l'otturatore dalla canna (fig.
42).
7) Sfilare il perno-arresto-percussore
dall'otturatore, avendo cura di
trattenere il percussore con relativa molla (fig. 43).
8) Estrarre il percussore con relativa
molla (fig. 44).
6) Extract the cocking lever (fig. 41),
then slide the bolt from the barrel
(fig. 42).
7) Slide the firing pin retaining pin
from the bolt, being sure to hold
back the firing pin with its spring
(fig. 43).
8) Extract the firing pin with its rela-
tive spring (fig. 44).
6) Extraire la manette (fig. 41) et
séparer l’obturateur du canon (fig.
42).
7) Extraire l’axe de blocage percuteur
de l’obturateur, en ayant soin de
retenir le percuteur et son ressort
(fig. 43).
8) Extraire le percuteur avec son res-
sort (fig. 44).
6) Den Spannhebel herausziehen
(Abb. 41) und dann den Verschluss
vom Lauf abnehmen (Abb. 42).
7) Den Arretierstift des Schlagbolzens
aus dem Verschluss herausziehen.
Dabei mit Sorgfalt den Schlag-
bolzen und dessen Spannfeder
zurückhalten (Abb. 43).
8) Den Schlagbolzen mit der Spannfeder herausziehen (Abb. 44).
41 42
Page 92

91
6) Extraer la maneta (fig. 41) y extraer
luego el obturador del cañón (fig.
42).
7) Extraer el perno-parada-percutor
del obturador, con cuidado para re-
tener el percutor con su correspondiente muelle (fig. 43).
8) Extraer el percutor con su correspondiente muelle (fig. 44).
6) Extrair a manete (fig. 41) e, de
seguida, desenfiar o obturador do
cano (fig. 42).
7) Desenfiar o perno-bloqueio-per-
cutor do obturador, tendo o cuidado de reter o percutor com a res-
pectiva mola (fig. 43).
8) Extrair o percutor com a respecti-
va mola (fig. 44).
6) Отсоединить рукоятку
перезаряжания (рис. 41) и извлечь
затвор из ствольного блока (рис. 42).
7) Извлечь из затвора фиксирующий
штифт бойка, придерживая при
этом боёк и его пружину (рис. 43).
8) Извлечь боёк и его пружину (рис.
44).
6) µÁ¿ÏÙ ÙÔ ÌÔ¯Ïfi (ÂÈÎ. 41) Î·È ÛÙË
Û˘Ó¤¯ÂÈ· ·Ê·ÈÚ¤ÛÙ ÙÔ ÎÏ›ÛÙÚÔ
·fi ÙËÓ Î¿ÓÓË (ÂÈÎ. 42).
7) µÁ¿ÏÙ ÙÔÓ Â›ÚÔ ÛÙÂÚ¤ˆÛ˘
ÂÈÎÚÔ˘ÛÙ‹Ú· ·fi ÙÔ ÎÏ›ÛÙÚÔ,
Û˘ÁÎÚ·ÙÒÓÙ·˜ ÙÔÓ ÂÈÎÚÔ˘ÛÙ‹Ú·
Î·È ÙÔ ÂÏ·Ù‹ÚÈfi ÙÔ˘ (ÂÈÎ. 43).
8) ∞Ê·ÈÚ¤ÛÙ ÙÔÓ ÂÈÎÚÔ˘ÛÙ‹Ú· Ì·˙›
ÌÂ ÙÔ ÂÏ·Ù‹ÚÈÔ ÙÔ˘ (ÂÈÎ. 44).
43 44
Page 93

92
9) Togliere il perno-rotazione-testa
di chiusura (fig. 45).
10) Sfilare la testa di chiusura (fig.
46).
11) Togliere la molla-rinculo-ottura-
tore dalla sua sede (fig. 47).
9) Remove the locking head rotating
pin (fig. 45).
10) Slide out the locking head (fig.
46).
11) Remove the inertia spring from its
lodging (fig. 47).
9) Enlever l’axe de rotation de la
tête de fermeture (fig. 45).
10) Extraire la tête de fermeture (fig.
46).
11) Enlever le ressort de recul de
l’obturateur de son emplacement
(fig. 47).
9) Den Rotationszapfen des Ver-
schlusskopfes abnehmen (Abb.
45).
10) Den Verschlusskopf herausziehen
(Abb. 46).
11) Die Pufferfeder aus ihrem Sitz
herausnehmen (Abb. 47).
45 46
Page 94

93
9) Quitar el perno-giro-cabeza de
cierre (fig. 45).
10) Extraer la cabeza de cierre (fig.
46).
11) Quitar el muelle-retroceso-obtu-
rador de su alojamiento (fig. 47).
9) Retirar o perno-rotação-cabeça
de culatra (fig. 45).
10) Desenfiar a cabeça de culatra
(fig. 46).
11) Retirar a mola-recuo-obturador
da sua sede (fig. 47).
9) Извлечь фиксирующий штифт
боевой личинки (рис. 45).
10) Извлечь боевую личинку (рис.
46).
11) Извлечь инерционную пружину
из её гнезда (рис. 47).
9) ∞Ê·ÈÚ¤ÛÙ ÙÔÓ Â›ÚÔ Ù˘ ÎÂÊ·Ï‹˜
ÙÔ˘ ÎÏ›ÛÙÚÔ˘ (ÂÈÎ. 45).
10) µÁ¿ÏÙ ÙËÓ ÎÂÊ·Ï‹ ÙÔ˘ ÎÏ›ÛÙÚÔ˘
(ÂÈÎ. 46).
11) ∞Ê·ÈÚ¤ÛÙ ÙÔ ÂÏ·Ù‹ÚÈÔ Â·Ó·ÊÔÚ¿˜
ÎÏ›ÛÙÚÔ˘ ·fi ÙË ı¤ÛË ÙÔ˘ (ÂÈÎ. 47).
47
Page 95

94
12) Inserire la sicura (fig. 48), estrar-
re quindi la spina-fissaggio-guar-
dia dall'affusto, utilizzando la
punta del percussore o un punteruolo idoneo (fig. 49).
13) Premere il pulsante leva-fermo-
cartuccia (fig. 50) e ruotare verso
l'alto il gruppo guardia, fino ad
estrarlo dall'affusto.
14) Ruotare il serbatoio in senso ora-
rio, fino a che il pulsante di
montaggio/smontaggio non si
posizioni come in figura 51.
12) Insert the safety catch (fig. 48),
then extract the trigger guard
fixing pin from the gun carriage,
using the point of the firing pin or
a suitable awl (fig. 49).
13) Press the cartridge stop latch but-
ton (fig. 50) and rotate the trigger
guard assembly upwards, until it
has been extracted from the gun
carriage.
14) Rotate the magazine cap clock-
wise, until the assembly/disassembly button is positioned as illu-
strated in fig. 51.
12) Enclencher la sûreté (fig. 48), et
extraire la cheville de fixage de la
garde sur l’affût, en utilisant la
pointe du percuteur ou un pointeau adéquat (fig. 49).
13) Appuyer sur le levier de blocage
cartouche (fig. 50) et tourner le
groupe de garde vers le haut pour
l’extraire de l’affût.
14) Tourner le magasin dans le sens
des aiguilles d’une montre, jusqu’à ce que le poussoir de montage/démontage se positionne com-
me illustré en figure 51.
12) Die Waffe sichern (Abb. 48), dann
den Arretierstift des Abzugsbügels
aus dem Waffengestell nehmen,
indem man den Kopf des Schlagbolzens oder einen geeigneten
Stift benutzt (Abb. 49).
13) Den Magazinsperrklinkenknopf
drücken (Abb. 50) und die Abzugsgruppe nach oben drehen bis er
aus dem Waffengestell genommen
werden kann.
14) Das Magazin in Uhrzeigersinn
drehen, bis der Knopf Montage/
Zerlegung wie in Abb. 51 positio-
niert ist.
48 49
Page 96

95
12) Introducir el seguro (fig. 48), ex-
traer luego la espiga-fijación-guar-
damonte desde el afuste, utilizando la punta del percutor o un punzón adecuado (fig. 49).
13) Presionar el botón palanca-blo-
queo-cartucho (fig. 50) y girar
hacia arriba el grupo guardamonte, hasta extraerlo del afuste.
14) Girar el almacén en sentido de las
agujas del reloj, hasta que el botón de montaje/desmontaje tome
la posición indicada en la figura
51.
12) Accionar a patilha de segurança
(fig. 48) e, de seguida, extrair a
cavilha-fixação-guarda-mato da
carreta, utilizando a ponta do percutor e um punção adequado (fig.
49).
13) Pressionar o botão alavanca-blo-
queio-cartucho (fig. 50) e rodar
grupo guarda-mato para cima até
o extrair da carreta.
14) Rodar o depósito no sentido dos
ponteiros do relógio, até o botão
de montagem/desmontagem se
encontrar na posição ilustrada na
figura 51.
12) Включить предохранитель (рис.
48), затем извлечь из лафета
фиксирующий штифт УСМ. Для
этого используйте боёк или
подходящую выколотку (рис. 49).
13) Нажать на кнопку ограничителя
патрона (рис. 50), вращательным
движением верх отделить блок
УСМ и извлечь его из лафета.
14) Повернуть магазин по часовой
стрелке до тех пор, пока кнопка
монтажной защёлки не займёт
положение, указанное на
рисунке 51.
12) µ¿ÏÙ ÙËÓ ·ÛÊ¿ÏÂÈ· (ÂÈÎ. 48), ÛÙË
Û˘Ó¤¯ÂÈ· ‚Á¿ÏÙ ÙÔ Â›ÚÔ
ÛηӉ·ÏÔı‹Î˘ ·fi ЩЛ ‚¿ЫЛ,
¯ЪЛЫИМФФИТУЩ·˜ ЩЛ М‡ЩЛ ЩФ˘
ВИОЪФ˘ЫЩ‹Ъ· ‹ ¿ППФ О·Щ¿ППЛПФ
ВЪБ·ПВ›Ф (ВИО. 49).
13) ¶È¤ÛÙ ÙÔ ÎÔ˘Ì› ·Ó·ÛÙÔϤ· (ÂÈÎ.
50) Î·È Á˘Ú›ÛÙ ÚÔ˜ Ù· ¿Óˆ ÙË
ÛηӉ·ÏÔı‹ÎË, ¤ˆ˜ fiÙÔ˘
·ÔÛ·ÛÙ› ·fi ÙË ‚¿ÛË.
14) °˘Ú›ÛÙÂ ÙËÓ ·Ôı‹ÎË ‰ВНИfiЫЩЪФК·,
¤ÙÛÈ ÒÛÙ ÙÔ ÎÔ˘Ì› Û˘Ó·ÚÌÔÏfiÁËÛ˘/
·ÔÛ˘Ó·ÚÌÔÏfiÁËÛ˘ Ó· ‚ÚÂı› ÛÙË
ı¤ÛË Ù˘ ÂÈÎ. 51.
50 51
Page 97

96
15) Spingere a fondo il pulsante di
montaggio/smontaggio e sfilare
in avanti il serbatoio, senza ruo-
tarlo (fig. 52), fino ad estrarlo
completamente (fig. 53).
AVVERTENZA: per i mercati ove -
per legge - il serbatoio deve essere
inamovibile, non è possibile separare
il modulo tubo serbatoio dall’affusto.
L'arma è completamente smontata:
le parti soggette a verifica e pulizia
sono tutte separate.
15) Push the assembly/disassembly
button all the way down and slide
the magazine tube forward,
without rotating it (fig. 52), until it
has been completely extracted (fig.
53).
WARNING: for markets where - by
law - the magazine must be fixed, the
magazine tube module cannot be
separated from the carriage.
The gun is completely disassembled:
the parts subject to checking and cleaning are all separated.
15) Pousser à fond le poussoir de
montage/démontage et extraire
vers l’avant le magasin, sans le
tourner (fig. 52), jusqu’à ce qu’il
sorte entièrement (fig. 53).
REMARQUE: pour les marchés où -
selon les normes de loi - le magasin
doit être inamovible, il n’est pas possible de séparer le tube magasin de
l’affût.
L'arme est alors entièrement démontée: les parties sujettes à un contrôle
et au nettoyage sont toutes séparées.
15) Den Knopf Montage/Zerlegung
nach unten drücken und das
Magazin nach vorne ziehen ohne
es zu drehen (Abb. 52), bis es
vollständig herausgezogen ist
(Abb. 53).
HINWEIS: Für Märkte, wo das Maga-
zin - laut Gesetz - nicht entfernbar
sein darf, ist es nicht möglich, das
Magazinrohr vom Waffengestell zu
entfernen.
Die Waffe ist nun vollständig zerlegt:
die zu prüfenden und zu reinigenden
Teile sind alle voneinander getrennt.
52
Page 98

97
15) Empujar a fondo el botón de mon-
taje/desmontaje y extraer hacia
adelante el almacén, sin girarlo
(fig. 52), hasta a extraerlo completamente (fig. 53).
ADVERTENCIA: para los mercados
donde - por ley - el almacén debe ser
inamovible, no es posible separar el
módulo tubo almacén del afuste.
El arma está completamente desmontada: las partes sujetas a control y limpieza están todas separadas.
15) Pressionar a fundo o botão de
montagem/desmontagem e fazer
deslizar o depósito para a frente,
sem o rodar (fig. 52), até estar
completamente extraído (fig. 53).
ADVERTÊNCIA: para os mercados
onde - por lei - o depósito deve ser
inamovível, não é possível separar o
módulo tubo depósito da carreta.
A arma está completamente desmontada: as partes a inspeccionar e limpar estão todas separadas.
15) Утопить до упора кнопку
монтажной защёлки и, не вращая,
сместить вперёд магазин (рис. 52)
до полного его извлечения (рис. 53).
ВНИМАНИЕ: у ружей,
предназначенных для стран, где по
закону магазин должен быть
неотъёмным, трубка магазина не
отделяется от блока лафета.
Разборка ружья завершена. Все
детали, подлежащие визуальному
контролю и чистке,отделены.
15) ¶È¤ÛÙ ̤¯ÚÈ Ù¤ÚÌ· ÙÔ ÎÔ˘Ì›
Û˘Ó·ÚÌÔÏfiÁËÛ˘/·ÔÛ˘Ó·ÚÌÔÏfiÁË
Û˘ Î·È ÙÚ·‚‹ÍÙ ÚÔ˜ Ù· ÂÌÚfi˜
ÙËÓ ·Ôı‹ÎË, ¯ˆÚ›˜ Ó· ÙËÓ
ВЪИЫЩЪ¤„ВЩВ (ÂÈÎ. 52), ¤ˆ˜ fiÙÔ˘
·ФЫ·ЫЩВ› ВУЩВПТ˜ (ВИО. 53).
¶ƒ√∂π¢√¶√π∏™∏: ÁÈ· ÙȘ ·ÁÔÚ¤˜ ÛÙȘ
Ôԛ˜ - ‚¿ÛÂÈ ÓfiÌÔ˘ - Ë ·Ôı‹ÎË
Ú¤ÂÈ Ó· Â›Ó·È ÛÙ·ıÂÚ‹, ‰ÂÓ Â›Ó·È
‰˘Ó·Ù‹ Ë ·fiÛ·ÛË Ù˘ ·Ôı‹Î˘ ·fi
ÙË ‚¿ÛË.
∆Ф fiПФ ¤¯ВИ ·ФЫ˘У·ЪМФПФБЛıВ›
П‹Ъˆ˜: Щ· ВН·ЪЩ‹М·Щ· Ф˘ ··ИЩФ‡У
¤ПВБ¯Ф О·И О·ı·ЪИЫМfi ¤¯Ф˘У
‰И·¯ˆЪИЫЩВ›.
53
Page 99

98
Montaggio dell’arma
Per il corretto montaggio dell'arma
rispettare la sequenza indicata.
1) Premendo il pulsante leva-fermo-
cartuccia, inserire nell'affusto la
guardia completa a cane armato
(fig. 54), e portarla in posizione
sull'affusto ruotandola poi verso il
basso (fig. 55).
2) Infilare la spina-fissaggio-guardia
(fig. 56).
Shotgun assembly
To correctly assembly the gun, follow
the sequence of operations given
below.
1) Press the cartridge stop latch but-
ton, insert the complete trigger
guard into the gun carriage, with
the hammer cocked (fig. 54), and
bring it into position on the gun
carriage, rotating it downwards
(fig. 55).
2) Insert the trigger guard pin (fig.
56).
Assemblage de l’arme
Pour l’assemblage correct de l’arme,
respectez la séquence indiquée.
1) En poussant le levier de blocage
cartouche, assembler sur l’affût la
garde complète avec le chien ar-
mé (fig. 54), en la positionnant sur
l’affût et en la tournant vers le bas
(fig. 55).
2) Enfiler la cheville de fixage de la
garde (fig. 56).
Zusammenbauen der Waffe
Die Waffe wird auf folgende Weise
korrekt zusammengebaut:
1) Indem den Magazinsperrklinken-
knopf gedrückt wird, den kompletten Abzugsbügel mit gespanntem
Hahn in das Waffengestell einfügen (Abb. 54) und ihn auf dem
Waffengestell positionieren, ihn
dann nach unten drehen (Abb. 55).
2) Den Abzugsbügelbefestigungsstift
einsetzen (Abb. 56).
54 55
1
2
Page 100

99
Montaje del arma
Para un correcto montaje del arma
respete la secuencia indicada.
1) Presionando el botón palanca-blo-
queo-cartucho, introduzca en el
afuste el guardamonte completo
con martillo armado (fig. 54), y
colóquela en la posición afuste
girándola luego hacia abajo (fig.
55).
2) Insertar la espiga-fijación-guarda-
monte (fig. 56).
Montagem da arma
Para a correcta montagem da arma,
respeitar a sequência indicada.
1) Pressionando o botão alavanca-
bloqueio-cartucho, introduzir na
carreta o guarda-mato completo
com o cão armado (fig. 54), e
posicioná-lo sobre a carreta,
rodando-o depois para baixo (fig.
55).
2) Enfiar a cavilha-fixação-guarda-
mato (fig. 56).
Порядок сборки ружья
Для правильной сборки ружья
соблюдайте следующую
последовательность действий.
1) Нажав на кнопку ограничителя
патрона, завести в соответствующее
окно лафета передний конец блока
УСМ со взведённым курком (рис.
54) и вращательным движением вниз
установить блок УСМ на место (рис.
55).
2) Вставить фиксирующий штифт
УСМ (рис. 56).
™˘Ó·ÚÌÔÏfiÁËÛË ÙÔ˘ fiÏÔ˘
°И· У· Ы˘У·ЪМФПФБ‹ЫВЩВ ЫˆЫЩ¿ ЩФ
fiПФ Ы·˜, ВК·ЪМfiЫЩВ ЩЛУ ·ОfiПФ˘ıЛ
‰И·‰ИО·Ы›·.
1) ¶È¤˙ÔÓÙ·˜ ÙÔ ÎÔ˘Ì› ·Ó·ÛÙÔϤ·,
ÙÔÔıÂÙ‹ÛÙÂ ÛÙË ‚¿ÛË ÙË
ÛηӉ·ÏÔı‹ÎË Ì ÔÏÈṲ̂ÓÔ ÙÔÓ
ÎfiÎÔÚ· (ВИО. 54) О·И ЩФФıВЩ‹ЫЩВ
ЫЩЛ ı¤ЫЛ ЩЛ˜ Б˘ЪУТУЩ·˜ ЩЛУ ЪФ˜
Щ· О¿Щˆ (ВИО. 55).
2) ∆ÔÔıÂÙ‹ÛÙ ÙÔÓ Â›ÚÔ
ÛηӉ·ÏÔı‹Î˘ (ÂÈÎ. 56).
56
 Loading...