

Page 1

Page 2

Uso • Manutenzione
Use • Maintenance
Usage • Entretien
Gebrauch • Wartung
Uso • Manutención
Utilização • Manutenção
Использование • Техобслуживание
±ñ‡óç
• Óõíô‡ñçóç
Montefeltro Duca di Montefeltro Centro
Comfort Beccaccia
*
Ultralight
*
USA market
Page 3

2
Indice
Norme di sicurezza ......................... 4
Presentazione .................................. 30
Funzionamento ............................... 32
Garanzia ......................................... 40
Montaggio ....................................... 42
Sicura del fucile .............................. 54
Caricamento .................................... 54
Sostituzione cartuccia ..................... 64
Scaricamento dell’arma ................... 68
Inconvenienti e rimedi ...................... 72
Munizioni da usare ......................... 76
Manutenzione ................................. 78
Smontaggio dell’arma ...................... 82
Montaggio dell’arma ....................... 92
Accessori e regolazioni.................... 104
Index
Basic safety rules ............................. 4
Introduction ..................................... 30
Operation ........................................ 32
Warranty ......................................... 40
Assembly ......................................... 42
Gun safety catch .............................. 54
Loading ........................................... 54
Cartridge replacement ..................... 64
Unloading ....................................... 68
Troubleshooting ............................... 72
Choice of ammunition ..................... 76
Maintenance ................................... 78
Shotgun stripping ............................. 82
Shotgun assembly ............................ 92
Accessories and adjustments ...........104
Table des matières
Normes de sécurité .......................... 4
Présentation ..................................... 30
Fonctionnement .............................. 32
Garantie .......................................... 40
Montage .......................................... 42
Sûreté du fusil .................................. 54
Chargement ..................................... 54
Remplacement cartouche ................ 64
Déchargement de l’arme ................. 68
Inconvénients et remèdes ................. 72
Munitions à utiliser .......................... 76
Entretien .......................................... 78
Démontage de l’arme ...................... 82
Remontage de l’arme ...................... 92
Accessoires et réglages ...................104
Inhaltsverzeichnis
Sicherheitsvorschriften .................... 4
Einleitung .......................................... 30
Funktionsweise .................................. 32
Garantie ............................................ 40
Zusammenbau .................................. 42
Sicherung des Gewehrs ..................... 54
Laden ................................................ 54
Auswechseln der Patrone .................. 64
Entladen der Waffe ............................ 68
Funktionsstörungen und Abhilfe ........ 72
Zu verwendende Munition ................ 76
Wartung ............................................ 78
Zerlegen der Waffe ............................ 82
Zusammenbauen der Waffe .............. 92
Zubehör und Einstellmöglichkeiten .. 104
Dati soggetti a modifiche senza
impegno di preavviso.
SALVO DIVERSE E SPECIFICHE INDICAZIONI,
IL TESTO E LE ILLUSTRAZIONI DEL PRESENTE
MANUALE HANNO SEMPRE COME RIFERI
-
MENTO LA VERSIONE DESTRA IN CALIBRO
12 DEL FUCILE DESCRITTO.
Data subject to modification without
notice.
UNLESS YOU ARE GIVEN SEPARATE AND
SPECIFIC INSTRUCTIONS
, THE TEXTS AND IL-
LUSTRATIONS CONTAINED IN THIS OWNER’S
MANUAL ALWAYS REFER TO THE RIGHT
-HAND
GAUGE
12 VERSION OF THE SPECIFIED SHOT-
GUN.
Données pouvant être modifiées sans
obligation de préavis.
SAUF SPECIFICATIONS ET INDICATIONS DIF-
FERENTES, LE TEXTE ET LES FIGURES DU PRE-
SENT MANUEL SE REFERENT TOUJOURS A LA
VERSION POUR DROITIERS CALIBRE
12 DU
FUSIL DECRIT
.
Diese Angaben können ohne
Vorankündigung geändert werden.
UNTER VORBEHALT ANDERER, SPEZIFISCHER
HINWEISE BEZIEHT SICH DIESER TEXT UND
DIE
ILLUSTRATIONEN DES VORLIEGENDEN
HANDBUCHES IMMER AUF DEN RECHTS-
HÄNDIGEN GEBRAUCH UND AUF DAS KALIBER
12 DER BESCHRIEBENEN WAFFE.
Page 4

3
Índice
Normas de seguridad ..................... 5
Presentación .................................... 31
Funcionamiento .............................. 33
Garantía .......................................... 41
Montaje ........................................... 43
Seguro del fusil ................................ 55
Carga ............................................... 55
Sustitución del cartucho .................. 65
Descarga del arma ........................... 69
Inconvenientes y soluciones ............ 73
Municiones a utilizar ....................... 77
Manutención ................................... 79
Desmontaje del arma ....................... 83
Montaje del arma ............................ 93
Accesorios y regulaciones ...............105
Índice
Regras de segurança ........................ 5
Apresentação .................................. 31
Funcionamento ............................... 33
Garantia .......................................... 41
Montagem ....................................... 43
Segurança da espingarda ................. 55
Carregamento .................................. 55
Substituição do cartucho ................. 65
Descarregamento da arma ............... 69
Problemas e soluções ....................... 73
Munições a utilizar .......................... 77
Manutenção .................................... 79
Desmontagem da arma ................... 83
Montagem da arma .......................... 93
Acessórios e regulações................... 105
Cодержание
Меры безопасности....................... 5
Введение ....................................... 31
Работа автоматики ........................ 33
Гарантия ......................................... 41
Сборка ........................................... 43
Предохранитель ружья ................. 55
Заряжание ..................................... 55
Замена патрона ............................. 65
Разряжание оружия ...................... 69
Неисправности и способы их
устранения ..................................... 73
Используемые патроны ............... 77
Техобслуживание ........................... 79
Разборка оружия ........................... 83
Сборка ружья ............................... 93
Принадлежности и
регулировки ................................. 105
¶ÂÚȯfiÌÂÓ·
∫·ÓfiÓ˜ ·ÛÊ·Ï›·˜ . . . . . . . . . . . . . . . . . . . . . . . 5
¬бспхуЯбуз . . . . . . . . . . . . . . . . . . . . . . . . . . . . . . . . . . 3 1
ЛейфпхсгЯб . . . . . . . . . . . . . . . . . . . . . . . . . . . . . . . . . . . . 3 3
Åããµçóç . . . . . . . . . . . . . . . . . . . . . . . . . . . . . . . . . . . . . . . . 4 1
Ухнбсмпльгзуз . . . . . . . . . . . . . . . . . . . . . . . . . . . 4 3
З буцЬлейб фпх фпхцекйпµ . . . . . . . . . 5 5
ЕнŸсгейет гŸмйузт . . . . . . . . . . . . . . . . . . . . . . . 5 5
БнфйкбфЬуфбуз цхуйггйпµ . . . . . . . . . . . 6 5
ЕнŸсгейет бƒпгŸмйузт . . . . . . . . . . . . . . . . . 6 9
¬ñïâë‡ìáôá êáé ëµóåéò . . . . . . . . . . . . . . . 7 3
З еƒйлпг‡ фщн цхуйггй¥н . . . . . . . . . . . . 7 7
Óõíô‡ñçóç . . . . . . . . . . . . . . . . . . . . . . . . . . . . . . . . . . . . 7 9
Бƒпухнбсмпльгзуз ф
ïõ üƒëïõ . . . . . . . . . . . . . . . . . . . . . . . . . . . . . . . . . . . . . . . 8 3
Ухнбсмпльгзуз фпх ьƒлпх . . . . . . . . . 9 3
∞ÍÂÛÔ˘¿Ú Î·È Ú˘ıÌ›ÛÂȘ . . . . . . . . . . . . . . . . 1 0 5
Datos sujetos a modificaciones sin
obligación de aviso previo.
SALVO DIFERENTES Y ESPECÍFICAS INDICA-
CIONES, EL TEXTO Y LAS ILUSTRACIONES
DEL PRESENTE MANUAL TIENEN COMO
REFERENCIA LA VERSIÓN DERECHA DE CALI
-
BRE 12 DEL FUSIL DESCRITO.
Dados sujeitos a alteração sem aviso
prévio.
SALVO INDICAÇÕES ESPECÍFICAS EM CON-
TRÁRIO, O TEXTO E AS ILUSTRAÇÕES DO
PRESENTE MANUAL REFEREM
-SE SEMPRE À
VERSÃO DIREITA DE CALIBRE
12 DA ESPIN-
GARDA DESCRITA.
Данные могут быть изменены,
без предварительного извещения.
ЗА ИСКЛЮЧЕНИЕМ ДРУГИХ СПЕЦИАЛЬНЫХ
УКАЗАНИЙ, ТЕКСТ И ИЛЛЮСТРАЦИИ
НАСТОЯЩЕГО РУКОВОДСТВА ВСЕГДА
ПОДРАЗУМЕВАЮТ ПРАВОСТОРОННИЙ
ВАРИАНТ РУЖЬЯ 12 КАЛИБРА.
Œлб фб бнбцесьменб уфпйчеЯб дµнбнфбй
нб фспƒпƒпйзипµн чщсЯт хƒпчсŸщуз
ƒспейдпƒпЯзузт.
БН ДЕН ДЙЕХКСЙНЙЖЕФБЙ ДЙБЦПСЕФЙКБ, ФП
КЕЙМЕНП КБЙ ПЙ ЕЙКПНЕУ ФПХ ¬БСПНФПУ
ЕГ±ЕЙСЙДЙПХ БНБЦЕСПНФБЙ УФЗН
¬БСБЛЛБГЗ ÃÉÁ ДЕОЙП±ЕЙСЕУ
ДЙБМЕФСЗМБФПУ 12 ФПХ
¬ЕСЙГСБЦПМЕНПХ ¬ХСПВПЛПХ П¬ЛПХ.
Page 5

4
NORME DI SICUREZZA
AVVERTENZA: SI PREGA DI LEGGE-
RE IL PRESENTE MANUALE PRIMA
DI MANEGGIARE L’ARMA.
AVVERTENZA: SE MANEGGIATE
NON CORRETTAMENTE, LE ARMI
DA FUOCO POSSONO ESSERE PERICOLOSE, NONCHÈ POTENZIALE
CAUSA DI GRAVI ED IRREPARABILI
DANNI. LE NORME DI SICUREZZA
QUI RIPORTATE VOGLIONO ESSERE UN IMPORTANTE RICHIAMO
ALLA RESPONSABILITÀ CHE RICADE SUI POSSESSORI E GLI UTILIZZATORI DI ARMI DA FUOCO.
BASIC SAFETY RULES
WARNING: PLEASE READ THIS
MANUAL BEFORE HANDLING
YOUR FIREARM.
WARNING: FIREARMS CAN BE
DANGEROUS AND CAN POTENTIALLY CAUSE SERIOUS INJURY,
DAMAGE TO PROPERTY OR
DEATH, IF HANDLED IMPROPERLY.
THE FOLLOWING SAFETY RULES
ARE AN IMPORTANT REMINDER
THAT FIREARM SAFETY IS YOUR
RESPONSIBILITY.
NORMES DE SECURITE
REMARQUE: NOUS VOUS PRIONS
DE LIRE ATTENTIVEMENT CE MANUEL AVANT DE MANIPULER VOTRE ARME.
REMARQUE: SI ELLES SONT MANI-
PULÉES DE FAÇON ERRONÉE, LES
ARMES À FEU PEUVENT ÊTRE DANGEREUSES ET REPRÉSENTER UNE
SOURCE POTENTIELLE D’ACCIDENTS GRAVES, VOIRE IRRÉPARABLES. LES NORMES DE SÉCURITÉ
REPORTÉES DANS CE MANUEL REPRÉSENTENT UN RAPPEL IMPORTANT CONCERNANT LA RESPONSABILITÉ DES PROPRIÉTAIRES ET DES
UTILISATEURS D’ARMES À FEU.
SICHERHEITSVORSCHRIFTEN
HINWEIS: BITTE LESEN SIE DAS
VORLIEGENDE HANDBUCH VOR
DER HANDHABUNG IHRER WAFFE
AUFMERKSAM.
HINWEIS: BEI NICHT KORREKTER
HANDHABUNG KÖNNEN FEUERWAFFEN GEFÄHRLICH SEIN SOWIE
POTENTIELL SCHWERE UND IRREPARABLE SCHÄDEN VERURSACHEN.
DIE IN DIESER ANLEITUNG AUFGEFÜHRTEN SICHERHEITSVORSCHRIFTEN SOLLEN INSBESONDERE
AUF DIE VERANTWORTUNG VERWEISEN, DIE DIE EIGENTÜMER UND
BENUTZER VON FEUERWAFFEN
TRAGEN.
Page 6

5
NORMAS DE SEGURIDAD
ADVERTENCIA: SE RUEGA LEER EL
PRESENTE MANUAL ANTES DE MANEJAR SU ARMA.
ADVERTENCIA: SI SE MANEJA EL
ARMA DE MODO INCORRECTO,
LAS ARMAS DE FUEGO PUEDEN SER
PELIGROSAS, ADEMÁS DE SER UNA
POTENCIAL CAUSA DE DAÑOS
GRAVES IRREPARABLES. LAS NORMAS DE SEGURIDAD QUE SE DETALLAN EN ESTE MANUAL TIENEN
POR OBJETO SER UN LLAMADO
IMPORTANTE A LA RESPONSABILIDAD QUE RECAE EN LOS POSESORES Y LOS USUARIOS DE ARMAS DE
FUEGO.
REGRAS DE SEGURANÇA
ADVERTÊNCIA: LER ATENTAMENTE
O PRESENTE MANUAL ANTES DE
MANUSEAR A ARMA.
ADVERTÊNCIA: SE MANUSEADAS
INCORRECTAMENTE, AS ARMAS DE
FOGO PODEM SER PERIGOSAS E
POTENCIAIS CAUSAS DE DANOS
GRAVES E IRREMEDIÁVEIS. AS REGRAS DE SEGURANÇA AQUI REFERIDAS TÊM POR OBJECTO REFORÇAR A RESPONSABILIDADE DOS
DETENTORES E UTILIZADORES DE
ARMAS DE FOGO.
МЕРЫ БЕЗОПАСНОСТИ
ВНИМАНИЕ: ПРОСИМ ИЗУЧИТЬ
НАСТОЯЩЕЕ РУКОВОДСТВО
ПЕРЕД НАЧАЛОМ ЭКСПЛУАТАЦИИ
ВАШЕГО РУЖЬЯ.
ПОМНИТЕ! ГЛАВНАЯ ЦЕЛЬ МЕР
БЕЗОПАСНОСТИ, ИЗЛОЖЕННЫХ В
НАСТОЯЩЕМ РУКОВОДСТВЕ, ПРИЗВАТЬ ВЛАДЕЛЬЦЕВ
ОГНЕСТРЕЛЬНОГО ОРУЖИЯ К
ОСТОРОЖНОМУ ОБРАЩЕНИЮ С
НИМ И НАПОМНИТЬ, ЧТО
ОТВЕТСТВЕННОСТЬ ЗА
ПРИМЕНЕНИЕ ОГНЕСТРЕЛЬНОГО
ОРУЖИЯ ЛЕЖИТ НА ТЕХ, КТО ИМ
ВЛАДЕЕТ И ПОЛЬЗУЕТСЯ.
∫∞¡√¡∂™ ∞™º∞§∂π∞™
¶ƒ√∂π¢√¶√π∏™∏: ¶∞ƒ∞∫∞§∂π™∆∂ ¡∞
¢π∞µ∞™∂∆∂ ∆√ ¶∞ƒ√¡ ∂°Ã∂πƒπ¢π√
¶ƒπ¡ Ã∏™πª√¶√π∏™∂∆∂ ∆√ √¶§√
™∞™.
¶ƒ√∂π¢√¶√π∏™∏: ∆∞ ¶Àƒ√µ√§∞
√¶§∞, ∞¡ ¢∂¡ Ã∏™πª√¶√π√À¡∆∞π
™ø™∆∞, ª¶√ƒ√À¡ ¡∞ °π¡√À¡
∂¶π∫π¡¢À¡∞ ∫∞π ¡∞ ¶ƒ√∫∞§∂™√À¡
™√µ∞ƒ∂™ ∫π ∞¡∂¶∞¡√ƒ£ø∆∂™
µ§∞µ∂™. √π ∫∞¡√¡∂™ ∞™º∞§∂π∞™
¶√À ¶∞ƒ√À™π∞∑√¡∆∞π ™∆√ ¶∞ƒ√¡
∂°Ã∂πƒπ¢π√ ∂Ã√À¡ ø™ ™∆√Ã√ ¡∞
À¶∂¡£Àªπ™√À¡ ∆√ ∞π™£∏ª∞
∂À£À¡∏™ ¶√À ¶ƒ∂¶∂π ¡∞ ¢π∂¶∂π
∆√À™ ∫∞∆√Ã√À™ ∫∞π ∆√À™ Ã∏™∆∂™
∆ø¡ ¶Àƒ√µ√§ø¡ √¶§ø¡.
Page 7
6
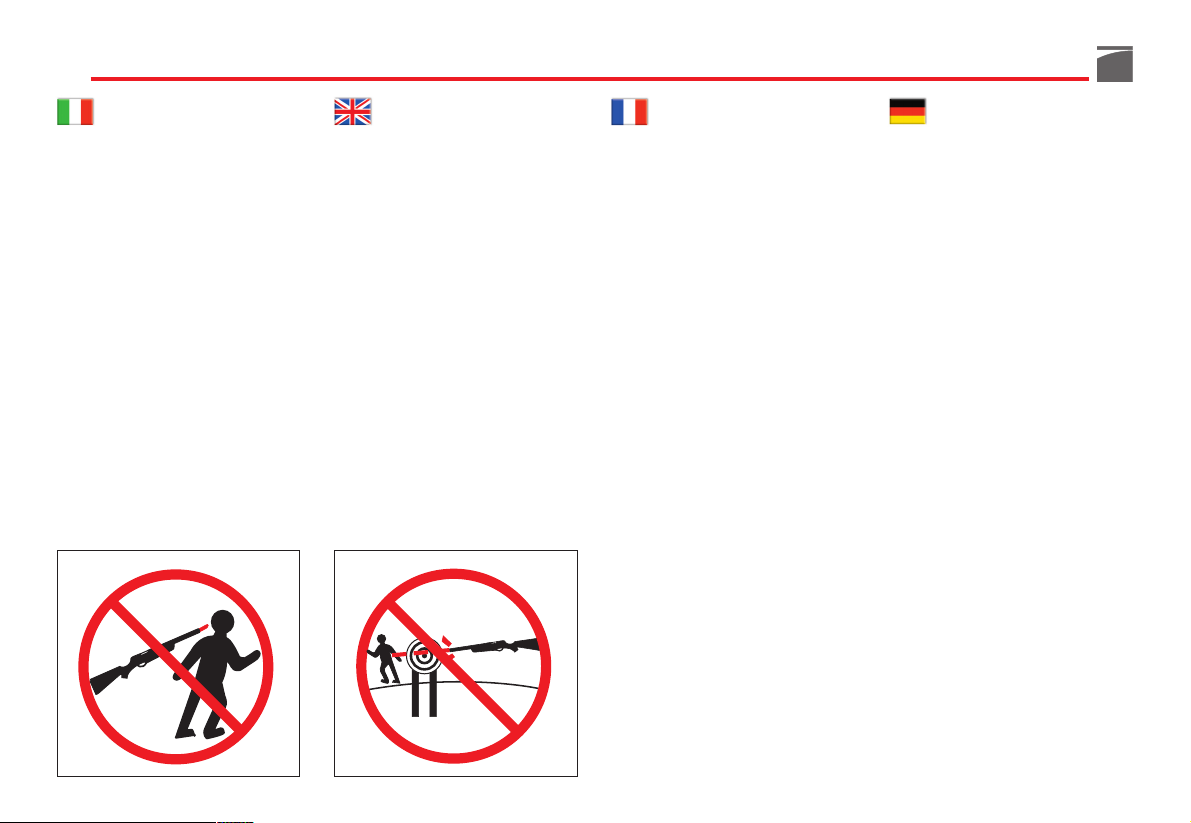
1. NON PUNTARE MAI L’ARMA
CONTRO UNA DIREZIONE CHE
NON SIA PIÙ CHE SICURA.
Non puntare mai la canna dell’arma
contro sé stessi o contro un’altra persona. Questo è di basilare importanza
quando si carica o scarica l’arma.
Quando ci si accinge a sparare ad un
bersaglio, accertarsi di cosa vi sia dietro di esso. I proiettili possono superare 1,5 km di distanza. Se si manca il
bersaglio o se il proiettile lo trapassa,
dovete accertarvi che lo sparo non
abbia causato danni o lesioni a qualcuno.
1. NEVER POINT A FIREARM AT
SOMETHING THAT IS NOT SAFE
TO SHOOT.
Never let the muzzle of a firearm
point at any part of your body or at
another person. This is especially
important when loading or unloading
the firearm. When you are shooting at
a target, know what is behind it. Some
bullets can travel over a mile. If you
miss your target or if the bullet penetrates the target, it is your responsibility to ensure that the shot does not
cause unintended injury or damage.
1. NE POINTEZ JAMAIS VOTRE ARME DANS UNE DIRECTION QUI
NE SOIT PAS TOTALEMENT SURE.
Ne pointez jamais le canon de l’arme
contre vous-mêmes ou contre une autre personne. Cette prescription revêt
une importance fondamentale lorsque
vous chargez ou déchargez votre
arme. Avant de tirer contre une cible,
vérifiez avec attention ce qui se trouve
derrière cette cible. Les projectiles
peuvent dépasser une distance de 1,5
km. Si vous manquez la cible ou si le
projectile la transperce, vous devez
vous assurer que le coup de feu n’a
pas causé de dommages ou de blessures à quelqu’un.
1. NIE DIE WAFFE IN EINE RICHTUNG HALTEN, DIE NICHT
KOMPLETT SICHER IST.
Den Lauf der Waffe nie auf sich selbst
richten oder auf eine andere Person.
Dies ist von grundlegender Wichtigkeit
beim Laden und Entladen der Waffe.
Wenn man auf ein Ziel schießen
möchte, prüfen, was sich dahinter befindet. Die Projektils können eine Entfernung von mehr als 1,5 km überwinden. Falls man das Ziel verfehlt, oder
das Projektil es durchschießt, sicherstellen, dass der Schuss niemandem
Schaden oder Verletzungen zugeführt
hat.
Page 8

7
1. NUNCA APUNTE EL ARMA
CONTRA UNA DIRECCIÓN QUE
NO SEA MÁS QUE SEGURA.
Nunca apunte el cañón del arma contra sí mismo o contra otra persona.
Esto es de básica importancia cuando
se carga o descarga el arma.
Cuando se apresta a disparar a un
blanco, cerciorarse de lo que puede
haber detrás del mismo. Los proyectiles pueden superar 1,5 km de distancia. Si se erra el blanco o si el proyectil lo traspasa, debe cerciorarse de que
el disparo no haya causado daños o
lesiones a alguien.
1. NUNCA APONTAR A ARMA NUMA DIRECÇÃO QUE NÃO SEJA
TOTALMENTE SEGURA.
Nunca apontar o cano da arma a si
próprio ou a outra pessoa. Isto é de
importância fundamental durante o
carregamento/descarregamento da
arma. Antes de disparar sobre um
alvo, verificar o que se encontra por
trás do mesmo. Os projécteis podem
ultrapassar 1,5 km de distância. Se
falhar o alvo ou se o projéctil atravessar o mesmo, certificar-se de que o
disparo não provocou danos ou lesões a ninguém.
1. ВСЕГДА ДЕРЖИТЕ РУЖЬЁ
ТОЛЬКО В БЕЗОПАСНОМ
НАПРАВЛЕНИИ.
Никогда не направляйте ствол ружья
на себя или на других людей.
Неукоснительно придерживайтесь
этих правил во время заряжания и
разряжания ружья.
Перед производством выстрела
обратите внимание на то, что
находится за целью. Ружейные
снаряды могут представлять опасность
на расстоянии свыше 1,5 км. Если
снаряд прошёл мимо цели или пробил
её насквозь, убедитесь, что он не нанёс
ранения человеку.
1. ª∏ ™∆ƒ∂º∂∆∂ ¶√∆∂ ∆√ √¶§√ ™∂
∫∞∆∂À£À¡™∏ ¶√À ¢∂¡ ∂π¡∞π
∞¶√§À∆ø™ ∞™º∞§∏™.
ªË ÛÙÚ¤ÊÂÙ ÔÙ¤ ÙËÓ Î¿ÓÓË ÙÔ˘ fiÏÔ˘
ÚÔ˜ ÙÔ Ì¤ÚÔ˜ Û·˜ ‹ ÚÔ˜ ¿ÏÏÔ˘˜
·ÓıÚÒÔ˘˜. ∞˘Ùfi ¤¯ÂÈ ÙÂÚ¿ÛÙÈ· ÛËÌ·Û›·
fiЩ·У БВМ›˙ВЩВ ‹ ·‰ВИ¿˙ВЩВ ЩФ fiПФ.
ŸЩ·У ВЩФИМ¿˙ВЫЩВ У· ˘ЪФ‚ФП‹ЫВЩВ ЫВ
О¿ФИФ ЫЩfi¯Ф, ‚В‚·ИˆıВ›ЩВ ЩИ ˘¿Ъ¯ВИ
›Ыˆ ЩФ˘. ∆· ЫО¿БИ· МФЪФ‡У У·
КЩ¿ЫФ˘У ЫВ ·fiЫЩ·ЫЛ ¿Уˆ ЩФ˘ 1,5 km.
∂¿У ·ЫЩФ¯‹ЫВЩВ ‹ Щ· ЫО¿БИ·
‰И·ВЪ¿ЫФ˘У ЩФ ЫЩfi¯Ф, Ъ¤ВИ У· В›ЫЩВ
‚¤‚·ИФИ fiЩИ ‰ВУ ı· ЪФО·П¤ЫФ˘У ˙ЛМИ¤˜ ‹
ЩЪ·˘М·ЩИЫМФ‡˜.
Page 9

8
2. MANEGGIARE SEMPRE L’ARMA
COME SE FOSSE CARICA.
Mai dare per scontato che l’arma sia
scarica. L’unico modo sicuro per
accertarsi che l’arma abbia la camera
vuota è quello di aprirla e verificare
visivamente e fisicamente che non vi
siano presenti proiettili.
Rimuovere o scaricare il serbatoio
non significa che l’arma sia scarica o
non possa sparare. Fucili e carabine
possono essere controllati rimuovendo tutti i proiettili e successivamente
aprendo ed ispezionando la camera
di scoppio in modo tale da poter effettuare un’ispezione completa ed assicurarsi che non vi siano rimasti colpi
all’interno.
2. ALWAYS TREAT A FIREARM AS IF
IT WERE LOADED.
Never assume that a firearm is unloaded. The only certain way to ensure
that a firearm has the chamber empty
is to open the chamber and visually
and physically examine the inside to
see if a round is present.
Removing or unloading the magazine
will not guarantee that a firearm is
unloaded or cannot fire. Shotguns and
rifles can be checked by removing all
rounds and by then opening and
inspecting the chamber so that a visual
inspection of the chamber for any
remaining rounds can be made.
2. MANIPULEZ TOUJOURS VOTRE
ARME COMME SI ELLE ETAIT
CHARGEE.
Ne donnez jamais pour sûr que l’arme soit déchargée. La seule façon
pour s’assurer que la chambre de l’arme soit vide est de l’ouvrir et de vérifier visuellement et physiquement l’absence de projectiles.
Retirer ou décharger le magasin ne
signifie pas que l’arme est déchargée
ou qu’elle ne peut pas faire feu. Les
fusils et les carabines peuvent être
contrôlés en retirant tous les projectiles, puis en ouvrant et en vérifiant la
chambre d’explosion de façon à pouvoir effectuer une inspection complète
et s’assurer qu’aucune balle ne soit
restée à l’intérieur.
2. DIE WAFFE IMMER SO HANDHABEN, ALS WÄRE SIE GELADEN.
Nie davon ausgehen, dass die Waffe
sicherlich entladen ist. Die einzige
Weise, um sicher zu sein, dass die
Waffe leere Patronenlager hat, besteht
darin, diese zu öffnen und visuell und
physisch zu prüfen, dass keine Projektils vorhanden sind.
Das Magazin entfernen oder entladen,
bedeutet nicht, dass die Waffe nicht
geladen ist oder nicht schießen kann.
Gewehre und Karabiner können überprüft werden, indem man alle Projektils entfernt und daraufhin das Patronenlager öffnet und überprüft, hierdurch kann man eine vollständige Kontrolle durchführen und sicherstellen,
dass keine Schüsse übrig geblieben
sind.
Page 10

9
2. MANEJAR SIEMPRE EL ARMA
COMO SI ESTUVIESE CARGADA.
Nunca dar por sentado que el arma
está descargada. El único modo seguro para asegurarse de que el arma tenga la cámara vacía es el de abrir y
comprobar visualmente y físicamente
que no hay proyectiles presentes.
Quitar o descargar el almacén no quiere decir que el arma esté descargada o
no pueda disparar. Fusiles y carabinas
se pueden controlar quitando todos los
proyectiles y luego abriendo e inspeccionando la cámara de explosión
de modo tal que se pueda efectuar una
inspección completa y cerciorar de
que no han quedado disparos en su
interior.
2. TRATAR SEMPRE A ARMA COMO
SE ESTIVESSE CARREGADA.
Nunca dar como garantido que a
arma está descarregada. A única forma segura de se certificar que a câmara da arma está vazia é abri-la e verificar física e visualmente se há projécteis no seu interior.
A remoção ou descarga do depósito
não significa que a arma está descarregada ou que não possa disparar. As
espingardas e carabinas podem ser
verificadas removendo todos os projécteis e, de seguida, abrindo e inspeccionando a câmara de modo a
poder efectuar uma inspecção completa e assegurar-se que não ficaram
projécteis no seu interior.
2. ВСЕГДА ОБРАЩАЙТЕСЬ С
РУЖЬЁМ, КАК С ЗАРЯЖЕННЫМ.
Никогда не предполагайте, что ваше
ружьё разряжено. Единственно
надёжный способ удостовериться в
том, что ружьё разряжено – это
открыть затвор и осмотреть патронник
на предмет отсутствия в нём патрона.
Если вы отсоединили и расснарядили
магазин, это не значит, что ружьё
разряжено и не может выстрелить.
Для того, чтобы привести ружьё в
безопасное состояние необходимо
удалить все патроны из магазина,
отвести затвор назад и осмотреть
патронник на предмет отсутствия в
нём патрона.
2. ¡∞ Ã∂πƒπ∑∂™∆∂ ¶∞¡∆∞ ∆√ √¶§√
™∞¡ ¡∞ ∂π¡∞π °∂ª∞∆√.
¡· ÌËÓ ˘Ôı¤ÙÂÙ ÔÙ¤ fiÙÈ ÙÔ fiÏÔ
Â›Ó·È ¿‰ÂÈÔ. Ο µνος σγουρος τρπος
για να βεβαιωθετε τι το πλο χει
δεια θαλµη, εναι να το ανοξετε και
να βεβαιωθετε µε το µτι και την αφ
τι δεν υπρχουν φυσγγια.
∞К·ИЪТУЩ·˜ ‹ ·‰ВИ¿˙ФУЩ·˜ ЩЛУ ·Фı‹ОЛ
‰ВУ ЫЛМ·›УВИ fiЩИ ЩФ fiПФ В›У·И ¿‰ВИФ О·И
‰ВУ МФЪВ› У· ˘ЪФ‚ФП‹ЫВИ. ∆·
ЩФ˘К¤ОИ· О·И ФИ О·Ъ·М›УВ˜ МФЪФ‡У У·
ВПВБ¯ıФ‡У ·К·ИЪТУЩ·˜ fiП· Щ· К˘Ы›ББИ·
О·И ·УФ›БФУЩ·˜ ЫЩЛ Ы˘У¤¯ВИ· ЩФ fiПФ
БИ· У· ВП¤БНВЩВ ЩЛ ı·П¿МЛ ¤ЩЫИ ТЫЩВ У·
О¿УВЩВ ¤У·У П‹ЪЛ ¤ПВБ¯Ф О·И У·
‚В‚·ИˆıВ›ЩВ fiЩИ ‰ВУ ¤¯Ф˘У ·ФМВ›УВИ
К˘Ы›ББИ· ЫЩФ ВЫˆЩВЪИОfi.
Page 11
10
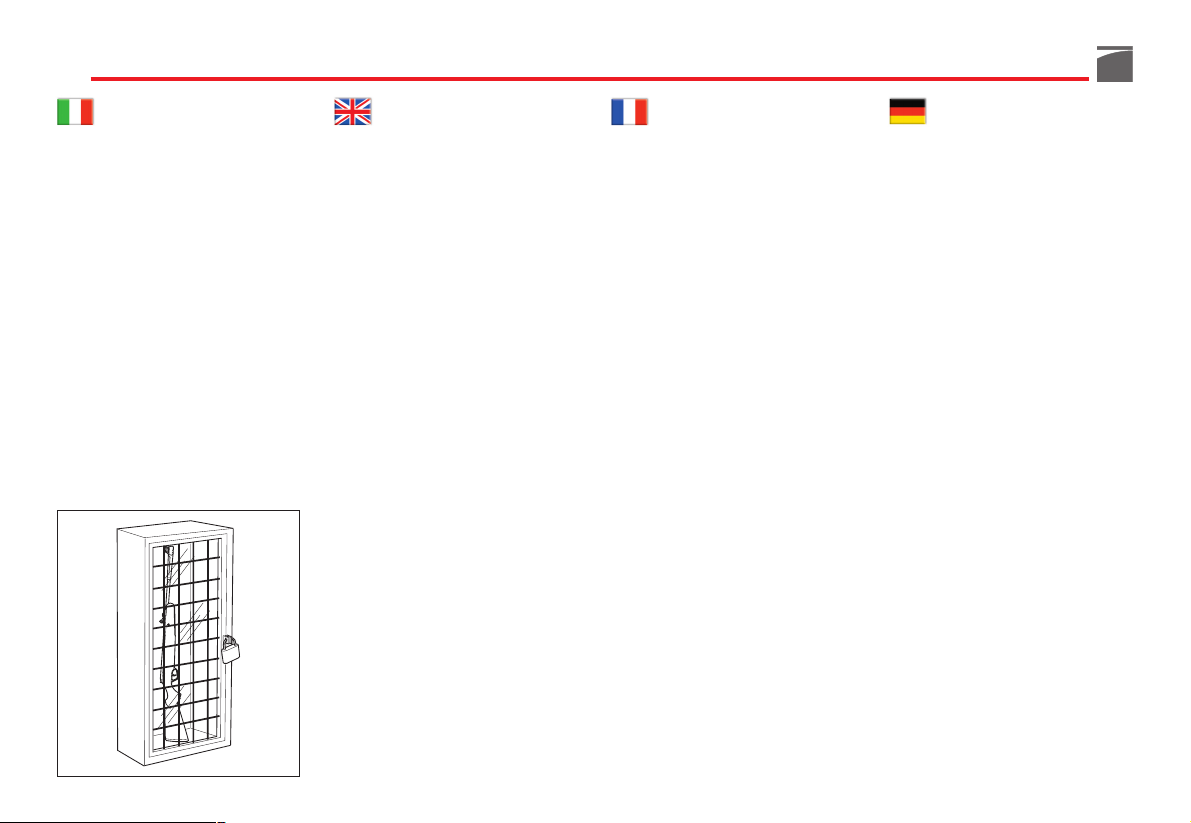
3. CUSTODIRE L’ARMA IN UN
LUOGO SICURO E NON ACCESSIBILE AI BAMBINI.
E’ vostro compito assicurarvi che i
minori o altre persone non autorizzate
non abbiano accesso all’arma. Per
ridurre il rischio di incidenti ai minori,
scaricate l’arma, mettetela sotto chiave e riponete le munizioni in una
separata sede e sempre sotto chiave.
Tenere sempre presente che i dispositivi utilizzati per prevenire incidenti es. lucchetti per armi, chiusure per
camere di scoppio ecc. non sono sufficienti ad impedire che altri possano
utilizzare l’arma o utilizzarla in modo
improprio. La custodia dell’arma in
una cassetta di sicurezza apposita in
acciaio sarebbe l’ideale per ridurre la
probabilità che minori o persone non
autorizzate possano utilizzare l’arma
in modo improprio.
3. STORE YOUR FIREARM SO THAT
CHILDREN CANNOT GAIN
ACCESS TO IT.
It is your responsibility to ensure that
children under the age of 18 or other
unauthorized persons do not gain
access to your firearm. To reduce the
risk of accidents involving children,
unload your firearm, lock it and store
the ammunition in a separate locked
location. Please note that devices
intended to prevent accidents - for
example, cable locks, chamber plugs,
etc, - may not prevent use or misuse of
your firearm by a determined person.
Firearm storage in a steel gun safe may
be more appropriate to reduce the
likelihood of intentional misuse of a
firearm by an unauthorized child or
person.
3. CONSERVEZ VOTRE ARME DANS
UN LIEU SUR ET NON ACCESSIBLE POUR LES ENFANTS.
Vous êtes chargés de vous assurer que
les mineurs ou autres personnes non
autorisées n’aient pas accès à l’arme.
Pour réduire le risque d’accidents envers les mineurs, déchargez l’arme,
fermez-la à clé et rangez les munitions
dans un endroit séparé et toujours
fermé à clé. N’oubliez jamais que les
dispositifs utilisés pour prévenir les
accidents - comme par ex. les cadenas
pour armes, les fermetures pour chambres d’explosion, etc. - ne suffisent pas
à empêcher que d’autres personnes
puissent utiliser l’arme à feu ou l’utiliser de façon impropre. Le rangement
de l’arme dans un étui de sécurité spécial en acier serait l’idéal pour réduire
la probabilité que les mineurs ou les
personnes non autorisées puissent utiliser l’arme de façon impropre.
3. DIE WAFFE AN EINEM SICHEREN
UND FÜR KINDER UNZUGÄNGLICHEN ORT AUFBEWAHREN.
Es ist Ihre Aufgabe sicherzustellen,
dass Minderjährige oder andere nicht
autorisierte Personen keinen Zugriff
auf die Waffe nehmen können. Um
das Unfallrisiko bei Minderjährigen zu
verringern, entladen Sie die Waffe und
lagern Sie sie unter Verschluss, bewahren Sie die Munition an einem anderen Ort und ebenfalls unter Verschluss
auf. Beachten Sie immer, dass die Vorrichtungen zum Unfallschutz - z.B.
Schlösser für Waffen, Verschlüsse für
Patronenlager u.s.w. nicht ausreichend
sind, um zu verhindern, dass andere
die Waffe benutzen oder dass diese
auf unsachgemäße Weise benutzt
wird. Die Verwahrung der Waffe in
einem eigens vorgesehenen Schließfach wäre ideal, um die Wahrscheinlichkeit zu verringern, dass Minderjährige oder nicht autorisierte Personen die Waffen auf unsachgemäße
Weise benutzen.
r
e
g
e
o
t
S
Page 12

11
3. GUARDAR EL ARMA EN UN
LUGAR SEGURO Y NO ACCESIBLE A LOS NIÑOS.
Es su deber cerciorarse de que menores u otras personas no autorizadas no
tengan acceso al arma. Para reducir el
riesgo de accidentes a menores, descargue el arma guárdela bajo llave y
coloque las municiones en otro lugar
separado y siempre bajo llave. Recuerde siempre que los dispositivos
utilizados para prevenir accidentes por ejemplo candados para armas,
cierres para cámaras de explosión etc.
no son suficientes para impedir que
otros puedan utilizar el arma o usarla
de modo impropio. La funda del arma
en una caja de seguridad especial de
acero sería ideal para reducir la posibilidad de que menores o personas no
autorizadas puedan utilizar el arma de
modo impropio.
3. GUARDAR A ARMA EM LOCAL
SEGURO E LONGE DO ALCANCE DE CRIANÇAS.
É seu dever assegurar-se que menores
ou outras pessoas não autorizadas não
tenham acesso à arma. Para minimizar
o risco de acidentes com crianças,
descarregue a arma, guarde-a fechada
à chave e mantenha as munições em
local separado e sempre fechado à
chave. Tenha sempre em conta que os
dispositivos de prevenção de acidentes - por ex. cadeados para armas,
fechaduras para câmaras, etc. são
insuficientes para impedir a utilização
ou utilização incorrecta da arma por
parte de terceiros. A conservação do
estojo da arma num cofre em aço adequado para o efeito seria ideal para
minimizar a probabilidade de a arma
ser utilizada incorrectamente por
menores ou pessoas não autorizadas.
3. ХРАНИТЬ ОРУЖИЕ В
НАДЁЖНОМ И НЕДОСТУПНОМ
ДЛЯ ДЕТЕЙ МЕСТЕ.
Владелец ружья должен принять все
необходимые меры для того, чтобы
несовершеннолетние или иные
посторонние лица не получили
доступа к оружию. В целях сведения к
минимуму риска несчастных случаев с
участием несовершеннолетних
храните оружие и боеприпасы
отдельно в закрытых на ключ сейфах.
Всегда имейте ввиду, что
приспособления, предназначенные
для предотвращения несчастных
случаев, например навесные замки на
ружьё и заглушки для патронника, не
гарантируют от несанкционированного
или нецелевого использования ружья.
Храните оружие в специальном
стальном сейфе. Это самый надёжный
способ избежать использования ружья
не по назначению несовершеннолетними
или посторонними лицами.
3. ¡∞ ºÀ§∞∆∂ ∆√ √¶§√ ™∂
∞™º∞§∂™ ™∏ª∂π√, ª∞∫ƒπ∞ ∞¶√
¶∞π¢π∞.
∂›Ó·È ηı‹ÎÔÓ Û·˜ Ó· ‚‚·Èˆı›Ù fiÙÈ ÔÈ
·У‹ПИОФИ О·И ¿ПП· МЛ ВНФ˘ЫИФ‰ФЩЛМ¤У·
¿ЩФМ· ‰ВУ МФЪФ‡У У· ¤¯Ф˘У
ЪfiЫ‚·ЫЛ ЫЩФ fiПФ. °И· У· МВИТЫВЩВ
ЩФУ О›У‰˘УФ ·Щ˘¯ЛМ¿ЩˆУ БИ· ·УЛП›ОФ˘,
·‰ÂÈ¿ÛÙ ÙÔ fiÏÔ, ÎÏÂȉÒÛÙ ÙÔ Î·È
ЩФФıВЩ‹ЫЩВ Щ· ˘ЪФМ·¯ИО¿ ЫВ
¯ˆЪИЫЩfi ЫЛМВ›Ф О·И ¿УЩ· ОПВИ‰ˆМ¤У·.
¶Ъ¤ВИ У· ¤¯ВЩВ ¿УЩ· ˘fi„Л Ы·˜ fiЩИ
Щ· Ы˘ЫЩ‹М·Щ· Ф˘ ¯ЪЛЫИМФФИФ‡УЩ·И
БИ· ЩЛУ ·ФЩЪФ‹ ·Щ˘¯ЛМ¿ЩˆУ –.¯.
ПФ˘О¤Щ· БИ· fiП·, Щ¿В˜ БИ· ı·П¿МВ˜
ОП.– ‰ВУ ·ЪОФ‡У БИ· У· ВМФ‰›ЫФ˘У ЫВ
¿ППФ˘˜ ЩЛ ¯Ъ‹ЫЛ ‹ ЩЛУ ·О·Щ¿ППЛПЛ
¯Ъ‹ЫЛ ЩФ˘ fiПФ˘. ∏ К‡П·НЛ ЩФ˘ fiПФ˘
ЫВ ВИ‰ИОfi ·ЩЫ¿ПИУФ ВЪМ¿ЪИФ В›У·И Ф
О·П‡ЩВЪФ˜ ЩЪfiФ˜ БИ· У· МВИТЫВЩВ ЩЛУ
Иı·УfiЩЛЩ· ·О·Щ¿ППЛПЛ˜ ¯Ъ‹ЫЛ˜ ЩФ˘
·fi ·ÓËÏ›ÎÔ˘˜ ‹ ÌË ÂÍÔ˘ÛÈÔ‰ÔÙË̤ӷ
¿ÙÔÌ·.
Page 13
12
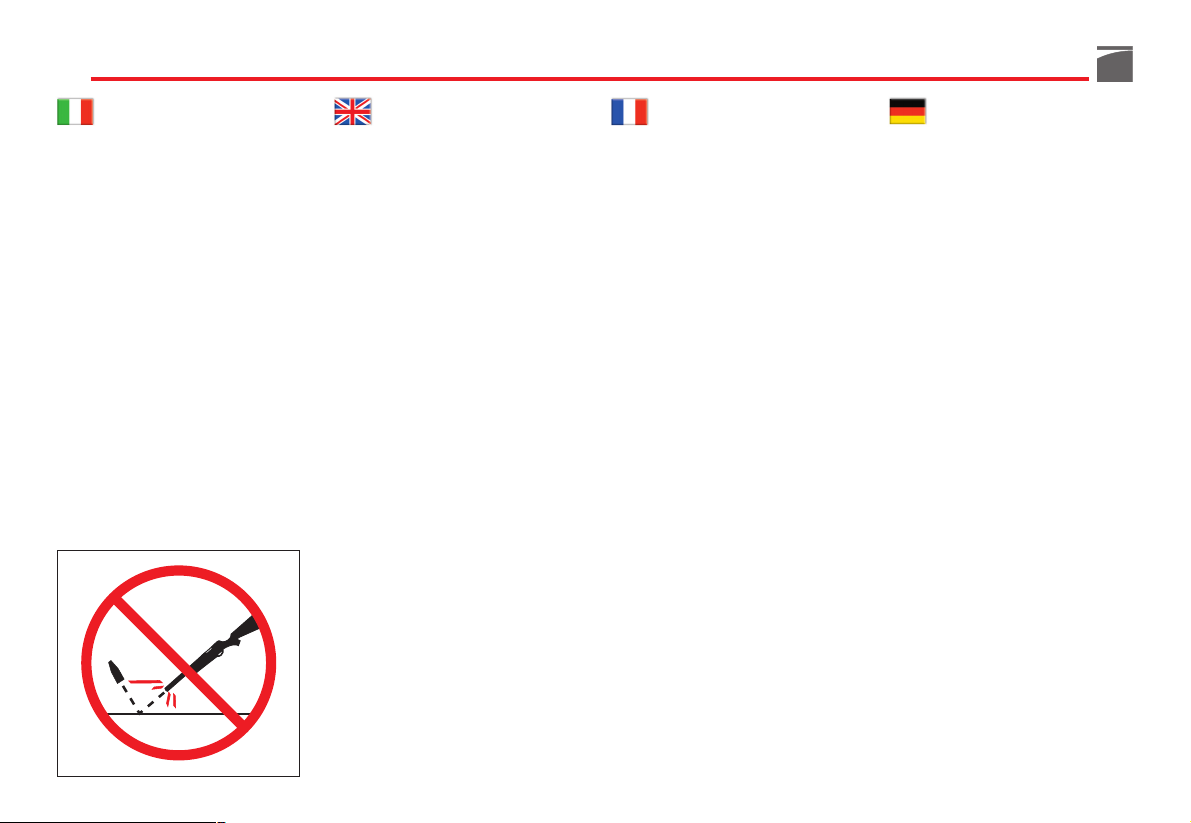
4. MAI SPARARE CONTRO SPECCHI D’ACQUA O SU SUPERFICI
DURE.
Sparare contro specchi d’acqua, contro una roccia o altre superfici dure
aumenta il rischio di rimbalzi o frammentazioni dei proiettili, che può
voler dire colpire bersagli non voluti o
limitrofi.
4. NEVER SHOOT AT WATER OR AT
A HARD SURFACE.
Shooting at the surface of water or at a
rock or other hard surface increases
the chance of ricochets or fragmentation of the bullet or shot, which can
result in the projectile striking an unintended or peripheral target.
4. NE TIREZ JAMAIS CONTRE UNE
PIECE D’EAU OU CONTRE DES
SURFACES DURES.
Tirer contre des pièces d’eau, contre
une roche ou d’autres surfaces dures
augmente le risque de rebondissements ou de fragmentations des projectiles, ce qui peut vouloir dire atteindre des cibles non souhaitées ou limitrophes.
4. NIE GEGEN WASSERSPIEGEL
ODER AUF HARTE OBERFLÄCHEN SCHIEßEN.
Durch das Schießen auf Wasserspiegel, gegen Felsen oder andere harte
Oberflächen wird das Risiko erhöht,
dass die Projektile rückprallen oder
zersplittern, wodurch ungewollte oder
angrenzende Ziele getroffen werden
könnten.
Page 14

13
4. NUNCA DISPARAR CONTRA
ESPEJOS DE AGUA O SUPERFICIES DURAS.
Disparar contra espejos de agua, contra una roca u otras superficies duras
aumenta el riesgo de rebote o fragmentaciones de los proyectiles, lo cual
puede significar dar en blancos no deseados o limítrofes.
4. NUNCA DISPARAR SOBRE SUPERFÍCIES AQUÁTICAS OU DURAS.
Disparar sobre superfícies aquáticas,
rochas ou outras superfícies duras aumenta o risco de ricochetes ou de
fragmentação dos projécteis, podendo
atingir alvos não desejados ou limítrofes.
4. НИКОГДА НЕ СТРЕЛЯЙТЕ В
ВОДУ ИЛИ ПО ТВЁРДЫМ
ПРЕДМЕТАМ.
Стрельба в воду, по камням или
иным твёрдым поверхностям
увеличивает риск рикошета или
разрушения снаряда, что может
повлечь поражение близлежащих
или непредусмотренных целей.
4. ª∏¡ ¶Àƒ√µ√§∂π∆∂ ∆∏¡
∂¶πº∞¡∂π∞ ∆√À ¡∂ƒ√À ◊ ™∂
™∫§∏ƒ∂™ ∂¶πº∞¡∂π∂™.
¶˘ЪФ‚ФПТУЩ·˜ ЩЛУ ВИК¿УВИ· ЩФ˘
УВЪФ‡, ‚Ъ¿¯Ф˘˜ ‹ ¿ППВ˜ ЫОПЛЪ¤˜
ВИК¿УВИВ˜, ·˘Н¿УВИ Ф О›У‰˘УФ˜
ВНФЫЩЪ·ОИЫМФ‡ ‹ ıЪ˘ММ·ЩИЫМФ‡ ЩˆУ
‚ПЛМ¿ЩˆУ О·И Л Иı·УfiЩЛЩ· У·
¯Щ˘‹ЫВЩВ ·УВИı‡МЛЩФ˘˜ ‹ БВИЩФУИОФ‡˜
ЫЩfi¯Ф˘˜.
Page 15

14
5. CONOSCERE LE CARATTERISTICHE DI SICUREZZA DELL’ARMA
CHE STATE USANDO, TENENDO
PRESENTE CHE I DISPOSITIVI DI
SICUREZZA NON SOSTITUISCONO LE PROCEDURE DI UN
MANEGGIO DELL’ARMA IN
SICUREZZA.
Non affidarsi esclusivamente ai dispositivi di sicurezza al fine di prevenire
incidenti. E’ di assoluta importanza
che conosciate ed osserviate le caratteristiche di sicurezza dell’arma che
state maneggiando; gli incidenti
comunque, possono essere maggiormente evitati se si seguono le procedure di un maneggio sicuro dell’arma,
contenute nelle regole di sicurezza e
all’interno di questo manuale. Per
familiarizzare ulteriormente con l’uso
appropriato di questa o altre armi, si
consiglia di seguire un corso sulla
sicurezza delle armi tenuto da un professionista del settore, esperto in tecniche d’uso e procedure di sicurezza.
5. KNOW THE SAFETY FEATURES
OF THE FIREARM YOU ARE
USING, BUT REMEMBER: SAFETY
DEVICES ARE NOT A SUBSTITUTE
FOR SAFE HANDLING PROCEDURES.
Never rely solely on a safety device to
prevent an accident. It is imperative
that you know and use the safety features of the particular firearm you are
handling, but accidents can best be
prevented by following the safe handling procedures described in these
safety rules and elsewhere in the product manual. To further familiarize
yourself with the proper use of this or
other firearms, take a Firearms Safety
Course taught by an expert in firearms
use and safety procedures.
5. IL EST FONDAMENTAL QUE
VOUS SOYEZ A CONNAISSANCE
DES CARACTERISTIQUES DE
L’ARME QUE VOUS UTILISEZ, EN
TENANT COMPTE DU FAIT QUE
LES DISPOSITIFS DE SECURITE
NE REMPLACENT PAS LES PROCEDURES DE SECURITE CONCERNANT LA MANIPULATION
DE L’ARME.
Ne vous en remettez pas uniquement
aux dispositifs de sécurité pour prévenir les accidents. Il est fondamental
que vous connaissiez et que vous
observiez les caractéristiques de sécurité de l’arme que vous manipulez;
dans tous les cas, les accidents peuvent être évités encore davantage en
suivant les procédures de sécurité concernant la manipulation de l’arme reportées dans les règles de sécurité et à
l’intérieur de ce manuel. Pour familiariser davantage avec cette arme ou
d’autres armes afin de pouvoir les utiliser de façon appropriée, il est conseillé de suivre un cours sur la sécurité
des armes tenu par un professionnel
du secteur, expert dans les techniques
d’utilisation et dans les procédures de
sécurité.
5. DIE SICHERHEITSEIGENSCHAFTEN DER WAFFE KENNEN, DIE
SIE BENUTZEN UND SICH BEWUSST SEIN, DASS DIE SICHERHEITSVORRICHTUNGEN DIE
VORGANGSWEISE EINER KORREKTEN UND SICHEREN HANDHABUNG DER WAFFE NICHT ERSETZEN.
Sich nicht ausschließlich den Sicherheitsvorrichtungen anvertrauen, um
Unfällen vorzubeugen. Es ist unbedingt notwendig, dass Sie die Sicherheitseigenschaften der von Ihnen gehandhabten Waffe kennen und einhalten, die Unfälle können auf jeden Fall
besser vermieden werden, wenn man
die Vorgangsweisen zu einer sicheren
Handhabung der Waffe befolgt, die in
den Sicherheitsregeln und innerhalb
dieses Handbuchs enthalten sind. Um
noch vertrauter mit dem angemessenen Gebrauch dieser oder anderer
Waffen zu sein, wird geraten, einen
Kurs über die Waffensicherheit zu
besuchen, der von einem Fachmann
der Branche gehalten wird, der Experte in Bezug auf Gebrauchstechniken
und Sicherheitsprozeduren ist.
Page 16

15
5. CONOCER LAS CARACTERÍSTICAS DE SEGURIDAD DEL ARMA
QUE ESTÁ USANDO, RECORDANDO QUE LOS DISPOSITIVOS DE SEGURIDAD NO SUSTITUYEN LOS PROCEDIMIENTOS DE UN MANEJO SEGURO
DEL ARMA.
Nunca confíe exclusivamente en los
dispositivos de seguridad para prevenir accidentes. Es de absoluta importancia que conozca y respete las características de seguridad del arma que
está manejando, los accidentes en
cualquier caso, pueden ser en su mayoría evitados si se respetan los procedimientos de un manejo seguro del
arma, contenidos en las reglas de seguridad y dentro de este manual. Para
familiarizar con el uso apropiado de
esta o de otras armas, se recomienda
hacer un curso sobre la seguridad de
las armas, con clases de un profesional del sector, experto en técnicas de
uso y procedimientos de seguridad.
5. CONHECER AS CARACTERÍSTICAS DE SEGURANÇA DA ARMA
QUE ESTÁ A SER UTILIZADA,
TENDO SEMPRE EM CONTA QUE
OS DISPOSITIVOS DE SEGURANÇA NÃO SUBSTITUEM OS
PROCEDIMENTOS PARA O
MANUSEAMENTO DA ARMA EM
SEGURANÇA.
Não confiar exclusivamente nos
dispositivos de segurança para prevenir acidentes. É de extrema importância conhecer e observar as características de segurança da arma que está a
ser manuseada; contudo, os acidentes
podem ser evitados sobretudo através
da implementação dos procedimentos
para um manuseamento seguro da
arma, referidos nas regras de segurança e no presente manual. Para uma
maior familiarização com a utilização
adequada desta e de outras armas,
aconselha-se a seguir um curso sobre
a segurança das armas realizado por
um profissional do sector, especialista
em técnicas de utilização e em procedimentos de segurança.
5. ИЗУЧИТЕ СПОСОБЫ
БЕЗОПАСНОГО ОБРАЩЕНИЯ С
ВАШИМ РУЖЬЁМ. ПОМНИТЕ, ЧТО
НАЛИЧИЕ ПРЕДОХРАНИТЕЛЬНЫХ
УСТРОЙСТВ НЕ ЗАМЕНЯЕТ
НАВЫКОВ БЕЗОПАСНОГО
ОБРАЩЕНИЯ С ОРУЖИЕМ.
Для предотвращения несчастных
случаев не полагайтесь исключительно
на предохранительные устройства.
Крайне важно изучить и соблюдать
правила безопасного обращения с
вашим оружием. Большую часть
несчастных случаев можно
предотвратить, если неукоснительно
придерживаться мер безопасности,
изложенных в настоящем руководстве.
Для дальнейшего совершенствования
ваших навыков по правильному
применению оружия рекомендуем
пройти специальный курс обучения под
руководством опытного инструктора по
стрелковому делу.
5. £∞ ¶ƒ∂¶∂π ¡∞ °¡øƒπ∑∂∆∂ ∆∞
Ã∞ƒ∞∫∆∏ƒπ™∆π∫∞ ∞™º∞§∂π∞™ ∆√À
√¶§√À ¶√À Ã∏™πª√¶√π∂π∆∂,
∂Ã√¡∆∞™ À¶√æ∏ √∆π ∆∞
™À™∆∏ª∞∆∞ ∞™º∞§∂π∞™ ¢∂¡
∞¡∆π∫∞£π™∆√À¡ ∆π™ ¢π∞¢π∫∞™π∂™
∞™º∞§√À™ Ã∂πƒπ™ª√À ∆√À
√¶§√À.
°È· ÙËÓ ·ÔÊ˘Á‹ ÙˆÓ ·Ù˘¯ËÌ¿ÙˆÓ ÌËÓ
ÂÌÈÛÙ‡ÂÛÙ ÌfiÓÔ Ù· Û˘ÛÙ‹Ì·Ù·
·ÛÊ·Ï›·˜. ∂›Ó·È Ôχ ÛËÌ·ÓÙÈÎfi Ó·
БУˆЪ›˙ВЩВ О·И У· ЩЛЪВ›ЩВ Щ·
¯·Ъ·ОЩЛЪИЫЩИО¿ ·ЫК·ПВ›·˜ ЩФ˘ fiПФ˘
Ф˘ ¯ВИЪ›˙ВЫЩВ. ™В О¿ıВ ВЪ›ЩˆЫЛ, Ф
О·П‡ЩВЪФ˜ ЩЪfiФ˜ БИ· ЩЛУ ·ФК˘Б‹
·Ù˘¯ËÌ¿ÙˆÓ Â›Ó·È Ë Ù‹ÚËÛË ÙˆÓ
‰И·‰ИО·ЫИТУ ·ЫК·ПФ‡˜ ¯ВИЪИЫМФ‡ ЩФ˘
fiПФ˘ Ф˘ ЪФ‚П¤Ф˘У ФИ О·УfiУВ˜
·ÛÊ·Ï›·˜ Î·È ÙÔ ·ÚfiÓ ÂÁ¯ÂÈÚ›‰ÈÔ. °È·
У· ВНФИОВИˆıВ›ЩВ О·П‡ЩВЪ· МВ ЩЛ ЫˆЫЩ‹
¯Ъ‹ЫЛ ЩФ˘ ·ЪfiУЩФ˜ ‹ ¿ППˆУ fiПˆУ,
Ы˘УИЫЩ¿Щ·И Л ·Ъ·ОФПФ‡ıЛЫЛ
М·ıЛМ¿ЩˆУ ·ЫК·ПФ‡˜ ¯Ъ‹ЫЛ˜ ЩˆУ
fiПˆУ ·fi В·ББВПМ·Щ›· ЩФ˘ ЩФМ¤·,
ВНВИ‰ИОВ˘М¤УФ ЫЩИ˜ ЩВ¯УИО¤˜ ¯Ъ‹ЫЛ˜ О·И
ЫЩИ˜ ‰И·‰ИО·Ы›В˜ ·ЫК·ПВ›·˜.
Page 17
16
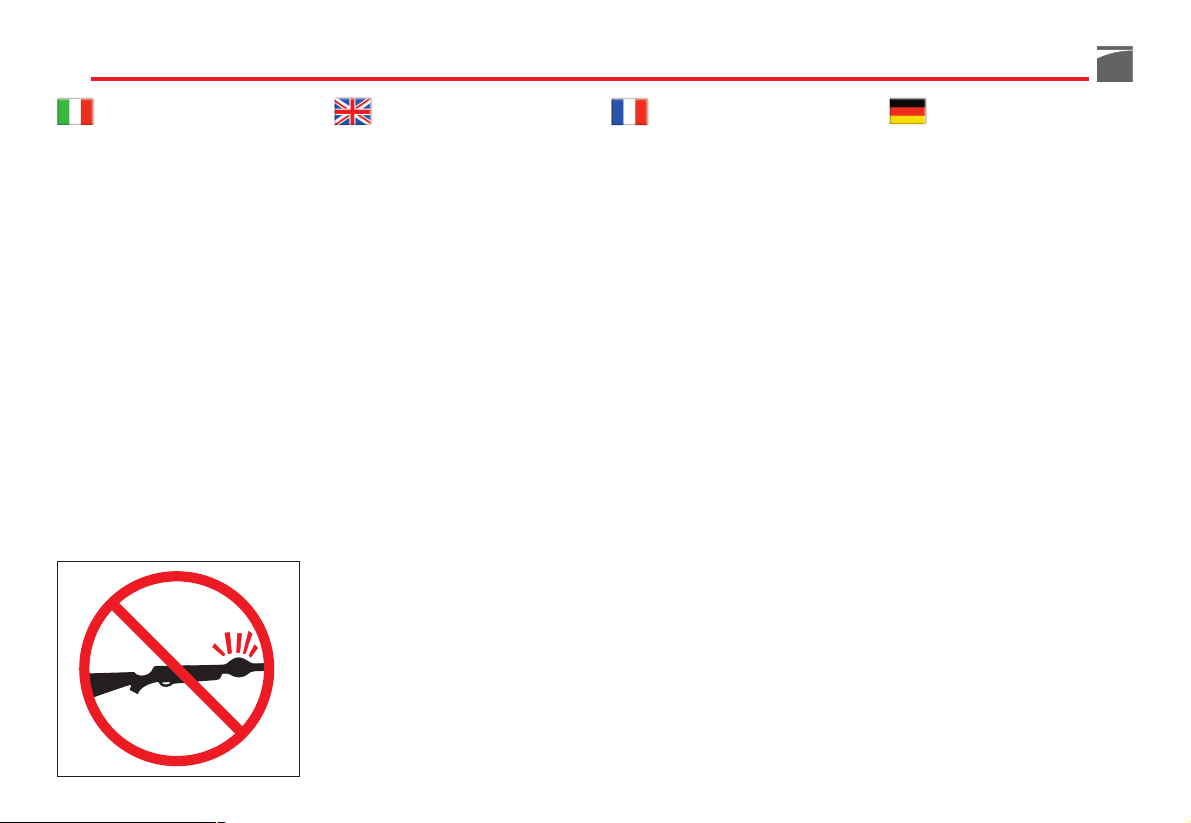
6. CONSERVARE L’ARMA IN MODO
APPROPRIATO.
Custodire l’arma in modo che non si
accumuli sporco o polvere nelle parti
meccaniche. Seguendo le istruzioni
contenute in questo manuale, pulire e
lubrificare l’arma dopo ogni utilizzo
per prevenire corrosione, danni alla
canna o accumulo di impurità che possano impedire all’arma di funzionare in
caso di necessità. Controllare sempre
l’interno e la camera di scoppio prima
di caricare l’arma per accertarsi che
siano puliti e privi di ostruzioni. Sparare quando vi siano ostruzioni nella canna o nella camera di scoppio può causare l’esplosione della canna e ferire
voi o altre persone vicine. Nel caso si
avverta un rumore anomalo durante lo
sparo smettere immediatamente di sparare, mettere la sicura e scaricare l’arma. Accertarsi che la camera e la canna siano libere da eventuali ostruzioni,
come ad es. un proiettile bloccato
all’interno della canna a causa di munizioni difettose o inadatte.
6. PROPERLY MAINTAIN YOUR
FIREARM.
Store and carry your firearm so that
dirt or lint does not accumulate in the
working parts. Clean and oil your
firearm, following the instructions provided in this manual, after each use to
prevent corrosion, damage to the barrel
or accumulation of impurities which
can prevent use of the gun in an emergency. Before loading your firearm,
always check the barrel internal part
and the chamber to ensure that they
are clean and free from obstructions.
Firing with an obstruction in the barrel
or chamber can rupture the barrel and
injure you or others nearby. In the
event you hear an unusual noise when
shooting, stop firing immediately,
engage the manual safety and unload
the firearm. Make sure the chamber
and barrel are free from any obstruction, like a bullet blocked inside the
barrel due to defective or improper
ammunition.
6. CONSERVEZ L’ARME DE FACON
ADEQUATE.
Conservez votre arme de façon à éviter
l’accumulation de saleté ou de poussière dans les parties mécaniques. En
suivant les instructions contenues dans
ce manuel, nettoyez et lubrifiez votre
arme après chaque utilisation afin de
prévenir la corrosion, les dommages
au canon ou l’accumulation d’impuretés qui peuvent empêcher le fonctionnement de l’arme en cas de nécessité. Contrôlez toujours l’intérieur et la
chambre d’explosion avant de charger
l’arme pour vous assurer qu’ils soient
propres et libres de toute obstruction.
Tirer en présence d’obstructions dans
le canon ou dans la chambre d’explosion peut provoquer l’explosion du
canon et vous blesser ou blesser des
personnes se trouvant dans le voisinage. Si vous percevez un bruit anomal
durant le coup de feu, interrompez
immédiatement le tir, enclenchez la
sûreté et déchargez l’arme. Vérifiez
que la chambre et le canon soient
libres de toute obstruction, comme par
exemple un projectile bloqué à l’intérieur du canon à cause de munitions
défectueuses ou inappropriées.
6. DIE WAFFE ANGEMESSEN AUFBEWAHREN.
Die Waffe so aufbewahren, dass sich
kein Schmutz oder Staub in den mechanischen Teilen ansammelt. Indem
man die in diesem Handbuch enthaltenen Anweisungen befolgt, die Waffe
nach jedem Gebrauch reinigen und
schmieren, um Korrosion, Beschädigungen des Laufs sowie das Ansammeln von Unreinheiten vorzubeugen,
die eine Funktion der Waffe im Bedarfsfall verhindern könnten. Das Innere und das Patronenlager immer vor
dem Laden der Waffe kontrollieren, um
sicherzustellen, dass diese sauber und
nicht verstopft sind. Falls bei Verstopfungen im Lauf oder Patronenlager geschossen wird, kann dies die Explosion
des Laufs verursachen und Sie oder
andere Personen in der Nähe könnten
verletzt werden. Sollte man ein anomales Geräusch beim Schießen hören, sofort damit aufhören, die Waffe sichern
und entladen. Sicherstellen, dass keine
Verstopfungen im Lauf oder Patronenlager vorhanden sind, wie beispielsweise ein blockiertes Projektil im Lauf
aufgrund defekter oder ungeeigneter
Munition.
Page 18

17
6. CONSERVAR EL ARMA DE MODO
APROPIADO.
Guardar el arma de modo que no se
acumule suciedad o polvo en las partes mecánicas. Siguiendo las instrucciones contenidas en este manual, limpie y lubrifique el arma después de
cada uso para prevenir corrosión, daños en el cañón o acumulación de impurezas que puedan impedir al arma
su funcionamiento en caso de necesidad. Controlar siempre el interior y la
cámara de explosión antes de cargar el
arma para asegurarse que estén limpias
y exentas de obstrucciones. Disparar
cuando haya obstrucciones en el
cañón o en la cámara de explosión
puede causar la explosión del cañón y
herir a usted o a otras personas que
estén cerca. En el caso de que se advierta un ruido anómalo durante el
disparo interrumpir inmediatamente la
acción, poner el seguro y descargar el
arma. Cerciorarse de que la cámara y
el cañón estén libres de posibles obstrucciones, como por ejemplo un proyectil bloqueado dentro del cañón debido a municiones defectuosas o inadecuadas.
6. CONSERVAR A ARMA DE FORMA
ADEQUADA.
Guardar a arma de modo a não permitir a acumulação de sujidade ou poeiras nas partes mecânicas. Seguindo as
instruções contidas neste manual, limpar e lubrificar a arma após cada utilização, por forma a prevenir a corrosão
e danos no cano ou a acumulação de
impurezas que possam impedir o funcionamento da arma em caso de
necessidade. Verificar sempre o interior
e a câmara antes de carregar a arma
para se certificar que estão limpos e
desobstruídos. Disparar a arma na presença de obstruções no cano ou na
câmara pode causar a explosão do
cano e ferimentos a si ou a outras pessoas próximas de si. Se se ouvir um ruído invulgar durante o disparo, deixar
de disparar imediatamente, travar a
patilha de segurança e descarregar a
arma. Certificar-se de que a câmara e o
cano estão livres de possíveis obstruções, como por exemplo, um projéctil
encravado no interior do cano devido a
munições defeituosas ou inadequadas.
6.
РЕКОМЕНДАЦИИ ПО ПРАВИЛЬНОМУ
ХРАНЕНИЮ ОРУЖИЯ.
Храните оружие таким образом,
чтобы на его подвижной системе не
скапливалась пыль и грязь.
После каждого выхода на охоту
необходимо почистить ружьё, следуя
указаниям настоящего руководства.
Это позволит предотвратить
появление коррозии, повреждений
ствола и скопления грязи, которые
могут вызвать задержки при стрельбе
в самый неподходящий момент. Перед
тем, как зарядить ружьё осмотрите
патронник и убедитесь в его чистоте и
в отсутствии посторонних предметов.
Наличие загрязнений или посторонних
предметов в канале ствола во время
выстрела может привести к разрыву
ствола и причинить травмы стрелку и
окружающим. Если во время стрельбы
вы услышите ненормальный звук,
немедленно прекратите стрельбу,
включите предохранитель и разрядите
ружьё. Осмотрите канал ствола и
патронник на предмет наличия
посторонних предметов, таких как
застрявший в канале ствола снаряд
недоброкачественного или нештатного
боеприпаса.
6. ¢π∞∆∏ƒ∂π∆∂ ∆√ √¶§√ ™ø™∆∞.
∏ К‡П·НЛ ЩФ˘ fiПФ˘ Ъ¤ВИ У· Б›УВЩ·И
¤ЩЫИ ТЫЩВ У· МЛ Ы˘ЫЫˆЪВ‡ВЩ·И ‚ЪˆМИ¿ ‹
ЫОfiУЛ ЫЩ· МЛ¯·УИО¿ ЩФ˘ М¤ЪЛ. ∆ЛЪВ›ЩВ
ЩИ˜ Ф‰ЛБ›В˜ ЩФ˘ ·ЪfiУЩФ˜ ВБ¯ВИЪИ‰›Ф˘
БИ· У· О·ı·Ъ›˙ВЩВ О·И У· П·‰ТУВЩВ ЩФ
fiПФ МВЩ¿ ·fi О¿ıВ ¯Ъ‹ЫЛ БИ· У·
·ФК‡БВЩВ ЩЛ ‰И¿‚ЪˆЫЛ, ˙ЛМИ¤˜ ЫЩЛУ
О¿УУЛ ‹ Ы˘ЫЫТЪВ˘ЫЛ ·О·ı·ЪЫИТУ Ф˘
МФЪФ‡У У· ВМФ‰›ЫФ˘У ЩЛ ¯Ъ‹ЫЛ ЩФ˘
ЫВ ВЪ›ЩˆЫЛ ·У¿БОЛ˜. Ελγχετε πντα
το εσωτερικ και τη θαλµη πριν
γεµσετε το πλο, για να βεβαιωθετε
τι εναι καθαρ και χωρς εµπδια. ∏
¯Ъ‹ЫЛ ЩФ˘ fiПФ˘ МВ ЩЛУ О¿УУЛ ‹ ЩЛ
ı·П¿МЛ ‚Ф˘ПˆМ¤УЛ МФЪВ› У·
ЪФО·П¤ЫВИ ¤ОЪЛНЛ ЩЛ˜ О¿УУЛ˜ О·И ЩФУ
ЩЪ·˘М·ЩИЫМfi ЩФ˘ ¯Ъ‹ЫЩЛ ‹ ¿ППˆУ
·ÓıÚÒˆÓ. ™Â ÂÚ›ÙˆÛË Ô˘
·УЩИПЛКıВ›ЩВ О¿ФИФУ ·УТМ·ПФ ıfiЪ˘‚Ф
fiЩ·У ˘ЪФ‚ФПВ›ЩВ, ЫЩ·М·Щ‹ЫЩВ ·М¤Ыˆ˜
ЩЛ ¯Ъ‹ЫЛ ЩФ˘ fiПФ˘, ‚¿ПЩВ ЩЛУ
·ЫК¿ПВИ· О·И ·‰ВИ¿ЫЩВ ЩФ. µВ‚·ИˆıВ›ЩВ
fiЩИ Л ı·П¿МЛ О·И Л О¿УУЛ ‰ВУ
·ЪФ˘ЫИ¿˙Ф˘У ВМfi‰И·, fiˆ˜ БИ·
·Ъ¿‰ВИБМ· К˘Ы›ББИФ МПФО·ЪИЫМ¤УФ
ЫЩФ ВЫˆЩВЪИОfi ЩЛ˜ О¿УУЛ˜ ПfiБˆ
ВП·ЩЩˆМ·ЩИОТУ ‹ ·О·Щ¿ППЛПˆУ
˘ЪФМ·¯ИОТУ.
Page 19

18
7. UTILIZZARE MUNIZIONI
APPROPRIATE.
Utilizzare solo munizioni di fabbrica,
nuove munizioni realizzate secondo
le seguenti specifiche industriali: CIP
(Europa e altri paesi), SAAMI®
(U.S.A.). Assicurarsi che i proiettili siano del calibro o del tipo adatti all’arma utilizzata. Il calibro dell’arma è
contrassegnato chiaramente sulla canna del fucile o sul carrello o canna
della pistola. L’utilizzo di munizioni
ricaricate o ricostruite può aumentare
la probabilità di pressione eccessiva
sulla cartuccia, esplosione del fondello o altri difetti delle munizioni che
possano causare danni all’arma e ferire voi o altre persone vicine.
7. USE PROPER AMMUNITION.
Only use factory-loaded, new ammunition manufactured to industry specifications: CIP (Europe and elsewhere),
SAAMI® (U.S.A.). Be certain that each
round you use is in the proper caliber
or gauge and type for the particular
firearm. The caliber or gauge of the
firearm is clearly marked on the barrels of shotguns and on the slide or
barrel of pistols. The use of reloaded
or remanufactured ammunition can
increase the likelihood of excessive
cartridge pressures, case-head ruptures
or other defects in the ammunition
that can cause damage to your firearm
and injury to yourself or others nearby.
7. UTILISEZ DES MUNITIONS
APPROPRIEES.
Utilisez toujours des munitions de
marque de fabrique, nouvelles munitions réalisées selon les spécifications
industrielles suivantes: CIP (Europe et
autres pays), SAAMI® (U.S.A.). Contrôlez que les projectiles soient du
calibre ou du type appropriés à l’arme
utilisée. Le calibre de l’arme est indiqué clairement sur le canon du fusil
ou sur le chariot ou sur le canon du
pistolet. L’emploi de munitions rechargées ou reconstruites peut augmenter la probabilité de pression
excessive sur la cartouche, d’explosion du culot ou d’autres défauts des
munitions qui peuvent endommager
l’arme et vous blesser ou blesser les
personnes qui se trouvent près de vous.
7. ANGEMESSENE MUNITIONEN
VERWENDEN.
Nur neue Fabrikmunitionen verwenden, die gemäß der nachfolgenden
Industriespezifikationen verwirklicht
wurden: CIP (Europa und andere Länder), SAAMI® (U.S.A.). Sicherstellen,
dass die Projektils für das Kaliber und
die Typologie der verwendeten Waffe
geeignet sind. Das Kaliber der Waffe
ist deutlich auf dem Gewehrlauf oder
dem Schlitten oder dem Pistolenlauf
angegeben. Die Verwendung von wieder geladenen oder nachgebauten
Munitionen kann die Wahrscheinlichkeit eines übermäßigen Drucks auf die
Patrone, die Explosion des Hülsenbodens oder anderer Defekte der Munitionen erhöhen, durch die die Waffe
Schaden erleiden kann und Sie oder
andere Personen in der Nähe verletzt
werden können.
Page 20

19
7. UTILICE MUNICIONES APROPIADAS.
Utilice sólo municiones de fábrica,
nuevas realizadas según los siguientes
requisitos específicos industriales: CIP
(Europa y otros países), SAAMI®
(U.S.A.). Cerciorarse de que los proyectiles sean del calibre o del tipo
adecuado al arma que se utiliza. El
calibre del arma está indicado claramente en el cañón del fusil o en el
tubo o cañón de la pistola. El uso de
municiones recargadas o reconstruidas
puede aumentar la probabilidad de
presión excesiva en el cartucho, explosión del culote u otros defectos de
las municiones que pueden causar
daños al arma y herir a usted o a personas que están cerca.
7. UTILIZAR MUNIÇÕES
ADEQUADAS.
Utilizar apenas munições de fábrica,
munições novas produzidas de acordo
com as seguintes especificações industriais: CIP (Europa e outros países),
SAAMI® (E.U.A.). Certifique-se de que
os projécteis são do calibre e tipo adequados à arma utilizada. O calibre da
arma está claramente indicado no
cano da espingarda ou no carregador
ou cano da pistola. A utilização de
munições recarregadas ou reconstruídas pode aumentar a probabilidade de
exercer pressão excessiva sobre o cartucho, explosão da base ou outros defeitos das munições que possam causar danos na arma e ferimentos a si ou
a outras pessoas próximas de si.
7. ИСПОЛЬЗУЙТЕ ТОЛЬКО
ШТАТНЫЕ БОЕПРИПАСЫ.
Используйте только боеприпасы
заводского изготовления с
неистёкшим сроком годности и
соответствующие требованиям CIP
(Европа и другие страны), SAAMI®
(США). Удостоверьтесь в том, что
калибр и тип патрона соответствуют
вашему ружью. Калибр указан на
стволе ружья. Применение
самостоятельно заряженных или
перезаряженных патронов может
вызвать повышенное давление в
гильзе и привести к разрыву её донца
и другим нежелательным явлениям,
которые способны повредить ружьё и
нанести увечья стрелку или
окружающим.
7. Ã∏™πª√¶√π∂π∆∂ ∫∞∆∞§§∏§∞
¶Àƒ√ª∞Ãπ∫∞.
ГЪЛЫИМФФИВ›ЩВ МfiУФ О·ИУФ‡ЪБИ·
˘ЪФМ·¯ИО¿ ВЪБФЫЩ·Ы›Ф˘ Ф˘
·ÓÙ·ÔÎÚ›ÓÔÓÙ·È ÛÙȘ ·ÎfiÏÔ˘ı˜
ЪФ‰И·БЪ·К¤˜: CIP (∂˘ЪТЛ О·И ¿ППВ˜
¯ТЪВ˜), SAAMI® (U.S.A.). µВ‚·ИˆıВ›ЩВ
fiЩИ Щ· К˘Ы›ББИ· ¤¯Ф˘У ЩФ ЫˆЫЩfi
‰И·М¤ЩЪЛМ· О·И В›У·И О·Щ¿ППЛП· БИ· ЩФУ
Щ‡Ф ЩФ˘ fiПФ˘ Ф˘ ¯ЪЛЫИМФФИВ›ЩВ. ∆Ф
‰И·М¤ЩЪЛМ· ЩФ˘ fiПФ˘ ·У·БЪ¿КВЩ·И
В˘ОЪИУТ˜ ЫЩЛУ О¿УУЛ ЩФ˘ ЩФ˘КВОИФ‡ О
ЫЩФ ОПВ›ЫЩЪФ ‹ ЫЩЛУ О¿УУЛ ЩФ˘
ИЫЩФПИФ‡. ∏ ¯Ъ‹ЫЛ Н·У·БВМИЫМ¤УˆУ ‹
·Ó·Î·Ù·Û΢·ÛÌ¤ÓˆÓ ˘ÚÔÌ·¯ÈÎÒÓ
МФЪВ› У· ·˘Н‹ЫВИ ЩЛУ Иı·УfiЩЛЩ·
˘ВЪ‚ФПИО‹˜ ›ВЫЛ˜ ЫЩФ К˘Ы›ББИФ,
¤ОЪЛНЛ˜ ЩФ˘ О·„Ф˘ПИФ‡ ‹ ¿ПП·
ВП·ЩЩТМ·Щ· ЩˆУ ˘ЪФМ·¯ИОТУ Ф˘
МФЪФ‡У У· ЪФО·П¤ЫФ˘У ‚П¿‚В˜
˙ЛМИ¤˜ ЫЩФ fiПФ О·И ЩЪ·˘М·ЩИЫМФ‡˜ ЩФ˘
¯Ъ‹ЫЩЛ ‹ ¿ППˆУ ·УıЪТˆУ.
Page 21

20
8. INDOSSARE SEMPRE OCCHIALI
DI PROTEZIONE E TAPPI PER LE
ORECCHIE QUANDO SI SPARA.
La probabilità che gas, polvere da
sparo o frammenti metallici colpiscano e feriscano il tiratore mentre spara,
è remota, ma nell’evenienza che questo succeda, i danni possono essere
gravi, inclusa la possibilità di perdere
la vista. Quando spara, il tiratore deve
sempre indossare occhiali di protezione ad alta resistenza. Tappi per le
orecchie o altri tipi di protezione di
alta qualità aiutano a ridurre il rischio
di danni provocati dallo sparo.
8. ALWAYS WEAR PROTECTIVE
GLASSES AND EARPLUGS WHEN
SHOOTING.
The chance that gas, gunpowder or
metal fragments will blow back and
injure a shooter who is firing a gun is
rare, but the injury that can be sustained in such circumstances can be severe, including the possible loss of eyesight. A shooter must always wear
impact resistant shooting glasses when
firing any firearm. Earplugs or other
high-quality hearing protectors help
reduce the chance of hearing damage
from shooting.
8. PORTEZ TOUJOURS DES LUNETTES DE PROTECTION ET DES
BOUCHONS POUR LES OREILLES LORSQUE VOUS TIREZ
La probabilité que des gaz, des poudres ou des fragments métalliques
atteignent et blessent le tireur après le
coup de feu est rare, mais dans l’hypothèse que cela s’avère, les blessures
peuvent être graves, y compris la possibilité de perdre la vue. Lorsque vous
tirez, vous devez toujours porter des
lunettes de protection à haute résistance. Les bouchons pour les oreilles et
autres types de protection de haute
qualité contribuent à réduire le risque
de blessures provoquées par le tir.
8. BEIM SCHIEßEN IMMER SCHUTZBRILLE UND OHRENSTÖPSEL TRAGEN.
Die Wahrscheinlichkeit, dass der Schütze beim Schießen von Gas, Schießpulver oder Metallfragmenten getroffen
wird, ist gering, doch falls dies passieren sollte, können schwerwiegende
Schäden verursacht werden, bis zum
Verlust des Sehvermögens. Beim
Schießen muss der Schütze immer eine
hochwiderstandsfähige Schutzbrille
tragen. Ohrenstöpsel oder andere
hochwertige Schutzvorrichtungen helfen, das Risiko von durch das Schießen
verursachten Schäden zu verringern.
Page 22

21
8. LLEVAR SIEMPRE GAFAS DE PROTECCIÓN Y TAPONES PARA LOS
OÍDOS CUANDO SE DISPARA.
La probabilidad de que gas, pólvora o
fragmentos metálicos golpeen y hieran
al tirador mientras dispara, es remota,
pero ante la posibilidad de que ello
suceda, los daños pueden ser graves,
incluso la posibilidad de perder la
vista. Cuando dispara, el tirador debe
siempre llevar gafas de protección de
alta resistencia. Tapones para los oídos
u otros tipos de protección de alta calidad ayudan a reducir el riesgo de
daños provocados por el disparo.
8. UTILIZAR SEMPRE ÓCULOS DE
PROTECÇÃO E TAMPÕES AUDITIVOS PARA DISPARAR.
A probabilidade de o gás, a pólvora ou
fragmentos metálicos atingirem ou ferirem o atirador enquanto dispara é
remota, mas na eventualidade de isso
acontecer, os danos podem ser graves,
incluindo a possibilidade de perder a
visão. Quando dispara, o atirador deve sempre utilizar óculos de protecção
de alta resistência. Os tampões auditivos ou outros tipos de protecção de
alta qualidade ajudam a minimizar o
risco de danos provocados pelo disparo.
8. ВО ВРЕМЯ СТРЕЛЬБЫ
ПОЛЬЗУЙТЕСЬ ЗАЩИТНЫМИ
ОЧКАМИ И НАУШНИКАМИ.
Вероятность прорыва пороховых газов
или частиц металла во время выстрела
крайне низка, однако необходимо
учитывать, что в этом случае стрелок
может получить тяжёлые травмы
вплоть до потери зрения. Поэтому во
время стрельбы рекомендуется
надевать высокопрочные защитные
очки. Вкладыши для ушей или другие
надёжные средства защиты позволяют
снизить вредное воздействие звука
выстрела на органы слуха.
8. Ã∏™πª√¶√π∂π∆∂ ¶∞¡∆∞ °À∞§π∞
¶ƒ√™∆∞™π∞™ ∫∞π ø∆√∞™¶π¢∂™
√∆∞¡ ¶Àƒ√µ√§∂π∆∂.
∏ Иı·УfiЩЛЩВ˜ ЩЪ·˘М·ЩИЫМФ‡ ЩФ˘
ЫОФВ˘Щ‹ ·fi ·¤ЪИ·, ˘Ъ›ЩИ‰· ‹
МВЩ·ППИО¿ ıЪ·‡ЫМ·Щ· В›У·И ВП¿¯ИЫЩВ˜,
ˆЫЩfiЫФ ЫВ ВЪ›ЩˆЫЛ Ф˘ Ы˘М‚В› О¿ЩИ
Щ¤ЩФИФ Ф ЩЪ·˘М·ЩИЫМfi˜ МФЪВ› У· В›У·И
ЫФ‚·Ъfi˜ ·ОfiМЛ О·И МВ Иı·УfiЩЛЩ·
·ÒÏÂÈ·˜ Ù˘ fiÚ·Û˘. ŸÙ·Ó
˘ЪФ‚ФПВ›ЩВ, ı· Ъ¤ВИ У·
¯ЪЛЫИМФФИВ›ЩВ ¿УЩ· Б˘·ПИ¿
ЪФЫЩ·Ы›·˜ ˘„ЛП‹˜ ·УЩФ¯‹˜. √И
ˆЩФ·Ы›‰В˜ ‹ ¿ПП· ЪФЫЩ·ЩВ˘ЩИО¿
˘„ЛП‹˜ ФИfiЩЛЩ·˜ БИ· ЩЛУ ·ОФ‹ ‚ФЛıФ‡У
ЫЩЛ МВ›ˆЫЛ ЩˆУ ‚П·‚ТУ Ф˘ ЪФО·ПВ› Л
ВО˘ЪЫФОЪfiЩЛЫЛ.
Page 23
22
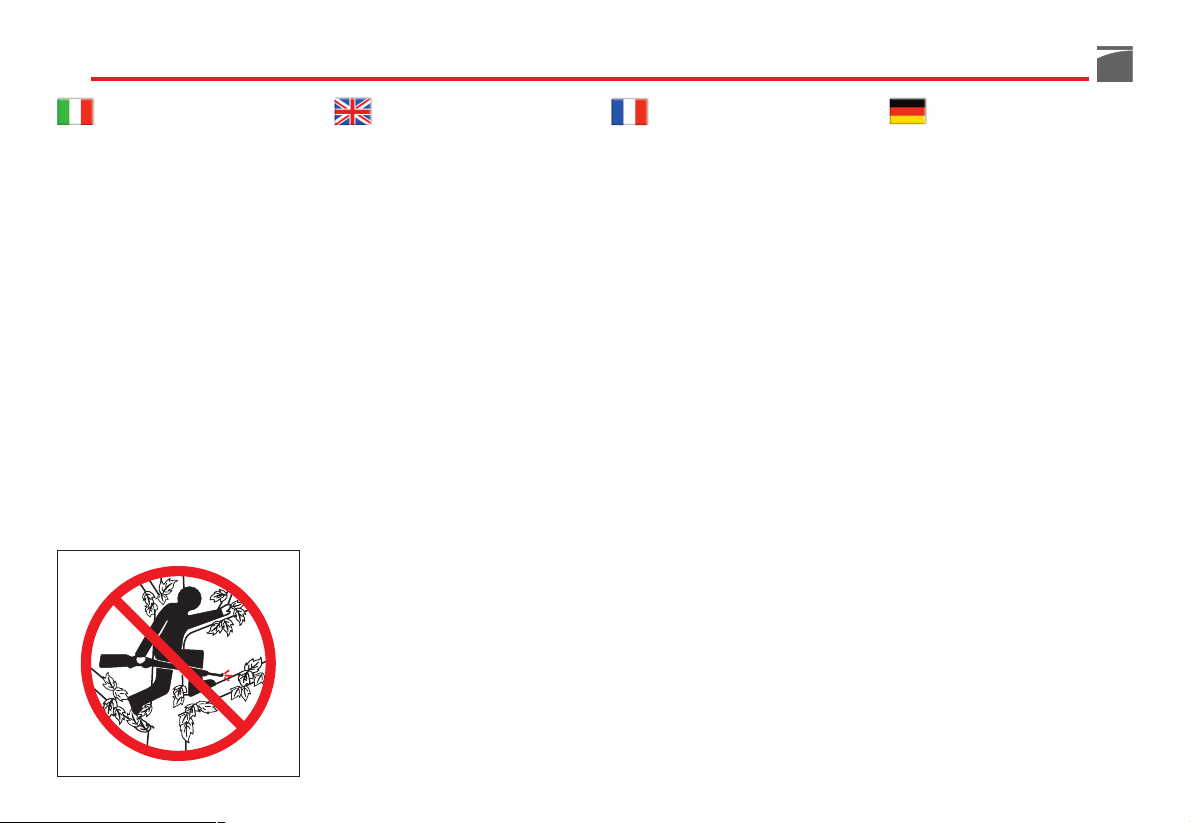
9. NON ARRAMPICARSI MAI SU
ALBERI, RECINZIONI O OSTACOLI CON L’ARMA CARICA.
Aprire e svuotare la camera dell’arma
e mettere la sicura prima di arrampicarsi o scendere da alberi o prima di
scavalcare recinti o saltare fossati o
altri ostacoli. Non tirare o spingere
l’arma verso se stessi o verso un’altra
persona. Scaricare sempre l’arma e
controllare visivamente e fisicamente
che il serbatoio, il meccanismo di
ricarica e la camera siano scarichi e
che l’arma abbia l’otturatore aperto
prima di darla in mano ad un’altra
persona. Non prendere mai un’arma
da un’altra persona a meno che non
sia scarica, controllata fisicamente e
visivamente per accertarsi che sia
effettivamente scarica e comunque
prendere l'arma solo se aperta.
9. NEVER CLIMB A TREE, FENCE OR
OBSTRUCTION WITH A LOADED FIREARM.
Open and empty the chamber of your
firearm and engage the manual safety
catch before climbing or descending a
tree or before climbing a fence or
jumping over a ditch or other obstruction. Never pull or push a loaded
firearm toward yourself or another
person. Always unload the firearm,
visually and physically check to see
that the magazine, loading mechanism and chamber are unloaded and
that the bolt is open before handing
the firearm to another person. Never
take a firearm from another person
unless it is unloaded, visually and
physically checked to confirm it is
unloaded, and the action is open.
9. NE GRIMPEZ JAMAIS SUR LES
ARBRES, LES CLOTURES OU LES
OBSTACLES AVEC L’ARME CHARGEE.
Ouvrez et videz la chambre de l’arme
et enclenchez la sûreté avant de grimper ou de descendre des arbres ou
avant de sauter les clôtures ou les fossés ou autres obstacles. Ne tirez pas et
ne poussez pas l’arme contre vousmême ou contre une autre personne.
Déchargez toujours l’arme et contrôlez
visuellement et physiquement que le
magasin, le mécanisme de recharge et
la chambre soient déchargés et que
l’arme ait l'obturateur ouvert avant de
la remettre dans les mains d’un tiers.
Ne prenez jamais une arme d’une autre personne si elle n’est pas déchargée
et si vous ne l’avez pas contrôlée visuellement et physiquement pour vous
assurer qu’elle soit effectivement déchargée et, d’autre part, prenez l'arme
seulement si celui-ci est ouverte.
9. MIT GELADENER WAFFE NIE AUF
BÄUME, ZÄUNE ODER HINDERNISSE KLETTERN.
Bevor man auf Bäume klettert oder
über Zäune oder über Gräben und
andere Hindernisse springt, das Patronenlager der Waffe öffnen und entleeren. Die Waffe nicht gegen sich
selbst oder eine andere Person drücken
oder ziehen. Die Waffe immer entladen und visuell und physisch kontrollieren, dass das Magazin, das Aufladesystem und das Patronenlager entladen
sind und dass der Verschluss geöffnet
ist, bevor man die Waffe einer anderen
Person übergibt. Nie die Waffe einer
anderen Person nehmen, es sei denn
sie ist entladen und wurde physisch
und visuell überprüft, um sicherzustellen, dass sie tatsächlich nicht geladen
ist, und nur nehmen, wenn sie geöffnet
ist.
Page 24

23
9. NO SE TREPE NUNCA A LOS ÁRBOLES, PROTECCIONES U OBSTÁCULOS CON EL ARMA CARGADA.
Abra y vacíe la cámara del arma y
ponga el seguro antes de treparse o de
bajar de árboles o antes de salvar una
empalizada o saltar un foso u otros
obstáculos. No tire ni empuje el arma
hacia sí mismo o hacia otra persona.
Descargue siempre el arma y controle
visualmente y físicamente que el almacén, el mecanismo de recarga y la
cámara estén descargados y que el
arma tenga el obturador abierto antes
de ponerla en manos de otra persona.
Nunca tome un arma de otra persona
excepto que la misma esté descargada, haya sido controlada físicamente y
visualmente para asegurarse que esté
efectivamente descargada y de cualquier modo tomar el arma sólo si está
abierta.
9. NUNCA SUBIR A UMA ÁRVORE,
OU SALTAR UMA VALA OU
OBSTÁCULOS COM A ARMA
CARREGADA.
Abrir e esvaziar a câmara da arma e
travar a patilha de segurança antes de
subir ou descer de uma árvore ou antes de saltar uma vala, uma cerca ou
outros obstáculos. Não puxar nem empurrar a arma em direcção a si ou a
outra pessoa. Descarregar sempre a arma e verificar física e visualmente que
o depósito, o mecanismo de recarga e
a câmara estão descarregados e que a
arma tenha o obturador aberto antes
de a entregar a outra pessoa. Nunca
pegar numa arma de outra pessoa sem
ter sido descarregada e verificada física e visualmente para confirmar se
está efectivamente descarregada e, em
todo o caso, pegar na arma apenas se
estiver aberta.
9. ЗАПРЕЩАЕТСЯ ЗАЛАЗИТЬ НА
ДЕРЕВЬЯ, ПЕРЕЛАЗИТЬ ЧЕРЕЗ
ИЗГОРОДИ ИЛИ ИНЫЕ
ПРЕПЯТСТВИЯ С ЗАРЯЖЕННЫМ
ОРУЖИЕМ.
Перед тем, как залезть на дерево или
слезть с него, а также перед
преодолением изгородей, канав или
других препятствий необходимо
извлечь патрон из патронника и
поставить ружьё на предохранитель.
Запрещается тянуть ружьё на себя и
толкать им других людей. Перед тем,
как передать кому-либо ваше ружьё,
разрядите его и удостоверьтесь в
отсутствии патрона в магазине, на
лотке подавателя и в патроннике,
затем, не закрывая затвора,
передайте ружьё. Никогда не
принимайте ружьё от кого-либо, если
вы не уверены в том, что оно
разряжено, проверено зрительно и на
ощупь на предмет отсутствия в нём
патронов, и, в любом случае, берите
ружье только когда оно открыто.
9. ª∏ ™∫∞ƒº∞§ø¡∂∆∂ ¶√∆∂ ™∂
¢∂¡∆ƒ∞, ¶∂ƒπºƒ∞•∂π™ ◊
∂ª¶√¢π∞ ª∂ ∆√ √¶§√ °∂ª∞∆√.
Ανοξτε και αδειστε τη θαλµη του
πλου και βλτε την ασφλεια πριν
σκαρφαλ#σετε κατεβετε απ
δντρα, πριν υπερπηδσετε
περιφρξεις πριν πηδσετε πνω
απ τφρους λλα εµπδια. ªËÓ
ÙÚ·‚¿ÙÂ Î·È ÌË ÛÚÒ¯ÓÂÙ ÔÙ¤ ÙÔ
fiÏÔ ÚÔ˜ ÙÔ Ì¤ÚÔ˜ Û·˜ ‹ ÚÔ˜ ¿ÏÏÔ˘˜
·ÓıÚÒÔ˘˜. ∞‰ÂÈ¿˙ÂÙ ¿ÓÙ· ÙÔ fiÏÔ
О·И ВП¤Б¯ВЩВ МВ ЩФ М¿ЩИ О·И ЩЛУ ·К‹ ·У
В›У·И ¿‰ВИ· Л ·Фı‹ОЛ, Ф БВМИЫЩ‹Ъ·˜ О·И
Л ı·П¿МЛ О·И ·У ЩФ fiПФ ¤¯ВИ ЩФ
ОПВ›ЫЩЪФ ·УФИ¯Щfi ЪИУ ЩФ ‰ТЫВЩВ ЫВ
¿ППФУ ¿УıЪˆФ. Μην παρνετε ποτ το
πλο απ λλο τοµο εν δεν το χει
αδεισει και ελγξει µε το µτι και την
αφ για να βεβαιωθε τι εναι δειο
και σε κθε περπτωση να το παρνετε
µνο αν εναι ανοιχτ.
Page 25

24
10. EVITARE L’USO DI BEVANDE
ALCOLICHE O MEDICINALI
CHE POSSANO DIMINUIRE I
RIFLESSI E L’AUTOCONTROLLO
MENTRE SI SPARA.
Non bere quando si spara. Se si assumono medicinali che possano diminuire i riflessi o l’autocontrollo, non
maneggiare armi mentre si è sotto l’effetto del medicinale.
10. AVOID ALCOHOLIC BEVERAGES
OR JUDGMENT/REFLEX IMPAIRING MEDICATION WHEN
SHOOTING.
Do not drink and shoot. If you take
medication that can impair motor
reactions or judgment, do not handle
a firearm while you are under the
influence of the medication.
10. EVITEZ DE BOIRE DES BOISSONS ALCOOLIQUES OU D’ASSUMER DES MEDICAMENTS
POUVANT DIMINUER VOS REFLEXES ET VOTRE SELF-CONTROL PENDANT QUE VOUS TIREZ.
Ne buvez pas lorsque vous utilisez
votre arme. Si vous assumez des médicaments pouvant diminuer vos réflexes
ou votre self-control, ne manipulez pas
d’armes tant que vous êtes sous l’effet
du médicament.
10. DIE EINNAHME VON ALKOHOLISCHEN GETRÄNKEN UND
MEDIKAMENTEN VERMEIDEN,
DIE DIE REFLEXE UND DIE SELBSTKONTROLLE BEIM SCHIEßEN
BEEINTRÄCHTIGEN KÖNNTEN.
Beim Schießen nicht trinken. Falls man
Medikamente einnimmt, die die Reflexe oder die Selbstkontrolle beeinträchtigen könnten, keine Waffen handhaben, während man unter Einfluss des
Medikaments ist.
Page 26

25
10. EVITE EL USO DE BEBIDAS ALCOHÓLICAS O MEDICAMENTOS QUE PUEDAN DISMINUIR
LOS REFLEJOS Y EL AUTOCONTROL MIENTRAS SE DISPARA.
No beba cuando dispara. Si se asumen
medicamentos que pueden disminuir
los reflejos o el autocontrol, no maneje armas mientras está bajo el efecto
de los mismos.
10. EVITAR A INGESTÃO DE BEBIDAS ALCOÓLICAS OU MEDICAMENTOS QUE POSSAM
DIMINUIR OS REFLEXOS E O
AUTOCONTROLO DURANTE A
UTILIZAÇÃO DA ARMA.
Não beber enquanto se está a utilizar
a arma. Se estiverem a ser tomados
medicamentos susceptíveis de diminuir os reflexos e o autocontrolo, não
manusear armas enquanto se está sob
o efeito do medicamento.
10. НЕ ДОПУСКАЙТЕ ПРИЁМА
ПЕРЕД СТРЕЛЬБОЙ
АЛКОГОЛЬНЫХ НАПИТКОВ ИЛИ
ЛЕКАРСТВЕННЫХ ПРЕПАРАТОВ,
СНИЖАЮЩИХ СКОРОСТЬ
РЕАКЦИИ И СПОСОБНОСТЬ К
САМОКОНТРОЛЮ.
Не распивайте алкогольные напитки во
время стрельбы. Если вы принимаете
лекарственные препараты, снижающие
скорость реакции и способность к
самоконтролю, не берите в руки оружие
до тех пор, пока их воздействие
полностью не прекратится.
10. ∞¶√º∂À°∂∆∂ ∆∏ Ã∏™∏
∞§∫√√§√ÀÃø¡ ¶√∆ø¡ ◊
º∞ƒª∞∫ø¡ ¶√À ª¶√ƒ√À¡ ¡∞
∂¶∏ƒ∂∞™√À¡ ∆∞
∞¡∆∞¡∞∫§∞™∆π∫∞ ∫∞π ∆√¡
∞À∆√∂§∂°Ã√.
ªËÓ ›ÓÂÙ fiÙ·Ó ˘ÚÔ‚ÔÏ›ÙÂ. ™Â
ÂÚ›ÙˆÛË Ï‹„˘ Ê·ÚÌ¿ÎˆÓ Ô˘
ÌÔÚÔ‡Ó Ó· МВИТЫФ˘У Ù·
·ÓÙ·Ó·ÎÏ·ÛÙÈο ‹ ÙÔÓ ·˘ÙÔ¤ÏÂÁ¯Ô, ÌË
¯ÂÈÚ›˙ÂÛÙ fiÏ· fiÛÔ Â›ÛÙ οو ·fi ÙËÓ
›‰Ú·ÛË ÙÔ˘ Ê·ÚÌ¿ÎÔ˘.
Page 27
26
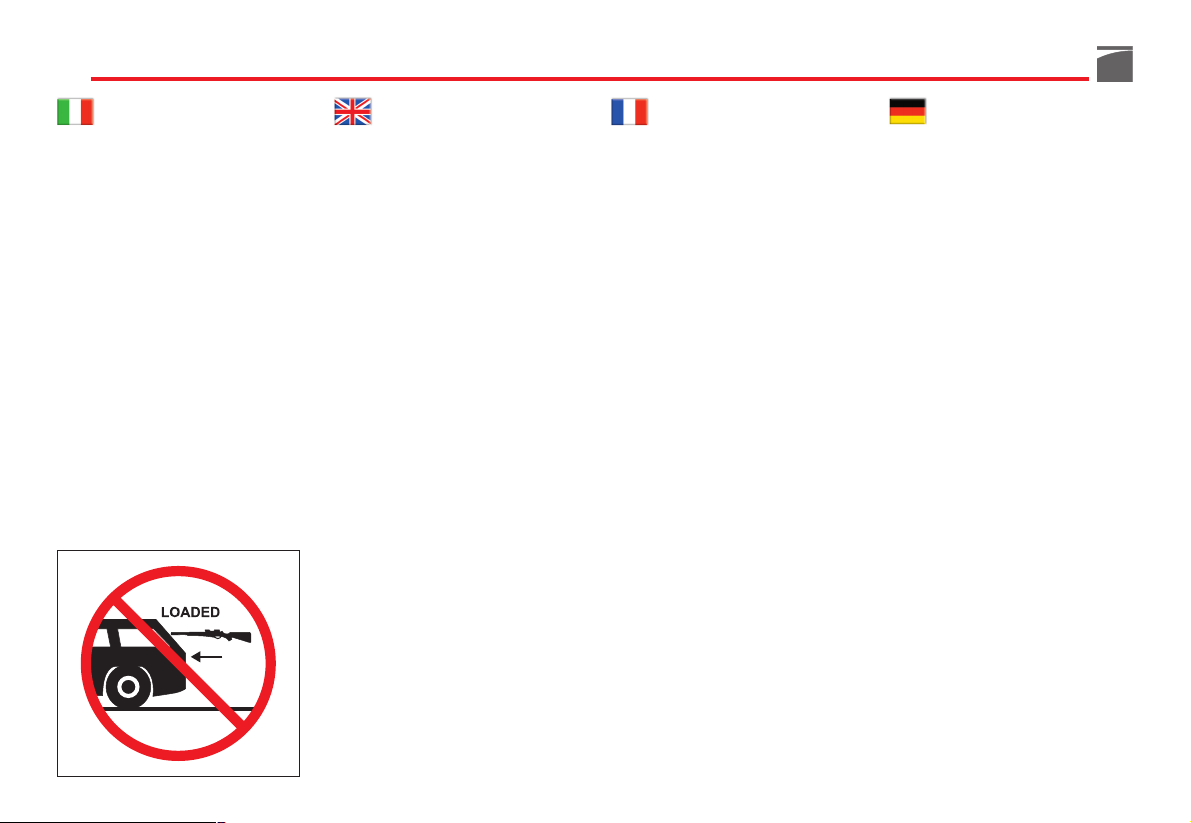
11. NON TRASPORTARE MAI
UN’ARMA CARICA.
Scaricare sempre l’arma prima di
riporla in un veicolo (camera e serbatoio vuoti). Cacciatori e tiratori devono caricare l’arma una volta giunti a
destinazione, e solo quando sono sul
punto di sparare. Se si detiene un
arma per difesa personale, lasciare la
camera scarica riduce la possibilità di
uno sparo involontario.
11. NEVER TRANSPORT A LOADED
FIREARM.
Unload a firearm before putting it in a
vehicle (chamber empty, magazine
empty). Hunters and target shooters
should load their firearm only at their
destination, and only when they are
ready to shoot. If you carry a firearm
for self-protection, leaving the chamber unloaded can reduce the chance
of an unintentional discharge.
11. NE TRANSPORTEZ JAMAIS UNE
ARME CHARGEE.
Déchargez toujours votre arme avant
de la poser dans un véhicule (chambre
et magasin vides). Les chasseurs et les
tireurs doivent charger l’arme lorsqu’ils sont arrivés à destination et seulement lorsqu’ils sont sur le point de
tirer. Si vous détenez une arme pour
votre défense personnelle, laissez la
chambre déchargée pour réduire la
possibilité d’un coup de feu involontaire.
11. NIE EINE GELADENE WAFFE
TRANSPORTIEREN.
Die Waffe immer entladen, bevor man
sie in ein Fahrzeug legt (Patronenlager
und Magazin leer). Jäger und Schützen
müssen die Waffe laden, nachdem sie
am Zielort angekommen sind und der
Moment des Schießens gekommen ist.
Falls man die Waffe zur Selbstverteidigung hält, beachten, dass ein nicht geladenes Patronenlager die Wahrscheinlichkeit eines ungewollten Schusses
reduziert.
Page 28

27
11. NUNCA TRANSPORTE UN ARMA
CARGADA.
Descargue siempre el arma antes de
ponerla en el vehículo (cámara y almacén vacíos). Cargadores y tiradores
deben cargar el arma solo tras haber
llegado a destino, y sólo cuando están
a punto de disparar. Si se tiene un arma
para defensa personal, dejar la cámara
descargada reduce la posibilidad de
disparos involuntarios.
11. NUNCA TRANSPORTAR UMA
ARMA CARREGADA.
Descarregar sempre a arma (câmara e
depósito vazios) antes de a voltar a
colocar num veículo. Os caçadores e
atiradores devem carregar a arma
quando chegam ao destino e só no
momento de disparar. Se se possuir
uma arma de defesa pessoal, deixar a
câmara descarregada para minimizar
o risco de disparo acidental.
11. НЕ ПЕРЕВОЗИТЕ ЗАРЯЖЕННОЕ
ОРУЖИЕ.
Всегда разряжайте ружьё перед тем,
как поместить его в транспортное
средство (при этом патронник и
магазин должны быть пусты).
Охотники и спортсмены должны
заряжать оружие только после
прибытия на место назначения и
непосредственно перед началом
стрельбы. Если вы держите ружьё в
целях самообороны, то отсутствие
патрона в патроннике поможет
избежать случайного выстрела.
11. ª∏ ª∂∆∞º∂ƒ∂∆∂ ¶√∆∂ ∆√
√¶§√ °∂ª∞∆√.
∞‰ВИ¿˙ВЩВ ¿УЩ· ЩФ fiПФ ЪИУ ЩФ
ЩФФıВЩ‹ЫВЩВ ЫВ О¿ФИФ fi¯ЛМ· (ı·П¿МЛ
О·И ·Фı‹ОЛ ОВУ‹). √И О˘УЛБФ› О·И ФИ
ЫОФВ˘Щ¤˜ Ъ¤ВИ У· БВМ›˙Ф˘У ЩФ fiПФ
fiЩ·У КЩ¿УФ˘У ЫЩФУ ЪФФЪИЫМfi ЩФ˘˜ О·И
МfiУФУ fiЩ·У В›У·И ¤ЩФИМФИ У·
˘ЪФ‚ФП‹ЫФ˘У. ∂¿У ¤¯ВЩВ ЩФ fiПФ БИ·
ЪФЫˆИО‹ ¿М˘У·, ·К‹УФУЩ·˜ ЩЛ
ı·П¿МЛ ¿‰ВИ· МВИТУВЩВ ЩЛУ Иı·УfiЩЛЩ·
·ОФ‡ЫИ·˜ ВО˘ЪЫФОЪfiЩЛЫЛ˜.
Page 29

28
12. AVVERTENZE SULL’ESPOSIZIONE AL PIOMBO.
Scaricare l’arma in aree con scarsa
ventilazione, pulire armi o maneggiare munizioni può comportare una
esposizione al piombo e ad altre
sostanze che possono causare danni
alla respirazione, danni all’apparato
riproduttivo ed altri gravi danni fisici.
Sostare sempre in aree con buona
ventilazione. Lavare accuratamente le
mani dopo l’esposizione.
AVVERTENZA: è VOSTRA responsabi-
lità conoscere e rispettare le leggi
locali e statali che regolamentano il
commercio, il trasporto e l’uso delle
armi nel vostro paese.
AVVERTENZA: questa arma può
togliere la vita a voi e agli altri! Siate
sempre estremamente attenti nel maneggiare l’arma. Un incidente è quasi
sempre la conseguenza del mancato
rispetto delle norme di sicurezza dell’arma.
12. LEAD WARNING.
Discharging firearms in poorly ventilated areas, cleaning firearms, or handling ammunition may result in exposure to lead and other substances
known to cause birth defects, reproductive harm, and other serious physical injury. Have adequate ventilation
at all times. Wash hands thoroughly
after exposure.
WARNING: It is YOUR responsibility
to know and abide by Federal, State
and Local laws governing the sale,
transportation and use of firearms in
your area.
WARNING: This firearm has the capa-
bility of taking your life or the life of
someone else! Always be extremely
careful with your firearm. An accident
is almost always the result of not following basic firearm safety rules.
12. AVVERTISSEMENT SUR L’EXPOSITION AU PLOMB.
Décharger l’arme dans des zones à faible ventilation, nettoyer des armes ou
manipuler des munitions peut comporter une exposition au plomb et à
d’autres substances qui peuvent nuire
à la respiration, à l’appareil reproductif
et causer des dommages physiques
graves. Choisissez toujours des zones
bien aérées. Lavez-vous soigneusement les mains après l’exposition.
REMARQUE: vous êtes entièrement
RESPONSABLES de la connaissance et
du respect des lois locales et nationales qui régissent le commerce, le transport et l’usage des armes à feu dans
votre pays.
REMARQUE: cette arme peut tuer une
personne! Soyez toujours extrêmement attentifs lorsque vous la manipulez. Un accident est presque toujours
dû au non respect des normes de sécurité de l’arme.
12. HINWEISE ZUR BLEI-EXPOSITION.
Die Waffe in wenig ventilierten Bereichen entladen, das Reinigen von Waffen und die Handhabung von Munitionen kann eine Exposition gegenüber
Blei und anderen Substanzen mit sich
bringen, die Schäden bei der Respiration, Schäden der Fortpflanzungsorgane und andere schwere körperliche
Schäden verursachen können. Man
sollte sich immer in gut belüfteten Gebieten aufhalten. Die Hände nach der
Exposition akkurat waschen.
HINWEIS: Es liegt in IHRER Verant-
wortung sich über die örtlichen und
staatlichen Gesetze zu informieren, die
den Handel, den Transport und den
Gebrauch von Waffen in Ihrem Land
regeln.
HINWEIS: Diese Waffe kann Ihnen
und anderen das Leben nehmen! Sie
sollten immer sehr vorsichtig beim
Umgang mit Ihrer Waffe sein. Ein
Unfall ist fast immer eine Folge der
Nichtbeachtung der Sicherheitsvorschriften der Waffe.
Page 30

29
12. ADVERTENCIAS SOBRE LA EXPOSICIÓN AL PLOMO.
Descargue el arma en zonas con escaza ventilación, limpiar armas o manejar municiones puede conllevar una
exposición al plomo y a otras sustancias que pueden causar daños a la
respiración, daños al aparato reproductivo y otros graves daños físicos.
Deténgase siempre en zonas con buena ventilación. Lávese muy bien las
manos después de la exposición.
ADVERTENCIA: es SU responsabili-
dad conocer y respetar las leyes locales y estatales que reglamentan el comercio, el transporte y el uso de armas
en su país.
ADVERTENCIA:¡Esta arma puede qui-
tarle la vida a usted y a los demás!
Tenga siempre sumo cuidado al manejar su arma. Un accidente es casi
siempre la consecuencia de la falta de
respeto de las normas de seguridad del
arma.
12. ADVERTÊNCIAS SOBRE A EXPOSIÇÃO AO CHUMBO.
Descarregar a arma em espaços pouco
ventilados, limpar armas ou manusear
munições pode levar à exposição ao
chumbo e a outras substâncias susceptíveis de causar problemas respiratórios, danos ao aparelho reprodutor
e outros danos físicos graves. Permaneçer em espaços bem ventilados.
Lavar cuidadosamente as mãos após a
exposição.
ADVERTÊNCIA: é SUA responsabili-
dade conhecer e respeitar as leis locais
e nacionais que regulamentam a comercialização, o transporte e a utilização de armas no seu país.
ADVERTÊNCIA: esta arma pode tirar a
vida a si e aos outros! Preste sempre
atenção máxima durante a utilização
da sua arma. Um acidente é quase
sempre consequência do incumprimento das regras de segurança da arma.
12.
ПРЕДУПРЕЖДЕНИЕ О ВОЗДЕЙСТВИИ
СВИНЦА.
Во время разряжания и чистки ружья,
а также при обращении с
боеприпасами в плохо проветриваемом
помещении можно подвергнуться
воздействию свинца и других веществ,
пагубно влияющих на органы дыхания,
репродуктивную систему и другие
органы. Всегда находитесь в хорошо
проветриваемом помещении. После
контакта с указанными веществами
обязательно помойте руки.
ВНИМАНИЕ: вы обязаны изучить и
соблюдать законодательство вашего
государства, регулирующее оборот,
транспортировку и применение
оружия.
ПОМНИТЕ! Это ружьё представляет
опасность для вашей жизни и для
жизни окружающих. При обращении
с ружьём проявляйте крайнюю
осторожность. Несчастный случай всегда результат несоблюдения мер
безопасного обращения с оружием.
12. ¶ƒ√∂π¢√¶√π∏™∂π™ °π∞ ∆∏¡
∂∫£∂™∏ ™∆√ ª√§Àµ¢√.
∏ ¯Ú‹ÛË ÙÔ˘ fiÏÔ˘ Û ÛËÌ›· Ì ÂÏÏÈ‹
·ВЪИЫМfi, Ф О·ı·ЪИЫМfi˜ ЩФ˘ ‹ Ф
¯ВИЪИЫМfi˜ ЩˆУ ˘ЪФМ·¯ИОТУ МФЪВ› У·
ЪФО·П¤ЫВИ ¤ОıВЫЛ ЫЩФ МfiП˘‚‰Ф О·И ЫВ
¿ППВ˜ Ф˘Ы›В˜, ФИ ФФ›В˜ МФЪФ‡У У·
ЪФО·П¤ЫФ˘У ·Ó·Ó¢ÛÙÈΤ˜
‰È·Ù·Ú·¯¤˜, ‚Ï¿‚˜ ÛÙÔ Û‡ÛÙËÌ·
·У··Ъ·БˆБ‹˜ О·И ¿ППВ˜ ЫФ‚·Ъ¤˜
ЫˆМ·ЩИО¤˜ ‚П¿‚В˜. ГЪЛЫИМФФИВ›ЩВ ЩФ
fiПФ ¿УЩ· ЫВ ЫЛМВ›· МВ О·Пfi ·ВЪИЫМfi.
¶П¤УВЩВ О·П¿ Щ· ¯¤ЪИ· МВЩ¿ ЩЛУ ¤ОıВЫЛ.
¶ƒ√∂π¢√¶√π∏™∏: Ô ¯Ú‹ÛÙ˘ √º∂π§∂π
У· БУˆЪ›˙ВИ О·И У· ЩЛЪВ› ЩФ˘˜ ЩФИОФ‡˜
О·УФУИЫМФ‡˜ О·И ЩЛ УФМФıВЫ›· Ф˘
‰И¤ВИ ЩФ ВМfiЪИФ, ЩЛ МВЩ·КФЪ¿ О·И ЩЛ
¯Ъ‹ЫЛ ЩˆУ fiПˆУ.
¶ƒ√∂π¢√¶√π∏™∏: Ù· fiÏ· ÌÔÚÔ‡Ó Ó·
·К·ИЪ¤ЫФ˘У ЩЛ ˙ˆ‹ ЩˆУ ·УıЪТˆУ! ¡·
В›ЫЩВ ¿УЩ· И‰И·›ЩВЪ· ЪФЫВОЩИОФ› fiЩ·У
¯ВИЪ›˙ВЫЩВ ЩФ fiПФ Ы·˜. ∆· ·Щ˘¯‹М·Щ·
В›У·И Ы¯В‰fiУ ¿УЩ· ·ФЩ¤ПВЫМ· ЩЛ˜ МЛ
Щ‹ЪЛЫЛ˜ ЩˆУ О·УfiУˆУ ·ЫК·ПВ›·˜ ЩФ˘
fiПФ˘.
Page 31

30
Presentazione
La Benelli Armi S.p.A. è lieta di presentare la propria gamma di fucili
semiautomatici, realizzati grazie all’efficace lavoro del proprio Centro Studi
e Ricerche, beneficiando inoltre della
ricca esperienza acquisita sul piano
tecnologico e delle costruzioni meccaniche di precisione.
L’esiguo numero di componenti, la
meccanica estremamente semplice e
razionale, l’originalità del sistema di
chiusura a testina rotante e del sistema
di alimentazione cartucce (cut off),
conferiscono ai fucili Benelli la massima affidabilità di funzionamento, praticità di impiego, semplicità di smontaggio e manutenzione, tanto che, in
assoluto, possono essere definiti i fucili più moderni, precisi, sicuri, veloci
ed eleganti attualmente in commercio.
Introduction
Benelli Armi S.p.A. is proud to introduce the line of semi-automatic shotguns, a result of painstaking work at
Benelli’s Research and Development
Center and of Benelli’s extensive
experience in precision engineering
and technical know-how.
The small number of components, an
extremely simple operating principle,
the innovativeness of the turning
block bolt locking system and the
new cartridge feeding system (cut off),
make the “Benelli” shotguns highly
reliable and practical, easy to strip
and upkeep to the extent that the shotguns can be considered the most
modern, accurate, safe, fast and elegant shotguns available today.
Présentation
La société Benelli Armi S.p.A. est heureuse de vous présenter sa nouvelle
gamme de fusils semi-automatiques,
realisés grâce au travail efficace du
Centre d’Etudes et de Recherches associé à l’expérience très vaste que
Benelli Armi S.p.A. a acquis dans le
domaine technologique en général et
notamment dans celui de la mécanique de précision.
Le nombre réduit de ses composants,
sa mécanique extrêmement simple et
rationnelle, l’originalité de sa tête de
fermeture rotative et de son système
d’alimentation du magasin (cut off),
confèrent aux fusils Benelli une très
grande fiabilité de fonctionnement, un
emploi pratique et une parfaite simplicité de démontage et d’entretien, tant
et si bien qu’on peut absolument les
considérer les fusils les plus modernes,
précis, sûrs, rapides et élégants actuellement dans le commerce.
Einleitung
Die Firma Benelli Armi S.p.A. ist
besonders stolz auf diese Modellpalette von halbautomatischen Gewehre das Ergebnis sorgfältiger Entwicklungsarbeit durch das Benelli Research and
Development Centers und der umfassenden Erfahrung auf dem Gebiet der
Präzisionsmechanik, kombiniert mit
technischem “Know-How” und Innovation.
Die geringe Anzahl von Bauteilen, die
extrem einfache und rationale Mechanik, das innovative Drehkopf-Verschlusssystem und "Cut-off" - Patronenbestückungssystem gewährleisten den
Benelli Gewehren höchste Zuverlässigkeit und beste Handhabungseigenschaften, einfache Demontage
und Wartung, so dass sie derzeit als die
absolut modernsten, präzisesten, sichersten, elegantesten und schnellsten
Gewehre bezeichnet werden dürfen,
die gegenwärtig auf dem Markt angeboten werden.
Page 32

31
Presentación
La Empresa Benelli Armi S.p.A. tiene
el gusto de presentar su nueva gama
de fusiles semi-automáticos, realizados gracias al trabajo eficaz de su
Centro de Estudios e Investigaciones.
Además, se ha utilizado la gran experiencia que la Empresa Benelli Armi
S.p.A. tiene en el campo tecnológico
y de las construcciones mecánicas de
precisión.
El exiguo número de sus componentes, su mecánica extremadamente
simple y racional, la originalidad de
su sistema de cierre con cabeza rotatoria y de su sistema de alimentación
de los cartuchos (cut off), dan a los
fusiles Benelli la máxima fiabilidad de
funcionamiento, practicidad de uso y
sencillez de desmontaje y manutención, tanto, que pueden ser definidos,
en absoluto, los fusiles más modernos,
precisos, seguros, rápidos y elegantes
actualmente a la venta.
Apresentação
A Benelli Armi S.p.A. tem o prazer de
apresentar a sua gama de espingardas
semi-automáticas, resultado do minucioso trabalho do seu Centro de Investigação e Desenvolvimento, juntamente com a ampla experiência
adquirida no plano tecnológico e da
engenharia de precisão.
O número reduzido de componentes,
a mecânica extremamente simples e
racional, a originalidade do sistema de
fecho de cabeça rotativa e o novo
sistema de alimentação de cartucho
(cut off), conferem às espingardas
Benelli a máxima fiabilidade, praticidade de utilização, facilidade de
desmontagem e manutenção, de tal
forma que podem ser justamente definidas como as espingardas mais
modernas, precisas, seguras, rápidas e
elegantes actualmente disponíveis no
mercado.
Введение
Компания Benelli Armi S.p.A. рада
представить Вам линейку
полуавтоматических ружей,
произведенных на основе разработок
собственного НаучноИсследовательского Центра,
опирающихся на богатый опыт
компании, приобретенный в сфере
прецизионных технологий.
Небольшое число деталей, очень
простая конструкция, оригинальная
система запирания при помощи
поворотной личинки затвора и
система подачи патронов с
отсекателем обеспечивают ружьям
Benelli максимальную надежность
функционирования, практичность при
использовании, простоту при разборке
и техобслуживании. Поэтому их можно
назвать наиболее современными,
точными, надежными,
скорострельными и элегантными
ружьями, имеющимися в настоящее
время в продаже.
¬бспхуЯбуз
Ç Benelli Armi S.p.A. еЯнбй ƒес‡цбнз
ƒпх убт ƒбспхуйЬжей фзн кбйнпµсгйб
уейсЬ змйбхфьмбфщн фпхцекй¥н ƒпх
дзмйпхсг‡изкбн чЬсйт уфзн
бƒпфелеумбфйк‡ есгбуЯб фпх
КŸнфспх МелŸфзт кй ‚сехнбт фзт
ефбйсеЯбт уе ухндхбумь ме фзн
ƒлпµуйб емƒейсЯб фзт Benelli Armi
S.p.A. уфпн фпмŸб фзт фечнплпгЯбт
кбй фзт кбфбукех‡т мзчбнйум¥н
бксйвеЯбт.
П елЬчйуфпт бсйимьт еобсфзмЬфщн, з
еобйсефйкЬ бƒл‡ кбй псиплпгйк‡
мзчбнйк‡, з ƒсщфпфхƒЯб фпх нŸпх
ухуф‡мбфпт клейд¥мбфпт ме
ƒесйуфсецьменз кецбл‡ кбй фп
кбйнпµсгйп уµуфзмб фспцпдпуЯбт
цхуйггй¥н (cut off), кЬнпхн фб
фпхцŸкйб «Benelli» еобйсефйкЬ
бойьƒйуфб уфз лейфпхсгЯб фпхт,
ƒсбкфйкЬ уфз чс‡уз фпхт кй еµкплб
уфзн бƒпухнбсмпльгзуз кбй фз
ухнф‡сзуз фпхт. Гйб фпхт льгпхт
бхфпµт, фб нŸб фпхцŸкйб Benelli
мƒпспµн чщсЯт кбмЯб бмцйвплЯб нб
чбсбкфзсйуфпµн фб ƒйп мпнфŸснб,
буцбл‡, гс‡гпсб кбй кпмшЬ
фпхцŸкйб ƒпх кхклпцпспµн у‡месб
уфп емƒьсйп.
Page 33

32
Funzionamento
I fucili semi-automatici “Benelli” fondano il loro funzionamento sul principio inerziale a canna fissa, che utiliz-
za l'energia cinetica di rinculo dell'arma: a tutt'oggi una innovazione tecni-
ca tra le più rilevanti e geniali nel settore produttivo delle armi sportive.
Il sistema non necessita di presa di gas
né di rinculo della canna, ma si avvale
di una molla interposta liberamente
tra testa di chiusura ed otturatore.
Durante lo sparo - per reazione al rinculo del fucile - l'otturatore (inerte)
compie un avanzamento di circa 4
mm, proporzionato alla potenza della
cartuccia; comprime la molla che,
ultimata la fase di compressione, si
distende, facendo arretrare il gruppo
otturatore e permettendo così l'estrazione del bossolo ed il successivo
ricaricamento dell'arma, che avvengono secondo il sistema tradizionale.
Il carico della molla è opportunamente
tarato sia per creare un ritardo all'apertura sia per compensare le diverse pressioni prodotte da cartucce di varia
potenza, senza necessità di regolazioni.
Questo principio - utilizzato per tutto
il funzionamento in automatico dell'arma - consente di eliminare sia gli
inconvenienti dei sistemi a canna rinculante (vibrazioni della canna durante lo sparo, adozione di freno di regolazione per cartucce potenti, ecc.) sia
quelli dei tradizionali sistemi a sottra-
Operation
Benelli semi-automatic shotguns
operate on the same basic principle
of inertial operation with fixed bar-
rel, utilizing the kinetic energy of gun
recoil, which still today represents
one of the most important and ingenious innovation of sporting weapon
production.
This system requires no outlet for gas
operation nor barrel recoil, but operates by means of a spring freely interposed between locking head and bolt.
As the gun recoils during firing, the
breech bolt (inert) moves about 4 mm
forward, thus compressing the spring.
When this is fully compressed, it overcomes breech bolt inertia, thrusting it
to the rear under residual pressure,
permitting cartridge case extraction
and reloading with the conventional
system.
Spring pressure is designed to delay
the opening of the action which
occurs after the shot has left the barrel,
and to compensate for the different
pressures produced by cartridges of
varying power, with no adjustment
necessary.
The fully automatic operation of this
new shotgun eliminates the drawbacks of the barrel recoil system (barrel vibrations during firing needed to
brake the system and regulate it when
firing powerful ammunition etc.) and
those of gas operated traditional type
Fonctionnement
Les fusils semi-automatiques "Benelli"
se basent sur le principe de fonctionnement inertiel à canon fixe, qui utilise l'énergie cinétique de recul de l'arme qui, encore aujourd'hui constitue
la plus importante et ingénieuse innovation technique du secteur de production des armes sportives.
Le système n’exige pas l’emprunt des
gaz ni le recul du canon, mais il utilise
un ressort intercalé librement entre la
tête de fermeture et l'obturateur.
Au moment du tir, par réaction au recul du fusil, I’obturateur (inerte) accomplit un avancement d’environ 4
mm., proportionnel à la puissance de
la cartouche en comprimant le ressort.
A la fin de la compression, le ressort se
detend, faisant reculer tout le groupe
obturateur, en permettant ainsi l’extraction de la douille et le rechargement de l’arme qui s’effectue selon le
système traditionnel.
Le ressort est chargé de façon à créer
un retard à l’ouverture, et à moduler,
sans nécessité de freinage, les diverses
pressions produites par les cartouches
de différentes puissances.
Ce principe - utilisé pour tout le fonctionnement en automatique de l'arme consent d’éliminer aussi bien les inconvénients des systèmes à canon reculant (vibrations du canon durant le
tir, adoption d’un frein de réglage pour
les cartouches puissantes, etc.) que
Funktionsweise
Die Funktionsweise der halbautomatischen “Benelli” Gewehre basiert auf
dem Inertial- Prinzip mit fixem Lauf,
wobei die Rückstoßenergie der Waffe
genutzt wird: bis heute handelt es sich
hierbei um eine der wichtigsten und
genialsten technischen Innovationen
in der Produktionsbranche der Sportwaffen.
Bekanntlich erfordert dieses Prinzip
weder ein Gasdruckladesystem, noch
den Rückstoß des Laufes. Bei seiner
Funktionsweise gelangt eine spezielle
Feder zum Einsatz, die frei beweglich
zwischen dem Verschlußkopf und dem
Verschlußblock eingefügt ist.
Beim Schießen verschiebt sich der (träge) Verschlußkopf proportional zur
Patronenkraft um etwa 4 mm und komprimiert die Feder. Nachdem diese
zusammengedrückt wurde, dehnt sich
die Feder wieder aus und schiebt die
gesamte Verschlußeinheit zurück, so
dass die abgefeuerte Hülse ausgezogen
und die Waffe nach dem traditionellen
System neu geladen werden kann.
Die Spannung der Feder ist so eingestellt, um sowohl eine verzögerte Öffnung zu bewirken, als auch um die
variierenden Druckverhältnisse auszugleichen, die von Patronen unterschiedlicher Stärke ausgehen, wobei keine
bremsende Mechanik notwendig ist.
Die Betriebsweise dieses Waffenprinzips ist automatisch und ermöglicht es,
Page 34

33
Funcionamiento
Los fusiles semi-automáticos “Benelli”
basan su funcionamiento en el principio inercial con cañón fijo, que utiliza
la energía cinética de retroceso del
arma y que hasta la fecha representa
la novedad técnica más relevante y
genial en el sector productivo de las
armas deportivas.
El sistema no necesita toma de gas ni
mucho menos el retroceso del cañón;
para su funcionamiento, se vale de un
resorte colocado libremente entre la
cabeza de cierre y el obturador.
Durante el disparo, por reacción del
retroceso del fusil, el obturador (inerte)
realiza un avance proporcional a la
potencia del cartucho, de aproximadamente 4 mm, comprimiendo el resorte.
Este último, al terminar de comprimirse, se relaja haciendo retroceder todo
el grupo obturador y permitiendo, de
esta manera, la extracción del casquillo y la recarga del arma, llevados a
cabo según el sistema tradicional.
La resistencia del resorte está oportunamente calibrada tanto para crear un
retraso en la apertura como para regular, sin necesidad de ajuste, las diferentes presiones producidas por cartuchos
de diferentes potencias.
Este principio - utilizado para todo el
funcionamiento en modo automático
del arma - permite eliminar tanto los
inconvenientes de los sistemas con
cañón de retroceso (vibraciones del
Funcionamento
Todas as armas semiautomáticas
“Benelli” baseiam o seu funcionamento no princípio inercial de cano fixo,
que utiliza a energia cinética do recúo
da arma, uma inovação técnica extre-
mamente relevante e genial no sector
produtivo das armas desportivas.
Sublinhe-se que o sistema não necessita da recuperação de gases, nem de
recúo do cano, mas baseia-se numa
mola colocada entre a cabeça rotativa
e o obturador.
Durante o disparo - por reacção do
recúo da arma - o obturador (inerte)
completa, com o avanço proporcional
à potência do cartucho, cerca de 4
mm, comprimindo a mola e, esta, ultimada a fase de compressão distendese, fazendo recuar o grupo obturador
permitindo assim a extracção do cartucho e o sucessivo recarregamento da
arma, segundo o sistema tradicional.
A força da mola é atempadamente
doseada para criar um atraso na abertura para compensar as pressões produzidas pelos cartuchos de várias
potências, sem necessitar de qualquer
regulação.
Este princípio - utilizado para todas as
armas com o funcionamento semiautomático - permite eliminar os inconvenientes resultantes dos sistemas de
recúo de cano (vibrações no cano
durante o disparo, adopção de freio de
regulação, para cartuchos potentes,
Работа автоматики
Новые полуавтоматические ружья
“Benelli” имеют механизм перезарядки
инерционного действия, использующий
кинетическую энергию отдачи оружия
при неподвижном стволе, которая в
настоящее время является самым
ярким отличительными признаком
нашего оружия.
Система не нуждается в механизме
газоотвода и откате ствола, а имеет
инерционную пружину, свободно
расположенную между телом затвора и
личинкой.
В момент выстрела затвор (инертное
тело) под воздействием отдачи ружья
смещается вперёд на 4 мм (это
расстояние пропорционально мощности
патрона), сжимая инерционную пружину.
По завершении фазы сжатия пружина
разжимается, смещая назад затворную
группу. При этом происходит выброс и
отражение гильзы. Затем новый патрон
подаётся на линию заряжания и
досылается в патронник. Три последние
действия осуществляются по
традиционной схеме.
Жесткость пружины откалибрована так,
чтобы открытие затвора происходило
после того, как снаряд покинул канал
ствола.
При этом регулировка в зависимости от
мощности патрона не требуется.
Надежное запирание канала ствола
происходит благодаря двухупорной
поворотной личинке затвора, которая
способна выдерживать любое давление,
ЛейфпхсгЯб
Фб змйбхфьмбфб фпхцŸкйб “Benelli”
вбуЯжпнфбй уфзн бсч‡ бдсбнейбк‡т
лейфпхсгЯбт ме уфбиес‡ кЬннз ƒпх
чсзуймпƒпйеЯ фзн кйнзфйк‡ енŸсгейб фзт
бнЬкспхузт: мйб фечнйк‡ кбйнпфпмЯб
ƒпх бкьмб уфйт мŸсет мбт иещсеЯфбй
бƒь фйт ƒйп бойьлпгет кбй йдйпцхеЯт
уфпн фпмŸб ƒбсбгщг‡т билзфйк¥н
ьƒлщн.
Фп уµуфзмб бхфь ден Ÿчей нб кЬней ме
фб бŸсйб бллЬ кй пµфе ме фзн пƒйуипдсьмзуз фзт кЬннзт. З лейфпхсгЯб фпх
вбуЯжефбй уе Ÿнб елбф‡сйп ƒпх
ƒбсемвЬллефбй елеµиесб бнЬмеуб уфп
клеЯуфсп кбй уфзн кецбл‡ фпх
клеЯуфспх.
КбфЬ фз дйЬскейб фпх ƒхспвплйумпµ, фп
клеЯуфсп (льгщ фзт бдсЬнейбт) бнфйдсЬ
уфзн пƒйуипдсьмзуз фпх фпхцекйпµ
ƒсбгмбфпƒпй¥нфбт, бнЬлпгб ме фз
дµнбмз фпх цхуйггйпµ, мйб кЯнзуз ƒспт
фб емƒсьт кбфЬ ƒесЯƒпх 4 mm ме
бƒпфŸлеумб нб ƒйŸуей фп елбф‡сйп. Фп
елбф‡сйп, бцпµ ƒйеуфеЯ, бсчЯжей нб
еƒйуфсŸцей уфзн бсчйк‡ фпх иŸуз
уƒс¥чнпнфбт ƒспт фб ƒЯущ ьлпн фпн
мзчбнйумь фпх клеЯуфспх кй
еƒйфсŸƒпнфбт, Ÿфуй, фзн бцбЯсеуз фпх
кЬлхкб кбй фзн фспцпдпуЯб цхуйггй¥н
ме фп ƒбсбдпуйбкь уµуфзмб.
З ƒЯеуз фпх елбфзсЯпх еЯнбй ейдйкЬ
мелефзмŸнз бƒь фп есгпуфЬуйп Ÿфуй
¥уфе нб дзмйпхсгеЯ мйб еƒйвсЬдхнуз
фпх бнпЯгмбфпт кбй нб бнфйуфбимЯжей фйт
ƒйŸуейт ƒпх дзмйпхсгпµн фб дйЬцпсб
еЯдз цхуйггй¥н чщсЯт бнЬгкз сµимйузт.
З бсч‡ бхф‡ – ƒпх ецбсмьжефбй уе
ьлет фйт бхфьмбфет лейфпхсгЯет фпх
фпхцекйпµ- еƒйфсŸƒей фзн бƒпцхг‡ фщн
мейпнекфзмЬфщн фьуп фщн
ухуфзмЬфщн
Page 35

34
zione di gas (frequente pulizia della
presa di gas, perdita di potenza nella
velocità iniziale della carica di piombo con ripercussione negativa sulla
conformazione in profondità della
rosata e possibili difetti in condizioni
atmosferiche avverse), permettendo
così di realizzare un'arma moderna e
pienamente affidabile.
A questo principio di funzionamento è
stata abbinata una testa di chiusura
rotante, di forma semplice e robusta,
che con soli due denti realizza una
perfetta chiusura assiale in culatta,
capace di sopportare le pressioni in
canna sviluppate dalla cartuccia.
Il gruppo di scatto, di concezione
moderna e rivoluzionaria, utilizza un
sistema a geometria variabile che permette all’utente di eseguire in ogni
momento un tiro preciso e senza
strappi.
La trazione viene ripartita sempre in
maniera controllata e costante, senza
precorse a vuoto o collassi successivi
al rilascio del cane, con indubbi vantaggi su sicurezza ed efficacia genera-
le dell’insieme.
Infine, la perfetta sincronizzazione
con cui i movimenti del doppio dente
di agganciamento del cane agiscono
sul sistema di alimentazione - tramite
un’azione concertata con la leva
discesa cartuccia ed il dente di arresto
- offre una sicurezza ed un’affidabilità
impareggiabili.
(the need to clean gas outlets, loss of
power due to acceleration of the
shot charge and adverse effect on the
longitudinal shape of the wad and
possible malfunctions under adverse
climatic conditions).
The Benelli system is therefore modern and highly reliable.
To this operating system has been added a revolving bolt head of simple
and robust shape, which with only
two locking lugs, closes the breech
axially and perfectly, withstanding any
pressure of the cartridge.
The modern and revolutionary trigger
action is carried out through a system
of variable profile which allows the
user to shoot precisely and without
jerking in trigger pull.
The pull action is carried out in a
smoothly and controlled way, without
trigger free pre-run or sudden relax
after releasing the hammer, thus ensuring efficacy and safety of the whole
system.
Finally, the precise synchronization of
the movement of the hammer double
coupling teeth optimise the feeding
system through a combined action
with the cartridge drop lever and the
stop notch.
ceux des systèmes traditionneaux procédant par emprunt de gaz (nettoyage
fréquent de la prise de gaz, perte de
puissance dans la vitesse initiale de la
charge de plomb avec une répercussion négative sur la conformation en
profondeur de la rosace et possibilités
d’enrayage lorsque les conditions atmosphériques sont défavorables), en
permettant ainsi de réaliser une arme
moderne et absolument fiable.
Ce principe de fonctionnement a été
combiné à une tête de fermeture tour-
nante, robuste et simple, qui grâce à
deux seules dents de fermeture, assure
une fermeture parfaite et axiale de la
culasse, capable de supporter dans le
canon la pression des cartouches.
Le groupe de déclenchement, de conception moderne et révolutionnaire,
monte un système à géométrie varia-
ble permettant à l’utilisateur d’effectuer
à tout moment un tir précis et sans
secousses.
La traction est toujours répartie d’une
manière contrôlée et constante, sans
pré-courses à vide ni baisse après le
relâchement du chien, avec des avantages incontestables sur la sécurité et
l’efficacité générale du groupe.
Enfin, la synchronisation parfaite avec
laquelle les mouvements de la double
dent d’accrochage du chien interviennent sur le système d’alimentation par le biais d’une action concertée
avec le levier de descente de la cartouche et la dent d’arrêt - offre une sécu-
die unangenehmen Nebenwirkungen
der Systeme mit notwendigem Laufrückstoß (Vibrationen des Laufs beim
Schießen, Anwendung einer bremsenden Mechanik für starke Patronen,
u.s.w.) und jener mit Gasentzugssystemen (häufige Reinigung des Gasdruckladesystems, Leistungsverlust bei der
Anfangsgeschwindigkeit der Bleiladung
mit negativen Auswirkungen auf die
Tiefenentwicklung und möglichen
Defekten bei schlechten Witterungsbedingungen) auszuschalten. Das Ergebnis ist eine moderne Waffe auf die man
sich voll und ganz verlassen kann.
Bei diesem Funktionsprinzip wird ein
einfach geformter, robuster und dreh-
barer Verschlußkopf eingesetzt, der
mit zwei Verriegelungswarzen einen
einwandfreien Verschluß axial zur
Laufverlängerung gewährleistet, welcher dem durch die Patrone im Lauf
erzeugten Druck problemlos standhält.
Die Auslöse-Einheit ist modern und
revolutionär entworfen und verwendet
ein System mit variabler Geometrie,
welches es dem Schützen jederzeit
ermöglicht, präzise und ruckfreie
Schüsse abzugeben.
Die Zug-Aktion wird immer kontrolliert und konstant verteilt, ohne Leer-
Vorläufe oder Zusammenbrechen
nach der Freigabe des Schlagstücks,
wodurch man zweifelsohne große Vorteile hinsichtlich der allgemeinen Waf-
fensicherheit- und Effizienz hat.
Die perfekte Synchronisation mit der
Page 36

35
cañón durante el disparo, utilización
de freno de regulación para cartuchos
potentes, etc.) como los inconvenientes de los sistemas tradicionales con
sustracción de gas (frecuente limpieza
de la toma de gas, pérdida de potencia
en la velocidad inicial de la carga de
plomo con repercusión negativa sobre
la conformación longitudinal de los
perdigones y posibles defectos en condiciones atmosféricas desfavorables),
realizando, de esta manera, un arma
moderna y completamente fiable.
A este principio de funcionamiento ha
sido agregada una cabeza de cierre
rotatoria, de forma simple y robusta,
que con dos dientes de cierre realiza
un perfecto cierre axial en el cerrojo,
capaz de soportar las presiones del
cañón desarrolladas por el cartucho.
El grupo de disparo, de moderna y
revolucionaria concepción, utiliza un
sistema de geometría variable que
permite al usuario realizar, en cada
momento, un disparo preciso y sin
tirones.
La tracción se reparte siempre de
manera controlada y constante, sin
pre-carreras en vacío o colapsos sucesivos a la liberación del martillo, con
ciertas ventajas sobre la seguridad y la
eficacia general del conjunto.
En fin, la perfecta sincronización con
la cual los movimientos del doble
diente de enganche del martillo actúan
sobre el sistema de alimentación - con
una acción concertada con la palanca
etc), seja o de sistema de recuperação
de gases (frequente limpeza, perda de
potência na velocidade inicial da carga de chumbo com repercussão negativa em profundidade no alvo e possíveis defeitos em condições atmosféricas adversas), permitindo assim efectuar uma arma moderna e plenamente
fiável.
A este princípio de funcionamento foi
conjugado um fecho de cabeça rotati-
va, simples e robusta, que com duas
alhetas efectua um fecho axial perfeito, apta a suportar qualquer pressão
desenvolvida pelo disparo.
O grupo de disparo, de confecção
moderna e revolucionária, utiliza um
sistema de geometria variável que
permite oa utente executar a qualquer
momento um tiro preciso e sem recúo.
A tracção reparte-se sempre de maneira controlada e constante, sem percur-
so de falhas e colapsos sucessivos na
libertação do cão, com inúmeras vantagens da sua segurança e eficácia
geral do sistema.
Por fim, a perfeita sincronização com
a qual os movimentos do duplo dente
de engate do cão actuam sobre o sistema de alimentação - permite uma
acção concertada do travão do depósito e o dente do elevador - oferecen-
do uma segurança e uma fiabilidade
inigualável.
производимое в стволе патроном
соответствующего калибра.
Этот принцип, используемый для всей
автоматической работы оружия,
позволяет избавиться от неудобств
систем с откатом ствола (вибрации
ствола во время выстрела, применение
регулировочного тормоза для мощных
патронов, и т. д.), а также систем с
отводом газов (частая очистка газового
отверстия, потеря мощности из-за
снижения начальной скорости
дробового снаряда, что приводит к
чрезмерному вытягиванию дробового
снопа, а также к задержкам в
неблагоприятных погодных условиях),
позволяя создать современное и
полностью надежное оружие.
Надежное запирание канала ствола
происходит благодаря двухупорной
поворотной личинке затвора,
которая способна выдерживать любое
давление, производимое в стволе
патроном соответствующего калибра.
Ударно-спусковой механизм,
современной и революционной
концепции, использует систему с
переменным профилем, позволяющую
пользователю в любой момент
произвести точный выстрел, не
совершая резких движений.
Усилие спуска всегда постоянныое и
контролируемыое, без холостого
предварительного хода или
неожиданного ослабления, что
несомненным улучшением надежности
и общей эффективности ружья в
целом.
Синхронность, с которой движения
ме пƒйуипдсьмзуз кЬннзт (фблЬнфщуз
фзт кЬннзт кбфЬ фз дйЬскейб фзт впл‡т,
бнЬгкз цсŸнпх схимЯуещт гйб фб
йучхсЬ цхуЯггйб кфл) ьуп кбй фщн
ухуфзмЬфщн дсЬузт бесЯщн (бнЬгкз
кбибсйумпµ фщн пƒ¥н дйбцхг‡т
бесЯщн, бƒ¥лейб йучµпт уфзн бсчйк‡
фбчµфзфб фщн укбгй¥н ме еƒйƒф¥уейт
уфз дйбуƒпсЬ кбй ƒйибнŸт
дхулейфпхсгЯет уфйт бнфЯопет
бфмпуцбйсйкŸт ухни‡кет). Фп
бƒпфŸлеумб еЯнбй з дзмйпхсгЯб еньт
мпнфŸснпх кбй бƒплµфщт бойьƒйуфпх
ƒхспвьлпх ьƒлпх.
З ƒбсбƒЬнщ бсч‡ лейфпхсгЯбт
ухндхЬуфзке ме мйб ƒесйуфсецьменз
кецбл‡ клеЯуфспх, бƒл‡ уфпн
учедйбумь фзт бллЬ дхнбф‡, ƒпх ме
дµп ейдйкЬ мелефзмŸнб дьнфйб
ƒсбгмбфпƒпйеЯ Ÿнб фŸлейп бопнйкь
клеЯдщмб уфп ƒЯущ мŸспт фзт кЬннзт,
йкбнь нб бнфŸоей кЬие еЯдпхт ƒЯеуз ƒпх
бнбƒфµууей фп цхуЯггй.
П мзчбнйумьт укбндЬлзт - мпнфŸснбт
кй еƒбнбуфбфйк‡т бнфЯлзшзтчсзуймпƒпйеЯ Ÿнб уµуфзмб мефбвлзф‡т
гещмефсЯбт ƒпх еƒйфсŸƒей кЬие уфйгм‡
фзн еƒЯфехоз мйбт бксйвпµт кбй
уфбиес‡т впл‡т.
З Ÿлоз ƒсбгмбфпƒпйеЯфбй ме
елегчьменп кбй уфбиесь фсьƒп чщсЯт
êåíŸò дйбдспмŸт ‡
еƒбнблбмвбньменпхт ксбдбумпµт
мефЬ фзн бƒелехиŸсщуз фпх кькпсб,
ме бнбмцйув‡фзфб ƒлепнекф‡мбфб
ьупн бцпсЬ уфз генйк‡ буцЬлейб кбй
бƒпфелеумбфйкьфзфб фпх ухньлпх.
ŃéƒëŸïí, п фŸлейпт ухгчспнйумьт ме
фпн пƒпЯп пй кйн‡уейт фпх дйƒлпµ
дпнфйпµ ƒпх кпхмƒ¥ней фпн кькпсб
еƒйдспµн уфп уµуфзмб фспцпдпуЯбт
(мŸущ мйбт бсмпнйк‡т ухнесгбуЯбт ме
Page 37

36
Il sistema di alimentazione cut-off si
avvale di una particolare “leva discesa
cartuccia”, sporgente per un tratto dal
piano inferiore della carcassa, in posizione di facile accesso al dito che sta
sul grilletto.
Al momento dello sparo, la molla del
cane fa ruotare verticalmente la “leva
discesa cartuccia” che, per effetto della sua molla di richiamo, ruota in senso orario, permettendo così l'uscita di
una cartuccia dal serbatoio.
La cartuccia poi, nel posizionarsi sul
cucchiaio elevatore, preme contro la
leva fermo cartuccia, facendola ruotare in senso contrario ed impedendo
quindi l'uscita di una seconda cartuccia.
Il cucchiaio elevatore, comandato dall'otturatore, sale automaticamente e
porta la cartuccia in posizione idonea
all'incameramento.
Nel frattempo, la molla del cane - già
ricompressa in posizione di armamento - ha lasciato libera la “leva discesa
cartuccia” di riprendere la sua posizione di riposo: in tal modo, la leva
fermo cartuccia è obbligata a trattenere definitivamente le cartucce ancora
nel serbatoio, fino a quando non verrà
sparato un nuovo colpo.
La “leva discesa cartuccia” presenta
sulla parte che sporge dal piano inferiore della carcassa un punto rosso,
ben identificabile: quando questo è
visibile, l'arma ha il cane armato ed è
The cut-off feeding system operates by
means of a special “cartridge drop
lever”, the outer portion of which protrudes below the receiver and is thus
easily reached by the trigger finger.
Upon shooting, the hammer spring
forces the cartridge drop lever upwards to disengage it from the carrier
latch which, pulled by the carrier latch
spring, rotates clockwise to allow a
cartridge to exit from the magazine.
As the cartridge falls into position on
the carrier, it presses against the “cartridge drop lever” which rotates in the
opposite direction to prevent a second
cartridge from exiting.
When the bolt is operated the carrier
rises automatically to position the cartridge for introduction in the chamber.
In the meantime, the hammer spring,
which was compressed during cocking, has freed the cartridge drop lever
to return to its rest position. In this
way, the carrier latch holds the remaining cartridges in the magazine
until the next shot is fired.
The end of the cartridge drop lever
which protudes from the receiver is
marked with a red point. When the
red point is visible, the hammer is
cocked and the gun is ready to fire;
otherwise the hammer is not cocked.
rité et une fiabilité inégalables.
Le système d’alimentation cut-off prévoit un “levier spécial de descente de
la cartouche” dont la partie extérieure
dépasse le plan inférieur de la carcasse
et qui est facilement accessible au
doigt qui appuie sur la détente.
Au moment du tir, le ressort du chien
fait pivoter verticalement le levier de
descente de la cartouche. Celui-ci, du
fait de son ressort de rappel, tourne de
gauche à droite en permettant ainsi la
sortie d’une cartouche du magasin.
Cette cartouche, en se positionnant sur
l’élévateur, appuie sur le levier d’arrêt
de la cartouche en le faisant tourner
dans le sens contraire et en empêchant
ainsi la sortie d’une deuxième cartouche.
L’élévateur, commandé par l’obturateur, monte automatiquement et amène la cartouche dans la position d’entrée dans la chambre.
Entre temps, le ressort du chien - déjà
comprimé en position d’armement - a
liberé “le levier de descente” en lui
permettant de reprendre sa place. De
cette manière, le levier d’arrêt de la
cartouche est obligé de retenir définitivement les cartouches encore dans le
magasin jusqu’à ce qu'un nouveau
coup ne soit tiré.
Le levier de descente de la cartouche
comporte, bien en vue sur la partie qui
dépasse du plan inférieur de la carcasse, un petit point rouge. Lorsque celuici est visible, le chien est armé et l'ar-
die Bewegungen des doppelten Schlagstück-Kupplungszahns auf das
Zuführungssystem einwirken – über
eine abgestimmte Aktion von Patronenfreigabehebel und Sperrzahn- bie-
tet zudem eine Sicherheit und eine
Zuverlässigkeit ohne Gleichen.
Im wesentlichen besteht das neue Cutoff Zuführungssystem aus dem Patronenfreigabehebel der in unmittelbarer
Nähe des Abzugfingers, seitlich am
Abzugsgehäuse sitzt.
Wenn der Abzug betätigt wird, schwenkt die Schlagfeder den Patronenfreigabehebel nach oben, aufgrund seiner Rückholfeder dreht sich dieser im
Uhrzeigersinn und bringt somit eine
neue Patrone zum Patronenlager.
Die auf dem Zubringer liegende Patrone drückt gegen den Patronenfreigabehebel (Cut-off) und läßt diesen wieder
arretieren, damit keine weitere Patrone
aus dem Magazinrohr zugeführt wird.
Wird der Verschluss zurückgezogen,
hebt sich der Ladelöffel und bringt die
Patrone, die in das Patronenlager eingelegt wird, in die richtige Position.
Währenddessen hat die Schlagfeder, die
beim Spannen zusammengedrückt wurde, den Patronenfreigabehebel in seine
Ruhestellung zurückgebracht, so dass
der Ladelöffel die anderen Patronen im
Magazin behalten muss bis der nächste
Schuss abgefeuert wird.
Der Patronenfreigabehebel weist einen
gut sichtbaren roten Punkt auf, der aus
dem Inneren des Gehäuses hervorragt.
Page 38

37
de descenso del cartucho y el diente
de detención - ofrece una seguridad y
una fiabilidad inigualables.
El sistema de alimentación cut-off utiliza una “palanca especial de descenso del cartucho”, que sobresale un
poco del plano inferior de la carcasa
en posición fácilmente accesible al
dedo que jala el gatillo.
Al momento del disparo, el resorte del
martillo hace girar verticalmente la
“palanca de descenso del cartucho”;
esta última, por efecto de su resorte
antagonista, gira en el sentido de las
manecillas del reloj permitiendo, de
esta manera, la salida de un cartucho
del almacén.
Dicho cartucho, al colocarse en el elevador, presiona la palanca del seguro
del cartucho haciéndola girar al contrario e impidiendo la salida de otro
cartucho.
El elevador, dirigido por el obturador,
sube automáticamente y lleva el cartucho a la posición ideal para entrar en
la cámara.
Mientras tanto, el resorte del martillo ya comprimido en la posición de
armado - permite a la “palanca de
descenso del cartucho” retomar su
posición de reposo: de esta manera, la
palanca del seguro del cartucho está
obligada a retener definitivamente los
cartuchos que quedan en el almacén
hasta que no se dispare otro tiro.
La “palanca de descenso del cartu-
O sistema de alimentação cut-off está
solidário com “o travão do depósito”
que sobressai do plano inferior da
báscula, tendo uma posição de fácil
acesso ao dedo do gatilho.
No momento do disparo, a mola do
cão fará mover verticalmente o
”travão do depósito” que, por efeito
da sua mola de chamada, roda no sentido horário, permitindo a saida de um
cartucho no depósito.
O cartucho, ao posicionar-se no elevador, comprime lateralmente o travão
do depósito fazendo uma rotação no
sentido anti-horário impedindo a saida
prematura do cartucho seguinte.
O elevador comandado pelo obturador, sobe automáticamente e encaminha novo cartucho para a câmara.
Entretanto, a mola do cão - já comprimida em posição de armamento deixou livre o “travão do depósito”,
que retoma a sua posição, bloqueando
os cartuchos que estão no depósito,
até que seja disparado um novo tiro.
O cut-off presente sobre a parte saliente do plano inferior da báscula com
um ponto vermelho bem identificado:
quando visível indica que o cão está
armado e, portando, a arma está pronta a disparar, no caso contrário, a arma
tem o cão desarmado.
Este funcionamento permite a passagem manual dos cartuchos do tubo do
depósito para o cano, para uma fácil e
rápida mudança de munições no
двойного зубца сцепления курка
воздействуют на систему подачи – при
помощи рычага выбрасывателя патрона
и стопорного выреза – обеспечивает
несравненную надежность и
безопасность.
Отсекатель патронов представляет
собой рычаг, одна сторона которого
выступает из нижней части ствольной
коробки, и доступен для указательного
пальца.
В момент выстрела боевая пружина
поворачивает вверх рычаг
выбрасывателя патрона, освобождая
его от рычага фиксатора подавателя
патронов, последний поворачивается по
часовой стрелке, позволяя выйти
одному патрону из магазина.
Патрон, размещаясь на подавателя,
нажимает на рычаг фиксатора
подавателя, поворачивая его в
противоположном направлении и
препятствуя, таким образом, подаче
следующего патрона.
Подаватель под воздействием затвора
поднимается устанавливает патрон
перед патронником.
Одновременно пружина курка,
приведенная во взведенное
положениения – освобождаетрычаг
выбрасывателя патрона, который
возвращается в исходное положение,
воздействуя на фиксатор подавателя и
таким образом, блокируя подачу
патронов, находящих в магазине, до тех
пор, пока не будет произведен
следующий выстрел.
Рычаг выбрасывателя патрона на
выступающей из ствольной коробки
фпн бƒелехиесщф‡ кбй ме фп дьнфй
уфЬуещт), еƒйцŸсей уфп ьƒлп
боеƒŸсбуфз буцЬлейб кй бойпƒйуфЯб.
Фп нŸп уµуфзмб фспцпдпуЯбт “cut off”
чсзуймпƒпйеЯ Ÿнбн йдйбЯфесп
бƒелехиесщф‡ цхуйггй¥н фпх пƒпЯпх
Ÿнб мŸспт ƒспеоŸчей уфзн кЬфщ ƒлехсЬ
фпх кпсмпµ фпх ьƒлпх, уе узмеЯп ме
еµкплз ƒсьувбуз гйб фп дЬкфхлп ƒпх
ƒбфЬей фзн укбндЬлз.
Фзн уфйгм‡ фпх ƒхспвплйумпµ, фп
елбф‡сйп фпх кькпсб ƒспкблеЯ фзн
кЬиефз ƒесйуфспц‡ фпх бƒелехиесщф‡
цхуйггй¥н, елехиес¥нпнфбт фпн бƒь
фпн бнбуфплŸб. П фелехфбЯпт, чЬсйт
уфп дйкь фпх елбф‡сйп еƒбнбцпсЬт,
ƒесйуфсŸцефбй кбфЬ фз цпсЬ фщн
дейкф¥н фпх сплпгйпµ еƒйфсŸƒпнфбт,
Ÿфуй, фзн Ÿопдп фпх цхуйггйпµ бƒь фзн
бƒпи‡кз.
Œфбн фп цхуЯггй всеиеЯ фпƒпиефзмŸнп
уфз гл¥ууб ƒйŸжей фпн бнбуфплŸб
бнбгкЬжпнфбт фпн нб ƒесйуфсбцеЯ ƒспт
фзн бнфЯиефз кбфеµихнуз кй
емƒпдЯжпнфбт фзн Ÿопдп фщн Ьллщн
цхуйггй¥н.
З гл¥ууб, ƒпх елŸгчефбй бƒь фп
клеЯуфсп, узк¥нефбй бхфьмбфб кбй
цŸсней фп цхуЯггй уфз ущуф‡ иŸуз гйб
фзн еЯупдп фпх уфз иблЬмз.
Ен фщ мефбоµ, фп елбф‡сйп фпх кькпсб
(ƒпх ƒйŸжефбй ьфбн фп фпхцŸкй еЯнбй
пƒлйумŸнп) елехиес¥ней фпн
бƒелехиесщф‡ цхуйггй¥н еƒйфсŸƒпнфбт
фпх нб еƒйуфсŸшей уе иŸуз бнЬƒбхузт.
Ме фпн фсьƒп бхфь, п бнбуфплŸбт
бнбгкЬжефбй нб ухгксбф‡уей фб
цхуЯггйб уфзн бƒпи‡кз мŸчсй фзн
еƒьменз впл‡.
Фп мŸспт фпх бƒелехиесщф‡ цхуйггй¥н
ƒпх ƒспеоŸчей уфзн кЬфщ ƒлехсЬ фпх
Page 39

38
pronta a far fuoco; in caso contrario,
l'arma ha il cane disarmato.
Questo funzionamento consente il
passaggio manuale delle cartucce in
canna dal tubo serbatoio, per un facile
e rapido cambio della munizione in
canna, assicurando una alimentazione
ancor più veloce e funzionale nel riarmo automatico. Consente, inoltre di
verificare rapidamente se l'arma abbia
il cane armato e sia pronta al tiro.
Per l'alto grado di perfezionamento
raggiunto - il fucile può funzionare
con una vasta gamma di cartucce: l'o-
riginalità del principio di funzionamento inerziale richiede comunque
alla cartuccia un minimo di energia
cinetica, necessaria per attuare il completo automatismo di riarmo determinato dal rinculo dell'arma stessa.
Approfondite esperienze di laboratorio balistico e di prove pratiche ci
consentono di fissare i parametri per il
corretto funzionamento dell'arma,
individuando in 230 kgm il valore
minimo dell'energia cinetica sviluppata dalla cartuccia cal. 12 e in 190 kgm
per il cal. 20 (valori misurati su canna
manometrica a 1 m dalla volata).
Thanks to this operation cartridges in
the barrel chamber can be easily replaced manually.
The shotgun can operate with a wide
range of cartridges, thanks to the high
degree of performance being acquired. The inertial system requires, however, a minimum of kinetic energy,
which is necessary to achieve a normal cycling of ammunition.
Extensive testing in ballistics labs and
repeated field testing of our line produced weapons put at 230 kgm the
lowest level of kinetic energy that
must be generated by the cartridge 12
gauge and at 190 kgm for 20 gauge to
fully cycle the action (value measured
by manometric barrel at 1 m from the
muzzle).
me est prête à tirer. Dans le cas contraire, le chien est désarmé.
Ce fonctionnement consent le passage
manuel des cartouches du canon au
tube magasin, en vue d’un changement facile et rapide de la munition
dans le canon, en assurant une alimentation encore plus rapide et fonctionnelle du réarmement automatique. Il
consent en outre de vérifier rapidement si le chien de l’arme est armé et
prêt à tirer.
Grâce à son haut degré de perfectionnement, le fusil est en mesure de fonctionner avec une très vaste gamme de
cartouches; l’originalité du système de
fonctionnement par inertie ne demande de toute façon à la cartouche qu’une toute petite quantité d’énergie cinétique nécessaire pour un automatisme
complet de la recharge déterminé par
le recul même de l’arme.
De multiples expérimentations balistiques ainsi que de nombreux essais
pratiques de fonctionnement nous permettent de fixer les paramètres pour un
fonctionnement correct de l’arme, en
déterminant à 230 kgm la valeur minimum de l’énergie cinétique développée par la cartouche cal. 12 et à
190 kgm celle développée par le cal.
20 (valeurs mesurées avec un canon
manométrique à 1 m de la volée).
Wenn der rote Punkt sichtbar ist, ist
das Schlagstück gespannt und die
Waffe schussbereit. Im gegenteiligen
Fall ist das Schlagstück nicht gespannt.
Diese Betriebsweise ermöglicht es, die
Patronen vom Magazinohr manuell in
den Lauf zu bringen, wodurch ein leichtes und schnelles Wechseln der Laufmunition gewährleistet ist und eine
noch schnellere und funktionellere
Zuführung beim automatischen Selbstladevorgang. Außerdem kann schnellstens geprüft werden, ob das Schlagstück gespannt und die Waffe schussbereit ist.
Dank des erreichten hohen technologischen Perfektionsniveaus kann die Waffe mit einer Vielzahl an Patronen funktionieren: Die Originalität des InertialFunktionssystems erfordert jedoch ein
Minimum an kinetischer Energie bei
der Patrone, um den automatischen
Selbstladevorgang durch die Waffenrückstosskraft zu ermöglichen.
Intensive Tests der ballistischen Abteilung und praktische Überprüfungen erlauben, folgende Parameter für das korrekte Funktionieren der Waffe anzugeben: der niedrigste Wert an kinetischer
Energie, die die Patrone des Kalibers 12
entwickeln muss, beträgt 230 kgm. Bei
dem Kaliber 20 beträgt der Wert 190
kgm (ein Wert, der durch manometrischen Lauf 1 m weit von der Mündung
gemessen wurde).
Page 40

39
cho”, tiene a la vista, en la parte que
sobresale del plano inferior de la carcasa, un punto rojo. Cuando el punto
se ve, el arma tiene el martillo armado
y está lista para disparar; en caso contrario, el arma tiene el martillo desarmado.
Este funcionamiento permite el pasaje
manual de los cartuchos al cañón
desde el tubo almacén, para un fácil y
rápido cambio de la munición del
cañón, asegurando una alimentación
aún más veloz y funcional en el rearme
automático. Además, permite verificar
rápidamente si el arma tiene el martillo
armado y está lista para disparar.
El fusil, por su alto grado de perfección, puede funcionar con una vasta
gama de cartuchos; la originalidad del
sistema de funcionamiento inercial, de
cualquier manera requiere del cartucho un mínimo de energía cinética,
necesaria para un completo automatismo de recarga determinado por el retroceso de la misma arma.
Exhaustivas pruebas de laboratorio
balístico y pruebas prácticas nos permiten fijar los parámetros para el correcto funcionamiento del arma estableciendo en 230 kgm el valor mínimo
de la energía cinética desarrollada por
el cartucho de calibre 12 y en 190
kgm para el calibre 20 (valores medidos con cañón manométrico a 1 m de
la voladura).
cano, assegurando-se uma alimentação também mais rápida e funcional
no rearmamento automático. Consentindo por outro lado de verificar ràpidamente se a arma tem o cão armado
e pronta a disparar.
Pelo alto nível de aperfeiçoamento
atingido - as armas podem utilizar
uma vasta gama de cartuchos: originalidade do princípio de funcionamento inercial requerendo contudo ao
cartucho um mínimo de energia cinética, necessária para actuar o completo automatismo de armamento.
Aprofundadas as experiências laboratoriais balísticas e práticas, permitenos fixar os parâmetros para o correcto
funcionamento da arma, sendo de 230
kg o valor mínimo de energia cinética
desenvolvida por um cartucho de cali-
bre 12 e 190 kg para o calibre 20
(valores medidos com cano manométrico a 1 m a partir da boca).
части хорошо видимую красную точку.
Когда она видна, курок взведен и
оружие готово к стрельбе.
Данная конструкция позволяет
досылать патрон в патронник из
магазина вручную, упрощает замен,
патрона в патроннике, обеспечивая еще
более быструю и эффективную подачу
при автоматической перезарядке, а
также позволяет быстро проверить,
взведен ли курок у оружия и готово ли
оно к выстрелу.
Благодаря высокому качеству
изготовления, ружье может работать с
обширной гаммой патронов:
оригинальность инерционного принципа
функционирования требует от патрона
минимума кинетической энергии,
необходимой для выполнения
перезаряжания в автоматическом
режиме.
Углубленный опыт баллистической
лаборатории и практические испытания
позволили нам определить параметры
правильного функционирования оружия,
установив минимальную величину
кинетической энергии, вырабатываемой
патроном кал. 12, равной 230 кгм, и 190
кгм для кал. 20 (значения измеренные
на крешерном стволе на расстоянии 1
м от дульного среза).
кпсмпµ Ÿчей Ÿнб ехксйнŸт кьккйнп
узмЬдй. Œфбн фп узмЬдй еЯнбй псбфь, фп
фпхцŸкй Ÿчей фпн кькпсб пƒлйумŸнп кй
еЯнбй Ÿфпймп гйб фз впл‡. Œфбн
бнфйиŸфщт ден еЯнбй псбфь, фп фпхцŸкй
ден Ÿчей фпн кькпсб пƒлйумŸнп.
П ƒбсбƒЬнщ фсьƒпт лейфпхсгЯбт
еƒйфсŸƒей фп ƒŸсбумб фщн цхуйггй¥н
бƒь фзн бƒпи‡кз уфзн кЬннз ме фп чŸсй
(гйб мйб гс‡гпсз кй еµкплз бллбг‡ фпх
цхуйггйпµ уфзн кЬннз) кй еобуцблЯжей
мйб бкьмб ƒйп гс‡гпсз кбй лейфпхсгйк‡
бхфьмбфз фспцпдпуЯб. ЕƒйƒлŸпн,
еƒйфсŸƒей нб елŸгчефе Ьмеуб бн фп
ьƒлп Ÿчей пƒлйумŸнп фпн кькпсб кй
еЯнбй Ÿфпймп гйб фз впл‡.
Фп ьƒлп, чЬсйт уфпн хшзль вбимь
бсфйьфзфбт фпх, еЯнбй уе иŸуз нб
лейфпхсг‡уей ме мйб ехсµфбфз гкЬммб
цхуйггй¥н. Щуфьуп, з ƒсщфпфхƒЯбт фзт
бсч‡т бдсбнейбк‡т лейфпхсгЯбт бƒбйфеЯ
бƒь фп цхуЯггй Ÿнб елЬчйуфп кйнзфйк‡т
енŸсгейбт, бƒбсбЯфзфп гйб Ÿнбн ƒл‡сз
бхфпмбфйумь фзт пƒлЯуещт з пƒпЯб
вбуЯжефбй уфзн пƒйуипдсьмзуз фпх
Ядйпх фпх ьƒлпх.
Пй ƒплхЬсйимет лейфпхсгйкŸт дпкймŸт
кбй феуф -фьуп уфп вбллйуфйкь
есгбуф‡сйп ьуп кбй уфзн ƒсЬоз- мбт
еƒйфсŸƒпхн ƒлŸпн нб псЯупхме уфб 230
kgm êáé óôá 190 kgm фзн елЬчйуфз фйм‡
кйнзфйк‡т енŸсгейбт ƒпх ƒсŸƒей нб
бнбƒфµоей Ÿнб цхуЯггй äéáì.12 êáé äéáì.
20 бнфйуфпЯчщт гйб фз ущуф‡ лейфпхсгЯб
фпх Ядйпх фпх ьƒлпх (
ЩИМ¤˜ МВЩЪЛМ¤УВ˜
ЫВ М·УФМВЩЪИО‹ О¿УУЛ ЫВ ·fiЫЩ·ЫЛ 1 m
·fi ÙÔ ÛÙfiÌÈÔ
).
Page 41

40
Garanzia
Le norme di garanzia sono contenute
nello specifico certificato.
La Benelli Armi S.p.A. non si ritiene
responsabile di eventuali danni derivanti dall’uso di munizioni improprie, da negligenze di manutenzione
o da incidenti dovuti ad imperizia nel
maneggio delI’arma.
ATTENZIONE: l’uso di componenti o
parti di ricambio non originali Benelli
annulla la garanzia.
Warranty
Warranty terms are given in the warranty certificate.
Benelli Armi Spa will not be held
responsible for consequential damage
derived from the use of improper
ammunition, lack of maintenance, or
from accidents resulting from misuse
of the arm.
WARNING: the use of non-Benelli
originals parts on the arm voids the
warranty.
Garantie
Les normes de garantie sont indiquées
dans le certificat de garantie.
Benelli Armi S.p.A. décline toute
responsabilité quant aux dommages
qui s’ensuivraient à une utilisation de
munitions impropres, à des négligences dans l’entretien ou à des accidents
dus à l’inexpérience dans l’utilisation
de l’arme.
ATTENTION: l’utilisation des compo-
sants ou pièces détachées autre que
Benelli annulent la garantie.
Garantie
Die Garantiebedingungen sind auf
dem Garantieschein angegeben.
Die Firma Benelli Armi S.p.A ist nicht
für Schäden oder Unfälle mit der Waffe haftbar, die durch unsachgemäße
Handhabung oder ungeeignete Munition verursacht werden.
ACHTUNG: Bei Verwendung fabrik-
fremder Teile erlischt der Garantieanspruch.
Page 42

41
Garantía
Las normas de garantía se encuentran
en el certificado específico.
La Empresa Benelli Armi S.p.A. no se
considera responsable por eventuales
daños derivados por el uso de municiones inapropiadas, por negligencias
de manutención o por accidentes
debidos a impericia en el manejo del
arma.
ATENCIÓN: la utilización de piezas
de repuesto que no sean originales de
Benelli anula esta garantía.
Garantia
As normas de garantia são as constantes no certificado.
A Benelli Armi S.p.A. não se respon-
sabiliza por eventuais danos provocados pela utilização de munições
impróprias, negligência de manutenção ou por incidentes devidos à
imperícia ou errado manuseamento
da arma.
ATENÇÃO: o uso de acessórios não
originais da Benelli anula a garantia.
Гарантия
Гарантийные обязательства
представлены в гарантийном
сертификате.
Компания Benelli Armi S.p.A. не несет
ответственности
за возможный ущерб и
несчастные случаи, произошедшие
вследствие использования
несоответствующих патронов, небрежного
ухода, или вызванные отсутствием опыта в
обращении с оружием.
ВНИМАНИЕ: использование
неоригинальных компонентов или
запасных частей Benelli приводит к
аннулированию гарантии.
Åããµçóç
Ïé üñïé ôçò åããµçóçò бнбцŸспнфбй
уфп ейдйкь ƒйуфпƒпйзфйкь.
Ç Benelli Armi S.p.A. ден цŸсей пхдемЯб
åõèµíç гйб фхчьн влЬвет ƒпх
мƒпспµн нб ƒспклзипµн льгщ фзт
чс‡узт бкбфЬллзлщн ƒхспмбчйк¥н,
льгщ фзт еллйƒпµт ухнф‡сзузт фпх
ьƒлпх ‡ льгщ бфхчзмЬфщн бƒь кбкь
чейсйумь.
¬ÑÏÓϱÇ: H чсзуймпƒпЯзуз ме гн‡уйщн
бнфбллбкфйк¥н Benelli бкхс¥нпхн фзн
еггµзуз.
Page 43

42
Montaggio
(da fucile imballato)
Componenti confezione (fig. 1):
a) gruppo calcio-carcassa-otturato-
re-astina
b) gruppo canna-culatta
c) manetta di armamento
Procedura di montaggio
1) Inserire a fondo la manetta di
armamento nel corpo otturatore
(fig. 2).
2) Svitare il cappellotto fissaggio
astina (figg. 3-4).
Assembly
(from packaged gun)
Components of the package (fig. 1):
a) stock-receiver-bolt-fore-end unit
b) barrel-breech unit
c) cocking lever
Assembly procedure
1) Insert completely the cocking lever
into the breech bolt unit (fig. 2).
2) Unscrew the fore-end cap (figs. 3-
4).
Montage
(fusil emballé)
Pièces de l’emballage (fig. 1):
a) groupe crosse-carcasse-obturateur-
devant
b) groupe canon-culasse
c) manette d’armement
Marche à suivre pour le montage
1) Introduire la manette d’armement
à fond dans le corps de l’obturateur (fig. 2).
2) Desserrer le capuchon de fixation
du devant (figs. 3-4).
Zusammenbau (des in der
Verpackung enthaltenen Gewehrs)
In der Verpackung enthaltene Teile (Abb. 1):
a) Schaft mit Gehäuse - Verschluss -
Vorderschaft
b) Einheit Lauf- Verschlussabdeckung
c) Spannhebel
Zusammenbauen
1) Den Spannhebel bis zum Anschlag
in den Verschluss einstecken (Abb.
2).
2) Die Vorderschaftbefestigungskap-
pe abschrauben (Abb. 3-4).
1 2
b
a
c
Page 44

43
Montaje
(del fusil embalado)
Componentes del paquete (fig. 1):
a) grupo culata-carcasa-obturador-
varilla
b) grupo cañón-cerrojo
c) maneta de armado
Procedimiento de montaje
1) Introduzca la maneta de armado
en el cuerpo del obturador, presionándola hasta el fondo (fig. 2).
2) Destornille el capuchón de fija-
ción de la varilla (figs. 3-4).
Montagem
(da arma embalada)
Componentes na embalagem (fig. 1):
a) grupo coronha-báscula-culatra-
fuste
b) grupo cano-culatrim
c) manette
Procedimento de montagem
1) Inserir no fundo a manette no
corpo da culatra (fig. 2).
2) Desapertar a porca do fuste (fig.
3-4).
Сборка
(после распаковки)
Ружье упаковано для
транспортировки (рис. 1):
a) приклад-ствольная коробка-
затвор-цевье в сборе
b) ствол
c) рукоятка взведения затвора
Порядок сборки:
1) Вставить до конца рукоятку
затвора в корпус затвора (рис. 2).
2) Отвинтить крышку крепления
цевья (рис. 3-4).
Ухнбсмпльгзуз
(ухукехбумŸнпх ьƒлпх)
З ухукехбуЯб ƒесйŸчей (ейк. 1):
б) фзн пмЬдб кпнфЬкйп - кпсмьт -
клеЯуфсп - ƒЬƒйб
в) фзн пмЬдб кЬннз - ƒЯущ мŸспт
кЬннзт
Ã) фпн мпчль пƒлЯуещт
ДйбдйкбуЯб ухнбсмпльгзузт
1) ¬спубсмьуфе ƒл‡сщт фпн мпчль
пƒлЯуещт óôï ó¥ìá ôïõ
клеЯуфспх (ейк. 2).
2) Оевйд¥уфе ôç âßäá ôçò ƒÜƒéáò
(åéê. 3-4).
3 4
Page 45

44
3) Sfilare l’astina facendola scorrere
lungo il tubo serbatoio (fig. 5).
4) Estrarre dalla sua sede, all’interno
della carcassa, il piastrino in pla-
stica rossa che ferma l’otturatore
nell’imballo (fig. 6).
ATTENZIONE: il piastrino serve solo
per l’imballo e non deve essere rimontato sull’arma.
5) Impugnare con una mano il gruppo calcio-carcassa-otturatore e
con l’altra, agendo sulla manetta,
portare l’otturatore in posizione di
apertura fino ad agganciamento
avvenuto (fig. 7).
3) Slide the fore-end off the magazine
tube (fig. 5).
4) Remove the red plastic bolt clip
from its seat in the receiver (fig. 6).
NOTE: the red plastic clip is used to
retain the bolt during shipping only.
It must not be reinstalled on the gun.
5) Take the stock-receiver-bolt unit
with a hand; with the other hand,
using the cocking lever, bring the
bolt into open position (until locked) (fig. 7).
3) Extraire le devant en le faisant
coulisser le long du tube magasin
(fig. 5).
4) Extraire de son logement, à l’inté-
rieur de la carcasse, la pièce en
plastique rouge qui bloque l’obturateur dans l’emballage (fig. 6).
ATTENTION: la pièce en question ne
sert que pour l’emballage et ne devra
en aucun cas être remontée sur l’ar-
me.
5) Saisir d’une main le groupe cros-
se-carcasse-obturateur et de l’autre, en agissant sur la manette,
amener l’obturateur en position
d’ouverture (jusqu’à ce que l’accrochage ait lieu) (fig. 7).
5 6
3) Den Vorderschaft längs des Maga-
zinrohrs herausziehen (Abb. 5).
4) Innerhalb des Gehäuses die rote
Kunststoffplatte, welche den Verschluss in der Verpackung fixiert,
abnehmen (Abb. 6).
ACHTUNG: Die Platte dient nur zu
Verpackungszwecken und darf nicht
wieder auf der Waffe montiert werden.
5) Umfassen Sie mit einer Hand den
Schaft-Gehäuse-Verschluss und
mit der anderen Hand betätigen
Sie den Spannhebel (bis er einrastet), um den Verschluss zu öffnen (Abb. 7).
Page 46

45
3) Quite la varilla haciéndola desli-
zar a lo largo del almacén (fig. 5).
4) Quite de su alojamiento, en el
interior de la carcasa, la plaquita
roja de plástico que detiene el
obturador en el embalaje (fig. 6).
ATENCIÓN: la plaquita sirve sólo
para el embalaje y no se debe volver
a montar en el arma.
5) Coja con una mano el grupo culata-carcasa-obturador y con la otra,
actuando sobre la maneta, lleve el
obturador a la posición de apertura hasta que enganche (fig. 7).
3) Retire o fuste fazendo-o deslizar
ao longo do tubo do depósito (fig.
5).
4) Retire do interior da báscula a
peça plástica vermelha que segura
o obturador aquando o embalo
(fig. 6).
ATENÇÃO: a peça plástica serve uni-
camente para o embalo e não deve
ser novamente montada na arma.
5) Empunhar com uma mão o grupo
coronha-báscula-culatra e com a
outra mão, agindo sobre a manette, levar a culatra à posição de
abertura até ficar preso (fig. 7).
3) Снять цевье по направлению к
передней части, вдоль трубки
магазина (рис. 5).
4) Извлеките из гнезда, внутри
ствольной коробки, пластину из
красного пластика, удерживающую
неподвижным затвор в упаковке
(рис. 6).
ВНИМАНИЕ: пластина служит
только в качестве упаковки и не
должна вновь устанавливаться на
оружие.
5) Взять в одну руку приклад-
ствольная коробка-затвор в
сборе и другой рукой отведите
затвор в крайнее заднее
положение до его фиксации (рис.
7).
3) БцбйсŸуфе ôçí ƒÜƒéá ôñáâ¥íôáò
ôçí êáôÜ ì‡êïò ôçò áƒïè‡êçò
(åéê. 5).
4) БцбйсŸуфе бƒь фз иŸуз фпх (уфпн
кпсмь) фп кьккйнп ƒлбуфйкь ƒпх
ухгксбфеЯ фп клеЯуфсп (ейк. 6).
¬ÑÏÓϱÇ: Фп кьккйнп ƒлбуфйкь
кпммЬфй бƒпфелеЯ мŸспт фзт
ухукехбуЯбт êáé ден ƒсŸƒей нб
еƒбнбухнбсмплпгзиеЯ óôï üƒëï.
5) Êñáô‡óôå ìå ôï Ÿíá ÷Ÿñé ôï
кпнфЬкйп - кпсмьт - клеЯуфсп кбй
ме фп Ьллп чŸсй фсбв‡офе фп
мпчль кй бнпЯофе фп клеЯуфсп
мŸчсй нб гбнфж¥уей (ейк. 7).
7
Page 47

46
AVVERTENZA: se l’otturatore non
rimane agganciato, agire sull’apposita
leva discesa cartuccia nel senso indi-
cato dalla freccia (fig. 8) e ripetere l'operazione.
AVVERTENZA: ricordarsi di rimuove-
re il copricanna di plastica prima di
utilizzare il fucile (fig. 9).
Durante le successive operazioni l'otturatore deve essere completamente
assemblato e alloggiato nella carcassa, rimanendo sempre in posizione
di apertura (tutto indietro).
WARNING: should the bolt fail to en-
gage, move the cartridge drop lever
as arrowed and repeat the operation
(fig. 8).
WARNING: please remember to
remove the plastic barrel sheath
before using the firearm (fig. 9).
During the following operations the
bolt group should be completely assembled and placed in the receiver,
in open position (backward).
ATTENTION: si l’obturateur ne reste
pas accroché, intervenir sur le levier
de descente de la cartouche, dans le
sens indiqué par la flèche, et répéter
l’opération (fig. 8).
ATTENTION: n’oubliez pas d’enlever
la protection en plastique du canon
avant d’utiliser l’arme (fig. 9).
Durant les opérations successives
l’obturateur doit être entièrement
assemblé et logé dans la carcasse, en
restant toujours en position d’ouvertu-
re (entièrement reculé).
HINWEIS: Falls der Verschluss nicht
einrastet, betätigen Sie den Patronenfreigabehebel in Pfeilrichtung, notfalls
wiederholen Sie den Vorgang (Abb.
8).
HINWEIS: erinnern Sie sich daran, die
Plastiklaufsheide abzunehmen, bevor
das Gewehr benutzt wird (Abb. 9).
Bei den folgenden Schritten muss der
Verschluss vollständig montiert, im
Gehäuse eingebaut und geöffnet
(ganz nach hinten geschoben) sein.
8
Page 48

47
ADVERTENCIA: si el obturador no se
queda enganchado, actúe sobre la
palanca de descenso del cartucho, en
el sentido indicado por la flecha y
vuelva a repetir la operación (fig. 8).
ADVERTENCIA: antes de utilizar el
arma quitar la protección de plástico
del cañón (fig. 9).
Durante sucesivas operaciones, el
obturador debe estar completamente
ensamblado e introducido en la car-
casa, quedándose siempre en posición de apertura (todo hacia atrás).
ADVERTÊNCIA: se a culatra não per-
manecer preso, accione o botão lateral no sentido indicado pela seta (fig.
8) e repita a operação.
ADVERTÊNCIA: não esquecer de reti-
rar a bainha de plástico do cano antes
de usar a espingarda (fig. 9).
Durante as sucessivas operações o
obturador deve estar completamente
junto e alojado na báscula e permanecendo sempre na posição de aber-
tura (todo para trás).
ПРЕДУПРЕЖДЕНИЕ: если затвор не
фиксируется в этом положении
нажмите на кнопку отсекателя
магазина, в направлении, указанном
стрелкой (рис. 8) и повторить операцию.
ВНИМАНИЕ! Перед началом
эксплуатации ружья не забудьте
удалить предохранительную
накладку ствола (рис. 9).
Во время последующих операций
затвор должен быть полностью
собран и размещен в ствольной
коробке, оставаясь всегда в
положении открытия (полностью
назад).
¶ƒ√∂π¢√¶√π∏™∏: ЕЬн фп клеЯуфсп
äåí ƒбсбмеЯней бнпйчфь, кпхн‡уфе
фпн бƒелехиесщф‡ цхуйггй¥н ƒñïò
фзн кбфеµихнуз ƒпх хƒпдейкнµей фп
вŸлпт кбй еƒбнблЬвефе фзн енŸсгейб
(ейк. 8).
¶ƒ√∂π¢√¶√π∏™∏: ı˘ÌËı›Ù ӷ
·Ê·ÈÚ¤ÛÂÙ ÙÔ Ï·ÛÙÈÎfi Î¿Ï˘ÌÌ· Ù˘
οÓÓ˘ ЪИУ ¯ЪЛЫИМФФИ‹ЫВЩВ ЩФ fiПФ
(ÂÈÎ. 9).
КбфЬ фз дйЬскейб бхф¥н фщн
енесгей¥н, фп клеЯуфсп ƒсŸƒей нб
еЯнбй ƒл‡сщт ухнбсмплпгзмŸнп кбй
фпƒпиефзмŸнп уфпн кпсмь фпх
ьƒлпх, ƒбсбмŸнпнфбт ƒЬнфб бнпйчфь
(фсбвзгмŸнп ьлп ƒспт фб ƒЯущ).
9
Page 49

48
6) Infilare il prolungamento della
culatta sulla carcassa, accertandosi che l'anello guida canna calzi
correttamente il tubo serbatoio
(fig. 10).
7) Con il prolungamento canna in
appoggio sull'otturatore e la testi-
na di chiusura alloggiata nella
sede ricavata nel prolungamento
canna, spingere a fondo la canna
nella carcassa: uno scatto metallico vi segnalerà il corretto assestamento della canna (fig. 11).
6) Slide the breech extension into
the receiver making sure that the
barrel ring slides on the magazine
tube(fig. 10).
7) With the barrel extension resting
on the bolt head, and the bolt
head fitting into the recess formed
into the barrel extension, slip the
barrel into receiver. A metallic
click will indicate the barrel is correctly seated (fig. 11).
6) Introduire le prolongement de la
culasse sur la carcasse en s’assurant que le guide du canon chaus-
se parfaitement le tube magasin
(fig. 10).
7) Le prolongement du canon étant
appuyé à l’obturateur et la tête de
fermeture logée dans le siège
obtenu dans le prolongement du
canon, pousser à fond le canon
dans la carcasse; un déclic métallique vous signalera la mise en
place correcte du canon (fig. 11).
6) Die Verlängerung der Verschluss-
abdeckung in das Gehäuse einsetzen und dabei darauf achten, dass
das Magazinrohr korrekt in den
Führungsring des Laufes einschoben wurde (Abb. 10).
7) Bei auf dem Verschluss positio-
nierter Laufverlängerung und im
Sitz der Laufverlängerung eingesetztem Verschlusskopf den Lauf
fest in das Gehäuse drücken: das
metallische Einrasten bedeutet,
dass der Lauf korrekt positioniert
wurde (Abb. 11).
10
Page 50

49
6) Deslice la prolongación del cerrojo
sobre la carcasa, asegurándose de
que el anillo guía cañón entre correctamente en el tubo almacén (fig. 10).
7) Con la prolongación cañón
apoyada sobre el obturador y la
cabeza de cierre alojada en su
alojamiento en la prolongación
cañón, empuje hacia el fondo de
la carcasa el cañón: un clic metálico le señalará la correcta colocación del mismo (fig. 11).
6) Introduza o prolongamento do
culatrim na báscula assegurandose que o anel do cano encaixa
perfeitamente no tubo do depósito
(fig. 10).
7) Com o culatrim apoiado no obtu-
rador e a cabeça da culatra junto
do mesmo, enfie a fundo o cano
na báscula, um estálo metálico irá
indicar a correcta montagem do
cano (fig. 11).
6) Вставьте хвостовик ствола в
ствольную коробку, проверив, что
установочное кольцо ствола
надевается на шток трубки
магазина (рис. 10).
7) Убедиться в том, что хвостовик
ствола опирается на затвор, а
боевая личинка вошла в
соответствующее гнездо на
хвостовике ствола. Затем
окончательно вставить ствол в
ствольную коробку. Металлический
щелчок означает, что ствол
вставлен правильно (рис. 11).
6) ЕйуЬгефе фзн ƒспŸкфбуз фпх
ƒЯущ мŸспхт фзт кЬннзт уфпн
кпсмь кбй вевбйщиеЯфе ьфй фп
дбкфхлЯдй пдзгьт фзт кЬннзт
ецбсмьжей ущуфЬ ƒЬнщ óôçí
áƒïè‡êç (åéê. 10).
7) Ìå фзн ƒспŸкфбуз ôïõ ƒßóù
мŸспхт фзт кЬннзт нб бкпхмƒЬ
фп клеЯуфсп кбй фзн кецбл‡ фпх
клеЯуфспх фпƒпиефзмŸнз ущуфЬ
уфз иŸуз фзт уфзн ƒспŸкфбуз
фпх ƒЯущ мŸспхт фзт кЬннзт,
уƒс¥офе дхнбфЬ фзн кЬннз мŸуб
уфпн кпсмь. Фп чбсбкфзсйуфйкь
мефбллйкь “клйк” иб убт д¥уей нб
кбфблЬвефе ьфй з кЬннз
фпƒпиеф‡изке ущуфЬ (ейк. 11).
11
Page 51

50
Il prolungamento cromato della canna
deve essere completamente inserito
nella carcassa; pertanto nessuna parte
cromata sarà visibile sul fronte della
carcassa.
ATTENZIONE: assicurarsi sempre che
il prolungamento della canna non
batta contro la testa di chiusura dell’otturatore.
8) Infilare l'astina lungo il tubo serbatoio (fig. 12).
9) Avvitare il cappellotto di fissaggio,
completo di molla, sull'estremità
del tubo serbatoio, serrandolo a
fondo per bloccare perfettamente
canna e astina contro la carcassa
(figg. 13-14).
The chrome barrel extension must be
completely contained by the receiver.
None of the chromate parts must be
visible at the front of the receiver.
NOTE: inserting the breech extension
on the receiver be sure that it does not
strike against the bolt locking head.
8) Slide the fore-end along the mag-
azine tube (fig. 12).
9) Screw the fore-end cap and its
spring on the magazine tube end,
then tighten them firmly until the
barrel and the fore-end are perfectly locked to the receiver (figs. 13-
14).
Le prolongement chromé du canon
doit être complètement introduit dans
la carcasse; par conséquent aucune
partie chromée ne sera visible sur le
front de la carcasse.
ATTENTION: n'oubliez pas de vous
assurer que le prolongement de la
culasse ne heurte pas la tête de fermeture de l’obturateur.
8) Introduire le devant le long du
tube magasin (fig. 12).
9) Visser le capuchon de fixation
avec son ressort sur l’extrémité du
tube magasin, en serrant à fond
pour immobiliser parfaitement le
canon et le devant contre la carcasse (figs.13-14).
Die verchromte Laufverlängerung
muss ganz in das Gehäuse eingeschoben sein; es darf daher kein verchromtes Teil an der Gehäusevorderseite
sichtbar sein.
ACHTUNG: Immer sicherstellen, dass
die Laufverlängerung nicht gegen den
Verschlusskopf stößt.
8) Den Vorderschaft über das Maga-
zinrohr schieben (Abb. 12).
9) Die Befestigungskappe mit der
Feder auf das vordere Ende des
Magazinrohres aufsetzen und so
festschrauben, dass eine einwandfreie Verbindung des Laufes und
des Vorderschafts mit dem Verschlussgehäuse gewährleistet ist (Abb.
13-14).
12
13
Page 52

51
La prolongación cromada del cañón
debe estar completamente introducida en la carcasa: por lo tanto, ninguna
parte cromada será visible en la parte
frontal de la carcasa.
ATENCIÓN: asegúrese siempre de
que la prolongación del cañón no
pegue contra la cabeza de cierre del
obturador.
8) Introduzca la varilla a lo largo del
tubo almacén (fig. 12).
9) Atornille el capuchón de fijación,
con su muelle, en la extremidad
del tubo almacén, fijándolo enér-
gicamente hasta bloquear perfectamente el cañón y la varilla en la
carcasa (figs. 13-14).
O culatrim deve estar completamente
inserido na báscula, portanto nenhuma parte cromada deverá ser visivel
na parte frontal da báscula.
ATENÇÃO: assegure-se sempre que o
prolongamento do culatrim não bata
na cabeça da culatra.
8) Coloque o fuste fazendo-o desli-
zar ao longo do depósito (fig. 12).
9) Aperte a porca do fuste com a
respectiva mola, na extremidade
do tubo de depósito, fixando-a
bem de modo a bloquear perfeitamente o cano e o fuste de encontro à báscula (figg. 13-14).
Хромированный хвостовик ствола
должен быть полностью вставлен в
ствольную коробку и, поэтому,
никакая хромированная часть не
должна выступать за пределы
ствольной коробки.
ВНИМАНИЕ: всегда следует
убедиться, что боевая личинка не
ударяется о хвостовик ствола.
8) Наденьте цевье на трубку
магазина (рис. 12).
9) Навинтите крышку цевья на шток
трубки магазина и затяните ее для
плотной фиксации ствола в
ствольной коробке (рис. 13-14).
З еƒйчсщмйщмŸнз ƒспŸкфбуз фзт
кЬннзт ƒсŸƒей нб фпƒпиефзиеЯ
ƒл‡сщт мŸуб уфпн кпсмь. ЕƒпмŸнщт,
кбнŸнб еƒйчсщмйщмŸнп фм‡мб фзт
ден ƒсŸƒей нб еЯнбй псбфь уфп
мƒспуфйнь мŸспт фпх кпсмпµ.
¬ÑÏÓϱÇ: ВевбйщиеЯфе ьфй з
ƒспŸкфбуз фпх ƒЯущ мŸспхт фзт
кЬннзт ден “чфхƒЬ” фзн кецбл‡ фпх
клеЯуфспх.
8) ¬спубсмьуфе ôçí ƒÜƒéá
ôñáâ¥íôáò ôçí êáôÜ ì‡êïò ôçò
áƒïè‡êçò (åéê. 12).
9) Âéä¥óôå ôç âßäá ôçò ƒÜƒéáò -ìáæß
ìå ôï åëáô‡ñéï- óôçí Üêñç ôçò
áƒïè‡êçò êáé уцЯофе кблЬ Ÿфуй
¥уфе нб уфесе¥уефе ƒл‡сщт фзн
ƒЬƒйб кбй фзн кЬннз ƒЬнщ уфпн
кпсмь (ейк. 13-14).
14
Page 53

52
ATTENZIONE: prima di bloccare can-
na ed astina contro la carcassa, accertarsi sempre che la molla del cappellotto di fissaggio sia inserita nel cap-
pellotto stesso: la mancanza della
molla non consente un regolare bloc-
caggio della canna, con conseguenti
danni all'arma.
10) Chiudere l'otturatore, premendo
il bottone di comando elevatore
(fig. 15).
NOTE: always make sure that the cap
spring is inserted in the cap itself
before locking the barrel and fore-end
to the receiver: a missing spring will
not allow proper locking of the barrel,
causing serious damage to the shotgun.
10) Close the bolt by pressing the
special carrier control button (fig.
15).
ATTENTION: avant de bloquer le
canon et le devant contre la carcasse,
toujours s’assurer que le ressort du
capuchon de fixation est introduit
dans le capuchon: l’absence du ressort ne permet pas un blocage régu-
lier du canon, sous risque d’endom-
mager l’arme.
10) Fermer l’obturateur en poussant
le bouton de commande élévateur (fig. 15).
ACHTUNG: Vor der Befestigung des
Laufes und des Vorderschafts am Gehäuse muss stets sichergestellt werden,
dass sich die Feder in der Befestigungs-
kappe befindet. Beim Fehlen dieser
Feder kann der Lauf nicht ordnungs-
gemäß befestigt werden, was zur
Beschädigung der Waffe führen kann.
10) Den Verschluss durch Drücken
auf den Verschlussfangknopf verschließen (Abb. 15).
15
Page 54

53
ATENCIÓN: asegúrese siempre de
que el muelle del capuchón de fija-
ción esté introducido en el mismo
antes de bloquear el cañón y la varilla
en la carcasa; la falta del muelle no
permite un bloqueo regular del cañón
y puede provocar daños al arma.
10) Cierre el obturador pulsando el
botón de mando del elevador
(fig. 15).
ATENÇÃO: antes de fixar o cano e o
fuste à báscula, certifique-se que colocou a mola da porca do fuste: a falta
desta mola, não permite o correcto
bloqueio do cano e pode causar
sérios danos na arma.
10) Feche a culatra, premindo o
botão de comando do elevador
(fig. 15).
ВНИМАНИЕ: перед тем, как
закручивать крышку цевья следует
всегда проверять, наличие пружины
крышки цевья. Отсутствие пружины
не позволяет осуществить
правильную фиксацию ствола и
может привести к порче оружия.
10) Закройте затвор оружия, нажав
на кнопку затворной задержки
(рис. 15).
¬ÑÏÓϱÇ: ¬сйн уфесе¥уефе фзн
кЬннз кбй фзн ƒЬƒйб уфпн кпсмь,
вевбйщиеЯфе ьфй ôï åëáô‡ñéï ôçò
вЯдбт всЯукефбй ìŸóá óôçí ßäéá ôçí
âßäá ôçò ƒÜƒéáò. З бƒпхуЯб фпх
елбфзсЯпх äåí åƒéôñŸƒåé фп ущуфь
уфесŸщмб фзт кЬннзт ме
бƒпфŸлеумб нб ƒспкблпµнфбй жзмйŸт
óôï ßäéï ôï üƒëï.
10) КлеЯуфе фп клеЯуфсп ƒйŸжпнфбт
фп ейдйкь кпхмƒЯ фпх бнбуфплŸб
(åéê. 15).
Page 55

54
Sicura del fucile
Spingere il bottone di sicura a traversino posto sulla guardia: a sicura inserita non si deve vedere l'anello rosso
indicante la posizione di sparo (figg.
16-17).
Caricamento
Prima di effettuare qualunque tipo di
intervento sul fucile, accertarsi sempre che camera di scoppio e serbatoio
siano completamente vuoti! (Leggere
attentamente le istruzioni di caricamento e scaricamento dell’arma).
Gun safety catch
Press the safety button on the trigger
guard until its red ring, indicating firing position, is no longer visible (figs.
16-17).
Loading
Before starting any operation on your
shotgun, make sure that the chamber
and the magazine are unloaded!
(Carefully read the instructions on gun
loading and unloading).
Sûreté du fusil
Pousser le bouton de sûreté situé sur
la sous-garde: la sûreté étant mise la
bague rouge indiquant la position de
tir ne devra pas être visible (figs. 16-
17).
Chargement
Avant d’effectuer n’importe quel type
d’intervention sur votre fusil, toujours
vérifier que la chambre d’explosion et
le magasin soient complètement vides!
(Lire attentivement les instructions de
chargement et de déchargement).
Sicherung des Gewehrs
Den stegförmigen Sicherungsknopf
am Abzugsbügel drücken: Bei betätigter Sicherung darf der rote Ring, der
die sofortige Feuerbereitschaft der
Waffe anzeigt, nicht sichtbar sein
(Abb. 16-17).
Laden
Vor jeder Waffenhandhabung sollten
Sie sicherstellen, dass die Patronenlager und das Magazin ihres Gewehrs
völlig leer sind! (Bitte lesen Sie auf-
merksam die Anweisungen für das
Laden und das Entladen der Waffe).
16
Page 56

55
Seguro del fusil
Empuje el botón transversal del seguro que se encuentra en el guardamon-
te; cuando el seguro está activado no
se debe ver el anillo rojo que indica la
posición de disparo (figs. 16-17).
Carga
Antes de realizar cualquier tipo de
operación en su fusil, asegúrese siempre que la cámara de explosión y el
almacén estén completamente vacíos.
(Lea atentamente las instrucciones
para la carga y la descarga).
Segurança da espingarda
Prima o botão transversal que se
encontra no guarda-mato por forma a
que a parte vermelha fique encoberta (fig. 16-17).
Carregamento
Antes de efectuar qualquer intervenção na sua arma, assegure-se que
a câmara e o depósito estão vazios.
(Leia atentamente as instruções de carregar e descarregar da arma).
Предохранитель ружья
Нажмите на кнопку предохранителя,
находящуюся на спусковой скобе.
При включённом предохранителе не
видна красная проточка,
указывающая на готовность ружья к
стрельбе (рис. 16-17).
Заряжание
Перед тем, как выполнять любые
операции с Вашим ружьем
убедитесь что патронник, механизм
подачи и магазин совершенно
пустые! (внимательно прочитайте
инструкции по заряжанию и
разряжанию оружия).
З буцЬлейб фпх фпхцекйпµ
Óƒñ¥îôå ôï кпхмƒЯ фзт буцЬлейбт
ƒпх фŸмней фзн укбндблпи‡кз. Œфбн
фп ьƒлп еЯнбй буцблйумŸнп äåí
ƒсŸƒей нб еЯнбй псбфь фп кьккйнп
дбкфхлЯдй ƒпх хƒпдейкнµей ьфй фп
фпхцŸкй еЯнбй Ÿфпймп нб ƒхспвпл‡уей
(ейк. 16-17).
ЕнŸсгейет гŸмйузт
¬сйн ƒсбгмбфпƒпй‡уефе пƒпйбд‡ƒпфе
енŸсгейб вевбйщиеЯфе ьфй з иблЬмз
кбй з бƒпи‡кз еЯнбй енфел¥т Ьдейет!
(ДйбвЬуфе ƒспуечфйкЬ фйт пдзгЯет
учефйкЬ ме фз гŸмйуз кбй фзн
бƒпгŸмйуз фпх ьƒлпх).
17
Page 57

56
Il serbatoio di alimentazione è predisposto per contenere 1, 2, 3 oppure 4
cartucce (a seconda della versione e
delle norme vigenti).
Compresa la cartuccia in canna, quindi, la capacità di fuoco del fucile è di
2, 3, 4 oppure 5 colpi.
Procedura
di caricamento
ATTENZIONE: l'arma deve essere in
sicura (vedi “Sicura del fucile”) e con
cane armato (per consentire alla leva
fermo cartuccia di bloccare le cartucce introdotte nel serbatoio).
AVVERTENZA: per maggior sicurezza,
verificare che l'arma sia scarica
aprendo l'otturatore. Riportare poi
l'otturatore in chiusura.
The ammunition magazine holds 1, 2,
3 or 4 cartridges (according to the
model and to local regulations).
Total firing capacity is 2, 3, 4 or 5
rounds, including the one in the
chamber.
Loading procedure
NOTE: make sure that the shotgun
safety catch (see “Gun safety catch”)
is engaged and the hammer cocked
(so that the carrier latch can retain the
cartridges as they are inserted in the
magazine).
WARNING: for safety reasons, check
if by opening the bolt the shotgun is
unloaded. Then close the bolt again.
Le magasin d’alimentation est prévu
pour contenir 1, 2, 3 ou 4 cartouches,
selon la version et les normes en
vigueur.
Par conséquent, y compris la cartouche dans le canon, la capacité de feu
du fusil est de 2, 3, 4 ou 5 coups.
Marche à suivre
pour le chargement
ATTENTION: l’arme doit toujours être
en sûreté (voir “Sûreté du fusil”) et le
chien armé (pour consentir au levier
d’arrêt de cartouche de bloquer les
cartouches introduites dans le magasin).
ATTENTION: pour plus de sécurité,
vérifier que l’arme se décharge lors-
qu’on ouvre l’obturateur. Ramener
ensuite l’obturateur en position de fermeture.
Das Magazinrohr ist je nach Bauart
und geltenden Bestimmungen für 1, 2,
3 oder 4 Patronen ausgelegt.
Die Feuerkapazität des Gewehrs beträgt daher, einschließlich der im Lauf
befindlichen Patrone, 2, 3, 4 oder 5
Schuss.
Laden
ACHTUNG! Die Waffe muss gesi-
chert (siehe "Sicherung des Gewehrs")
und das Schlagstück muss gespannt
sein (damit die Magazinsperrklinke
die im Magazin vorhandenen Patronen blockiert.
HINWEIS: Zur besseren Sicherheit
öffnen Sie den Verschluss und prüfen
Sie, ob die Waffe entladen ist, danach
schließen Sie den Verschluss wieder.
Page 58

57
El almacén de alimentación está predispuesto para contener 1, 2, 3, ó 4
cartuchos (según la versión y las normas vigentes).
Por lo tanto, incluyendo el cartucho
del cañón, la capacidad de disparo
del fusil es de 2, 3, 4, ó 5 tiros.
Procedimiento
de carga
ATENCIÓN: el arma debe tener el
seguro puesto (ver “Seguro del fusil”),
y el martillo armado (para permitir a
la palanca de bloqueo del cartucho
bloquear los cartuchos introducidos
en el almacén).
ADVERTENCIA: para mayor seguri-
dad, verifique que el arma esté
descargada abriendo el obturador.
Después vuelva a cerrarlo.
O depósito pode conter 1, 2, 3 ou 4
cartuchos (segundo as versões e as
normas vigentes em cada país).
Incluindo o cartucho no cano, a capacidade de fogo da arma é de 2, 3, 4
ou 5 tiros.
Procedimento
de carregamento
ATENÇÃO: a arma deve estar travada
(ver “Segurança da arma”) e com cão
armado (para permitir que o cut-off
trave os cartuchos que são alojados
no depósito).
ADVERTÊNCIA: para maior segu-
rança, verifique se arma está descarregada abrindo a culatra. Após essa
análise poderá voltar a fechar a culatra.
Магазин имеет емкость от 1 до 4 –х
патронов (в зависимости от модели и
от действующих норм) Включая
патрон в патроннике, количество
имеющихся патронов может быть
равно 2, 3, 4 или 5.
Порядок заряжания
ВНИМАНИЕ: оружие должно быть на
предохранителе (смотри
“Предохранитель ружья”) и со
взведенным курком (чтобы позволить
рычагу держателя патрона удерживать
патроны в магазине).
ПРЕДУПРЕЖДЕНИЕ: для большей
безопасности проверьте, что оружие
разряжено, открыв затвор. Затем
закройте затвор.
З бƒпи‡кз еЯнбй уе иŸуз нб цŸсей 1,
2, 3 ‡ 4 цхуЯггйб (бнЬлпгб ме фп
мпнфŸлп кбй фпхт йучµпнфет ньмпхт
фпх ксЬфпхт). Бн хƒплпгйуфеЯ кбй фп
цхуЯггй уфз иблЬмз, з ухнплйк‡
йкбньфзфб фпх ьƒлпх еЯнбй 2, 3, 4 ‡ 5
вплŸт.
ДйбдйкбуЯб гŸмйузт
¬ÑÏÓϱÇ: Фп ьƒлп ƒсŸƒей нб еЯнбй
буцблйумŸнп (вл. «З буцЬлейб фпх
üƒëïõ»), ìå пƒлйумŸнп кькпсб Ÿфуй
¥уфе п бнбуфплŸбт нб мƒлпкЬсей фб
цхуЯггйб ƒпх всЯукпнфбй уфзн
бƒпи‡кз.
¬СПЕЙДП¬ПЙЗУЗ: Гйб мегблµфесз
буцЬлейб, бнпЯофе фп клеЯуфсп гйб нб
вевбйщиеЯфе ьфй фп ьƒлп ден еЯнбй
гемЬфп. Ен ухнечеЯб, клеЯуфе фп
клеЯуфсп.
Page 59

58
1) La leva discesa cartuccia deve ave-
re il punto rosso ben visibile (avviso cane armato) (fig. 18). Se neces-
sario, portarla in tale posizione
premendo il bottone comando ele-
vatore, aprendo a mano l'otturato-
re e riportandolo poi in posizione
di chiusura (fig. 19).
2) Con otturatore chiuso e cane ar-
mato, rovesciare l'arma, orientan-
do la canna verso il basso.
3) Infilare una cartuccia a fondo nel
serbatoio (fig. 20): la leva di arresto deve agganciare la cartuccia
automaticamente, trattenendola
(fig. 21). Ripetere l'operazione
sino al completo caricamento del
serbatoio.
1) The red dot on the cartridge drop
lever (indicating that the hammer
is cocked) (fig. 18) must be clearly
visible. To bring lever to this posi-
tion, press the carrier button and
open the bolt by hand, then bring
it to close position again (fig. 19).
2) With the bolt closed and the hammer cocked, reverse the gun
pointing the barrel downwards.
3) Insert a cartridge into the mag-
azine (fig. 20): push it until it is
retained by the carrier latch which
engages automatically (fig. 21).
Repeat the operation until the
magazine is fully loaded.
1) Le point rouge du levier de
descente de la cartouche doit être
bien visible (avis chien armé) (fig.
18). Si nécessaire, l’amener dans
cette position en appuyant sur le
bouton commande élévateur, en
ouvrant l’obturateur à la main et
en le ramenant ensuite en position
de fermeture (fig. 19).
2) L’obturateur étant fermé et le chien
armé, renverser l’arme en orien-
tant le canon vers le bas.
3) Introduire une cartouche à fond
dans le magasin (fig. 20); le levier
d’arrêt doit accrocher automatiquement la cartouche, en la retenant (fig. 21). Répéter l’opération
jusqu’à ce que le magasin soit
complètement chargé.
18 19
1) Der rote Punkt auf dem Patronen-
freigabehebel muss deutlich sicht-
bar sein (Hinweis, dass das Schlagstück gespannt ist). Um dies zu
bewerkstelligen, muss ggfs. der Verschlussfangknopf betätigt (Abb. 18),
der Verschluss mittels Spannhebel
per Hand geöffnet und wieder
geschlossen werden (Abb. 19).
2) Die Waffe bei geschlossenem Verschluss und gespanntem Schlagstück umdrehen und den Lauf
nach unten richten.
3) Eine Patrone tief in das Magazin
einschieben (Abb. 20); die Maga-
zinsperrklinke muss automatisch
hinter der Patrone einrasten und
diese blockieren (Abb. 21). Diesen
Vorgang bis zum völligen Laden
des Magazins wiederholen.
Page 60

59
1) La palanca de descenso del cartu-
cho debe tener el punto rojo a la
vista (aviso martillo armado) (fig.
18). Si es necesario llevarla a esa
posición pulsando el botón de
mando del elevador, abriendo
manualmente el obturador y
regresándolo después a la posición
de cierre (fig. 19).
2) Con el obturador cerrado y el mar-
tillo armado, voltee el arma orien-
tando el cañón hacia el suelo.
3) Introduzca un cartucho en el
almacén hasta el fondo (fig. 20): la
palanca de bloqueo debe enganchar el cartucho automáticamente,
deteniéndolo (fig. 21). Repita la
operación hasta cargar completamente el almacén.
1) O cut-off deve ter o ponto ver-
melho visível (aviso de cão armado) (fig. 18). Se necessário, leve-o
à posição premindo o botão de
comando do elevador, abrindo a
culatra e levando-o novamente à
posição de fecho (fig. 19).
2) Com a culatra fechada e o cão
armado, volte o cano para baixo.
3) Introduza um cartucho no fundo
da depósito (fig. 20) que ficará
automaticamente preso (fig. 21).
Repita a operação até encher o
depósito.
1) Красная точка на кнопке
отсекателя магазина говорит о
взведенном курке (рис. 18). Для
её перевода в указанное
положение нажмите на кнопку
затворной задержки, откройте и
закройте затвор (рис. 19).
2) С закрытым затвором и
взведенным курком переверните
ружье и направьте ствол вниз.
3) Вставьте патрон в магазин (рис.
20) до его фиксации стопором
патронов (рис. 21). Повторите
операцию до полного заряжания
магазина.
1) Ç кьккйнз фелеЯб ôïõ
бƒелехиесщф‡ цхуйггй¥н (ƒпх
ƒспейдпƒпйеЯ ьфй п кькпсбт еЯнбй
пƒлйумŸнпт) ƒсŸƒей нб еЯнбй
оекЬибсб псбф‡ (ейк. 18). Бн еЯнбй
бƒбсбЯфзфп, цŸсфе фзн уфз ущуф‡
иŸуз ƒйŸжпнфбт ôï êïõìƒß ôïõ
бнбуфплŸб, бнпЯгпнфбт ме фп чŸсй
фп клеЯуфсп кбй клеЯнпнфбт фп кбй
ƒÜëé (åéê. 19).
2) Ме клеЯуфсп клейуфь кбй фпн
кькпсб пƒлйумŸнп, бнбƒпдпгхсЯуфе
фп ьƒлп узмбдеµпнфбт ме фзн
кЬннз ƒспт фп ƒЬфщмб.
3) Фпƒпиеф‡уфе Ÿнб цхуЯггй уфп
вЬипт фзт бƒпи‡кзт (ейк. 20). П
бнбуфплŸбт иб фп ухгксбф‡уей
бхфьмбфб уфз иŸуз фпх (ейк. 21).
ЕƒбнблЬвефе фзн енŸсгейб мŸчсй
нб гемЯуефе фзн бƒпи‡кз.
20 21
Page 61

60
ATTENZIONE: il caricamento del ser-
batoio deve essere effettuato con il
cane armato per consentire alla leva
fermo cartuccia di bloccare le cartucce che si introducono nel serbatoio
stesso.
A questo punto il fucile non può ancora sparare se prima non si introduce
una cartuccia in canna, operando
come segue:
1) Aprire l'otturatore e trattenerlo in
tale posizione mentre si introduce
una cartuccia in canna attraverso
la finestra di espulsione bossolo
(fig. 22).
NOTE: the gun must be loaded with
the hammer cocked so that the carrier
latch can retain the cartridges as they
are inserted in the magazine.
Now the gun cannot be fired unless a
cartridge is placed in the barrel, following the relative procedure:
1) Open the bolt and at the same
time insert a cartridge into the barrel through the case ejection port
(fig. 22).
ATTENTION: le chargement du maga-
sin doit être effectué chien armé afin
de permettre au levier d’arrêt de cartouche de bloquer les cartouches que
l'on introduit dans le magasin.
A ce point le fusil ne peut pas encore
tirer si, auparavant, vous n’avez pas
introduit une cartouche dans le ca-
non, en suivant les marches indiquées
ci-après:
1) Ouvrir l’obturateur et le maintenir
dans cette position en introduisant
en même temps une cartouche
dans le canon à travers la fenêtre
d’éjection de la douille (fig. 22).
ACHTUNG: Das Magazin muss mit
gespanntem Schlagstück geladen wer-
den, damit die Magazinsperrklinke
die Patronen vorschriftsmäßig aufnimmt, die ins Magazin geschoben
werden.
Die Waffe ist noch nicht schussbereit,
denn vorher muss eine Patrone in das
Patronenlager des Laufes geladen
werden, indem man folgenderweise
vorgeht:
1) Den Verschluss öffnen und bei
dieser Verschlussstellung gleichzeitig manuell eine Patrone durch
die Hülsenauswurföffnung stecken
(Abb. 22).
22
Page 62

61
ATENCIÓN: la carga del almacén se
debe realizar con el martillo armado
para permitir a la palanca de bloqueo
del cartucho bloquear los cartuchos
que se introduzcan en el almacén.
Ahora, el fusil todavía no puede
disparar si antes no se introduce un
cartucho en el cañón llevando a cabo
la siguiente operación:
1) Abra el obturador y manténgalo
en esa posición mientras introduce
un cartucho en el cañón a través
de la ventana de expulsión del
casquillo (fig. 22).
ATENÇÃO: a arma deve ser carregada
com o cão armado de forma que o
cut-off trave os cartuchos que são
alojados no depósito.
A arma não pode ainda disparar sem
que introduza um cartucho na câma-
ra, operando da seguinte forma:
1) Abra a culatra e mantenha-a nessa
posição enquanto introduz um
cartucho no cano na janela de
ejecção (fig. 22).
ВНИМАНИЕ: заряжание магазина
должно выполняться со взведенным
курком, чтобы позволить рычагу
держателя патрона удерживать
патроны в магазине.
Ружье еще не может стрелять, если
не дослать патрон в патронник
действуя, как описано далее:
1) Откройте затвор и удерживая его
в этом положении, вставьте
патрон в патронник через окно
выброса гильзы (рис. 22).
¬ÑÏÓϱÇ: Ç ãŸìéóç ôçò áƒïè‡êçò
ƒсŸƒей нб ƒсбгмбфпƒпйеЯфе ме
пƒлйумŸнп кькпсб Ÿôóé ¥óôå íá
мƒпсеЯ п бнбуфплŸбт нб мƒлпкЬсей
фп цхуЯггйб ƒпх мƒбЯнпхн уфзн Ядйб
фзн бƒпи‡кз.
Бкьмб фп фпхцŸкй ден еЯнбй уе иŸуз
нб ƒхспвпл‡уей. Гйб нб фп кЬней,
ƒсŸƒей нб фпƒпиеф‡уефе Ÿнб цхуЯггй
уфзн кЬннз енесг¥нфбт ме Ÿнбн бƒь
фпхт дµп фсьƒпхт ƒпх ƒесйгсЬцпнфбй
уфз ухнŸчейб:
1) БнпЯофе фп клеЯуфсп кбй ксбф¥нфбт
фп бнпйчфь фпƒпиеф‡уфе Ÿнб
цхуЯггй уфзн кЬннз бƒь фзн пƒ‡
бƒьссйшзт фпх кЬлхкб (ейк. 22).
Page 63

62
2) Rilasciare l'otturatore che, scor-
rendo in avanti, incamera la cartuccia e si arresta in posizione di
chiusura (fig. 23).
ATTENZIONE: durante queste opera-
zioni - anche se l'arma è in sicura
(vedi “Sicura del fucile”) - è opportuno orientare la canna in direzione di
sicura prudenza.
A questo punto il fucile è carico: portando la sicura in posizione di sparo
(anello rosso visibile), l'arma è pronta
per sparare.
2) Release the cocking lever: the bolt
will push the cartridge on the carrier into the chamber and stop in
the closed position (fig. 23).
NOTE: during this operation, always
point the gun in a safe direction, even
though the safety catch is engaged
(see “Gun safety catch”).
Now the gun is loaded: when the
safety catch is moved to firing position
(red ring visible), the gun is ready for
use.
2) Relâcher l’obturateur qui, en cou-
lissant vers l’avant, chambrera la
cartouche et s’arrêtera en position
de fermeture (fig. 23).
ATTENTION: durant ces opérations,
même si la sûreté de l’arme est mise
(voir “Sécurité fusil”), n’oubliez pas
d’orienter le canon dans une direction de prudence certaine.
A ce point le fusil est chargé: placer la
sûreté en position de tir (bague rouge
visible), l’arme est prête à tirer.
2) Den Verschluss freigeben; durch
die Vorwärtsbewegung wird die
Patrone in das Patronenlager befördert und wird in der Verschlussposition verriegelt (Abb. 23).
ACHTUNG: Bei diesen Ladevorgän-
gen muss der Lauf immer in eine
sichere Richtung gehalten werden,
auch wenn die Waffe gesichert ist
(siehe “Sicherung des Gewehrs”).
Nun ist die Waffe geladen; nach dem
Entsichern (der rote Ring ist sichtbar)
ist die Waffe schussbereit.
23
Page 64

63
2) Suelte el obturador que, deslizán-
dose hacia adelante, toma el cartucho y se para en la posición de
cierre (fig. 23).
ATENCIÓN: durante estas operacio-
nes - aunque el arma tenga puesto el
seguro (ver “Seguro del fusil”) - es
oportuno orientar el cañón hacia una
dirección segura.
Ahora el fusil está cargado: llevando
el seguro a la posición de disparo
(anillo rojo a la vista), el arma está
lista para disparar.
2) Feche a culatra, pois, esta ao
avançar encaminha o cartucho
para a câmara (fig. 23).
ATENÇÃO: durante esta operação,
mesmo que a arma esteja em segurança (ver “Segurança da arma”),
oriente sempre o cano para baixo em
posição de prudência.
Neste momento a arma está carregada: (ponto vermelho visível) está
pronta a disparar.
2) Отпустите затвор, который
дошлет патрон в патронник и
запрет канал ствола (рис. 23).
ВНИМАНИЕ: во время этих операций –
даже если оружие установлено на
предохранитель (смотри
“Предохранитель ружья”) - следует
направлять ствол в безопасную
сторону.
Теперь ружье заряжено. Установите
предохранитель в положение
выстрела, сместив предохранитель
(становится видимым красное
кольцо).
2) Елехиес¥уфе фп клеЯуфсп:
еƒйуфсŸцпнфбт уфз иŸуз фпх, иб
уƒс¥оей фп цхуЯггй уфз иблЬмз
кбй иб ƒбсбмеЯней клейуфь (ейк.
23).
¬ÑÏÓϱÇ: КбфЬ фз дйЬскейб бхф¥н
фщн енесгей¥н, бкьмб кй бн фп ьƒлп
еЯнбй буцблйумŸнп (вл. «З буцЬлейб
фпх фпхцекйпµ»), кбль еЯнбй íá
уфсŸцефе фзн кЬннз уе бƒьлхфб
буцбл‡ кбфеµихнуз.
Ôï üƒëï еЯнбй, ƒлŸпн, гемЬфп.
ЦŸснпнфбт фзн буцЬлейб уфзн
кбфЬллзлз иŸуз (ме псбфь фп кьккйнп
дбкфхлЯдй), фп фпхцŸкй еЯнбй Ÿфпймп нб
ƒхспвпл‡уей.
Page 65

64
Sostituzione cartuccia
(Operazione da effettuarsi con fucile
in sicura - vedi “Sicura del fucile” - e
canna orientata in direzione di sicura
prudenza)
Per sostituire una cartuccia già incamerata si possono seguire due procedure:
A) introduzione manuale della nuova
cartuccia;
B) azionamento della leva discesa
cartuccia.
A) introduzione manuale della cartuccia (sostituzione con cartuccia non
proveniente dal serbatoio)
1) Appoggiare il calcio sull’anca ed
aprire manualmente l’otturatore: la
cartuccia in camera viene estratta
ed espulsa dall’arma (fig. 24).
2) Introdurre, anche parzialmente in
canna, la nuova cartuccia attraverso la finestra di espulsione (fig.
22), prima di lasciare libera la manetta per richiudere l’otturatore.
Cartridge replacement
(This operation must be carried out
with the gun safety catch engaged see “Gun safety catch” and barrel
pointed in a safe direction)
To replace a cartridge in the chamber,
two procedures can be followed:
A) by manual replacement of a new
cartridge;
B) by using the cartridge drop lever.
A) manual replacement (when the
cartridge is not coming from the
magazine)
1) Rest the stock on your hip and pull
the cocking lever to open the bolt:
the cartridge in the chamber is
extracted and ejected from the gun
(fig. 24).
2) Insert a new cartridge even partially in the barrel through the
special ejection window (fig. 22)
and release the cocking lever to
close the bolt again.
Remplacement cartouche
(Opération à effectuer avec le fusil en
sûreté - voir “Sûreté du fusil” - et le
canon orienté en direction de prudence certaine)
Pour remplacer une cartouche déjà
chambrée on pourra suivre deux procédures:
A) en introduisant à la main la nou-
velle cartouche;
B) en actionnant le levier de descente
de la cartouche.
A) introduction manuelle de la cartouche (remplacement de la cartou-
che n’étant pas présente dans le magasin)
1) Appuyer la crosse sur la hanche,
et ouvrir manuellement l’obtura-
teur; la cartouche chambrée est
extraite et éjectée de l’arme (fig.
24).
2) Introduire partiellement la nouvelle cartouche dans le canon par la
fenêtre d’éjection (fig. 22), avant
de relâcher la manette pour refermer l’obturateur.
Auswechseln der Patrone
(Dieser Vorgang ist bei gesichertem
Gewehr durchzuführen - siehe "Sicherung des Gewehrs" - wobei der Lauf in
eine sichere Richtung gehalten werden muss)
Zum Auswechseln einer bereits dem
Patronenlager zugeführten Patrone ist
wie folgt vorzugehen:
A) Manuelle Zuführung der Patrone
von Hand;
B) Betätigung des Patronenfreigabe-
hebels.
A) Manuelle Zuführung der Patrone
(Zuführung der Patrone nicht aus dem
Magazin)
1) Den Schaft auf die Hüfte stützen
und den Verschluss von Hand öffnen: die Patrone wird aus dem
Patronenlager herausbefördert und
aus der Waffe ausgestossen (Abb.
24).
2) Die neue Patrone durch die Auswurföffnung in den Lauf einsetzen
(Abb. 22). Dann den Spannhebel
loslassen, um den Verschluss zu
schließen.
Page 66

65
Sustitución del cartucho
(Esta operación se debe realizar con
el seguro puesto - ver “Seguro del
fusil” - y cañón orientado hacia una
dirección segura)
Para sustituir un cartucho que ya se
encuentra en la cámara se pueden
seguir dos procedimientos:
A) por medio de la introducción ma-
nual del nuevo cartucho;
B) por medio del accionamiento de la
palanca de descenso del cartucho.
A) introducción manual del cartucho
(sustitución con cartucho no presente
en el almacén)
1) Apoye la culata en la cadera y
abra manualmente el obturador.
De esta manera el cartucho de la
cámara es extraído y expulsado
del arma (fig. 24).
2) Introduzca en el cañón, aún parcialmente, el nuevo cartucho a
través de la ventana de expulsión
(fig. 22) antes de dejar libre la
maneta para volver a cerrar el
obturador.
Substituição do cartucho
(Operação a efectuar com a arma
em segurança - ver “Segurança da
arma” e cano orientado em posição
de segurança)
A substituição de um cartucho na
câmara pode fazer-se de duas formas:
A) introdução manual do cartucho;
B) por acção do cut-off.
A) introdução manual do cartucho
(substituição do cartucho que não
esteja no depósito)
1) Apoie a coronha na anca e abra
manualmente o obturador: o cartucho da câmara é expulso (fig.
24).
2) Introduza, o novo cartucho na
janela (fig. 22) e largue a manette
para fechar o obturador.
Замена патрона
(Операция выполняется с ружьем,
установленным на предохранитель смотри “Предохранитель ружья” - и
со стволом, направленным в
безопасную сторону.
Существует два варианта извлечения
патрона из патронника и его замены.
A) Ручное досылание нового патрона;
B) При помощи отсекателя магазина.
A) Ручное досылание патрона
(замена на патрон, не поступающий
из магазина)
1) Уприте приклад в бедро, откройте
затвор, и извлеките патрон из
патронника (рис. 24).
2) Частично установите новый
патрон в патронник через окно
выбрасывателя (рис. 22) перед
тем, как отпустить рукоятку
затвора для его закрытия.
БнфйкбфЬуфбуз цхуйггйпµ
(¬сйн фзн бнфйкбфЬуфбуз буцблЯуфе
фп ьƒлп –вл. «З буцЬлейб фпх
фпхцекйпµ»- кбй уфсŸшфе фзн кЬннз
уе бƒьлхфб буцбл‡ кбфеµихнуз)
З бнфйкбфЬуфбуз цхуйггйпµ ƒпх
всЯукефбй уфз иблЬмз мƒпсеЯ нб
ƒсбгмбфпƒпйзиеЯ ме дµп фсьƒпхт:
Б) БнфйкбфЬуфбуз цхуйггйпµ ме фп
÷Ÿñé.
В) БнфйкбфЬуфбуз мŸущ фпх
бƒелехиесщф‡ цхуйггй¥н.
Б) БнфйкбфЬуфбуз ме фп чŸсй (ме
цхуЯггй ƒпх ден всЯукефбй уфзн
бƒпи‡кз)
1) Бкпхмƒ‡уфе фп кпнфЬкйп уфп гпць
кй бнпЯофе ме фп чŸсй фп клеЯуфсп
фсбв¥нфбт фз лбв‡: фп цхуЯггй
бƒпвЬллефбй бƒь фз иблЬмз (ейк.
24).
2) Фпƒпиеф‡уфе (Ÿуфщ кбй месйк¥т)
уфзн кЬннз фп кбйнпµсгйп цхуЯггй
бƒь фзн пƒ‡ бƒьссйшзт фпх
кЬлхкб (ейк. 22) кй елехиес¥уфе
фз лбв‡ гйб нб клеЯуефе фп
клеЯуфсп.
Page 67

66
B) azionamento della leva discesa
cartuccia (sostituzione con cartuccia
proveniente dal serbatoio)
1) Appoggiare il calcio sull’anca ed
aprire manualmente l’otturatore:
la cartuccia in camera viene estratta ed espulsa dall’arma (fig. 24).
2) Premere la leva discesa cartuccia;
quindi lasciar libera la manetta per
richiudere l’otturatore: si otterrà in
tal modo il passaggio rapido della
cartuccia dal serbatoio alla camera di scoppio.
B) using the cartridge drop lever
(when the cartridge is coming from
the magazine)
1) Rest the stock on your hip and pull
the cocking lever to open the bolt:
the cartridge in the chamber is
extracted and ejected from the gun
(fig. 24).
2) Press the cartridge drop lever and
release the cocking lever to close
the bolt again. In this way, the cartridge will pass quickly from the
magazine to the chamber.
B) actionnement du levier de descente cartouche (remplacement de la
cartouche présente dans le magasin)
1) Appuyer la crosse sur la hanche,
et ouvrir manuellement l’obtura-
teur; la cartouche chambrée est
extraite et éjectée de l’arme (fig.
24).
2) Appuyer sur le levier de descente
de cartouche; ensuite relâcher la
manette pour refermer l’obturateur; on obtient ainsi un passage
rapide de la cartouche du magasin
à la chambre d’explosion.
B) Betätigung des Patronenfreigabehebels (Zuführung der Patrone aus
dem Magazin)
1) Den Schaft auf die Hüfte stützen
und den Verschluss von Hand öffnen: die Patrone wird aus dem
Patronenlager herausbefördert und
aus der Waffe ausgestossen (Abb.
24).
2) Den Patronenfreigabehebel drük-
ken und den Spannhebel freilassen,
um den Verschluss zu schließen.
So wechselt die Patrone schnell
vom Magazin in das Patronenlager.
24
Page 68

67
B) accionamiento de la palanca de
descenso del cartucho (sustitución
con cartucho presente en el almacén)
1) Apoye la culata en la cadera y
abra manualmente el obturador.
De esta manera el cartucho de la
cámara es extraído y expulsado
del arma (fig. 24).
2) Pulse la palanca de descenso del
cartucho; después deje libre la
maneta para volver a cerrar el obturador; de esta manera obtendrá el
pasaje rápido del cartucho desde el
almacén a la cámara de explosión.
B) accionando o cut-off (substituição
do cartucho que esteja no depósito)
1) Apoie a arma na anca e abra
manualmente o obturador: o cartucho da câmara é expulso (fig.
24).
2) Premir o cut-off e (accionar a
culatra). Desta forma, o cartucho
passa rapidamente do deposito
para a câmara.
B) При помощи отсекателя
магазина (замена на патрон,
поступающий из магазина)
1) Уприте приклад в бедро, откройте
затвор, и извлеките патрон из
патронника (рис. 24).
2) Нажмите на кнопку отсекателя
магазина, затем отпустите
рукоятку затвора и дошлите
патрон в патронник.
В) БнфйкбфЬуфбуз мŸущ фпх
бƒелехиесщф‡ цхуйггй¥н (ме цхуЯггй
ƒпх всЯукефбй уфзн бƒпи‡кз)
1) Бкпхмƒ‡уфе фп кпнфЬкйп уфп
гпць кй бнпЯофе ме фп чŸсй ôï
клеЯуфсп фсбв¥нфбт фз лбв‡: фп
цхуЯггй бƒпвЬллефбй бƒь фз
иблЬмз (ейк. 24).
2) ¬éŸóôå фпн бƒелехиесщф‡
цхуйггй¥н кй елехиес¥уфе фз
лбв‡ гйб нб клеЯуефе фп клеЯуфсп.
Ме фпн фсьƒп бхфь, еƒйфхгчЬнефбй
Ÿнб гс‡гпсп ƒŸсбумб фпх
цхуйггйпµ бƒь фзн бƒпи‡кз уфз
иблЬмз.
Page 69

68
Scaricamento dell’arma
(Operazione da effettuarsi con fucile
in sicura - vedi “Sicura del fucile” - e
canna orientata in direzione di sicura
prudenza)
Per scaricare il fucile, agire come
segue:
1) Aprire l'otturatore: la cartuccia
incamerata viene estratta ed espulsa dall'arma (fig. 24).
2) Chiudere l'otturatore, accompa-
gnando la manetta con la mano
(fig. 25).
Unloading
(This operation must be carried out
with the gun safety catch engaged see “Gun safety catch” and the barrel
pointed in safe direction)
To unload the shotgun, proceed as follows:
1) Open the bolt: the cartridge in the
chamber will be extracted and
ejected (fig. 24).
2) Close the bolt: gently releasing the
cocking lever (fig. 25).
Déchargement de l’arme
(Opération à effectuer le fusil étant
en sûreté - voir “Sûreté du fusil” - et
le canon orienté en direction de prudence certaine)
Pour décharger le fusil suivre la marche suivante:
1) Ouvrir l’obturateur: la cartouche
chambrée est extraite et éjectée de
l’arme (fig. 24).
2) Fermer l’obturateur, en accompa-
gnant la manette de la main (fig.
25).
Entladen der Waffe
(Dieser Vorgang ist bei gesichertem
Gewehr durchzuführen - siehe "Sicherung des Gewehrs" - wobei der Lauf in
eine sichere Richtung gehalten werden muss)
Zum Entladen der Waffe muss wie
folgt vorgegangen werden:
1) Den Verschluss öffnen: Die im
Patronenlager vorhandene Patrone
wird aus der Waffe herausgezogen
und ausgeworfen (Abb. 24).
2) Den Verschluss schließen und
dabei den Spannhebel mit der
Hand führen (Abb. 25).
25
Page 70

69
Descarga del arma
(Esta operación se debe realizar con
el seguro puesto - ver “Seguro del
fusil” - y cañón orientado hacia una
dirección segura)
Para descargar el fusil siga las indicaciones siguientes:
1) Abra el obturador: el cartucho de
la cámara es extraído y expulsado
del arma (fig. 24).
2) Cierre el obturador, acompañan-
do la maneta con la mano (fig. 25).
Descarregamento da arma
(Operação a efectuar com a arma em
segurança - ver “Segurança da arma”
- e cano orientado em posição de
segurança)
Para descarregar a arma, proceda da
seguinte forma:
1) Abrir a culatra: o cartucho é
extraído e expulso (fig. 24).
2) Fechar a culatra, acompanhando
a manette com a mão (fig. 25).
Разряжание оружия
(Ружье должно быть поставлено на
предохранитель - смотри
“Предохранитель ружья”, ствол
направлен в безопасную сторону).
Для разряжания ружья:
1) Откройте затвор и извлеките
патрон из патронника (рис. 24).
2) Закройте затвор, сопровождая
рукоятку рукой (рис. 25).
ЕнŸсгейет бƒпгŸмйузт
(¬сйн фзн бƒпгŸмйуз, буцблЯуфе фп
ьƒлп –вл. «З буцЬлейб фпх
фпхцекйпµ»- кбй уфсŸшфе фзн кЬннз
уе бƒьлхфб буцбл‡ кбфеµихнуз)
Гйб нб бƒпгемЯуефе фп фпхцŸкй,
бкплпхиеЯуфе фб ƒбсбкЬфщ в‡мбфб:
1) БнпЯофе фп клеЯуфсп: фп цхуЯггй
бƒпвЬллефбй бƒь фз иблЬмз (ейк.
24).
2) КлеЯуфе фп клеЯуфсп бкплпхи¥нфбт
ôç ëá⇠ìå ôï ÷Ÿñé (åéê. 25).
Page 71

70
3) Capovolgere l'arma e - spingendo
l'elevatore all'interno - far pressio-
ne con l'indice della mano nella
parte anteriore della leva di fermo
cartuccia (fig. 26): la prima cartuccia nel serbatoio uscirà (fig. 27). Si
deve premere la leva di fermo per
ogni cartuccia che si vuol togliere
dal serbatoio.
AVVERTENZA: l'arma può essere sca-
ricata anche ripetendo più volte l'operazione descritta al punto B del capitolo: "Sostituzione cartuccia".
3) Reverse the gun and - thrusting the
carrier towards inside - press the
carrier latch frontal part with your
index finger (fig. 26); the first cartridge will come out (fig. 27). The
carrier latch must be pressed for
each released cartridge.
WARNING: gun can be unloaded by
repeating the operation, as described
under point B, of the chapter: ”Car-
tridge replacement”.
3) Retourner l’arme et - en poussant
l’élévateur à l’intérieur - faire pres-
sion avec l’index de la main dans
la partie avant du levier d’arrêt
cartouche (fig. 26): la première
cartouche dans le magasin sortira
(fig. 27). Il faudra appuyer sur le
levier d’arrêt chaque fois que l’on
voudra retirer une cartouche du
magasin.
ATTENTION: l’arme pourra égale-
ment être déchargée en répétant plusieurs fois l’opération décrite au point
B du chapitre: “Remplacement car-
touche”.
3) Die Waffe umdrehen und bei gleich-
zeitigem Drücken des Ladelöffels
nach innen mit dem Zeigefinger
der Hand auf den vorderen Bereich der Magazinsperrklinke
(Abb. 26) drücken; dabei tritt die
erste, im Magazin enthaltene
Patrone aus (Abb. 27). Für jede aus
dem Magazin zu entleerende
Patrone muss die Magazinsperrklinke gedrückt werden.
HINWEIS: Die Waffe kann auch durch
mehrmaliges Wiederholen des unter
Punkt B des Abschnitts "Auswechseln
der Patrone" beschriebenen Vorgangs
entladen werden.
26
Page 72

71
3) Voltee el arma y, empujando el
elevador hacia adentro, presione
con el dedo índice la parte anterior de la palanca de parada del
cartucho (fig. 26): el primer cartucho del almacén saldrá (fig. 27).
Se debe presionar la palanca de
parada para cada cartucho que se
quiere sacar del almacén.
ADVERTENCIA: el arma también se
puede descargar repitiendo varias
veces la operación descrita en el punto B del capítulo: “Sustitución del
cartucho”.
3) Voltando a espingarda e empur-
rando o elevador interno, pressio-
ne com o dedo o travão do depósito (fig. 26): o primeiro cartucho
do depósito sairá (fig. 27), deve-se
repetir esta operação, por cada
cartucho que se pretenda extrair.
ADVERTÊNCIA: a arma pode ser
descarregada também repetindo a
operação do capitulo “B”: “Substi-
tuição dos cartuchos”.
3) Переверните оружие и ,толкая
подаватель внутрь, надавите
указательным пальцем правой
руки на переднюю часть рычага
стопора патрона (рис. 26). Первый
патрон выйдет из магазина (рис.
27). Необходимо нажать на рычаг
стопора для извлечения каждого
патрона из магазина.
ПРЕДУПРЕЖДЕНИЕ: оружие может
быть разряжено путем повтора
операции, описанной в пункте B главы:
“Замена патрона”.
3) БнбƒпдпгхсЯуфе фп ьƒлп кбй
уƒс¥чнпнфбт фз гл¥ууб ƒспт фб
мŸуб, ƒéŸóôå ме фпн деЯкфз фпх
чесйпµ фзн мƒспуфйн‡ ƒлехсЬ ôïõ
бнбуфплŸб (ейк. 26): фп ƒс¥фп
цхуЯггй фзт бƒпи‡кзт иб вгей (ейк.
27). ЕЯнбй бƒбсбЯфзфп нб ƒйŸуефе
фпн бнбуфплŸб гйб кЬие цхуЯггй
ƒпх еƒйихмеЯфе нб бцбйсŸуефе
бƒь фзн бƒпи‡кз.
¬СПЕЙДП¬ПЙЗУЗ: МƒпсеЯфе нб
бдейЬуефе фп ьƒлп еƒбнблбмвЬнпнфбт
ƒесйууьфесет цпсŸт фз дйбдйкбуЯб
ƒпх ƒесйгсЬцефе уфп узмеЯп «В» фпх
кецблбЯпх «БнфйкбфЬуфбуз цхуйггйпµ».
27
Page 73

72
Inconvenienti
e rimedi
Prima di effettuare qualunque tipo di
intervento sul fucile, accertarsi sempre che camera di scoppio e serbatoio
siano completamente vuoti! (Leggere
attentamente le istruzioni di caricamento e scaricamento dell'arma).
Se il fucile non spara:
1) Controllare la sicura: se inserita,
spingere il pulsante a traversino
nella posizione di fuoco.
2) Controllare che la cartuccia sia in
canna. Se necessario, introdurre
una cartuccia seguendo le istruzioni relative al caricamento (pag. 56).
3) Controllare il meccanismo di spa-
ro. Se necessario, procedere alla
sua pulizia e lubrificazione.
Troubleshooting
Before starting any operation on your
shotgun, make sure that the chamber
and the magazine are unloaded!
(Carefully read the instructions on gun
loading and unloading).
The gun fails to fire:
1) Check the safety catch: if it is
engaged, push the button to the
fire position.
2) Check that there is a cartridge in
the barrel. If necessary, insert a
cartridge following the loading
instructions (page 56).
3) Check the firing mechanism. If
necessary, clean and lubricate it.
Inconvénients
et remèdes
Avant d’effectuer n’importe quel type
d’intervention sur votre fusil, toujours
vérifier que la chambre d’explosion et
le magasin soient complètement vides!
(Lire attentivement les instructions de
chargement et de déchargement).
Si le fusil ne tire pas:
1) Contrôler la sûreté: si elle est mi-
se, pousser le bouton dans la position de feu.
2) Contrôler que la cartouche est
dans le canon. Si nécessaire introduire une cartouche en suivant les
instructions relatives au chargement (page 56).
3) Contrôler le mécanisme de tir. Si
nécessaire, effectuer son nettoyage
et sa lubrification.
Funktionsstörungen
und Abhilfe
Vor jeder Waffenhandhabung sollten
Sie sicherstellen, dass die Patronenlager und das Magazin ihres Gewehrs
völlig leer sind! (Bitte lesen Sie auf-
merksam die Anweisungen für das
Laden und das Entladen der Waffe).
Das Gewehr schießt nicht
1) Die Sicherung überprüfen; falls
sie aktiviert ist, den Stegknopf auf
Feuerbereitschaft bringen.
2) Prüfen, ob eine Patrone im Lauf
ist. Falls nötig, unter Beachtung
der Anweisungen für das Laden (S.
56) eine Patrone einstecken.
3) Den Schussmechanismus über-
prüfen und, falls nötig, reinigen
und schmieren.
Page 74

73
Inconvenientes
y soluciones
Antes de realizar cualquier tipo de
intervención en su fusil, asegúrese
siempre de que la cámara de explosión
y el almacén estén completamente
vacíos. (Lea atentamente las instruccio-
nes para la carga y descarga del arma).
Si el fusil no dispara:
1) Controle el seguro: si está puesto,
empuje el botón transversal hacia
la posición de fuego.
2) Controle que el cartucho esté en
el cañón. Si fuera necesario, introduzca un cartucho siguiendo las
instrucciones relativas a la carga
(página 57).
3) Controle el mecanismo de dispa-
ro. Si fuera necesario límpielo y
lubríquelo.
Problemas
e soluções
Antes de efectuar qualquer intervenção na sua arma, assegure-se que
a câmara e o depósito estão vazios.
(Leia atentamente as instruções de carregar e descarregar da arma).
Se a arma não dispara:
1) Controlar o travão: se está accio-
nado, empurre o botão transversal
para a posição de fogo.
2) Verificar se tem cartucho na
câmara. Se necessário introduza
um cartucho seguindo as
instruções de carregamento (pág.
57).
3) Verificar o mecanismo de disparo.
Se necessário proceda à sua limpeza e lubrificação.
Неисправности и
способы устранения
Перед тем, как выполнять любые
операции с Вашим ружьем
убедитесь, что патронник, механизм
подачи и магазин совершенно
пустые! (внимательно прочитайте
инструкции по заряжанию и
разряжанию оружия).
Если выстрела не происходит:
1) Проверьте предохранитель:
если он включен, сдвиньте кнопку
в положение выстрела.
2) Убедитесь, что патрон находится
в патроннике. Если необходимо,
дошлите патрон в патронник,
следуя инструкциям по заряжанию
(стр. 57).
3) Проверьте, предварительно
разрядив, ударно-спусковой
механизм. Если необходимо,
проведите его чистку и смазку.
¬ñïâë‡ìáôá
êáé ëµóåéò
¬сйн ƒсбгмбфпƒпй‡уефе пƒпйбд‡ƒпфе
енŸсгейб, вевбйщиеЯфе ьфй з иблЬмз
кбй з бƒпи‡кз еЯнбй енфел¥т Ьдейет!
(ДйбвЬуфе ƒспуекфйкЬ фйт пдзгЯет
учефйкЬ ме фз гŸмйуз кбй фзн
бƒпгŸмйуз фпх ьƒлпх).
Бн фп фпхцŸкй ден ƒхспвплеЯ:
1) ЕлŸгофе фзн буцЬлейб. Бн фп ьƒлп
еЯнбй буцблйумŸнп, уƒс¥офе фзн
ƒспт фзн бнфЯиефз ƒлехсЬ, уфз
иŸуз впл‡т.
2) ВевбйщиеЯфе ьфй хƒЬсчей цхуЯггй
уфзн кЬннз. Бн ден хƒЬсчей,
фпƒпиеф‡уфе фп бкплпхи¥нфбт
фйт пдзгЯет ƒпх ƒбспхуйЬжпнфбй
уфз уелЯдб 57.
3) ÅëŸãîôå ôïí мзчбнйумь
ƒхспдьфзузт. Бн чсейЬжефбй,
кбибсЯуфе фпн кбй лбд¥уфе фпн.
Page 75

74
Cappellotto fissaggio astina
Accertarsi durante il montaggio che il
cappellotto fissaggio astina sia completo di molla e, specialmente dopo i
primi colpi, che sia ben avvitato, in
modo da mantenere la canna completamente bloccata alla carcassa.
Munizionamento
Il fucile Benelli utilizza per il suo funzionamento l'energia cinetica del rinculo dell'arma.
Utilizzare sempre cartucce che garantiscano un rinculo sufficiente per
il completo automatismo di riarmo.
AVVERTENZA: all'inizio dell'uso (fu-
cile nuovo) può essere necessario un
breve periodo di rodaggio prima che
l'arma funzioni perfettamente anche
con cariche leggere. In presenza di
problemi di funzionamento, è opportuno sparare a titolo di rodaggio tre o
quattro scatole di cartucce con carica
standard.
Fore-end cap
Check that the fore-end cap is fitted
with spring and, especially after the
first rounds, check that it is tightened
firmly, to keep the barrel firmly against
to the receiver.
Ammunition
Benelli shotguns use the kinetic energy generated by the recoil to work the
action.
Use always ammunition that is powerful enough to fully cycle the action.
WARNING: when your shotgun is
new and before beginning to use it
normally, a breaking-in period may be
required before your new gun works
perfectly with light target loads. If you
experience any initial functioning
problems, we recommended firing
three or four boxes of standard hunt-
ing cartridges.
Capuchon de fixation de devant
Lors du montage, s’assurer que le
capuchon de fixation de devant présente aussi son ressort et, tout particu-
lièrement après les premiers coups,
qu’il est bien serré de manière à maintenir le canon complètement bloqué
contre la carcasse.
Ravitaillement
Pour leur fonctionnement, le fusil
Benelli utilise l’énergie cinétique de
recul de l’arme.
Toujours utiliser des cartouches qui
garantissent un recul suffisant pour
l’automatisme de réarmement complet.
ATTENTION: au début de son utilisa-
tion (fusil neuf), une courte période de
rodage pourrait se rendre nécessaire
avant que votre fusil fonctionne parfaitement même avec des charges
légères. En présence de problèmes de
fonctionnement, il est opportun de
tirer trois ou quatre boîtes de cartouches à charge standard à titre de ro-
dage.
Befestigungskappe des Vorderschafts
Achten Sie bei dem Zusammenbau
darauf, dass die Befestigungskappe des
Vorderschafts auch tatsächlich mit der
dazugehörigen Feder versehen ist.
Insbesondere nach den ersten Schüssen
prüfen, ob sie gut angezogen wurde,
damit der Lauf fest am Gehäuse ve-
rankert ist.
Munitionsbestückung
“Benelli” Gewehre nutzen für ihre
Funktion die Rückstoßenergie der
Waffe aus.
Stets Patronen verwenden, die eine
ausreichende Rückstoßkraft für den
kompletten Selbstladevorgang garantieren.
HINWEIS: Bei Neuwaffen kann eine
"Einschießphase" erforderlich sein, bis
die Waffe auch mit leichter Ladung
einwandfrei funktioniert. Bei Funktionsstörungen empfiehlt es sich drei
oder vier Patronenschachteln mit
Standardmunition zu verschießen.
Page 76

75
Capuchón fijación varilla
En fase de montaje asegúrese de que
el capuchón de fijación de la varilla
esté dotado de resorte y especialmen-
te después de los primeros disparos
esté bien atornillado, para mantener
el cañón completamente fijado en la
carcasa.
Municiones
Para su funcionamiento, el fusil automático Benelli utiliza la energía cinética del retroceso del arma.
Siempre utilice cartuchos que garanticen un retroceso suficiente para el
completo automatismo de recarga.
ADVERTENCIA: al inicio del uso (fusil
nuevo), puede ser necesario un breve
periodo de rodaje antes de que el
arma funcione perfectamente incluso
con cargas ligeras. En presencia de
problemas de funcionamiento es
oportuno disparar tres o cuatro cajas
de cartuchos con carga estándar
como rodaje.
Porca do fuste
Assegure-se que ao colocar a porca
do fuste não esqueceu a respectiva
mola e, depois dos primeiros tiros,
também que esteja apertada por forma a manter o fuste perfeitamente
ajustado com a báscula.
Munições
As armas Benelli utilizam a energia
cinética do recuo.
Utilize sempre cartuchos que garantam um recuo suficiente para um
completo rearmamento do automatismo.
ADVERTÊNCIA: ao estrear uma arma
pode ser necessário um breve período
de adaptação até que se obtenha o
rendimento desejado, mesmo com
cargas leves. Na presença de qualquer
problema de funcionamento, recomenda-se disparar três ou quatro
caixas de cartuchos com cargas stan-
dard, a título de rodagem.
Заглушка цевья
Убедитесь в том, что крышка
крепления цевья укомплектована
пружиной и, особенно после первых
выстрелов, хорошо затянута, так,
чтобы плотно фиксировать ствол в
ствольной коробке.
Патроны
Автоматическое ружье Benelli
использует для своего
функционирования кинетическую
энергию отката оружия.
Следует всегда использовать
патроны, гарантирующие
достаточный откат для полностью
автоматической перезарядки.
ПРЕДУПРЕЖДЕНИЕ: в начале
использования нового ружья может
быть необходим короткий период
притирки, перед тем, как оружие
начнет хорошо работать даже с
легкими зарядами. При наличии
проблем с функционированием
следует отстрелять для обкатки три
или четыре коробки патронов со
стандартным зарядом.
Ç âßäá ôçò ƒÜƒéáò
Œфбн ухнбсмплпгеЯфе фп ьƒлп,
вевбйщиеЯфе ьфй ç âßäá фзт ƒЬƒйбт
Ÿчей вйдщиеЯ ìå ôï åëáô‡ñéï.
Ейдйкьфесб мефЬ фйт ƒс¥фет вплŸт,
вевбйщиеЯфе ьфй ƒбсбмŸней уцйкфЬ
вйдщмŸнз Ÿфуй ¥уфе нб уфбиеспƒпйеЯ
бƒьлхфб фзн кЬннз уфпн кпсмь.
ЦхуЯггйб
З лейфпхсгЯб фпх фпхцекйпµ Benelli
уфзсЯжефбй уфзн кйнзфйк‡ енŸсгейб фзт
бнЬкспхузт фпх ьƒлпх.
±сзуймпƒпйеЯфе ƒЬнфб фб кбфЬллзлб
цхуЯггйб Ÿфуй ¥уфе з бнЬкспхуз нб
еобуцблЯжей фпн ƒл‡сз бхфпмбфйумь
фзт пƒлЯуещт.
¬СПЕЙДП¬ПЙЗУЗ: Бн фп ьƒлп еЯнбй
кбйнпµсгйп, еЯнбй ƒйибнь нб чсейбуфеЯ
мйб уµнфпмз ƒесЯпдп уфсщуЯмбфпт
ƒсйн бсчЯуей нб лейфпхсгеЯ уфзн
енфŸлейб кбй ме елбцсŸт гпм¥уейт. Бн
емцбнйуфпµн ƒспвл‡мбфб
лейфпхсгЯбт, убт ухмвпхлеµпхме нб
ƒхспвпл‡уефе фсейт ‡ фŸууесйт
ухукехбуЯет цхуйггй¥н уфЬнфбс гйб
ƒспубсмпг‡.
Page 77

76
Munizioni da usare
Nell’automatico Benelli si possono
usare indistintamente cartucce con
bossolo da 65 mm (2” 1/2) o 70 mm
(2” 3/4) con cariche massime di 42
grammi (Semi-Magnum) per cal. 12 e
32 grammi (Semi-Magnum) per cal.
20.
Per i modelli con canna Magnum,
oltre ai tipi di munizioni sopra visti, si
possono utilizzare anche cartucce
con bossoli da 76 mm (3”) e cariche
massime di 56 grammi per cal. 12 e
36 grammi per cal. 20.
ATTENZIONE: non usare mai cartuc-
ce con bossolo la cui lunghezza supe-
ri quella della camera di scoppio!
La mancata osservanza di questa
regola comporta gravi conseguenze
sia per il tiratore che per l'arma.
I fucili Benelli non richiedono regolazione alcuna per qualsiasi munizionamento impiegato.
Utilizzare sempre cartucce che garantiscano un rinculo sufficiente al
completo riarmo dell'arma.
Tutti i fucili Benelli sono sottoposti
alla prova forzata di 1370 bar presso
il Banco Nazionale di Prova di Gardone Valtrompia (Brescia).
Choice of ammunition
The Benelli automatic shotgun can
use shells with a 65 mm (2” 1/2) or 70
mm (2” 3/4) case, with maximum shot
loads of 42 grammes (Semi-Magnum)
for 12 gauge and 32 grammes (SemiMagnum) for 20 gauge .
As for models with Magnum barrel,
besides the above types of ammunition, 76 mm (3”) cartridges may be
used with maximum permissible shot
loads of 56 grammes for 12 gauge and
36 grammes for 20 gauge.
CAUTION: never use cartridges with
a case longer than the chamber.
Non-compliance to this rule would
have serious consequences for both
the shotgun and the shooter.
No adjustment to the shotgun is necessary to fire any of the ammunition
listed above.
Always use ammunition that is powerful enough to fully cycle the action.
All Benelli shotguns are subjected to
a 1370 bar burst test at the Italian
National Proof House in Gardone
Valtrompia (Brescia).
Munitions à utiliser
Dans l’automatique Benelli, on peut
utiliser indifféremment des cartouches
à douilles de 65 mm (2” 1/2) ou 70
mm (2” 3/4) ayant des charges maxima
de 42 grammes (Semi-Magnum) pour
cal. 12 et 32 grammes (Semi-Magnum)
pour cal. 20.
Pour les modèles avec canon Magnum,
on pourra utiliser non seulement les
types de munitions indiquées ci-dessus,
mais aussi les cartouches à douilles de
76 mm (3”) et des charges maxima de
56 grammes pour cal. 12 et 36 grammes pour cal. 20.
ATTENTION: ne jamais utiliser des
cartouches avec des douilles dont la
longueur dépasserait celle de la
chambre d’explosion!
Observer cette règle sous risque de
graves préjudices aussi bien pour le
tireur que pour l’arme.
Les fusils Benelli ne requièrent aucun
réglage, quel que soit le type de
munition employée.
Toujours utiliser des cartouches garantissant un recul suffisant au réarmement complet de l’arme.
Tous les fusils Benelli sont soumis au
test forcé de 1370 bars au banc
National de Tir de Gardone Valtrompia (Brescia).
Zu verwendende Munition
Mit dem Benelli Automatiksystem können sowohl Patronen mit 65 mm Hülse
(2" 1/2) als auch mit 70 mm Hülse (2"
3/4) bei Höchstladungen von 42
Gramm (Semi-Magnum) für Kaliber 12
und 32 Gramm (Semi-Magnum) für
Kaliber 20 verwendet werden.
Für Modelle mit Magnum-Lauf können
außer den obigen Munitionsarten auch
Patronen mit 76 mm (3") Hülsen und
Höchstladungen von 56 Gramm für
Kaliber 12 und 36 Gramm (SemiMagnum) für Kaliber 20 benutzt werden.
ACHTUNG: Niemals Patronen ver-
wenden, deren Hülsen länger als das
Patronenlager der Waffe sind!
Die Nichteinhaltung dieser Sicherheitsbestimmung kann sowohl für den
Schützen als auch für die Waffe schlimme Folgen haben!
“Benelli” Gewehre erfordern keine
weiteren Munitionsabstimmungen bei
einer Verwendung der oben angeführten Munitionsarten.
Stets Patronen verwenden, die eine
ausreichende Rückstoßkraft für den
kompletten Ladevorgang garantieren.
Alle Benelli-Gewehre werden der
Druckprüfung bei 1370 Bar auf dem
Nationalen Prüfstand in Gardone Valtrompia (Brescia) unterzogen.
Page 78

77
Municiones a utilizar
Con el fusil automático Benelli se pueden utilizar indistintamente cartuchos
con casquillo de 65 mm (2” 1/2) o 70
mm (2” 3/4) con cargas máximas de
42 gramos (Semi-Magnum) para cali-
bre 12 y 32 gramos (Semi-Magnum)
para calibre 20.
Para los modelos con cañón Magnum,
además de los tipos de municiones
arriba mencionados, también se pueden utilizar cartuchos con casquillos
de 76 mm (3”) y cargas máximas de
56 gramos para calibre 12 y 36 gramos para calibre 20.
ATENCIÓN: nunca utilice cartuchos
con casquillos cuya longitud sea
superior a la de la cámara de explosión.
La inobservancia de esta regla comporta graves consecuencias tanto para
el tirador como para el arma.
Los fusiles Benelli no requieren ninguna regulación para cualquier tipo de
munición utilizada.
Siempre utilice cartuchos que garanticen un retroceso suficiente para la
completa recarga del arma.
Todos los fusiles Benelli son sometidos a la prueba forzada de 1370 bar
en el Banco Nacional de Prueba de
Gardone Valtrompia (Brescia).
Munições a utilizar
Podem usar-se indistintamente cartuchos de 65 mm (2” 1/2), 70 mm (2”
3/4) com cargas máximas de 42 gramas (Semi-Magnum) para cal. 12 e de
32 gramas (Semi-Magnum) para cal.
20.
Nos modelos com câmara Magnum,
além dos referidos anteriormente,
pode utilizar cartuchos de 76 mm (3”)
com cargas máximas de 56 gramas
para cal. 12 e de 36 gramas (Semi-
Magnum) para cal. 20.
ATENÇÃO: não utilizar cartuchos
cujo comprimento supere o da câma-
ra.
A inobservância deste item pode causar graves incidentes para o atirador
e para a arma.
As armas Benelli não requerem regulação em função da munição utilizada.
Utilize sempre cartuchos que garantam o recuo suficiente para o completo rearmamento da arma.
Todas as armas Benelli são sujeitas a
prova forçada de 1370 bar no “Banco Nacional de Provas” de Gardone
Valtrompia (Brescia).
Используемые патроны
В автоматических ружьях Benelli
можно использовать патроны с
гильзой 65 мм (2” 1/2) или 70 мм (2”
3/4) и с максимальной навеской дроби
42 грамма (Semi-Magnum) для кал. 12
и 32 грамм (Semi-Magnum) для кал.
20.
Для моделей со стволом Magnum,
помимо перечисленных выше
боеприпасов, можно также
использовать патроны с гильзами 76
мм (3”) и с максимальной навеской
дроби 56 грамм для кал. 12 и 36
грамм для кал. 20.
ВНИМАНИЕ: никогда не используйте
патроны длина которых превышает
длину патронника!
Несоблюдение данного правила
может привести к серьезным
последствиям, как для стрелка, так
и для оружия.
Ружья Benelli не требуют какой-либо
регулировки для использования
любых патронов.
Однако следует всегда использовать
патроны, гарантирующие достаточный
откат для автоматической
перезарядки.
Все ружья Benelli проходят испытания
на прочность с давлением в 1370 бар на
Национальном испытательном стенде
в г. Гардоне Валтромпия (Брешия).
З еƒйлпг‡ фщн цхуйггй¥н
Фп бхфьмбфп Benelli еЯнбй уе иŸуз нб
чсзуймпƒпй‡уей цхуЯггйб ме кЬлхкб
65 mm (2’’ 1/2) ‡ 70 mm (2’’ 3/4) êáé
мŸгйуфп цпсфЯп укбгй¥н мплµвдпх
42 gr (Semi-Magnum) ãéá äéáì. 12 êáé
32 gr (Semi-Magnum) ãéá äéáì. 20.
Фб мпнфŸлб ме кЬннз Magnum, екфьт
бƒь фб ƒбсбƒЬнщ, мƒпспµн нб
чсзуймпƒпй‡упхн кбй цхуЯггйб ме
кЬлхкб 76 mm (3’’) кбй мŸгйуфп
цпсфЯп укбгй¥н мплµвдпх 56 gr ãéá
äéáì. 12 êáé 36 gr ãéá äéáì. 20.
¬ÑÏÓϱÇ: Мзн чсзуймпƒпй‡уефе
ƒïôŸ цхуЯггй ме кЬлхкб ƒпх Ÿчей
мегблµфесп м‡кпт áƒü áõôü ôçò
иблЬмзт!
З ƒбсбвЯбуз фпх кбньнб бхфпµ
еƒйцŸсей упвбсьфбфет еƒйƒф¥уейт
фьуп гйб фпн укпƒехф‡ ьуп кбй гйб фп
ьƒлп.
Ôá ôïõöŸêéá Benelli ден чсейЬжефбй нб
схимйуфпµн гйб нб чсзуймпƒпй‡упхн
фб цхуЯггйб ƒпх ƒесйгсЬцпнфбй ƒйп
ƒЬнщ.
±сзуймпƒпйеЯфе ƒЬнфб фб кбфЬллзлб
цхуЯггйб Ÿфуй ¥уфе з бнЬкспхуз нб
еобуцблЯжей фпн ƒл‡сз бхфпмбфйумь
фзт пƒлЯуещт.
Œëá ôá ôïõöŸêéá Benelli Ÿчпхн
дпкймбуфеЯ уе ƒЯеуз 1370 bar уфп
Йфблйкь Еинйкь КŸнфсп Дпкйм¥н фпх
Gardone Valtrompia (Brescia).
Page 79

78
Manutenzione
Prima di effettuare qualunque tipo di
intervento sul fucile, accertarsi sempre che camera di scoppio e serbatoio
siano completamente vuoti! (Leggere
attentamente le istruzioni di caricamento e scaricamento dell'arma).
Per l'estrema semplicità costruttiva e
per l'accurata scelta dei materiali, l’automatico Benelli non richiede particolari interventi di manutenzione.
Si consiglia quindi di effettuare:
1) la normale pulizia della canna
dopo l'uso;
2) eliminare con una periodica puli-
zia e lubrificazione gli eventuali
residui di polvere (o materiali
estranei) dal gruppo di sparo (cane,
grilletto, ecc.);
3) smontare, pulire e lubrificare il
gruppo otturatore, che può essere
soggetto parimenti ai residui sopra
citati;
4) per la buona conservazione dell'arma, si consiglia di tenere lubrificate le parti soggette agli agenti
atmosferici.
Maintenance
Before starting any operation on your
shotgun, make sure that the chamber
and the magazine are unloaded!
(Carefully read the instructions on gun
loading and unloading).
Thanks to its extreme simplicity and
excellent materials, the Benelli Automatic Shotgun requires no special
maintenance.
The following few controls are recom-
mended:
1) normal cleaning of the barrel after
use;
2) the firing mechanism, consisting of
hammer, trigger, etc., may become
clogged with any powder residuals
(or foreign matters). Remove them
by periodical cleaning or lubrication;
3) the bolt assembly may also
become clogged with the same
residuals over mentioned and
therefore must be periodically dismantled, cleaned and lubricated;
4) to keep the gun in good order, oiling of the parts subject to atmospheric corrosion is recommended.
Entretien
Avant d’effectuer n’importe quel type
d’intervention sur votre fusil, toujours
vérifier que la chambre d’explosion et
le magasin soient complètement vides!
(Lire attentivement les instructions de
chargement et de déchargement de
l’arme).
Grâce à leur extrême simplicité de
construction et au choix des matériaux qui les composent, les fusils
Benelli ne requièrent aucune inter-
vention particulière d’entretien.
Il est par conséquent conseillé d’effectuer:
1) le nettoyage normal du canon
après l’usage;
2) d’éliminer par un nettoyage et un
entretien périodiques les résidus
éventuels de poudre (ou de matières étrangères) du groupe de tir
(chien, détente, etc.);
3) de démonter et de nettoyer le
groupe obturateur, sur lequel
pourraient également se déposer
les résidus que nous venons d’indiquer;
4) pour la bonne conservation de
l’arme, n’oubliez pas de veiller à
ce que les parties pouvant être
agressées par les agents atmosphériques soient toujours lubrifiées.
Wartung
Vor jeder Waffenhandhabung sollten
Sie sicherstellen, dass die Patronenlager und das Magazin ihres Gewehrs
völlig leer sind! (Bitte lesen Sie auf-
merksam die Anweisungen für das
Laden und das Entladen der Waffe).
Aufgrund der extrem einfachen Konstruktion und sorgfältigen Wahl der
Materialien erfordern die BenelliGewehre keine besonderen War-
tungsmaßnahmen.
Es wird daher empfohlen:
1) den Lauf nach Gebrauch des Ge-
wehrs regelmäßig zu reinigen;
2) durch regelmäßige Reinigung und
Schmierung eventuelle Verbrennungsrückstände (oder andere
Fremdmaterialien) von der Abzugsgruppe (Abzug, Schlagstück, usw.)
zu entfernen;
3) den Verschlussblock zu zerlegen,
zu reinigen und zu schmieren, da
auch in diesem Bereich die oben
erwähnten Verschmutzungen auftreten können;
4) um das Gewehr immer in gutem
Zustand zu halten, wird empfohlen
die der Witterung ausgesetzten
Teile stets gut geschmiert zu halten.
Page 80

79
Manutención
Antes de realizar cualquier tipo de
operación en su fusil, asegúrese siempre que la cámara de explosión y el
almacén estén completamente vacíos.
(Lea atentamente las instrucciones
para la carga y la descarga del arma).
Gracias a su extremada sencillez constructiva y a la cuidadosa elección de
los materiales, el fusil automático
Benelli no requiere particulares intervenciones de manutención.
Por lo tanto se aconseja realizar:
1) la limpieza normal del cañón des-
pués del uso;
2) eliminar con una limpieza y lubri-
cación periódicas los eventuales
residuos de polvo (o materiales
extraños) del grupo de disparo
(martillo, gatillo, etc.);
3) desmontar, limpiar y lubricar el
grupo obturador, que de otra
manera puede estar sujeto a los
residuos antes citados;
4) para una buena conservación del
arma se aconseja mantener lubricadas las partes sujetas a los agentes atmosféricos.
Manutenção
Antes de efectuar qualquer intervenção na sua arma, assegure-se que
a câmara e o depósito estão vazios.
(Leia atentamente as instruções de
carregar e descarregar da arma).
Pela extrema simplicidade e cuidada
selecção nos materiais utilizados, as
armas Benelli não requerem particulares intervenções de manutenção.
Aconselhamos, portanto, efectuar:
1) a normal limpeza do cano após
utilização;
2) eliminar com uma limpeza perió-
dica e lubrificação os resíduos de
pólvora (ou matérias estranhas),
da bateria de disparo (cão, gatilho,
etc);
3) desmontar, limpar e lubrificar o
grupo da culatra;
4) para uma correcta conservação
da arma, aconselha-se manter
lubrificadas as partes sujeitas aos
agentes atmosféricos.
Техобслуживание
Перед тем, как выполнять любые
операции с Вашим ружьем,
убедитесь в том, что патронник и и
магазин совершенно пустые!
(внимательно прочитайте инструкцию
по заряжанию и разряжанию оружия).
Из-за необычайной простоты
конструкции и благодаря тщательному
подбору материалов, ружья Benelli не
требует особых мероприятий по
техобслуживанию.
Рекомендуется выполнять следующее:
1) обычную очистку ствола после
стрельбы;
2) периодически смазывать и
удалять грязь и посторонние
предметы из ударно-спускового
механизма.
3) снять, очистить и смазать затвор;
4)
Для лучшей сохранности оружия
рекомендуется держать смазанными
части, подвергающиеся
атмосферным воздействиям.
Óõíô‡ñçóç
¬сйн ƒсбгмбфпƒпй‡уефе пƒпйбд‡ƒпфе
енŸсгейб, вевбйщиеЯфе ьфй з иблЬмз
кбй з бƒпи‡кз еЯнбй енфел¥т Ьдейет!
(ДйбвЬуфе ƒспуекфйкЬ фйт пдзгЯет
учефйкЬ ме фз гŸмйуз кбй фзн
бƒпгŸмйуз фпх ьƒлпх).
±Ьсйт уфзн бƒльфзфб фзт кбфбукех‡т
фпхт кбй фзн ƒспуегмŸнз еƒйлпг‡ фщн
хлйк¥н, фб бхфьмбфб Benelli äåí Ÿ÷ïõí
бнЬгкз йдйбЯфесзт ухнф‡сзузт.
Убт ƒспфеЯнпхме, åƒïìŸíùò:
1) нб ƒсбгмбфпƒпйеЯфе Ÿнбн бƒль
кбибсйумь ôïõ üƒëïõ ìåôÜ ôçí
÷ñ‡óç
2) нб кбибсЯжефе кбй нб лбд¥нефе, уе
фбкфЬ чспнйкЬ дйбуф‡мбфб, фпн
мзчбнйумь ƒхспдьфзузт
(кькпсбт, укбндЬлз кфл) Ÿфуй
¥уфе нб бƒпмбксµнпнфбй фхчьн
кбфЬлпйƒб кбµуещт ‡ îŸíá
ó¥ìáôá
3) нб бƒпухнбсмплпгеЯфе, нб
кбибсЯжефе кбй нб лбд¥нефе ôïí
мзчбнйумь клеЯуфспх гйб фпхт
Ядйпхт льгпхт
4) нб лбд¥нефе фбкфйкЬ ьлб ôá
фм‡мбфб фпх ьƒлпх ƒпх еЯнбй
екфеиеймŸнб уфзн бфмпуцбйсйк‡
дйЬвсщуз.
Page 81

80
NB: tutte le canne sono cromate inter-
namente.
NOTA: per la pulizia dello strozzato-
re e della relativa sede leggere attentamente il paragrafo “Strozzatore
interno” pag. 118.
Utilizzare sempre il set di pulizia
(non in dotazione con il fucile) e l'olio
Benelli Armi (fig. 28).
NB: all barrels are internally chromium
plated.
NOTE: for maintenance of the choke
and relative seat, carefully read the
instructions in the “Internal choke”
paragraph, page 118.
Use only Benelli Armi cleaning set
(not equipped with shotgun) and oil
(fig. 28).
NB: tous les canons sont chromés à
l’intérieur.
NOTA: avant de nettoyer le choke et
son siège, lire attentivement le paragraphe “Choke intérieur” en p. 118.
Utiliser toujours le set de nettoyage
(qui n’est pas fourni en dotation avec
le fusil) et l’huile Benelli Armi (fig. 28).
NB: Alle Läufe sind innen verchromt.
HINWEIS: Zur Choke-Reinigung und
seines Sitzes aufmerksam den Paragraphen “Wechsel-Choke” Seite 118
lesen.
Immer das Reinigungsset verwenden
(nicht im Lieferumfang des Gewehrs
enthalten) sowie Öl von Benelli Armi
(Abb. 28).
28
Page 82

81
Nota: todos los cañones están croma-
dos por dentro.
NOTA: para la limpieza del choke y
de su alojamiento lea cuidadosamente el punto “Choke interno” pág. 119.
Utilice siempre el juego de limpieza
(no forma parte de la dotación del
fusil) y el aceite Benelli Armi (fig. 28).
NB: todos os canos são cromados
internamente.
NOTA: para a limpeza do choke e
respectiva cama leia atentamente o
parágrafo “Choke interior” pág. 119.
Utilizar sempre o conjunto de limpeza (não fornecido com a espingarda) e
o óleo Benelli Armi (fig. 28).
ПРИМ.: все стволы внутри
хромированы.
ПРИМЕЧАНИЕ: для очистки
сменного чока и его места посадки
внимательно прочитать параграф
“Сменные чоки”, стр. 119.
Для чистки ружья используйте
только оригинальный набор
принадлежностей (не включён в
стандартную комплектацию) и масло
Бенелли (рис. 28).
Х¬ЕНИХМЙУЗ: Œлет пй кЬннет еЯнбй
еƒйчсщмйщмŸнет уфп еущфесйкь фпхт.
УЗМЕЙЩУЗ: Гйб фпн кбибсйумь фпх
фупк кбй фзт Ÿдсбт фпх, дйбвЬуфе
ƒспуечфйкЬ фзн ƒбсЬгсбцп
“Еущфесйкь фупк” ÛÂÏ. 119.
ГЪЛЫИМФФИВ›ЩВ ¿УЩ· ЩФ ЫВЩ
О·ı·ЪИЫМФ‡
(‰ÂÓ ÂÚÈÏ·Ì‚¿ÓÔÓÙ·È ÛÙÔÓ
‚·ЫИОfi ВНФПИЫМfi ЩФ˘ ЩФ˘КВОИФ‡)
Î·È ÙÔ
Ï¿‰È Ù˘ Benelli Armi (ÂÈÎ. 28).
Page 83

82
Smontaggio dell’arma
(per manutenzione e pulizia)
Prima di effettuare qualunque tipo di
intervento sul fucile, accertarsi sempre
che camera di scoppio, elevatore e
serbatoio siano completamente vuoti!
(Leggere attentamente le istruzioni di
caricamento e scaricamento dell'arma).
Procedura di smontaggio
1) Svitare il cappellotto di fissaggio
astina e sfilare l'astina verso l'avanti, lungo il tubo serbatoio (figg.
3-4-5).
Shotgun stripping
(for cleaning and maintenance)
Before starting any operation on your
shotgun, make sure that the chamber,
carrier and the magazine are unloaded! (Carefully read the instructions on
gun loading and unloading).
Stripping procedure
1) Unscrew the fore-end cap and
remove the fore-end making it
slide forward along the magazine
tube (figs. 3-4-5).
Démontage de l’arme
(pour le nettoyage et l’entretien)
Avant d’effectuer n’importe quelle
intervention sur votre fusil, assurezvous toujours que la chambre d’explosion, l'élévateur et le magasin soient
complètement vides! (Lire attentive-
ment les instructions de chargement et
de déchargement).
Marche à suivre pour le
démontage
1) Desserrer le capuchon de fixation
de devant et dégager le devant vers
l’avant, le long du tube de magasin
(figs. 3-4-5).
Zerlegen der Waffe
(für die Reinigung und Wartung)
Vor jeder Waffenhandhabung sollten
Sie sicherstellen, dass die Patronenlager und das Magazin ihres Gewehrs
völlig leer sind! (Bitte lesen Sie auf-
merksam die Anweisungen für das
Laden und das Entladen der Waffe).
Zerlegen
1) Die Befestigungskappe abschrau-
ben und den Vorderschaft entlang
dem Magazinrohr nach vorne
herausziehen (Abb. 3-4-5).
Page 84

83
Desmontaje del arma
(para manutención y limpieza)
Antes de realizar cualquier tipo de
operación en su fusil, asegúrese siempre que la cámara de explosión, el
elevador y el almacén estén completamente vacíos. (Lea atentamente las
instrucciones para la carga y la descarga del arma).
Procedimiento
de desmontaje
1) Destornille el capuchón de fijación
de la varilla y quite la varilla
haciéndola deslizar hacia adelante
a lo largo del tubo almacén (figs.
3-4-5).
Desmontagem da arma
(para manutenção e limpeza)
Antes de efectuar qualquer intervenção na sua arma, assegure-se que
a câmara e o depósito estão vazios.
(Leia atentamente as instruções de
carregar e descarregar da arma).
Procedimento
de desmontagem
1) Desaperte e retire a porca do fuste,
em seguida retire o fuste puxando-
o ao longo do depósito (fig. 3-4-5).
Разборка оружия
(для обслуживания и чистки)
Перед тем, как выполнять любые
операции с Вашим ружьем,
убедитесь, что патронник и магазин
совершенно пустые! (внимательно
прочитайте инструкции по заряжанию
и разряжанию оружия).
Порядок разборки
1) Отвинтите крышку крепления
цевья и снимите цевье по
направлению вперед, вдоль
трубки магазина (рис. 3-4-5).
Бƒпухнбсмпльгзуз фпх ьƒлпх
(гйб ухнф‡сзуз кбй кбибсйумь)
¬сйн ƒсбгмбфпƒпй‡уефе пƒпйбд‡ƒпфе
енŸсгейб, вевбйщиеЯфе ьфй з гл¥ууб, з
иблЬмз кбй з бƒпи‡кз еЯнбй енфел¥т
Ьдейет! (ДйбвЬуфе ƒспуекфйкЬ фйт
пдзгЯет учефйкЬ ме фз гŸмйуз кбй фзн
бƒпгŸмйуз фпх ьƒлпх).
ДйбдйкбуЯб
бƒпухнбсмпльгзузт
1) Оевйд¥уфе фз âßäá ôçò ƒÜƒéáò êáé
бцбйсŸуфе ôçí ƒÜƒéá ôñáâ¥íôáò
ôçí ƒñïò ôá åìƒñüò, êáôÜ ì‡êïò
ôçò áƒïè‡êçò (åéê. 3-4-5).
Page 85

84
2) Impugnare il fucile con una mano
e, con l'altra, aprire l'otturatore
(fig. 29). Se l'otturatore non rimane aperto, agire sulla leva discesa
cartuccia, come indicato dalla
freccia e ripetere l'operazione (fig.
30).
3) Appoggiare il calcio sull'anca ed
afferrare la canna, appena fuori
dal tubo serbatoio.
4) Tirare la canna in avanti sfilando il
gruppo canna-culatta dalla carcas-
sa (fig. 31).
2) Take the gun in one hand and with
the other open the bolt (fig. 29);
should the bolt fail to engage,
move the cartridge drop lever as
arrowed and repeat the operation
(fig. 30).
3) Rest the stock on the hip and grip
the barrel which has moved forward from the magazine tube.
4) Pull the barrel forward to remove
the whole barrel-breech unit from
the receiver (fig. 31).
2) Saisir d’une main le fusil et de
l’autre main ouvrir l’obturateur
(fig. 29). Si l’obturateur ne reste
pas en position d’ouverture, intervenir sur le levier descente car-
touche, de la manière indiquée
par la flèche et répéter l’opération
(fig. 30).
3) Appuyer la crosse sur la hanche et
saisir le canon, juste hors du tube
de magasin.
4) Tirer le canon en avant en déga-
geant le groupe canon-culasse de
la carcasse (fig. 31).
2) Das Gewehr mit einer Hand
festhalten und mit der anderen
Hand den Verschluss öffnen (Abb.
29). Falls der Verschluss nicht offen
bleibt, den Patronenfreigabehebel
wie vom Pfeil angezeigt betätigen
und den Vorgang wiederholen
(Abb. 30).
3) Den Schaft auf die Hüfte stützen
und den Lauf umfassen, sobald
der aus dem Magazinrohr tritt.
4) Den Lauf nach vorne ziehen,
indem die Gruppe Lauf und Lauf-
verlängerung aus dem Gehäuse
gezogen wird (Abb. 31).
29 30
Page 86

85
2) Coja el fusil con una mano y con
la otra abra el obturador (fig. 29).
Si el obturador no se queda en
esta posición, actúe sobre la
palanca de descenso del cartucho
como indica la flecha y vuelva a
repetir la operación (fig. 30).
3) Apoyar la culata sobre la cadera y
sujetar el cañón, apenas afuera del
tubo almacén.
4) Tirar el cañón hacia adelante qui-
tando el grupo cañón-cerrojo de
la carcasa (fig. 31).
2) Empunhar a arma com uma mão
e, com a outra, abrir a culatra (fig.
29). Se o obturador não permanece aberto, accione o cut-off como
indica a seta e repetir a operação
(fig. 30).
3) Apoie a coronha na anca e solte o
cano, penas do tubo do depósito.
4) Retire o cano separando-o da
báscula (fig. 31).
2) Возьмите ружье одной рукой и
другой рукой откройте затвор
(рис. 29). Если затвор не
фиксируется в открытом
положении, воздействуйте на
кнопку отсекателя магазина,
как показано стрелкой, и
повторите операцию (рис. 30).
3) Прислонить приклад к бедру и
взяться за ствол, чуть за
пределами магазина.
4) Вытянуть приклад вперед, снимая
узел ствола-казенника с коробки
(рис. 31)
2) Êñáô‡óôå ôï ôïõöŸêé ìå ôï Ÿíá
чŸсй кбй ме фп Ьллп бнпЯофе ôï
клеЯуфсп (ейк. 29). Бн фп клеЯуфсп
ден ƒбсбмеЯней бнпйчфь, кпхн‡уфе
фпн бƒелехиесщф‡ цхуйггй¥н
ьƒщт хƒпдейкнµей фп вŸлпт кбй
еƒбнблЬвефе фзн енŸсгейб (ейк.
30).
3) Бкпхмƒ‡уфе фп кпнфЬкйп уфпн
мзсь убт, кбй ксбф‡уфе фзн
кЬннз.
4) Tсбв‡офе фзн кЬннз ƒспт фб
емƒсьт гйб нб бƒпмпн¥уефе фзн
кЬннз-ƒЯущ мŸспт кЬннзт бƒь
фпн кпсмь (ейк. 31).
31
Page 87

86
5) Trattenere la manetta di armamento e premere contemporaneamen-
te il bottone comando elevatore
lasciando poi avanzare lentamente
l’otturatore, fino al suo arresto
(figg. 32-33).
6) Togliere la manetta di armamento,
con uno strappo deciso (fig. 34).
7) Estrarre il gruppo otturatore dalla
carcassa facendolo scorrere in
avanti (fig. 35).
5) Take a firm hold of the cocking
lever and simultaneously press the
carrier button, thus allowing the
bolt to move slowly forward until
it stops (figs. 32 and 33).
6) Pull the cocking lever off with a
firm tug (fig. 34).
7) Pull the bolt assembly out of the
receiver, sliding it along its guides
(fig. 35).
5) Retenir fermement la manette
d’armement et presser le bouton
de commande de l’élévateur en
laissant avancer lentement l’obturateur jusqu’à ce qu’à son arrêt
(figs. 32 et 33).
6) Dégager la manette d’armement
avec un coup net (fig. 34).
7) Extraire de la carcasse le groupe
obturateur en le faisant coulisser
en avant sur ses guides de logement (fig. 35).
5) Den Spannhebel festhalten und
gleichzeitig den Verschlussfang-
knopf drücken; dann langsam den
Verschluss bis zum Anschlag nach
vorne gleiten lassen (Abb. 32-33).
6) Den Spannhebel mit einer kräftigen Bewegung herausziehen (Abb.
34).
7) Den Verschlussblock entlang seiner
Führung im Gehäuse nach vorne
herausziehen (Abb. 35).
32 33
Page 88

87
5) Detenga la maneta de armado y
simultáneamente pulse el botón
de mando elevador dejando avanzar lentamente el obturador hasta
su parada (fig. 32 y 33).
6) Quite la maneta de armado de un
solo jalón (fig. 34).
7) Extraiga el grupo obturador de la
carcasa haciéndolo deslizar hacia
adelante (fig. 35).
5) Segure a manette e prima simultaneamente o botão lateral, deixan-
do depois avançar a culatra lentamente, até à posição de fecho
(figg. 32-33).
6) Retire a manette e maneira firme
(fig. 34).
7) Retire o grupo culatra da báscula
fazendo-o deslizar nas suas guias
(fig. 35).
5) Удерживйте рукоятку затвора и
одновременно нажмите на
кнопку затворной задержки, дав
затем медленно продвинуться
вперед затвору до упора (рис. 32 и
33).
6) Извлеките рукоятку затвора
(рис. 34).
7) Выньте затвор из ствольной
коробки, продвинув его вперед
(рис. 35).
5) Êñáô‡óôå фпн мпчль пƒлЯуещт êáé
ƒéŸóôå фбхфьчспнб фп кпхмƒЯ фпх
бнбуфплŸб. Бц‡уфе фп клеЯуфсп
нб мефбкйнзиеЯ ƒспт фб емƒсьт
мŸчсй нб уфбмбф‡уей (ейк. 32-33).
6) БцбйсŸуфе фп мпчль пƒлЯуещт ме
мйб гс‡гпсз кй бƒпцбуйуфйк‡
кЯнзуз (ейк. 34).
7) Tñáâ‡îôå фпн мзчбнйумь фпх
клеЯуфспх ƒспт фб емƒсьт,
глйуфс¥нфбт фпн уфпхт
пдзгпµт фпх кпсмпµ (ейк. 35).
34
35
Page 89

88
8) Sfilare il perno arresto percussore dal gruppo otturatore, avendo
cura di trattenere il percussore e
la sua molla di richiamo (fig. 36).
9) Estrarre dall’otturatore il percus-
sore con la sua molla di richiamo
(fig. 37).
10) Togliere il perno rotazione testa
di chiusura sfilandolo dalla sua
sede (fig. 38).
11) Sfilare la testa di chiusura dall’ot-
turatore (fig. 39).
8) Remove the firing pin retaining
pin from the bolt assembly, while
holding the firing pin and firing
pin spring in place (fig. 36).
9) Remove the firing pin and firing
pin spring from the bolt (fig. 37).
10) Remove the locking head rotating
pin from its seat (fig. 38).
11) Remove the bolt locking head
from the bolt (fig. 39).
8) Retirer le pivot d’arrêt du percu-
teur de l'ensemble obturateur en
ayant soin de retenir le percuteur
et son ressort de rappel (fig. 36).
9) Extraire de l’obturateur le percu-
teur avec son ressort de rappel
(fig. 37).
10) Retirer le pivot de rotation de la
tête de fermeture en le dégageant
de son siège (fig. 38).
11) Extraire la tête de fermeture de
l’obturateur (fig. 39).
8) Den Befestigungsstift des Schlag-
bolzens aus dem Verschlussblock
herausziehen. Dabei mit Sorgfalt
den Schlagbolzen und dessen
Spannfeder zurückhalten (Abb.
36).
9) Den Schlagbolzen mit der Spann-
feder aus dem Verschluss herausziehen (Abb. 37).
10) Den Drehzapfen des Verschluss-
kopfes aus seinem Sitz herausziehen (Abb. 38).
11) Den Verschlusskopf aus dem Ver-
schluss herausziehen (Abb. 39).
36 37
Page 90

89
8) Quite el eje de parada del percutor del grupo obturador, reteniendo el percutor y su resorte anta-
gonista (fig. 36).
9) Extraiga del obturador el percutor
y su resorte antagonista (fig. 37).
10) Quite el eje de rotación de la
cabeza de cierre sacándolo de su
alojamiento (fig. 38).
11) Quite la cabeza de cierre del
obturador (fig. 39).
8) Retire o troço final da culatra,
tendo o cuidado de segurar o
percutor e respectiva mola (fig.
36).
9) Retire da culatra o percutor e a
mola do mesmo (fig. 37).
10) Retire o perne rotativo da cabeça
da culatra (fig. 38).
11) Retire da culatra a cabeça rotati-
va (fig. 39).
8) Снимите фиксатор бойка с
затвора, помня о необходимости
удерживать боек и его пружину
(рис. 36).
9) Извлеките боек из затвора
вместе с его пружиной (рис. 37).
10) Снимите шпильку фиксации
личинки затвора, вынув ее из
гнезда (рис. 38).
11) Извлеките личинку затвора
(рис. 39).
8) БцбйсŸуфе фпн ƒеЯсп фпх
еƒйкспхуф‡сб бƒь фп клеЯуфсп
ухгксбф¥нфбт ƒспуечфйкЬ фпн
еƒйкспхуф‡сб кбй фп елбф‡сйп
еƒбнбцпсЬт фпх (ейк. 36).
9) БцбйсŸуфе бƒь фп клеЯуфсп фпн
еƒйкспхуф‡сб êáé ôï åëáô‡ñéï
еƒбнбцпсЬт ôïõ (åéê. 37).
10) БцбйсŸуфе ôïí ƒåßñï фзт кецбл‡т
фпх клеЯуфспх фсбв¥нфбт фпн бƒь
фз иŸуз фпх (ейк. 38).
11) БцбйсŸуфе фзн кецбл‡ клеЯуфспх
бƒь фп клеЯуфсп (ейк. 39).
38 39
Page 91

90
12) Togliere la molla di rinculo ottu-
ratore dalla sua sede (fig. 40).
13) Sfilare dal gruppo calcio-carcassa
la spina arresto guardia, spingendola da destra o da sinistra con la
punta del percussore stesso o con
un punteruolo qualunque (fig. 41).
14) Premere il bottone comando ele-
vatore e sfilare in avanti il gruppo
guardia (fig. 42).
Il fucile è completamente smontato; le
parti che necessitano un’accurata verifica e pulizia sono ora smontate.
12) Remove the recoil spring from its
seat in the bolt (fig. 40).
13) Extract the trigger guard pin from
the stock-receiver unit, thrusting
it from right or left with the point
of the same firing pin or punch
(fig. 41).
14) Press the carrier button and ex-
tract the trigger guard assembly
towards the front (fig. 42).
The shotgun is now completely
stripped. All the parts that require routine maintenance and cleaning are
disassembled.
12) Retirer de son siège le ressort de
recul de l'obturateur (fig. 40).
13) Retirer du groupe crosse-carcasse
la goupille d’arrêt de la sous-garde en la poussant de la droite ou
de la gauche avec la pointe du
percuteur même ou avec un pointeau quelconque (fig. 41).
14) Appuyer sur le bouton de com-
mande élévateur et dégager vers
l’avant le groupe sous-garde (fig.
42).
Le fusil est complètement démonté:
les parties qui doivent être vérifiées et
nettoyées sont toutes séparées maintenant.
40 41
12) Die Inertial-Feder des Verschlus-
ses aus ihrem Sitz herausnehmen
(Abb. 40).
13) Aus der Gruppe Schaft - Gehäuse
den Arretierstift der Abzugs-
einheit von der rechten oder der
linken Seite her entfernen. Zum
Heraustreiben den Kopf des
Schlagbolzens oder einen geeigneten Stift benutzen (Abb. 41).
14) Den Verschlussfangknopf drücken
und die komplette Abzugsgruppe
nach vorn entnehmen (Abb. 42).
Das Gewehr ist nun komplett zerlegt.
Die Teile, die einer Wartung oder
einer Reinigung bedürfen liegen nun
separat bereit.
Page 92

91
12) Quite el resorte de retroceso del
obturador de su alojamiento (fig.
40).
13) Quite del grupo culata-carcasa la
espiga de parada del guardamonte, empujándola desde la derecha
o la izquierda con la punta del
mismo percutor o con un punzón
(fig. 41).
14) Pulse el botón de mando del ele-
vador y deslice hacia adelante el
grupo guardamonte (fig. 42).
El fusil está completamente desmontado; las partes que necesitan una verificación cuidadosa y una limpieza están
separadas.
12) Retire de seu alojamento a mola
de recuo da culatra (fig. 40).
13) Retire do grupo coronha-báscula
o perne do guarda mato, empurrando-o da direita para a esquerda com a ponta do percutor ou
com um punção (fig. 41).
14) Prima o botão lateral e retire o
grupo guarda-mato (fig. 42).
A arma está completamente desmontada: as partes que podem interessar
para uma cuidada verificação e limpeza estão todas separadas.
12) Снимите инерционную пружину
затвора из гнезда (рис. 40).
13) Выньте из ствольной коробки
шпильку фиксации ударноспускового механизма, толкая
ее слева или справа выколоткой
(рис. 41).
14) Нажмите на кнопку затворной
задержки и снимите, толкая
вперед, ударно-спусковой
механизм (рис. 42).
Ружье полностью разобрано; детали,
которые требуют тщательной проверки
и чистки, теперь разобраны.
12) БцбйсŸуфе фп елбф‡сйп
еƒбнбцпсЬт фпх клеЯуфспх бƒь
фз иŸуз фпх уфп клеЯуфсп (ейк. 40).
13) БцбйсŸуфе бƒь фзн пмЬдб
кпнфЬкйп - кпсмьт фпн ƒеЯсп фзт
укбндблпи‡кзт уƒс¥чнпнфбт
фпн бƒь фб бсйуфесЬ ‡ бƒь фб
деойЬ ме фз мµфз фпх еƒйкспхуф‡сб ‡ ме Ÿнб пƒпйпд‡ƒпфе Ьллп
мхфесь бнфйкеЯменп (ейк. 41).
14) ¬йŸуфе фп кпхмƒЯ фпх бнбуфплŸб
êáé ôñáâ‡îôå ƒспт фб емƒсьт фп
мзчбнйумь укбндЬлзт (ейк. 42).
Фп фпхцŸкй бƒпухнбсмплпг‡изке.
%λα τα εξαρτµατα που χρειζονται
καθαρισµ και συντρηση εναι πλον
αποσυναρµολογηµνα.
42
Page 93

92
Montaggio dell’arma
Per un corretto montaggio dell'arma,
procedere nel seguente ordine:
1) Impugnare il gruppo calcio-car-
cassa e, premere il bottone comando elevatore, inserendo contemporaneamente il gruppo guar-
dia completo, a cane armato, nella carcassa in posizione leggermente avanzata rispetto alla posizione finale di montaggio; arretrare poi leggermente tutto il gruppo
guardia fino a portarlo in battuta
sulla parte posteriore della carcassa stessa (fig. 43).
Shotgun assembly
For correct assembly after cleaning
and maintenance operations, proceed
as follows:
1) Grip the stock-receiver group: press
the carrier button so that the whole
protection cover unit is simultaneously fitted into the receiver
(hammer must be cocked) and is
kept in a slightly advanced position compared to its final position.
Slightly withdraw the whole protection cover until it is wedged against
the back end of the receiver (fig.
43).
Remontage de l’arme
Pour remonter l’arme correctement
suivre la marche ci-dessous:
1) Saisir le groupe crosse-carcasse et
appuyer sur le bouton de commande élévateur, en introduisant
en même temps le groupe sous-
garde complet - chien armé dans
la carcasse en position légèrement
avancée par rapport à la position
finale de montage. Faire reculer
légèrement tout le groupe de la
sous-garde jusqu'à le faire buter
sur la partie arrière de la carcasse
même (fig. 43).
Zusammenbauen der Waffe
Die Waffe wird auf folgende Weise
korrekt zusammengebaut:
1) Die Gruppe Hinterschaft mit Ge-
häuse umfassen, den Verschlussfangknopf drücken und dabei
gleichzeitig die komplette Abzugs-
gruppe, mit gespanntem Schlagstück, in das Gehäuse einsetzen,
die Position sollte etwas weiter
vorne sein als die definitive Montagestellung, dann die gesamte Abzugsgruppe leicht nach hinten bis
zum Anschlag an den hinteren Teil
des Gehäuses selbst verschieben
(Abb. 43).
43
Page 94

93
Montaje del arma
Para el correcto montaje del arma
proceda en el siguiente orden:
1) Coja el grupo culata-carcasa y pul-
se el botón de mando del elevador
introduciendo al mismo tiempo el
grupo guardamonte completo,
con el martillo armado, en la carcasa, en posición ligeramente
avanzada respecto a la posición
final del montaje; haga retroceder
un poco todo el grupo guardamonte hasta que tope en la parte
posterior de la misma carcasa (fig.
43).
Montagem da arma
Para montar a arma corretamente,
proceda da seguinte forma:
1) Segure o grupo coronha-báscula e,
prima o botão lateral, inserindo o
grupo guarda-mato completo,
(com o cão armado), na báscula
numa posição ligeiramente avançada respeitando a posição final
de montagem; recuar depois ligeiramente todo o grupo guarda-mato
até que faça um ligeiro click,
sobre a parte posterior da báscula
(fig. 43).
Сборка ружья
Для правильной сборки ружья,
действуйте в указанной
последовательности:
1) Возьмите в руку узел приклад-
ствольная коробка и нажмите на
кнопку затворной задержки
одновременно вставляйтее
собранный ударно-спусковой
механизм со взведенным
курком в ствольную коробку в
слегка продвинутом вперед
положении, затем слегка отведите
назад ударно-спусковой механизм
весь блок УСМ до его фиксации в
ствольной коробке (рис. 43).
Ухнбсмпльгзуз фпх ьƒлпх
Гйб нб ухнбсмплпг‡уефе ущуфЬ фп
фпхцŸкй, бкплпхиеЯуфе фб ƒбсбкЬфщ
в‡мбфб:
1) ¬Ьсфе уфп чŸсй фзн пмЬдб
кпнфЬкйп-кпсмьт, ƒйŸуфе ôï êïõìƒß
фпх бнбуфплŸб кбй чщсЯт нб фп
бц‡уефе вЬлфе фз укбндблпи‡кз
ме пƒлйумŸнп фпн кькпсб уфпн
кпсмь, лЯгп ƒйп мƒспуфЬ бƒь фзн
фелйк‡ фзт иŸуз. Tсбв‡офе
елбцс¥т ƒспт фб ƒЯущ фзн
укбндблпи‡кз щуьфпх уцзн¥уей
уфп ƒЯущ мŸспт фпх кпсмпµ (ейк.
43).
Page 95

94
2) Infilare da destra o da sinistra la
spina arresto guardia fermandola
quando si trova completamente
inserita nella carcassa (fig. 44).
3) Infilare la molla rinculo otturatore
nella propria sede (fig. 45).
ATTENZIONE: accertarsi di collocare
sempre la molla di rinculo dell'ottura-
tore tra testa di chiusura ed otturatore stesso, per evitare che - nella fase
di chiusura - possa partire il colpo.
2) Push the trigger guard pin into the
receiver from the right or left, until
it is completely inside (fig. 44).
3) Slide the bolt recoil spring into its
appropriate position (fig. 45).
NOTE: always make sure that the bolt
recoil spring is positioned between
the locking head and the bolt itself, in
order to avoid a shot being fired
during the closing phase.
2) Introduire, par la droite ou par la
gauche, la goupille d’arrêt de la
sous-garde et ne s’arrêter que lorsqu’elle aura été entièrement introduite sur la carcasse (fig. 44).
3) Introduire le ressort de recul de
l'obturateur dans son logement (fig.
45).
ATTENTION: s’assurer que le ressort
de recul de l’obturateur soit toujours
placé entre la tête de fermeture et
l’obturateur pour éviter le risque
qu’un coup puisse partir par mégarde
durant la fermeture.
2) Den Befestigungsstift des Abzugs
von rechts oder links einschieben
und fixieren, nachdem er vollständig in das Gehäuse eingesteckt
wurde (Abb. 44).
3) Die Inertial-Feder des Verschlusses
in ihren Sitz einführen (Abb. 45).
ACHTUNG: stets prüfen, ob die Iner-
tialfeder auch zwischen dem Versch-
lusskopf und dem Verschlussblock eingesetzt wurde, um beim Verriegeln
eine ungewollte Schussabgabe zu ver-
meiden!
44
Page 96

95
2) Introduzca desde la derecha o la
izquierda la espiga de parada del
guardamonte fijándola cuando se
encuentre completamente introducida en la carcasa (fig. 44).
3) Introduzca el resorte de retroceso
del obturador en su alojamiento
(fig. 45).
ATENCIÓN: asegúrese siempre de
colocar el resorte de retroceso del
obturador entre la cabeza de cierre y
el obturador mismo, para evitar que
en fase de cierre pueda partir un tiro.
2) Introduza, pela direita ou pela
esquerda, o perne de fixação do
guarda-mato e complete a montagem do grupo guarda-mato inserindo-o completamente na bascula (fig. 44).
3) Introduza a mola do interior do
bloco da culatra (fig. 45).
ATENÇÃO: assegure-se sempre que
não esqueceu de colocar a mola do
interior do bloco da culatra para evi-
tar que na fase de fecho, haja um
disparo permaturo.
2) Вставьте справа или слева шпильку
фиксации ударно-спускового
механизма (рис. 44).
3) Установите инерционную
пружину в собственное гнездо
(рис. 45).
ВНИМАНИЕ: проверьте, что
инерционная пружина затвора
находится между личинкой затвора
и самим затвором, для того, чтобы
избежать случайного выстрела во
время закрытия затвора.
2) Уƒс¥офе бƒь фб бсйуфесЬ ‡ бƒь фб
деойЬ ôïí ƒåßñï фзт укбндблпи‡кзт
мŸчсй нб ейучщс‡уей енфел¥т уфпн
кпсмь (ейк. 44).
3) Ôïƒïèåô‡óôå ôï åëáô‡ñéï
еƒбнбцпсЬт фпu клеЯуфспх уфз
иŸуз фпu (ейк. 45).
¬ÑÏÓϱÇ: ВевбйщиеЯфе ьфй
фпƒпиеф‡убфе фп елбф‡сйп еƒбнбцпсЬт
фпх клеЯуфспх бнЬмеуб уфзн кецбл‡
клеЯуфспх кбй уфп Ядйп фп клеЯуфсп
ãéá áƒïöµãåôå ôçí ƒйибньфзфб
екƒхсупксьфзузт кбфЬ фп клеЯуймп.
45
Page 97

96
4) Prendere la testa di chiusura ed
infilarla nell’otturatore avendo cura che il foro sul suo gambo colli-
mi con l’asola dell’otturatore stesso (fig. 46).
AVVERTENZA: i piani inclinati ricava-
ti sul gambo della testa di chiusura
non devono essere visibili a pezzo
montato.
5) Infilare il perno rotazione testa di
chiusura nel foro ricavato sul gambo della testa di chiusura, facendolo passare attraverso l’asola dell’otturatore (fig. 47).
4) Slide the locking head into the
bolt, making sure that the hole on
its stem coincides with the slot on
the bolt (fig. 46).
WARNING: the slanted surfaces on
the locking head’s stem should not be
visible once the bolt locking head is
mounted.
5) Insert the locking head pin in its
hole on the locking head’s stem,
through the slot on the bolt (fig.
47).
4) Introduire la tête de fermeture
dans l’obturateur, en faisant coïncider le trou de son devant avec la
boutonnière de l’obturateur (fig.
46).
ATTENTION: les plans inclinés obte-
nus sur le devant de la tête de fermeture ne doivent pas être visibles lorsque la pièce est montée.
5) Engager l’axe de rotation de la tête
de fermeture dans son logement
sur la tête, en le faisant passer à
travers la boutonnière de l’obturateur (fig. 47).
4) Den Verschlusskopf in den Versch-
lussblock einschieben und darauf
achten, dass die Bohrung am
Stamm des Verschlusskopfes mit
der entsprechenden Ausfräsung des
Verschlussblockes übereinstimmt
(Abb. 46).
VORSICHT: Die geneigten Ebenen am
Stamm des Verschlussblocks dürfen
nach der Montage nicht sichtbar sein.
5) Den Drehzapfen des Verschluss-
kopfes durch die Ausfräsung im
Verschlussblock in die vorgesehene Bohrung im Stamm des Verschlusskopfes stecken (Abb. 47).
46
Page 98

97
4) Coja la cabeza de cierre e intro-
dúzcala en el obturador, cuidando
que el agujero que lleva en el
vástago coincida con el ojal del
obturador mismo (fig. 46).
ADVERTENCIA: los planos inclinados
que se encuentran en el vástago de la
cabeza de cierre no se deben ver
cuando la pieza está montada.
5) Introduzca el eje de rotación de la
cabeza de cierre en el agujero de
alojamiento que se encuentra en
el vástago de la misma, pasándolo
por el ojal del obturador (fig. 47).
4) Pegue na cabeça da culatra e
introduza-a no bloco da culatra,
respeitando a incidência do furo
com o rasgo do pino rotativo (fig.
46).
ADVERTÊNCIA: os planos inclinados
da cabeça rotativa não devem estar
visíveis.
5) Coloque o perne rotativo na cula-
tra, fazendo coincidir o seu furo
com a ranhura (fig. 47).
4) Установите личинку в тело
затвора так, чтобы отверстие на
ее стебле совпадало с прорезью
самого затвора (рис. 46).
ПРЕДУПРЕЖДЕНИЕ: наклонные
поверхности на стебле личинки, не
должны быть видны когда она
установлена в тело затвора.
5) Вставьте шпильку фиксации
личинки затвора в отверстие,
имеющееся в стебле, пропустив ее
через прорезь затвора (рис. 47).
4) Ôïƒïèåô‡óôå ôçí кецбл‡ фпх
клеЯуфспх уфп клеЯуфсп
ƒспуŸчпнфбт нб ухмƒŸуей ç 
ôïõ óôåëŸ÷ïõò ôçò ме фзн учйум‡
ƒЬнщ уфп Ядйп фп клеЯуфсп (ейк. 46).
¬СПЕЙДП¬ПЙЗУЗ: ÌåôÜ ôçí
ƒспубсмпг‡ фзт кецбл‡т клеЯуфспх,
äåí ƒñŸƒåé нб еЯнбй псбфŸт пй еƒйклйнеЯт
еƒйцЬнейет фпх уфелŸчпхт фзт.
5) ¬спубсмьуфе ôïí ƒåßñï фзт
кецбл‡т уфзн ейдйк‡ пƒ‡ фпх
уфелŸчпхт фзт ƒесн¥нфбт фпн
бƒь фз учйум‡ фпх клеЯуфспх (ейк.
47).
47
Page 99

98
ATTENZIONE: la linea di riferimento
marcata sull'estremità del perno deve
essere in vista e allineata con l'asse
longitudinale del gruppo otturatore
(fig. 47).
6) Inserire il percussore con la sua
molla nel foro nell’otturatore (fig.
48).
ATTENZIONE: accertarsi di aver mon-
tato sempre la molla del percussore.
7) Inserire il perno arresto percusso-
re nel suo foro, in modo che blocchi il percussore (fig. 49).
NOTE: the reference line on top of
the pin must be visible and aligned
with the bolt assembly longitudinal
axis (fig. 47).
6) Insert the firing pin and the firing
pin spring inside the bolt hole (fig.
48).
NOTE: always make sure that the fir-
ing pin spring has been mounted.
7) Insert the firing pin retaining pin
in its seat, so as to block the firing
pin (fig. 49).
ATTENTION: la ligne de référence
marquée sur l’extrémité de l’axe doit
être visible et alignée avec l’axe longi-
tudinal du groupe obturateur (fig. 47).
6) Introduire le percuteur avec son
ressort dans le trou de l'obturateur
(fig. 48).
ATTENTION: assurez-vous que vous
avez toujours monté le ressort du per-
cuteur.
7)
Introduire le pivot d’arrêt
du percuteur dans son logement de manière à ce qu’il bloque le percuteur (fig. 49).
ACHTUNG: Der am Zapfenende
markierte Strich muss sichtbar sein
und nach der Längsachse des Verschlussblockes ausgerichtet sein (Abb. 47).
6) Den Schlagbolzen zusammen mit
der Schlagbolzenfeder in den Verschlussblock einsetzen (Abb. 48).
ACHTUNG: Stets prüfen, ob der Schlag-
bolzen zusammen mit der Schlagbolzenfeder eingebaut ist.
7) Den Fixierstift des Schlagbolzens
in die vorgesehene Bohrung einsetzen, um ihn somit zu blockieren
(Abb. 49).
48
Page 100

99
ATENCIÓN: la línea de referencia
marcada en la extremidad del eje
debe estar a la vista y alineada con el
eje longitudinal del grupo obturador
(fig. 47).
6) Introduzca el percutor con su re-
sorte en el agujero de alojamiento
que se encuentra en el obturador
(fig. 48).
ATENCIÓN: asegúrese siempre de
haber montado el resorte del percutor.
7) Introduzca el eje de parada del
percutor en su agujero de alojamiento de manera que detenga el
percutor (fig. 49).
ATENÇÃO: a linha de referência mar-
cada numa das extremidades do perne deve ficar à vista e alinhada com a
culatra (fig. 47) e indica o sentido do
orifício do percutor.
6) Coloque o percutor e a sua mola
no orifício da culatra (fig. 48).
ATENÇÃO: certifique-se sempre que
colocou a mola juntamente com o
percutor.
7) Insira o troço final do percutor no
respectivo furo perpendicular, de
modo a deixá- lo bloqueado (fig.
49).
ВНИМАНИЕ: линия, маркированная
на конце шпильки, должна быть
видна и выровнена по продольной
оси узла затвора (рис. 47).
6) Вставьте боек с его пружиной в
отверстие затвора (рис. 48).
ВНИМАНИЕ: убедитесь в том, что
пружина бойка установлена.
7) Вставьте фиксатор бойка в
отверстие так, чтобы он блокировал
боек (рис. 49).
¬ÑÏÓϱÇ: З гсбмм‡ бнбцпсЬт уфзн
Ьксз фпх ƒеЯспх ƒсŸƒей нб еЯнбй
псбф‡ кбй ехихгсбммйумŸнз ме фпн
еƒйм‡кз Ьопнб фпх клеЯуфспх (ейк.
47).
6) Ôïƒïèåô‡óôå ôïí еƒйкспхуф‡сб
ме фп елбф‡сйп фпх уфзн пƒ‡ фпх
клеЯуфспх (ейк. 48).
¬ÑÏÓϱÇ: ВевбйщиеЯфе ьфй ден
Ÿчефе оечЬуей фп елбф‡сйп фпх
еƒйкспхуф‡сб.
7) Ôïƒïèåô‡óôå фпн ейдйкь ƒеЯсп
уфзн пƒ‡ Ÿфуй ¥уфе нб
уфбиеспƒпй‡уей фпн еƒйкспхуф‡сб
(ейк. 49).
49
 Loading...