

Belling XOU592, XOU593 Installation And User Instructions Manual
Build Under
Double Oven
XOU592
XOU593
INSTALLATION AND USER INSTRUCTIONS
Retention of this instruction Book
This Instruction Book must be kept handy for reference as it contains important
details on the safe and proper use of the appliance.
If you sell or pass the appliance to someone else, or move house and leave it behind,
make sure this Book is also provided so the new owner can become familiar with
the appliance and safety warnings.

Contents
Introduction............. .....................................................................................................................................................3
For your own safety – Always.....................................................................................................................................4
– Never....................................................................................................................................5
Installation Instructions (incl. Electrical Installation).....................................................................................6
Know Your Oven.............................................................................................................................................................10
The Controls .....................................................................................................................................................................11
Oven Timer Operation.................................................................................................................................................12
Grilling ................................................................................................................................................................................18
Top Oven Cookery Notes ...........................................................................................................................................21
Main Oven – Fan Oven Cookery Notes................................................................................................................23
The Economy Setting...................................................................................................................................................24
Temperature Conversion Scale...............................................................................................................................26
Oven Temperature Charts.........................................................................................................................................27
Care and Cleaning .........................................................................................................................................................29
Is There Something Wrong With Your Cooker? ..............................................................................................32
Service................................................................................................................................................................Back Cover
2

Thank you for purchasing a new Belling built-under oven unit. Its stylish
and practical design will enhance your kitchen and make Cooking a
pleasure. It features a fan oven, a top oven, and a dual power grill. There is
also an electronic auto timer featuring a minute minder.
Even if you have used an electric cooker before, it is important
that you read this book thoroughly before starting to cook, paying particular attention to the installation and safety instructions.
If you have any problems with installing, operating, or cooking
with your Belling Oven, please check through the relevant
instructions thoroughly to make sure that you have not missed
anything. If you still need help, then please write to the following
address (including a daytime telephone number if possible):
Consumer Relations Department
Belling Appliances Ltd.
Talbot Road
Mexborough
South Yorkshire
S64 8AJ
Tel: 01709 579902
Details of how to contact a Belling Approved Service Agent,
should your oven ever require maintenance, can be found in the
‘Service’ section of this book.
Please quote the oven unit model and serial number with all
enquiries. This can be found on the rating plate on the oven frame.
For your own safety, make sure that all the instructions contained
in this book on installation, use and maintenance are followed.
We advise you to keep these instructions in a safe place for
future reference.
If you sell or transfer ownership of this product, please pass on
these instructions to the new owner.
This appliance conforms to EN55014 regarding suppression of Radio and
Television reception interference.
After unpacking your cooker, make sure that you remove all the packing
from the oven and grill and any stickers from the oven/grill door.
Your Belling
Formula Built-in
Oven
Unpacking
Introduction
3

When used properly your Belling oven is completely safe but as with
any electrical product there are certain precautions that must be
observed.
PLEASE READ THE PRECAUTIONS BELOW BEFORE USING YOUR
APPLIANCE.
● Always make sure you remove all packing from inside the
oven/grill before switching on for the first time.
● Always make sure you understand the controls prior to using
the appliance.
● Always keep children away from the appliance when grilling
as the surfaces will get extremely hot during and after use.
● Always make sure all controls are turned off when you have
finished cooking and when not in use.
● Always stand back when opening an oven door to allow any
build up of steam or heat to disperse.
●
Always use dry good quality oven gloves when removing items
from the oven/grill.
●
Always take care to avoid heat/steam burns when operating the
controls.
● Always turn off the electricity supply at the wall switch before
cleaning and allow the appliance to cool.
●
Always make sure the shelves are in the correct position before
switching on the oven/grill.
● Always keep the oven and grill doors closed when the appliance is
not
in use.
● Always take care when removing utensils from the top oven when
the main oven is in use, as the contents may be hot.
● Always keep the appliance clean, as a build up of grease or fat
from cooking can cause a fire.
●
Always follow the basic principles of food handling and hygiene
to prevent the possibility of bacterial growth.
● Always keep ventilation slots clear of obstructions.
● Always refer servicing to a qualified appliance service engineer.
Always ..
For Your Own Safety
4

● Never leave children unsupervised where a cooking appliance
is installed as all surfaces will be hot during and after its use.
● Never allow anyone to sit or stand on any part of the appliance.
●
Never store items above the appliance that children may attempt
to reach.
● Never remove the oven shelves whilst the oven is hot.
● Never heat up unopened food containers as pressure can build
up causing the container to burst.
● Never store chemicals/food stuffs, pressurised container in or
on the appliance, or in cabinets immediately above or next to
the appliance.
● Never operate the grill with the door closed as this will cause the
appliance to overheat.
● Never use the appliance as a room heater.
● Never use the grill to warm plates.
● Never dry any items on the oven doors.
● Never install the appliance next to curtains or other soft
furnishings.
● Never allow children to play with the appliance controls.
● Never line the shelves, the floor or the sides of the oven or grill with
aluminium foil, as overheating and damage may result.
● Never install on a platform.
● During use, the oven becomes hot. Care should be taken to avoid
touching heating elements inside the oven.
Never ..
For Your Own Safety
5
To minimise the risk of injury to children please dispose of your product
carefully and safely. Remove all doors and lids (where fitted). Remove the
mains cable (where fitted) by cutting off flush with the appliance and
always ensure that no plug is left in a condition where it could be
connected to the electricity supply.
To help the environment Local Authority instructions should be followed
for the disposal of your product.
Disposal of your
product

This equipment is designed specifically for domestic purposes
and Belling Appliances Limited cannot accept responsibility if used in any
other type of installation.
This appliance must not be installed over any appliance that
generates heat.
Before you cook for the first time, we recommend that you switch on each
element in turn to burn off any odours remaining from manufacture.
Simply operate the grill on maximum for a few minutes, and the oven for
about 30 mins.
For your own safety, we recommend that your cooker is installed by a
qualified electrician. The cooker should be installed in accordance
with the latest Edition of the IEE Regulations.
WARNING:– THIS APPLIANCE MUST BE EARTHED.
THE INSTALLER MUST check that the voltage shown at the rating plate
corresponds with the house electricity supply.
The oven must be supplied via a suitable double pole isolating switch,
having a contact separation of at least 3mm in all poles placed in a readily
accessible position adjacent to the unit.
If the oven is to be wired into a connector unit this may be positioned
behind the oven provided the following requirements are met:
i) The connector unit must not project from the wall more than 25mm.
ii) The top of the connector must not be more than 130mm above floor
level.
Remove the terminal cover at the rear base of the oven. Pass the cable
through the cable clamp and connect to the appropriate
terminals provided. Allow sufficient cable so that the oven can be set
down on the floor whilst still connected up. Tighten the screws on the
cable clamp and replace the terminal cover. Make mains connections.
This appliance conforms to B.S. EN 55014 regarding suppression of Radio
and Television reception interference.
Where a double oven is used a 32 amp double pole control switch should
be used to feed the unit using a suitable rated cable. We recommend that
a minimum of 4mm2PVC insulated twin and earth cable conforming to
B.S. 6004. Where a hob is fitted adjacent to an oven then a 45 amp Double
Pole control switch should be used to feed both units via separate suitably
rated cables. We recommend that a minimum of 4mm2PVC insulated twin
and earth cable conforming to B.S. 6004.
In all cases adhere to routing details (see Fig.5).
Important
Before Cooking
Electrical
Requirements
Electrical
Connections
Installation Instructions
6
Note: Due to many different types of installation, a mains cable is
not supplied with this product. The installer will fit the correct type
and length of cable.
Installation Instructions
7
The appliance is designed for mounting on a floor between two adjacent
cabinets. The cabinets must be securely fixed to the wall and the
appliance securely fixed to the cabinets.
Warning: This appliance must be earthed.
Note: This cooker must not be fitted on a platform.
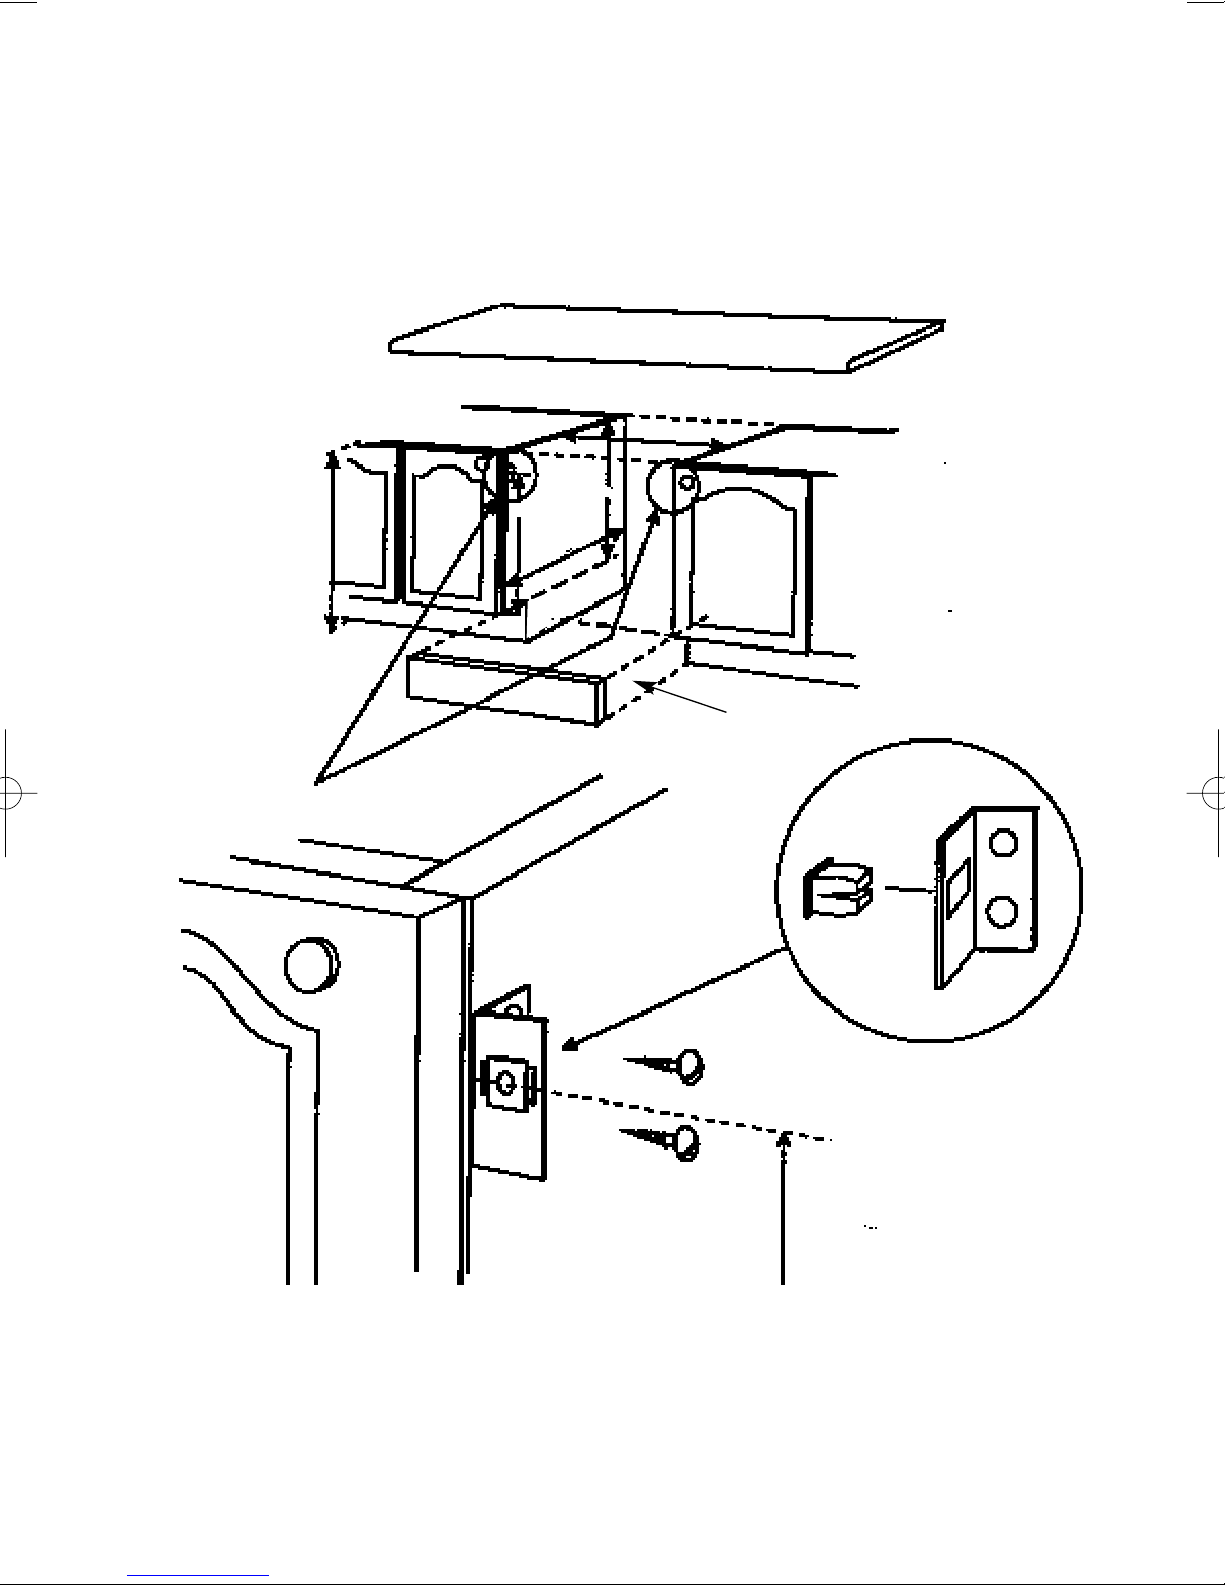
a. Ensure that the adjacent cabinets and the gap between them have
dimensions in accordance with the diagram.
b. Assemble the plastic plugs provided into the fixing brackets. See
diagram.
c. Fix the fixing brackets to the sides of the adjacent cabinets so that the
centre line of the brackets are 565mm above the top of the plinth line
and the front face of the plastic plug is level with the front face of the
cabinet sides. See diagram.
d. Adjust the feet on the cooker to their minimum position, i.e. fully
screwed in.
e. Slide the cooker centrally into the space between the cabinets
ensuring the following:
i) The gap between the cabinet sides and the cooker is even along
the length of the cabinet sides.
ii) The cable is routed away from any vents in the rear panel and is not
trapped between the cooker and the wall, adjacent cabinets or under
the feet
f. Adjust the feet using an open ended spanner until the bottom of the
cooker door is in line with the top of the plinth. Using a spirit level,
check that the cooker is level in all directions.
g. Check that the plinth can be fitted. If necessary re - adjust the feet and
check that the cooker is level.
h. Open the top oven door and fix the cooker to the brackets through
the holes in the side trims.
i. Fix the plinth in position.
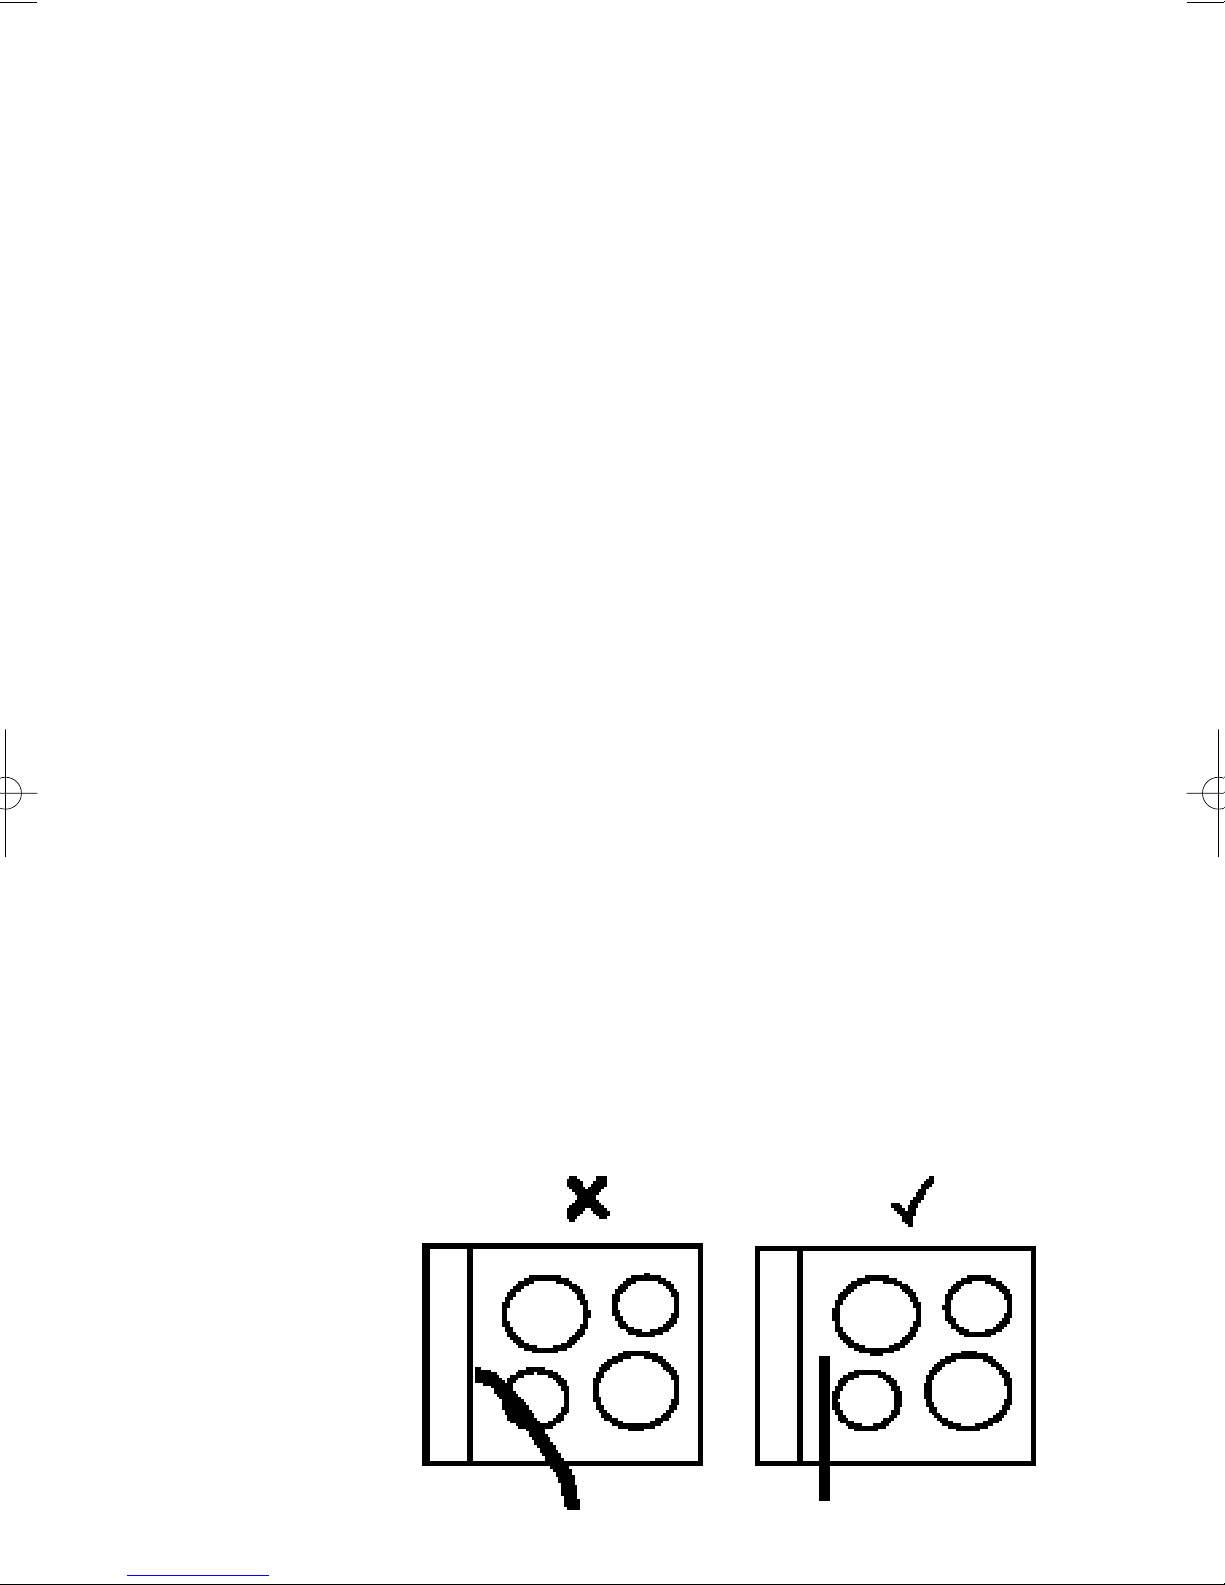
j. Ensure that there is a minimum gap of 1mm between the cooker side
trim and the adjacent cabinet doors or drawer fronts.
k. If a hob is to be installed directly above the cooker it must not project
downwards more than 20mm below the underside of the work top.
Any projection of more than 10mm must not project more than
500mm from the wall.
1. General
2. Final
Installation
Installation Instructions
8
A minimum distance of 25mm should be maintained between the front
face of the cabinet side and the front face of the plinth.
890mm Max
870mm Min
597mm min
720mm min
150mm min
170mm max
565mm
to top of plinth
570 min
565mm
Installation Instructions
9
Wall
Fixing Bracket
Cabinet Doors
Cooker
2.5mm
2 85o
C
heat resistant cable to
BS 6141 Table 15
Cable size to suit
current
rating of
appliance/s
Hob Cable
Double pole control
switch
Connector
box
4mm
2
Cable
Top View
1mm min
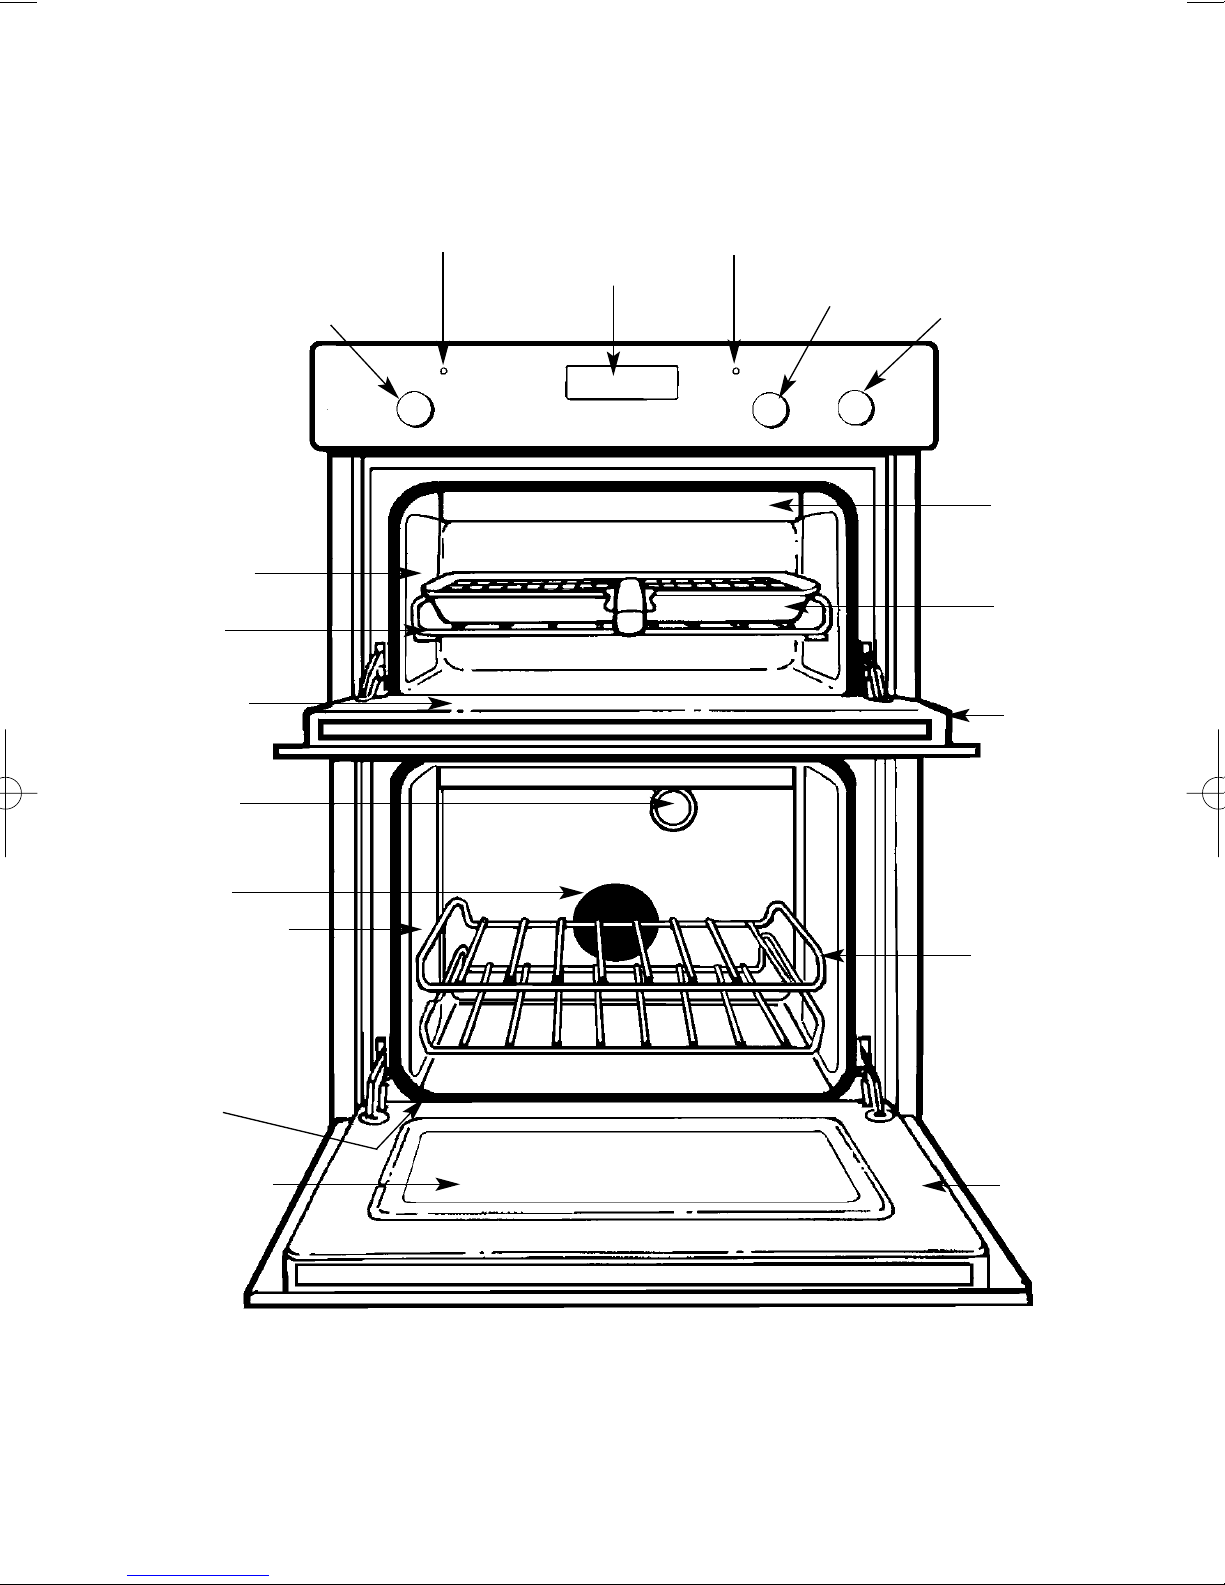
Grill Element
Removable roof
panel
Cookclean Liner
Know Your Oven
Fan Oven
Temperature
Control
Fan Oven Pilot
Top Oven Pilot
Timer
Top Oven
Temperature
Control
Grill Setting
Control
Rod
Shelf
Inner Door
Glass
Oven
Light
Oven Fan
Cookclean
Liner
Rating
Plate
Inner Door
Glass
Grill Pan/
Food support
Top Oven
Door
Oven
Shelves
Main Oven
Door
IMPORTANT NEVER line the shelves, floor or sides of the oven or grill with aluminium foil
as overheating and damage may result.
10
Important Before using your cooker ALWAYS make sure that the timer
has been set to MANUAL operation. Unless this is done, the
main oven cannot heat up. Before seeking assistance make
sure this is done (refer to oven timer operation)
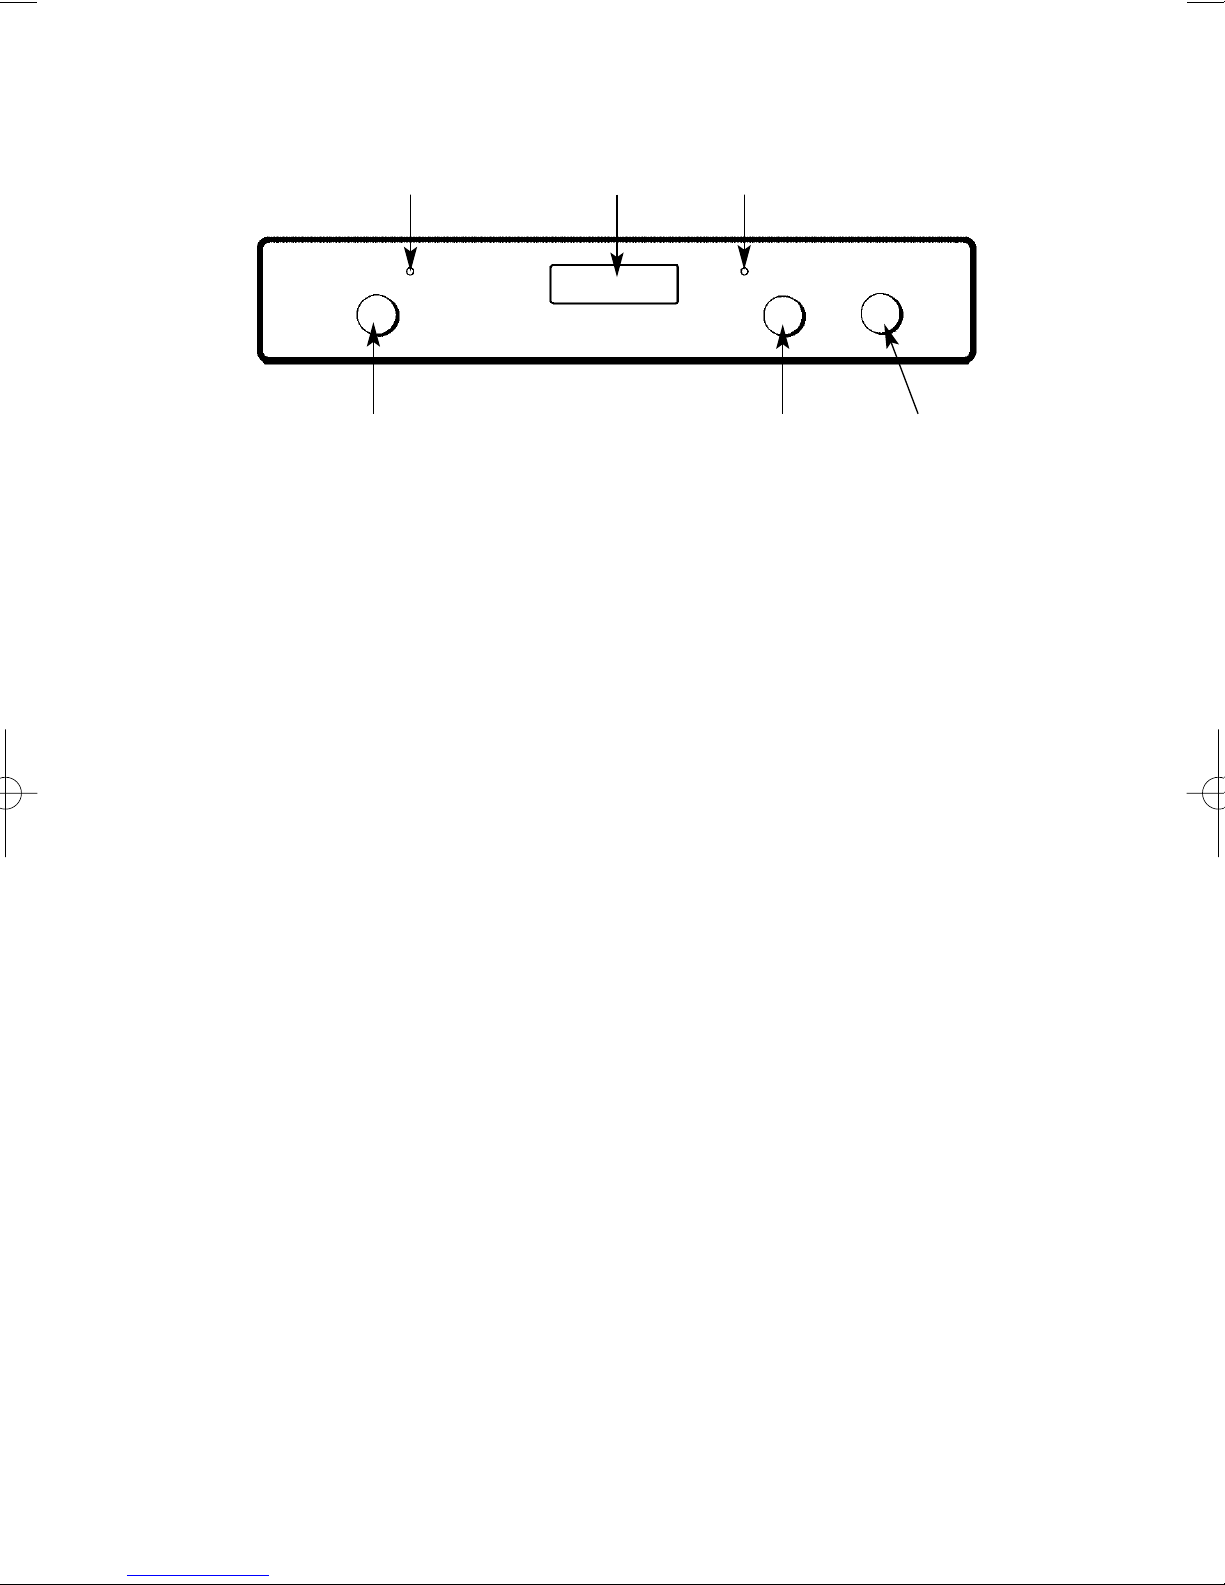
Fan Oven Turn the control clockwise to set the fan oven thermostat to the
Temperature required temperature.
Control If the timer is set correctly an indicator light will illuminate. This will
remain on until the oven reaches the required temperature. The oven
light and oven fan will operate when this control is set.
Timer See Oven Timer Operation.
Top Oven Turn the control clockwise to set the top oven thermostat to the
Temperature required temperature. An indicator light will illuminate. This will
Control remain on until the oven reaches the required temperature. This light
will then cycle on and off as the thermostat maintains control of the
oven temperature.
Grill Setting Control The grill control is designed to provide variable heat control of either
the whole grill or the left hand side only, depending upon which
direction the control knob is rotated. With the control knob rotated
clockwise both will come on together, and with the control rotated
anti-clockwise the left hand element only will come on.
Do not operate the Top Oven control when grilling.
Cooling Fan A gentle flow of air will be blown below the control panel when any
control is used. In some instances this will continue after switching
off. This helps to keep the control panel and knobs cool.
After use always return the controls to their off ‘O’ position.
The Controls
11
Fan Oven
Temperature
Control
Top Oven
Temperature
Control
Grill Setting
Control
Timer
Fan Oven Pilot Top Oven Pilot
 Loading...