

Bellcome advanced 1 Fam., advanced 2 Fam., advanced 3 Fam., advanced 5 Fam. operation manual
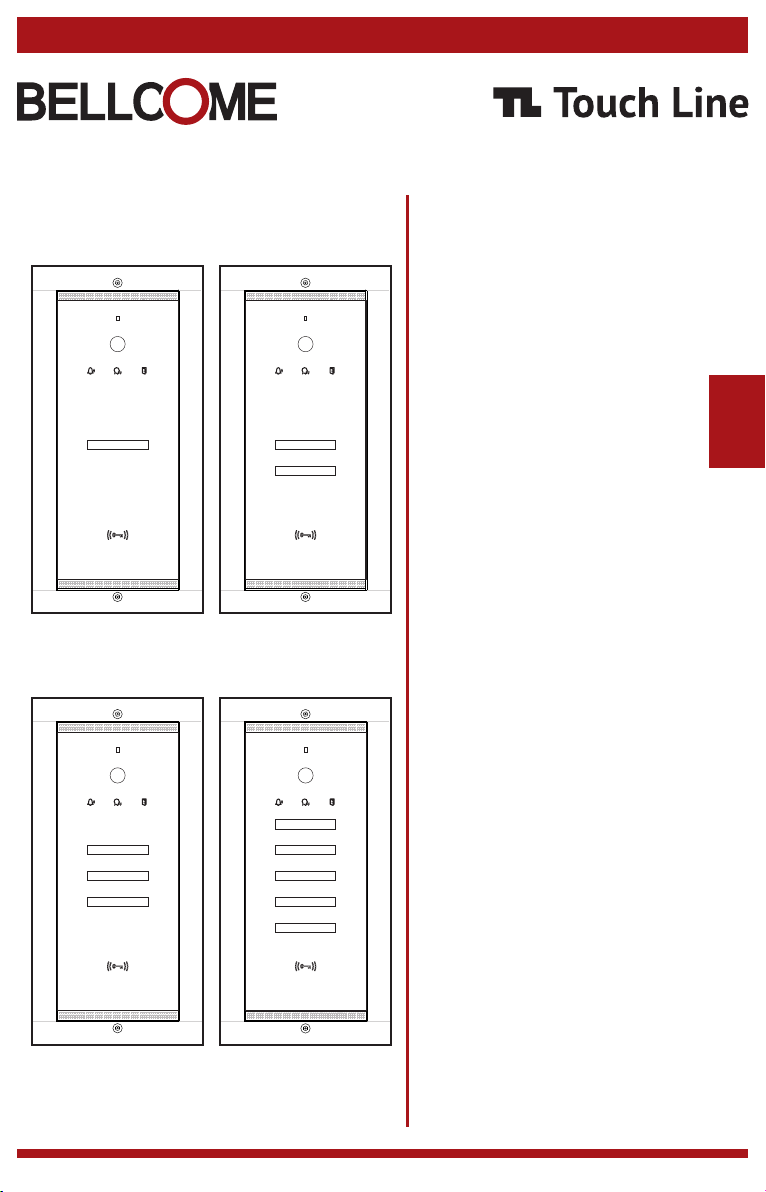
advanced 1 Fam.
advanced 2 Fam.
USER MANUAL
Video outdoor panels
1 – 5 Families
door system4 WIRE
EN
advanced 3 Fam.
advanced 5 Fam.
Contents
0
Safety instructions
1
Description of the Touch Line video panels
2
Recommended cables.
3
Installation of the Touch Line video panels.
Connection diagrams for 1 – 5 Families
4
Safety instructions
1
DO NOT power the product at 110 – 230 Va.c.!
DO NOT hit the glass screen with hard objects!
If the glass screen is broken, DO NOT touch the product.
Protect the products against lime and dust during renovation activities.
Connection of additional panels
5
Connection of additional video cameras
6
Programming and deleting the RFID cards
7
Maintenance
8
Declaration of conformity. Warranty.
9
EN
2
1
2.1
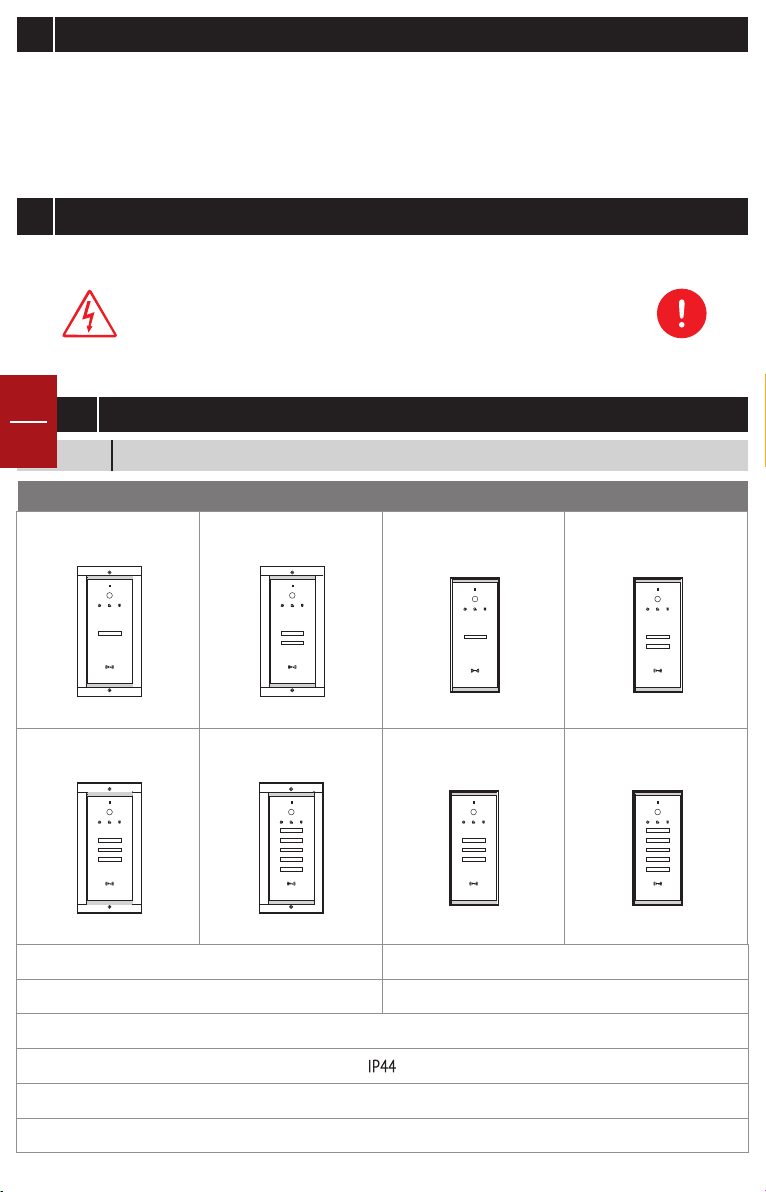
VPA.1FR03.BLB(W)04
Description of the Touch Line video panels
Technical data
FLUSH mounting
VPA.2FR03.BLB(W)04
VPA.5FR03.BLB(W)04VPA.3FR03.BLB(W)04
294 x 144 x 53 mm
1,52 kg
VPA.1SR03.BLB(W)04 VPA.2SR03.BLB(W)04
SURFACE mounting
VPA.5SR03.BLB(W)04VPA.3SR03.BLB(W)04
260 x 110 x 33 mm
1,3 kg
*B = Black; W = White
Aluminium case + chemically toughened glass
= 12 … 14 Vd.c.
U
Acces – RFID card
Use
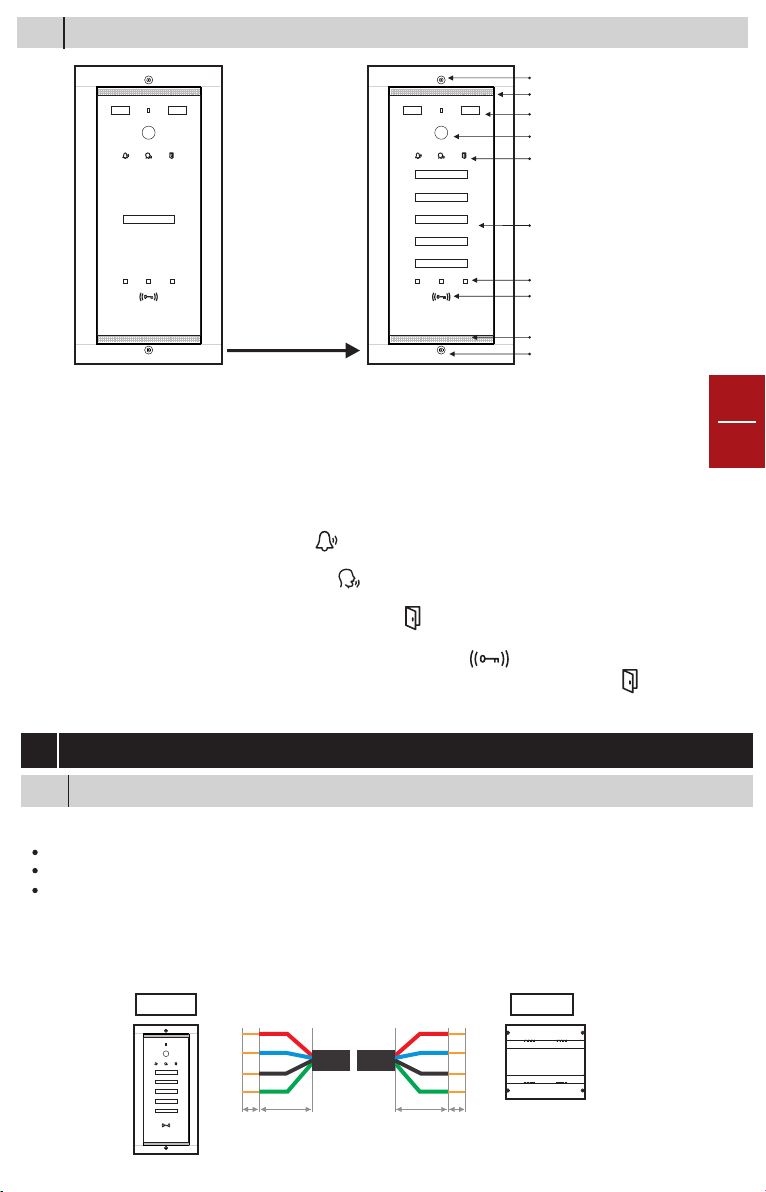
2.2
Fastening Torx screw
Microphone
LEDs (day and night white lighting)
Orientable video camera
LEDs signaling status during use
Fam 5
Fam 4
Fam 1
Fam 3
Fam 2
Fam 1
Touch key with the name
of the family
Presence sensors
RFID reader
Speaker
Fastening Torx screw
1 Fam. 5 Fam.
1. STAND-BY. The keys with the names of the residents are off. The red LED blinks and signals the possibility of
video monitoring.
2 Fam., 3 Fam.
EN
2
Note: The Red LED can be disabled through jumper JP1 (RED LED) on the board of the keyboard, when the name
labels are added.
2. CALL + TALK + ACCESS. The keyboard turns on when a person approaches the panel less than 1m away. Touch
the key corresponding to the name of the family you are looking for. The panel signals the call acoustically, with a beep
sequence and visually – video camera LEDs and LED on.
The call lasts max. 1 min. Each touch of the key reinitiates the call.
If the resident answers, the talk mode is activated – LED on. The conversation is hands-free, with a duration of
max. 2 min. If the resident grants the access, it is commanded the opening of the door/ gate and the panel signals
acoustically, with a confirmation beep sequence and visually – LED on.
The door/ gate remains open max. 8 sec.
3. RFID card ACCESS. Approach the RFID card to the area marked with the symbol. It is commanded the opening of
the door/ gate and the panel signals acoustically, with a confirmation beep sequence and visually – LED on.
The door/ gate remains open max. 8 sec.
Recommended cables. Installation of the Touch Line video panels
3
Recommended cables
3.1
4 WIRE Installation (standard)
4 wires x 0.5 mm (type H03VV-F4G 0.5) for maximum 60 ml or another type of equivalent cable;
4 wires x 0.75 mm (type H05VV-F4G 0.75) for maximum 150 ml or another type of equivalent cable;
2
2
Generally, any type of 4-wire cable with a 0.5 mm section is accepted. Telephone cables type TCYY -
2x2x0.5-24 AWG (max. 30 ml); TCYY -3x2x0.5-24 AWG (max. 50 ml); TCYY - 4x2x0.5-24 AWG (max. 50 ml)
can also be used.
Note: If the cable has more than 4 wires, the additional wires will be connected the same as in the case of
a UTP cable. The +14 and GND connections are equally supplemented with the additional wires.
Panel
+14
C/D
GND
Vout
6mm
20-25mm
20-25mm
6mm
+14
C/D
GND
Vin
SCU
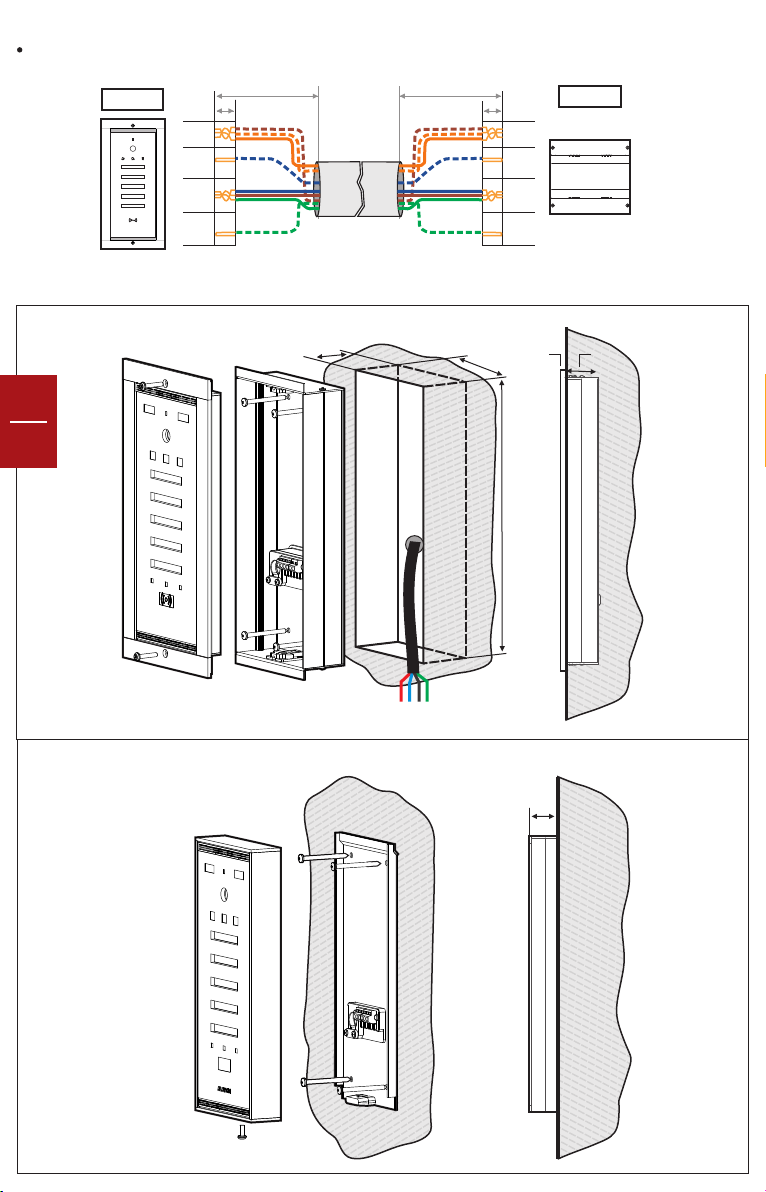
UTP Cable Installation
For distances between 150 ml and 250 ml it is mandatory to use the twisted pair cable type
UTP/ FTP cat5e (AWG24) or UTP/ FTP cat6 (AWG23).
Panel
+14
C/D
6mm
20-25mm
20-25mm
6mm
SCU
+14
C/D
Mounting on the wall - Flush
EN
3
Mounting on the wall - Surface
GND
Vout
50mm
120mm
≈20cm
GND
Vin
4mm
280mm
33mm
50mm

Unmount the module and add name labels
Mount back the family name module.
Orientation of the video camera
o
90
o
45
o
45
1
175 cm
130 cm
115 cm
130 cm-160cm
90
EN
4
o
90
o
25
-20
o
o
65
+20
65
o
o
o
90
o
25
2 3
o
-20
o
130 cm-160cm
175 cm
130 cm
115 cm
90
o
130 cm-160cm
175 cm
130 cm
115 cm
+10
90
o
o
1
4 5
 Loading...