

Page 1
BellAire™ Model 3000 Tire Inflator Instructions • Mode d’emploi du gonfleur de pneu BellAire™ Modèle 3000
12V12V
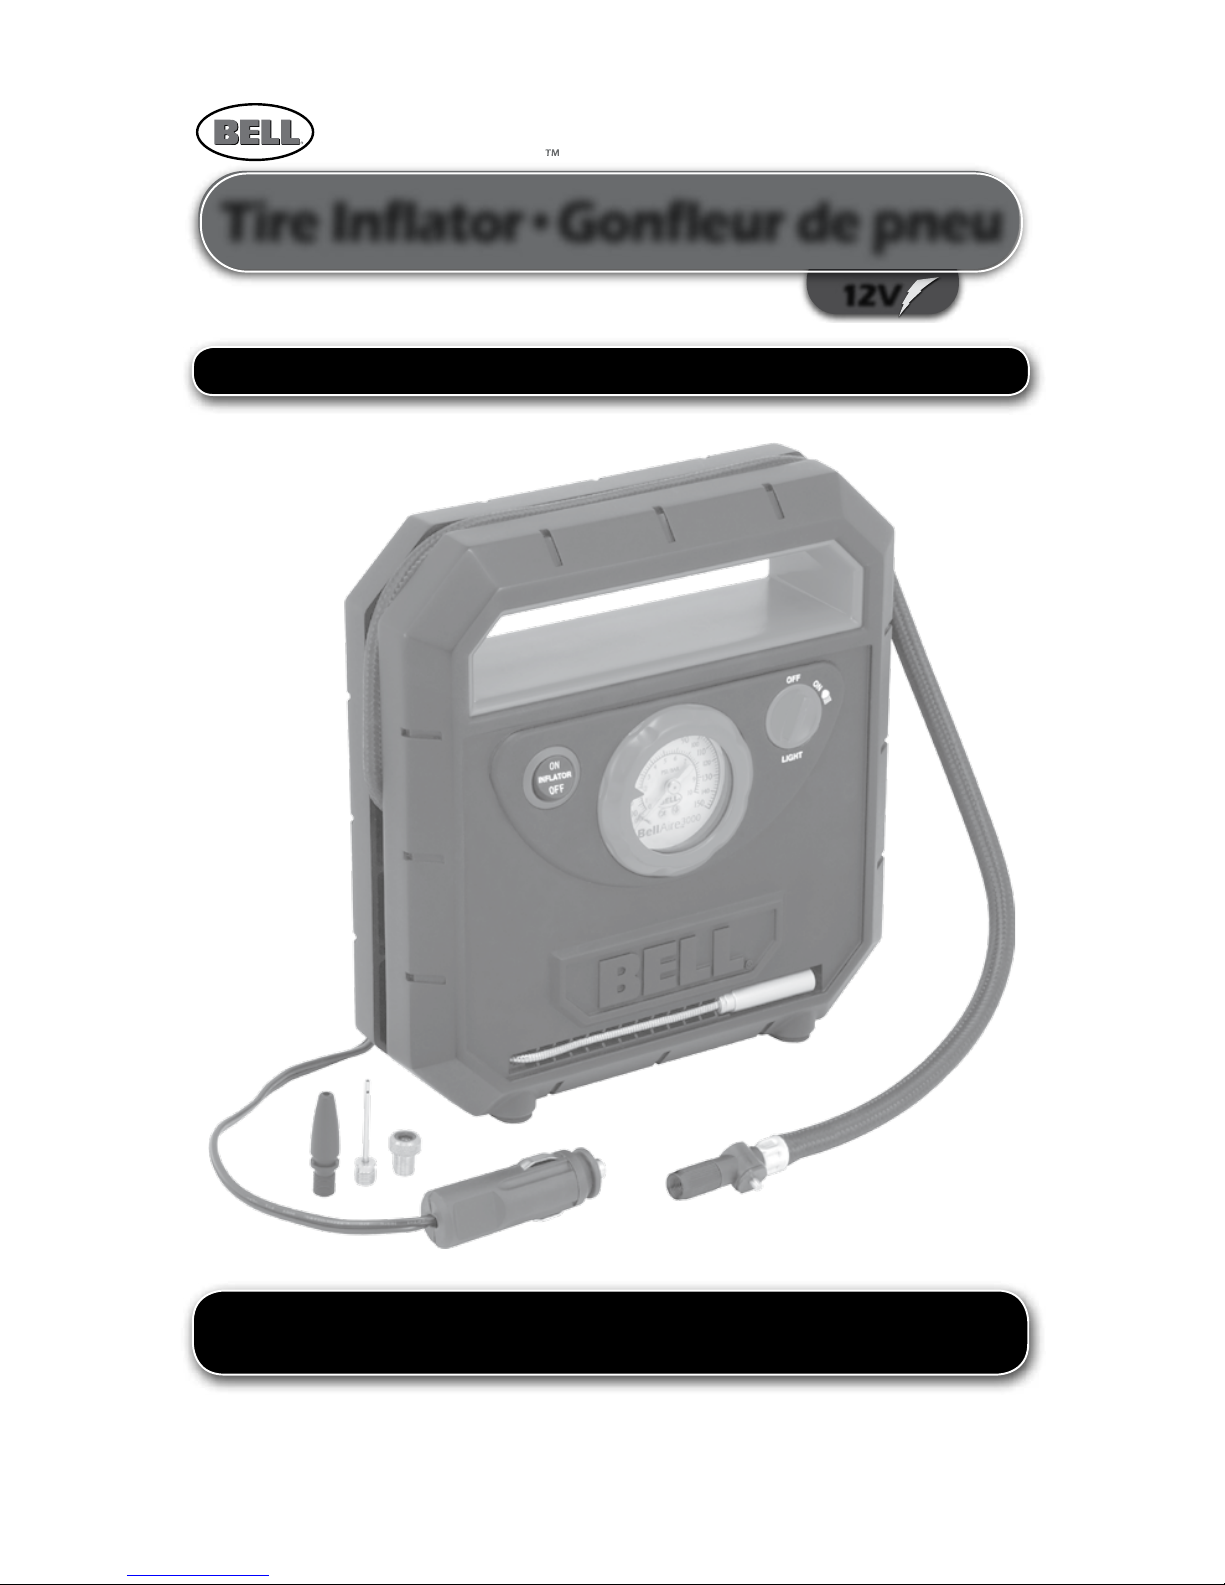
Tire Inflator•Gonfleur de pneu
BellAire
3000
ATTENTION! READ ALL INSTRUCTIONS AND WARNINGS CAREFULLY BEFORE USE
ATTENTION! LIRE ATTENTIVEMENT TOUTES LES INSTRUCTIONS ET TOUS LES
AVERTISSEMENTS AVANT L’EMPLOI
INFLATES CAR TIRES & OTHER INFLATABLES
GONFLE LES PNEUS DE VOITURE ET AUTRES OBJETS GONFLABLES
INSTRUCTIONS FOR USE • MODE D’EMPLOI
Page 2
2
BellAire™ Model 3000 Tire Inflator Instructions • Mode d’emploi du gonfleur de pneu BellAire™ Modèle 3000
INTRODUCTION
TABLE OF CONTENTS
Introduction____________________________________________________________________2
Featured Product Illustrations____________________________________________________3
General Safety Rules and Warnings_______________________________________________4
Inflator Operation_______________________________________________________________5
Inflating Tires_________________________________________________________________5
Inflating sports balls or other high pressure small inflatables__________________________5
Work Light___________________________________________________________________6
Maintenance____________________________________________________________________7
Trouble Shooting________________________________________________________________7
Warranty_______________________________________________________________________8
Notes___________________________________________________________________________9
Contact Us_____________________________________________________________________16
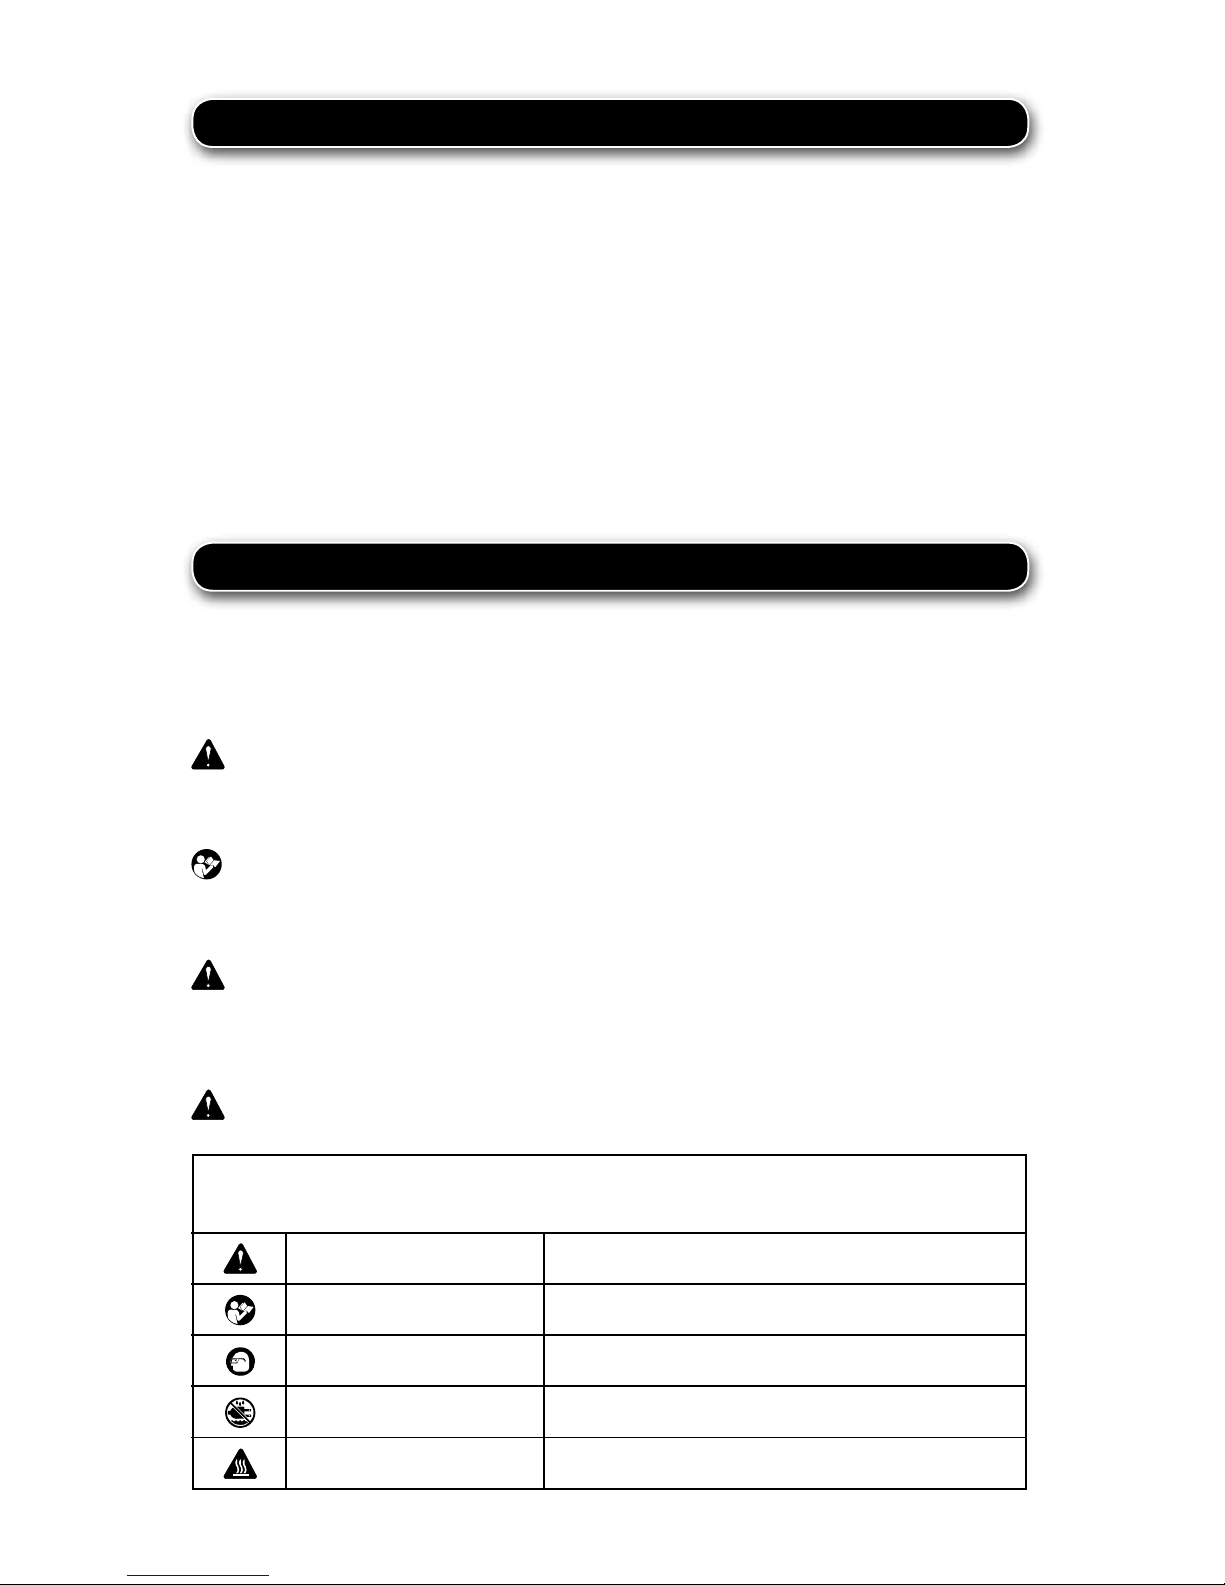
Some of the following symbols may be used on this product. Please study them and learn their meaning. Proper interpretation of these symbols will allow you to operate the product better and safer.
SYMBOL NAME DESIGNATION/EXPLANATION
Safety Alert
Read The Operator’s Manual
Eye Protection
Wet Conditions Alert
Hot Surface
Indicates a potential personal injury hazard.
To reduce the risk of injury, user must read and understand operator’s manual before using this product.
Always wear eye protection with side shields marked to
comply with ANSI Z87.1.
Do not expose to rain or use in damp locations.
To reduce the risk of injury or damage, avoid contact
with any hot surface.
Your new inflator provides up to 150 PSI (10.34 bars) and must be connected to a 15 amp
12 Volt DC power outlet. The BellAire™ 3000 includes a high pressure inflator for vehicle
tires and sports balls. This model also includes an inflation pre-set and automatic shut-off
feature and a flexible LED work light.
INSPECT INFLATOR AFTER UNPACKING
After unpacking your inflator, carefully inspect the inflator to ensure there is no
damage that may have occurred during transit and verify all components have been
included as listed and shown on page 3.
IMPORTANT! READ ALL INSTRUCTIONS CAREFULLY BEFORE ATTEMPTING TO
USE THIS INFLATOR. FAILURE TO FOLLOW WARNINGS AND COMPLY WITH
ALL INSTRUCTIONS COULD RESULT IN FIRE, PROPERTY DAMAGE OR INJURY TO
PERSONS.
PROTECT YOURSELF AND OTHERS BY OBSERVING ALL SAFETY INFORMATION.
OPERATE INFLATOR WITH 15 AMP 12 VOLT DC CIGARETTE LIGHTER SOCKETS
OR 12 VOLT POWER OUTLETS ONLY. DO NOT USE WITH OLDER 8 AMP CIGARETTE LIGHTER RECEPTACLES.
RETAIN INSTRUCTIONS FOR FUTURE REFERENCE.
Page 3
3
13
10 4
12 11
13 14
15 6
1 4 2
3
5
98
6
7
10
BellAire
3000
R
O
T
A
T
E
R
O
T
A
T
E
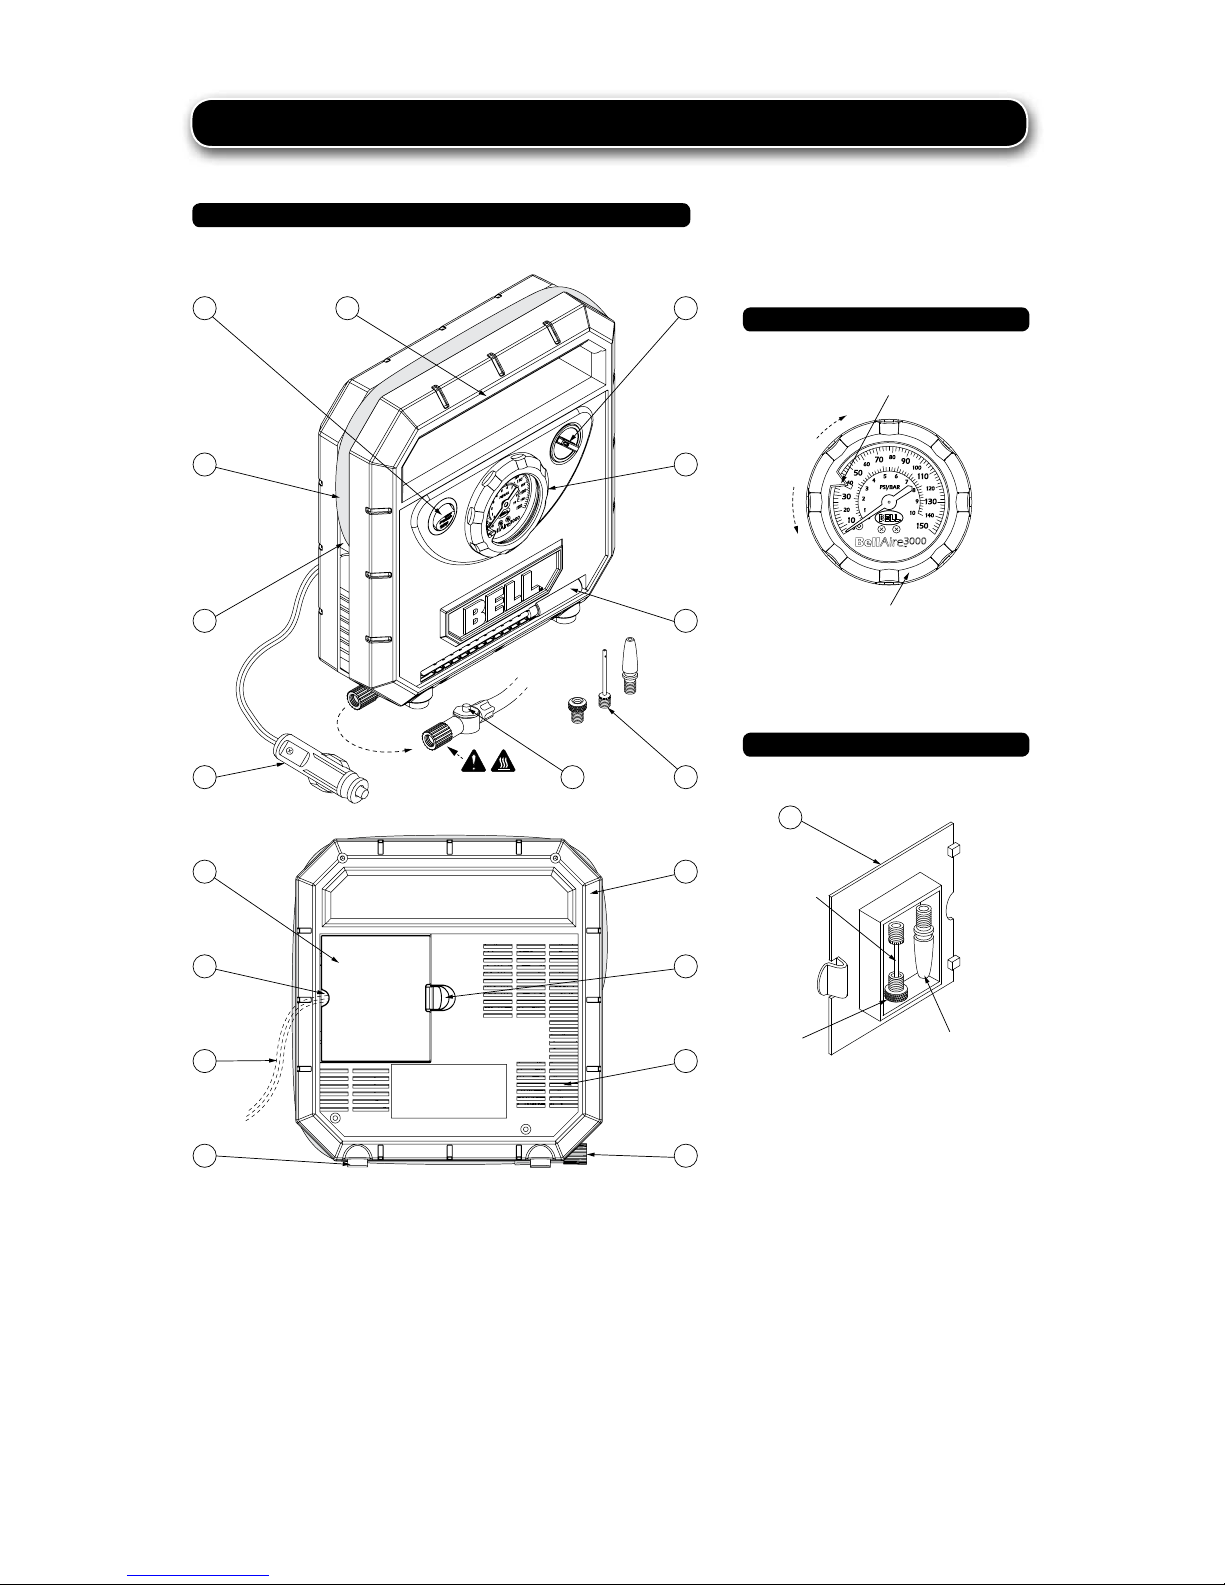
PRODUCT ILLUSTRATIONS
1. Inflator Power Switch
2. Work Light Power Switch
3. Dial Pressure Gauge with
programmable auto shut-off
4. Carry Handle
5. Flexible LED Work Light
6. 2 Foot (60 cm) Air Hose
7. Air Hose Storage Channel
8. Air Nozzle Bleeder Valve
9. Inflator Needle Kit
10. Storage Compartment Door
11. Storage Door Release Latch
12. 12 Volt Power Cord Exit Slot
13. 10 Foot (3 m) 12 Volt Power Cord
with replaceable fuse
14. Air Intake/Exhaust Vents
15. Foam Rubber Feet for noise and
vibration suppression
BellAire™3000 Tire Inflator
— FIGURE 1 —
Dial Pressure Gauge
— FIGURE 2 —
High Pressure Inflator Needle Kit
— FIGURE 3 —
Toy Inflator
Adapter
Pressure Gauge Pre-set Dial
Auto Shut-off Indicator/Stop
(Front View)
(Rear View)
Presta
Valve
Adapter
Sports Ball
Adapter
Page 4

4
BellAire™ Model 3000 Tire Inflator Instructions • Mode d’emploi du gonfleur de pneu BellAire™ Modèle 3000
GENERAL SAFETY RULES and WARNINGS
WARNING!
Failure to follow warnings and comply with all instructions listed below could
result in fire, property damage or injury to persons.
• Keep children and others away while operating inflator.
• Keep the inflator dry, clean and free from oil and grease. Always use a clean
cloth when cleaning. Never use typical vehicle fluids such as brake fluid, gasoline, any petroleum products or strong solvents to clean inflator.
• Operate inflator in an open area and away from any objects that could restrict
the flow of air to ventilation openings.
• Do not operate inflator near fire, flammable liquids or in gaseous or explosive
atmospheres.
Always wear eye protection.
• Always use in a safe area away from traffic and other dangers.
• Do not attempt to disassemble inflator. No user serviceable parts inside. Only
user serviceable part is fuse replacement. See maintenance section on page 7.
• Before each use, always check inflator hoses and 12 Volt cord for weak or worn
condition and make certain all connections are secure. Do not use if a defect is
present.
• Do not pull or carry the inflator by the power cord or air hose.
• Do not over stretch power cord or air hose.
• Never point an inflator air hose toward yourself, others or animals.
• Never start a vehicle with the inflator plugged into the DC 12 Volt power socket.
See operation instructions on pages 5 through 6.
• Use the inflator for its intended use only. Do not alter or modify the inflator.
Do not store inflator in a damp or wet location. Protect the inflator from rain,
snow or other moisture sources.
• When not in use, make certain the inflator power button is in the off position.
See #1 in figure 1, page 3. Store inflator out of the reach of children.
• IMPORTANCE OF PROPER TIRE PRESSURE
— Correct tire pressure is vital to road safety.
— Correct tire pressure can help improve vehicle fuel economy.
— Regularly check tires on vehicles to meet manufacturer’s recommended tire
pressure.
— Always check pressures at ambient temperature, never check immediately
following a long trip.
WARNING: COMPRESSED AIR CAN BE DANGEROUS
— Never allow children to use this inflator.
— Never leave inflator unattended while running.
— Never over-inflate items. Over-inflation could cause property damage or
personal injury.
— Check manufacturer’s recommended inflation pressure before starting the
inflation process.
WARNING: VEHICLE EXHAUST WITHOUT PROPER VENTILATION IS EXTREMELY
DANGEROUS
— Never start and leave a vehicle running in a confined or enclosed space such as
a garage. Start and run vehicles outdoors.
Page 5

5
INFLATOR OPERATION
TO INFLATE TIRES:
1. Remove and unwind 12 Volt power cord (see #13 in figure 1, page 3) from the storage compartment. See #10 in figure 1.
2. Make certain the inflator power switch is in the off position. See #1 in figure 1.
3. Set emergency brake and start vehicle engine. See “Warning: Vehicle Exhaust Without
Proper Ventilation”, page 4.
4. Plug inflator lighter plug into vehicle 12 Volt cigarette lighter socket.
5. Check manufacturer’s recommended tire pressure specifications indicated on the tire
sidewall.
6. Locate the dial pressure gauge (see #3 in figure 1) and turn the pre-set dial until the
auto shut-off indicator/stop is set to the desired shut-off pressure. See figure 2, page
3. The pre-set inflation feature will automatically stop inflating once a predetermined
pressure has been reached.
7. Unwind the air hose from its storage channel and attach air hose nozzle to vehicle tire
valve stem by threading the nozzle onto the stem clockwise until secure. See #6 in
figure 1. Do not turn inflator on.
NOTE: When the nozzle is connected correctly, wait 5-7 seconds and the gauge will
indicate the current tire pressure. Always follow the manufacturer’s inflation pressure recommendations to avoid over-inflation. If the tire is over-inflated, press the deflation bleeder
valve button to release air until pressure gauge indicates the correct pressure. See #8 in
figure 1.
The pressure gauge on the inflator is for reference only and is therefore not binding for
exact values. While inflating, the gauge is a measurement of the fluctuating pressure
between the tire and the high pressure hose. To reduce the risk of over-inflation, use a reliable pressure gauge periodically during inflation before driving a vehicle inflated with the
inflator.
8. Turn on inflator power switch to the on position. See #1 in figure 1. The BellAire™
3000 will now inflate your tire to the pre-set pressure level and then shut off automatically. After pre-set auto shut-off has taken place, turn inflator power switch to the off
position. See #1 in figure 1.
9. To stop inflator before reaching the pre-set auto shut-off pressure, turn inflator power
switch to the off position. See #1 in figure 1.
10. Remove air hose nozzle from vehicle tire valve stem by turning air hose nozzle counterclockwise and return air hose to its built-in storage location on inflator.
11. Unplug inflator from vehicle 12 Volt cigarette lighter socket and store cord in its storage compartment.
12. Turn off vehicle.
TO INFLATE SPORTS BALLS AND OTHER HIGH PRESSURE SMALL INFLATABLES:
1. Remove and unwind 12 Volt power cord (see #13 in figure 1, page 3) from the storage compartment. See #10 in figure 1.
2. Unwind air hose from its storage channel (see #6 in figure 1) and select one of the
small adapter needles provided in the storage compartment. See figure 3, page 3.
3. Attach the adapter needle to the air hose nozzle by turning the adapter needle clockwise.
4. Check manufacturer’s recommended pressure specifications for inflatable.
5. Locate the dial pressure gauge (see #3 in figure 1) and turn the pre-set dial until the
auto shut-off indicator/stop is set to the desired shut-off pressure. See figure 2, page
3. The pre-set inflation feature will automatically stop inflating once a predetermined
pressure has been reached.
6. Insert adapter needle into inflatable.
Page 6

6
BellAire™ Model 3000 Tire Inflator Instructions • Mode d’emploi du gonfleur de pneu BellAire™ Modèle 3000
7. Make certain the inflator power switch is in the off position. See #1 in figure 1.
8. Set emergency brake and start vehicle engine. See “Warning: Vehicle Exhaust Without
Proper Ventilation”, page 4.
9. Plug inflator lighter plug into vehicle 12 Volt cigarette lighter socket.
NOTE: When the nozzle is connected correctly, wait 5-7 seconds and the gauge will indicate the current inflatable item’s pressure. Always follow the manufacturer’s inflation pressure recommendations to avoid over-inflation. If the inflatable item is over-inflated, press
the deflation bleeder valve button to release air until pressure gauge indicates the correct
pressure. See #8 in figure 1.
The pressure gauge on the inflator is for reference only and is therefore not binding for
exact values. While inflating, the gauge is a measurement of the fluctuating pressure between the inflatable item and the high pressure hose.
When inflating items requiring 10 PSI (0.69 bars) or less, inflate in short bursts and check by
feel or by a reliable measuring device to determine accurate pressure.
10. Turn on inflator power switch to the on position. See #1 in figure 1. The BellAire™
3000 will now inflate your inflatable item to the pre-set pressure level and then shut
off automatically. After pre-set auto shut-off has taken place, turn inflator power
switch to the off position. See #1 in figure 1.
11. To stop inflator before reaching the pre-set auto shut-off pressure, turn inflator power
switch to the off position. See #1 in figure 1.
12. Remove air hose nozzle from inflatable, remove adapter needle from air hose nozzle
by turning the adapter needle counterclockwise, and return air hose and adapter
needle to their storage locations on inflator.
13. Unplug inflator from vehicle 12 Volt cigarette lighter socket and store cord in its storage compartment.
14. Turn off vehicle.
USING THE LED WORK LIGHT:
1. The flexible LED work light (see #5 in figure 1, page 3) is operated with a separate
light switch. See #2 in figure 1. The light can be used by itself or used while inflating
to illuminate the work area.
2. Position the work light for best directional lighting of your work area.
Page 7

7
MAINTENANCE
TROUBLE SHOOTING
1. Your BellAire™ 3000 has a replaceable fuse providing maximum protection for the
inflator and/or your vehicle. See figure 4 for fuse replacement instructions.
2. Regularly check inflator air hose, 12 Volt cord and adapters for damage.
3. Keep the inflator dry, clean and free from oil and grease. Always use a clean cloth
when cleaning.
The inflator fails to run with the inflator power switch turned on:
• Check that the plug is fully inserted into 12 Volt cigarette lighter socket. See operation
instructions on pages 5-6.
• Your vehicle may require the ignition be turned to the accessory position for the cigarette lighter to have power. The inflator should be used with the vehicle running.
• Check to see if the fuse in the 12 Volt lighter plug has blown. See fuse replacement
instructions in the maintenance section. See figure 4, above .
Inflator fails to stop at the auto shut-off pre-set pressure:
• Check to make sure auto shut-off pressure settings are being set correctly. See operation instructions on pages 5-6.
• Check that the correct pre-set pressure has been set.
12 Volt power cord gets hot:
• Make certain power cord is not coiled up or in a knot or damaged.
Pressure gauge appears to read incorrectly:
• Make certain when you attach the air hose nozzle to the tire stem that the gauge is
reading the current tire pressure before turning on the inflator switch.
• Wait 5-7 seconds for gauge to display proper pressure.
The inflator is running but the tire is not inflating:
• Turn off inflator and check that the air hose nozzle is securely attached to the tire valve
stem.
Turn tip counterclockwise to unlock Fuse Adapter Body
Fuse (Replace with ACG glass 15 amp fuse only)Adapter Body
12 Volt Adapter Fuse Replacement
— FIGURE 4 —
Page 8

8
BellAire™ Model 3000 Tire Inflator Instructions • Mode d’emploi du gonfleur de pneu BellAire™ Modèle 3000
WARRANTY
Lifetime Warranty
Bell Automotive® Products, Inc. warrants this product will be free from defects in material
and workmanship. Bell Automotive® Products, Inc., at its option, will repair or replace
this product or any component of the product found to be defective. Replacement will be
made with a new or remanufactured product or component. In the event the product is no
longer available, replacement may be made with a similar product.
This warranty is valid for the original retail purchaser and is not transferable. Keep the
original sales receipt. Proof of purchase is required to obtain warranty coverage.
What This Warranty Does Not Cover
This warranty does not cover parts that are not genuine Bell Automotive® parts, or
damage resulting from any of the following: negligent use or misuse of the product; use on
improper voltage or current; commercial use of the product; use other than the operating
instructions, disassembly, repair or alteration by anyone other than Bell Automotive®
Products, Inc. Further, the warranty does not cover Acts of God, such as fire, flood,
hurricanes and tornadoes.
Bell Automotive® Products, Inc. shall not be liable for any incidental or consequential
damages caused by the breach of any express or implied warranty or conditions, except
to the extent prohibited by applicable law, any implied warranty of merchantability or
fitness for a particular purpose is limited to the above warranty or conditions. Some
states, provinces, or jurisdictions do not allow the exclusion or limitation of incidental or
consequential damages or limitations on how long an implied warranty lasts so the above
limitations or exclusion may not apply to you. This warranty gives you specific legal rights,
and you may also have other rights that vary from state to state or province to province.
The costs of transporting the product to Bell Automotive® Products, Inc. for warranty
service are the responsibility of the purchaser.
DO NOT RETURN THIS PRODUCT TO THE PLACE OF PURCHASE
If you have any questions regarding this warranty please contact us, as shown on page 16.
Page 9

9
NOTES • REMARQUES
Page 10

10
BellAire™ Model 3000 Tire Inflator Instructions • Mode d’emploi du gonfleur de pneu BellAire™ Modèle 3000
INTRODUCTION
TABLE DES MATIÈRES
Remarques______________________________________________________________________9
Introduction___________________________________________________________________10
Illustrations du produit_________________________________________________________11
Consignes générales de sécurité et avertissements________________________________12
Fonctionnement du gonfleur____________________________________________________13
Gonflage des pneus___________________________________________________________13
Gonflage des ballons de sport et autres petits objets gonflables sous haute pression___13
Lampe de travail_____________________________________________________________14
Entretien______________________________________________________________________15
Diagnostic et dépannage_______________________________________________________15
Garantie_______________________________________________________________________16
Contactez-nous_________________________________________________________________16
Certains des symboles ci-dessous peuvent figurer sur ce produit. Il convient de prendre le temps de les
consulter et d’en apprendre la signification afin de pouvoir les interpréter pour utiliser le produit dans
de meilleures conditions et sans risque.
SYMBOLE NOM DESIGNATION/EXPLICATION
Alerte concernant la sécurité
Lire le manuel d’utilisation
Protection oculaire
Alerte concernant les environnements humides
Surface chaude
Indique un risque de blessure corporelle potentiel.
Pour limiter les risques de blessures, l’utilisateur doit lire
et bien comprendre le manuel d’utilisation avant de se
servir de ce produit.
Toujours porter une protection oculaire à écrans latéraux conformément à la norme ANSI Z87.1.
Ne pas exposer à la pluie ni utiliser dans des lieux
humides.
Pour limiter les risques de blessures ou de dommages,
éviter tout contact avec une surface chaude.
Votre nouveau gonfleur a une capacité de 150 PSI (10,34 bars) et doit être branché sur une
prise électrique de 12 volts c.c. Le BellAire™ 3000 inclut un gonfleur haute pression pour
pneus automobiles et ballons de sport. Ce modèle comporte aussi un dispositif de gonflement préréglé et d’arrêt automatique ainsi qu’une lampe de travail DEL flexible.
VÉRIFIER LE GONFLEUR UNE FOIS DÉBALLÉ
Après avoir déballé le gonfleur, l’inspecter soigneusement pour vérifier qu’il n’a pas été
endommagé pendant le transport et pour s’assurer que tous les composants ont bien
été inclus comme indiqué et illustré à la page 11.
IMPORTANT! LIRE ATTENTIVEMENT TOUTES LES INSTRUCTIONS AVANT DE
TENTER D’UTILISER CE GONFLEUR. LE NON-RESPECT DES AVERTISSEMENTS ET
DE TOUTES LES INSTRUCTIONS PEUT ENTRAÎNER UN INCENDIE, DES DOMMAGES MATÉRIELS OU DES BLESSURES CORPORELLES.
ASSUREZ VOTRE PROTECTION ET CELLE DES AUTRES EN RESPECTANT TOUTES
LES CONSIGNES DE SÉCURITÉ.
NE FAIRE FONCTIONNER LE GONFLEUR QU’AVEC UNE PRISE D’ALLUME-CIGARETTE DE 15 A, 12 VOLTS C.C. NE PAS UTILISER AVEC LES PRISES D’ALLUMECIGARETTE PLUS ANCIENNES DE 8 A.
CONSERVER CES INSTRUCTIONS POUR TOUTE RÉFÉRENCE ULTÉRIEURE.
Page 11

11
13
10 4
12 11
13 14
15 6
1 4 2
3
5
98
6
7
10
BellAire
3000
T
O
U
R
N
E
R
T
O
U
R
N
E
R
ILLUSTRATIONS DU PRODUIT
1. Interrupteur d’alimentation du
gonfleur
2. Interrupteur de la lampe de travail
3. Manomètre à cadran avec arrêt
automatique programmable
4. Poignée de transport
5. Lampe de travail DEL flexible
6. Conduit d’air 2 pieds (60 cm)
7. Système de rangement du
conduit d’air
8. Valve de purge de la buse d’air
9. Coffret d’aiguilles pour gonfleur
10. Porte du compartiment de rangement
11. Loquet de déblocage de la porte du
compartiment de rangement
12. Fente de sortie du cordon
d’alimentation 12 volts
13. Cordon d’alimentation 12 volts de
10 pieds (3 m) avec fusible de rechange
14. Admission d’air/évents d’aération
15. Pieds en mousse de caoutchouc pour
atténuer le bruit et les vibrations
Gonfleur de pneu BellAire™3000
— FIGURE 1 —
Manomètre à cadran
— FIGURE 2 —
Coffret d’aiguilles pour gonfleur
haute pression
— FIGURE 3 —
Adaptateur
de gonflage
pour jouet
Cadran préréglé du
manomètre
Indicateur d’arrêt
automatique/Stop
(Vue de face)
(Vue de dos)
Adaptateur pour
valve Presta
Adaptateur
pour ballon
de sport
Page 12

12
BellAire™ Model 3000 Tire Inflator Instructions • Mode d’emploi du gonfleur de pneu BellAire™ Modèle 3000
CONSIGNES DE SÉCURITÉ GÉNÉRALES et AVERTISSEMENTS
AVERTISSEMENT!
Le non-respect des avertissements et de toutes les instructions peut entraîner
un incendie, des dommages matériels ou des blessures corporelles.
• Tenir les enfants et autres personnes éloignés d’un gonfleur en fonctionnement.
• Le gonfleur doit rester sec, propre, sans trace d’huile ou de graisse. Toujours utiliser un chiffon propre pour le nettoyage. Ne jamais utiliser les liquides automobiles types tels que le liquide de frein, l’essence, tout produit à base de pétrole ou
solvant puissant pour nettoyer le gonfleur.
• Utiliser le gonfleur dans un espace ouvert et en l’éloignant d’objets susceptibles
de limiter le flux d’air au niveau des évents de ventilation.
• Ne pas faire fonctionner le gonfleur à proximité d’un feu, de liquides inflammables ou dans des atmosphères gazeuses ou explosives.
Toujours porter une protection pour les yeux.
• Toujours utiliser dans un lieu sûr, loin de la circulation routière et d’autres dangers.
• Ne pas tenter de démonter le gonfleur. Aucune pièce interne n’est réparable par
l’utilisateur. La seule pièce réparable par l’utilisateur est le fusible. Voir la section
Entretien à la page 15.
• Avant toute utilisation, vérifier toujours que les conduits du gonfleur et le cordon
de 12 volts ne sont pas endommagés et usagés, et que tous les raccordements
sont bien fixés. Ne pas utiliser en cas de défaut.
• Ne pas tirer ou transporter le gonfleur par le cordon d’alimentation ou le conduit
d’air.
• Ne pas tirer exagérément sur le cordon d’alimentation ou le conduit d’air.
• Ne jamais orienter le conduit d’air d’un gonfleur sur soi, sur d’autres personnes
ou sur des animaux.
• Ne jamais démarrer un véhicule lorsque le gonfleur est branché dans une prise
électrique de 12 volts c.c. Voir le mode d’emploi page 13 à 14.
• Utiliser le gonfleur uniquement pour ce à quoi il est destiné. Ne pas altérer ni
modifier le gonfleur.
Ne pas ranger le gonfleur dans des lieux humides. Protéger le gonfleur de la
pluie, de la neige ou d’autres sources d’humidité.
• Lorsqu’il n’est pas utilisé, s’assurer que l’interrupteur d’alimentation du gonfleur
est sur OFF (arrêt). Voir n°1, Figure 1, page 11. Ranger le gonfleur hors de portée des enfants.
• IMPORTANCE D’UNE BONNE PRESSION DES PNEUS
— Une bonne pression des pneus est vitale pour la sécurité routière.
— Une bonne pression des pneus peut permettre des économies de carburant.
— Vérifier régulièrement la pression des pneus en observant les recommanda-
tions du fabricant.
— Vérifier toujours la pression à température ambiante, et jamais après un long
voyage.
AVERTISSEMENT : L’AIR COMPRIMÉ PEUT ÊTRE DANGEREUX
— Ne jamais laisser les enfants utiliser ce gonfleur.
— Ne jamais laisser le gonfleur sans surveillance lorsqu’il est en marche
— Ne jamais surgonfler les objets. Un surgonflage peut provoquer des dommages
matériels et des blessures corporelles.
— Vérifier la pression de gonflage recommandée par le fabricant avant
d’entreprendre le gonflage.
AVERTISSEMENT : SANS VENTILATION ADÉQUATE, LES ÉCHAPPEMENTS D’UN
VÉHICULE SONT EXTRÊMEMENT DANGEREUX
— Ne jamais démarrer un véhicule et le laisser tourner dans un lieu confiné ou
fermé comme un garage. Démarrer et faire tourner le véhicule dehors.
Page 13

13
FONCTIONNEMENT DU GONFLEUR
POUR GONFLER DES PNEUS :
1. Retirer et dérouler le cordon d’alimentation 12 volts (voir n°13, Figure 1, page 11) du
compartiment de rangement. Voir n°10, Figure 1.
2. S’assurer que l’interrupteur d’alimentation du gonfleur est sur OFF (arrêt). Voir n°1,
Figure 1.
3. Mettre le frein de stationnement et démarrer le moteur. Voir « Avertissement :
Échappement du véhicule sans ventilation adéquate », page 12.
4. Brancher la fiche allume-cigarette du gonfleur dans la prise allume-cigarette 12 volts
du véhicule.
5. Vérifier les spécifications du fabricant concernant la pression recommandée pour les
pneus sur le flanc des pneus.
6. Localiser le manomètre à cadran (voir n°3, Figure 1) et tourner le cadran pré-réglé
jusqu’à ce que l’indicateur d’arrêt automatique/Stop soit sur la pression d’arrêt souhaitée. Voir Figure 2, page 11. La fonctionnalité de gonflement préréglée cesse le
gonflage automatiquement une fois la pression pré-déterminée atteinte.
7. Dérouler le conduit d’air de son système de rangement et raccorder la buse du conduit d’air sur le corps de la valve du pneu du véhicule en vissant la buse sur le corps
dans le sens horaire jusqu’à ce qu’elle soit solidement en place. Voir n°6, Figure 1. Ne
pas mettre en marche le gonfleur.
REMARQUE : Lorsque la buse est correctement raccordée, attendre 5 à 7 secondes pour
que le manomètre donne la pression actuelle du pneu Toujours respecter les pressions
de gonflage recommandées par le fabricant pour éviter le surgonflage. Si le pneu est trop
gonflé, appuyer sur le bouton de la valve de purge pour dégonfler en libérant l’air jusqu’à
ce que le manomètre indique la bonne pression. Voir n°8, Figure 1.
Le manomètre du gonfleur est fourni à titre de référence uniquement et ses valeurs sont
juste indicatives. Lors du gonflage, le manomètre donne la mesure de la pression fluctuante entre le pneu et le conduit haute pression. Pour réduire les risques de surgonflage,
utiliser un manomètre fiable régulièrement pendant le gonflage avant de conduire un
véhicule gonflé avec le gonfleur.
8. Mettre l’interrupteur d’alimentation du gonfleur sur marche. Voir n°1, Figure 1. Le BellAire™ 3000 va alors gonfler le pneu à la pression préréglée puis s’arrêter automatiquement. Une fois que l’arrêt automatique préréglé s’est produit, mettre l’interrupteur
d’alimentation du gonfleur sur la position d’arrêt. Voir n°1, Figure 1.
9. Pour arrêter le gonfleur avant qu’il n’atteigne la pression d’arrêt automatique préréglée, mettre l’interrupteur d’alimentation du gonfleur sur la position d’arrêt. Voir n°1,
Figure 1.
10. Retirer la buse du conduit d’air de la tige de la valve du pneu du véhicule en tournant
la buse dans le sens antihoraire et remettre le conduit d’air dans son espace de rangement intégré sur le gonfleur.
11. Débrancher le gonfleur de la prise de l’allume-cigarette 12 volts et ranger le cordon
sans son compartiment de rangement.
12. Arrêter le moteur du véhicule.
POUR GONFLER DES BALLONS DE SPORT ET AUTRES PETITS OBJETS GONFLABLES SOUS HAUTE PRESSION :
1. Retirer et dérouler le cordon d’alimentation 12 volts (voir n°13, Figure 1, page 11) du
compartiment de rangement. Voir n°10, Figure 1.
2. Dérouler le conduit d’air de son système de rangement (voir n°6, Figure 1) et sélectionner l’une des petites aiguilles de l’adaptateur fournies dans le compartiment de rangement. Voir Figure 3, page 11.
Page 14

14
BellAire™ Model 3000 Tire Inflator Instructions • Mode d’emploi du gonfleur de pneu BellAire™ Modèle 3000
3. Fixer l’aiguille de l’adaptateur sur la buse du conduit d’air en tournant l’aiguille de
l’adaptateur dans le sens horaire
4. Vérifier les spécifications de pression recommandées par le fabricant pour les objets à
gonfler.
5. Localiser le manomètre à cadran (voir n°3, Figure 1) et tourner le cadran préréglé
jusqu’à ce que l’indicateur d’arrêt automatique/Stop soit sur la pression d’arrêt souhaitée. Voir Figure 2, page 11. La fonctionnalité de gonflement préréglée cesse le
gonflage automatiquement une fois la pression pré-déterminée atteinte.
6. Insérer l’aiguille de l’adaptateur dans l’objet à gonfler.
7. S’assurer que l’interrupteur d’alimentation du gonfleur est sur OFF (arrêt). Voir n°1,
Figure 1.
8. Mettre le frein de stationnement et démarrer le moteur. Voir « Avertissement :
Échappement du véhicule sans ventilation adéquate », page 12.
9. Brancher la fiche allume-cigarette du gonfleur dans la prise allume-cigarette 12 volts
du véhicule.
REMARQUE : Lorsque la buse est correctement raccordée, attendre 5 à 7 secondes pour
que le manomètre donne la pression actuelle de l’objet gonflable. Toujours respecter les
pressions de gonflage recommandées par le fabricant pour éviter le surgonflage. Si l’objet
est surgonflé, appuyer sur le bouton de la valve de purge pour dégonfler en libérant l’air
jusqu’à ce que le manomètre indique la bonne pression. Voir n°8, Figure 1.
Le manomètre du gonfleur est fourni à titre de référence uniquement et ses valeurs sont
juste indicatives. Lors du gonflage, le manomètre mesure la pression fluctuante entre l’objet
à gonfler et le conduit haute pression.
Pour gonfler des objets exigeant une pression de 10 PSI (0,69 bars) ou moins, gonfler par
petits à-coups et vérifier au toucher ou à l’aide d’un dispositif de mesure pour déterminer la
pression exacte.
10. Mettre l’interrupteur d’alimentation du gonfleur sur marche. Voir n°1, Figure 1. Le
BellAire™ 3000 va alors gonfler l’objet gonflable à la pression préréglée puis s’arrêter
automatiquement. Une fois que l’arrêt automatique préréglé s’est produit, mettre
l’interrupteur d’alimentation du gonfleur sur la position d’arrêt. Voir n°1, Figure 1.
11. Pour arrêter le gonfleur avant qu’il n’atteigne la pression d’arrêt automatique préréglée, mettre l’interrupteur d’alimentation du gonfleur sur la position d’arrêt. Voir
n°1, Figure 1.
12. Retirer la buse du conduit d’air de l’objet, retirer l’aiguille de l’adaptateur de la buse du
conduit d’air en tournant l’aiguille dans le sens antihoraire, puis remettre le conduit
d’air et l’aiguille de l’adaptateur dans son espace de rangement sur le gonfleur.
13. Débrancher le gonfleur de la prise de l’allume-cigarette 12 volts et ranger le cordon
sans son compartiment de rangement.
14. Arrêter le moteur du véhicule.
UTILISATION DE LA LAMPE DE TRAVAIL DEL :
1. La lampe de travail DEL flexible (voir n°5, Figure 1, page 11) fonctionne avec un interrupteur d’éclairage distinct. Voir n°2, Figure 1. Il est possible d’utiliser la lampe seule
ou lorsque l’on gonfle pour éclairer l’aire de travail.
2. Positionner la lampe de travail de façon à obtenir le meilleur éclairage de votre espace
de travail.
Page 15

15
ENTRETIEN
DIAGNOSTIC ET DÉPANNAGE
1. Votre BellAire™ 3000 possède un fusible de rechange offrant une protection maximale
pour le gonfleur et/ou votre véhicule. Voir Figure 4 pour les instructions de remplacement du fusible.
2. Vérifier régulièrement l’intégrité du conduit d’air du gonfleur, du cordon 12 volts et
des adaptateurs.
3. Le gonfleur doit rester sec, propre, sans trace d’huile ou de graisse. Toujours utiliser un
chiffon propre pour le nettoyage.
Le gonfleur ne démarre pas lorsque l’interrupteur d’alimentation du gonfleur est sur
Marche :
• Vérifier que la fiche est parfaitement insérée dans la prise 12 volts de l’allume-cigarette.
Voir le mode d’emploi pages 13 à 14.
• Il se peut qu’il faille mettre le contact du véhicule sur la position Accessoires pour que
l’allume-cigarette soit alimenté. Le gonfleur devrait être utilisé lorsque le véhicule
tourne.
• Vérifier si le fusible de la prise 12 volts de l’allume-cigarette est grillé. Voir les instructions de remplacement du fusible dans la section Entretien. Voir Figure 4 ci-dessus.
Le gonfleur ne s’arrête pas à la pression d’arrêt automatique préréglée :
• Vérifier que les réglages de pression d’arrêt automatique sont correctement établis.
Voir le mode d’emploi pages 13 à 14.
• Vérifier que la pression préréglée établie est la bonne.
Le cordon d’alimentation 12 volts chauffe :
• S’assurer que le cordon d’alimentation n’est pas entortillé, qu’il n’y a pas de nœud et qu’il
n’est pas endommagé.
La lecture du manomètre semble incorrecte :
• Lorsque la buse du conduit d’air est raccordée au corps du pneu, vérifier que le
manomètre donne la pression actuelle du pneu avant de mettre le gonfleur en
marche.
• Attendre 5 à 7 secondes pour que le manomètre affiche la bonne pression.
Le gonfleur fonctionne, mais le pneu ne se gonfle pas :
• Arrêter le gonfleur et vérifier que la buse du conduit d’air est bien raccordée au corps
de la valve du pneu.
Tourner l’embout dans le sens antihoraire pour déverrouiller le corps de l’adaptateur de fusible
Fusible (remplacer uniquement par un fusible ACG 15 A en verre)Corps de l’adaptateur
Remplacement du fusible 12 volts de l’adaptateur
— FIGURE 4 —
Page 16

16
BellAire™ Model 3000 Tire Inflator Instructions • Mode d’emploi du gonfleur de pneu BellAire™ Modèle 3000
CONTACT INFORMATION • COORDONNÉES
Bell Automotive® Products, Inc.
Attn: Customer Service
18940 N. Pima Road, Suite 200
Scottsdale, AZ 85255
www.bellautomotive.com
Bell Automotive® Products, Inc.
Attn: Customer Service
18940 N. Pima Road, Suite 200
Scottsdale, AZ 85255 , États-Unis
www.bellautomotive.com
GARANTIE
Garantie à vie
Bell Automotive® Products, Inc. garantit ce produit contre tout défaut de matériau et de
fabrication. Bell Automotive® Products, Inc., réparera ou remplacera, à sa discrétion, ce
produit ou tout composant de ce produit qui s’avérerait défectueux. Le remplacement
consistera en un produit ou composant neuf ou remis à neuf. Dans l’hypothèse où se
produit ne serait plus disponible, il sera échangé pour un produit similaire.
Cette garantie n’est valable que pour l’acheteur original et n’est pas transférable. Conserver
la preuve d’achat originale. Cette preuve d’achat vous sera demandée pour obtenir une
couverture au titre de la garantie.
Ce que cette garantie ne couvre pas
Cette garantie ne couvre pas les pièces qui ne sont pas des pièces Bell Automotive®
d’origine, ni les dommages résultant de : négligence ou utilisation impropre du produit;
utilisation d’une tension ou d’un courant inapproprié; utilisation commerciale du produit;
utilisation non conforme au mode d’emploi, démontage, réparation ou altération effectués
par un tiers autre que Bell Automotive® Products, Inc. De plus, cette garantie ne couvre
pas les catastrophes naturelles telles que les incendies, les inondations, les ouragans ou les
tornades.
Bell Automotive® Products, Inc. ne peut être tenue responsable de tout dommage
accessoire ou indirect dû à la violation de toute garantie explicite ou implicite, sauf dans la
mesure interdite par la loi applicable, et toute garantie implicite de qualité marchande ou
d’adéquation à un usage particulier est limitée à la garantie ou aux conditions ci-dessus.
Certains états, provinces ou juridictions n’autorisent pas l’exclusion ou la limitation des
dommages accessoires ou indirects ou les limites de durée d’une garantie implicite, auquel
cas la limitation ou l’exclusion ci-dessus peut ne pas vous concerner. Cette garantie vous
confère des droits juridiques précis, et vous pouvez aussi disposer d’autres droits variant
selon les états ou les provinces.
Les frais d’expédition du produit à Bell Automotive® Products, Inc. pour un service au titre
de la garantie incombent à l’acheteur.
NE PAS RAPPORTER CE PRODUIT SUR LE LIEU D’ACHAT.
Si vous avez des questions concernant cette garantie, n’hésitez pas à nous
contacter ci-dessous :
 Loading...