

Page 1
Installation for the F5U004 in Windows 2000
If you Downloaded the Software off the website, it’s a compressed file and needs to be
unzipped before running this setup.
Steps:
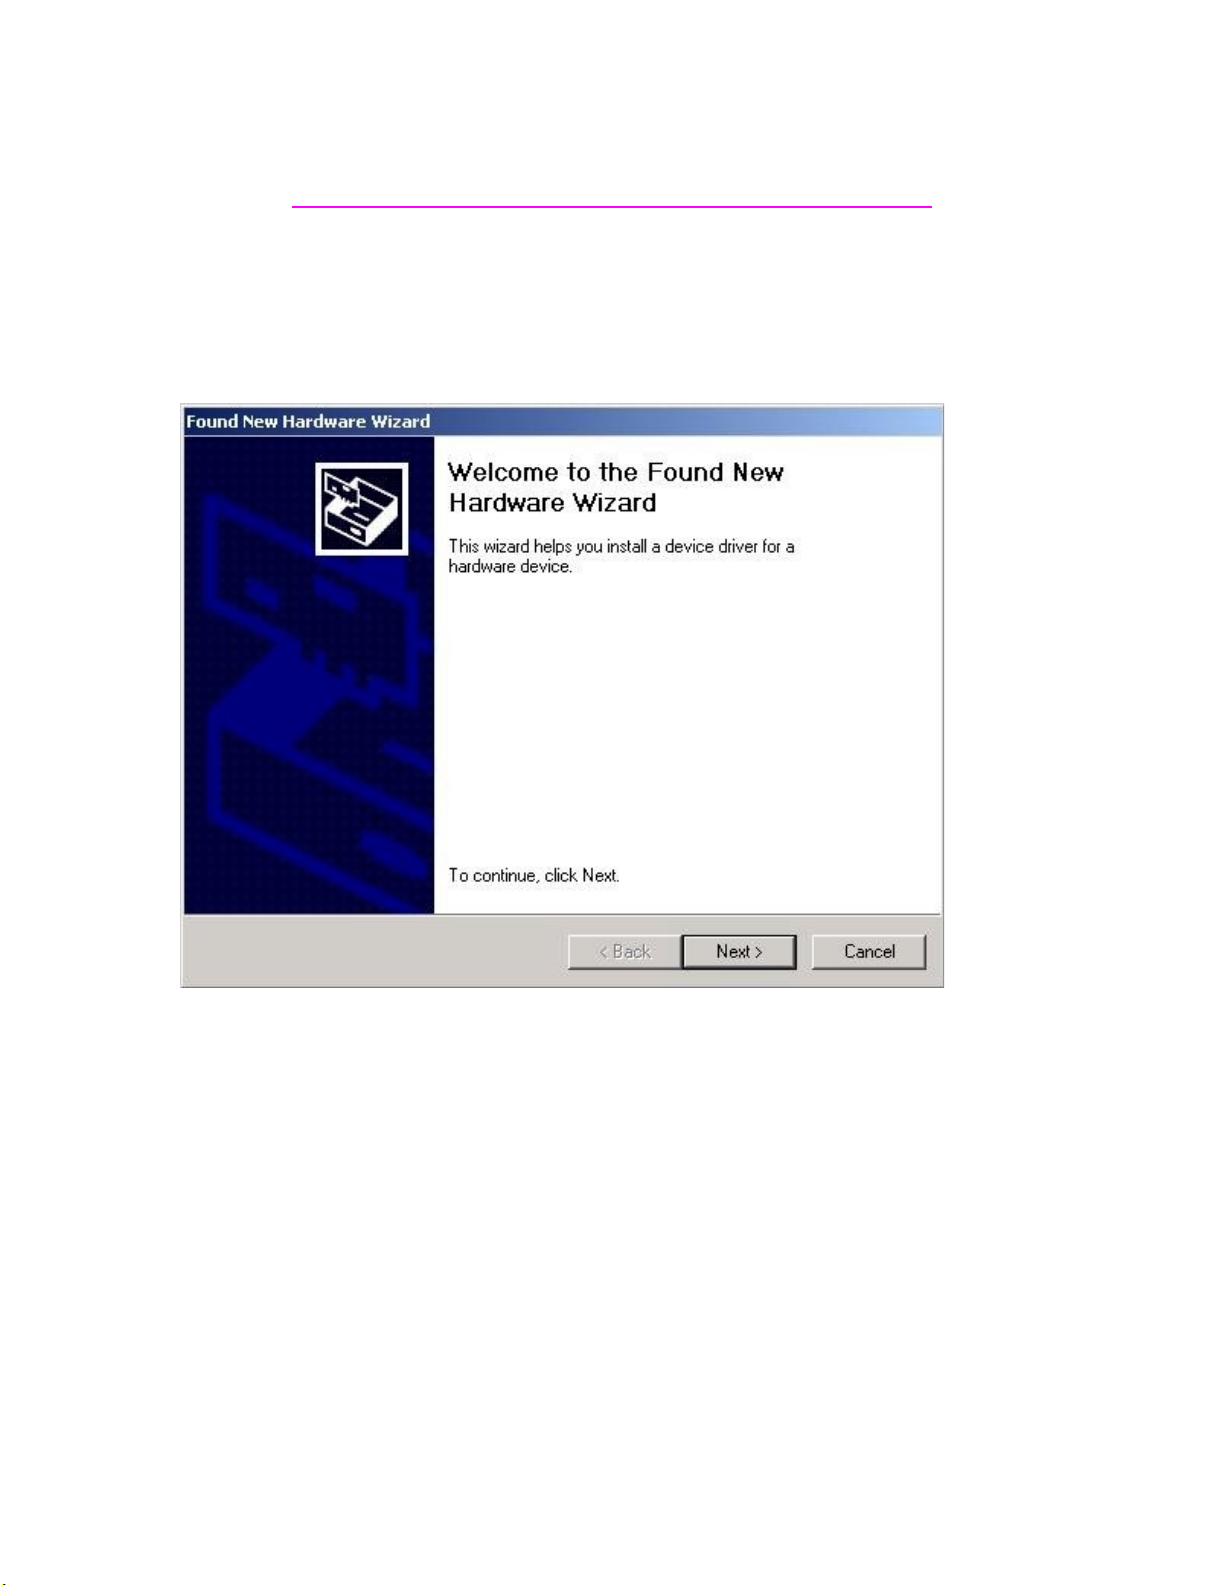
1. Connect the direct connect to your PC. This window Should Appear.
2. Search for a suitable driver… Should already be selected Go ahead and Click Next.
Page 2
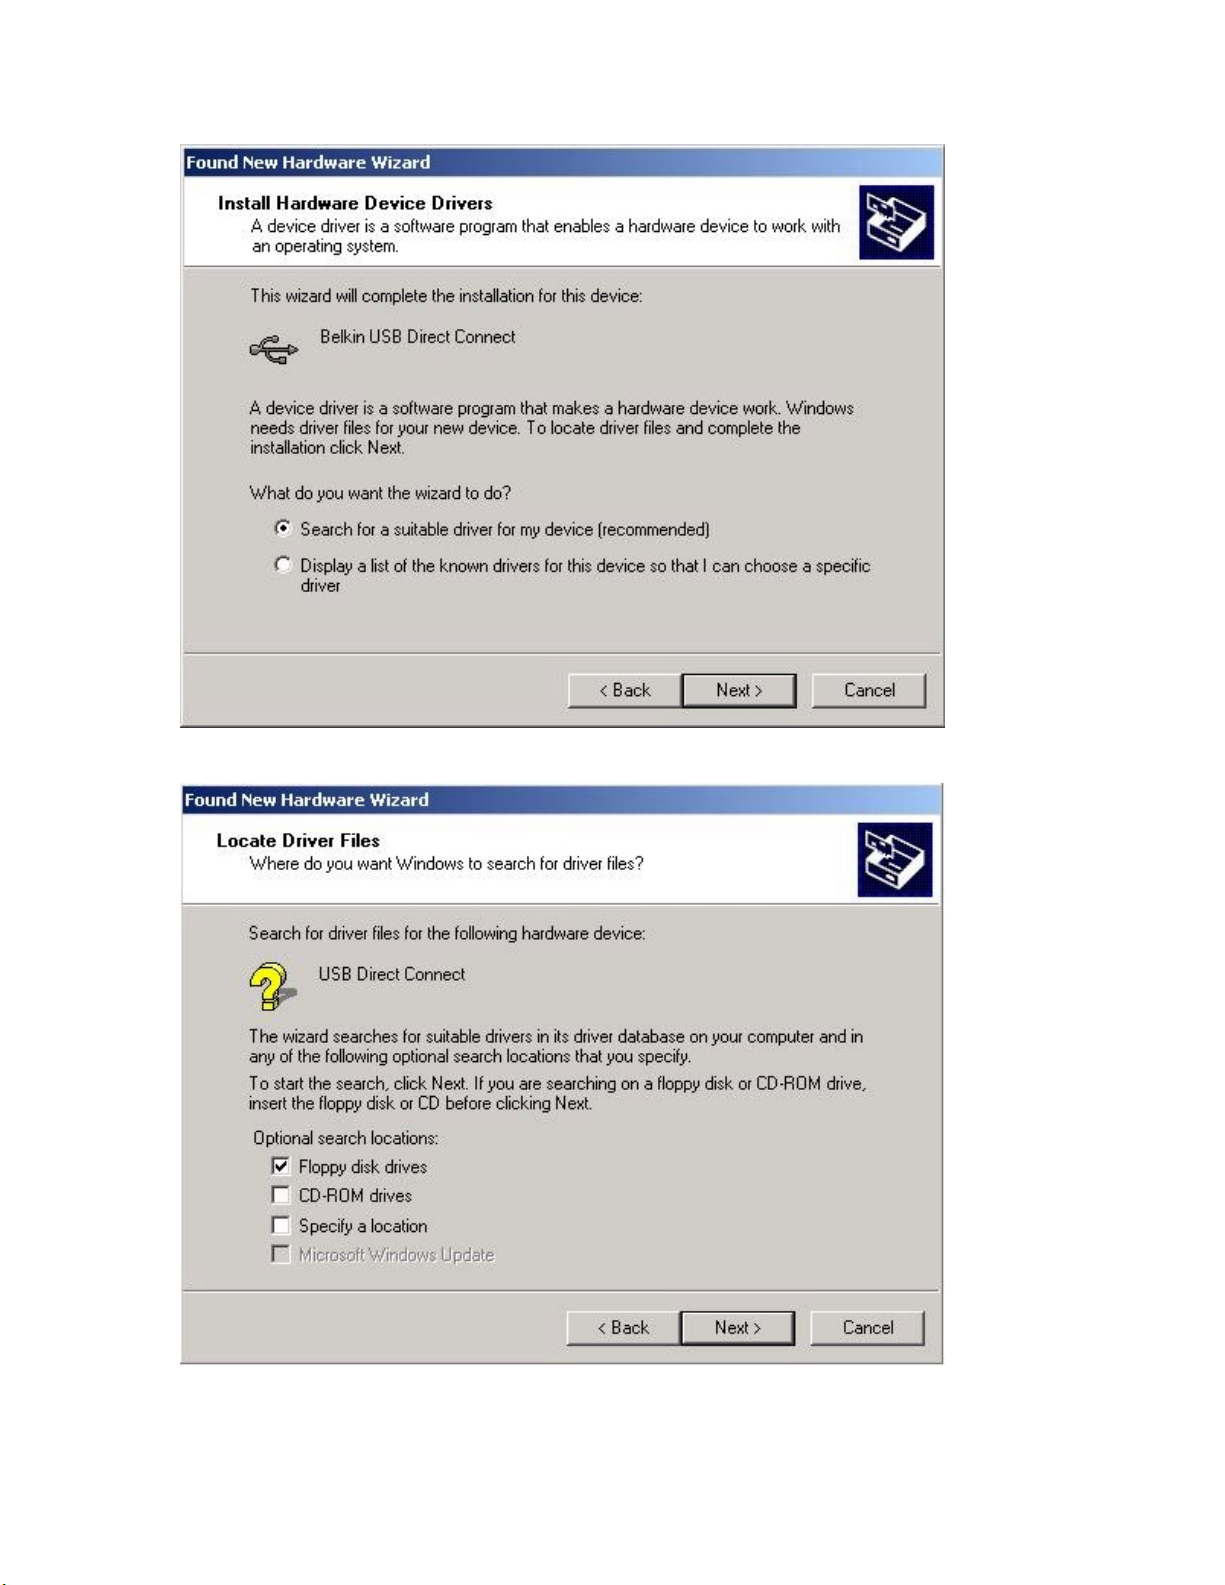
3. Check Specify a Location and uncheck everything else and click next.
Page 3
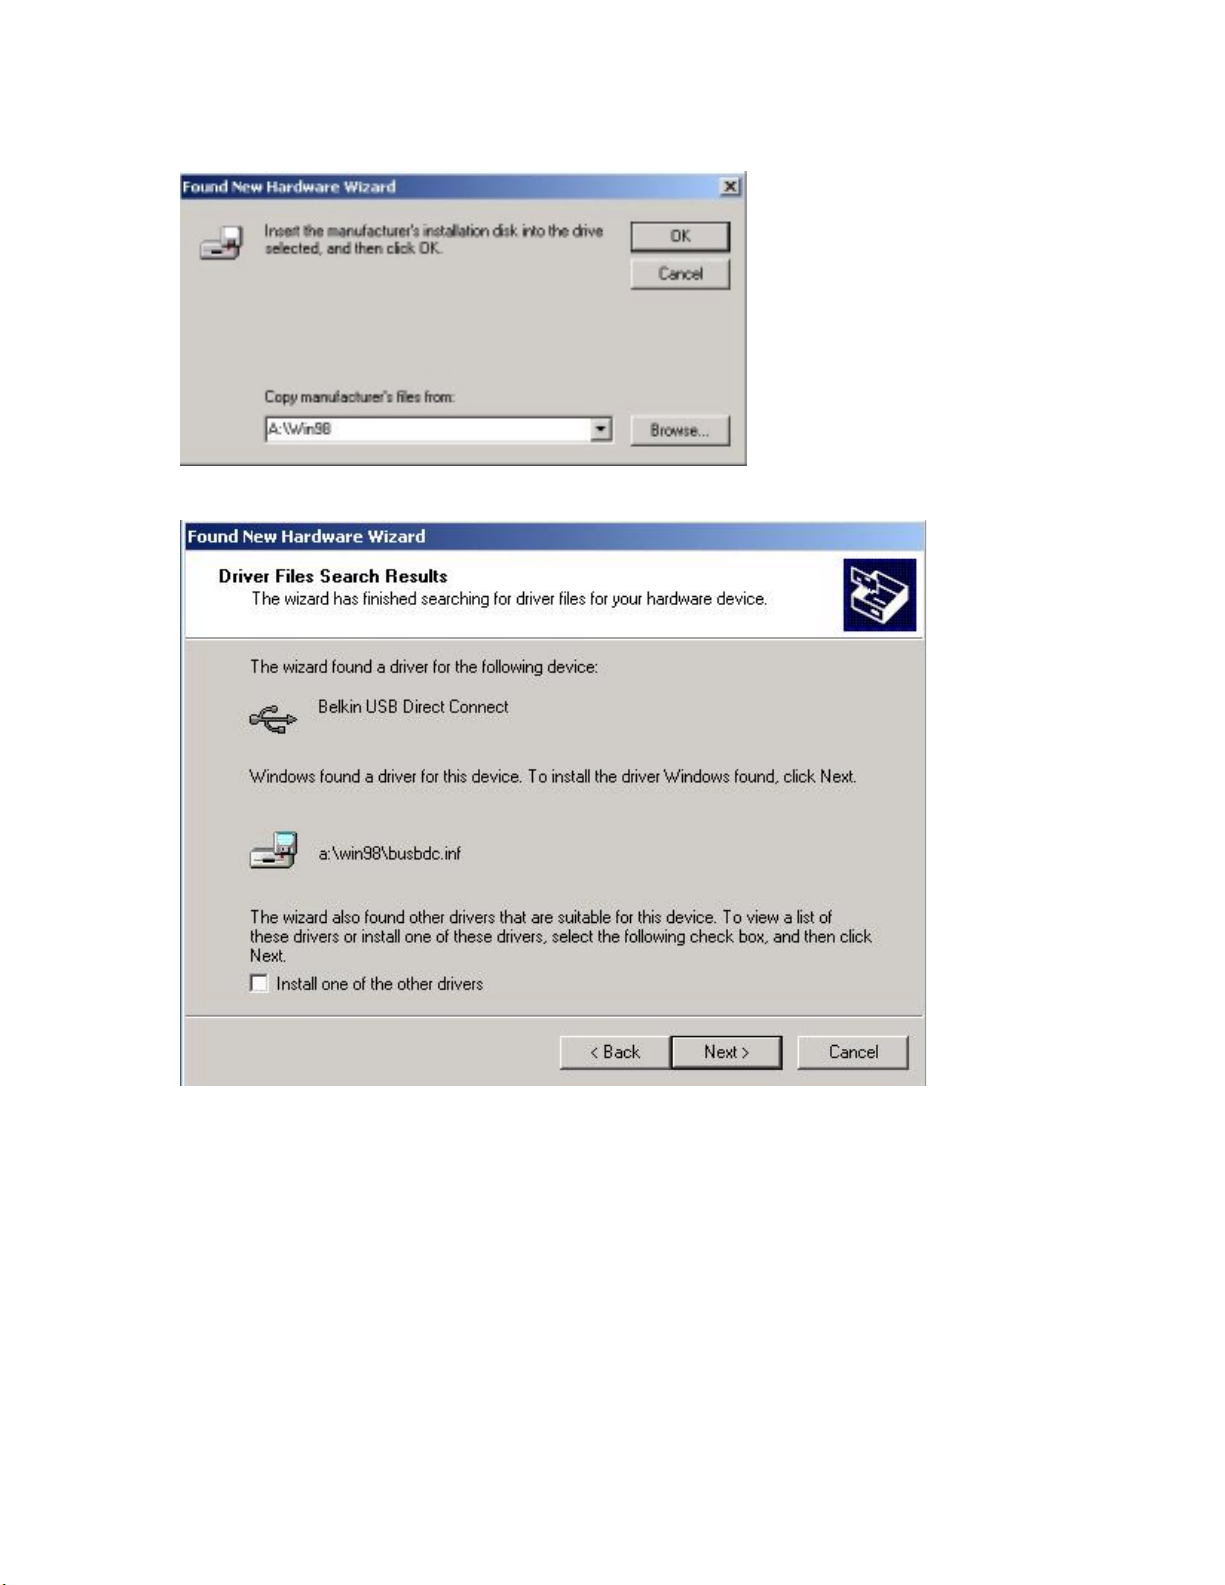
4. Type A:\win98 and click next
5. Click next on this window.
6. Click Finish.
Page 4

7. After installing the software, you will then need to install the Belkin Network Adapter
on to your system. By doing this, you will have to go to your control Panel
(Start/Setting/Control Panel. And select Add/Remove Hardware by double clicking the
Icon.
8. Then Click Next.
Page 5

9. Add/Troubleshoot a Device should already be selected. If its not, select it and click
Next.
Page 6

10. Then select Add a new device and click next.
11. Here you want to select: No, I want to select the Hardware from a list. And click next.
Page 7

12. Select Network Adapter and click next.
13. In here you want to select: Have Disk.
Page 8

14. Then Type A:\win98 and hit OK.
15. It should then bring to this windows again but have our adapter as an option. Here
you select it and Hit next.
16. Hit Next.
Page 9

17. This window might come. If it does, then click next.
18. Hit Finish.
Page 10

Now your USB Direct Connect should now be correctly installed.
19. Now it’s time to set up your Network configuration. To do this, first go to My
Network Places Properties by Right clicking on the My Network Place Icon on your
desktop.
20. Then select your “Local Area Connection” Icon. If you have many there to choose
from, It should be the one with number next to it. In this example it “Local Area
Connection 7”. Yours may be different. When you determine which one is yours Right
click on it and go to Properties.
Page 11

21. Make sure that under connect using, it says “Belkin Direct Connect Network
Adapter”. If it does not, then that means you did not select the correct one under
my network places Properties in step 19 and 20.
22. Now need to make sure the all the boxes in the list below check marks in them.
23. Then Double left click on “Internet Protocol (TCP/IP)”
Page 12

24. Here you need to set your IP Address and Subnet Mask. It might be set to Obtain
Automatically. If it is then select Use the following IP address and in the Box
below it type your IP address. We recommend using 192.168.?.? . The first
three sections of the address should be the same but the last section must be
different between. (For Example Computer 1 is 192.168.100.1 and Computer 2
is 192.168.100.2)
25. Then Set your Subnet Mask to 255.255.255.0 And hit ok.
26. Now you can close out of the these windows and return to you desktop.
Page 13

27. On your desktop you should have a My Computer Icon. Right Click on My computer
and go to properties. Next go to Network Identification and Select Properties.
Page 14

28. In here you Select the Computer name that will Identify it on the network and also
select your Workgroup name which needs to be identical on all the PC’s that are
connected. (It is case sensitive)
Page 15

29. You are now finished and you should restart. When the computer Boots it might
ask for you to put in a password. In order for your network to connect correctly, you
will need to have a User name and password for it. If you hit cancel, then you will not
correctly be logged onto the network.
30. Now you will need to repeat these steps on the Other PC’s.
Note: These instruction are written for the software off our website. If any other the
installation does not correctly, it is recommend that you download the current drivers.
 Loading...