

Page 1
INTRODUCTION
Enable wireless and wireless security on your Belkin VoIP modem/router.
APPLIES TO:
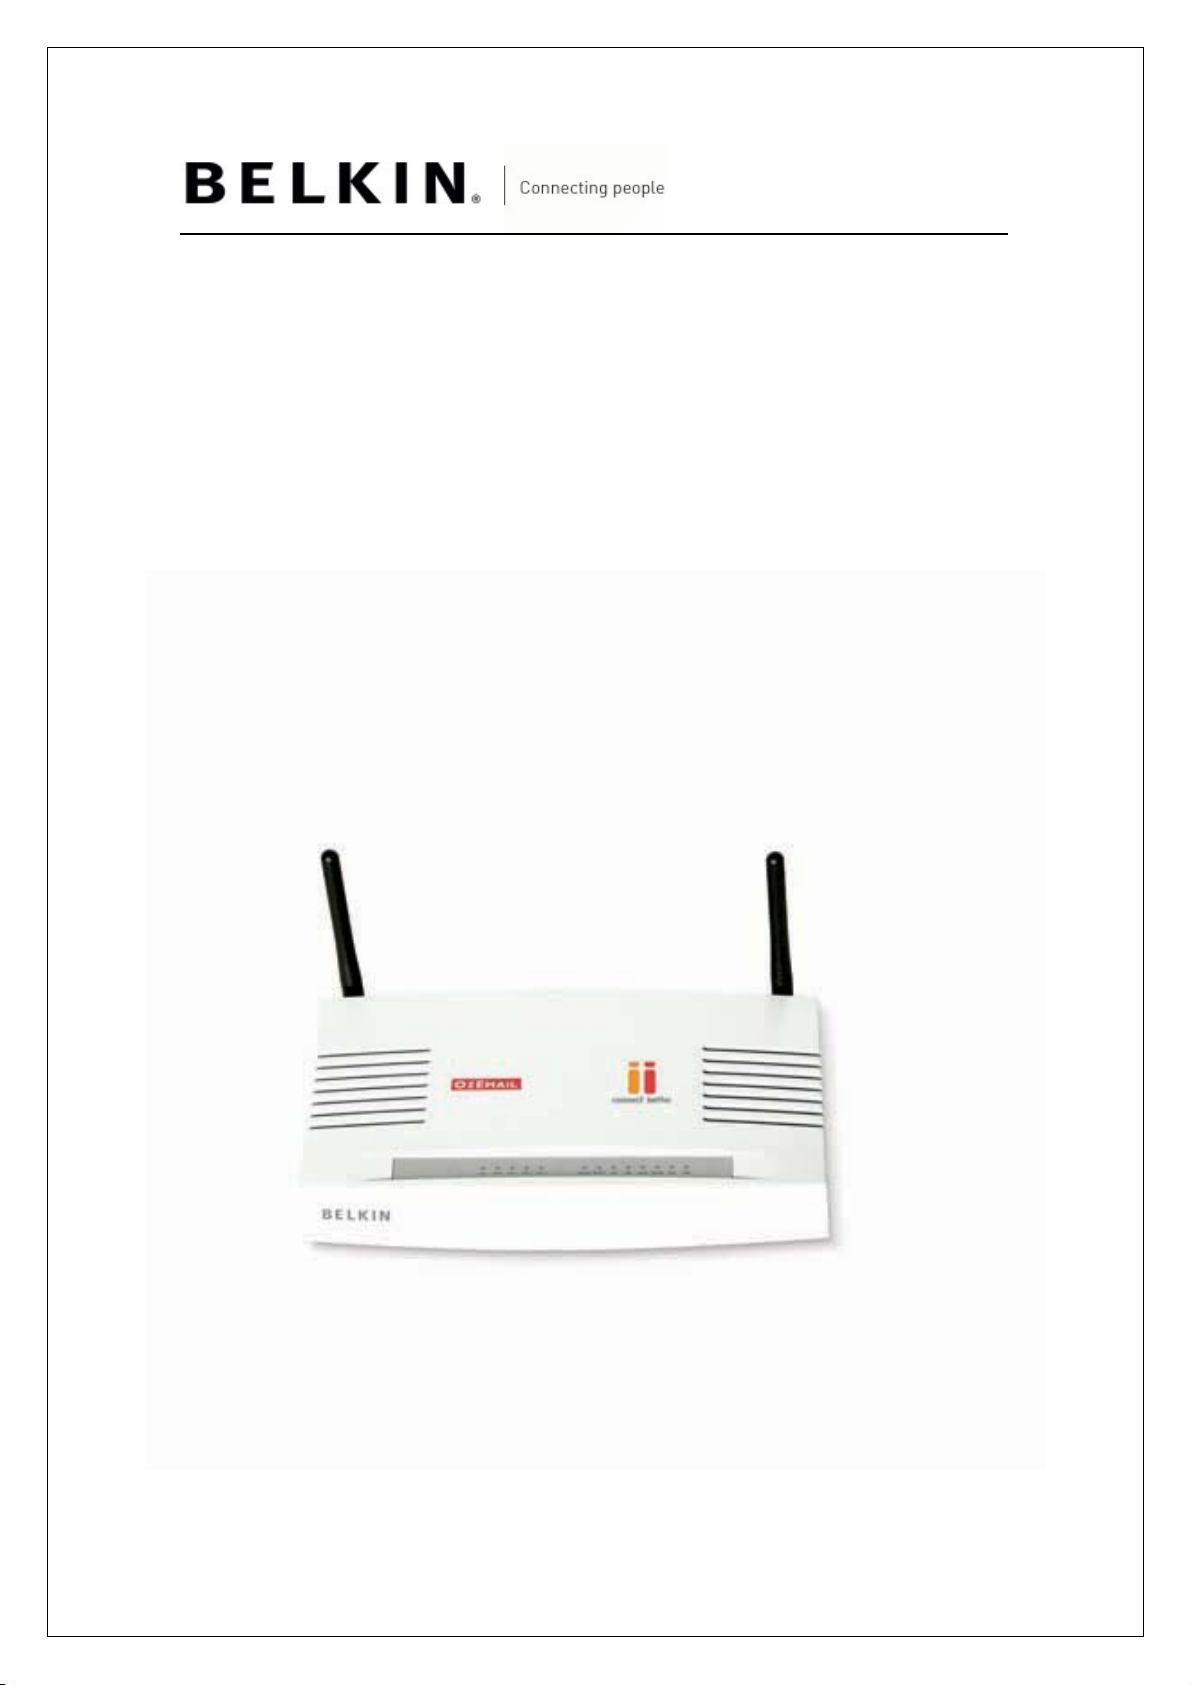
• F1PI241EGau
Page 2

TABLE OF CONTENTS:-
Enable Wireless on your Modem/Router 1
Setup Wireless Encryption 3
Wireless Security Information 3
64 Bit WEP 4
128 Bit WEP 6
WPA 8
Connecting to the Wireless Network 9
Page 3
Before you begin:
You will need:
• Belkin Wireless / VoIP unit
• Power cable
• Network cable
Hardware check:
• Your computer is switched on
• The Wireless / VoIP unit is switched on (power switch at rear)
• Network cable connected from computer to the Wireless / VoIP unit
STEPS:
1) Open your web browser (Internet Explorer, Mozilla FireFox, Safari etc)
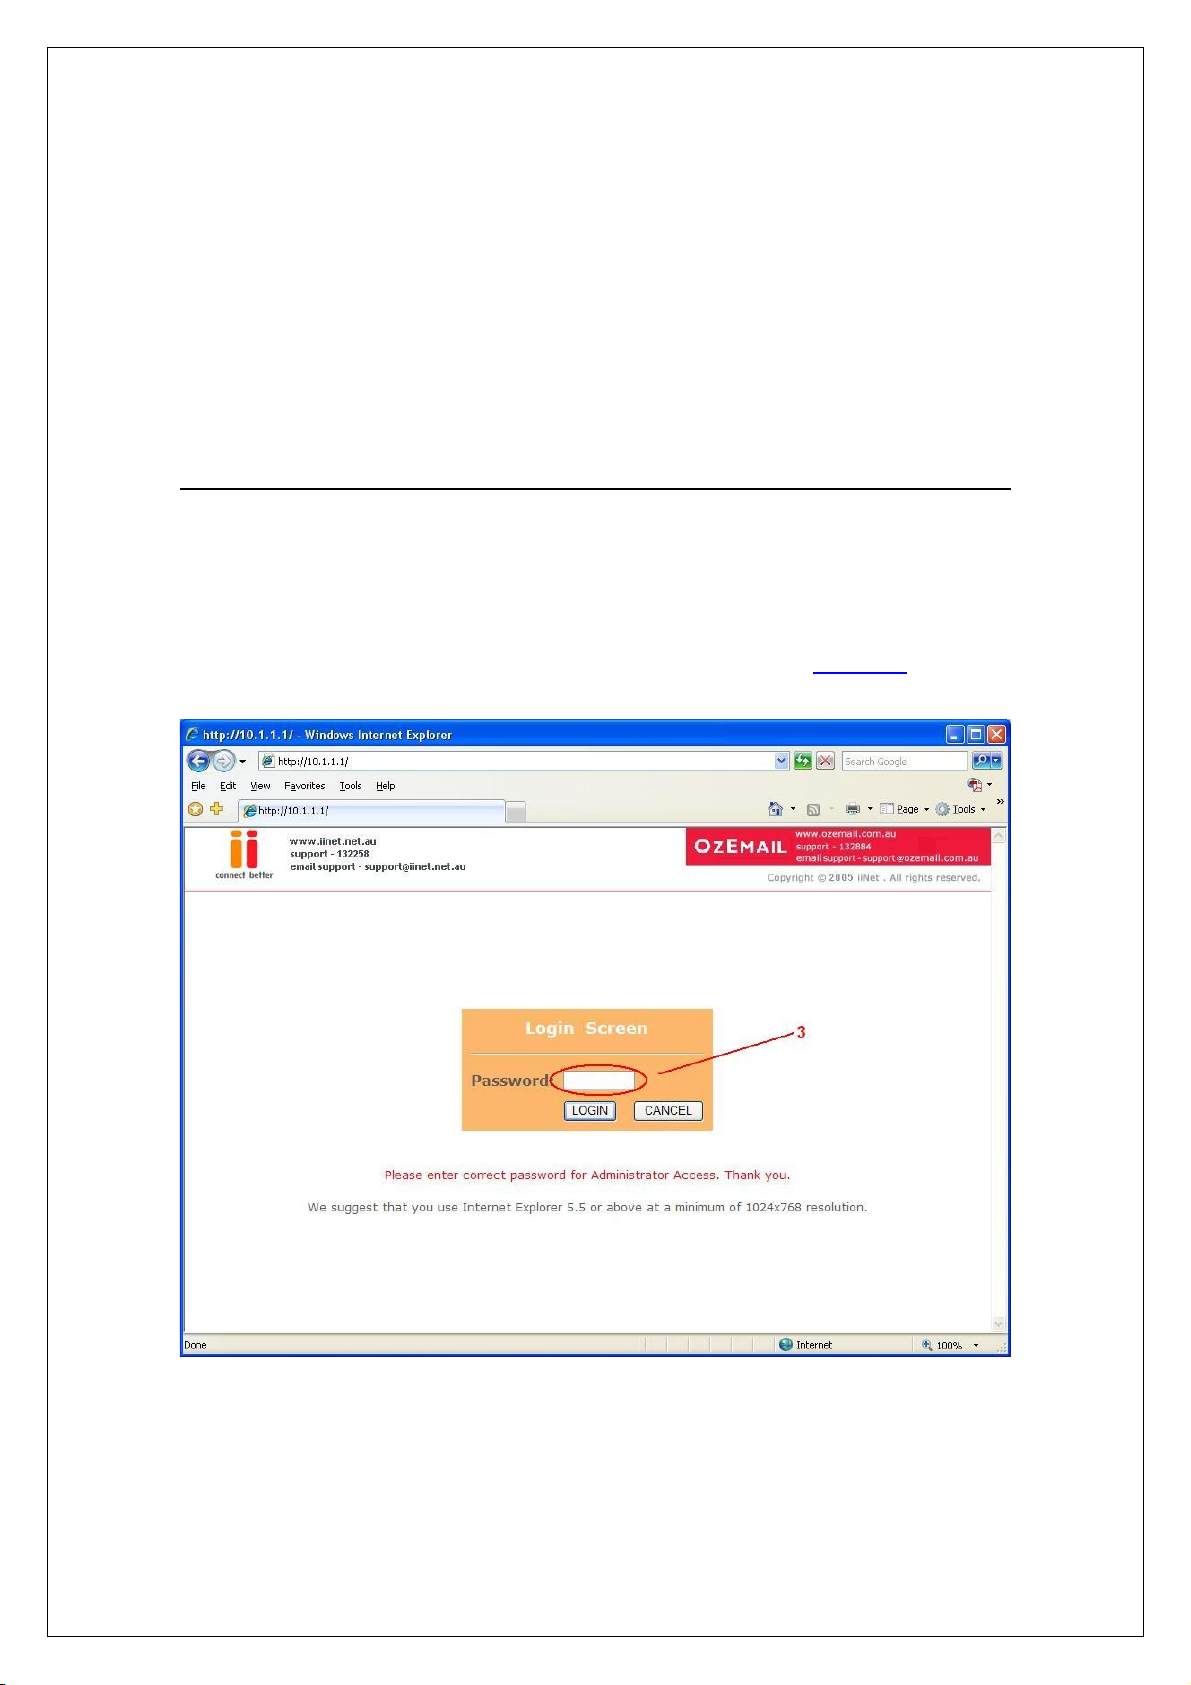
2) In the Address Bar, delete any text and type in 10.1.1.1 or click here to open
the page directly
3) Type in your current password (default password = admin) then click LOGIN
4) On the left hand side of the screen click Advanced Setup
1
Page 4
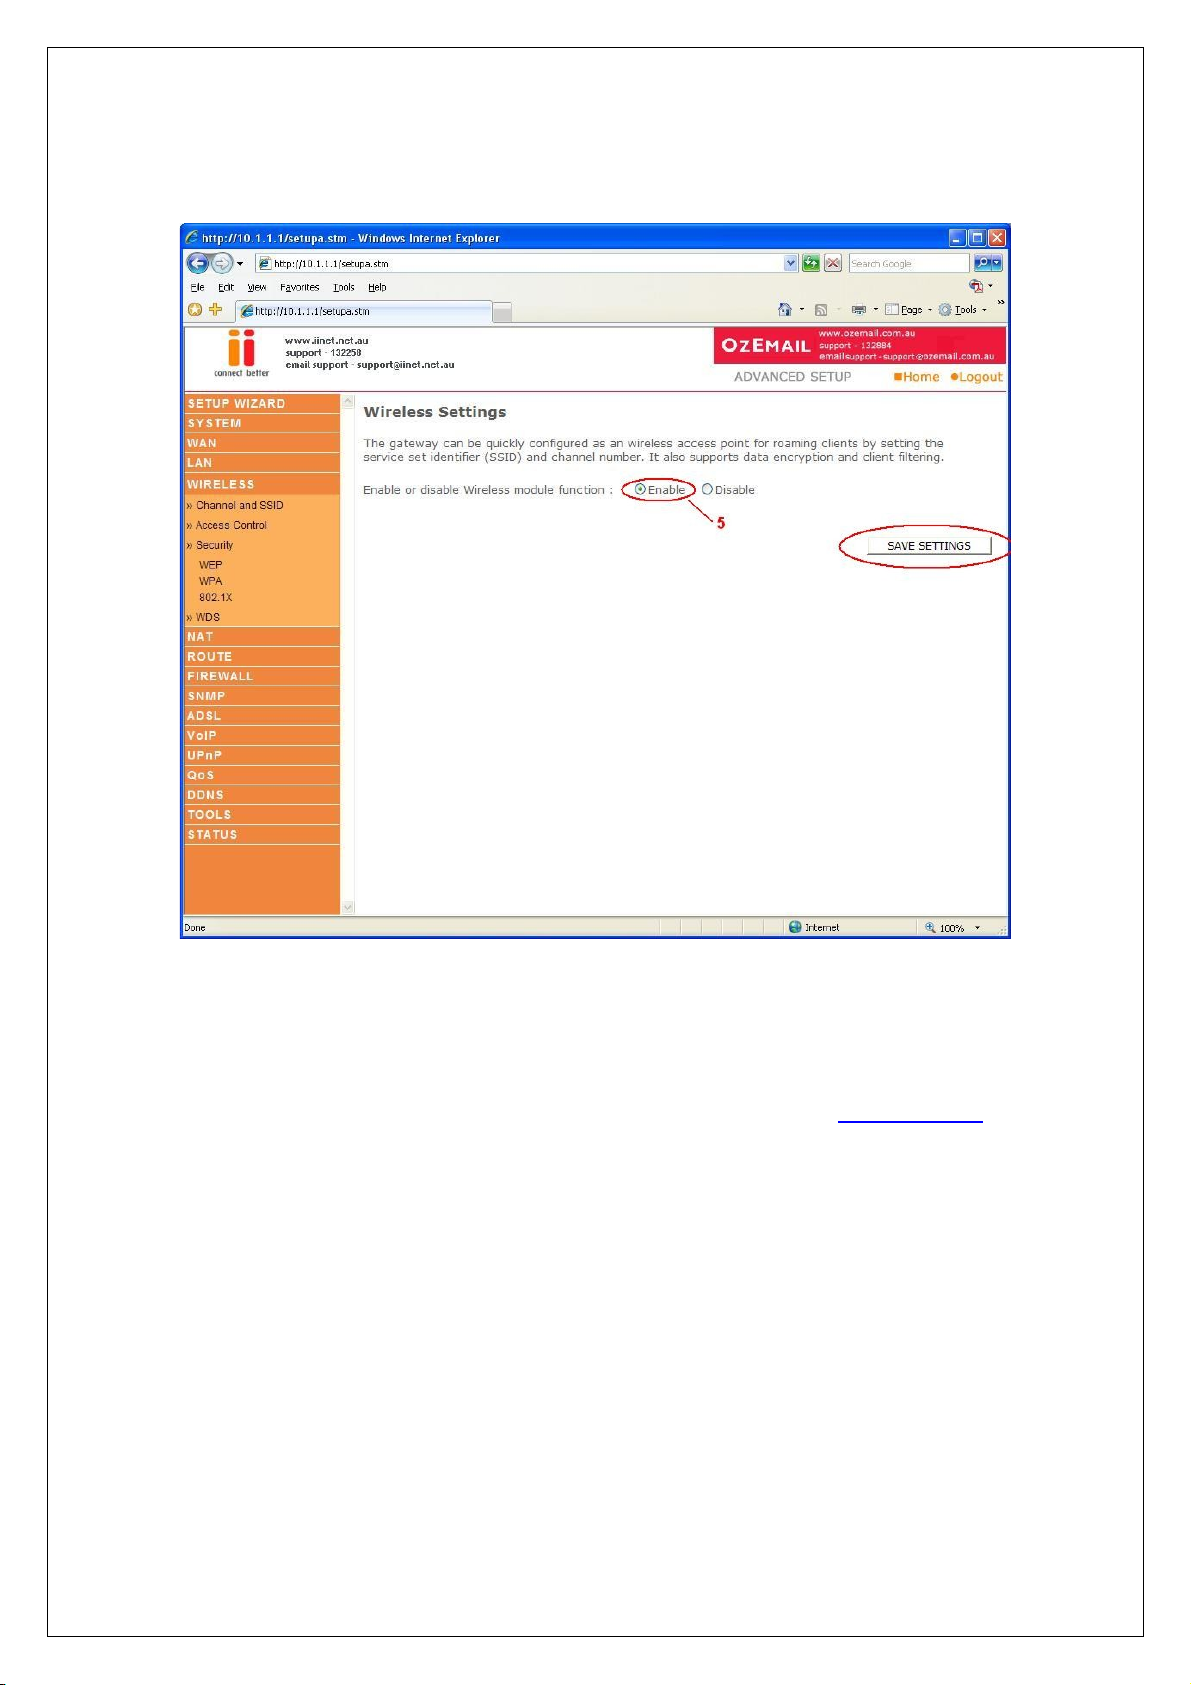
5) You will now be presented with more options in the menu on the left. Click
Wireless then click Enable Wireless Function and click Save Settings
Wireless is now enabled. We strongly recommend that you setup Wireless Security to
help protect your wireless network against unauthorised use.
If you like to setup Wireless Security, please follow the steps on the following page.
2
Page 5

WIRELESS SECURITY INFORMATION
Click the type of security you wish to setup:-
1) 64 Bit WEP
2) 128 Bit WEP
3) WPA
3
Encryption
Type Pros Cons Recommended usage
64 Bit WEP Most compatible form of encryption Least secure Older computers and wireless adapters
(Windows 98/ME/2000 &/or 802.11b Wireless
Easy to setup and manage
Home users
128 Bit WEP More secure than 64 Bit, yet still Long network key Apple Macintosh/Office use
widely supported by wireless cards (26 Characters)
WPA Easy to setup and most secure form Limited support Windows XP (Service Pack 2)
of encryption Later model wireless cards
Cards)
Page 6

64 Bit WEP:-
1) Under Wireless click WEP
2) Click Enable for WEP Function
3) Click 64 Bit for WEP Mode leave all other settings as default
4) Under Key 4 field, click the Clear button
5) Place a tick in the Passphrase field
6) In the space provided in Passphrase, create a passphrase – this can be
any combination of letters and numbers
7) Click Save Settings
4
Page 7

8) Now click WEP again
9) Write down the characters in Key 1 – this is now your ‘Network Key’
or ‘Encryption Key’
NB. There are ten (10) characters in total.
This is the ‘key’ that will be required to be entered on your wireless PC. When you
setup your wireless adapter, it will ask you to type in a ‘Network Key’ or ‘Encryption
Key’.
10) 64 Bit WEP is now enabled.
Click here for information on how to connect to the Wireless Network.
5
Page 8

128 Bit WEP:-
1) Under Wireless click WEP
2) Click Enable for WEP Function
3) Click 128 Bit for WEP Mode leave all other settings as default
4) Under Key 4 field, click the Clear button
5) Place a tick in the Passphrase field
6) In the space provided in Passphrase, create a password – this can be any
combination of letters and numbers
7) Click Save Settings
6
Page 9

8) Now click WEP again
9) Write down the characters in Key 1 – this is now your ‘Network Key’ or
‘Encryption Key’
NB. There are twenty six (26) characters in total.
This is the ‘key’ that will be required to be entered on your wireless PC. When you
setup your wireless adapter, it will ask you to type in a ‘Network Key’ or ‘Encryption
Key’.
10) 128 Bit WEP is now enabled.
Click here for information on how to connect to the Wireless Network.
7
Page 10

WPA:-
1) Under Wireless click WPA
2) Click Enable for WPA Function
3) Authentication is Pre-Shared Key – leave all other settings as default
4) In the space provided in Pre-shared Key, create a password – minimum of
eight (8) characters, it can be any combination of numbers and letters
5) Click Save Settings
6) Now click WPA again
7) The password you created earlier is now your ‘Network Key’ or ‘Encryption
Key’. This is the ‘key’ that will be required to be entered on your wireless PC.
8) WPA is now enabled.
Click here for information on how to connect to the Wireless Network.
8
Page 11

Connecting to the Wireless Network using Wireless Zero Configuration
1) If you are using a laptop or notebook with a built in wireless connection, make
sure the Wireless Switch and/or Wireless Button on your computer is turned
on. (Please refer to the documentation which came with your computer for
further details)
2) Open Control Panel, select Network Connections. (If you do not have
Network Connections select Network and Internet Connections, then click
Network Connections.)
3) Right click on Wireless Network Connection, select Properties
4) Click Wireless Networks, make sure there is a tick in ‘Use Windows to
configure my wireless network settings’ and click OK.
5) Right click on Wireless Network Connection again and select View Available
Wireless Networks
9
Page 12

6) Select your network from the list and click Connect
7) If you have encryption enabled – it will prompt you to enter your Network
Key. In the Network Key field type in the network key you wrote down when
setting up encryption in the router.
8) Re-enter the key next to Confirm Network Key and click Connect.
9) You should now be connected to your wireless network.
10
Page 13

For further assistance setting up non-Belkin wireless cards (including laptops
with built-in wireless) you will need to contact the appropriate manufacturer. If
you required further assistance with a Belkin Wireless Card, please contact
Belkin Technical Support on 1800 BELKIN.
11
 Loading...