

Belkin TuneStage 2 User Manual

Introduction
User Manual
TuneStage® 2 for iPod
®
Setup Instructions | 02Introduction | 01
Introduction
TuneStage 2 provides a st ylish, easy way to play you r iPod tunes th rough your ho me
stereo —without wi res. Setup takes onl y minutes and r equires no so ftware or custom
configuration. Just p lug it in and e njoy your music.
TuneStage 2 from Belkin delive rs the pristine, CD -quality s ound that iPod users demand.
Featuri ng advanced B luetooth 2. 0 technology for enhanced a udio qualit y, the TuneStage 2
provides improved reje ction of int erference, and lowe r power consumption co mpared to the
Blueto oth 1.2 stand ard. TuneStage 2 transmits wire lessly from u p to 10m away from your stereo,
even thr ough walls. Please re view this User Manual caref ully so that you can b e sure to get the
most from your TuneStag e 2.
The TuneStage 2 works with any iPod that has a
dock connector on the bottom
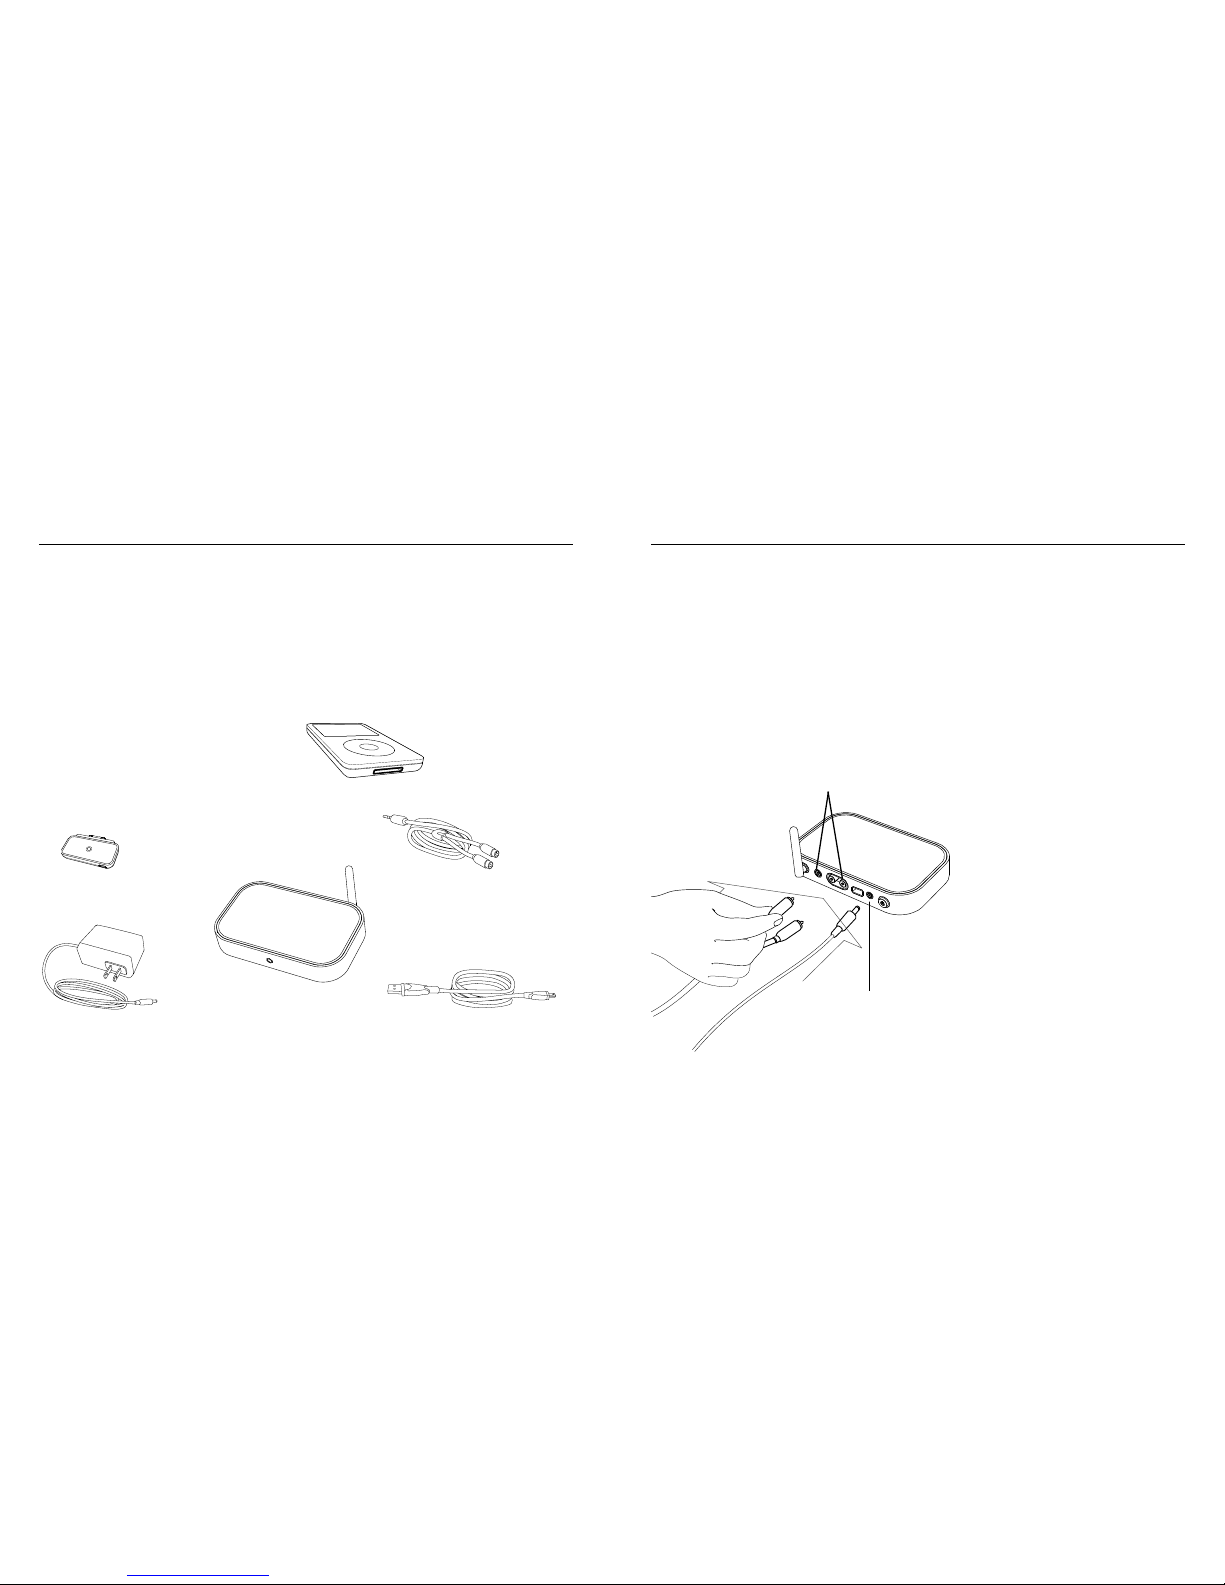
Packa ge Include s
STEP 1 : TuneS tage 2 Rece iver Setup
1. Power of f your stere o system.
2. Plug the TuneStage 2 Receiver into o ne of your home-stereo, au dio-source inputs using the
suppli ed audio cab le, usually the “aux” input is a goo d choice. Do n ot connect TuneStage 2
to your r eceiver’s “pho no” input.
3. Plug the includ ed power adapter into the TuneStage 2 Receiver and then plug the oth er end
into an AC outlet.
4. Press in the power but ton located at the back of the TuneStage 2 Receiver.
5. Power on your home ste reo and sele ct the audio -source inp ut to which the TuneStag e 2
Receiver is connecte d.
Setup Instructions
1.8m Dual RCA-to-3.5 mm Stereo Cabl e
12V/1.0A AC Power Adap ter
TuneStage 2 B luetooth™ Transmi tter
TuneStage 2 B luetooth Re ceiver
2 RCA or 3.5mm Mini-Jac k Stereo Conne ctions
DC-Power-Ada pter Connec tion
^EdY
^EdYb^c^
bV`^c\XdccZXi^dch XdccZXii]ZIjcZHiV\ZIgVchb^iiZgidi]Z^EdY jcYZghiVcY^c\i]ZA:9h
"dg"
e^X`dcZ/
IjcZHiV\ZbVcjVa^aajhigVi^dch
7Za`^c>9<%)$%*$%*dYh
0.9m USB A- to-Mini- B Cable
iPod with video 30GB
Setup Instructions | 03 Operating Instructions | 04
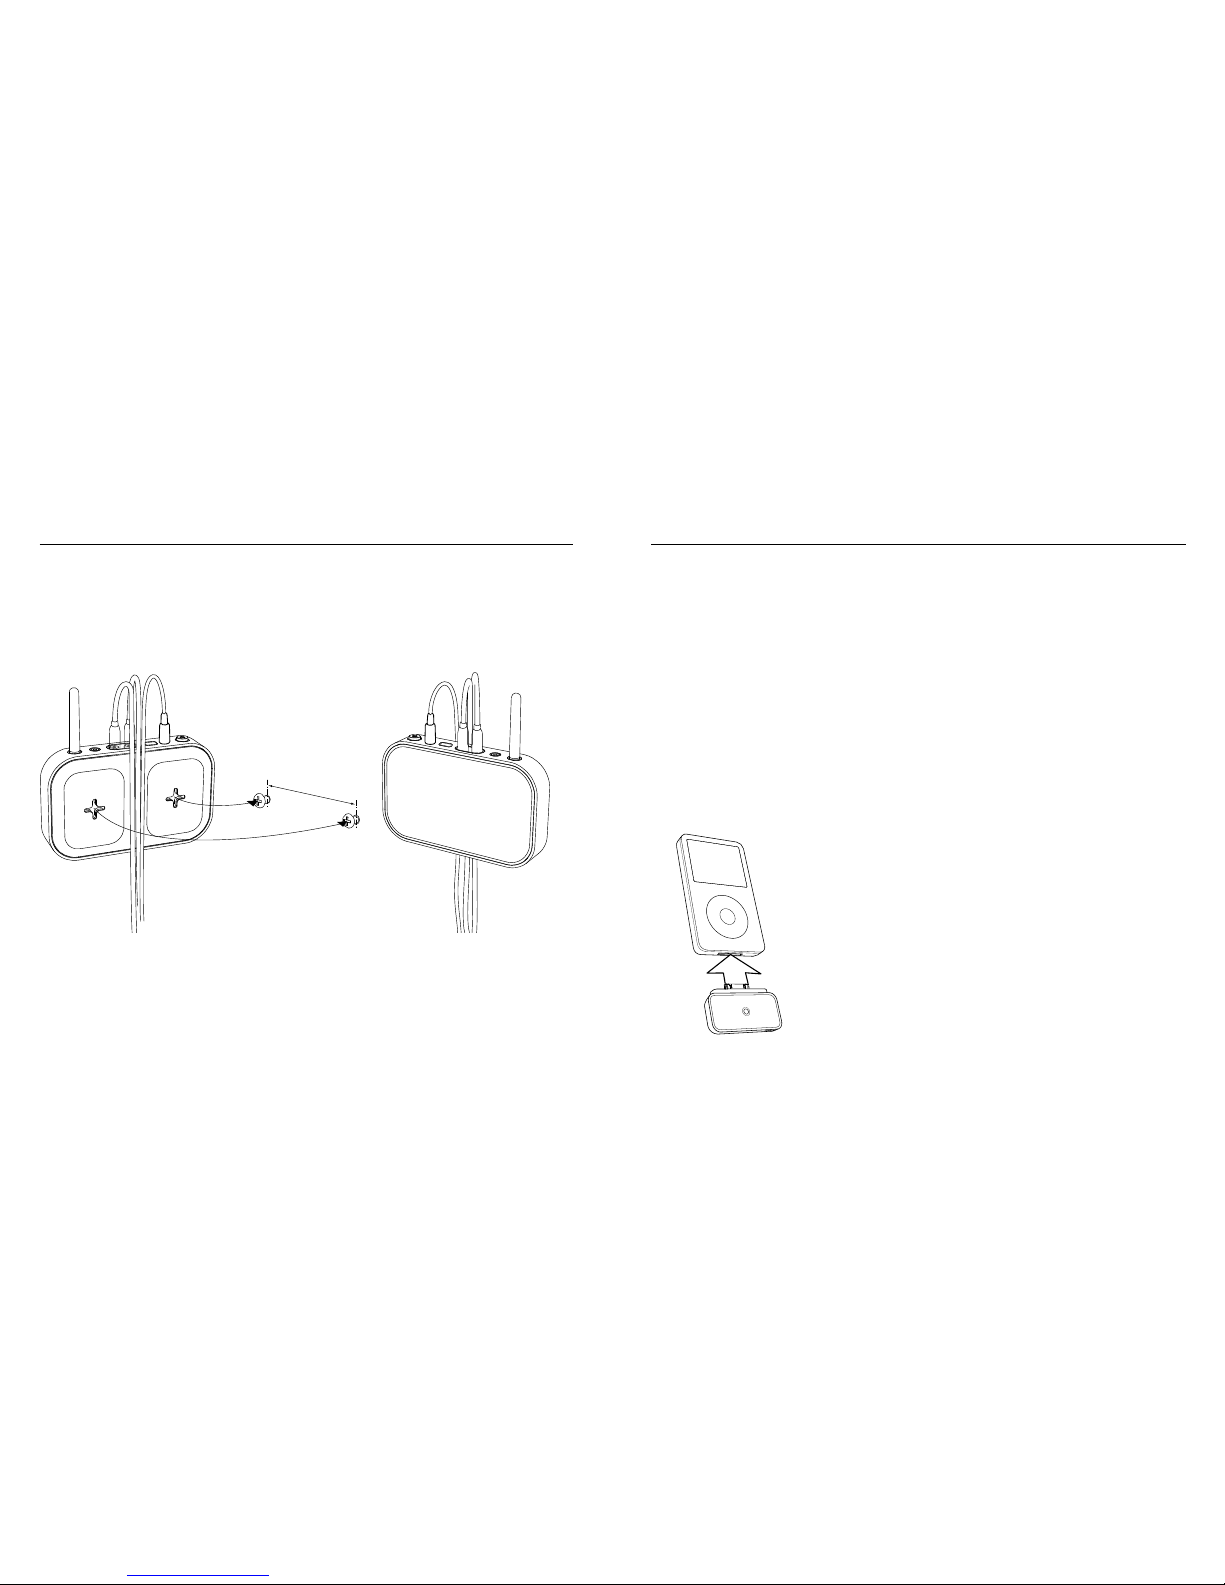
Wall- Mounting t he TuneStage 2 Receiver ( Optional )
1. Make sur e the antenna is pointe d upward.
2. You can hang the Receiver on a wall using two screws (not incl uded).
3. The cables sh ould run thro ugh the channel on the bottom of the Receiver, so they are held
secure ly to the wall .
Setup Instructions
STEP 2 : TuneStage 2 Trans mitter Set up
1. For bes t results, th e Transmi tter should be close to th e Receiver wh en first ma king the
wirele ss connection.
2. Power on your iPod, and then insert the TuneStage 2 Trans mitter into th e bottom of the
iPod. Wait approximatel y two second s and press “PLAY” on the iPod.
3. The Transmitter w ill power on a utomatically, a nd the blue LED will b egin to blink rapidly
while i t searches for the Re ceiver to which to pair. The Re ceiver LED will also blink rapidly
during this search mo de.
4. The Transmitter a nd Receiver w ill pair with each other within 60 s econds. Whe n the devices
are pai red and ready, t he LED on the R eceiver will r emain on and t he LED on the Trans mitter
will bl ink slowly. NOT E: The ne xt time you start up the TuneStage 2, it wil l pair much fa ster
as the R eceiver remembers t he last device with which it p aired. This w ill usually happen i n
less than 10 secon ds.
5. You can now play any song on your iPod th rough your stereo. For the be st audio qual ity,
adjust the volume level on yo ur stereo to l ess than 50- percent full, and use just the iPod to
change the volume up or down.
Operating Instruc tions
80mm
iPod with video 30GB
Operating Instructions | 05 Understanding the LEDs | 06
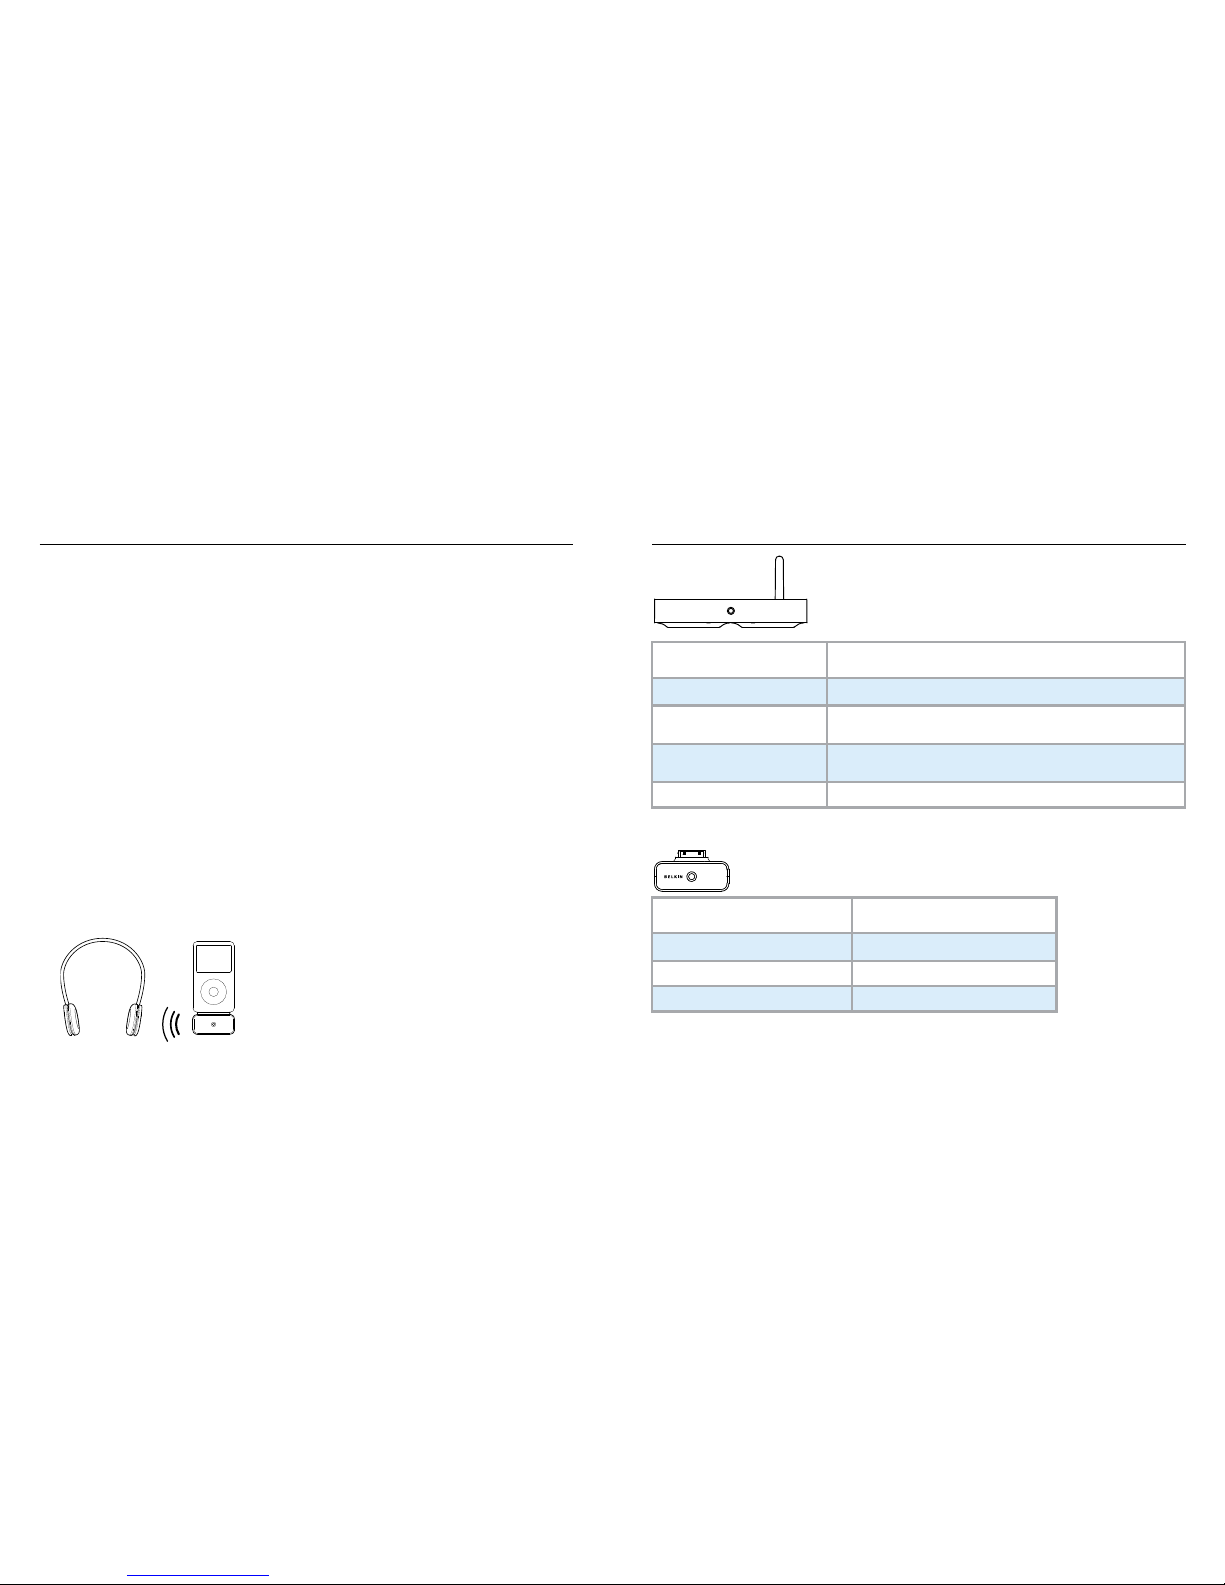
Operating Instruc tions Understanding the LEDs
TuneStage 2 Receiver Status LED Behaviour
Power off Off
Power switched on
Blinks on/off in 0.5-second intervals for 20 seconds, then turns off
(Note: Receiver remains in standby mode, ready to detect a Transmitter.)
Pairing with Transmitter
LED blinks rapidly for 60 seconds (LED will turn OFF after 60 seconds, but
the Receiver will remain detectable)
Paired/receiving signal On
TuneStage 2 Transmitter Status LED Behaviour
Power off Off
Searching for Receiver Blinks on/off rapidly for up to 60 seconds*
Paired/receiving signal Blinks once every 2 seconds
*Universal Pairing Sequence:
The Belkin Transmitter will
automatically search for the last
connected/paired Receiver
device first. If no device is
detected, it will then search for
a new Receiver with a security
code of 0000. This sequence will
last up to a total of 60 seconds.
If no connection is made, the
Receiver will return to standby
mode and the Transmitter will
turn off. To retry pairing, press
“PLAY” on the iPod. Pairing will
automatically begin again.
STEP 3 : TuneStage 2 Setup for U se with Hea dphones E nabled wit h
Bluet ooth Tec hnology ( Optional )
NOTE : TuneStage 2 w ill only pair with stereo h eadphones enabled with
Blueto oth
techno logy that have a pairing code o f 0000. Consult you r headphones ’ manual for the
pairin g code.
1. Make sur e the TuneStage 2 R eceiver’s power but ton is in the off pos ition.
2. Put your headphones enabled with Bluetooth technology into p airing mode. Consult your
headph ones’ user ma nual on how this is don e.
3. For bes t results, th e Transmi tter should be close to th e headphones when f irst makin g a
wirele ss connection.
4. Power on your iPod, and then insert the TuneStage 2 Trans mitter into the bottom of th e
iPod. Wait approximatel y two second s and press “PLAY” on the iPod.
5. The Transmitter w ill power on a utomatically, a nd the blue LED will b egin to blink rapidly
while i t searches for your he adphones to w hich to pair.
6. Your headp hones’ LED in dicator should also blink du ring pairing. Consul t your headph ones’
user ma nual on how the LED- indicator lig ht works.
7. The TuneSta ge 2 Transmitter and your headp hones shoul d pair within 60 seco nds. You will
be abl e to hear music through your headphones if your iPod is in play mode.
8. You can now play any song on your iPod th rough your headphon es. You can control the
volume and track chan ge features th rough your iPo d or through the head phones if they
feature these controls.
 Loading...