

Page 1
CHANGE NOTICE
Firmware Version 1.01.08
The overall look and feel of this new firmware has changed. While graphically the User
Interface has changed, functionally, the User Interface is the same.
NEW ADVANCED FEATURE DOCUMENTATION
Wireless Bridge
Your new firmware has the additional feature of wireless bridging.
Wireless bridging works with the following models only:
F5D7230-4 54g Wireless Cable/DSL Gateway Router
F5D7130 54g Wireless Network Access point
The following firmware version must be install ed on the AP and the Router for proper
operation:
F5D7230-4: Version 1.01.08 or higher
F5D7130: Version 1.01.08 or higher
What is a Wireless Bridge?
A wireless bridge is actually a “mode” in which your Wireless Router can directly connect to a
secondary Wireless Access Point. Note that you can only bridge your 54g Wireless Router (Model
F5D7230-4) to a Belkin 54g Wireless Access Point (model F5D7130). Bridging with other brands
of Access Points is not supported at this time. You can use the bridge mode for extending the
range of your wireless network, or adding an additional extension of your network in another
area of your office or home without running cables.
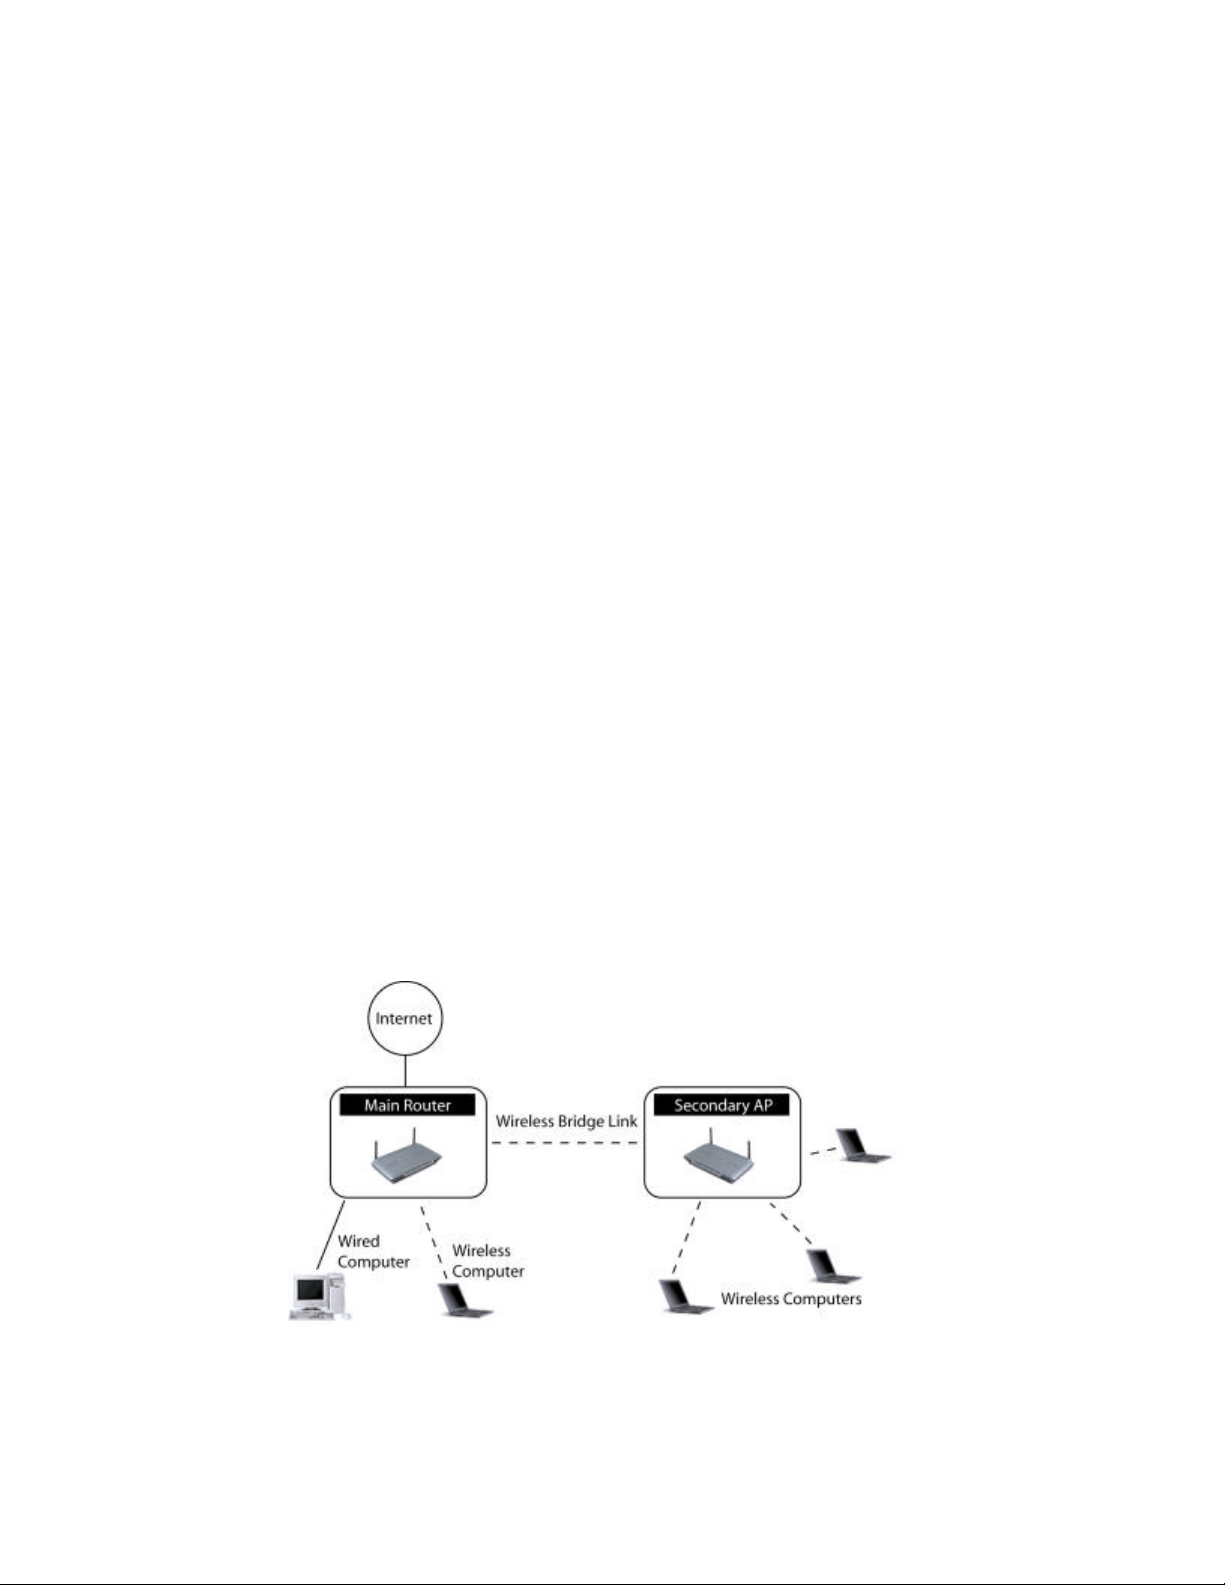
Range Extension
Range extension will extend the wireless coverage area in your home or office. The example
below illustrates using bridging to extend the range of your wireless network. In this example,
the Router is set up to connect to an Access Point located in another area. Laptops can roam,
or move between the two wireless coverage areas.
Adding another network segment wirelessly
Bridging an Access Point to your wireless router will also allow you to add another network
segment without running wires to the area where the new segment is located. Connecting a
Page 2
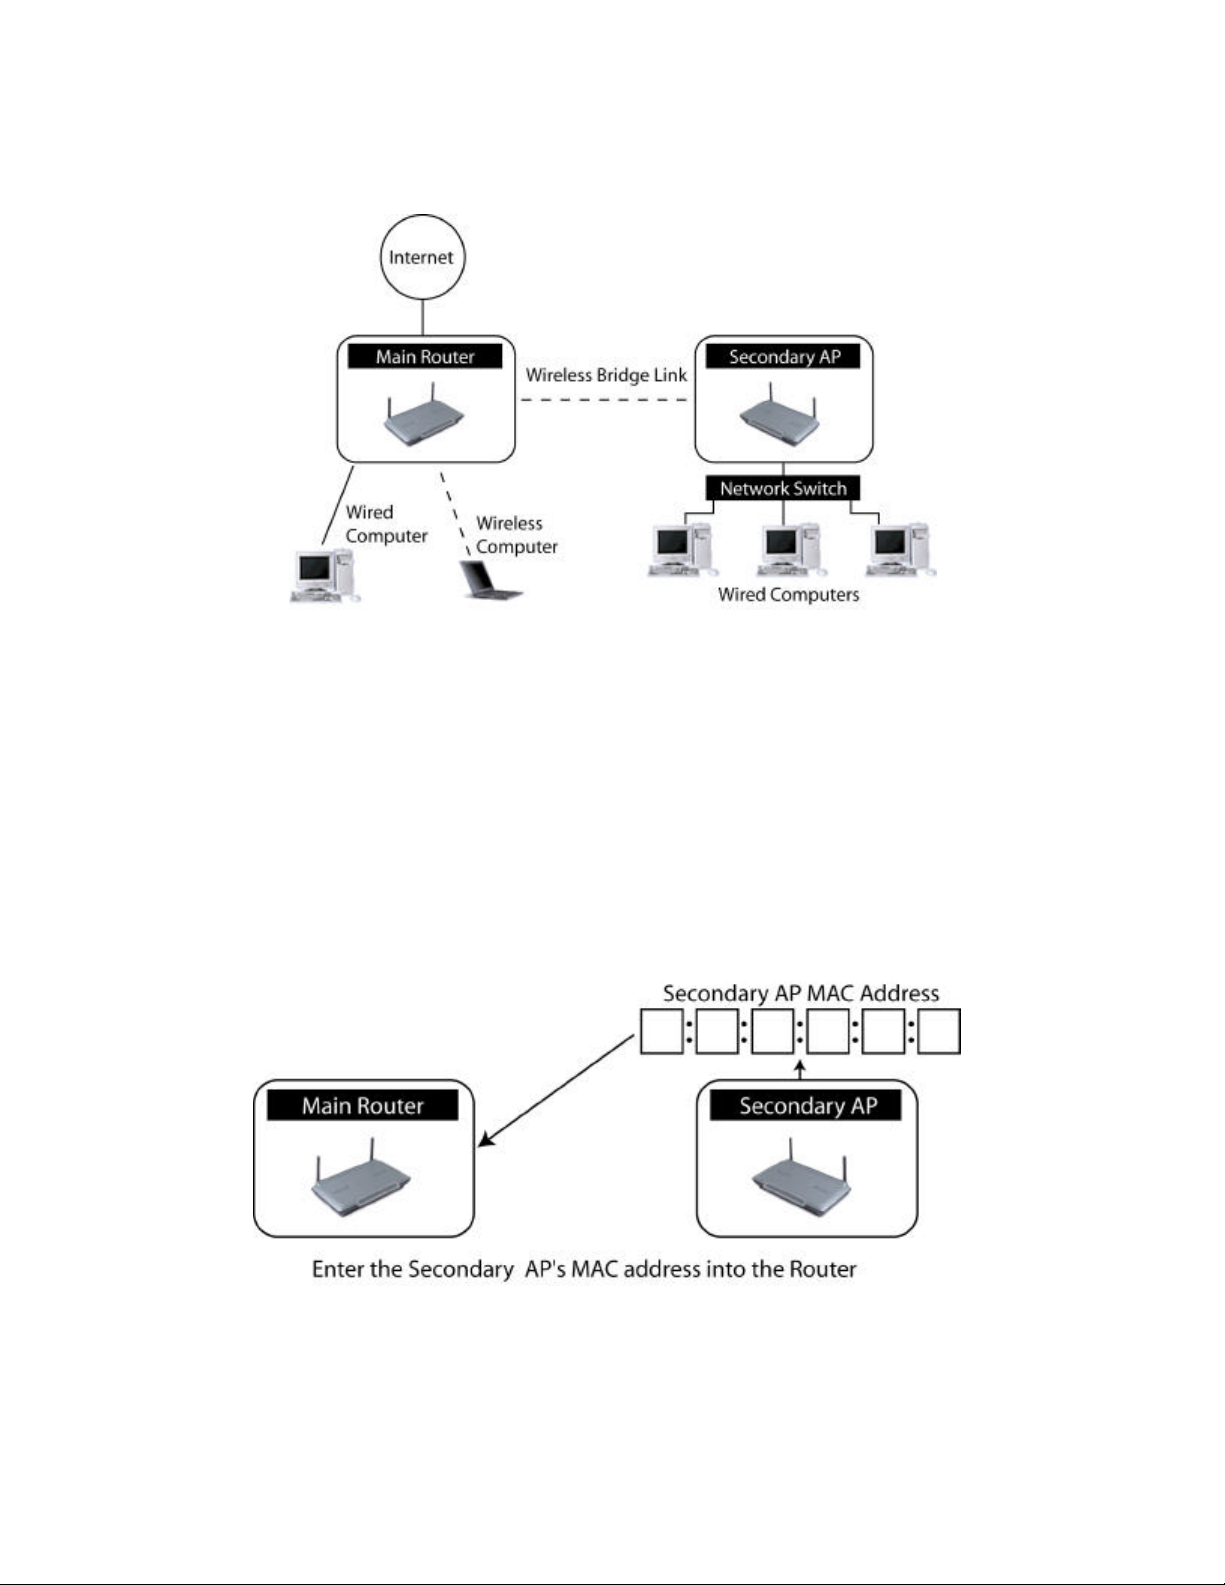
network switch or hub to the Access Point’s RJ45 jack will allow a number of computers
connected to the switch access to the rest of the network.
Setting up a Bridge between your wireless Router and a secondary Access Point
Bridging your router to a secondary AP requires that you access the Router’s Advanced Setup
utility and enter the MAC address of the AP in the appropriate area. There are also a few other
requirements. Make sure you follow the steps below carefully.
1. Set your Access Point to the same channel as the router. By default the router and AP
channels are set to channel 11 at the factory. If you have never changed the channel,
you don’t need to do anything.
2. Find the AP MAC address on the bottom label of the AP. There are two MAC addresses
on the bottom label. You will need the MAC address named “WLAN MAC Address”. The
MAC address starts with 0030BD and is followed by 6 other numbers or letters. (0030BDXXXXXX). Write the MAC address below. Go to the next step.
3. Place your secondary AP within range of your wireless router and near the area where
you want to extend the range or add the network segment. Typically, indoor range
should be between 50 and 150 feet.
Page 3

(2)
(1)
4. Connect power to your AP. Make sure the AP is on and proceed to the next step.
5. From a computer already connected to your router, access the Advanced Setup Utility
by opening your browser. In the address bar, type in “192.168.2.1” do not type in
“www” or http:// before the number. Note: if you have changed your router’s IP
address, use that IP address.
6. You will see the router’s user interface in the browser window. Click “Wireless Bridge”
(1) on the left- hand side of the screen. You will see the following screen.
(3)
7. Check the box that says “Enable ONLY specific Access Points to connect” (2)
8. In the field named AP1, (3) type in the MAC address of your secondary AP. When you
have typed in the address, click “Apply Changes”.
9. Bridging is now setup.
Page 4

Testing the Wireless Bridge
You can test to see if your wireless bridge is working by doing a simple PING test. You will need
a computer with Windows 98, 98SE, Me, 2000, NT, or XP. If you are running Mac OS, you will
need to aquire a PING utility. If you are using any other OS, you may need a PING utility or
there may be one built in. The following directions are for Windows OS, but the same method
can be used on other operating systems with a PING utility.
1. Open a Command window. click Start then Run. In Windows 98, 98SE, Me type the word
“Command” in the Run field. For Windows 2000, NT or XP type “CMD”. This will open a
Command window on the desktop.
2. In the command window type “PING 192.168.2.254” This is the IP address of the
secondary Access Point. If you changed the IP address of the Access Point, then use
that IP address.
3. If everything is working fine, you will see “Reply from 192.168.2.254: bytes=32
time=12ms TTL=255” four times on the screen. The test is complete.
 Loading...