


Vacuum Cleaner
User Manual
BKS 1410
BKS 1420
EN TR FR RU KK
BS MK SQ SR TH
01M-8934193200-2916-05
01M-8934203200-2916-05
Please read this user manual first!
Dear Customer,
Thank you for prefering a Beko product. We hope that you get the best results from your product which has been manufactured with high quality and state-of-the-art technology. Therefore, please read this entire user manual and all other accompanying documents carefully before using the product and keep it as a reference for future use. If you handover the product to someone else, give the user manual as well. Follow all warnings and information in the user manual.
Explanation of symbols
Throughout this user manual the following symbols are used:
C Important information or useful hints about usage.
A Warning for hazardous situations with regard to life and property.
This product has been produced in environmentally friendly, modern facilities.
Complies with the WEEE Regulation. |
Does not contain PCB. |
|
Made in P.R.C. |

CONTENTS
1 Important safety and environmental instructions 4-5
1.1 General safety . . . . . . . . . . . . . . . . . . . . . . . . . . . . . .4 1.2 Compliance with the WEEE Directive and disposal of waste products . . . . . . . . . . . . . . . . . . . . 5 1.3 Package information . . . . . . . . . . . . . . . . . . . . . . . 5
2 Your vacuum cleaner |
6 |
2.1 Overview. . . . . . . . . . . . . . . . . . . . . . . . . . . . . . . . . . . . 6 2.2 Technical data . . . . . . . . . . . . . . . . . . . . . . . . . . . . . . 6
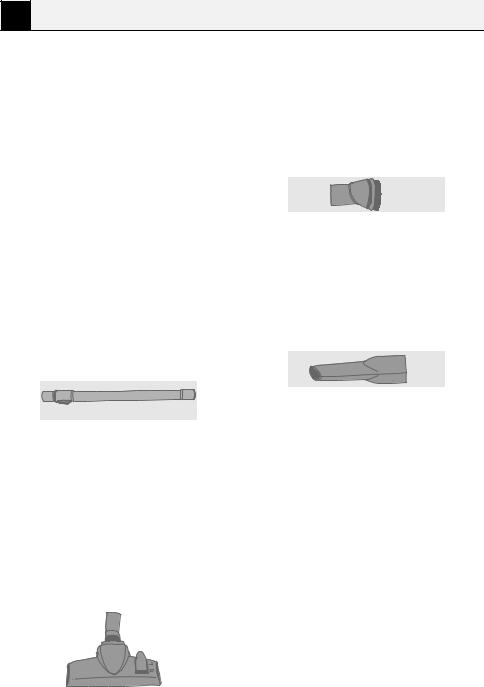
3 Individual parts / accessories 7
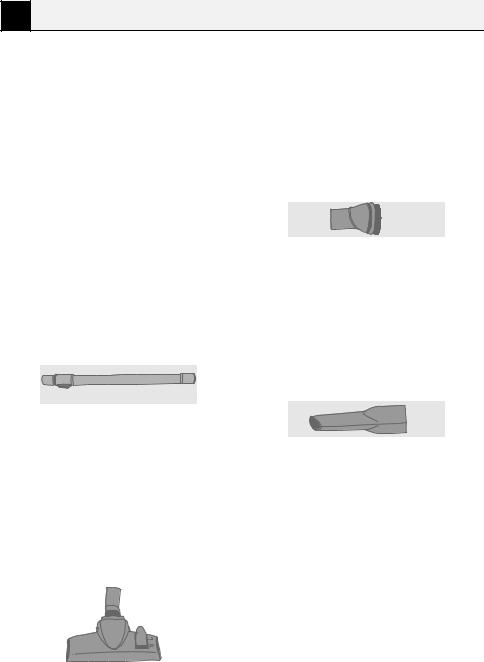
3.1 Intended use. . . . . . . . . . . . . . . . . . . . . . . . . . . . . . . . 7 3.2 Flexible hose. . . . . . . . . . . . . . . . . . . . . . . . . . . . . . . . 7 3.3 Multi step metal telescopic pipe . . . . . . . . . . . . 7 3.4 Brush . . . . . . . . . . . . . . . . . . . . . . . . . . . . . . . . . . . . . . . 7 3.5 Small brush . . . . . . . . . . . . . . . . . . . . . . . . . . . . . . . . . 7 3.6 Narrow crevice tool. . . . . . . . . . . . . . . . . . . . . . . . . 7
4 Preparation and usage |
8-9 |
4.1 Preparation . . . . . . . . . . . . . . . . . . . . . . . . . . . . . . . . .8 4.2 Switching on and off . . . . . . . . . . . . . . . . . . . . . . .8 4.3 Air slider . . . . . . . . . . . . . . . . . . . . . . . . . . . . . . . . . . . . 9 4.4 Dust bag full indicator . . . . . . . . . . . . . . . . . . . . . . 9 4.5 Rewind power cord. . . . . . . . . . . . . . . . . . . . . . . . . 9
5 Cleaning and maintenance10-11
5.1 Changing the dust bag. . . . . . . . . . . . . . . . . . . . .10 5.2 Cloth dust bag . . . . . . . . . . . . . . . . . . . . . . . . . . . . .10 5.3 Cleaning or replacing the filter . . . . . . . . . . . .10 5.4 Cleaning the dust container filter
(motor protective filter) . . . . . . . . . . . . . . . . . . . . . . . 11 5.5 Cleaning the exhaust filter . . . . . . . . . . . . . . . . 11 5.6 Storage . . . . . . . . . . . . . . . . . . . . . . . . . . . . . . . . . . . . 11
Vacuum cleaner / User manual |
3 / 109 EN |
|
|

1 Important safety and environmental instructions
This |
section |
contains |
safety |
••Do not use it if the power |
||||||||||
instructions |
|
that |
will |
|
help |
cable or the appliance itself |
||||||||
protect from risk of personal |
is |
damaged. |
Contact |
an |
||||||||||
injury or property damage. |
|
authorized service. |
|
|
||||||||||
Failure |
to |
follow |
these |
••Your mains power supply |
||||||||||
instructions |
|
invalidates |
the |
should |
comply with |
the |
||||||||
granted warranty. |
|
|
|
information supplied on the |
||||||||||
1.1 General safety |
rating plate of the appliance. |
|||||||||||||
••This appliance complies with |
••The mains supply of the |
|||||||||||||
the |
|
international |
security |
appliance must be secured |
||||||||||
|
with a minimum 16 A fuse. |
|||||||||||||
standards. |
|
|
|
|
|
|||||||||
|
|
|
|
|
••Do not use the appliance with |
|||||||||
••This appliance can be used by |
||||||||||||||
thechildrenwhoareattheage |
an extension cord. |
|
|
|||||||||||
••In order to prevent the power |
||||||||||||||
of 8 or over and by the people |
||||||||||||||
who have limited physical, |
cable from getting damaged, |
|||||||||||||
sensory or mental capacity or |
make sure that it doesn’t get |
|||||||||||||
who do not have knowledge |
stuck, twisted or rub against |
|||||||||||||
and |
|
experience, |
provided |
sharp surfaces. |
|
|
||||||||
that |
they |
are supervised |
••Do not touch the appliance or |
|||||||||||
or |
they |
understand |
the |
its plug when it is plugged if |
||||||||||
instructions with regard to |
your hands are damp or wet. |
|||||||||||||
safe use of the product and |
••Do |
not |
pull |
the |
power |
|||||||||
potential |
dangers. Children |
cable when unplugging the |
||||||||||||
should not |
play |
with |
the |
|||||||||||
appliance. |
|
|
|
|||||||||||
appliance. |
Cleaning |
|
and |
|
|
|
||||||||
|
••Do not vacuum flammable |
|||||||||||||
maintenance works should |
||||||||||||||
not be performed by children |
materials |
and |
when |
|||||||||||
unless they are supervised by |
vacuuming cigarette ashes |
|||||||||||||
an adult. |
|
|
|
|
|
make sure that it got cold. |
|
|||||||
4 / 96 EN |
Vacuum cleaner / User manual |
1 Important safety and environmental instructions
••Do not vacuum water or other liquid materials.
••Protect the appliance from rain, humidity and heat sources.
••Never use the appliance in or near to combustible or inflammable places and materials.
••Unplug the appliance before cleaning and maintenance.
••Do not dip the appliance or its cable in water to clean it.
••Check the hose of the appliance regularly. Do not use if it is damaged and contact an authorized service.
••Do not attempt to dismantle the appliance.
••Only use the original parts or parts recommended by the manufacturer.
••If heavily used for cleaning dust such as cement or grout the dust indicator will lit earlier then expected, in such case replace the dust bag even it is empty.
••Do not use the appliance without filters; otherwise it can get damaged.
••When vacuuming the stairs, the appliance should be located below the user.
••If your store the package material, keep it out of the reach of children.
1.2 Compliance with the WEEE Directive and disposal of waste products
 This product does not include harmful and
prohibited materials specified in the
“Regulation for Supervision of the Waste
 Electric and Electronic Appliances” issued by the Ministry of Environment and Urban Planning. This appliance conforms to the WEEE regulation. This product has been manufactured with high quality parts and materials which can be reused and are suitable for recycling. Therefore, do not dispose the product with normal domestic waste at the end of its service life. Take it to a collection point for the recycling of electrical and electronic equipment. Ask the local authority in your area for these collection points. Contribute to the preservation of environment and natural sources by taking the used products to the recycling points.
1.3 Package information
Package of the product is made of recyclable materials in accordance with our National Legislation. Do not dispose of the packaging materials together with
the domestic or other wastes. Take them to the packaging material collection points designated by the local authorities.
Vacuum cleaner / User manual |
5 / 96 EN |
|
|

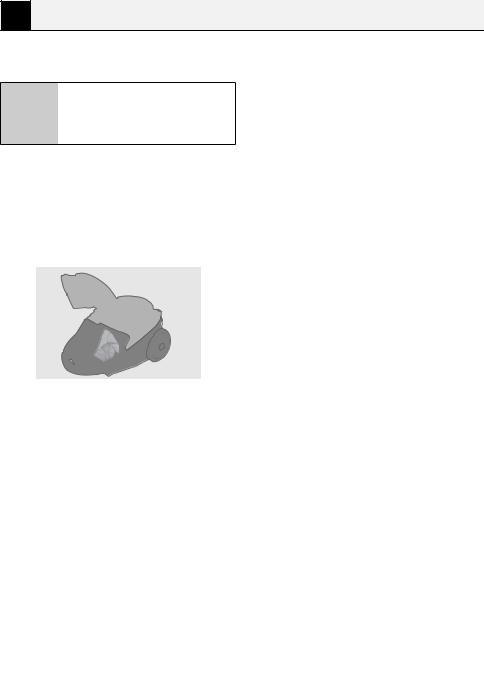
2 Your vacuum cleaner
2.1 Overview |
|
5 |
|
|
|
|
|
|
|
|
|
|
|
|
|
|
3 |
|
19 |
|
|
|
|
|
|
|
|
|
|
|
|
|
|
9 |
20 |
|
|
|
|
|
|
|
|
|
|
|
|
2 |
|
|
|
|
|
|
|
|
|
|
6 |
|
|
|
|
|
|
18 |
|
|
|
|
|
1 |
|
|
17 |
16 |
15 |
14 13 |
12 |
|
|
|
|||||
|
|
|
7 |
|
|
|
|
|
|
|
8 |
|
|
|
|
|
|
|
4 |
|
|
|
|
|
|
|
|
10 |
|
11 |
|
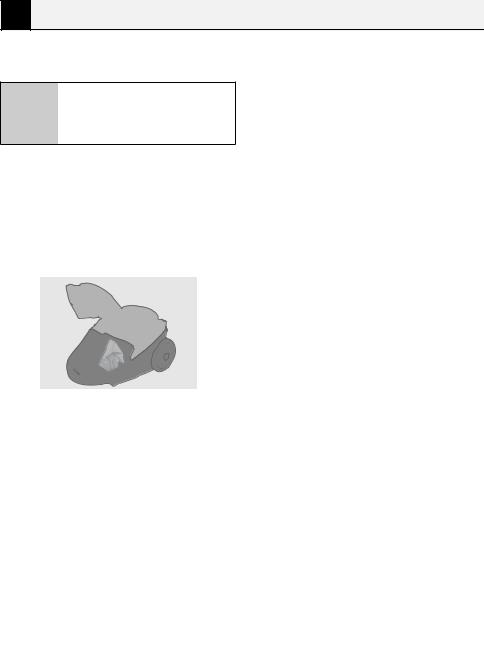
1.Parquetry carpet brush
2.Height adjustment switch
3.Metal telescopic pipe
4.Carriage handle
5.Air slider
6.Elastic vacuum hose
7.Flexible connection adaptor for flexible hose
8.Front cover release button
9.Cleaning handle
10.Front cover
11.Rear wheels
12.Brush holder
13.Air outlet filter lid
14.Pushbutton for switching on and off
15.Suction power adjustment switch
16.Cable winding button
17.Dust bag full indicator
18.Park adaptor Accessories
19.Small brush
20.Crevice tool
2.2 Technical data
Power supply |
: 220-240 V~, 50 Hz |
Power nom |
: 1800 W |
Power max |
: 2000 W (BKS 1410) |
|
: 2100 W (BKS 1420) |
Protection class |
: II |
Rights to make technical and design changes are reserved.
The values which are declared in the markings affixed on your product or the other printed documents supplied with it represent the values which were obtained in the laboratories pursuant to the pertinent standards. These values may vary according to the usage of the appliance and ambient conditions.
6 / 109 EN |
Vacuum cleaner / User manual |
|
|
3 Individual parts / accessories
3.1 Intended use
The appliance was designed to be used in houses, and is not fit for industrial use.
3.2 Flexible hose
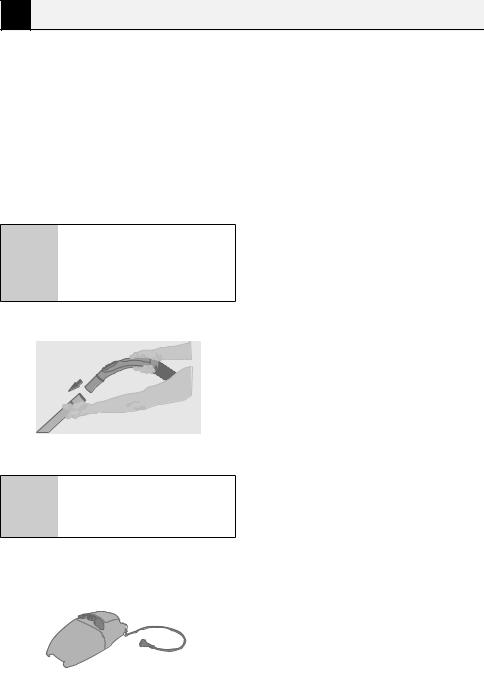
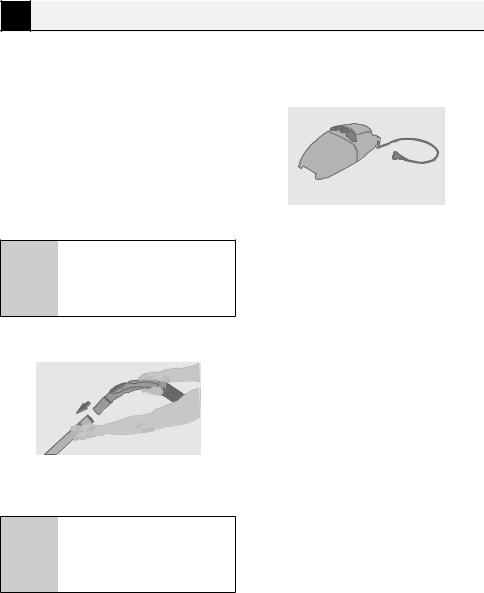
Flexible hose (7) is the connection between the appliance and metal telescopic pipe.
1.Insert the flexible hose with flexible connection port (7) into the suction intake (8) on the appliance until it fits securely.
2.Attach the other end of the flexible hose (Cleaning handle) onto the metal telescopic pipe.
3.3 Multi step metal telescopic pipe
1.Metal telescopic pipe (3). You can adjust this by sliding the lock switch forwards and extending the pipe to the required length.
2.Release the lock switch to lock the pipe.
3.5 Small brush
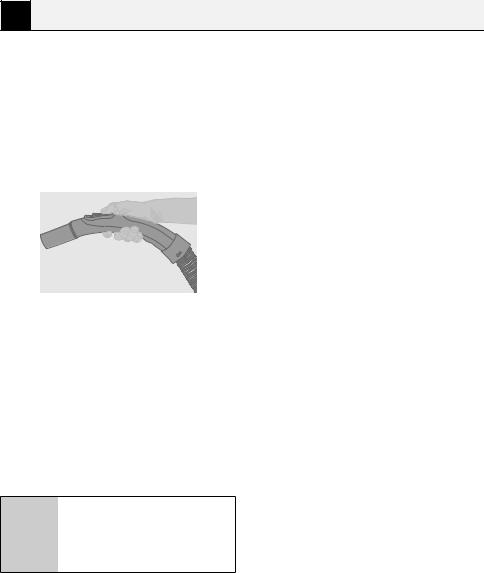
Use small brush (19) to clean furniture and picture frames. It can rotate up to 90°.
•• Push the small brush directly onto the cleaning handle (9).
•• Push the small brush onto the metal telescopic pipe (3) to obtain a better reach.
3.6 Narrow crevice tool
Use the narrow crevice tool (20) to clean places which are narrow and difficult to reach.
1.Push the narrow crevice tool directly onto the cleaning handle (9).
2.Push the narrow crevice tool onto the metal telescopic pipe (3) to obtain a better reach.
3.4 Brush
The vacuum cleaner is supplied with a high quality multi-floor brush whose height can be adjusted according to the thickness of the carpet.
Suitable for all types of carpets as well as hard floors and is adjustable by foot.
1.Push the multi-floor brush (1) onto the telescopic pipe (3).
2.Alter the switch on the multi-floor brush depending on the carpet thickness.
|
|
|
|
|
|
|
|
Vacuum cleaner / User manual |
7 / 109 EN |
||
|
|
|
|
4 Preparation and usage
Make sure that the supply voltage indicated on |
4.2 Switching on and off |
the rating plate (under the appliance) conforms to |
1. Pull out the required length of power cord. |
the local supply voltage. |
|
4.1 Preparation
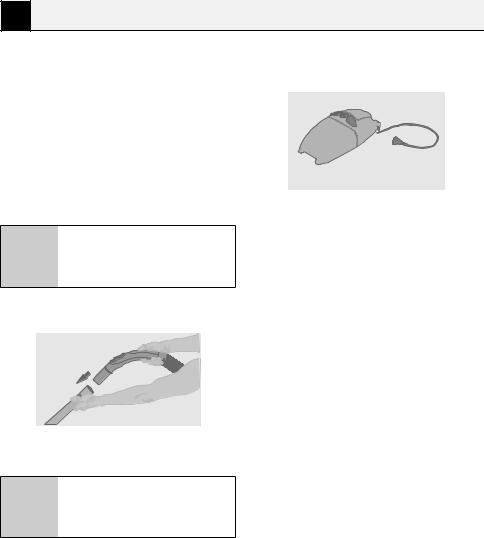
Your appliance is supplied with a dust bag already fitted. Once you have assembled the individual parts the appliance is ready to use.
1.Push the plug-in contact of the elastic hose (6) in the socket (8) provided on the dust container until it latches into place.
WARNING: To remove the elastic A hose (6) press the side release buttons on the plug-in contact and
then pull out the hose.
2.Attach the other end of the flexible hose onto the metal telescopic pipe (3).
3.Attach the required brush or accessories to the lower end of the metal telescopic pipe (3).
WARNING: Fit together all the A plug-in connections with a push and turn movement and undo them with
a pull and turn movement.
WARNING: The maximum cable A length is indicated by a red mark.
Never try to pull out the power cord beyond the red mark.
2.Plug the power cord plug into the wall socket.
3.Switchontheappliancebypressingpushbutton (14).
4.Set the required suction power with control switch (15).
5.After use, press (14) button to switch off the appliance and remove the power cord plug from the socket.
A WARNING: If the appliance is not being used, always disconnect the mains plug at the wall socket.
8 / 109 EN |
Vacuum cleaner / User manual |
|
|
4 Preparation and usage
4.3 Air slider
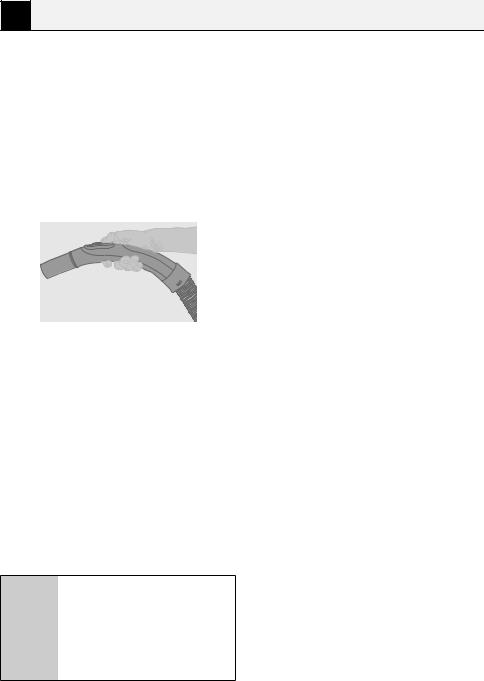
You can adjust the air slider (5) on the cleaning handle with your thumb. If the slider (5) is closed completely, max. suction power is attained.
In some cases such as cleaning upholstery, fabric or plush carpets, it may be necessary to decrease the suction power. If this is the case, open the air slider as required.
4.4 Dust bag full indicator
This indicator (17) shows the fullness level of the dust bag. If the indicator shows a fullness level above 50%, you must change the dust bag.
4.5 Rewind power cord
1.Unplug the power cord plug from the wall socket.
2.Hold the power cord in one hand, and press and hold the button (16).
3.Carefully guide the power cord back into the appliance.
WARNING: Always rewind the A power cord with care as pressing one side of the button (16) and a high rewinding speed can cause
unforeseeable cable movements.
Vacuum cleaner / User manual |
9 / 109 EN |
|
|
5 Cleaning and maintenance
Switch off and unplug the appliance ,before cleaning it.
WARNING: Never use gasoline, A solvent, abrasive cleaning agents, metal objects or hard brushes to
clean the appliance.
5.1 Changing the dust bag
If the indicator (17) on the dust container changes to red you must change the dust bag.
1.Unplug the power cord plug from the wall socket.
2.Open the dust container by pressing the front cover release button (8) and lift up the cover.
3.Push the filter bracket forward.
4.Seal the dust bag by pushing the tab of the cardboard reinforcement into the opening.
5.Dispose of the sealed dust bag.
A WARNING: Do not try to empty and reuse the dust bag.
6.Insert a new dust bag in the bracket.
7.Close the cover of the dust container.
WARNING: Test the appliance A after changing the dust bag. If the indicator (17) is still red, the tools, hoses or filter are blocked (see
following section).
WARNING: Never start up the A appliance without a dust bag. The cover of the dust container cannot be closed unless a dust bag has
been inserted.
5.2 Cloth dust bag
If you are using cloth dust bags instead of paper ones, you may empty and reuse the bag several times.
•• Cleaning the cloth dust bag:
1.Hold the cloth dust bag upside down over a trash can. Push the clips sideways to remove it.
2.Shake the dust bag to pour its content into the trash can.
3.Wash the cloth bag by hand in lukewarm water. Leave it to dry after washing and do not use it unless it is dry.
4.Push the clips under the dust bag to close the bag.
5.If you are using a cloth dust bag, we recommend you to wash the motor protection filter every six months in cold water. Ensure that the filter is completely dry before installing it back to the appliance.
5.3 Cleaning or replacing the filter
WARNING: The dust bag and A filter must be inserted before starting up the appliance as otherwise the motor will be
damaged.
10 / 109 EN |
Vacuum cleaner / User manual |
|
|
5 Cleaning and maintenance
5.4 Cleaning the dust container filter (motor protective filter)
1.Open the dust container by pressing the release button (8) of the dust container and lifting up the cover.
2.Pull the dust bag out of the bracket, remove and seal it.
3.Pull out the filter.
4.Shake out the filter, then wash it in hot soapy water, rinse well and leave to air dry.
A WARNING: Never wash the filter in the washing machine or dry it with a hair dryer.
A WARNING: Ensure the filter is completely dry before you install it back into the vacuum cleaner.
5.If necessary replace with a new filter and install it into the vacuum cleaner.
6.Change the dust bag.
5.5 Cleaning the exhaust filter
1.Press the release button (on the rear of the appliance) and pull up the filter bracket to remove it.
2.Remove the filter from the filter bracket.
3.Shake out the filter, then wash it in hot soapy water, rinse well and leave to air dry.
A WARNING: Never wash the filter in the washing machine or dry it with a hair dryer.
A WARNING: Ensure the filter is completely dry before you install it back into the vacuum cleaner.
4. Carefully replace all the parts.
A WARNING: The filter in the dust container should be changed every six months or sooner if necessary.
A WARNING: The exhaust air filter should be replaced every six to nine months or sooner if necessary.
A WARNING: Washing the filter frequently results in filter wear and tear.
5.6 Storage
•• If you do not intend to use the appliance for a long time, store it carefully.
•• Pull the appliance's plug out.
•• Keep the appliance out of the reach of children.
Vacuum cleaner / User manual |
11 / 109 EN |
|
|
Lütfen önce bu kılavuzu okuyun!
Değerli Müşterimiz,
Beko ürününü tercih ettiğiniz için teşekkür ederiz. Yüksek kalite ve teknoloji ile üretilmiş olan ürününüzün size en iyi verimi sunmasını istiyoruz. Bunun için, bu kılavuzun tamamını ve verilen diğer belgeleri ürünü kullanmadan önce dikkatle okuyun ve bir başvuru kaynağı olarak saklayın. Ürünü başka birisine verirseniz, kullanma kılavuzunu da birlikte verin. Kullanma kılavuzunda belirtilen tüm bilgi ve uyarıları dikkate alarak
talimatlara uyun.
Bu kullanma kılavuzunun başka modeller için de geçerli olabileceğini unutmayın. Modeller arasındaki farklar kılavuzda açık bir şekilde belirtilmiştir.
Sembollerin anlamları
Bu kullanma kılavuzunun çeşitli kısımlarında aşağıdaki semboller kullanılmıştır:
C
A
Bu ürün çevreye saygılı modern tesislerde doğaya zarar vermeden üretilmiştir.
AEEE Yönetmeliğine Uygundur. |
PCB içermez. |
|
Menşei P.R.C. |

İÇİNDEKİLER
1 Önemli güvenlik ve |
14-15 |
çevre talimatları |
1.1 Genel güvenlik . . . . . . . . . . . . . . . . . . . . . . . . . . . . .14 1.2 AEEE yönetmeliğine uyum ve atık ürünün elden çıkarılması . . . . . . . . . . . . . . . . . . . . . . . . . . . . . .15 1.3 Ambalaj bilgisi . . . . . . . . . . . . . . . . . . . . . . . . . . . . .15
2 Elektrikli süpürgeniz |
16 |
2.1 Genel bakış. . . . . . . . . . . . . . . . . . . . . . . . . . . . . . . . |
.16 |
2.2 Teknik veriler . . . . . . . . . . . . . . . . . . . . . . . . . . . . . |
.16 |
3 Parçalar / aksesuarlar |
17 |
3.1 Kullanım amacı . . . . . . . . . . . . . . . . . . . . . . . . . . . . .17 3.2 Hortum . . . . . . . . . . . . . . . . . . . . . . . . . . . . . . . . . . . .17 3.3 Ayarlanabilir metal teleskobik boru. . . . . . . .17 3.4 Fırça . . . . . . . . . . . . . . . . . . . . . . . . . . . . . . . . . . . . . . .17 3.5 Küçük fırça. . . . . . . . . . . . . . . . . . . . . . . . . . . . . . . . .17 3.6 Dar ağızlı uç. . . . . . . . . . . . . . . . . . . . . . . . . . . . . . . .17
4 Hazırlık ve kullanım |
18-19 |
4.1 Hazırlık . . . . . . . . . . . . . . . . . . . . . . . . . . . . . . . . . . . . .18 4.2 Açma ve kapama. . . . . . . . . . . . . . . . . . . . . . . . . . .18 4.3 Hava sürgüsü . . . . . . . . . . . . . . . . . . . . . . . . . . . . . .18 4.4 Toz torbası dolum göstergesi . . . . . . . . . . . . .19 4.5 Elektrik kablosunu geri sarma . . . . . . . . . . . . .19
5 Temizlik ve bakım |
20-21 |
5.1 Toz torbasını değiştirme . . . . . . . . . . . . . . . . . . 20 5.2 Bez toz torbası. . . . . . . . . . . . . . . . . . . . . . . . . . . . 20 5.3 Filtreyi temizleme veya değiştirme . . . . . . .21 5.4 Egzoz filtresini temizleme . . . . . . . . . . . . . . . . .21 5.5 Saklama. . . . . . . . . . . . . . . . . . . . . . . . . . . . . . . . . . . .21 5.6 Taşıma ve Nakliye . . . . . . . . . . . . . . . . . . . . . . . . .21
Elektrikli Süpürge / Kullanma Kılavuzu |
13 / 109 TR |
|
|

1 Önemli güvenlik ve çevre talimatları
Bu |
bölümde, |
yaralanma ya |
||
da |
maddi |
hasar tehlikelerini |
||
önlemeye |
yardımcı |
olacak |
||
güvenlik |
talimatları |
yer |
||
almaktadır. |
|
|
|
|
Bu |
talimatlara |
uyulmaması |
||
halinde her türlü garanti geçersiz hale gelir.
1.1 Genel güvenlik
••Bu cihaz, uluslararası güvenlik standartlarına uygundur.
••Cihaz, 8 yaş ve üzeri çocuklar ve fiziksel, algısal ve zihinsel yetenekleri azalmış veya tecrübe ve bilgi eksikliği olan kişiler tarafından gözetim altında veya cihazın güvenli bir şekilde kullanımına ve karşılaşılan ilgili tehlikelerin anlaşılmasına dair talimat verilirse kullanılabilir. Çocuklar cihazla oynamamalıdır. Temizlik ve kullanıcı bakım işlemleri, başlarında bir büyük olmadığı sürece çocuklar tarafından yapılmamalıdır.
••Elektrik kablosu veya cihaz hasarlıysa kullanmayın. Yetkili servise başvurun.
••Şebeke güç kaynağınız cihazın tip etiketinde belirtilen bilgilere uygun olmalıdır.
••Cihazı kullanacağınız şebeke en az 16 A’lık bir sigorta ile emniyete alınmış olmalıdır.
••Cihazı uzatma kablosuyla kullanmayın.
••Elektrik kablosunun hasar görmesini önlemek için sıkışmasını, kıvrılmasını veya keskin kenarlara sürtünmesini engelleyin.
••Cihaz elektriğe bağlıyken elleriniz nemli veya ıslaksa, cihazın fişine dokunmayın.
••Cihazın fişini prizden çıkartırken kablosundan çekmeyin.
••Yanıcı maddeleri süpürmeyin ve sigara külünü süpürürken soğumuş olmasına dikkat edin.
••Su veya diğer sıvı maddeleri süpürmeyin.
14 / 109 TR |
Elektrikli Süpürge / Kullanma Kılavuzu |
|
|
1 Önemli güvenlik ve çevre talimatları
••Cihazı yağış, nem ve ısı kaynaklarından koruyun.
••Cihazı patlayıcı veya yanıcı ortamların ve maddelerin bulunduğu yerde veya yakınında kullanmayın.
••Temizlik ve bakım öncesi cihazın fişini prizden çekin.
••Cihazı veya elektrik kablosunu temizlemek için suya daldırmayın.
••Cihazın hortumunu düzenli olarak kontrol edin. Hasar durumunda kullanmayın, yetkili servise başvurun.
••Cihazı parçalarına ayırmayın.
••Sadece orijinal parçaları veya üretici tarafından tavsiye edilen parçaları kullanın.
••Çimento, sıva gibi ince tozlu temizliklerde yoğun kullanımda toz torbası dolum lambası erken yanacaktır, bu durumda toz torbası boş olsa dahi değiştirin.
••Cihazı filtreleri olmadan kullanmayın, zarar görebilir.
••Merdivenleri süpürürken cihaz kullanıcının aşağısında bulunmalıdır.
••Ambalaj malzemelerini saklıyorsanız çocukların ulaşamayacağı bir yerde muhafaza edin.
1.2 AEEE yönetmeliğine uyum ve atık ürünün elden çıkarılması
 Bu ürün, T.C. Çevre ve Şehircilik Bakanlığı
tarafından yayımlanan “Atık Elektrikli ve
Elektronik Eşyaların Kontrolü
 Yönetmeliği”nde belirtilen zararlı ve yasaklı maddeleri içermez. AEEE Yönetmeliğine uygundur. Bu ürün, geri dönüşümlü ve tekrar kullanılabilir nitelikteki yüksek kaliteli parça ve malzemelerden üretilmiştir. Bu nedenle, ürünü, hizmet ömrünün sonunda evsel veya diğer atıklarla birlikte atmayın. Elektrikli ve elektronik cihazların geri dönüşümü için bir toplama noktasına götürün. Bu toplama noktalarını bölgenizdeki yerel yönetime sorun. Kullanılmış ürünleri geri kazanıma vererek çevrenin ve doğal kaynakların korunmasına yardımcı olun.
1.3 Ambalaj bilgisi
Ürünün ambalajı, Ulusal Mevzuatımız gereği geri dönüştürülebilir malzemelerden üretilmiştir. Ambalaj atığını evsel veya diğer atıklarla birlikte
atmayın, yerel otoritenin belirttiği ambalaj toplama noktalarına atın.
Elektrikli Süpürge / Kullanma Kılavuzu |
15 / 109 TR |
|
|

2 Elektrikli süpürgeniz
2.1 Genel bakış |
|
5 |
|
|
|
|
|
|
|
|
|
|
|
|
|
|
3 |
|
19 |
|
|
|
|
|
|
|
|
|
|
|
|
|
|
9 |
20 |
|
|
|
|
|
|
|
|
|
|
|
|
2 |
|
|
|
|
|
|
|
|
|
|
6 |
|
|
|
|
|
|
18 |
|
|
|
|
|
1 |
|
|
17 |
16 |
15 |
14 13 |
12 |
|
|
|
|||||
|
|
|
7 |
|
|
|
|
|
|
|
8 |
|
|
|
|
|
|
|
4 |
|
|
|
|
|
|
|
|
10 |
|
11 |
|
1.Parke halı fırçası
2.Yükseklik ayar düğmesi
3.Metal teleskobik boru
4.Taşıma sapı
5.Hava sürgüsü
6.Hortum
7.Hortum için esnek bağlantı noktası
8.Ön kapak açma düğmesi
9.Temizlik sapı
10.Ön kapak
11.Arka tekerlekler
12.Fırça park yeri
13.Hava çıkış filtre kapağı
14.Açma / kapatma düğmesi
15.Emiş gücü ayar düğmesi
16.Kablo sarıcı düğmesi
17.Toz torbası dolu göstergesi
18.Park adaptörü
19.Toz fırçası
20.Dar ağızlı uç
2.2 Teknik veriler
Besleme gerilimi |
: 220-240 V~, 50 Hz |
Güç nom |
: 1800 W |
Güç max |
: 2000 W (BKS 1410) |
|
: 2100 W (BKS 1420) |
Koruma sınıfı |
: II |
Teknik ve tasarım değişiklikleri yapma hakkı saklıdır.
Ürününüz üzerinde bulunan işaretlemelerde veya ürünle birlikte verilen diğer basılı dökümanlarda beyan edilen değerler, ilgili standartlara göre laboratuvar ortamında elde edilen değerlerdir. Bu değerler, ürünün kullanım ve ortam şartlarına göre değişebilir.
16 / 109 TR |
Elektrikli Süpürge / Kullanma Kılavuzu |
|
|
3 Parçalar / aksesuarlar
3.1 Kullanım amacı
Cihaz ev tipi kullanım için tasarlanmıştır, sanayi tipi kullanım için uygun değildir.
3.2 Hortum
Hortum (6) cihaz ile metal teleskobik boru arasında bulunan bağlantıdır.
1.Esnek bağlantı noktalı esnek hortumu (6) yerine oturana kadar cihazdaki vakum deliğine (7) takın.
2.Esnek hortumun diğer ucunu (Temizlik sapı) metal teleskobik boruya takın.
3.5 Küçük fırça
Mobilya veya resim çerçevelerini temizlemek için küçük fırçayı (19) kullanın. 90°’lik bir açıya kadar dönebilir.
Küçük fırçayı doğrudan temizlik sapına (9) üzerine bastırarak takın.
Daha iyi erişebilmek için küçük fırçayı metal teleskobik borunun (3) üzerine bastırarak takın.
3.3 Ayarlanabilir metal teleskobik boru
1. |
Metal teleskobik boruyu (3), kilidi ileriye |
|
itip boruyu gerekli uzunluğa çekerek |
2. |
ayarlayabilirsiniz. |
Kilitlemek için kilidi serbest bırakın. |
3.4 Fırça
Elektrikli süpürge, halının kalınlığına göre yükseklik ayarlamalı kaliteli kombi zemin fırçasıyla birlikte verilir.
Sert zeminlerin yanı sıra tüm halı türlerine uygundur ve ayakla ayarlanabilir.
1.Kombi zemin fırçasını (1) metal teleskobik borunun üzerine (3) bastırarak takın.
2.Kombi zemin fırçasındaki düğmeyi zeminin halı veya sert zemin olmasına göre değiştirin.
3.6 Dar ağızlı uç
Dar ve erişilmesi zor yerleri temizlemek için dar ağızlı ucu (20) kullanın.
1.Dar ağızlı ucu doğrudan temizlik sapına (9) üzerine bastırarak takın.
2.Daha iyi erişebilmek için dar ağızlı ucu metal teleskobik borunun (3)üzerine bastırarak takın.
|
|
|
|
|
|
|
|
Elektrikli Süpürge / Kullanma Kılavuzu |
17 / 109 TR |
||
|
|
|
|
4 Hazırlık ve kullanım
Değer plakasında (cihazın altındaki) verilen şebeke voltajının yerel şebeke voltajıyla eşleştiğinden emin olun.
4.1 Hazırlık
Cihazınız, içinde bir toz torbası ile birlikte verilir. Cihazın parçaları birbirlerine takıldığında cihaz artık kullanıma hazırdır.
1.Elastik hortumun geçmeli bağlantı parçasını (7) yerine oturana kadar toz haznesinde bulunan bağlantı parçasının (10) içine bastırın.
UYARI: Hortumu (6) çıkartmak A için, geçmeli bağlantı parçasının yan tarafında bulunan kilit açma düğmelerine basın ve ardından
hortumu çekin.
2.Hortumun diğer ucunu metal teleskobik boruya (3)takın.
3.Gerekli fırçayı veya aksesuarları metal teleskobik borunun alt ucuna (3) takın.
UYARI: Tüm geçmeli bağlantıları A itip çevirme hareketiyle birbirine takın ve çekip çevirme hareketiyle
çıkartın.
4.2 Açma ve kapama
1. Elektrik kablosunu gerekli uzunluğa kadar çekin.
Maksimum kablo uzunluğu kırmızı bir C işaretle gösterilir. Elektrik kablosunu kırmızı işaretten daha uzun dışarıya
çekmeyin
2.Elektrik kablosunun fişini prize takın.
3.Düğmesine basarak cihazı açın (14).
4.Kumanda düğmesiyle gerekli emiş gücünü ayarlayın.(16)
5.Kullanımdan sonra cihazı kapatmak için (14) düğmesine basın ve elektrik kablosunu prizinden çıkarın.
C Cihaz kullanılmıyorsa, elektrik fişini daima prizden çekin.
4.3 Hava sürgüsü
Temizlik sapında bulunan emiş ayarlayıcıyı (5) baş parmağınızla kullanabilirsiniz. Ayarlayıcı (5) tamamen kapalıysa, maks. vakum gücüne erişilir.
Bazı durumlarda, örneğin döşeme, kumaş veya pelüş halıları temizlerken, emiş gücünün azaltılması gerekebilir. Bu durumda hava sürgüsünü ihtiyaca göre açabilirsiniz.
|
|
|
|
|
|
|
|
18 / 109 TR |
|
Elektrikli Süpürge / Kullanma Kılavuzu |
|
|
|
|
|
4 Hazırlık ve kullanım
4.4 Toz torbası dolum göstergesi
Bu gösterge (17) toz torbasının ne kadar dolu olduğunu gösterir. Gösterge %50’den daha dolu gösteriyorsa, torbayı değiştirmeniz gerekir.
4.5 Elektrik kablosunu geri sarma
1.Elektrik kablosunun fişini prizden çekin.
2.Bir elinizle elektrik kablosunu tutun ve (16) düğmesine basılı tutun.
3.Elektrik kablosunu dikkatlice geriye sarın.
Yüksek hızda geri sarma beklenmedik kablo hareketlerine C neden olabileceğinden düğmenin (16) bir tarafına basarak elektrik kablosunu geri sararken daima
dikkatli olun.
Elektrikli Süpürge / Kullanma Kılavuzu |
19 / 109 TR |
|
|
5 Temizlik ve bakım
Temizlik yapmadan önce cihazı kapatın ve fişini prizden çekin.
UYARI: Cihazı temizlemek için A kesinlikle benzin, solvent, aşındırıcı temizleyiciler, metal nesneler veya
sert fırçalar kullanmayın.
5.1 Toz torbasını değiştirme
Toz haznesindeki gösterge (17) kırmızıya dönerse toz torbasını değiştirmelisiniz.
1. Elektrik kablosunun fişini prizden çekin.
2. Ön kapak açma düğmesine (8) basarak toz haznesini açın ve kapağını kaldırın.
3. Filtre braketini öne doğru itin.
4. Karton güçlendirme elemanının tırnağını boşluğa iterek toz torbasını kapatın.
5. Kapalı toz torbasını atın.
C Toz torbasını boşaltmayı ve yeniden kullanmayı denemeyin.
6.Brakete yeni bir toz torbası takın.
7.Toz haznesi kapağını kapatın.
UYARI:Toztorbasınıdeğiştirdikten A sonra cihazı test edin. Gösterge (17) hala kırmızıysa aparatlar, borular veya filtre tıkalıdır (aşağıdaki bölüme
bakın).
UYARI: Cihazı toz torbası olmadan A asla çalıştırmayın. Toz torbası takılmadan toz haznesinin kapağı
kapatılamaz.
5.2 Bez toz torbası
Kağıt yerine bez torba kullanıyorsanız, torbayı defalarca boşaltıp kullanabilirsiniz.
•• Bez toz torbanın temizlenmesi:
1.Bez torbayı bir çöp kutusunun üstünde ters tutun. Kenara iterek klipsi çıkartın.
2.Toz torbasını sallayarak içindekileri çöp kutusuna dökün.
3.Bez torbayı ılık suda elde yıkayınız. Yıkadıktan sonra kurumaya bırakınız ve tamamen kurumadan tekrar kullanmayınız.
4.Klipsi toz torbasının alt kenarına iterek torbayı kapatın.
5.Bez toz torbası kullanıyorsanız, motor koruma filtresini altı ayda bir kez soğuk suda yıkamanızı öneririz. Filtreyi cihaza geri takmadan önce tamamen kuruduğundan emin olunuz.
20 / 109 TR |
Elektrikli Süpürge / Kullanma Kılavuzu |
|
|
5 Temizlik ve bakım
5.3 Filtreyi temizleme veya değiştirme
C Cihaz çalıştırılmadan önce toz torbası ve filtresi takılmalıdır; aksi halde motor zarar görecektir.
•• Toz haznesinin filtresini temizleme (motor koruyucu filtre)
1.Toz haznesi düğmesine (8) basıp kapağını kaldırarak toz haznesini açın.
2.Toz torbasını braketten dışarı çekip çıkartın ve ağzını kapatın.
3.Filtreyi çekip çıkarın.
4.Filtreyi silkeleyin ve daha sonra da sıcak sabunlu su ile yıkayın, iyice durulayın ve kendiliğinden kurumasını bekleyin.
C Filtreyi hiçbir zaman çamaşır makinesinde yıkamayın veya bir saç kurutma makinesi ile kurutmayın.
C Süpürgeye yeniden yerleştirmeden önce filtrenin tamamen kuru olduğundan emin olun.
5.Gerekirse yeni bir filtre ile değiştirip süpürgeye geri takın.
6.Toz torbasını değiştirin.
5.4 Egzoz filtresini temizleme
1.Serbest bırakma düğmesine (cihazın arkasında) yukarı yönde çekerek filtre braketini çıkartın.
2.Filtreyi filtre braketinden çıkartın.
3.Filtreyi silkeleyin ve daha sonra da sıcak sabunlu su ile yıkayın, iyice durulayın ve kendiliğinden kurumasını bekleyin.
C Filtreyi hiçbir zaman çamaşır makinesinde yıkamayın veya bir saç kurutma makinesi ile kurutmayın.
C Süpürgeye yeniden yerleştirmeden önce filtrenin tamamen kuru olduğundan emin olun.
4. Tüm parçaları dikkatlice yerine takın.
A UYARI: Toz haznesindeki filtre her altı ayda bir veya gerektiğinde değiştirilmelidir.
A UYARI: Egzoz hava filtresi her altı veya dokuz ayda bir veya gerektiğinde değiştirilmelidir.
A UYARI: Filtrenin sık sık yıkanması filtrenin aşınmasına neden olur.
5.5 Saklama
•• Cihazı uzun süre kullanmayı düşünmüyorsanız, dikkatli bir şekilde saklayın.
•• Cihazın fişini çekin.
•• Cihazı, çocukların ulaşamayacağı bir yerde muhafaza edin.
5.6 Taşıma ve Nakliye
•• Taşıma ve nakliye sırasında cihazı orijinal ambalajı ile birlikte taşıyın. Cihazın ambalajı, cihazı fiziksel hasarlara karşı koruyacaktır.
•• Cihazın veya ambalajının üzerine ağır cisimler koymayın. Cihaz zarar görebilir.
•• Cihazın düşürülmesi durumunda cihaz çalışmayabilir veya kalıcı hasar oluşabilir.
Elektrikli Süpürge / Kullanma Kılavuzu |
21 / 109 TR |
|
|

Avant de commencer, bien vouloir lire ce manuel d'utilisation !
Chère cliente, cher client,
Merci d’avoir choisi les produits Beko. Nous espérons que ce produit, fabriqué dans des installations modernes et soumis à un processus de contrôle qualité rigoureux, vous offre les meilleures performances possibles. C’est pourquoi nous vous recommandons, avantd’utiliserceproduit,delireattentivementcemanuelettouslesautresdocuments fournis et de les conserver soigneusement pour toute consultation future. Si vous confiez le produit à quelqu’un d’autre, n’oubliez pas de lui remettre également le manuel d’utilisation. Veillez à bien respecter les consignes et les instructions figurant dans le manuel d’utilisation.
Notez que ce manuel d'utilisation peut s'appliquer à plusieurs autres modèles. Les différences entre un modèle et un autre sont clairement exposées dans le manuel.
Signification des pictogrammes
Les symboles suivants sont repris tout au long de ce manuel:
C
A Avertissement sur les situations dangereuses concernant la sécurité des biens et des personnes.
Ce produit a été fabriqué dans les usines modernes respectueuses de l'environnement.
Cet appareil est conforme à la directive DEEE |
Ne contient pas de PCB. |
|
|
|
Fabriqué en P.R.C. |
CONTENU
1 Instructions importantes en matière de sécurité et
d'environnement 24-26
1.1 Consignes générales de sécurité . . . . . . . . . 24 1.2 Conformité avec la directive DEEE et mise au rebut des produits usagés . . . . . . . . . . . . . . . . 26 1.3 Information sur l’emballage . . . . . . . . . . . . . . 26
2 Présentation de l’aspirateur 27
2.1 Vue d’ensemble. . . . . . . . . . . . . . . . . . . . . . . . . . . .27 2.2 Données techniques. . . . . . . . . . . . . . . . . . . . . . .27
3 Pièces détachées / |
28 |
Accessoires |
3.1 Utilisation préconisée . . . . . . . . . . . . . . . . . . . . . 28 3.2 Tube élastique. . . . . . . . . . . . . . . . . . . . . . . . . . . . 28 3.3 Tube télescopique en métal à longueurs d’extraction multiples . . . . . . . . . . . . . . . . . . . . . . . . 28 3.4 Brosse . . . . . . . . . . . . . . . . . . . . . . . . . . . . . . . . . . . . 28 3.5 Petite brosse . . . . . . . . . . . . . . . . . . . . . . . . . . . . . 28 3.6 Suceur plat et fin . . . . . . . . . . . . . . . . . . . . . . . . . 28
4 Préparation et utilisation 29-30
4.1 Préparation . . . . . . . . . . . . . . . . . . . . . . . . . . . . . . . 29 4.2 Mise en marche et à l’arrêt . . . . . . . . . . . . . . . . 29 4.3 Curseur d’air . . . . . . . . . . . . . . . . . . . . . . . . . . . . . . 30 4.4 Indicateur de sac à poussière plein. . . . . . . 30 4.5 Rembobinage du câble secteur. . . . . . . . . . . 30
5 Nettoyage et entretien 31-32
5.1 Changement du sac à poussière . . . . . . . . . . .31 5.2 Sac à poussière en tissu . . . . . . . . . . . . . . . . . . .31 5.3 Lavage ou remplacement du filtre. . . . . . . . .31 5.4 Nettoyage du filtre ou du conteneur à poussière (filtre de protection du moteur) . . . .32 5.5 Nettoyage du filtre d’échappement . . . . . . .32
Aspirateur / Manuel d’utilisation |
23 / 109 FR |
|
|

1Instructions importantes en matière de sécurité et d'environnement
Cette section contient les consignes de sécurité qui aident à se prémunir contre les risquesdedommagescorporels ou de dégâts matériels.
Le non-respect de ces consignes annule la garantie.
1.1 Consignes générales de sécurité
••Cet appareil est conçu selon les normes internationales de sécurité.
••Cet appareil peut être utilisé par des enfants de 8 ans et plus et des personnes dont les capacités physiques, sensorielles ou mentales sont réduites ou n’ayant pas suffisamment d’expérience ou de connaissances si une personne chargée de la sécurité les surveille ou leur apprend à utiliser le produit en toute sécurité et en étant conscients des dangers y afférents.
Les enfants ne doivent pas jouer avec cet appareil. Le nettoyage et l’entretien d’utilisation ne doivent pas être effectués par des enfants sans surveillance.
••Ne l’utilisez jamais si le câble d’alimentation ou l’appareil lui-même est endommagé. Contactez le service agréé.
••Assurez-vous que votre source d’alimentation électrique soit conforme aux informations spécifiées sur la plaque signalétique de votre appareil.
••Un minimum de 16 A est nécessaire pour assurer la sécurité de l’alimentation secteur de l’appareil.
••N’utilisez pas de cordon prolongateur avec l’appareil.
••Pour éviter d’endommager le câble d’alimentation, assurezvous qu’il ne reste pas coincé, tordu ou frotté contre des objets pointus.
24 / 109 FR |
Aspirateur / Manuel d’utilisation |
|
|

1Instructions importantes en matière de sécurité et d'environnement
••Lorsque l’appareil est branché évitez de toucher la prise avec des mains mouettes ou humides.
••Ne tirez pas sur le câble d’alimentation de l’appareil pour le débrancher de l’alimentation.
••Ne passez pas des matériaux inflammables à l’aspirateur. Lorsque vous passez des mégots de cigarettes à l’aspirateur, assurez-vous qu’ils sont refroidis.
••Ne passez pas à l’aspirateur de l’eau ou d’autres liquides similaires.
••Mettez l’appareil à l’abri de la pluie, des sources d’humidité et de chaleur.
••Ne jamais utiliser l’appareil à proximité des combustibles, des matières ou des lieux inflammables.
••Veillez à toujours débrancher l’appareil avant le nettoyage et l’entretien.
••Ne trempez pas l’appareil ou son câble dans de l’eau pour son nettoyage.
••Faites un vérification régulière du tuyau de l’appareil. Ne l’utilisez pas s’il est endommagé. En cas de problème, contactez un technicien agréé.
••N’essayez pas de démonter l’appareil.
••Utilisez uniquement des pièces d’origine ou pièces recommandées par le fabricant.
••Si vous nettoyez des poussières épaisses comme du ciment ou du mortier liquide, l’indicateur de poussière s’allume plus tôt que prévu ; dans ce cas, changez de sac à poussière, même s’il est vide.
••N’utilisez pas l’appareil sans filtre; autrement dit, il va s’endommager.
Aspirateur / Manuel d’utilisation |
25 / 109 FR |
|
|
1Instructions importantes en matière de sécurité et d'environnement
••Lorsque vous passez l’aspirateur au niveau des escaliers, l’appareil doit être situé en dessous de l’utilisateur.
••Si vous conservez le matériel d’emballage, veuillez le tenir hors de la portée des enfants.
1.2 Conformité avec la directive DEEE et mise au rebut des produits usagés
 Ce produit ne contient pas de substances
dangereusesetprohibées,tellesquedécrites
dans la « Directive réglementant les déchets
 d’équipementsélectriquesetélectroniques » émanant du Ministère de l’Environnement et de l’Aménagement urbain. Cet appareil est conforme à la directive DEEE Le présent appareil a été fabriqué avec des pièces et du matériel de qualité supérieure susceptibles d’être réutilisés aux fins de recyclage. Par conséquent, à la fin de sa durée de vie, il ne doit pas être mis au rebut aux côtés de déchets domestiques ordinaires. Au contraire, il doit être éliminédansunpointdecollecteréservéaurecyclage d’appareils électriques et électroniques. Consultez les autorités locales de votre région pour connaître les points de recyclage. Contribuez à la préservation de l’environnement et des sources naturelles en déposant les produits usagés dans les points de recyclage.
1.3 Information sur l’emballage
L’emballage du produit est fait à partir de matériaux recyclables, conformément à notre Règlementation nationale. Ne jetez pas les éléments d’emballage avec les
déchets domestiques et autres déchets. Déposezles dans un des points de collecte d’éléments d’emballage que vous indiquera l’autorité locale dont vous dépendez.
26 / 109 FR |
Aspirateur / Manuel d’utilisation |
|
|
2 Présentation de l’aspirateur
2.1 Vue d’ensemble |
|
|
|
|
|
|
||
|
5 |
|
|
|
|
|
|
|
|
3 |
19 |
|
|
|
|
|
|
|
|
|
|
|
|
|
||
|
9 |
20 |
|
|
|
|
|
|
|
|
|
|
|
|
|
||
|
2 |
|
|
|
|
|
|
|
|
|
6 |
|
|
|
|
|
|
|
18 |
|
|
|
|
|
|
|
|
1 |
17 |
16 |
15 |
14 13 |
12 |
||
|
|
|||||||
|
|
7 |
|
|
|
|
|
|
|
|
8 |
|
|
|
|
|
|
|
|
4 |
|
|
|
|
|
|
1. |
Brosse à tapis de parqueterie. |
|
10 |
|
11 |
|
|
|
|
|
|
|
|
|
|||
2. |
Bouton d’ajustement de la hauteur. |
2.2 Données techniques |
|
|||||
3. |
Tube télescopique en métal. |
|
||||||
4. |
Poignée de transport. |
|
|
|
|
|
|
|
5. |
Curseur d’air. |
Alimentation électrique |
|
: |
||||
6. |
Tube d’aspiration élastique. |
|
||||||
220-240 V~, 50 Hz |
|
|
|
|
|
|||
7. |
Adaptateur de raccordement élastique pour |
|
|
|
|
|
||
tube élastique. |
Puissance nominale : 1800 W |
|
|
|||||
8. |
Bouton de déblocage du couvercle avant |
Puissance Maxi. |
: 2000 W (BKS 1410) |
|||||
9. |
Poignée de nettoyage. |
|||||||
|
|
: 2100 W (BKS 1420) |
||||||
10. |
Couvercle avant. |
|
|
|||||
11. |
Roues arrière. |
Classe de protection : II |
|
|
|
|||
12. |
Support de la brosse combinée. |
|
|
|
|
|
|
|
13. |
Couvercle du filtre de sortie d’air. |
Droits de modifications |
techniques |
ou de |
||||
14. |
Bouton poussoir marche/arrêt. |
|||||||
conception réservés. |
|
|
|
|
|
|||
15. |
Régulateur de la puissance d’aspiration. |
|
|
|
|
|
||
16. |
Bouton d’enroulement de câble. |
|
|
|
|
|
|
|
17. |
Indicateur de sac à poussière plein. |
|
|
|
|
|
|
|
18. |
Adaptateur de parc Accessoires |
|
|
|
|
|
|
|
19. |
Petite brosse |
|
|
|
|
|
|
|
20. Suceur plat |
|
|
|
|
|
|
||
Les valeurs indiquées sur les inscriptions apposées sur votre produit ou les autres documents fournis avec le produit sont des valeurs obtenues en conditions de laboratoire, conformément aux normes en vigueur. Ces valeurs peuvent varier selon l’utilisation de l’appareil et les conditions environnantes.
Aspirateur / Manuel d’utilisation |
27 / 109 FR |
|
|
3 Pièces détachées / Accessoires
3.1 Utilisation préconisée
L’appareil a été conçu pour un usage domestique. Il n’a pas été conçu pour un usage industriel.
3.2 Tube élastique
Le tube élastique (7) sert de raccord entre l’appareil et le tube télescopique en métal.
1.Insérez le tube flexible avec le port de branchement élastique (7) dans l’orifice d’aspiration (15) de l’appareil, jusqu’à ce qu’il s’enclenche bien.
2.Attachez l’autre extrémité du tube flexible (poignée de nettoyage) dans le tube télescopique en métal.
3.3 Tube télescopique en métal à longueurs d’extraction multiples
1.Tube télescopique en métal (3). Vous pouvez ajuster ce tube en faisant coulisser les contacts de blocage vers l’avant et en prolongeant le tube vers la longueur souhaitée.
2.Pour bloquer le tube, relâchez le dispositif de blocage.
3.4 Brosse
L’aspirateur est fourni avec une brosse combinée de haute qualité à hauteur réglable en fonction de l’épaisseur de la moquette.
Adaptée à tous les types de moquettes ainsi qu’aux sols durs, et réglable au pied.
1.Poussez la brosse combinée (1) sur le tube télescopique (3).
2.Modifiezlecommutateursurlabrossecombinée en fonction de l’épaisseur de la moquette.
3.5 Petite brosse
Utilisez la petite brosse (19) pour nettoyer les meubles ou les cadres de tableau. Elle peut pivoter jusqu’à 90°.
•• Poussez la petite brosse directement sur la poignée de nettoyage (9).
•• Poussezlapetitebrossesurletubetélescopique en métal (3) pour un meilleur accès.
3.6 Suceur plat et fin
Utilisez le suceur plat et fin (20) pour nettoyer les endroits d’accès difficiles.
1.Poussez le suceur plat directement sur la poignée de nettoyage (9).
2.Poussez le suceur sur le tube télescopique en métal (3) pour un meilleur accès.
28 / 109 FR |
Aspirateur / Manuel d’utilisation |
|
|
4 Préparation et utilisation
Vérifiez que la tension d’alimentation indiquée sur la plaque signalétique (sous l’appareil) correspond bien à la tension secteur.
4.1 Préparation
Au moment de la livraison, un sac à poussière est déjà installé dans l’appareil. Si vous avez assemblé les différentes pièces, l’appareil est prêt à fonctionner.
1.Poussez le contact de raccord du tube élastique
(7) dans la prise présente dans le conteneur à poussière, jusqu’à ce qu’il s’enclenche.
ATTENTİON: Pour retirer le A tube élastique, (7) appuyez sur les boutons de déblocage latéraux sur le contact de raccord, puis retirez le
tube.
2.Attachez l’autre extrémité du tube flexible dans le tube télescopique en métal (3).
3.Insérez la brosse ou l’accessoire correspondant dans l’extrémité inférieure de l’intérieur du tube télescopique métallique (3).
ATTENTİON: Raccordez les A raccords de branchement en poussant dessus tout en le faisant tourner et détachez le raccord en
tirant et en tournant.
4.2 Mise en marche et à l’arrêt
1.Déroulez la longueur de câble secteur nécessaire.
ATTENTİON: La longueur
A maximum de câble est indiquée par un repère rouge. N’essayez jamais de tirer le câble secteur au-delà de la marque rouge.
2.Branchez la fiche du câble secteur dans la prise de courant.
3.Allumez l’appareil en appuyant sur le bouton poussoir (14).
4.Ajustez la puissance d’aspiration souhaitée à l’aide du régulateur (15).
5.Après utilisation, (14) éteignez l’appareil en
appuyant sur la touche et débranchez la fiche du câble secteur de la prise..
A ATTENTİON: Si vous n’utilisez pas l’appareil, débranchez toujours la fiche de la prise murale.
Aspirateur / Manuel d’utilisation |
29 / 109 FR |
|
|
4 Préparation et utilisation
4.3 Curseur d’air
Vous pouvez ajuster le curseur d’air (5) à partir de la poignée de nettoyage avec votre pouce. Si le curseur (5) est complètement fermé, ceci signifie que la puissance d’aspiration est atteinte.
Dans certains cas, il peut cependant être utile de réduire la puissance d’aspiration, par exemple lors du nettoyage de tissus, de canapés ou de moquettes épaisses. Si tel est la cas, ouvrez le curseur d’air comme souhaité.
4.4 Indicateur de sac à poussière plein
Cet indicateur (17) présente le niveau de largeur du sac à poussière. Si l’indicateur présente un niveau de largeur supérieur à 50%, vous devez changer de sac à poussière.
4.5 Rembobinage du câble secteur
1.Débranchez la fiche du câble secteur de la prise de courant.
2.Tenez le câble secteur d’une main et maintenez le bouton poussoir enfoncé (14).
3.Guidez le câble secteur avec précaution dans l’appareil.
ATTENTİON: Rembobinez toujours le câble secteur avec A précaution, un actionnement unilatéral de la touche (14) et une vitesse de rembobinage élevée peuvent entraîner des mouvements
imprévisibles du câble.
30 / 109 FR |
Aspirateur / Manuel d’utilisation |
|
|
 Loading...