How it Works
Log In / Sign Up
Buy Points
How it Works
FAQ
Contact Us
Questions and Suggestions
Users
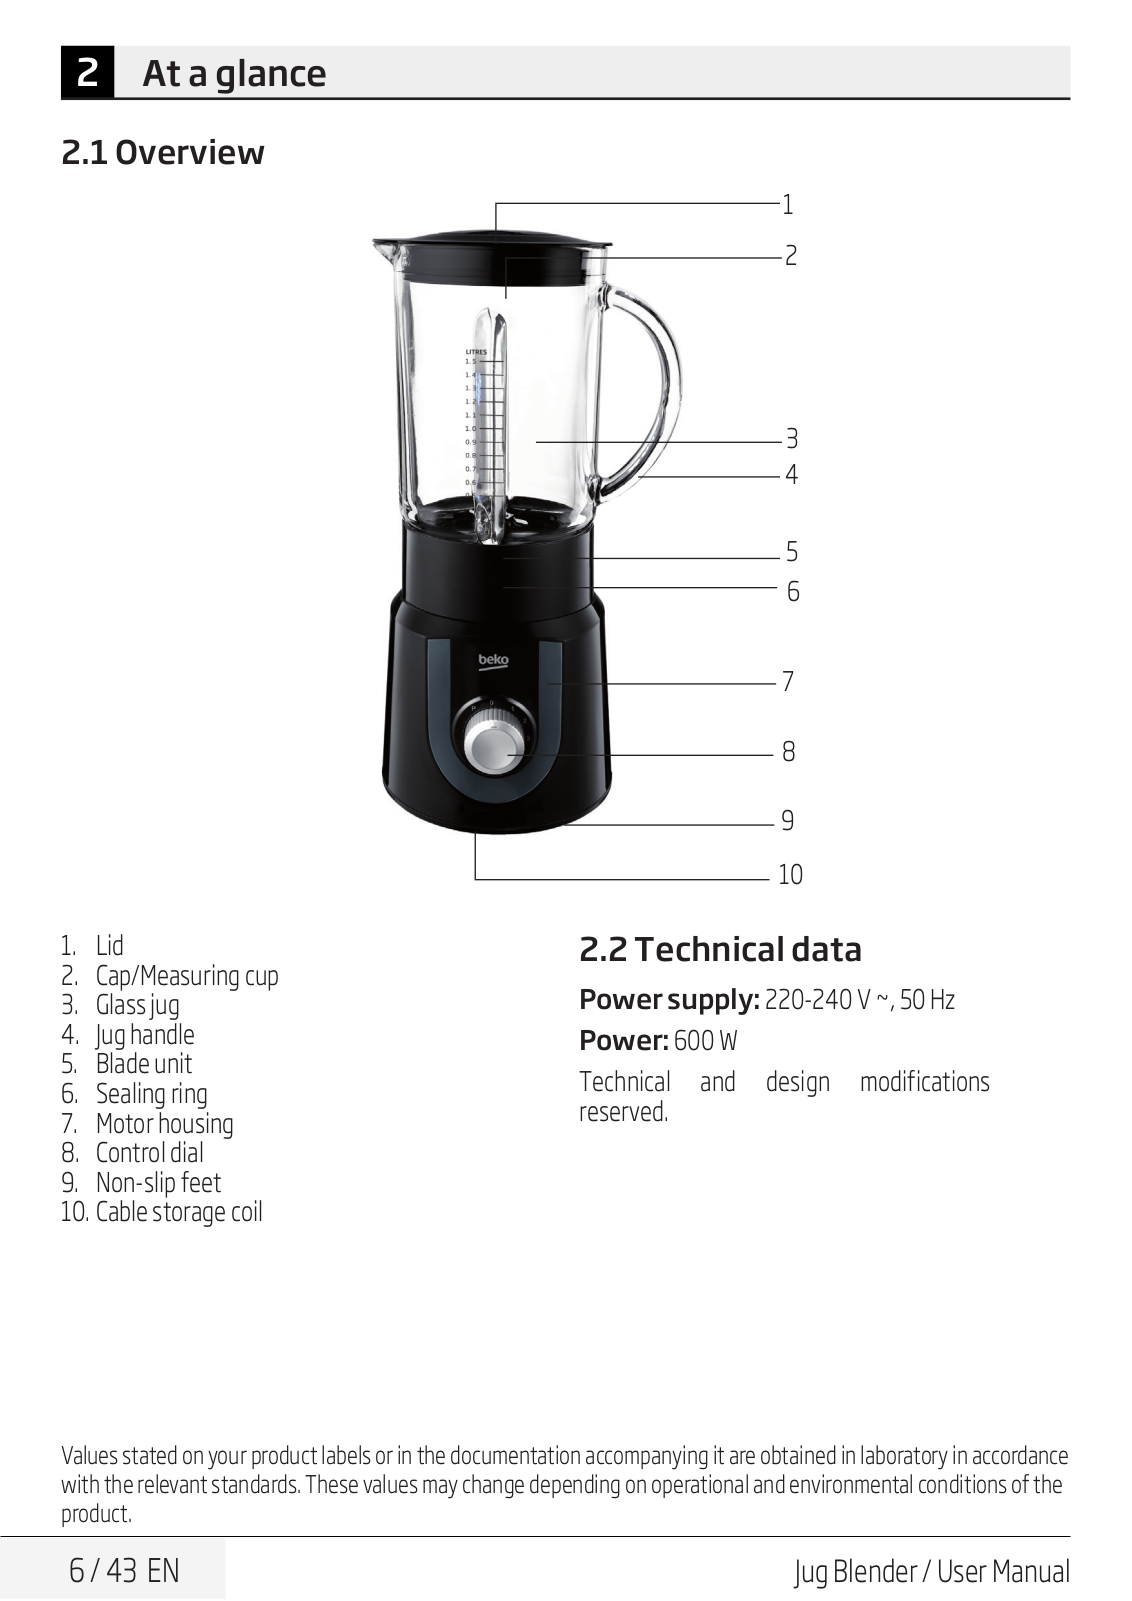
Beko
Loading...
B
BKK1100Y
2
BKK1105
BKK1156
3
BKK1200DKR
2
BKK-12C
BKK-12 H
BKK1600DKR
4
BKK1600PKR
2
BKK2115 Inox
BKK2121
2
BKK2128L
BKK2128T
4
BKK2130
5
BKK-2177
2
BKK-2180
4
BKK 2213
3
BKK 2214 IN
2
BKK 2215 IN
BKK 2216
BKK 2219 IN
BKK 2220 IC
BKK 2220 IN
BKK 2221 C
BKK 2232
2
BKK 2233
BKK 2233 T
BKK 2235 SK
2
BKK 2254
BKK 2260
2
BKK 2262
3
BKK 2262 Y
BKK 2284 TG
BKK 2294 TG
BKK 2295 TG
BKK 2296 TG
BKK 2299
BKK 230
BKK 2300
9
BKK 2300 BJK
2
BKK-2300 GRI
BKK 2301
BKK 2304
2
BKK 2306
BKK 2307
2
BKK 2308
2
BKK 2309
2
BKK 2310
2
BKK 2311
BKK 2312
2
BKK 2313
2
BKK 2356
BKK 2400
2
BKK 2407
BKK 2420
2
BKK 2422
BKK 2431
BKK 2500
2
BKK 2505
2
BKK 2510
BKK 2515
BKK 2700
BKK 3005 KL
BKK 3008 KM
3
BKK 3015 HM
2
BKK 3020 HB
BKK 3025 EK
2
BKK 3030 TB
2
BKK 3050 HB
BKK 3055 MK
BKK 3060 KL
BKK 3065 KM
BKK 3070 EK
BKK 3075 TG
BKK 3080 RHB
BKK 3082 RHB
BKK 3088 HBS
BKK 3090 HB
BKK 3091 HB
BKK 3092 HM
BKK 3093 HM
BKK 3094 TB
BKK 3095
BKK 3096
BKK 3097 TB
BKK 3098
BKK 3098 M
BKK 3098 T
BKK 3099 HBS
BKK 4130 MV
BKK 4130 PV
BKK 4134 MV
BKK 4134 PV
BKK 4160 M
BKK 4160 P
BKK 4235 HBV
BKK 4245 VSV
BKK 4260 MK
BKK 4305 KL
BKK 4315 KM
BKK 4375 EK
Loading...
Loading...
Nothing found
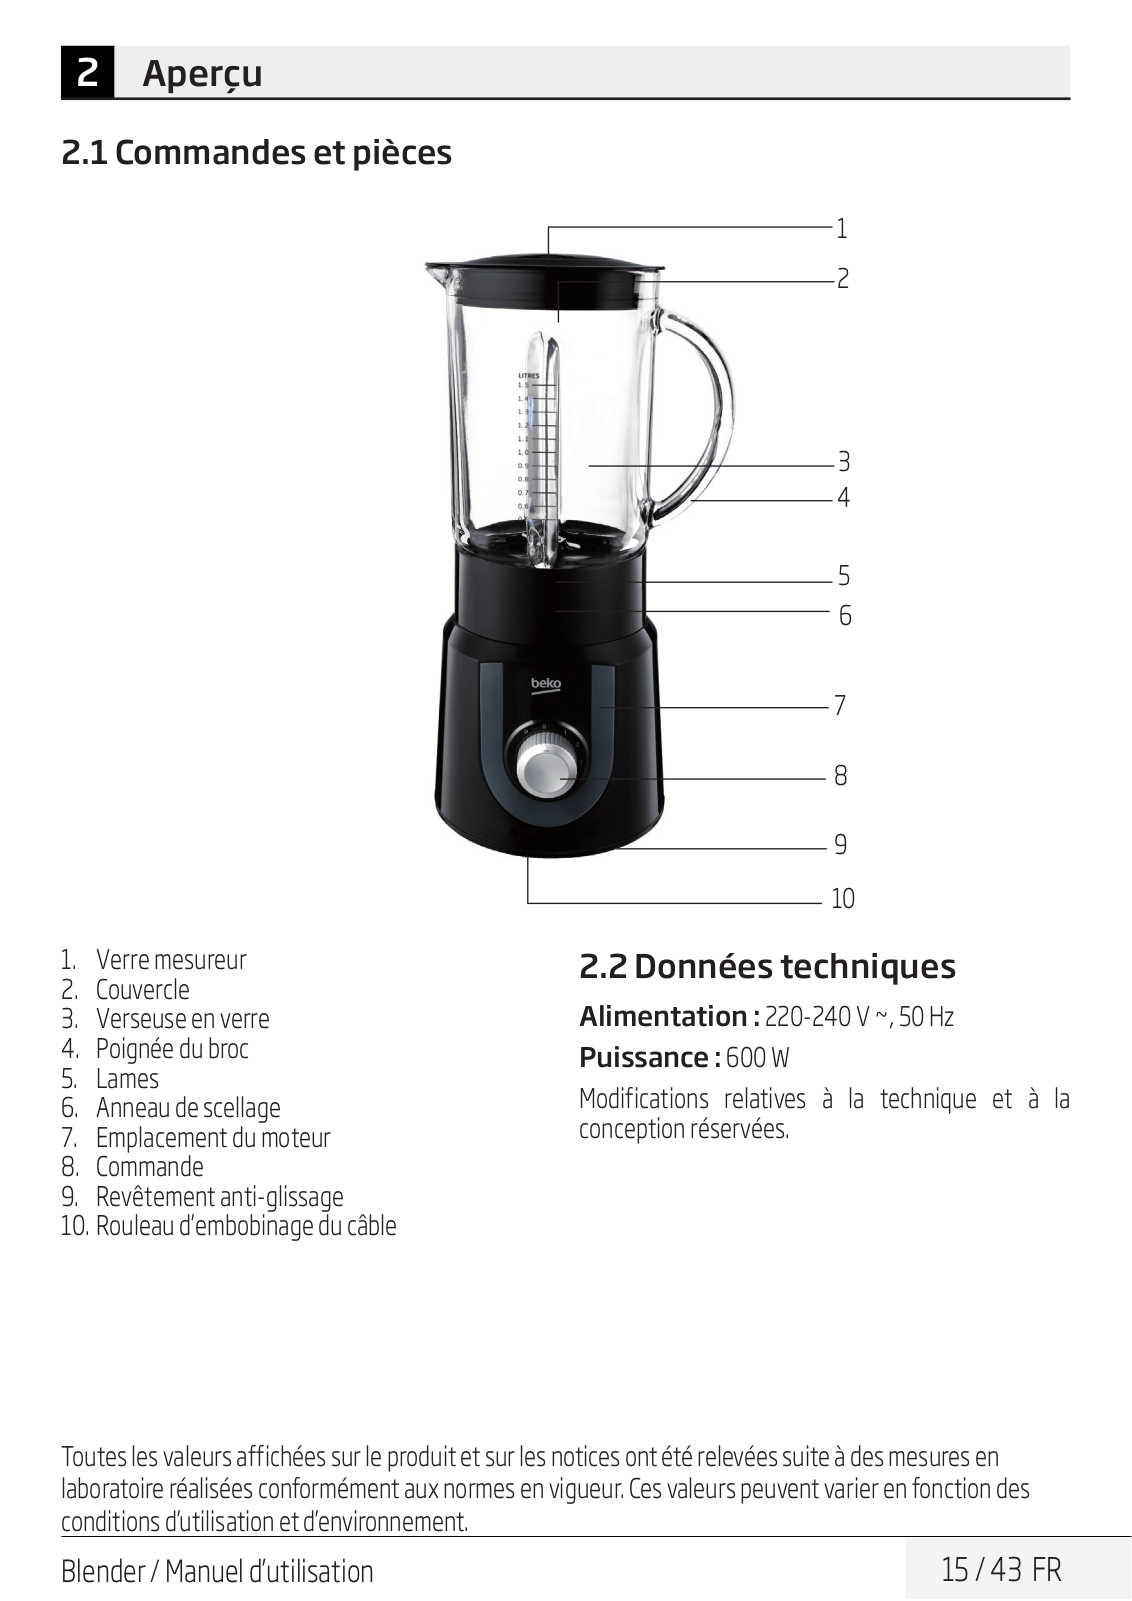
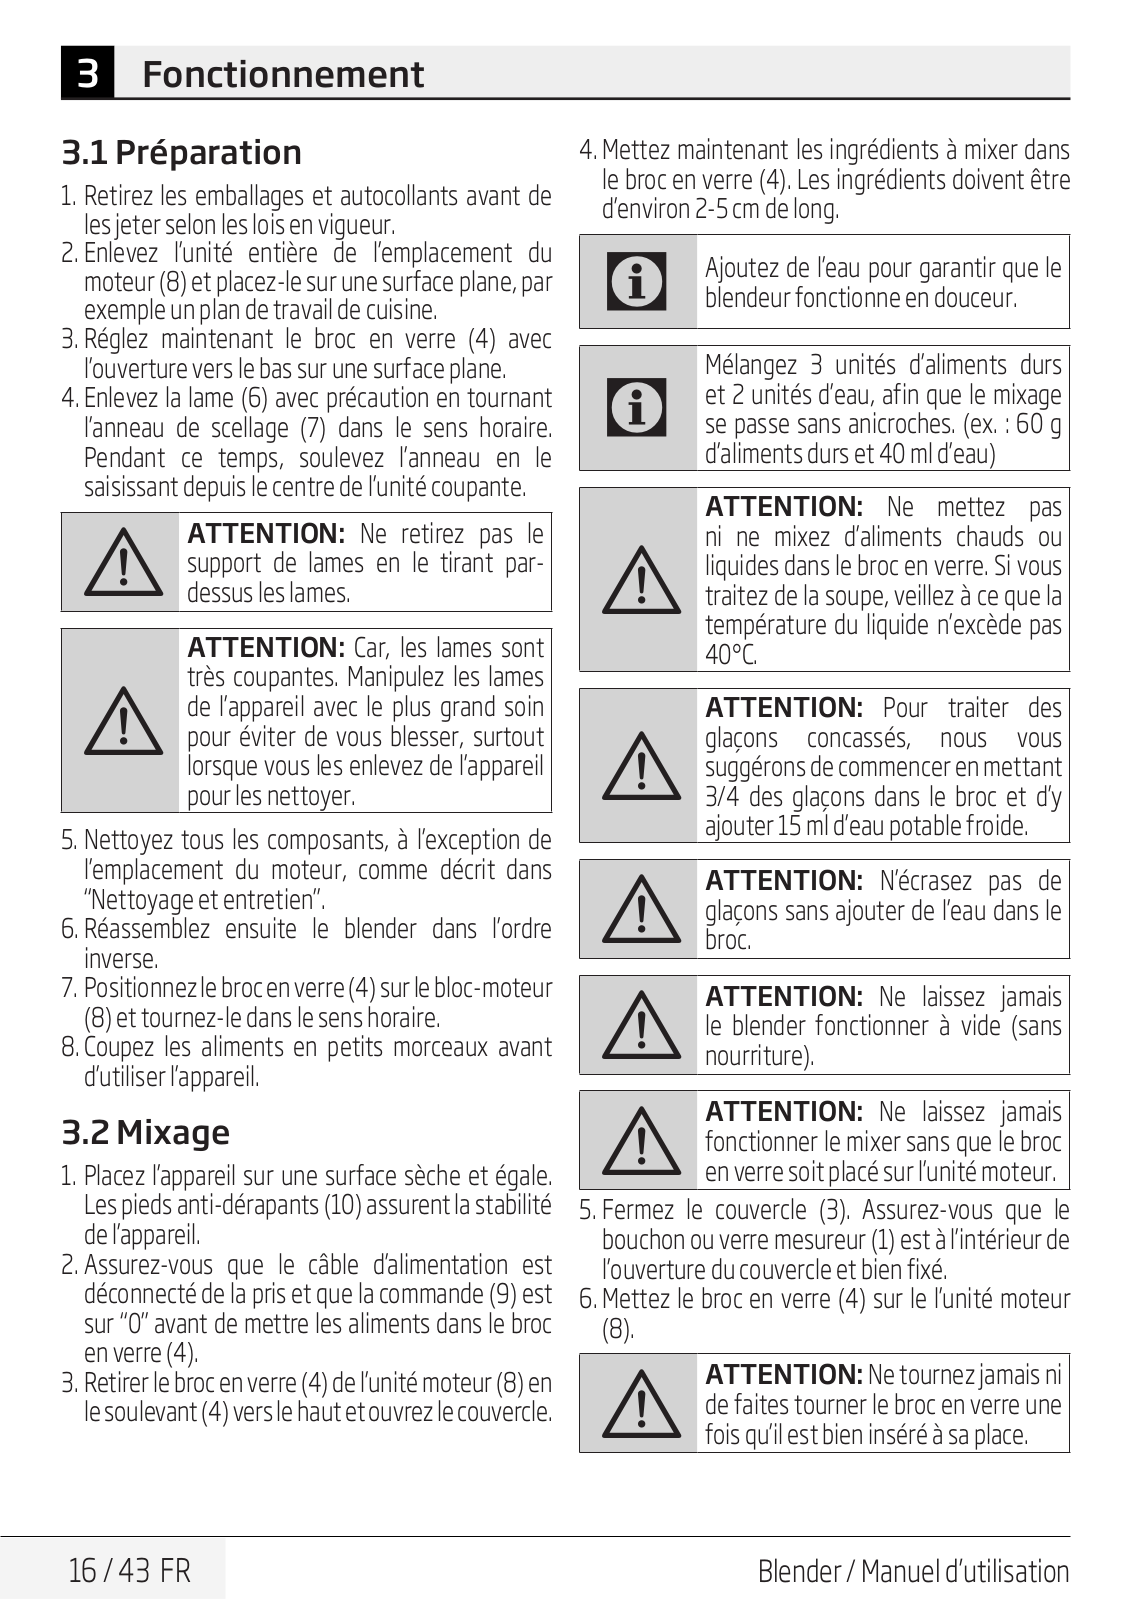
BKK 3030 TB
User Manual
44 pgs
1.39 Mb
0
User manual [EN,FR,RU,TR]
52 pgs
1.43 Mb
0
Table of contents
Loading...
Beko BKK 3030 TB User manual [EN,FR,RU,TR]
...
Beko User manual [EN,FR,RU,TR]
Download
Specifications and Main Features
Frequently Asked Questions
User Manual
Download
Loading...
+
36
hidden pages
Unhide
You need points to download manuals.
1 point = 1 manual.
You can buy points or you can get point for every manual you upload.
Buy points
Upload your manuals