How it Works
Log In / Sign Up
Buy Points
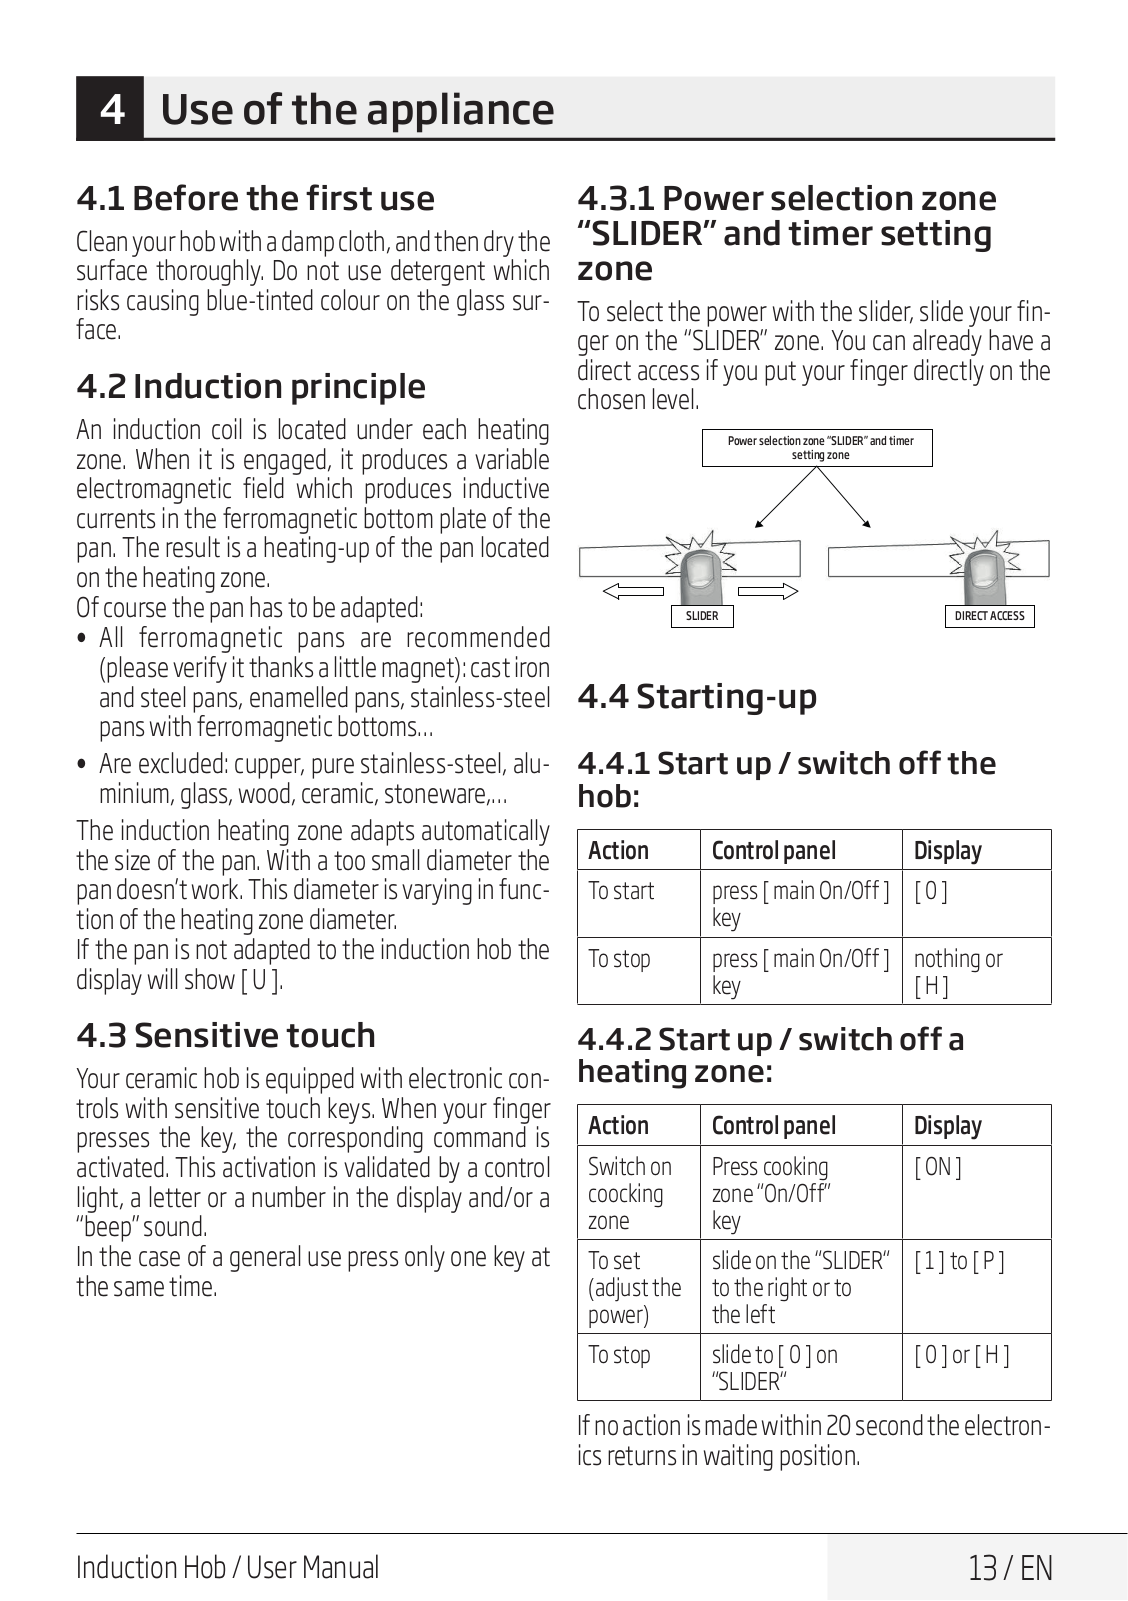
How it Works
FAQ
Contact Us
Questions and Suggestions
Users
Beko
Loading...
B
BCNA275E4SN
6
BCNA275K2S
3
BCNA275K3S
4
BCNA275K3SN
3
BCNA306E2S
5
BCNA306E3S
3
BCNA306E3SN
7
BCNA306E4SN
5
BCP 60 X
BCP 80 X
BCS18500X
3
BCS 28 K2S
2
BCS28KFSN
3
BCSA240K3S
4
BCSA283E2S
9
BCSA283E3S
3
BCSA283E4SN
2
BCSA285E4SN
2
BCSA285K2S
12
BCSA285K2SF
2
BCSA285K2SF LH
2
BCSA285K2S LH
2
BCSA285K3S
9
BCSA285K3SF
2
BCSA285K3SFN
3
BCSA285K3SN
5
BCSA285K3SN LH
3
BCSA285K41SN
3
BCSA285K4SN
5
BCSA306E3SF
2
BCSA306E3SFLH
2
BCSA306E4SFN
3
BCSA306E4SFN LH
3
BCSA306K2S
2
BCSA306K2SLH
2
BCSA306K3SN
3
BCSA306KFSN LH
3
BCSG50
BCT601IG
3
BCT603IG
2
BCT60GX
3
BCT75GX
3
BCT9031G
BCT903IG
2
BCT90GG
3
BCT90GX
4
BCTG24400SS
3
BCTG30500SS
3
BCTG36500SS
3
BCTI30410
2
BCTI36510
2
BCW12400X
BCW 14400 B
2
BCW14500BG
5
BCW15500X
13
BCW15500XG
5
BCW18400X
2
BCW18500X
4
BCW18501X
BCW19400DX
3
BD 10000
BD 220
2
BD 230
BD 240
BD 250
BD250K2S
2
BD250KFSN
4
BD 300
2
BD 531 A
BD 532 A
BD 600
BD-610
2
BDC 5422/A
BDC 545 A
BDC 643
BDC6C55W
BDC6C55X
BDC710W
2
BDC830W
2
BDCC 640
BDDN38530XD
3
BDE22300X
BDF 10
BDF13A70A
BDF13A70S
BDF13A70W
BDF1410W
6
BDF1410X
6
BDF1620W
5
BDF1620X
4
BDF1630X
6
BDF16B30X
BDF 22300
BDF22300B
5
BDF 26300
BDF26300X
5
BDG 581
BDG 582
BDG 584
BDG 585
Loading...
Loading...
Nothing found
BCTI36510
Specifications
2 pgs
726.57 Kb
0
User Manual
44 pgs
1.69 Mb
0
Table of contents
Loading...
Beko BCTI36510 User Manual
...
Beko User Manual
Download
Specifications and Main Features
Frequently Asked Questions
User Manual
Download
Loading...
+
30
hidden pages
Unhide
You need points to download manuals.
1 point = 1 manual.
You can buy points or you can get point for every manual you upload.
Buy points
Upload your manuals
 Loading...