

Page 1
User Manual
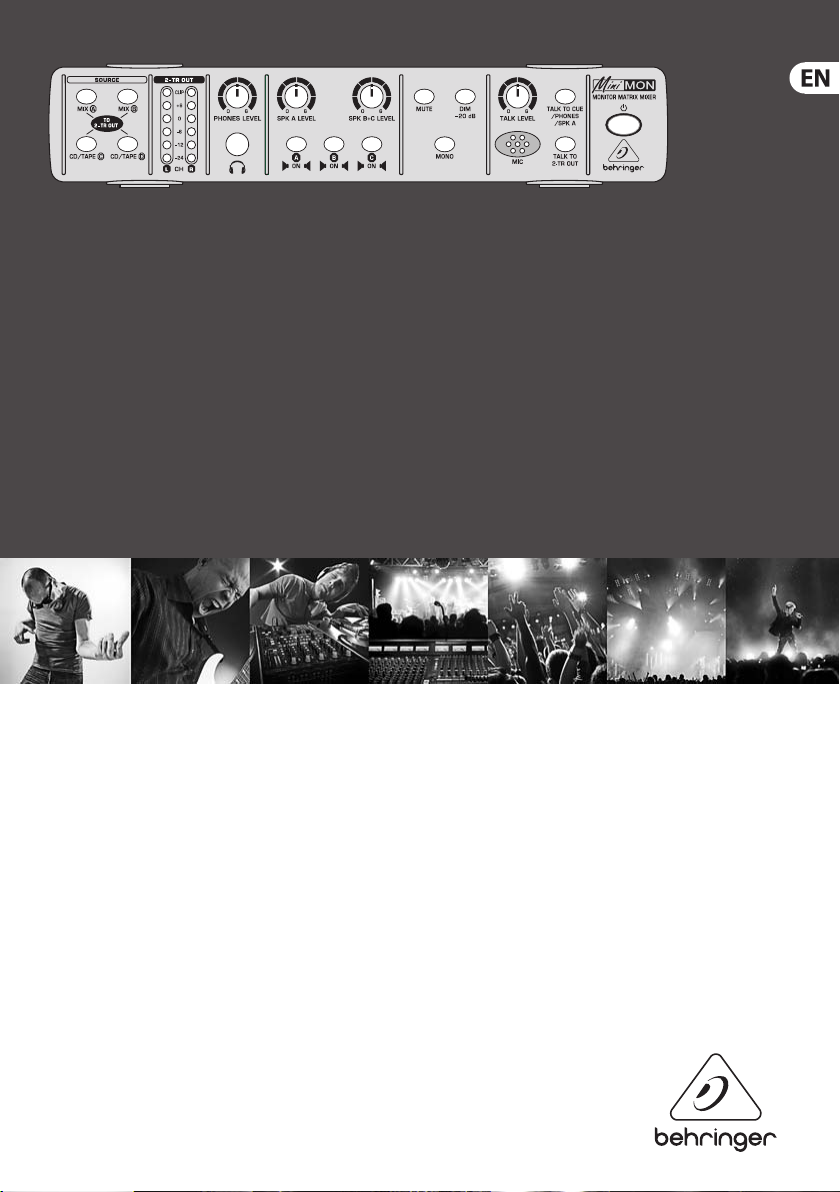
MINIMON MON800
Ultra-Compact Stereo Monitor Matrix Mixer with Talkback Mic
Page 2

2 MINIMON MON800 User Manual
Table of Contents
Thank you ...............................................................2
Important Safety Instructions ..............................3
Legal Disclaimer .....................................................3
Limited Warranty ...................................................3
1. Introduction .......................................................4
1.1 Before you get started ..........................................4
2. MON800 Quick-Start Set-Up ............................5
3. Control Elements and Connections ................6
3.1 Front panel ................................................................6
3.2 Rear panel ..................................................................7
4. Application Examples .......................................8
4.1 The MINIMON in a recording
environment .....................................................................8
4.2 Using the MINIMON for signal
distribution in simple P.A. applications .................9
5. Audio Connections ..........................................10
5.1 Connection with ¼" or cinch cables ............. 10
5.2 Footswitch connection ..................................... 10
5.3 Headphones connection .................................. 10
6. Specications ..................................................11
7. Other Mini Products ........................................12
Thank you
Thank you fo r showing your cond ence in BEHRINGER produ cts by
purchasi ng the MINIMON MON80 0. With the MINIMON MON8 00
you have purc hased a exible mo nitoring unit, wh ich allows you
to control a v ariety of signa ls during music prod uction. You can use
the MON80 0 as an add-on unit to a m ixing console wit h only limited
monitor ing capabilitie s, or you can use it wit hout a console at all.
With the i ck of a switch you can l isten to your produc tions over
dieren t loudspeaker sys tems and thus be able to i dentify mixi ng
problem s at an early stage. Rec ording musicians c an be provided wi th
appropr iate monitor signal s and thanks to the ta lk-back micropho ne
it’s you who h as the entire recor ding process unde r control
Page 3
3 MINIMON MON800 User Manual
4. Follow all instructions .
16. Where the MAINS
COPYRIGHTED. NO PART OF THIS MANUAL
ELECTRONIC OR MECHANICAL, INCLUDING
Important Safety Instructions
Terminals marked with this
symbol c arry electri cal
current of su cient
magnitude to constitute risk of electric
shock. Use only high -quality professional
speaker cable s with ¼" TS or twistlocking plug s pre-installed. Allother
installation or modi cation should be
perfo rmed only by quali edpersonnel.
This symbol, wherever it
appears, aler ts you to the
presence of uninsulated
dangerous voltage inside the enclosure voltage that may be su cient to
constitute a risk o fshock.
This symbol, wherever it
appears, aler ts you to
important operating and
maintenance instructions in the
accompanying literat ure. Please read
themanual.
Caution
To reduce the risk of elec tric
shock, do not rem ove the
top cover (or the rear sec tion). No user
serviceable part s inside. Refer servicing
to quali edpersonnel.
Caution
To reduce the risk of re or
electr ic shock, do not expos e
this appliance to rai n and moisture.
Theapparatu s shall not be exposed to
dripping or splashing liquids and no
objects lled with liquids, suc h as vases,
shall be placed on the ap paratus.
Caution
These service instruc tions
are for use by qual i ed
service p ersonnel only. Toreduce the
risk of elec tric shock do not perfo rm any
servicing other than that contained in the
operation i nstructions. Rep airshave to be
perfo rmed by quali ed serviceperso nnel.
1. Read these instructions.
2. Keep these instructions.
3. Heed all warnings.
5. Do not use this appar atus nearwater.
6. Clean only with dry cloth.
7. Do not bloc k any ventilation
openings. Ins tall in accordance with the
manufacturer ’s instructions.
8. Do not install near any heat sources
such as radiator s, heat registers, stoves,
orother appar atus (including ampli ers)
thatproduceheat.
9. Do not defeat the sa fety purpose
of the polarized or grounding-type plug.
Apolarized plu g has two blades with
one wider than the other. A groundingtype plug has t wo blades and a third
grounding prong. The wide blade or the
third prong a re provided for your safe ty.
Ifthe provided p lug does not t in to
your outlet, cons ult an electrician for
replacement of t he obsoleteoutlet.
10. Protect the power cord fr om being
walked on or pinc hed particularly at
plugs, convenience re ceptacles, and the
point where t hey exit from theappar atus.
11. Use only attachments/accessories
speci ed by themanufac turer.
12. Use only with
the cart , stand,
tripod, bracket,
ortable speci ed by
the manufacturer,
orsold with t he
apparatus . When a cart is used, us ecaution
when moving the cart/apparatus
combination to avoid in jury from tip-ove r.
13. Unplug this apparatus during
lightning storms or when unused for long
periods oft ime.
14. Refer all s ervicing to quali ed
service personnel. Servicing is required
when the apparat us has been damaged
in any way, such as power suppl y cord or
plug is damaged, liquid has b een spilled
or object s have fallen into the apparatus,
the apparatu s has been exposed to rain
or moistur e, does not ope rate normally,
orhas beendrop ped.
15. The appar atus shall be connected to
a MAINS socket outl et with a protective
earthingconnection.
plug or an appliance
coupler is use d as the
disconnect device,
thedisconnec t device shall
remain readilyoperable.
LEGAL DISCLAIMER
TECHNICAL SPECIFICATIONS AND
APPEARANCES ARE SUBJECT TO CHANGE
WITHOUT NOTICE AND ACCURACY
IS NOT GUARANTEED. BEHRINGER,
KLARKTEKNIK, MIDAS, BUGERA,
ANDTURB OSOUND ARE PART O F THE
MUSIC GROUP MUSICGROUP.COM.
ALL TRADEMARKS ARE THE PROPERTY
OF THEIR RESPECTIVE OWNERS.
MUSICGRO UP ACCEPTS NO LIA BILITY
FOR ANY LO SS WHICH MAY BE
SUFFERED BY ANY PERSON WHO RELIES
EITHER WHOLLY OR IN PART UPON
ANY DESCRIPTION, PHOTOGRAPH
OR STATEMENT CONTAINED HEREIN.
COLORSAN D SPECIFICATION S MAY
VARY FROM ACTUAL PRODUCT.
MUSIC GRO UP PRODUCT S ARE SOLD
THROUGH AUTHORIZED FULLFILLERS
AND RESELLERS ONLY. FULLFILLERS
AND RES ELLERS ARE NOT AG ENTS OF
MUSICGRO UP AND HAVE ABSOLUT ELY
NO AUTHO RITY TO BIND MUSI CGROUP BY
ANY EXPRESS OR IMPLIED UNDERTAKING
OR REPRESENTATION. THIS MANUAL IS
MAY BE REPRODUCED OR TRANSMITTED
IN ANY FO RM OR BY ANY MEANS,
PHOTOCO PYING AND RECOR DING OF
ANY KIND, FORANY PURPOSE, WITHOUT
THE EX PRESS WRIT TEN PERMISSIO N OF
MUSICGRO UPIPLTD.
ALL RIGHTS RESERVED.
© 2013 MUSICGroupIPLtd.
Trident Chambers, Wickhams Cay,
P.O. Box 146, Road Town, Tortola,
BritishVirg in Islands
LIMITED WARRANTY
For the applicable warranty terms
and conditions and additional
information regarding MUSIC
Group’s Limited Warrant y, please
see complete de tails online at
www.music-group.com/warranty.
Page 4

4 MINIMON MON800 User Manual
1. Introduction
The MON80 0 features a clear ly structure d input secti on with four
selec table and mixable s tereo inputs, as w ell as a high-prec ision,
6-dig it LED output level me ter for accurate le vel control. It also
include s a powerful headp hones output wi th its own volume con trol,
plus thre e selectable s tereo loudspeake r outputs with s eparate
volume controls for optimum adjustment.
The Mute and D im functions a s well as a mono switch f or checking
signals fo r mono compatibili ty (phase) give the MO N800 even
greater e xibility. The inte grated talk-back s ection with it s
built-in mi crophone provid es you with a full se t of routing option s.
High-quality potentiometers and backlit switches ensure long-term
reliabili ty. What is more, our ex tremely low-no ise operational
amplier s are synonymou s for outstand ing audio quality.
With the MO N800 you have your music p roductions to tally
undercont rol!
1.1 Before you get started
1.1.1 Shipment
Your MON800 wa s carefully pac ked at the assembly p lant to assure
secure t ransport. Sho uld the condition of t he cardboard box
sugges t that damage may have taken p lace, please inspec t the unit
immediat ely and look for physi cal indication s of damage.
◊ Damaged equipment should NEVER be sent directly to us.
Please in form the dealer f rom whom you acq uired the
unit immediately as well as the transportation company
from wh ich you took delive ry. Otherwi se, all claims for
replacement/repair may be rendered invalid.
◊ Please al ways use the origi nal packagin g to avoid damage
due to stor age or shipping .
◊ Never let unsupervised children play with the MON800 or
with its packaging.
◊ Please di spose of all pack aging material s in an
environmentally friendly fashion.
1.1.2 Initial operation
Be sure that t here is enough spac e around the unit for c ooling.
Toavoid overheati ng, do not place the MON8 00 on top of power amps
or near radi ators, etc.
◊ To power the MON8 00, use only the powe r supply unit that i s
delivered with your equipment.
◊ Please en sure that the unit i s installed an d operated only by
people q ualified to do s o. During insta llation and ope ration
the user m ust have suff icient elect rical contac t to earth.
Elect rostatic dis charge may aff ect the operat ion of the unit.
1.1.3 Online registration
Please reg ister your new BEHRIN GER equipment righ t after your
purchas e by visiting http: //behring er.com and read the terms an d
conditions of our warranty carefully.
Should your B EHRINGER produc t malfunction, i t is our intention
to have it repa ired as quickly as p ossible. To arrange for w arranty
servi ce, please contac t the BEHRINGER retai ler from whom the
equipment was purchased. Should your BEHRINGER dealer not
be locate d in your vicinit y, you may direc tly contact o ne of our
subsidiaries. Corresponding contact information is included in
the original equipment packaging (Global Contact Information/
European Co ntact Inform ation). Should your countr y not be listed,
pleasecon tact the distr ibutor nearest y ou. A list of distri butors can be
found in th e support area of o ur website (http://be hringer.com).
Registe ring your purchas e and equipment wit h us helps us proces s
your repair claims more quickly and eciently.
Thank you fo r your cooperatio n!
Page 5

5 MINIMON MON800 User Manual
2. MON800 Quick-Start Set-Up
Computer
B-CONTROL
FADER BCF2000
Digital Monitor
Speakers MS20
TRUTH B2031A
Mix in A
MINIMON MON800
Fig. 2.1: MON800 quick-start set-up
Speakers Out A
Please fo llow the instruc tions below to set u p the MON800 as a
monitor un it with dierent s peakers in your st udio.
• Connec t your computer or any ot her line-level so urce to the
MIX IN A connec tors on the MON8 00.
• Connec t your main monitor sp eakers to the SPEAKER S OUT A
connec tors, and another p air of speakers to the B o utputs.
• Press the M IX A switch in the SOURC E section.
• Use the 2-TR OUT LED dis play to check the sign al level. If the CLIP
LED lights u p, please reduce the i nput signal level unt il it settles
betwe en the -6 dB and +6 dB mar kings.
• The switc hes A and B allow you to swi tch the pairs of spe akers
on and o. Acti vate the A speakers an d adjust the desir ed
volume wit h SPK A LEVEL.
Speakers Out B
• Switch o the A s peakers and act ivate the B speakers . UseSPK
B + C LEVEL to adj ust a volume level that i s roughly the same as
the A speaker s volume.
• Switch bet ween the two pai rs of speakers to che ck the volume
levels. Alig n the volume if neces sary.
• By switc hing between the t wo pairs of speake rs you can
evaluate you r mixes by way of a direc t comparison usi ng two
dierent monitor systems.
Page 6

6 MINIMON MON800 User Manual
3. Control Elements and Connections
3.1 Front panel
(4) (7) (9) (10)(5)
(1) (2)
Fig. 3.1: Front pa nel contro l element s of the MON80 0
(3) (8) (11) (12) (13)(6)
(1) Use the fou r switches in the SOURCE s ection to sele ct up to four
input sou rces (MIX A and B, CD/TAPE C and D) for moni toring
and recor ding. If desired, se veral sources can b e activated at
the same ti me. Subsequently, the s ignals are mixed. Ea ch active
source is in dicated by its sw itch lighting up.
(2) The two LED d isplays are for moni toring the outpu t level of the
2-TRACK OUT outp uts. They compri se 6 LEDs each. When the
CLIP LED light s up, this indicates th at distortion m ay occur.
In this cas e, please reduce the le vels of the signal sou rces
connec ted to the input of the M ON800.
(3) A pair of head phones with a ¼" TRS conn ector (e.g. BEHRINGER
HPS5000) c an be connected to t he PHONES jack. This outpu t is
wired in pa rallel with the rea r-panel output jac k (15), so that up
to two head phones can be use d at the same time.
(4) With the PHONES LEVEL cont rol you can adjust t he
volume for t he two headphone s jacks on the fro nt or rear
panelrespectively.
◊ The volum e on the headphone s from the fro nt and rear
panel jac ks cannot be ad justed separ ately.
(5) SPK A LEVEL gover ns the volume level of t he SPEAKERS OUT A
outputs (18). SPK B + C LEVEL allow s you to set the volume f or
output s B and C (17) simultaneously.
(6) Use the sw itches A/B/C ON t o switch the speaker s A, B and C on
and o. While mi xing it is advisab le to listen to your pro duction
over at least t wo dierent pai rs of speakers, so a s to get an
objec tive impression of y our mix. If you wish to s witch between
dierent monitoring systems, press the corresponding switches
of the act ive and of the inact ive speaker pair one af ter the
other. Acti ve speakers are alway s indicated by their s witches
lighting u p.
(7) With the MUTE s witch you can disa ble all loudspeaker an d
headphones outputs.
(8) The MONO switc h switches all moni tor paths to mono. Thisi s
useful, i n particular, when yo u want to check your mi x for
mono compatibility. Extreme panorama settings and excessive
use of ee cts, such as cho rus, phaser and ang er in the
stereo mi x can lead to signal ca ncellations durin g playback in
mono. Suchph ase problems can e asily be detecte d with the
MONOswit ch.
(9) The DIM switc h lowers the level of th e monitor paths by -20 dB.
This allows y ou, for example, to ta lk to somebody whil e mixing
without losing track of the recording.
◊ Switches (7) to (9) light up when th e correspond ing
functions are active. The functions performed by
these sw itches do not af fect the sign als of the two
2-TRACK OUT outpu ts.
(10) Use the TALK LEVEL co ntrol to adjust the s ensitivity o f the
talk-back microphone.
(11) The talk-back microphone is installed behind the MIC openings.
Speak into the microphone to make announcements which are
then rout ed to the recording d evices connec ted to the 2-TRACK
OUT outpu ts. This allows you to r ecord the number s or names
of diere nt recording take s, for example, and th us maintain a
clear over view of your work. Ad ditionally, the micr ophone can
be used to co mmunicate with th e musicians who can he ar your
voice on their headphones.
Page 7

7 MINIMON MON800 User Manual
(12) The TALK TO CUE/PHONES/SPK A and TALK TO 2-TR OUT
buttons determine where the talk-back microphone signal is
routed to. W ith the TALK TO CUE/PHONES/SPK A button th e
signal is ro uted to the monitor p aths CUE OUT, PHONES, PH and
SPEAKERS O UT A. In this case, the D IM function (9) is ac tivated
automati cally to avoid feedb ack. The TALK TO 2-TR OUT button
allows you to r oute the signal via th e two 2-TRACK OUT output s
to the reco rding devices conn ected.
◊ Hold the b utton down as lon g as you wish to speak .
3.2 Rear panel
(15)
(13) The s witch turns you r MINIMON MON800 on and o .
◊ Attention: The switch does not fully disconnect
the unit f rom the mains. To disc onnect the uni t from
the mains , pull out the main co rd plug or appli ance
coupler. Whe n installing t he product, en sure the plug or
appliance coupler is readily operable. Unplug the power
cord com pletely when the u nit is not used for p rolonged
periods of time.
(14) (17)(16)
Fig. 3.2: R ear panel co nnector s of the MON8 00
(18) (19) (20) (21) (22)
(14) The MON8 00 is connecte d to the mains using a 2-pol e POWER
connec tor jack. A matching m ains adaptor is inclu ded with
theunit.
◊ To avoid damage to y our COM800 always us e the mains
adaptor supplied with the unit.
(15) A secon d pair of headphones c an be connecte d to the PH jack.
This conne ctor is wired in pa rallel with the f ront-panel jack (3).
(16) The TB jack i s used to connect a si ngle footswi tch.
Thisfoot switch allows han ds-free talkin g and the use of the
talk-back b utton (12) (TALK TO CUE/PHO NES/SPK A) at the
sametime.
◊ Hold the b utton down as lon g as you wish to speak .
(17) Two pairs of l oudspeakers can b e connected to th e
SPEAKERSOUT B a nd C jacks. Since the l evels of both pairs
(BandC) can o nly be adjusted tog ether on the MON80 0, it’sa
good idea t o connect one spea ker pair to output B and a n
additio nal sub-woofer to o utput C (see chapter 4.1).
(18) Connec t your main monitor s peakers to the
SPEAKERS OUT Aj ack.
◊ The loudspeaker outputs are designed for the
connec tion of active s ystems or an ex ternal amplif ier
with passive speakers.
(19) CUE OUT is an a dditional outp ut, which you can us e to route
the MINIMON si gnals to other device s, such as an additio nal
headphon es amp (e.g. BEHRINGER MINIAMP A MP800)
(seechapte r 4.1).
◊ The CUE OUT leve l cannot be chan ged on the MON800.
(20) The two 2-TRACK OUT jacks ar e wired in parallel a nd carry the
same signa ls. Use the ¼" or cinch outp uts, depending o n the
recording device used.
(21) Use the CD/ TAPE IN jacks C and D to conn ect playback de vices,
such as a comp uter, CD/MD or cassette p layer.
(22) The MIX IN jacks A an d B are for connec ting the main signal
sources (e.g. mi xing console, audio c ard, etc.) using ¼" plugs.
Mono signa ls must be connec ted to the L jacks.
The SERIAL NUMBER of your MON8 00 can be found on th e bottom
side of the un it.
Page 8

8 MINIMON MON800 User Manual
4. Application Examples
The MINIMON g ives you a great number o f monitoring opti ons,
whichyou wo uld otherwise nd only in costly mix ing consoles .
Therefo re, an ideal eld of app lication is to use th e MON800 to control
and distr ibute signals in a re cording environm ent. However, with its
exibil ity the MON800 is a lso the ideal tool fo r P.A. applicati ons.
ComputerRecording studio
Microphone
B-2 PRO
HPM1000
B-CONTROL
MINIAMP AMP800
CUE OUT MIX IN A
FADER BCF2000
PH
(Rear)
4.1 The MINIMON in a recording environment
A typic al example of how to us e the MON800 is the com puter-based
production of music with additional instrument or voice recordings.
The follow ing illustratio n shows an example of h ow to wire the unit in
such an envi ronment.
TRUTH B1031A
TRUTH B2031A
SPEAKERS
OUT A
MS40
SPEAKERS
OUT B
SPEAKERS
OUT C
MINIMON MON800
HPS5000
Fig. 4.1: The MON800 in a typical computer-based recording environment
PHONES
MIDI Sound module
MIX IN B TB 2-TRACK
As a centra l element of this con guration, the comp uter is connecte d
via its au dio card to the MIN IN A or B jac ks (22) of the MON800.
Addition al sound modules, w hich are connec ted to the computer,
forexamp le, via MIDI, can be wire d to the remaining inp uts
(depending on the respective connecting plugs). Playback devices
(CD,MD, etc.) should be conn ected to the CD/TAPE IN jac ks (21).
Connec t your main monitor sp eakers to the SPEAKER S OUT A jacks (18).
Output B (17) i sfor a second pair of sp eakers. Oft en, smaller systems
CD/TAPE
IN C
Switch AB200
CD player
OUT
DAT recorder
are used as s econdary spea kers, so that it is pos sible to evaluate a mix
over less powerful systems. A sub-woofer is an ideal complement
to such a pair o f speakers and shoul d be connected to o utput C (17),
sincethe lev els of both output s can be adjusted si multaneously.
If requir ed, you can also conne ct a third pair of sp eakers, ideally wi th
an adjust able amplier st age, so that you can set t he volume of the
speaker pai r C independently o f the SPK LEVEL B + C contro l (5).
Page 9

9 MINIMON MON800 User Manual
◊ The speake r outputs of the M INIMON provide lin e-level
signals. Passive loudspeaker systems must be connected via
an external integrated amplifier. Active loudspeakers have
an ampli fier built in an d can therefor e be connecte d directly
to the MINIMON o utputs.
The two headphones connectors (3) and (15) al low you to check your
mix with a p air of headphones o r route a monitor sig nal to one of the
musicians . If you want to recor d several musician s, use the CUE OUT jack
(19) for the c onnection of a he adphones amp (e.g. BEHRIN GER MINIAMP
AMP800). In thi s way, eachmusician cans et the volume of his
headphones separately on the headphonesamplier.
Using a foot switch conne cted to the TB jac k (16) you can activat e the talkback micr ophone and rout e the microphon e signal to the monit or paths.
A recordi ng device, such as a DAT or CD recor der, can be connecte d to
the 2-TRACK OUT ou tputs (20).
MONITOR
SPEAKERS
1C-BK
EUROPOWER
EP2000
4.2 Using the MINIMON for signal distribution in simple P.A. applications
The MINIMON c an also be used for sm all P.A. systems,
forexamp le,incafés and galle ries. In this case, t he three loudspea ker
outputs (17) and (18) can be use d for three pairs o f speakers set up
in several r ooms. The inputs C a nd D (21) of the MINIMON canbe
connected directly to consumer equipment, such as CD/MD/
casset te players or a radi o tuner. If necessar y, the built-in talk-bac k
microphone (11) allows you to ma ke announcements f or your guests.
With an add itional set of head phones you can pre -listen to the inpu t
signals you w ish to play back via the au dio system. The fo llowing
illustrations shows a possible wiring scheme.
MONITOR SPEAKERS MS16
SPEAKERS
OUT A
MINIMON MON800
MIX IN A
MD player
Fig. 4.2: U sing the MON 800 for sig nal distri bution in s mall P.A. syste ms
PHONES
HPM1000
SPEAKERS
OUT B
CD/TAPE
IN C
Casette tape player
SPEAKERS
OUT C
CD/TAPE
IN D
CD player
Page 10

10 MINIMON MON80 0 User Manual
5. Audio Connections
There are va rious ways to integr ate the MON800 into y our set-up.
Depending on the application in question, you will need dierent sets
of connec ting cables. Th e cables to use are de scribed below.
5.1 Connection with ¼" or cinch cables
Please use s tandard ¼" or cinch cab les to connect th e MINIMON to
other equ ipment. These ca bles have a ¼" or cinch connec tor at each
end. Conne ct the inputs an d outputs of the MON 800 to the respec tive
connec tors of the other de vices.
tip tip
sleevesleeve
Fig. 5.1: Wiring d iagram of a hi - cinch ca ble
shield
tip
signal
sleeve
ground/shield
tip
sleeve
strain relief clamp
strain relief clamp
sleeve
5.2 Footswitch connection
The MINIMON f eatures a jack for th e connection of a f ootswitch.
Here,you can c onnect any comme rcially available fo otswitch wit h
a ¼" TS connecto r. As some f ootswitch mod els on the market have
a dieren t polarity, please b e sure to use one that is ap propriately
wired. The correct wiring is shown in the illustration below.
¼" TS footswitch connector
strain relief clamp
sleeve
tip
sleeve
pole 1/ground
tip
pole 2
The footswitch connects both poles momentarily
Fig. 5.3: Wi ring of a ¼" TS conn ector for f ootswi tch connec tion
5.3 Headphones connection
The MINIMON ha s two jacks for he adphones. Here, yo u can connect
any standa rd pair of stereo he adphones with a ¼" TRS con nector.
For3.5-mm p lugs you need an appr opriate adaptor. The cor rect
wiring diagram is shown in the illustration below.
¼" TRS headphones connector
strain relief clamp
sleeve
ring
tip
tip
sleeve
ground/shield
tip
signal
Fig. 5.2: Un balanced c able with ¼" TS c onnecto rs
sleeve
ground/shield
ring
right signal
tip
left signal
Fig. 5.4: Wiring of a ¼" TRS headphones connector
Page 11

11 MINIMON MON800 User Manual
6. Specications
Mix In A + B
Type ¼" TS connecto rs
Impedanc e approx. 10 k Ω unbalanced
approx. 20 k Ω balanced
Max. inpu t level 15 dBu
CD/Tape In C + D
Type RCA conne ctors
Impedanc e approx. 10 k Ω
Max. inpu t level 15 dBu
2-Track Out A + B
Type ¼" TS connecto rs /
RCA conne ctors
Impedanc e approx. 150 Ω (T S),
approx. 150 Ω (RC A)
Max. out put level 15 dBu
Cue Out
Type ¼" TS connecto rs
Impedanc e min. 150 Ω
Max. out put level 15 dBu
Phones
Type ¼" TRS connec tor
(on front/back)
Impedanc e min. 100 Ω
Max. out put level 10 dBu / 100 Ω (70 mW)
System Specications
Frequenc y response 10 Hz to 80 kHz, ±3 dB
Dynamic r ange 112 dB, 20 Hz to 20 kHz
Distor tion (THD) 0,005% typ. @ +4 dBu
Crosst alk -75 dB @ 1 kHz
Signal-to -noise ratio 102 dBu @ +4 dBu,
A-weighted
Power Supply
Mains connection external power supply,
9 V~, 750 mA
Mains Voltage
USA/Canad a 120 V~, 60 Hz
U.K./Austra lia 240 V~, 50 Hz
China 220 V~, 50 Hz
Europe 230 V~, 50 Hz
Japan 100 V~, 50 - 60 Hz
Power consum ption approx. 6 W
Dimensions/Weight
Dimensio ns (H x W x D) approx. 4 8 x 242.6 x 120 mm
Weight approx. 0.77 kg
BEHRIN GER makes eve ry eff ort to ens ure the high est stan dard of quali ty. Necess ary modi ficati ons
are carr ied out wi thout not ice. Thus, th e specif ication s and design o f the device m ay diffe r from the
information given in this manual.
Speake rs Out A
Type ¼" TS connecto rs
Impedanc e min. 150 Ω
Max. out put level 15 dBu
Speake rs Out B + C
Type RCA conne ctors
Impedanc e min. 150 Ω
Max. out put level 15 dBu
Page 12

12 MINIMON MON800 User Manual
7. Other Mini Products
The MINIMON b elongs to the MINI suit e of BEHRINGER produc ts,
which can o perate together a nd are introduced b elow:
MINIFEX FEX800
Ultra- compact 9.5" stereo m ulti-eec ts processor f or studio and
stage applications
• 16 awesome FX p resets in 24-bit /48 kHz resolutio n including
reverb, dela y, chorus, a nger, phaser, rotary spe aker,
pitchshif ter and multi- eects
• Intuiti ve FX Preset contr ol with LED’s indicat ing the
selec tedprogram
MINIAMP AMP800
Ultra-compact 9.5" headphones amplier system for studio and
stageapplications
• 4 totally independent stereo high-power amplier sections
• Highest s onic quality wi th virtually all t ypes of headpho nes
even at maximum volume
MINIMIC MIC800
Ultra- compact 9.5" microp hone modeling pre amp for studio and
stage applications
• High-end preamplier for all microphone, instrument and
line-level sources. Perfectly complements studio- grade
condensermics
• Ultra- exible Preamp Mod eling allows you to quic kly optimize
your recordings
Fig. 7.1: MINI produc ts stac k on top of each o ther
MINIFBQ FBQ800
Ultra- compact 9.5" graphi c equalizer for st udio and stage app lications
• Revolutionary FBQ Feedback Detection System instantly reveals
critic al frequencie s and can also be used a s AudioAnalyzer
• Additional Low Cut lter removes unwanted frequencies,
e.g. oor rum ble
MINIMIX MIX800
Ultra- compact 9.5" karaoke m achine for studi o and stage applic ations
• Revolutionary Voice Canceller—eectively eliminates vocals
from any s tereo source while r etaining most mu sicelements
• Integrat ed digital echo/re verb processor in 24 -bit/40 kHz
resolution for ultimate vocal enhancement
Page 13

We Hear You
 Loading...