

Page 1

ASSEMBLY INSTRUCTIONS
Hardware Pkg.
PORTABLE CARE CENTER
W/Headgate 62074482 & WO/ Headgate 62074492
THANK YOU FOR PURCHASING THIS PRODUCT
For questions about this product, or for parts inquiries, please contact our Customer Service Center listed below.
62174511
CUSTOMER SERVICE CENTER
PO Box 569
Columbus, NE
68602-0569
F-18347-1 TECHNICAL INFORMATION 70021 Rev. 4-12-02 7-15-95
Ph: 1-800-447-2751
Fax: (402) 563-7447
www.behlencountry.com
Page 2

ASSEMBLY INSTRUCTIONS
FOR
PORTABLE CARE CENTER
Instructions for Latch Bracket & Plate
NOTE: You can install the latch bracket holder onto the corral panel first and then assemble the
latch plate to the latch bracket holder. The illustration is shown with the plate being installed
before the whole bracket assembly is mounted to the corral panel. (Refer to Illustration A, B, & C).
1. First, move the plate into the position that is in line with the holes on the latch bracket holder.
Tilt the plate back as shown in Illustration A
torsion springs.
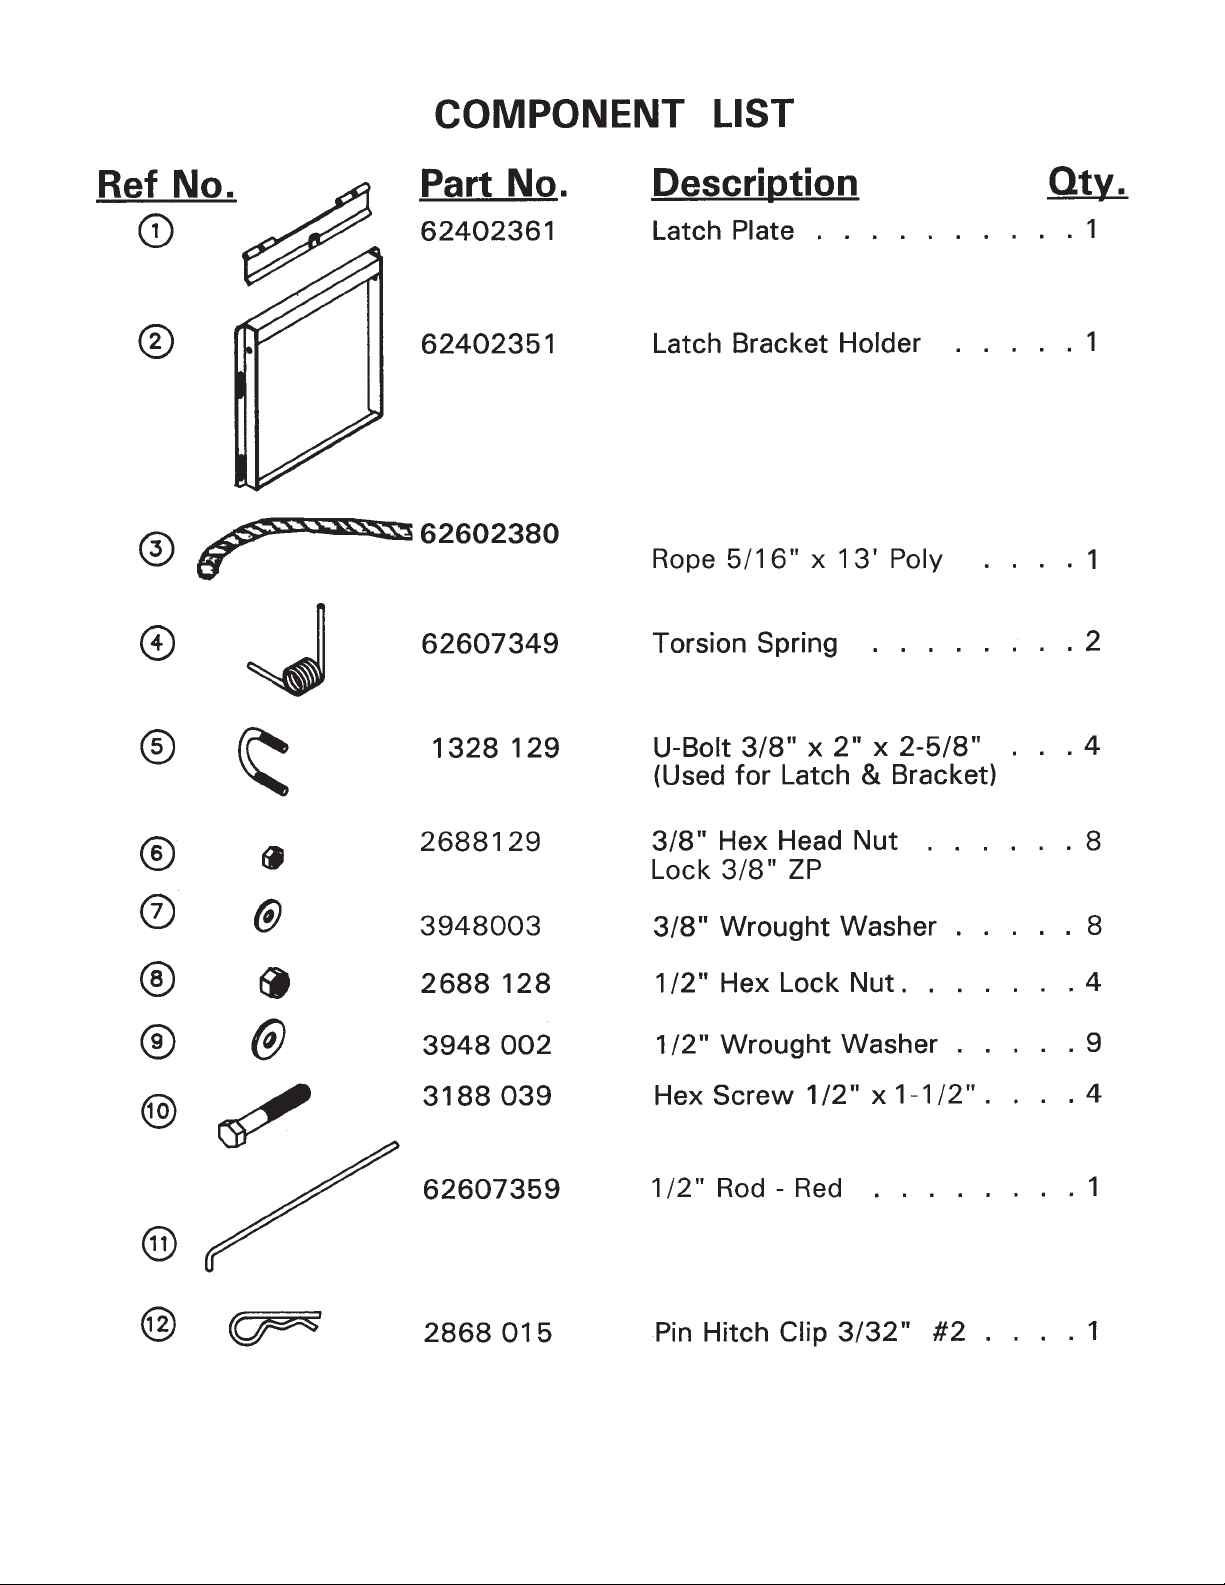
2. Position the torsion springs (62607349) between the two sets of 3/4" pipes that are welded to
the plate (It ma y be easier to assemble one spring at a time.) With the plate tilted back as
shown you will not have pressure on the springs which makes installation easier.
3. Insert the plated 1/2" dia. rod (62607359) into the holes provided on the latch bracket holder
and through the 3/4" pipes and torsion springs located on the latch plate. When the rod is
positioned all the way through the latch bracket holder, install a 1/2" (3948002) washer on the
end of the plate. Slide the clip (2868015) that is provided into the hole located at the end of the
plated rod. Install the latch plate onto the latch bracket holder.
. At this stage you will be ready to add the two
NOTE: The torsion springs will not let the latch plate hang vertically. Simply rotate the latch
plate by hand back the other way and then release the latch plate. The plate should now hang
vertically.
4. The latch bracket holder can now be assembled onto the corral panel. When installing the latch
bracket holder to the corral panel you will use four U-bolts (1328129), eight 3/8" nuts and eight
3/8" wrought washers (3948003). See Illustration B.
5. Install the rope (62602380) into the loop provided on the latch plate. String the rope back to the
overhead arch that is located at the rear of the care center. Tie the rope to the top tube of the
arch and position the tie far enough back so that the rope does not hang down into the animal’s
eyesight.
F-18348 7-15-95
Page 3
F-18349-1 4-12-02
Page 4
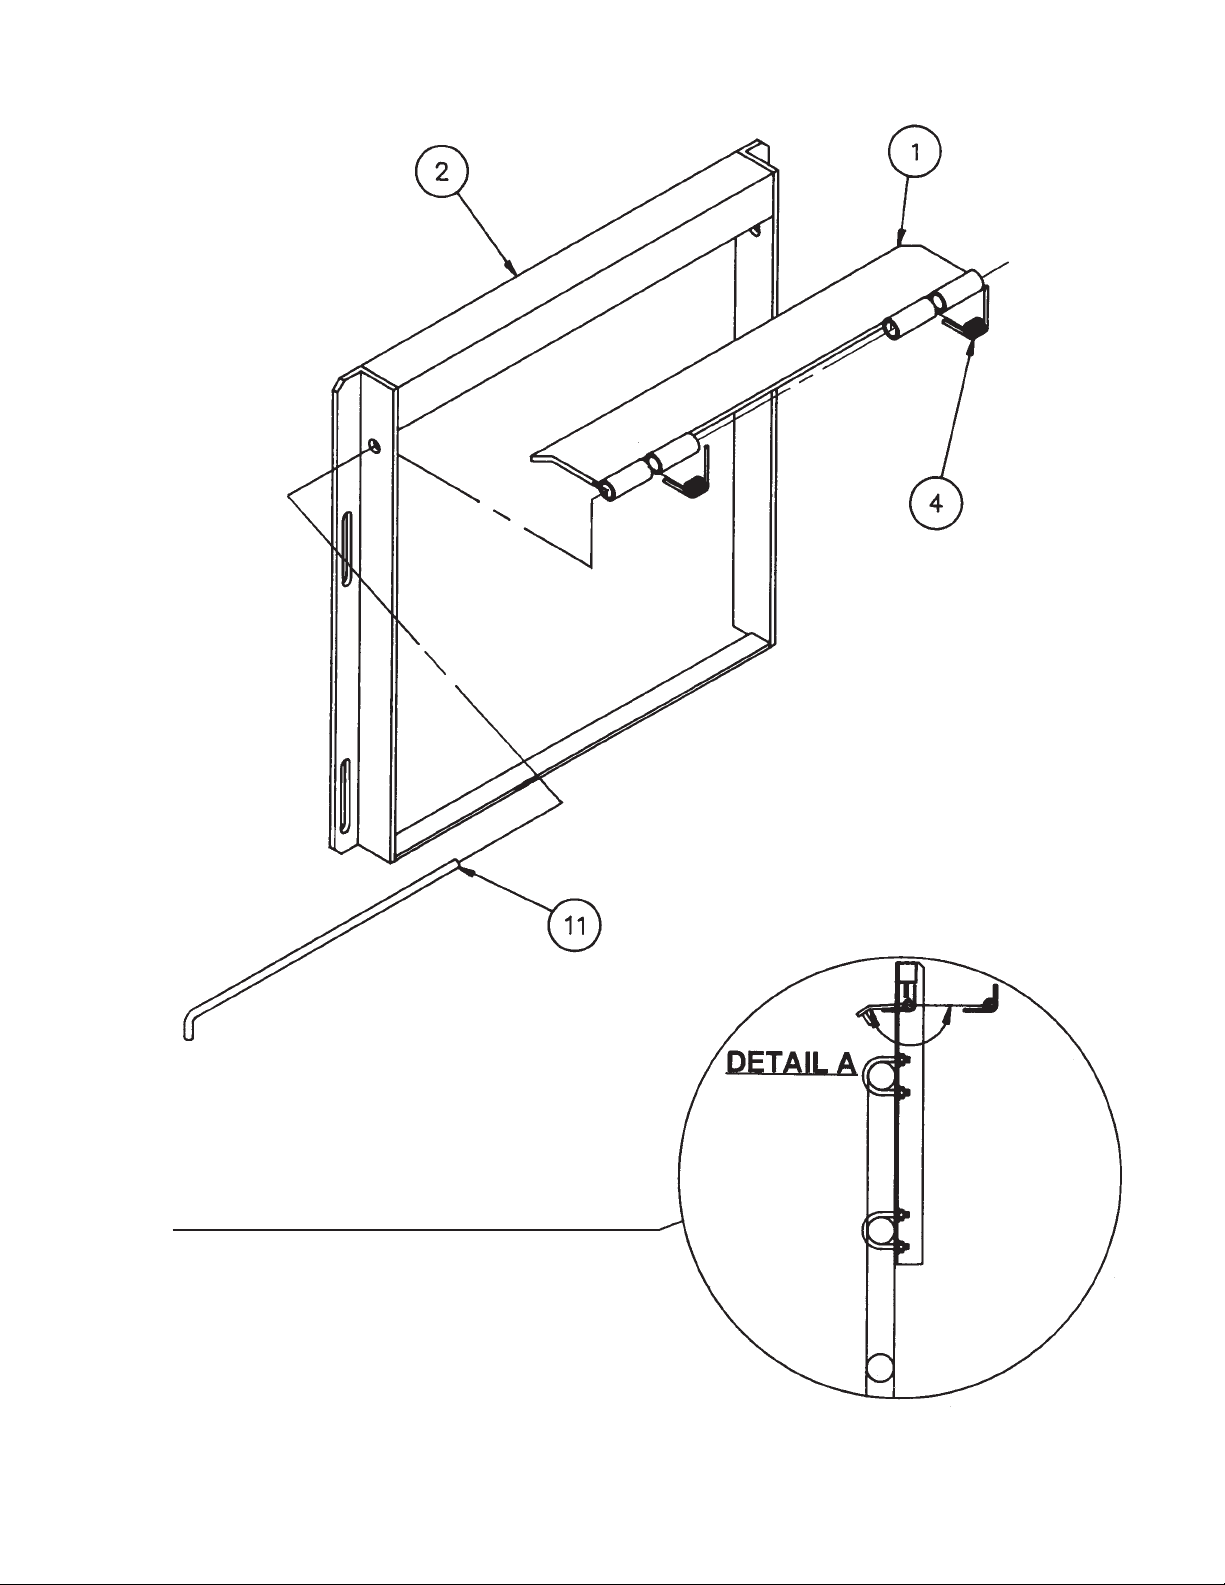
ILLUSTRATION “A”
NOTE:
This is a side view showing the latch bracket
mounted to a corral panel. The illustration also shows
how to install the latch and torsion springs.
The springs will prevent the latch from hanging
vertically after it has been installed onto the latch
bracket. Rotate the latch back from the other way, as
the arrow is showing, to form the legs of the spring
straight. The latch should hang vertically after the
procedure is completed.
F-18350 7-15-95
Page 5
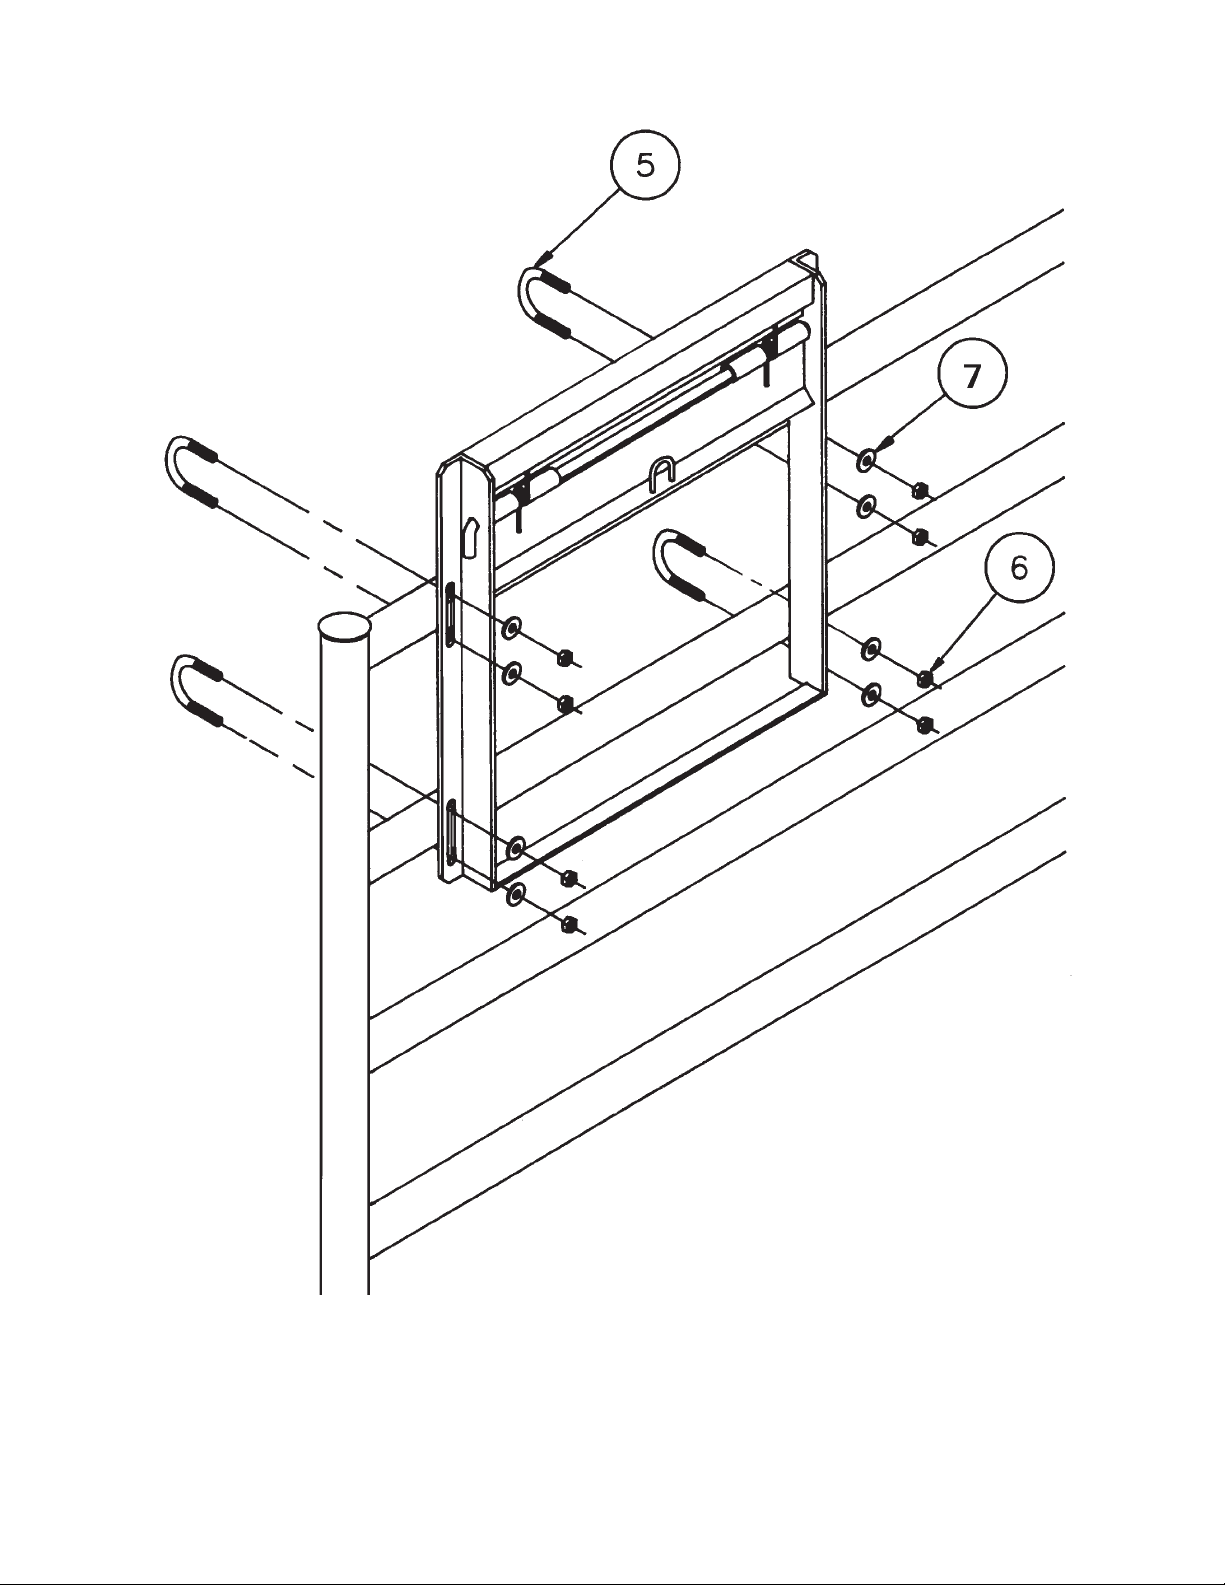
ILLUSTRATION “B”
This view shows the assembly of the Portable Care Center’s latch. Note the position of the torsion
springs. The spring extension legs should be facing outward.
F-18351-1 4-12-02
Page 6
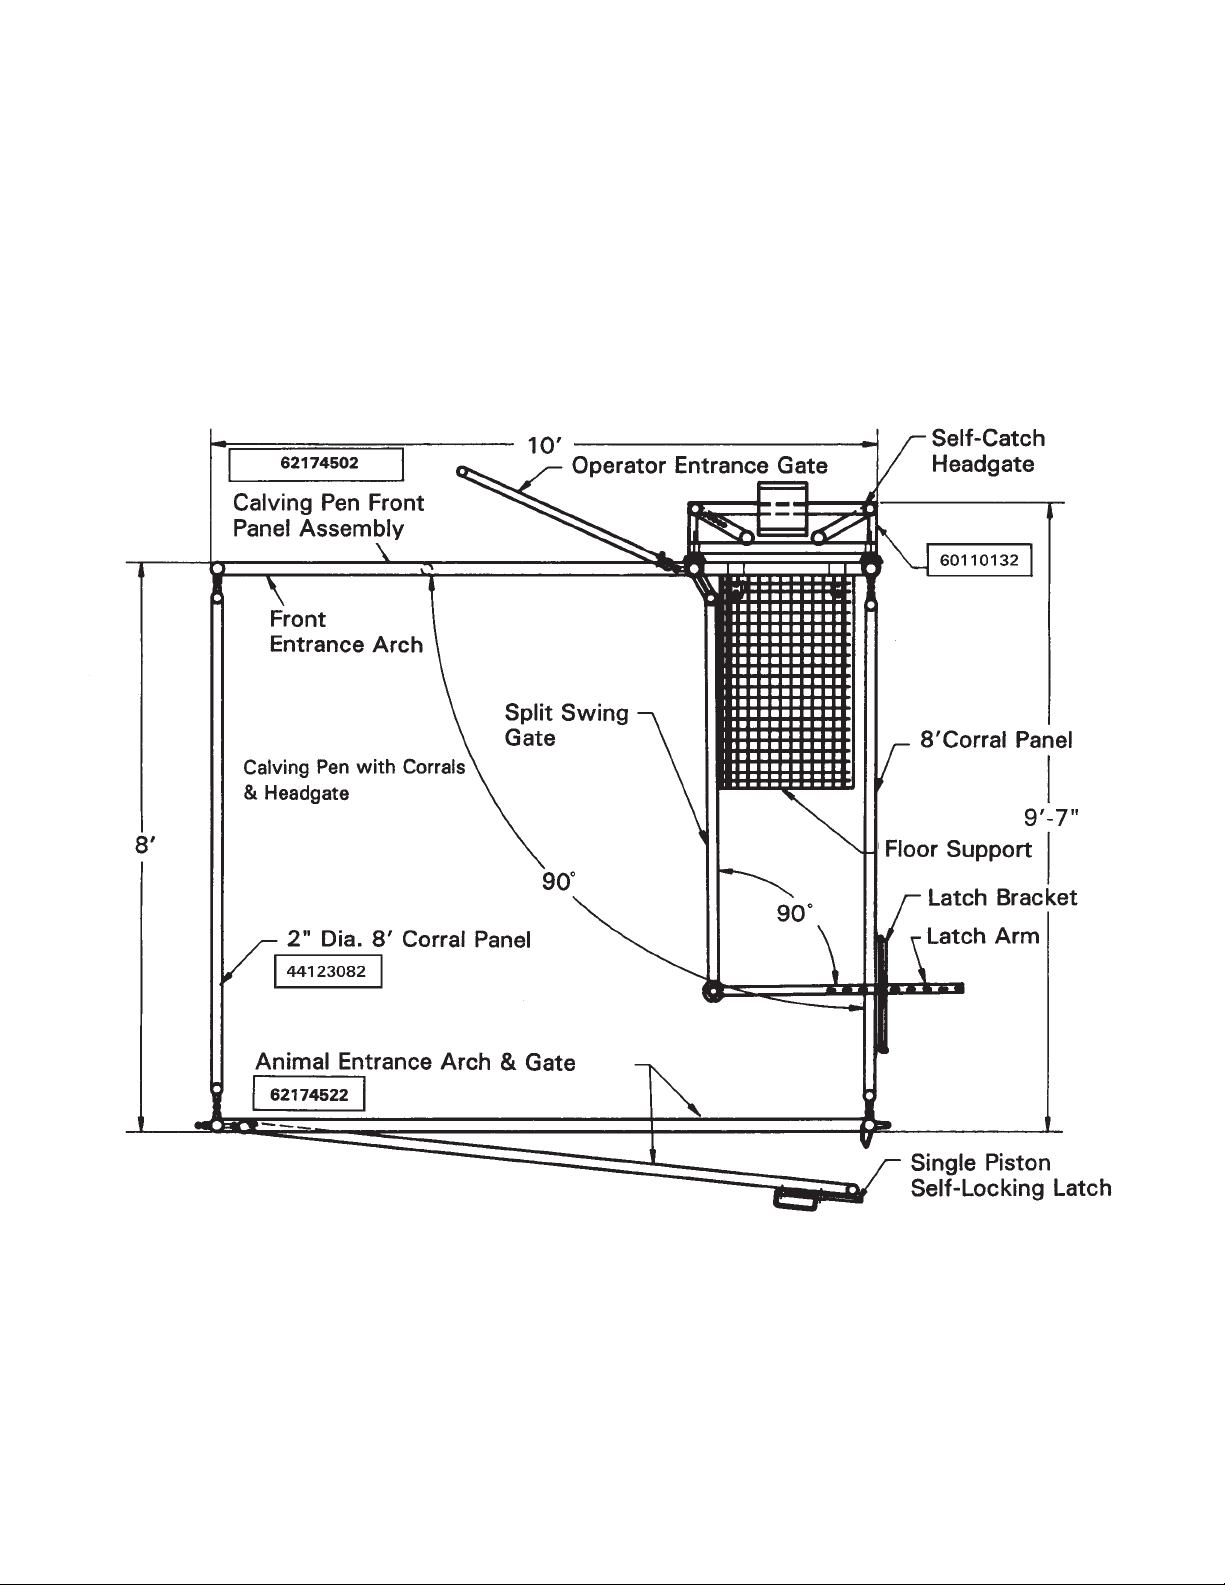
INSTRUCTIONS FOR BOLTING HEADGATE
TO PORTABLE CARE CENTER
Attach headgate by lining up the four brackets on the back of the headgate to the four brackets on the
front side of the care center front. Assemble together using the following hardware:
(4) ½” x 1½” Hex Screws
(8) ½” Washers
(4) ½” Hex Lock Nuts
CAUTION: This unit is designed for one cow/calf pair ONLY. If more than one pair needs to be confined
overnight for observation, it is recommended to use the 10’ or 12’ corral panels.
If Portable Care Center is being used for sick calves (weighing 500-650 lbs.), no more than five shall be
confined in the pen overnight.
F-18352-1 4-12-02
 Loading...