

Page 1
ASSEMBLY INSTRUCTIONS
Circular Sweep Pen With Alley Series 2
THANK YOU FOR PURCHASING THIS PRODUCT
For questions about this product, or parts inquiries, please contact our Customer Service Center listed below.
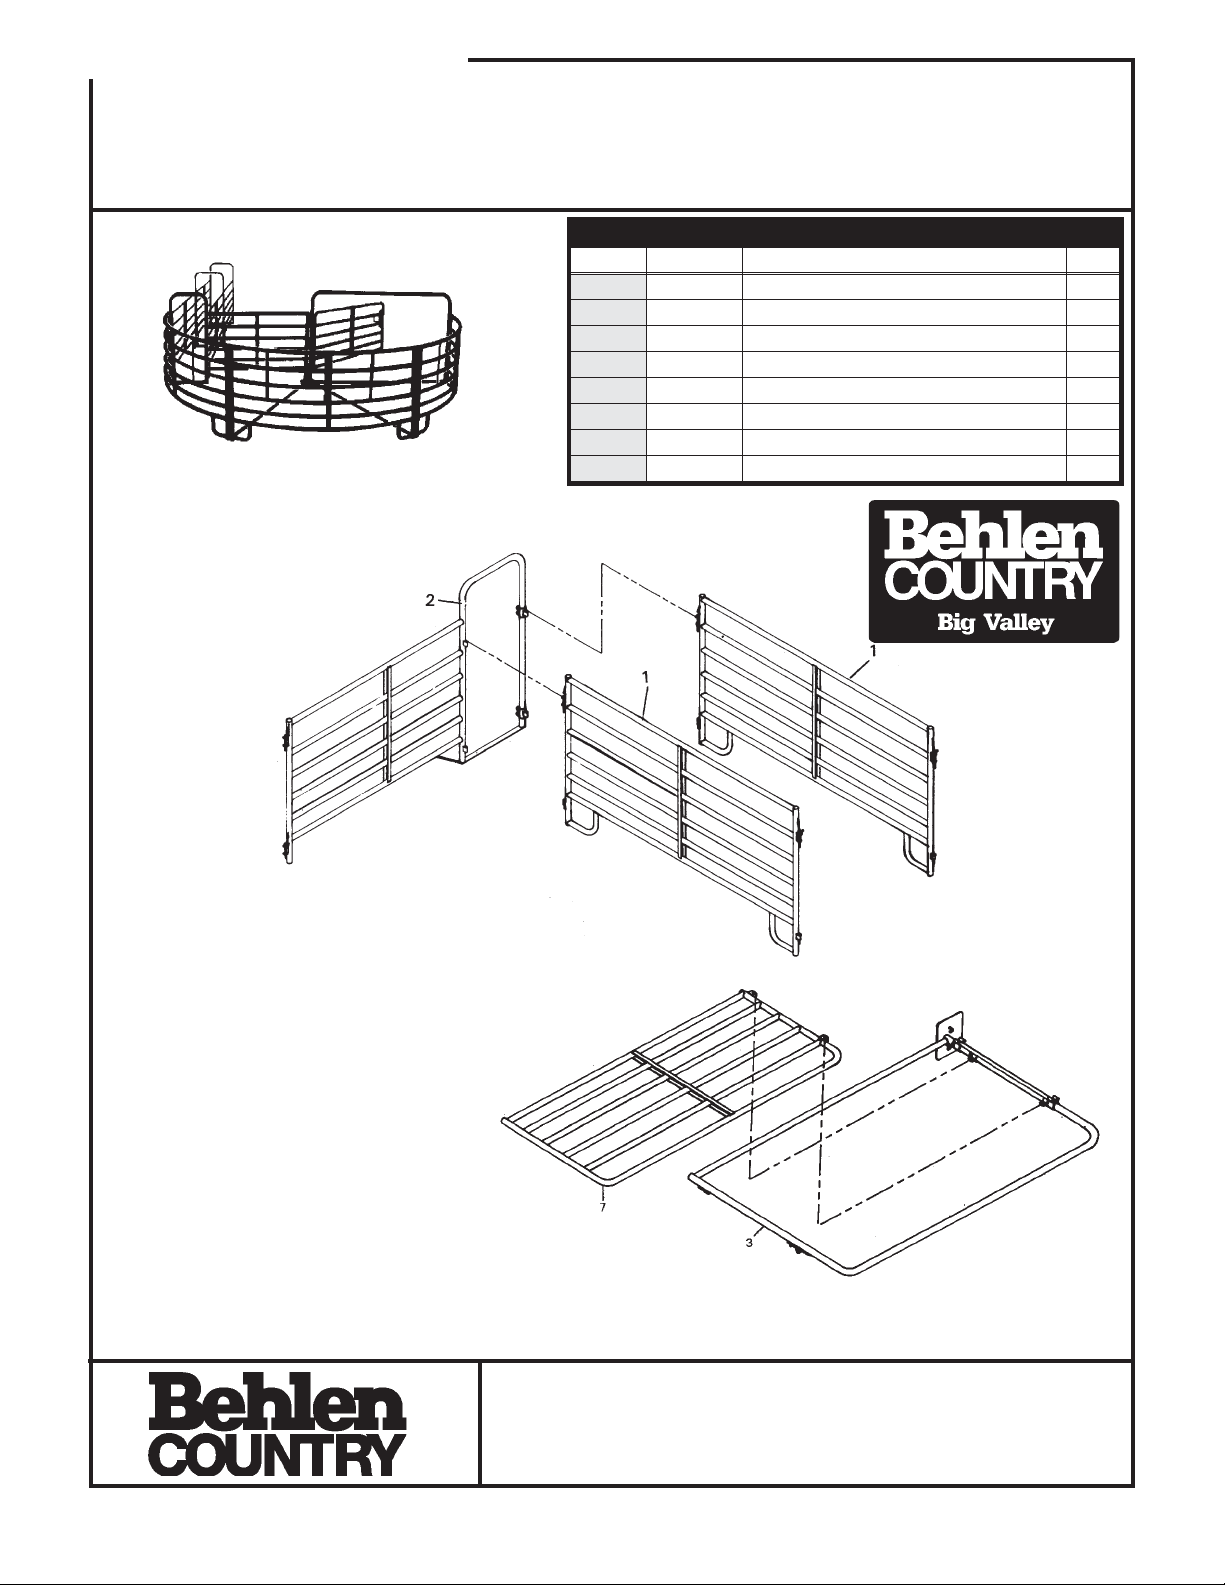
Ref No. Part No. Description Qty.
1 46160282 10’ Straight Crowd Alley Panel 4
2 46180232 10’ Panel with Alley Frame (Entrance Panel) 1
3 46180222 Arch for Sweep Gate 1
4 46180212 Brace, 10’ Ground Support 2
5 46179572 Panel, Curved 10’ 3
6 46112232 Alley Arch (Non-Adjustable) 2
7 46160292 Gate, 10’ Sweep Open System 1
8 46180272 Latch Assy. & Hardware 1
Hardware Pkg.
46900048
MATERIAL LIST
It is important to install the circular sweep system on level ground for
best results. Begin your installation by connecting the straight panel (1) to
the entrance panel (2).
Next, connect the 10’ sweep gate to the main 10’ arch. Attach the
gate using the ½” x 2” hex head bolts and ½” lock nut. The assembly
of the gate to the main arch is simplified by laying the main arch on
the ground and then attaching the gate.
CUSTOMER SERVICE CENTER
PO Box 569
Columbus, NE
68602-0569
Ph: 1-800-447-2751
Fax: (402) 563-7447
www.behlencountry.com
F- 17839-1C TECHNICAL INFORMATION 70 023 Rev. 4-7-03 9-26-00
Page 2
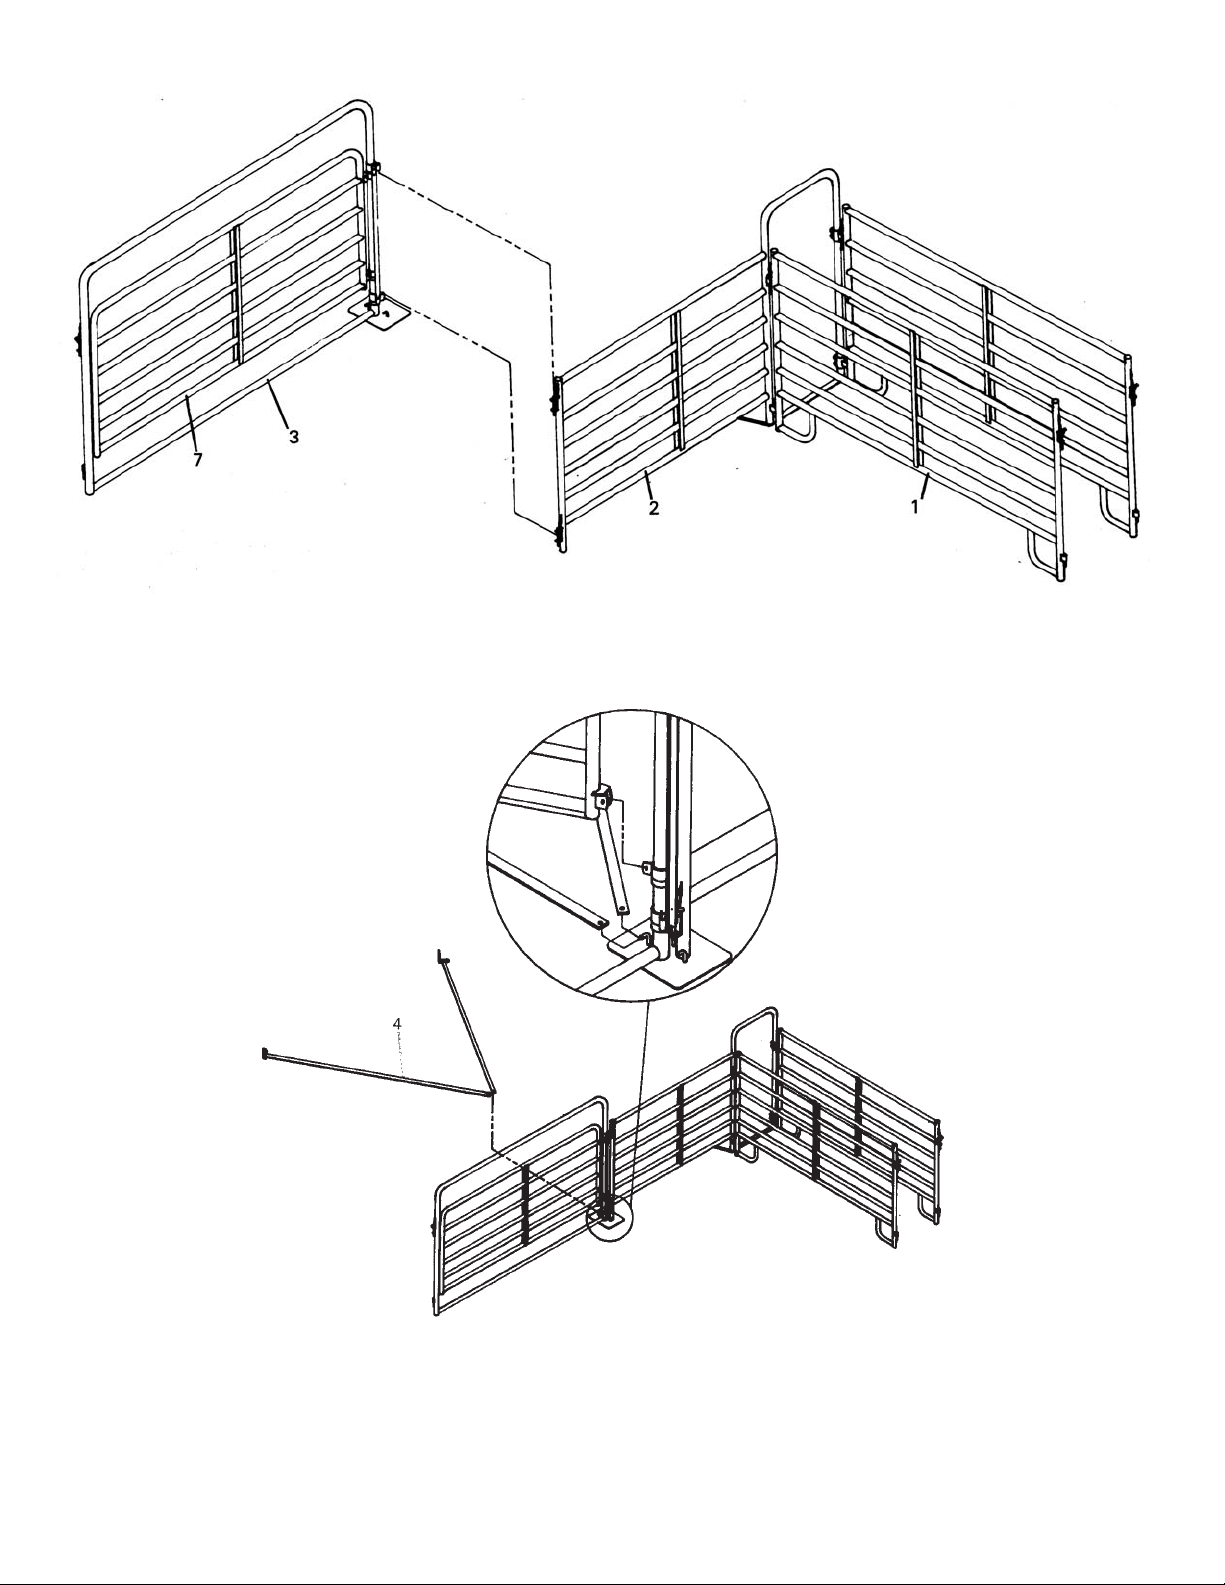
Next, stand up the 10’ main arch. NOTE: Wrap a rope or wire around the end of the gate and the main 10’ arch. This will prevent
the gate from swinging out of control while lifting the 10’ main arch. Attach the 10’ main arch on to the two c-clamp hook-ups
located on the 10’ panel with alley arch. NOTE: The 10’ alley arch panel will sit off the plate of the 10’ main arch about a 1/4”.
Once the arch and entrance panels are connected it’s time to install the flat 10’ ground supports. Two are required for a 3-panel
sweep and only one for a 2-panel sweep. Insert the end with the hole over the bent rod located on the base plate of the 10’ main
arch. NOTE: Holes are offset to one side of the flat strap. The strap side with the shortest distance to the hole will always face
down when sliding the strap over the rod hookup. After the strap has been inserted on the rod, rotate the strap flat and then allow
the strap to fall and rest on the base plate.
F-17840-1C 9-26-00
Page 3
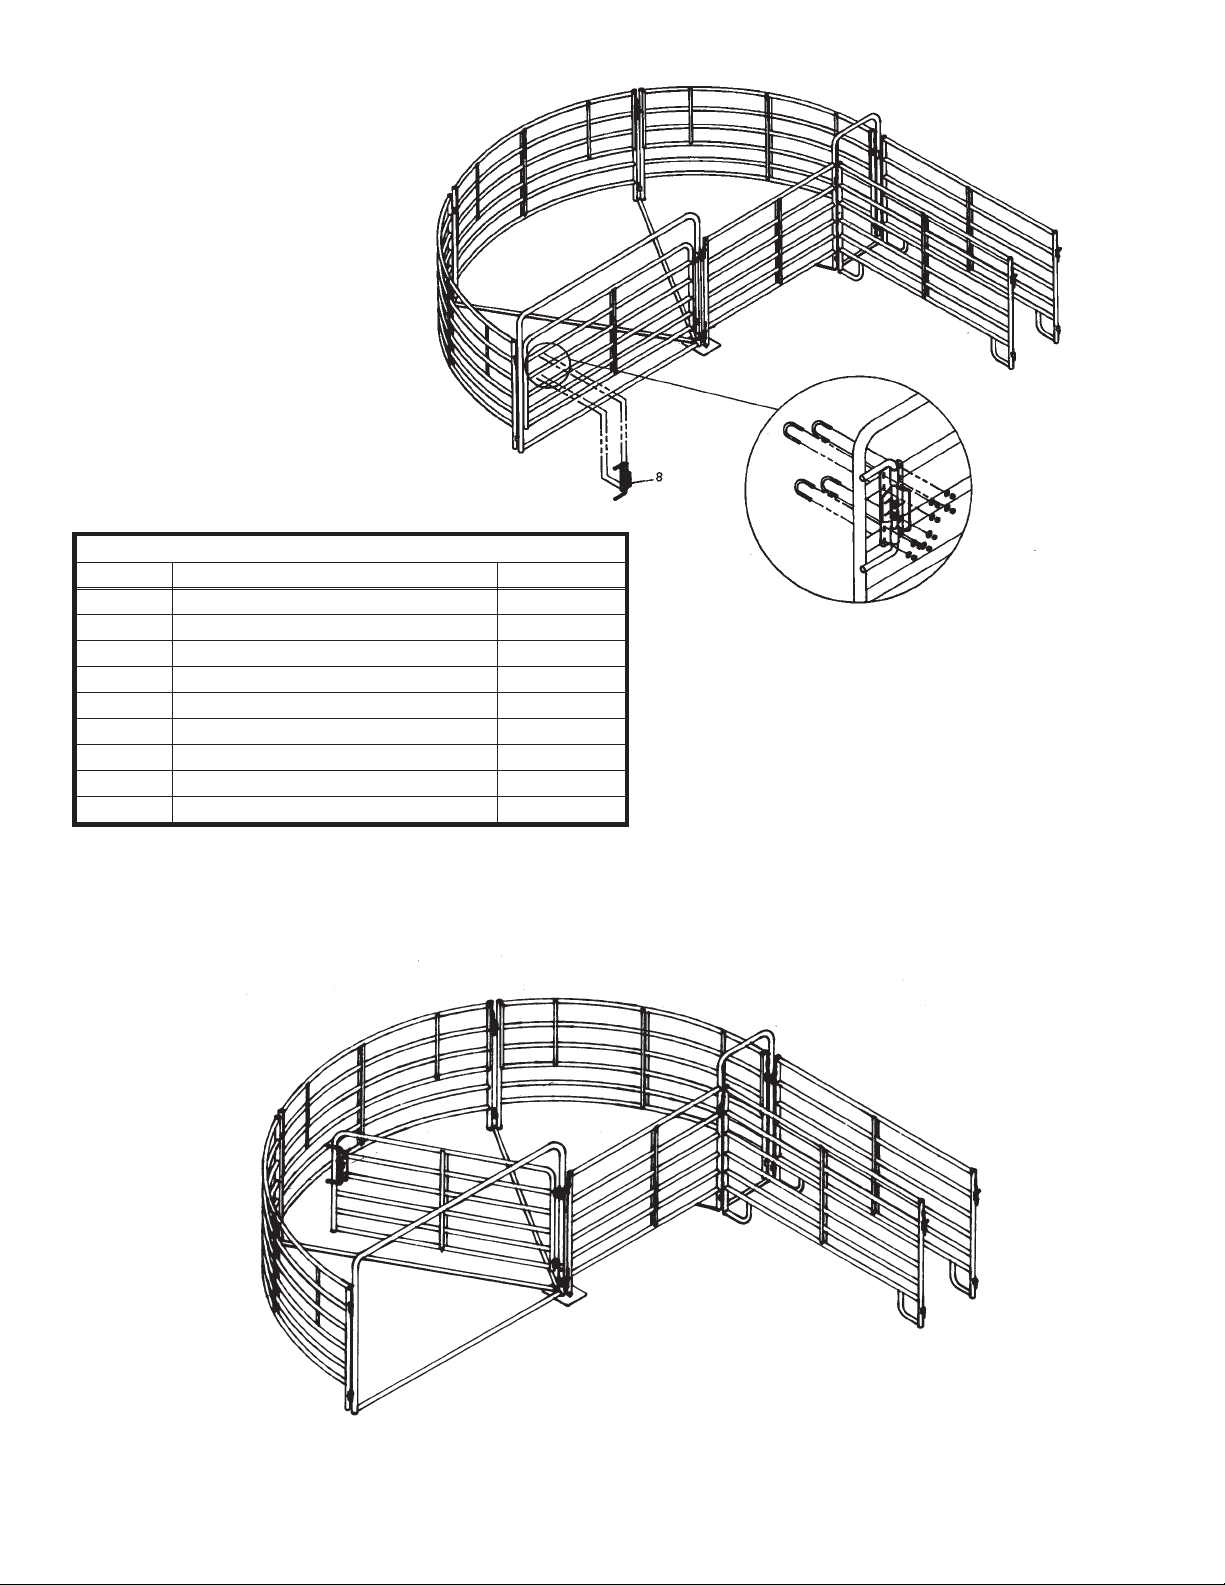
LISTED BELOW ARE ITEMS SUPPLIED IN HARDWARE
Part No. Description Qty.
62602419 Pin, Drop 2
1328129 Bolt-U 3/8”x2x2-5/8” 4
3948003 Washer 3/8” 8
— Tech Info Sheet 1
44600069 U-Hook Plated 2
3188032 Screw Hex½”x2” 4
3948002 Washer ½” 4
2688128 Nut, Hex ½”- 13w/ Nylint 2
2688008 Nut, Hex 3/8” NC Plated 8
Next, install the sweep gate no back latch using four u-bolts, 8 nuts, 8 washers supplied. The sweep gate latch if installed properly will
have 1-1/2” of rod extending past the flat straps located on the curved panels.
The open system series-2 tub sweep pen is now assembled, at this time the crowd alley arches can now be installed.
F-17839-2C 9-26-00
Page 4
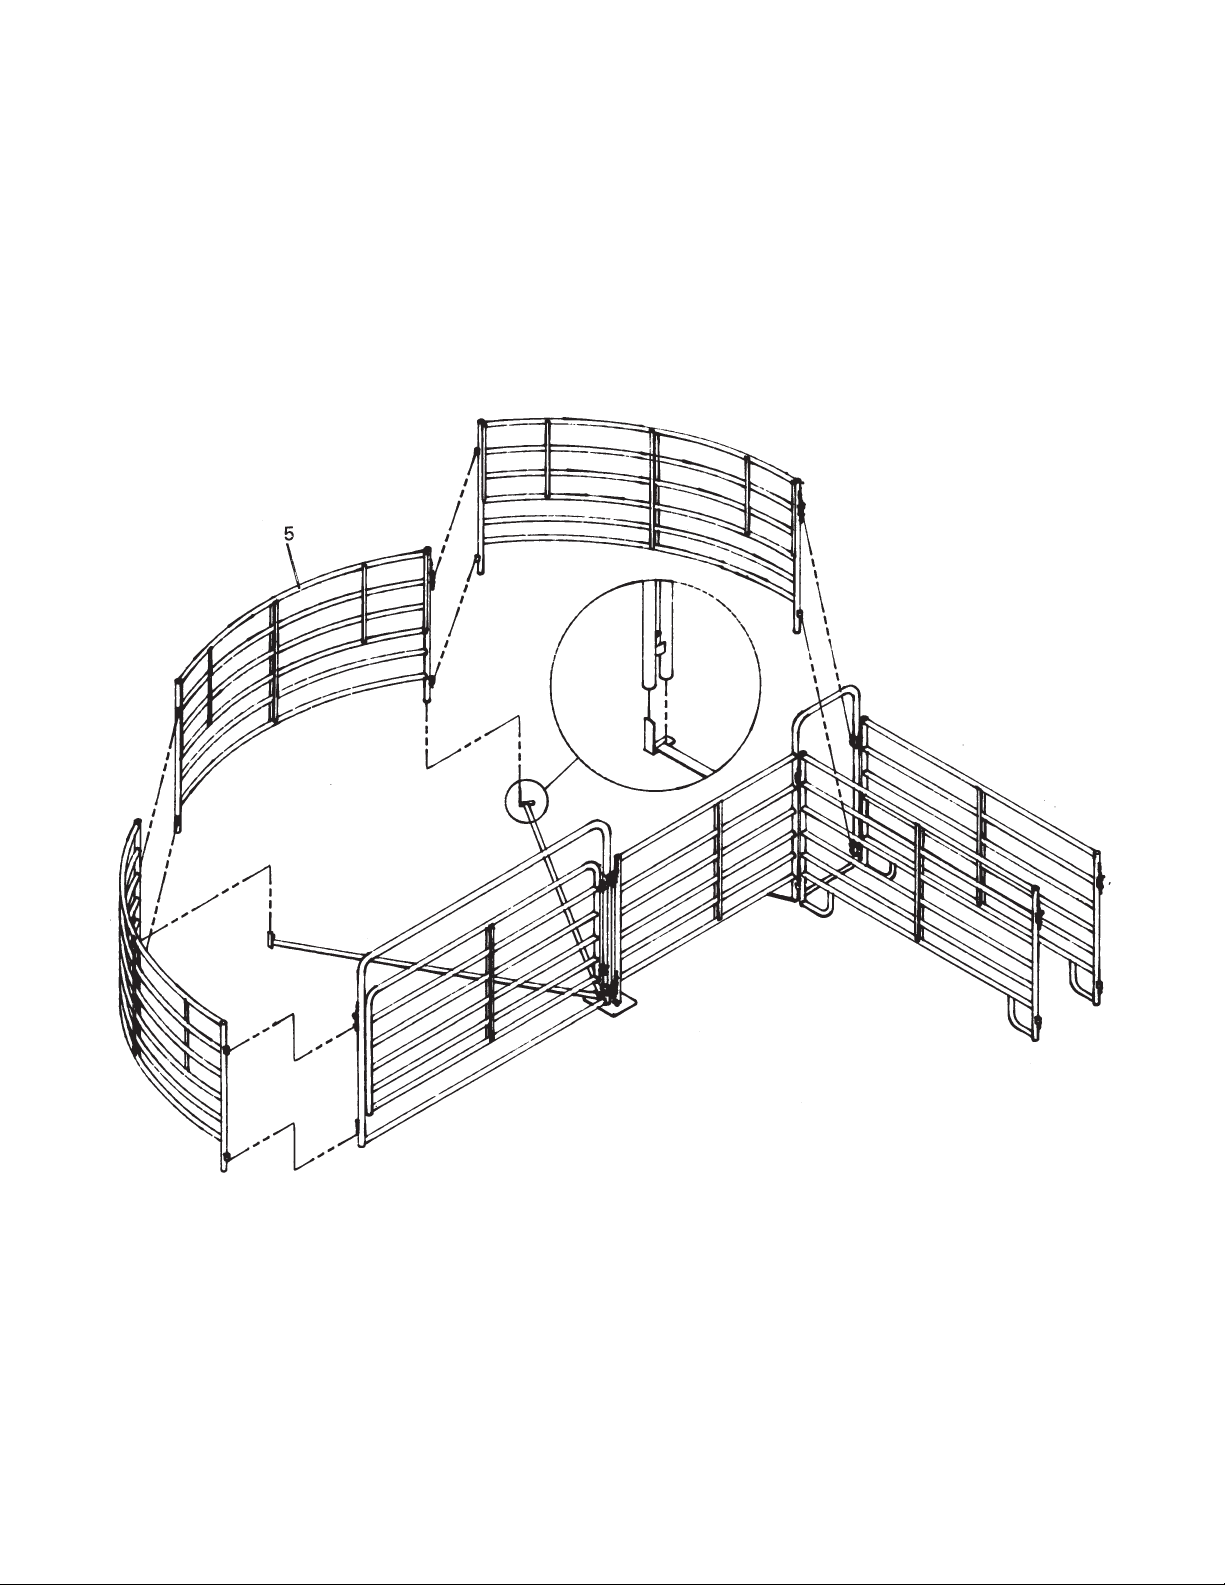
Next, connect the curved panel to the outside hook-up on the 10’ main arch. Insert the other side of the curved panel over the
ground support stud. Repeat the process for the next two panels. If the system requires two curved panels than only one 10’
ground support is needed. When installing a 2-panel sweep the 10’ alley will have to pivot around to connect with the second
curved panel.
F-17840-2C 9-26-00
 Loading...