

Page 1
ASSEMBLY INSTRUCTIONS
Heating Pad
Replacement Service Kits For
2198160S 2198161S 2198162S
Installation Instructions
THANK YOU FOR PURCHASING THIS PRODUCT
For questions about this product, or for parts inquiries, please contact our Customer Service Center listed below.
PLEASE READ INSTRUCTIONS
COMPLETELY
Heat Pad Removal Instructions
1. Make sure the power is off.
2. Disconnect the old heat pad from thermostat
and supply line.
3. Remove old heat pad by sliding it out from
under the retainer. Some retainers can be
removed by bending the tabs in with pliers,
and some are retained with screws. Riveted
retainers cannot be removed.
4. Install the new heat pad between the retainer
and the basin.
5. Make sure the heat pad is tight up against the
basin. Bend the retainer if necessary to get a
tight fit.
6. Follow the hookup instructions for the type of
thermostat you have.
Your drinker may have one of two thermostats
the old style or the new style.
BEFORE INSTALLATION.
2198174S 2198172S 2198175S
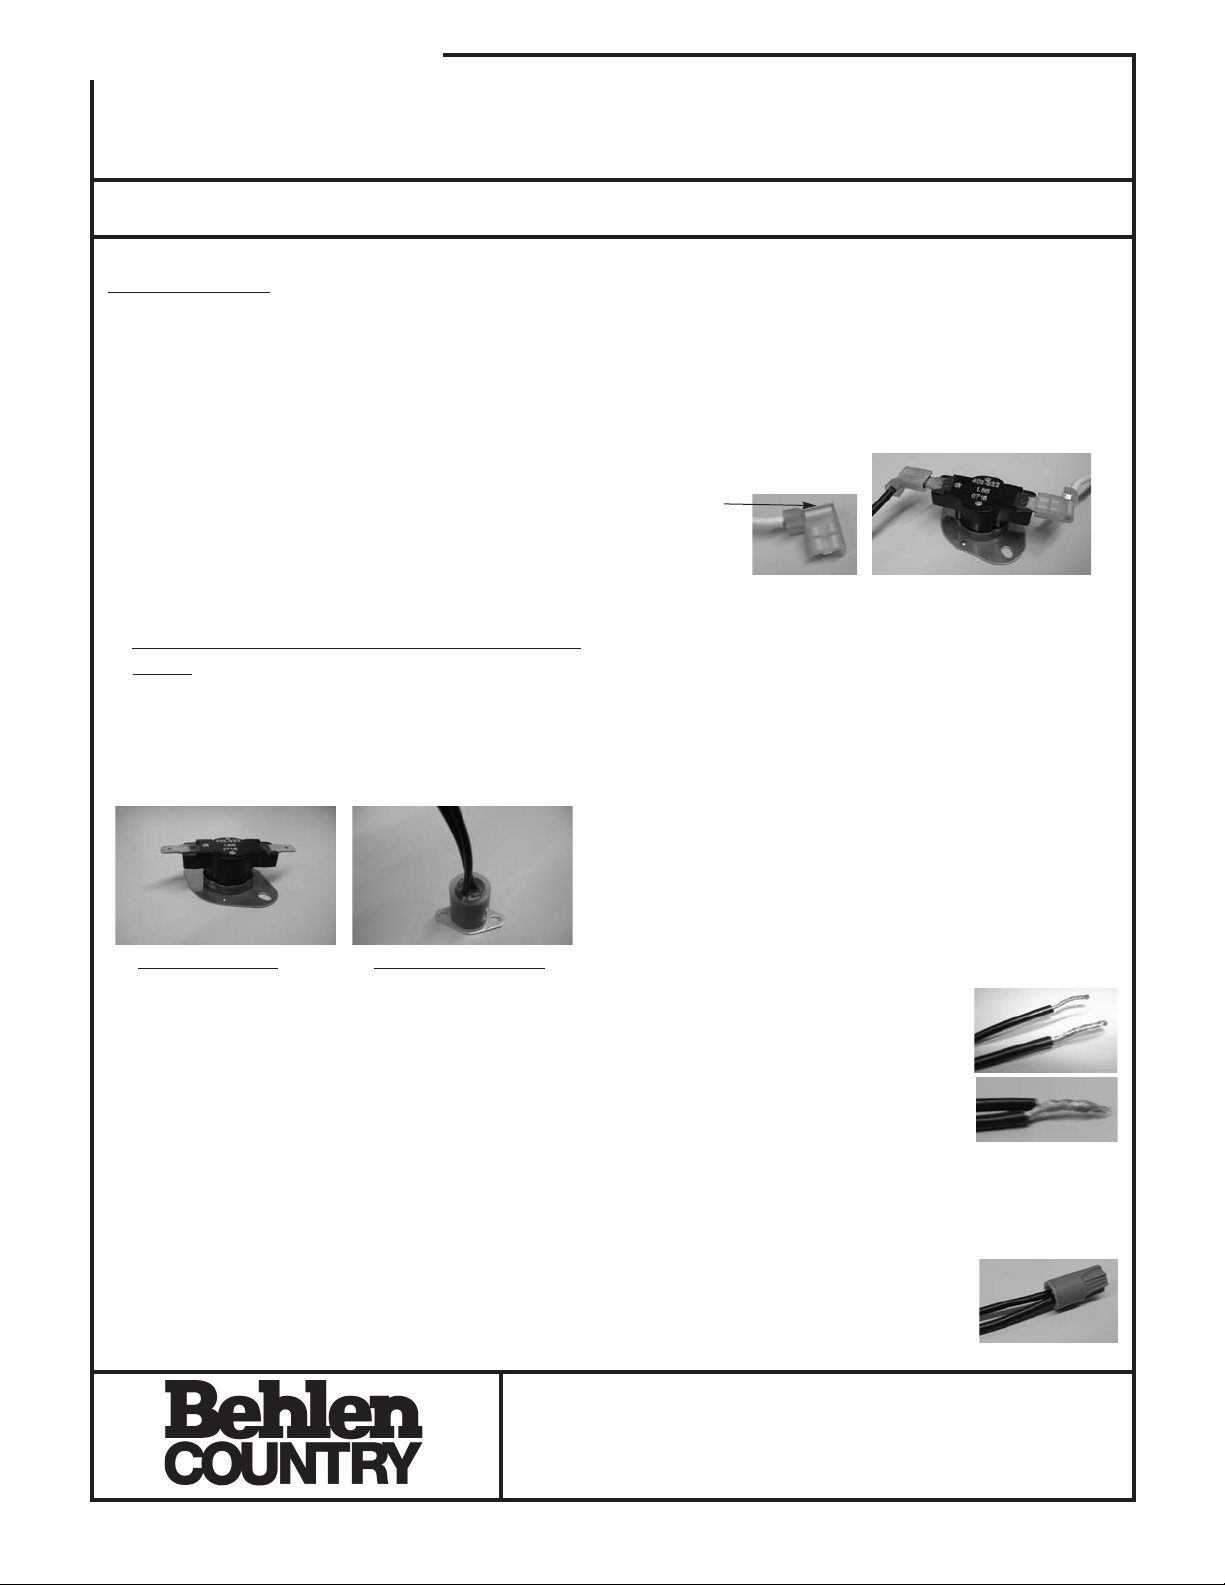
Using Flag Wire Connectors:
1. Strip the wire back ½". Insert the wire into the
connector sleeve.
2. Crimp the connector with a wire crimp in the
area shown in the illustration.
3. Slide the connector onto the spade terminal
on the thermostat.
Crimp
Center
only
New Style Thermostat Part Number 3668011:
Strip ½" off the insulation from all wires to be
connected. Using a wire nut, connect one wire
from the thermostat to the black wire on the
heating pad, (it doesn't matter which wire from
the thermostat you connect to). Using a wire
nut, connect the white wire from the supply line
to the white wire on the heating pad. Then using
another wire nut, connect the black supply line
to the unused black wire on the thermostat.
Finally, connect the ground wire from the
supply line to the ground plug in the Handy Box
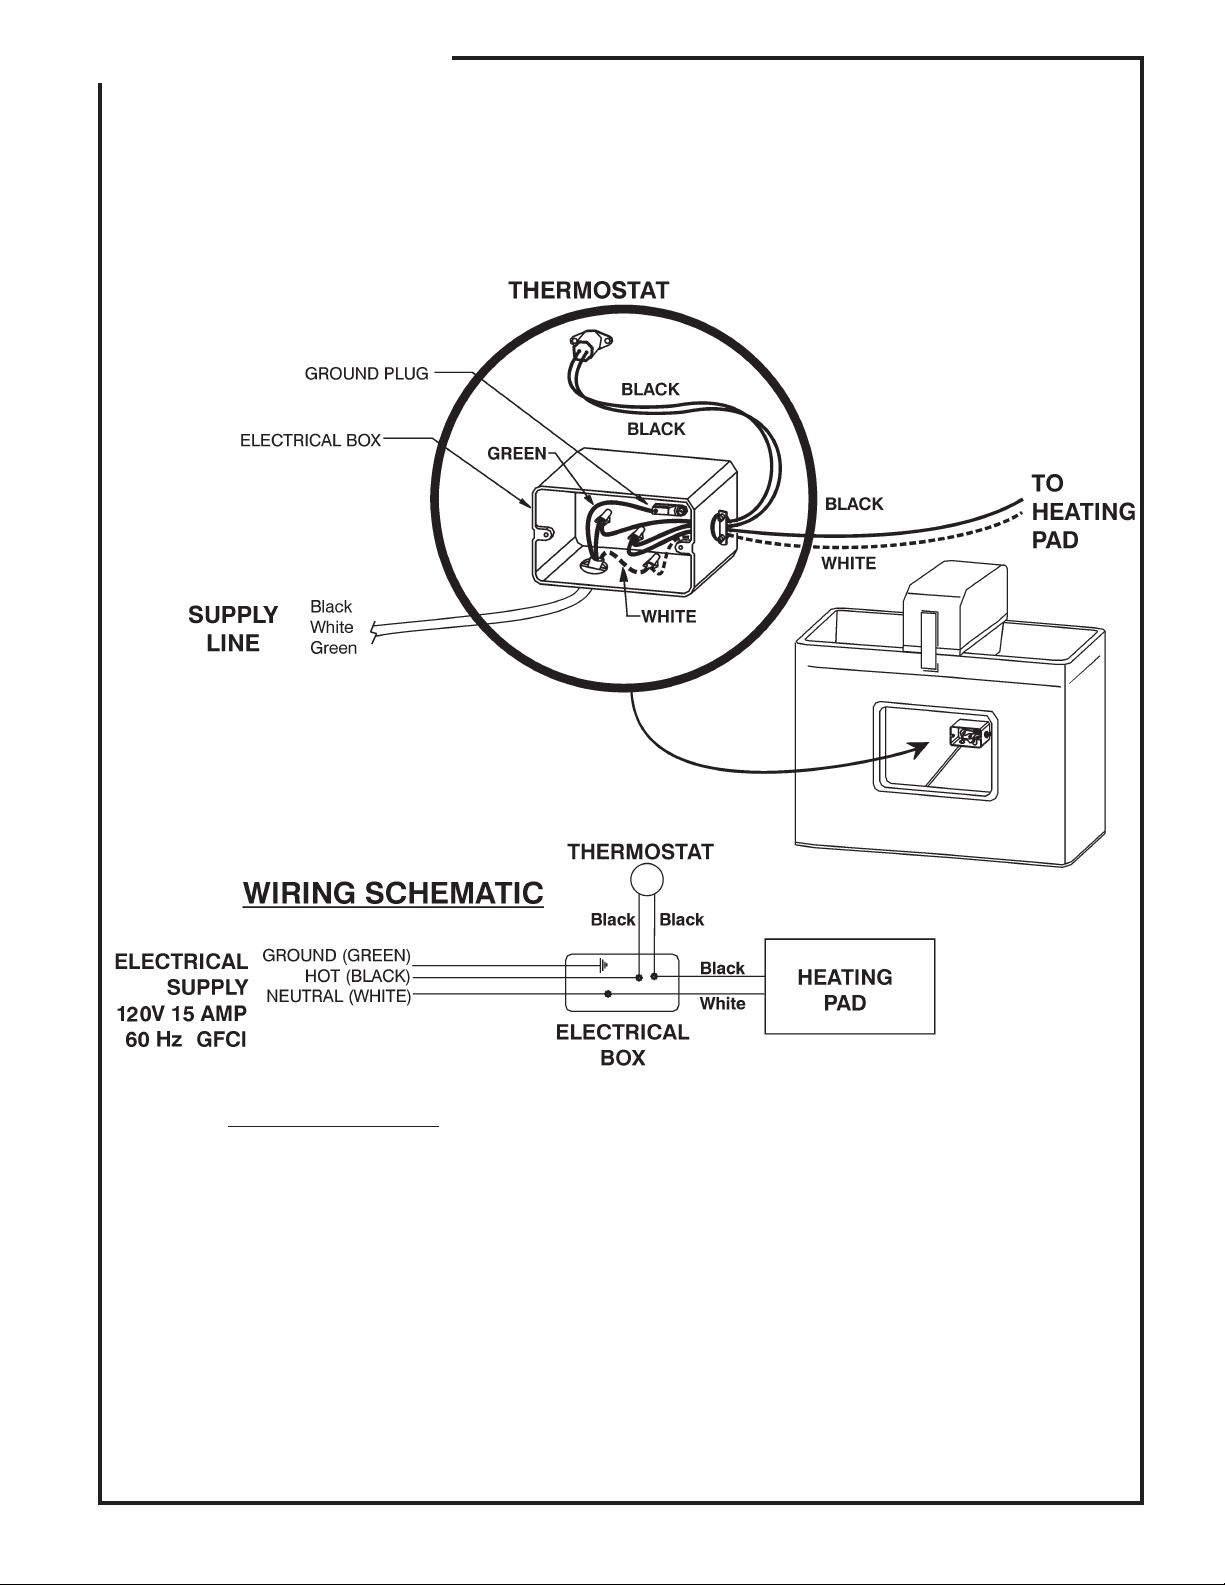
Assembly. Refer to wiring schematic on the
back for help.
Using a Wire Nut:
Old Style Thermostat Part Number 3668008:
Connect the flag wire connector to the black
wire on the heating pad. Connect this lead to
the thermostat, (it doesn't matter which terminal
on the thermostat you connect to). Using a wire
nut, connect the white supply wire to the white
wire on the heating pan. A short, black lead wire
with a flag terminal is used to connect the other
terminal on the thermostat to the black supply
line. Then attach the ground from the supply
line to the ground plug inside of the Handy Box
Assembly. Refer to wiring schematic on the
back for help.
1. Strip wires ½" and pre-twist
stranded wire in a clockwise
direction. Twist bare wire
ends together in clockwise
direction as shown.
2. Insert wires through the
flexible sealing fingers on the supplied
silicone-filled wire nut until bottom of nut is
felt. Rotate nut clockwise until
tight. The pre-filled silicone
nut fully waterproofs the
connection. Do not reuse
connector.
CUSTOMER SERVICE CENTER
PO Box 569
Columbus, NE
68602-0569
F-20636-1 TECHNICAL INFORMATION 70134 Rev. 10-21-09 1-6-09
Ph: 1-800-447-2751
Fax: (402) 563-7447
www.behlencountry.com
Page 2
ASSEMBLY INSTRUCTIONS
VIEW INSIDE
CAVITY OF DRINKER
IMPORTANT NOTE:
Voltage must be grounded and contain Ground Fault
Circuit Interruption (GFCI). Contains live electrical components, disconnect
power before servicing.
F-19909-4 Rev. 3-17-08 8-15-02
 Loading...