

Becker BSP-100 Owner's Manual

BSP-100
digital piano
owner’s manual
Contents
Look What You Can Do! ...........................................4
Panel Description
Getting Ready
Music Rest
Using a Stand
Getting Ready
Turning the Power On and O
Listening to the Demos
Performing
Performing with Various Sounds
Performing with the Metronome
Adjusting the Sound to Your Taste
Shifting the Pitch (Transpose)
Adding Accompaniment to Your Performance
Playing Along with a Rhythm
................................................6
...................................................7
......................................................7
...................................................7
...................................................8
...................................8
Turning the Power On
Turning the Power O
......................................................9
Switching Tones
Performing with Two Layered Tones
Playing Dierent Tones with the Right and Left Hands
(Split Play)
Changing the Metronome’s Tempo
Changing the Metronome’s Time Signature
Changing the Metronome’s Volume
Adding Reverberation (Ambience)
Adding Chorus Eect
Using Pedal
..................................9
..............................................11
.....................................8
.....................................8
..........................................8
.................................9
..........................................9
........................9
...............................10
. . . . . . . . . . . . . . . . . . . . . . . .10
...............10
.......................10
..............................10
........................10
.....................................11
..................................11
....................12
...................................12
Selecting and Playing a Rhythm ..........................12
Playing Along with an Arranger
Selecting and Playing an Arranger
Chord Fingering
Recording Your Performances
Recording
Playingback Your Recording
Internal Piano Song
Playingback Internal Song
Playing along with Internal Song
Detailed Function Settings (Function Mode)
Entering the Function Mode
Objects for setting
Tone List
Internal Song List
Accompaniment List
Chord Fingering List
Main Specications
USING THE UNIT SAFELY
.....................................................14
Preparing Your Recording
Start Recording
Stop Recording
.......................................................17
..........................................14
...........................................14
.............................................15
.............................................16
...............................................18
............................................20
............................................21
.............................................22
.........................................23
.................................12
..........................................12
...................................14
.................................14
....................................14
......................................15
...............................15
....................................16
........................12
......................16
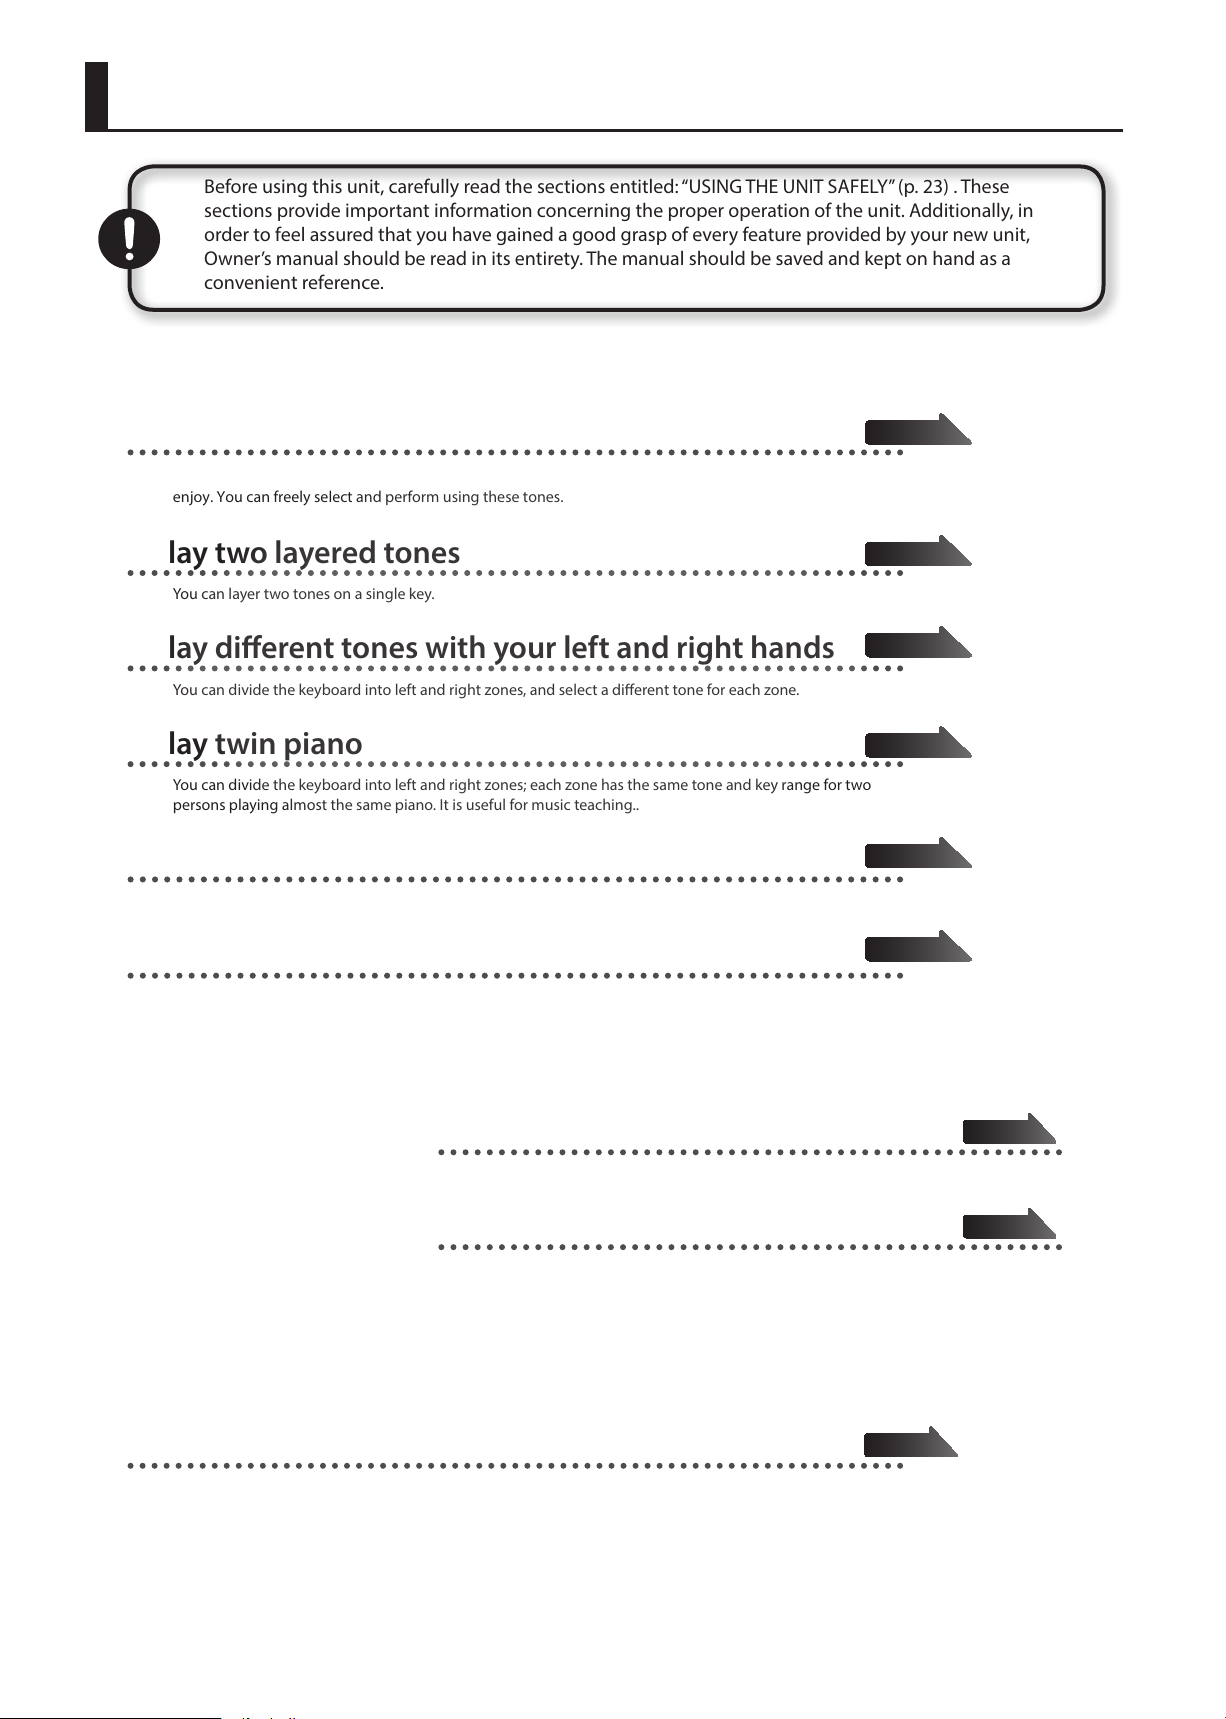
Look What You Can Do!
Before using this unit, carefully read the sections entitled: “USING THE UNIT SAFELY” (p. 23) . These
sections provide important information concerning the proper operation of the unit. Additionally, in
order to feel assured that you have gained a good grasp of every feature provided by your new unit,
Owner’s manual should be read in its entirety. The manual should be saved and kept on hand as a
convenient reference.
Play the Piano
♦
Play various sounds
The BSP-100 features more than 100 different tones for you to
enjoy. You can freely select and perform using these tones.
Page 9
♦
Play two layered tones
You can layer two tones on a single key.
♦
Play dierent tones with your left and right hands
You can divide the keyboard into left and right zones, and select a dierent tone for each zone.
♦
Play twin piano
You can divide the keyboard into left and right zones; each zone has the same tone and key range for two
persons playing almost the same piano. It is useful for music teaching..
♦
Sound a metronome
You can sound a metronome.
♦
Play pedals
When the BSP-100 is equipted with optional stand B-Stand-100, you can play three pedals like real piano.
Playing with Accompaniment
♦
Play along with a rhythm
Page 9
Page 9
Page 10
Page 10
Page 11
Page 12
Record Songs
♦
Record your performances
You can record your performance, including accompaniment.
1
The BSP-100 features 30 different rhythms that can accompany you as you play.
♦
Play along with a chord pattern
The BSP-100 has 30 built-in chord patterns that you can play along with.
Lets you enjoy performing as though you’re playing with a backup band.
Page 14
Page 12
Designing Sounds
Look What You Can Do!
♦
Add reverberation to the sound
You can add reverberation (ambience) to create the sensation of performing in a concert hall.
♦
Add chorus eect to the sound
You can add reverberation (ambience) to create the sensation of performing in a concert hall.
♦
Adjust the tone color
You can use the equalizers to adjust the sound’s tone color
♦
Adjust the string resonance
You can adjust the string resonance effect to the desired level for playing piano.
♦
Adjust the damper pedal resonance
You can adjust the resonance effect to the desired level for playing the damper pedal.
Live Performance Features
Page 10
Page 11
16 页
Page 16
Page 16
Page 16
♦
Transpose the pitch of the keyboard
You can transpose the pitch of the keyboard, allowing you to change the key of your
performance quickly and easily.
♦
Adjust the keyboard touch
You can adjust the touch sensitivity of the keys.
♦
Adjust the pitch of the sound
You can ne tune the sound pitch to match other musical instrument.
Practice Along with songs
♦
Internal songs for practice
-100 has 99 Internal songs. You can exercise right, left and both hand performance along with
The BSP
the songs.
Personalize your Setup
Page 15
11 页
Page 16
Page 16
Page 16
♦
Functional setup
You can setup many functionalities per your demand such as Auto save, Local On/
Off, Recover factory setting etc.
Page 16
2
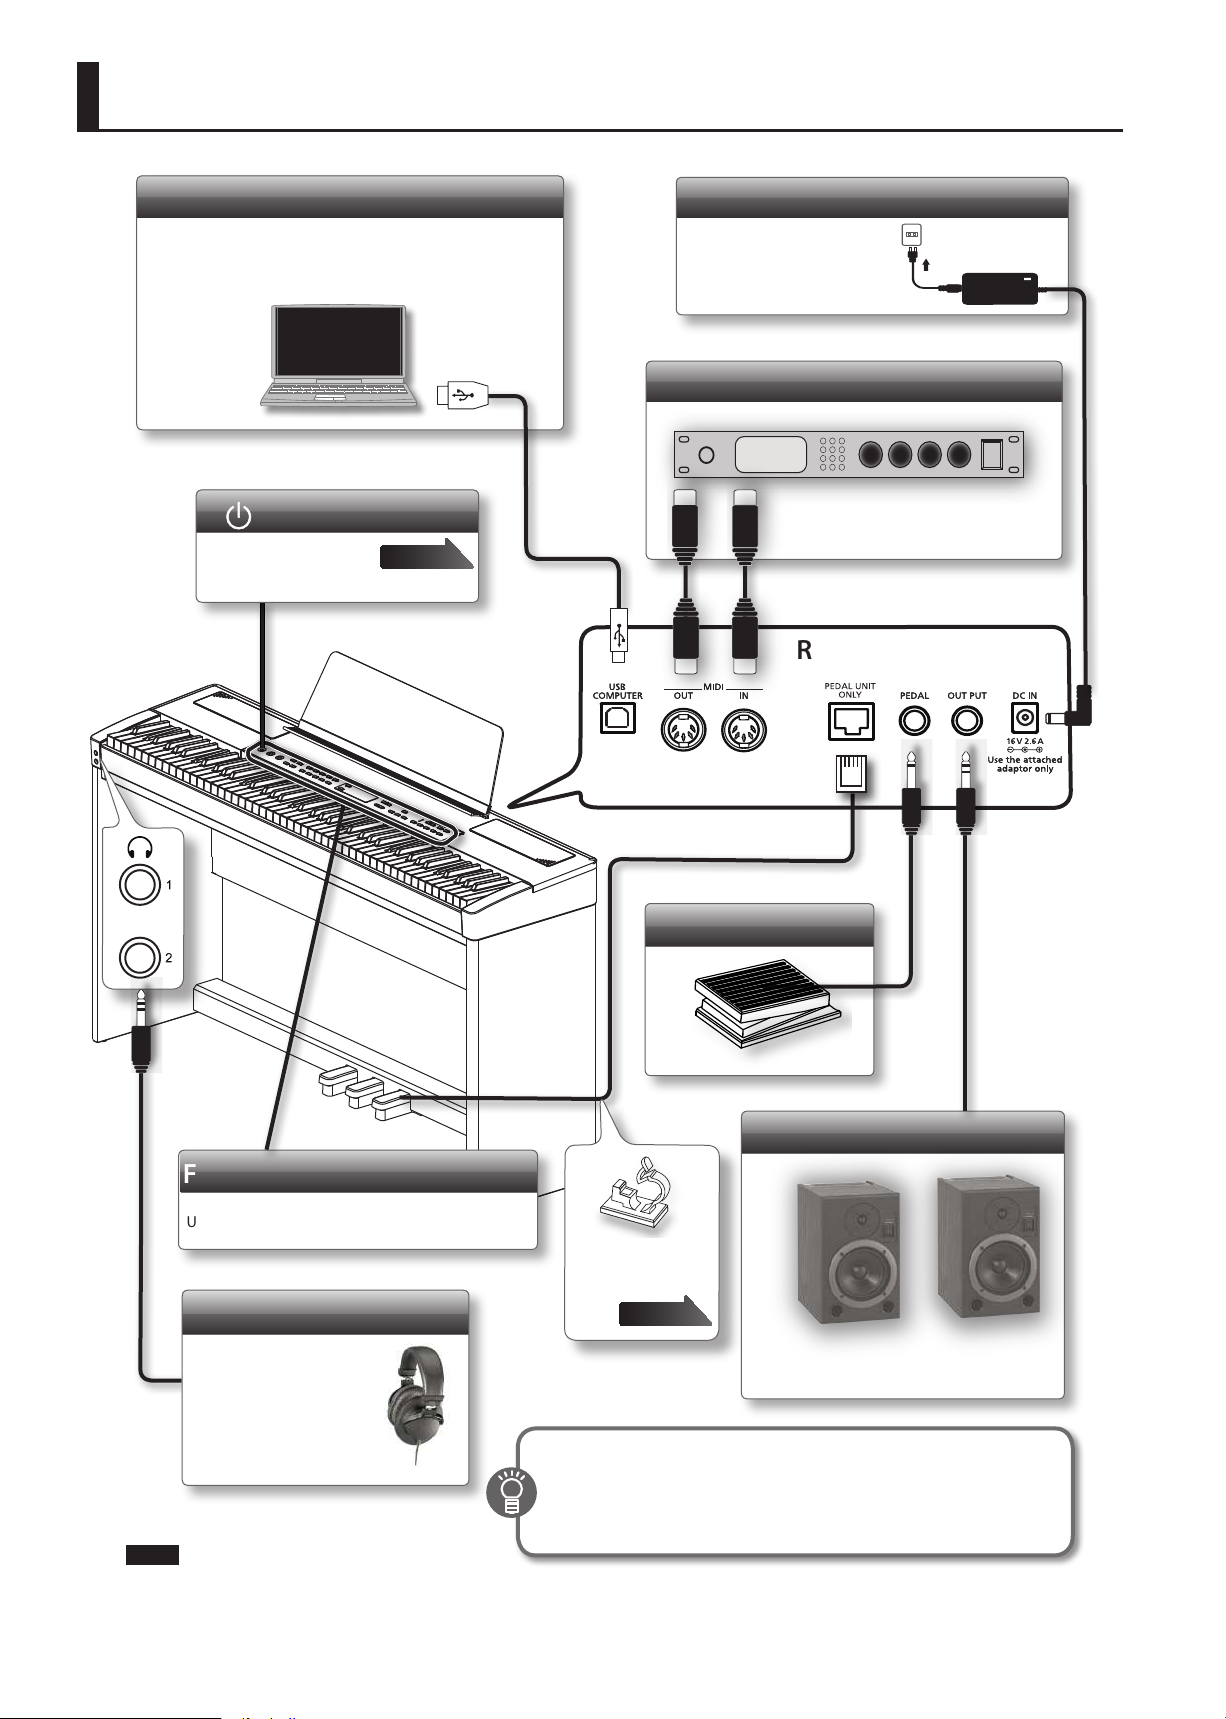
Panel Description
USB COMPUTER Port
You can use commerically available USB cable to
connect the BSP-100 to your computer. You can
then use MIDI-related software to record and play
back BSP-100 performances.
[ ] Power Switch
Turns the power on
and o.
Page 13
DC IN Jack
Connect the included AC
adaptor here.
External MIDI device
Connect these jacks to external MIDI
devices.
Rear side
Pedal unit cable
Damper pedal
OUTPUT Jacks
Front Panel
Single sustain pedal
Use these buttons and knobs to control the BSP-100
Fix the pedal unit
cable with the cable
clips.
Headphone Jack
Connect your headphones
(sold separately) here.
Pluging into the jack [1] will
mute the piano speakers;
Pluging into the jack [2] will
keep the piano speakers
sound.
NOTE
* To prevent malfunction and equipment failure, always turn down the volume, and turn o all the units before making any connections.
What is MIDI?
Page 7
If you connect these jacks to amplified
speakers, the sound of BSP-100 will be
heard through them
MIDI stands for Musical Instrument Digital Interface. This is a world
wide standard communication interface that enables electronic
musical instruments and computers to communicate with each other.
3
Getting Ready
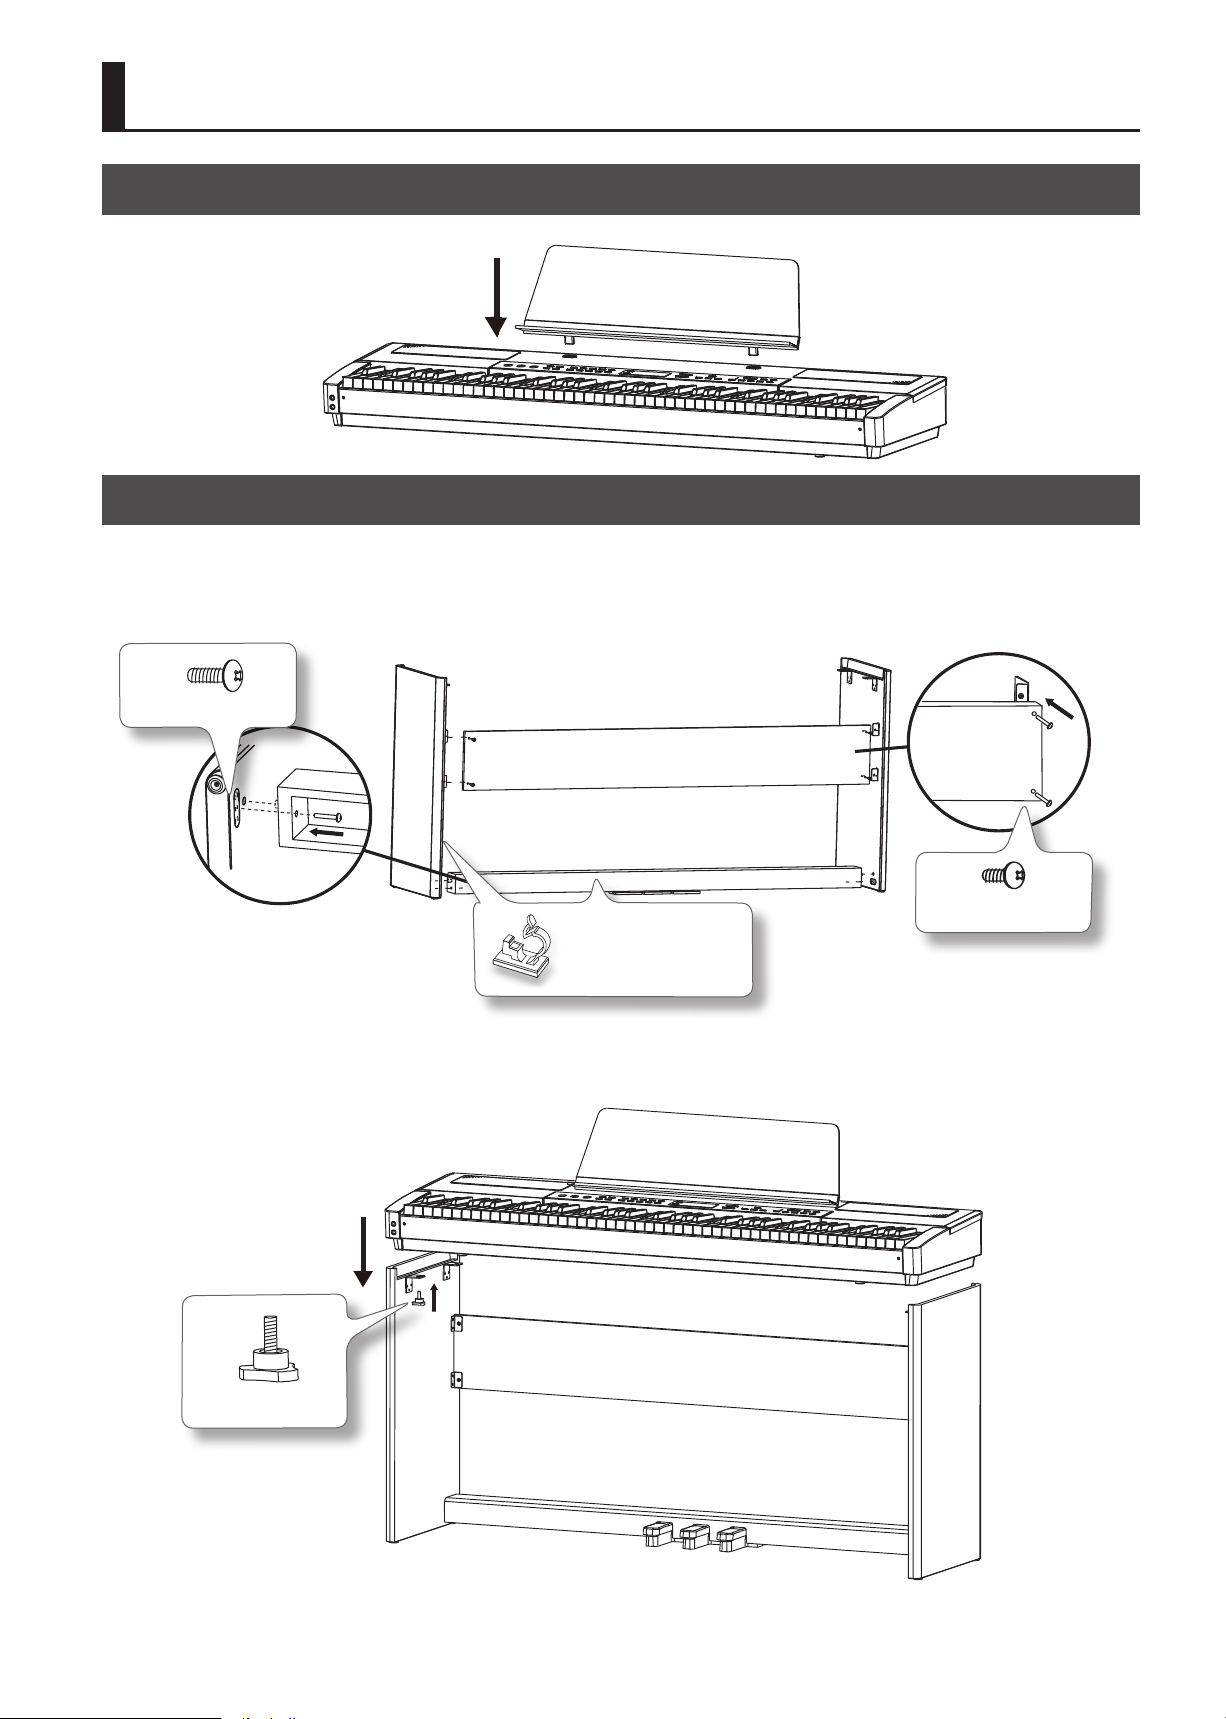
Music Rest
Attach the included music rest as shown below.
Using a Stand
Please use the Becker stands B-Stand-100 to support your BSP-100, this is an optional and you should purchase separately.
Refer to the following diagram to assemble the stand. You should install the rear panel in the back side; when assemble the pedal cross bar, you
should turn the stand over then install it.
Four M6X25 screws
Peel o protection lm on
the pedal unit cable clip;
stick the clips in proper
location in the stand.
Rear panel
Pedal Cross bar
1. Align the bottom of the BSP-100 with the top slots of the stand; fix the piano with 4 knobbed screws.
2. Plug the pedal unit cable jack into the [PEDAL UNIT ONLY] socket in the rear panel (Page 6).
Four M4X16 screws
Four knobbed screws
4
Getting Ready
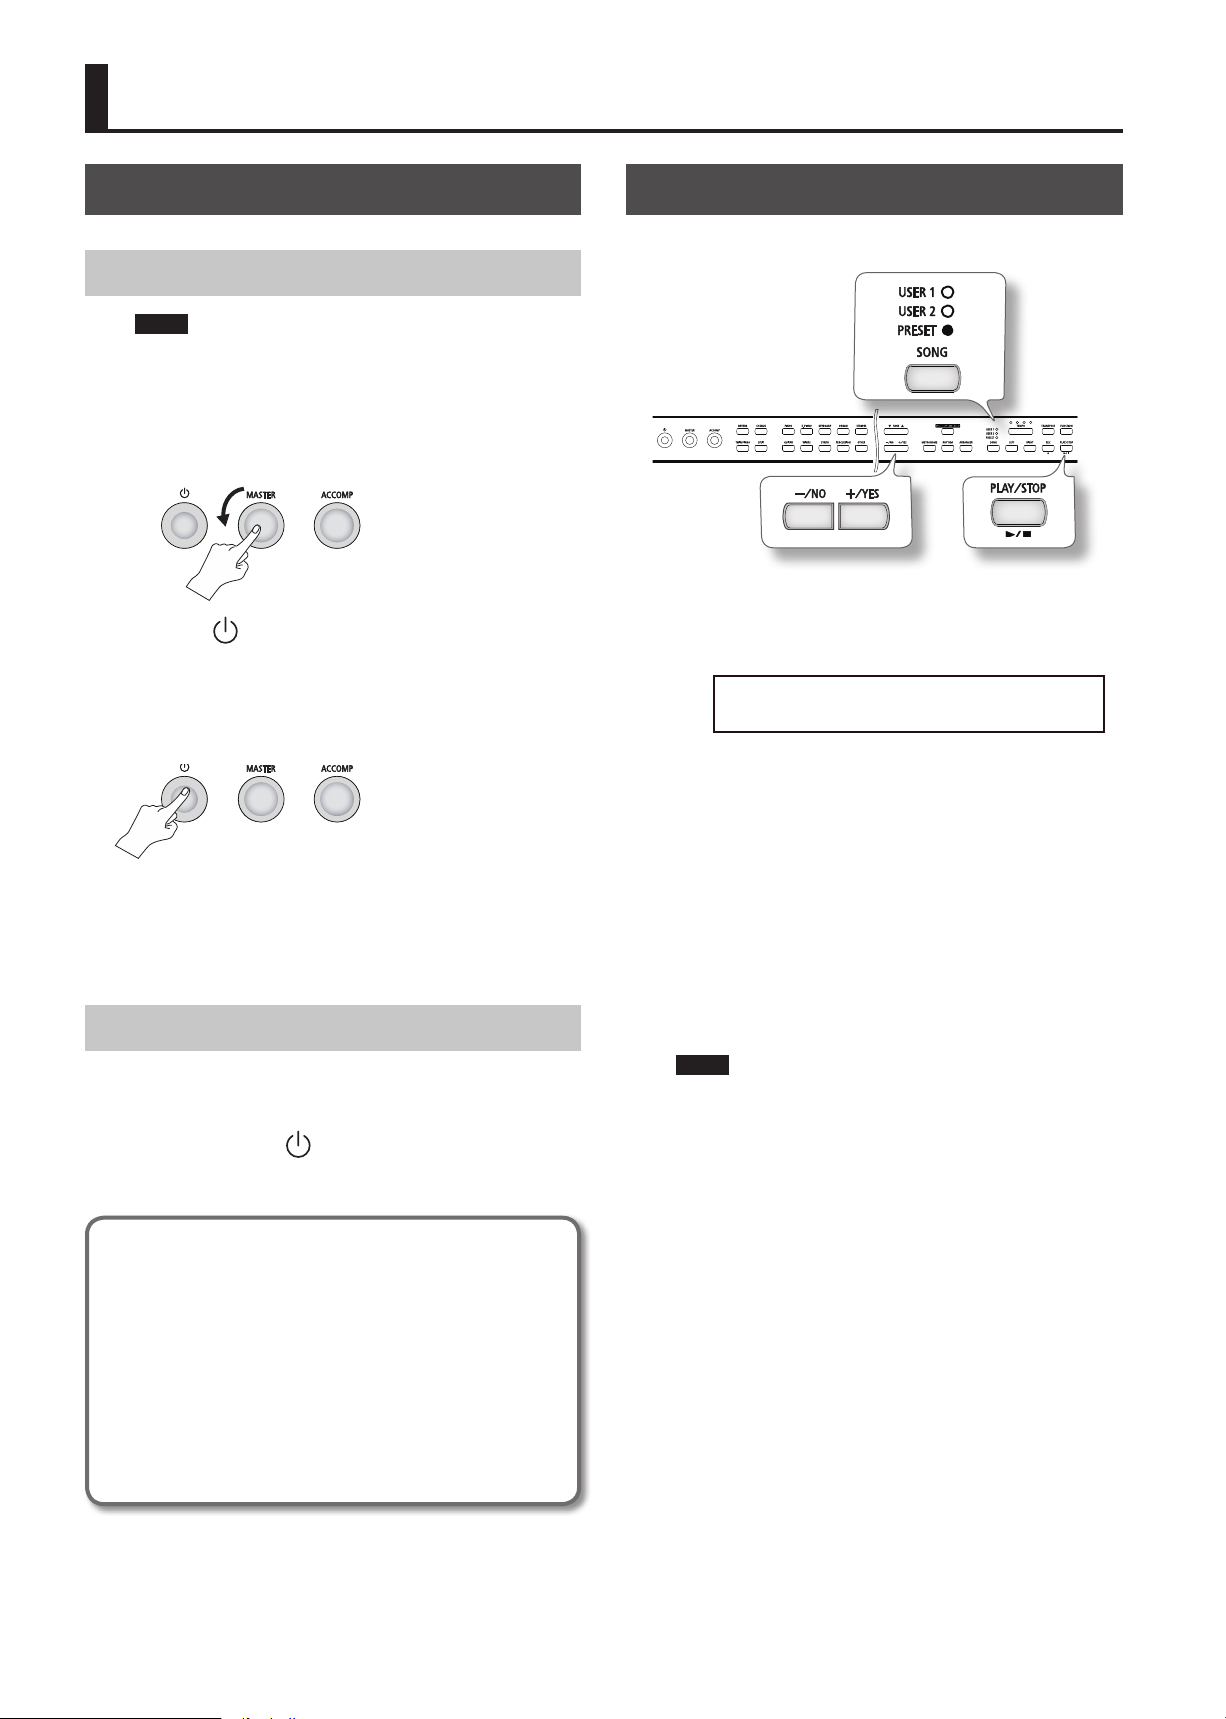
Turning the Power On and Off
Turning the Power On
NOTE
Once everything is properly connected (p. 6), be sure to follow
the procedure below to turn on their power. If you turn on
equipment in the wrong order, you risk causing malfunction or
equipment failure
1. Rotate the [MASTER] knob all the way anticlockwise
to minimize the volume.
2. Press the [ ] switch.
The unit turns on and a TONE button along with other buttons light
up.
* This unit is equipped with a protection circuit. A brief interval (a
few seconds) after turning the unit on is required before it will
operate normally
Listening to the Demos
The BSP-100 comes with 99 bult-in piano songs. Here’s how to
listen to the demo songs.
1. Selecting a song
Press the [SONG] button repeaditely until the PRESET indicator
lights up, song number and its name will appears on the screen .
Press the [+/Yes] or [-/NO]button to select a song.
S01:Valse 34-1
After 4 seconds, the display will turn to tone screen, the indicator
of TUNE button will light up. If you want to see song name and
number once more, press the [SONG] again, then you may select
another song by [+/Yes] or [-/NO]button. Please refer to < Song
List> to nd all songs.
3. Rotate the [MASTER] knob to adjust the volume .
* Before turning the unit on/o, always be sure to turn the volume
down. Even with the volume turned down, you might hear some
sound when switching the unit on/o. However, this is normal
and does not indicate a malfunction
Turning the Power Off
1. Rotate the [MASTER] knob all the way anticlockwise to
minimize the volume.
2. Press and hold the [ ] switch until the display turns o.
The unit turns o.
Concerning the Auto Off function
The power to this unit will be turned o automatically after
a predetermined amount of time has passed since it was
last used for playing music, or its buttons or controls were
operated (Auto O function). If you do not want the power to
be turned o automatically, press and hold down the most
left white key then turn on the power, release the white key
until “01: Grand Piano” appeares on the disply..
Any settings that you are in the process of editing will be lost
when the power is turned o. If you have any settings that
you want to keep, you should engage the Auto Save feature
in Setup menu (Page 16).
2. Playing the song
Press the [PLAY/STOP] button and it will light, the selected song
will start to play.
3. Stop playing
The playing will stop automatically when the song is nished,
the [PLAY/STOP] lighting will go out. You may stop the playing
anytime by pressing the [PLAY/STOP] button again.
NOTE
* No data for the music that is played will be output from the MIDI
OUT connector and USB port.
* All rights reserved. Unauthorized use of this material for
purposes other than private, personal enjoyment is a violation
of applicable laws.
5
 Loading...