

Page 1
Courtesy of:DiscountCarStereo.com
Radio is for illustration purposes only
BKRCD-HF
Hands-Free, Audio Streaming
Installation Guide for Becker Radios with CD Changer
Created June 30, 2016
Revised: July 24, 2016
Page 2
Introduction:
Introduction:Introduction:
Introduction:
Safety comes first when you’re on the road, so having an intuitive
and easy to use Bluetooth kit is essential to reducing driver
distraction. The BKRCD-HF kit is compatible with virtually all
Bluetooth phones, and sounds great whether using it for mobile
conversations, streaming music or listening to the CD Changer via
the “CD” input. In addition, a USB Charging port is included to keep
your devices fully charged. One button with built-in mic
conveniently installed on the dash is used to launch Voice
Recognition application (Siri, Google Now, Assistant etc.), initiate
phone calls, launch applications and listen to the CD Changer.
Thanks to the BKRCD-HF Kit you can keep the radio and
keep the radio and keep the radio and
keep the radio and CD
CD CD
CD
Changer
ChangerChanger
Changer while enjoying Bluetooth features only available on newer
cars. Note
NoteNote
Note: A working CD Changer must be installed in your vehicle
otherwise this part will not work as described....
Installation:
Installation:Installation:
Installation:
Warning!
Warning!Warning!
Warning! Although not critical, we recommend disconnecting the car
battery. Keep in mind that most Becker radios are coded and will not
operate without the code. Radio code must be available for radio to operate
upon reconnection.
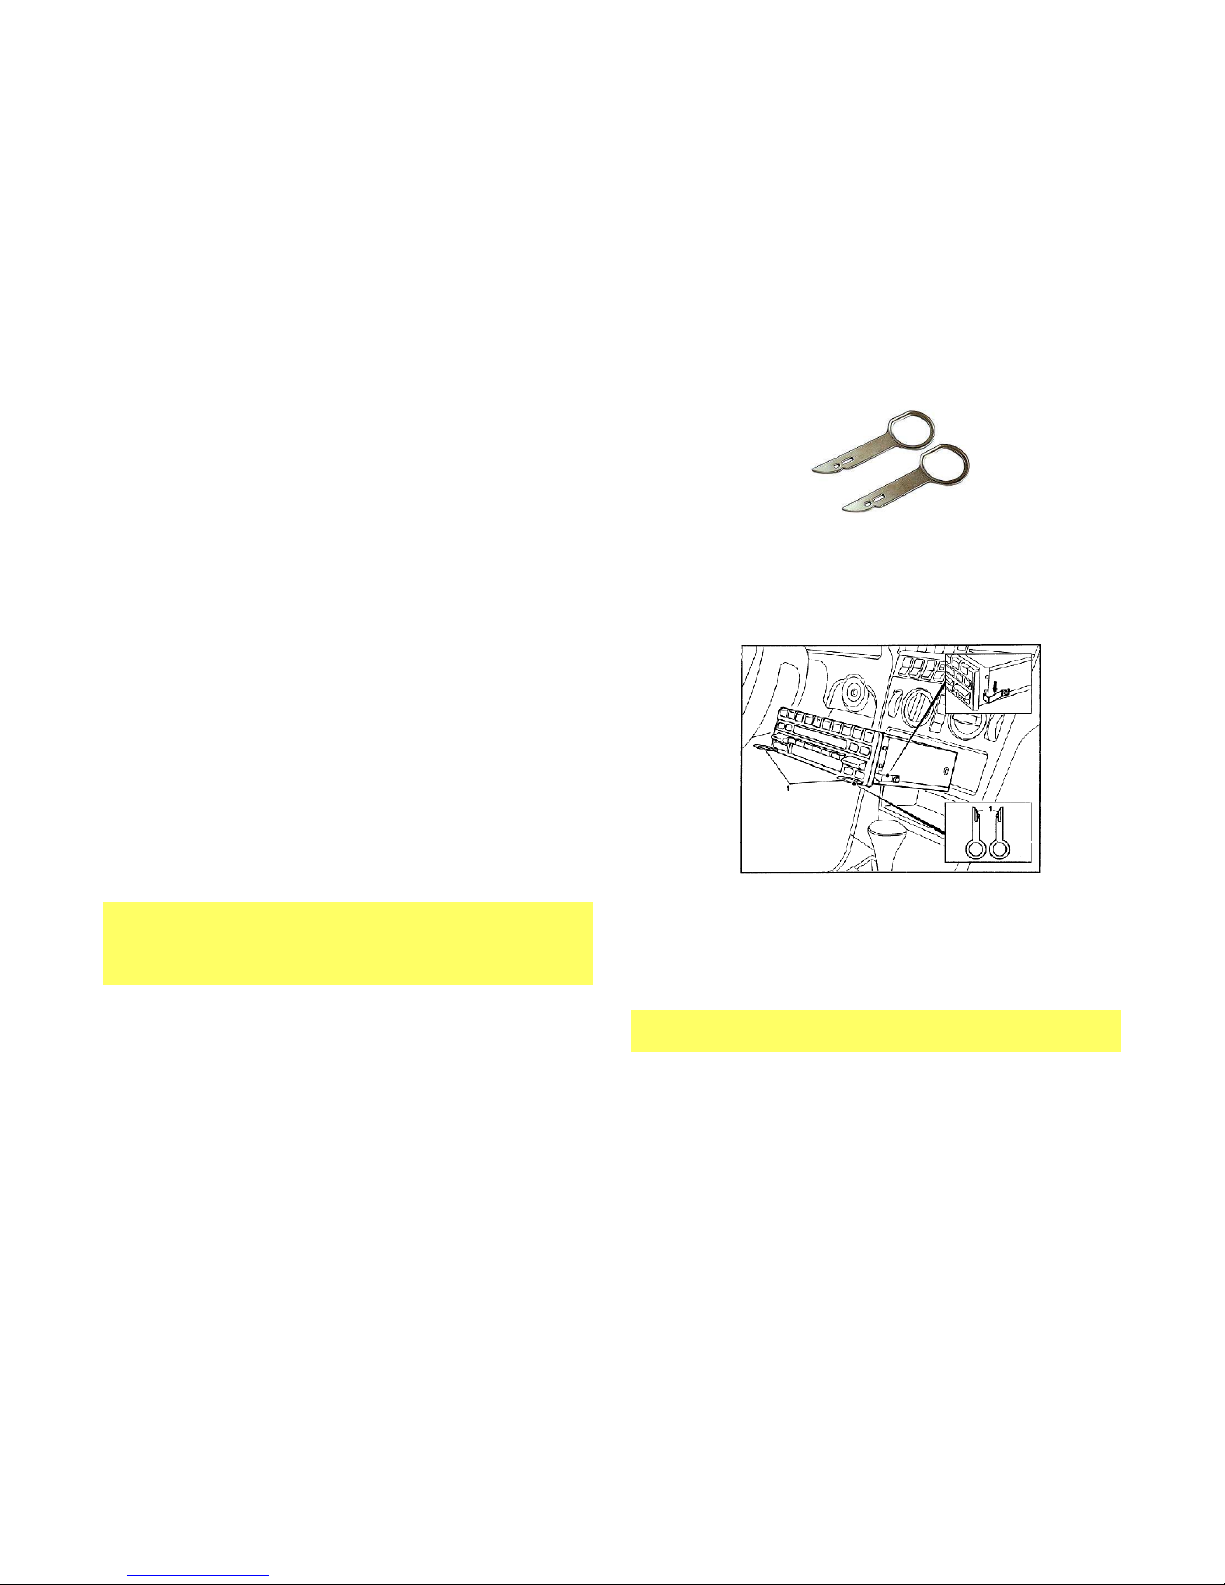
Remove radio from the dashboard to gain access to the
connectors. Special removal tools (See Fig. 1
Fig. 1Fig. 1
Fig. 1) are required to
remove the Becker radio (except PCM1)
Fig. 1
Fig. 1Fig. 1
Fig. 1
Radio removal Tools
1. To remove radio, slide tools into slots to detent position.
Withdraw the radio by pulling outwards. See Fig. 2
Fig. 2Fig. 2
Fig. 2
Fig. 2
Fig. 2Fig. 2
Fig. 2
2. With radio removed disconnect and separate the blue, green
and yellow plugs (C1
C1C1
C1, CCCC----2 and C
2 and C2 and C
2 and C----3333) from Radio connector
(See Fig.
Fig. Fig.
Fig. 3333)
Note
NoteNote
Note!!!!
A yellow iso plug is present only if vehicle has an amplifier, otherwise
C1 slot will be empty
Page 3
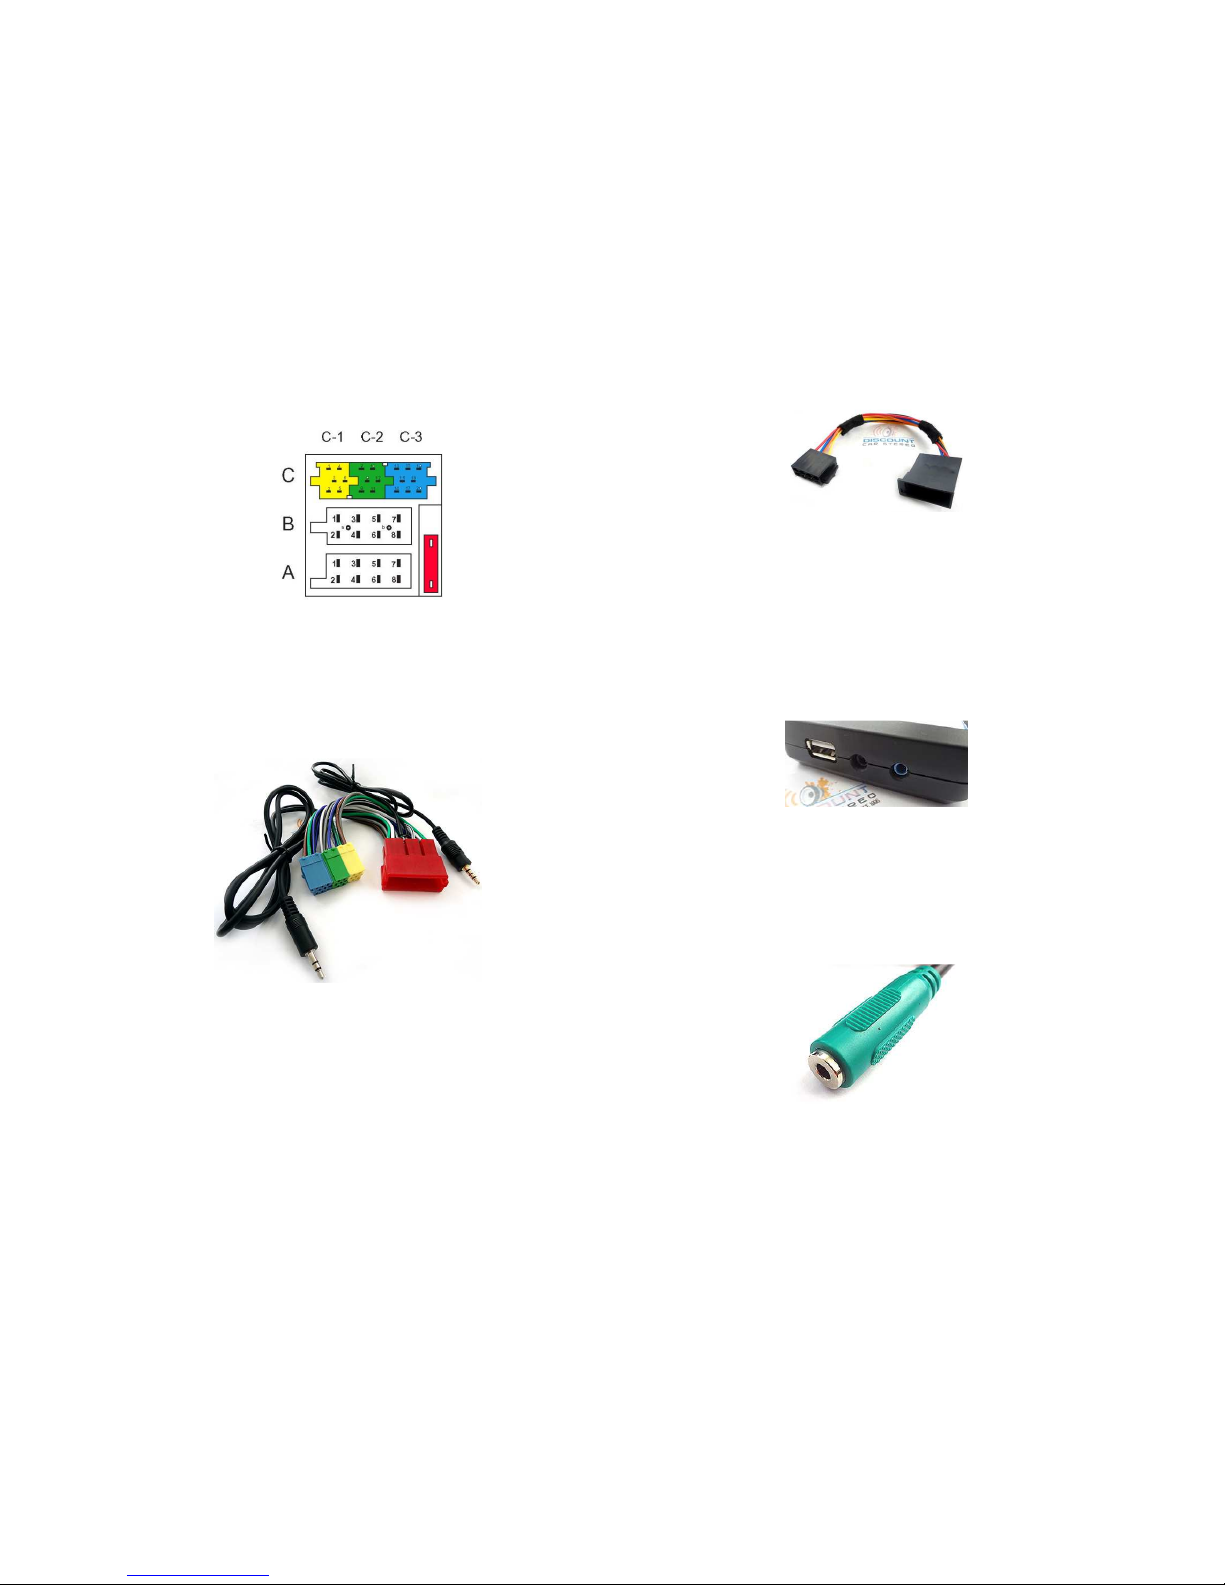
Fig.
Fig. Fig.
Fig. 3333
Radio Connectors
3. Connect the yellow (if present), blue and green iso plugs
from radio to the Red 20-way connector on adapter harness
(See Fig.
Fig. Fig.
Fig. 4444) to C slot on Radio.
Fig.
Fig. Fig.
Fig. 4444
Adapter harness
4. Disconnect 8-way “A”
“A”“A”
“A” plug from Radio (See Fig.
Fig. Fig.
Fig. 3333)
5. Connect the 8-way “A
AAA”””
” plug (from step 4) to matting 8-way
connector on power supply harness (See Fig.
Fig. Fig.
Fig. 5555)
Fig. 5
Fig. 5Fig. 5
Fig. 5
Power harness
6. Connect the 8-way plug from power supply harness to 8-way
“AAAA”””” connector on Radio (vacated in step 4)
7. Connect the gold plated 3.5mm plug from adapter harness
(See Fig. 4
Fig. 4Fig. 4
Fig. 4) to the black “CD” input jack on Bluetooth
Module (See Fig.
Fig. Fig.
Fig. 6666)
Fig.
Fig. Fig.
Fig. 6666
Module
7. Connect the nickel plated 3.5mm plug from adapter harness
(See Fig. 4
Fig. 4Fig. 4
Fig. 4) to the green 3.5mm jack on Bluetooth Module
(See Fig.
Fig. Fig.
Fig. 7777)
Fig. 7
Fig. 7Fig. 7
Fig. 7
Audio output jack
Page 4
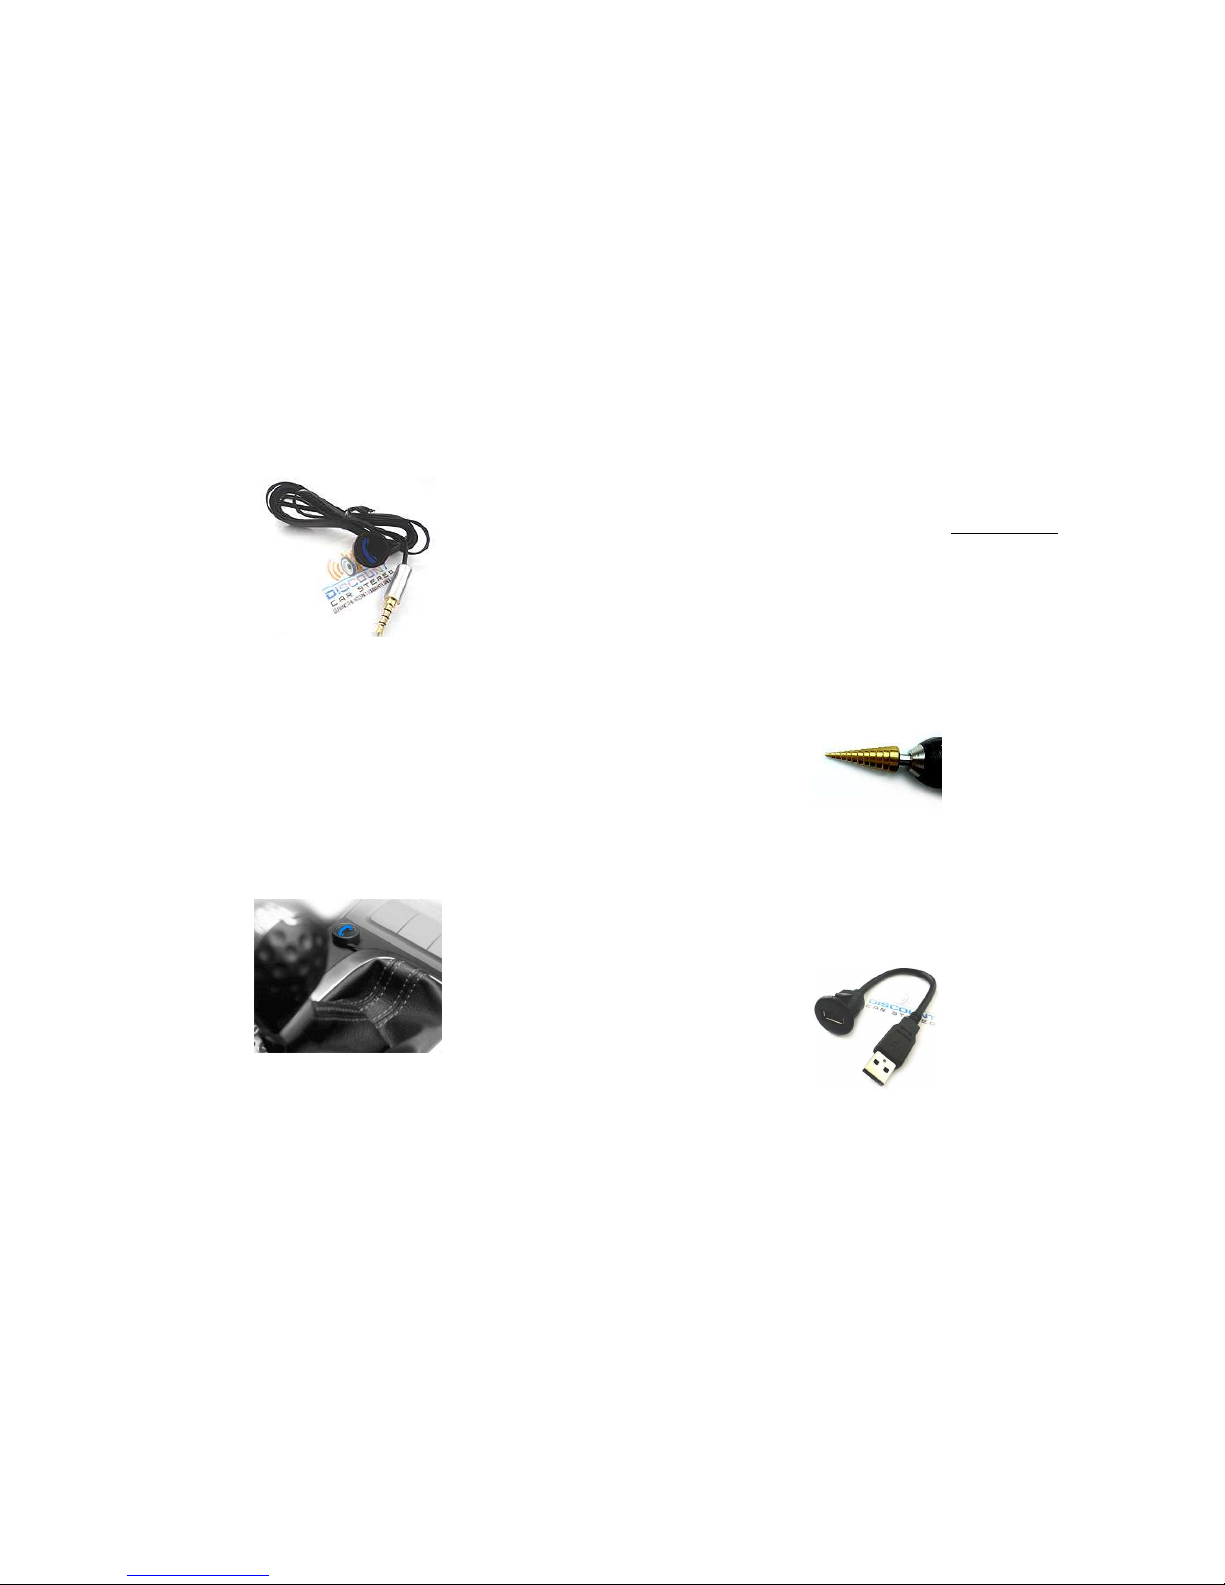
8. Connect plug on control/mic (See Fig .
Fig . Fig .
Fig . 8888) to blue jack on
Bluetooth Module (See Fig.
Fig. Fig.
Fig. 6666)
Fig.
Fig. Fig.
Fig. 8888
Control button/Microphone
9. Consider where to install control/mic button. Keep in mind
the control button must be within reach of the driver and
facing driver for voice commands and phone dialog (cable is
6ft. long).
We recommend completing the rest of the install
We recommend completing the rest of the install We recommend completing the rest of the install
We recommend completing the rest of the install
prior to secur ing t
prior to secur ing tprior to secur ing t
prior to secur ing the control/mic button to the dash
he control/mic button to the dashhe control/mic button to the dash
he control/mic button to the dash
.
. .
. Once you
decide on a location simply remove tape backing from
control /mic button
Make sure no ventilation duct is pointed towards the mic.
It is best to mount button facing driver
The Bluetooth Module includes a USB Charging port. Should you
decide to use it, we suggest one of 3 connecting options:
A. Flush
Flush Flush
Flush to dash/panel
to dash/panelto dash/panel
to dash/panel requires drilling a ¾” hole in the dash
requires drilling a ¾” hole in the dashrequires drilling a ¾” hole in the dash
requires drilling a ¾” hole in the dash
B. Flush
Flush Flush
Flush with Support
with Supportwith Support
with Support bracket
bracket bracket
bracket (use this option to mount USB
terminal wherever your installation demands without drilling)
C. No
No No
No USB
USB USB
USB Mount
MountMount
Mount---- (default)
A.
A.A.
A. Flush t
Flush tFlush t
Flush toooo Dash
DashDash
Dash or Panel
or Panel or Panel
or Panel (drilling required)
(drilling required)(drilling required)
(drilling required)
1. Drill a ¾” hole in the dash or panel using a step drill bit or
equivalent (See Fig.
Fig. Fig.
Fig. 9999)
Fig.
Fig. Fig.
Fig. 9999
Step drill bit
2. Insert the 3ft. USB cable male terminal (See Fig.
Fig. Fig.
Fig. 10
1010
10)
through the ¾” hole created in step 1 and plug into USB port
on Module (See Fig.
Fig. Fig.
Fig. 11111111)
Fig.
Fig. Fig.
Fig. 10
1010
10
Flush mount 3 ft. USB cable
Page 5
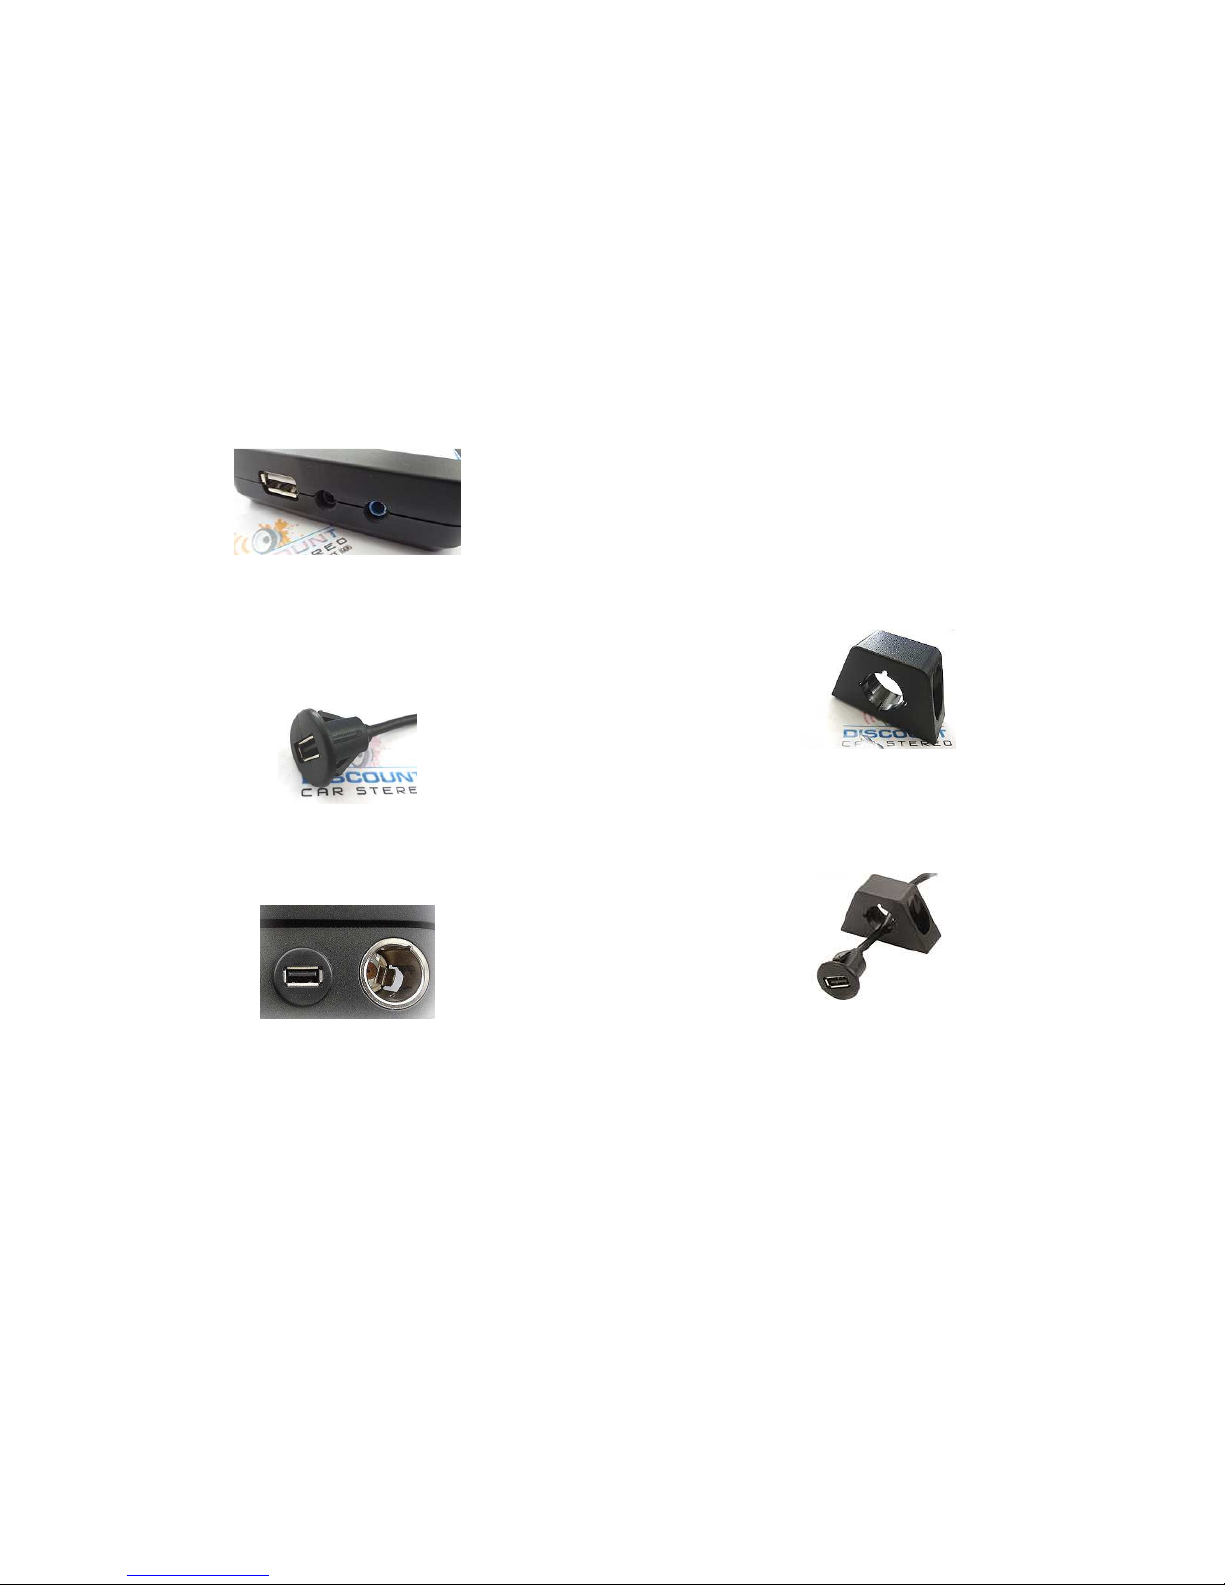
Fig.
Fig. Fig.
Fig. 11111111
Module USB port
3. Push USB head ( See Fig.
Fig. Fig.
Fig. 11112222) until it snaps in place and
flush with mounting surface (See Fig.
Fig. Fig.
Fig. 11113333)
Fig.
Fig. Fig.
Fig. 11112222
Flush mount USB Terminal
Fig.
Fig. Fig.
Fig. 11113333
Flush mounted to dash
4. Tuck and secure any extra wire from moving parts and test
operation (See Enabling the AUX
Enabling the AUXEnabling the AUX
Enabling the AUX section below)
B.
B.B.
B.
USB
USBUSB
USB with
withwith
with Bracket
BracketBracket
Bracket Mount
MountMount
Mount
(No drilling)
(No drilling)(No drilling)
(No drilling)
1. Locate a flat surface at location of choice within 3.2 ft. of
radio and mount USB support bracket (See Fig. 1
Fig. 1Fig. 1
Fig. 14444) to
surface using adhesive/tape or screws.
Fig.
Fig. Fig.
Fig. 11114444
USB mounting bracket
2. Insert USB male terminal through hole in bracket (See Fig.
Fig. Fig.
Fig.
11115555) and connect to USB port on Module (See Fig. 1
Fig. 1Fig. 1
Fig. 11111)
Fig. 1
Fig. 1Fig. 1
Fig. 15555
3. Push USB head until it snaps in place and flush (See Fig
FigFig
Fig.... 11116666)
Page 6
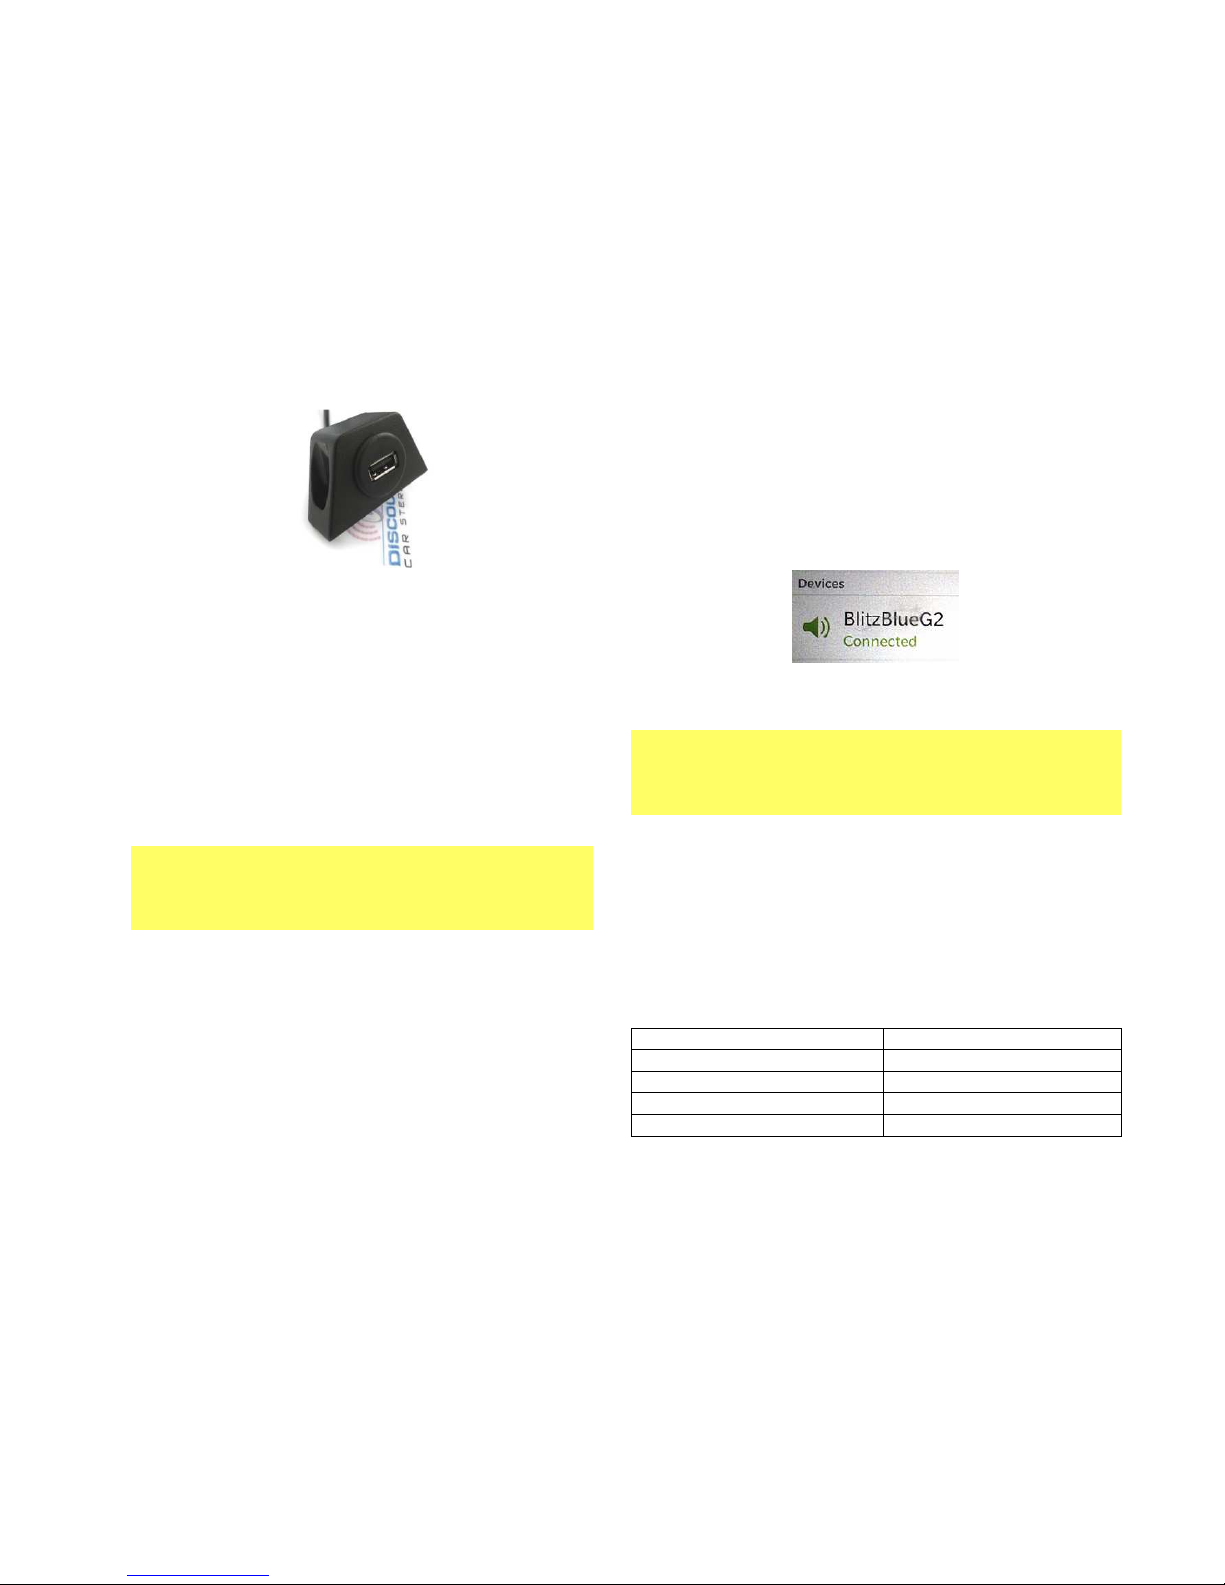
Fig. 1
Fig. 1Fig. 1
Fig. 16666
4. Tuck and secure any extra wire away from moving parts and test
operation (
See
See See
See Bluetooth Pairing and Connection
Bluetooth Pairing and ConnectionBluetooth Pairing and Connection
Bluetooth Pairing and Connection
)
C.
C.C.
C. No
NoNo
No USB
USB USB
USB Mount
MountMount
Mount
The USB on main module is for charging only. Use your own
USB extension cable option or proceed to next step if charging is
not required.
The radio cavity in most vehicles may lack extra room needed to fit
aftermarket equipment and because of that you will have to be creative
when fitting this part. Extra length cables are provided to allow for
flexibility.
Secure module and proceed to section next section.
BBBBluetooth Pairing and Connection
luetooth Pairing and Connectionluetooth Pairing and Connection
luetooth Pairing and Connection
This process is required the first time you use the BKRCD-HF. After
initial pairing, the BKRCD-HF will automatically reconnect with the
paired phone upon entering the vehicle.
1. Turn the vehicle ignition to “ON”.
2. The Red LED inside module will begin to flash
3. Access your Smartphone Bluetooth menu settings, and
search (scan) for devices.
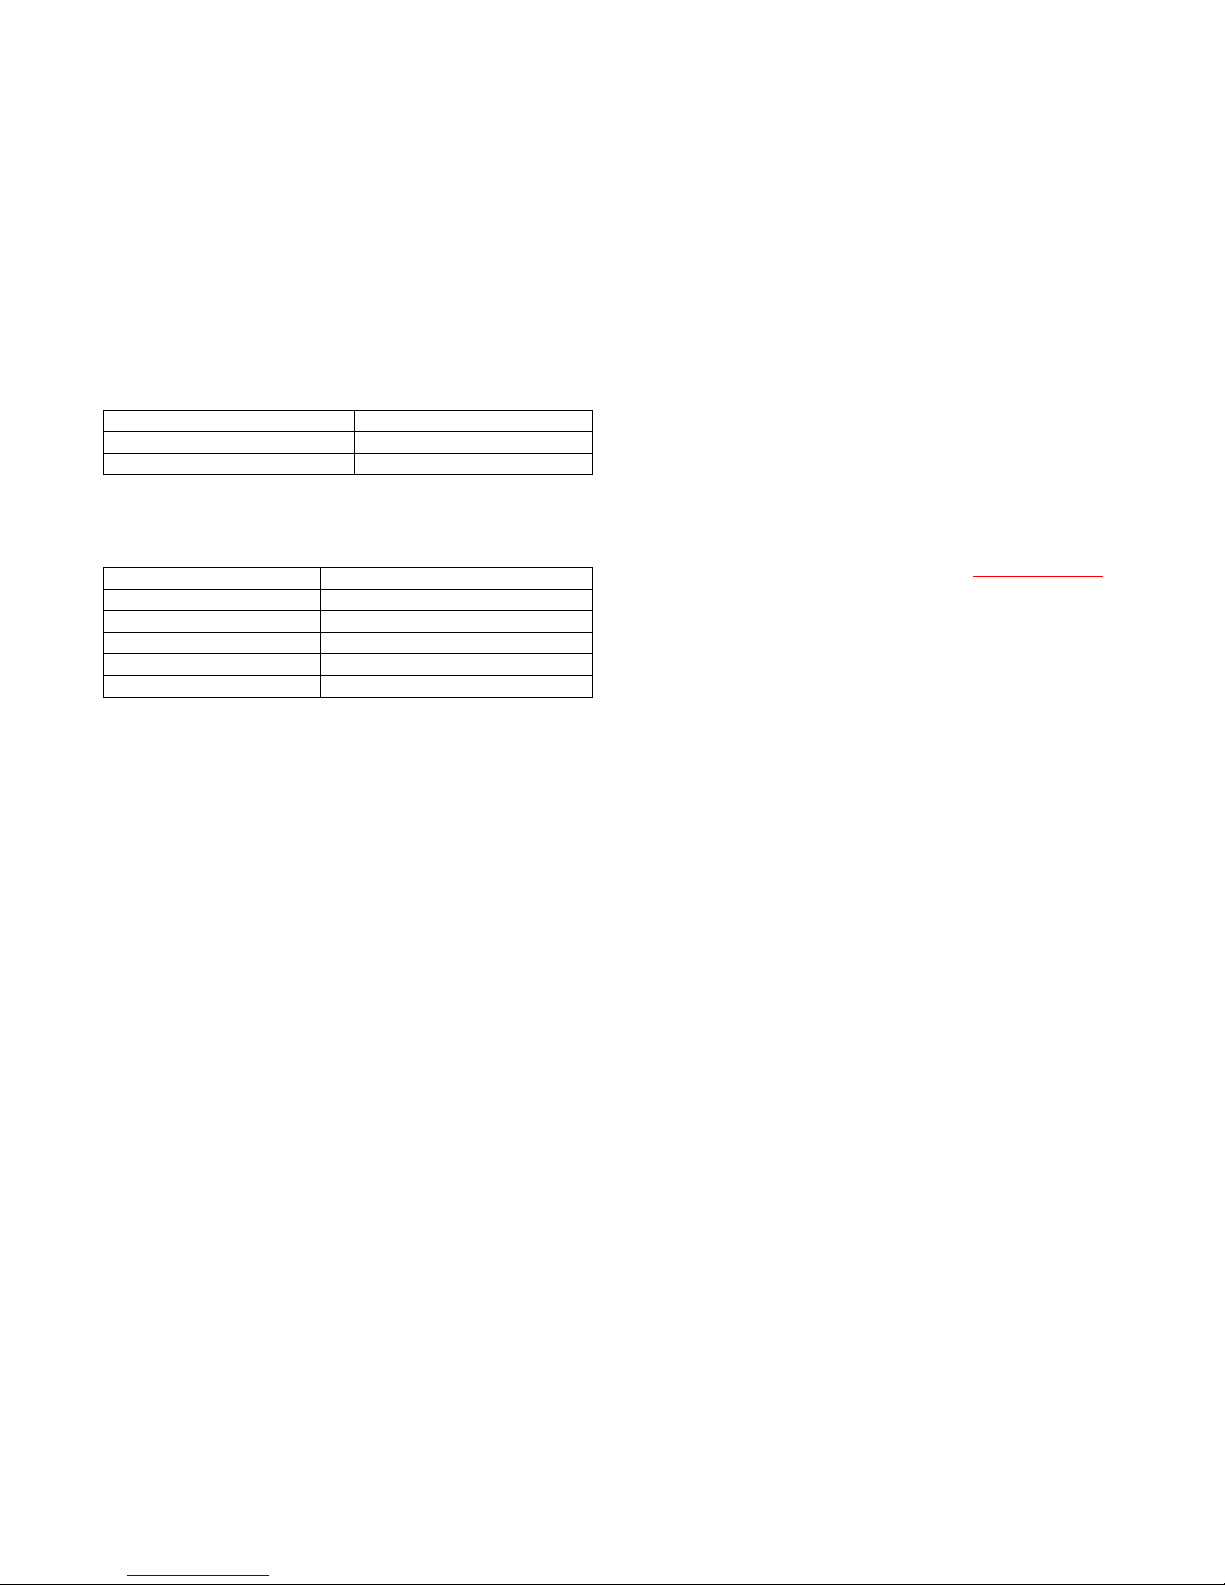
4. Select the G2 and click “Connect”
Note: Supports multiple phones but connects to only one phone at a time.
Warning!
Warning!Warning!
Warning!
Caller ID and text display are not possible in
not possible in not possible in
not possible in CD Changer
CD Changer CD Changer
CD Changer
mode
modemode
mode. Operating Bluetooth device is by pressing the control button and
your Voice Recognition application. Use the Becker radio volume button to
control playback level.
Bluetooth
Bluetooth Bluetooth
Bluetooth Operation
OperationOperation
Operation
1. Set the radio to CD Changer
CD ChangerCD Changer
CD Changer mode
2. Adjust the Radio Volume
Music Commands
Music CommandsMusic Commands
Music Commands
To
ToTo
To Proceed this way
Proceed this wayProceed this way
Proceed this way
Pause a Song Press and release button
Resume Play Press and release button
Skip to next song Press button twice
Skip to Previous Song Press button 3 times
Page 7
Activate
Activate Activate
Activate CD Changer
CD ChangerCD Changer
CD Changer Playback
PlaybackPlayback
Playback* Press button 4
Press button 4 Press button 4
Press button 4 times
timestimes
times
Activate Voice Control Press/hold button for 2 seconds
Switch out of CD Changer Mode Press and release button
Phone Commands
Phone CommandsPhone Commands
Phone Commands
To
ToTo
To Proceed this way
Proceed this wayProceed this way
Proceed this way
Answer call Press and release button
End call Press and release button
Reject incoming call Press button twice (call goes to VM)
Cancel outgoing call Press button twice
Activate Voice Control Press/hold button for 2 seconds
Notes:
Notes:Notes:
Notes:
1.
If playback is distorted, adjust volume on Bluetooth device.
2.
To reset Module press and Hold button for 5 seconds
To reset Module press and Hold button for 5 seconds To reset Module press and Hold button for 5 seconds
To reset Module press and Hold button for 5 seconds (this will
not un-pair phone or erase stored phones)
3.
On incoming calls, ring tone will play on car speakers
4.
Bluetooth range is approximately 30 ft. make sure device is within
range of receiver
5.
Voice command compatible with Apple (Siri), Android (Google
Now), Blackberry (Assistant)
6.
* The control button does not control CD Changer functions. Use
the Radio control for music selection and controls of the Changer.
If successful go ahead and Reinstall the Radio
If successful go ahead and Reinstall the RadioIf successful go ahead and Reinstall the Radio
If successful go ahead and Reinstall the Radio
Congratulations, you’ve j ust updated your vehicle to support
new technology while pres erving the original radio and dash
components.
Enjoy!
Frequently asked questions
Frequently asked questionsFrequently asked questions
Frequently asked questions
1. My vehicle has a CD Changer. Do I have to disconnect it for this
My vehicle has a CD Changer. Do I have to disconnect it for this My vehicle has a CD Changer. Do I have to disconnect it for this
My vehicle has a CD Changer. Do I have to disconnect it for this
adapter to work?
adapter to work?adapter to work?
adapter to work?
NO
NONO
NO;;;; CD Changer
CD Changer CD Changer
CD Changer is required
is required is required
is required and remain fully functional
and remain fully functionaland remain fully functional
and remain fully functional
2. Does the BKR
Does the BKRDoes the BKR
Does the BKRCD
CDCD
CD----HF
HFHF
HF work on all Becker Radios?
work on all Becker Radios?work on all Becker Radios?
work on all Becker Radios?
NO; works on Becker radios with the optional
works on Becker radios with the optional works on Becker radios with the optional
works on Becker radios with the optional analog CD Changer
analog CD Changeranalog CD Changer
analog CD Changer
Not for digital systems (e.g. PCM2, CDR
Not for digital systems (e.g. PCM2, CDRNot for digital systems (e.g. PCM2, CDR
Not for digital systems (e.g. PCM2, CDR----23/24 etc.)
23/24 etc.)23/24 etc.)
23/24 etc.)
3. Can I control my Smartphone music from the radio buttons?
Can I control my Smartphone music from the radio buttons?Can I control my Smartphone music from the radio buttons?
Can I control my Smartphone music from the radio buttons?
NO;
NO;NO;
NO; you must
must must
must continue to use Phone
continue to use Phonecontinue to use Phone
continue to use Phone built
builtbuilt
built----in controls
in controlsin controls
in controls or the
or the or the
or the
control button and
control button andcontrol button and
control button and////or voice commands
or voice commands or voice commands
or voice commands to operate the device.
to operate the device.to operate the device.
to operate the device. The
volume button on the Becker radio is used to set playback level.
4. How to I reset the Module?
How to I reset the Module?How to I reset the Module?
How to I reset the Module?
Press and hold the control button for 5 seconds then release.
5. How can I listen to my disc Changer
How can I listen to my disc ChangerHow can I listen to my disc Changer
How can I listen to my disc Changer????
Simply press the CD button on the radio and press the control button 4
times.
6. Where is the best place to install the control button/mic?
Where is the best place to install the control button/mic?Where is the best place to install the control button/mic?
Where is the best place to install the control button/mic?
We found that having the control button/mic mounted higher on the
dash worked best, but the user is left to find best location.
7.
Will the stereo mute when I receive or make a phone call?
Will the stereo mute when I receive or make a phone call?Will the stereo mute when I receive or make a phone call?
Will the stereo mute when I receive or make a phone call?
This system will not mute the stereo unless the radio is in “CD Changer”
mode (Bluetooth mode). If you are in Radio Mode (AM/FM) and a call
comes in, the radio will not mute. In addition you must switch the
radio to “CD Changer” (Bluetooth Mode)
8. My second phone can’t pair or locate the Bluetooth device
My second phone can’t pair or locate the Bluetooth deviceMy second phone can’t pair or locate the Bluetooth device
My second phone can’t pair or locate the Bluetooth device????
In order to pair with another phone make sure no other phone is
connected. Once the device is free, it is ready for pairing.
Page 8

Disclaimer
DisclaimerDisclaimer
Disclaimer
• This product has no affiliation with Porsche, Becker or Apple
• There are no warranties expressed or implied by purchase of this product
• We’re not liable for misuse of this product.
© 1995-16 Discount Car Stereo, Inc. All rights reserved. Information in this
document is subject to change without notice. Other products and companies referred
to herein are trademarks or registered trademarks of their respective companies or
mark holders.
 Loading...