

Page 1
Kosmonaut 7, 3824 MK Amersfoort (NL)
Office: +31 33 466 8938
WhatsApp: +31 6 1595 6105
Web: www.cranecamera.eu
E-mail: info@cranecamera.eu
User manual camerasystem VH-1250
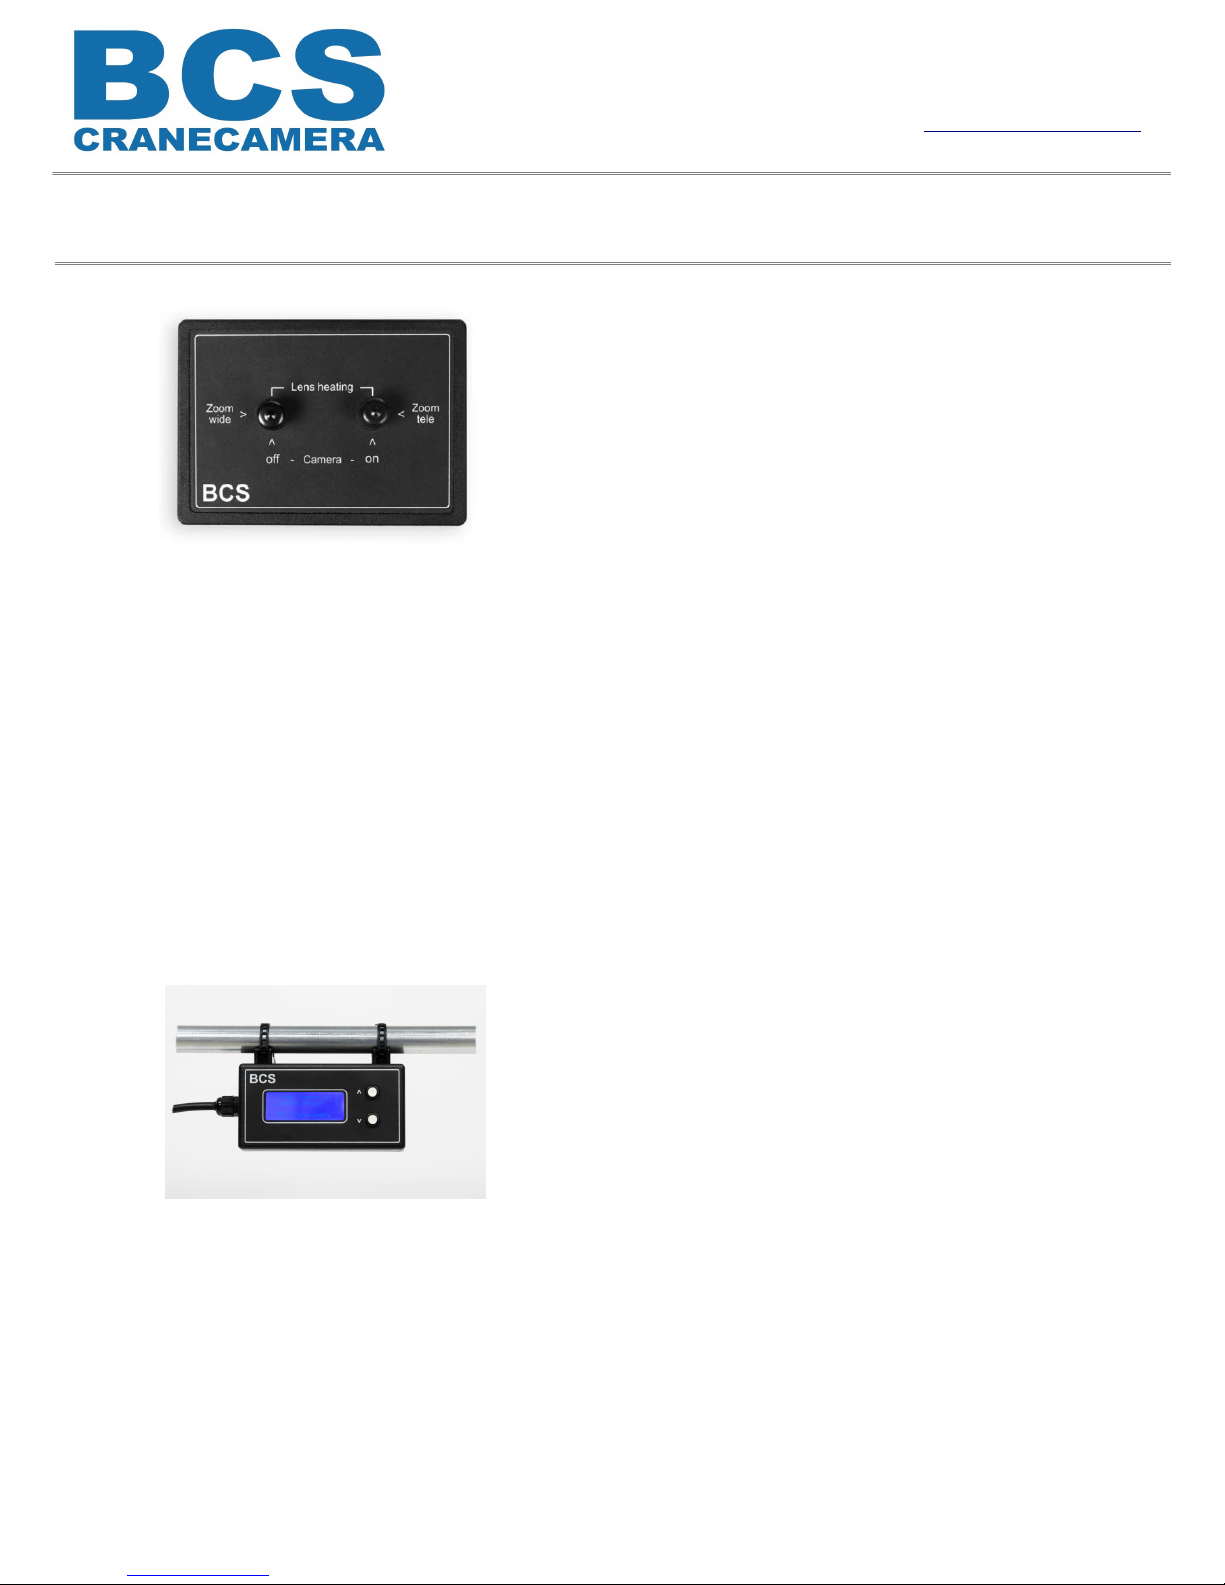
Turning the camera on:
Press the “Zoom tele” button for 2 seconds. The green
LED on the camera and the monitor are now ON.
Turning the camera off:
Press and hold the “Zoom wide” button for 10 seconds.
The green LED on the camera and the monitor are now
OFF.
Pairing the wireless zoom pedal with the monitor:
To wireless pair the zoom pedal with the monitor press and hold the “Learn” button on the
back of the monitor, and then press the “Zoom tele” button on the zoom pedal. Now
release the button on the back of the monitor. The zoom pedal is now wireless paired with
the monitor.
In case of low battery voltage or interference with other wireless signals the zoom pedal
can be connected with the supplied cable. Connect the cable to the back of the zoom
pedal and to the back of the monitor in the “Remote” input.
Zoom:
To zoom in use the “Zoom tele” button. To zoom out use the “Zoom wide” button.
Lens-heating:
To activate the lens-heating press and hold both “Zoom wide” and “Zoom tele” buttons for
5 seconds. The green LED on the camera will now flash slow. After 5 minutes the lensheating is automatically turned OFF.
Changing video channels:
There are 7 video channels to be used. To change the video
channel use the white UP and DOWN buttons on the receiver.
Position of the receiver:
For a perfect image and reception, mount the receiver as good
as possible in line of sight with the camera.
Chaning the camera unit ID:
The last 3 digits of the camera's serial number is the camera ID. To change the camera ID in
the receiver press and hold the DOWN button until the arrow switches to the second line.
Now use the UP and DOWN buttons to change the camera ID to the desired number.
When done, wait for 5 seconds until the arrow switched back to the first line.
Important:
– The camera system will automatically shut down after 10 hours. Use the “Zoom tele” button
on the zoom pedal to turn the camera system back on.
– The battery is charged by the solar panel, no external charging is needed.
– Regularly clean the lens of the camera for a optimal image.
– Always keep the solar panel free from snow.
Page 2

Kosmonaut 7, 3824 MK Amersfoort (NL)
Kantoor: +31 33 466 8938
WhatsApp: +31 6 1595 6105
Web: www.cranecamera.eu
E-mail: info@cranecamera.eu
Gebruikershandleiding camerasysteem VH-1250
Het camerasysteem aanzetten:
Druk 2 seconden op de “Zoom tele” knop, de groene LED
op de camera gaat nu branden en de monitor gaat aan.
Het camerasysteem is nu aan.
Het camerasysteem uitzetten:
Druk 10 seconden op de “Zoom wide” knop, de groene
LED van de camera en de monitor gaan uit.
Draadloos verbinden van het zoom pedaal:
Om het zoom pedaal draadloos te verbinden met de monitor druk en houdt ingedrukt de
“Learn” knop op de achterkant van de monitor, tegelijkertijd druk op de “Zoom tele” knop
op het zoom pedaal. Laat nu de “Learn” knop los. Het zoom pedaal is nu draadloos
gekoppeld met de monitor.
In geval van lege batterijen of draadloze interferentie kan het zoom pedaal ook met
bijgeleverde kabel aangesloten worden. Sluit deze kabel op de achterkant van het zoom
pedaal aan en op de achterkant van de monitor in de “Remote” ingang.
Zoom:
Voor in-zoomen gebruik de “Zoom tele” knop. Voor uit-zoomen gebruik de “Zoom wide”
knop.
Lens-verwarming:
Om de lens-verwarming in te schakelen druk beide zoom knoppen tegelijkertijd in voor 5
seconden, op de camera gaat de groene LED langzaam knipperen. De lens-verwarming
schakelt automatisch uit na 5 minuten.
Video-kanalen wisselen:
Er zijn 7 video-kanalen beschikbaar. Met de witte op en neer
knoppen is er te wisselen tussen deze kanalen in geval van
interferentie van andere video-systemen.
Positie van de ontvanger:
Voor een optimaal beeld moet de ontvanger zo goed mogelijk
in rechte lijn hangen met de camera (in line of sight).
Het camera unit ID aanpassen in de ontvanger:
De laatste 3 cijfers van het serienummer van de camera is het camera unit ID. Om deze in de
ontvanger de wijzigen houdt de onderste witte knop op de ontvanger ingedrukt totdat de pijl
verspringt naar de 2e regel. Met de op en neer toetsen kan het camera ID nummer nu
gewijzigd worden. Als deze goed staat wacht 5 seconden tot de pijl terug springt naar de
Belangrijk:
– Het camerasysteem schakelt na 10 uur automatisch uit, druk op “Zoom tele” om het weer in
te schakelen.
– De lens van de camera moet regelmatisch schoongemaakt worden voor een optimaal beeld
 Loading...