

CERT. N. 9115 BCEL
INSTRUCTION MANUAL
UNI EN ISO 9001:2000
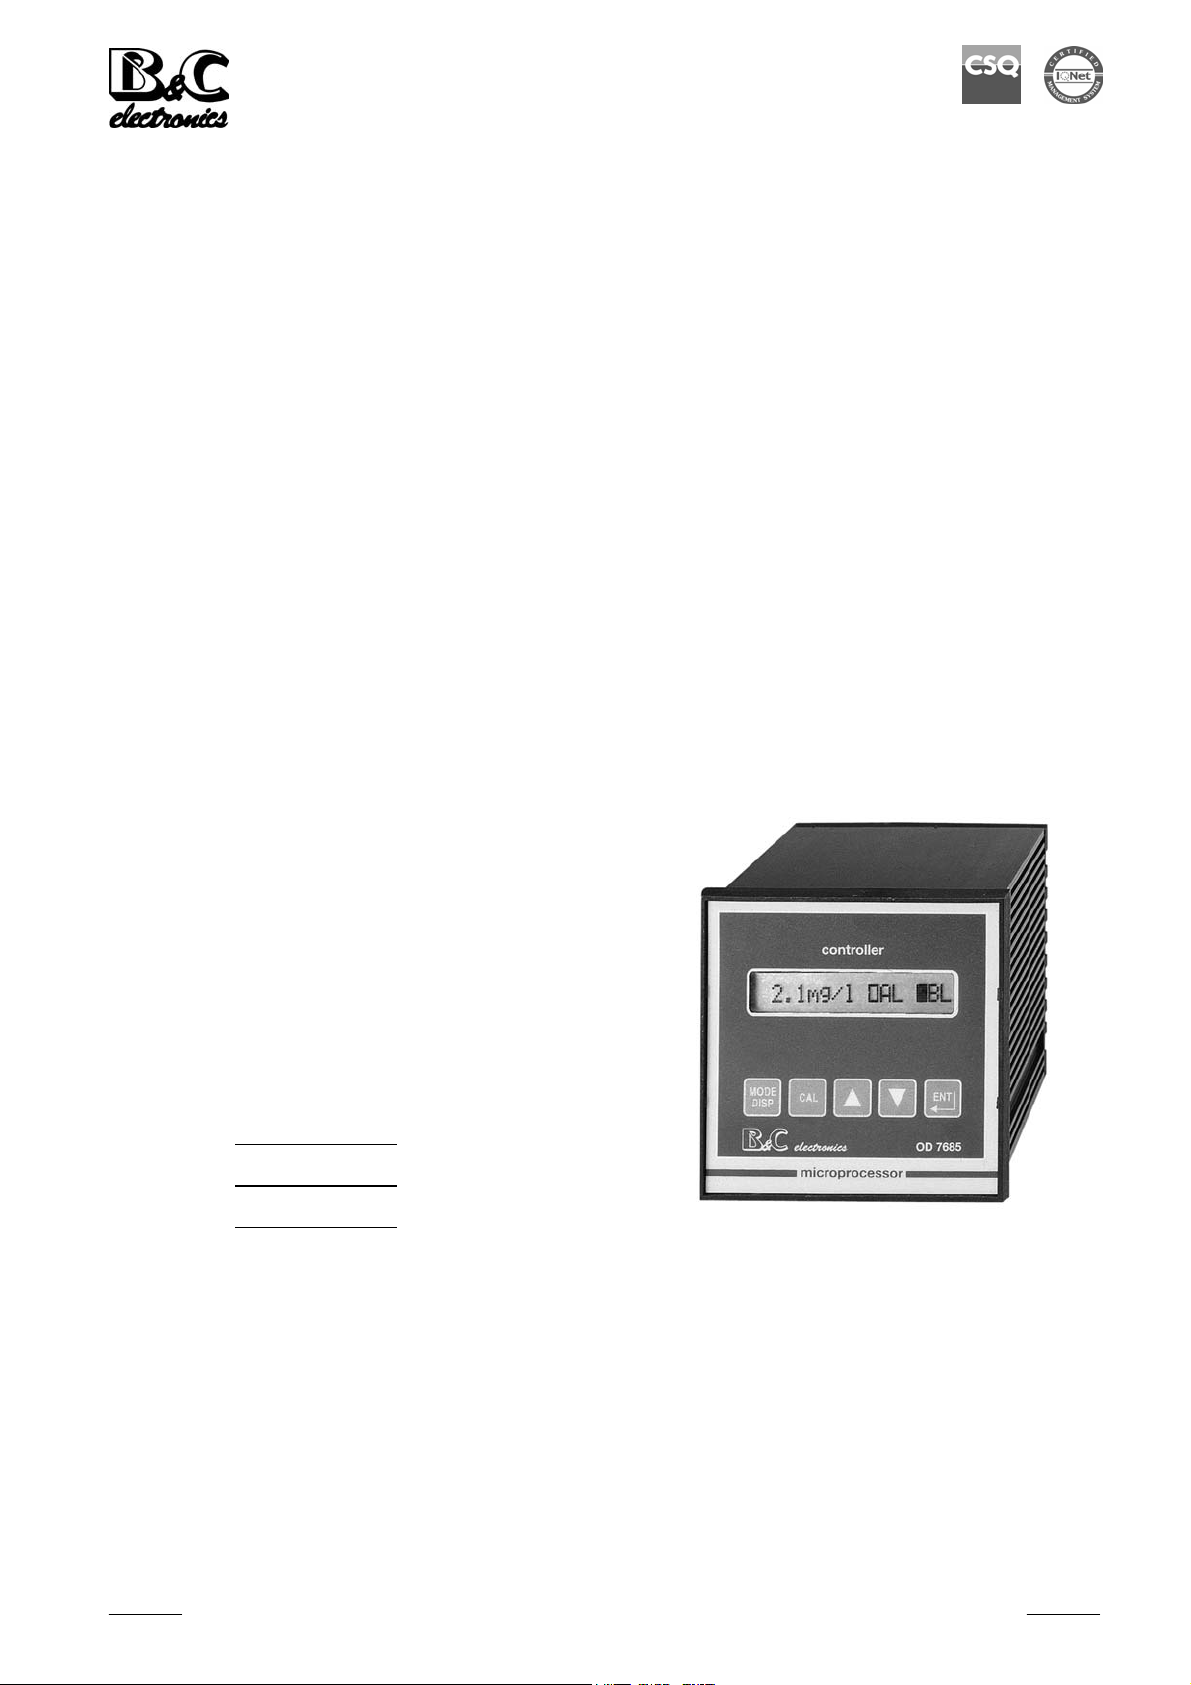
OD 7685
DISSOLVED OXYGEN CONTROLLER
MICROPROCESSOR BASED
D. Oxygen scales: 0/200.0 %air
0/200.0 mmHg
0/20.00 PPM
0/20.00 mg/l
Temperature scale: -2/+52 °C
Power supply: 110/220 Vac
Software: R2.2x
Option
S/N
REP N°
Valid for options 091.3711 e 091.601
Cod. 28006762 - Rev. D - 12/06
B&C Electronics Srl - Via per Villanova 3 - 20040 Carnate (Mi) - Italy - P.IVA 00729030965
Tel +39 039 63 1721 - Fax +39 039 607 6099 – bc@bc-electronics.it - www.bc-electronics.it

B&C Electronics OD 7685
Index
1 GENERAL .........................................................................................................................................4
1.1 Measuring principle..................................................................................................................5
1.2 Measuring system .....................................................................................................................5
1.3 Functional specifications ..........................................................................................................6
1.4 Physical specifications..............................................................................................................9
2 SPECIFICATIONS..........................................................................................................................10
3 INSTALLATION ............................................................................................................................14
3.1 Controller installation .............................................................................................................14
3.2 Sensor installation...................................................................................................................14
3.3 Electrical connections.............................................................................................................15
3.4 Operating the system ..............................................................................................................18
4 KEYBOARD ...................................................................................................................................20
5 READOUT SEQUENCES ..............................................................................................................21
6 CALIBRATION SEQUENCES ......................................................................................................27
6.1 Manual/automatic mode .........................................................................................................27
6.2 Zero and Sensitivity calibration..............................................................................................28
6.3 Secondary parameters calibration...........................................................................................34
6.4 Set-point A/B setting ..............................................................................................................37
6.5 Alarm setting ..........................................................................................................................39
6.6 Cleaning function ...................................................................................................................40
7 CONFIGURATION.........................................................................................................................43
7.1 Keyboard locked/unlocked .....................................................................................................43
7.2 LCD display contrast ..............................................................................................................43
7.3 Access number........................................................................................................................44
7.4 Cell type..................................................................................................................................44
7.5 Microtransmitter selection......................................................................................................45
7.6 Measuring unit........................................................................................................................45
7.7 Thermocompensation type......................................................................................................45
7.8 Thermocompensation coefficient ...........................................................................................45
7.9 Calibration mode ....................................................................................................................46
7.10 Polarization voltage ................................................................................................................46
7.11 Software filter .........................................................................................................................46
7.12 Input relared to analog output n°1 (Option 091.3711) ...........................................................47
7.13 Analog output n°1 range.........................................................................................................47
7.14 Input related to analog output n°2 (Option 091.3711)............................................................47
7.15 Analog output n°2 range.........................................................................................................48
7.16 Set-point A function ...............................................................................................................48
7.17 Set-point B function................................................................................................................48
7.18 Alarm on set-point A ..............................................................................................................49
7.19 Alarm on set-point B ..............................................................................................................49
7.20 Alarm relay C contacts ...........................................................................................................50
7.21 Cleaning function ...................................................................................................................50
Instruction Manual - Rev. D - 12/06
- 2 -

B&C Electronics OD 7685
7.22 Cleaning time (Relay d on).....................................................................................................50
7.23 Holding time ...........................................................................................................................50
7.24 New access number ................................................................................................................51
8 CALIBRATION...............................................................................................................................52
9 PREVENTIVE MANTENIANCE...................................................................................................54
10 TROUBLESHOOTING...................................................................................................................55
11 APPENDIX Nr. 1 (Valid for option 091.601) .................................................................................59
WARRANTY CERTIFICATE...............................................................................................................62
REPAIRS................................................................................................................................................62
TECHNICAL SUPPORT .......................................................................................................................63
Instruction Manual - Rev. D - 12/06
- 3 -

B&C Electronics OD 7685
1 GENERAL
The instrument structure has been designed considering the three way of use:
1) The user checks measuring values and the proper functioning of the instrument.
The user should consult the Chapters 1 and 2.
2) The user should define the operating parameters and carry out the periodic calibration.
The user can carry out the following choices and operations:
- operating with keyboard locked/unlocked
- manual/automatic operating mode
- selecting the values of Set-point, Hysteresis, and Delay time for the relay switching
- selecting the Minimum/maximum function and the alarm Delay time
- calibrations
- programming the Cleaning function
3) The user should operate the functioning choice required for the system in which the instrument is
used.
After the installation the instrument should be configured for the desired functioning.
Can be carried out:
- selections between possible options
- input numeric values within a fixed range
We suggest to follow the next steps:
1) in the Chapter 2 "Specifications", locate parameters marked with
"*" and the corresponding factory values in the "Default" column
2) make a list of changing in order to fit with the specific application
3) insert the "Configuration" access code to:
** select the Dissolved Oxygen sensor type
** select the measuring unit
- program the two Software Filter response time
- select the calibration mode
- program the Automatic Pressure Compensation (option)
- select the input for the analog output N°1 and N°2
- select the mA output range
- program the measuring value corresponding to 0/4 and 20 mA
** select the Min/Max function for the Set-Point A and B
- program the alarm action on the activation time for Set-point A and B
- program the Max. activation time for Set-point A and B
- select the Activated/Deactivated function for relay C
- program the Cleaning function (relay D)
- select the Access number to the Configuration
(The choice of the parameters marked ** is the minimum required for the use of the instrument).
Refer to the Chapter 7 "Configuration".
Instruction Manual - Rev. D - 12/06
- 4 -

B&C Electronics OD 7685
1.1 MEASURING PRINCIPLE
Polarographic method
The measurement is performed with a Polarographic sensor introduced by Clark and still represents
the more practical measuring system since it allows accurate and fast measurement as well as easy
calibration procedures.
The method consists of the Dissolved Oxygen diffusion through a membrane which divides the
sample from an electrolytic cell with a Silver Anode and a Platinum Cathode.
A suitable polarization Voltage generates a current flow which is proportional to the diffused
Dissolved Oxygen through the membrane.
The Oxygen in the cell will be restored by the continuous diffusion through the membrane. The result
is a great stability of the measurement.
Anyway the method is influenced by two physical factors: the Temperature and the sample speed.
Temperature effect
The membrane is affected by a contraction/dilatation at the Temperature variation, with the
consequence of a variation of the membrane porosity.
This changing modify the diffusion speed of the Dissolved Oxygen through the membrane and
consequently a different measuring.
This effect is compensated by the instrument by means of a Thermoresistance included in the
D.O. sensor.
Sample speed effect
The Oxygen diffusion through the membrane will decrease the concentration close to the membrane,
resulting in a reduction of the measuring value.
For this reason it is necessary to allow a continuous flow of the sample with a speed from 0,3 to 0,7
meter/second close to the membrane.
Avoid air bubbles in the sample that would affect the measuring accuracy.
1.2 MEASURING SYSTEM
The Dissolved Oxygen monitoring system consists of two parts:
- the measuring/regulating instrument which is discussed in this instruction manual
- the Dissolved Oxygen sensor
The system could be implemented with additional devices for field application:
B&C Electronics amplified sensor, Temperature sensor, recorder, remote display, ON-OFF regulators,
PID regulators, sensor Cleaning devices.
Instrument
This instrument carries out the following functions:
1) Dissolved Oxygen measuring when connected to the sensor
Instruction Manual - Rev. D - 12/06
- 5 -

B&C Electronics OD 7685
2) manual or automatic Dissolved Oxygen regulation, if suitable devices are connected to the output
relays
3) Temperature measuring, if an RTD Pt100 is connected
4) manual or automatic compensation of Temperature, Pressure, Salinity and Relative Humidity
effects
5) alarm devices activation when unexpected measuring and Set-point conditions happen
6) D.O. and/or Temperature acquisition, when connected to a Recorder or a Data Logger
7) sending data via a Serial interface, if the option 091.701 "RS232" is installed
8) external device activation for the sensor Cleaning
9) Barometric Pressure measuring if the option 091.601 is installed
Sensor
For the proper functioning of the system it is necessary to use the suitable sensor for each specific
application.
The sensor installation should allow a continuous contact with the sample, in a position with sufficient
stirring and exchange of sample.
In some applications the use of sensor Cleaning devices is suggested.
1.3 FUNCTIONAL SPECIFICATIONS
R2.2x Software specification updates
- Two Software Filter Time depending on the amplitude of the input signal changing
- Selectable access number to the Configuration
- Manual Temperature calibration even with sensor connected
- Sensor cleaning function
- Barometric Pressure reading (option)
- Sensor calibration in Immediate/Postponed mode
- Type of sensor and microtransmitter selection.
Input
The instrument accepts input from three sensors:
- Dissolved Oxygen sensor;
- Temperature sensor (Pt100);
- Barometric Pressure internal sensor (option).
Software Filter
The unit is provided with a programmable software filter, to be inserted when the readout is not stable.
The user may select different filter values for small and large signal fluctuations.
Instruction Manual - Rev. D - 12/06
- 6 -

B&C Electronics OD 7685
D.Oxygen sensor type
The following sensor type can be used:
- 3 polarographic sensor types with different Current in air;
- galvanic sensor;
- B&C Electronics amplified sensor (ST series)
An exclusive feature of the instrument allows to connect ST series sensors, amplified by the 080610.2
microtransmitter, for long distance applications.
Scales
The following D.O. measuring scales can be selected:
mmHg (partial pressure) - % (air saturation) - PPM - mg/litre.
The instrument holds the calibration data when changing the measuring scale.
Temperature compensation
The unit is supplied with manual or automatic Temperature compensation. The instrument detects of
the absence or malfunctioning of the Temperature sensor and automatically switches to manual
compensation.
Secondary parameters
The D.O. measuring is affected from Barometric Pressure, Salinity and Relative Humidity.
The programming of these parameters values avoids the use of the conversion tables.
As an option the automatic Barometric Pressure compensation can be implemented.
Analog output
Either a 0/20 mA or 4/20 mA programmable and isolated output may be selected, for use as an
interface with computers or data loggers.
The input range corresponding to the output is programmable.
Control relays
The monitor is equipped with two SPST control relays.
Each control relay may be programmed for set-point, high/low, hysteresis or delay time actuation.
The full display indicates the current settings and current status of each relay.
Alarm relay
The unit contains a third SPDT relay designated as an alarm relay.
This relay may be used to warn of conditions that may indicate operational problems.
The relay will activate on either high/low value conditions, or on failure of the control relays to
maintain proper control.
In addition this relay may be programmed for either normal or fail-safe operation.
Instruction Manual - Rev. D - 12/06
- 7 -

B&C Electronics OD 7685
Operating mode
The instrument is provided with 2 programmable modes of operation.
- Automatic operation:
The Automatic mode is the normal operation mode of the unit.
- Manual operation:
This mode of operation would normally be used for control system troubleshooting.
The unit will allow the relays to be manually actuated by pushing up/down keys.
The letter "M" flashing on the display, indicates the instrument is in manual operation mode.
Calibration
The sensitivity calibration in air can be automatically performed.
The manual calibration mode can be selected in two ways:
- immediate calibration;
the user immediately adjusts the measuring value;
- postponed calibration;
the instrument memorizes the sample value;
the user adjusts the memorized value after the laboratory analysis.
Cleaning function
The unit contains a SPST relay designated as an autoclean relay.
This relay may be used to start a manual or automatic autoclean cycle.
The user may select:
- the cleaning time
- the waiting time to turn to the normal operation
- the repetition time of the cycle
During the cleaning and waiting the unit will provide:
- flashing messages
- analog outputs in hold
- control and alarm relays deactivated
Configuration
A number of programming functions are provided in the Configuration menu and are protected by a
selectable access number, which must be entered to allow changes in this setting.
The keys on the front panel of the monitor can be used for both changing the display and for
calibrations and set-point adjustments.
When the monitor is shipped, all functions are accessible.
However, the adjustment and calibration functions may be locked in order to prevent unauthorized
adjustments to the instrument.
Instruction Manual - Rev. D - 12/06
- 8 -

B&C Electronics OD 7685
IMPORTANT NOTE: the factory configuration allows the immediate use of the instrument in main
applications.
Options
091.3711 Dual isolated and programmable output.
Two outputs may be configured for Concentration or Temperature.
091.701 RS232 isolated output.
The output sends the data (Concentration, °C) to the serial port of the computer.
091.404 24 VAC power supply.
091.4143 9/36 VDC power supply.
1.4 PHYSICAL SPECIFICATIONS
The controller enclosure is designed for surface or panel mounting.
It consists of an anodized aluminium case built according to the standard DIN 43700, with an
aluminium panel coated with scratch-proof and non-corrosive polycarbonate membrane.
A transparent waterproof front door SZ 7601 can be added to the housing, in order to protect the unit
from excessive moisture or corrosive fumes.
Signal and power cable connections are made by using two special extractable terminal blocks placed
in the back of the instrument.
This makes wiring, installation and general maintenance of the probes and other devices easier.
The package is supplied complete with fixing clamps for panel-mounting.
Instruction Manual - Rev. D - 12/06
- 9 -

B&C Electronics OD 7685
2 SPECIFICATIONS
The Default values are corresponding to the factory calibration values.
Parameters marked by " * " can be modified in the Configuration procedures.
Default
OPERATING MODE
Automatic/Manual Auto
SENSOR TYPE
* 250nA-P/45nA-P/300nA-P/30mV-G 250nA-P
* Microtransmitter: On/Off Off
Input from POLAROGRAPHIC CELL 250
Current in air input at 20°C: 200/400 nA 250 nA
* Thermocompensation: according to internal table/Coefficient Table
* TC selectable: 0/4 %/°C 2.3%
(table arranged for SZ654.1 cell with Vpol. 675 mV)
Input from POLAROGRAPHIC CELL 45 nA
Current in air input at 20°C: 25/75 nA 45 nA
* Thermocompensation: according to internal table/Coefficient Table
* TC selectable: 0/4 %/°C 2.3%
Input from POLAROGRAPHIC CELL 300 nA
Current in air input at 20°C: 170/510 nA 300 nA
* Thermocompensation: according to internal table/Coefficient Table
* TC selectable: 0/4 %/°C 2.3%
Polarization voltage: 0/1250 mV 675 mV
Input from GALVANIC CELL 30 mV
Voltage in air input at 20°C: 17/51 mV 30 mV
* Thermocompensation: according to internal table/Coefficient Table
* TC selectable: 0/4 %/°C 2.3%
Software filter 90% RT:
* Large signal variation: 0.4/20.0 sec. 2.0 sec
* Small signal variation: 0.4/20.0 sec. 10.0 sec
Ref. Temp. for the Thermocompensation: 20°C
* Scales: % air saturation: 0/200.0 % air % air sat
PPM: 0/20.00 PPM
mg/l: 0/20.00 mg/l
Partial pressure O2: 0/200.0 mmHg
Zero regulation: (+/- 3.00 nA/30 nA) +/- 10% air/20°C 0 nA
Sensitivity regulation: 55/170 % 100 %
Display accuracy at 20°C: 1/1000
Automatic calibration (function of Temp-Press-RH)
Manual calibration (function of the adjusted value)
Signalling of the calibration value stability reached
Instruction Manual - Rev. D - 12/06
- 10 -

B&C Electronics OD 7685
SECONDARY PARAMETERS
Pressure: 500/800 mmHg 760 mmHg
Salinity (Chloride): 0/60000 PPM 0 PPM
Relative Humidity: 0/100 % 50 %
TEMPERATURE
Input: RTD Pt100
Connections: 2/3 wires
Measuring and compensation range: -2/+52 °C
Accuracy: 0.1 °C
Zero adjustment: +/- 2°C 0°C
Manual temperature value range: 0/50°C 20°C
SET-POINT A/B
Set value (function of the scale): 0/200.0 % 0 %
Hysteresis (function of the scale): 0/20.0 % 0 %
Delay time: 0.0/99.9 sec 0 sec
* Function: HI/LO (Max/Min) LO
Relay contact: SPDT 220V 5Amp resistive
ALARM (CONTACT C-D)
Low value (function of the scale): 0/200.0 % 0.0 %
High value (function of the scale): 0/200.0 % 200.0 %
Delay time: 0.0/99.9 sec 0 sec
* Alarm for max. activation time on SA (Set-point A): ON/OFF OFF
* Max. activation time for SA: 0/60 minutes 60 min.
* Alarm for max. activation time on SB (Set-point B): ON/OFF OFF
* Max. activation time for SB: 0/60 minutes 60 min.
* Contact type (activated/deactivated): ACT/DEA ACT
Relay contact: SPST 220V 5Amp resistive
CLEANING (Relay D)
* Action: Disabled/Manual Clean/Auto+Manual Clean Disabled
Auto Clean:
Repetition time: 0.1/24.0h 24.0h
* Cleaning time: 0.5/60.0" 15.0"
* Hold time (hold of analog output,
deactivation of Set-point A and B and Alarm C): 0.1'/20.0' 3.0'
Relay contact: SPST (N.O.)
Instruction Manual - Rev. D - 12/06
- 11 -

B&C Electronics OD 7685
ANALOG OUTPUT N°1
* Input related to analog output
(only for option 091.3711): PPM/°C PPM
* Output range: 0-20/4-20 mA 0/20 mA
* Point 1 (corresponding to 0 mA or 4 mA): 0.0%
mmHg/%air: 0.0/200.0
PPM/mg/l: 0.00/20.00
* Point 2 (corresponding to 20 mA): 200.0%
mmHg/%air: 0.0/200.0
PPM/mg/l. 0.00/20.00
Response time: 2.5 sec approx. for 98 %
Isolation: 250 Vca
Rmax: 600 ohm
ANALOG OUTPUT N°2 (only for Option 091.3711) Default
* Input related to analog output: PPM/°C PPM
* Output range: 0-20/4-20 mA 0/20 mA
* Point 1 (corresponding to 0 mA or 4 mA): 0.0%
mmHg/%air: 0.0/200.0
PPM/mg/l: 0.00/20.00
* Point 2 (corresponding to 20 mA): 200.0%
mmHg/%air: 0.0/200.0
PPM/mg/l. 0.00/20.00
Response time: 2.5 sec approx. for 98 %
Isolation: 250 Vca
Rmax: 600 ohm
CONFIGURATION (*) Default
Free calibration (Access number not required):
keyboard locked/Unlocked Unlocked
LCD Display contrast (0/7) 4
Access number required:
Sensor type 250nA-P
Microtransmitter: On/Off Off
D.O. input scales: mmHg/%air/PPM /mg/l % air
Thermocompensation type: Table/Coefficient Table
Thermocompensation coefficient 2,3 %/°C
Calibration mode Immediate
Polarization voltage of the cell 675 mV
RT Large software filter 2.0 sec
RT Small software filter 10.0 sec
Input related to analog output N°1 (Option 091.3711) % air
Analog output N°1 range 0/20 mA
Point 1 (x mA minimum) 0.0
Point 2 (x mA maximum) 200.0
Input related to analog output N°2 (Option 091.3711) % air
Analog output N°2 range (Option 091.3711) 0/20 mA
Point 1 (x mA minimum) (Option 091.3711) 0.0
Point 2 (x mA maximum) (Option 091.3711) 200.0
Relay A function LO
Relay B function LO
Alarm for max. activation time on SA OFF
Max. activation time for SA 60 m
Alarm for max. activation time on SB OFF
Instruction Manual - Rev. D - 12/06
- 12 -

B&C Electronics OD 7685
Max. activation time for SB 60 m
Alarm relay contact function ACT
Cleaning function Disabled
Cleaning time 15.0 sec
Hold time 3.0 min
Configuration access code number: 0/999 0
GENERAL SPECIFICATION
Alphanumeric display: 1 line x 16 character
Acquisition time: 0,1"
Updating time for main measure: 0,4"
Operating Temperature: 0/50 °C
Ambient Humidity: 95% without condensation
Power supply: 110/220 Vac +/- 10% 50/60 Hz
Isolation: 4000 volt between primary and secondary (IEC 348)
Power consumption: 5 VA max.
Terminal boards: extractable
Net weight: 850 gr.
Housing: DIN 43700 96 x 96
Dimension: 96 x 96 x 155 mm.
Instruction Manual - Rev. D - 12/06
- 13 -

B&C Electronics OD 7685
3 INSTALLATION
Packing list
The instrument packaging contain:
- N° 1 instrument with serial number label
- N° 2 brackets for panel mounting
- N° 1 English instruction manual according to IEC N° 278 standard
- N° 1 warranty certificate with Technical Assistance card, included in the instruction manual.
Unpackagin of the instrument
1) Remove from the packaging the instruction manual containing the warranty certificate.
2) Open the packaging and remove the instrument enclosed in a plastic transparent bag.
3) Remove the transparent bag preserving the two brackets.
Storage
For long storage periods hold the instrument in a dry place.
3.1 CONTROLLER INSTALLATION
The instrument can be installed near the sensor or in a distant area, in the electrical cabinet.
The panel mounting should be made in a unbending surface, in a position protected from humidity,
corrosive fumes and casual collisions.
The picture 3 shows the instrument dimensions and the panel cut-out dimensions.
- Introduce the instrument in the cut panel.
- Mount the two fastening brackets on the two sides of the instrument, with the screw head
turned to the back of the instrument.
- Screw on the two fastening brackets until a complete blockage of the housing.
In the field mounting application, the use of a protection cabinet will assure a long time reliability; it is
also available a transparent cover with IP55 protection level (mod. SZ7601).
3.2 SENSOR INSTALLATION
See the instruction manual of the sensor.
Instruction Manual - Rev. D - 12/06
- 14 -

B&C Electronics OD 7685
3.3 ELECTRICAL CONNECTIONS
Safety rules
Before connecting the power supply to the instrument perform the followings check:
- check that the terminal 4 is connected to ground and that all connection are all correct
- check that the connection wires are well fastened to the terminal block
WARNING
The failure coming from erroneous connections is not covered by warranty
Refer to the back panel printing described in Figure 2.
All the connections are made with extractable terminal blocks on the back panel.
The power connections are on the lower terminal block (13 positions).
The input and output signals are on the upper terminal block (12 positions).
Connecting the power
- terminal 4 connect to the ground
- terminals 1-2 connect to the ac power (if power is 110 V)
- terminals 1-3 connect to the ac power (if power is 220 V)
(If 091.404 option is installed, connect 24 VAC to 1-3 terminals)
WARNINGS
- power the device by means of an isolation transformer
- avoid mains-voltage from an auto-transformer
- avoid mains voltage from a branch point with heavy inductive loads
- separate power supply wires from signal ones
- control the mains voltage value
- an internal device protects the unit against power overloads.
Disconnect the power and wait few minutes before powering again.
Connecting the Cell or Microtransmitter
- Use original cables suggested by the sensor manufacturer.
- Avoid interruption on the cable if a high insulation terminal block is not available.
Keep the cable away from power wires on the overall length.
Polarographic cell
- terminal 20_ connect to the cathode (Platinum electrode)
- terminal 19_ connect to the anode (Silver electrode)
- terminals 21-22_ install a jumper
Instruction Manual - Rev. D - 12/06
- 15 -

B&C Electronics OD 7685
Galvanic cell
- terminal 22_ connect to the cathode (Platinum or Silver electrode)
- terminal 21_ connect to the anode (Lead electrode)
- terminals 21-22_ remove the jumper
Sensor with microtransmitter
Refer to operating instruction of this special sensor.
Connecting the RTD
The Temperature readout and the automatic Temperature compensation is provided by connecting the
Pt100.
If the Temperature sensor is not connected or damaged, the unit will operate in manual Temperature
compensation automatically.
3-wire connection
- terminal 23 connect to the Pt100
- terminals 24 - 25 connect to the Pt100 common
2-wire connection
- terminals 23 - 24 connect to the Pt100
- terminals 24 - 25 install a jumper between terminals
Connecting a recorder
Connect to terminals 14-16 for the 1st channel output
Connect to terminals 15-16 for the 2nd channel output (091.3711 option)
- terminal 14 connect to the terminal (+) of the recorder N°1
- terminal 15 connect to the terminal (+) of the recorder N°2
- terminal 16 connect to the terminal (-) of the two recorder
Series connection is required for driving more loads having a total input Resistance lower than 600
ohm for each channel.
Connecting alarms, pumps, valves
Regulators output are available on the instrument terminal block by means of relay contacts relating to
set-point A and B.
RELAY "A" SET-POINT "SA"
terminal 6 marked C common contact
terminal 5 marked NO normally open contact
terminal 7 marked NC normally closed contact
Instruction Manual - Rev. D - 12/06
- 16 -

B&C Electronics OD 7685
RELAY "B" SET-POINT "SB"
terminal 9 marked C common contact
terminal 8 marked NO normally open contact
terminal 10 marked NC normally closed contact
RELAY "C" ALARM
terminal 12 marked C common contact
terminal 11 marked NO normally open contact
Arc suppressor
Install a suitable snubber between relay terminals if the relay activation causes interferences on the
display. (B&C Electronics snubber SX101)
Connecting cleaning system
To activate the external cleaning device, use the following relay contacts.
RELAY "D" SENSOR CLEANING
terminal 12 marked C common contact
terminal 13 marked NO normally open contact
Instruction Manual - Rev. D - 12/06
- 17 -

B&C Electronics OD 7685
3.4 OPERATING THE SYSTEM
Checking
Before connecting the system to the power supply:
- check that all cables are properly fastened to prevent strain on the connections
- check that all terminal-strip connections are mechanically and electrically sound
- check that power voltage is correct
Pre-operation check
The system's controls and indicators are all located on the front panel
(see Fig.1).
The meter has a LCD display 1 indicating that the unit is on.
The cards of the controllers are adjusted at the factory.
If sensors have been connected correctly, as described in the above sections, the system should
function correctly needing only the start up and the parameters calibrations as described in the
following section.
Quick start guide
The unit may be installed for the following purposes:
- measuring
- measuring and regulation
- measuring, regulation and recording
The instrument is shipped with factory calibration and configuration suitable for the most popular
applications.
For this reason the operation may require just the following steps:
measuring
1. Connect the cell to the meter.
2. Power the instrument.
The instrument will show the Display (D0).
3. The instrument is pre-configured for polarographic cell SZ654.1.
Access the Configuration menu to select other cell types.
From Display (D0) press 9 times ù to start the Configuration sequences
Eventually select the secondary parameters.
4. The instrument is pre-arranged for automatic calibration.
Perform the Dissolved Oxygen calibration in air.
Instruction Manual - Rev. D - 12/06
- 18 -

B&C Electronics OD 7685
measuring and regulation
Add the following to the preceding operations:
1. Press § ò £ to go to the manual operation. If the automatic mode is selected,
go to the step 2.
2. A and B relay are configured as LOW (Minimum).
Select HIGH (Maximum) if necessary.
3. Select the Set-point, the Hysteresis and the Delay of A and B relay. From (D0) press 4 times
ù to start the Set-point A selection sequence.
From (D0) press 5 times
4. The alarm on the activation time of A and B relay is deactivated.
Activate this kind of alarm if necessary.
5. Select alarm values of min/max and delay if necessary.
From (D0) press 6 times
measuring, regulation and recording
Add the following to the preceding operations:
1. Analog output is configured as PPM at 0/20 mA corresponding to the input scale.
Select 4/20 mA and a suitable input span if necessary.
2. If option 091.3711 is installed, follow the step 1. for the second output.
This option allows to select the analog output as °C scale.
Manual operation
When the instrument is programmed for the manual operation (see Calibration sequences) the flashing
"M" will appear on the display.
Analog outputs and alarm relay will remain activated.
ù to start the Set-point B selection sequence.
ù to start the alarm selection sequence.
ò while pressing the key, A relay will be activated.
ç while pressing the key, B relay will be activated.
Instruction Manual - Rev. D - 12/06
- 19 -
B&C Electronics OD 7685
4 KEYBOARD
KEY FUNCTION
ù
- it allows the operator to go to the next Display
- it allows to go back to the main Display.
The eventual new parameter values will not be memorized
- it allows the access of calibration sequences
§
- it allows to increase the displayed parameters
- it allows to choose between different functions
ò
- it allows to decrease the displayed parameters
- it allows to choose between different functions
ç
- it allows to enter the selected data and to return to the main Display D0
£
Instruction Manual - Rev. D - 12/06
- 20 -

B&C Electronics OD 7685
5 READOUT SEQUENCES
Applying the power to the instrument the display will shows for 3 seconds the type of cell selected,
then will shows the main Display (D0).
250nA-P nominal Current value for Polarographic cell
(45nA-P) " "
(300nA-P) " "
(30mV-G) nominal Voltage value for Galvanic cell
Press ù to visualize the following Display:
D0
O2 meter 250nAP
XXX %airM àAL ì BH
Dissolved Oxygen value,
set-point status/functions
D1
D2
D3
D4
D5
D6
D7
xxx.x%air xx.x°C
P:xxx sal: xxxxx
TEMP.: xx.x°CM
SA:xxx %air* à LO
SB:xxx %air* à HI
AL xxx/xxx %air
CLEANING OFF
Dissolved Oxygen and Temperature values
Barometric Pressure and Salinity values
for the compensation
Temperature value
Set-point A parameters
Set-point B parameters
Alarm Parameters
Cleaning function
D8
Instruction Manual - Rev. D - 12/06
01 xx.xmA/xxx %a
Analog output Nr.1 /input values
- 21 -

B&C Electronics OD 7685
D8BIS
02 xx.xmA/xxx %a
D9
Configuration
D10
----------------------------------
(D0)
Dissolved Oxygen value, set-point status/functions
xxx %air D.Oxygen value and measuring unit
(PPM)
(mg/l)
(mmHg)
(>>>>) value higher than the full scale (over range)
(<<<<) value is negative (under range)
(flashing) system in alarm
(M flashing) manual operating mode
ì A relay A deactivated
(è A) relay A with delayed activation
(à A) relay A activated
ì B relay B deactivated
(è B) relay B with delayed activation
(à B) relay B activated
L relay programmed for min. function (LO)
H relay programmed for max. function (HI)
MESSAGE MEANING
"CLEANING" cleaning cycle activated
"HOLDING" holding time cycle
OD7685 R2.2x
XXX %airM àAL ì BH
Analog output Nr.2 /input values
Configuration Display
Instrument code and Software release
§ to activate the procedure of the manual/automatic mode selection.
ù to go to
Instruction Manual - Rev. D - 12/06
- 22 -

B&C Electronics OD 7685
----------------------------------
(D1)
Dissolved Oxygen and Temperature values
xxx.x %air Dissolved Oxygen value (with one more digit)
and
measuring unit selected
xx.x°C Temperature value
§ to activate the calibration sequence.
xxx.x%air xx.x°C
ù to go to
----------------------------------
(D2)
Barometric Pressure and Salinity values of the sample
p: xxx Barometric Pressure value (mmHg)
sal: xxxxx Salinity value of the sample (PPM)
P:xxx sal: xxxxx
§ to activate the secondary parameters calibration sequence.
ù to go to
----------------------------------
(D3)
Temperature value
xx.x Temperature value
M Only in manual Temperature
value selection.
§ to activate the Temperature calibration or the procedure of the manual Temperature
TEMP.: xx.x°CM
ù to go to
Instruction Manual - Rev. D - 12/06
- 23 -

B&C Electronics OD 7685
----------------------------------
(D4)
Set-point A parameters
SA set-point A parameters
xxx %air set-point value in % of air
à set-point A status (relay activated)
LO selected function (minimum)
* alarm function on Set-point A is selected
§ to activate the Set-point value, Hysteresis and Delay time programming sequences.
SA:xxx %air* à LO
ù to go to
----------------------------------
(D5)
Set-point B parameters
SB set-point B parameters
xxx %air set-point value in % of air
à set-point B status (relay activated)
HI selected function (maximum)
* alarm function on Set-point B is selected
SB:xxx %air* à HI
§ to activate the Set-point value, Hysteresis and Delay time programming sequences.
ù to go to
----------------------------------
(D6)
Alarm parameters
AL Dissolved Oxygen values alarm (% air)
xxx Low alarm value
xxx.x High alarm value
§ to activate the Alarm value programming sequences.
AL xxx/xxx %air
Instruction Manual - Rev. D - 12/06
- 24 -

B&C Electronics OD 7685
ù to go to
----------------------------------
(D7)
Cleaning function
OFF cleaning function disabled
(ON) cleaning function enabled
MANUAL CLEAN manual cleaning activation
(AUTO CLEAN) automatic cleaning activation
§ to activate the Cleaning function programming sequences.
CLEANING OFF
ù to go to
----------------------------------
(D8)
Analog output N°1 value and input measuring value
01 analog output N°1
xx.xmA: current value output in mA
xxx %air input measuring value in % of air (PPM, mg/l, mmHg)
01 xx.xmA/xxx %a
ù to go to
----------------------------------
(D8BIS)
Analog output N°2 value and input measuring value
02 analog output N°2
xx.xmA: current value output in mA
xxx %air input measuring value in % of air (PPM, mg/l, mmHg, °C)
02 xx.xmA/xxx %a
ù to go to
Instruction Manual - Rev. D - 12/06
- 25 -

B&C Electronics OD 7685
----------------------------------
(D9)
Configuration display
§ to activate the Configuration sequences.
Configuration
ù to go to
----------------------------------
(D10)
Instrument P/N and Software Release
OD7685 instrument Part Number
R2.2x software release installed
OD7685 R2.2x
ù to go back to the main Display (D0)
Instruction Manual - Rev. D - 12/06
- 26 -

B&C Electronics OD 7685
6 CALIBRATION SEQUENCES
The following procedures are accessible only if the Keyboard is unlocked.
To unlock the keyboard follow the instruction of the Chapter 7 "Configuration".
Following procedures allow the operator to perform the sensors calibration and the Set-point/Alarm
parameters programming.
The sequence (1, 2, ....) helps the operator to following the regular calibration sequence.
IMPORTANT NOTE: During the calibration procedure the microprocessor turn the unit to the main
display if no keys have been pressed within 5 minutes (30 minutes for ISE calibration sequences).
6.1 MANUAL/AUTOMATIC MODE
Normally the instrument works in automatic mode.
Follows this procedure only to switch the instrument operating mode.
1. ù to go to
(D0)
2. § to access the operating mode selection
AUTO automatic mode
(MANUAL) manual mode
ù to stop the procedure
3. ò ç to select the operating mode
XXX %airM àAL ì BH
CAL MODE: AUTO
4. £ to confirm the selected operating mode and to go back to (D0)
MESSAGE MEANING
the new parameter is stored
and the instrument goes back to (D0)
Instruction Manual - Rev. D - 12/06
“ UPDATE “
- 27 -

B&C Electronics OD 7685
6.2 ZERO AND SENSITIVITY CALIBRATION
This procedure allows to:
- visualize the Zero Current value, to confirm the value and to go to the visualization of the
Sensitivity.
- access to the Zero calibration sequence
Before calibrating is necessary:
- to verify the correct programming of the Secondary parameters in D2.
- to prepare a solution without Dissolved Oxygen if Zero calibration has to be performed.
ZERO CALIBRATION
1. ù to go to
(D1)
2. § to access the calibration sequences.
x.x nA Zero Current value of the cell
ù to stop the procedure
£ to end the Zero calibration procedure and to go to the Sensitivity calibration
procedure (see next section)
3.
§ to access the Zero calibration procedures
xxx.x%air 20.0°C
Zero: x.xnA
x.x Current value from the cell
CAL Zero: x.x
ù to stop the procedure
ò + ç + £ press the three key to turn to factory calibration (Zero=0)
Instruction Manual - Rev. D - 12/06
- 28 -

B&C Electronics OD 7685
4. £ to end the Zero calibration procedure and to go to the Sensitivity calibration sequence.
MESSAGE MEANING
The calibration is accepted
Error messages
Zero > 10.0 %
£ to stop the error message.
The next message is displayed
The calibration is not accepted.
The instrument goes back to (D1).
See Chapter 10 “Troubleshooting” if error messages turn up.
SENSITIVITY CALIBRATION
The Sensitivity calibration can be performed in one of the three methods:
- immediate automatic calibration in air (procedure A)
- immediate manual calibration (procedure B)
- postponed manual calibration (procedure C)
The selection immediate or postponed is done in the Configuration menu
NOTE 1
Before memorizing the calibration value the instrument check for his stability showing the flashing
message 'R' (READY) until the stability is reached.
When the stability is reached, the instrument shows the steady message 'R' .
If the stability is not reached for several causes, the operator can go ahead with the procedure by
“ UPDATE “
Z > 10.0%
“ NO UPDATE “
pressing £ . In this case the instrument will show for approx. 1" the message:
NOTE 2
At the end of the Sensitivity calibration procedure the instrument will show one of the following
messages:
Instruction Manual - Rev. D - 12/06
' Skip Stability '
- 29 -

B&C Electronics OD 7685
MESSAGE MEANING
The calibration is accepted
Error messages
Sensitivity > 170.0%
Sensitivity < 55.0%
The above mentioned messages remain
for 5 minutes.
£ to stop the messages readout and to
show:
The calibration is not accepted and the
instrument goes back to (D1).
See Chapter 10 “Troubleshooting” if error messages turn up.
After the Zero calibration, the procedure begins with the following display:
xxx.x Sensitivity value
“ UPDATE “
SENS > 170.0%
SENS < 55.0%
“ NO UPDATE “
SENS: xxx.x%
ù to stop the procedure
£ to end the Sensitivity calibration procedure and to go back to (D1)
1. § to access the selection of manual or automatic calibration mode
AUTO (MANUAL) automatic mode calibration (manual)
ù to stop the procedure and to go back to (D1)
Instruction Manual - Rev. D - 12/06
CAL O2:AUTO/air
- 30 -

B&C Electronics OD 7685
2. ò ç to select the calibration mode
3. £ - to confirm the calibration mode selected
- to go to the Sensitivity calibration sequence in automatic (procedure A) or manual
(procedures B or C).
(procedure A.) AUTOMATIC SENSITIVITY CALIBRATION
It is the regular calibration method, therefore it is automatically proposed at this point of the
procedure.
Refer to the Chapter 8 "Calibration".
Carry out the following operations:
- remove the cell from the sample
- make sure that the sensor is dry
- bring the sensor in air with a known Relative Humidity
xx.x Temperature value
Before proceeding, check for the Temperature value stability, to avoid calibration errors.
CHECK TEMP.:x.xx
ù to stop the procedure and to go back to (D1)
4A. £ to access the calibration procedure
xxx.x Dissolved Oxygen measuring value
R measuring stability indicator
A automatic calibration procedure
ù to stop the procedure and to go back to (D1)
ò + ç + £ press the 3 keys to turn to the Sensitivity factory calibration and to go back to (D1)
5A. £ to end the calibration procedure and to go back to (D1)
See Chapter 10 “Troubleshooting” if error messages turn up.
CAL O2: xxx.xR A
Instruction Manual - Rev. D - 12/06
- 31 -

B&C Electronics OD 7685
(procedures B. and C.) MANUAL SENSITIVITY CALIBRATION
Two types of manual calibration can be selected in the "Configuration" menu:
- Immediate calibration (procedure B.)
- Postponed calibration (procedure C.)
IMMEDIATE CALIBRATION
It is suitable when the D.Oxygen contents are stable or known.
The Display will show for few seconds the message:
then the following Display will be shown:
xxx.x Dissolved Oxygen measuring value
R measuring stability indicator
M: manual calibration procedure
IMMEDIATE CAL
CAL O2: xxx.xR M
ù to stop the procedure and to go back to (D1)
ò + ç + £ press the 3 keys to turn to the Sensitivity factory calibration and to go back to (D1)
4B. ò ç press the keys to adjust the D.O. value
£ to end the calibration and to go back to (D1).
5B.
POSTPONED CALIBRATION
It is suitable when the D.Oxygen contents are not stable or unknown.
The Display will show for few seconds the message:
VAL. REC. sample value memorization
SAMPLE VAL. REC.
Instruction Manual - Rev. D - 12/06
- 32 -

B&C Electronics OD 7685
xxx.x Dissolved Oxygen measuring value
R measuring stability indicator
M: manual calibration procedure
CAL O2: xxx.xR M
ù to stop the procedure and to go to (D1)
ò + ç + £ press the 3 keys to turn to the Sensitivity factory calibration and to go back to (D1)
Withdraw a sample to check the concentration:
4C. £ to memorize D.O. value of the sample; the following message will be displayed:
After few seconds the instrument goes back to Display (D1) and it is ready to continue in the normal
operation.
To end the postponed Sensitivity calibration it is necessary:
- to have the correct Dissolved Oxygen value from the analyzed sample
- to select the Display (D1)
- to access again to the manual Sensitivity calibration procedure
The display will show the message:
Afterwards the Display will show the previous memorized value
xxx.x D.O. value to be changed according to the analyzed sample value
SAMPLE V. UPDATE
SAMPLE V. ADJUST
SAMPLE V.: xxx.x
ù to stop the procedure and to go to (D1)
ò + ç + £ press the 3 keys to turn to the Sensitivity factory calibration
5C. ò ç to adjust the D.O. value
Instruction Manual - Rev. D - 12/06
- 33 -

B&C Electronics OD 7685
6C. £ to end the postponed Sensitivity calibration value and to go back to (D1)
See Chapter 10 “Troubleshooting” if error messages turn up.
6.3 SECONDARY PARAMETERS CALIBRATION
This procedure allows programming the following parameters:
- Barometric Pressure
- Salinity
- Relative Humidity
- Temperature
These parameters will be used by the instrument to access the memorized compensation table.
1. ù to go to
(D2)
xxx Pressure value
xxxxx Salinity value
2. § to access the calibration sequence
Barometric Pressure calibration
p xxx mmHg Barometric Pressure value selected
ù to stop the procedure and to go back to (D2)
P:xxx sal: xxxxx
CAL p: xxx mmHg
3. ò ç to program the Pressure value
4. £ to confirm the new value and to go to the Salinity Calibration procedure
Instruction Manual - Rev. D - 12/06
- 34 -

B&C Electronics OD 7685
MESSAGE MEANING
the new value has been memorized
Salinity calibration
xxxxx PPM Salinity value selected
ù to stop the procedure and to go back to (D2)
ò ç to program the Salinity value
5.
“ UPDATE “
CAL sal:xxxxxPPM
6.
£ to confirm the new value and to go to the Relative Humidity calibration procedure
MESSAGE MEANING
the new value has been memorized
Relative Humidity calibration
xxx% Relative Humidity value selected
ù to stop the procedure and to go back to (D2)
7. ò ç to program the Relative Humidity value
“ UPDATE “
CAL RH: xxx%
8. £ to confirm the new value and to go back to (D2)
Instruction Manual - Rev. D - 12/06
- 35 -

B&C Electronics OD 7685
MESSAGE MEANING
the new value has been memorized
Temperature calibration
This calibration should be performed with a reference Thermometer.
1. ù to go to
(D3)
xx.x Temperature value
M manual Temperature mode
“ UPDATE “
TEMP.: xx.x°CM
2. § to access the Pt100 Zero calibration procedure
T Pt100 Zero calibration
xx.x measuring Temperature value
ù to stop the procedure and to go back to (D3)
3. ò ç to adjust the Temperature value
£ to confirm the new value and to go to manual Temperature value calibration
4.
_
CAL T: xx.x°C
CAL T.M.: xx.x°C
ù to stop the procedure
5. ò ç to program the manual Temperature value
6. £ to confirm and to go back to (D3)
Instruction Manual - Rev. D - 12/06
- 36 -

B&C Electronics OD 7685
MESSAGE MEANING
the new values has been memorized
Error messages
Zero PT100 > 2.00 °C
This message will be shown for 5 minutes.
£ to acknowledge the error message
The calibration is not accepted
The unit goes back to (D3)
“ UPDATE “
Z> 2.00°C
“ NO UPDATE “
6.4 SET-POINT A/B SETTING
For each set-point it is possible:
- to insert the set-point
- to insert the hysteresis
- to insert the delay time
1. ù to go to:
(D4)
(D5)
The following procedures are suitable for both set-point A and B.
Set value
SA:xxx %air* à LO
SB:xxx %air* à HI
2. § to access the calibration sequences
SA Set-point A calibration
xxx.x Set-point value
ù to stop the procedures
Instruction Manual - Rev. D - 12/06
CAL SA S:xxx.x
- 37 -

B&C Electronics OD 7685
3. ò ç to insert the Set-point value
4. £ to confirm and to go to the next step
xx.x Actual Hysteresis value
ù to stop the procedure
5. ò ç to insert the Hysteresis value
CAL SA I: xx.x
6. £ to confirm and to go to the delay time insertion
xx.xs Actual Delay Time value (in seconds)
ù to stop the procedure
7. ò ç to insert the Delay Time value
8. £ to confirm and to go back to (D4)/(D5)
The calibration is accepted.
CAL SA D: xx.xs
“ UPDATE “
Instruction Manual - Rev. D - 12/06
- 38 -

B&C Electronics OD 7685
6.5 ALARM SETTING
This procedure allows to:
- select the min/max alarm value
- select the Delay Time alarm value
1. ù press the key to go to:
(D6)
2. § to access the calibration sequence
AL L low alarm calibration
xxx.x actual low alarm value
AL xxx/xxx %air
CAL AL L:xxx.x
ù to stop the procedure
3. ò ç to insert the alarm value
4. £ to confirm and to go to the high alarm insertion
AL H high alarm calibration
xxx.x actual high alarm value
ù to stop the procedure
5. ò ç to insert the alarm value
CAL AL H: xxx.x
6. £ to confirm and to go to the Delay Time selection
Instruction Manual - Rev. D - 12/06
- 39 -

B&C Electronics OD 7685
AL D Delay alarm calibration
xx.xs Delay Time value (in seconds)
ù to stop the procedure
7. ò ç to insert the Delay value
8. £ to confirm the new value and to go back to (D6)
the calibration is accepted
CAL AL D: xx.xs
“ UPDATE “
6.6 CLEANING FUNCTION
1. ù to go to
(D7)
CLEANING OFF Cleaning function disabled
(MANUAL CLEAN) Cleaning function with manual activation
(AUTO CLEAN) Automatic Cleaning function
2. § to access the Cleaning function parameters calibration
Manual clean
The following message will be shown:
WAITING the unit is waiting to start a Cleaning cycle
(START) cleaning cycle starting
CLEANING OFF
CLEAN C.: WAITING
Instruction Manual - Rev. D - 12/06
- 40 -

B&C Electronics OD 7685
ù to stop the procedure
3A. ò ç to select START or WAITING
4A.£ to confirm the selected option
- By selecting START the instrument begins a manual Cleaning cycle and
the (D0) Display will be shown.
- By selecting WAITING the instrument go back to (D7)
Automatic functioning (AUTO CLEAN)
The instrument will show the waiting time for the next Cleaning cycle
xx.xh Waiting time for the next cycle (hours)
NEXT CYCLE: xx.xh
ù to stop the procedure
ò + ç + £ press the 3 keys to reset the waiting time.
3B. £ visualization of waiting condition for the next cycle
WAITING the unit is waiting to start a Cleaning cycle
(START) the unit begins a manual Cleaning cycle
ù to stop the procedure
4B. ò ç to select START or WAITING
5B. £ to confirm the selected option
CLEAN C.: WAITING
- By selecting START the instrument begins an extra manual cycle and then go to
the (D0) Display.
- By selecting WAITING the instrument will go to the Cleaning cycle repetition
Time calibration
Instruction Manual - Rev. D - 12/06
- 41 -

B&C Electronics OD 7685
REPETITION:xx.xh
xx.xh: Cleaning cycle repetition time (hours)
ù to stop the procedure
6B. ò ç to insert the Cleaning cycle repetition time
7B. £ to confirm the new value and to go back to (D7)
Instruction Manual - Rev. D - 12/06
- 42 -

B&C Electronics OD 7685
7 CONFIGURATION
The following operations are possible:
- keyboard locked/unlocked selection
- display contrast selection
- access number insertion
1. ù to go to
(D9)
2. § to access the Configuration sequences
Configuration
7.1 KEYBOARD LOCKED/UNLOCKED
Unlocked (Locked) Keyboard unlocked (locked)
ù to go back to (D9)
ò ç to select locked or unlocked
3.
4.
£ to confirm and to go to the next step
KB UNLOCKED
7.2 LCD DISPLAY CONTRAST
This procedure allows the operator to select up to 7 different levels of Display Contrast, in a way to
get a better visibility of the Display.
x Contrast level
LCD contrast: x
ù to go back to (D9)
Instruction Manual - Rev. D - 12/06
- 43 -

B&C Electronics OD 7685
1. ò ç to select the Contrast from 0 to 7
2. £ to confirm and to go to the access number insertion
7.3 ACCESS NUMBER
0 Access number request
ù to go back to (D9)
Access Nr.: 0
1. ò ç to insert the access number (when keeping the key pressed the number will scroll
with 3 speed levels)
2. £ to confirm and to proceed with the configuration
MESSAGE MEANING
a wrong number has been selected;
it is only allowed the visualization of the
parameters and not the modification.
‘Cal Inhibition’
7.4 CELL TYPE
250nA-P (polarographic cell with 250 nA in air)
(45nA-P) (polarographic cell with 45 nA in air)
(300nA-P) (polarographic cell with 300 nA in air)
(30mV-G) (galvanic cell with 30 mV in air)
Input: 250 nA-p
Active keys:
ù - ò ç - £
Instruction Manual - Rev. D - 12/06
- 44 -

B&C Electronics OD 7685
7.5 MICROTRANSMITTER SELECTION
By using a sensor with microtransmitter (080610.2) the option ON has to be selected.
OFF Microtransmitter input disabled
(ON) Microtransmitter input enabled
Active keys: ù - ò ç - £
Microt.: OFF
7.6 MEASURING UNIT
%air scale in % of air saturation
(PPM) scale in PPM
(mg/l) scale in mg/l
(mmHg) scale in mm of Mercury
O2 Scale: %air
Active keys: ù - ò ç - £
7.7 THERMOCOMPENSATION TYPE
TABLE the instrument use the memorized tables
(COEFF.) the instrument use the Thermocompensation Coefficient
Active keys:
By selecting COEFF. the instrument will go to the Coefficient selection procedure.
TERMOC.: TABLE
ù - ò ç - £
7.8 THERMOCOMPENSATION COEFFICIENT
x.xx Thermocompensation Coefficient value
CAL TC: x.xx%/°C
Active keys:
Instruction Manual - Rev. D - 12/06
ù - ò ç - £
- 45 -

B&C Electronics OD 7685
7.9 CALIBRATION MODE
IMM Immediate calibration mode
(POST) Postponed calibration mode
Active keys: ù - ò ç - £
MODE OF CAL:IMM.
7.10 POLARIZATION VOLTAGE
xxx Polarization Voltage value
Adjust the Polarization Voltage by means of the trimmer accessible removing the back panel.
CAL Pol.: xxxmV
Active keys: ù - ò ç - £
7.11 SOFTWARE FILTER
Large s RT Response time for wide variations
xx.xs Response time value(sec.)
Active keys: ù - ò ç - £
Small s RT Response time for small variations
xx.xs Response time value (sec.)
Active keys: ù - ò ç - £
Large s RT:xx.xs
Small s RT:xx.xs
Instruction Manual - Rev. D - 12/06
- 46 -

B&C Electronics OD 7685
7.12 INPUT RELARED TO ANALOG OUTPUT N°1 (OPTION 091.3711)
%air (PPM, mg/l, mmHg) input related to output N°1 (°C)
Active keys: ù - ò ç - £
CAL OUT1:%air
7.13 ANALOG OUTPUT N°1 RANGE
0/20mA (4/20mA) output range
Active keys: ù - ò ç - £
P1 begin of the range
xxx.x measuring value related to 0(4) mA.
CAL OUT1: 0/20mA
CAL P1:xxx.x%air
Active keys: ù - ò ç - £
P2 end of the range
xxx.x measuring value related to 20 mA.
Active keys:
IMPORTANT NOTE: If the value related to P1 is lower than the value related to P2, the analog
output will be "Direct", otherwise it will be "Reverse".
CAL P2:xxx.x%air
ù - ò ç - £
7.14 INPUT RELATED TO ANALOG OUTPUT N°2 (OPTION 091.3711)
%air (PPM, mg/l, mmHg) input related to output N°2 (°C)
CAL OUT2: %air
Active keys: ù - ò ç - £
Instruction Manual - Rev. D - 12/06
- 47 -

B&C Electronics OD 7685
7.15 ANALOG OUTPUT N°2 RANGE
0/20mA (4/20mA) output range
Active keys: ù - ò ç - £
P1 begin of the range
xxx.x measuring value related to 0(4) mA
Active keys: ù - ò ç - £
P2 end of the range
xxx.x measuring value related to 20 mA.
CAL OUT2: 0/20mA
CAL P1:xxx.x%air
CAL P2:xxx.x%air
Active keys: ù - ò ç - £
IMPORTANT NOTE: If the value related to P1 is lower than the value related to P2, the analog
output will be "Direct", otherwise it will be "Reverse".
7.16 SET-POINT A FUNCTION
F function
LO (HI) minimum (maximum)
Active keys: ù - ò ç - £
SET A F.: LO
7.17 SET-POINT B FUNCTION
F function
LO (HI) minimum (maximum)
SET B F.: LO
Active keys: ù - ò ç - £
Instruction Manual - Rev. D - 12/06
- 48 -

B&C Electronics OD 7685
7.18 ALARM ON SET-POINT A
ON (OFF) alarm enabled (disabled)
Active keys: ù - ò ç - £
- By selecting OFF the alarm function is not activated.
The unit goes to the next parameter calibration.
- By selecting ON the alarm function is activated. (When the relay B will be active
longer than the time selected in the following procedure).
xx m Activation time selected (minutes)
AL SET A: ON
TIME SET A: xx m
Active keys: ù - ò ç - £
7.19 ALARM ON SET-POINT B
ON (OFF) alarm enabled (disabled)
Active keys: ù - ò ç - £
- By selecting OFF the alarm function is not activated.
The unit goes to the next parameter calibration.
- By selecting ON the alarm function is activated. (When the relay B will be active
longer than the time selected in the following procedure).
xx m Activation time selected (minutes)
AL SET B: ON
TIME SET B: xx m
Active keys: ù - ò ç - £
Instruction Manual - Rev. D - 12/06
- 49 -

B&C Electronics OD 7685
7.20 ALARM RELAY C CONTACTS
Select one of the following Display:
ACT (DEA) relay activated (deactivated) when the alarm is active
Active keys: ù - ò ç - £
IMPORTANT NOTE: By selecting DEA, it is necessary to modify some Jumpers on the Power
supply board (contact the Service Department).
AL RELAY: ACT
7.21 CLEANING FUNCTION
CAL CF Cleaning function calibration
DISABLED Cleaning function disabled
(MANUAL) Manual cleaning function
(AUTO) Automatic cleaning function
CAL CF:DISABLED
Active keys: ù - ò ç - £
7.22 CLEANING TIME (RELAY D ON)
xx.x" Cleaning time (sec.)
Active keys: ù - ò ç - £
CLEANING T:xx.x”
7.23 HOLDING TIME
xx.x' Waiting time between two cleaning cycle (min)
Active keys: ù - ò ç - £
HOLDING T:xx.x’
Instruction Manual - Rev. D - 12/06
- 50 -

B&C Electronics OD 7685
7.24 NEW ACCESS NUMBER
NO (YES) access number changing not required (required)
Active keys: ù - ò ç - £
- By selecting NO the unit will go to the Configuration display
- By selecting YES the unit will go to the following display:
xxx actual access number
Change A Nr.:NO
New Nr.: xxx
Active keys: ù - ò ç - £
The instrument ask the operator to insert again the new access number.
xxx actual access number
The double insertion of the new access number assures the memorization of the
right code.
As soon as the new number is memorized the message "UPDATE" will appear.
Should the operator insert two different numbers, the instrument will not modify the
access number and the message "NO UPDATE" will be shown.
£ Press several time the key to verify the selected parameters before leaving
the Configuration routine.
Confirm Nr.:xxx
ù Press to exit from the Configuration menu.
Instruction Manual - Rev. D - 12/06
- 51 -

B&C Electronics OD 7685
8 CALIBRATION
Zero cell calibration
The Zero cell calibration is necessary at the start up of the system, after the installation of a new cell
and after the cell maintenance is done.
The calibration consists of the Zero Current compensation, setting the cell response to the standard
operating condition of the instrument.
The calibration sequence consists of a Zero value visualization, in order to perform the new Zero
calibration or to maintain the previous one.
Dip the sensor in a 2% of Sodium Sulphite solution. The solution should be made at the time of
calibration to assure the total lack of Dissolved Oxygen during the calibration.
When the measuring is steady and close to Zero, perform the calibration following the instruction in
Chapter 6.2 “Zero and Sensitivity calibration”.
After the calibration rinse the sensor with clean water.
The Zero solution can be stored for few days in a dark bottle, without any trace of air.
Sensitivity cell calibration
This calibration can be manually or automatically performed.
In the usual application the automatic calibration in air is performed.
This method is fast and quite accurate.
Operate as follow:
- Verify that the Pressure, Salinity and Relative Humidity values selected correspond to the real
values.
- Select the automatic mode calibration
- Remove the cell from water, let the Temperature value stabilize in air and press the
- verify the stability of the Dissolved Oxygen value on the Display and press the £ key for the
autocalibration.
If the measured value is not steady it is necessary to evaluate if proceeding with the calibration or
stopping the procedure and check the cell.
As alternative the manual calibration requires the use of a sample with a known D.Oxygen
concentration.
Since it is very difficult to have this type of sample, because of some factors that influence the Oxygen
concentration (Temperature, Salinity, Barometric Pressure, Oxygen concentration in air), this method
is normally used for special applications.
Instruction Manual - Rev. D - 12/06
£ key.
- 52 -

B&C Electronics OD 7685
Temperature calibration
From display (D0) press ù to access the Temperature calibration sequences.
Immerse the sensor in a liquid with a known Temperature value and verify the correspondence of the
measuring.
To adjust the reading, follows the first four points of the procedure described in Chapter 6.3.
“Secondary parameters calibration”
Electrical check
The following procedures can be used to verify the correct operation of the instrument, eventually they
should be performed periodically in the calibration checks.
- Turn back the instrument to Zero and Sensitivity factory calibration and proceed as follows:
Polarographic cell
- Connect to terminals 19-20 of the instrument a cell Simulator
(for instance the mod. OD 105.1 of B&C Electronics).
- Simulate the value 0 nA and check for the value 0.0 on the display.
- Simulate the value 30 nA or 250 nA or 300 nA depending on the type of polarographic cell
installed.
In This condition the display will shows 100 %.
Should the instrument measure different values send it back to B&C Electronics.
Galvanic cell
- Connect to terminals 21-22 of the instrument a mV generator.
- Simulate the value 0 mV and check for the value 0.0 on the display.
- Simulate the value 30 mV and check for the value 100% on the display.
Should the instrument measure different values send it back to B&C Electronics.
Instruction Manual - Rev. D - 12/06
- 53 -

B&C Electronics OD 7685
9 PREVENTIVE MANTENIANCE
Instrument
The use of high quality electronics components, gives to the instrument a great reliability.
The maintenance frequency is depending of each application.
As for any electronic instrument the mechanical components like relays and the terminal blocks, are
the parts subjected to failure.
If the instrument has been supercharged, remove the power supply for 5/10 minutes to allow the reset
of the protections.
Check that connections in the terminal blocks are clean and dry.
Sensor
The sensor maintenance is prescribed by sensors manufacturer.
Store the sensor with the membrane wet in order to avoid the electrolyte loss.
Remove deposits from the membrane by rinsing with water, eventually using detergents, to avoid the
reduction of the membrane life.
Change periodically the membrane and the electrolyte, especially when the measuring response
becomes slow and the Zero Current value is too high.
Normally if the Zero value is reached in more than 30 seconds (when the cell is dipped in Zero
solution) the change of the membrane and the electrolyte is suggested.
During the membrane changing, avoid any touch of the cathode which is located in the centre of the
cell, close to the membrane.
The use of cleaning systems keep the sensor more efficient and reduce the membrane/electrolyte
changing frequency.
Instruction Manual - Rev. D - 12/06
- 54 -

B&C Electronics OD 7685
10 TROUBLESHOOTING
In case of problems in the functioning of the measuring and regulation system it is necessary to locate
were they come from:
- wrong connections
- measuring cell maintenance
- measuring cell failure
- wrong configuration of the instrument
- instrument failure
The following table shows the possible cause and relative remedy for the main problems in the
instrument use.
PROBLEM
LCD extinguished Power not connected.
Unacceptable measure Instrument calibration
Error messages in the
Zero calibration
Error messages in the
Sensitivity calibration
Error messages in the
Pressure calibration
The regulation doesn't
work
Relay chattering if the
measuring is close to the
Set-point
The recorder doesn't
work properly
PROBABLE CAUSE
Over Voltage
Wrong compensation value.
Instrument failure
Cell maintenance.
Cell failure
Cell maintenance.
Cell failure.
Wrong type of cell selected
Pressure sensor failure Send back the instrument to B&C
Relay contacts wrong
selection.
Instrument failure
Interferences on the signal Connect to the ground the instrument
Recorder not connected or
damaged.
Wrong configuration of the
analog output.
Instrument failure.
REMEDY
Check the power supply.
Wait 10 Sec. for the reset of the
protections
Calibrate the instrument.
Check the compensation of °C-P-UR.
Send back the instrument to B&C
Regeneration of the cell.
Change the cell.
Regeneration of the cell.
Change the cell.
Verify the configuration of the cell type
Verify the relay operating mode
selection.
Send back the instrument to B&C
and the sample.
Increase the RT filter SW.
Increase the Delay time.
Increase the Hysteresis.
Check the connections.
Check the analog output configuration.
Send back the instrument to B&C
Instruction Manual - Rev. D - 12/06
- 55 -

B&C Electronics OD 7685
FRONT PANEL
electronics
1. Display
2. Mode-display key
3. Calibration key
4. Increase key
5. Decrease key
6. Enter key
Fig. 1
Instruction Manual - Rev. D - 12/06
- 56 -

B&C Electronics OD 7685
REAR PANEL CONNECTIONS
1.2. Power supply 110 V
1.3. Power supply 220 V
4. Ground
5.6. Relay A – contact N.O.
6.7. Relay A – contact N.C.
8.9. Relay B – contact N.O.
9.10. Relay B – contact N.C.
11.12. Relay C – contact N.O. (alarm)
12.13. Relay D – contact N.O. (cleaning)
14. Analog output N°1 (+)
15. Analog output N°2 (+)
16. Analog output (-) common
17.18.21.22. Microtransmitter input
23.24.25. Pt100 input
POLAROGRAPHIC CELL GALVANIC CELL
19. Input Ag (anode) 21. Input Pb (anode)
20. Input Pt (cathode) 22. Input Ag (cathode)
21.22. External jumper
Fig. 2
Instruction Manual - Rev. D - 12/06
- 57 -

B&C Electronics OD 7685
DIMENSIONS
electronics
DRILL PLAN
Fig. 3
Instruction Manual - Rev. D - 12/06
- 58 -

B&C Electronics OD 7685
11 APPENDIX NR. 1 (VALID FOR OPTION 091.601)
The instrument equipped with this option can measure the Barometric Pressure.
The measuring value can be used to access the conversion table.
The measuring sensor is installed inside the instrument.
In the Configuration procedure it is possible to disable the Pressure measurement and to use the
selected manual value.
In case of sensor failure, the instrument automatically switch to manual Pressure value.
Technical specifications
Change the secondary parameters technical specification with the followings:
Default
SECONDARY PARAMETERS
Barometric Pressure measuring:
Sensor type: absolute (40 mV/760 mmHg)
Sensor sensitivity: 80%/120% 100%
Measuring range: 500/800 mmHg
External Pressure measuring: Auto/Manual Auto
Manual Pressure value: 500/800 mmHg 760mmHg
Salinity (Chloride): 0/60000 PPM 0PPM
Relative Humidity: 0/100 % 50%
Pressure calibration
The calibration is performed in the factory.
The operator can periodically check the calibration.
To calibrate the Sensitivity of the sensor, the operator should access to the procedures and program the
correct Pressure value.
1. ù to go to
xxx Pressure value
M Manual Pressure value xxxxx Salinity value
Instruction Manual - Rev. D - 12/06
P:xxxMsal:xxxxx
- 59 -

B&C Electronics OD 7685
2. § to access the secondary parameters calibration
xxx Barometric Pressure measuring
(>>>>>) Pressure value over the range
ù to stop the procedure
ò + ç + £ press the 3 keys to turn the Pressure to factory calibration
ò ç to modify the Barometric Pressure value
3.
CAL p: xxx mmHg
4.
£ to confirm and to go to the manual Pressure value calibration
MESSAGE MEANING
data has been memorized
Error messages
Sensitivity sensor too high
Sensitivity sensor too low
See Chapter 10 “Troubleshooting” if error messages turn up.
Manual Barometric Pressure value calibration
p M manual value
xxx manual Pressure value
“ UPDATE “
S > 120%
S < 80%
CAL p M:xxx mmHg
ù to stop the procedure
Instruction Manual - Rev. D - 12/06
- 60 -

B&C Electronics OD 7685
5. ò ç to insert the manual Pressure value
6. £ to confirm and to go to Salinity value calibration
From this point follows the procedures of Chapter 6.3. “Secondary parameters calibration”
Auto/Man/Pressure configuration
Access the instrument configuration menu and press £ until the following display:
External p.: AUTO
AUTO automatic acquisition of Pressure value (MAN) manual Pressure value
Active keys: ù - ò ç - £
Instruction Manual - Rev. D - 12/06
- 61 -

B&C Electronics OD 7685
WARRANTY CERTIFICATE
1) Your product is covered by B&C Electronics Warranty for 5 years from the date of
shipment. In order for this Warranty to be valid, the Manufacturer must determine that the
instrument failed due to defective materials or workmanship.
2) The Warranty is void if the product has been subject to misuse and abuse, or if the damage
is caused by a faulty installation or maintenance.
3) The Warranty includes the repair of the instrument at no charge. All repairs will be
completed at the Manufacturer’s facilities in Carnate, Italy.
4) B&C Electronics assumes no liability for consequential damages of any kind, and the
buyer by accepting this equipment will assume all liability for the consequences of its use by
the Customer, his employees, or others.
REPAIRS
1) In order to efficiently solve your problem, we suggest You to ship the instrument along
with the Technical Support’s Data Sheet (following page) and a Repair Order.
2) The estimate, if requested by the Customer, is free of charge when it is followed by the
Customer confirmation for repair. As opposite, if the Customer shall not decide to have the
instrument repaired, he will be charged to cover labour and other expenses needed.
3) All instruments that need to be repaired must be shipped pre-paid to B&C Electronics. All
other expenses that have not been previously discussed will be charged to Customer.
4) Our Sales Dept. will contact You to inform You about the estimate or to offer you an
alternative, in particular when:
- the repairing cost is too high compared to the cost of a new instrument,
- the repairing results being technically impossible or unreliable
5) In order to quickly return the repaired instrument, unless differently required by the
Customer, the shipment will be freight collect and through the Customer’s usual forwarder.
B&C Electronics Srl - Via per Villanova 3 - 20040 Carnate (Mi) - P.IVA 00729030965
Tel (+39) 039 63 1721 - Fax (+39) 039 607 6099 - info@bc-electronics.it - www.bc-electronics.it
Instruction Manual - Rev. D - 12/06
- 62 -

B&C Electronics OD 7685
TECHNICAL SUPPORT
Data sheet
In case of damage, we suggest You to contact our Technical Support by email
or phone. If it is necessary for the instrument to be repaired, we recommend to
photocopy and fill out this data sheet to be sent along with the instrument, so
to help us identifying the problem and therefore accelerate the repairing
process.
□ ESTIMATE □ REPAIR
COMPANY NAME
ADDRESS ZIP CITY
REFER TO MR./MISS. PHONE
MODEL S/N DATE
Please check the operator’s manual to better identify the area where the problem seems to be
and please provide a brief description of the damage:
□ SENSOR □ ANALOG OUTPUT
□ POWER SUPPLY □ SET POINT
□ CALIBRATION □ RELAY CONTACTS
□ DISPLAY □ PERIODICAL MALFUNCTIONING
¾ DESCRIPTION
................................................................................................................................................................
................................................................................................................................................................
................................................................................................................................................................
................................................................................................................................................................
................................................................................................................................................................
................................................................................................................................................................
................................................................................................................................................................
................................................................................................................................................................
Instruction Manual - Rev. D - 12/06
- 63 -

B&C Electronics OD 7685
N O T E S
Instruction Manual - Rev. D - 12/06
- 64 -

B&C Electronics OD 7685
N O T E S
Instruction Manual - Rev. D - 12/06
- 65 -
 Loading...