


OV851
Table of contents
 Loading...
Baxter Manufacturing Co. • 19220 State Route 162 East • Orting, WA 98360 •
Phone: (360) 893-5554 • Toll free: 1-800-280-2495 • Fax: (360) 893-6128
Model Number: ___________
Serial Number: ___________
Date of Installation: ___________
FORM 31199 Rev. B (July 2009)
OV851
REVOLVING
TRAY OVEN
– 2 –
IMPORTANT FOR YOUR SAFETY
THIS MANUAL HAS BEEN PREPARED FOR PERSONNEL QUALIFIED TO INSTALL GAS
EQUIPMENT, WHO SHOULD PERFORM THE INITIAL FIELD START-UP AND ADJUSTMENTS
OF THE EQUIPMENT COVERED BY THIS MANUAL.
POST IN A PROMINENT LOCATION THE INSTRUCTIONS TO BE FOLLOWED IN THE EVENT
THE SMELL OF GAS IS DETECTED. THIS INFORMATION CAN BE OBTAINED FROM THE
LOCAL GAS SUPPLIER.
IMPORTANT
IN THE EVENT A GAS ODOR IS DETECTED, SHUT
DOWN UNITS AT MAIN SHUTOFF VALVE AND
CONTACT THE LOCAL GAS COMPANY OR GAS
SUPPLIER FOR SERVICE.
FOR YOUR SAFETY
DO NOT STORE OR USE GASOLINE OR OTHER
FLAMMABLE VAPORS OR LIQUIDS IN THE VICINITY
OF THIS OR ANY OTHER APPLIANCE.
IMPROPER INSTALLATION,
ADJUSTMENT, ALTERATION, SERVICE OR
MAINTENANCE CAN CAUSE PROPERTY DAMAGE,
INJURY OR DEATH. READ THE INSTALLATION,
OPERATING AND MAINTENANCE INSTRUCTIONS
THOROUGHLY BEFORE INSTALLING OR SERVICING
THIS EQUIPMENT.
IN THE EVENT OF A POWER FAILURE, DO NOT
ATTEMPT TO OPERATE THIS DEVICE.
© ITW FOOD EQUIPMENT GROUP L.L.C., 2009

– 3 –
Table of Contents
GENERAL ............................................................................................................................................. 4
INSTALLATION ..................................................................................................................................... 4
OPERATION .......................................................................................................................................... 4
General Oven Description (Fig. 1) ................................................................................................... 5
OV851G Digital Control Panel Without Auto Start ........................................................................... 7
OV851G Digital Control Panel With Auto Start ................................................................................ 8
Start Up Preheat .............................................................................................................................. 9
Basic Operation ............................................................................................................................... 9
Timer Options ................................................................................................................................ 10
Clock .............................................................................................................................................. 12
Auto Start ....................................................................................................................................... 12
Customized Operation ................................................................................................................... 13
Shutdown ....................................................................................................................................... 15
CLEANING .......................................................................................................................................... 16
MAINTENANCE .................................................................................................................................. 16
Inspecting the Oven ....................................................................................................................... 16
Preventive Maintenance ................................................................................................................ 16
Service and Parts Information ....................................................................................................... 17
TROUBLESHOOTING ........................................................................................................................ 18
Temp Display Error Codes ............................................................................................................. 19
Emergency Tray Operation ............................................................................................................ 20
– 4 –
OPERATION AND CARE OF
MODEL OV851G REVOLVING TRAY OVEN
SAVE THESE INSTRUCTIONS
GENERAL
The Baxter OV851G Revolving Tray Oven has been carefully engineered and tested to deliver an excellent
baking environment for a wide variety of products. It is equipped with easy-to-understand digital controls
and a large, easy-to-read tray indicator display.
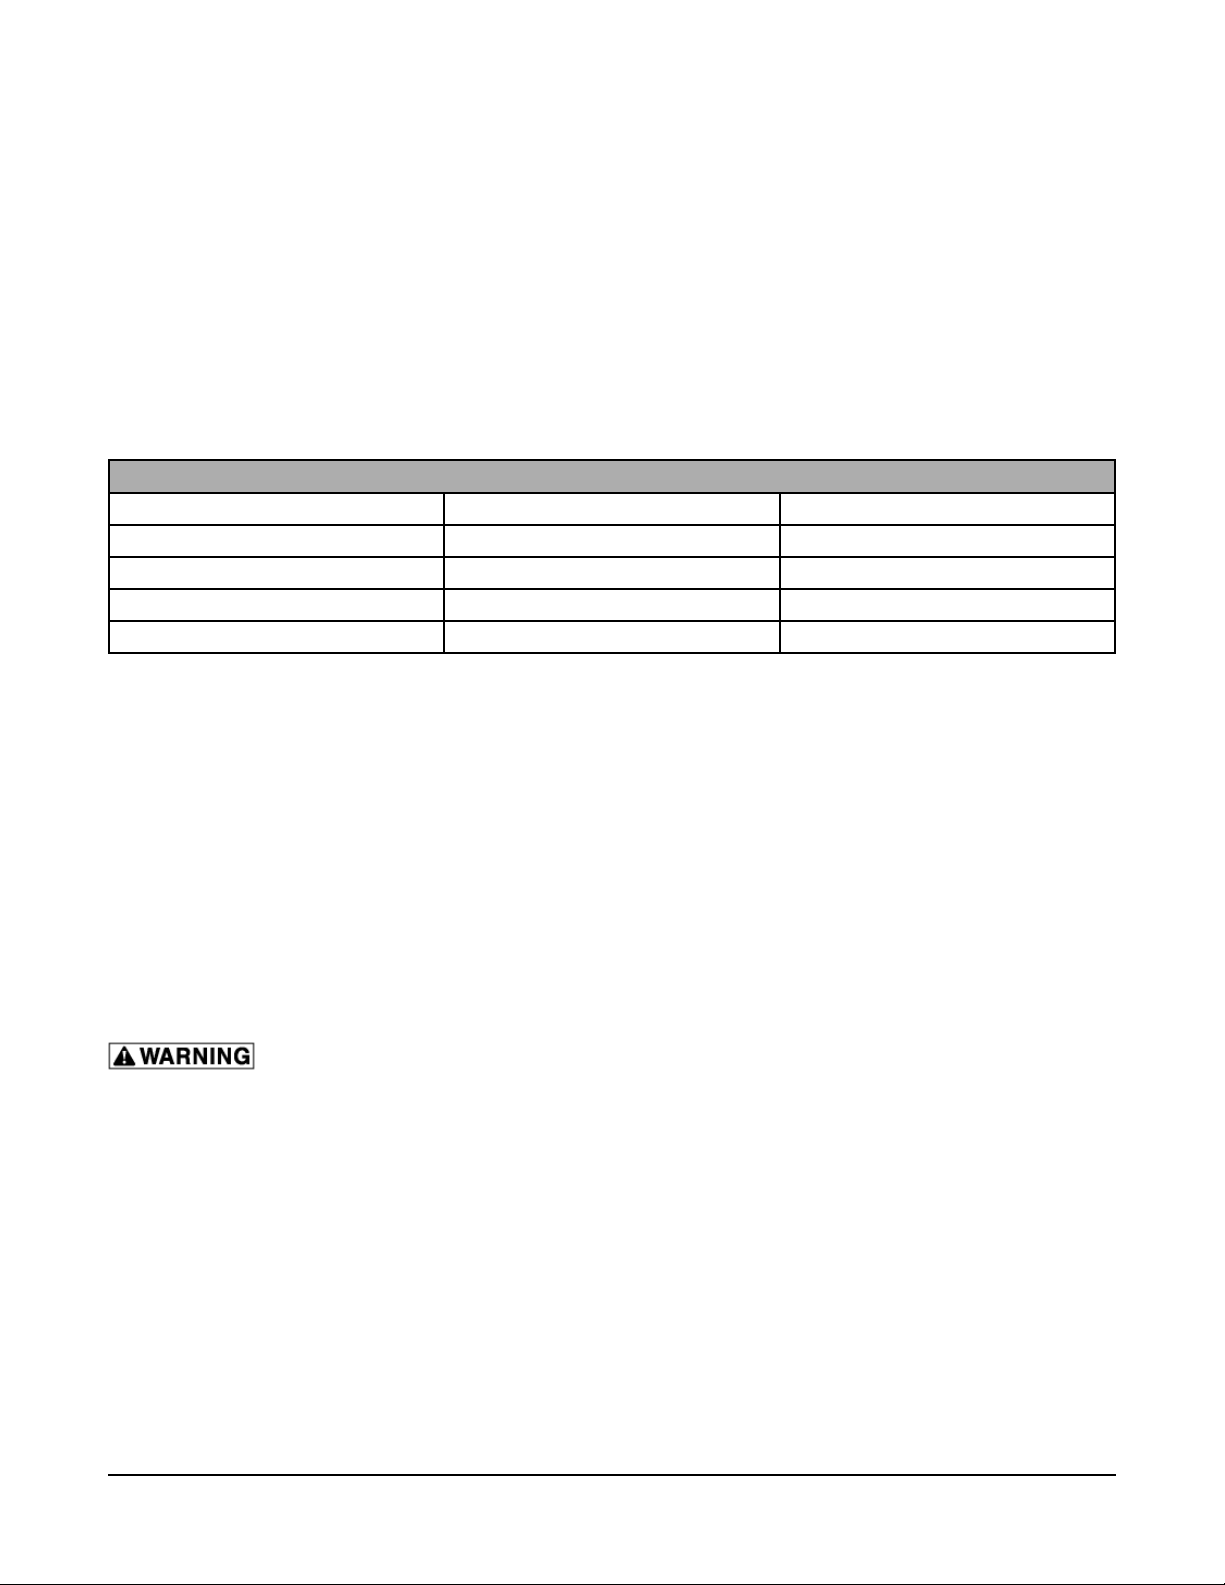
Model Sizes and Gas Ratings
Model Size BTU/hr Natural Gas BTU/hr LP Gas
18-Pan Capacity 250,000 200,000
24-Pan Capacity 300,000 250,000
30-Pan Capacity 300,000 250,000
36-Pan Capacity 350,000 300,000
INSTALLATION
Models OV851G must be installed, moved or serviced only by authorized Bakery Systems trained service
technicians.
OPERATION
The oven and its parts are hot. Use care when operating, servicing or cleaning the
oven.

– 5 –
GENERAL OVEN DESCRIPTION (Fig. 1)
PL-56261
Panel Stop Clip
Ventilation
Hood
Emergency
Stop Panel
Gas Shut
Off Valve
Loading Door Sill
Service Door
Interlock
Service Door
AUTO Button
RUN Button
REVERSE Button
Loading Door
Motor Shaft
Power Switch
Digital
Control Panel
Quick-View Panel
Manual-Auto Switch
Lower Front Panel
Fig. 1
DIGITAL CONTROL PANEL - Displays temperature, time and oven functions.
QUICK-VIEW PANEL - Displays the status of oven systems.
POWER SWITCH - Oven ON/OFF switch.
MOTOR SHAFT - The hand crank attaches to the motor shaft to manually move the trays in the event of
power failure. (See Emergency Tray Operation Procedures on page 19 for details.)
MANUAL-AUTO SWITCH - Use Auto for normal operation. Use Manual to unload product in the event of
a control malfunction.
LOWER FRONT PANELS - Gives access to Motor Shaft, Manual-Auto Switch and Service Door.

– 6 –
REVERSE BUTTON - Press to move trays in a downward direction. The next tray will stop when it is even
with the loading door sill.
RUN BUTTON - Press to start the trays moving in a continuous upward direction.
AUTO BUTTON - Press to stop the trays. The next tray will stop when it is even with the loading door sill.
Use the Auto button for all routine stops.
SERVICE DOOR - Gives access to the interior of the oven for cleaning and servicing.
OVEN SERVICE DOOR INTERLOCK - Prevents oven operation when door is removed.
LOADING DOOR SILL - Use for loading and unloading.
LOADING DOOR - Slides up for easy product loading.
GAS SHUT OFF VALVE - Shuts off the gas supply to the oven.
EMERGENCY STOP PANEL - Press the panel bottom to stop tray movement. A buzzer will sound; to
silence the buzzer, lift loading door.
VENTILATION HOOD - Captures and vents oven exhausts.
PANEL STOP CLIP - Stop for the Emergency Stop Panel. Unscrew and remove to tilt door for cleaning
of the hood, fi lters and grease cup.
Loading...