

Page 1
VISUAL INTERFACE
Operator
Manual
CONTROLS
FOR USE WITH:
BAXTER HCO100 HYBRID OVENS
BAXTER OV310 MINI-RACK OVENS
Model Number: ___________
Serial Number: ___________
Date of Installation: ___________
Baxter Mfg, a Division of ITW FEG, LLC • 19220 State Route 162 East • Orting, WA 98360-9236
Phone: (360) 893-5554 • Fax: (360) 893-1337
www.baxterbakery.com
FORM 36725 Rev. A (July 2013)
Page 2

TABLE OF CONTENTS
GENERAL ............................................................................................................................................. 4
Control Panel Overview ................................................................................................................... 4
Oven OFF Mode .............................................................................................................................. 4
Oven ON Mode ................................................................................................................................ 5
Manual Mode Overview ................................................................................................................... 5
Manual Bake Function Overview ............................................................................................... 6
Manual Cook Function Overview ............................................................................................... 7
Toolbox Function Overview ........................................................................................................ 8
Auto Mode Overview ..................................................................................................................... 10
OPERATION .........................................................................................................................................11
Using the Manual Bake Function ....................................................................................................11
Setting the Bake Temperature ....................................................................................................... 12
Setting the Bake Time ................................................................................................................... 12
Setting the Steam Time ................................................................................................................. 12
Setting the Fan Speed (HCO Only) ...............................................................................................13
Setting the Fan Delay .................................................................................................................... 13
Setting the Vent Position ............................................................................................................... 13
Setting the Multi Phase .................................................................................................................. 14
Adding a Phase ....................................................................................................................... 14
Editing a Phase ........................................................................................................................ 14
Deleting a Multi Phase ............................................................................................................. 15
Saving a Recipe ............................................................................................................................ 15
Using the Manual Recipe Function ................................................................................................ 17
Using the Auto Recipe Function .................................................................................................... 18
Recipe Running Screens ............................................................................................................... 19
TOOLBOX SETTINGS ........................................................................................................................ 21
User Level Settings ....................................................................................................................... 21
Version Information .................................................................................................................. 22
Access Functions ..................................................................................................................... 22
Recipe Loading ........................................................................................................................ 22
Display Settings ....................................................................................................................... 23
Machine Functions - Auto On .................................................................................................. 23
Machine Functions - Auto Off .................................................................................................. 24
©BAXTER MFG, 2013
– 2 –
Page 3

Supervisor Level Functions ........................................................................................................... 25
Access Functions ..................................................................................................................... 25
Manual Menu Access ............................................................................................................... 25
Assign Passcodes ................................................................................................................... 26
Display Settings ...................................................................................................................... 26
Time Mode ............................................................................................................................... 26
Temperature Units ................................................................................................................... 26
Bake Timer Mode ..................................................................................................................... 26
Language ................................................................................................................................. 26
Language Lock ........................................................................................................................ 26
Recipe Permissions ................................................................................................................. 27
Delete Recipes ........................................................................................................................ 27
Purge All Recipes .................................................................................................................... 28
Recipe Lock ............................................................................................................................. 28
Manual Mode Recipe List ........................................................................................................28
Auto Selection .......................................................................................................................... 28
Change Recipe While Running ................................................................................................ 29
Machine Functions ........................................................................................................................ 29
Oven Start Up .......................................................................................................................... 29
Energy Saving Mode ............................................................................................................... 30
Recipe Ready .......................................................................................................................... 30
Factory Defaults ....................................................................................................................... 30
Pan Count ................................................................................................................................ 30
Technician Level Settings .............................................................................................................. 31
Vent Evacuation ....................................................................................................................... 31
Vent Open Time/min ................................................................................................................ 31
Temperature Calibration .......................................................................................................... 31
Heating Off from Set Point ....................................................................................................... 31
Heating On from Set Point ....................................................................................................... 31
Maximum Water Injection Time (Burst/Bake) .......................................................................... 32
Maximum Water Injection Time (Pulse/Cook) .......................................................................... 32
Pulse Steam Minimum Interval ................................................................................................ 32
LANGUAGE......................................................................................................................................... 32
MULTI RECIPE MODE ........................................................................................................................ 32
– 3 –
Page 4
OPERATION OF
EPICON™ VISUAL INTERFACE CONTROL (VIC)
SAVE THESE INSTRUCTIONS
GENERAL
The Epicon Visual Interface Control (VIC) is an intuitive control providing on-screen instructions for use.
Currently offered with Baxter's OV310 series mini-rack ovens and HCO100 series hybrid convection
ovens, the Epicon control provides a common interface format that is also used on Traulsen's blast chillers;
minimizing staff training for operation and maximizing your investment. The VIC is also equipped with a
USB access port to easily import or export recipe data.
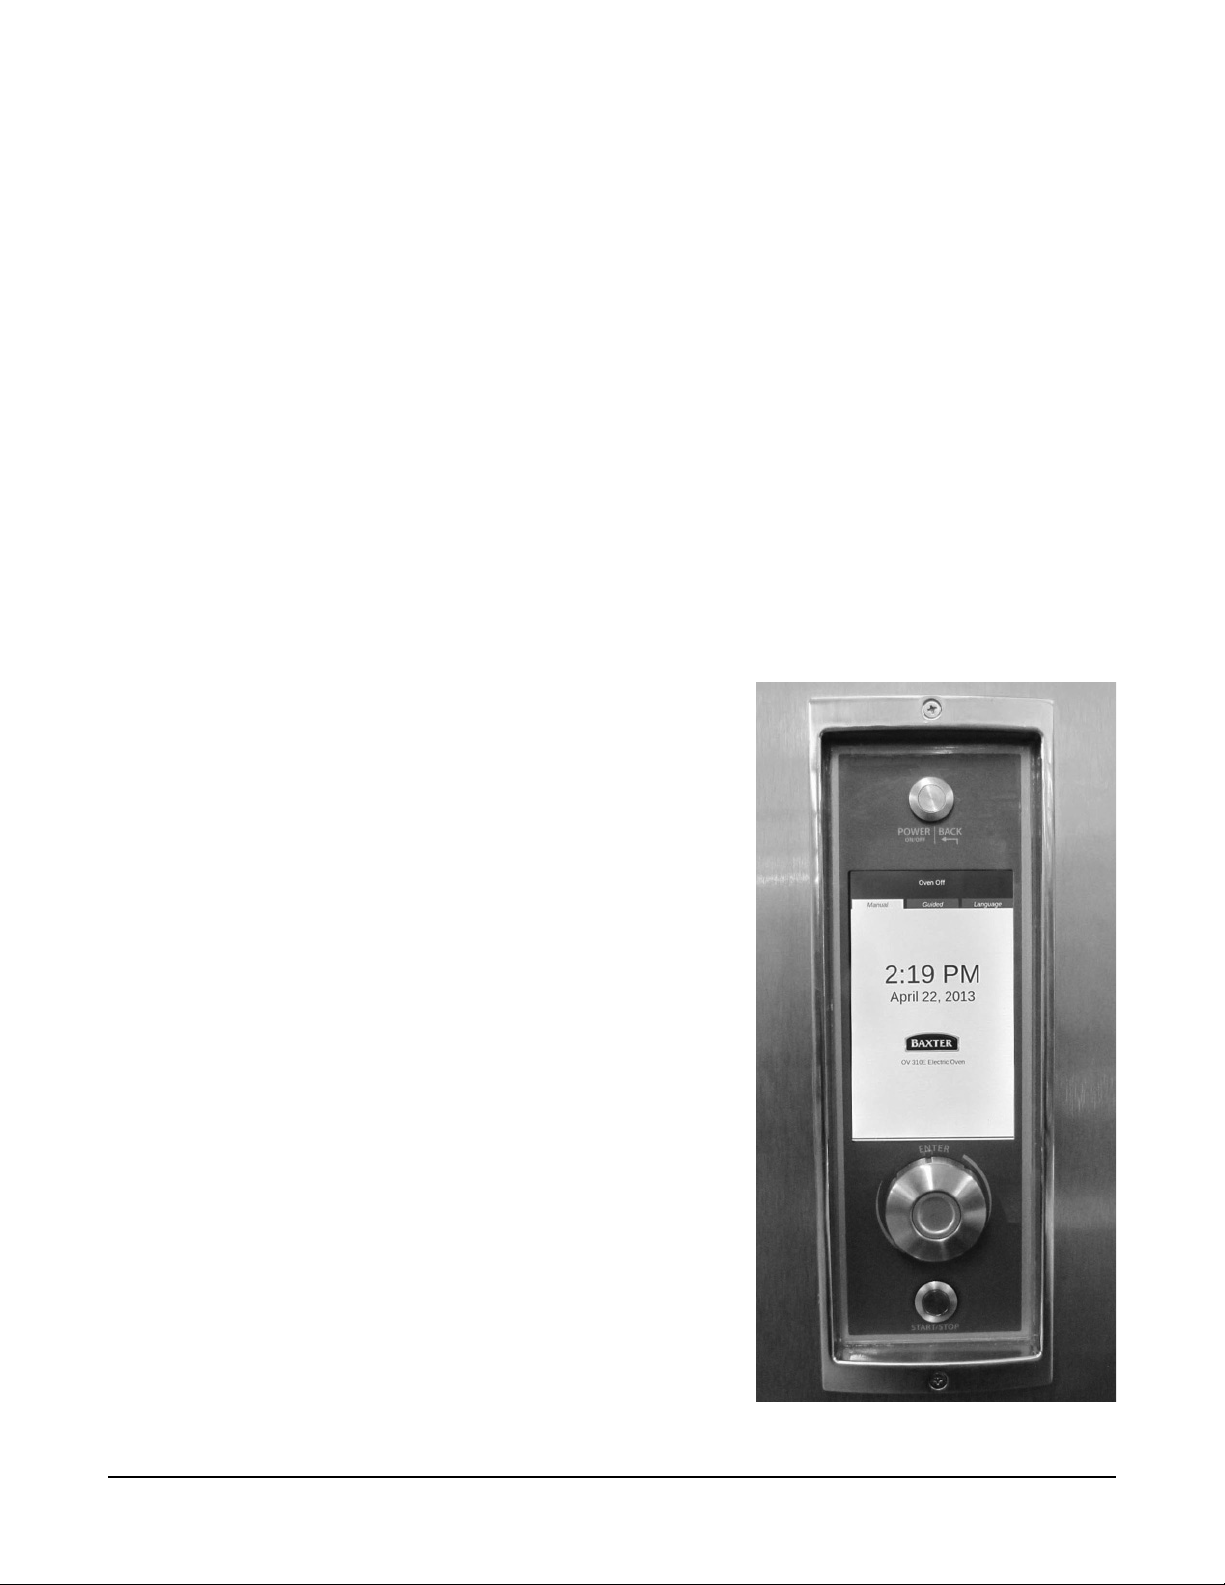
The Epicon Visual Interface Control (VIC) incorporates a POWER/BACK button, a START/STOP button,
a rotating selection knob and display screen for all choices and selections. When power to the oven is on,
the display will be illuminated and "Oven Off" will be displayed at the top. If there is no display, there is no
control power being supplied to the oven for use with the Recipe Central PC application.
CONTROL PANEL OVERVIEW
POWER/BACK Button - This button is a multifunction
button. A simple press will turn the oven on. Once oven is
on, a simple press will provide a Back function to go to a
previously selected screen. Press and hold for 5 seconds
to turn oven off.
LCD Screen - Visual interface for displaying functional
operation details.
ENTER Dial/Select Knob - Rotary knob which operates
CW (Clockwise) or CCW (Counterclockwise) to highlight a
function. Pressing the knob will select that function.
START/STOP Button - This button will start or pause a
recipe when selected and running. When a recipe has been
completed, this button will stop the recipe, and control will
go to previous selection page.
NOTE: To reboot the controller, simultaneously press and hold
the POWER/BACK and START/STOP buttons for 15 seconds
or cycle power by unplugging oven.
OVEN OFF MODE
When the oven is in the off mode, the following items are
displayed.
Oven Off - Indicates that the oven is not operating.
Time and Date - Shows the present time of day and date.
Oven Model - Shows the oven model the control is operating.
Recipe Version - Provides version information of the recipe
fi le in the control.
– 4 –
Page 5
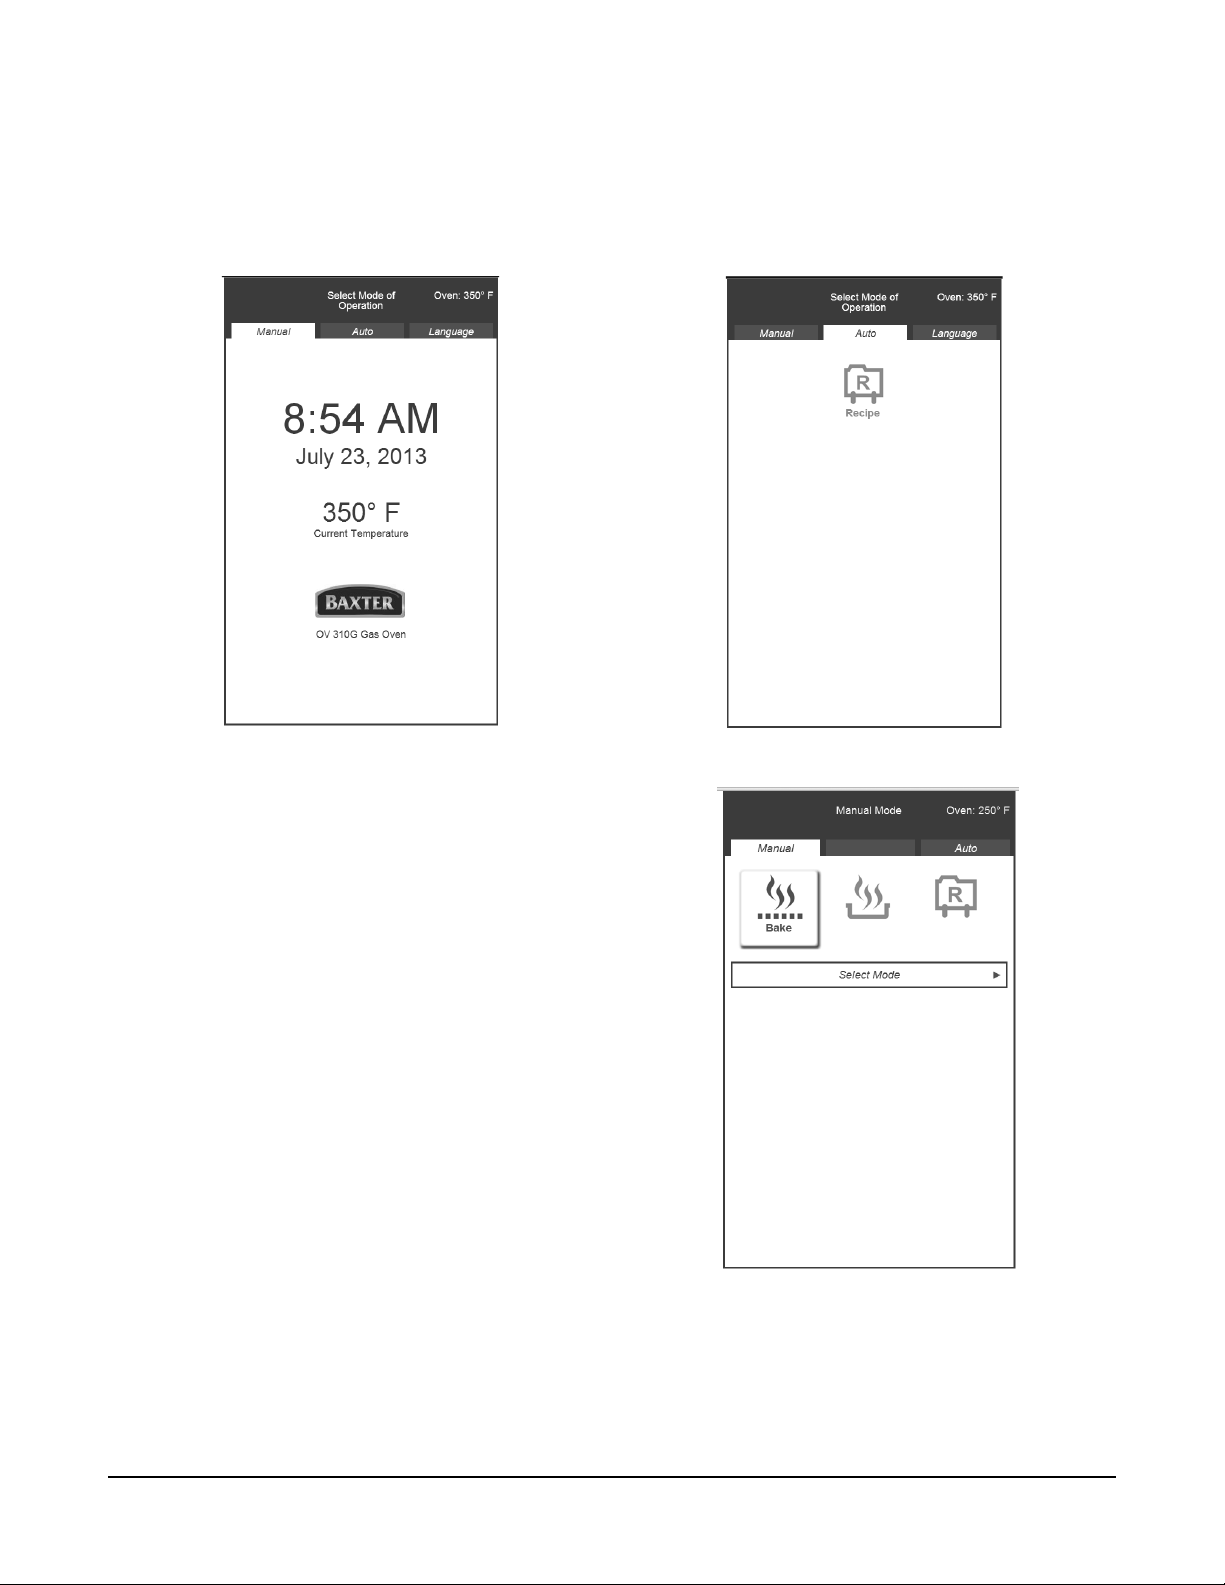
OVEN ON MODE
Press the POWER/BACK button to turn the oven on. Turn the Dial/Select knob to the Manual (Fig. 1)
or Auto (Fig. 2) tab. Press ENTER (push the knob) to select the desired mode. Once the desired mode
is selected, use the correct section in this manual that describes mode operation. It would be helpful to
review the overview section of each mode before using.
Fig. 1 Fig. 2
MANUAL MODE OVERVIEW
The Manual mode has three different functions of
operation for the control.
• Bake Function
• Cook Function
• Recipe Function
Turn the knob to the desired function, the icon for the
function will become highlighted, and press ENTER
to select the function. The instruction box near the
middle of the screen shows the action required.
NOTE: Press the BACK button at any time to return
to the previous selection area.
Fig. 3
– 5 –
Page 6

Manual Bake Function Overview
The Manual Bake function (Fig. 4) will allow the user
to manually set all oven functions, such as:
• Bake Temperature
• Bake Time
• Steam Time
• Fan Speed (HCO only)
• Fan Delay
• Vent Position
• Multi Phase Selection
• Save Recipe
Turn the knob to the desired icon and press ENTER
to select the icon. The icon will become highlighted.
See the Manual Bake Icon Chart for details about
each icon.
NOTE: Press the BACK button at any time to return
to the previous selection area.
Fig. 4
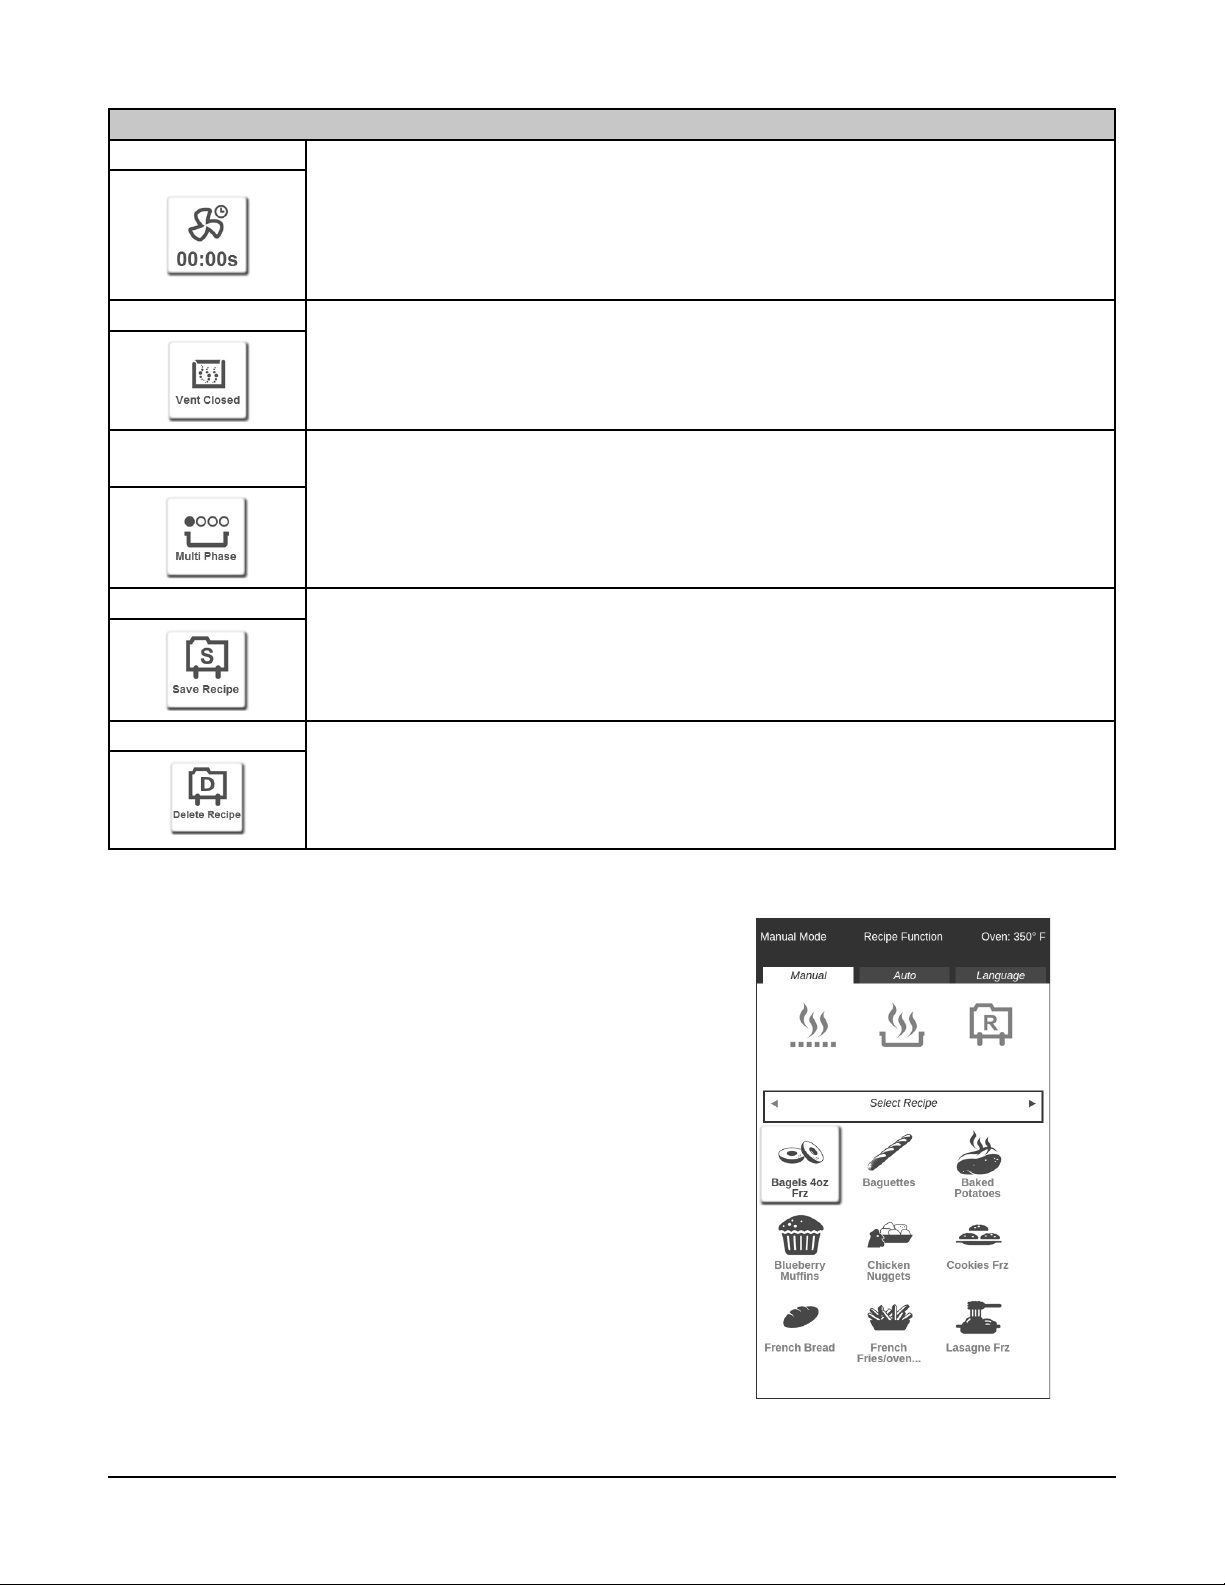
ICON CHART
Bake Temperature Selection of this icon allows changing the Oven Set Temperature for each phase of
operation. Once selected, rotating the knob CW increases the set temperature; CCW
decreases the set temperature. When in F (Fahrenheit), the temperature increments by 5˚
for each click to maximum or minimum settings. When in C (Centigrade), the temperature
increments by 1˚ for each click to maximum or minimum settings. Once desired setting is
reached, press ENTER.
Bake Time Selection of this icon allows setting the Bake Time for each phase of operation. Once
selected, rotating the knob CW increases the time value; CCW decreases the time value.
There are two modes of operation depending on the setup by the supervisor. The default
setting changes the time by one (1) minute for each click, up to a maximum time of 24
hours. The display will be HH:MMm. The seconds mode will allow the timer to be set by
10-second increments up to 04:50s, at which point it will increment by one (1) minute
starting at 05:00m. Once desired setting is reached, press ENTER.
Steam Time Selection of this icon allows setting the Steam Time for an individual phase. The bake
mode only allows steam to be generated at the beginning of a phase for the duration
selected. Once selected, rotating the knob CW increases the time value; CCW decreases
the time value. The setting is in seconds and will increment by one (1) per click, up to a
maximum as defi ned in the toolbox (default 20 seconds). Display shows 00:SSs. Once
setting is reached, press ENTER. (NOTE: The bake time must be set greater than the
value of steam time required for the phase selected.)
Fan Speed
(HCO Model Only)
Selection of this icon allows setting the Fan Speed for an individual phase. There are
two speeds available for the HCO: High and Low. Turning the knob CW will provide High
Speed. Turning the knob CCW will provide Low Speed. Once desired setting is reached,
press ENTER.
– 6 –
Page 7
ICON CHART
Fan Delay Selection of this icon allows setting the Fan Delay for an individual phase. This setting
delays the start of the fan for a value of minutes at the beginning of a phase. Once
selected, rotating the knob CW increases the time value; CCW decreases the time value.
The setting increments in minutes to a maximum of nine (9) minutes. Display shows
00:MMm. Once desired setting is reached, press ENTER. (NOTE: The bake time must be
set greater than the value of fan delay time required for the phase selected.)
Vent Position Selection of this icon allows the Vent Position to be Open or Closed (default). Turning the
knob CW will set Open Vent. Once desired setting is reached, press ENTER.
Multi Phase
Operation
Save Recipe Selection of this icon provides a Save Recipe feature, which will allow the user to create
Delete Recipe Completely removes recipe from the list. Must be enabled in toolbox to be visible.
Selection of this icon provides Multi-phase Baking or Cooking with additional selection to
Add, Edit or Delete a phase in a single recipe. You may have up to six different phases for
a single functioning recipe. Once desired setting is reached, press ENTER. See Setting
the Multi Phase for additional information.
a unique name or overwrite an existing named recipe. Once desired setting is reached,
press ENTER. See Saving a Recipe for additional information.
Manual Cook Function Overview
The Manual Cook function adds a Pulse Steam feature, which
allows steam to be produced on a repeat cycle within a phase.
Manual Recipe Function Overview
The Manual Recipe function (Fig. 5) will allow the selection
of saved recipes. Additionally, the user can manually adjust
any oven function. This function provides the ability to select
recipes that have previously been saved. This function may
require a passcode to access depending on the restrictions
placed by the supervisor. See the Toolbox Function Overview
for additional information about passcodes. Once a recipe is
chosen and selected, it will provide all the settings for review.
Settings may be changed or the recipe started.
Turn the knob to the desired recipe icon and press ENTER
to select the icon. The icon will become highlighted. See
the Using the Manual Recipe Function section for more
information.
NOTE: Press the BACK button at any time to return to the
previous selection area.
– 7 –
Fig. 5
Page 8

Toolbox Function Overview
To access the Toolbox tab turn the knob CW while on the
home screen. The Toolbox function (Fig. 6) allows the
user to change the parameter settings of the controller
and requires a passcode to access. There are four
different access levels: User, Supervisor, Technician
and Hobart Tech. These levels are passcode protected
to ensure the integrity of operation for the control
based on the skill level requirements for the variable
settings. Each successive access level has access
to all of the features of the preceding level. Hobart
Tech level is outlined in the technical service manual.
See the Toolbox Access Chart for more information
about access levels.
TOOLBOX ACCESS CHART
User Access Passcode: Assigned by Supervisor
Version
Information
Access
Functions
Display
Settings
Machine
Function
HTML Displays version of software being utilized by control (e.g., V2.08-220).
IO Displays version of software being utilized by I/O Board (e.g., 18).
UI Displays version of OS being utilized (e.g., 1.10).
Recipe Version Displays version assigned to the recipes loaded. (This may be a date code.)
Recipe Loading Import or export recipes provide the ability to download or upload recipes from a
USB Thumbdrive.
Date Set Ability to change the date shown and used on the control.
Time Set Ability to change the time shown and used on the control.
Auto On Ability to set the oven to automatically turn on at a preset time while unattended.
Auto Off Ability to shut the oven off at a preset time or during a period of inactivity while
unattended.
Fig. 6
TOOLBOX ACCESS CHART
Supervisor Access Passcode: 333
Access
Functions
Display
Settings
User Access MultiRecipe Mode
User Access Auto
Mode
User Access
Manual Mode
Manual Menu
Access
Assign Passcodes Assigns a User passcode so user can access some restricted functions.
Language Lock Hides the Language tab on home screen to prevent users from changing
Hides the Multi tab on the home screen from all operators.
Requires users to enter a passcode to access the Auto Mode Tab.
Requires users to enter a passcode to access the Manual Mode Tab.
Requires users to enter a passcode to access Manual Mode Tab's Bake,
Cook, and Recipe functions.
language.
Changes the language the controller displays (English, Spanish, or French.
– 8 –
Page 9
TOOLBOX ACCESS CHART
Supervisor Access Passcode: 333
Recipe
Permissions
Machine
Functions
Delete Recipes Allows users to delete recipes with the Manual Mode Recipe function.
Notes: Recipe Lock must be disabled to access this function. If you don't
see the Delete icon verify you have enabled Delete Recipes. If pan count
is enabled the entire recipe (all pans) will be erased. Use Recipe Central to
remove individual pan recipes.
Purge All Recipes Deletes all recipes from the controller.
Recipe Lock Restricts users from changing recipes.
Manual Mode
Recipe List
Auto Selection Displays only Favorite recipes or all available recipes in the Auto mode.
Auto Selection
Features
Change recipe
While Running
Oven Start-up Sets the oven to start up to a preset temperature or a specially designated
Energy Saving
Mode
Recipe Ready Determines when the timer begins, after preheating or at any temperature.
Factory Defaults Resets the toolbox settings.
Pan Count Enabled Used when cooking times increase due to additional trays/pans.
Changes how the recipes are displayed in the Manual Recipe Mode: By
Icon (picture), alphabetical by name or alphabetical by date created.
Provides the ability to change how the recipes are displayed in the Manual
Recipe Mode: By Icon (picture) or alphabetical by name.
Allows users to make a change to a recipe while it is running.
Start Up recipe, which will advise when oven is ready for the fi rst bake.
An energy saving feature that will reset the temperature set point to a
lower standby temperature after a set period of idle time.
NOTE: Detailed information about the toolbox functions begin on pg. 20 of this manual.
TOOLBOX ACCESS CHART
Technician Access Passcode: 222
Machine
Functions
Vent Evacuation Time that the vent is 100% open at the beginning of the fi rst phase.
Vent Open Tim/Min This value is the seconds the bake chamber vent is open per 60 seconds
after the vent evacuate time has expired.
Temperature
Calibration
Heating On from
Set Point
Heating Off from
Set Point
Maximum Water
Injection Time
(Burst/Bake)
Maximum Water
Injection Time
(Pulse/Cook)
Pulse Steam
Interval
Used for calibrating the oven to an external probe.
Set for number of degrees below set point the oven will remove call for
heat.
Set for number of degrees below set point the oven will call for heat.
Sets the maximum amount of steam time for Baking (singular event).
Sets the maximum amount of steam time for Cooking (when using Steam
Repeat).
Controls how frequently steam can be applied when using Manual Cook
mode. Warning, applying steam too frequently can prevent the steam
balls from reaching proper temperature as well as lower the oven cavity
temperature.
– 9 –
Page 10

AUTO MODE OVERVIEW
The Auto Mode only uses stored recipes. The Auto
Recipe Function (Fig. 7) is used when an operator is
selecting a recipe that has been previously saved and
no changes are desired. The oven will automatically
begin heating to the programmed set point and time
programmed duration once started. Typically, this is
used for inexperienced bakers or cooks to maintain
consistent products as defi ned by corporate or head
chefs.
Turn the knob to the desired recipe icon and press
ENTER to select the icon. The icon will become
highlighted. See the Using the Auto Recipe Function
section for more information.
NOTE: Press the BACK button at any time to return
to the previous selection area.
Fig. 7
– 10 –
Page 11

OPERATION
USING THE MANUAL BAKE FUNCTION
1. Press the POWER button to turn the oven on. The
oven will start and display one of two screens,
depending on the oven parameter setup. If the
oven is confi gured with:
• Recipe Start-Up Enabled (Fig. 8), proceed
to step 2.
• Set Temperature Enabled (Fig. 9), go to
step 3.
NOTE: Start up recipes are designated using the
Recipe Central PC software.
2. Wait for the oven ready screen (Fig. 10) to display,
then load the food product and press START.
3. Rotate the knob CCW to make sure Manual is
highlighted and press ENTER to select Manual
mode.
Fig. 9Fig. 8
4. Rotate the knob CCW until the Bake icon is
highlighted and press ENTER to select the
Bake icon. The Manual Bake function screen
(Fig. 11) should be displayed and the Set
Bake Temperature icon should be highlighted.
All settings, except Temperature setting, are
defaulted to 00:00.
NOTE: Press the BACK button at any time to return
to the previous selection area.
NOTE: The instruction box shows the action required.
Fig. 10 Fig. 11
– 11 –
Page 12

SETTING THE BAKE TEMPERATURE
1. Press ENTER to select the Set Temperature icon. The Set Temperature
screen (Fig. 12) should be displayed.
2. Rotate the knob CCW to decrease value and CW to increase value.
When the temperature setting is the value desired, press ENTER to set.
Selection will advance to the next setting (Bake Time).
SETTING THE BAKE TIME
1. Press ENTER to select the Set Bake Time icon.
The Set Bake Time screen (Fig. 13) should be
displayed.
2. Rotate the knob CW to increase the bake time
and CCW to decrease the bake time. If bake time
mode parameter is set for seconds, the value
will change by ten (10) second increments up to
04:50s (Fig. 14) and then will increase by one
(1) minute increments up to 00:05m. If bake time
mode parameter is set for minutes, the value
increases by one (1) minute increments 00:01m.
When the time setting is the value desired, press
ENTER to set. Selection will advance to the next
setting (Steam Time).
Fig. 12
Fig. 14Fig. 13
NOTE: Once a time has been set the START button may be pressed at anytime to begin baking. There
is no need to set the remaining recipe values.
SETTING THE STEAM TIME
1. Press ENTER to select the Set Steam Time icon. The Set Steam Time
screen (Fig. 15) should be displayed.
2. Rotate the knob CW to increase the steam time and CCW to decrease
the steam time. The values will increase by one (1) second increments
up to the maximum value defi ned in the parameter settings. When the
steam time setting is the value desired, press ENTER to set. Selection
will advance to the next setting (Fan Speed for HCO or Fan Delay).
Fig. 15
– 12 –
Page 13

SETTING THE FAN SPEED (HCO ONLY)
1. Press ENTER to select the Fan Speed icon.
The Set Fan Speed screen (Fig. 16) should be
displayed.
2. Rotate the knob CCW for low speed (Fig. 17).
Press ENTER to select the desired fan speed.
Selection will advance to the next setting (Fan
Delay).
NOTE: The default fan speed setting is High.
Fig. 16
SETTING THE FAN DELAY
1. Press ENTER to select the Fan Delay icon. The Set Fan Delay screen
(Fig. 18) should be displayed.
2. Rotate the knob CW to increase the fan delay time and CCW to decrease
the fan delay time. The values will increase by one (1) minute increments,
up to the maximum value of 10:00m. When the fan delay time setting
is the value desired, press ENTER to set. Selection will advance to the
next setting (Vent Position).
SETTING THE VENT POSITION
1. Press ENTER to select the Vent Position icon.
The Set Vent Position screen (Fig. 19) should
be displayed.
Fig. 17
Fig. 18
2. Rotate the knob CCW for Vent Closed (Fig. 19)
or CW for Vent Open (Fig. 20). Press ENTER to
select the desired vent position. Selection will
advance to the next setting (Multi Phase).
– 13 –
Fig. 19
Fig. 20
Page 14

SETTING THE MULTI PHASE
Multi Phase will allow a recipe to have multiple phases within a recipe, allowing
all settings to vary for each phase. The recipe will change settings for each
phase automatically and accumulate total time for completing the recipe. Multi
Phase selections allow the user to Add, Edit, or Delete phases when selected.
1. Press ENTER to select the Multi Phase icon. The Set Multi Phase screen
(Fig. 21) should be displayed.
2. Rotate the knob to select Add, Edit, or Delete. See the subsections for
instructions on adding, editing, or deleting a Multi Phase.
Adding a Phase
1. Rotate the knob to the Add box and press ENTER
to select Add. It will then highlight the solid block
where the phase will be inserted (Fig. 22).
2. Rotate the knob to the position the added phase
should be placed, either before (CCW rotation) or
after (CW Rotation) any phase that has already
been entered or requested.
Fig. 21
3. Press ENTER to select the position. The Manual
Bake Function screen (Fig. 23) should be
displayed and Phase 2 - Set Bake Temp should
be in the instruction box.
4. Rotate the knob and set each function icon as
Fig. 22 Fig. 23
outlined.
Editing a Phase
1. Rotate the knob to the Edit box (Fig. 24) and press ENTER to select
Edit. It will then highlight the solid block.
2. Rotate the knob to the phase position to edit and press ENTER to select.
3. Rotate the knob and edit each function icon as outlined.
Fig. 24
– 14 –
Page 15

Deleting a Multi Phase
1. Rotate the knob to the Delete box (Fig. 25) and press the knob to select Delete. It will then highlight
the solid block.
2. Rotate the knob to the phase position to delete and press ENTER to select. A pop up screen (Fig.
26) will display to verify this action.
3. Rotate the knob to Delete or Cancel and press ENTER to confi rm.
4. Rotate the knob to Done (Fig. 27) and press ENTER to exit Multi Phase operation.
Fig. 25 Fig. 27Fig. 26
SAVING A RECIPE
1. After creating a recipe, rotate the knob to the Save Recipe icon (Fig. 28) and press ENTER to select.
The Enter Recipe Name screen (Fig. 29) should be displayed.
2. Rotate the knob CW or CCW to choose a letter or number. The letter or number will be block inverted
to show selection. If there are any recipes already saved with the letter selected, they will show up
in the list below (Fig. 30).
3. Press ENTER to select the letter. This example shows the letter C selected (Fig. 30).
4. Rotate the knob after selecting the letter to the List box (Fig. 31) and press ENTER to select.
Fig. 28
Fig. 29
– 15 –
Fig. 30
Fig. 31
Page 16

5. Rotate the knob to select any of the listed named recipes (Fig. 32). This example shows the recipe
Cookies selected.
6. If an existing name is selected, it will fi ll in the name in the selection box and highlight the review
box (Fig. 33). If no name exists, go to step 10.
7. Press ENTER to review the recipe as inputted or add additional letters or numbers to create a new
unique name. This process will provide the same icon as the selected recipe. The general review
screen (Fig. 34) provides the ability to examine the overall requirements of the recipe.
8. Rotate the knob to highlight the Save box (Fig. 34) and press ENTER to save the recipe.
9. If a recipe name is selected that already exists, an additional screen (Fig. 35) will ask to overwrite
the existing recipe. Rotate the knob to select Yes or No and press ENTER to confi rm.
Fig. 32
Fig. 34Fig. 33 Fig. 35
10. Complete the input by turning the knob and selecting letters to spell the recipe name (Fig. 36).
11. To change the icon, rotate the knob to the symbol (Fig. 37) and press ENTER to select.
12. Rotate the knob to highlight the icon (Fig. 38) to represent this product and press ENTER to set.
Fig. 36 Fig. 37 Fig. 38
– 16 –
Page 17

13. Rotate the knob so that Review (Fig. 39) is
highlighted and press ENTER select.
14. If the recipe is correct (Fig. 40), rotate the knob
to highlight Save and press ENTER to complete
and save the recipe. The recipe naming screen
(Fig. 39) should display.
15. Rotate to highlight the Back box and press
ENTER to make a variation of this recipe or
press the BACK button twice to get back to the
Manual Bake mode.
Fig. 39
Fig. 40
USING THE MANUAL RECIPE FUNCTION
Manual Recipe mode is used when an operator wants to use a recipe that has been previously saved as
is, or with the ability to make minor changes to the recipe before starting. If the word Recipe is not visible
under the function icon, a passcode will be required to access this function (see step 2).
1. Rotate the ENTER knob CCW to make certain
Manual is highlighted, then press the knob to
access manual function.
2. Rotate the knob until the Recipe icon (Fig. 41) is
highlighted and press ENTER to access recipes.
If the word Recipe is not visible (Fig. 42) under
the icon, a passcode will be required to access
this function (see step 3). If the word Recipe is
visible, go to step 4.
3. Rotate the knob to enter the assigned passcode
(Fig. 43) and press ENTER for each number.
4. The display will show a list of recipes previously
saved either in the Icon Mode (Fig. 44), List
Mode (Fig. 45) or saved by date.
Fig. 41
Fig. 42
5. Rotate the knob to
highlight the desired
recipe and ENTER
knob to select.
– 17 –
Fig. 44
Fig. 45Fig. 43
Page 18

6. If pan count parameter is enabled (Fig. 46), it will
allow the selection to choose how many pans
will be loaded for the bake. Rotate the knob to
the desired number of pans and press ENTER
to select.
7. If pan count is not enabled, the screen will
display the recipe settings (Fig. 47). Press the
START button to run the recipe as is or make
adjustments as shown in Using the Manual Bake
Function section of this manual.
Fig. 46
Fig. 47
USING THE AUTO RECIPE FUNCTION
Auto Recipe mode is used when an operator will only use the recipes provided with no changes being
allowed, except for the ability to add time at the end of a recipe.
1. Rotate the knob CW to make certain Auto is highlighted, then press ENTER to access Auto Recipe
(Fig. 48).
2. The display will show a list of recipes previously saved either in the Icon Mode (Fig. 49), List Mode
(Fig. 50) or saved by date.
3. Rotate knob to highlight the desired recipe and press ENTER to select.
4. If pan count parameter is enabled (Fig. 51), rotate the knob to the desired number of pans and press
ENTER to select. If pan count parameter is not enabled, press the knob or the START button to start
the recipe.
Fig. 48
Fig. 49
– 18 –
Fig. 50
Fig. 51
Page 19

RECIPE RUNNING SCREENS
After starting a recipe, the oven will adjust to the set point temperature. Note that the recipe cannot be
started unless the oven has reached the proper temperature unless the Recipe Ready, At Any Temperature
setting is enabled. If the oven is too hot, the Cool Down screen (Fig. 52) will display. Open the door to
quicken the cool down process. If the oven has not reached the proper baking temperature, the Oven
Heating screen (Fig. 53) will display.
When the oven has reached the proper temperature, the oven lights will fl ash, and the control will show
Oven Ready (Fig. 54). Be prepared to load product when the door is opened. The Recipe instructions are
shown in two locations on the Load Product screen (Fig. 55).
Fig. 52
Fig. 53
Fig. 54
Fig. 55
After product has been loaded, close the door. The display now shows the Press Start screen (Fig. 56).
Press the START button to start the timer and the rack rotation (for ovens with rack rotation).
NOTE: Rack rotation and timer will NOT start unless the START button has been pressed with door
closed.
After the START button has been pressed, the recipe running screen (Fig. 57) will display the following:
a. Phase running
b. Recipe running
ba c
c. Mode used
d. Oven temperature
e. Total set time
d
e
f
f. Operation in phase and countdown
of phase
g
g. Target Temperature
h. Total Time Remaining
h
i. Number of phases for the recipe
i
with solid indicating the phase that
is running
j. Timeline showing graphic
Fig. 56
j
Fig. 57
representation of time remaining in
phase
– 19 –
Page 20

Once the bake time is complete, the oven lights will
fl ash, a beeper will sound and the Open Door or Add
Time screen (Fig. 58) will display.
• To add more time - press the knob. The
buzzer will stop and the lights will stop
fl ashing. Rotate the knob for the desired
additional time (Fig. 59) and press the
START button.
• OR open the door to silence the beeper,
stop the lights fl ashing and check the
product. If more time is required after
opening the door, rotate the knob for the
desired additional time, close the door and
press the START button.
Fig. 58
Fig. 59
• OR if product is done, Press the STOP button.
NOTE: After the STOP button has been pressed, the control will revert back to the previous settings for
the recipe.
– 20 –
Page 21

TOOLBOX SETTINGS
The Toolbox allows the user to change the controller settings and requires a passcode to access. There are
three different access levels (User, Supervisor, and Technician) each requires a different passcode. These
levels are provided to ensure the integrity of operation for the control based on the skill level requirements
for the variable settings. The Supervisor level includes all User levels, the Technician level includes all
the Supervisor levels. See the Toolbox Access Chart (page 7) for more information about access levels.
Functions are described only once for brevity. Please refer to lower access levels for unlisted function details.
USER LEVEL SETTINGS
The Toolbox function is used to verify version information, download/update recipes from a USB Thumbdrive,
change date and time and turn the oven OFF and/or ON while unattended. To access the toolbox, you
must have a 3-digit access code. See the Toolbox Access Chart for more information about access levels.
1. The oven must be on in order to access the
toolbox. Press the POWER/BACK button until
the home screen (Fig. 60) displays.
2. Rotate the knob CW until the Toolbox tab is
highlighted, then press ENTER to select.
Fig. 60
Fig. 61
3. Rotate and press ENTER to select the assigned passcode (Fig. 62). The toolbox screen (Fig. 63)
should now be displayed.
NOTE: To access the User
Level settings a passcode
must fi rst be assigned to Users
from the Supervisor Level. If
the passcode is not valid, an
invalid passcode screen (Fig.
64) will display. Repeat steps
1 through 3 to re-enter the
correct code.
Fig. 63
Fig. 64Fig. 62
– 21 –
Page 22

Version Information
1. Rotate the knob to Version Information and press
ENTER to select (Fig. 65).
2. Rotate the knob to HTML Version, IO Version,
UI Version or Recipe Version and press ENTER
to select to review the selected version. The
example shows the Recipe Version screen (Fig.
66).
3. Press the BACK button to return to the previous
selection area.
Access Functions
Recipe Loading
Fig. 65
Fig. 66
This function is used to manipulate the recipes that
are loaded on the controller.
1. Rotate the knob to Access Functions and press
ENTER to select (Fig. 67).
2. Rotate the knob to Recipe Loading and press
ENTER. The Import Recipes screen (Fig. 68)
will display.
3. Rotate the knob CW to change the screen to
Export Recipes (Fig. 69).
NOTE: The Import Recipes and Export Recipes
features require a USB Thumbdrive. Before pressing
the knob to select either feature, a USB Thumbdrive
with the fi le “recipe.csv” must be loaded on the top
Fig. 67
Fig. 68
(Root) directory, or within the recipes folder as generated by the Recipe Central PC Application of the
thumbdrive. The thumbdrive should be inserted into the USB connection located under the access panel
below the control panel (Fig. 70). Wait at least 15 seconds after inserting the thumbdrive before pressing
the knob to select.
4. If any of the recipes to be imported have the same name as those already existing you will be
prompted as shown (Fig.71).
5. Press the BACK button to return to the previous selection area.
Fig. 70Fig. 69
– 22 –
Fig. 71
Page 23

Display Settings
This section is used to update the date and time.
1. Rotate the knob to Display Settings and press ENTER to select (Fig. 72).
2. Rotate the knob to Date Set or Time Set and press ENTER. The Date Set screen (Fig. 73) or the
Enter Time screen (Fig. 74) will display.
3. Rotate the knob to change the settings and press ENTER.
Fig. 73Fig. 72 Fig. 74
Machine Functions - Auto On
The Machine Functions allow the user to set the oven to turn ON automatically
at a set time of day.
1. Rotate the knob to Machine Functions and press ENTER to select
(Fig. 75).
2. Rotate the knob to Auto On and press ENTER.
3. Rotate the knob to Enable and press ENTER.
4. Rotate the knob to Enable or Disable and press ENTER to select. The
Enable screen (Fig. 76) is shown.
NOTE: This feature must be set to Enable for the Auto function to work.
5. Rotate the knob to Auto On Time (Fig. 75) and press ENTER to select.
6. Rotate the knob to set the time and press ENTER to select.
7. Rotate the knob to Mode (Fig. 75) to set the day of the week to turn
the oven on automatically. The default is daily.
8. If set to days of the week, rotate the knob to Days (Fig. 75) and select
each day to turn the oven on automatically.
Fig. 75
– 23 –
Fig. 76
Page 24

NOTE: If the day has an asterisk (*) (Fig. 77), it
means that day is active for the time set. To remove
the asterisk (*) (Fig. 78), press the knob when the day
is displayed.
9. Rotate the knob to change the setting and press
ENTER.
10. Press the BACK button to return to the previous
selection area.
Fig. 77
Machine Functions - Auto Off
The Machine Functions allow the user to set the oven to turn OFF automatically
at a set time of day or period of idle time.
1. Rotate the knob to Machine Functions and press ENTER to select (Fig.
79).
2. Rotate the knob to Auto Off and press ENTER to select.
3. Rotate the knob to Enable and press ENTER to select.
4. Rotate the knob to Enable or Disable and press ENTER to select. The
Enable screen (Fig. 76) is shown.
NOTE: This feature must be set to Enable for the Auto function to work.
5. Rotate the knob to Mode (Fig. 79) and press ENTER to select.
6. Rotate the knob to set to Daily, Daily and Inactivity (Fig. 80), Day of
Week or Weekday/Inactive (Fig. 81) and press ENTER to set.
7. Rotate the knob to Energy Saving Time (Fig.
79) and press ENTER to select.
8. Rotate the knob to set the time and press ENTER
to select.
Fig. 78
Fig. 79
9. Rotate the knob to Inactive Time (Fig. 79) if a
mode with inactivity was selected and press
ENTER to select.
Fig. 80
Fig. 81
10. If set to days of the week, rotate the knob to Days (Fig. 79) and select each day to turn the oven off
automatically.
NOTE: If the day has an asterisk (*) (Fig. 77), it means that day is active for the time set. To remove the
asterisk (*) (Fig. 78), press the knob when the day is displayed.
11. To change the setting, rotate the knob and press ENTER.
12. Press the BACK button to return to the previous selection area.
– 24 –
Page 25

SUPERVISOR LEVEL FUNCTIONS
Supervisor Level access provides management with the ability to dictate what features Users have access
to, to change the ovens settings, and modify recipe features.
Enter the Toolbox passcode “333” to access Supervisor Level Functions.
Access Functions
Rotate the knob until Access Settings is highlighted and press ENTER to expand the drop down menu
items for items in this section.
User Level access to the different Mode tabs (Auto, Manual, etc.) can be restricted by Enabling or Disabling
the respective tab setting.
1. Rotate the knob CW until Access Functions is
highlighted and press ENTER. The menu will
expand below (Fig. 82).
2. Turn the knob CW until the desired User Access
Mode is highlighted and press ENTER.
3. Select either Enabled or Disabled (Fig. 83
demonstrates Manual Mode).
NOTE: Once a mode is disabled the Tab Heading
will no longer display its heading and will require a
passcode to access its features. The Multi-Mode Tab
will disappear completely and not be selectable.
Manual Menu Access
This setting provides the ability to restrict access to
limited portions of the Manual Mode tab. For example
a Supervisor may desire to limit access to the Manual
Recipe to disallow users from altering a recipe.
1. Rotate the knob CW until Manual Menu Access
is highlighted and press ENTER (Fig. 84).
2. Rotate the knob to the desired Menu to be
changed and press Enter. Access may then be
changed (Fig. 85).
Fig. 82
Fig. 84
Fig. 83
Fig. 85
– 25 –
Page 26

Assign Passcodes
This allows the user to change/assign the passcode
used to access the Toolbox and other User restricted
functions.
1. Rotate the knob CW until Assign Passcodes is
highlighted and press ENTER to expand the
drop down menu (Fig. 86).
2. Rotate the knob CW until “User” is highlighted
and press ENTER. Assign the new password
(Fig. 87) and press ENTER.
Display Settings
Rotate the knob until Display Settings is highlighted
Fig. 86 Fig. 87
and press ENTER to expand the drop down menu items in this section.
Time Mode
This is used to change between 12 hour (standard) and 24 hour (military) time
display formats.
1. Rotate the knob CW until Time Mode is highlighted and press ENTER.
2. Rotate the knob as to select the desired format and press ENTER
(Fig. 88).
Temperature Units
Choose between Celsius or Farenheit
1. Rotate the knob CW until Temperature Units is highlighted and press
ENTER.
2. Select the desired unit and press ENTER (Fig. 89).
Bake Timer Mode
This determines whether the bake timer displays hours and minutes (HH:MM)
or hours, minutes, and seconds (HH:MM:SS) (Fig.90).
Language
Choose whether the controller displays are in English, French, or Spanish (Fig.91)
by rotating the knob. Language selection may alternatively be changed using
the Language Tab found on the home screen and appear in their native script.
Language Lock
When enabled, this setting will disallow users from changing the display
language and will remove the Language Tab from the home screen.
Fig. 88
Fig. 89
Fig. 90
– 26 –
Fig. 91
Page 27

Recipe Permissions
Delete Recipes
Enabling this setting allows users to erase recipes from the controller memory by making the Delete Recipe
icon visible on the Manual Recipe Mode function screen. Recipes will be permanently removed from both
the Auto and Manual Mode Tabs.
1. From the Home screen, rotate the know CCW until the Manual Mode Tab is highlighted and press
ENTER.
2. Rotate the knob CW until the Recipe Function is highlighted (Fig.92) and press ENTER.
3. Select the desired recipe and press ENTER.
4. Rotate the knob CW until the Delete icon is selected (Fig.93).
NOTE: Recipe Lock must be disabled to access this screen.
NOTE: If pan count is enabled deleting any pan recipe will erase all pan recipes for the particular food
item. Use Recipe Central to remove individual pan recipes from a food item.
5. Confi rm that you would like to delete the selected recipe by pressing ENTER (Fig.94).
NOTE: Icon images remain in memory and need not be reloaded when reused for new recipes.
Fig. 92 Fig. 93 Fig. 94
– 27 –
Page 28

Purge All Recipes
This allows the user to delete all recipes from the controller memory
in a single action. Recipes will be permanently deleted from memory.
1. Highlight Purge All Recipes and press ENTER.
2. Confi rm the action (Fig.95).
Recipe Lock
This prevents users from editing recipes parameters before running
them from the Manual Recipe Mode. Once enabled, the options to set
bake time, temp, etc. (Fig.96) will no longer appear and the controller
will display a Status screen similar to Figures 52-55.
1. Highlight Recipe Lock and press ENTER.
2. Select the desired setting and press ENTER (Fig.97).
Manual Mode Recipe List
This changes how recipes are displayed when using the Manual
Mode Recipe function. The Icons format is the default setting and a
visual representation will show next to the recipe descriptions. List and
By Date formats will remove the recipe icons for a more condensed
format (Fig.98).
Fig. 95
Auto Selection
This function allows only recipes designated as Favorites to be
displayed for Auto Mode. Designate Favorite recipes by selecting
+Fav , see Fig. 40, when saving a recipe.
Fig. 96
– 28 –
Fig. 98Fig. 97
Page 29

Change Recipe While Running
This allows users to modify recipes once they have begun timing.
To change a recipe while running, simply press ENTER and the
Live Edit screen will display (Fig.99). Press ENTER again to
confi rm. Dial select the desired parameter to change (Fig.100) and
press ENTER. Perform edits and press ENTER. Once all edits are
performed press START. The recipe will then resume using the new
setting(s). Only the current recipe phase may be edited.
NOTE: The Recipe Locked setting must be disabled in order to
change recipes while running.
MACHINE FUNCTIONS
Oven Start Up
Mode
Chose how you would like the oven to start up. Select
Temperature if you would like the oven to automatically
preheat to a designated temperature. Use Recipe Central to
designate a Start Up Recipe to have the oven automatically
begin running it when the oven is turned on. The oven will
begin heating to the recipe’s temperature and prompt the user
when ready. Dial select the desired mode and press ENTER.
Start Up Temperature
For use with Temperature start up mode.
Fig. 99
– 29 –
Fig. 100
Page 30

Energy Saving Mode
Energy Saving Mode reduces the oven temperature after a set period of inactivity/
idle time. When in this mode, the following screen (Fig. 101) will be displayed.
To exit out of this mode, press any button or rotate the knob. The oven is now
ready to proceed to any normal operation.
Enable/Disable
Select Enable if you would like the oven to revert to a lower temperature
during idle periods.
Inactive Time
Sets the duration of no user interaction that must transpire before the oven
reduces the temperature. Inactivity does not include bake/cook duration.
10 minutes is the minimum duration setting.
Fig. 101
Set Back Temperature
Sets the temperature the oven will revert to after idle periods. The minimum set back temperature
is 250 degrees Fahrenheit.
Recipe Ready
Choose what determines when the oven is ready and able to begin the bake/
cook timing cycle.
Recipe Ready
Select When Within Range (Fig.102) to automatically preheat the oven,
to a selected range, before the oven signals the user (“Oven Ready” is
displayed and lights fl ash). Select At Any Temperature (Fig.103) to allow
the bake/cook timer to begin at any temperature.
Recipe Start below set point
This determines the minimum temperature allowable to begin the baking/
cooking cycle when the When Within Range option is selected. Select
from -15˚F to 0˚F.
Recipe Start above set point
This determines the maximum temperature allowable the bake/cook cycle
when the When Within Range option is selected. Select from 0˚F to 20˚F.
Factory Defaults
This will remove all user settings and restore the VIC to its original out of the
box state.
This will reset oven settings that may render the oven
inoperable or affect performance. Contact your local Hobart Service
technician to recalibrate.
Fig. 102
Fig. 103
Pan Count
Enable Pan Count for use with recipes that have multiple time settings for
varying quantities of pans. This will disallow Auto Mode recipe modifi cation
from displaying the setting controls and the Select Pan Confi guration screen
will immediately appear (Fig.104).
– 30 –
Fig. 104
Page 31

TECHNICIAN LEVEL SETTINGS
Vent Evacuation
When the vent is programmed to be open during a recipe phase, the vent will open for the Vent Evacuation
duration during the fi rst recipe phase and phases that follow vent closed phases. The remainder of time for
phases when Vent Evacuation occurs will operate the vent according to Vent Open Time/min (Fig. 105).
Vent Open Time/min
This sets how much time per minute (60 sec is the default setting) the vent will be open when the user
programs the Vent Position open for a recipe phase. The vent will open for the programmed duration
at the beginning of each minute and close for remainder. Vent Open Time/min is superseded by Vent
Evacuation operation (Fig. 105).
džĂŵƉůĞƌĞĐŝƉĞĚĞŵŽŶƐƚƌĂƟŶŐǀĞŶƚŽƉĞƌĂƟŽŶ
sĞŶƚǀĂĐƵĂƟŽŶ
Time*
Phase 1
VentTime /min
Vent Time /min
Phase 2
sĞŶƚĐůŽƐĞĚƉĞƌ
ƌĞĐŝƉĞ
Phase 3
Fig. 105
sĞŶƚǀĂĐƵĂƟŽŶ
Time*
Phase 4
ΎsĞŶƚǀĂĐƵĂƟŽŶŽĐĐƵƌƐĂƚƚŚĞ
ďĞŐŝŶŶŝŶŐŽĨƚŚĞĮƌƐƚƉŚĂƐĞĂŶĚ
ĂŌĞƌǀĞŶƚĐůŽƐĞĚƉŚĂƐĞƐ
Vent Time /min
Vent Time /min
Phase 5
Temperature Calibration
This is used to calibrate the oven RTD with the IO board. When selected, the oven raw temperature from
the internal probe will be displayed. Enter the external temperature probe (meter) temperature by turning the
knob and push to enter. Note, if the temperature calibration screen is revisited the temperature displayed
will revert back to the raw internal probe value and the last calibration offset will be erased. Please refer
to the specifi c oven models service manual for the probe calibration procedure.
Heating Off from Set Point
Determines when the call for heat will be removed based on the calibrated oven temperature.
Heating On from Set Point
Determines when the oven calls for heat based on the calibrated oven temperature.
– 31 –
Page 32

Maximum Water Injection Time (Burst/Bake)
Sets how much water may be introduced into the oven cavity for the purpose of steaming during the
Manual – Bake mode.
NOTE: Extended water injection durations may cause substantial drops in oven temperature and not
render full conversion to steam.
Maximum Water Injection Time (Pulse/Cook)
Sets how much water may be introduced into the oven cavity for the purpose of steaming during the
Manual – Cook mode for both Burst and Steam Repeat applications.
NOTE: Extended water injection durations may cause substantial drops in oven cavity temperature and
not render full conversion to steam.
Pulse Steam Minimum Interval
Determines the minimum time duration that must occur before steam may be reapplied when using the
Manual – Cook Steam Repeat time function.
LANGUAGE
From the home screen, rotate the knob until the Language tab is
highlighted and press to select. Rotate the knob until the desired
language, English, French, or Spanish, (Fig. 106) is displayed and press
to select. Language may also be changed from within the Toolbox-Display
Settings. The Language tab can be hidden by enabling the Language
Lock feature found under Toolbox-Display Settings.
MULTI RECIPE MODE
This mode allows the operator to set timers for individual trays. From
the home screen, rotate the knob until the Multi tab is highlighted and
press ENTER. Select Bake and press ENTER. Select the desired
temperature and press Start. Rotate the knob until the desired tray
position is highlighted and press ENTER. Select the desired time for
this position and press ENTER. To start a timer highlight the desired
position and press Start. When the timer expires, the tray timer will
fl ash green (Fig. 107). If multiple timers have expired the controller
will highlight the position icon that has been expired the longest and
advance the highlight sequentially through the timers in the order they
expired. Press Start to acknowledge the highlighted timer. This feature
is currently still under development.
NOTE: Multi timers must all utilize the same temperature setting.
Fig. 106
Fig. 107
FORM 36725 Rev. A (July 2013) PRINTED IN U.S.A.
– 32 –
 Loading...