

Page 1
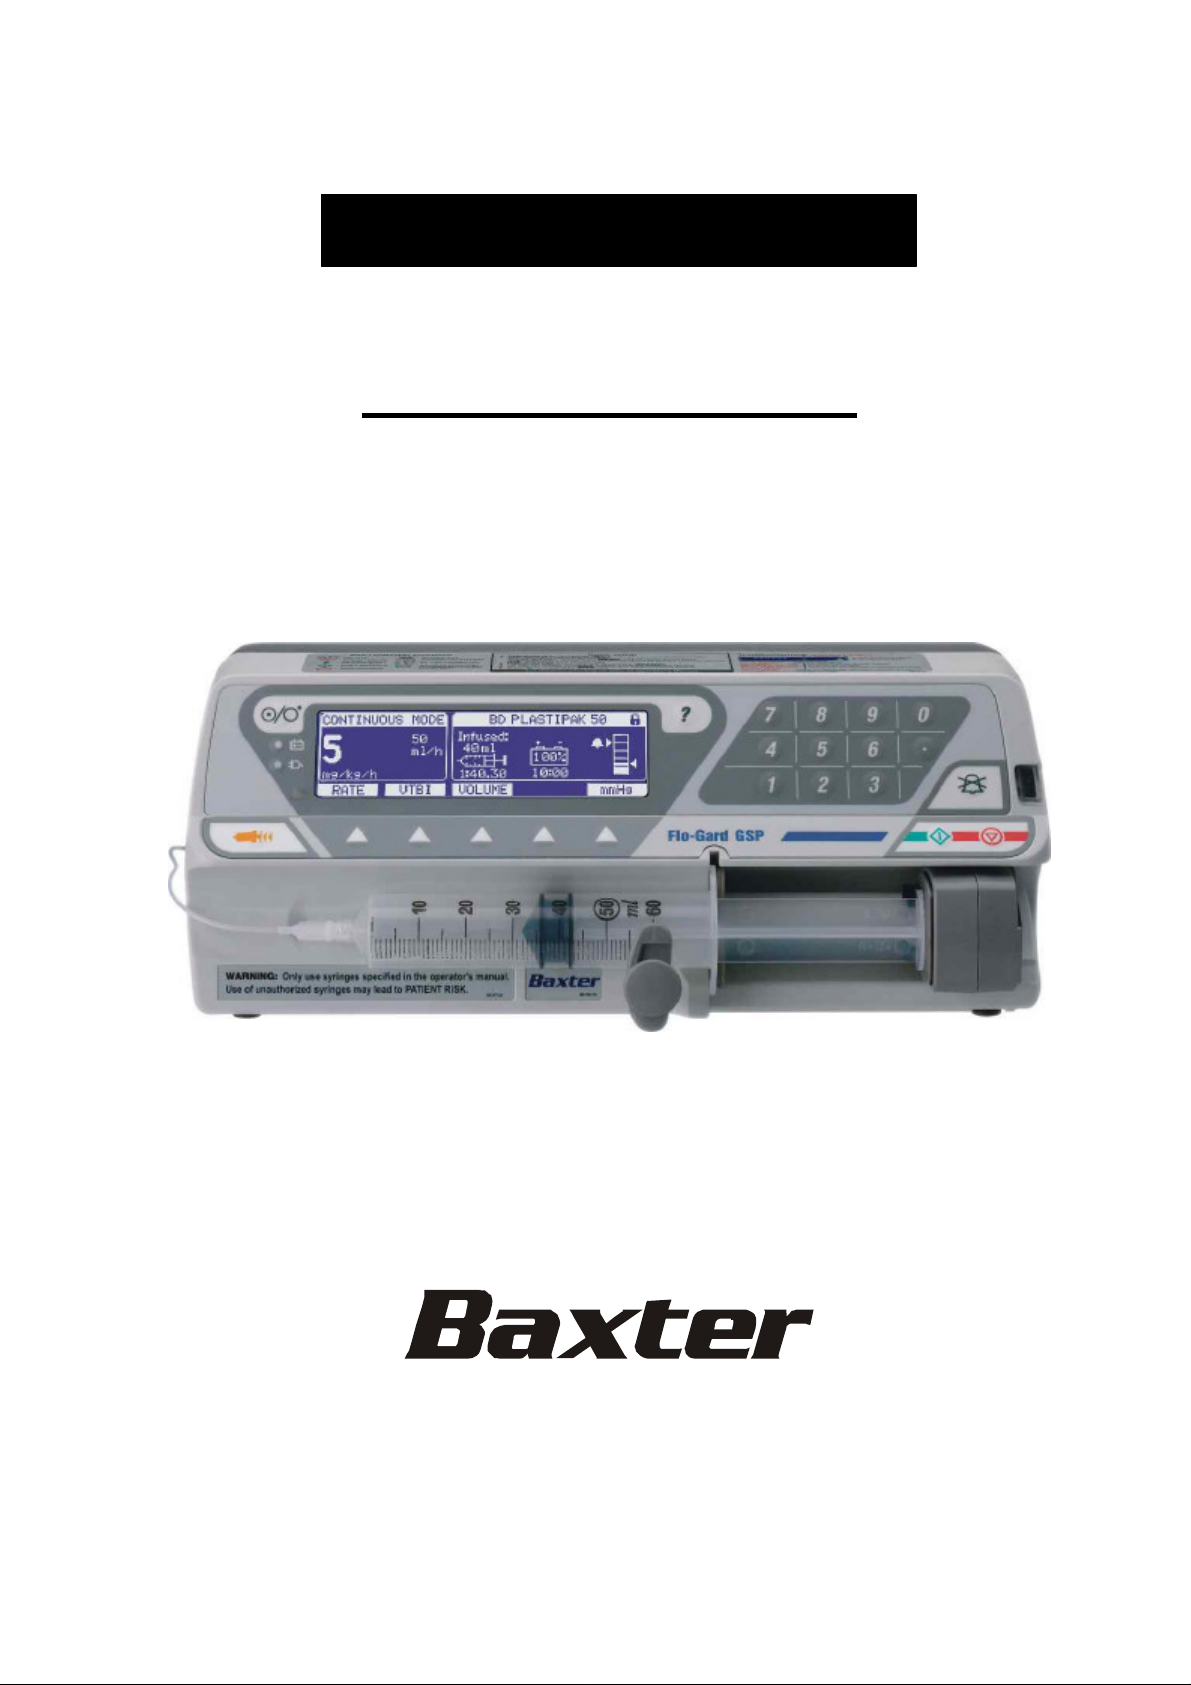
Service Manual
Flo-Gard GSP
S Y R I N G E I N F U S I O N P U M P
BS036010EN-P06
Prior to servicing this pump, read this manual and the pump’s
Operator’s Manual carefully to fully understand the pump’s
functionality and to ensure safe and proper servicing.
Page 2

CONTENTS
1. INTRODUCTION………………………………………….…..4
1.1 General Information……………………………………4
1.2 General Precaution……………………………………..4
1.3 Service Contacts………………………………………..5
2. TECHNICAL DESCRIPTION………………………………..8
2.1 General…………………………………………………8
2.2 Electronic board……………………………………….10
2.3 Drive Unit board …………………………………...13
2.4 Power Supply Unit…………………………………….14
2.5 IRDA/RS232/Nurse Call Interface Specification……...14
2.6 Bootstrap Loader Unit……….………………………...15
3. USER CONFIGURATION MENU…………………………...16
4. SERVICE MENU………………………………………………16
4.1 Maintenance Menu……………………………………..16
4.2 Loading Program…………...…………………………..16
4.3 Calibration……………………………………………...17
4.4 Testing………………………………………………….20
5. RECOMMENDED ROUTINE MAINTENANCE
AND TESTING…………………………………………………22
5.1 AC/Battery Operation Check…………………………...22
5.2 General Cleaning and Inspection for Damage…………22
5.3 Battery Test……………………………………………..23
5.4 Infusion Rate Check……………………………………23
5.5 Occlusion Pressure Level Check……………………….23
6. TROUBLE-SHOOTING……………………………………….24
6.1 Safety WARNINGS…………………………………….24
6.2 Pump has been dropped or damage……………………..24
6.3 Pump has been exposed to fluids………………………..24
6.4 Trouble-shooting by fault symptom……………………..25
6.5 Trouble-shooting by failures codes……………………...28
Flo-gard GSP Service Manual
2
Page 3

7. REPAIR………………………………………………………….33
7.1 Access to the Pump……………………………………...33
7.2 Front Case and Sub-assemblies………………………….33
7.3 Rear Case and Sub-assemblies…………………………..49
7.4 Torque guide…………………………………………….40
8. ELECTRICAL SCHEMATIC DIAGRAMS, COMPONENT
LOCATION DIAGRAMS……………………………………...43
8.1. Electrical Block Diagram of the Pump…………………..43
8.2. Electrical Schematic Diagram of the Pump……………...44
8.3. Electronic Board Schematic Diagram……………………47
8.4. Electronic Board Component Location Diagram………...51
8.5. Drive Unit Board Schematic Diagram …………………..52
8.6. Drive Unit Board Component Location Diagram …….53
8.7. Power Supply Unit Schematic Diagram………………….54
8.8. Power Supply Unit Component Location Diagram………55
8.9. Battery Monitoring Unit Component Location Diagram…56
9. MECHANICAL ASSEMBLY DRAWINGS
AND PART LIST…………………………………..……………..57
9.1. Part List……………………………………………………57
9.2. Front Case Assembly………………………………………59
9.3. Rear Case Assembly……………………………………….71
9.4. Final Assembly…………………………………………….75
10. SPARE PARTS LISTING………………………………………...82
10.1 Spare Accessories…………………………………………77
10.2 Spare Labels/Publications…………………………………77
10.3 Spare Electrical Components……………………………...78
10.4 Spare Mechanical Components……………………………78
Flo-gard GSP Service Manual
3
Page 4
1. INTRODUCTION
1.1.GENERAL INFORMATION
The Flo -Gard GSP syringe pump is designed to accurately control the delivery of solution to the
patient by means of a disposable syringe.
The Flo -Gard GSP syringe pump is compatible with a wide range of standard, single-use,
disposable Luer-lock syringes, ranging from 10ml to 100ml in size.
This SERVICE MANUAL describes the theory of operation, how to check, troubleshoot and
repair Flo -Gard GSP syringe infusion pump.
Ensure that you are fully familiar with this equipment by carefully studying the Operator’s
Manual and this Service Manual prior to attempting any repairs or servicing.
1.2. GENERAL PRECAUTION
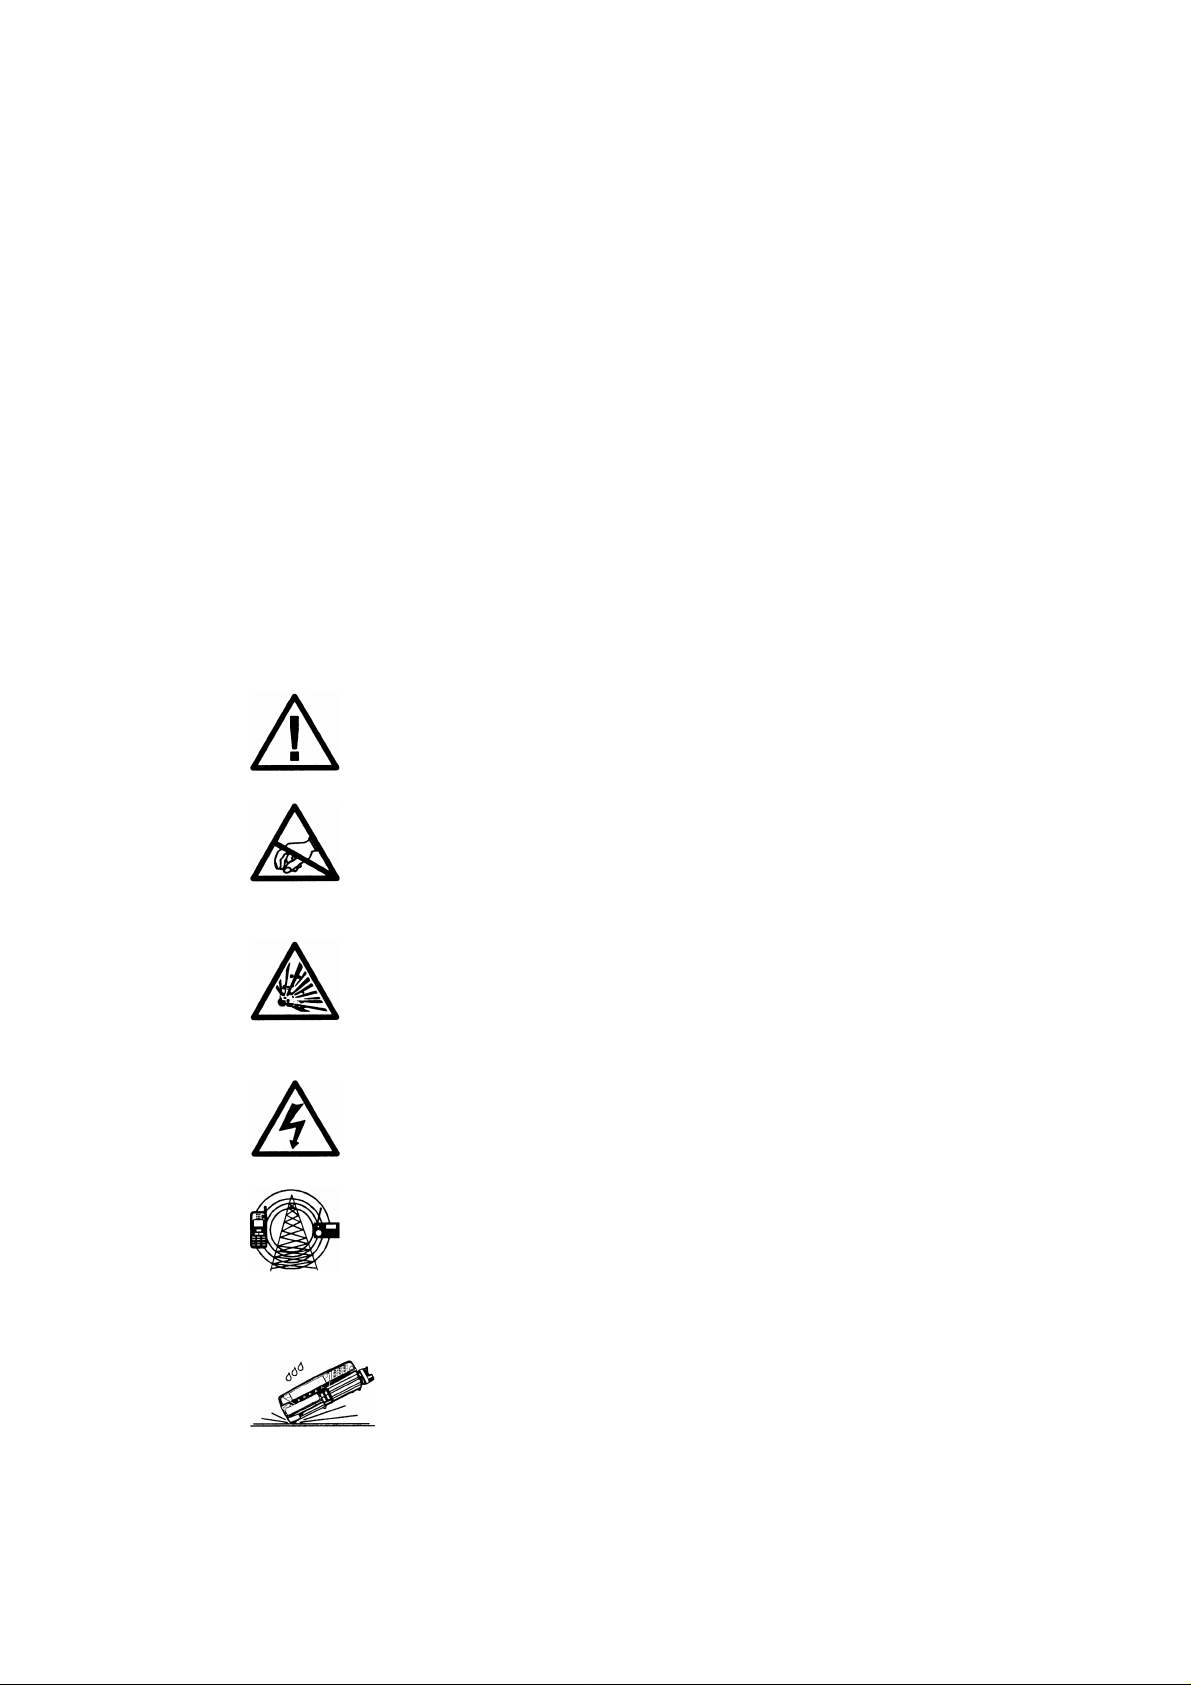
Please read the general Operating Precautions described in the Operating
Instructions carefully prior to using this pump.
This pump contains static- sensitive components. Observe strict precautions
for the protection of static sensitive components when attempting to repair and
service the pump.
An explosion hazard exists if the pump is used in the presence of
flammable materials. Exercise care to locate the pump away from any such hazardous
sources.
An electrical shock hazard exists if the pump casing is opened or removed.
Refer all servicing to qualified service personnel.
This pump is protected against the effects of high-energy radio frequency
emissions and is designed to fail-safe if extremely high levels of interference are
encountered. Should false alarm condition be encountered, either remove the source
of the interference or regulate the infusion by another appropriate means.
If the pump is dropped, subjected to excessive moisture, humidity or
high temperature, or otherwise suspected to have been damaged, remove it from
service for inspection by a qualified service engineer.
Flo-gard GSP Service Manual
4
Page 5

1.3. SERVICE CONTACTS
Baxter Technical Service Centre locations and full addresses:
Argentina
Baxter Immuno SA
Av. Olivos 4140
Tortuguitas-C.P. 1667ARGENTINA
Tel: 54-11-4463-3333
Austria
Baxter-Immuno Vertriebs GmbH
IZ-Sued Strasse 7 Obj. 58D/Tops2
2355 Wiener Neudorf
AUSTRIA
Tel: +43 (0)1 711 20 138
Fax: +43 (0)1 711 20 157
Brazil
Baxter Hospitalar Ltda
Avenida Santa Catarina 2660
04378-200
Sao Paulo, SP
BRAZIL
Tel: 55-11-541-8922 x5250
Fax: 55-11-5563-7933
Chile
Baxter de Chile, Ltda.
Avenida Mexico #715
Recoleta, Santiago
CHILE
Tel: 56-2 -6213707
Fax: 56-2 -6213708
Colombia
Laboratorios Baxter SA
Carrera 99
#46a22
Santafe’de Bogota DC
COLOMBIA
Tel: 57-1-4211820
Fax: 57-1-4210055 x234 or x233
Ecuador
Baxter Ecuador SA
Av. Naciones Unidas #1084
Esquina Amazonas
Edif. Previsora Torre B, Ofic 408
Quito
ECUADOR
Australia
Baxter Healthcare Pty. Ltd.
Baxter Drive, Old Toongabbie
New South Wales 2146
AUSTRALIA
Tel: 61-2-8845-1560
Belgium
N.V. Baxter S.A.
Boulevard R. Branquart 80
B-7860 Lessines
BELGIUM
Tel: +32 (0)68 27 30 54
Canada
Baxter Instrument Services
5055 - Unit 5, Satellite Drive
Mississauga, Ontario
L4W 5K7
CANADA
Tel: 1-877-331-9336
Fax 905-281-6730
China
Baxter Healthcare Ltd.
Rm 503 China Garments Mansion
99 Jian Guo Road
Beijing 100020,
CHINA
Tel: 8610-6581-1206
Denmark
Baxter A/S
Gydenvang 43
DK-3450
Allerod
DENMARK
Tel: +45(0)48 166 435
Fax: +45(0)48 166 464
Finland
Baxter OY
Pakkalankuja 6
PO Box 46
FIN-015111 Vantaa
Finland
Tel: +35 (0)89 862-1111
Fax: +35 (0)89 862-1211
Flo-gard GSP Service Manual
5
Page 6

France
Baxter S.A.
Avenue Louis Pasteur
Boite Postale 56
78311 Maurepas Cedex
FRANCE
Tel: +33(0)1 34 61 5566
Fax: +33(0)1 34 61 5537
Greece
Baxter (Hellas) EPE
Ethnarhou Makariou 34 & Athinodorou
GR-156341 Illioupolis
Athens
GREECE
Tel: +30 (0)1 9959 818
Fax: +30 (0)1 9959 820
Italy
Baxter S.p.a.
Via Lorenzini, 4
20139 Milano
ITALY
Tel: 39/2 89 52 71
Netherlands
Baxter BV
Koblatweg 49
3542 CE Utrecht
THE NETHERLANDS
Tel: +31(0)30 2488 771
Fax: +31(0)30 2488 795
Panama
Baxter de Panama
Calle 55 Obarrio
Edificio Plaza Obarrio
Primer Piso Suite #105
Panama
REPUBLIC OF PANAMA
Tel: 507-264-6010 or 6013
Fax: 507-264-6027
Portugal
Baxter Medico Farmaceutica Lda
Urbanizacao Industrial Cabrafiga
Estrada Nacional 249/4 Lote 3
Cabrafiga
2735 Rio De Mouro
PORTUGAL
Tel: +351 (0)1 915 8180
Fax: +351 (0)1 915 8209
Germany
Baxter Deutschland GmbH
Am Wolfsmantel 46
91058 Erlangen
GERMANY
Tel: 091 31 61 79 122
Ireland
Baxter Healthcare Limited
Unit 7, Deansgrange Industrial Estate
Blackrock Co.,Dublin
IRELAND
Tel: +353 (0)1 206 5568
Fax: +353 (0)1 206 5555
Northern Ireland
Tel: 01232 777 800
Baxter-SA de CV
Av. Javier Rojo Gomez #709
Col. Guadelupe del Moral CP
09000 MEXICO D.F.
Tel: (52) -56-94-05-20
Fax: (52) -56-94-04-53
Norway
Baxter A/S,
Box 70 Grefsen
0490 Oslo
Gjerdrumsvei 11
NORWAY
Tel: +47(0)2 258 4800
Fax: +47(0)2 258 4801
Peru
Laboratorios Baxter del Peru SA
Las Camelias 780. Segundo piso
Lima 27
PERU
Tel: (51) 1-2217170
Fax: (51) 1-4217275
Puerto Rico
Baxter Sales & Distribution
State Road 24
Rexco Industrial Park
Buchanan
Guaynabo
PUERTO RICO 00968
Tel: 787-792-5757
Flo-gard GSP Service Manual
6
Page 7

Singapore
Baxter Healthcare Asia Pte Ltd
Singapore Technical Services
159 Sin Ming Road
#02-01/02/03 Amtech Building
SINGAPORE 575625
Tel: 65-4553911
Fax: 65-4553963
Spain
Baxter S.A.
Poligno Industrial Vara de Quart
Calle Dels Gremis 7
46014 Valencia
SPAIN
Tel: +34(0)96 386 0800
Fax: +34(0)96 3702 697
Switzerland
Baxter AG
Muellerenstrasse 3
CH-8604 Volketswil
SWITZERLAND
Tel: 0041 19085050
Venezuela
Urb. Industrial Castillito
Centro Comercial Valencia II
Valencia. Edo. Carabobo,
VENEZUELA
Tel: 58-2-204-42-68
South Korea
Baxter International
4, 5/F Jinsung Bldg 996-17
Daechi-dong
Kangnam-ku, Seoul
KOREA
Tel: 82-2-5607-184
Fax: 82-2-538-0679
Sweden
Baxter Medical AB
PO Box 63
SE- 164 94 KISTA
Torshamnsgatan 35
Sverige
Tel: 46 (0)8 632 6400
UK
Baxter Healthcare Limited
UK Nat’l Distribution Centre
Salthouse Road
Brackmills Industrial Estate
Northampton
ENGLAND
NN4 0UF
Tel: 44(0) 1604 704555
Fax: 44(0) 1604 704590
Flo-gard GSP Service Manual
7
Page 8

2. TECHNICAL DESCRIPTION
2.1. GENERAL
The Block Diagram of the pump is given in the section 8.1. The Electrical Schematic Diagram is
given in the section 8.2. The pump is composed of the following elements:
- Keypads
- Stepper motor
- Stepper motor encoder
- Syringe Force sensor
- Syringe plunger grippers and pusher lever sensor
- Drive engagement sensor
- Syringe size sensor
- Pusher position sensor
- Syringe barrel sensor
- Battery unit
- Electronic board
- Drive Unit board
- Power Supply Unit
- IRDA/RS232/Nurse Call Interface
- Hard bootstrap loader
Below follows a description of these elements, refer the appropriate diagram for full
understanding of the functionality:
2.1.1. Keypads
Keypad K1 comprises of a 4 x 3 key matrix connected to the Electronic board at connector JP1.
The ON/OFF key and BATTERY & MAINS LED’s are also located on the K1 keypad connect
to the Electronic board via JP12.
Keypad K2 comprises of a 4 x 2 key matrix. It is connected to the Electronic board via connector
JP4.
2.1.2. Stepper motor
A two-phase unipolar stepper motor with 7.5º step-angle is used in the pump drive. The motor is
connected to the Drive Unit board via connector P5 and is driven in micro stepping mode. There
are 48 steps to complete one full revolution of the motor shaft. The motor is connected to the
lead screw by means of timing belt. The belt ratio is 5:1; as a result 240 motor steps move the
drive carriage by 1 mm.
2.1.3. Stepper motor encoder
Motor speed and direction is monitored by means of the encoder. It is composed of two photointerrupters D1, D2 and a 9 slot-encoding disk mounted on the stepper motor shaft. Quadrature
signals (Tax1, Tax2) are transferred to the Drive Unit board via P6 connector.
Flo-gard GSP Service Manual
8
Page 9

2.1.4. Syringe force sensor
Plunger grippers
As a syringe force sensor is used a strain gauge TZ1 mounted on a steel plate within the plunger
retaining mechanism. When this plate is deflected by applied force on the plunger mechanism, a
differential voltage is generated at gauge output. This signal, which magnitude is proportional to
the applied force, is transferred to the Drive Unit board.
2.1.5. Syringe retainer (plunger grippers and pusher lever) sensors
The plunger grippers and pusher lever sensors are composed of photo interrupters D4, D5, D6.
The LED’s of the photo interrupters are supplied with pulse-modulated current through pin 8 of
JP1 connector of the Drive Unit board.
When the syringe is loaded, the shutters controlling the photo interrupters D4 and D6 are opened.
When the pusher lever is lifted up, the shutter controlling the photo interrupter D5 is opened.
Output signals of these sensors are summed to form syringe retainer output voltage (at pin 7 of
JP1 – Drive Unit board) in accordance with the Table 1.
sensors (D4, D6)
Pusher lever
sensor (D5)
Syr. retainer
output voltage
Off Off <0.3V
On Off
≥0.3V;
≤0.6V
Off On >0.6V;
≤0.95V
On On >0.95V;
≤1.4V
Table 1
2.1.6. Drive engagement sensor
The drive engagement sensor is comprised of photo interrupter D3. Its LED is supplied with
pulse-modulated current. When the half-nuts of drive are closed (engaged), the shutter
controlling the photo interrupter D3 is open and electrical pulses are generated at pin 6 of the
Drive Unit’s board JP1 connector.
2.1.7. Syringe size sensor
The syringe size sensing is achieved using the linear potentiometer R1. The signal from the
potentiometer slider is applied to the Electronic board via pin 2 of JP8 connector.
2.1.8. Pusher position sensor
An optical absolute encoder of pusher position is comprised of a steel encoder ruler and photo
interrupter D7. Ruler is attached to the drive walls, and the photo interrupter is mounted on the
drive carriage and moves along ruler during infusion so that edge of the ruler is inside the gap of
photo interrupter. The edge of the ruler is punched with the slots distributed with various
intervals in certain pattern. Each slot passing the gap generates electrical pulse when the photo
interrupter is moved along the ruler. Microcontroller permanently monitors width of intervals in
Flo-gard GSP Service Manual
9
Page 10

sequence of pulses and determines pusher position basing on combination of passed intervals.
Obviously, certain number of slots should be passed after start of infusion before the pusher
position (and, correspondingly, remaining time and volume) may be determined. Maximum
delay is when the pusher is at the rightmost position (up to 9 mm of pusher travel may be
required).
2.1.9. Syringe barrel sensor
The syringe barrel sensor comprises switch S1. When the syringe is loaded, the switch S1
contacts are closed and a logic “0” is generated at pin 1 of the Electronic board’s JP5 connector.
2.1.10. Battery unit
The battery unit comprises the Ni-MH (7,2V x 2.5Ah) battery GB1 together with the battery
monitoring circuit. The integrated circuit U1 monitors battery voltage, temperature and
charge/discharge current. This data is used to calculate battery charge state and remaining
working time when pump runs on battery. Data is transferred to the microcontroller via 1-Wire
interface (pin 4 of the JP7 connector). R2 is a current sense resistor; R3 and C1 constitute a low
pass filter for the current monitoring circuit. Thermistor R1 terminates battery charging if battery
temperature exceeds the permissible value. The resettable fuse F1 protects against a short circuit
of the battery.
2.2. ELECTRONIC BOARD
The electrical diagram of the Electronic board is given in section 8.3. It comprises following
main parts:
- Microcontroller circuit
- Display unit
- Display contrast regulator
- RS232 interface
- Watch-dog circuit
- Piezotransducer drive
- Reference voltage source
- LED indicators
2.2.1. Microcontroller circuit
The 16 bit microcontroller U12 (SAB-C167CR-LM) controls and monitors major syringe pump
functions. Clock pulses are generated by the quartz oscillator Q1 at a frequency of 3.686400
MHz and multiplied x 5. Supervisor integrated circuit U9 generates a reset signal for the
microcontroller when the supply voltage changes from 0V to 5V.
Software instructions are stored in 1-Megabyte FLASH memory U10. Device constant
parameters are stored in 8-kilobyte SPI EEPROM, U14. Temporary variables are stored in 128 kilobyte SRAM U8 with real time clock and lithium battery.
Flo-gard GSP Service Manual
10
Page 11

The microcontroller functions include:
- Scanning the keypad via the port P8 and the buffers of the U2 and U4 ICs. The
keypad status information is read via other buffers of the U2 and U4 ICs to the
inputs P5.9 (pin 36), P5.10 (pin 39) and P5.11 (pin P40).
- Setting the output P2.10 (pin 59) to ‘0’on switching the pump on. This signal
maintains power supply active. In order to switch power off, the ON/OFF key
shall be kept depressed, thereby setting the P5.7 input (pin 34) to ‘1’. After 3 sec
delay micrcontroller sets the P2.10 output (pin 59) to ‘1’, which switches the
power supply off.
- Detecting pump connection to 100-240VAC mains power or 12VDC by the signal
at the P5.6 input (pin 33) (‘1’ – when connected). At this state transistor T11
opens thereby activating the MAINS indicator on the front panel. When pump is
running on internal battery, microcontroller activates the BATTERY indicator by
setting the P2.0 output (pin 47) to ‘1’.
- Obtaining information from the battery monitoring circuit on the battery voltage,
temperature and capacity via the input P7.6 (pin 25); obtaining battery fast charge
signal via the P5.14 input (pin 43) (‘0’ – fast charge in progress); disabling the
AC mains supply by setting the P7.4 output (pin 23) to ‘1’ in the battery
calibration mode.
- Activating the Nurse Call circuit located at the Supply Unit, by setting the P2.5
output (pin 52) to ‘1’.
- Receiving voltage proportional to syringe size from the syringe size sensor via the
AN0 input (pin 27). Force sensor reference voltage is applied to the AN1 input
(pin 28). Voltage directly proportional to force acting on the syringe pusher, is
applied to the AN2 input (pin 29). Force sensor reference 0 voltage is applied to
the AN3 input (30 pin). Syringe retainer output voltage (see table 1) is applied to
the input AN4 (pin 31). Voltage from piezo transducer current monitor is applied
to the input AN5 (pin 32). The P2.12 output is used for controlling force sensor’s
supply.
- Controlling (pulse modulating) the current through the LEDs of the drive
engaged, gripper and pusher lever sensors via the P2.13 output (pin 62); receiving
signal of engagement of drive half-nuts with lead screw (‘1’ pulses) via the P5.13
input (pin 42) (via the buffer U20); receiving signal that syringe barrel is fitted
(‘0’ level) via the P5.12 input (pin 41) (via the buffer U4E); receiving tachometer
pulses from the Drive Unit board via the P2.15 input (pin 64). Prior to starting
motor rotating backwards and during it microcontroller sets the P2.11 output (pin
60) to ‘0’ to disable motor direction sensor in the Drive Unit board; during normal
infusion this output is set to ‘1’.
- Generating signals for the stepper motor controller/driver which is located in the
Drive Unit board: Data A via the P2.6 output (pin 53), Data B via the P2.7 (pin
54), Strobe A,B via the P2.8 (pin 57), Clock A,B via the P2.9 (pin 58). Signal
controlling magnitude of motor winding current is generated at the POUT0 output
(pin 19) by means of PWM; AC component of this signal is suppressed by means
of the second order low-pass filter (R54, C71, R56, C73), and DC component
having range 0.4 to 2.5 V is transferred via the diode D23 and pin 4 of JP10 to the
Drive Unit board – REF/ENABLE A,B circuit. This circuit is used also for
disabling motor driver by applying +5 V to it. For this sake pin 4 of JP10 is also
connected with the P7.7 output of microcontroller (pin 26) and output of
watchdog via the D21 and D22 correspondingly; logic ‘1’ at any of these two
Flo-gard GSP Service Manual
11
Page 12

outputs sets windings current to zero (e.g. in STOP mode, during pause between
two adjacent steps or when the watchdog is activated).
- Selecting IRDA rate via the P6.4 output (pin 5). Selecting of UART connection
either with the RS232 or IRDA interface via the P6.5 output (pin 6). The P6.7
output is set to ‘1’ when RS232 selected, and ‘0’ is set when IRDA interface
selected.
- Activates Z1 buzzer by setting output P6.7 to ‘1’ when piezotransducer circuit is
interrupted;
- receiving interrupt pulses from the SRAM (U8) Real Time Clock via the T2IN
input (pin 74);
- receiving pulses from the syringe pusher position sensor via T4IN input (pin 70).
2.2.2. Display unit
A 240 x 64 dot blue negative graphic LCD display (MD1) is used in the pump. The backlight is
controlled by means of PWM, using control signal generated at the POUT2 output (pin 21) of the
microcontroller.
2.2.3. Display contrast regulator
Negative voltage adjustable within range of 7.5 to 8.5 V is utilized to control the display
contrast. The negative voltage is generated by means of the DC/DC converter U16, and voltage
regulator U17. Initial voltage value is adjusted by means of trimmer potentiometer R52. The
microcontroller U12 then controls display contrast by means of PWM signal generated at the
POUT3 output (pin 22) and applied to pin6 of the U17 via low-pass filter R50, C60 and diode
D19.
2.2.4. RS232 interface circuit
The RS232 interface circuit is isolated from the pump circuitry by means of the opto-couplers
D8, D9. This isolated part of the circuit is powered from the PC COM port using RTS (+10V)
and DTR (+10V), rectified by means of the D6, D7 diodes signals. Voltage regulator U1 is used
to provide the RS232 interface chip U3 with +5V supply (VDD).
U3 includes a DC/DC converter providing the necessary voltages of +7V and –7V. Integrated
circuit U3 hibernates when no valid receiver level and no receiver or transmitter transient is
detected for 30 seconds, and wake up when a valid receiver level or receiver or transmitter
transient is detected.
2.2.5. Watchdog circuit
The watchdog function is carried out by the uP supervisory circuits with windowed (Min/Max)
watchdog U9. The microcontroller generates clocks at the P2.4 output (pin 51) that are applied to
the WDI input (pin 3 of U9). If the clock period goes outside the permissible range, U9 generates
a short logic ‘0’ pulse at the WDP0 output (pin 5). This pulse sets ‘1’ at the Q output (pin5) of
the flip-flop U6A, which acts as follows:
1) Stops motor (via the D22),
2) Activates red alarm LED D1 (via the D4),
3) Activates the nurse call circuit located in the Supply Unit (via the D16),
Flo-gard GSP Service Manual
12
Page 13

4) Launches the buzzer Z1 (via the D10),
5) Eliminates 3 s delay when switching the pump off (via the input 5 of U11),
6) Indicates to the microcontroller U12 that watchdog is activated (via the P5.8 input – pin 35).
The watchdog circuit is also activated if the motor starts rotating backwards despite forward
rotation commands. In this case the rotation direction sensor in the Drive Unit board sets
“Backwards” circuit (pin 3 of JP9) to ‘0’ which inputs logic “0” to the watchdog (via D18) thus
activating it.
The pump carries out watchdog test each time it is powered up, and if test passes successfully
U6B trigger Q output (pin 9) is set to ‘0’, if test fails – Q output is set to ‘1’. This watchdog
signal is applied to the 67 pin of U12 microcontroller.
2.2.6. Piezotransducer drive
The audible signal is generated by means of PWM at the POUT1 output (pin 20) of the
microcontroller U12. Carrier frequency is suppressed by third order low-pass filter (R58, C75,
R60, C76, R61, C77).
In order to obtain double maximal output voltage a bridge layout of the U18 amplifier is used.
The ratio of R64 and R67 determines audio gain.
R77 monitors current applied on the piezotransducer. Signal from the R77 is amplified by the
U18A amplifier, rectified with the D21, C86 and applied to the AN5 input (pin 32) of the U12
microcontroller.
2.2.7. Reference voltage source
Voltage regulator U7 generates voltage Vref used as reference for the microcontroller’s ADC
and the syringe size sensor. U7 is switched on/off by microcontroller (via the P6.6 output).
2.2.8. LED indicators
The red LED indicator D1 flashes when an ALARM condition is detected or when the watchdog
circuit is activated. It is controlled by the microcontroller U12 via the P2.2 output (pin 49) or by
the watchdog (via the D4). The Green LED D2 flashes during infusion. It is controlled via the
P2.3 output (pin 50) of the microcontroller. The orange LED D3 flashes in ALERT condition. It
is controlled via the P2.1 output (pin 48).
2.3. DRIVE UNIT BOARD
The drive electronics is located on the separate PCB attached to drive mechanical assembly.
Controller-driver U2 is used to operate the stepper motor. It controls current through motor
windings by means of the PWM using control signals from the microcontroller: “Data A” (pin 6
of the U2), “Data B” (pin 17), “Strobe A,B” (pins 2, 13), “Clock A,B” (pins 5, 16),
“REF/ENABLE A,B” (pins 3, 14). Each step of the motor consists of 8 successive micro-steps,
which provide regulation of current through windings closely to sin/cos law, thus ensuring
smooth rotation of the motor shaft. In the case the watchdog is actuated, a high level (+5V)
signal is applied to the “REF/ENABLE A,B” inputs, which removes power from the motor
windings.
Quadrature signals from the motor encoder are processed by means of the decoder built on the
U6, U7, and U8 integrated circuits. 9 square pulses are generated at the TAX output (pin2 of
JP2) during one revolution of motor shaft. The “BACKWARDS” output is used to indicate
Flo-gard GSP Service Manual
13
Page 14

direction of motor rotation. Logic “0” is generated at this output if motor st arts rotating so as to
move syringe pusher backwards while logic “1” is applied to the FWD input (i.e. motor should
not rotate backwards). Logic “0” applied to the FWD input (pin 1 of JP2) disables the direction
sensor and ensures that logic “1” is set at the “BACKWARDS” output regardless of rotation
direction.
The operational amplifier U1 amplifies syringe force sensor’s output signal. Integrated circuit U3
produces precise supply voltage +5V both for the syringe force sensor and amplifier U1. The
trimmer potentiometer R2 is used to balance the force gauge (bridge).
U5A performs buffering of syringe retainer output signal, and U5B performs conditioning of
pusher position sensor’s signal.
2.4. POWER SUPPLY UNIT
The power supply unit includes switching power supply PS1, +5V voltage regulator U2, and
accumulator battery fast-charge controller U1 together with transistor T4. Protective circuits
built using comparators U3, U6 and thyristors D6, D7 are intended to prevent occurrence of
over-voltage and under-voltage at the +5V supply circuit in the case of failure of voltage
regulator or short circuits within pump electronics.
Voltage in the VccNS circuit is approximately +11V when pump is connected to the mains, and
approximately +7V when disconnected (powered from the internal battery). Vcc voltage is +5V
when pump is switched on, and 0 when switched off. The +5V regulator (U2) is switched on
when VccNS voltage is applied to its “ON/OFF” input (pin 2), which occurs when the operator
presses the pump’s ON/OFF key. The regulator is switched off by means of the “SHDN” signal,
which is generated by microcontroller when the operator depresses the ON/OFF key for 3
seconds.
The T8 transistor key is used for switching mains supply off in the course of the accumulator
battery test.
The controller U1 initiates fast charge of accumulator battery each time the pump is connected to
the mains. Detecting a negative battery voltage slope, which occurs when charge is completed,
normally terminates fast charge. For safety reasons termination of the fast charge is provided by
means of the thermistor within the battery pack detecting over-temperature. Additionally,
termination of fast charge is provided on elapsing of established fast charge time. After
termination of fast charge the controller switches to trickle charge mode.
A socket is located on the pump for powering from an external 12VDC source. This circuit
comprises a connector on the rear side of pump and fuses F2, F3, and filter components L1, L2,
C21, C22 mounted on the power supply unit’s PCB. Diode D10 prevents pump from damaging
in case of wrong polarity of external 12 VDC source.
2.5. IRDA/RS232/NURSE CALL INTERFACE
2.5.5. IRDA interface
Serial infrared data communication is operating in accordance with the IRDA standard using
modulator-demodulator U4 and transceiver U5 located on the power supply’s PCB.
Flo-gard GSP Service Manual
14
Page 15

The transceiver is mounted on the rear of the PCB, in front of the window at the back of the
pump. The window is covered with dark IR-transparent plastic.
2.5.6. RS232 interface
The technical specification of the RS232 Interface is listed in table 2 below:
Table 2
Connector D Type –9 Pin, female
TXD Output Voltage Range Minimum: -5V(mark), +5V(space)
Typical: -5.4V(mark), +5.4V(space) with 3kohm load to
ground
RXD Input Voltage Range -25V - +25V maximum
RXD Input Thresholds Low: 0.8V minimum/ High: 2.4V maximum
RXD Input Resistance 3 kohm minimum
Isolation Socket/pump 4 kV
Baud Rate 115 kBaud
Bit Format 1 start, 8 data, no parity, 1 stop
RS232 connections data:
1 - Not used
2 - Transmit Data (TXD) Output
3 - Received Data (RXD) Input
4 - Power Input (DTR)
5 - Ground (GND)
6 - Not used
7 - Power Input (RTS)
8 - Not used
9 - Not used
2.5.7. Nurse Call Interface
Nurse call interface is implemented using relay RL1 located on the power supply’s PCB.
Contacts are rated at 1A at 50VAC or 1 A at 30VDC. Relay contacts are accessible at the
connector on the rear of the pump.
After detecting an alarm condition the microcontroller sets a logic “1” at its P2.5 output (pin 52),
which opens transistor T3 on the power supply’s PCB and the relay is activated. If a failure of
the microcontroller is detected an output signal from the watchdog circuits activated the relay.
2.6. BOOTSTRAP LOADER UNIT
A bootstrap loader unit is used for downloading bootstrap into the Flash memory U10 on the
Electronic board, utilizing microcontroller’s U12 internal bootstrap loader, when the Flash
memory’s software does not contain bootstrap or it does not work. Bootstrap loader unit is
connected to the JP6 connector of the Electronic board. It allows launching the U12
microcontroller by means of manual reset signal, maintains Power Supply Unit active,
commutates UART via the RS232 interface and configures the microcontroller so as to launch its
internal bootstrap lo ader.
Flo-gard GSP Service Manual
15
Page 16
3. USER CONFIGURATION MENU
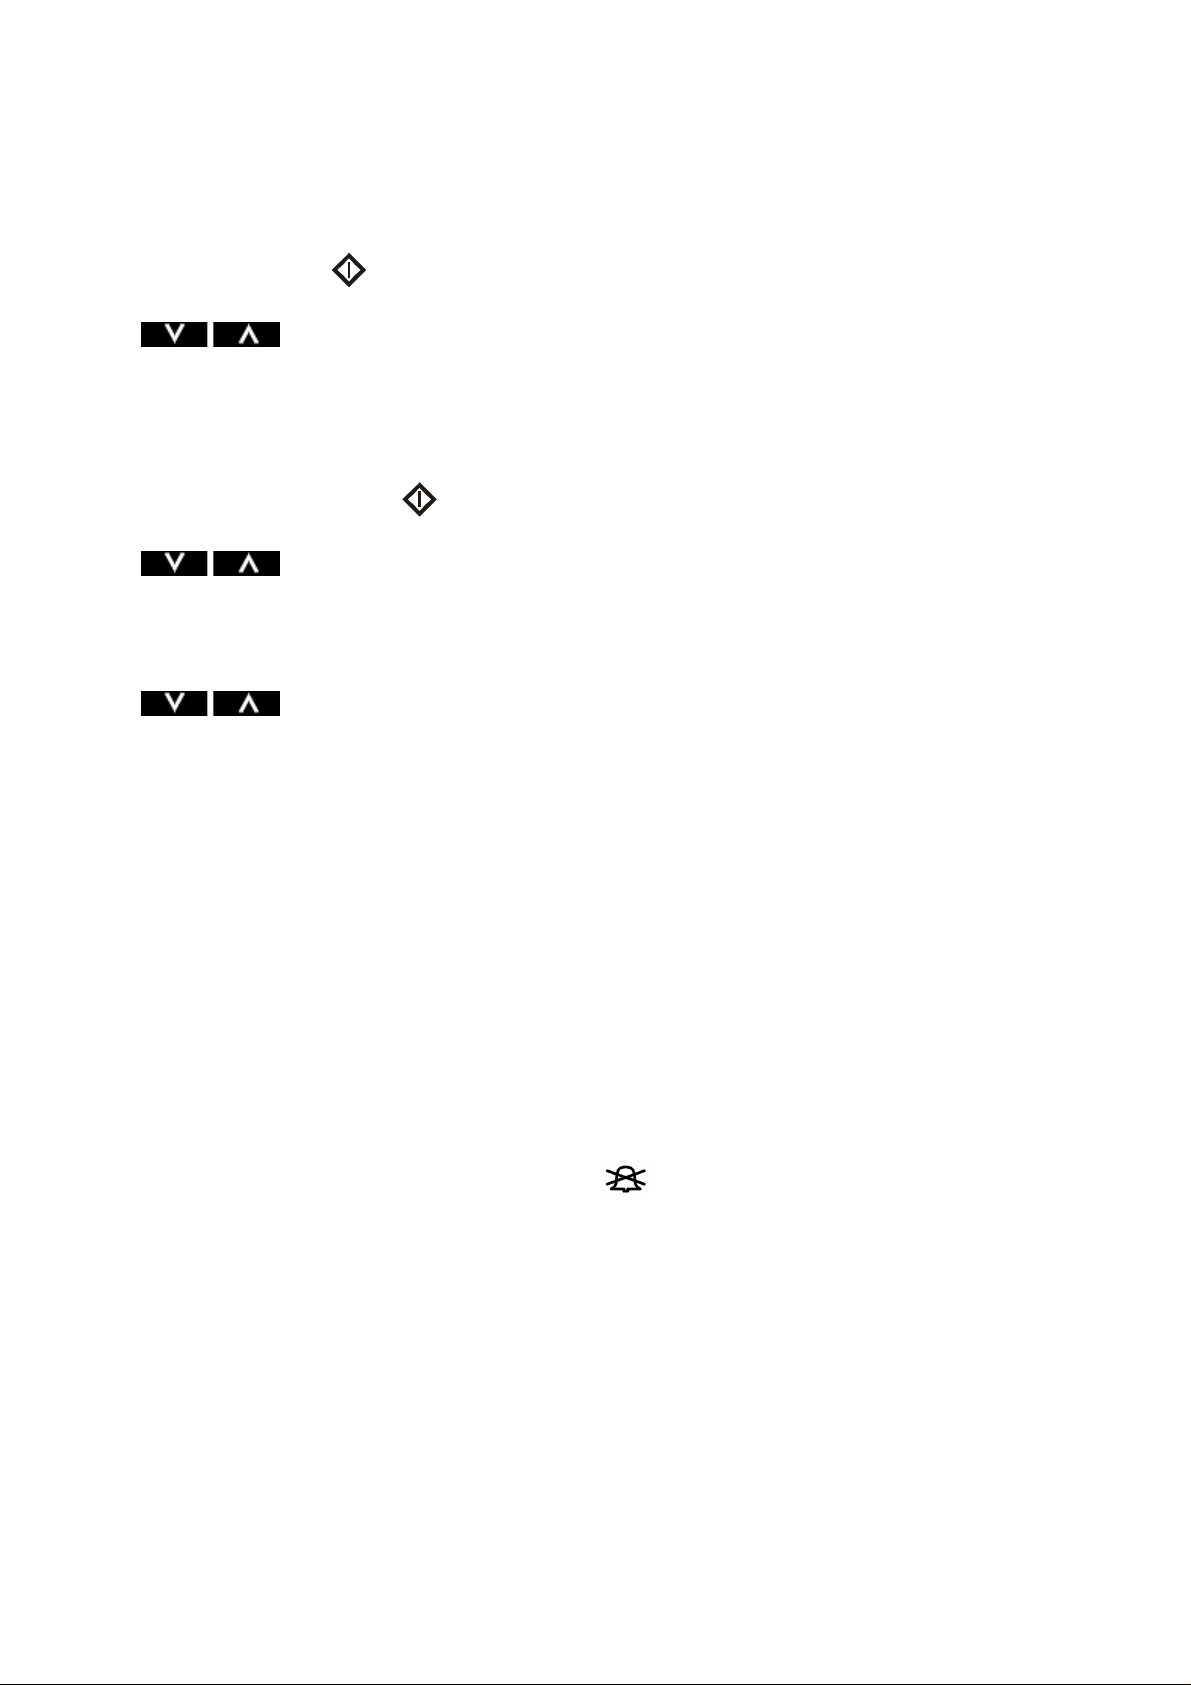
Depressed the key and turn the pump on. Enter code 237 using the numerical keypad.
Press OK to confirm the code. The User Configuration Menu will be displayed. Use the
softkeys to select the required parameter (see Operator’s Manual).
4. SERVICE MENU
While keeping pressed the key turn the pump on. Enter code 751 using the numerical
keypad. Press OK to confirm the code. The Service Menu will be displayed. Use the
softkeys to select the required parameter.
4.1. MAINTENANCE MENU
Select the MAINTENANCE MENU from the Service menu and press the OK softkey. Use the
softkeys to select the required parameter. Press the OK softkey:
- to modify the NEXT SERVICE DATE
- to view the selected LOG (event, use, key or service)
- to set TIME FORMAT (24h or 12h)
- to set DATE FORMAT (dd-MM-yyyy or MM-dd-yyyy)
- to set DEFAULT PARAMETERS
- to set ALARM PITCH
- to set ALERT PITCH
- to view serial number
- to select INTERFACE type (RS232 or IRDA). (Only one of these interfaces may
be active at a time.)
Press the QUIT softkey to return to Service menu.
4.2. LOADING PROGRAM
4.2.1. Loading program
In order to check the program version, keep the key depressed while turning the pump on.
To perform a programming operation, the following is required:
- Flo -Gard GSP Firmware Upload Utility must be installed and configured on the computer that
is being used.
- Either RS232 extension cable must be connected between the COM port of the computer and
the 9-way ‘D’ connector in the rear of the pump.
Select the LOADING PROGRAM and press the OK softkey. The pump is ready for loading the
program.
Note. When the ERROR: PR02 message (incorrect program CRC) is displayed, the pump also is
ready for loading the program.
Flo-gard GSP Service Manual
16
Page 17
Programming sequence:
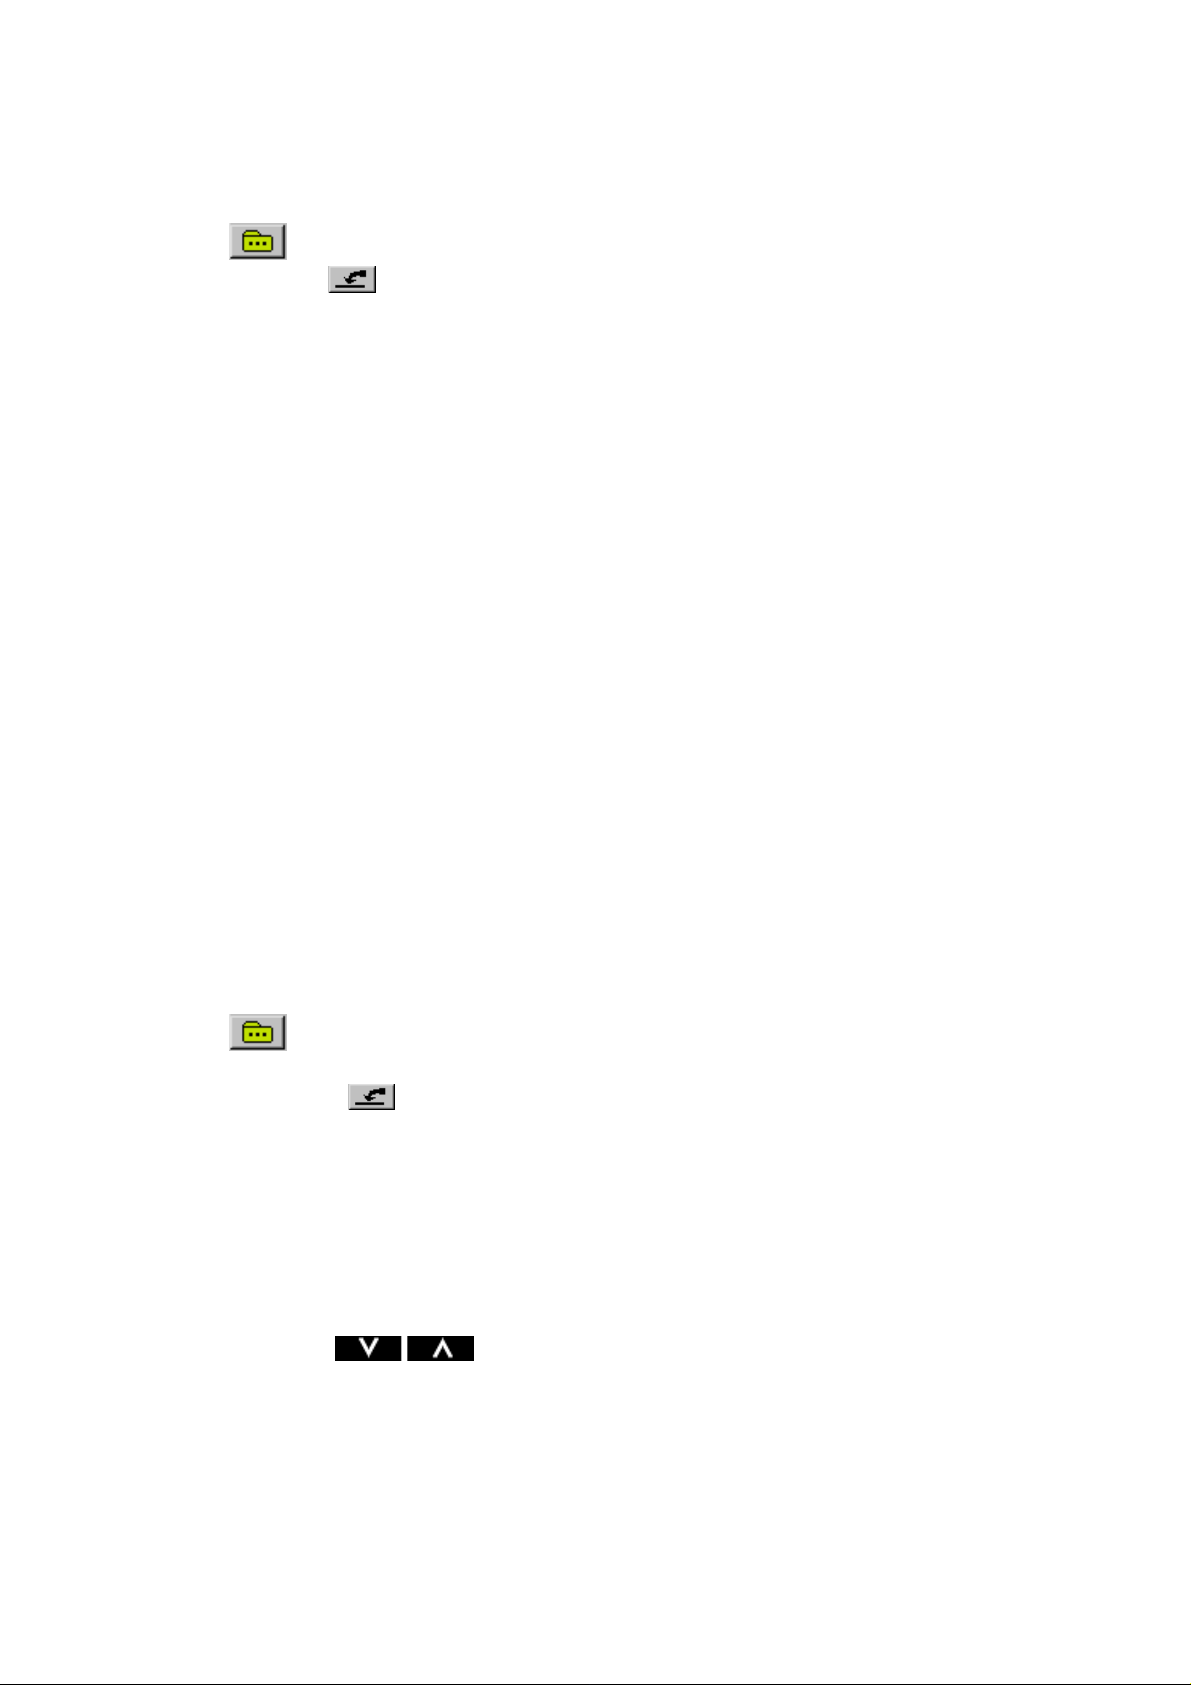
Start Flo -Gard GSP Firmware Upload Utility application by clicking on the appropriate icon.
Select which COM port is going to be used.
Click on (Load configuration Set) in order to load program.
Click on Firmware key to start the programming operation.
Note. When the ERROR: OTH01 message is displayed set DEFAULT PARAMETERS.
Having loaded new program it is necessary to execute full testing (see Section 4.4.1).
4.2.2. Loading Bootstrap
In order to perform a programming operation, the following should be in place:
- Flo -Gard GSP Firmware Upload Utility should be installed and configured on the computer
that is being used.
- Having opened the pump housing, Bootstrap Loader Unit should be connected to the Electronic
board connector JP6 (Bootstrap Loader Unit switch should be in ON position).
- RS232 extension cable connected between the COM port of the computer and the 9-way ‘D’
connector in the rear of the pump.
Switch on the pump. Press the Reset key on the Bootstrap Loader Unit. The pump is now ready
to download a Bootstrap.
Programming sequence:
Start Flo -Gard GSP Firmware Upload Utility application by clicking on the appropriate icon.
Select which COM port is going to be used.
Click on (Load configuration Set) in order to load Bootstrap.
Click on Bootloader key to start the programming operation.
After Bootstrap downloading process is completed, it is necessary to switch Bootstrap Loader
Unit switch into OFF position and to press the Reset key.
4.3. CALIBRATION
Select the CALIBRATION from the Service menu and press the OK softkey. Select item to be
calibrated using the softkeys and press the OK softkey.
4.3.1. Syringe size sensor calibration
The syringe size detection system stores the characteristics of the syr inge clamp assembly,
including the travel of the linear potentiometer in non-volatile memory.
Equipment:
Flo-gard GSP Service Manual
17
Page 18

- Spacer (gauge) SP1 (B8640037-01) or old (B8640022-01);
- Spacer (gauge) SP2 (B8640037-02) or old (B8640022-02);
- Spacer (gauge) SP3 (B8640037-03) or old (B8640022-03);
- Spacer (gauge) SP4 (B8640023).
Select the Syringe size sensor from calibration menu and press the OK softkey. With the
syringe clamp at the lowermost position press the OK softkey. One after another insert spacers
from 1 to 4, each time closing the syringe clamp and pressing the OK softkey to acknowledge.
Finally fix the syringe clamp at the uppermost position and again press the OK softkey.
4.3.2. Pusher position sensor calibration
Equipment:
- Calibration spacer (gauge) SP1 (B8640037-01) or old (B8640022-01).
Select the Pusher position sensor from calibration menu and press the OK softkey. When
display reads the message Insert spacer SP1, insert the spacer SP1 and slide the drive pusher to
the spacer SP1. Press the OK softkey. Syringe pusher moves backwards and afterwards returns
to the spacer SP1. Following question will be indicated on display:
Is pusher contacting the spacer?
If pusher is not contacting the spacer, press the NO softkey and repeat the calibration. If pusher
is contacting the spacer, press the YES softkey. Following message will be indicated on display:
Offset XX mm,
where XX value shall be (10-13) mm. Press the QUIT softkey to exit.
4.3.3. Force sensor calibration
Equipment:
- Digitron pressure meter, model: 2022P (0-1500 mmHg);
- 50 ml BD PLASTIPAK or 60 ml BD syringe with extension line.
Select the Force sensor from calibration menu and press the OK softkey. The “0 cm Hg
>XXXmV<” message should appear on the screen.
First step is to be performed without loading syringe. Make sure that plunger retainer lever is
released and plunger grippers are in idle position, and pushing surface of the retainer is not in
contact with any part of pump or extraneous object. Leave the pump at rest for at least 15 min,
then press and release the retainer lever a few times. Make sure that actual output value of the
force sensor displayed on the pump screen is (1100±400) mV; if necessary, adjust it by means of
the R2 potentiometer on the Drive Unit board. Press the OK softkey, and the “Insert 60 ml BD
or 50 ml BD PLASTIPAK” message should appear.
Fill syringe with 10-20 ml of water, and fit it to the pump. Connect syringe to the pressure meter
by means of the extension line. Locate the pressure meter at the same height as the syringe. Press
the RUN softkey and keep it depressed, allowing the transmission to run until the pressure meter
reads (148±1.5) cmHg. When approaching the target value, it is recommended to run
transmission in short steps, since if you fail to stop transmission timely and target value is
Flo-gard GSP Service Manual
18
Page 19

overridden, calibration procedure must be repeated from the beginning. When pressure is
adjusted as required, press the OK softkey, then press retainer lever and move the retainer away
from the plunger.
Leave the pump at rest for at least 15 min, then press and release the retainer lever a few times
and check the values displayed on the pump screen to make sure the following:
− difference between actual output value and V1 value is not greater than ±10 mV,
otherwise this calibration procedure shall be repeated from the beginning (a few
times, if necessary),
− difference between V2 and V1 values is within range of 1500-2900 mV. Wrong
readings may indicate malfunction of the force sensor or the Drive Unit.
Press the QUIT softkey to exit.
4.3.4. Battery calibration
Battery calibration cycles the battery through a charge, discharge, re-charge sequence during
which the fuel gauge within Battery Unit will be updated with a measurement of the current
capacity of the cells.
This calibration allows the fuel gauge to monitor accurately the charge in the pack. Over time the
estimate of capacity may drift from the actual cell capacity, which generally decreases with time.
Recalibration will update the fuel gauge with the measured capacity of the cells.
Remove the battery pack lid to ensure a stable pack environment during calibration. It is
recommended that the pack is removed from the battery compartment and placed behind the
pump.
Connect the pump to the mains.
Extend the plunger drive arm to the maximum as it will automatically move during the discharge
phase. Select the Battery from calibration menu and press the OK softkey. Leave pump in
calibration mode for up to 14 hours. The cycle should run passing automatically three phases one
by one:
• Initial charge phase – 0 to 3 hours
• Measured discharge phase. Pack is discharged using typical load down to 1.1 V per cell
to determine how much charge is available from the pack – up to 10 hours
• Final charge phase. Pack is fully recharged ready for use. Early in this phase the
measured discharge value is transferred to the pack gas gauge to be stored as the new
capacity (mAh).
While the calibration cycle is active the battery related information is displayed on the pump
screen. At the end of the cycle the screen should show CALIBRATION COMPLETED. Press
the QUIT softkey to exit.
Flo-gard GSP Service Manual
19
Page 20

4.4. TESTING
Select the TESTING from the Service menu and press the OK softkey. Select the item to be
tested using the softkeys and press the OK softkey.
4.4.1. Full testing
This section provides a complete pump test procedure. During test it is possible to review and
modify following parameters: language, date, time, next service date. Follow each stage test and
follow the instructions on the display use the QUIT softkey to move to the other test.
4.4.2. Program testing
This test is intended to calculate program and bootstrap CRC. Select the Program from testing
menu and press the OK softkey. Software version, bootstrap version and calculated CRC values
are indicated in the display. Press the QUIT softkey to return to TESTING menu.
4.4.3. Drive sensors test
This test enables checking of the following sensors: syringe barrel, plunger grippers, push lever
and drive disengaged.
Select Drive Sensors from the testing menu and press the OK softkey. Loading and removing
the syringe will cause the sensors status to changes indicated on the pump display.
Drive engagement sensor can not be activated if nut and lead screw threads come “tooth on
tooth”. In such case slide the syringe pusher to another position and repeat the checking.
Once complete press the QUIT softkey to return to TESTING menu.
4.4.4. Syringe size sensor test
This test is enables checking the operation of syringe size sensor.
Select Syringe size sensor from the testing menu and press the OK softkey. Slowly lift the
syringe clamp. Check if syringe size sensor value changes (mV and mm). Having finished
testing press the QUIT softkey to return to TESTING menu.
4.4.5. Pusher position sensor test
This test is enables checking the operation of pusher position sensor. Select Pusher position
sensor from the testing menu and press the OK softkey. Insert the spacer SP1and slide the drive
pusher to the spacer SP1. Press the OK key. Syringe pusher moves backwards and afterwards
returns to the spacer SP1. Pusher position distance (22 ± 0.5)mm should be indicated on the
display. Having finished testing press the QUIT softkey to return to TESTING menu.
4.4.6. Motor test
This test enables checking of the motor operation. During test no syringe should be installed.
Select Motor from the testing menu and press the OK softkey. Having finished testing press the
QUIT softkey to return to TESTING menu.
Flo-gard GSP Service Manual
20
Page 21

4.4.7. Display test
This test checks that all of the display pixels (240x64) illuminate. Select Display from testing
menu and press the OK softkey. Observe “chess- board” structure fields that appear in the
display. All the rectangles should be same shaped and evenly filled. Having finished testing
press the QUIT softkey to return to TESTING menu.
4.4.8. Nurse call test
Equipment:
- Nurse call cable (B6650012);
- Ohmmeter.
This test checks the nurse call circuit operation. Select Nurse call from testing menu and
press the OK softkey. Using a meter check the circuit between the Nurse call contact 3 (com)
and contacts 1 (NO), 5 (NC). The contacts should toggle each time the CHANGE softkey is
pressed, as indicated on the display. Press the QUIT softkey to return to TESTING menu.
4.4.9. Piezotransducer (speaker)/buzzer test
This test checks the piezotransducer (speaker) and buzzer operation. Select Speaker/buzzer
from the testing menu and press the OK softkey. Check for the alternating volume and pitches
sound from the speaker. Check for the sound from the buzzer. Press the QUIT softkey to return
to TESTING menu.
4.4.10. Keyboard test
This test enables checking the keypad operation. Select Keyboard from the testing menu and
press the OK softkey. You will be prompted to press keys on the display (flashing) in sequence.
4.4.11. LEDs test
This test is intended to check the LED operation. Select LEDs from testing menu and press the
OK softkey. The following LEDs should activate one after another: ALARM, ALERT, INFUS.
and BATTERY. In order to check the operation of BATTERY LED it is necessary to connect the
power cable. In order to check the operation of MAINS LED it is necessary to remove and
reconnect the power cable. Press the QUIT softkey to return to TESTING menu.
4.4.12. Watch-dog test
This test enables checking of the watch-dog circuit operation. Select Watch-Dog from testing
menu and press the OK softkey. Initially the watch-dog circuit is applied with an over frequency
signal and later with an under frequency signal. When test completed switch off the pump using
the OFF key.
Flo-gard GSP Service Manual
21
Page 22

5. RECOMMENDED ROUTINE MAINTENANCE AND TESTING
It is recommended that routine maintenance be carried out at least once a year. This should
include:
- AC Mains / Battery operational checks (section 5.1).
- General cleaning and inspection for damage (section 5.2).
- Battery test (section 5.3).
- Infusion rate check (section 5.4).
- Occlusion pressure level check (section 5.5).
- Full test (sections 4.4.1-4.4.12).
5.1. AC MAINS / BATTERY OPERATION CHECK
Switch the pump on and plug pump into the mains. Observe that the MAINS indication LED
becomes illuminated. Remover the mains supply and observe that the MAINS LED switches off.
Observe that the battery indication LED becomes illuminated as the mains supply is removed.
5.2. GENERAL CLEANING AND INSPECTION FOR DAMAGE
To ensure that this pump remains in good operating condition, it is important to keep it clean and
carry out the routine procedures described below. Servicing should be performed only by a
qualified service engineer, with reference to this manual. The following routine maintenance
procedures should be carried out as required but at least once per year:
Thoroughly clean external surfaces of the pump before and after prolonged periods
of storages by wiping a lint- free cloth lightly dampened with warm water and standard
disinfectant/detergent solution.
Disinfectants known to be corrosive to metals and plastics must not be used.
Before cleaning always switch OFF and disconnect from the AC power supply.
Never allow liquid to enter the casing and avoid excessive fluid build up on the pump.
Do not use aggressive cleaning agents as these may damage the exterior surface of the pump.
Do not steam autoclave, ethylene oxide sterilize or immerse this pump in any fluid.
Check Labels should be flat and legible. Replace as required
Case components must be checked for damage that may affect function, present fluid ingress
routes and present a user hazard must be replaced as necessary.
Check the operation of the pole clamp screw. Check it is not loose and that the threads are not
damaged. Check that it folds away correctly.
Inspect the AC power supply inlet and cable for sings of damage.
Flo-gard GSP Service Manual
22
Page 23

5.3. BATTERY TEST
Perform battery calibration in accordance with 4.3.4. When calibration is completed and the
battery is fully charged (at least 2 hours 30 minutes on charge) disconnect the pump from the
mains. Load 50 ml BD Plastipak or 60ml BD syringe with the plunger at 60.0 ml position on the
syringe barrel scale.
Set the 5.0 ml/h rate and start infusion (see the Operator’s Manual for further information on
starting the pump).
Normally pump should be able to work on battery for about 10 hours. If this time is significantly
less battery should be replaced.
After completion of the test the pump should be recharged for a minimum of 2 hours 30 minutes.
5.4. INFUSION RATE CHECK
Equipment:
- stop-watch;
- graduated glass test-tube (one point equals to 0.1 ml, volume 60ml or more).
Take the BD Plastipak 50 ml or 60 ml BD syringe with extension set and fill it with distilled
water up to point of 60ml. Program the following infusion parameters:
- VTBI 50 ml;
- Rate 50 ml/h.
Insert the free end of extension set into the test -tube and start the infusion. Measure infusion time
with the stop-watch and read the volume of water delivered into the test-tube. Calculate the
infusion rate. It shall be 50ml/h ±1ml/h (±2%).
5.5.OCCLUSION PRESSURE LEVEL CHECK
Equipment:
- Digitron pressure meter, model: 2022P (0-1500mmHg).
Fill the 50 ml BD Plastipak or 60 ml BD syringe with 20-30 ml of the distilled water and connect
it to the pressure meter using the extension set. Switch on the pressure meter and set the ma x/min
pressure recording mode.
Set pump occlusion alarm level to L-5 and launch infusion at 5 ml/hr rate (for pump operation
details refer to the Operator’s Manual).
When pump will stop and indicate OCCLUSION read the maximum pressure recorded by
pressure meter. Readings shall be within (63 - 107) cmHg range.
If recorded value is outside this range, re-calibrate the force sensor in accordance with 4.3.3 and
repeat this test.
Flo-gard GSP Service Manual
23
Page 24

6. TROUBLE-SHOOTING
6.1.SAFETY WARNINGS
- Use extreme caution when pump whilst it is connected to the AC mains.
Hazardous voltages are present at the mains inlet and on the power supply even the pump is
switched off.
- Disconnect the battery and AC power whenever removing or inserting PCBs or
other connectors.
- This pump contains static-sensitive components. Wherever the ESD
symbol appears observe strict precaution for the protection of static-sensitive components when
attempting to service and repair the pump.
- Always visually inspect the pump, power cord and plug for damage. If the power
cord or plug is damaged they should be replaced.
- Should further technical assistance be required call your local BAXTER Service
Centre.
6.2. PUMP HAS BEEN DROPPED OR DAMAGED
If the pump is dropped or damaged, the damaged parts should be identified and replaced before
any further troubleshooting is carried out.
During inspection, careful attention should be paid to the front and rear case halves, for signs of
drop damage. Also check the pump drive, syringe pusher, syringe pusher drive, syringe size
sensor.
6.3. PUMP HAS BEEN EXPOSED TO FLUIDS
Excessive fluid spills can lead to fluid ingress into the pump. Even if the fluid dries out, deposits
can be left which cause the pump to fail.
If fluid ingress is suspected the pump should be inspected internally.
Clean and dry out the pump.
Take care to ensure dried deposits do not remain on the PCBs or other electrical components.
Replace any damaged PCBs or components.
Flo-gard GSP Service Manual
24
Page 25

6.4. TROUBLE-SHOOTING BY FAULT SYMPTOM
SYMPTOM CHECK CORRECTIVE ACTION
MAINS LED does not light
when plugged into a known
good AC outlet. BATTERY
Check mains cord
Check switching power
supply
LED lights, when pump is
powered up. MAINS LED
lights when powered from
12VDC.
MAINS LED does not light
when plugged into a known
good AC or 12VDC outlet.
BATTERY LED lights when
pump is powered up.
Check the MAINS LED of
the keypad K1 and keypad
connection with the
Electronic board connector
JP12.
Check Electronic board.
MAINS LED is light. Pump
does not switch on.
Pump is unplugged.
BATTERY LED does not
light when pump is powered
up.
Check fuse F1 in the Supply
Unit.
Check the BATTERY LED
of the keypad K1 and keypad
connection with the
Electronic board connector
JP12.
One or more keypad key
Perform keypad test. Replace keypad if necessary.
presses are not accepted.
Too high or too low contrast
level.
Check contrast setting.
Check the voltage of the
Electronics Board test point
TP9. The value should be
(-8,0±0,1)V, when contrast is
set to level 6.
Backlight does not operate
when pump is powered on.
Check backlight setting.
Check backlight circuit
interconnection on Electronic
board
Check Display Unit and its
connection with the
Electronic board connector
JP13.
Replace mains cord.
Replace switching power
supply if necessary.
Replace keypad K1 if
necessary.
Replace Electronic board if
necessary.
Replace fuse F1 with
identical one.
Replace keypad K1 if
necessary.
Adjust the contrast as
described in Operator’s
Manual.
Adjust voltage by means of
R52, if the problem persists –
replace the Electronic board.
Adjust the backlight as
described in Operator’s
Manual.
If necessary replace
Electronic board.
If necessary replace Display
Unit.
Flo-gard GSP Service Manual
25
Page 26

Red alarm LED does not
light when alarm occurs.
Yellow alert LED does not
light when alert occurs.
Green infusion LED does not
light while pump is running.
Second (long) audible alarm
does not sound after power
on.
After power up the pump
display empty or horizontal
lines illuminated only, no
backlight and watchdog
activated.
Syringe gripper sensor does
not activate when syringe is
loaded.
Pusher lever sensor does not
activate when syringe is
loaded.
Syringe barrel sensor does
not activate when syringe is
loaded.
Drive engaged sensor does
not activate when syringe is
loaded.
Syringe size sensor does not
determine syringe size.
Pusher position sensor
calculates time to end of
infusion (syringe)
incorrectly.
Stepper motor is not rotating
when it should.
Check red alarm LED (D1)
in the Electronic board.
Check yellow alert LED (D3)
in the Electronic board.
Check green infusion LED
(D2) in the Electronic board.
Check buzzer (Z1) in the
Electronic board.
Check for the presence of
VCC of +5V on Electronic
board. Check if reset
duration is (TP4) > 100ms.
Check if quartz oscillator
(Q1) is working.
Check syringe gripper
(retainer) sensor signal (see
section 2.1.5).
Check pusher lever (retainer)
sensor signal (see section
2.1.5).
Check syringe barrel sensor
and its connection on the
Electronic board.
Check drive engaged sensor
and its connection with Drive
Unit board. Check the circuit
starting from drive engaged
sensor to the Electronic
board.
Calibrate syringe size sensor
(see section 4.3.1). If the
problem persists - check
syringe size sensor.
Calibrate pusher position
sensor (see section 4.3.2). If
the problem persists - check
pusher position sensor.
Check encoder unit.
Check stepper motor.
Check Drive Unit board.
Check motor belt.
Replace faulty red alarm
LED (D1).
Replace faulty yellow alert
LED (D3).
Replace faulty green infusion
LED (D2).
Replace faulty buzzer (Z1).
If necessary load bootstrap
and afterwards lo ad program.
If necessary replace syringe
pusher with syringe gripper
sensor.
If necessary replace syringe
pusher with pusher lever
sensor.
If necessary replace syringe
barrel sensor.
If necessary replace drive
with drive engaged sensor.
If necessary replace syringe
size sensor.
If necessary replace encoder
ruler.
If necessary replace sensors
unit B6660032.
If necessary replace encoder
unit.
If necessary replace stepper
motor.
If necessary replace Drive
Unit board.
If necessary replace motor
belt.
Flo-gard GSP Service Manual
26
Page 27

Occlusion pressure level
incorrect.
Calibrate syringe force
sensor (see section 4.3.3) If
the problem persists - check
syringe force sensor.
Check syringe force sensor
amplifier circuit.
Too short operation time on
battery.
Pump does not operate from
external 12 VDC (MAINS
LED does not operate).
Pump operates from the AC
power supply.
Calibrate battery unit (see
section 4.3.4).
Check 12VDC & Nurse call
connector unit.
Check fuses F2, F3 in Supply
Unit.
Nurse Call does not operate. Perform Nurse Call test.
Check nurse call circuit
interconnection on Supply
Unit.
RS232 interface does not
operate (communication via
the RS232 interface enabled
in maintenance menu).
Check RS232 connector unit.
Check RS232 cable.
Check RS232 circuit
interconnection on Electronic
board.
IRDA interface does not
operate (communication via
the IRDA interface enabled
in maintenance menu).
Check IRDA circuit
interconnection on Supply
Unit.
Check Supply Unit
connection with the
Electronic board connector
JP3.
Check IRDA circuit
interconnection on Electronic
board.
Versatile clamp does not fix
Check versatile clamp. If necessary replace versatile
to the pump.
If necessary replace syringe
pusher with syringe force
sensor.
If necessary replace Drive
Unit board.
If necessary replace battery
unit.
If necessary replace 12VDC
& Nurse call connector unit.
If necessary replace fuses F2,
F3 wit h identical ones.
If necessary replace 12VDC
& Nurse call connector unit.
If necessary replace Supply
Unit.
If necessary replace RS232
connector unit.
If necessary replace RS232
cable.
If necessary replace
Electronic board.
If necessary replace Supply
Unit.
If necessary replace Supply
Unit.
If necessary replace
Electronic board.
clamp.
Flo-gard GSP Service Manual
27
Page 28

6.5 TROUBLE-SHOOTING BY FAILURE CODES
CODE DESCRIPTION CORRECTIVE ACTION
BT01 Communications with the battery fuel gauge
has failed.
Inspect cables between Battery
Monitoring, Drive Unit board and
Electronic board.
BT02 The battery cell voltage is low (less than
1.05V per cell).
BT03 The battery cell voltage is high (greater than
1.75V per cell).
Charge battery, if failure code recurs,
replace Battery Unit.
Check battery charge circuit and
replace power supply unit if
necessary.
BT04 The battery temperature is high (greater than
60°C).
Check battery charge circuit and
replace power supply unit if
necessary.
BT05 The battery charging current is high (greater
than 1.5A).
Check battery charge circuit and
replace power supply unit if
necessary.
BT06 The battery discharging current is high
(greater than 1.5A).
Disconnect one by one all the
connectors, find current leakage place
and replace faulty unit.
BT07 The battery charging current is low (less
than 50mA)
Inspect cables between battery
Monitoring and Power Supply Unit.
Check battery charge circuit and
replace Power Supply Unit if
necessary.
BT08 The battery fast charge time is longer then 3
hours 30 minutes
Check battery charge circuit and
replace Power Supply Unit if
necessary.
BT09 The battery is discharging whilst the pump is
on the mains.
Inspect cables between battery
Monitoring and Power Supply Unit.
Check battery charge circuit and
replace Power Supply Unit if
necessary.
BT10 The battery monitor software module has
failed.
Power off then on. If failure code
recurs, replace software.
BT11 Incorrect CRC of the battery capacity Calibrate the battery
RT01 Accuracy of the real time clock or
microcontroller quartz clock is out of spec.
(±1%).
Replace SRAM on the Electronic
board.
Replace Electronic board.
RT02 Real time clock software module has failed. Power off then on. If failure code
recurs, replace software.
RT03 Incorrect date and time settings. Set date and time.
KY01 Keypad key has been depressed for 5
Replace keypad.
minutes.
KY02 Keypad monitor software module has failed. Power off then on. If failure code
recurs, replace software.
WD01 W-D circuit failed Replace Electronic board
WD02 W-D circuit failed Replace Electronic board
WD03 W-D cir cuit failed Replace Electronic board or Drive
Flo-gard GSP Service Manual
28
Page 29

Unit board
WD04 W-D circuit failed Replace Electronic board or Drive
Unit board
WD05 W-D circuit failed Power off then on. If failure code
recurs, replace Electronic board
WD06 W-D circuit failed Power off then on. If failure code
recurs, replace Electronic board
WD07 Watch-Dog circuit activated Power off then on. If failure code
recurs, replace software or Electronic
board.
WD08 Watch-Dog circuit activated Power off then on. If failure code
recurs, replace software.
WD09 Watch-Dog circuit activated Power off then on. If failure code
recurs, replace software.
EE01 Cannot read data from external EEPROM Replace Electronic board.
EE02 Cannot write data to external EEPROM Replace Electronic board.
EE03 External EEPROM software module has
failed.
Power off then on. If failure code
recurs, replace software.
PR01 Incorrect soft Bootstrap CRC Power off then on. If failure code
recurs, replace Bootstrap software.
PR02 Incorrect program CRC Power off then on. If failure code
recurs, replace software.
PR03 A certain program task not responding Power off then on. If failure code
recurs, replace software.
BSxx Internal soft Bootstrap errors Power off then on. If failure code
recurs, replace Bootstrap software.
SM01 Stepper motor software module has failed. Power off then on. If failure code
recurs, replace software.
SM02 Momentarily stepper motor rotation speed is
high in comparison of inputs steps and
encoder.
Check Encoder Unit and replace it if
necessary.
Check Drive Unit board and replace it
if necessary.
SM03 Momentarily stepper motor rotation speed is
low in comparison of input steps and
encoder, or is not rotating when it should.
Check Encoder Unit and replace it if
necessary.
Check Drive Unit board and replace it
if necessary.
Check Stepper Motor and replace it if
necessary.
Check Motor Belt and replace it if
necessary.
SM04 Accumulated stepper motor rotation speed is
low or high in comparison of input steps and
encoder.
Check Encoder Unit and replace it if
necessary.
Check Drive Unit board and replace it
if necessary.
Check Stepper Motor and replace it if
necessary.
Check Motor Belt and replace it if
necessary.
BAR01 Barrel sensor is damaged. Check barrel sensor and replace it if
necessary.
Flo-gard GSP Service Manual
29
Page 30

AB01 During antibolus motor has exceeded the
step count limit.
Power off then on. If failure code
recurs, replace software. If the
problem persists, replace Electronic
board if necessary.
AB02 During antibolus pusher position travel has
exceeded the limit.
Power off then on. If failure code
recurs, replace software. If the
problem persists, replace Electronic
board if necessary.
AB03 Antibolus duration has exceeded the limit. Power off then on. If failure code
recurs, replace software. If the
problem persists, replace Electronic
board if necessary.
PS02 Pusher drive travel deviated from expected
position based upon motor control.
Check pusher position sensor and
replace encoder ruler or sensors unit
B6660032 if necessary.
PS03 Incorrect CRC of the pusher position table. Calibrate pusher position sensor.
PS04 Pusher position sensor readings out of range
for the inserted syringe.
Calibrate pusher position and syringe
size sensors. If the problem persists,
check and replace encoder ruler,
sensors unit B6660032 or syringe size
sensor if necessary.
PS05 Pusher position sensor has failed. Check pusher position sensor and
replace encoder ruler or sensors unit
B6660032 if necessary.
PS06 Invalid pusher position codes. Check pusher position sensor and
replace encoder ruler or sensors unit
B6660032 if necessary.
IO01 Input-output software module has failed. Power off then on. If failure code
recurs, replace software.
SS01 Syringe size sensor readings out of range. Calibrate syringe size sensor. If the
problem persists, check syringe size
sensor and replace it if necessary.
SS02 Incorrect CRC of the syringe table in
Calibrate syringe size sensor.
EEPROM
SS03 Incorrect CRC of the syringe table in SRAM Power off then on. If failure code
recurs, replace SRAM.
SRE01 Syringe gripper and push lever (retainer)
sensors readings out of range (>1.4V).
Check syringe gripper and push lever
sensors and replace syringe pusher if
necessary.
SRE02 Pusher lever or drive engaged sensors are
damaged.
Check push lever sensor and drive
engaged sensor. Replace syringe
pusher or drive if necessary.
SRE03 Syringe retainer (pusher lever, syringe
gripper) or drive engaged sensors are
damaged.
Check push lever sensor, syringe
gripper sensor and drive engaged
sensor. Replace syringe pusher or
drive if necessary.
SF01 Syringe force sensor reading out of range. Calibrate syringe force sensor. If the
problem persists:
Check syringe force sensor and
replace syringe pusher with syringe
Flo-gard GSP Service Manual
30
Page 31

force sensor if necessary.
Check syringe force sensor amplifier
circuit and replace Drive Unit board if
necessary.
SF02 Syringe force test reading out of range. Calibrate syringe force sensor. If the
problem persists:
Check syringe force sensor and
replace syringe pusher with syringe
force sensor if necessary.
Check syr inge force sensor amplifier
circuit and replace Drive Unit board if
necessary.
SF03 Syringe force 0 reference reading out of
range.
Calibrate syringe force sensor. If the
problem persists:
Check syringe force sensor and
replace syringe pusher with syringe
force sensor if necessary.
Check syringe force sensor amplifier
circuit and replace Drive Unit board if
necessary.
SF04 Incorrect CRC of the force (pressure) table. Calibrate syringe force sensor.
SF05 Syringe force sensor reading not change Clean syringe pusher, check syringe
force sensor and replace syringe
pusher if necessary
SF06 Syringe force reference voltage drift Calibrate syringe force sensor. If the
problem persists:
Check syringe force sensor Uref and
replace Drive Unit board if necessary.
SF07 Incorrect occlusion pressure level value in
EEPROM.
Power off then on. Set the default
occlusion pressure level. If failure
code recurs, replace Electronic board
if necessary.
SR01 SRAM test failed. Power off then on. If failure code
recurs, replace Electronic board.
SC01 Interrupted piezotransducer circuit. Check piezotransducer unit and
replace it if necessary.
Check piezotransducer drive circuit
and replace Electronic board if
necessary.
SC02 Shorted piezotransducer circuit. Check piezotransducer unit and
replace it if necessary.
Check piezotransducer drive circuit
and replace Electronic board if
necessary.
SC03 Sound control software module has failed. Power off then on. If failure code
recurs, replace software.
LED01 LEDs control software module has failed. Power off then on. If failure code
recurs, replace software.
AL01 Alarm manager software module has failed. Power off then on. If failure code
Flo-gard GSP Service Manual
31
Page 32

recurs, replace software.
OFF1 Software OFF module has failed. Replace software.
LOG1 Software Log module has failed. Power off then on. If failure code
recurs, replace software.
LOG2 Cannot read log (from flash). Replace Electronic board.
LOG3 Cannot write log (to flash). Replace Electronic board.
EV01 Software Event module has failed. Power off then on. If failure code
recurs, replace software.
LCD01 LCD display software module has failed Power off then on. If failure code
recurs, replace software.
LCD02 Software graph plotting on display module
has failed.
Power off then on. If failure code
recurs, replace software.
EOI01 Incorrect x ml near EOI settings. Set x ml near EOI value.
EOI02 Incorrect x min near EOI settings. Set x min near EOI value.
BR01 Incorrect basal rate limit. Set basal rate limit.
KOR01 Incorrect KVO rate. Set KVO rate.
MOD01 Incorrect infusion mode settings. Select infusion mode.
RES01 Incorrect residual volume. Set residual volume.
OCL01 Incorrect restart count of after occlusion. Set restart count after occlusion.
PUR01 Incorrect purge volume limit. Set purge volume limit.
PUR02 Incorrect purge rate for 10 ml syringe. Set purge rate for 10 ml syringe.
PUR03 Incorrect purge rate for 20 ml syringe. Set purge rate for 20 ml syringe.
PUR04 Incorrect purge rate for 30 ml syringe. Set purge rate for 30 ml syringe.
PUR05 Incorrect purge rate for 50 ml syringe. Set purge rate for 50 ml syringe.
PUR06 Incorrect purge rate for 100 ml syringe. Set purge rate for 100 ml syringe.
PUR07 Incorrect purge rate for 5 ml syringe. Set purge rate for 5 ml syringe.
BOL01 Incorrect bolus volume limit. Set bolus volume limit.
BOL02 Incorrect max bolus rate for 10 ml syringe. Set max bolus rate for 10 ml syringe.
BOL03 Incorrect max bolus rate for 20 ml syringe. Set max bolus rate for 20 ml syringe.
BOL04 Incorrect max bolus rate for 30 ml syringe. Set max bolus rate for 30 ml syringe.
BOL05 Incorrect max bolus rate for 50 ml syringe. Set max bolus rate for 50 ml syringe.
BOL06 Incorrect max bolus rate for 100 ml syringe. Set max bolus rate for 100 ml syringe.
BOL07 Incorrect max bolus rate for 5 ml syringe. Set max bolus rate for 5 ml syringe.
TR01 Internal microcontroller TRAP activated Power off then on. If failure code
recurs, replace software.
TR02 Internal microcontroller TRAP activated Power off then on. If failure code
recurs, replace software.
TR03 Internal microcontroller TRAP activated Power off then on. If failure code
recurs, replace software.
TR04 Internal microcontroller TRAP activated Power off then on. If failure code
recurs, replace software.
ID01 Incorrect drug name or pump ID in
EEPROM.
Power off then on. Set default
parameters. If failure code recurs,
replace Electronic board if necessary.
IF01 Pump software not compatible with
Replace software
hardware revision
OTH01 Other failures Check log, if necessary replace
software
Flo-gard GSP Service Manual
32
Page 33

7. REPAIR
Ensure the unit is disconnected from AC power supply and switched off before attempting to
service the pump.
The pump contains static-sensitive components. Wherever the ESD symbol appears
observe strict precautions for the protection of static-sensitive components when attempting to
service and repair the pump.
Refer to section 7.4 for torque guidelines. Components may fail or be damaged if not tightened
to correct torque level.
During servicing components found to be damaged will require replacement. Follow the
instructions below together with the assembly drawings in section 9 for further information.
Battery should be disposed of as outlined by the local country regulation. Do not send back to
the manufacturer.
For additional technical assistance, contact your local BAXTER Service Centre.
7.1 ACCESS TO THE PUMP
In order to replace any label (85, 87, 88, 90, 91, 93, 95), the clip (84) or the leg (83) there is no
need to disassemble the pump. Carefully using knife peel the old label, the old clip (84) or the
old leg (83). Using isopropyl alcohol clean the case where the label, the clip or the leg will be
positioned ensuring all old adhesive residue is removed. Stick the label (85, 87, 88, 90, 91, 93,
95) by pressing it firmly with a soft cloth. Stick the clip (84) by pressing it. Stick the leg (83) by
pressing it.
Place the pump on an anti-static grounded surface. Remove the versatile clamp (44). Remove the
2 battery covers screws (61), remove the battery compartment lid (43), disconnect the battery
unit cable and withdraw the battery unit (42). Remove the six case retaining screws (60) located
on the back of the pump.
Turn the pump upside-down. Carefully separate the front and rear case halves and disconnect the
power supply to the Electronic board cable, the piezotransducer cable, the RS232 cable and IrDA
cable. It may be necessary to remove some of the connectors by applying gentle force to the
cable.
Reassemble the pump in the reverse order. When reassembling ensure that the seal (45) under
the battery compartment lid (43) and the seal (45) between the front and rear cases are correctly
positioned.
7.2 FRONT CASE AND SUB-ASSEMBLIES
7.2.1 Removal instructions
7.2.1.1 Syringe barrel sensor cover removal
It is not necessary to disassemble the pump in order to replace syringe barrel sensor cover (28).
Use a knife to find the edge of the syringe barrel sensor cover (28) and carefully peel it back.
7.2.1.2 Keypads removal
Detach the flexi-cables of the keypad K1(25), K2(26) from the Electronic board (23). Carefully
access the edge of the keypad, peel it back.
Flo-gard GSP Service Manual
33
Page 34

7.2.1.3 SRAM removal
In order to remove SRAM (24) from the Electronic board (23), carefully insert a small
screwdriver under the SRAM (24) case at alternate edges and lift free.
7.2.1.4 Electronic board and display unit removal
Remove the five retaining screws (61) and disconnect all flexi-cables and cable connections.
Carefully withdraw the Electronic board (23) with display unit (22) from the front case.
Using pincer squeeze one by one all four standoff (79) snap locks and detach display unit (22)
from the Electronic board (23). Disconnect the display unit (22) cables. If necessary loosen the
screws (64) and withdraw standoffs (79) from display unit (22).
Ensure that the display panel and case panel remain protected from dust and scratches until the
display is refitted.
Having removed the Electronic board (23) it is possible to remove and replace the red LED D1,
green LED D2, yellow LED D3 or buzzer Z1 as required.
7.2.1.5 Syringe clamp removal
It is not necessary to disassemble the pump in order to replace the syringe clamp. Lift the syringe
clamp (20) to the upper position and hold it in this position. Unscrew the syringe clamp screw
(59) and remove the syringe clamp (20).
7.2.1.6 Syringe size sensor removal
Remove the syringe clamp. Disconnect the syringe size sensor (19) cable. Remove the syringe
sensor retainer screws (62) and carefully withdraw the syringe size sensor (19).
7.2.1.7 Drive Unit board removal
Disconnect the Drive Unit’s board flexi-cable and cable connections. Remove the retaining
screws (63, 64). Carefully withdraw the Drive Unit board (17) from the front case.
7.2.1.8 Syringe pusher drive removal
Slide the syringe pusher to the right approx. 20mm from the extreme right position, to gain
access to the drive fastening screws (57, 61). Remove the four retaining screws (55, 56).
Carefully withdraw the syringe pusher drive (15) and the shaft (18). Carefully withdraw the
plastic screen (16).
7.2.1.9 Syringe pusher removal
Disconnect flexi-cables. Remove syringe pusher (12) from the stops (13) by pushing it to the left.
Remove stops (13) from the tube using a screwdriver. Remove syringe pusher (12).
Flo-gard GSP Service Manual
34
Page 35

7.2.1.10 Syringe support removal
Remove the two retaining screws (49). Remove the syringe support (11).
7.2.1.11 Drive removal
Remove the syringe pusher drive, syringe pusher and syringe support. Remove the ring (9).
Disconnect the Drive Unit board(17) cables from Electronic board (23). Remove the three
retaining screws (57,61). Carefully withdraw the drive (10) from the front case.
7.2.1.12 Encoder ruler removal
Remove the drive. Remove the retaining screw (67) and nut (58). Remove the encoder ruler (7).
7.2.1.13 Sensors unit B6660032 removal
Remove the drive. Remove the encoder ruler. Disconnect the sensors unit B6660032 (8) cable
from Drive Unit board (17). Remove the retaining screw (61). Remove the sensors unit
B6660032 (8).
7.2.1.14 Motor belt removal
Remove the drive. Remove the screw (66) and nut (70). Loosen the screw (63) and nut (70). In
order to loosen the motor timing belt, rotate motor unit (5) relative to the screw (63). Pull off
timing belt (6) from the bigger pulley. Rotate motor unit (5) relative to the screw (63) to the
position, allowing remove of the belt (6). Remove the motor belt (6).
7.2.1.15 Motor unit removal
Remove the drive. Remove the motor belt. Disconnect the motor unit (5) cable from Drive Unit
board (17). Remove the screw (63) and nut (70). Remove motor unit (5).
7.2.1.16 Encoder unit removal
Disconnect the encoder unit (3) cable from Drive Unit board (17). Remove the screw (69), the
nut (70) and remove encoder unit (3).
7.2.1.17 Syringe barrel sensor removal
Remove the Electronic board. Remove the drive. Remove the screw (61) and remove syringe
barrel sensor (1).
Flo-gard GSP Service Manual
35
Page 36

7.2.2 Installation instructions
7.2.2.1 Syringe barrel sensor fitting
Fit the syringe barrel sensor (1) and secure with screw (61). Barrel sensor (1) is adjusted as
follows:
1. Drive (10), syringe support (11) and syringe size sensor (19) should be fitted.
2. Using multimeter check the circuit between contacts 1 and 2 of the barrel sensor’s (1)
connector. The circuit should be open.
3. Load the 5 ml BD syringe and close the syringe clamp. Circuit between the contacts 1
and 2 should be short. If not, adjust position of the barrel sensor (1) by means of the
screw (68), until required result is reached.
4. Load the 5 ml BD syringe incorrectly so that syringe barrel lays on the syringe support
(11) and close the syringe clamp. Circuit between contacts 1 and 2 should be open. If not,
adjust barrel sensor with screw (68) until the required result is reached and repeat step 3.
5. Execute steps 3 and 4 with the 140 ml MONOJECT syringe. If this procedure required
manipulation of the screw (68), then afterwards it is necessary to repeat checking with 5
ml BD syringe.
6. Fasten the screw (68) using adhesive.
7.2.2.2 Encoder unit installation
Fit encoder unit (3) and secure with screw (69) and the nut (70). Connect the encoder unit (3)
cable to the Drive Unit board (17).
7.2.2.3 Motor unit and motor belt installation
Fit the motor unit (5) and fasten (not too tight) it with the screw (63), nut (70), via two dampers
(71) and two washers (75). Fit the two dampers (71) to the designated places between the motor
and drive (10) wall. Rotate motor unit (5) relative to the screw (63) to the position, allowing
fitting of the timing belt (6) on the pulley of the motor unit (5). Fit the belt (6) on the motor unit
(5) pulley.
Timing belt teeth should be directed to inside. Rotate the motor unit (5) relative to the screw (63)
to the position allowing to fitting the timing belt (6) on the larger pulley.
Fix the motor unit (5) using screw (66) and nut (70) via dampers (71) and washer (75). Tighten
timing belt as much, when it is pressed with a force of 1,5 N it should bend for a 2…3 mm.
Finally fix screw (63). Connect the motor unit (5) cable to the Drive Unit board(17).
7.2.2.4 Sensors unit B6660032 installation
Fit the sensors unit B6660032 (8) and secure with the screw (61). Connect the sensors unit
B6660032 (8) cable to Drive Unit board (17).
7.2.2.5 Encoder ruler installation
Fit the encoder ruler (7) and secure with the screw (67) and the nut (58) via washer (72). Perform
pusher position sensor calibration procedure in accordance with the 4.3.2.
Flo-gard GSP Service Manual
36
Page 37

7.2.2.6 Drive installation
Install the drive (10) to the front case and secure with three screws (57,61). Connect the Drive
Unit board (17) cables to the Electronic board (23). Perform pusher position sensor calibration
procedure in accordance with the 4.3.2.
7.2.2.7 Syringe support installation
Fit the ring (9). Fit the syringe support (11) and secure wit h two screws (49).
7.2.2.8 Syringe pusher installation
Fit the syringe pusher (12) on the tube and move it to the left. Fit the stops (13) on the tube.
Moving the syringe pusher to the right fit it on the stops (13). Connect the flexi-cables.
NOTE. Pusher reassembling always entails necessity of syringe force sensor calibration. Perform
it at the final stage of pump reassembling prior to joining front and rear cases, since it may be
necessary to adjust trimmer potentiometer R2 on the Drive Unit board.
Restore 16-way electrical connection between front and rear cases of the pump and put the cases
vertically on the table as far apart as the length of cable allow.
Perform force sensor calibration procedure in accordance with the 4.3.3.
7.2.2.9 Syringe pusher drive installation
Turn the pusher lever to the position shown in the picture B. Gear tooths “b” and “c” should be
placed so as to be in contact with a second groove of the rack bar “a” (see. Picture A). Carefully
insert the plastic screen (16) into the syringe pusher (12). Carefully fit the shaft (18) and the
syringe pusher drive (15) on drive arm. Ensure the seal (48) between the syringe pusher (12) and
syringe pusher drive (15) is correctly positioned. Secure the syringe pusher drive (15) with four
screws (55,56).
7.2.2.10 Drive Unit board installation
Carefully insert the Drive Unit board (17) into the front case. Secure the retaining screw (64)
and the retaining screw (63) using spacer (74). Connect all flexi-cable and cable connections.
NOTE. Drive unit board replacement entails necessity of syringe force sensor calibration.
Perform it at the final stage of pump reassembling prior to joining front and rear cases, since it
may be necessary to adjust trimmer potentiometer R2 on the Drive Unit board.
Restore 16-way electrical connection between front and rear cases of the pump and put the cases
vertically on the table as far apart as the length of cable allow.
Perform force sensor calibration procedure in accordance with the 4.3.3.
7.2.2.11 Syringe size sensor installation
Carefully insert the syringe size sensor (19). Secure with 2 screws (62). Connect the syringe size
sensor (19) cable to the Electronic board (23). Perform syringe size sensor calibration procedure
in accordance with the 4.3.1.
Flo-gard GSP Service Manual
37
Page 38

7.2.2.12 Syringe clamp installation
Fit the syringe clamp (20) and secure with the screw (59).
7.2.2.13 Keypad installation
Using isopropyl alcohol clean the case where the keypad will be positioned ensuring all old
adhesive residue is removed.
Remove the protective film from the keypad. Insert the keypad K1 (25) flexi-cable through the
appropriate case slot. Align the bottom edges and corners of the keypad K1 (25) with the recess
in the case. Stick the keypad K1 (25) by pressing it firmly with a soft cloth, starting from bottom
edge working to the top. Seal the keypad edges using silicon coating.
Insert the keypad K2 (26) flexi-cable through the appropriate case slot. Align the keypad K2 (26)
with the recess in the case. Stick the keypad K2 (26) to the case as previously with keypad K1.
Seal the keypad edges using silicon coating.
Connect the keypad K1, K2 (25, 26) flexi-cable to the Electronic board (23).
7.2.2.14 Electronic board and Display unit installation
Fix the four standoffs (79) to display unit (22) using screws (64) and washers (76).
Fit the display unit (22) on the Electronic board (23). Connect all cables assemblies. Remove the
protective film from the display.
Carefully insert the Electronic board (23) with display unit (22) into the front case. Fit the
washers (77, 75), fix the five retaining screws (61) and connect all flexi-cables and cable
connections to the Electronic board (23).
Perform syringe size sensor calibration procedure in accordance with the 4.3.1. Perform pusher
position sensor calibration procedure in accordance with the 4.3.2. Perform force sensor
calibration procedure in accordance with the 4.3.3. Perform date and time setting procedure in
accordance with the 3.8.
7.2.2.15 SRAM installation
Fit the SRAM (24) on the Electronic board (23), following the orientation by the mark on the
SRAM case (24). Perform date and time setting procedure in accordance with the 3.8.
7.2.2.16 Syringe barrel sensor cover installation
Using isopropyl alcohol clean the case surface ensuring all old adhesive residue is removed
where the syringe barrel sensor cover (28) will be positioned. Glue the syringe barrel sensor
cover (28) using instant glue.
Flo-gard GSP Service Manual
38
Page 39

7.3 REAR CASE AND SUB-ASSEMBLIES
7.3.1 Removal instructions
7.3.1.1 Power supply unit and switching power supply removal
Remove the two battery cover screws (61), remove the battery compartment lid (43), disconnect
the power supply unit (40) cable and withdraw the battery unit (42).
Remove the cable from the battery unit compartment. Disconnect the mains filter unit (37) and
12VDC & Nurse call unit (35) connection. Unscrew the nut (50) and disconnect power supply
unit (40) grounding wire from the potential equalization connector. Remove the six power
supply unit (40) retaining screws (61). Carefully withdraw the power supply unit (40) from the
rear case.
Disconnect power supply unit (40) connection from the switching power supply (41). Remove
the four switching power supply (41) retaining screws (53) and nuts (70). Remove the switching
power supply (41).
7.3.1.2 Mains filter unit removal
Detach the mains filter unit (37) connector from the switching power supply (41). Remove the
retaining clips screws (52). Carefully withdraw the mains filter unit (37) from the rear case.
7.3.1.3 12VDC & Nurse call unit removal
Remove the 12VDC & Nurse call unit (35) retainer screw, disconnect the 12VDC & Nurse call
unit (35) cable from power supply unit (40) and withdraw the 12VDC & Nurse call unit (35). In
order to detach strings of the RS232 connector cap (46) and 12 VDC&Nurse call connector cap
(47), unscrew the screw (69) with the nut (70).
7.3.1.4 RS232 connector unit removal
Remove the RS232 connector unit screws (51) and carefully withdraw the RS232 connector unit
(34).
7.3.1.5 Piezotransducer unit removal
The piezotransducer (30) is glued to the rear case. Using the small knife carefully remove the
piezotransducer (30) from the rear case.
Flo-gard GSP Service Manual
39
Page 40

7.3.2 Fitting instructions
7.3.2.1 Piezotransducer unit installation
Clean the case surface where the piezotransducer (30) should be positioned. Glue the
piezotransducer (30) using instant adhesive.
7.3.2.2 RS232 connector unit installation
Fit the RS232 connector unit (34) and secure with the screws (51).
7.3.2.3 12VDC & Nurse call unit installation
Fit the 12VDC & Nurse call unit (35) and secure with the retainer screw via washer (82).
Connect the 12VDC & Nurse call unit (35) cable into the power supply unit (40). Fix the strings
of the RS232 connector cap (46) and 12 VDC&Nurse call connector cap (47) using screw (69)
washer (75) and nut (70).
7.3.2.4 Mains filter unit installation
Insert the mains filter unit (37) into the rear case and secure with retaining clips screws (52) via
washers (81) and fix the retaining clips (52). Connect the mains filter unit (37) connector to the
switching power supply unit (41).
7.3.2.5 Power supply unit and switching power supply installation
Fix the switching power supply (41) to the supply unit (40) using four screws (53), nuts (70),
spacers (74) and washers (78). Connect power supply unit (40) cable to the switching power
supply (41).
Carefully insert the power supply unit (40) into the rear case. Fix the six retaining screws (61)
and connect the mains filter unit (37) and 12VDC & Nurse call unit (35) connections. Fix the
power supply unit (40) grounding wire to the potential equalization connector using nut (50) and
washer (80). Insert the power supply unit (40) wire into the battery unit (42) compartment. Insert
the battery unit (42) and connect the power supply unit (40) wire. Ensure that the seal (45)
between the battery compartment lid (43) and the rear case is correctly positioned. Fit the
battery compartment lid (43) and secure with the two screws (61). Perform battery calibration
procedure in accordance with the 4.3.4.
7.4 Torque guide
The following list outlines the torque levels established during product manufacture. NOTE:
These values are for the first insertion of screws and fasteners. When selecting a torque for
servicing activity, be aware that refastening will require slightly less torque than the initial
manufacture.
Over-tightening of screws and fasteners can cause damage. The manufacturer cannot be held
responsible for such damage caused.
Flo-gard GSP Service Manual
40
Page 41

Front Case Assembly:
Stage Description Component Description Part No Qty Established
Process
Torque
Secure Electronic board Screw ISO 7049 ST2,9x9,5-F-Z B1000219 5 40cNm
Secure display unit Screw ISO 7045 M3x6 B1000041 4 30cNm
Secure syringe clamp Screw ISO 7046 M2,5x10 B1000108 1 50cNm
Secure syringe size sensor Screw ISO 7049 ST2,9x6,5-F-Z B1000217 2 40cNm
Secure Drive Unit board Screw ISO 7045 M3x12 B1000050 1 50cNm
Screw ISO 7045 M3x6 B1000041 1 50cNm
Secure pusher drive Screw ISO 1580 M3x20 B1000057 2 30cNm
Screw ISO 1580 M3x25 B1000059 2 30cNm
Secure syringe support Screw ISO 1207 M3x12 B1000051 2 30cNm
Secure drive Screw ISO 7049 ST2,9x9,5-F-Z B1000219 1 40cNm
Screw ISO 7049 ST2,9x13-F-Z B1000220 2 40cNm
Secure motor unit Screw ISO 7046 M3x12 B1000123 1 40cNm
Screw ISO 7045 M3x16 B1000013 1 50cNm
Nut ISO 4032 M3 B1001030 2 50cNm
Secure encoder ruler Screw ISO7045 M2x8 B1000012 1 40cNm
Nut ISO4032 M2 B1001010 1 40cNm
Secure sensors unit
Screw ISO7049 ST2,9x9,5-F-Z B1000219 1 40cNm
B6660032
Secure encoder unit Screw ISO 7045 M3x8 B1000043 1 40cNm
Nut ISO 4032 M3 B1001030 1 40cNm
Secure barrel sensor Screw ISO7049 ST2,9x9,5-F-Z B1000219 1 40cNm
Rear Case Assembly:
Stage Description Component Description Part No Qty Established
Process
Torque
Secure power supply unit Screw ISO7049 ST2,9x9,5-F-Z B1000219 6 40cNm
Secure mains filter unit Nut S5 (1KT0006) L5555022 2 50cNm
Secure RS232 connector
Nut S4,5 (FCN770-A07) L5555023 2 50cNm
unit
Secure switching power
Screw ISO 7046 M3x16 B1000125 4 50cNm
supply
Nut ISO 4032 M3 B1001030 4 50cNm
Secure power supply unit
Nut ISO 4032 M6 B1001060 1 1Nm
grounding wire
Flo-gard GSP Service Manual
41
Page 42

Final Assembly:
Stage Description Component Description Part No Qty Established
Secure battery
Screw ISO 7049 ST2,9x9,5-F-Z B1000219 2 40cNm
compartment lid
Secure Front Case to Rear
Screw ISO7045 M4x10 B1000062 6 1Nm
case
Process
Torque
Flo-gard GSP Service Manual
42
Page 43

8. ELECTRICAL SCHEMATIC DIAGRAMS, COMPONENT LOCATION DIAGRAMS
8.1. ELECTRICAL BLOCK DIAGRAM OF THE PUMP
Flo-gard GSP Service Manual
43
Page 44

8.2. ELECTRICAL SCHEMATIC DIAGRAM OF THE PUMP
Flo-gard GSP Service Manual
44
Page 45

ELECTRICAL SCHEMATIC DIAGRAM OF THE PUMP (CONTINUED)
Flo-gard GSP Service Manual
45
Page 46

ELECTRICAL SCHEMATIC DIAGRAM OF THE PUMP (CONTINUED)
Flo-gard GSP Service Manual
46
Page 47

8.3.ELECTRONIC BOARD SCHEMATIC DIAGRAM
Flo-gard GSP Service Manual
47
Page 48

ELECTRONIC BOARD SCHEMATIC DIAGRAM (CONTINUED)
Flo-gard GSP Service Manual
48
Page 49

ELECTRONIC BOARD SCHEMATIC DIAGRAM (CONTINUED)
Flo-gard GSP Service Manual
49
Page 50

ELECTRONIC BOARD SCHEMATIC DIAGRAM (CONTINUED)
Flo-gard GSP Service Manual
50
Page 51

8.4.ELECTRONIC BOARD COMPONENT LOCATION DIAGRAM
Flo-gard GSP Service Manual
51
Page 52

8.5.DRIVE UNIT BOARD SCHEMATIC DIAGRAM
Flo-gard GSP Service Manual
52
Page 53

8.6. DRIVE UNIT BOARD COMPONENT LOCATION DIAGRAM
Flo-gard GSP Service Manual
53
Page 54

8.7.POWER SUPPLY UNIT SCHEMATIC DIAGRAM
Flo-gard GSP Service Manual
54
Page 55

8.8.POWER SUPPLY UNIT COMPONENT LOCATION DIAGRAM
Flo-gard GSP Service Manual
55
Page 56

8.9.BATTERY MONITORING UNIT COMPONENT LOCATION DIAGRAM
Flo-gard GSP Service Manual
56
Page 57

9. MECHANICAL ASSEMBLY DRAWINGS AND PART LIST
9.1. PART LIST
REFERENCE PART
DESCRIPTION QUANTITY
NUMBER
1 B6660024 Syringe barrel sensor 1
3 B6660026 Encoder unit 1
5 B6670007 Motor unit 1
6 V8413101 Motor belt 1
7 B6290002 Encoder ruler 1
8 B6660032 Sensors unit 1
9 B8247019 Ring 1
10 B6337021 Drive 1
11 B8126037 Syringe support 1
12 B6678003 Syringe pusher 1
13 B8074050 Syringe pusher support 2
15 B6337019 Syringe pusher driver 1
16 B8110033 Plastic screen 1
17 B6900002 Drive Unit board 1
18 B8280007 Shaft 1
19 B6210004 Syringe size sensor 1
20 B8127005 Syringe clamp 1
22 B6800002 Display unit 1
23 B3087044-01 Electronic board (without display unit) 1
24 V5202704 SRAM 1
25 V6675047 Keyboard K1 1
26 V6675048 Keyboard K2 (narrow) 1
28 B8703025 Syringe barrel sensor cover 1
30 B6710007 Piezotransducer unit 1
34 B6680015 RS232 connector unit 1
35 B6680016 12VDC&Nurse call unit 1
37 B6730007 Mains filter unit 1
40 B6340012-01 Power supply unit (without switching power
supply)
41 V5500700 Switching power supply MPS30-12 1
42 B6341001 Battery unit 1
43 B8178015 Battery compartment lid 1
44 B6400001 Versatile clamp 1
45 V6300310 Silicon gasket (length 1.2m) 1
46 V5511152 Cap RS232 1
47 V5511153 Cap 12VDC&Nurse call 1
48 V6300312 Silicon gasket (length 0.2m) 1
49 B1000051 Screw ISO 1207 M3x12 2
50 B1001060 Nut ISO 4032 M6 1
51 L5555023 Screw kit (FCN770-A07) 1
52 L5555022 Retaining clips with screw kit (1KT0006) 1
53 B1000125 Screw ISO7046 M3x16 4
55 B1000059 Screw ISO 1580 M3x25 2
56 B1000057 Screw ISO 1580 M3x20 2
1
Flo-gard GSP Service Manual
57
Page 58

57 B1000220 Screw ISO 7049 ST2,9x13-F-Z 2
58 B1001010 Nut ISO4032 M2 1
59 B1000108 Screw ISO 7046 M2,5x10 1
60 B1000062 Screw ISO7045 M4x10 6
61 B1000219 Screw ISO 7049 ST2,9x9,5-F-Z 16
62 B1000217 Screw ISO 7049 ST2,9x6,5-F-Z 2
63 B1000050 Screw ISO 7045 M3x12 2
64 B1000041 Screw ISO 7045 M3x6 5
66 B1000013 Screw ISO 7045 M3x16 1
67 B1000012 Screw ISO 7045 M2x8 1
68 B1000121 Screw ISO 7046 M3x10 1
69 B1000043 Screw ISO 7045 M3x8 2
70 B1001030 Nut ISO 4032 M3 8
71 B8917003 Damper 6
72 B1002010
Washer ISO 7089 ∅2,2-140HV
74 V6300504 Spacer SS6-2 5
75 B1002020
Washer ISO 7089 ∅3.2-140HV
76 V8947015 Washer 4
77 B8947028 Washer 5
78 V8947015
Washer ISO 7089 ∅3,2-7
79 L5580040 Standoff TCBN-T1-M3-6-7 4
80 B1002260 Washer DIN6798 – A6,4 Fst 1
81 B1002220 Washer DIN6798 – A3,2 Fst 2
82 B8947032
Washer ∅12/18 thickness 0.3
83 V6300400 Leg 4
84 L5555024 Clip 1
85 B8180123 Label (serial number) 1
87 B8180125-P01 Label (WARNING, syringes 10-140ml) 1
87 B8180227 Label (WARNING, syringes 5-140ml) 1
88 B8180126 Label (BAXTER LOGO) 1
90 B8180127 Label (RS232) 1
91 B8180136 Label (Do not disassemble) 1
93 B8180139 Label (instruction) 1
94 B8180152 Label (clip) 1
95 B8180205 Label (alignment) 1
96 V8180082 Label (electrostatic) 1
97 V8180085 Label (ground) 1
1
9
4
1
Flo-gard GSP Service Manual
58
Page 59

9.2 FRONT CASE ASSEMBLY
9.2.1 Syringe barrel sensor
9.2.2 Encoder Unit
Flo-gard GSP Service Manual
59
Page 60

9.2.3 Motor Unit
9.2.4 Motor belt
Flo-gard GSP Service Manual
60
Page 61

Motor belt (continuation)
9.2.5 Sensor unit B6660032
Flo-gard GSP Service Manual
61
Page 62

9.2.6 Encoder ruler
9.2.7 Drive
Flo-gard GSP Service Manual
62
Page 63

Drive (continuation)
9.2.8 Syringe support
Flo-gard GSP Service Manual
63
Page 64

9.2.9 Syringe pusher
Syringe pusher (continuation)
Flo-gard GSP Service Manual
64
Page 65

9.2.10 Syringe pusher drive
9.2.11 Drive Unit board
Flo-gard GSP Service Manual
65
Page 66

Drive Unit board (continuation)
9.2.12 Syringe size sensor
Flo-gard GSP Service Manual
66
Page 67

9.2.13 Syringe clamp
9.2.14 Display Unit
Flo-gard GSP Service Manual
67
Page 68

9.2.15. Electronic board
9.2.16.
9.2.15
9.2.16
9.2.17
9.2.18
Electronic board (continuation)
Flo-gard GSP Service Manual
68
Page 69

9.2.16. SRAM
9.2.17. Keypads
Flo-gard GSP Service Manual
69
Page 70

9.2.18. Syringe barrel sensor cover
Flo-gard GSP Service Manual
70
Page 71

9.3 REAR CASE ASSEMBLY
9.3.1 RS232 connector unit and piezotransducer unit
9.3.2 Mains filter unit and 12VDC&Nurse call unit
Flo-gard GSP Service Manual
71
Page 72

9.3.3 Switching power supply
9.3.4 Power supply unit
Flo-gard GSP Service Manual
72
Page 73

Power supply unit (continued)
9.3.5 Battery unit
Flo-gard GSP Service Manual
73
Page 74

Battery unit (continuation)
Flo-gard GSP Service Manual
74
Page 75

9.4. FINAL ASSEMBLY
Final assembly (continuation)
Flo-gard GSP Service Manual
75
Page 76

Final assembly (continuation)
Final assembly (continuation)
Flo-gard GSP Service Manual
76
Page 77

10. SPARE PARTS LISTING
10.1. SPARE ACCESSORIES
PART NUMBER DESCRIPTION
B8640037-01
Spacer (gauge) SP1
(old B8640022-01)
B8640037-02
Spacer (gauge) SP2
(old B8640022-02)
B8640037-03
Spacer (gauge) SP3
(old B8640022-03)
B8640023 Spacer (gauge) SP4
Digitron pressure meter, model: 2022P (0-1500 mmHg)
P322009 Flo-Gard GSP Firmware Upload Utility
B6690006 Bootstrap Loading Unit
10.2. SPARE LABELS / PUBLICATIONS
PART NUMBER DESCRIPTION
BS036010EN Service Manual Flo-Gard GSP Syringe Infusion Pump
BN036011XX Operator’s Manual Flo -Gard GSP Syringe Infusion Pump
B8180123 Label (serial number)
B8180125XX-P01 Label (WARNING, syringes 10-140ml)
B8180227XX Label (WARNING, syringes 5-140ml)
B8180126 Label (BAXTER LOGO)
B8180127 Label (RS232)
B8180136 Label (Do not disassemble)
B8180139XX Label (instructio n)
B8180152 Label (clip)
B8180205 Label (alignment)
XX- language name codes:
Language name Code (XX)
Danish DA
Dutch NL
English EN
Finnish FI
French FR
German DE
Italian IT
Norwegian NO
Spanish ES
Swedish SV
Greek EL
Flo-gard GSP Service Manual
77
Page 78

10.3. SPARE ELECTRICAL COMPONENTS
PART NUMBER DESCRIPTION
B6341001 Battery unit
B6340013-01 Power supply unit (without switching power supply)
V5500700 Switching power supply MPS30-12
B6730007 Mains filter unit
B6800002 Display Unit
B3087044-01 Electronic board (without display unit)
B6660026 Encoder unit
B6660032 Sensor unit
B6900002 Drive Unit board
B6670007 Motor unit
B6660027 Syringe barrel sensor
V6675047 Keypad K1
V6675048 Keypad K2 (narrow)
B6710007 Piezotransducer unit
V5570010 AC power lead - European
V5570011 AC power lead- UK
V5570013 AC power lead- USA
V5570015 AC power lead- Danish
V5501041 Fuse F800mA
V5501042 Fuse F2A
V5570020 RS232 extension cable
B6650012 Nurse call cable
B6650013 12VDC cable
V5430312 Red LED (D1)
V5430213 Green LED (D2)
V5430112 Yellow LED (D3)
V5500202 Buzzer SMA-24 (Z1)
10.4 SPARE MECHANICAL COMPONENTS
PART NUMBER DESCRIPTION
B6678003 Syringe pusher
B6337019 Syringe pusher drive
B6210004 Syringe size sensor
V8413101 Motor timing belt
B8703025 Syringe barrel sensor cover
B8127005 Syringe clamp
B8126037 Syringe support
B6400001 Versatile clamp
B6290002 Encoder ruler
Flo-gard GSP Service Manual
78
Page 79

B6337021 Drive
V5511152 Cap RS232
V5511153 Cap 12VDC&Nurse call
L5555024 Clip
B8280007 Shaft
V6300400 Leg
Flo-gard GSP Service Manual
79
 Loading...