

Page 1
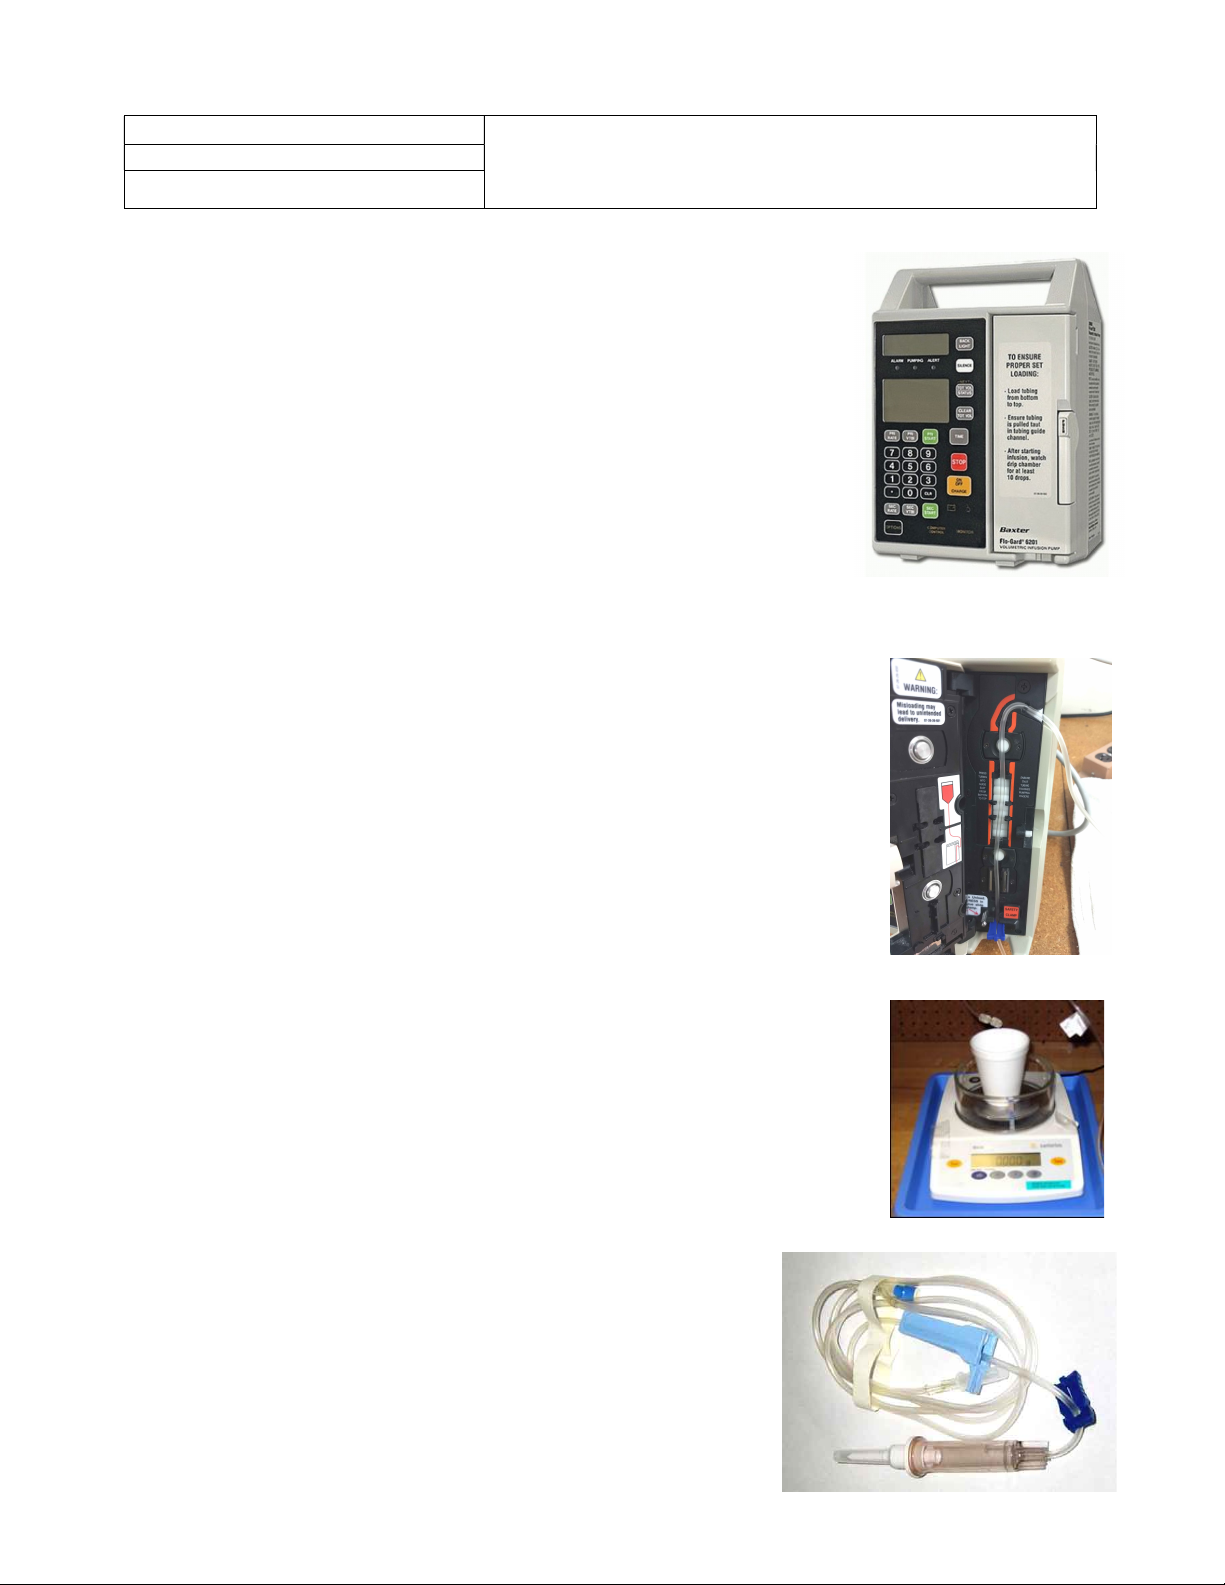
Title: Baxter Infusion Pump
DATE: 5-18-2022
File = Flo-Gard4.doc
DISCLAIMER: THIS PROCEDURE PROVIDED "AS IS" AND
WITH POSSIBLE FAULTS. USER MUST VERIFY BEFORE
USE. NEITHER PROVIDER NOR WEBSITE ASSUMES ANY
RESPONSIBILITY FOR ITS USE.
1. General
Applies to the Baxter Flo-Gard Infusion Pump
2. Reference Documents:
Flo-Gard 6201 User Manual 7-19-01-602
Service Manual 7-19-01-688
Also, see youtube.com for setup videos
3. Tools / Fixtures
Safety Testor: Dale 601
Buret or scale (preferred)
Tubing Set (relatively inexpensive; see photo below)
4. Initial Inspection
Clean unit as required. Common problems are internal breakage due to dropping.
5. Mechanical and Electrical Safety Inspection
5.1. Door movement – opens up slightly passed 90 deg. The latch should
not swing past horizontal. Check the small round nylon cover on the
latch pin.
5.2. Check Pole Clamp (allen nut, rubber surface)
5.3. Label Integrity
5.4. Line Cord Integrity (< .500 ohms)
5.5. Equipment Frame Leakage ( < 300 uA)
Note: For remainder of this procedure, run unit unplugged to check battery
quality.
6. Basic PM Procedure
6.1. Check date and time; update if necessary using check config initiated
by simultaneously pressing the rear switch button, On/Off, and Stop.
Hitting “Tot Vol Status” button then cycles thru all the options.
6.2. Other Configuration Checks: Using above configuration mode:
Check software revision level for 1.10 or better (using
<Silence><On-Off>).
All parameters are default per the 6201 service manual except
“Insert Clamp” - Alarm
6.3. Open/Close the Door to give corresponding display alert.
6.4. Simultaneous Flow, Volume and Secondary to Primary
Transition Test:
Set Pri Rate = 375, Pri Vol = 5, Sec Rate 250, Sec Volume
= 5.
Set/Note burette or scale to a known starting level; press
Sec Start which should start a 2 stage delivery of 10 ml
Page 2
total. Open door while running to temporarily cause a stop/alarm.
6.5. Accept 9.5 - 10.5 mL (See Appendix); total elapsed time = 2 min
6.6. Upper Occlusion Check – run unit at 100 – 200 ml/min and pinch hose upstream. Note
alarm “Upstream Occlusion”.
6.7. Lower Occlusion Check – switch the pressure gage into the output circuit and occlude.
Run unit at 100 ml/min and note pressure (assuming Occlusion level has been set to 1.)
Display will soon read “Occlusion”. The acceptable pressure is 6- 9 psi.
6.8. Air-In-Line Detection - To save time, set Pri Flow to 500 and volume = 5-10mL. Tip
the air trap in the upstream line to form at least 1 bubble ¾” long or less.
Alarm soon will occur as “AIR”. Press “Pri Start”.
6.9. Tubing Set Removal After opening door, press-in the small blue clip. Then press the
<Safety Clamp>, which releases the clip. It will easily then pull out.
6.10. Re-label: Replace old PM label Close work order and then enter performance data..
APPENDIX (Notes/Troubleshooting/Adjustments)
OCCLUSION LEVEL ADJUSTMENTS
Turn on unit by holding down <Clear Total Volume>, <1>, <On>
The display will show the following number array:
Occlusion Values (on left side) Battery Info (on right side)
UPPER 3242 – 3314 (avg = 3278) 688-714 (Battery charge quality)
LOWER 2967 – 3039 (avg = 3003) 574-737 (Lithium battery)
CLAMP SENSOR DETECTORS – CLEANING
There are two sensors to clean – one up front, and one in the back which requires opening the unit and
cleaning with a Q-tip. When cleaning does not remedy clamp sensor detection, the clamp sensor circuit
may need calibration:
Enter diagnostic mode via <Clear Tot Volume>, <1>, <On/Off>
Clamp In < 0.50 volts; Clamp Out > 4.2v
DUAL CHANNEL SINGLE CHANNEL
Plug a molex into CNTEST2
Pin1 2 3 4 Pin5
Pump 2 Pump 1
VR803 VR805 TP802 Adj VR802
SLIDE CLAMP CONNECTOR – 3 WIRE TRANSFER ON 9 PIN CONNECTOR
The last 3 wires (empty slots on new connector) have color sequence gray, brown, purple (end).
VOLUME ACCURACY NOTE: Baxter specs are +/- 3%.
FORCE SENSING FLEX RESISTORS -- Good resistance will range from 140K to 210K. For digital
readout, use test mode 2: <Clear Tot Volume>, <2>, <On/Off> Note: With no tubing or even tubing
loaded/centered properly, there is no change in resistance when door is closed.
AIR SENSOR DIAGNOSTIC Enter test mode 2 using <Clear Tot Volume>, <2>, <On/Off>.
Pri RateWindow (400-650) Ignore
Pri Vol Window (400-650) Ignore
An empty tubing set will give a reading less than 11. A tube with fluid will read 400-650. If dual pump,
check both sides.
 Loading...