

Page 1
Original
-
Bedienungsanleitung
TS60
100197
V1/0917
Page 2

Page 3

GB/UK
ENGLISH
Table of contents
1. Safety ............................................................................................................... 20
1.1. Warning symbols explanation ...................................................................... 20
1.2. Safety instructions ....................................................................................... 21
1.3. Use as intended ........................................................................................... 24
1.4. Use against the intended purpose ............................................................... 24
2. General information .......................................................................................... 25
2.1. Manufacturer Liability and Warranties ......................................................... 25
2.2. Copyright ..................................................................................................... 25
2.3. CE Declaration of Conformity ...................................................................... 25
3. Transport, packaging and storage .................................................................... 26
3.1. Delivery check ............................................................................................. 26
3.2. Packaging .................................................................................................... 26
3.3. Storage ........................................................................................................ 26
4. Technical data .................................................................................................. 27
4.1. Technical specification ................................................................................. 27
4.2. List of components ....................................................................................... 28
5. Installation and operation ................................................................................. 29
5.1. Installation ................................................................................................... 29
5.1.1. Location ....................................................................................................... 29
5.1.2. Connection................................................................................................... 29
5.2. Operation ..................................................................................................... 30
5.2.1. Important tips for optimal toast result ........................................................... 30
5.2.2. Toasting ....................................................................................................... 31
5.2.3. Turn off before the set time .......................................................................... 32
5.2.4. Stuck bread slices. ....................................................................................... 33
6. Cleaning ........................................................................................................... 34
6.1. Cleaning of removable crumb tray ............................................................... 35
6.2. Storage ........................................................................................................ 35
7. Disposal ........................................................................................................... 36
- 19 -
Page 4
Read these instruction manual before using and keep it
available at all times!
This instruction manual contains information about the installation, operation and
maintenance of the appliance and should be consulted as an important source of
information and reference guide. The knowledge of all the operational and safety
instructions included in this manual is the pre-condition for the safe and proper dealing
with the appliance. Furthermore, local regulations for health and safety protection and
accident prevention should be observed. This instruction manual is an integral element
of the product and should be stored in the direct vicinity of the appliance so that it would
be available to the persons who install, operate, do maintenance work or clean the
appliance. In case the appliance is operated by third parties it is necessary to provide
them with this instruction manual.
1. Safety
This appliance is designed in accordance with the current technical standards.
However, the appliance may be a source of dangers, if used improperly or against its
intended purpose. All the users must follow the information included in this instruction
manual and observe the health and safety guidelines.
1.1. Warning symbols explanation
Important safety information and warning information are indicated in this instruction
manual by appropriate warning symbols. You must strictly comply with the information
to prevent accidents, personal injury and damage.
DANGER
The warning symbol DANGER warns
against a risk of severe injury or
fatality, if not prevented.
WARNING
The warning symbol WARNING warns
against a risk of severe or medium
injury or fatality, if not prevented.
CAUTION
The warning symbol CAUTION warns
against a risk of minor or moderate
injury, if not prevented.
WARNING - HOT SURFACE
The warning symbol WARNING - HOT
SURFACE warns against a risk that
may cause personal injury, i.e. burns,
if not prevented.
- 20 -
Page 5

NOTE
The warning symbol NOTE warns
against material damage.
The symbol INFORMATION present
information and guidelines to the user
about the use of the appliance.
1.2. Safety instructions
Risk of fatal electric shock!
• Too a high mains voltage or incorrect installations may cause electric shock.
• Connect the appliance to an easily accessible power supply socket so that in case of
defect it is possible to immediately disconnect the appliance from the power supply.
• The appliance may be connected only when the information on the rating plate
correspond with the mains voltage.
• The damaged power supply cord can be changed by the manufacturer or qualified
staff only.
• Any repairs or housing opening may be carried out by professionals and relevant
workshop only.
Power supply cord and plug
• Do not transport the appliance by holding the power supply cord.
• Do not use the appliance when the power supply cord or plug are visibly damaged or
are broken.
• Never allow the power cord to come into contact with heat sources or sharp edges.
• Do not bend, pinch or knot the power supply cord.
• Always completely unwind the power supply cord.
• Never place the appliance or other objects on the power supply cord.
• Always hold of the plug to disconnect the appliance from the power supply.
• Do not connect the appliance to the multi-socket.
Risk of fatal short-circuit!
• Store the appliance so that it may not fall down to water e. g. in a washbasin or bath
tube.
• Never hold of the appliance if it has fallen into water. In such the case, unplug
immediately.
• Never immerse the appliance in water or other liquids.
• Liquids in the appliance may cause short-circuit.
• Use the appliance in the dry surrounding and indoors only.
• When cleaning, unplug the appliance.
• Do not touch the plug with wet hands.
- 21 -
Page 6

Risk to life due to lack of experience and knowledge!
• The appliance can be used by children of 8 years old and older, as well as by people
with disabilities and those with limited experience/knowledge as long as they are
under supervision or have been instructed on proper use of the appliance and its
possible dangers.
• Do not leave the appliance unattended and in the presence of children.
• Keep the packing films and polystyrene foam elements away from children.
The children may get embroiled and suffocate.
• Do not leave the appliance unattended during operation.
• Cleaning and maintenance may not be carried out by children or persons with limited
physical, sensory or mental capabilities.
Health hazard due to burnt food!
• Acrylamide that is present in burnt pieces of bread for example may cause cancer.
• Do not brown bread excessively.
• Remove the burnt pieces.
Risk of burns by hot surfaces!
• The surface of the appliance becomes hot during operation. The hight temperature
remains for some time after the appliance has been switched off.
• Do not insert the hands into the toast slots or touch any surface of the appliance.
• You can transport or clean the appliance only when it has cooled down completely.
Risk of fire due to flammable food and materials!
• Toast bread may catch fire.
• Any flammable objects in the vicinity of the appliance may ignite.
• Do not locate the appliance in the vicinity of the inflammable materials or
underneath. The appliance must be monitored.
• Do not use the appliance in the immediate vicinity of the heat source and hot
surfaces.
• Do not place any inflammable or flammable objects on the hot surface or the
appliance.
• Do not cover the appliance with b e. g. aluminium foil or clothes.
• Clean the appliance and empty the crumb tray regularly to prevent the risk of fire.
• In case of fire, remove the plug from the socket before the fire extinguishing
activities. When the fire has been extinguished ensure sufficient fresh air inflow.
Never use water for fire extinguishing when the appliance is connected to the power
supply.
- 22 -
Page 7

Risk of damage due to improper operation!
• Incorrect handling may cause damage to the appliance.
• Never expose the appliance to high temperature (a cooker, etc.) or weather
conditions (rain, etc.).
• Do not use the appliance or place on a hot surface, e. g. on a cooktop or near open
fire.
• Do not allow that the power supply cord hangs above the edge of the working
surface.
• Use the appliance only when it is positioned on an even, stable, and heat-resistant
surface.
• Use the appliance with the crumb tray only.
• Do not use the appliance with the external timer or remote control.
• In case the toast bread stuck in the toast slot unplug the appliance and leave the
appliance to cool down.
• Use the appliance only in the standing position.
• Do not place the appliance under the kitchen cupboards. The cupboards may be
damaged due to the hot air flowing up.
• Do not immerse the appliance in water or other liquids during cleaning.
• Do not use any scouring agents that include solvents or corrosive cleaning agents
for cleaning. They may damage the surface.
- 23 -
Page 8

The appliance is not int
ended for continued industrial application.
1.3. Use as intended
Every use of the appliance for a different purpose and/or in a way that diverges from the
intended use is not allowed and is assumed as the use against the intended purpose.
The safe operation of the appliance is guaranteed only when used according to its
intended use and the information included in this instruction manual.
The appliance is intended for use in household and similar places:
• in factory kitchens, in shops, offices, and other similar working environments,
• in farm houses,
• by customers in hotels, motels, bed & breakfasts, and other typical residential
environments.
The appliance is only intended for toasting slices of bread.
Any claims against the manufacturer or their authorized representatives as a
consequence of experiencing damage resulting from the use against the intended
purpose are inadmissible. The liability for damage occurred during the use of the
appliance against its intended purpose is borne solely and exclusively by the user.
1.4. Use against the intended purpose
Any use other than those mentioned in point 1.3. “Use as intended”, is assumed as the
use against the intended purpose and is not allowed. The use against the intended
purpose may lead to severe injury or damage caused by hazardous voltage, fire or high
temperature. It is allowed to use the appliance to perform only the work described in the
instruction manual. Any manipulation with the appliance, assembly or maintenance work
may be performed exclusively by the authorized service staff. Incorrect handling may
cause damage to the appliance.
It is not allowed to use the appliance for:
• baking bread rolls,
• reheating of the already toasted bread,
• bagel toasting
• toasting frozen bread,
• toasting spread slices of bread (e.g. sandwiches), bakery goods with filling or
coating (e.g. jam or icing).
- 24 -
Page 9

CAUTION!
2. General information
2.1. Manufacturer Liability and Warranties
All the information and instructions in this manual take into account standard safety
regulations, current levels of technical engineering as well as the expertise and
experience we have developed over the years. If the order consists of a special model
or includes additional options, the actual scope of delivery may differ from the
descriptions and illustrations in this manual. This is also the case when the state-of-theart technical solutions have been applied.
Read this instruction manual before you use the appliance and particularly before you
start the appliance to prevent injury or damage. Incorrect use may cause injury or
damage.
The manufacturer is not liable for any damage or faults caused when:
• you do not follow the instructions,
• you use the appliance against the intended purpose,
• alterations are made by the user,
• inappropriate spare parts are used.
We reserve the right to introduce technical modifications to the product which are
intended for improvement of the appliance and its performance.
2.2. Copyright
This instruction manual and included text, drawings, images or other illustrations are
copyrighted. This instruction manual, including any extracts, – may not be reproduced in
any form or by any means, or transmitted to or used by third parties – without
permission in writing from the manufacturer. Breach of the above results in payment of
compensation. We reserve the right to pursue further claims.
The illustrations included in this instruction manual may slightly vary from the actual
realization of the appliance.
2.3. CE Declaration of Conformity
The appliance meets the applicable standards and guidance of the
European Union. We confirm the above in the CE Declaration of
Conformity. If required, we will be pleased to send you the relevant
Declaration of Conformity.
- 25 -
Page 10

3. Transport, packaging and storage
3.1. Delivery check
Check the delivery upon completeness and transport damage immediately after receipt.
In case of visible transport damage refuse to accept the receipt or conditionally accept
the receipt. Note the scope of damage on the transport documents/consignment list of
the shipping company and place a complain. Hidden damage must be reported
immediately upon its discovery as compensation claims may only be presented within
the applicable time-limits.
3.2. Packaging
The packaging and its elements are made of recyclable materials. Particularly, plastic
films and bags, cardboard boxes. Do not dispose of the appliance cardboard box. It may
be used to store the appliance when relocating or when sending the appliance to our
service point in case of any defaults. Before you start the appliance, completely discard
any external or internal packaging material. Check that the unit and all accessories are
present. If you find that something is missing, please contact our Customer Service
Department. When managing the packaging observe the applicable domestic law.
Introduce the recyclable packaging materials to recycling.
3.3. Storage
Leave the packaging closed until installation of the appliance, and follow the external
indications as to the location and storage. Store the packaging only in the following
conditions:
• not outdoors,
• in dry and dust free surroundings,
• away from aggressive agents,
• not exposed to direct sunlight,
• protected against mechanical shocks.
In case of longer storage time (> 3 months) check the general state of all the elements
and packaging and refresh or renew, if necessary.
- 26 -
Page 11

4. Technical data
4.1. Technical specification
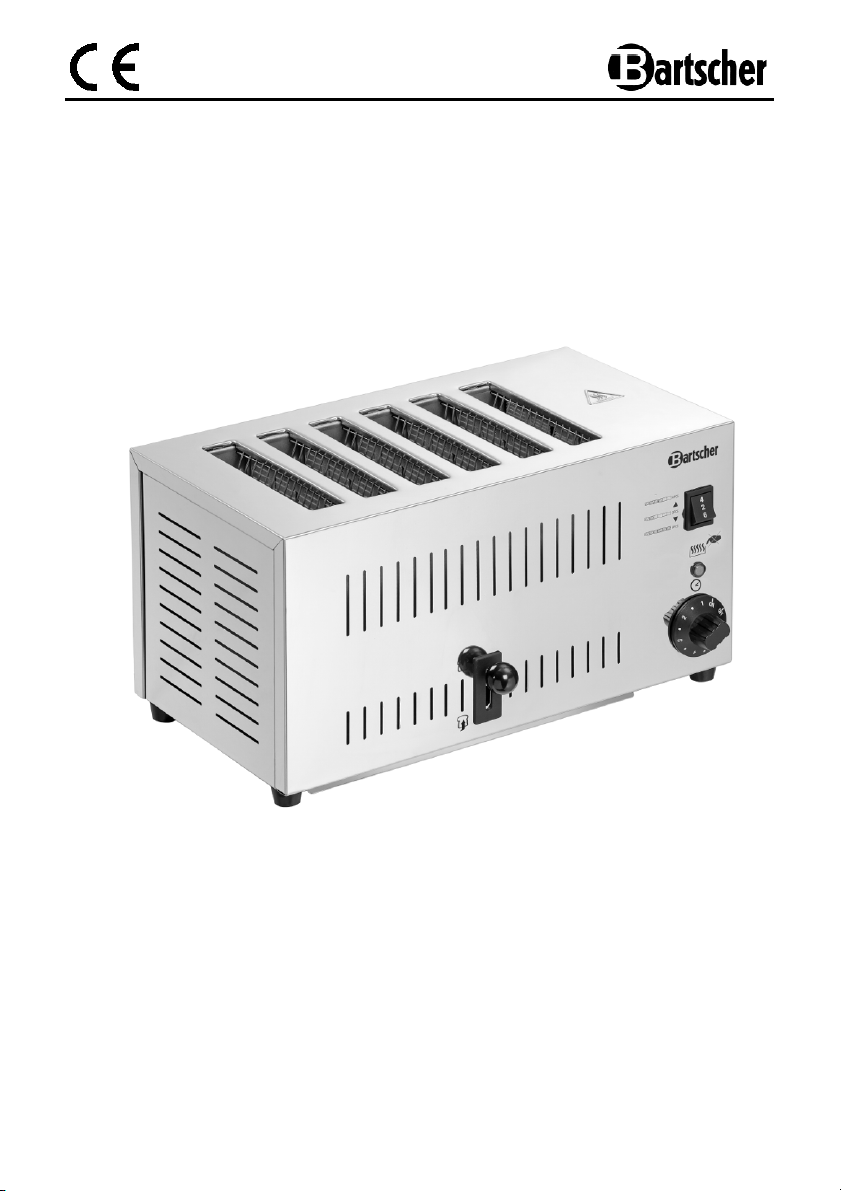
Name Toaster TS60
Art. no.:
Material: stainless steel
Realization:
Number of toast slots 6
Slot size: W 145 x D 20 x H 135 mm
Timer:
Power supply: 2.5 kW / 230 V 50 Hz
Power
consumption at
230V:
Dimensions: W 405 x D 245 x H 225 mm
100197
• Feature: toasting
• Designed for:
- Toasts
- Sandwich toasts
• Operation
- 1 lever handling 6 slots (manual release)
- Selector switch to choose a toast slot,
grouped by 2
• Heating indicator light
• Crumb tray, removable
Time setting: 1-5 minutes, acoustic sound after
the end of set time
2 slices: 1100W
4 slices: 1800W
6 slices 2500W
Weight: 5.65 kg
We reserve the right to technical modifications.
- 27 -
Page 12

4.2. List of components
9
8
7
6
5 4 3 2 1
1
Timer
2
Heating indicator light (red)
3
Selector switch
4
Operating lever
5
Removable crumb tray
6
Rubber feet (4)
7
Ventilation slots
8
Housing
9
Toast slot (6)
- 28 -
Page 13

DANGER!
Risk of fatal electric shock!
5. Installation and operation
5.1. Installation
5.1.1. Location
• Remove the appliance from the packaging and discard all the packing materials.
• Never remove the rating plate or any warning signs from the device.
• The installation place must be easily accessible and sufficiently spacious to allow
easy operation of the appliance and good air circulation.
• Allow 10 cm space at the sides and at the rear away from the walls and other
objects.
• In case of the smaller space place the protective elements, e. g. heat resistant film.
• Locate the appliance in a well-ventilated room.
• Place the appliance on top of an even, stable, dry, and water and heat resistant
surface.
• Never place the appliance directly underneath a hanging cupboard as hot air moves
upwards.
• Never use the appliance at the edge of a table as the appliance may fall over and
down.
• Locate the appliance so that the plug is easily accessible and can be quickly
disconnected from the power supply, if necessary.
• Remove the protective film from the appliance before use. Remove the film slowly in
order not to leave the glue residues. Any glue residues may be removed with the
use of proper solvent.
• Insert the crumb tray into the provided slot underneath the appliance.
5.1.2. Connection
Incorrect electric installations or too high mains voltage may cause electric shock.
• Connect the appliance to a single grounded socket with 16A protection
1. Verify if the technical specification of the appliance (see the rating plate) correspond
to the local electricity grid.
2. Position the appliance.
3. Fully unwind the power supply cord.
4. Plug in to the grounded socket.
The appliance is ready for use.
- 29 -
Page 14

5.2. Operation
5.2.1. Important tips for optimal toast result
At the same settings of the browning level, the toasting result varies depending on the
different characteristics of bread (moisture, type of bread, size and thickness of the
slices).
• Set shorter toasting time when toasting dry, smaller or thinner slices or when
toasting only one slice.
• Set longer browning time or carry out 2 toasting processes when toasting thicker
slices of bread.
• The cut surface of the bread should be as smooth as possible in order to achieve a
uniform toasting result.
• Remove loose crumbs or protruding bread components, e.g. grains, before toasting
because they can burn.
• Let longer browning time for the slices with an uneven surface.
• For the uniform result of toasting toast one type of bread at a time.
• Recommended toasting time is approx. 3 min.
• Take into account that during several operations one after another the toaster
becomes hotter and the toasted slices become darker accordingly. Select shorter
browning time for next toast processes, if necessary.
• The level of browning can be changed also during the toasting process by turning
the browning control.
- 30 -
Page 15

Risk of burns by hot surfaces!
5.2.2. Toasting
NOTE!
Incorrect use may cause damage.
• Only use the appliance with the inserted crumb tray to prevent damage to the
appliance and avoid crumb dirt.
1. Make sure that there are no packaging materials or other objects left in the
appliance.
2. Position the appliance according to the description.
3. Insert the crumb tray (5) into the provided slot underneath the appliance.
4. Connect the plug with the socket outlet installed according to the regulations. .
toast slots (9) that may be selected are indicated next to the selector
switch (3).
5. Select the number of the toast slots (9) that are to be heated with the selector
switch (3).
6. Insert the bread slices to the toast slots (9).
0
Turn the Timer (1) clockwise to intensify the browning. Turn Timer (1) anti-clockwise to
reduce the browning.
Take into account that during several operations one after another the toaster
becomes hotter and the toast slices become darker accordingly.
WARNING - HOT SURFACE
The toaster becomes hot during operation.
• Do not touch the surface or insert your hands into the toast slots.
7. Press the operating lever (4) upwards until it is blocked.
8. Turn the Timer (1) clockwise to set a desired browning time, between 1 and 5
minutes. The red heating indicator light (2) is on and the appliance is heating up.
9. The acoustic signal sounds when the toasting process has finished. The red heating
indicator light (2) is off, the heating is switched off and the Timer (1) is in its OFF
position.
- 31 -
Page 16

Risk of burns by hot surfaces!
Risk of burns by hot surfaces!
Risk of burns by hot surfaces!
10. Press the operating lever (4) downwards. The bread slices become lifted from the
toast slots (9).
WARNING!
Risk of fire as a result of continued operation!
The bread slices may burn.
• Move the operating lever to lift the bread from the toast slots.
WARNING - HOT SURFACE
The surfaces remain hot after operation.
• You can move or transport the appliance when it has cooled down completely.
11. Leave the appliance to cool down completely.
12. Pull the plug from the socket.
5.2.3. Turn off before the set time
Finish of the toasting process before the set time:
WARNING - HOT SURFACE
The toaster switches off after the set time has elapsed.
• Do not touch any surfaces.
1. Turn the Timer (1) anti-clockwise to its OFF position. The red heating indicator light
(2) is off, the appliance is switched off.
2. Press the operating lever (4) downwards . The bread slices become lifted from
the toast slots (9).
3. Remove the bread slices.
WARNING - HOT SURFACE
The surfaces remain hot after operation.
• You can move or transport the appliance when it has cooled down completely.
4. Leave the appliance to cool down completely.
5. Pull the plug from the socket.
- 32 -
Page 17

Risk of fire due to stuck bread slices.
Risk of burns by hot surfaces!
5.2.4. Stuck bread slices.
Pay attention that the slices are not too thick.
WARNING!
The bread may start to burn.
• Remove the stuck bread immediately.
Remove the stuck slice of bread from the toast slot:
1. Turn the Timer (1) anti-clockwise to its OFF position. The red heating indicator light
(2) is off, the appliance is switched off.
2. Pull the plug from the socket.
WARNING - HOT SURFACE
The surfaces remain hot after operation.
• Remove the stuck bread only when it has cooled down.
3. Let the appliance cool down completely.
WARNING!
Do not use any sharp metal objects to remove the stuck toast bread. The sharp
objects may damage the heating elements and when in contact with the live parts may
cause electric shock.
4. Turn the appliance by 180° and shake slightly to remove the stuck slices of bread
from the toast slots (9).
5. Carefully remove the stuck bread.
- 33 -
Page 18

Risk of short
-circuit due to water!
Risk of burns by hot surfaces!
6. Cleaning
WARNING!
Water in the toaster may cause short-circuit.
• Do not let any water to the toaster.
The appliance is not designed for flushing with direct water jet. The appliance is not
suited for direct washing via water jets.
NOTE!
Incorrect use may cause damage.
• Never use aggressive cleaning agents to clean the appliance.
• Never poke around with any sharp objects in the toast slots to remove bread
crumbs.
Regular cleaning:
1. Turn the Timer (1) anti-clockwise to its OFF position. The red heating indicator light
(2) is off, the appliance is switched off.
2. Pull the plug from the socket.
WARNING - HOT SURFACE
The surfaces remain hot after operation.
• You can move or transport the appliance when it has cooled down completely.
3. Leave the appliance to cool down completely.
4. Turn the appliance by 180° and shake slightly to remove the bread crumbs from the
toast slots (9).
5. Wipe the housing (8) of the toaster with a soft, damp cloth and a cleaning agent.
6. Dry the housing (8) thoroughly using a soft cloth.
7. Leave the appliance to dry completely before restarting.
- 34 -
Page 19

Risk of burns by hot surfaces!
6.1. Cleaning of removable crumb tray
NOTE!
Incorrect use may cause damage.
• Only use the appliance with the inserted crumb tray to prevent damage to the
appliance or crumb dirt.
• Empty and clean the crumb tray regularly.
WARNING - HOT SURFACE
The surfaces remain hot after operation.
• You can move or transport the appliance when it has cooled down completely.
The appliance is provided with the
removable crumb tray located in the
lower part of the appliance.
1. Remove the crumb tray (5) from the
slot underneath the appliance.
2. Clean the crumb tray (5) with a dry
or slightly damp, soft cloth and dry it.
3. Insert the crumb tray (5) into the
provided slot underneath the
appliance.
6.2. Storage
If the unit is to remain unused for a longer period of time, clean it according to the
instructions and store in a dry, clean place, safe from frost and sun and inaccessible to
children. Do not place any heavy objects on the appliance.
- 35 -
Page 20

7. Disposal
Old appliances
The electric appliances are marked with this symbol. You must not
dispose of electric appliances with household waste. When the
appliance may not be longer used each consumer is obliged to
dispose of the appliance at the dedicated local collection point,
separately from household waste.
NOTE!
Electric appliances should be used and disposed of properly to prevent the impact on
the environment.
• Disconnect the appliance from the power supply and remove the power cord from
the appliance with the use of diagonal pliers.
Bartscher GmbH
Franz-Kleine-Str. 28
33154 Salzkotten Tel.: +49 (0) 5258 971-0
Germany Fax: +49 (0) 5258 971-120
- 36 -
 Loading...