


Barnes & Noble, Inc. 122 Fifth Avenue, New York, NY 10011 USA.
© 2010-2012 Barnes & Noble, Inc. All rights reserved. NOOK®, NOOK Color™, NOOK Tablet™, NOOK
Book™, NOOK Bookstore™, NOOK Friends™, NOOK Kids™, NOOK Newsstand™, NOOK Store™, NOOK
Study™, Read In Store™, More In Store™, Free Friday™, LendMe®, PubIt!™, Lifetime Library™, GlowLight™,
Read What You Love. Anywhere You Like™, The Simple Touch Reader™, and Read Forever™ are trademarks of
Barnes & Noble, Inc. Patent Pending. Screenshots and product images are simulated and for instructional purposes
only. They may dier from the actual product and are subject to change without notice. Content shown may vary
from actual available content, which may change without notice. Your use of NOOK is subject to the NOOK Terms
of Service located in this User Guide and here: www.nook.com/legal. Contains Reader® Mobile technology by
Adobe Systems Incorporated. All trademarks or registered trademarks that are not the property of Barnes & Noble
or its aliates are the property of their respective owners.
Model BNRV350A
Version: 1.1.1.A

Table of Contents
Introduction .................................................................................................................................................... 7
Contact Us ........................................................................................................................................................................................ 7
Getting to Know Your NOOK ........................................................................................................................................................ 7
Getting Started with Your NOOK .............................................................................................................. 11
Registering Your NOOK ................................................................................................................................................................ 12
Power and Charging ........................................................................................................................................................................ 14
Safety and Care ............................................................................................................................................................................... 16
Caring for Your NOOK .................................................................................................................................................................. 18
Locking and Unlocking Your NOOK ............................................................................................................................................. 19
Using Gestures to Control Your NOOK .................................................................................................... 20
Tap ................................................................................................................................................................................................... 20
Double Tap ...................................................................................................................................................................................... 20
Press and Hold ............................................................................................................................................................................... 21
Swipe ............................................................................................................................................................................................... 21
Scroll ................................................................................................................................................................................................ 22
The Quick Nav Bar ...................................................................................................................................... 23
The Status Bar ............................................................................................................................................. 24
The Left Side of the Status Bar ....................................................................................................................................................... 24
The Right Side of the Status Bar .................................................................................................................................................... 24
Swiping Left on the Status Bar ........................................................................................................................................................ 24
GlowLight™ .................................................................................................................................................. 25
Turning GlowLight On or O ........................................................................................................................................................ 25
Adjusting the Brightness of GlowLight .......................................................................................................................................... 26
The Home Screen ........................................................................................................................................ 27
The Reading Now Panel ................................................................................................................................................................. 27
The New Reads List ........................................................................................................................................................................ 28
The What to Read Next Shelf ....................................................................................................................................................... 28
Reading Books on Your NOOK ................................................................................................................... 30
Opening a Book .............................................................................................................................................................................. 30
Page Layout ..................................................................................................................................................................................... 30
Turning Pages .................................................................................................................................................................................. 30
The Reading Tools Menu ................................................................................................................................................................ 31
Reading Magazines and Newspapers on Your NOOK .............................................................................. 54

The Library on Your NOOK ....................................................................................................................... 55
Pull-down Menus ............................................................................................................................................................................. 55
The Sync Button .............................................................................................................................................................................. 57
Searching Your Library .................................................................................................................................................................... 57
Memory Card .................................................................................................................................................................................. 58
Viewing and Sorting the Contents of Your Library ....................................................................................................................... 58
Organizing Your Library on Shelves ............................................................................................................................................... 59
Archiving Books and Periodicals ..................................................................................................................................................... 60
Unarchiving Books and Periodicals ................................................................................................................................................. 61
Opening Files on a microSD Memory Card .................................................................................................................................. 61
Transferring Files from Your Personal Computer to Your NOOK .............................................................................................. 61
Using the LendMe Program ........................................................................................................................ 63
Lending and Borrowing Books ....................................................................................................................................................... 63
Guidelines for Lending and Borrowing Books ............................................................................................................................... 63
Determining whether a Book Can Be Lent ................................................................................................................................... 64
Lending a Book ................................................................................................................................................................................ 64
Borrowing a Book ........................................................................................................................................................................... 64
Shopping on Your NOOK ............................................................................................................................ 66
Introduction ..................................................................................................................................................................................... 66
Browsing Lists and Categories ........................................................................................................................................................ 67
Searching for Titles, Authors, or Topics ......................................................................................................................................... 67
Buying a Book .................................................................................................................................................................................. 68
Buying a Single Issue of a Magazine or Newspaper ...................................................................................................................... 69
Buying a Subscription to a Magazine or Newspaper ..................................................................................................................... 69
What Happens When You Buy an Item in the Shop? ................................................................................................................... 69
Using Your Wishlist ......................................................................................................................................................................... 69
Using Your NOOK in a Barnes & Noble Store .......................................................................................... 71
Read In Store™: Reading Books in a Barnes & Noble Store ...................................................................................................... 71
Searching Your NOOK ................................................................................................................................ 72
Searching from the Quick Nav Bar ................................................................................................................................................ 72
Searching in Your Library ................................................................................................................................................................ 72
Searching for Words with Accents and Other Diacritical Marks.................................................................................................. 72
Configuring Your NOOK ............................................................................................................................. 73
Configuring GlowLight™ ................................................................................................................................................................ 74
Viewing and Configuring Device Info ............................................................................................................................................. 75
Configuring Wireless Settings ......................................................................................................................................................... 77

Configuring Screen Settings ............................................................................................................................................................ 78
Configuring Time Settings ............................................................................................................................................................... 80
Configuring Navigation Buttons in the Reader .............................................................................................................................. 82
Configuring the Shop ...................................................................................................................................................................... 83
Configuring Social Features ............................................................................................................................................................ 85
Configuring Search .......................................................................................................................................................................... 92
Using Your NOOK at Wi-Fi Hotspots ........................................................................................................ 93
Wi-Fi Networks in Barnes & Noble Stores ................................................................................................................................... 93
Unsecured Wi-Fi Networks ........................................................................................................................................................... 93
Secured Wi-Fi Networks ................................................................................................................................................................ 93
Updating the Software on Your NOOK ..................................................................................................... 94
Using an SD Memory Card ......................................................................................................................... 95
Types of Memory Cards Supported .............................................................................................................................................. 95
Installing a Memory Card ................................................................................................................................................................ 95
Removing a Memory Card ............................................................................................................................................................. 97
Tips and Troubleshooting ............................................................................................................................ 98
Solving Problems ............................................................................................................................................................................. 98
Appendix A: Page Numbering and File Formats .................................................................................... 100
Appendix B: International Use and Languages .......................................................................................101
Appendix C: One Year Limited Warranty ............................................................................................. 103
ONE YEAR LIMITED WARRANTY ........................................................................................................................................... 103
WHAT WARRANTIES APPLY TO MY NOOK? ....................................................................................................................... 103
HOW DO I MAKE A WARRANTY CLAIM OR OTHERWISE ARRANGE FOR THE RETURN OF MY NOOK? ............. 103
HOW DO I RETURN MY NOOK TO B&N? ............................................................................................................................104
IF I MAKE A WARRANTY CLAIM, WHAT WILL B&N DO WHEN IT RECEIVES MY NOOK? .......................................... 104
WHAT WILL BE THE WARRANTY PERIOD IF MY NOOK IS REPLACED? ......................................................................... 104
WHAT IF MY NOOK IS NOT COVERED BY THIS LIMITED WARRANTY? ........................................................................ 104
WHAT IS NOT COVERED BY THE WARRANTY? .................................................................................................................. 104
WHAT OTHER LEGAL TERMS APPLY TO THIS LIMITED WARRANTY? ............................................................................ 105
Appendix D: Trademarks and Copyrights ............................................................................................... 107
Adobe Reader Mobile Software ................................................................................................................................................... 107
AT&T ............................................................................................................................................................................................. 107
Dictionary ...................................................................................................................................................................................... 107
Fonts .............................................................................................................................................................................................. 107
microSD and microSDHC ............................................................................................................................................................ 107

Wi-Fi .............................................................................................................................................................................................. 107
Additional Information .................................................................................................................................................................. 107
Appendix E: FCC Notices ......................................................................................................................... 108
FCC IDs ........................................................................................................................................................................................ 108
FEDERAL COMMUNICATIONS COMMISSION (FCC) STATEMENT INFORMATION TO THE USER ............................ 108
FCC/IC Radiation Exposure Statement ...................................................................................................................................... 108
Other Information Related to the Radio ..................................................................................................................................... 108
Appendix F: Industry Canada Notice ..................................................................................................... 110
Appendix G: NOOK® Terms of Service ................................................................................................... 111
Appendix H: AT&T Terms of Service & Acceptable Use Policy ........................................................... 112

Introduction
This User Guide is designed to help you get the most enjoyment out of your NOOK Simple Touch with GlowLight™.
Contact Us
If you have questions about your NOOK that this guide doesn’t answer, be sure to visit the NOOK online support
center at:
http://www.nook.com/support
The online support center oers additional information about your NOOK, including:
• A PDF version of this NOOK User Guide that you can download to your computer
• Tutorial videos
• Frequently Asked Questions
You can also contact Barnes & Noble Customer Support by sending email to NOOK@barnesandnoble.com or
by calling 1-800-843-2665 (1-800-THE-BOOK) and selecting the option for Digital Technical Support. Outside the
United States, please call 1-201-438-1834.
Stay in Touch
Follow us on Facebook and Twitter to receive daily reviews, exclusive oers, and free NOOK Books.
http://www.facebook.com/nookBN
http://www.twitter.com/nookbn
Now, let’s get started with a quick tour of your NOOK and its main features.
Getting to Know Your NOOK
Your NOOK is an eReader with a grayscale touchscreen.
On your NOOK, you can:
• Read books, magazines, and newspapers
• Shop over two million titles. Buy books, single issues of magazines and newspapers, as well as subscriptions to
magazines and newspapers
• Store hundreds of books, along with magazines, newspapers, and personal files
• Sample books for free
• Lend, borrow, share, and recommend books to friends via Facebook®, Twitter®, or Google® using Barnes &
Noble’s exclusive LendMe® technology
• Store and read files, including PDFs
Your NOOK is small enough to hold easily with one hand and to slip into a bag or a purse. When you turn on GlowLight™ on your NOOK, you can read books, magazines, and newspapers even in dim lighting conditions.
Barnes & Noble NOOK User Guide 7
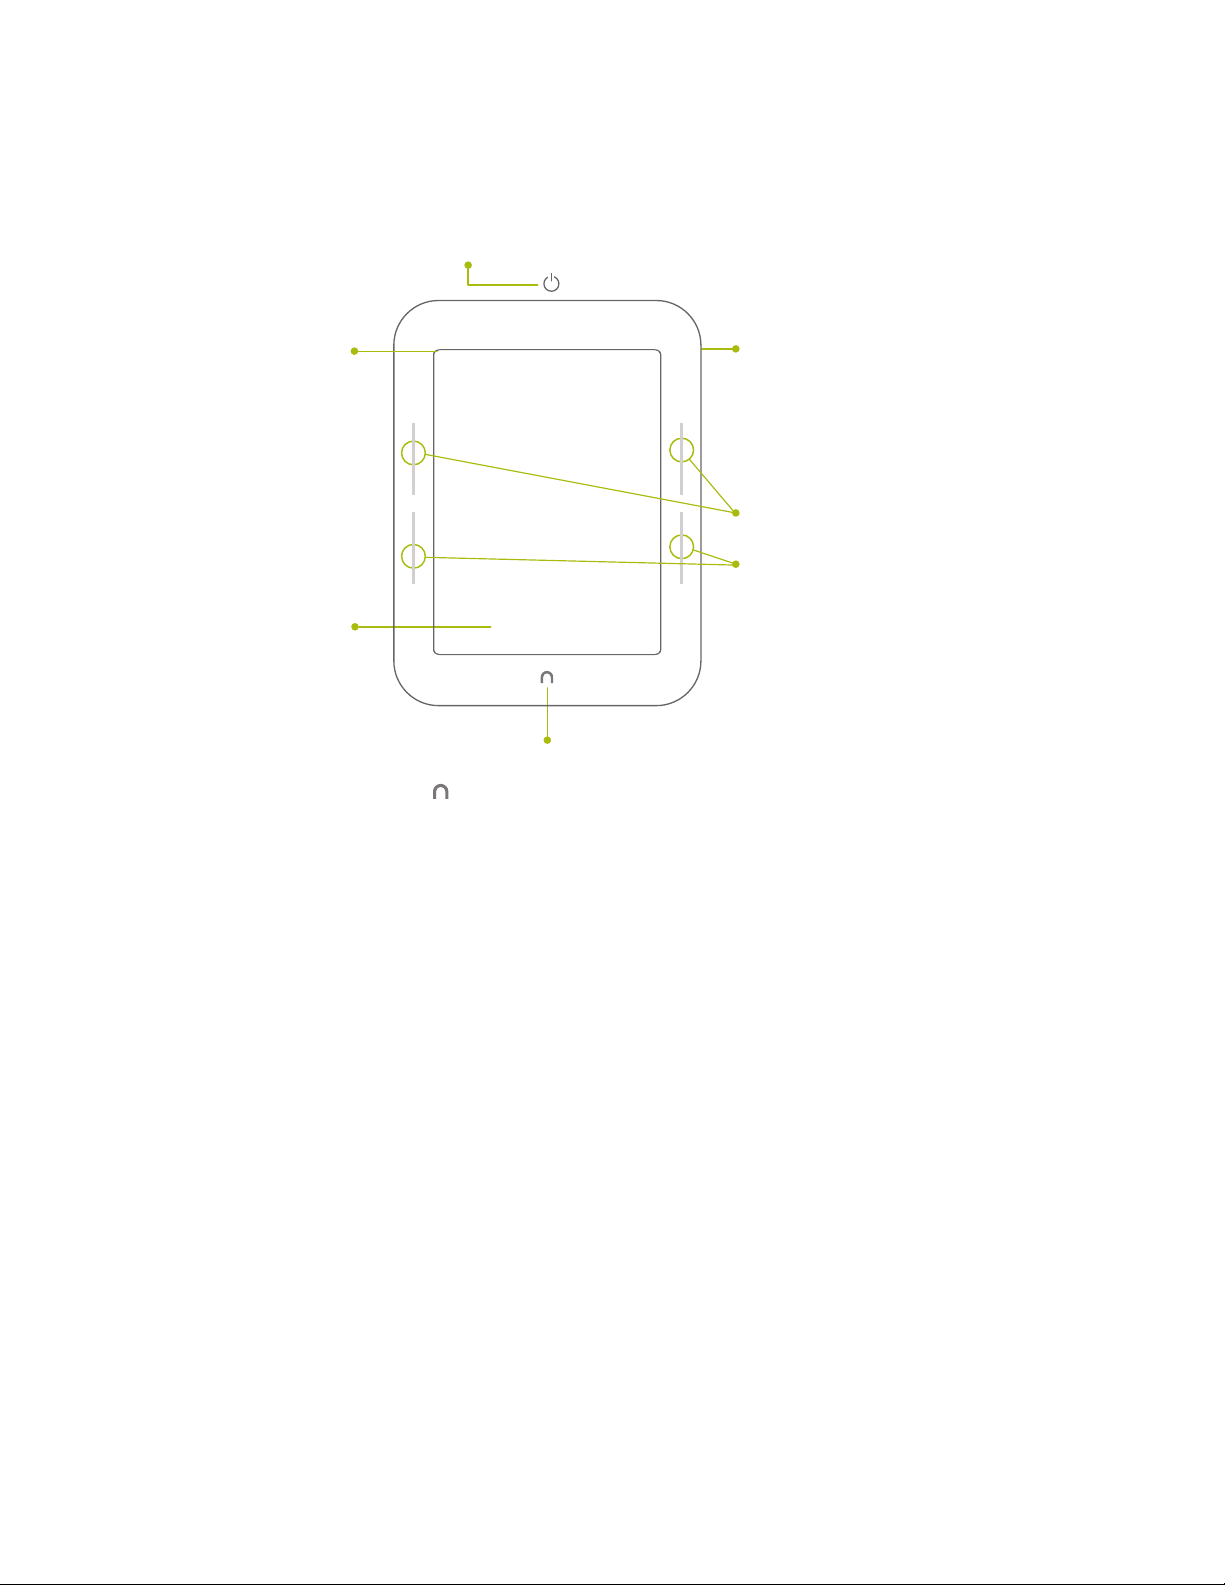
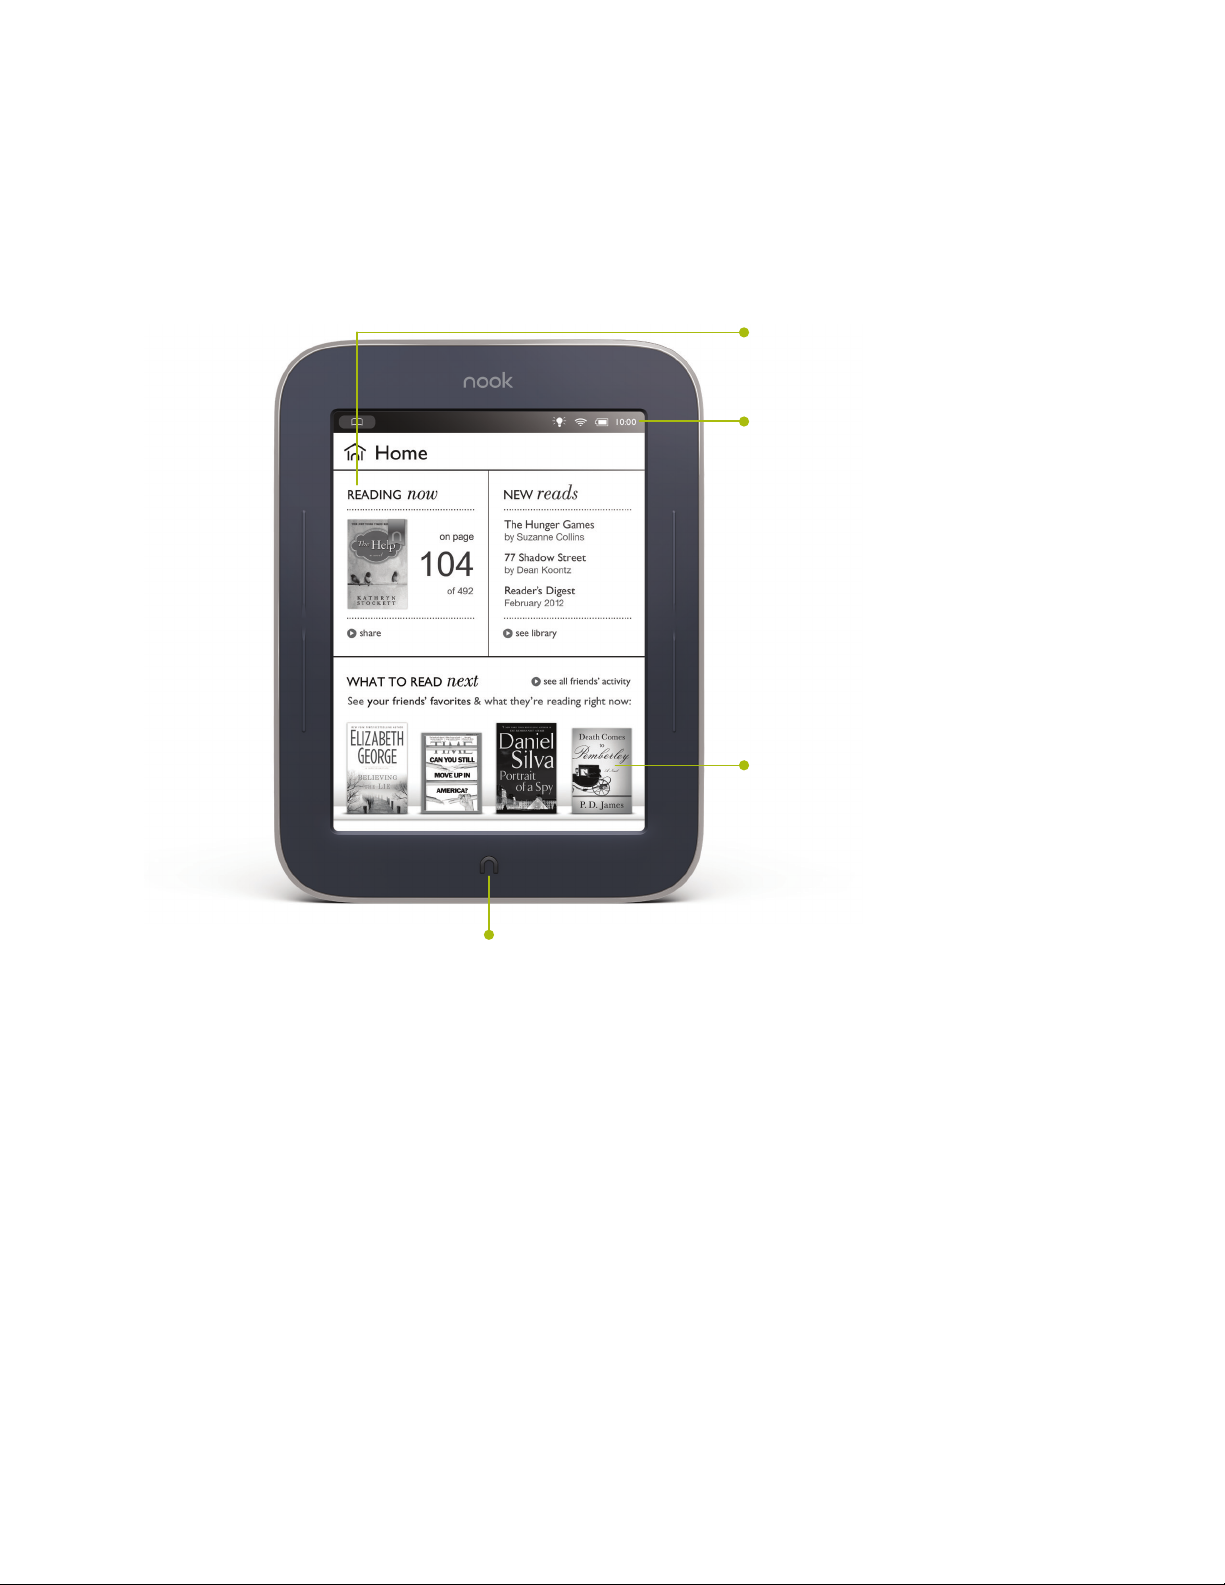
The picture below shows the features on the front of your NOOK.
Power Button
Press and hold the power button on the back of your NOOK
for about 2 seconds to turn your NOOK on or o.
GlowLight
A reading light is built into
the bezel of your NOOK.
You can turn the light on
or o and control its
brightness.
™
Touchscreen E Ink®
Pearl Display
Your NOOK features a full
touchscreen to turn pages
with just a tap or swipe
and for easy navigation.
The front of your NOOK.
microSD™ Memory
Card Slot
On the right side of your
NOOK, lift the rubber
flap to insert a microSD
memory card
your personal files.
Page Turn Buttons
Turn forward one page
or scroll up a list.
Turn back one page
or scroll down on a list.
NOOK Button
This NOOK™ symbol on the bottom face of the device is
a button. Press it to wake up your device from sleep mode
(turn the display on). When the device is on, press the
NOOK button to view the Quick Nav Bar, or press and hold
the NOOK button to turn the GlowLight on or o.
*
for storing
E Ink® Touchscreen Display
Your NOOK features a high-resolution 6-inch E Ink touchscreen for easy navigation and page turns.
NOTE: To ensure the highest quality of reading imaginable, NOOK Simple Touch™ with GlowLight™ has an
anti-glare, screen protector already installed. The use of any additional screen protectors may damage
the device and will void the warranty.
Page-Turn Buttons
Built into the black frame on either side of the E Ink touchscreen display are two narrow buttons for paging forward
and backward in books and periodicals. You can also use the buttons for scrolling up and down lists and shelves in the
Library and Shop.
By default, the upper button on each side of the screen turns the page backward, and the lower button turns the
page forward. You can change these settings on the Reader settings screen, which you can access through the Settings
button on the Quick Nav Bar.
These buttons also can be used to scroll through scrollable pages in the Library and the Shop. Press either of the
lower page-turn buttons to scroll down. Press either of the upper page-turn buttons to scroll up.
8 Barnes & Noble NOOK User Guide

NOOK Button
Power Button
This NOOK symbol on the lower front of your NOOK is called the NOOK button.
If your NOOK is sleeping, press the NOOK button to wake up your NOOK and turn it on.
If your NOOK is already on, press this button to open the Quick Nav Bar, a navigation menu that appears at the bottom of the NOOK touchscreen. You can tap buttons on this navigation menu to jump to features such as the Shop
and the Library.
If your NOOK is on, you can also press and hold the NOOK button for 2 seconds to turn on or o GlowLight™,
the light built into the frame of your NOOK. When GlowLight is on, you can read your NOOK’s E Ink Touchscreen
display even in areas with low lighting.
microUSB Port
Your NOOK features a microUSB port for charging and for connecting to a personal computer.
The image below shows the back of your NOOK.
microSD™
Memory
Card Slot
The back of your NOOK.
Power Button
The power button for your NOOK is located near the top of the back panel. Press and hold the button for 2 seconds
to turn on your NOOK. To learn more about power management for your NOOK, see “Power and Charging”.
microSD Memory Card Slot
Your NOOK features enough built-in memory to hold hundreds of books, along with many magazines, newspapers,
and personal files such as PDFs.
Barnes & Noble NOOK User Guide 9

You can add more storage to your NOOK for your personal files by installing a standard microSD Memory card. The
card fits into a slot on the upper right side of your NOOK. A microSD Memory Card can hold up to 32 GB of additional content.
NOTE: The files on a Memory Card appear in the My Files section of your Library. They do not appear in the
Books or Newsstand sections.
To learn about installing a microSD Memory Card in your NOOK, see “Using an SD Memory Card”.
10 Barnes & Noble NOOK User Guide

Getting Started with Your NOOK
The first time you use your NOOK, you’ll need to go through a short set-up process that will take about 5 to 10 minutes. Make sure that you’re in an area that has a Wi-Fi® connection (a wireless connection to the Internet), because
part of the process is registering your NOOK with your Barnes & Noble account on BN.com.
NOTE: You will not be able to set up your NOOK without a Wi-Fi connection.
In the set-up process, you will do the following:
• Turn on your NOOK by pressing the power button on the back panel.
• Accept the Terms of Service.
• Set the time zone.
• Connect to a Wi-Fi network.
• Register your NOOK to a Barnes & Noble account.
NOTE: If you don’t already have a Barnes & Noble account, you’ll have an opportunity to create one during the
registration step.
Your Barnes & Noble Account
A Barnes & Noble account allows you to purchase and download books, magazines, and newspapers on your
NOOK, and from the Barnes & Noble Web site.
The account also allows you to synchronize your NOOK with any other NOOK eReaders you have, such as NOOK
eReader software applications installed on your tablet (for example, an iPad® or an iPod touch®), PC, or smartphone (for example, an iPhone® or an Android phone).
If you don’t have a Barnes & Noble account, you can set one up in a few minutes on the NOOK Web site. Just open
a browser on your computer, and visit the page: www.nook.com/setup. You’ll also have the opportunity to set up an
account during the registration process for your NOOK.
Your Barnes & Noble account is ready for use once you have set up the following:
• An email address
• A default credit card number
• A valid expiration date for the credit card
• A current U.S. billing address
If you have any questions about setting up an account, please call Customer Service at 1-800-THE-BOOK (1-800-
843-2665).
Barnes & Noble NOOK User Guide 11

Registering Your NOOK
NOTE: You will need to connect to a Wi-Fi network to complete your registration.
1. Read the Welcome screen. Tap the Next in the lower right corner of the screen.
Your NOOK displays its Terms of Service.
2. Read the NOOK Terms of Service. If you agree to them, tap the Agree button.
If you do not accept the Terms of Service, you will not be able to use your NOOK.
If you tapped the Agree button, your NOOK displays a list of time zones.
3. Select your Time Zone by tapping its button. Tap Next.
4. Connect to a Wi-Fi network.
To register your NOOK and to purchase and download books and periodicals, you need to be connected to a
Wi-Fi network. If you’re in a Barnes & Noble store, your NOOK will automatically connect to the store’s Wi-Fi
network. If you’re in some other location with Wi-Fi access, your NOOK will list all the networks it finds. Tap
on the name of the network you want to connect to. If you see a lock symbol beside the network’s name, it’s a
secure network. You’ll need to enter a password to connect to the network. If you do not know the network
password, ask for the network administrator for help. If you have problems connecting, visit http://nook.com/
wifi for more troubleshooting tips.
5. Once you have connected to a network, tap Next (if you are in a Barnes & Noble store and connected to its
network) or Continue with Setup (if you are connected to any other Wi-Fi network.)
Your NOOK displays a messaging saying it is registering your device. When the registration has completed,
your NOOK displays a Sign In screen with an email field, a password field, and a keyboard at the bottom of the
screen.
6. Sign in to your BN.com account.
When you register your NOOK, you link it to your Barnes & Noble account and give it access all the books and
periodicals in your Barnes & Noble library. You also make it possible to shop for new books and periodicals on
your NOOK.
If you already have a Barnes & Noble account, do this:
a. On the Sign In screen, enter the email address and password for your Barnes & Noble account.
(As a security precaution, if you enter your password incorrectly five times, you will be locked
out of your BN.com account for half an hour. If you like, you can reset your account by visiting
BN.com.)
b. Tap the Sign In button below the password field.
c. When a dialog box appears, saying “Registration successful,” tap the OK button.
If you do not already have a Barnes & Noble account, do this:
a. Tap the Create Account button.
Your NOOK displays a form for creating a Barnes & Noble account.
b. Enter the information requested, including your name, password, credit card type, number, and
expiration date, and a security question.
c. Tap Submit.
Your NOOK creates your Barnes & Noble account and registers your NOOK to your account.
NOTE: If you had turned GlowLight on, it now automatically turns o.
12 Barnes & Noble NOOK User Guide

7. Read the message that your NOOK displays about GlowLight. Press the NOOK button and hold it for 2 seconds
to turn on GlowLight.
GlowLight turns on, and a Next button appears in the lower right corner of the screen.
8. Tap the Next button.
A new screen tells you that you’re ready to get started exploring the features of your NOOK. You can now turn
GlowLight on or o as you wish, using the NOOK button.
9. Tap the NOOK button (without holding it down) to display the Quick Nav Bar and begin exploring your NOOK.
That’s it. You’ve registered your NOOK and tried out GlowLight.
You’re ready to read books, magazines, and newspapers, and to shop in the NOOK Store.
Tutorial Videos
The Barnes & Noble Web site oers tutorial videos and other useful information about your NOOK. To watch the
videos on your personal computer, visit http://www.nook.com/support
Barnes & Noble NOOK User Guide 13

Power and Charging
Turning Your NOOK On and O
Turning On Your NOOK
To turn on your NOOK, press the power button on the back of your NOOK. Hold the button down for 2 seconds
and release it.
Your NOOK starts up.
Turning O Your NOOK
You do not need to turn your NOOK o when you stop using it.
With a fully charged battery and Wi-Fi turned o, your NOOK has enough power to support up to two months of
casual reading. With a fully charged battery and Wi-Fi turned on, your NOOK has enough power to support 3 weeks
of casual reading.
If you are carrying your NOOK without a cover in a bag or purse, you might want to turn o your NOOK to avoid it
being accidentally turned on from its “sleeping” state. You also might want to turn o your NOOK simply to conserve power.
To turn o your NOOK, do this:
1. Press the power button and hold it down for 5 seconds.
A window appears, asking if you really want to turn your NOOK completely o.
2. Tap the Power o button in the dialog box.
Your NOOK turns o.
NOTE: If you ignore the window asking you to confirm that you want to power o your NOOK, after several
seconds the window disappears and your NOOK resumes whatever it was doing before you pressed
the power button.
14 Barnes & Noble NOOK User Guide
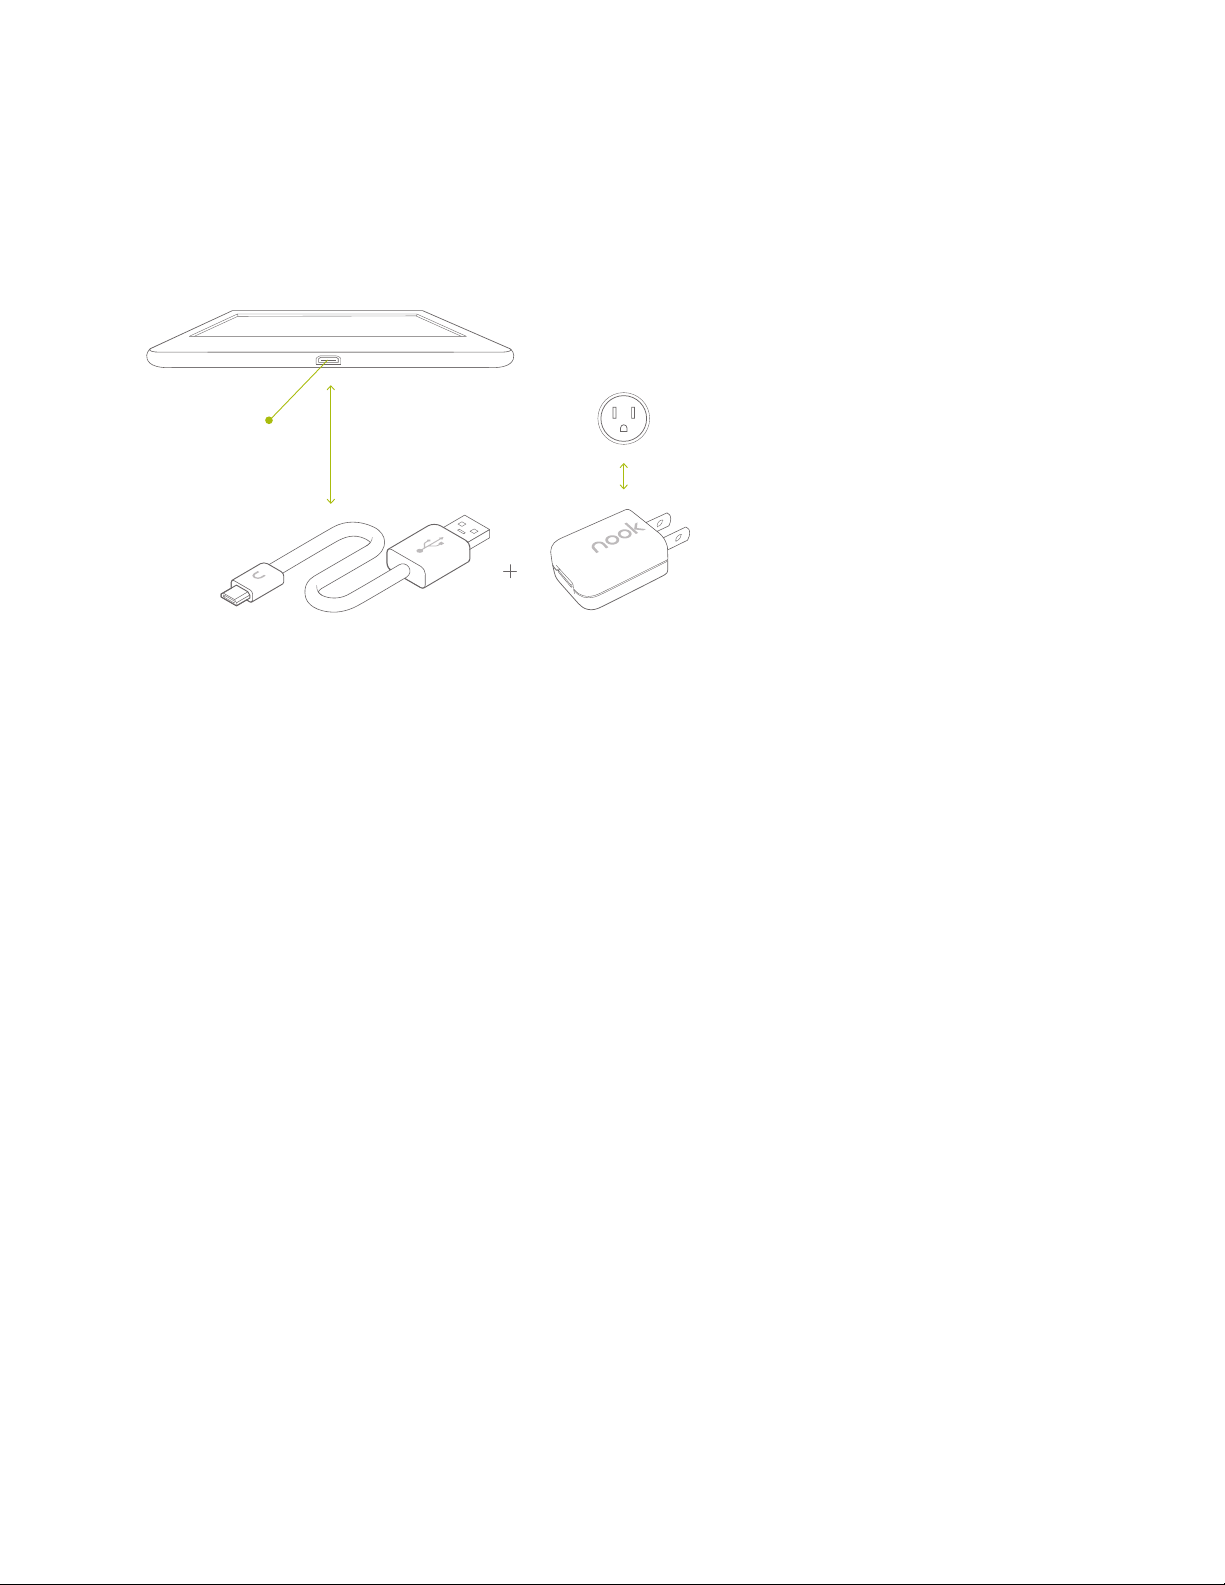
Charging Your NOOK
There are two ways to charge your NOOK. You can plug it into your personal computer. Or you can use a power
adapter and plug it into a wall outlet. (If your NOOK does not include a power adapter in box, you can purchase one
from a Barnes & Noble store or online at http://www.barnesandnoble.com.) The diagram below shows the components available for charging your NOOK.
Wall Outlet
microUSB Port
USB
Cable
Power adapter may be purchased
*
separately if not included with
your model of NOOK
Power
Adapter*
CAUTION: If you are using a power adapter, use only a Barnes & Noble power adapter and custom microUSB
cable supplied with your NOOK. Other power adapters might damage your NOOK and its battery. Do
not use a power adapter and cable intended for other models of NOOK eReader. Use only a NOOK
Simple Touch Reader power adapter and cable.
To charge your NOOK from your personal computer, do this:
1. Insert the large end of the USB cable into a USB port on your personal computer.
2. Plug the NOOK end of the USB cable into your NOOK. If your NOOK was turned o, it will now turn itself on.
NOTE: Depending on how much power remains in the battery, it might take up to 4 hours to fully recharge
your NOOK through a USB port. Do not turn o your NOOK while it is charging.
NOTE: Once your NOOK has enough power to turn on, you can see how much power remains in the battery
by checking the battery charge indicator in the right corner of the Status Bar.
NOTE: Some personal computers must be turned on in order to charge other devices through USB ports.
When these computers are asleep or turned o, their USB ports are inactive, and no charging takes
place. If you have connected your NOOK to your personal computer and the NOOK does not seem
to be charging, check your computer’s documentation to determine what the requirements are for
charging devices through USB ports.
3. Once your NOOK has fully charged, unplug the USB cable from your NOOK.
Barnes & Noble NOOK User Guide 15

To charge your NOOK from a wall outlet with a power adapter, do this:
1. Assemble the power adapter and microUSB cable. Insert the large end of the USB cable into the matching slot in
the power adapter.
2. Plug the small end of the USB cable into your NOOK.
3. Plug the power adapter into a compatible electrical outlet. If your NOOK was turned o, it will now turn itself
on.
NOTE: Depending on how much power remains in the battery, it might take around 3 hours to fully recharge
your NOOK through an electrical outlet. Do not turn o your NOOK while it is charging.
NOTE: Once your NOOK has enough power to turn on, you can see how much power remains in the battery
by checking the battery charge indicator in the right corner of the Status Bar.
4. Once your NOOK has fully charged, unplug the power adapter from the electrical outlet. Unplug the USB cable
from your NOOK.
Resetting Your NOOK
Performing a Soft Reset
If for some reason your NOOK becomes unresponsive, you can perform a soft reset to restart the device.
1. Press and hold the power button for 20 seconds, then release the power button.
2. Press the power button again for 2 seconds to turn on your NOOK.
Low Power
You can see how much power remains in your battery by checking the battery icon in the Status Bar, or by checking
the Battery indicator on the Device Info settings screen. (To see the Device Info screen, tap the NOOK button, tap
settings, and on the Settings screen tap the Device Info menu choice.)
If you turn on your NOOK when its battery charge is almost depleted, a warning appears on the screen, suggesting
that you begin charging your NOOK before trying to use it.
If the battery is depleted, your NOOK will shut down until it has been suciently recharged.
Charging Recommendations
Your NOOK contains a rechargeable battery. To maximize battery life:
• Avoid fully discharging the battery. Charge your NOOK after several hours of use or when you see the low
charge alert, rather than continuing to use it until it turns itself o.
• Avoid high temperatures for charging, use, and storage. For more information, see “Temperature Ranges.”
• Charge the battery half way before storing your NOOK for a week or more.
Safety and Care
This section explains important information about safety and about caring for your NOOK.
16 Barnes & Noble NOOK User Guide

Water
CAUTION: Your NOOK, cables, and adapters are not waterproof. To avoid risk of overheating, melting, and burns,
keep the device and all accessories away from water and other liquids.
Do not use the cable if either end of the cable gets wet or is exposed to liquid spray. Allow the
end(s) of the cable to dry thoroughly before trying to use the cable. Do not expose your NOOK
to wet or damp conditions. Avoid exposing the device to liquid or food. If liquid is spilled on the
device, make sure to unplug the charging cable and allow the device to dry thoroughly before
reusing. Do NOT attempt to dry out your NOOK with an external heat source such as a dryer or
microwave oven. Clean the screen of your NOOK with a soft cloth and avoid using liquid cleaners
on the screen.
Electricity
Your NOOK is an electrical device. Follow the same basic safety procedures you would follow with any electrical
device.
When charging your NOOK, use only the custom components included with your NOOK: either a custom USB
cable or a custom USB cable along with a power adapter.
Airplanes
When using your NOOK on an airplane, be sure to follow the instructions of the flight crew.
To turn your NOOK’s wireless networking on or o, do this:
1. Tap on the right end of the Status Bar to open the Quick Settings dialog box.
2. Slide the Wi-Fi checkbox to turn wireless networking on or o.
3. Tap anywhere outside the Quick Settings dialog box to close it.
Electronic Equipment
If you are around sensitive electronic equipment–for example, if you are in a hospital–ask if you may use your
NOOK. Settings such as intensive care units might forbid the use of any electronic device, with or without networking.
Battery
Your NOOK includes a non-replaceable, rechargeable battery. Do not attempt to replace the battery. If you suspect
your battery is having problems, please contact Customer Service at 1-800-THE-BOOK (1-800-843-2665).
Barnes & Noble NOOK User Guide 17

Caring for Your NOOK
To take the best possible care of your NOOK, please follow the recommendations below.
Temperature Ranges
Your NOOK should function as designed in these temperature ranges:
• Operation: 0 C to 40 C, 32 F to 104 F
• Storage: -25 C to 60 C, -13 F to 140 F
Outside of these ranges, your NOOK might develop power, display, and/or software issues. If temperatures are
extremely cold or hot, permanent physical damage can result. Such damage is not covered by the warranty. Storage
applies to temporary locations like the trunk of your car (or other motor vehicle) as well as long-term storage.
Even on a day that is not very hot, the passenger compartment or trunk of a car can be extremely hot. Do not leave
your NOOK in a car.
High storage temperatures reduce battery life. For more information, see “Charging Recommendations”.
Caring for the Touchscreen
You should clean the touchscreen on your NOOK from time to time. Clean the screen with a damp soft cloth, such
as a micro-fiber cloth. Micro-fibre cloths are available from Barnes & Noble stores and from partner retailers. Do not
use any chemicals to clean the screen.
B&N and Designer Covers
You can purchase an optional B&N or designer cover for your NOOK at your local Barnes & Noble Bookstore, at
partner retailers, and online at BN.com. The cover helps protect your NOOK from daily wear and tear. It keeps dust
from accumulating on the screen, reducing the need to clean it. The cover also provides some protection against
spills.
Warranty Coverage and the B&N Protection Plan
Your NOOK is backed by a one-year manufacturer’s warranty against defects in materials and workmanship. For a
copy of this warranty, see “One Year Limited Warranty”. The warranty is also available at:
www.nook.com/warranty
In the event of any changes to the warranty, the version in eect on the Web site as of the date of purchase shall
apply.”
You can extend your NOOK’s coverage by purchasing a two-year B&N Protection Plan to help safeguard NOOK
against spills, drops, and other accidents. The B&N Protection Plan can only be purchased together with a NOOK,
not later.
Information about the B&N Protection Plan can be found on the Web page listed above.
NOTE: To ensure the highest quality of reading imaginable, NOOK Simple Touch™ with GlowLight™ has an
anti-glare, screen protector already installed. The use of any additional screen protectors may damage
the device and will void the warranty.
18 Barnes & Noble NOOK User Guide
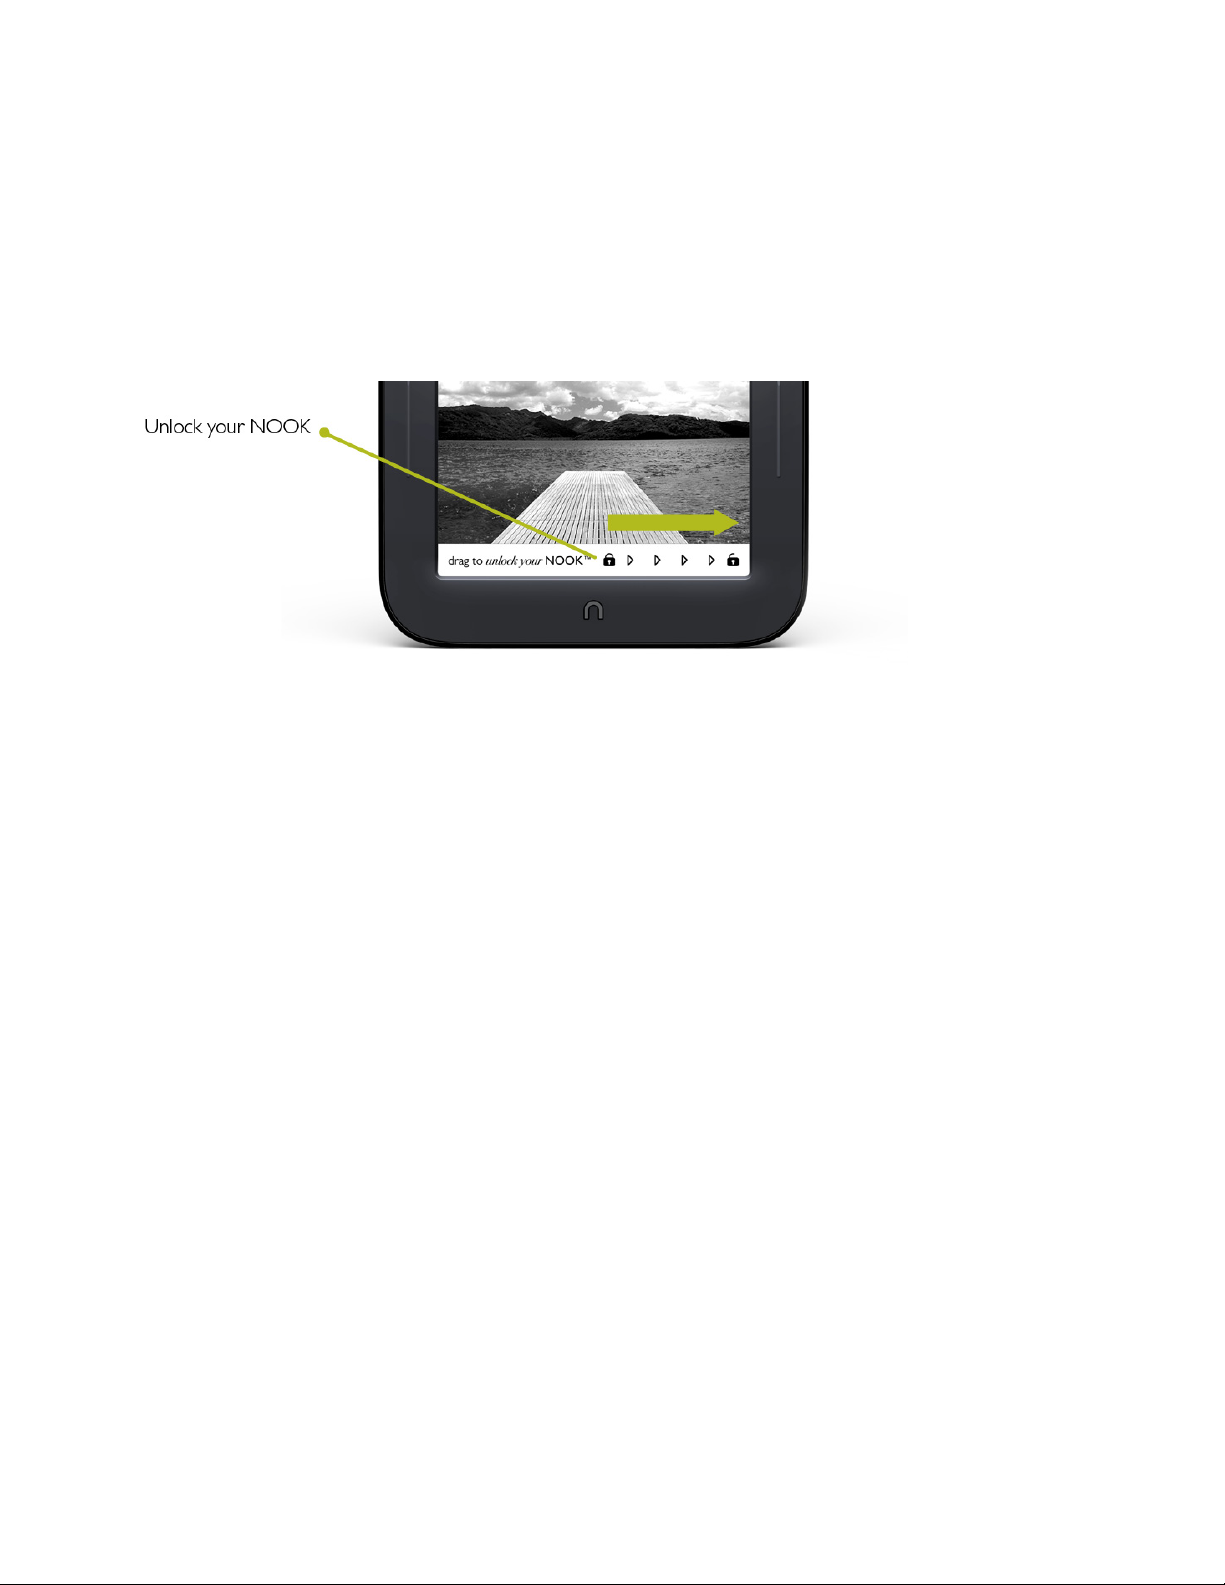
Locking and Unlocking Your NOOK
When your NOOK has been idle, your NOOK goes to “sleep.” Your NOOK displays a screensaver on the screen
(by default, a portrait of an author). It also locks the screen so that accidental touches do not perform actions.
To wake up your NOOK, do this:
1. Press the NOOK button (the raised NOOK symbol on the lower front panel of your NOOK).
2. Unlock your NOOK. Swipe your finger across the rightward pointing arrows between the closed lock symbol
and the unclosed lock symbol on the screen.
Sliding your finger across the row of locks on the screen to unlock your NOOK.
Barnes & Noble NOOK User Guide 19
Using Gestures to Control Your NOOK
Your NOOK puts great reading material right at your fingertips. To read that material, to share it, to rate it, and so
on, you’ll use your fingers in dierent ways.
Your NOOK recognizes these dierent gestures:
• Tap
• Double tap
• Press and hold
• Swipe
• Scroll
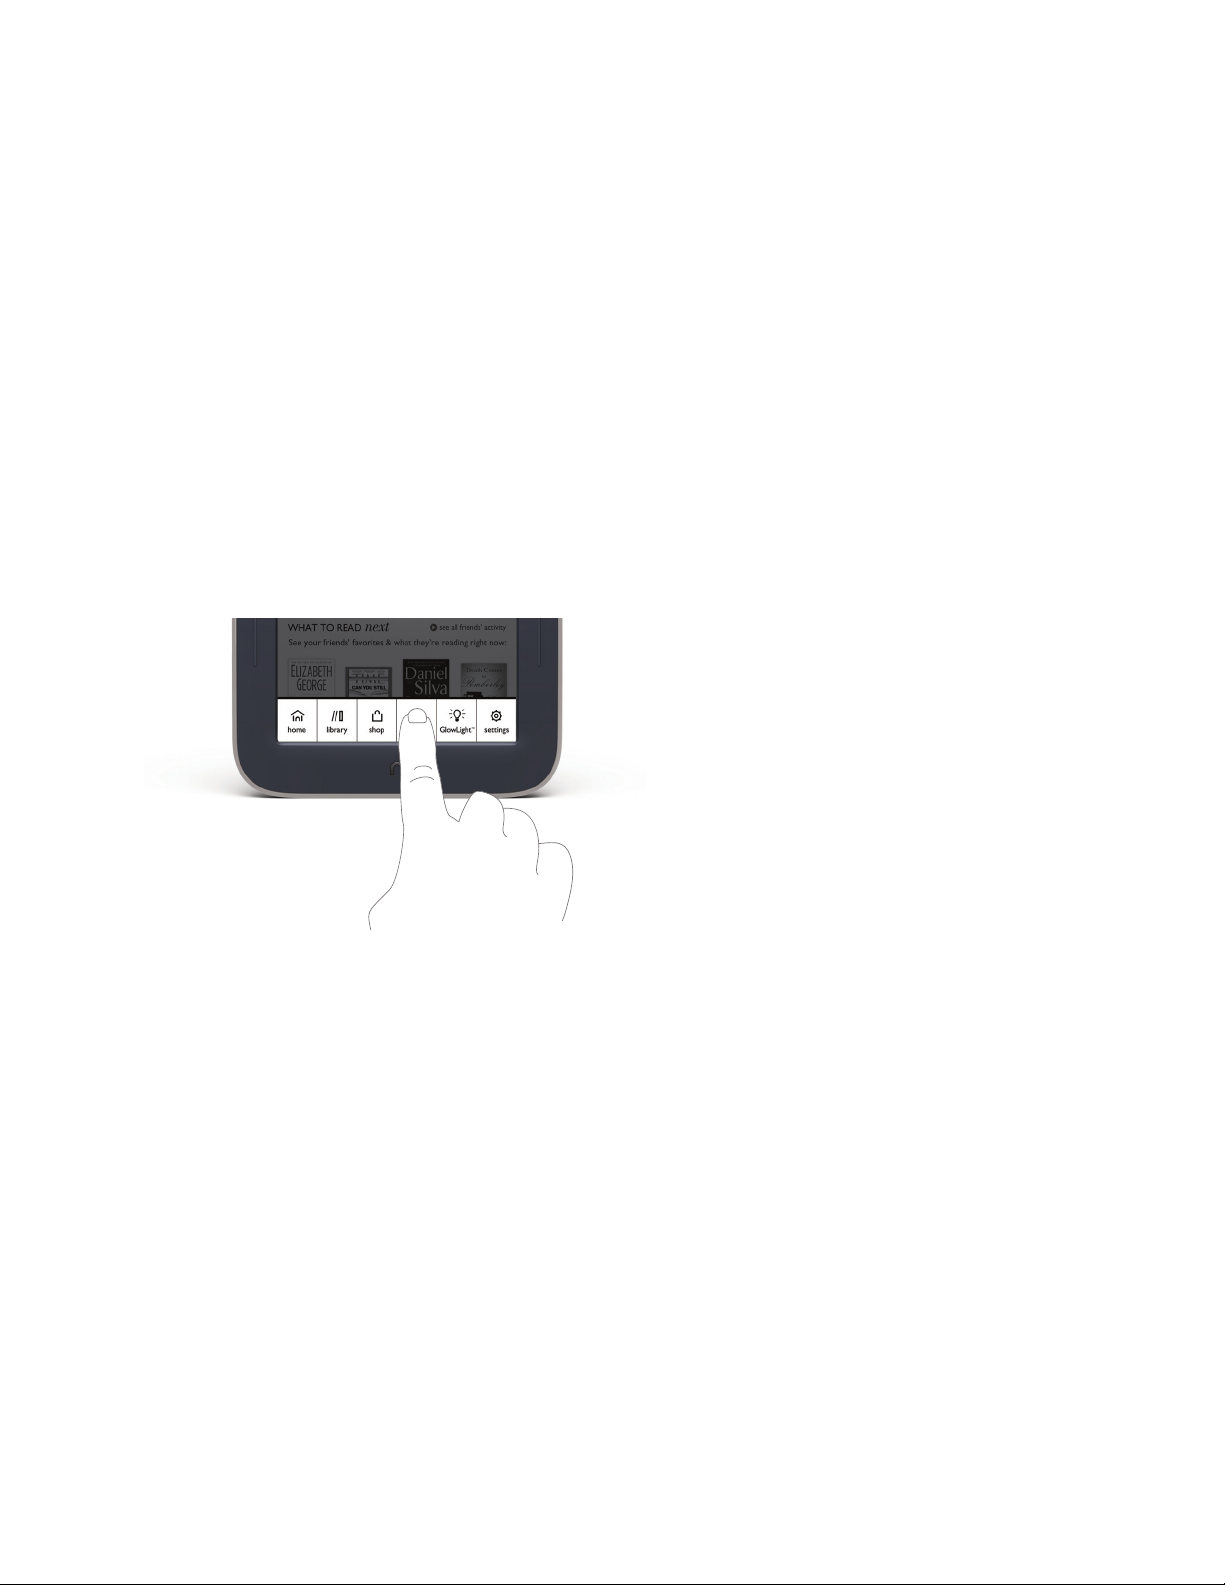
Tap
A tap on the screen is a quick touch of your fingertip. It’s the same gesture you use when you tap a key on a computer keyboard.
Tapping on an icon in the Quick Nav Bar.
Double Tap
Tapping twice quickly on the screen is a useful short-cut for many features.
In the Library or the Shop, double-tapping on the cover of a book or periodical opens a window with details about
the item.
20 Barnes & Noble NOOK User Guide
Press and Hold
Pressing and holding means touching your finger to the screen and holding it there for 2 seconds.
In many situations, pressing and holding causes your NOOK to open menu at the bottom of the screen. The menu
oers you choices about the image your finger is resting on.
For example, if you press and hold on a word in a book, your NOOK opens a menu oering you choices of things
you can do with that book: highlight the word, write a note, look the word up in a dictionary, and so on.
Pressing and holding on a word in a book and then lifting your finger opens the Text Selection Toolbar.
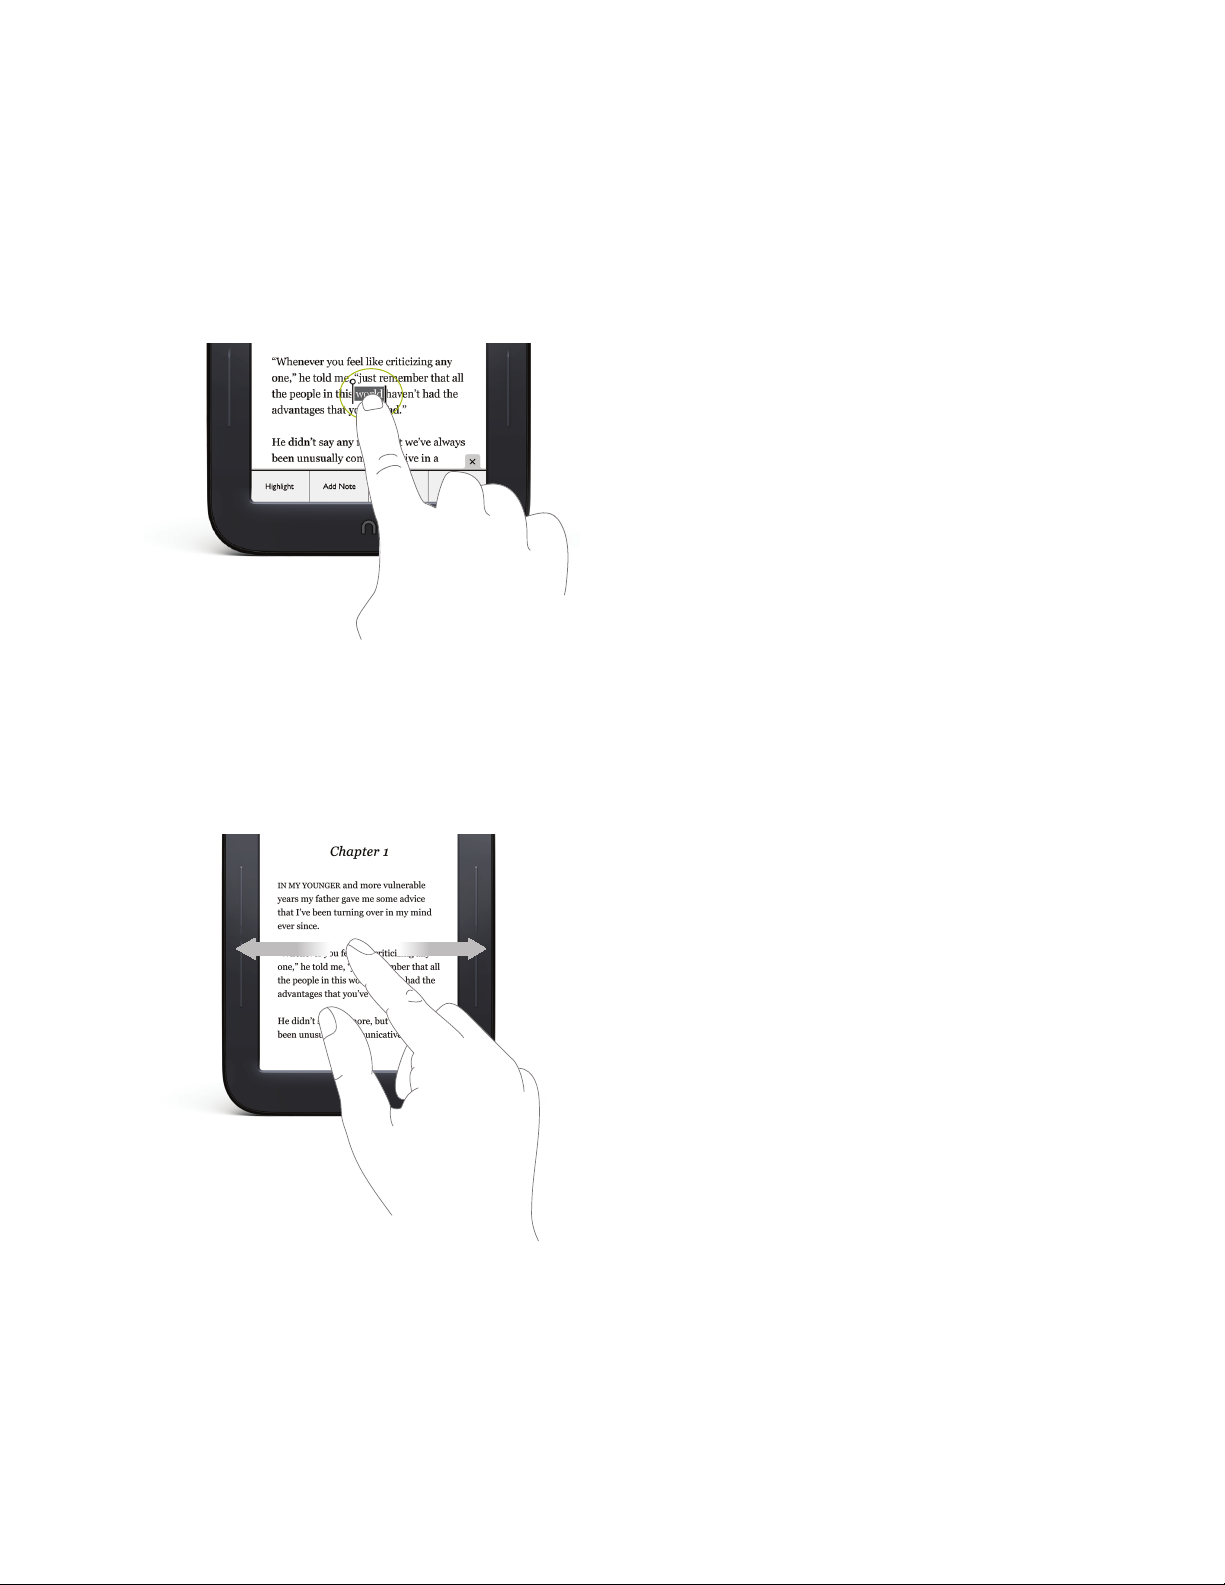
Swipe
To swipe is to slide your finger across the screen, usually to the left or right.
You can swipe to turn pages in a book you are reading.
Swiping to scroll left and right.
If you swipe left on the Status Bar, your NOOK goes back to your previous activity. The Status Bar is a narrow black
bar that displays icons at the top of your NOOK screen in Home, Library, Shop, Search, and Settings.
Barnes & Noble NOOK User Guide 21
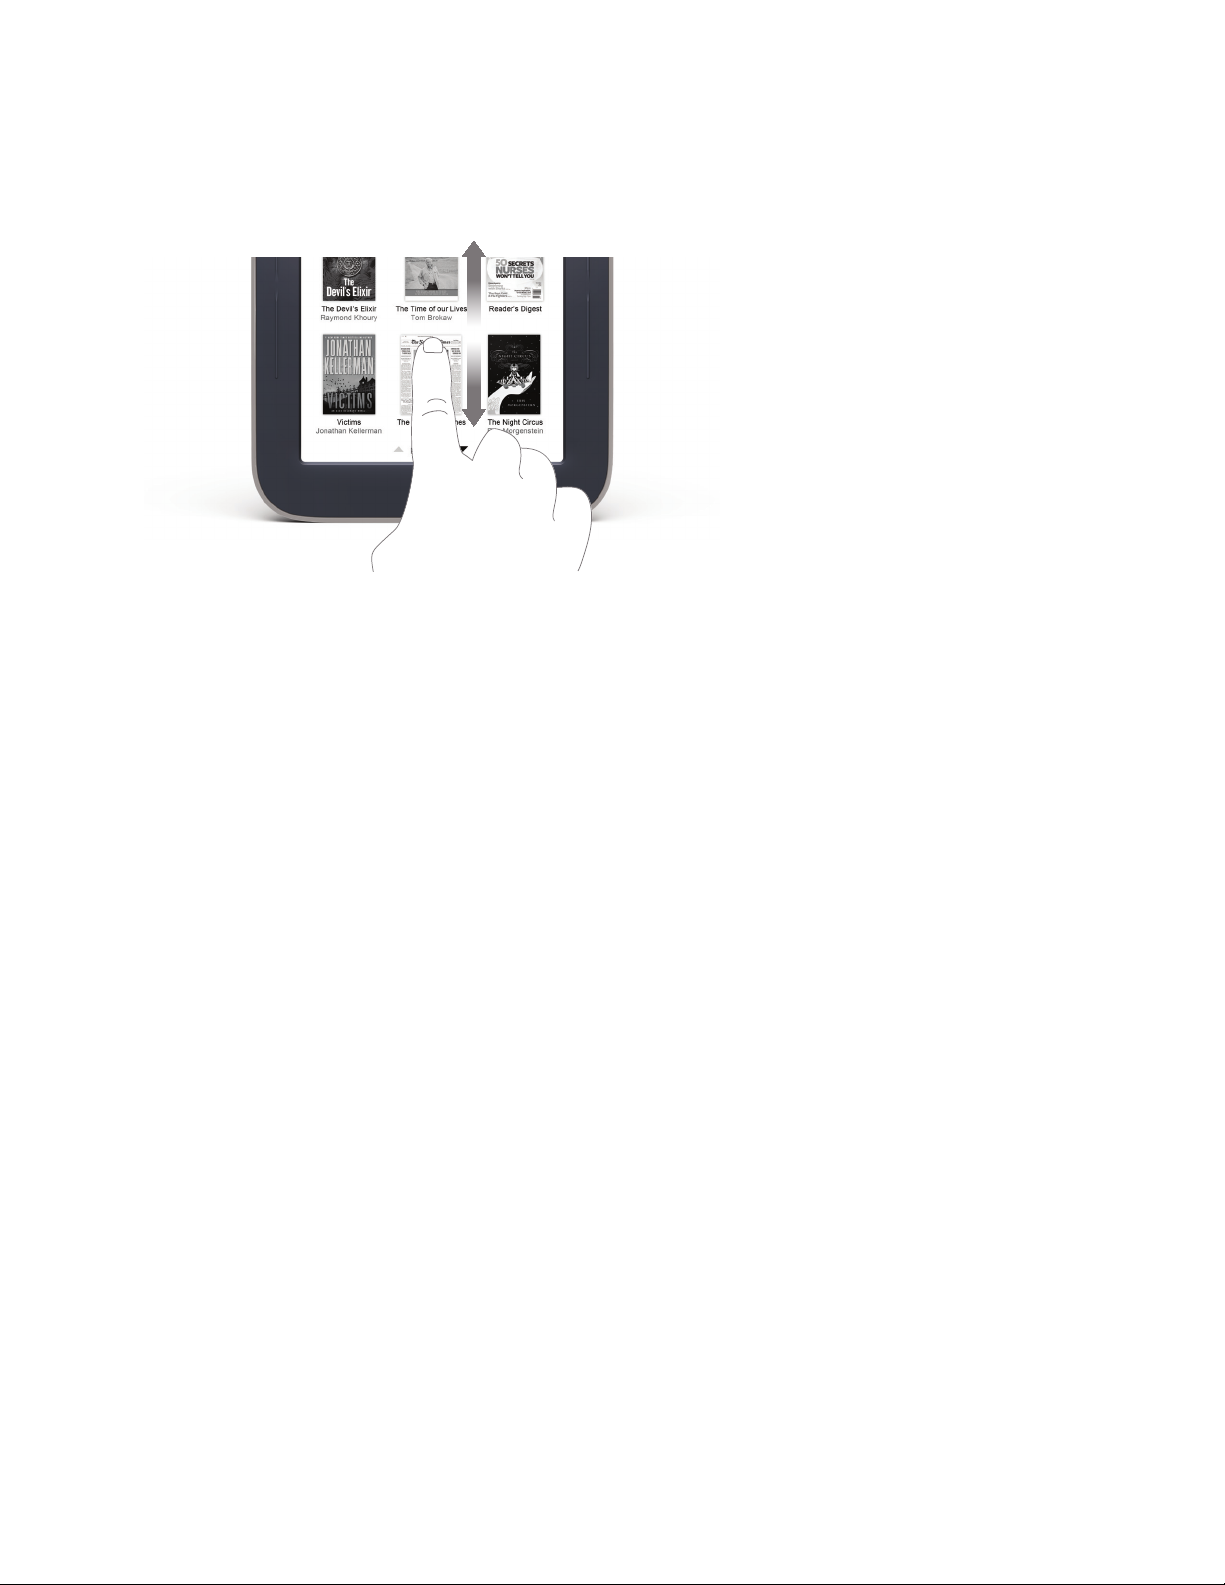
Scroll
Slide your finger up or down the screen to scroll through any list displaying up and down arrows at the bottom of the
screen. A scroll gesture is like a vertical swipe.
You can scroll up and down through shelves of books and periodicals.
22 Barnes & Noble NOOK User Guide
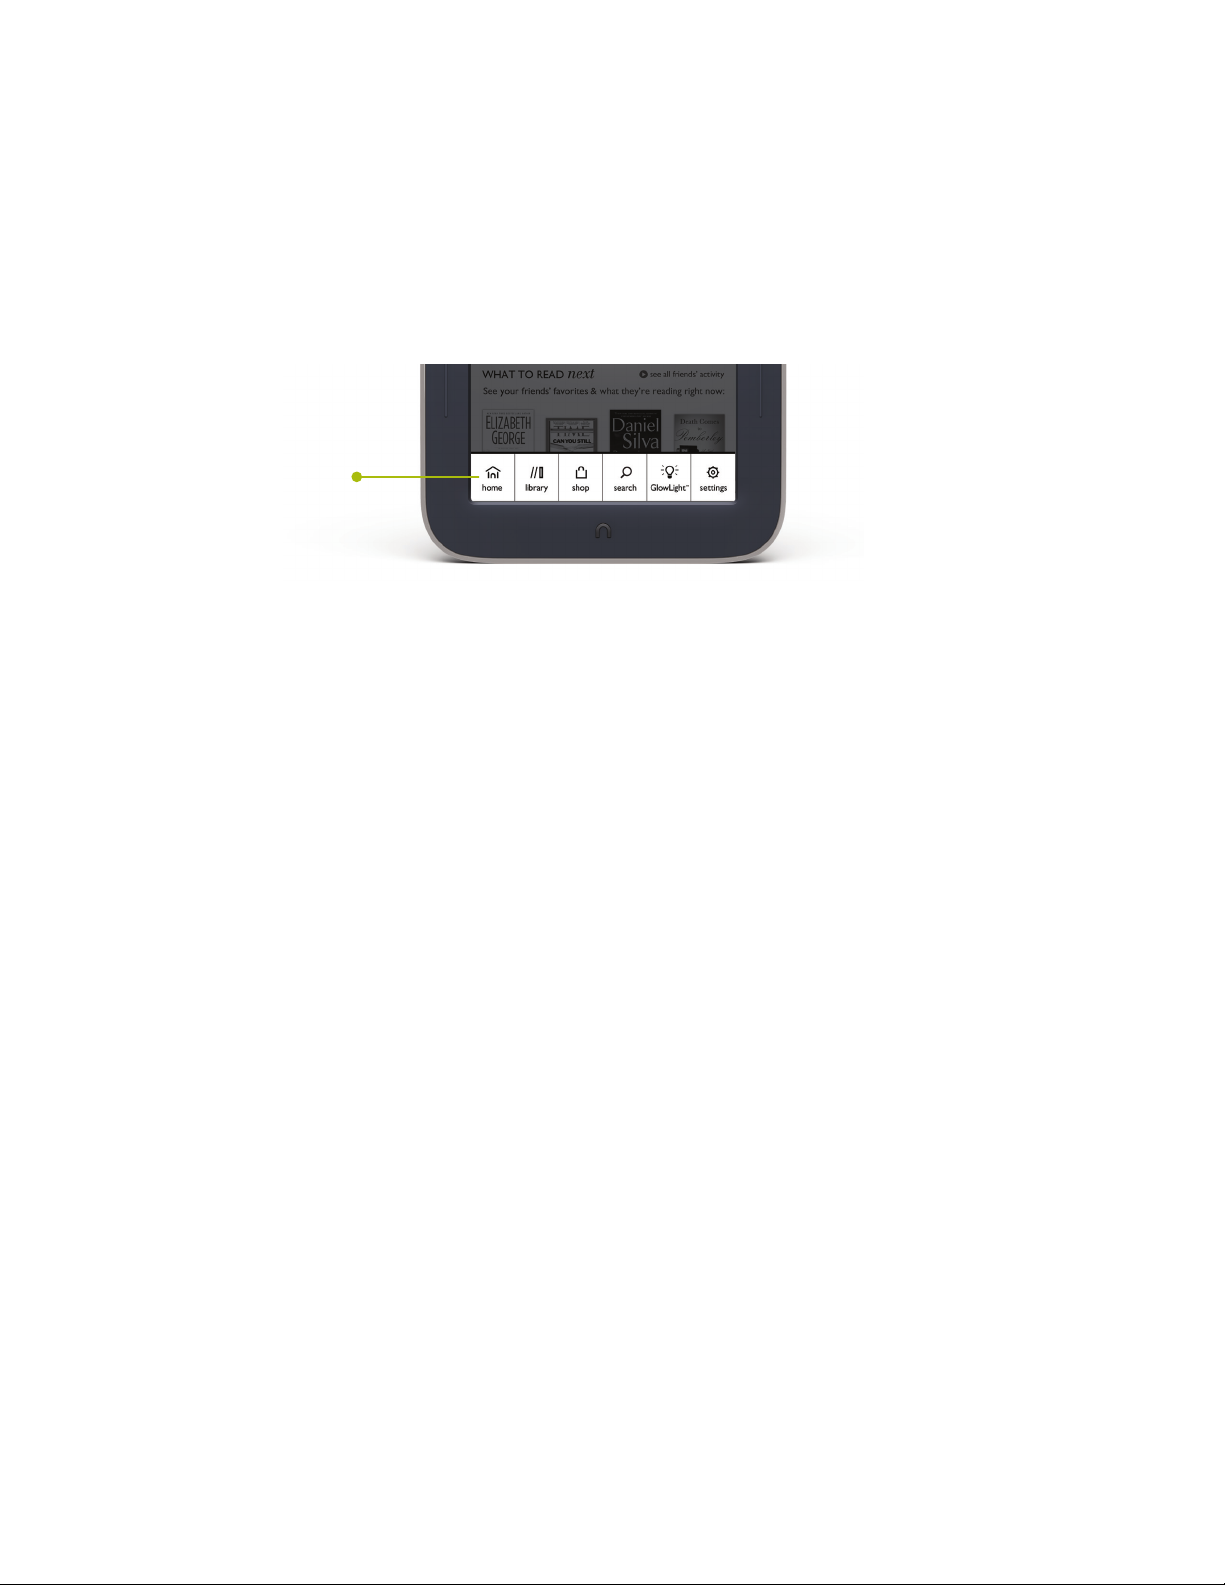
The Quick Nav Bar
The Quick Nav Bar is a row of six icons that appears at the bottom of the NOOK touchscreen and enables you to
navigate from one feature to another.
If your NOOK is turned on and active, you can make the Quick Nav Bar appear by pressing the NOOK button below the touchscreen. After you tap on one of its buttons, the Quick Nav Bar disappears.
The Quick Nav Bar looks like this:
Quick Nav Bar
The Quick Nav Bar.
If you don’t see the Quick Nav Bar, tap the NOOK button, and the Quick Nav Bar will appear.
The Quick Nav Bar shows six navigation buttons:
• Home - opens a screen showing the books and periodicals you have most recently read or purchased
• Library - opens your personal library of books, magazines, and newspapers
• Shop - opens the NOOK Store on your NOOK, where you shop for books, magazines, and newspapers
• Search - opens a tool for searching the Library and Shop on your NOOK
• GlowLight™ - opens a window for controlling the built-in light on your NOOK
• Settings - opens configuration settings
Barnes & Noble NOOK User Guide 23
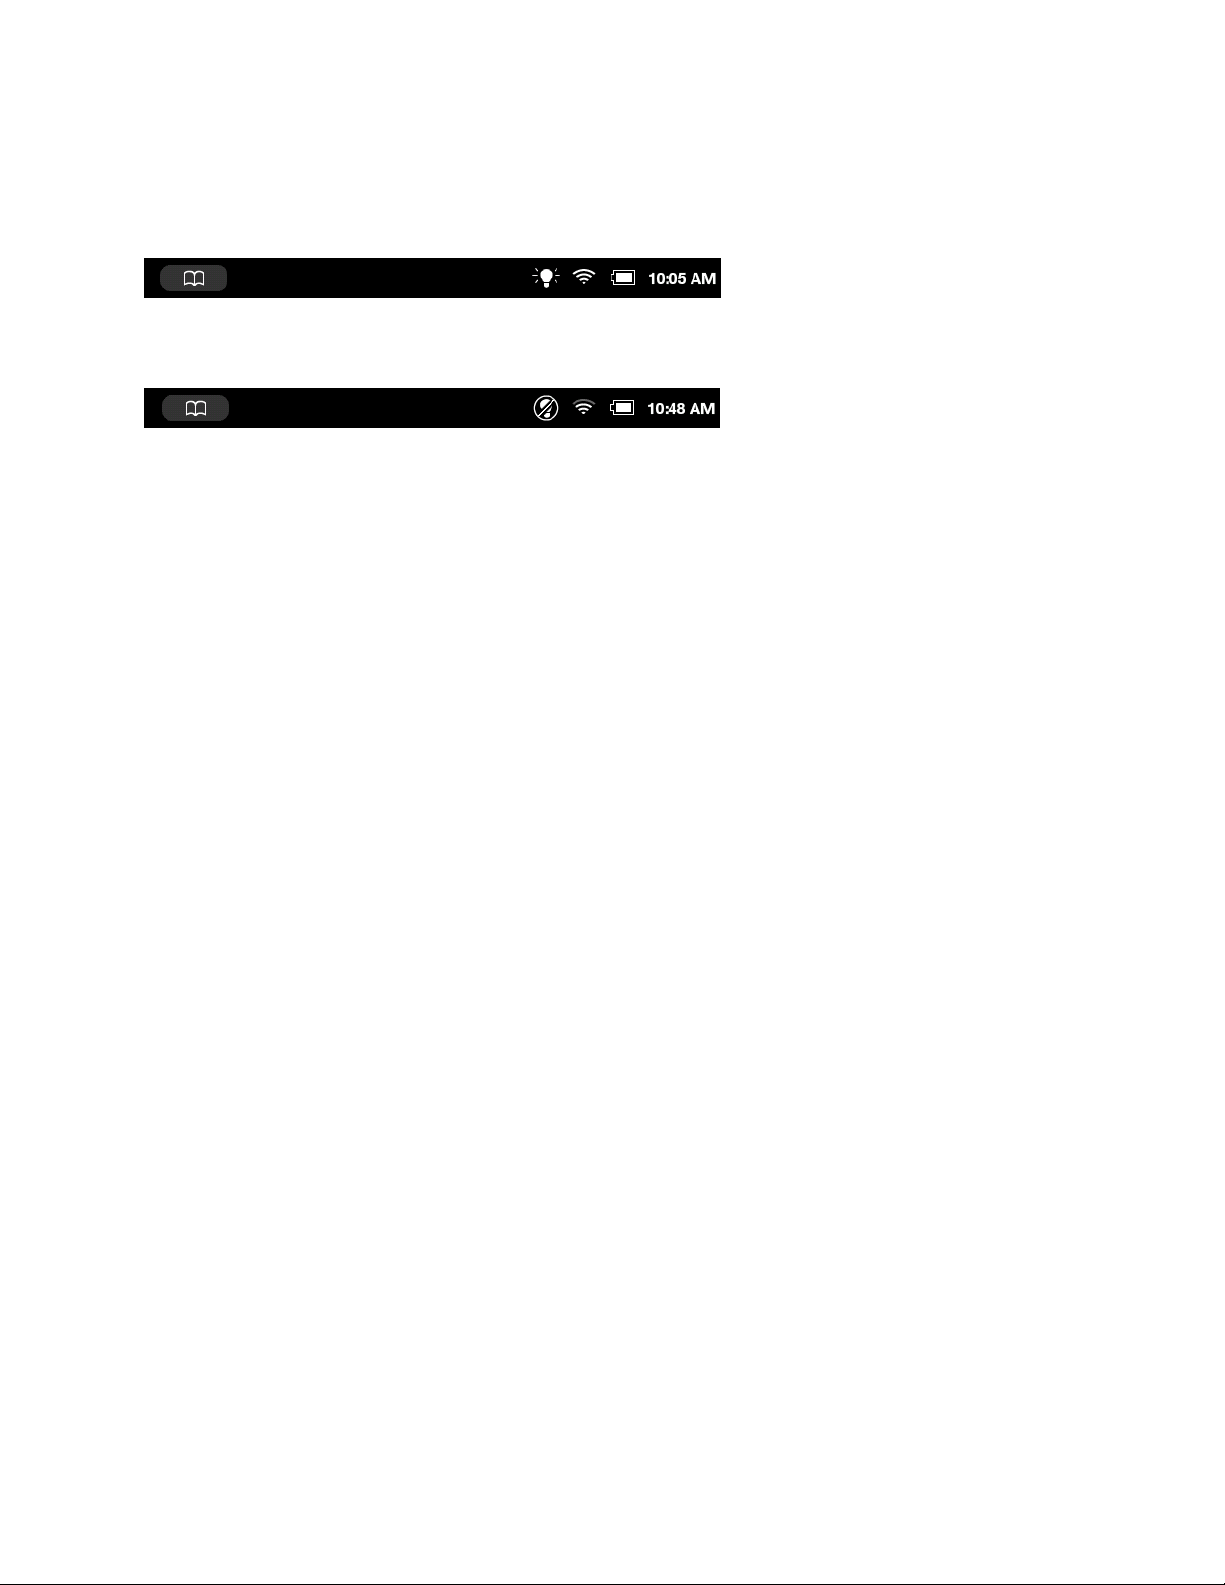
The Status Bar
A Status Bar runs along the top of the NOOK touchscreen. The Status Bar looks like this when GlowLight is turned
on:
The Status Bar with GlowLight turned on.
The Status Bar shows a dierent lightbulb icon when GlowLight is turned o:
The Status Bar with GlowLight turned o.
The Status Bar appears on the Home Screen, the Library, the Shop, the Search screen, and on Settings screens. A
slightly dierent version appears in books or periodicals when you open the Reading Tools.
The Left Side of the Status Bar
The left side of the Status Bar presents:
• A NOOK symbol that appears when new software updates have been installed
• An open book icon that returns you to the book, magazine, or newspaper you were most recently reading.
• An envelope icon with a number inside it indicating that you have received that number of notifications; tapping
on the envelope opens the notifications.
The Right Side of the Status Bar
The right side of the status bar presents:
• A light bulb icon that indicates whether GlowLight is turned on or o
• A wireless connection indicator
• A battery charge indicator
• A digital clock showing the current time
The light bulb icon indicates whether GlowLight is turned on or o. If GlowLight is on, an icon representing an illuminated light bulb icon appears in the Status Bar. If GlowLight is turned o, an icon representing a crossed-out lightbulb
appears instead.
The wireless connection indicator displays a stack of concentric curves, indicating the strength of your NOOK’s
connection to a local Wi-Fi network. The higher the stack of curves, the stronger the connection. In general, it’s best
to have at least 2 or 3 curves showing to have a reliable connection. If no curves are shown, the NOOK is not connected to a network.
By default, the NOOK status bar displays time on a 12-hour clock. To change the time or to switch to a 24-hour
clock, set the 24-hour clock option on the Time Settings screen.
Swiping Left on the Status Bar
If you swipe left across the Status Bar, your NOOK goes back to the feature or function you were previously using.
24 Barnes & Noble NOOK User Guide

GlowLight™
Your NOOK includes GlowLight, a built-in light that enables you to read even in dim lighting conditions.
Turning GlowLight On or O
There are several ways you can turn GlowLight on or o.
Turning GlowLight On or O with the NOOK Button
To turn GlowLight on or o, press and hold the NOOK button for 2 seconds.
• If GlowLight was o, pressing the NOOK button turns it on.
• If GlowLight was on, pressing the NOOK button turns it o.
When GlowLight is turned on, the screen illuminates and a light bulb icon appears in the Status Bar.
Turning GlowLight On or O with the GlowLight Control Window
You can also turn GlowLight on or o through the GlowLight Control window, which you can access through the
Quick Nav Bar.
To switch GlowLight on or o, do this:
1. Tap the NOOK button to open the Quick Nav Bar.
2. Tap the GlowLight™ button in the Quick Nav Bar.
Your NOOK opens the GlowLight Control window.
3. Tap the checkbox next to the description of GlowLight.
• If the GlowLight Control window says, “GlowLight™ is ON,” tapping the checkbox turns GlowLight o.
• If the GlowLight Control window says, “GlowLight™ is OFF,” tapping the checkbox turns GlowLight on.
NOTE: The GlowLight Control window also lets you adjust the brightness of GlowLight, as described below.
4. To close the GlowLight Control window, tap in the X in the upper right corner of the window or tap anywhere
outside the window.
Turning GlowLight On or O in the Quick Settings Window
You can also turn GlowLight on or o in the Quick Settings window.
1. On the Home screen, in the Library, in the Shop, on the Search screen, or in Settings, tap the lightbulb icon or
Wi-Fi symbol in the Status Bar.
Your NOOK opens the Quick Settings window.
2. Tap the checkbox next to the description of GlowLight.
• If the QuickSettings window says, “GlowLight™ is ON,” tapping the checkbox turns GlowLight o.
• If the Quick Settings window says, “GlowLight™ is OFF,” tapping the checkbox turns GlowLight on.
NOTE: The Quick Settings window also lets you adjust the brightness of GlowLight, as described below.
3. To close the Quick Settings window, tap in the X in the upper right corner of the window or tap anywhere outside the window.
Barnes & Noble NOOK User Guide 25

Adjusting the Brightness of GlowLight
To adjust the brightness of GlowLight, do this:
1. Do either of the following:
• On the Home screen, in the Library, in the Shop, on the Search screen, or in Settings, tap on the lightbulb or Wi-Fi symbol in the Status Bar to open the Quick Settings window.
• On any screen, tap the NOOK button to open the Quick Nav Bar, and tap the GlowLight™ button to
open the GlowLight Control window.
Your NOOK opens a window with a checkbox for turning GlowLight on and o. The window also includes a
slider bar for adjusting the brightness of GlowLight.
2. If GlowLight is o, tap the checkbox to turn it on.
3. Once GlowLight is on, drag your finger along the slider to make GlowLight brighter or dimmer.
• Slide the bar to the left to make it dimmer.
• Slide the bar to the right to make it brighter.
4. Once you have adjusted the brightness of GlowLight to your satisfaction, close the window by tapping the X in
the upper right corner of the window or by tapping anywhere outside the window.
The picture below shows the Quick Settings window. The GlowLight Control window features similar controls for
GlowLight.
The Quick Settings window.
26 Barnes & Noble NOOK User Guide
The Home Screen
The Home screen gives you easy access to the books and periodicals you have recently read or purchased.
In the top portion of the screen, you’ll see the cover of the most recent book or periodical you’ve been reading.
Here’s an example of a Home screen:
Reading Now
Status Bar
What to Read Next
NOOK Button
The Reading Now Panel
The Reading Now panel shows the cover of the book or periodical you were most recently reading. If you have not
read a book or periodical, yet, the Reading Now panel shows the cover of the NOOK User Guide. This guide is automatically included in your Library.
To open the book or periodical shown in the Reading Now panel, tap on its cover.
To share information about the book–for example, to rate or review it or to recommend it to friends–tap the share
link at the bottom of the panel.
Barnes & Noble NOOK User Guide 27

The New Reads List
To the right of that item, you’ll see the New Reads list–a list of three books or periodicals that you have recently
purchased or received. The Recent Reads list includes:
• books and periodicals you have recently purchased
• new issues of periodicals you have subscribed to
To view your complete Library, tap the see library link at the bottom of the New Reads list.
The What to Read Next Shelf
At the bottom of the screen, you’ll see a shelf with four book recommendations for you. The recommendations
come from the B&N Top 100 list or, if you have linked your NOOK to your Contact, Facebook, or Google email accounts, the recommendations come from your friends.
To learn more about a book on the What to Read Next shelf, tap on its cover. Your NOOK opens a detailed description of the book, including an overview, a list of reviews, a list of related titles, and a button for purchasing the book.
The details page might also include a button for downloading a free sample of the book.
28 Barnes & Noble NOOK User Guide
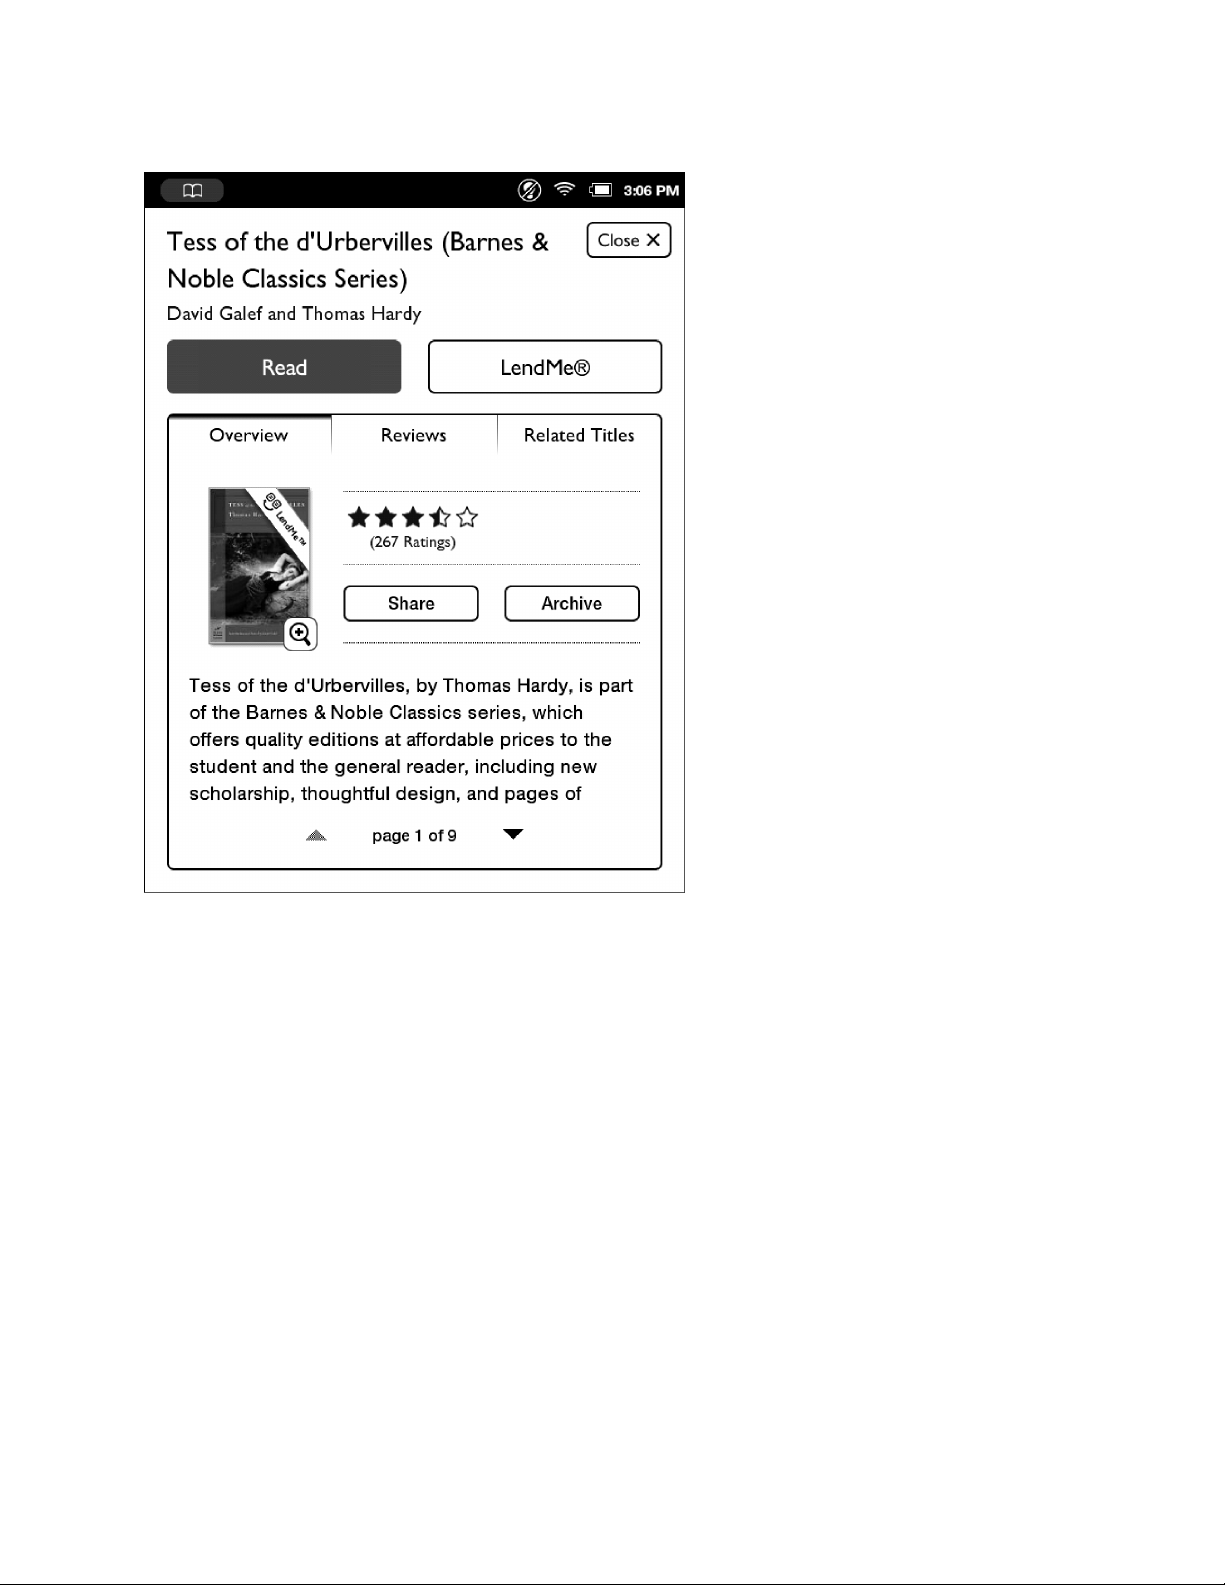
The picture below shows an example of a details page about a recommended book.
The Details page for a book.
Returning to the Home Screen
You can return to the Home screen at any time by pressing the NOOK button (the raised button in the shape of the
NOOK logo) on the lower front of your NOOK to open the Quick Nav Bar and then tapping the Home icon.
Barnes & Noble NOOK User Guide 29

Reading Books on Your NOOK
You can read books, magazines, and newspapers on your NOOK. You can make notes about what you’re reading,
highlight and annotate favorite passages, and share your thoughts and recommendations with friends on social sites
such as Facebook.
Your NOOK makes reading books fun. To start reading, simply tap on a book’s cover. The book opens and fills the
page. Then you can use the features described in this section to get the most out of your reading experience.
While you’re reading, you can customize the look of the page. You can switch fonts, make type bigger or smaller, and
adjust line-spacing and margins. You can switch between page designs whenever you like.
Opening a Book
To open a book, tap on its cover. Or if you’re displaying a list of titles in the Library, tap on the book’s title.
Page Layout
When you’re reading content on NOOK, the text fills most of the page.
The title of the book you’re reading appears in the upper left.
Page numbers appear at the bottom of the screen.
Turning Pages
Turning to the Next Page
To turn to the next page, either:
• Tap anywhere along the right edge of the page.
• Swipe to the left. (To swipe left, you place your finger on the right side of the page and slide it quickly to the left,
as though you were flipping the page of a printed book.)
• Tap either of the upper page-turn keys built into the frame of your NOOK.
NOTE: On the Reader settings screen, you can control whether the upper or the lower page-turn key turns the
page forward. See “Configuring Navigation Buttons in the Reader”.
To move forward quickly through the book, press and hold the page-turn key that turns pages forward.
Turning to the Previous Page
To turn to the previous page, either:
• Tap anywhere along the left edge of the page.
• Swipe to the right. (To swipe right, you place your finger on the left side of the page and slide it quickly to the
right, as though you were flipping a page backwards in a printed book.)
• Tap the lower long narrow buttons to the side of the screen.
NOTE: On the Reader settings screen, you can control whether the upper or the lower page-turn key turns the
page forward. See “Configuring Navigation Buttons in the Reader”.
To move backward quickly through the book, press and hold the page-turn key that turns pages backward.
30 Barnes & Noble NOOK User Guide

The Reading Tools Menu
The Reading Tools menu makes it easy to move through a book, to search for content, share content, and adjust the
display of text.
To call up the Reading Tools menu, tap anywhere in the center of the page or tap on the small dark arrow at the bottom of the page.
The Reading Tools menu appears at the bottom of the screen. When the Reading Tools appear, your NOOK also
displays the GlowLight indicator, the battery status indicator, and a digital clock in the upper right corner of the
screen, as shown in the figure below.
The Reading Tools menu.
There are five tools in the Reading Tools menu. Here’s a quick look at what they do.
• Content - opens a table of contents for the book. Also displays tabs that give you access to Notes & Highlights
and to Bookmarks
• Find - lets you search the book you are reading
• G o To - lets you skip forward or backward to a specific page
• Text - lets you adjust the font size, line spacing, and other stylistic attributes of the page
• More - opens a page with details about the book and tools for sharing, archiving, and more
Barnes & Noble NOOK User Guide 31

Reading Tools: content
Tap on the content icon in the Reading Tools to open a window with three tabs:
• Chapters - a Table of Contents listing chapters or sections
• Notes & Highlights - list of all the passages you have highlighted or written notes about
• Bookmarks - a list of all the bookmarks you have set
Tap on any title, highlighted passage summary, or bookmark on these tabs to jump to that location in the book.
The Contents dialog box.
When the dialog box opens, it displays the Chapters tab, which lists all the chapters in the book. If the list of chapters
runs longer than one screen, you can tap the arrows at the bottom of the screen to scroll down and up through the
list.
Tapping on any chapter number or title closes the dialog box and moves you to the beginning of that chapter in the
book.
32 Barnes & Noble NOOK User Guide

Tapping on the Notes & Highlights tab displays the Notes & Highlights screen.
The Notes & Highlights screen.
The Notes & Highlights screen lists all the passages you have highlighted or written notes about. Each passage is identified by its page number and opening line. If the list of notes and highlights runs longer than one screen, you can tap
the arrows at the bottom of the screen to scroll down and up through the list.
To jump to a particular passage, tap on it.
To erase all the notes and clear all the highlights, tap the Clear all button.
You can control whether or not your NOOK shows highlighted passages and note symbols in the NOOK Book
you’re reading. Tap the check box labeled Show Notes & Highlights. Leave the box checked to show Notes & Highlights. Leave it unchecked to hide them.
NOTE: When you hide Notes & Highlights, they are still visible on the Notes & Highlights screen, but in the
pages of the NOOK Book, highlighted passages no longer appear with a tinted background, and Note
symbols do not appear in the margin.
To close the window without making a selection, tap the Close button in the upper right.
Barnes & Noble NOOK User Guide 33

Tapping on the Bookmarks tab displays the Bookmarks screen.
Here’s an example of a Bookmarks screen.
The Bookmarks screen.
For each bookmarked page, the screen lists the page number and either the chapter number (if you bookmarked the
first page of a chapter) or the first line of text that appears on the page (if you bookmarked any page other than the
first page of a chapter).
To clear all the bookmarks, tap the Clear all button.
To clear an individual bookmark, tap the bookmark to visit its page, and then tap the bookmark ribbon in the upper
right corner.
34 Barnes & Noble NOOK User Guide

Reading Tools: goto
Tap on the goto icon in the Reading Tools to jump to another page in the book.
When you tap on goto, a navigation dialog box appears at the bottom of the screen, as shown below.
The goto dialog box.
The dialog box includes a slider bar that shows your current position in the book.
Using the Slider to Move to Another Page
To move to another page, do this:
1. Tap in the center of the page to open the Reading Tools, if they are not already open.
2. Tap the goto button.
A dialog box opens with a slider showing your current position in the book.
3. Press on the knob on the slider and drag it left or right until you see the page number you are looking for appear
on the right end of the slider bar. If the book is divided into chapters, the slider bar will list chapter numbers and
titles as you slide through them.
4. When you have moved the slider to the position in the book you want, tap on the center of the page to close
the goto dialog box and resume reading the book.
Barnes & Noble NOOK User Guide 35

If instead of moving to the new page, you want to jump back to the previous page you had navigated from, tap the
Go Back button in the goto dialog box. You can tap the Go Back button repeatedly to through several previous locations.
Typing a Page Number to Move to Another Page
To move to another page by entering its page number, do this:
1. Tap in the center of the page to open the Reading Tools.
2. Tap the goto button.
A dialog box opens with a slider showing your current position in the book.
3. Tap the Go to Page button in the lower right corner of the dialog box.
Your NOOK opens a page-number dialog box with a numerical keyboard.
4. Type the number of the page you want to move to. Then tap go.
The page-number dialog box.
Once you have moved to the new page, tap the X symbol in the tab to close the goto dialog box.
36 Barnes & Noble NOOK User Guide

Reading Tools: find
Tap on the find icon in the Reading Tools to search for a word or phrase in the book you’re reading.
When you tap on find, a keyboard appears on the screen. Type a word or phrase you want to search for in the book,
then tap the search button in the lower right corner of the screen.
The Find screen.
If the word or phrase you searched for appears in the book, your NOOK displays a list of page numbers and passages. To jump to a passage, tap on it.
Barnes & Noble NOOK User Guide 37

The image below shows an example of search results.
Search results within a book.
38 Barnes & Noble NOOK User Guide

If the word or phrase you searched for appears more than once in the book, your NOOK displays a search navigation tool at the bottom of the screen when you jump to the location of a search result. This toolbar includes a
forward arrow and a backward arrow for moving from one appearance of the word or phrase to another.
Viewing a search result and using the mini toolbar.
To jump to the next appearance of this search term in the book, tap the right arrow
To jump back to the previous appearance of the search term, tap the left arrow.
To return to the screen listing all appearances of the search term, tap the square icon with the stack of horizontal
lines.
To start a search for a dierent word or phrase, tap in the text field. Your NOOK opens a new search screen. Type
the word or phrase you want to search for and tap find.
To close the mini toolbar, tap the X symbol in the raised tab by the upper right corner of the toolbar.
Barnes & Noble NOOK User Guide 39

Reading Tools: text
Tap on the text icon in the Reading Tools to open a window for adjusting the font, the font size, line spacing, and
margin size.
The Text dialog box.
The Text dialog box lets you pick:
• a font size
• a font
• line spacing - single, double, or triple
• margin size - narrow, medium, or wide
NOTE: Some publishers have defined default settings for the display of NOOK Books. This settings specify a
specific type font, font size, line spacing, and margin setting. If these defaults have been defined for the
NOOK book you are reading, you will be able to check and uncheck a box labeled Publisher Defaults.
You need to uncheck this box in order to make any changes to the text settings.
Tap on the settings that you would like to use. As you change settings, you will see the new settings applied to the
page behind the text screen.
When you have finished making changes, close the dialog box either by tapping on the X in the upper right corner of
the dialog box or by tapping anywhere on the page of the NOOK book you are reading.
40 Barnes & Noble NOOK User Guide

Reading Tools: more
Tap on the more icon in the Reading Tools to open a page with details about the book, along with buttons for opening
Social features.
The More screen.
The More screen presents details about the book you are reading, as well as options for sharing quotes and recommendations with NOOK friends or for searching for other books like it.
Reading the Book
To return to reading the book, either tap the Read button or tap the Close button in the upper right.
Lending the Book to a Friend
If the book is eligible for lending, and you haven’t lent it, yet, you can oer to lend it to a friend who has a Barnes &
Noble account by tapping the LendMe button. See “Using the LendMe Program” for details.
Sharing the Book
Tap the Share button to lend the book or share your impressions about it.
Barnes & Noble NOOK User Guide 41

Tapping the Share button opens a dialog box like that shown below. (The contents of this dialog box may vary, depending on whether you are reading a book you own or a sample and whether the book is eligible for lending.)
The Share dialog box.
• Recommend - recommend the book to your friends by
• sending email to one or more contacts
• posting a recommendation on your Facebook wall or the wall of a friend on Facebook
• posting a recommendation through your Twitter account
• Post Reading Status - post a message on Facebook or Twitter telling how far you have read in the book
• Rate and Review - rate the book and post a short review on BN.com
• Like on Facebook - use the Like feature on Facebook to tell people you like this book
• LendMe® - launch the LendMe program to lend this book to a friend (see “Using the LendMe Program” for
details)
• View Friends’ Activities - view the recommendations, shared quotes, and other activities of your NOOK
friends™
To use these features, you must first link your NOOK to your Facebook and Twitter accounts, and you must add
some email accounts to your NOOK Contacts application. For more information, see “Configuring Social Features”.
42 Barnes & Noble NOOK User Guide

Archiving Books and Periodicals
To save storage space on your NOOK, you can archive books and periodicals you’re not currently reading. Archiving
keeps a copy of a book in your account on the Barnes & Noble Web site, while removing all but the most basic information about the book (such as its cover, title, author, and description) from your NOOK. You can unarchive a book
at any time, so your reading material is not lost.
NOTE: While your book is archived, you will not be able to read it. Unarchive the book to gain access to it
again.
To archive a book or periodical, do this:
1. On the details page you opened with the more button in the Reading Tools, tap the Archive button.
A dialog box opens, asking you if you are sure you want to move this item to your BN.com archive.
2. Tap OK.
Your NOOK archives the book or periodical. It lists the book or periodical on a shelf in your Library called
Archived.
NOTE: Because the text of the item you have been reading has been archived, when you close the details page,
you will see a page from some other item you have been reading, rather than the item you were just
reading.
Unarchiving Books or Periodicals
Unarchiving a book or periodical makes its contents available again on your NOOK.
To unarchive a book or periodical, do this:
1. In the Library, pull down the category menu and select Archived.
Your NOOK displays titles that you have archived.
2. Find the book you want to unarchive, and tap the Unarchive button next to its title.
Your NOOK unarchives the book or periodical and downloads it to your Library.
NOTE: If the book or periodical does not appear right away, tap the Sync button at the top of the Library
screen to update your Library.
Jumping to the Furthest Page Read
If you’ve been reading this book or periodical on some other device (such as a desktop computer or a smartphone)
using a NOOK application, and your NOOK has access to the Internet through its Wi-Fi connection, then when you
open a book or periodical, your NOOK will compare the last page you read on the NOOK to the last page you read
on any other device.
If you have read further on the other device, your NOOK jumps to the furthest page you’ve read, even if you haven’t
read that page on your NOOK.
Barnes & Noble NOOK User Guide 43

Using Bookmarks
Adding a Bookmark
A bookmark marks a location in a book. In a printed book, a bookmark helps you find the page where you left o
reading.
You can set bookmarks in books to make it easy to jump to specific locations You can set as many bookmarks as you
like.
To set a bookmark on the page you are reading, do this:
1. Tap in the upper right corner of the page.
A dark ribbon appears in the corner of the page, indicating that a bookmark has been placed.
A bookmark symbol appears when you tap in the upper right corner of the page. By setting bookmarks,
you make it easier to return to a location in your book.
Viewing All Bookmarks in a Book
To view a list of all the bookmarks in a book, do this:
1. Tap the center of the page to open the Reading Tools.
2. In the Reading Tools, tap the Contents icon.
3. In the Contents pane, tap the Bookmarks tab.
Your NOOK displays a list of all the bookmarks in the book.
44 Barnes & Noble NOOK User Guide

To visit any bookmarked passage, tap on its bookmark in the list.
To close the bookmark list without visiting a bookmark, tap the Close button in the upper right corner of the Contents window.
Removing a Bookmark
To remove a bookmark on the current page, tap on the ribbon in the upper right corner of the page. The ribbon
disappears, and the bookmark is cleared.
Clearing All Bookmarks
To clear all the bookmarks in a book, do this:
1. Display the list of bookmarks by tapping the Contents icon in the Reading Tools, then tapping the Bookmarks tab.
2. Tap the Clear All button in the lower left corner of the bookmarks list.
A dialog box opens asking you to confirm that you want to clear all the bookmarks.
3. Tap OK.
Barnes & Noble NOOK User Guide 45

Selecting Text to Look up Words, Add Highlighting or Notes, and Share Quotes with Friends
You can select a word or a passage of text. Once you have selected a word, you can look it up in a dictionary. You
can also select words or passages for highlighting, making notes, or sharing through email or social media networks
such as Facebook.
To select a word or a passage of text, press and hold on a word and then lift your finger.
The word appears highlighted, and two vertical bars will appear on either side of it, defining the start and end of the
selected text. At the same time, the Text Selection Toolbar appears, as shown below.
A selected word and the Text Selection Toolbar.
46 Barnes & Noble NOOK User Guide

Changing the Selection from a Word to a Passage
To select an entire passage, rather than just a word, select the word that you want to have at the beginning or end of
the selected passage and drag the vertical bar that’s closest to the direction in which you want to extend the selection. Drag the vertical bar until you have selected the passage you want.
Select a word at the beginning or the end of the passage you want to select, and extend the selection by dragging a vertical bar.
When you lift your fingers after resizing the text selection, the Text Selection Toolbar re-appears.
Using the Text Selection Toolbar
Once you’ve highlighted a word or a passage, the Text Selection Toolbar appears. The “Toolbar oers you these
choices:
• Highlight - Lets you highlight a word or passage.
• Add Note - Opens a window for writing a note about the selected word or passage.
• Share - Opens the Share dialog window.
• Look Up - Displays a dictionary definition of the selected word.
If you decide not to take any of these actions, simply tap anywhere on the screen other than in the Text Selection
Toolbar.
Barnes & Noble NOOK User Guide 47

Looking Up Words in the Dictionary
It’s easy to look up information about a word or topic when you’re reading.
Looking Up a Word in the Dictionary
Your NOOK includes the Merriam-Webster’s Collegiate® Dictionary, Eleventh Edition.
To look up a word in the dictionary, do this:
1. Press and hold on a word to select it.
2. Tap the look up icon in the Text Selection Toolbar.
A pop-up window appears, presenting a dictionary definition of the word. To close the window, tap anywhere
outside the window.
The picture below shows an example of a dictionary definition.
A definition from your NOOK’s built-in dictionary.
48 Barnes & Noble NOOK User Guide

Sharing Quotes through Social Media and Email
You can share a highlighted passage with friends through email, Facebook, or Twitter.
NOTE: Before you can share quotes through Facebook or Twitter, you need to link your NOOK to your
Facebook or Twitter account. Use the Social settings page to link your NOOK to social sites. On the
Quick Nav Bar, tap Settings, and then tap the Social menu choice to open the Social settings page.
To share the highlighted passage, tap the share icon in the Text Selection Toolbar. The “Share a Quote” window
opens, oering you the following choices:
• with Contacts
• on Facebook
• via Twitter
Tap on the choice you want to use.
• with Contacts opens a window that lets you select one or more email contacts to whom you can send the quote
you have selected. If you haven’t set up any email contacts, tap the Add Contacts button in the upper right to fill
in a form with a contact’s first name, last name, and email address.
• on Facebook opens a window that lets you post the quote, along with a brief message, on either your Facebook
wall or on the wall of a friend.
• via Twitter opens a window that lets you post the quote to your Twitter account.
NOTE: Twitter messages must not be longer than 140 characters. A number in the lower right corner of the
Twitter posting window will let you know how many characters remain before you hit the 140 character limit. If you see a negative number, you have exceeded the 140-character limit by that number of
characters. Delete words in the quoted passage displayed in the posting window until number reads 0
or a positive number.
Using Notes
Writing a Note
Just as you might write a note in the margins of a printed book, you can make notes about specific passages in a book
on your NOOK.
To write a note, do this:
1. Press and hold on a word at the beginning or end of the passage you want to write a note about.
The Text Selection Toolbar appears at the bottom of the screen.
2. Lift your finger, then drag one of the vertical bars to other end of the passage.
The Text Selection Toolbar appears again.
3. Tap the Add Note button in the toolbar.
An “Add Note” window appears with a keyboard for typing notes.
4. Type the text of the note.
5. Tap the Done button to post the Note and close the note window.
In your book, a note icon now appears in the margin, indicating that a note has been written about this passage.
Barnes & Noble NOOK User Guide 49

Viewing a Note
To open a note and read it, tap the note icon in the margin.
When you’re done viewing the note, you can close the note window by tapping the X in the upper right corner of the
window.
NOTE: By default, your NOOK displays a note icon next to any passage of text about which you’ve written a
note. However, you can configure your NOOK not to display note icons. Tap in the center of the page
to display the Reading Tools, tap the Content button, tap the Notes & Highlights tab, and uncheck the
checkbox labeled Show Notes & Highlights. This hides notes and highlights while you’re reading, though
you can still read notes by opening the Contents tool and tapping on the Notes & Highlights tab. To read
a note in the Notes & Highlights tab, tap on it.
Editing a Note
To edit a note, do this:
1. Tap the Note icon to open the note you want to edit.
Your NOOK displays the note, along with buttons labeled Cancel and Edit.
2. In the Note window, tap the Edit button.
A window opens, displaying the text of the note and a keyboard.
3. Use the keyboard to edit the note as you like.
4. When you have finished editing the note, tap the Done button.
Removing a Note
To remove a note, do this:
1. Tap on the highlighted word or phrase associated with the note.
A menu appears at the bottom of the screen.
2. Tap the Remove Note button.
Your NOOK deletes the note.
Viewing All Notes
To view all notes, do this:
1. Tap the page to display the Reading Tools.
2. Tap the Contents icon.
3. Tap the tab labeled “Notes & Highlights.”
Making Notes Visible or Invisible
You can control whether or not your NOOK displays a Note icon next to any text about which you’ve written a
note.
To make notes visible or invisible in the text, do this:
1. Tap the page to display the Reading Tools.
2. Tap the Contents icon.
3. Tap the tab labeled “Notes & Highlights.”
50 Barnes & Noble NOOK User Guide

4. Tap the On/O switch labeled “Notes & Highlights.”
Tap the switch On to display notes and highlights, or tap it o to hide notes and highlights.
Sharing a Quote
If you have entered contacts in your NOOK or linked your NOOK to Facebook or Twitter, you can share quotations
from the book you’re reading with your friends.
NOTE: You must have set up contacts or linked to Facebook or Twitter before you can use this feature. To set
up contacts and links to Facebook and Twitter, see “Configuring Social Features”.
To share a quote, do this:
1. Tap the first or last word of the passage to highlight it.
Vertical bar appear at the beginning and end of the word.
2. Drag a vertical bar to the other end of the passage, highlighting all the words in the passage.
3. In the Text Selection Toolbar, tap share.
The Share a Quote window opens. See the picture below.
The Share a Quote window.
4. Tap the button for the way you want to share the quote: with Contacts, on Facebook, or via Twitter.
5. Tap Next.
Barnes & Noble NOOK User Guide 51

6. Fill in the form to finish sharing the quote.
• If you opted to share the quote with contacts, you will see an email form with a Select Contacts but-
ton. Tap the button to see a list of your contacts. Select the contacts with whom you want to share the
quote. When you have finished selecting contacts, tap Done. In the message form, type a message you
would like to include with the quote, then tap send.
• If you opted to share the quote on Facebook, you will see a form that lets you either post the quote
along with a message to your own wall or to the wall of a friend. If you want to post to the wall of a
friend, select the tab Post to a Friend’s wall, tap the Select Friend button, and then tap on the name of the
friend on whose wall you want to post the quote. Whether you are posting on your own wall or that of
a friend, you tan type a message in the message field to accompany the quote. When you are ready to
post the quote and your message, tap the post button in the lower right corner of the keyboard.
• If you opted to share the quote on Twitter, you will see a form for posting a message to your Twitter
account. Twitter messages (known as “tweets”) must be no longer than 140 characters. If your quote is
longer than 140 characters, you will need to shorten it to post it on Twitter.
Adjusting the Appearance of the Page
In most books, you can adjust the features described below.
Fonts
• A range of font sizes from small to large
Font Families
• Amasis
• Caecilia®
• Malabar™
• Gill Sans
• Helvetica® Neue
• Trebuchet
Line Spacing
• Single spacing
• 1.5-line spacing
• Double spacing
Margins
• Narrow
• Medium
• Wide
Publisher Defaults
• On/O
If you turn on Publisher Settings, the page displays using the settings recommended by the publisher.
52 Barnes & Noble NOOK User Guide

NOTE: Some publishers define recommended settings for their eBooks; other publishers do not. If the Pub-
lisher Settings toggle switch is grayed out, the publisher of the eBook you are reading has not defined
recommended settings.
All other page controls in the dialog box appear grayed out.
To change the appearance of the book, do this:
1. Tap the center of the page to make the Reading Tools appear.
2. Tap the text icon.
Your NOOK opens a window displaying font and spacing controls.
3. Tap the controls to select the font, font size, line spacing, and margins you want.
4. Tap anywhere outside the text dialog box to close the dialog box.
Reviews and Recommendations
To view a summary of the book, along with reviews and recommendations for similar books, tap in the center of the
page to bring up the Reading Tools and tap the more button.
For details, see “Reading Tools: more”.
Opening DRM-protected Files
DRM stands for Digital Rights Management. DRM software protects books from being copied, sold, or distributed in
an unauthorized manner.
Your NOOK and the Barnes & Noble website automatically make sure that when you buy and download a NOOK
Book, the NOOK Book recognizes you as its legitimate owner and presents its contents for you to read on your
NOOK.
In some rare cases, you might need to unlock a book or periodical that you have bought from Barnes & Noble. In this
case, you’ll need to enter the following information to unlock the book or periodical:
• Your name as it appears on the billing address of your BN.com account
• The number of the credit card associated with your BN.com account when you downloaded the book or peri-
odical
Barnes & Noble NOOK User Guide 53

Reading Magazines and Newspapers on Your NOOK
Reading magazines and newspapers on your NOOK is similar to reading books. You use the same gestures--tapping
and swiping–to turn pages. You have access to the same Reading Tools, such as Contents and GoTo.
Some periodicals may include their own table of contents with live links to specific articles and features, but otherwise
the features are similar to the features used in reading books.
54 Barnes & Noble NOOK User Guide

The Library on Your NOOK
Your library is where you keep everything you want to read on NOOK. In your library, you will find:
• Books you have purchased from the NOOK Store
• Newsstand magazines and newspaper you have purchased from the NOOK Store
• Free books you have downloaded from the NOOK Store
• EPUB files and PDFs you have transferred onto NOOK using a USB connection from your personal computer
(these files appear in the My Files section of the Library).
To access your library, tap the Library icon on the Quick Nav Bar.
The Library looks like this:
Category Menu
Sort Menu
Sync
Search
List View
Grid View
The Library
Pull-down Menus
To help you quickly find what you’re looking for, the Library on your NOOK features a couple of pull-down menus
that let you select which contents to display and how to display them.
Barnes & Noble NOOK User Guide 55

The Category Menu
The category menu (sometimes called the filter menu) is a pull-down menu in the upper left corner of the Library lets
you select the Library contents you want to display.
Choices include:
• All - shows everything in your Library
• Books - shows only books
• Newsstand - shows only magazines and newspapers (this menu choice appears only if you have purchased
magazines or newspapers)
• LendMe - shows only books eligible for lending and books that you have borrowed (this menu choice appears
only if you have lendable books or if you have borrowed books)
• Shelves - shows any books, magazines, and newspapers that you have organized on shelves
• Archived - shows any books or periodicals you have archived (this menu choice appears only if you have once
archived any books or periodicals)
• My Files - shows any files, such as EPUB or PDF files, that you have transferred from your personal computer to
your NOOK
The picture below shows an example of the category menu.
The Category Menu.
56 Barnes & Noble NOOK User Guide

The Sort Menu
The sort menu is a pull-down menu that lets you sort the content shown on the screen according to rules such as
Most Recent, Title (an alphabetical listing of titles), or Author (an alphabetical listing of authors’ last names).
The Sort Menu.
The Sync Button
In the upper right corner of the Library is a button with two curved arrows forming a circle. This is the Sync button.
Sync’ing your NOOK downloads any books and periodicals that you have purchased from other devices, such as a
smartphone or a personal computer.
Searching Your Library
You can search your library to find any of the following for books, magazines, and newspapers:
• Author
• Title
• Subject
To search your Library for a particular author, title, or subject do this:
1. Tap the magnifying glass icon in the upper right corner of the Library screen.
A keyboard appears.
2. Type the word or phrase you want to search for.
3. Tap the search button.
Your NOOK displays a list of any items it finds matching the word or phrase you typed. To open an item in the
list, tap on its name.
Searching for Words with Accents and Other Diacritical Marks
To type a word that contains accents or diacritical marks (such as a French cedilla ç), do this:
1. Press and hold on the letter you want to select a diacritical mark for.
A pop-up window appears, oering additional keyboard buttons for diacritical marks.
2. Tap on the letter-mark combination you want.
The pop-up window disappears, and the letter you selected appears in the text field where you were typing.
Barnes & Noble NOOK User Guide 57

Memory Card
If you have an SD Memory Card installed in your NOOK, you’ll see two links appear at the top of the Library screen
when you select My Files from the Category menu.
• My NOOK
• Memory Card
You can tap on these links to switch between viewing files stored on NOOK and files content stored on your SD
Memory Card.
NOTE: You can use a Memory Card to add storage for personal files, including EPUB files, but all files stored on
a Memory Card appear in the My Files section of your Library, rather than in Books or Newsstand.
Viewing and Sorting the Contents of Your Library
Your Library allows you to view and sort your books and periodicals in dierent ways.
You can arrange items in a grid, in horizontal shelves running across the screen, or in various types of lists.
You can also sort items by title and by date of publication.
Two pull-down menus at the top of the Library screen give control over the presentation of your Library.
Sorting and Viewing Books
You can sort books by:
• Most Recent
• Title
• Author
You can view books in these arrangements:
• a grid
• a list, which includes titles and author names
Sorting and Viewing Your Newsstand (Magazines and Newspapers)
You can sort magazines and newspapers in your Newsstand by:
• Most Recent
• Title
You can view magazines in these arrangements:
• a grid
• a list, which includes titles, publisher names, and publication dates
Opening Books, Magazines, and Newspapers
You can tap on any cover you see to open it.
58 Barnes & Noble NOOK User Guide

If you tap on a book with a Download banner, your NOOK begins downloading the book. A progress bar on the
book’s cover indicates how much of the book has been downloaded. Once the book has fully downloaded, you can
open it.
NOTE: When you buy a book or periodical, it becomes available to your NOOK, as well as to any Barnes &
Noble eReader applications installed on your smartphone, tablet, or personal computer.
Badges on Content
Your NOOK displays the following badges on books and periodicals:
• New: This is a new item that has been downloaded to your NOOK and is now ready for reading.
• Sample: This is a free sample of a book, magazine, or newspaper.
• Download: Tap on this book or periodical to download it from your Barnes & Noble Lifetime Library.
• Pre-order: This item is available for pre-order. You can order it now, even though it hasn’t been released, yet.
You will be able to read it the moment it is released.
• Recommended: A friend has recommended this book or periodical to you.
• LendMe: You can lend this book to a friend.
• Lent: This book has been lent to you. The number on the cover indicates the number of days left on the loan.
• Returned: This book has been returned to the lender.
• Google: This is a Google eBook.
When a book, magazine, or newspaper is being downloaded, a striped bar appears across its cover, indicating that the
download is in progress.
Organizing Your Library on Shelves
In addition to views of all your books, magazines, and newspapers, your Library also includes a feature called My
Shelves where you create named collections of books, periodicals, and files. A shelf is a group of items that you have
collected under a common name, such as Mysteries or Cookbooks. You can give a shelf any name you like.
A book, periodical, or file can appear in as many shelves as you like. For example, if your favorite book is a mystery
novel, you could include it on your Favorites shelf as well as on a new shelf you create called Mysteries.
Creating a Shelf
To create a shelf, do this:
1. In the Library, tap the category menu and select My Shelves.
2. Tap the Add Shelf button.
A dialog box appears.
3. Tap in the text field in the dialog box. When a keyboard appears, type the name of the shelf you want to create.
4. Tap Save.
Your NOOK creates the shelf, then displays a list of all the items in your Library. It also displays a number in
parentheses, indicating how many items are currently in the shelf. When you first create the shelf, this number is
zero.
Barnes & Noble NOOK User Guide 59

5. Tap the checkbox next to any item to you want to add to the shelf you just created.
Use the page up and down buttons on your NOOK to scroll through the list. As you add items to the library,
your NOOK updates the number which appears in parentheses by the shelf’s name, indicating the number of
items on the shelf.
6. When you have finished adding items to the shelf, tap the Save button in the lower right corner of the screen.
7. Your NOOK creates the shelf and returns you to the main My Shelves screen, which displays all your shelves.
Adding or Removing Items
When you create a shelf, it’s empty.
To add items to a shelf or to remove items from a shelf, do this:
1. Tap the edit button to the right of the shelf ’s name.
A window opens, displaying a list of your books and periodicals.
2. Tap the checkboxes to the left of book and periodical titles to add or remove items, as you like:
• Any item with a checked checkbox is included in the shelf.
• Any item with a blank checkbox is excluded.
3. When you have finished adding or removing items, tap Save.
Renaming a Shelf
To rename a shelf, do this:
1. Tap the edit button to the right of the shelf ’s name.
A window opens, displaying a list of your books and periodicals. The window also includes buttons for renaming
or removing the shelf.
2. Tap the Rename button.
A dialog box with a text field appears.
3. Tap in the text field in the dialog box. When a keyboard appears, edit the shelf’s name as you like. Tap Save.
Removing a Shelf
Removing a shelf does not delete any of the books or periodicals on the shelf. It simply eliminates the shelf itself.
To remove a shelf, do this:
1. Tap the edit button to the right of the shelf ’s name.
A window opens, displaying a list of books and periodicals. Buttons appear at the top and bottom of the window.
2. Tap the Delete Shelf button.
A dialog box appears, asking if you really want to remove the shelf.
3. To remove the shelf, tap OK.
Archiving Books and Periodicals
To save storage space on your NOOK, you can archive NOOK books and periodicals you’re not currently reading.
Archiving keeps a copy of a book in your account on the Barnes & Noble Web site, while removing all but the most
60 Barnes & Noble NOOK User Guide

basic information about the book (such as its cover, title, author, and description) from your NOOK. You can unarchive a book at any time, so your reading material is not lost.
To archive a book or periodical, do this:
1. In the Library, double-tap on the cover or title of the book or periodical.
The details page for the item you tapped on appears.
2. On the details page, tap the Archive button.
Your NOOK archives the book or periodical. It lists the book or periodical on a shelf in your Library called
Archived.
NOTE: You must be in the Library to archive an item. You cannot archive items from the Home Screen.
Unarchiving Books and Periodicals
Unarchiving a book or periodical makes its contents available again on your NOOK.
To unarchive a book or periodical, do this:
1. In the Library, tap the category menu, then tap the Archived menu choice.
Your NOOK displays the items you have archived.
2. Double-tap on the cover or title of the book or periodical you want to unarchive.
The details page for that item appears.
3. Tap the Unarchive menu choice.
Your NOOK unarchives the item, restores its contents, and removes it from the Archived shelf.
Opening Files on a microSD Memory Card
To open files from a microSD Memory Card installed in your NOOK, do this:
1. Make sure that the microSD Memory Card is installed in your NOOK. If it’s installed, you’ll see a link that says
“Memory Card” near the top of the Library when you tap My Files in the Library’s category menu.
2. In the Library, open the category menu and tap My Files.
Your NOOK displays the folders and files on your microSD Memory Card.
3. To open a file, do either of the following:
• Tap on the file.
• Double-tap on the file. A window opens, displaying details about the file, such as its size, location, and
file size. Tap the Open button.
NOTE: You can use the steps above to access any files on the SD Memory Card. To transfer files from an SD
Memory Card to internal memory of your NOOK, connect your NOOK to your personal computer,
following the directions below. Transfer the files from the SD Memory Card to your personal computer,
and then from your personal computer to the My Files folder on your NOOK.
Transferring Files from Your Personal Computer to Your NOOK
You can transfer files, including EPUB files, PDFs, and photos, from your personal computer to your NOOK.
NOTE: You can transfer photos to your NOOK only for use as screensavers. To learn about setting up screen-
savers, see “Configuring Screen Settings”.
Barnes & Noble NOOK User Guide 61

NOTE: Transferring files from your personal computer to your NOOK is sometimes called “sideloading.”
To transfer files from your personal computer to your NOOK, do this:
1. Using the custom microUSB cable provided with your NOOK, connect your NOOK to your personal computer.
NOTE: Use only the microUSB cable provided with your NOOK. Using any other cable might damage your
NOOK.
2. When you connect your NOOK to your personal computer, your NOOK will appear as a new disk drive called
“NOOK” on your personal computer. Drag the files you want to transfer onto the “NOOK” drive.
NOTE: If you connect your NOOK to a Windows PC, the PC might display a dialog box asking if you want to
install a driver for a “Nook.” Click Cancel to close this dialog box. You do not need to install a special
driver to transfer files to your NOOK.
3. To organize the files, open the “NOOK” drive. You’ll see several folders on your NOOK. Move your personal
files in the My Files folder.
4. When you have finished arranging files, eject the “NOOK” drive from your personal computer to unmount the
NOOK file system.
5. Disconnect the microUSB cable.
Recommendations for Files
After you transfer documents to your NOOK, keep back-up copies on your personal computer. Barnes & Noble cannot be responsible for any loss of data transferred to your NOOK.
62 Barnes & Noble NOOK User Guide

Using the LendMe Program
Lending and Borrowing Books
With Barnes & Noble’s exclusive LendMe technology, you can share lendable NOOK Books with any NOOK Friend
or any friend who has a Barnes & Noble account with a valid credit card number. Your NOOK Friend or friend can
read the book on any NOOK or NOOK Color eReader or on any NOOK application such as NOOK for iPhone®,
NOOK for iPod touch®, and NOOK for PC.
You may lend each of your lendable books once. You cannot read a book while it is on loan or while a lending oer is
pending, but you always get the book back once it has been returned or when 14 days have passed.
You can access LendMe features the details pages of books in your Library and the Shop. You can also access them
through the Social settings controls described in “Configuring Social Features”.
Guidelines for Lending and Borrowing Books
Here are details about lending and borrowing books.
• You can lend only books that are in your Barnes & Noble Lifetime Library. Your Lifetime Library holds all the
NOOK Books that you have purchased. Not all books can be lent, though many can.
• You can lend only from a registered NOOK or NOOK Color.
• You can send a lending oer to any email address, but to accept the oer, the other person must have an email
address associated with a Barnes & Noble online account, a valid credit card number associated with the online
account, and a NOOK, NOOK Color, or other B&N eReader application that supports lending. An account
holder’s credit card is not charged when he or she borrows a book from you.
• You can lend a book from anywhere with supported wireless connectivity (including Wi-Fi hotspots outside of
the United States, U.S. territories, and Canada).
• You can only lend a book one time. It only counts as the one-time lending if your friend accepts the lending oer.
If the lending oer expires or your friend rejects the oer, you can still lend the book.
• When you oer to lend a book, the oer lasts for up to 7 days. The oer ends when your friend accepts the offer or when 7 days have passed.
• Once you have oered to lend the book, you cannot retract your oer.
• A loan is for 14 calendar days, counting the day on which the lending oer is accepted. A lent book is automati-
cally returned at the beginning of the 15th calendar day (if the borrower has not returned it more quickly).
• When you lend a book, you temporarily lend the digital rights to the book. During the period when the lending
oer is pending and while the book is lent, you cannot read it. When the book is returned, you get the digital
rights back, and can read the book again.
• You cannot lend a book that has been lent to you.
• You cannot save a copy of a lent book to the microSD card.
• You cannot archive a book that has been lent to you.
Barnes & Noble NOOK User Guide 63

Determining whether a Book Can Be Lent
Not all books can be lent. Here’s how you can determine whether or not a book is lendable.
• Any book eligible for lending has a LendMe badge on its cover.
• If your Library includes any books eligible to be lent out, they will appear on the shelf of lendable books in the
LendMe section of your Library.
• LendMe badges are present when you are browsing and searching for books in the NOOK Store on the BN.com
website. When you navigate to the details page for a book by clicking on the title, the badge is located below the
cover image if that book title can be lent.
• LendMe badges are present in your library on the BN.com website. If you can lend a book, a LendMe badge is
present below the date added. Click the badge to lend the book.
If you have lent a book, it appears in the list of books you have lent and a “Lent” badge appears on its cover. If you
double-tap on the book to open its details page, you’ll see the name of the friend to whom you lent the book.
Lending a Book
To lend a book from your library, do this:
1. Open the LendMe application for the book you want to lend. You can open the LendMe application doing any of
the following:
• If the book is in the Reading Now panel of the Home screen, tap the share link beneath the book’s
cover.
• If the book is in the Library, double-tap on the book’s cover or on its title to open the book details
page. On the details page, tap the Share button. When the Share dialog box opens, tap the LendMe
menu choice.
• In the book itself, tap the center of the page to bring up the Reading Tools. Tap the more button to
bring up the book’s details page. On the book’s details page, tap the Share button. When the Share
dialog box opens, tap the LendMe menu choice.
2. In the dialog box that appears, tap on a social media icon to select the way you want to notify your friend of the
LendMe oer.
• You can notify your friend through email through your Contacts.
• If you have linked your NOOK to your Facebook account, you can notify your friend by posting the of-
fer posting a message on your friend’s wall.
• If you have linked your NOOK to your Google account, you can notify your friend through the email account associated with your Google account.
• If you have not entered any contacts or linked your account in any way, select Contacts, then use the
Add Contact button to add your friend’s email address.
3. Tap the Next button in the lower right corner of the screen.
4. Write your email message or wall message and send it to your friend.
Borrowing a Book
You can ask a friend to lend you a book in his or her library.
64 Barnes & Noble NOOK User Guide

To find out which of your friends have lendable books, use the Manage my NOOK friends™ feature on the Social set-
tings screen.
NOTE: If you’re enjoying a book sample or a book you’ve borrowed, you can purchase the book at any time.
Simply tap the Buy button at the top of any page in the book to purchase the book using your Barnes &
Noble account.
Barnes & Noble NOOK User Guide 65

Shopping on Your NOOK
Introduction
NOTE: To access the Shop on your NOOK, you must be connected to a Wi-Fi network. If you are not con-
nected to a network but you are in an area with Wi-Fi access, your NOOK will guide you through the
process of connecting to a network.
To begin shopping, tap on the Shop icon in the Quick Nav Bar. The Shop page displays recommendations from our
booksellers. You can scroll left and right through these recommendations. To learn more about any book or periodical, tap on its cover. To purchase an item, tap on the button displaying the item’s price.
Whenever you tap on a price to buy an item, your NOOK replaces the price button with a button labeled Confirm.
Tap this button to confirm that you want to buy the item.
When you buy an item in the Shop, Barnes & Noble charges the credit card associated with your Barnes and Noble
account.
When shopping, you can always return to the Shop store front by tapping on Shop icon in the upper left corner of
the screen or on the home icon (a little house) in the upper right corner of the screen, next to the search field.
Browse bestseller lists
and categories
The Shop on your NOOK.
Search the store
66 Barnes & Noble NOOK User Guide

Browsing Lists and Categories
To browse lists and categories of books and periodicals, tap the Browse button at the top of the Shop screen.
The Shop displays a menu showing lists, such as BN Top 100, and categories such as books, magazines, and newspapers.
Tapping on the Books link under the Browse Shop heading on the home page displays a list of book categories you
can explore.
Browsing book categories in the Shop.
Searching for Titles, Authors, or Topics
To search for a book or periodical, tap the search field in the upper right corner of the screen. When a keyboard appears, type the title, author’s name, or topic you’re looking for, then tap the Search button.
When the Shop search engine displays its results, tap on the item you’re interested in to see more details about it.
If the search engine finds more entries than will fit on the screen, scroll through the search engine results by dragging
your finger up or down.
Barnes & Noble NOOK User Guide 67

Buying a Book
Once you’re in the Shop, you can buy any book you see that has a button displaying the book’s price. (If you don’t
see a button with a price next to a particular book, it’s because you’ve already purchased the book. A label reading
Purchased or Read appears where the price button used to be.)
Tap on the price button to purchase a book.
To buy a book, do this:
1. To buy a book, tap on the button displaying a price next to the book’s cover or title.
The Shop replaces the price button with a button labeled Confirm.
2. Tap the Confirm button.
What happens next depends on how you’ve customized your Shop. If you’re using the default set-up, your
NOOK begins downloading the book once you tap Confirm. If you’ve set up your Shop to require that your B&N
Account password be entered every time anyone makes a purchase on your NOOK, a dialog box opens. Tap in
the Password field and enter the password for your B&N Account. Tap OK.
NOTE: You can configure your NOOK to prompt you for a password before you make a purchase. To set up
your NOOK to require a password, visit Settings and open the Shop settings page.
To cancel the transaction without buying, do not tap the Confirm button. Tap the Close button in the upper right corner to close the details page without completing the purchase.
68 Barnes & Noble NOOK User Guide

Buying a Single Issue of a Magazine or Newspaper
To buy a single issue of a newspaper or magazine, do this:
1. Open the details page for the magazine or newspaper you want to buy.
2. Tap the Buy Current Issue button.
The button changes to a gray Confirm button.
3. Tap the Confirm button to confirm your purchase.
Once you have confirmed your purchase, your NOOK downloads the issue. The Confirm button changes to a
button labeled Read.
4. Tap the Read button to begin reading the issue.
Buying a Subscription to a Magazine or Newspaper
Your NOOK oers free 14-day trials of magazines and newspapers. You are eligible for one free trial for each newspaper and magazine.
To start your free 14-day trial, do this:
1. Open the details page for the magazine or newspaper you want.
2. Tap the Free Trial button.
A dialog button opens, asking you to confirm your order.
3. Tap the Start My Free Trial.
NOTE: All first-time subscribers receive a FREE 14-day trial. If you cancel your subscription before the end of
the 14 days, you will not be charged. If you do not cancel the subscription, deliveries will continue and
your default credit card will be charged automatically at the monthly subscription rate then in eect.
Your subscription will automatically renew each month unless you choose to cancel. You are only eligible for one free trial for each eNewspaper and eMagazine.
What Happens When You Buy an Item in the Shop?
When you buy a book, magazine, or newspaper on your NOOK, it begins downloading right away. Here’s what happens:
• The item appears in your Library.
• A badge saying “New” appears on item’s cover. This badge will disappear once you open the item.
• If an item is still in the process of downloading, a progress bar appears on its cover, indicating the amount of
content that remains to be downloaded.
• The item appears in the New Reads list on the Home screen.
Using Your Wishlist
Your Wishlist is like a shopping cart on your NOOK. You can add books, magazines, and newspapers to your
Wishlist so you can buy them later.
NOTE: The Wishlist on your NOOK is separate from the Wishlist on the BN.com Web site. Your Wishlist on
BN.com can include paper books and other items, as well as NOOK books, magazines, and newspapers
for your NOOK.
Barnes & Noble NOOK User Guide 69

Adding to Your Wishlist
To add a book, magazine, or newspaper to your Wishlist, do this:
1. Tap on the book or periodical’s cover to display the details page for the item.
2. On the details page, tap on the checkbox next to the word Wishlist.
Your NOOK adds the item to your Wishlist.
Viewing Your Wishlist
To view your Wishlist, do this:
1. On the store front of the Shop, tap the my wishlist link in the Popular Lists panel.
The Shop displays your current Wishlist. Your Wishlist shows all the books and periodicals you have added to
your Wishlist. Your Wishlist shows the cover, title, and price of each item. It also shows the date each item was
added to list.
2. If you would like to sort your Wishlist, tap the menu in the upper left and select the view of your Wishlist you
would like to see:
• Date Added
• Best Selling
• Title
• Price
• Release Date
Buying from Your Wishlist
To buy an item on your Wishlist, do this:
1. Tap the item’s cover or title to display the details page for the item.
2. Tap the price button next to the item’s name. Tap the Confirm button to complete your purchase.
70 Barnes & Noble NOOK User Guide

Using Your NOOK in a Barnes & Noble Store
When you turn on your NOOK in a Barnes & Noble store, your NOOK automatically detects the Wi-Fi network
running in the store. Your NOOK displays a special window, asking if you would like to connect to the InStore network.
• To connect to the store’s network, tap the Connect button.
• To use your NOOK without connecting to the store’s network, tap the Dismiss button.
Read In Store™: Reading Books in a Barnes & Noble Store
When you use your NOOK in a Barnes & Noble store, you have access to all the usual features of your NOOK. In
addition, you have special privileges and abilities, including the ability to read most NOOK Books for one hour per
day free.
After you have read a book free for one hour, a dialog box appears, letting you know that one hour has passed. The
dialog box oers you two choices:
• Buy the book
• Add the book to your wishlist
NOTE: Barnes & Noble More In Store™ provides access to exclusive content and oers available only when
connected to a Barnes & Noble InStore Wi-Fi hotspot.
Barnes & Noble NOOK User Guide 71

Searching Your NOOK
Your NOOK includes a search tool to help you quickly find what you’re looking for. To provide you with the most
relevant results possible, your NOOK customizes its searching according to what you were doing when you started
the search.
Searching from the Quick Nav Bar
When you search using the Search tool in the Quick Nav Bar, your NOOK searches both the Library and the Shop.
To access the search tool, tap the NOOK button and then tap the Search button in the Quick Nav Bar.
When the Search tool displays a list of results, tap on any result to see more information about it.
Searching in Your Library
If you search while you’re in your Library, the Search tool initially limits its search to your Library. The Search tool
searches:
• Author
• Title
• Subject
Searching for Words with Accents and Other Diacritical Marks
To type a word that contains accents or diacritical marks (such as a French cedilla ç), do this:
1. Press and hold on the letter you want to select a diacritical mark for.
A pop-up window appears, oering additional keyboard buttons for diacritical marks.
2. Tap on the letter-mark combination you want.
The pop-up window disappears, and the letter you selected appears in the text field where you were typing.
72 Barnes & Noble NOOK User Guide

Configuring Your NOOK
Your NOOK gives you full control over many areas of its operations, from Wi-Fi connections to font sizes.
To adjust the configuration of your NOOK, you’ll often work with the Settings tool. To call up Settings, do this:
1. Tap the NOOK button to open the Quick Nav Bar.
2. In the Quick Nav Bar, tap the Settings icon.
Your NOOK opens the Settings Screen, which looks like this:
The Settings Screen
The Settings Screen leads to pages for configuring dierent aspects of your NOOK. When you’re on a page for a specific feature, you can always return to the main Settings Screen by tapping the Back arrow on the upper left of a page.
Barnes & Noble NOOK User Guide 73

Configuring GlowLight™
You can use the GlowLight settings screen to turn GlowLight on and o and to adjust its brightness. (You can also
make these adjustments using the Quick Settings window, which is described earlier in this guide.)
To configure GlowLight, do this:
1. On the Settings screen, tap GlowLight™.
The GlowLight settings screen opens.
2. To change the setting of GlowLight, tap the checkbox.
• If GlowLight is o, tapping the checkbox turns it on.
• If GlowLight is on, tapping the checkbox turns it o.
3. To adjust the brightness of GlowLight, make sure it is turned on, then slide your finger along the Brightness control to make the light dimmer or brighter.
NOTE: You can adjust the brightness of GlowLight only when GlowLight is turned on.
The picture below shows the GlowLight settings screen.
The GlowLioght settings screen.
74 Barnes & Noble NOOK User Guide

Viewing and Configuring Device Info
To display device information, do this:
1. On the Settings screen, tap Device Info.
Your NOOK displays the Device Info page, which shows:
• a Battery charge status bar, showing how much power is left on your battery
• an Available storage status bar, showing how much free storage is left on your NOOK’s internal storage
• an SD Card status bar, which indicates whether or not an SD Memory Card is installed in your NOOK
The Device Info page also presents three menu choices:
• About Your NOOK
• Erase & Deregister Device
• Legal
The Device Info presents useful information about your NOOK.
The Device Info screen.
Barnes & Noble NOOK User Guide 75

Displaying System Information
Tap the About Your NOOK menu choice to display the following information:
• Owner, the name of the owner of this NOOK
• Account, the email address of the Barnes & Noble account linked to this NOOK
• Software version, the version number of your NOOK software
• Model number, the model number of your NOOK
• Serial number, the unique serial number of your NOOK
• Wi-Fi MAC address, a unique networking address your NOOK uses when its connects to a Wi-Fi network.
Erase & Deregister Device
The Erase & Deregister feature erases your Barnes & Noble account information from your NOOK and resets the
NOOK to its default factory settings. Deregistration unlinks your NOOK from your Barnes & Noble account.
NOTE: Erasing and deregistering your NOOK does not delete any of the books, magazines, and newspapers
from your Barnes & Noble account. Your reading material, while no longer available on your NOOK, is
still available for downloading and for reading with NOOK applications, such as NOOK for iPhone and
NOOK for Android. In addition, you can re-register your NOOK by following the same steps you used
when you first set up your NOOK. Once you have registered, your complete Library is once again available on your NOOK.
NOTE: Erasing and deregistering does delete any files you have transferred to your NOOK from your personal
computer. Be sure to back up these files before erasing and deregistering, if you want to have access to
them after deregistering your NOOK.
NOTE: Be very cautious using this feature unless specifically instructed by Barnes & Noble’s Customer Support.
NOTE: You must be connected to a Wi-Fi network to deregister your NOOK.
To erase and deregister your NOOK, do this:
1. Tap the Erase & Deregister Device menu choice on the Device Info screen.
Your NOOK displays a page for erasing and deregistering your device.
2. Tap the button labeled Erase & Deregister Device.
A dialog box appears, asking you to confirm that you want to reset your NOOK.
3. Tap the button labeled Reset NOOK.
Your NOOK displays a messaging saying it is deregistering itself. Once your NOOK has deregistered itself, it
displays a message saying that it is clearing data. Once data has been cleared o the device, your NOOK reboots
itself.
To re-register with your existing account, or to register with a new account, follow the instructions for getting started.
Viewing Legal Notices
To view legal notices, such as the Terms of Service for using your NOOK, tap the Legal menu choice on the Device
Info page.
76 Barnes & Noble NOOK User Guide

Configuring Wireless Settings
The Wireless settings screen provides:
• a switch for turning on and o Wi-Fi networking
• a list of all the Wi-Fi networks your NOOK has detected
Turning Wi-Fi Networking On or O
On the Wireless settings page, tap the Wi-Fi button to change its status from On to O or from O to On.
NOTE: If Wi-Fi networking is turned o, you will not be able to access the Shop, share information with friends,
download new books, magazines, or newspapers, or perform any other action that requires a live network connection.
Connecting to a Wi-Fi Network
When Wi-Fi networking is turned on, the Wireless settings page displays a list of the Wi-Fi networks it detects. The
list includes the name of the network and a wireless connection icon (a stack of curved lines). The darker the lines in
the wireless connection icon, the stronger the network signal is for that network.
A lock symbol indicates that a network is secured with a password. To connect to a secured network, you will need
to enter the network’s password. If you do not know the network’s password, ask the network administrator.
To connect to a network, do this:
1. Tap on the network’s name.
If the network is secured, a dialog box appears, asking for a Wireless password. Tap in the password box, then
use the keyboard that appears at the bottom of the screen to enter the network’s password.
2. Tap Connect.
For a list of network security protocols supported by your NOOK, see “Secured Wi-Fi Networks”.
Barnes & Noble NOOK User Guide 77

Configuring Screen Settings
On the Screen settings page, you can:
• Change the amount of time your NOOK should wait when no activity is taking place before turning o the
screen.
• Select the screensaver your NOOK displays when it turns o the screen and goes into sleep mode.
To display the Screen settings page, tap the word Screen on the main Settings screen. Your NOOK displays the screen
shown here:
The main Settings screen.
78 Barnes & Noble NOOK User Guide

Adjusting the Screen Timeout
When your NOOK has been setting for some amount of time and no activity has taken place (e.g., you haven’t
tapped the screen or pressed any buttons), your NOOK turns o its screen to conserve power. When that happens,
you can turn on your NOOK again simply by pressing the NOOK button.
By default, your NOOK waits 5 minutes before turning o the screen.
To adjust the screen timeout for your NOOK, do this:
1. On the Setting screen, tap Screen.
2. On the Screen Settings page, tap the menu choice Screen timeout.
A dialog box appears with four menu choices:
• 2 minutes
• 5 minutes
• 15 minutes
• 1 hour
3. Tap on the menu choice listing the amount of time you want your NOOK to wait.
The dialog box closes. Your change takes eect right away.
Selecting a Screensaver
The Screen Saver is the image your NOOK displays after it has been idle for the amount of time you configured as
the screen timeout (see above).
Your NOOK includes two sets of screensavers:
• authors (portraits of famous authors)
• nature (pictures of nature)
By default, your NOOK displays the authors screensaver when it goes to sleep.
NOTE: You can add your own collection of screensavers. Each image in the collection should be a .GIF, .JPG,
or .PNG file. Connect your NOOK to your personal computer, and using your computer’s file navigation controls, (such as Finder on a Mac) open the screensavers folder on your NOOK. Create folder
for your images and give it a one-word title, such as kids. Then drag the .GIF, .JPG, or .PNG files from
your personal computer into the folder you created. To make your screensaver active, select it using the
steps below.
To change the screensaver on your NOOK, do this:
1. On the Settings screen, tap Screen.
2. On the Screen Settings page, tap the Screensaver button.
A dialog box opens, listing the screensavers available.
3. Tap the name of the screensaver or set of screensavers you want to use.
The dialog box closes, and your selection takes eect right away, though you won’t see the screensaver until the
next time your NOOK goes to sleep.
Barnes & Noble NOOK User Guide 79

Configuring Time Settings
On the Time settings page, you can control whether your NOOK uses a 12-hour clock or a 24-hour clock. You can
also select a Time Zone for your NOOK.
The Time Settings screen.
To return to the main Settings page, tap the back arrow under the title Settings.
Switching to a 24-hour Format
To switch to a 24-hour format in which hours after 12 noon are added to the number 12, so that 1:15 p.m. becomes
13:15, tap the Use 24-hour format field so that the box is checked. Leave the box unchecked to use a default, 12-hour
format is which hours run 1 to 12 and are identified as either a.m. or p.m.
80 Barnes & Noble NOOK User Guide

Selecting a Time Zone
To select a time zone for your NOOK, do this:
1. Tap the Select Time Zone field on the Time Settings screen.
Your NOOK display a screen for selecting time zones.
NOTE: By default, the list of time zones includes only time zones in the United States. To see a list of all time
zones around the world, tap the checkbox labeled Show all world time zones.
A list of Time Zones.
2. When you see the time zone you want to select, tap it.
Barnes & Noble NOOK User Guide 81

Configuring Navigation Buttons in the Reader
When reading a book or periodical, you can use the buttons built into the frame of your NOOK to page forward or
backward.
By default, the top buttons turn the page forward, and the bottom buttons turn the page backward. If you would like
to switch the functions of these buttons, use the Reader Settings screen.
To switch the function of the page-forward and back-backward buttons, do this:
1. On the Settings screen, tap Read.
Your NOOK displays the Reader Settings screen.
2. Tap the picture that shows the button functions you would like to use.
Your changes take eect right away.
The Reader Settings screen showing the default settings for the page-forward and page-backward buttons.
82 Barnes & Noble NOOK User Guide

Configuring the Shop
Requiring Your Account Password for Purchases
By default, your NOOK asks you to confirm all purchases by tapping a Confirm button.
If you like, you can require that your Barnes & Noble account password be entered before your NOOK authorizes a
purchase. If other people might have access to your NOOK, you might want to require a password for purchases to
ensure that you know about and approve all purchases being made.
To configure your NOOK to require a password for purchases, do this:
1. On the Settings screen, tap Shop.
2. Tap the line reading Require Password for Purchases. (NOTE: If the checkbox on the line appears bold, rather
than grayed out, this configuration option has already been turned on, and you do not need to tap on it.)
A dialog box appears, prompting you to enter your password.
3. Tap on the password field in the dialog box to call up your NOOK’s online keyboard. Type your password,
and tap OK.
Removing the Password Requirement for Purchases
If you’ve configured your NOOK to require a password for purchases and you want to be able to purchase an item in the Shop without entering your password, do this:
1. On the Settings screen, tap Shop.
2. Tap the line reading Require Password for Purchases.
A dialog box appears, prompting you to enter your password.
3. Tap on the password field in the dialog box to call up your NOOK’s online keyboard. Type your password,
and tap OK.
Managing the Credit Card for Your BN.com Account
To purchase books or periodicals, you must have a credit card associated with our BN.com account. You can assign a
credit card to your BN.com account through the Manage Credit Card feature on the Shop settings screen.
To manage your credit card, do this:
1. On the Settings screen, tap Shop.
2. On the Shop settings screen, tap Manage Credit Card.
If you have not set up a credit card for your account, yet, you will see a button reading New Card. If you have
already assigned a credit card to your account, you will see a button reading Change Card.
3. Tap the Change Card or New Card button.
Your NOOK displays a credit card form.
4. Enter the information for the card you want to use for purchasing books and periodicals on your NOOK and on
BN.com.
Once you have entered all the information, including your credit card’s billing address, the screen displays a
Submit button.
5. Tap Submit.
Barnes & Noble NOOK User Guide 83

Clearing Your Wishlist
If you have added any items to the Wishlist on your NOOK and now want to clear your Wishlist, tap the Clear
Wishlist menu button.
If you have not added any items to your Wishlist, this menu choice appears grayed out.
Clearing the List of Recently Viewed Items
Your NOOK keeps track of the items you have viewed recently in the Shop. To clear this list, tap the Clear Recently
Viewed List menu choice.
If you have not viewed any items in the Shop, yet, this menu choice appears grayed out.
84 Barnes & Noble NOOK User Guide

Configuring Social Features
You can use the Social settings screen to manage:
• your links to your Facebook, Twitter, and Google accounts
• your email contacts
• your NOOK friends™
• the visibility of your lendable books to your NOOK friends
A NOOK friend™ is a friend who has a Barnes & Noble account and an email address in your contacts list, and who
has accepted your invitation to connect as a NOOK friend. Friendship is reciprocal. When someone becomes your
NOOK friend, you also become his or her NOOK friend. NOOK friends can lend each other books, and they can
request books from each other for loan.
Once you have linked to Facebook and Twitter and set up email contacts, you can share favorite quotes, book recommendations, and reading status updates with your friends.
NOTE: Your NOOK must be connected to a Wi-Fi network in order to link to Facebook, Twitter, or Google.
To display the Social settings page, tap the Social menu choice on the main Settings page. The Social settings page
looks like this.
The Social Settings screen
Barnes & Noble NOOK User Guide 85

Linking Your NOOK to Your Facebook Account
You can import your friends on Facebook as contacts for lending books, sharing quotations, and other social activities.
You can post a LendMe oer, a quotation, and a recommendation on the wall of a friend. You can also post a quote,
a recommendation, and reading status on your own wall.
NOTE: If you don’t have a Facebook account and would like to set one up, launch a Web browser on your
personal computer, and navigate to www.facebook.com.
To link your NOOK to your Facebook account, do this:
1. On the Social screen in Settings, tap the button labeled Link your Facebook, Twitter, and Google Accounts.
2. Tap the Link Your Account button under the Facebook logo.
Your NOOK displays a Facebook login screen.
3. Tap in the Email or Phone field.
4. Enter the email address or phone number associated with your Facebook account.
5. Tap in the Password field and enter the password to your Facebook account.
6. Tap the Login button.
Linking Your NOOK to Your Twitter Account
You can share quotes, recommendations, and reading status by posting a message to your Twitter account. If you
post while reading a book, your NOOK will automatically embed a shortened link to the book you’re writing about.
NOTE: If you don’t have a Twitter account and would like to set one up, launch a Web browser on your per-
sonal computer, and navigate to www.twitter.com.
To link your NOOK to your Twitter account, do this:
1. On the Social screen in Settings, tap the button labeled Link your Facebook, Twitter, and Google Accounts.
2. Tap the Link Your Account button under the Twitter logo.
Your NOOK displays a Twitter login screen. The screen says that your NOOK would like to access and update
your data on Twitter.
3. Tap in the Username or email field.
4. Enter your Twitter account’s username, or enter the email address associated with your Twitter account.
5. In the Password field, enter the password for your Twitter account.
6. Tap the Sign In button.
Your Twitter account displays a notice that an application, NOOK by Barnes & Noble, would like to connect to
your account.
7. Tap the Allow button.
Linking Your NOOK to Your Google Account
You can import contacts from your Google account.
You can share quotes, recommendations, and reading status with your contacts. You and your contacts can also lend
and borrow books using Barnes & Noble’s exclusive LendMe technology.
86 Barnes & Noble NOOK User Guide

To link your NOOK to your Google account, do this:
1. On the Social screen in Settings, tap the button labeled Link your Facebook, Twitter, and Google Accounts.
2. Tap the Link Your Account button under the Google logo.
Your NOOK displays a Google login screen.
3. Tap in the Email address field.
4. Enter your Google account’s email address in the Email field.
5. Enter your Google account’s password in the Password field.
6. Check or uncheck the Remember me checkbox, depending on whether you want your NOOK to automatically
fill in the Email and Password fields the next time you return to this screen.
7. Tap the Sign in button.
Google logs you in to an account management page.
8. Tap the Grant Access button.
Managing Your Contacts
Contacts are friends whose names and email addresses you have entered in your NOOK. Contacts include your
NOOK friends, but they may include other users, as well. Contacts can include:
• Users whose names and addresses you imported from your Google account
• Users whose names and email addresses you have entered manually
• NOOK friends
NOOK friends can see each other’s lists of lendable books and to borrow books. Contacts who are not NOOK
friends don’t have these privileges, but you can use your contacts list for sharing book recommendations and quotes,
and you can also oer to lend books to users who are not NOOK friends.
To manage your contacts, do this:
1. On the Settings screen, tap Social.
2. On the Social settings screen, tap Manage my Contacts.
Your NOOK displays a list of all your Contacts. You can limit the list to only your Google contacts or your
NOOK friends by tapping the pull-down menu in the upper left and selecting the category of contacts you want
to see.
Use the instructions below to manage your contacts.
Adding a Contact
To add a contact, do this:
1. On the Manage my Contacts screen, tap the Add Contact button.
A Contact Information page appears.
2. Tap in the First Name, Last Name, and Email fields and use the keyboard on the screen to edit the contact’s
information.
3. To send an email message to the contact, inviting him or her to become your NOOK friend, tap the Invite as
NOOK friend checkbox.
4. Tap Save.
Barnes & Noble NOOK User Guide 87

Inviting Individual Friends to Become NOOK Friends
To send an NOOK Friends™ invitation to a user in your Contacts list, do this:
1. On the Manage my Contacts page, tap on the user’s name.
Your NOOK displays the Contact Information page for that user.
2. Tap in the checkbox labeled Invite as NOOK friend™.
3. Tap Save.
Your NOOK sends the contact an invitation to become your NOOK friend. The invitation includes a link for setting up a Barnes & Noble account, in case your friend does not already have an account.
Once you have invited a user, his or her name shows up in the list of Sent invitations (see below).
To send an invitation to a friend who is not in your Contacts list, do this:
1. Follow the instructions in “Adding a Contact” to add your friend’s contact information.
2. On the Contact Information button, be sure to check the box labeled Invite as a NOOK friend™.
3. Tap the Save button.
Viewing the Contact Information of a Contact
To view the details of a particular contact, tap on his or her name on the Manage my Contacts screen.
Adding or Editing Email Addresses
If you have entered contact information for a friend manually, you can edit that contact’s name or email address, and
you add email addresses for that friend.
NOTE: You cannot make these changes to contacts you have imported from your Google account.
To add another email address for a contact or to edit an existing email address, do this:
1. On the Manage my Contacts screen, tap on the contact’s name.
Your NOOK displays the Contact Information page for the contact you selected.
2. Tap the Add/Edit more emails button. On the Add or Edit email page, do one of the following:
• To edit an existing email address, tap in the email address field. A keyboard appears at bottom of the
screen. Type the changes you want to make, and tap Done.
• To add an email address, tap the Add New button. A keyboard appears at the bottom of the screen.
Type the address you want to add, and tap Done.
• To remove an email address, tap the minus sign (-) next to the address. You must leave at least one
email address for each contact.
Deleting a Contact
To delete a contact, do this:
1. On the Manage my Contacts page, tap the contact’s name.
2. On the Contact Information page, tap the Delete this contact button.
Your NOOK deletes the contact.
88 Barnes & Noble NOOK User Guide

Managing Your NOOK Friends™
Tap the Manage my NOOK Friends™ menu choice on the Social settings screen to sent and accept NOOK Friends
invitations and to see a list of all your current NOOK Friends™.
The Manage my NOOK Friends™ feature includes three tabs under the Manage my NOOK Friends title. The three tabs
are:
• Friends - a list of your NOOK Friends
• Requests - a list of requests from friends who have sent you invitations to become NOOK Friends™
• Sent - a list of friends to whom you have sent invitations, asking them to become your NOOK Friends™
The page also includes a plus sign button (+) you can use for issuing invitations and adding NOOK Friends™.
Friends
The Friends tab shows an alphabetical list of all your NOOK Friends™.
Use the page-forward and page-back buttons or swipe your finger to scroll through the list of friends.
Tap on a friend’s name to see information about that friend’s books.
To remove a NOOK friend from this list, press and hold on the friend’s name and tap Remove Friend in the pop-up
menu.
Requests
The Requests tab shows a list of the invitations you have received to become a NOOK friend of someone else.
When you receive a NOOK Friends™ invitation, you have two choices:
• Accept - tap the Accept button to add this person as a NOOK friend™
• Reject - tap the Reject button to turn down the invitation for friendship
Sent
The Sent tab lists the names of people to whom you have sent NOOK Friends™ invitations. When friends accept
your invitations, their names appear on the Friends tab, rather than the Sent tab.
To cancel an invitation, press and hold on the name of the friend to whom you sent the invitation and select Cancel
Invite in the pop-up menu.
Inviting Friends to Become NOOK Friends™
To invite a contact to become a NOOK friend™, do this:
1. Tap the plus sign (+) button on the Manage my NOOK Friends™ screen.
Your NOOK displays a list of your contacts.
2. Do one of the following:
• Tap on the Invite button next to the name of any contact you would like to invite to become your
NOOK friend™. Your NOOK sends an invitation automatically to that contact.
• Tap Add New to enter information for a new contact. The Contact Information form includes a check-
box for inviting that friend to become your NOOK Friend.
Barnes & Noble NOOK User Guide 89

If the Suggested button is not grayed out, you can tap it to see a list of your contacts who already have Barnes &
Noble accounts and who can easily become your NOOK Friends™. Tap the Invite button next to a contact’s name to
send that contact a NOOK Friends™ invitation.
If you have not imported contacts from a Google account, a Setup Account button appears in the dialog box that
opens after you have tapped the + button. Tap the Setup Account button to open the Social settings screen for linking
your NOOK to your Google account.
Managing the Visibility of Your LendMe Books
By default, your NOOK Friends™ can see all your lendable books.
To control which of your lendable books are visible to your NOOK Friends, do this:
1. On the Settings screen, tap Social.
2. On the Social settings screen, tap the menu choice Manage visibility of my LendMe books.
Your NOOK displays a screen with controls for selecting which books are visible to friends. The screen looks like
this:
You manage the visibility of LendMe items using the checkbox and toggle switches on this screen.
3. Use the checkbox to control whether or not any of your lendable books are visible to your NOOK Friends. If
you uncheck the checkbox, none of your books will be visible. To make one or more books visible, leave the
checkbox checked.
90 Barnes & Noble NOOK User Guide

4. To control the visibility of individual books, use the Show/Hide toggle switches next to book titles.
• Set the toggle to Show to show the book to your NOOK Friends.
• Set the toggle to Hide to hide the book from your NOOK Friends.
NOTE: Only NOOK Friends can see the books you make visible, and they can see the books only through
NOOK Friends™ software on a NOOK or NOOK Color eReader. No other users can see your lendable books.
Viewing the Activities of Your NOOK Friends™
To see the recent activities of your NOOK friends, open the book details for any book in your Library or in the Shop,
tap the Share button, and in the Share dialog box, tap View Friends’ Activities.
To see the book details page of a book in the Library or the Shop, double-tap on the book’s cover.
To see the book details page of a book you are reading, tap in the center of any page of the book to call up the Reading Tools, then tap the more button.
Barnes & Noble NOOK User Guide 91

Configuring Search
You can clear your NOOK’s history of items that you have searched for and selected.
To clear the list of search-result shortcuts, do this:
1. On the Settings screen, tap Search.
2. Tap the menu choice Clear recent NOOK searches.
A dialog box appears, explaining that this will clear shortcuts to recently searched items.
3. Tap OK.
NOTE: If you have selected any items from search results yet, the Clear recent NOOK searches menu choice will
be grayed out.
92 Barnes & Noble NOOK User Guide

Using Your NOOK at Wi-Fi Hotspots
In addition to connecting to your Wi-Fi network in your home or oce, you can use your NOOK to connect to WiFi hot spots in stores, restaurants, hotels, and restaurants.
This section summarizes how your NOOK works with various types of Wi-Fi hotspots.
Wi-Fi Networks in Barnes & Noble Stores
Your NOOK will automatically detect a Wi-Fi network in a Barnes & Noble store and ask if you want to connect to
it.
Unsecured Wi-Fi Networks
Your NOOK will detect unsecured Wi-Fi networks close by. An unsecured Wi-Fi network does not require users to
enter a password in order to establish a connection. You can simply select the network and connect to it.
Secured Wi-Fi Networks
Your NOOK will also detect secured Wi-Fi networks. A secured Wi-Fi network requires users to enter a password
before they can connect to the network.
There are several dierent security protocols available for securing networks. Your NOOK recognizes and supports
the most popular Wi-Fi security protocols, including:
• WEP
• WPA/WPA2 PSK
• 802.1x EAP
To connect to a secured Wi-Fi network, select it from a list of networks and enter its password when prompted.
NOTE: If you do not know the password for the network, ask the network administrator for help.
NOTE: If your NOOK will display dialog boxes that let you select a network and enter a password.
Proxied Wi-Fi Networks
Proxied Wi-Fi networks typically present a Web page with terms and conditions, a login screen, and possibly a payment screen, before allowing you to connect to the network. You’ll encounter this type of network in many hotels,
restaurants, and airports. Your NOOK detects these networks. When you select a proxied network as a connection,
your NOOK automatically opens a dialog box in which you can read through any terms and conditions, accept terms,
perhaps enter credit card information and login credentials, and connect.
Barnes & Noble NOOK User Guide 93

Updating the Software on Your NOOK
From time to time Barnes & Noble will release software updates for your NOOK. Your NOOK will automatically
install these updates.
NOTE: Updating software does not delete any of your books, magazines, or newspapers, nor does it delete any
of the files you have transferred onto your NOOK from your personal computer. The software update
simply installs new NOOK software to give you the latest features available from Barnes & Noble. Your
NOOK remains registered to your Barnes & Noble account, and all your reading material remains accessible.
Installing a Software Update over a Wireless Network
When a new software release is available, your NOOK will download it and install it when you next connect to a
wireless network. A small NOOK symbol will appear in the far left corner of the Status Bar when a new software
release is available. Tap on the NOOK symbol to learn details about the release.
Software installations take only a few minutes. Updating your software doesn’t aect the contents of your Library
or the titles listed in your Keep Reading list. Once the software installation is complete, you can continue reading or
shopping or doing whatever else you were doing before the new software was installed.
Discovering the Version Number of Your NOOK Software
To discover which software release your NOOK is running, do this:
1. Tap the NOOK button to open the Quick Nav Bar.
2. Tap on the Settings icon.
3. Tap on Device Info.
4. Tap on About Your NOOK.
You’ll see a screen listing the version number of the NOOK software installed on your NOOK.
94 Barnes & Noble NOOK User Guide

Using an SD Memory Card
You can install an SD Memory Card in your NOOK to add up to 32 GB of memory to your NOOK—enough for
many thousand more books, along with periodicals, music, and personal files.
NOTE: This extra storage space appears in the My Files section of your Library, not in the Books or Newsstand
sections.
SD Memory Cards will hold about 1,000 books per gigabyte. The number of periodicals you can store on card depends on the size of the periodicals and the amount of storage on the card. Digital magazines and newspapers vary
dramatically in size. Some highly interactive, photo-rich magazines can reach 1 GB each.
Types of Memory Cards Supported
Your NOOK works with two types of SD Memory Cards: a microSD™ or microSDHC™ card. microSD and microSDHC cards have the following logos:
Supplemental microSDHC cards will hold about 1000 NOOKbooks per gigabyte. The amount of space for NOOK
Books is aected by how much space you devote to other files, such as PDFs.
Following are the specifications of supported cards:
• A microSDHC card with a storage capacity of up to 32 GB.
• Class 6 microSDHC cards are supported. Class 6 is faster than class 4, which is faster than class 2. The class
should be mentioned on the packaging for the microSDHC card and printed on the card itself. If no speed is
indicated, the card is a class 2 card. The speed of the card does not aect page display speeds. It can aect read
and write speeds when transferring books, periodicals, and personal files to and from the SD card.
• The microSDHC card must be formatted with a FAT32 file system.
If you have installed a memory card in your device, the Library will display links below the Media Bar oering two
choices for viewing content:
• My NOOK
• Memory Card
If you do not see this banner, a memory card is not installed in your NOOK.
Installing a Memory Card
To install a memory card in your NOOK, do this:
1. Turn o your NOOK.
2. Set your NOOK down on a clean, level surface.
3. Find the small lid on the upper left side of your NOOK. Gently pull this lid open to expose the slot for the SD
Memory card.
4. Hold the memory card gently between your thumb and forefinger, logo-side down. Gently guide the card into
the SD Memory Card slot.
Barnes & Noble NOOK User Guide 95

5. Push gently against the card, guiding it into the slot until it clicks into place.
6. Close the small gray lid and snap it into place.
7. Turn on your NOOK.
Opening the microSD slot on the upper right side of your NOOK.
96 Barnes & Noble NOOK User Guide

Positioning the microSD card in the slot.
Formatting a New Card
If you have installed a new, never-before-used microSD Memory Card into your NOOK, a dialog box appears, reporting that the SD Memory Card is unformatted and that it needs to be formatted.
To format the memory card, do this:
1. Tap the Format Now button to format the memory card.
Your NOOK displays a warning that formatting the memory card will erase its contents.
2. Tap the Format Now button again to confirm that you want to format the memory card.
Removing a Memory Card
To remove a memory card from your NOOK, do this:
1. Turn o your NOOK.
2. Lay your NOOK face down on a clean, level surface.
3. Find the small gray lid on the corner of your NOOK closest to the open corner with the curved bar. Using your
finger tip, gently pull the lip open, folding it flat against the back of the device.
4. With the tip of your finger, push in the memory card, then release it.
The memory card will pop partly out.
5. Slide the memory card the rest of the way out of the slot, and remove the cover.
6. Turn on your NOOK.
Barnes & Noble NOOK User Guide 97

Tips and Troubleshooting
Solving Problems
I want to change my BN.com account password. What should I do?
Before you change your password on BN.com, first deregister your NOOK, so your NOOK isn’t configured to use a
password that you have made obsolete.
NOTE: You must be connected to a Wi-Fi network to de-register your NOOK.
NOTE: De-registering your device will delete any content you have side-loaded on your NOOK. You might
want to make sure you have copies of this content on your personal computer. You do not need to
back up the books, magazines, and newspapers you have purchased through the NOOK Store. These
items will be restored to your NOOK automatically when you re-register it, using your new password.
Deregistering Your NOOK
To deregister your NOOK, do this:
1. Tap the NOOK button to bring up the Quick Nav Bar and tap the settings button.
2. On the Settings screen, tap Device Info.
3. Tap the Erase & Deregister menu choice.
4. On the Erase & Deregister screen, tap the Erase & Deregister button.
A dialog box appears, asking you to confirm that you want to reset your NOOK.
5. Tap the Reset NOOK button.
Your NOOK deregisters itself, restoring factory default settings.
Changing Your Password
Once you have deregistered your NOOK, log in to BN.com and change your password.
Reregistering Your NOOK
Once you have changed your password on BN.com, register your NOOK, following the registration instructions you
followed when you first set up your NOOK. See “Registering Your NOOK” at the beginning of this guide.
When you need to enter your BN.com account login information, be sure to enter your new password.
The screen is acting as though I’m tapping on it, even though I am not.
If your screen is dirty, it might detect touches when none are occurring. This problem can occur on any touchscreen
device. Turn o your NOOK, and wipe the screen clean with a soft, dry cloth. Then turn your NOOK back on.
I’m trying to lend a book through Facebook, but the Post button doesn’t seem to be working.
Make sure you include a comment with your posting about lending the book. Posting a LendMe oer through
Facebook requires at least a brief comment.
98 Barnes & Noble NOOK User Guide

I transferred a ZIP archive from my personal computer. Why can’t I access the files?
Unzip files on your personal computer before transferring them to your NOOK. Your NOOK can read EPUB files
and PDFs, but not .zip files.
Barnes & Noble NOOK User Guide 99

Appendix A: Page Numbering and File Formats
When you read a book or periodical on your NOOK, you’re reading the same words that appear in the paper edition of the book or periodical. In most books, the page number that appears at the bottom of the screen is the page
number you would see if you were reading the printed version of the same book.
Because printed pages can be larger than the screen of your NOOK, and because many printed books use type that
is smaller than would be pleasant to read on an eReader, your NOOK may enlarge the type on a page and spread a
physical page of text across two or more digital pages.
Because digital pages might be smaller than the physical pages of a book, you might turn the page a few times on your
NOOK and still see the same physical page number in the upper right hand corner. For example, you might find three
screenfuls of text in your book all labeled page 47.
The relation between digital pages and physical pages can vary, because your NOOK gives you a great deal of freedom in choosing the size of fonts, the amount of spacing between lines, and other factors that aect how text flows
onto a page.
In most books, you’ll always know which physical page you’re on from the number in the upper right. So if you’re
discussing a book in a book club, everyone can refer to page 295 and be talking about the same page, even if you’ve
configured your NOOK to use small type and single-spacing and everyone else in the group is using large type and
double-spacing.
Page Numbering and File Formats
There are several dierent formats for eBooks, and these dierent formats treat page numbers dierently. Barnes
& Noble eBooks are published in the EPUB format, but you can load other types of documents, such as PDFs, onto
your NOOK.
Here’s a quick summary of what you need to know about file formats and page numbering:
• eBooks and Periodicals in EPUB format
EPUB is the standard format for books in the Barnes & Noble online store. The EPUB format numbers all pages
in a book sequentially, based on some prior account of page numbering, such as the page numbering used in the
print edition. If the print edition of the book had 525 pages, so will the eBook. But the pages are re-flowed in the
eBook edition to make them easier to view on a screen. As a result, a page from the print edition might be larger
or smaller than a page in the eBook.
In many cases, a page from the print edition will span two or more pages on an eReader, as described above.
• Reflowable eBooks in PDF Format
In reflowable eBooks formatted in PDF, page numbering is for the entire book and reflects some prior account
of page numbering, before formatting for the eBook text size. The behavior is the same as for eBooks in EPUB
format, which is described above.
• Non-reflowable eBooks in PDF format
Page numbering is for the entire book, and reflects the number of scanned pages. Page numbers also might be
on the scanned pages, but there is no necessary relationship. Page 6 in the eBook might have the scanned page
number iv, and page 30 in the eBook might have the scanned page number 5.
100 Barnes & Noble NOOK User Guide
 Loading...