

Bang & Olufsen ML Gateway Installation Manual
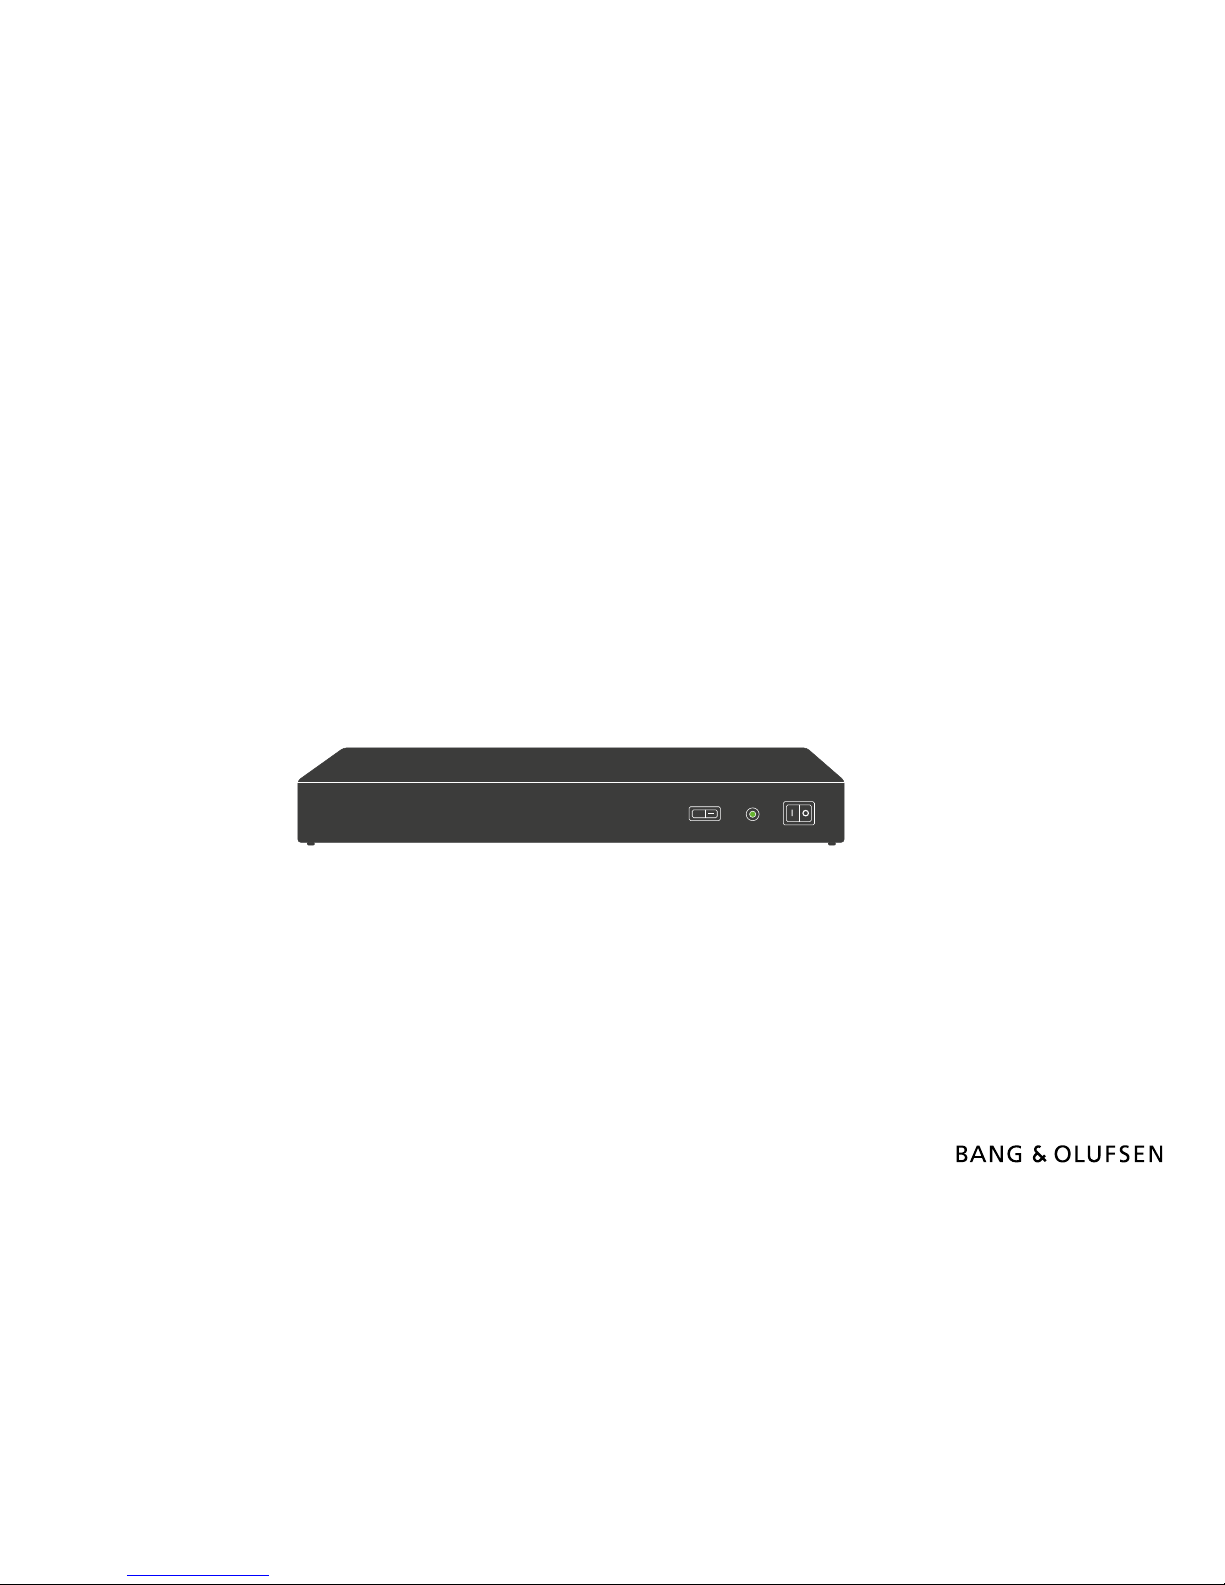
ML Gateway
Installation Guide for installation and setup of ML Gateway
English – From software version 1.90e
SETUP
BANG & OLUFSEN
ON
OFF
Introduction 2
Introduction
ML Gateway is developed with the purpose to integrate Bang & Olufsen Master Link products with home automation systems (supported devices).
This provides a new world of opportunities for the customer to control comfortable home functions with, for example, a Beo5 in his/her hand.
But other scenarioes are also possible, such as giving the customer the opportunity to switch on several Bang & Olufsen products on a dened
radio or tv channel by only pressing one switch of the home automation system.
This product is the gateway between Bang & Olufsen products and the home automation systems.
Installation and conguration of ML Gateway Encore must be performed by a trained installation/service partner, for whom this installation guide is
intended. For detailed information about using the product and BeoPlayer, please refer to the on-line user guides in the software.
How to navigate this guide
When the guide is opened, it automatically opens in Full Screen Mode (can be left as desired - see below). This is primarily done to optimize the
usability of screen reading. There are several ways to navigate when using the guide, see the survey of keys, shortcuts and hotkeys below:
/ (arrow keys on the keyboard) navigates to the next page
/ (arrow keys on the keyboard) navigates to the previous page
Esc
(Esc button ) exit Full Screen Mode (press CTRL + L to return to Full Screen Mode).
Another feature to optimize the navigation is the navigation icons in the bottom of the screen (see below for explanation).
Navigates you to the previous view
Navigates you directly to the start page
Navigates directly to the table of contents (theese are active links - click the link to be directed directly to the associated section)
Prints the document - the print dialog box opens (Ctrl + P also brings up this feature)
Furthermore to ease the navigation, this guide contains links. The links are mouseover active and marked with blue text. Just click on a page
reference to be transferred to that page.

Information 3
Information
There is no need for a special ServiceTool as known from other Bang & Olufsen products, when maintaining or servicing the ML Gateway. All types
of service or adjustments take place from a web-based user interface.
Access
To access the web-based user interface, enter the IP address for ML Gateway. When ML Gateway is delivered, the IP address is set to a static value.
The default IP address for ML Gateway is 192.168.1.10 (factory default).
Depending on the customer’s network settings, it may be necessary to change the IP address in order to t the network range.
Please note
This installation guide is designed to give the installer the opportunity to understand and follow an installation process in the relevant situation. It will
ensure a correct setup of ML Gateway and thereby a smooth operation.
This installation guide describes the setup procedure for the different supported devices, and the currently dened list contains:
- Clipsal
- Conson XP
- Custom strings (up to 4 drivers)
- Dynalite
- IP Camera
- KNX / EIB
- Lauritz Knudsen, IHC, Schneider, LexControl
- Legrand / BTicino
- Lutron Grak Eye
- Lutron Grak QS
-- Lutron HomeWorks
- Lutron HomeWorks QS / Radio Ra2
- Lutron Radio RA
- Scheduler
- SmartHouse
- Vantage
- 3rd part drivers to AMX / Creston (more in the future)
! When installing ML Gateway on the Chinese market, please read the information regarding RoHS directive (appendix -> technical specications).
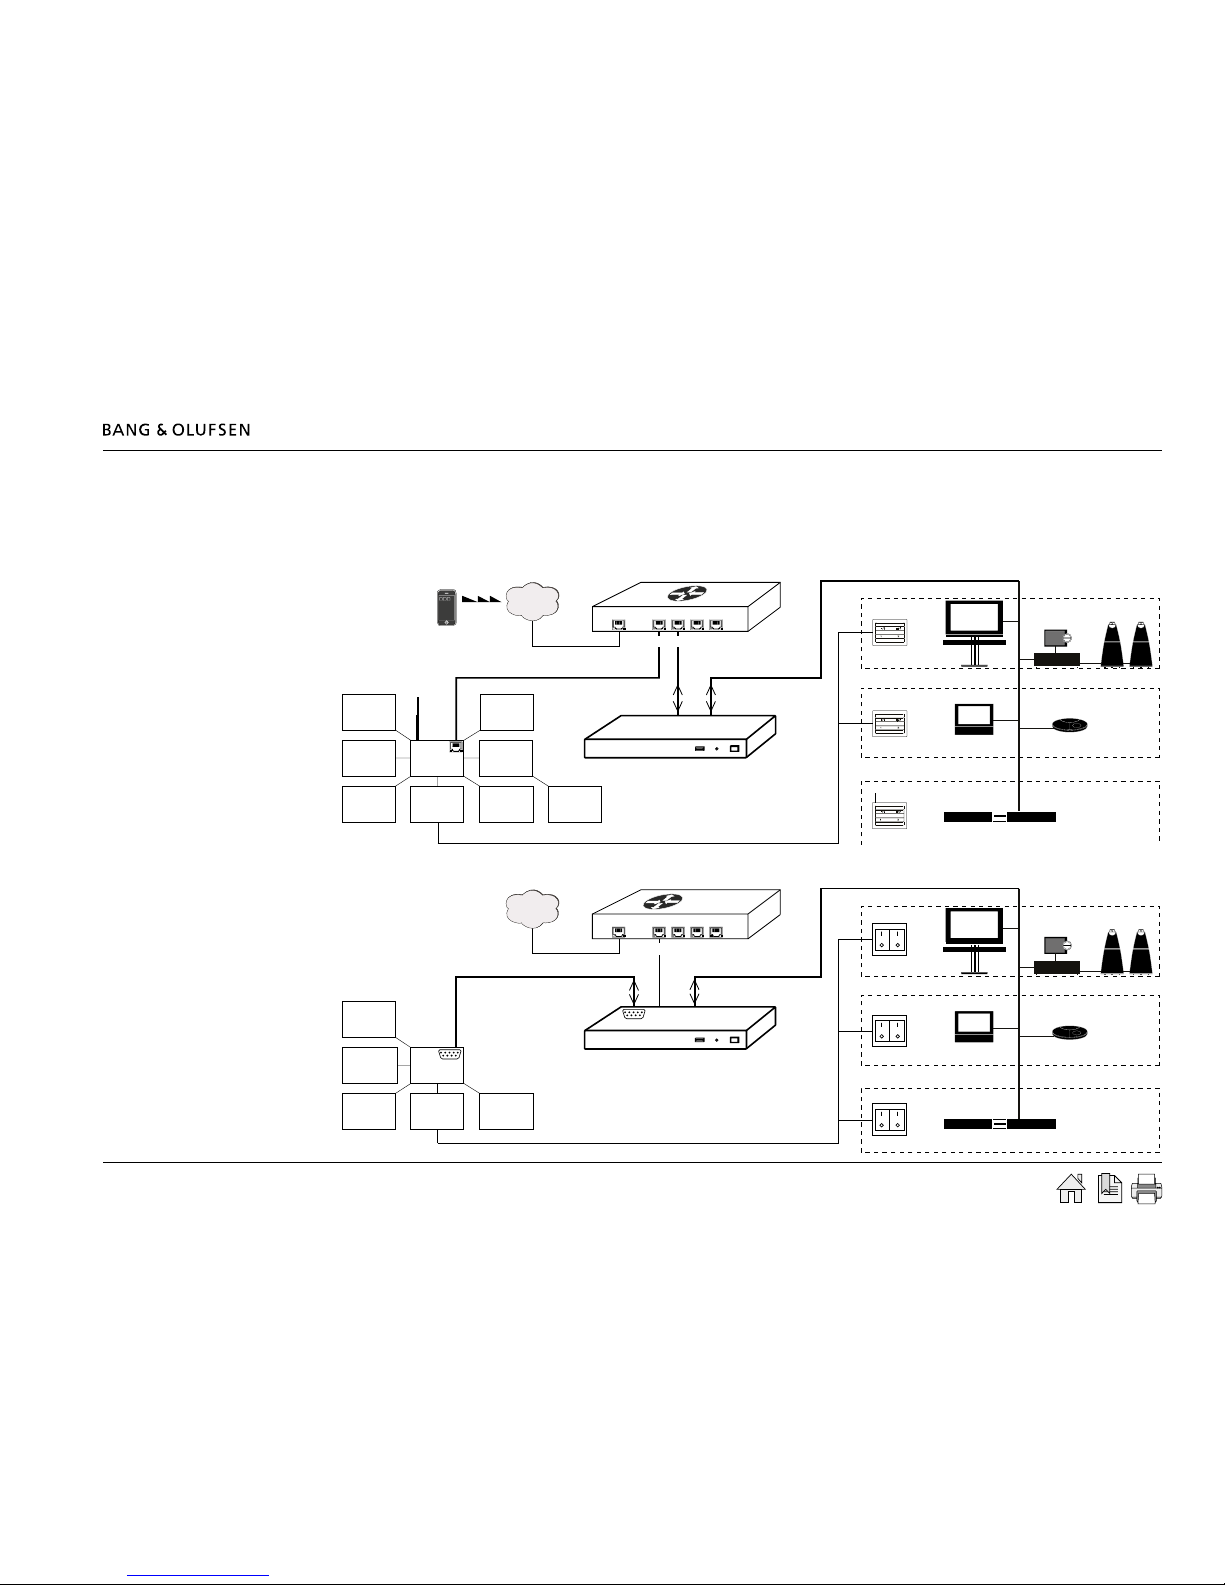
Installation overview 4
Installation overview
Basically there are two different types of connections between ML Gateway and the supported device (home automation systems).
Ethernet or RS232 connection. The connection types are illustrated in two examples below:
Ethernet connection - Example with ethernet connection (LK IHC)
RS232 connection - example with RS232 connection (KNX)
IHC
Controller
Alarm
Heat
control
Lighting
Operation
switches
Sensors
Energy
control
Modem
Phone
Router / switch
Bang & Olufsen
Room 1
Room 2
Room 3
(( ))
(( ))
ML Gateway
Internet
Home automation system
Ethernet
Master Link system
Router / switch
Bang & Olufsen
Room 1
Room 2
Room 3
ML Gateway
Internet
Home automation system
RS 232
Master Link system
Data
Interface
Lighting
Operation
switch
Sensors
Energy
control
Environment
control
1
5
6
9
1
5
6
9
Ethernet
Installation overview 5
Survey of connection types
Direct Ethernet connection:
Use this option for systems with a network interface, and provide the IP address of the system.
The IP address has to be in the form xxx.xxx.xxx.xxx (for example: 192.168.1.200).
Some systems requires a TCP port number on which it expects incoming connections. Port 23 (Telnet port) is the most common default value.
Depending on the system, login and password information may be required. Default values will be suggested when available.
Direct RS232 connection:
- ML Gateway has one RS232 interface for connecting to external systems.
Only one system can be connected to the interface at a time, so when conguring ML Gateway, only one system is allowed to be set up on RS232.
A notice will appear if the interface has already been reserved for another system.
(The message RS232 port in use by MLGW Protocol appears on the screen).
- Some devices may require hardware ow control. In this case, verify that you are using a fully wired cable. Examples are Lutron HomeWorks
processors and Lutron Radio RA interface.
- Make sure to use high quality cables with proper shielding to avoid interference.
If the distance to cover is excessive, use a lower bit rate, or use an RS232 to Ethernet interface next to the external system. This last recommendation
also applies in case of interference or ground-loop problems.
- For information regarding the RS232 connector pin assignment, please refer to the appendix -> technical specication.
Using RS232 to Ethernet interfaces:
- For systems with an RS232 interface, it is also possible to use an RS232 to Ethernet interface. This way, the network installation can be used
instead of having to run a long RS232 cable between the system and ML Gateway.
- You should congure the interface for the correct RS232 parameters (bit rate, ow control, etc.).
- Parameters to congure on ML Gateway are the IP address and TCP port number of the interface.
Installation overview 6
Ethernet connection (RJ45)
- LK IHC (Intelligent House Control, Viewer models only)
- Lutron: Grak Eye (GRX), Grax QS (QSE), Home Works, Home Works QS, Home Works Radio Ra2, Radio RA,
- KNXnet (IP tunneling)
- Crestron
- Clipsal
RS232 connection (D9SUB)
- Clipsal
- Dynalite
- Lutron Grak Eye (GRX), Lutron Grax QS (QSE), Lutron Radio RA
- Lutron Home Works Interactive
- KNX (FT 1.2)
- Conson Concept XP (converter from RS 485 to RS 232 is needed)
- Crestron
! For RS232 connectivity, check that the RS232 protocol is not already reserved by MLGW Protocol (see link) when setting up the product.
! Do not use RS232 cables that exceed a length of 10 meters. It is recommended to use a cable between 2-5 meters.

Preparing setup 7
Preparing setup
Conguration of IP address
When ML Gateway is delivered, the IP address is set to a static value. The IP address for ML Gateway is 192.168.1.10 (factory default).
Depending on the customer’s network settings, it may be necessary to change the IP address in order to t the network range. Follow the
procedure below:
- The rst step is to determine the network setup in the installation (IP address range, DHCP/non-DHCP). To do this it is necessary to access the
customer’s router.
- Connect the ML Gateway with an ethernet patch cable to a computer with ethernet connection and web browser. On older computer models, it
might be necessary to use a cross-wired ethernet patch cable.
- Set the IP address on the computer to a static value in the same IP address range as the default value, eg. 192.168.1.11, and the subnet mask to
255.255.255.0 (for information about how to access settings, refer to the desired OS below):
Windows XP:
- Start -> Settings -> Network Connections -> right-click on Local Area Connections and choose Properties -> choose Internet Protocol (TCP/
IP) and click Properties.
Windows Vista:
- Start -> right click on Network and choose Properties -> click Manage Network connections -> right click on Local Area Connection and
choose Properties (if a security message appears, choose continue) -> choose Internet Protocol Version 4 (TCP/IPv4) and click Properties.
Windows 7:
- Start -> Control Panel -> Network and Sharing Center -> Change adapter settings -> right click on Local Area Connection and choose
Properties (if a security message appears, choose continue) -> choose Internet Protocol Version 4 (TCP/IPv4) and click Properties.
MAC:
- Click on System Preferences -> click Network -> click Advanced -> click TCP/IP.
Preparing setup 8
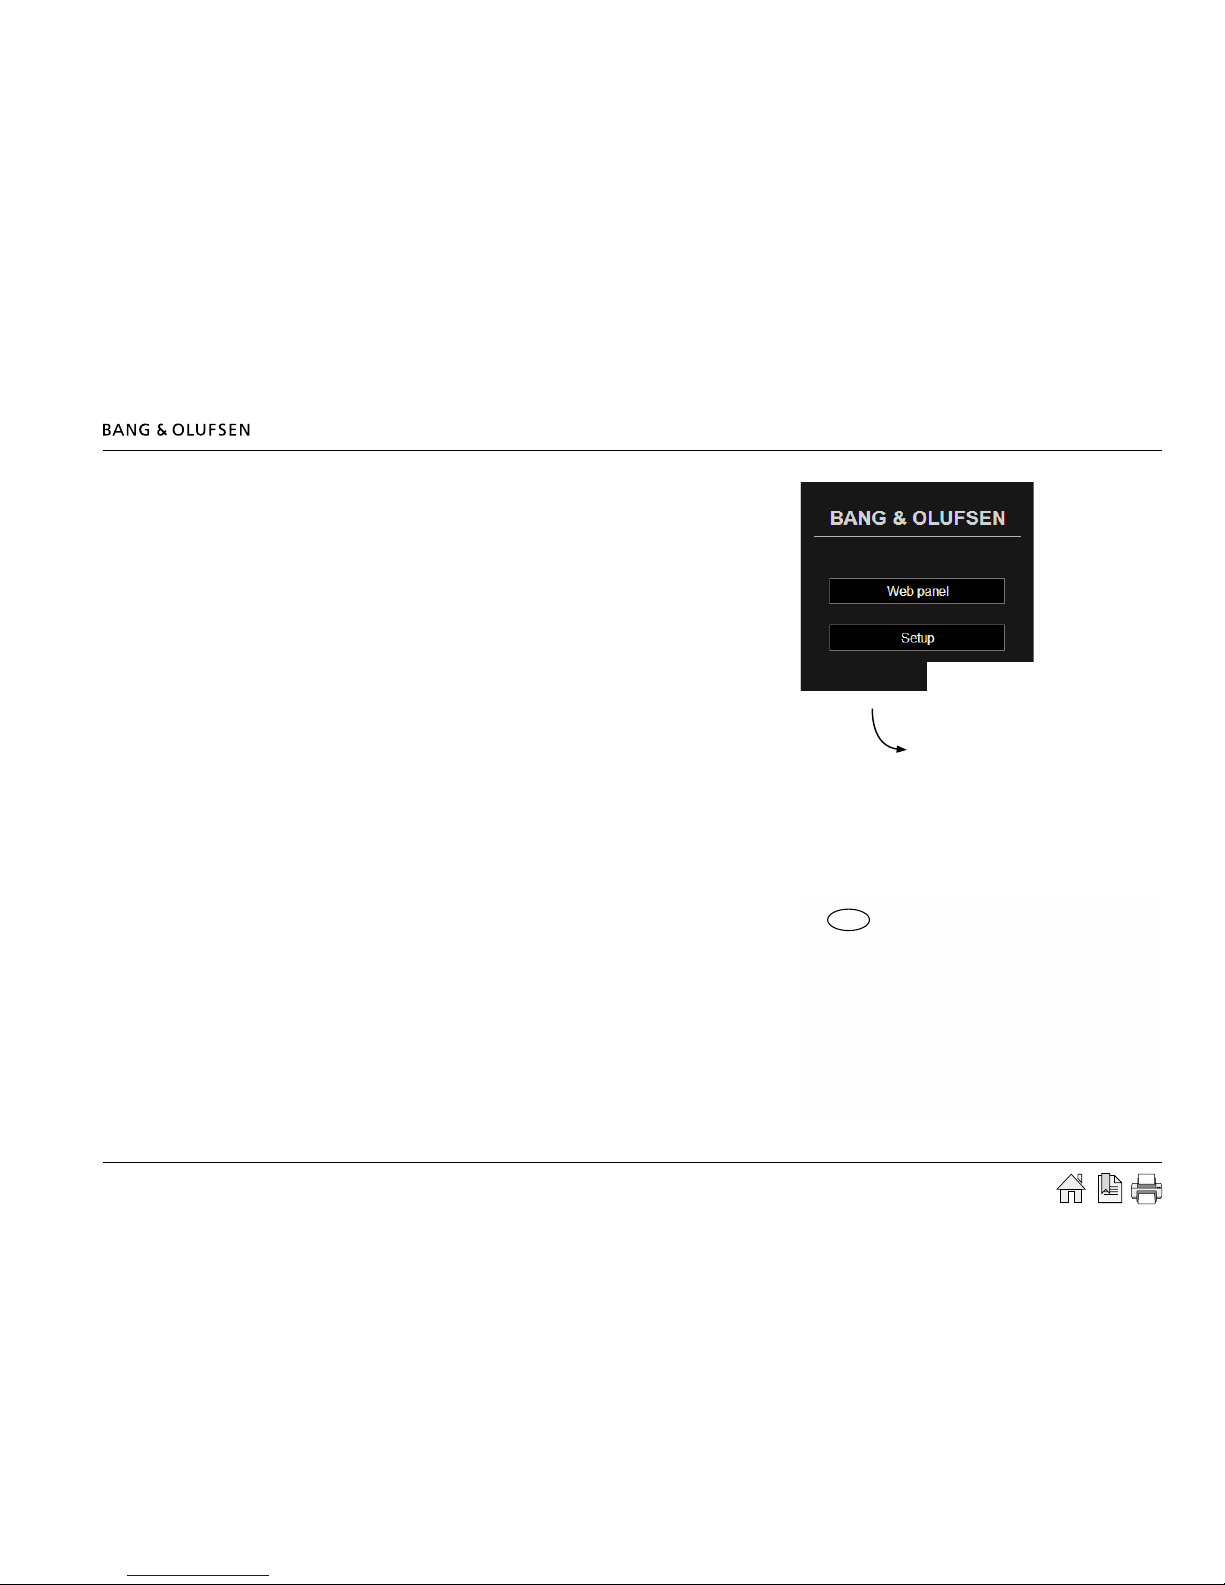
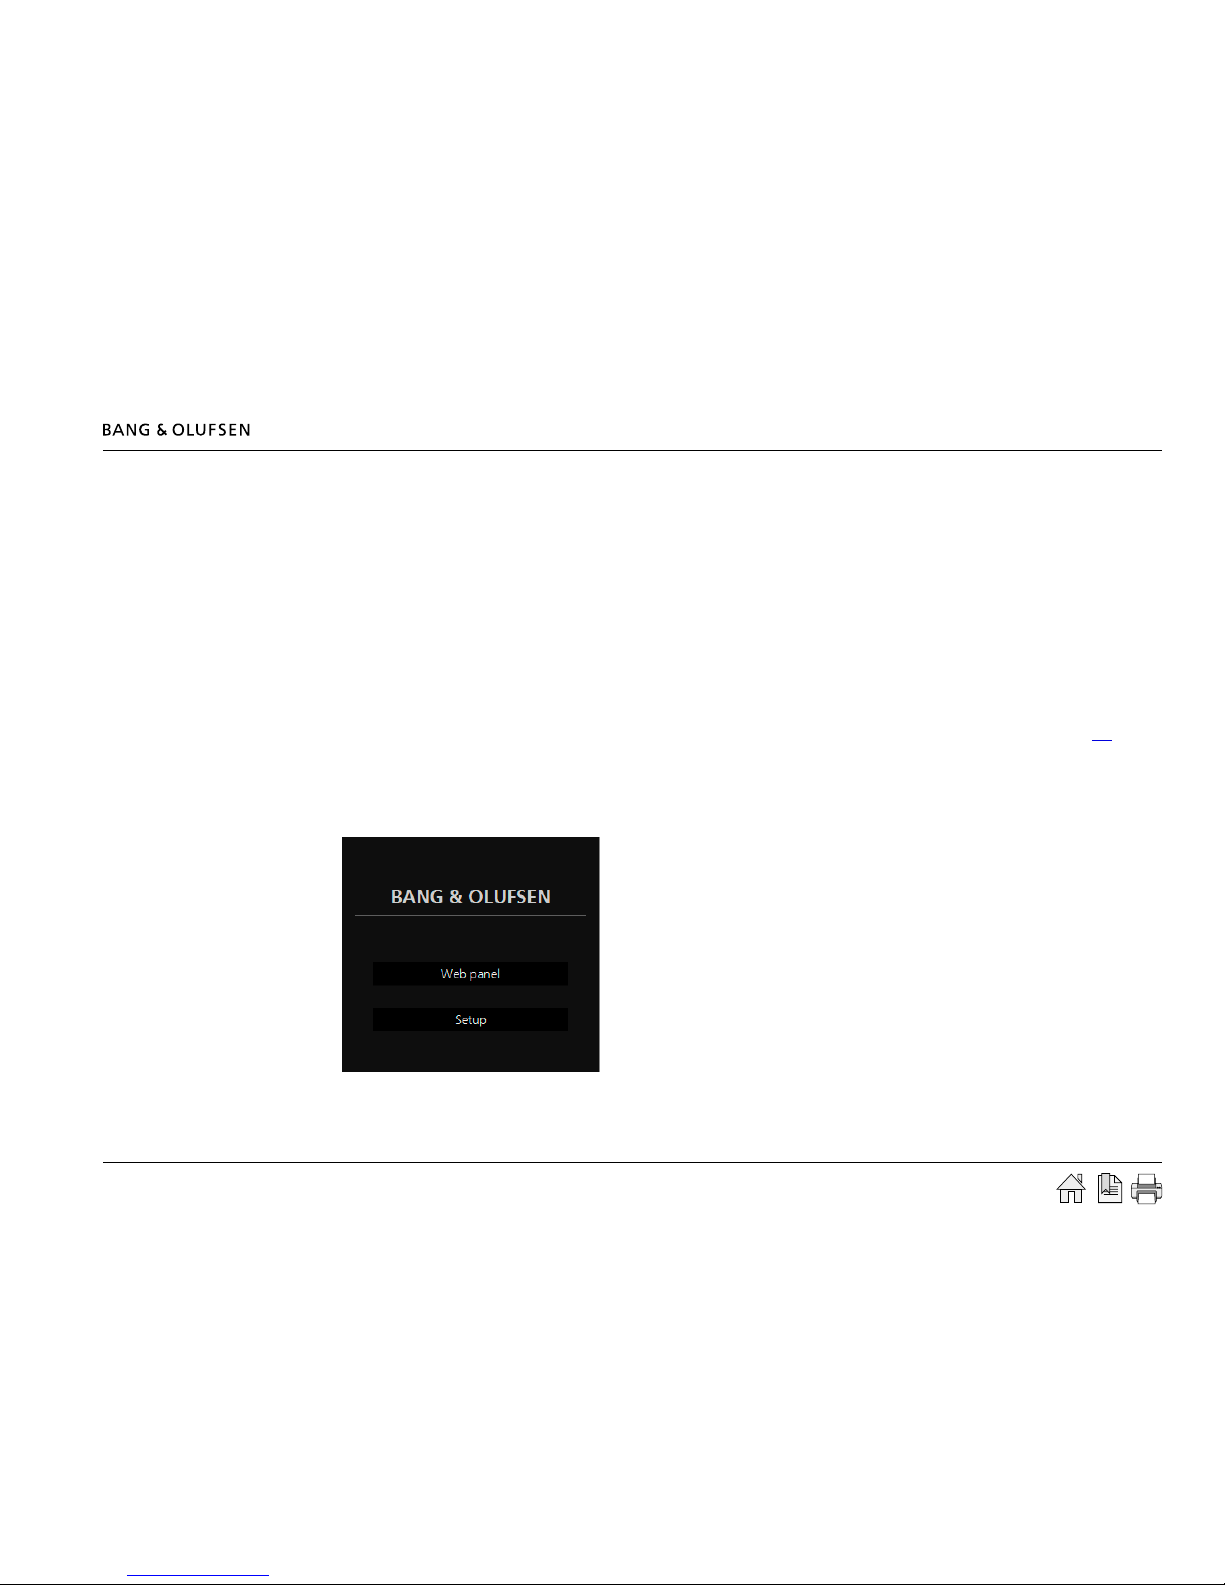
- Open a web browser and enter http://192.168.1.10 in the address eld.
Now the ML Gatway web interface appears.
- Click the Setup button to access ML Gateway setup functions.
Now the login box appears on the screen.
- Type admin in both elds and click OK.
(Username is always ‘admin’. The password can be changed by the user later).
Now the web-based user interface appears on the screen.
- Click the tab System and then Network.
Preparing setup 9
In Network Settings it is possible to define the connection possibilities of MLGateway.
The aim here is to fit the network settings which was observed in the router before.
The default Hostname is ‘mlgw’. This can be changed, eg. to ‘mlgw1’ or ‘mlgw2’
(if there is more than one mlgw in the installation).
! It is important that the hostname is dened, otherwise ML Gateway can not be
found using Multicast DNS (also known as mDNS or Bonjour).
If the network is a DHCP setup, this can be selected, but it is recommended to use
a static IP address for ML Gateway.
If the network is a non-DHCP setup, the IP address must be dened manually in
order to t the IP range in the router. This means that the rst 3 'octets' must be
the same as the network setup in the router conguration.
- Choose Static connection and ll in the elds for:
IP address, Subnet mask, Gateway, DNS server.
Tip !
An easy way nd the addresses for Gateway and for DNS server is to:
PC: Open a command prompt (cmd in Windows), and type ipcong /all.
Mac: Click System Preferences and then Network (Router = Gateway).
- Click Apply settings to apply settings immediately.
! After applying new settings, it is necessary to reconnect the web browser to the new address. In case of problems nding ML Gateway, the IP
address can be reset to default using the setup button on the front panel (see link).
If the computer supports Multicast DNS (default on Mac/Linux, utility required for Windows), ML Gateway can be found by typing mlgw.local in
the browser’s address eld.
The next step is to mount ML Gateway in the installation setup. It is recommended to use the angle bracket for a rack-mout solution (see next
page).

Preparing setup 10
Installation and connection
A rack-mount installation is preferred if possible. In this case mount the two angle brackets as shown. Alternatively ML Gateway can be placed on
its feet on a stable surface.
- Connect the Master Link cable from the installation to the ML socket on ML Gateway.
- Connect either the RS232 cable or the ethernet cable (depending on the communication type).
- Mount mains cable and the wire holder with screw to fasten the mains cable as illustrated below.
- Mount ML Gateway in the rack system or place it on a stable surface.
Now ML Gateway is ready for further setup. Press the mains switch on the front to switch on the product.
Rack-mount warnings
! When installing ML Gateway in a rack installation, the following precautions must be considered:
Operating temperatures
The operating ambient temperature of the rack installation may be higher than room ambient temperature.
Therefore, consideration should be given to installing the equipment in an environment compatible with the maximum ambient temperature
specied for the product (see link).
Reduced air ow
Installation of the equipment in a rack should be such that the amount of airow required for safe operation of the equipment is not
compromised.
ML
RS232
Max. 10mm
Max. 10mm
ML
RS232
Router setup - port forwarding 11
Router setup - port forwarding
To ensure that users can access ML Gateway (to control home automation functions) from a web panel/smart phone on the wide area network
(WAN), the network router must be congured to allow data trafc from specic ports. In the most common routers this feature is called port
forwarding.
The ports used for web panel access and mobile devices are:
Application: Port range:
- MLGW Web panel 80
- MLGW Telnet 23
- MLGW Protocol 9000
To dene the port forwarding rules in the network router follow
the procedure below.
- Open a web browser and enter the IP address of the network
router.
- Choose ‘Admin’ as user and type in the password to login.
- Go to the port forwarding section
(typical named Applications & Gaming).
- Type in the previously stated port settings (see example here).
! Be aware of that setup layout and names of menues in the costumers router may vary between types/brands of network routers, compared to the
shown example.
- Save settings and leave the router setup.
Setting up ML Gateway 12
Now the ML Gatway web interface appears.
- Click the Setup button to access ML Gateway setup funtions.
Now the login box appears on the screen.
- Type admin in both fields and click OK.
(Username is always 'admin', the password can be changed by
the user later).
Setting up ML Gateway
Additional information
To set up ML Gateway it is necessary to access a web-based user interface. The web interface is organised into a series of screens which can be
selected by means of the navigation bars.
Please avoid using the browser’s back and forward navigation buttons, as you may loose the information you are entering. Also note that changing
to another screen does not save the modications you have made. There are Apply or Save buttons next to most controls and data elds.
On-line help
All screens on the web interface have a link to the on-line help. Clicking on this link will open a new browser window showing the relevant section
of the help le. At the top of each help page there is a link to the table of contents.
Login
- Switch on the ML Gateway (for information about the front panel indicator and the setup button, refer to technical specications (see link).
- Connect the service PC with an ethernet cable to the network connection (to a free port in the router/switch).
- Access the web-based user interface by typing the IP address dened earlier (during Conguration of IP address) for ML Gateway in the address
eld of the web browser.
Setting up ML Gateway 13
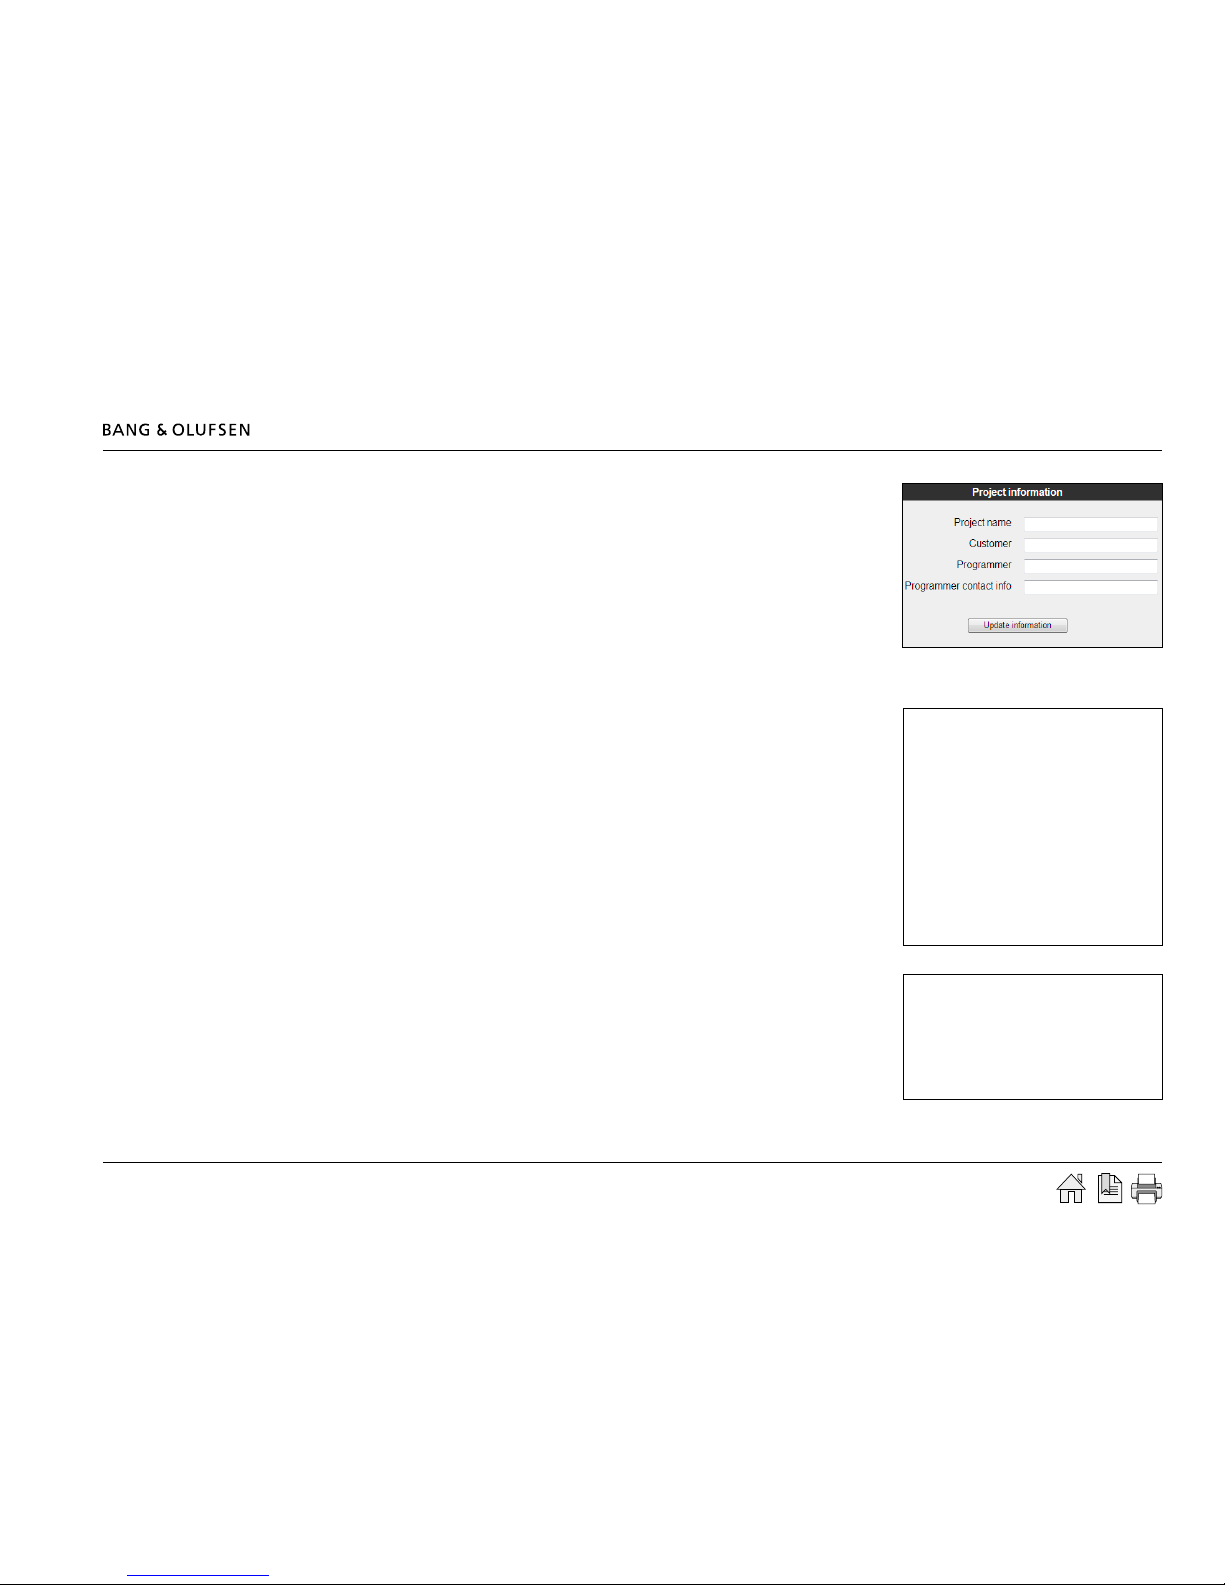
Info
The rst picture that appears on the screen after a successful login is the Info screen. This section,
called Project information, provides the opportunity to enter information regarding the project.
It is recommended to ll in the elds in order to make it easier for future service. Follow the
procedure below:
- Fill in the four elds for Project name, Customer, Programmer and Programmer contact
info.
- Click Update information to save the information.
System
Date & Time
ML Gateway can get its system time from the BeoLink sysrem, and this is the recommended option.
In this case the time will be constantly synchronised to the clock of the main BeoLink product.
Alternatively, the date and time can be set manually.
! Note that ML Gateway will loose its time setting if powered down for several hours.
System time is useful for monitoring events and for examining the system and error logs, but
correct time setting is not critical to the system.
- Click on the tab System and then Date & Time.
- Choose the preferred option for time and date.
- Click Apply date and time settings to apply settings immediately.
Text size (optional)
The web-based user interface may be too wide for low resolution screens such as those of mobile
Internet devices, subcompact laptop computers, or old laptop computers.
In this case, a more compact style for the user interface can be selected.
Note that most web browsers have text size and screen zoom options, which allow for further
adjustment of the interface.
- Click Switch to .... to toggle between low and high screen resolution.
Setting up ML Gateway 14
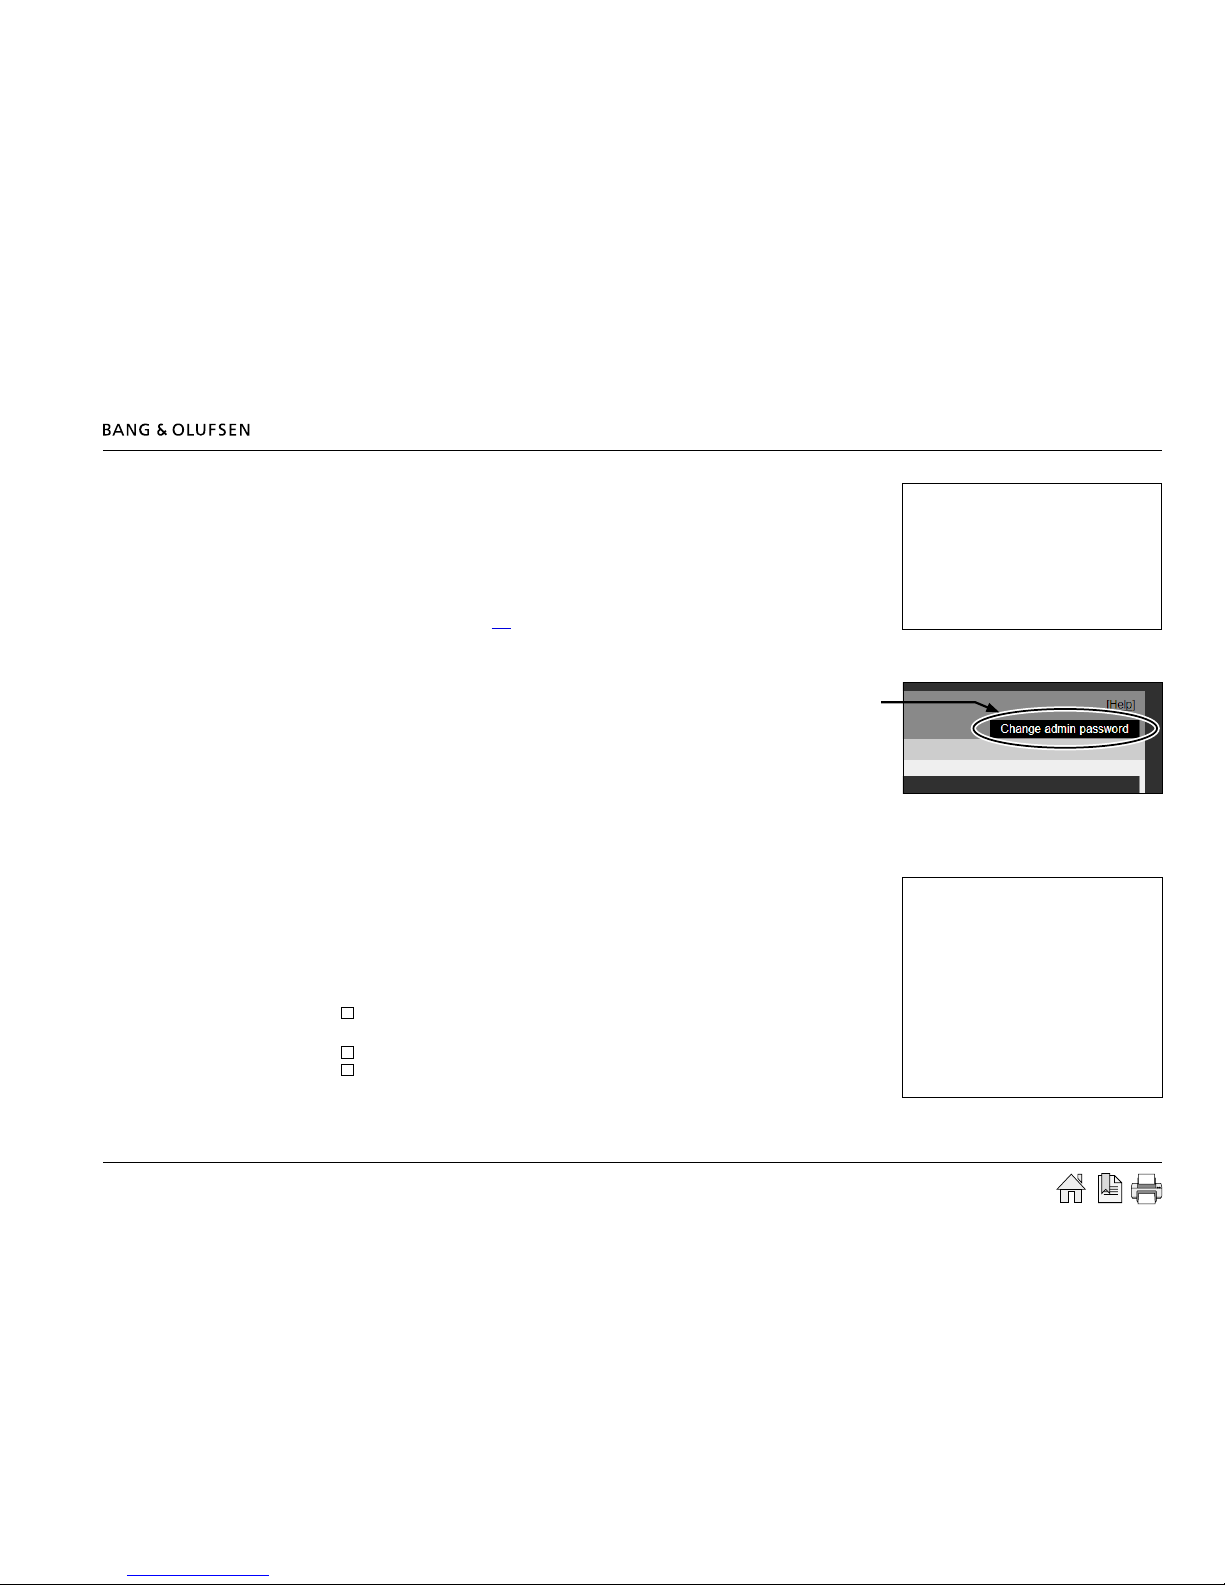
Password
The system password is used for accessing both the web user interface and the command line
interface (CLI). Logging in to the web interface requires entering ‘admin’ for both the user name,
and the password. The factory default password is also ‘admin’. Logging into the CLI requires
only entering the password.
The password can be changed here to avoid unwanted access. If the modied password is
forgotten, it can always be reset to the default value. This requires an execution of service
function 2 (described here link) .
- Fill in the elds for current and new passwords (twice), and click Update password to save the new password.
If the default password is not changed, this notication is displayed on the right side of the
screen. This will disappear when the password is changed.
! It is highly recommended to change it to a unique password.
Master Link Gateway Protocol settings
The ML Gateway protocol is available on RS232 connections and as TCP socket connections (ethernet RJ45). This is a proprietary protocol for
communication with general-purpose home automation controllers. Multiple simultaneous ML Gateway protocol connections are supported.
The options available are:
- Availability and TCP port number on the network connection.
- Authentication required on TCP (Ethernet). Can be ticked if it is required that the connected
Home Automation has to start logging in with Username and Password.
- Availability and bit rate on RS232 port.
The default Master Link Gateway Protocol settings are:
Enable MLGW protocol over ethernet
IP port 9000
Authentication required on TCP (Ethernet)
Enable MLGW protocol over RS232
RS232 bit rate 9600 bps
! If the RS232 port is already congured for another device, a message is shown and selection is disabled. If RS232 is enabled for MLGW protocol,
the product can not be used with eg. Conson and KNX installation.
Setting up ML Gateway 15
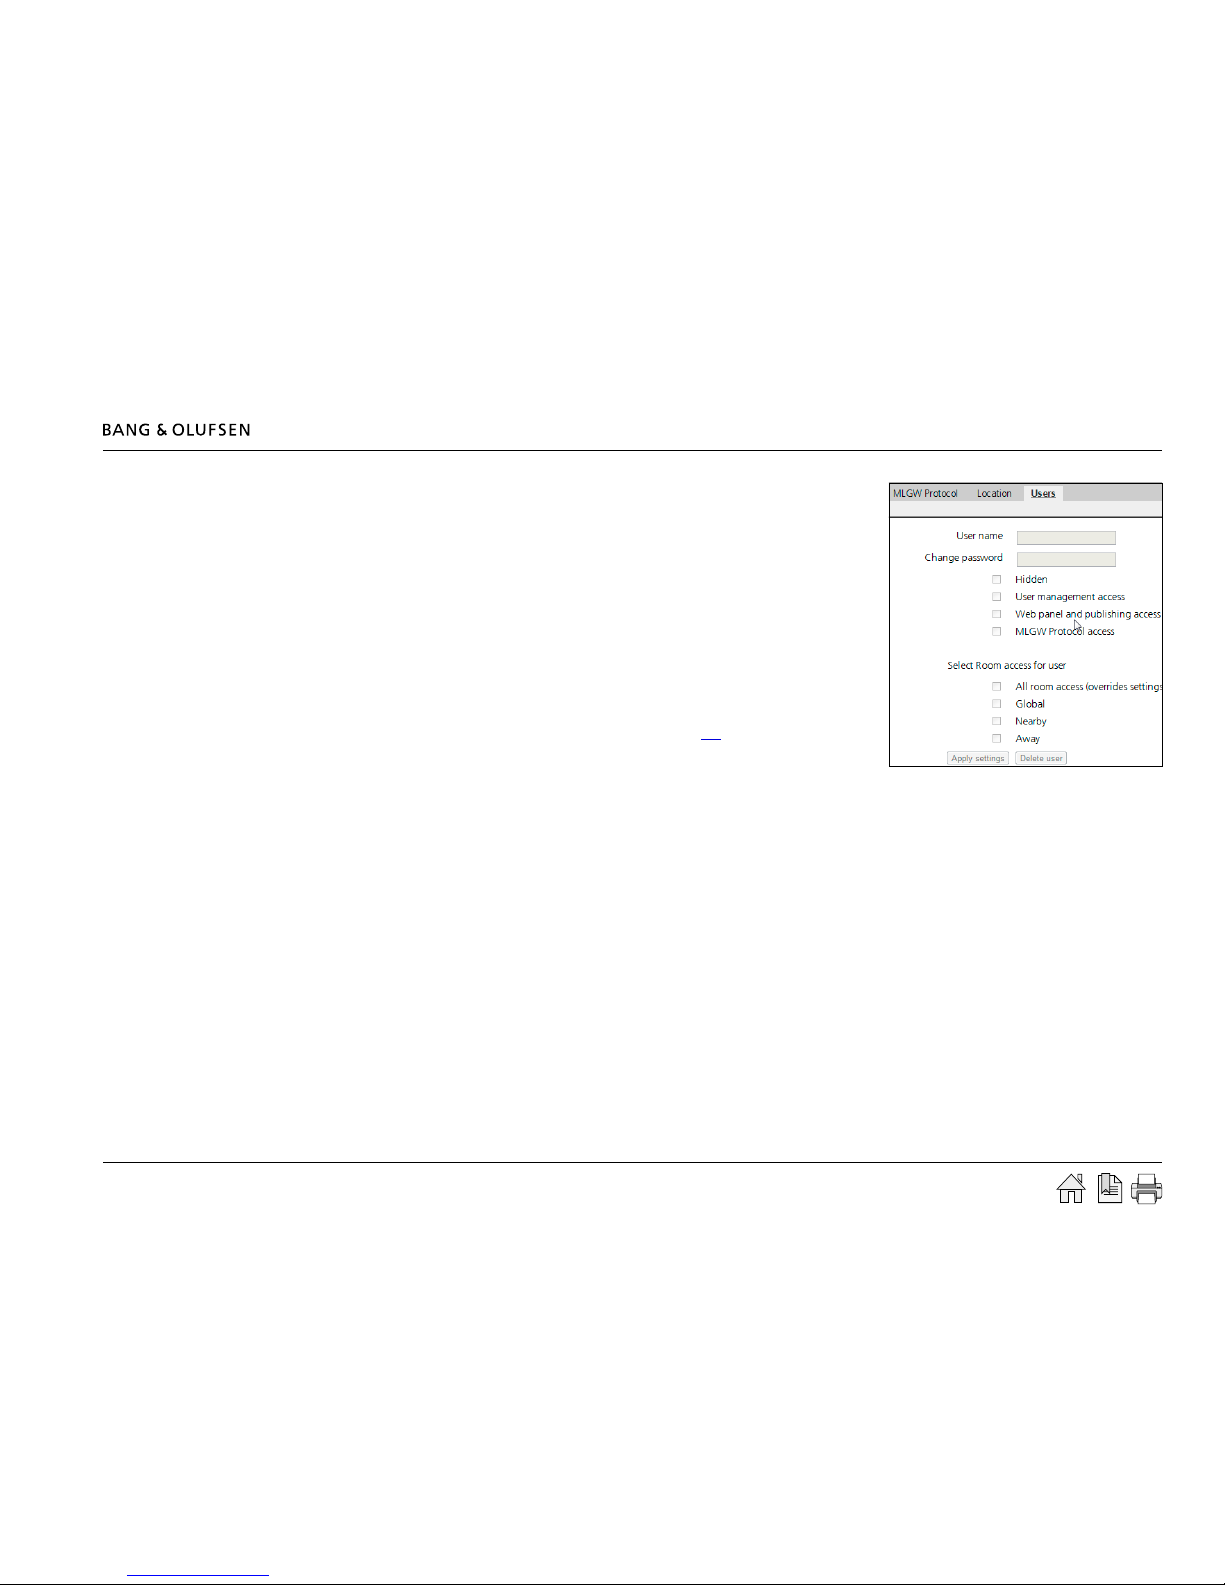
Users
ML Gateway keeps a list of users that, individually (depending on the access level), can access
the external interfaces and services such as:
- ML Gateway Protocol access
- Web Panel access
- Publishing service access (mobile applications)
- Room access control
Dening users is important but this can not be made yet. The list of available rooms is taken
from the active conguration, therefore it is important to make sure that rooms are dened
and testet before setting up users.
An explanation for this section will follow later in the guide (see link).
Basic setup done
The basic setup is now completed for ML Gateway, but before continuing to the programming
part, it is recommended to check for software updates.
Please follow the procedure on the next pages.
Setting up ML Gateway 16
Software update
There are two methods for updating ML Gateway software. One for Internet access and one for no Internet access:
Internet access
When ML Gateway is congured to have Internet access, it provides the opportunity to check for new software on-line and download the most
recent version.
- Click on the Tools tab and choose Software Update. Use the Check available software on-
line button to check for the latest available software. The online version will be displayed
together with the currently running version. Internet access of ML Gateway requires two
conditions:
- The installation network has direct access to Internet (no proxies).
- The network settings for ML Gateway are correctly set up.
If the network has a DHCP server, connect via DHCP in order to get all these settings automatically. You can revert to static IP address later if
needed, while keeping the other settings provided by the DHCP server. Most DSL routers nowadays are DHCP servers by default.
- Select the Update from on-line version... button to download and install the new software.
No Internet access
If ML Gateway has no direct Internet access, it is possible to upload and install a software image le from a location stored on your computer.
- Navigate to the Load new software.. section and click Browse... . When the navigation box
appears, choose the destination and software le. Click Update software.
! Do not switch off ML Gateway during the installation of new software, as this may
result in a corrupted system.

Setting up ML Gateway / Programming 17
Restarting ML Gateway on factory-installed software
If a software update causes ML Gateway to fail (for example due to power failure during ash update), the unit can be restarted using the original
factory-installed software.
To do this, switch ML Gateway off, and while pressing the setup button, switch it back on. Release the setup button after 5 seconds. This will start
the system using the original factory software, but will not x nor replace the ‘broken’ software. You need to log into the system and perform a
software upgrade to x the broken software.
If you suspect that the failure is inherent to the latest software installed (and not a failure during the ash process), you can manually download an
earlier software version from BeoWise to your computer, and perform a software update from that le.
Software update complete
When it is conrmed that ML Gateway has the latest software, the next step is to dene devices and resources. Please follow the procedure on the
next page.
Programming
Additional information
The programming section provides the opportunity to dene how BeoLink products and the home automation systems interact.
The programming section in ML Gateway consists of two main elements:
- Devices (including Resources for BeoLink, Virtual buttons, Home automation system)
- Macros
Refer to the following pages for information about setting up devices and resources. Macros is not described since this is individually for each
home automation system.
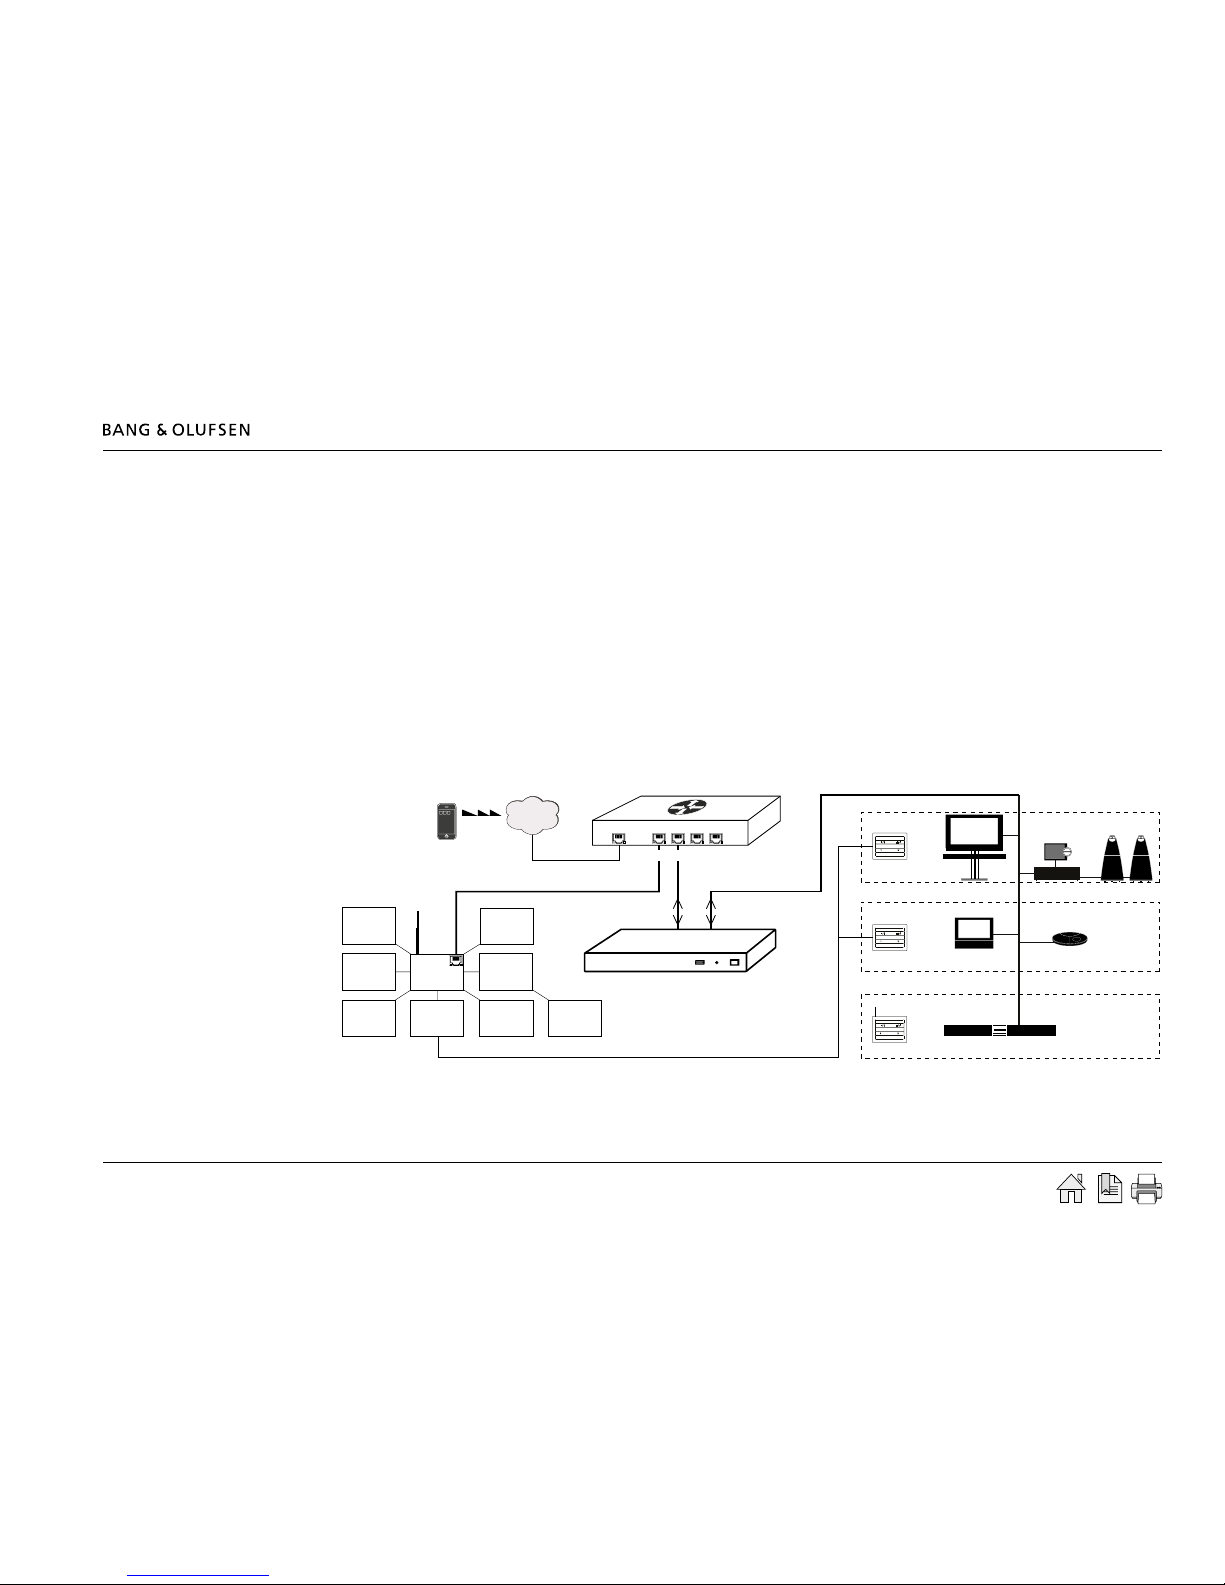
Programming 18
Devices - setting up resources
The next step is setting up resources for each device. Devices is the basic elements which ML Gateway looks into.
Devices can be:
- BeoLink
- Virtual buttons
- Home automation systems
The resources area is where you identify all the necessary components with which ML Gateway will interact. Each device contain individual
Resources which can be:
- Setup and settings for BeoLink rooms / BeoLink products
- Setup and settings for scenes with virtual buttons
- Conguration and denitions for home automation systems
Survey of Devices and Resources in a ML Gateway setup: ➀ = Devices ➁ = Resources
Follow the procedure on the next page to dene the supported device (home automation system).
➀ Devices ➁ Resources
IHC
Controller
Alarm
Heat
control
Lighting
Operation
switches
Sensors
Energy
control
Modem
Phone
Router / switch
Bang & Olufsen
Room 1
Room 2
Room 3
(( ))
(( ))
ML Gateway
Internet
Home automation system
Ethernet
Master Link system
➀ Home automation system
➁ - Connection
➁ - Project
➀ Mobile device
➁ - Virtual buttons
➁ - Scenes
➀ Master Link
➁ - Rooms
➁ - Products
 Loading...