

Bakers Pride CBBQ-30S Service Manual
OPERATION MANUAL
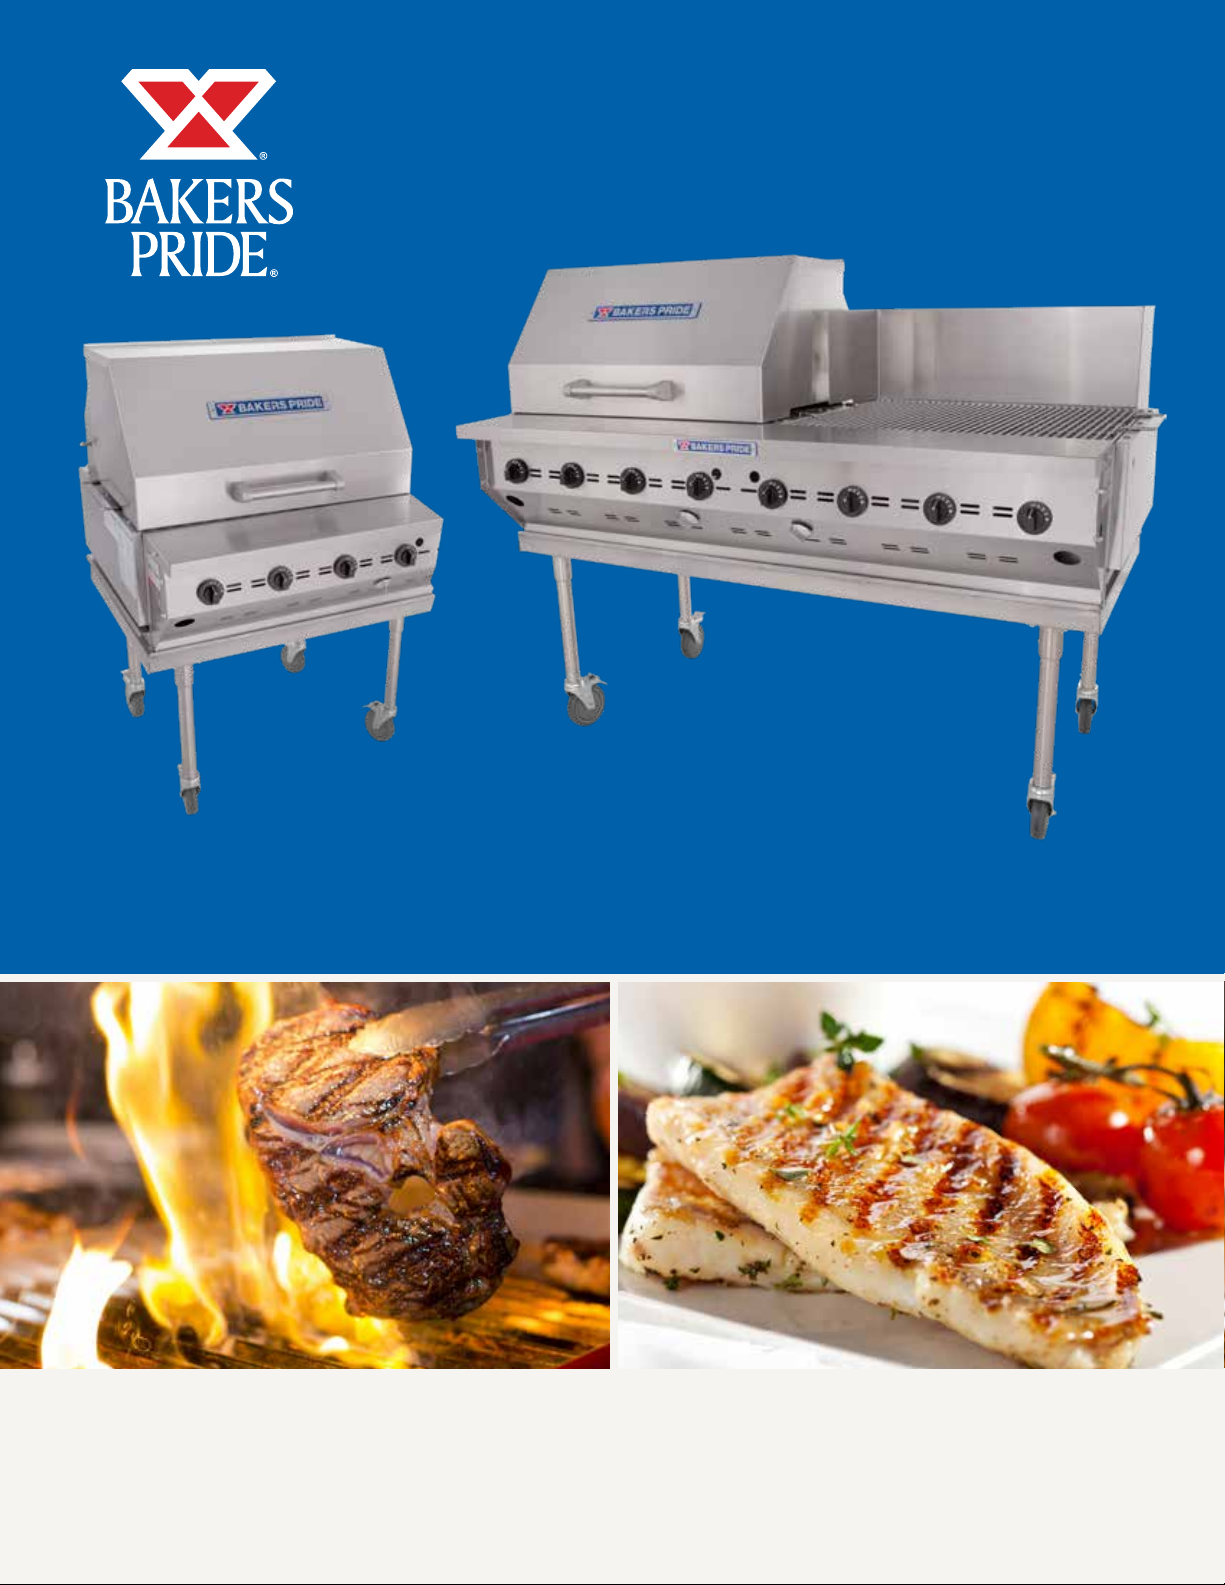
ULTIMATE SERIES OUTDOOR CHARBROILERS
SERIES: CBBQ
BUILT BY CRAFTSMEN. TESTED BY TIME®.
OUTDOOR GAS CHARBROILER OPERATION MANUAL
OUTDOOR GAS CHARBROILERS
Outdoor Gas CharBroiler Models:
CBBQ-30S & CBBQ-60S
Bakers Pride Oven Company, LLC is a wholly owned
subsidiary of Standex International Corporation.
All gas operated Bakers Pride® charbroilers are intended
for use with the type of gas specified on the rating plate
and for installation will be in accordance with National
Fuel Gas Code ANSI Z223.1 (latest edition).
WARNING
FOR YOUR SAFETY: Do not store or use gasoline
or other flammable vapors or liquids in the vicinity
of this or any other appliance.
WARNING
California Residents Only
WARNING: This product can expose you to
chemicals including chromium which is known to
the State of California to cause cancer and birth
defects or other reproductive harm. For more
information go to www.P65Warnings.ca.gov.
Please retain this manual for future references.
This equipment is design engineered for commercial
use only.
WARNING
Improper installation, adjustment, alteration,
service or maintenance can cause property
damage, injury or death. Read the installation,
operating and maintenance instructions
thoroughly before installing or servicing this
equipment.
BAKERS PRIDE OVEN COMPANY, LLC.
1307 N. Watters Rd., Suite 180
Phone: 800.527.2100 | Fax: 914.576.0605 | www.bakerspride.com
Allen, TX 75013
P/N 8839300 9/18
TABLE OF CONTENTS
DANGER
WARNING
CAUTION
NOTICE
OUTDOOR GAS CHARBROILER OPERATION MANUAL
INSTALLATION INSTRUCTIONS 1
Safety Precautions 1
Unpacking Instructions 3
Assembly 3
Connecting The Gas Lines To The Propane Tanks 4
Installing Side Tank Mounting Brackets 5
Installing Optional Tank Caddies 5
Leak Testing 5
LIGHTING INSTRUCTIONS 6
Lighting Instructions 6
Shutdown Instructions 6
Gas Specifications
Model Number Propane Gas
BTU/HR @ 10” W.C.
CBBQ-60S 160,000 160,000
CBBQ-30S 80,000 80,000
Model Definitions
Model Number Width
CBBQ-30 S Overall Width = 32”
CBBQ-60 S Overall Width = 62 1/2”
MAINTENANCE INSTRUCTIONS 7
Cleaning Instructions 7
Burner/Orifice Inspection 7
Troubleshooting Chart 8
ACCESSORIES 9
Instructions for Installing Char Broiler Accessories 9
EXPLODED VIEWS & PARTS LISTS 10
WARRANTY 13
Natural Gas
BTU/HR @ 3.5” W.C.
INSTALLATION INSTRUCTIONS
Safety Precautions
This symbol warns of imminent hazard which will
result in serious injury or death.
This symbol refers to a potential hazard or unsafe
practice, which could result in serious injury or
death.
This symbol refers to a potential hazard or unsafe
practice, which may result in or moderate injury or
product or property damage.
This symbol refers to information that needs
special attention or must be fully understood even
though not dangerous.
1
OUTDOOR GAS CHARBROILER OPERATION MANUAL
WARNING
NOTICE
INSTALLATION INSTRUCTIONS
Safety Precautions
(Must Be Posted In A Prominent Location)
For your safety, the following safety precautions
should be followed and enforced.
If You Smell Gas:
• Shut off gas supply to appliance
• Extinguish open flames
• Immediately call your gas supplier
Instructions must be posted in a prominent
location. All safety precautions must be taken in
the event the user smells gas. Safety information
can be obtained from your local gas supplier.
1. This unit should be only operated outdoors.
2. LIGHTING: Follow the instructions in the Lighting
Instructions section and from the label attached
to right side of the broiler.
3. Do not place or use unapproved accessories or items
on the broiling area or on any part of this unit.
4. Do not place combustibles or non-combustible
materials in the proximity of the broiler as this
could cause fires or obstruct airflow to the main
burners.
5. This unit may be operated with 0” minimum
clearance to non-combustible construction in
areas that are non- combustible locations. For
combustible construction installations: Minimum
12” each side, 24” back.
6. This installation must conform to local codes, or
in absence of local codes to the National Fuel
Gas Code ANSI Z223.1, latest edition. In Canada,
it must conform to current National Standard
CAN/CGA B 149. 1 & 2. - natural gas/propane
installation code.
7. Use only the legs and casters provided with the
unit. Always lock the caster brakes to prevent
movement while the appliance is in use.
8. Broiler must be disconnected from gas supply
during any pressure testing of pipelines in excess
of ½ psig (3.45 kPa), and isolated (by turning off
gas shut-off valve) during any testing less than ½
psig.
9. Inspect the flexible gas hose(s) prior to each use.
If excessive abrasion or wear occurs, or if the
hose is cracked or damaged it must be replaced.
10. LP cylinders used with the broiler must conform
to the specifications of the US Department
of Transportation (DOT), or in Canada to the
Canadian Transport Commission. The construction
must include a collar to protect the service valve
from physical damage; they must have a safety
relief device that communicates directly with
the vapor space of the cylinder and a system
to withdraw vapor in the vertical position. The
cylinder must have proper marking, shutoff valve
and a Type I (QCC1) service outlet connection.
11. Any attempt to fit the regulator(s) with anything
other than the mating Type I (QCC1) connector
will negate the important safety features designed
into the Type I system. Fitting a standard #510
POL connector will not provide the flow control or
temperature shutoff safety features build into the
complete Type I system.
12. Propane cylinders must be stored outdoors in a
well-ventilated area out of the reach of children.
13. The handling, filling, use, storage and
transportation of all sizes of LP gas cylinders
must be in accordance with NFPA 58, Storage
and Handling of LP Gases, or CAN/CGA B149.2,
Propane Gas Installation Code.
14. Surfaces of unit will become hot during normal
operation and can cause burns and/or serious
injury. Do not touch a hot unit without protective
clothing. Allow the unit to cool before cleaning or
disassembling.
15. High winds may adversely affect burner
performance.
16. The minimum ambient temperature for proper
operation of this appliance is 50°F (10° C).
17. Retain this manual for future reference.
2
OUTDOOR GAS CHARBROILER OPERATION MANUAL
INSTALLATION INSTRUCTIONS
Unpacking Instructions:
Carefully unpack the broiler and inspect immediately for
shipping damages. Your outdoor boiler was shipped in a
carton designed to give maximum protection in normal
handling. It was thoroughly inspected before leaving the
factory and the carrier accepted and signed for it. File
any claims for shipping damage or irregularities with the
carrier.
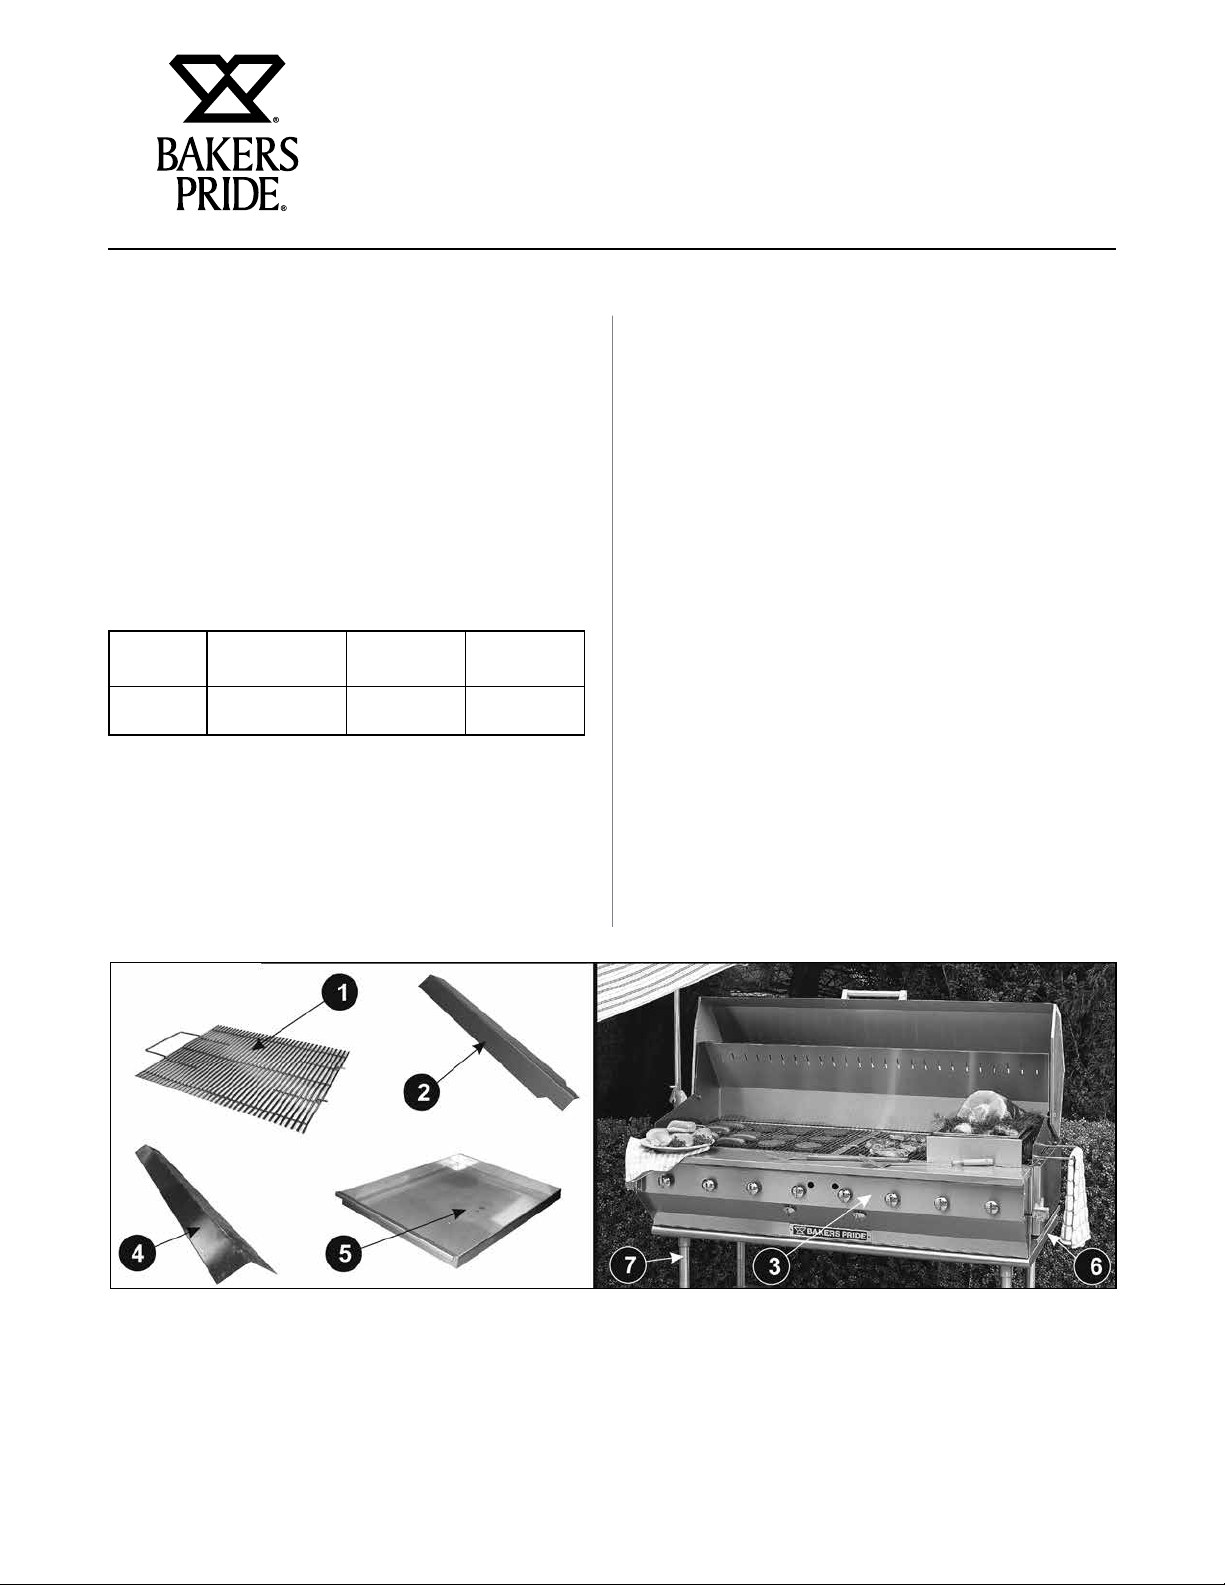
Assembly: (Refer To Figure “A”)
These unassembled parts should be included in your
charbroiler package:
1 Grate (s) 3 Frame assembly 5 Water Pan (s) 7 Leg & Caster
Assemblies
2 Radiants 4 Carryover tube
cover (s)
1. Remove shipping bands from carton.
2. Remove top of carton.
3. Remove grates from the unit and set them aside.
4. Remove and unwrap any small parts packages
that are located underneath the grates. If
stainless steel parts are coated with PVC film,
remove it prior to installation.
6 Base
5. Lift frame assembly from carton and set aside.
6. Lift base from carton and place it upside down on
ground.
7. Install legs & caster assemblies and flip the stand
over into the upright position.
8. Mount side tank brackets to the unit (see Figures
A-1 & A-2).
9. Place the broiler on the stand.
10. Place the carryover tubes cover(s) on their
brackets to cover the tubes.
11. Place the radiants on their front and rear support
pins over each burner.
12. Place grates into frame assembly.
Figure A
3
OUTDOOR GAS CHARBROILER OPERATION MANUAL
NOTICE
INSTALLATION INSTRUCTIONS
Connecting The Gas Lines To The Propane Tanks
• New propane tanks are shipped empty with no
pressure and must be purged of air and filled
with propane per NPGA (national propane gas
Association)
• Tank brackets must be mounted to the charbroiler
stand (refer to on the Lighting Instructions
section).
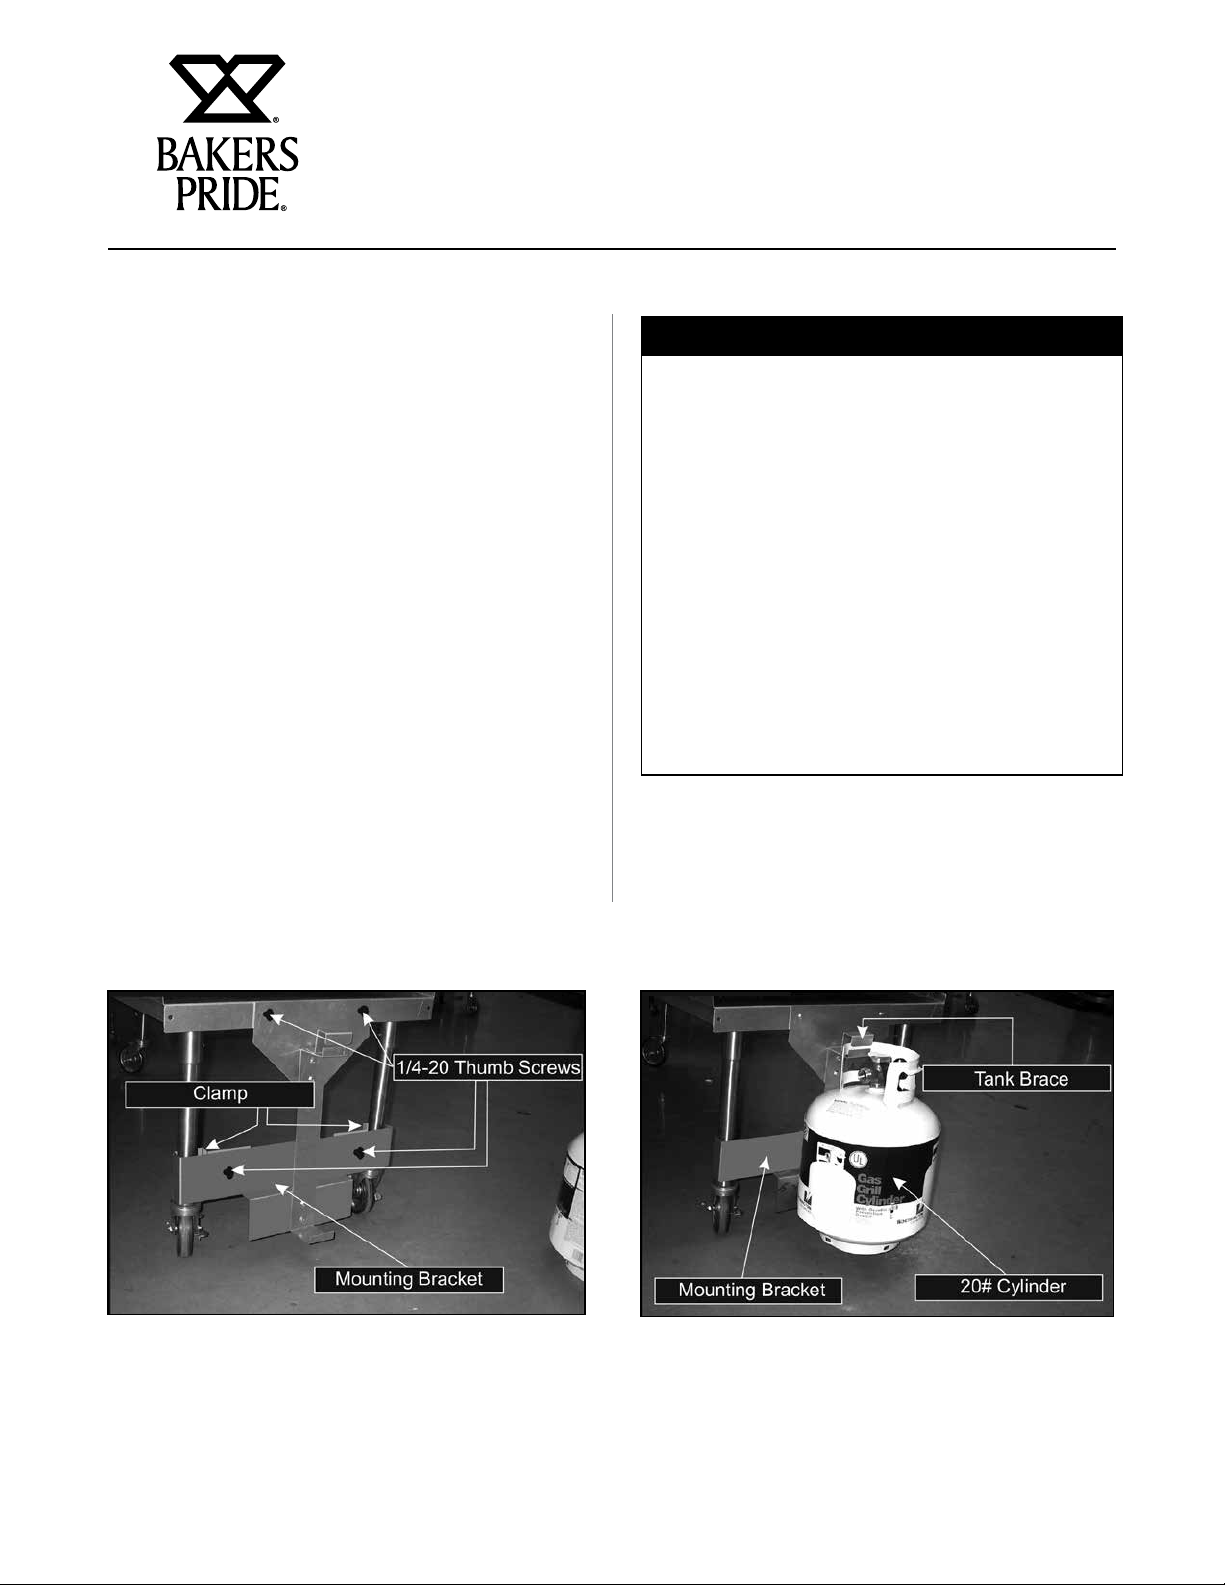
• Tanks must be mounted securely to the mounting
brackets (refer to paragraph “E” below).
• Install the green plastic connector onto the
external thread on the tank valve. Turn it
clockwise and hand tighten. The plastic nut is
designed for easy grip and allows user friendly,
wrench-less connection. It is thermally sensitive
and will shut off the flow of gas if subjected to
temperatures between 240°F and 300°F. Type I
(Q.C.C. 1) connection system will not allow gas
to flow until a positive seal has been made (See
Figure “A-3”).
• Make sure the vent on the regulator is facing
down (toward the ground) so that water and other
liquids do not get into the regulator.
All 20-lb LP cylinders are provided with the new
Type I ACME valve with an OPD (overfill protection
device) installed. The 40-lb LP cylinders have a
Type I ACME service valve with a one-way valve
that only allows propane to flow out of the valve.
The 40-lb cylinder cannot be filled through this
Type I ACME service valve as the 20 lb cylinders
are. The 40-lb cylinders have a 1-3/4” ACME
male fill connection with a built in OPD to protect
the cylinder from being overfilled. Be sure that
your local propane supplier has the correct
adapter to fill through a 1-3/4” ACME male filling
connector.
20-lb cylinders must be used in the vertical
(upright) position and 40-lb cylinders must be
used in the horizontal (laying down) position.
Installing Side Tank Mounting Brackets
Figure A1 Figure A2
4
 Loading...