

Page 1
NOTE: IF YOUR TABLE HAS AN
H_BRACE OR SHELF, THE LEGS
MUST BE INSTALLED WITH H
BRACE HOLES FACING INSIDE,
SEE PAGES 4 & 5
PAGE 1 of 5
BAILEY MANUFACTURING COMPANY • 800-321-8372 • www.baileymfg.com
Page 2
PAGE 2 of 5
NOTE: IF YOUR TABLE HAS AN
H_BRACE OR SHELF, THE LEGS
MUST BE INSTALLED WITH H
BRACE HOLES FACING INSIDE,
SEE PAGES 4 & 5
BAILEY MANUFACTURING COMPANY • 800-321-8372 • www.baileymfg.com
Page 3
NOTE: IF YOUR TABLE HAS AN
H_BRACE OR SHELF, THE LEGS
MUST BE INSTALLED WITH H
BRACE HOLES FACING INSIDE,
SEE PAGES 4 & 5
PAGE 3 of 5
BAILEY MANUFACTURING COMPANY • 800-321-8372 • www.baileymfg.com
Page 4
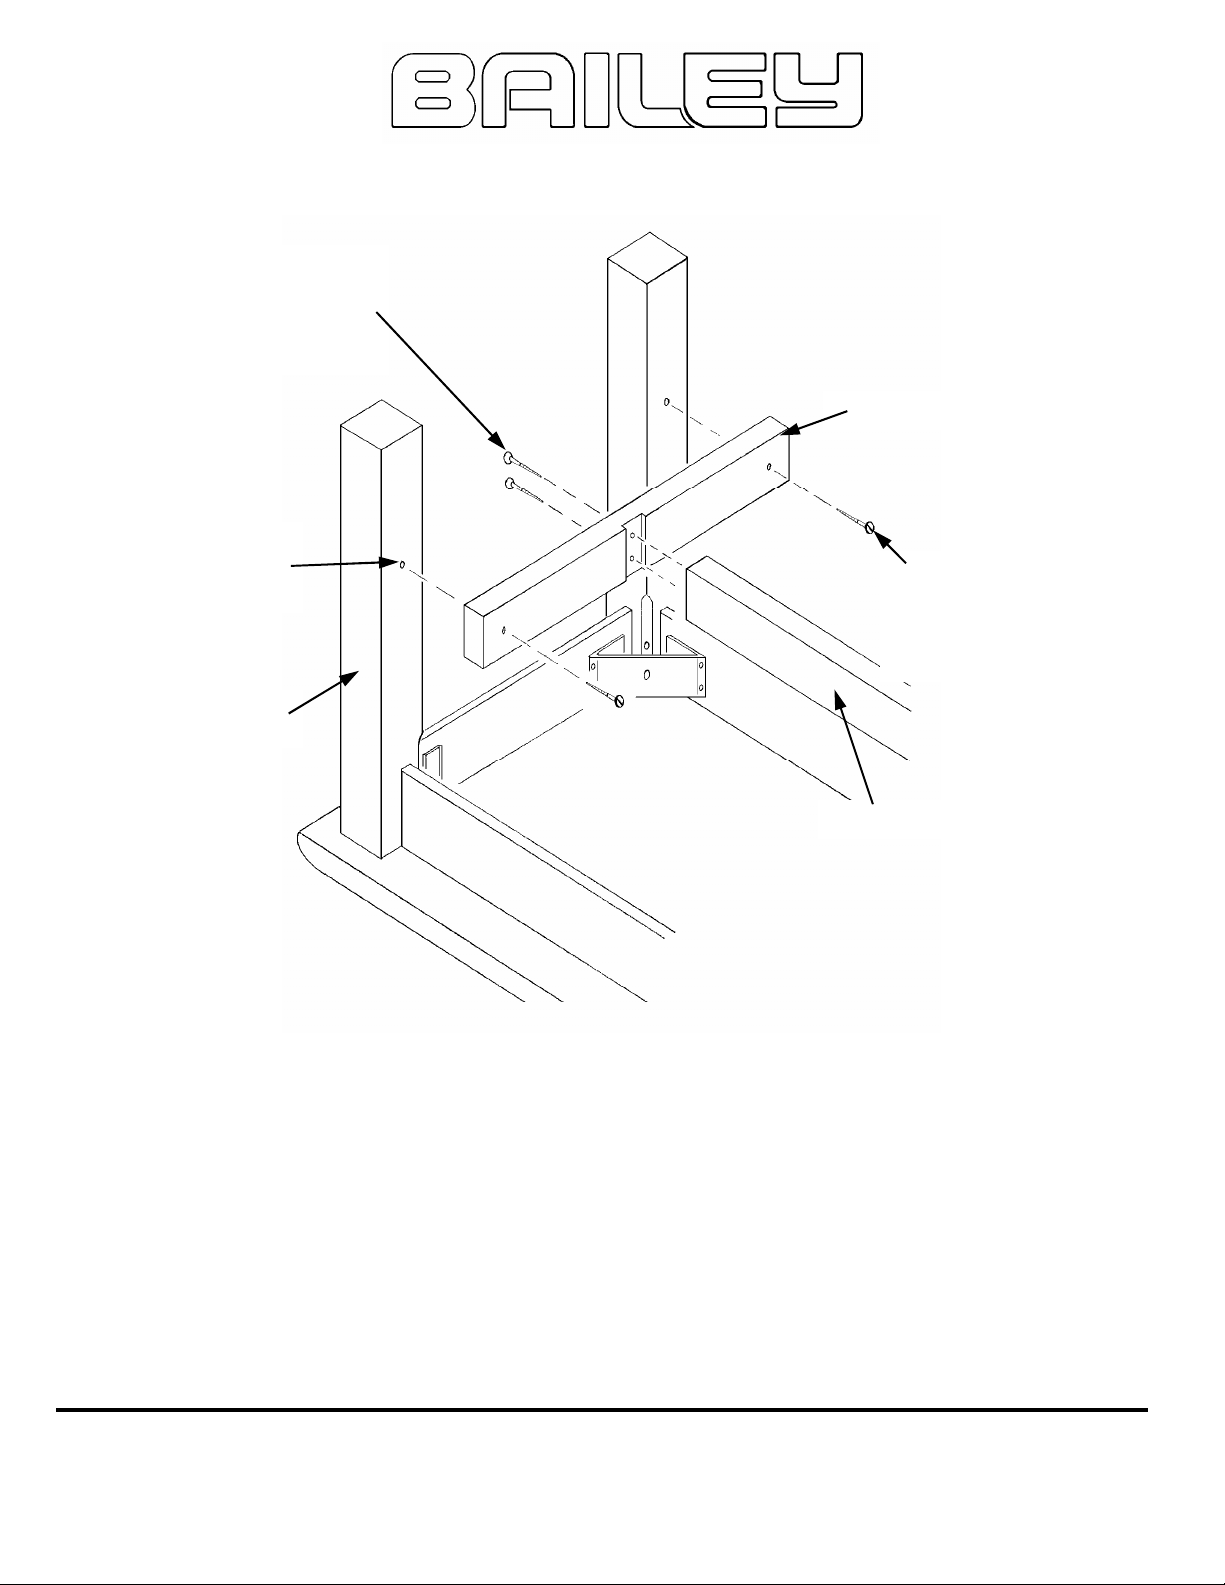
Predrilled
Starter
Hole
PAGE 4 of 5
Models 491 & 493 H-Brace Assembly
#3220
2” x #10
Flathead
Wood
Screw
Crosstie
#3220
2” x #10
Flathead
Wood
Screw
Corner
Leg
Long Brace
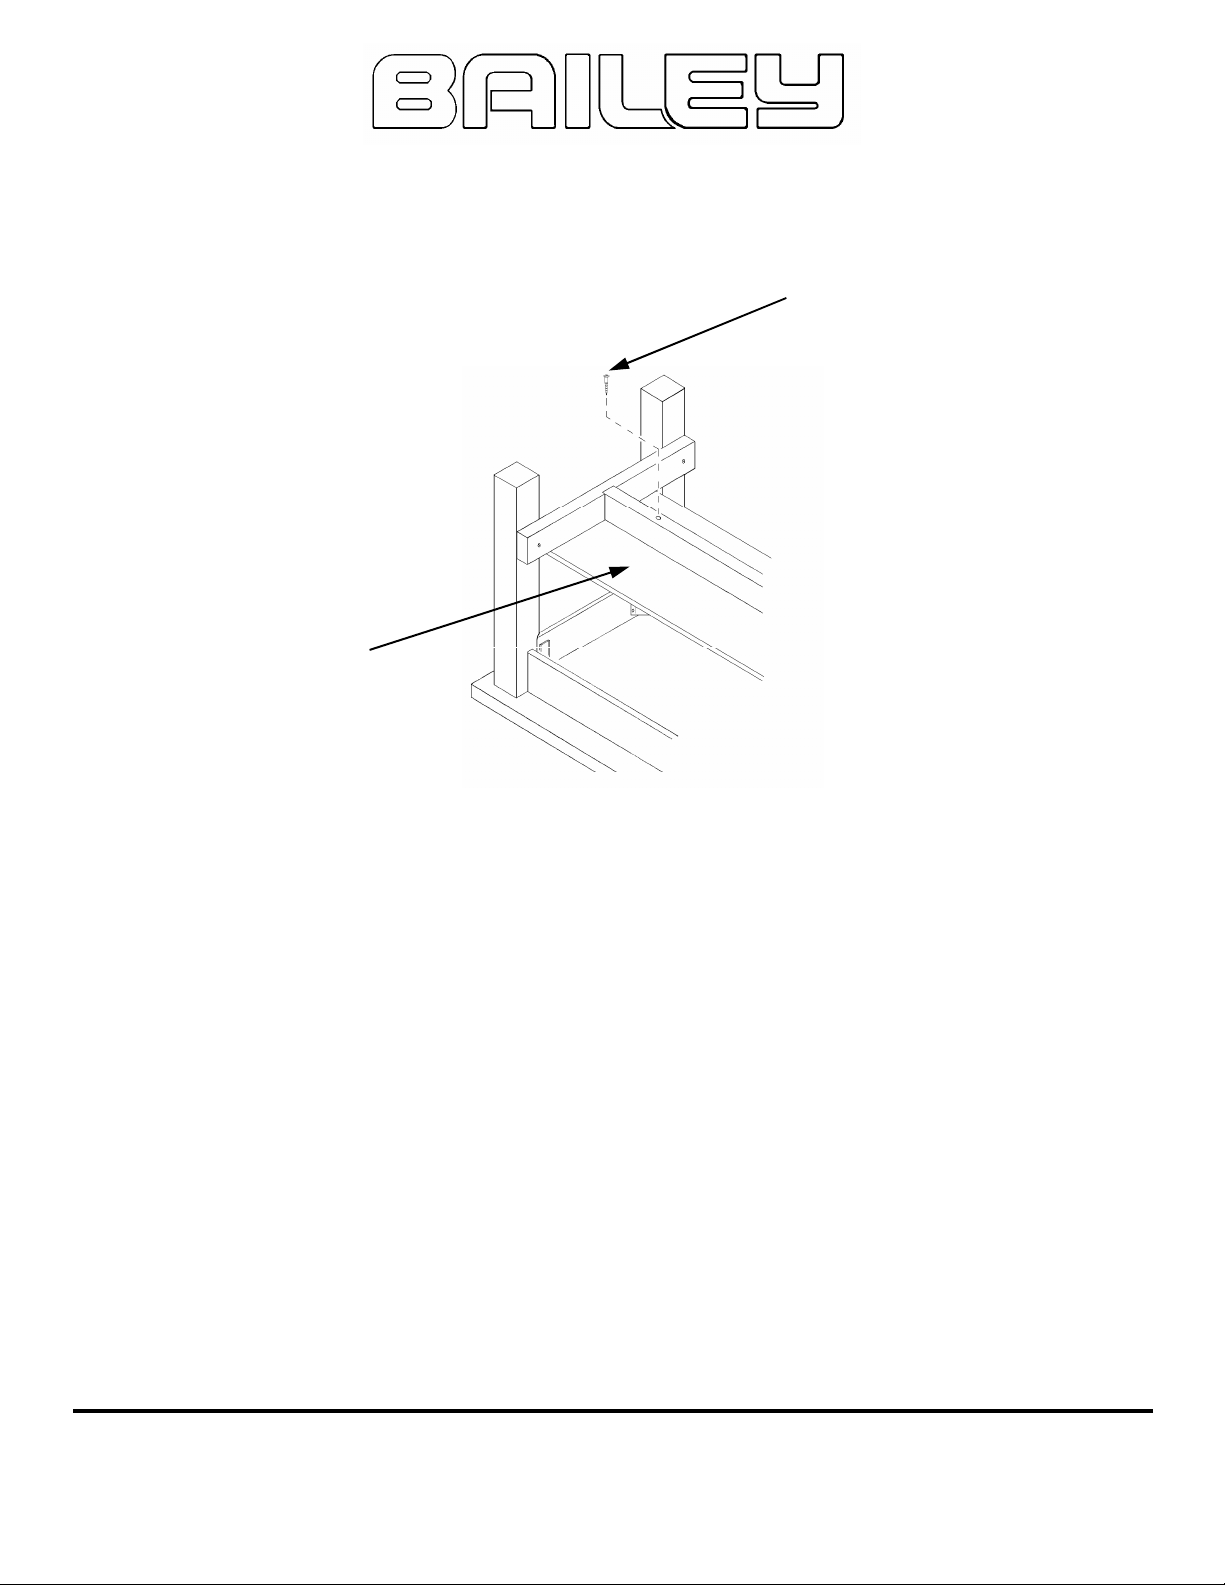
H Brace Assembly, Model 491 and 493 H-Brace Models Only:
Attach each of the two (2) Crossties to a pair of Legs [Crosstie notches face inward toward
each other, Figure 3] at each end using one (1) 2” x #10 Flathead Wood Screw per
leg.
The screws go through the predrilled holes in Crossties and into predrilled starter hole in Legs.
Do not tighten the screws! Crossties must be loose enough to move. Attach the Long
Brace between the Crossties, using two (2) 2” x #10 Flathead Wood Screws through each
Crosstie and into starter holes in the Long Brace. Do not tighten the screws!
Finally, tighten all screws gradually all around the table, until all are tight.
BAILEY MANUFACTURING COMPANY • 800-321-8372 • www.baileymfg.com
Page 5
Plain Shelf
[this side unfinished
with starter holes]
PAGE 5 of 5
Model 492 Plain Shelf Assembly
#3230
2 1/2” x #10
Flathead Wood Screw,
(3) places
H Brace & Shelf Assembly, Model 492 Plain Shelf Models Only:
Refer to H Brace Diagram on previous page. Attach each of the two (2) Crossties to a pair of
Legs [Crosstie notches face inward toward each other, Figure 3] at each end using one (1) 2” x
#10 Flathead Wood Screw per
leg.
The screws go through the predrilled holes in Crossties and into predrilled starter hole in Legs.
Do not tighten the screws! Crossties must be loose enough to move. Attach the Long
Brace between the Crossties, using two (2) 2” x #10 Flathead Wood Screws through each
Crosstie and into starter holes in the Long Brace. Do not tighten the screws!
Note, Plain Shelf Models: there are three predrilled holes in the Long Brace which must
have the countersunk side facing away from the shelf.
For all Plain Shelf Models, attach the Plain Shelf to Long Brace with unfinished side against the
Brace, using three (3) 2 1/2” x #10 Flathead Wood Screws. The Shelf has three (3) predrilled
starter holes in one unfinished side. Align these with the matching holes in the Long Brace and
install the Wood Screws. Tighten these three Screws from the center outward, until the shelf is
flush with the Long Brace and the Screws are flush or slightly below the wood surface.
Finally, tighten all screws gradually all around the table, until all are tight.
BAILEY MANUFACTURING COMPANY • 800-321-8372 • www.baileymfg.com
 Loading...