

Baby Jogger Bicycle Accessories User Manual

ASSEMBLY INSTRUCTIONS
1
1
2
1
2
3
FOR TAILWIND TRAILER AND
SWITCHBACK TRAILER HYBRID
Amazing Quick Fold System (patented)
SwiTchback Trailer/hybri d
These products comply with ASTM F1975-02
Tailwind Trailer
Read these instructions carefully
before use and keep them
for future reference.
Your children’s safety
may be affected if you
do not follow these instructions.
SAFETY GUIDELINES
• WARNING: Avoid serious injury from falling or
sliding out. Always use safety harness(es).
• Always use the crotch strap(s) in combination
with the waist belt(s).
WARNING: Securely attach hitch and safety
•
strap prior to use. Failure to do so can cause an
accident and result in a serious injury.
WARNING: Do not install a car seat or any
•
other seating device not approved by the
manufacturer inside this trailer.
WARNING: Make no modifications to this
•
trailer.
WARNING: Do not allow any of the child’s body,
•
clothing, shoe laces, or toys to come in contact
with moving parts.
WARNING: Never leave child unattended in the
•
trailer.
WARNING: A reflector that complies with
•
CPSC regulations shall be visible on the rear
of the trailer.
WARNING: Before each ride, ensure the
•
attached trailer does not interfere with braking,
pedaling, or steering of the bicycle.
WARNING: Never ride bicycle at night
•
without adequate lighting. Obey all local legal
requirements for lightning. Failure to comply
with the manufacturer’s instructions can lead to
serious injury or death of the passenger/rider.
WARNING: Do not use with children who
•
exceed the weight limitations.
WARNING: Do not use cleaning solvents;
•
clean only with mild soap and water
• CAUTION: Allow extra clearance when making
turns, wide turning radius is required.
Do not turn sharply.
• This unit sits one to two passengers. When
used with one passenger, the passenger
must be seated in the center position.
• Always use flag for increased visibility.
• Make sure your bicycle brakes work properly.
Braking distance is increased when pulling
a trailer.
• Maximum weight capacity – 100lbs (45 kg)
(combined passenger(s) and baggage weight.)
• Not for use at high speed, do not exceed 10mph.
Slow down to less than 6 mph around corners.
• Children must be at least 12 months and able
to sit upright unassisted to ride in trailer.
• Passenger must wear a CPSC or CE approved
bicycle helmet when riding in trailer.
• Check tire pressure before each use. Refer to
the number on the tire wall for the optimum
tire pressure for your tires.
• We strongly recommend that the bicycle on
which the trailer will be attached to, undergo
a safety check by a qualified bicycle mechanic
before attaching the trailer to it.

FRAME
1 Set wheels aside for now.
2 Before unfolding trailer frame, you will need
to unsnap storage straps on both sides.
These are located near the trailer handle.
3 Flip trailer frame so handle
is laying on top.
WARNING: ENSURE THAT ALL LOCKING DEVICES ARE ENGAGED BEFORE USE.
FAILURE TO DO SO COULD CAUSE THE TRAILER TO COLLAPSE.
4 Pull handle up until frame locks into place.
1
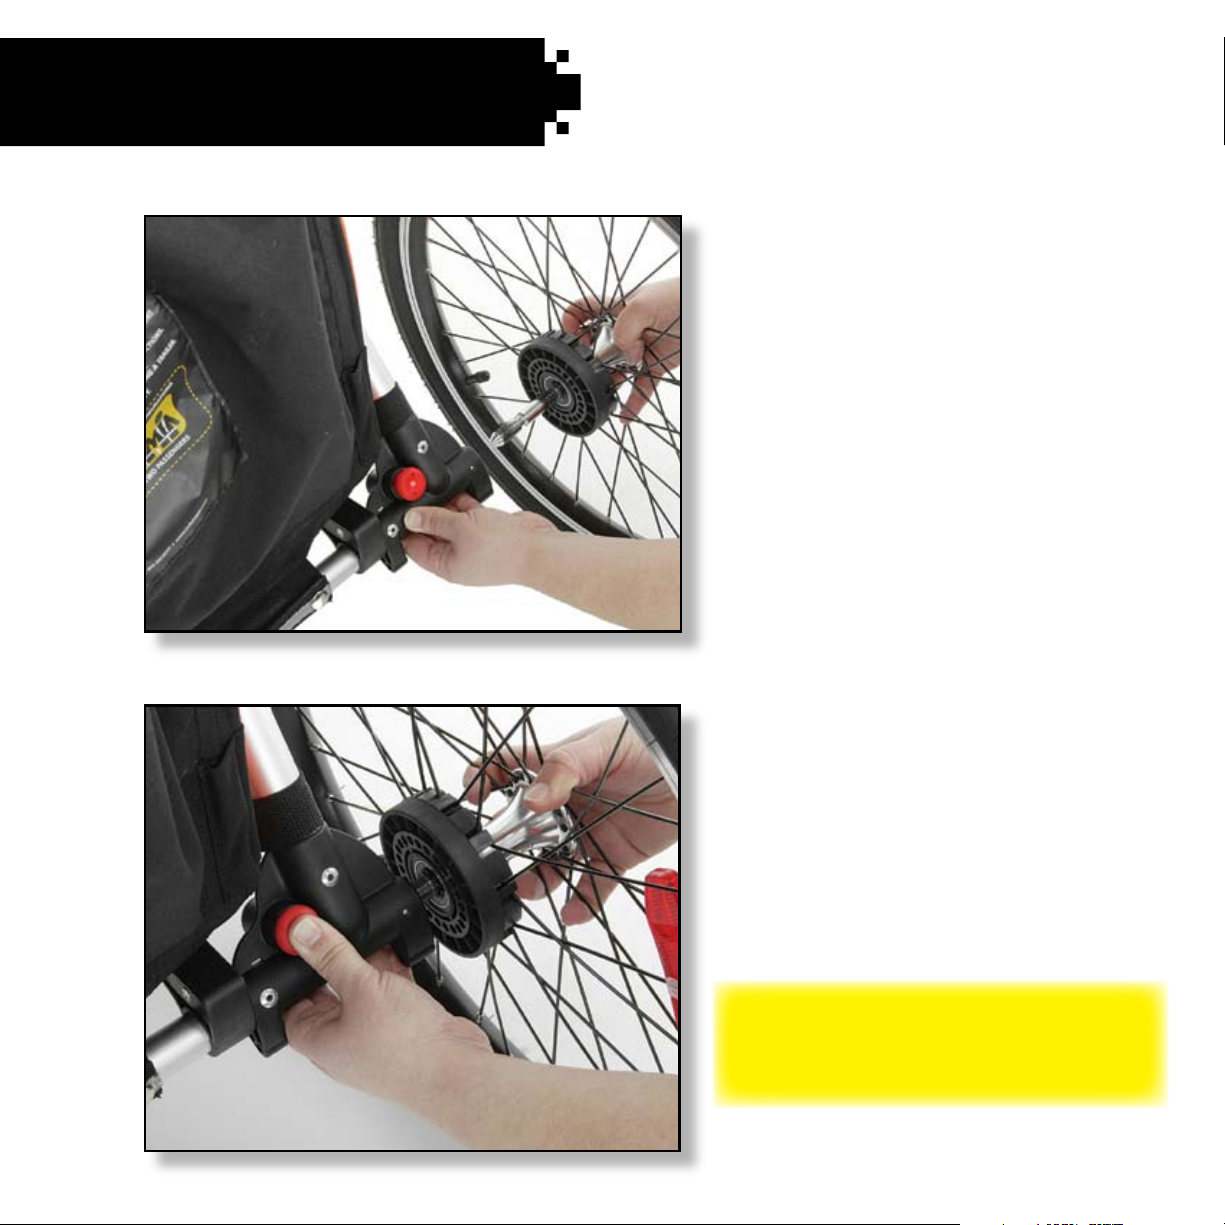
REAR WHEELS
• To install rear wheel, gently slide
the wheel’s rear axle into the
trailer’s axle end until you hear it
click into place.
• To remove rear wheels, simply
push the red release button on
the trailer’s rear axle while pulling
the wheel out.
IMPORTANT: To ensure the wheel is
properly secured to the frame, test by
trying to pull the wheel out after installing.
2
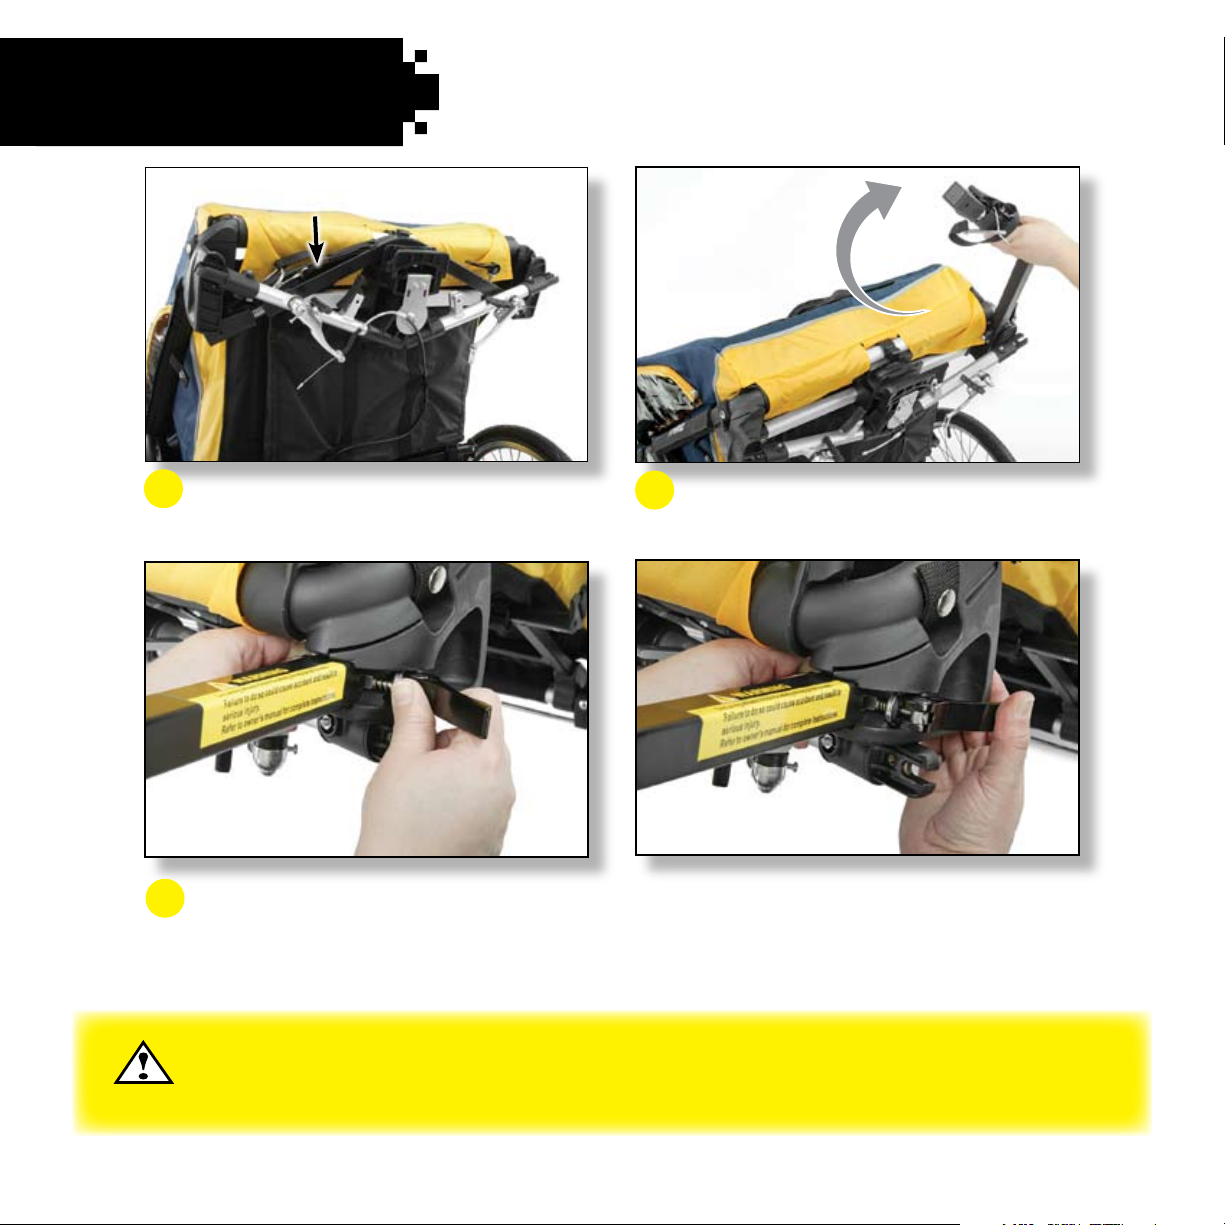
TOW BAR
Tow Bar
1 Locate tow bar under front end of
trailer frame.
2 Pull tow bar up and to the side.
3 Insert tow bar into frame bracket by pushing down on the tow bar’s quick release skewer.
Once the quick release skewer has popped into place, secure tow bar by pressing quick
release lever until it is locked into position.
(To ensure tow bar is properly secured, test by pushing inward.)
WARNING: FAILURE TO LOCK TOW BAR’S QUICK RELEASE SKEWER PROPERLY TO THE FRAME
COULD CAUSE AN UNSTABLE CONDITION RESULTING IN SERIOUS INJURY OR DEATH.
3

SECURING HITCH TO BICYCLE
If your rear wheel bicycle has a quick release skewer please skip to page 5.
Rear Wheel With Lock Nut
1
Remove lock nut (turning counterclockwise)
from bicycle’s rear wheel hub.
The adaptor piece isn’t needed on this
style hub, you may want to store it for
future need.
IMPORTANT: We strongly recommend that the bicycle on which the trailer will be attached,
undergo a safety check by a qualified bicycle mechanic before attaching the trailer.
WARNING: FAILURE TO PROPERLY TIGHTEN LOCK NUT TO BICYCLE COULD CAUSE
HITCH FAILURE AND WHEEL LOSS RESULTING IN A SERIOUS INJURY OR DEATH.
4
Mount hitch to bicycle’s rear wheel
2
bolt with lock nut and tighten (turning
clockwise) using a wrench while holding
the hitch in place to prevent it from
moving.
 Loading...