

AXTON AT-115H-270P, AT-33H-180P, AT-33H-360P, AT-50H-270P Quick Setup Guide
Quick Setup Guide Panoramic Hybrid
ILLUMINATE THE NIGHT
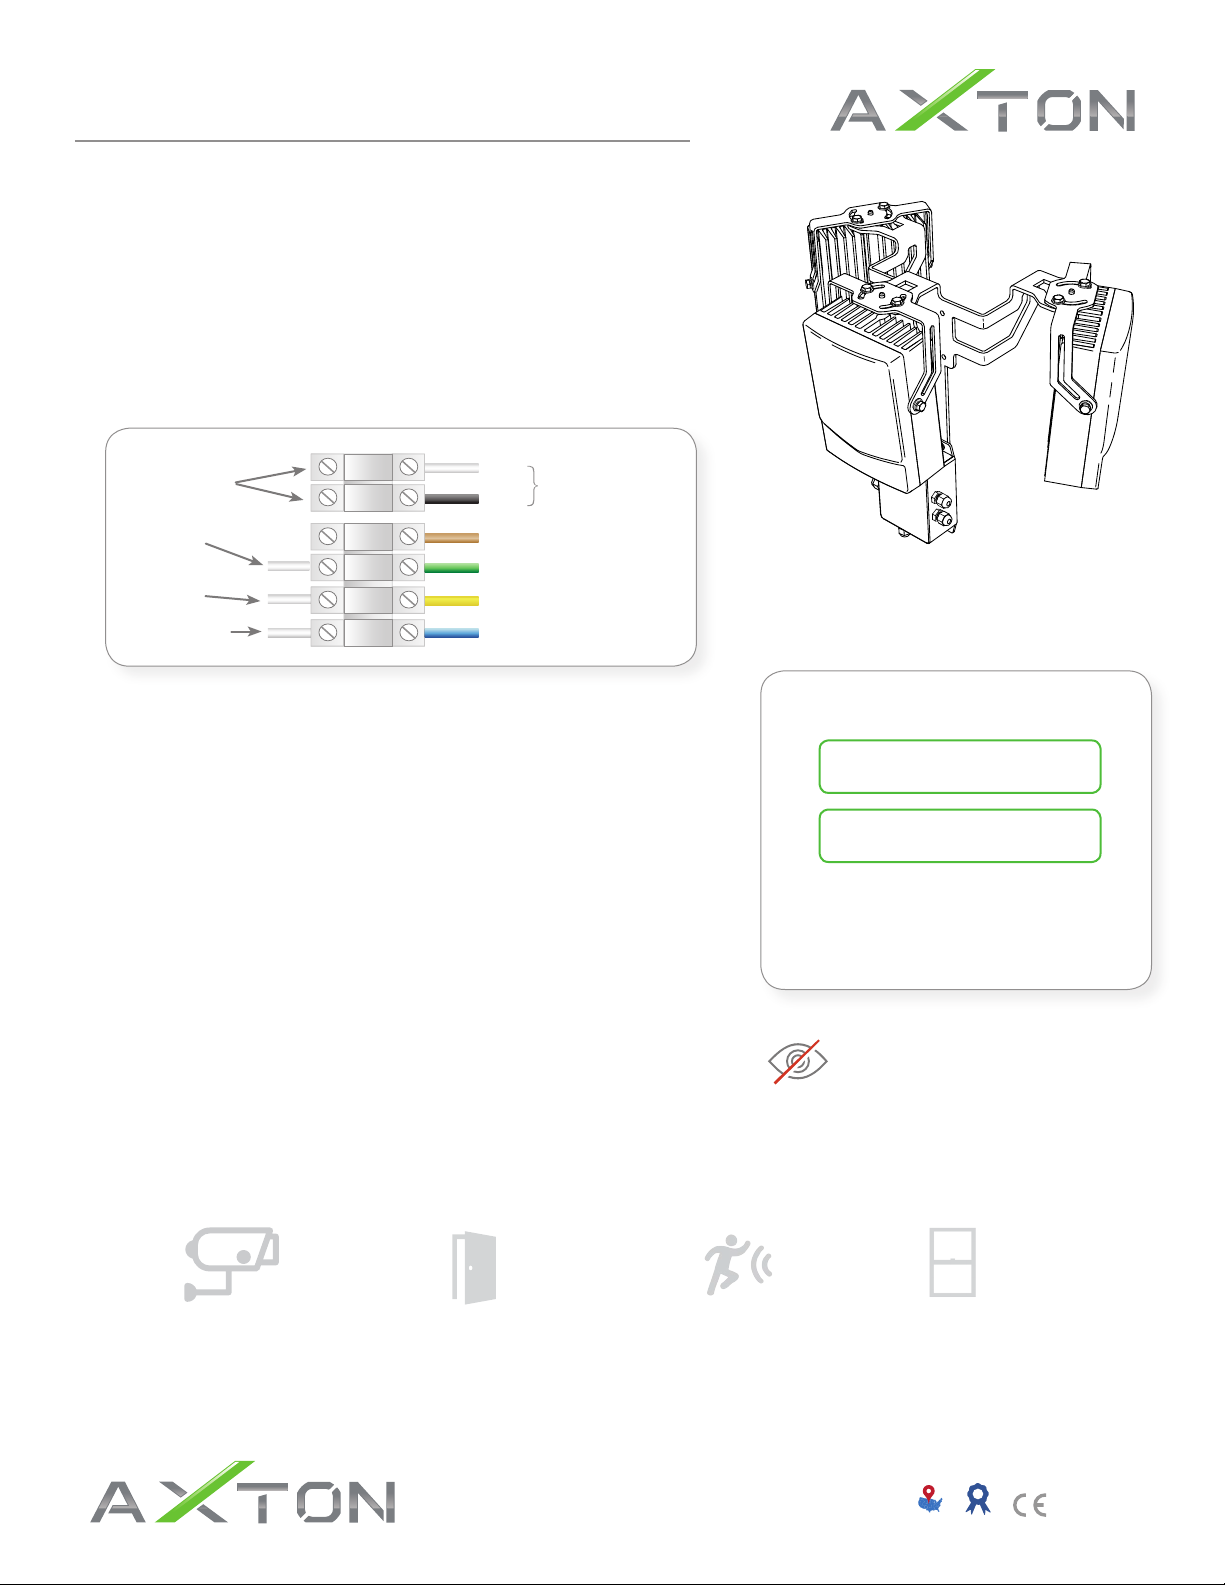
TO/ FROM CAMERA
WIRING
Illuminator Ground Must Be Connected
to Cameras Digital Ground-Wiring
AXTON Illuminators have been designed and tested to run 24/7
continuously both indoors and outdoors.
Apply Power
To Trigger
Device
To Trigger
Device
Digital GND
PROGRAM YOUR CAMERA
You will need to log into the camera via computer and program
the I/O ports to trigger when IR illumination is desired.
WHITE
BLACK
BROWN
GREEN
YELLOW
BLUE
Power Input
IN/Infrared
IN/ White Light
OUT
Digital GND
TO / FROM ILLUMINATOR
Picture example only
Make all electrical connections
TTTTTTT
BEFORE applying power.
Voltage Input Configurations
1.
24 V AC/DC
1.
To switch illuminator Infrared ON, your camera Output port(s)
have to be set as ACTIVE LOW. Status should be set to change
in association with/during an event like IR cut filter, motion
detection, etc.
To switch illuminator White Light ON, you will need a camera
with a second output or an external triggering device such as a
motion detector, door contact, etc. which will need to be set up
the same as above (ACTIVE LOW).
Common Trigger Devices
Below are some examples of devices that can be used to trigger
the illuminator's white light to switch ON during an event.
Camera Door Contact Window SensorMotion Detector
2.
110 - 220 VAC
Polarity NON-Sensitive
Applying voltage other than the required range may
cause permanent damage and VOID WARRANTY.
WARNING! Infrared light is not visible.
Do not view directly with optical instruments (magnifiers)
or stare directly into the illuminator at close distance.
Do not attempt to open or modify the light as this will void the
warranty. If you need a modification, electric or physical, contact us
directly. We will let you know if it can be done. All changes MUST be
made at our factory.
QUESTIONS ? (801) 519-0500 or support@axtontech.com │ www.axtontech.com
801 West Robinson Drive, Suite 500, North Salt Lake, UT 84054
q801/519-0500 < 801/519-0501 %sales@axtontech.com
Made in the USA
Lifetime Warranty
 Loading...