

Page 1

Preface
Thank you for purchasing the AXIS 540/640 Network Print Server. Our goal in developing this
product is to enable you to connect your printers anywhere in your network, allowing all network
users access to shared printer resources.
About Axis
Axis Communications, founded in 1984, is one of the world’s fastest growing companies in the
market of network connectivity. The headquarters are located in Lund, Sweden, with subsidiaries
in Beijing, Boston, Hong Kong, Paris, Sao Paulo, Shanghai, Singapore and Tokyo.
Axis Communications has a distributor network operating in more than 60 countries world-wide,
marketing four major product lines:
Network CD-ROM Servers. Multi-protocol CD-ROM servers provide a flexible and
cost-efficient solution for sharing CD-ROMs across the network. The AXIS StorPoint CD, the
stand-alone version, and the AXIS StorPoint CD/T, the plug-in CD-ROM tower module, are
both available in Ethernet and Token Ring versions.
Network Print Servers. These intelligent Ethernet and Token Ring print servers support a
wide range of LAN protocols. The AXIS 150, 152, 540, 542, 560, 570 are Ethernet print servers,
while the AXIS 640, 642, 660, 670 are Token Ring print servers.
Network Camera Servers. The AXIS NetEye 200 Network Camera attaches directly to an
Ethernet network and supports TCP/IP and Internet-related protocols, acting as a Web server.
IBM Mainframe and S/3x – AS/400 Printer Interfaces. These products include a wide
range of plug-in interfaces and stand-alone products such as the AXIS Cobra+, AXIS 330/370 Cobra, AXIS HP MIO, the AXIS AFP IPDS-to-PostScript converter and the AXIS AFP MIO/IOP
IPDS-to-PCL converters.
About this manual
This manual will guide you through simple step-by-step installation and set up procedures.
Introduction - The AXIS 540/640 Print Server, how it works, where to use it, its main features.
Basic Installation - How to connect your AXIS 540/640 to your printer and network.
Setting Up... - Five sections; one for each of the network environments for your AXIS 540/640.
AXIS 540/640 User’s Manual 1
Page 2

Every care has been taken in the preparation of this manual; if you detect any inaccuracies or
omissions, please inform us at the address on the back cover. Axis Communications AB cannot be
held responsible for any technical or typographical errors and reserves the right to make changes
to the product and manuals without prior notice.
Electromagnetic Compatibility (EMC) notices
USA
This equipment generates, uses, and can rad iate radio frequency energy and if not installed and used in accordance with the
instruction manual, may cause interference to radio communications. It has been tested and found to comply with the limits for a
Class A computing device pursuant to Subpar t B of Part 15 of FCC rules, which a re designed to provide reasonable protection against
such in terference when operated in a commercial environment. Operation of this equipment in a residential area is likely to cause
interference in which case the user at his own expense will be required to take whatever measures may be required to correct the
interference. Shielded cables should be used with this unit to ensure compliance with the Class A limits.
Europe
This digital equipment fulfils the requirements for radiated emission a ccording to limit B of EN55022/1987, and the requirements
for immunity according to EN50082-1/1992 residential, commercial, and light industry. (Compliance is not valid for unshielded
network and printer cables.)
Trademark acknowledgements
AIX, Apple, DEC, DOS, Ethernet, EtherTalk, HP, IBM, LAN Manager, LAN Server, Ma cintosh, Microsoft, MVS, Netscape,
Novell NetWare, OS/2, OS/400, PostScript, PS/2, SCO, TokenTalk, UNIX, VM, VMS, VSE, Windows, Internet Explorer ,
Netscape Navigator, Oracle Power Browser, NCSA Mosaic, Chimera, WWW, Internet are r egistered tradema rks of the respective
holders.
AXIS 540/640 User’s Manual Revision 2.1
Part No: 14677 Dated: January 1997
Copyright © Axis Communications AB, 1996
2 AXIS 540/640 User’s Manual
Page 3

Table of Contents
Table of Contents
Section 1 Introduction . . . . . . . . . . . . . . . . . . . . . . . . . . . . . . . . . . . . . . . . . . . . . . . . . . . . . . . 5
Where to use it . . . . . . . . . . . . . . . . . . . . . . . . . . . . . . . . . . . . . . . . . . . . . . . . 8
Section 2 Basic Installation . . . . . . . . . . . . . . . . . . . . . . . . . . . . . . . . . . . . . . . . . . . . . . . . . . 13
Checking and Identifying the Hardware . . . . . . . . . . . . . . . . . . . . . . . . . . . 13
Connecting Printers to the AXIS 540/640 . . . . . . . . . . . . . . . . . . . . . . . . . 17
Connecting the AXIS 540/542 to the Ethernet Network . . . . . . . . . . . . 18
Connecting the AXIS 640/642 to the Token Ring Network . . . . . . . . . 19
Basic Set Up of the Network . . . . . . . . . . . . . . . . . . . . . . . . . . . . . . . . . . . 20
Basic Set Up with AXIS NetPilot . . . . . . . . . . . . . . . . . . . . . . . . . . . . . . . . 22
Basic Set Up for TCP/IP . . . . . . . . . . . . . . . . . . . . . . . . . . . . . . . . . . . . . . . . 25
Section 3 Setting Up - NetWare . . . . . . . . . . . . . . . . . . . . . . . . . . . . . . . . . . . . . . . . . . . . . 35
Set Up using the AXIS NetPilot . . . . . . . . . . . . . . . . . . . . . . . . . . . . . . . . . 35
Other NetWare Configuration Methods . . . . . . . . . . . . . . . . . . . . . . . . . 42
Section 4 Setting Up - Windows . . . . . . . . . . . . . . . . . . . . . . . . . . . . . . . . . . . . . . . . . . . . . 45
Installation Using AXIS Print Utility for Windows . . . . . . . . . . . . . . . . . . . 45
Windows 3.1 . . . . . . . . . . . . . . . . . . . . . . . . . . . . . . . . . . . . . . . . . . . . . . . . . 47
Windows for Workgroups . . . . . . . . . . . . . . . . . . . . . . . . . . . . . . . . . . . . . 48
Windows 95 . . . . . . . . . . . . . . . . . . . . . . . . . . . . . . . . . . . . . . . . . . . . . . . . . 51
Windows NT . . . . . . . . . . . . . . . . . . . . . . . . . . . . . . . . . . . . . . . . . . . . . . . . 53
Windows NT - LPD Printing . . . . . . . . . . . . . . . . . . . . . . . . . . . . . . . . . . . . 54
Other Windows Configuration Methods . . . . . . . . . . . . . . . . . . . . . . . . . 56
Section 5 Setting Up - OS/2 . . . . . . . . . . . . . . . . . . . . . . . . . . . . . . . . . . . . . . . . . . . . . . . . . 57
Installation Using AXIS Print Utility for OS/2 . . . . . . . . . . . . . . . . . . . . . . 57
Integrating your AXIS 540/640 into the OS/2 Environment . . . . . . . . . . 59
Other OS/2 Configuration Methods . . . . . . . . . . . . . . . . . . . . . . . . . . . . . 61
Section 6 Setting Up - Macintosh . . . . . . . . . . . . . . . . . . . . . . . . . . . . . . . . . . . . . . . . . . . . . 63
Installation Using the Chooser Window . . . . . . . . . . . . . . . . . . . . . . . . . . 63
Choosing a Printer . . . . . . . . . . . . . . . . . . . . . . . . . . . . . . . . . . . . . . . . . . . . 64
Other Macintosh Configuration Methods . . . . . . . . . . . . . . . . . . . . . . . . . 68
AXIS 540/640 User’s Manual 3
Page 4

Table of Contents
Section 7 Setting Up - UNIX . . . . . . . . . . . . . . . . . . . . . . . . . . . . . . . . . . . . . . . . . . . . . . . . 69
Installation in the UNIX Environment . . . . . . . . . . . . . . . . . . . . . . . . . . . . 69
Print Methods on TCP/IP Networks . . . . . . . . . . . . . . . . . . . . . . . . . . . . . 72
Using Telnet with the AXIS 540/640 . . . . . . . . . . . . . . . . . . . . . . . . . . . . . 82
Using SNMP for Remote Monitoring . . . . . . . . . . . . . . . . . . . . . . . . . . . . . 85
Other UNIX Configuration Methods . . . . . . . . . . . . . . . . . . . . . . . . . . . . . 87
Section 8 Web Based Management . . . . . . . . . . . . . . . . . . . . . . . . . . . . . . . . . . . . . . . . . . . 89
Accessing the Web Pages . . . . . . . . . . . . . . . . . . . . . . . . . . . . . . . . . . . . . . 90
Enhanced HTTP Management Services . . . . . . . . . . . . . . . . . . . . . . . . . . . 92
Appendix A The Test Button . . . . . . . . . . . . . . . . . . . . . . . . . . . . . . . . . . . . . . . . . . . . . . . . . . 95
Appendix B The Parameter List . . . . . . . . . . . . . . . . . . . . . . . . . . . . . . . . . . . . . . . . . . . . . . . . 97
Editing the Configuration Parameters . . . . . . . . . . . . . . . . . . . . . . . . . . . . . 97
The Config File . . . . . . . . . . . . . . . . . . . . . . . . . . . . . . . . . . . . . . . . . . . . . . . 99
Appendix C Updating the Software . . . . . . . . . . . . . . . . . . . . . . . . . . . . . . . . . . . . . . . . . . . . 105
Obtaining the Updated Software . . . . . . . . . . . . . . . . . . . . . . . . . . . . . . . 105
Upgrading the Software . . . . . . . . . . . . . . . . . . . . . . . . . . . . . . . . . . . . . . . 106
Appendix D Technical Specifications . . . . . . . . . . . . . . . . . . . . . . . . . . . . . . . . . . . . . . . . . . . 109
Appendix E How To Contact Axis . . . . . . . . . . . . . . . . . . . . . . . . . . . . . . . . . . . . . . . . . . . . 113
Index . . . . . . . . . . . . . . . . . . . . . . . . . . . . . . . . . . . . . . . . . . . . . . . . . . . . . . . . . . . 117
4 AXIS 540/640 User’s Manual
Page 5
Section 1 Introduction
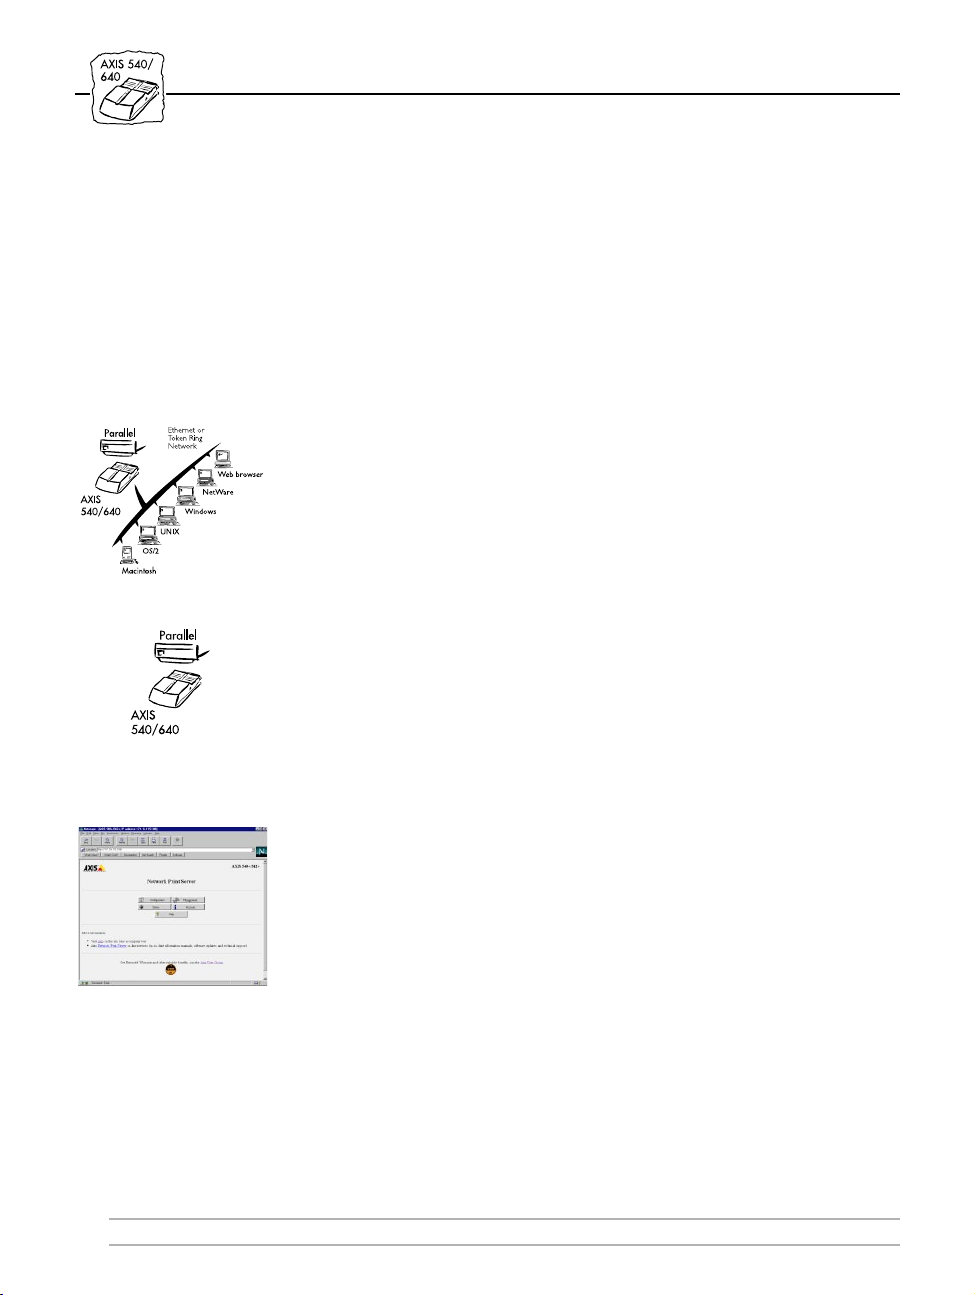
The AXIS 540/640 series is a range of plug-in network print servers
for use in Ethernet and Token Ring environments. The AXIS
540/640 server plugs directly into the printer’s parallel port and
provides all network users with access to shared printer resources.
Using state of the art technology the server provides excellent print
flexibility and simultaneously supports multiple network protocols.
This includes advanced support for TCP/IP, support for NetWare
including NDS, and support for over 20 UNIX systems, Windows for
Workgroups, Windows 95, Windows NT, and OS/2. The AXIS
540/640 range also includes AXIS 540+ and 542+ models which
support Apple EtherTalk in addition to the above protocols.
Section 1: Introduction
Network
Connections
The AXIS 540/542 and AXIS 640/642 print servers have identical
functionality, but are designed for use in different network
environments, or with different types of network cabling.
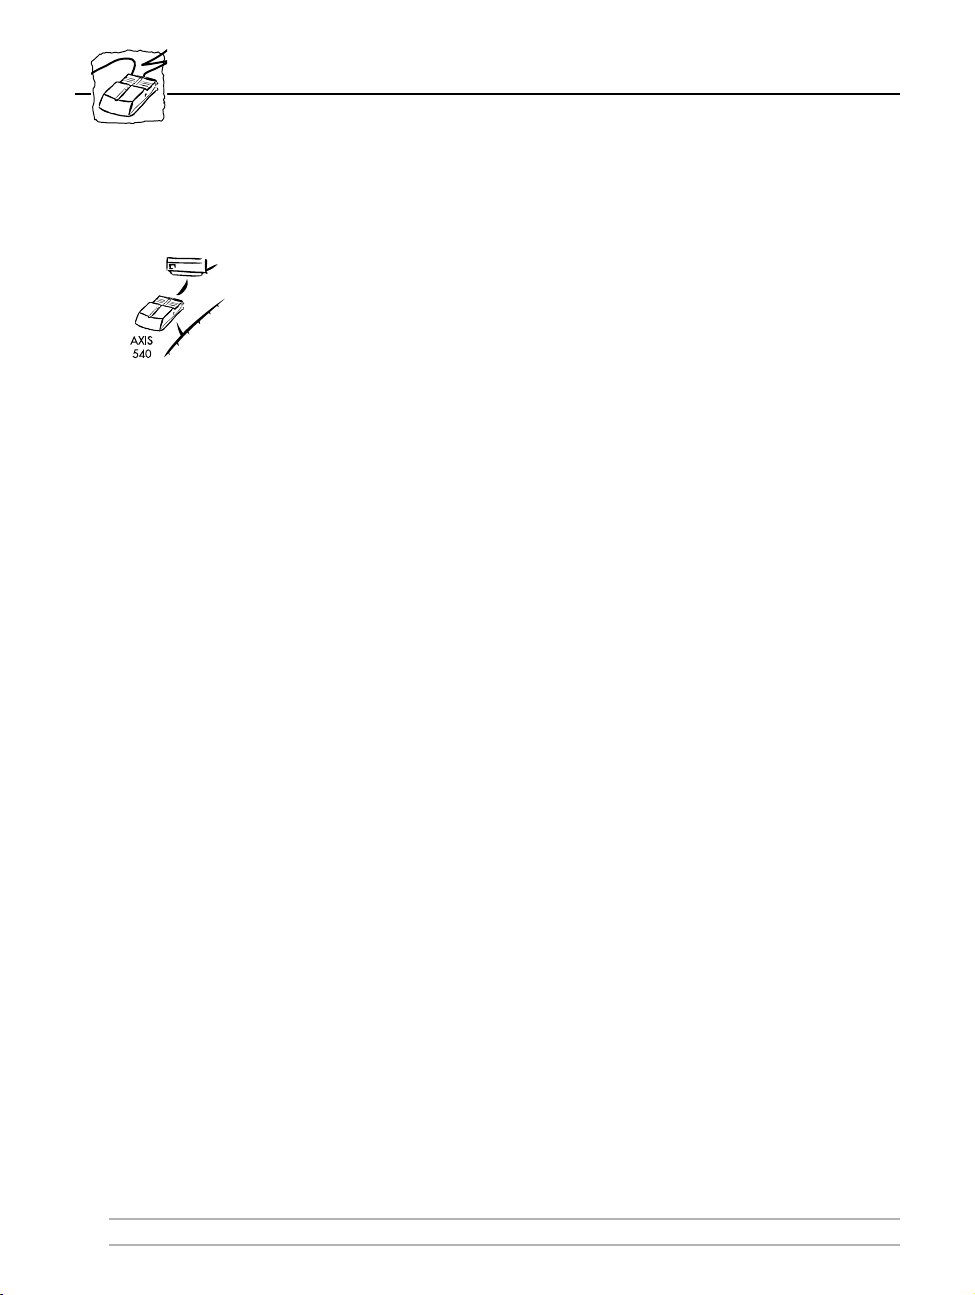
The AXIS 540/540+ and AXIS 542/542+ are suitable for Ethernet
network environments. The AXIS 540/540+ have network connectors
for twisted pair (10 base T) cabling, while the AXIS 542/542+ have
network connectors for thin wire (10 base2) cabling.
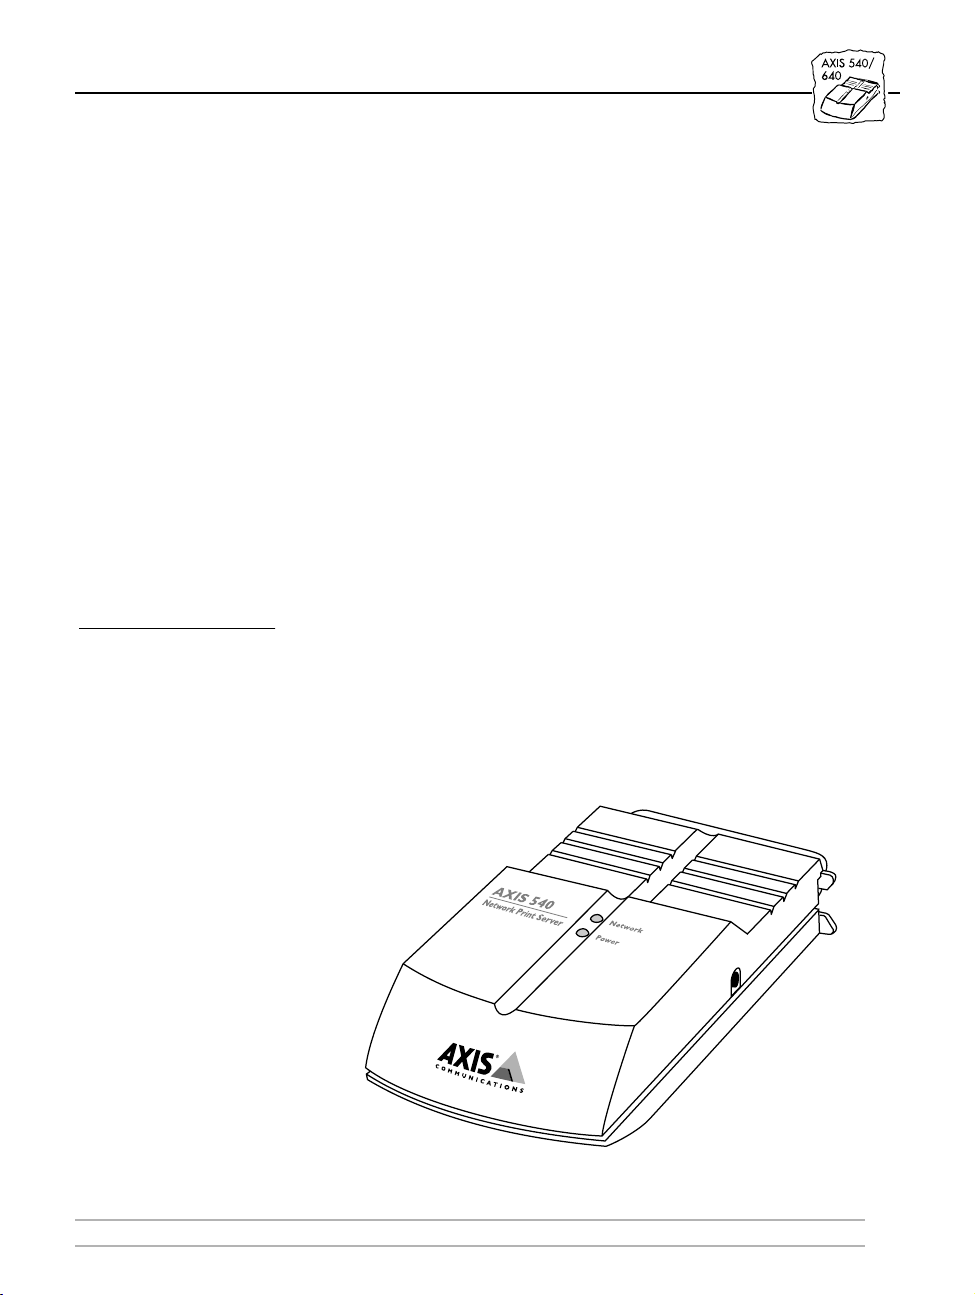
The AXIS 540 Network Print Server
AXIS 540/640 User’s Manual 5
Page 6
Section 1: Introduction
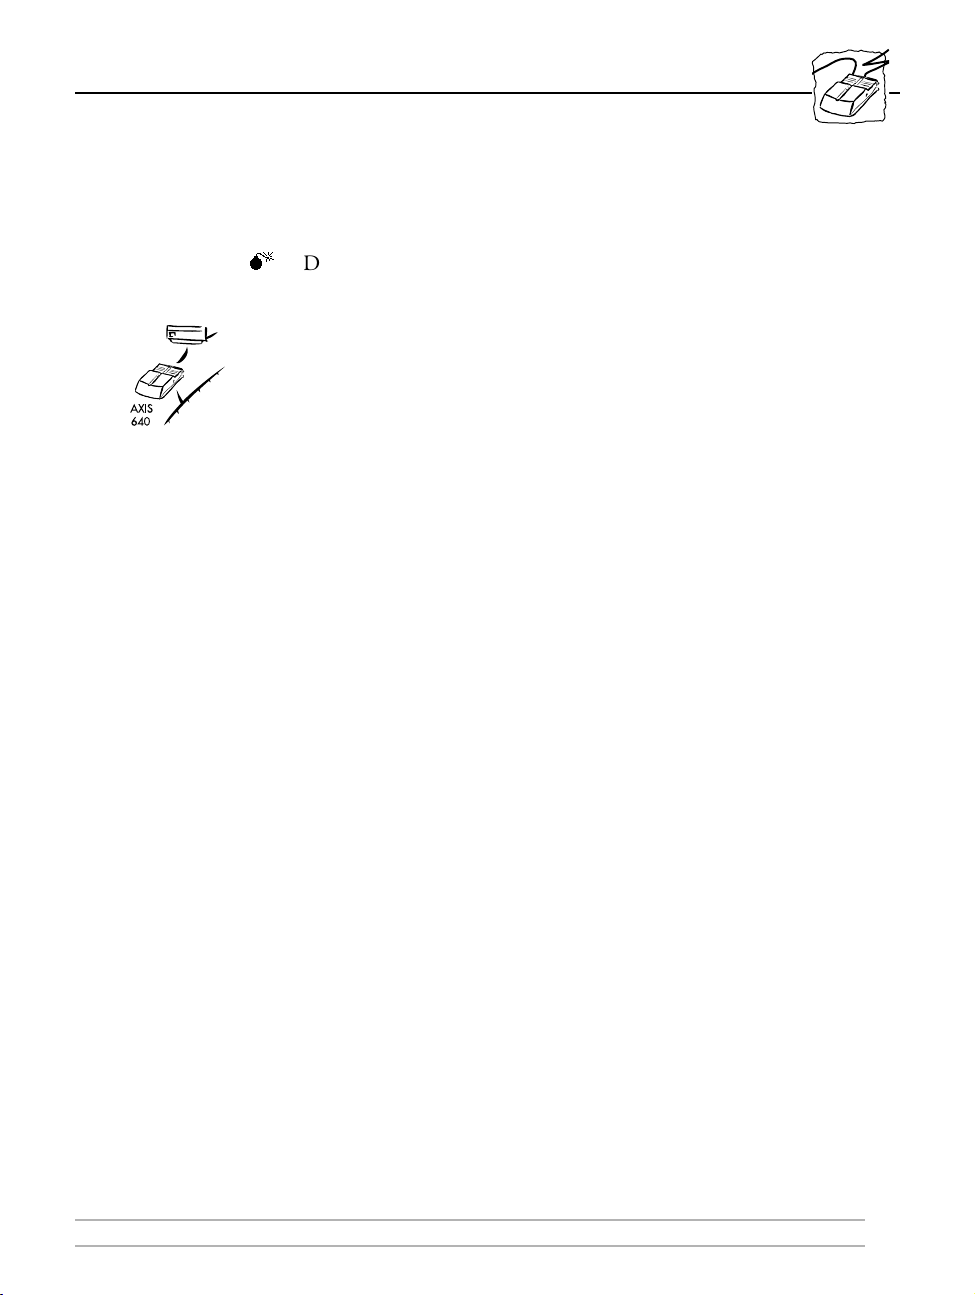
The AXIS 640/642 models are suitable for Token Ring network
environments. The AXIS 640 has a network connector for Unshielded
Twisted Pair (UTP) cabling, while the AXIS 642 has a network
connector for Shielded Twisted Pair (STP) cabling.
How it Works
Because of the variety of computer and operating systems employed in
a modern computing environment, it is common for print data to be
transmitted across a single network using a variety of transport
protocols. The AXIS 540/640 Print Server automatically detects the
protocol being used for each print job, and adapts the print data into a
format which is suitable for the printer.
As the AXIS 540/640 is a pocket-sized print server which plugs
directly in to the printer’s parallel port, there is no need for additional
cabling.
Installation of the AXIS 540/640 and its integration into the network
is performed using one of the Axis software packages; AXIS Print
Utility for Windows, AXIS Print Utility for OS/2, axinstall for UNIX
environments, and AXIS NetPilot.
If you are using the TCP/IP network transport protocol and have
access to an Internet browser, you may also access AXIS 540/640 series
of Network Print Servers from any standard Web browser, regardless
of your type of platform. Furthermore, the enhanced HTTP support
available in the AXIS 540+/542+ and Token Ring models includes a
quick and easy management tool that allows you to configure and view
unit status, within all supported networking environments.
6 AXIS 540/640 User’s Manual
Page 7
World
Wide
Web
Section 1: Introduction
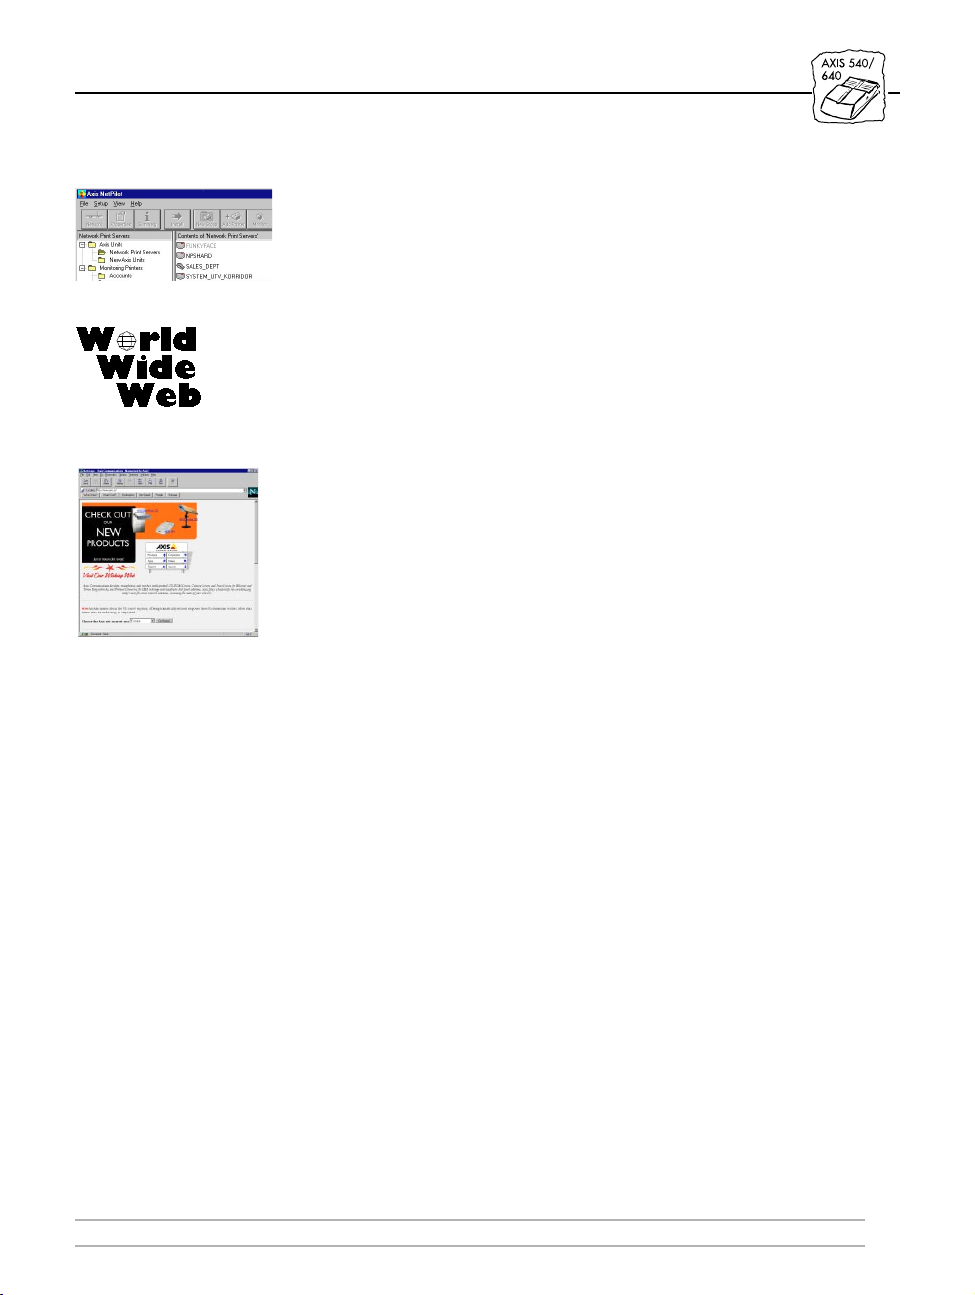
The AXIS NetPilot software, which is supplied on the AXIS Utilities
diskette, makes the job of installation and configuration quick and
convenient. AXIS NetPilot runs on Windows platforms, and provides
a quick installation facility so that the AXIS 540/640 can be rapidly
put to use. Together with the supplied AXIS Utilities, it provides user
friendly facilities to tune the configuration, allowing you to maintain
optimum printing performance as you make changes to the network.
For more detailed information that is not included in this manual, you
are invited to visit our WWW Home Page where you can down-load
further technical information. You may also down-load on-line
manuals, tools such as the Acrobat Reader and the latest versions of the
software utilities. Naturally enough links to this information are
provided from within the AXIS 540/640 home pages. Your Axis dealer
will also be pleased to provide you with additional information or
assistance that you might require. For details on the appropriate
WWW addresses in your region, please refer to Appendix E - How To
Contact Axis.
AXIS 540/640 User’s Manual 7
Page 8
Section 1: Introduction
Where to use it
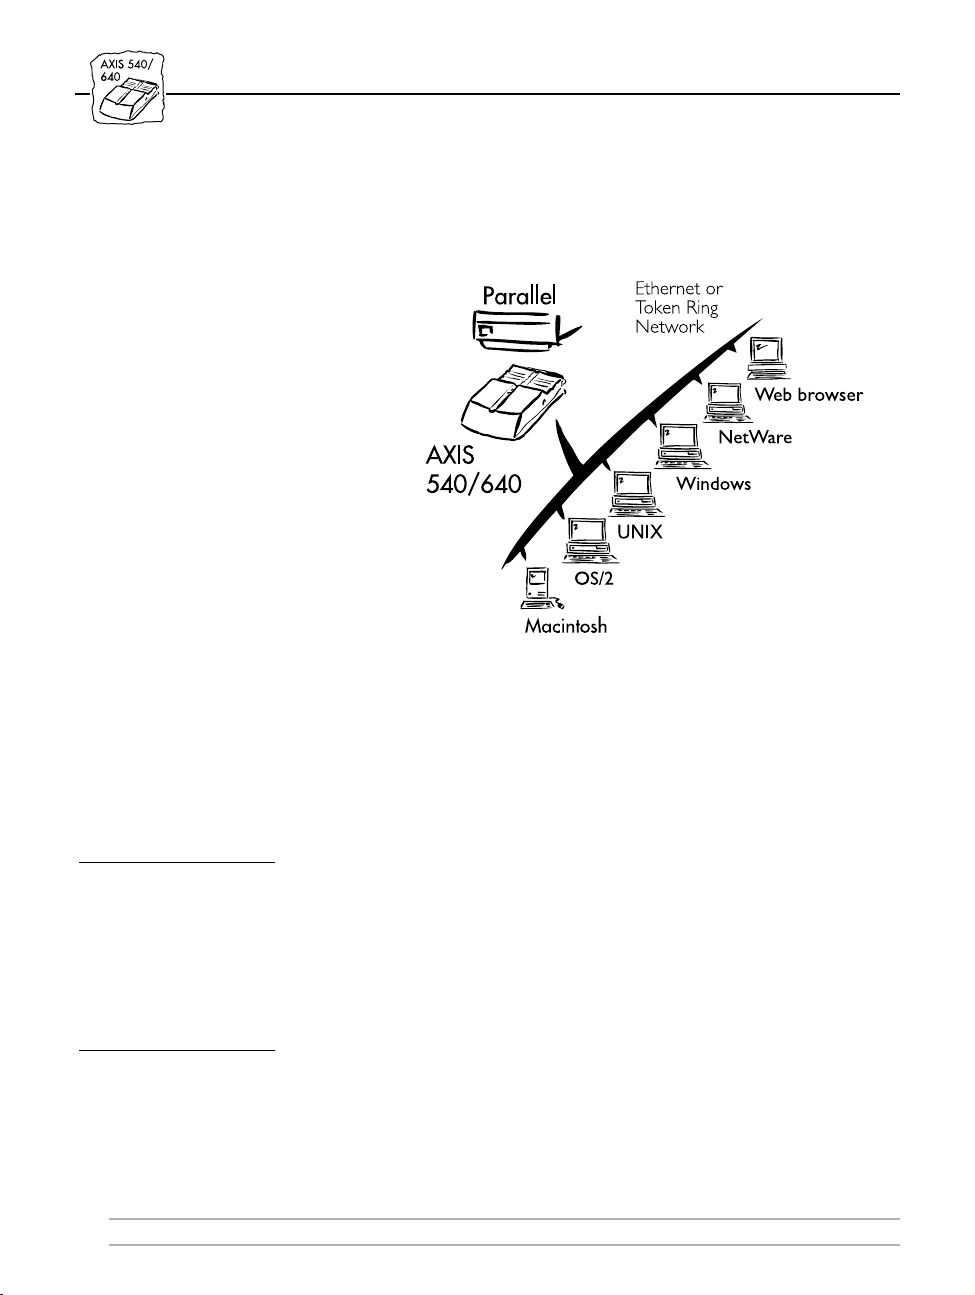
The AXIS 540/640 can communicate with all the major computer
systems and network protocols. The supported protocols can be
handled simultaneously making the AXIS 540/640 the ideal print
server solution for a mixed systems environment.
Web Browser Because the AXIS 540/640 comprises its own built-in Web server it
may be configured and managed directly from its own Web pages,
using HTTP over a TCP/IP network. Access to the AXIS 540/640 via
HTTP, affords the user with a platform-independent management
tool that is suitable for all of the supported network environments.
NetWare
Environment
AXIS NetPilot is the preferred utility for installing and integrating the
AXIS 540/640 into a NetWare environment. The AXIS 540/640 can
be operated in both Print Server Mode and Remote Printer Mode.
It is compatible with both NetWare 4.10 and above (NDS and
bindery emulation), as well as NetWare 3.11, 3.12.
8 AXIS 540/640 User’s Manual
Page 9

Section 1: Introduction
In Print Server Mode the AXIS 540/640 emulates a NetWare print
server, while in Remote Printer Mode it emulates a workstation
running RPRINTER or NPRINTER. Logical printers are supported
in both bindery and NDS modes for both PSERVER and
NPRINTER.
Windows
Environments
Unless you wish to change the default name of your AXIS 540/640
the setup operation within the windows environment may be
performed solely with the AXIS Print Utility for Windows, which is
supplied on the AXIS Utilities diskette.
Having installed the AXIS 540/640 onto your network, the AXIS
Print Utility for Windows may then be used to install and maintain
the print server ports as Windows printer ports. Windows 3.1,
Windows for Workgroups, Windows 95, and Windows NT are all
supported.
OS/2 Environments Unless you wish to change the default name of your AXIS 540/640
the setup operation in an OS2 environment may be performed solely
with the supplied AXIS Print Utility for OS2.
Use the AXIS Print Utility for OS/2 to install and integrate the AXIS
540/640 into the OS/2 spool system. The printers attached to the
AXIS 540/640 will appear as connected directly to the file server, and
may be used by any client on your network.
UNIX Environment You can use the AXIS 540/640 as an integral part of your system, so
that the printers appear directly connected to the host print spool. Use
axinstall for the integration. You can also operate the AXIS 540/640 in
an interactive mode to print your host documents.
Several protocols and print methods are provided, the choice of which
is governed by your requirements and the system you are using. Five
print methods are supported in UNIX: LPD, FTP, PROS A,
PROS B, and Reverse Telnet.
The AXIS 540/640 supports any host that uses the TCP/IP protocol
suite.
AXIS 540/640 User’s Manual 9
Page 10

Section 1: Introduction
Macintosh
Environment (AXIS
540+/542+ only)
The printer connected to the AXIS 540+/542+ will appear as a
LaserWriter printer connected to an AppleTalk network. Once
selected from the Chooser window in the Apple menu, the printers
can be accessed in the same manner as any other LaserWriter.
Main Features
Reliability The AXIS 540/640 hardware provides high performance and
reliability combined with low power consumption. The electronic
circuits are based on the proven AXIS ETRAX chip that comprises an
integrated 32 bit RISC processor and associated network controllers.
Flexibility It supports NetWare, Windows 95, Windows NT, Windows for
Workgroups, OS/2, Macintosh, and UNIX simultaneously, and five
different print methods in the TCP/IP environment.
Speed The AXIS ETRAX chip has been specifically designed for LAN
products and benefits users with a significantly faster throughput than
a direct PC-to-printer connection. The AXIS 540/640 has a sustained
data throughput of up to 390 kbytes per second. It also supports high
speed Centronics communication such as Hewlett-Packard Fast
Mode, High Speed and IBM Fast Byte is supported.
Easy to Install Without being a computer expert you can install the AXIS 540/640 in
minutes, allowing you to quickly realise the benefits afforded by
workgroup printing. The AXIS NetPilot installation software includes
a user friendly installation wizard. Together with the axinstall script
for UNIX workstations this allows installation into all of the AXIS
540/640 networking environments.
For TCP/IP networks your favourite Web browser may also act as a
convenient configuration tool. Links provided within the AXIS
540/640 Web pages allow modification of the configuration
parameters and quick access to useful information.
10 AXIS 540/640 User’s Manual
Page 11

Section 1: Introduction
Security You may set up passwords for all users, restricting both log in and
printer access.
Monitoring The AXIS NetPilot software provided allows you to continuously
monitor printer status. The AXIS 540/640 also supports SNMP for
remote monitoring.
Futureproof The AXIS 540/640 has the ability to have its Flash memory updated.
This allows you to quickly update and enhance the operational
features of your AXIS 540/640 when new print server software
becomes available. All software updates are free of charge. You may
perform the update operation over the network which makes the job
of updating your AXIS 540/640 quick and easy.
Pocket-sized One high-speed parallel port that plugs directly into the printer´s
parallel port. No cables needed. Bi-directional support for Apple
EtherTalk.
AXIS 540/640 User’s Manual 11
Page 12

Section 1: Introduction
12 AXIS 540/640 User’s Manual
Page 13
Section 2: Basic Installation
Section 2 Basic Installation
Checking and Identifying the Hardware
Unpack and check all the items using the following check list. Contact
your dealer if anything is missing or damaged. All packing materials
are recyclable.
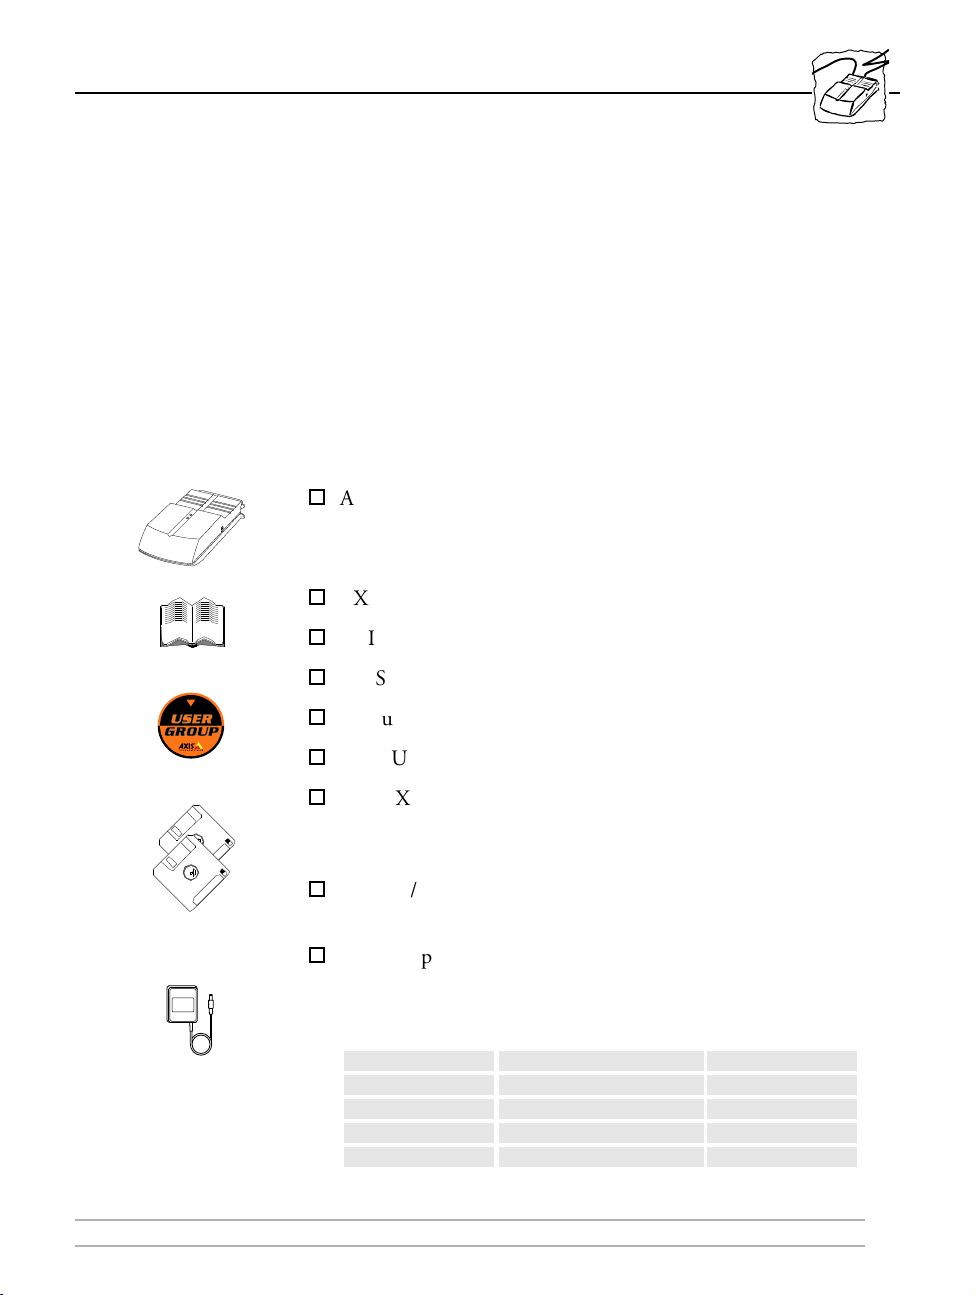
The AXIS 540/640 Hardware Pack contains:
o
AXIS 540, part no: 0058-1, or AXIS 542, part no: 0058-2, or
AXIS 540+, part no: 0058-3, or AXIS 542+, part no: 0058-4, or
AXIS 640, part no: 0059-1, or AXIS 642, part no: 0059-2
o
AXIS 540/640 User’s Manual, part no: 14677
o
AXIS 540/640 User’s Printing Guide, part no: 14678
o
AXIS 540/640 Quick Installation Guide, part no: 14679
o
Product Brochure, part no: 14412
o
AXIS UserGroup Registration Card, part no: 15119
o
3.5” AXIS Utilities disk comprising the AXIS NetPilot
Configuration Software and AXIS Print Utility for Windows,
part no: 14428
o
3.5” OS/2 Utilities disk with AXIS Print Utility for OS/2, part
no: 14232
o
Power Supply:
AXIS
Part no.
Europe 13599 13267
UK 12866 13268
Australia 12867 13269
USA 12919 13270
Japan 13249 13936
AXIS 540/640 User’s Manual 13
540/540+
(PS-A)
AXIS
542/542+/640/642
(PS-B)
Page 14

Section 2: Basic Installation
Optional accessories
o
Self-adhesive velcro ribbons, part no: 13282 and 13283
o
BNC T-adaptor (AXIS 542 only), part no: 12839
o
Printer cable extension, part no: 13522
14 AXIS 540/640 User’s Manual
Page 15
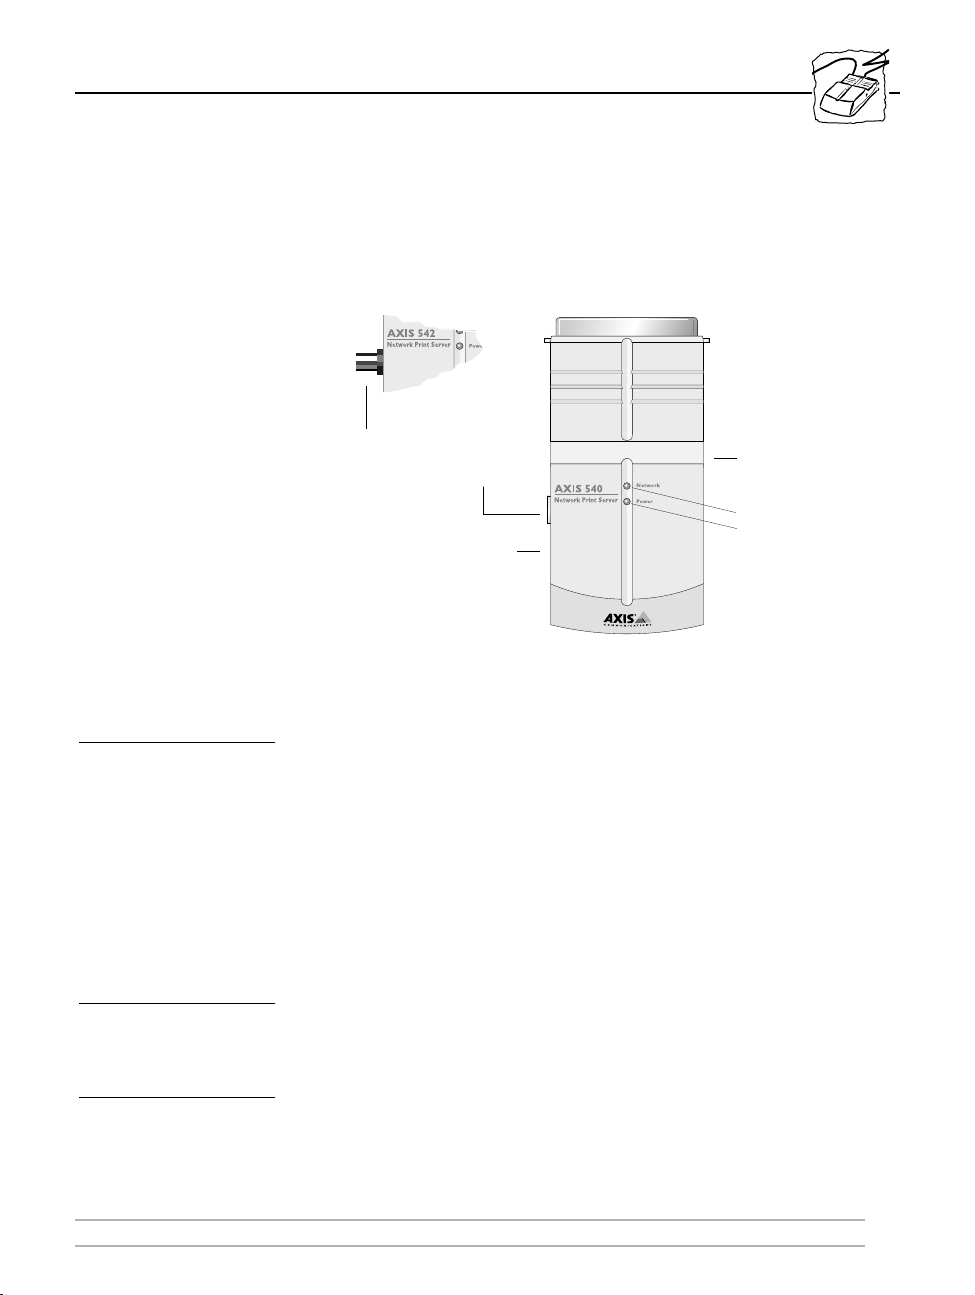
AXIS 540/542 Connectors
Section 2: Basic Installation
LPT1 Printer
Connector
Ethernet
10base2
Connector
Ethernet
or
10bas eT
Connector
External Power
Supply Connector
Plan view of the AXIS 540/542
Test Button The test button is used for:
• Printing a test page to check the connection to the printer.
• Printing the parameter list showing all the AXIS 540/542 settings.
• Resetting the AXIS 540/542 parameters to the factory default
settings.
Refer to Appendix A - The Test Button for more information about
printing and resetting the parameters.
Network Indicator This flashes to indicate network activity.
Test Button
Network Indicator
Power Indicator
Power Indicator Is normally on while power is applied. If it is not lit, or it flashes, there
is a problem with the AXIS 540/542 or its power supply.
AXIS 540/640 User’s Manual 15
Page 16
Section 2: Basic Installation
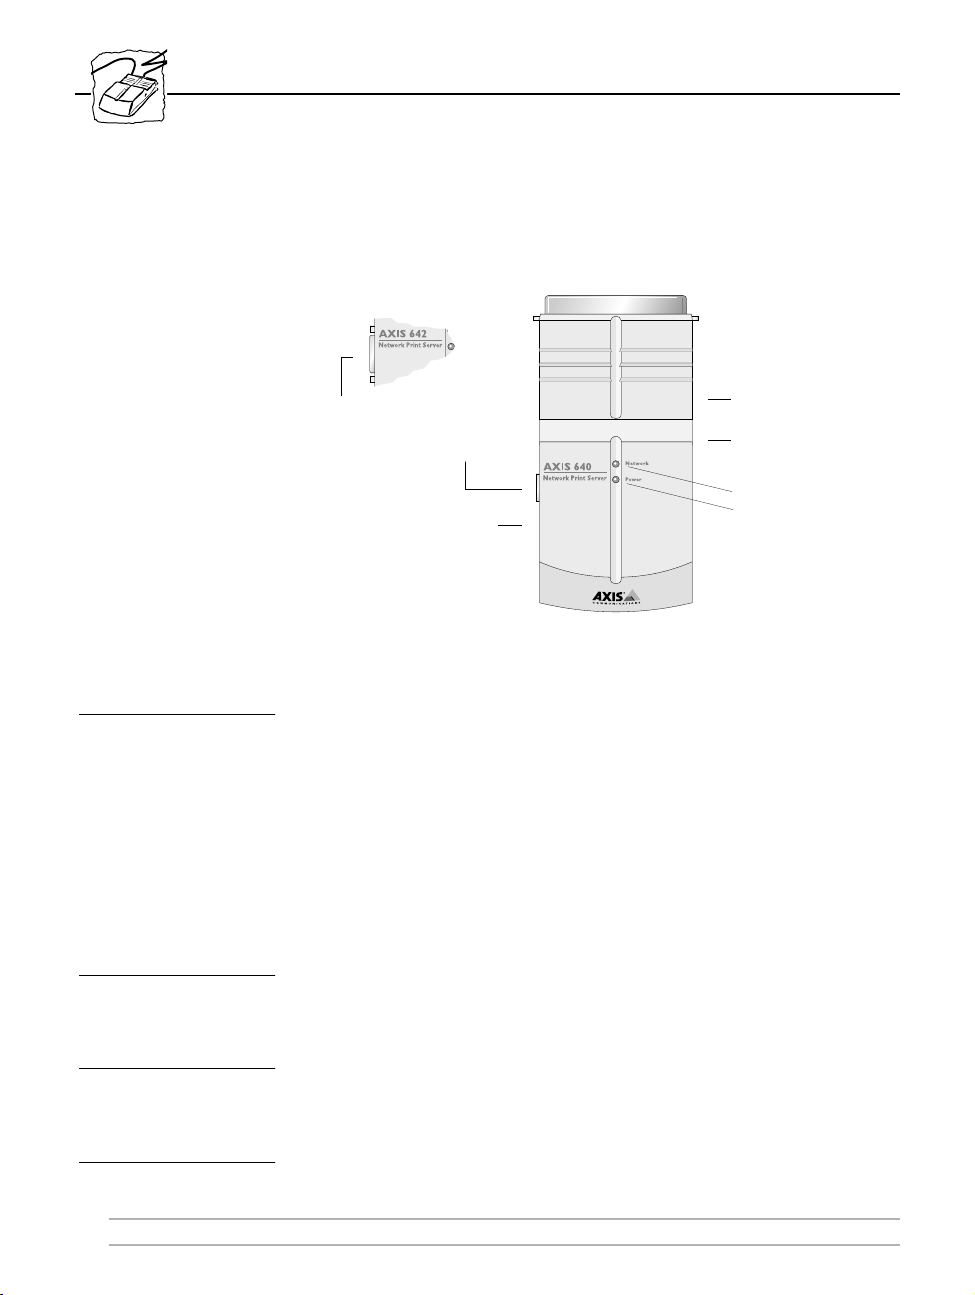
AXIS 640/642 Connectors
Token Ring
STP
Connector
External Power
Supp ly Connec tor
or
LPT1 P rin te r
Connector
Token Ring
UTP
Connecto r
Plan view of the AXIS 640/642
Ring Speed
Switch
(recessed)
Test Button
Network Indicator
Power I ndicator
Test Button The test button is used for:
• Printing a test page to check the connection to the printer.
• Printing the parameter list showing all the AXIS 640/642 settings.
• Resetting the AXIS 640/642 parameters to the factory default
settings.
Refer to Appendix A - The Test Button for more information about
printing and resetting the parameters.
Ring Speed Switch This switch is set to match your network speed.
Network Indicator This flashes to indicate network activity.
Power Indicator Is normally on while power is applied. If it is not lit, or it flashes, there
is a problem with the AXIS 640/642 or its power supply.
16 AXIS 540/640 User’s Manual
Page 17
Section 2: Basic Installation
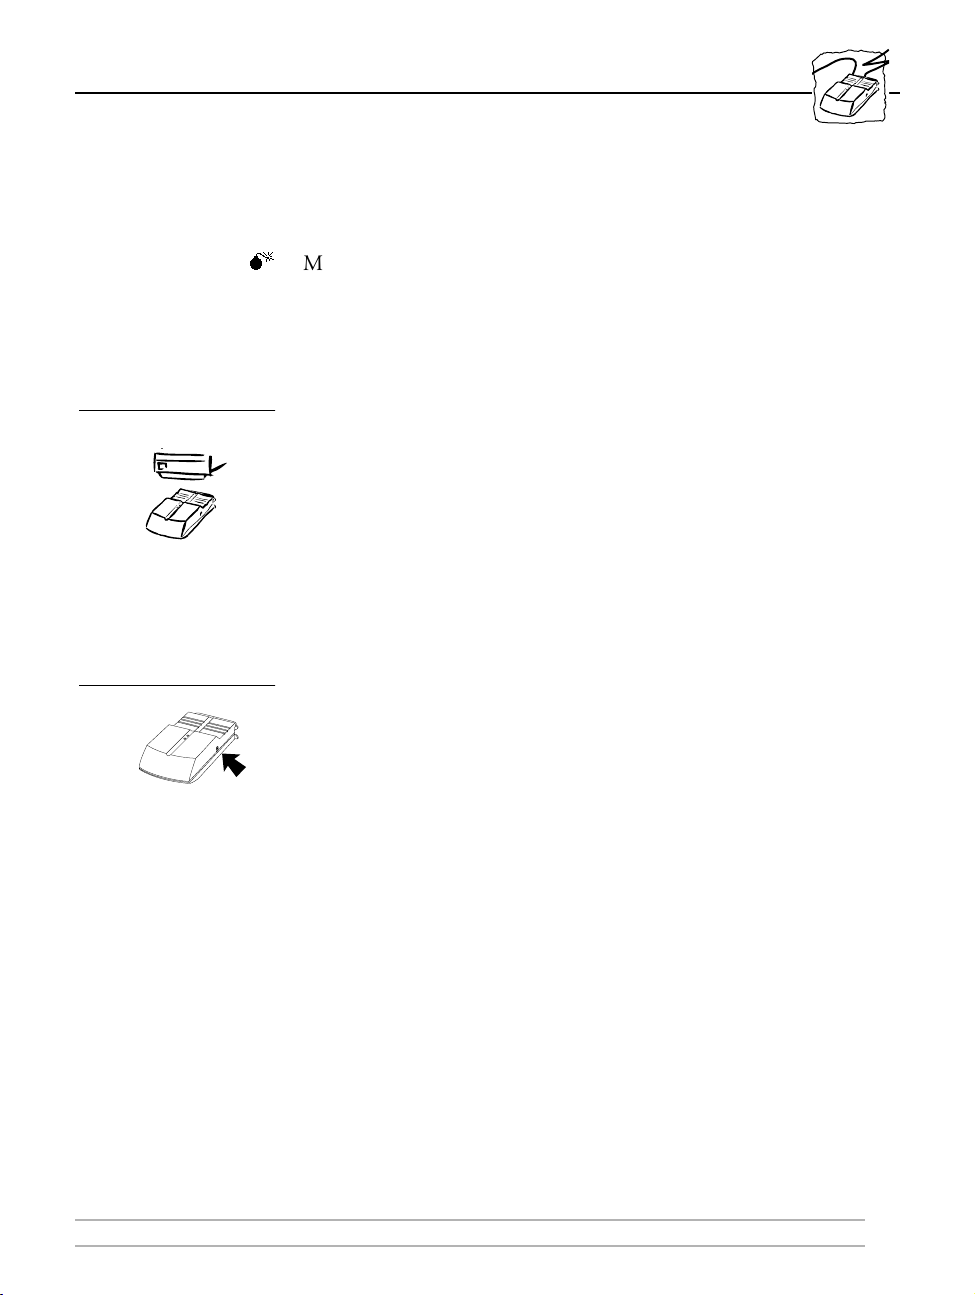
Connecting Printers to the AXIS 540/640
Caution
Connect a Printer: 1. Switch off the printer.
Test the Connection: 1. Switch on the printer.
M
Make sure that the external power supply is marked with the correct
mains voltage.
2. Connect the AXIS 540/640 to the printer, either directly to the
parallel printer port, or using the optional velcro ribbons and
printer cable extension.
3. Connect the external power supply to the AXIS 540/640. The
indicators will flash during power up and self test. When the
Network indicator stops flashing and remains off, the AXIS
540/640 is ready for use.
2. Press and release the test button on the AXIS 540/640 to print a
test page.
The test page shows the most important parameters as well as the
firmware version number. But all you need to be concerned with at
this stage is whether the test page has printed satisfactorily or not.
Note: ❏ The AXIS 540/640 supports high speed Centronics
Communication. For use with older printers not supporting high
speed, this function may be disabled by changing the parameter
L1_CENTR as defined in Appendix A - The Test Button.
AXIS 540/640 User’s Manual 17
Page 18
Section 2: Basic Installation
Connecting the AXIS 540/542 to the Ethernet Network
1. Switch off the printer and disconnect the AXIS 540/542 external
power supply.
2. Note the AXIS 540/542 serial number found on the underside
label of the print server. You need this number during the
network configuration.
3. Connect your AXIS 540/542 to the network using a twisted pair
(10baseT) or thin wire (10base2) cable.
4. Switch on the printer and connect the external power supply to
the AXIS 540/542.
5. Successful connection of the AXIS 540/542 to your network will
be confirmed by the intermittent flashing of the Network
Indicator.
6. You are now ready to install your server onto your network using
one of the methods detailed in the Installation Guide, on page 20.
By commencing with the preferred installation method, you can
further verify that your AXIS 540/542 is properly connected to
your network.
Note: ❏ Each AXIS 540/542 Print Server is pre-configured with a unique
Node Address that is identical to the serial number. This can be
changed using the AXIS NetPilot, or any standard Web browser,
if required.
18 AXIS 540/640 User’s Manual
Page 19
Section 2: Basic Installation
Connecting the AXIS 640/642 to the Token Ring Network
Caution
M
DO NOT connect or disconnect the network cabling while the
AXIS 640/642 is powered on.
1. Switch off the printer and disconnect the AXIS 640/642 external
power supply.
2. Note the AXIS 640/642 serial number found on the underside
label of the print server. You need this number during the
network configuration.
3. Slide the Ring Speed switch towards 4 or 16 depending on the
ring speed of your network.
4. Connect your AXIS 640/642 to the network using an STP
(Media Type 1) or UTP (Media Type 3) cable.
5. Switch on the printer and connect the external power supply to
the AXIS 640/642.
6. Successful connection of the AXIS 640/642 to your network will
be confirmed by the intermittent flashing of the Network
Indicator.
7. You are now ready to install your server onto your network using
one of the methods detailed in the Installation Guide, on page 20.
By commencing with your preferred installation method, you can
further verify that your AXIS 640/642 is properly connected to
your network.
Notes: ❏ Each AXIS 640/642 Print Server is pre-configured with a unique
Node Address that is identical to the serial number. This can be
changed using the AXIS NetPilot, or any standard Web browser,
if so required.
❏ It is recommended that you use screened or foiled Media Type 3
cabling for 16 Mbit networks and not
AXIS 540/640 User’s Manual 19
standard UTP cabling.
Page 20

Section 2: Basic Installation
Basic Set Up of the Network
Installation Guide After connecting the AXIS 540/640 to your network you are now
ready to perform the basic setup procedures. The method of
installation that you choose should be dictated by your printing
requirement and the type of network into which you are integrating.
Proceed with an appropriate installation method from the list below:
NetWare • If you have access to a Windows platform which uses NetWare
you should firstly follow the procedures defined in:
- Basic Set Up with AXIS NetPilot, on page 22.
- Section 3 Setting Up - NetWare
UNIX • Perform the basic TCP/IP set up procedures if your network uses
UNIX workstations, as defined in:
- Basic Set Up for TCP/IP, on page 25.
- Section 7 Setting Up - UNIX
Windows • If your Windows platform uses NetBIOS/NetBEUI, use the
NetPilot only if you want to change the default print server name.
If this is unnecessary, proceed directly to:
- Section 4 Setting Up - Windows
If your Windows platform uses neither NetWare nor NetBEUI,
you must initially perform the basic TCP/IP set up procedures, as
defined in:
- Basic Set Up for TCP/IP, on page 25.
- Windows NT LPD Printing, Section 4
OS/2 • If your network uses OS/2 workstations, use the NetPilot only if
you want to change the default print server name. If this is
unnecessary, proceed directly to:
- Section 5 Setting Up - OS/2
Macintosh • If the only workstations on your network are Apple computers,
you should refer directly to:
- Section 6 Setting Up - Macintosh
20 AXIS 540/640 User’s Manual
Page 21

Section 2: Basic Installation
Web Based
Management
If you are using the TCP/IP protocol suite and also have access to an
Internet browser, you may manage the AXIS 540+, 542+ 640 and 642
models using HTTP, regardless of your system platform. Should you
wish to use this easy-to-use configuration method, you should initially
refer to:
• Basic Set Up for TCP/IP, on page 25. Refer then to:
• Section 8 Web Based Management
Installation Summary The appropriate Installation, Management and Configuration tools
for the AXIS 540/640 can be summarized in the following table:
Operating System
Protocols
IPX/SPX AXIS NetPilot AXIS NetPilot
TCP/IP (UNIX) AXINSTALL
TCP/IP (Windows)
NetBIOS/NetBEUI
(Windows)
NetBIOS/NetBEUI
(OS/2)
Apple EtherTalk Standard using the Chooser (**)
Installation
Use LPD
Monitor/Spooler *
AXIS Print Ut ility for Windows
AXIS Print Utility for OS/2
Configuration/
Management
FTP, SNMP,
Web browser
FTP, SNMP,
Web browser
AXIS NetPilot
AXIS NetPilot
Recommended Installation, Configuration and Management tools
* You may use the resident LPD monitor in Windows NT to print
via TCP/IP. A shareware LPR spooler is available for Windows
95, or Windows for Workgroups. You can download this software
fr om http://www.axis.com/techsup/.
** Use Mac-FTP or HTTP. Alternatively use the AXIS NetPilot
from a PC platform within the same network.
AXIS 540/640 User’s Manual 21
Page 22
Section 2: Basic Installation
Notes: ❏ IPX/SPX: used in Novell NetWare
❏ TCP/IP: used in UNIX systems,Windows NT, Windows 95,
Windows 3.11, Windows for Workgroups...
❏ NetBIOS/NetBEUI: used in Windows NT, Windows for
Workgroups, Windows 95, LAN Server, LAN Manager
Basic Set Up with AXIS NetPilot
Follow the instructions on the AXIS Utilities disk label to install the
AXIS NetPilot software on to your computer. AXIS NetPilot runs on
any of the Windows platforms: Windows 3.x, Windows 95, Windows
NT, Windows for Workgroups, or in a WinOS/2 window under
OS/2.
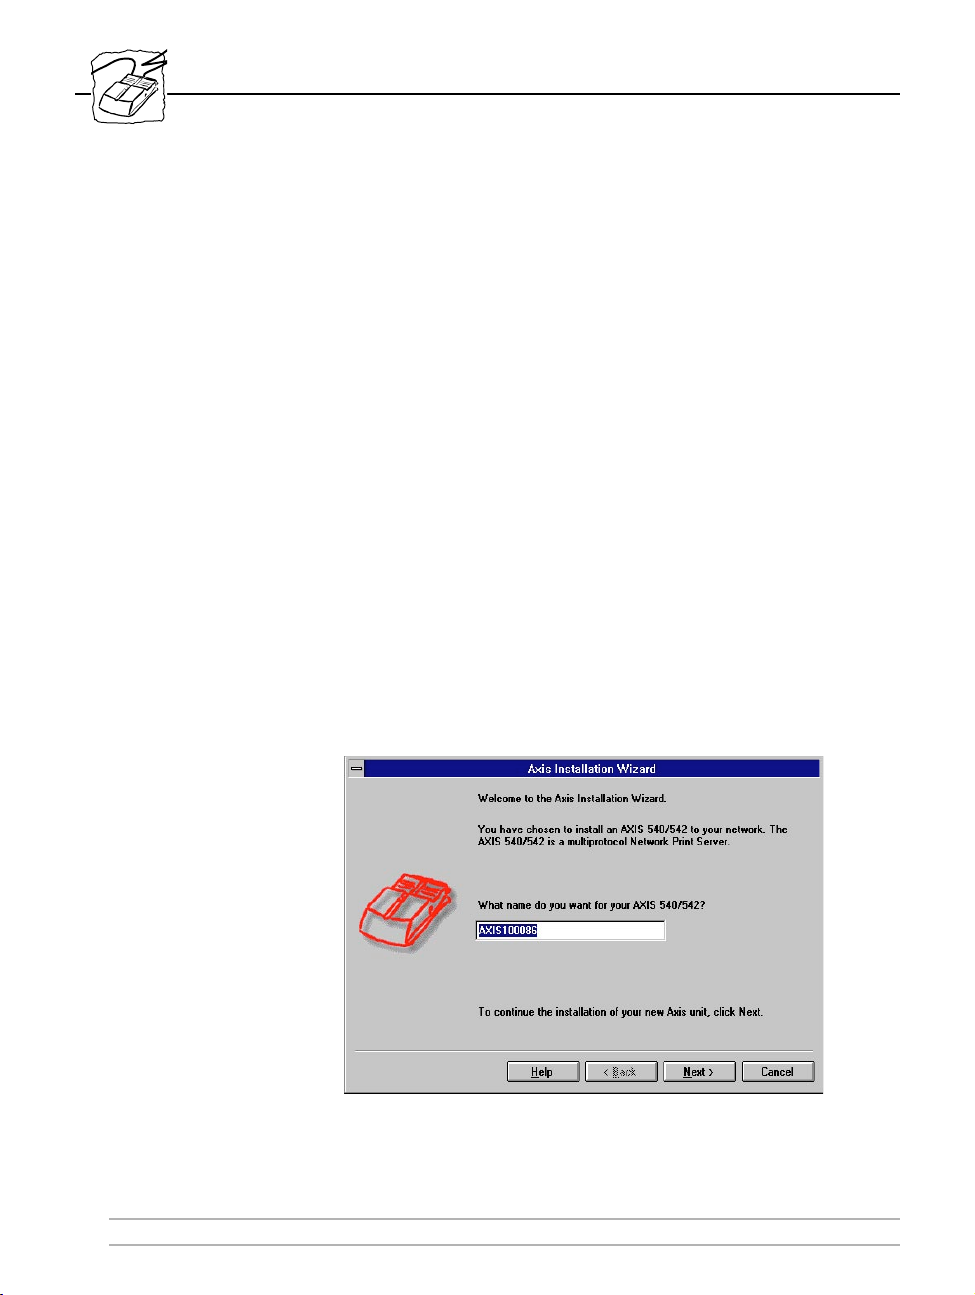
When AXIS NetPilot is started, the program searches the network for
new Axis units that have not yet been installed. If any new units are
found the user is given the option of installing them.
The AXIS Installation Wizard Main window
22 AXIS 540/640 User’s Manual
Page 23

Section 2: Basic Installation
The user is guided through the installation process by a Wizard which
asks for the relevant information concerning your network
environment. You will find more information about AXIS NetPilot in
Section 3 Setting Up - NetWare.
Environments When configuring the AXIS 540/640 for use on your network you
may select any combination of the supported environments. In a
multi-platform environment you may wish to enable printing from all
of the supported environments: Netware, TCP/IP, Windows OS/2 or
AppleTalk.
NetWare NDS You may place NetWare Print Queues on a specific bindery server, or
alternatively into a NDS Tree.
Print Queues The default Print Queue names comprise of the print server name
followed by the Port name:
Environment Default name
NetWare AXIS1A0003_LPT1_Q
Windows & OS/2 AX1A0003.LP1
AppleTalk AXIS1A0003_LPT1
Example of default Print Queue Names for each of the operating environments
The Installation Wizard allows you to amend the default names if you
wish.
The Internet Address During the Installation Wizard you may choose the method the AXIS
540/640 employs for obtaining an Internet Address. ARP, RARP,
BOOTP and DHCP are all supported. Refer to page 27, for more
information on these methods.
Wizard A special form of user assistance that automates a task (in
this case the installation) through a dialog with the user.
Wizards help the user to accomplish tasks that are complex
and require experience, and even for the experienced user
can help to speed up an operation.
AXIS 540/640 User’s Manual 23
Page 24

Section 2: Basic Installation
Test Page The final user prompt in the Installation Wizard allows you to print a
test page through NetWare. This page displays the name of all the
NetWare servers the AXIS 540/640 is connected to and shows the
status of each connection. This will assist diagnosis in the event of a
configuration error.
Notes: ❏ The parameters entered during installation are not permanent;
they can be altered at any time according to your network
printing requirements.
❏ No serious or permanent damage will be caused if you make a
mistake during installation. If at any time you find that printing is
not satisfactory, the parameters can easily be changed to tune the
system to your requirements.
❏ For information on advanced functions, please refer to the AXIS
Network Print Server Technical Reference. You may down-load
this or other technical information over the Internet by accessing
the Axis WWW Home Page at http://www.axis.com/. Refer also
to Appendix E - How To Contact Axis.
Refer to one or more of the following sections to learn how you might
fine tune the AXIS 540/640 configuration and manage your network
printing. Proceed as is appropriate to your type of network.
Section 3 Setting Up - NetWare
Section 4 Setting Up - Windows
Section 5 Setting Up - OS/2
Section 6 Setting Up - Macintosh
Section 7 Setting Up - UNIX
Section 8 Web Based Management
24 AXIS 540/640 User’s Manual
Page 25

Basic Set Up for TCP/IP
To establish communication with the TCP/IP network, an Internet
address and a host name must be mapped to the Ethernet/Node
address of your AXIS 540/640 Print Server. To do this, you must
firstly acquire an unused Internet address and decide upon an
appropriate and unique name for your AXIS 540/640. This
information then must then be included into your system host table.
The procedures for doing this are described below.
Before you start
System privileges You will need root privileges on your UNIX system, or administrator
privileges on a Windows NT server.
Ethernet address You will need to know the Ethernet address of your AXIS 540/542 to
perform the installation. The Ethernet address is based upon the serial
number of your AXIS 540/542. This means that an AXIS 540/542
with a serial number of 00408C100086, will have a corresponding
Ethernet address of 00 40 8C 10 00 86. The serial number of your
unit is located on the underside label of the unit.
Section 2: Basic Installation
Node address In Token Ring networks the node address is either the serial number
found on the underside label of the AXIS 640/642 or a Locally
Administrated Address.
AXIS 540/640 User’s Manual 25
Page 26
Section 2: Basic Installation
The Internet Address
and Host Name in
Your Host Table
Enter the Internet address and Host name into your host table using
the following step-by-step instructions:
1. Acquire an unused Internet address from your Network
Administrator and choose a unique name for your AXIS 540/640.
2. Add the Internet address and host name to your system host table.
On most systems, this is done by appending the following line to
the /etc/hosts file:
<Internet address> <host name>
Example:
192.168.3.191 npsname
3. Update your Alias Name data bases. If your system utilizes alias
name data bases such as Yellow Pages (YP) or Network
Information Services (NIS), you should update these. On most
systems this is done by entering the following commands:
cd /var/yp
make
M
Caution
DO NOT use the default or example Internet address when installing
your AXIS 540/640. Always consult your Network Administrator
before assigning an Internet address.
26 AXIS 540/640 User’s Manual
Page 27

Section 2: Basic Installation
Set the Internet
Address and Host
Name
You may set the Internet address of the AXIS 540/640 in four
different ways, using either arp, rarp, bootp, or dhcp. The main
characteristics of each of these methods are described below:
• ARP - available in UNIX, Windows 95, and Windows NT. This
is generally considered to be the easiest method although it does
require the Internet address for each new device to be downloaded individually. It is not appropriate to use this method over
routers.
• RARP - available in UNIX, it down-loads the Internet address to
each device automatically. It requires a rarp daemon on your
system, and operates within a single network segment only.
• BOOTP - available in UNIX and quite similar to rarp, although it
can however operate on the entire network. Requires a BOOTP
daemon on your system. A request made to an active BOOTP or
RARP daemon initiates a search of the Ethernet Address Table
(RARP daemon), or Boot Table (BOOTP daemon) for an entry
matching the print server's Ethernet address. If a matching entry
is found, the daemon then down loads the Internet Address to the
print server.
• DHCP - available in Windows NT and UNIX systems, it allows
for the automatic but temporary assignment of Internet addresses
from a central pool. In the absence of either an active RARP or
BOOTP daemon running on the host DHCP will, when enabled,
cause the selected host to automatically allocate and down load a
free Internet Address, Default Router Address and Net Mask to
the requesting print server. It also provides validation data that
defines how long the Internet addresses will remain valid.
The procedures for using each of the above methods are described in
detail below.
AXIS 540/640 User’s Manual 27
Page 28
Section 2: Basic Installation
Notes: ❏ DHCP is only available in “+” and Token Ring models.
❏ Please note that although it is recommended practice to refer to
the host name when accessing your AXIS 540/640, it is perfectly
acceptable to replace this name with the Internet address in all
instances. Indeed, this becomes a necessity when:
• the host name has not been included in your system host table
• attempting to use the arp command in a Windows 95 or NT
environment.
The latter point is demonstrated in the first of the examples below.
Using ARP in Windows
95, Windows NT
In both Windows 95 and Windows NT the Internet address can be set
using the arp method. Perform the following commands to down-load
the Internet address and verify correct Internet communication.
AXIS 540/542 Ethernet Print Server:
Start a DOS window. Type the following command:
arp -s <Internet address> <Ethernet address>
ping <Internet address>
arp -d <Internet address>
Example:
arp -s 192.168.3.191 00-40-8c-10-00-86
ping 192.168.3.191
arp -d <192.168.3.191>
The host will return Reply from 192.168.3.191... or some
similar message. This indicates that the address has been set and the
communication is established.
28 AXIS 540/640 User’s Manual
Page 29
Section 2: Basic Installation
AXIS 640/642 Token Ring Print Server:
Start a DOS window. Type the following command:
arp -s 802.5 <Internet address> <node address>
ping <Internet address>
arp -d <Internet address>
Example:
arp -s 802.5 192.168.3.191 00-02-31-48-00-61
ping 192.168.3.191
arp -d <192.168.3.191>
The host will return Reply from 192.168.3.191... or some
similar message. This indicates that the address has been set and the
communication is established.
Notes: ❏ Due to a bug in the Windows 95 implementation of arp you must
first, if you have an empty arp table (seen with arp -a), ping an
existing unit on your network before setting the IP number of
your AXIS 540/640.
❏ Please note that when you execute the ping command for the first
time, you will experience a significantly longer response time than
is usual.
❏ The
arp -d command is advised so that the Internet to Ethernet
address information is stored as a dynamic parameter within the
host’s cache memory. Failure to execute this command will mean
that the mapping is static and consequently installed permanently
on the host.
AXIS 540/640 User’s Manual 29
Page 30
Section 2: Basic Installation
Using ARP in UNIX You may also use the arp method for downloading the Internet
address within a UNIX environment:
AXIS 540/542 Ethernet Print Server:
Type the following command:
arp -s <host name> <Ethernet address> temp
ping <host names>
Example:
arp -s npsname 00:40:8c:10:00:86 temp
ping npsname
The host will return
npsname is alive, or some similar message.
This indicates that the address has been set and the communication is
established.
AXIS 640/642 Token Ring Print Server:
Type the following command:
arp -s 802.5 <host name> <node address> temp
ping <host names>
Where the node address is either the serial number found on the
underside label of the AXIS 640/642 or a Locally Administrated
Address.
Example:
arp -s 802.5 npsname 00:02:31:48:00:61 temp
ping npsname
The host will return
This indicates that the address has been set and the communication is
established.
npsname is alive, or some similar message.
30 AXIS 540/640 User’s Manual
Page 31

Section 2: Basic Installation
Notes: ❏ The arp command can vary between different UNIX systems. The
802.5 argument is only required for IBM AIX systems, and some
BSD type systems expect the host name and node address in
reverse order. Furthermore IBM AIX systems will require the
additional argument ether. For example:
arp -s ether <host name> 00:40:8c:10:00:86 temp
❏ Please note that when you execute the ping command for the first
time, you may experience a significantly longer response time
than is usual.
Using RARP in UNIX Follow the step-by-step procedure below to use the rarp method:
AXIS 540/542 Ethernet Print Server
1. Append the following line to your Ethernet Address table. This is
typically performed using the command
/etc/ethers:
<Ethernet address> <host name>
Example:
00:40:8c:10:00:86 npsname
2. Update your host table and alias name databases, as described
previously.
3. If it is not already running, start the rarp daemon. This is typically
performed using the command
rarpd -a.
4. Restart the AXIS 540/542 to down-load the Internet address.
AXIS 540/640 User’s Manual 31
Page 32

Section 2: Basic Installation
AXIS 640/642 Token Ring Print Server
If you are a IBM AIX user, you will probably not have access to a rarp
daemon. If this is the case, you may use either the arp or bootp
methods instead.
1. Append the following line to your Node Address table. This is
typically performed using the command
<node addre ss> <host name>
Where the node address is either the serial number found on the
underside label of the AXIS 640/642 or a Locally Administrated
Address.
Example:
00:02:31:48:00:61 npsname
2. Update your host table and alias name databases, as described
previously.
/etc/ethers:
3. If it is not already running, start the rarp daemon. This is typically
performed using the command
rarpd -a.
4. Restart the AXIS 640/642 to down-load the Internet address.
32 AXIS 540/640 User’s Manual
Page 33

Section 2: Basic Installation
Using BOOTP
in UNIX
Follow these step-by-step procedure below to use the bootp method:
1. Append the following entry to your boot table. This is typically
performed editing the file:
<host na me>:ht=<hardwa re type>:vm=<ven dor magic>:\
:ha=<hardware address>:ip=<Internet address>:\
:sm=<subnet mask>:gw=<gateway field>
/etc/bootptab:
Example for AXIS 540/542 /Ethernet:
npsname:ht=ether:vm=rfc1048:\
:ha=00408c100086:ip=192.168.3.191:\
:sm=255.255.255.0:gw=192.168.1.1
Example for AXIS 640/642 /Token Ring:
npsname:ht=tr:vm=rfc1048:\
:ha=000231480061:ip=192.168.3.191:\
:sm=255.255.255.0:gw=192.168.1.1
2. Update your host table and alias name databases as described
previously.
3. If it is not already running, start the bootp daemon. This is
typically performed using the command
bootpd.
4. Restart the AXIS 540/640 to down-load the Internet address,
default router address, and net mask.
Notes: ❏ The
❏ The
ht and vm fields must be entered exactly as in the example.
ha field is the Ethernet address and the ip field is the
Internet address of your AXIS 540/640.
❏ The gw and sm fields correspond to the default router address and
net mask (
AXIS 540/640 User’s Manual 33
DEF_ROUT and NET_MASK).
Page 34

Section 2: Basic Installation
Using DHCP
in Windows
Follow these step-by-step procedure below to use the DHCP method:
1. Edit or create a scope in the DHCP manager of the DHCP
daemon. The entries included into this scope should include the
following:
• range of IP addresses
• subnet mask
• lease duration
• default router IP address
2. Activate the scope
3. Enable the DHCP_ENB parameter in the Configuration file of
the AXIS 540/640 using AXIS NetPilot or any other preferred
method.
Note: ❏ DHCP is only available in “+” and Token Ring models.
34 AXIS 540/640 User’s Manual
Page 35

Section 3: Setting Up - NetWare
Section 3 Setting Up - NetWare
If you have not already done so, you should use the Installation
Wizard in AXIS NetPilot to install your network print server; refer to
Section 2 - Basic Installation.
After performing the basic installation, the AXIS 540/640 is ready for
printing within the NetWare environment. This section provides
information for making further adjustments to the configuration.
If you intend to operate your AXIS 540/640 in a multiprotocol
environment, you should also proceed to the other relevant sections in
this manual, namely:
Section 4 Setting Up - Windows
Section 5 Setting Up - OS/2
Section 6 Setting Up - Macintosh
Section 7 Setting Up - UNIX
Section 8 Web Based Management
NetWa re
Set Up using the AXIS NetPilot
You may use the AXIS NetPilot to:
• set up the print queues, printers, and print servers.
• set up the configuration parameters of the AXIS 540/640.
• monitor the printers on the network.
Notes: ❏ AXIS NetPilot contains an extensive on-line help facility to assist
you with any of the operations listed above.
❏ The AXIS NetPilot software is designed to set up a range of
different network environments. Therefore you will encounter
windows that are relevant to other systems as well as NetWare.
Caution
AXIS 540/640 User’s Manual 35
M
Any network configuration should involve the Network
Administrator.
Page 36

NetWare
Section 3: Setting Up - NetWare
Using AXIS NetPilot
to Manage your
Print Servers
By opening folders from within the left hand pane of the AXIS
NetPilot main window you can:
• from ‘Network Print Servers’ select any installed network print
server that you wish to configure, or
• from ‘New Axis Units’ select any Axis network print server that
you wish to install using the Installation Wizard, or
• from ‘Monitoring Printers’ select any group of printers that you
wish to monitor.
AXIS NetPilot’s main window
36 AXIS 540/640 User’s Manual
Page 37

Section 3: Setting Up - NetWare
NetWa re
Managing Printers
and Print Queues
Examine Queues
and Servers
Having installed your AXIS 540/640 print server in accordance with
the basic installation procedures described in Section 2 - Basic
Installation, your AXIS 540/640 should now feature in the Contents
of ‘Network Print Servers’ pane of the AXIS NetPilot Main window.
The NetWare Network Environment window detailed below, allows
you to examine all Print Queues and NetWare Print Servers
connected to the AXIS 540/640.
To gain access to this window, simply select the required Network
Print Server from AXIS NetPilot Main window, and then choose
Network from the Setup menu. Alternatively, you may click on the
Network Icon on the Toolbar. If you are not already, a dialog box will
then ask you to log on to your NetWare file server
The AXIS NetPilot NetWare Network Environment window
The AXIS 540/640 periodically updates the configuration by
searching the NDS tree or, in the case of NetWare versions 3.x, the file
servers.
AXIS 540/640 User’s Manual 37
Page 38

NetWare
Section 3: Setting Up - NetWare
Print Queue
Connection
To connect a print queue to a print server port, select the print server
port you wish to connect from the NetWare Network Environment
window. Click Connect...
The Connect NetWare Print Queues window detailed below, will
then be displayed.
The AXIS NetPilot Connect NetWare Print Queues window
Select the location of the print queue from the Resources box.
Click either on an existing NetWare print queue for connection to the
server port, or alternatively create a new print queue by clicking on
Create Queue...
To define the method of printing to be used, select either Print Server
Mode or Remote Printer Mode. If you use Remote Printer Mode you
must enter the NetWare Print Server name, or make an appropriate
selection that will work with the AXIS 540/640 print server, using the
Browse... button.
Finally click the OK button to return to the Network Environments
window.
38 AXIS 540/640 User’s Manual
Page 39

Section 3: Setting Up - NetWare
NetWa re
Configuring via the
Property Pages
Select the required Network Print Server and then Properties from the
Setup menu in the NetPilot Main window, or alternatively click the
Properties Icon on the Toolbar. A comprehensive set of Property Pages
are then presented with an appropriate array of selection tabs.
A Property Page showing general parameters to be set
AXIS 540/640 Modes The AXIS 540/640 can run in either Print Server Mode or Remote
Printer Mode. The following overview explains the advantages and
limitations of each mode.
Property Pages: This is AXIS NetPilot’s way of allowing you to inspect
and change any of the AXIS 540/640 parameters.
There are different Property Pages for each of your
network environments. Simply click the NetWare tab
to gain access to the NetWare configuration.
AXIS 540/640 User’s Manual 39
Page 40

NetWare
Section 3: Setting Up - NetWare
Print Server Mode In this mode the AXIS 540/640 logs in to a file server(s) and
repeatedly polls the print queues for print jobs. In this fashion, the
AXIS 540/640 emulates a NetWare print server, that is a workstation
running PSERVER. It provides high printing speed with low network
load and is the recommended mode for medium to large sized
networks. Each print server in PSERVER mode will occupy one
NetWare license.
Advantages • Easy to set up.
• High performance (typically 150-400 kbytes/s).
Limitations • Requires a NetWare user licence for each AXIS 540/640 to file
server link.
Remote Printer Mode In this mode the AXIS 540/640 connects itself to a PSERVER
NetWare program running on the file server, or alternatively to a
dedicated workstation running PSERVER.EXE. It then automatically
receives print jobs from the file server. In this fashion, the AXIS
540/640 emulates a workstation running the NetWare remote printer
software RPRINTER, or NPRINTER. This mode is only
recommended for small networks where the number of NetWare user
licences is a major issue.
Advantages • NetWare user licences are not required.
• Easy to set up.
Limitations • Lower performance, e.g. typically 20 - 70 kbytes/s for NLM.
• Higher network load.
40 AXIS 540/640 User’s Manual
Page 41

Section 3: Setting Up - NetWare
NetWa re
Monitoring the
Printers
For the purpose of printer monitoring the AXIS NetPilot allows users
to create groups of printers. The printers comprising each group may
then be displayed in the AXIS NetPilot window. To examine the
status of any printer within a group, simply click on the appropriate
group folder icon. The status of each printer within a group is
displayed and also denoted by a relatively colored icon.
Any number of printer groups can be created and unwanted groups
can be deleted. Similarly, individual printers can be included or
deleted from any group. A printer may also be included in more than
one group, if required.
AXIS NetPilot’s Monitoring Window
AXIS 540/640 User’s Manual 41
Page 42

NetWare
Section 3: Setting Up - NetWare
Other NetWare Configuration Methods
Novell Utilities After installing the AXIS 540/640 into the NetWare environment
using the AXIS NetPilot, adjustments to the configuration can be
made at any time, using the AXIS NetPilot. Alternatively, you may
wish to manage the AXIS 540/640 using either Novell’s NetWare
Administrator, or PCONSOLE.
Some useful features provided by the NetWare Administrator are
described in more detail below:
Printer Status The NetWare dialog Printer Status menu detailed below, shows the
status of an active print job serviced by an AXIS 540/640 network
print server. Detailed information concerning the active job is
displayed including, Print Queue, print job description, size of print
file, percentage of job completed, etc. The administrator also has the
ability to abort or pause the print job from this menu.
NetWare Administrator Printer Status Menu
42 AXIS 540/640 User’s Manual
Page 43

Section 3: Setting Up - NetWare
NetWa re
Notification Using the NetWare Administrator you may also enable/disable status
notification messages for printers connected to the AXIS 540/640, i.e.
Busy, Offline, Out of paper, Paper jam...etc. Print job owners and
chosen administrators may be added or removed from the list of
persons to be notified.
Print Layout A print layout of installed AXIS 540/640 Network Print Servers and
their relative print queues may be viewed for any NetWare
Organisational Unit. Summary information is also displayed simply
by right-clicking on the printer object you wish to examine.
NetWare Print Layout with corresponding summary information
AXIS 540/640 User’s Manual 43
Page 44

NetWare
Section 3: Setting Up - NetWare
Web Browser If your network supports TCP/IP, you may configure the AXIS
540+/542+/640 and 642 models for operation within the NetWare
environment, using any standard Web browser. From the AXIS
NetWare Configuration Page you have the ability to change any
NetWare parameter. You can also monitor the status of your print
jobs, download software updates and access useful information. Refer
to Section 8 - Web Based Management for further information.
The AXIS 540+/542+ NetWare Configuration Page
FTP FTP provides another method for configuring the AXIS 540/640. For
further information refer to Editing using FTP, on page 98.
44 AXIS 540/640 User’s Manual
Page 45

Section 4: Setting Up - Windows
Section 4 Setting Up - Windows
Having connected the AXIS 540/640 to your network, this section
now describes how to set up your AXIS 540/640 for printing in the
Windows environment.
The following Windows platforms are supported:
• Windows 3.1 (requires add-on network support, see page 47)
• Windows for Workgroups
• Windows 95
• Windows NT
If you intend to use the AXIS 540/640 in a multiprotocol
environment, you should also proceed to other relevant sections in this
manual, namely:
Section 3 Setting Up - NetWare
Section 5 Setting Up - OS/2
Section 6 Setting Up - Macintosh
Section 7 Setting Up - UNIX
Section 8 Web Based Management
Installation Using AXIS Print Utility for Windows
Unless you wish to change the default name of your AXIS 540/640,
the setup operation may be performed solely with the AXIS Print
Utility for Windows, which is supplied on the AXIS Utilities disk.
You should install this utility now if you have not already done so - see
the instructions on the AXIS Utilities disk label.
If you wish, you may change the default name of your AXIS 540/640
or amend any of the default parameters, using the AXIS NetPilot, or
any standard Web browser. Refer to Section 8 - Web Based
Management.
AXIS 540/640 User’s Manual 45
Page 46

Section 4: Setting Up - Windows
Note: ❏ The AXIS Print Utility for Windows is not needed on the client
platforms for client-server printing.
About
AXIS Print Utility
for Windows
Notes: ❏ Microsoft Network (NetBIOS/NetBEUI) must be running when
AXIS Print Utility for Windows is a dual purpose application for
network printing in the Windows environment. It has two
fundamental purposes:
1. Install and maintain AXIS 540/640 printer ports as Windows
printer ports.
2. Capture and monitor print jobs directed to the AXIS 540/640
ports. Print jobs are directed through a spool directory either at
your local hard disk (peer-to-peer mode), or at the file server
(client-server mode). The printer port status of your AXIS
540/640 may be monitored and pop-up notification messages can
be generated, keeping you informed of completed print jobs or
any problematic condition.
For more information about AXIS Print Utility for Windows, see the
on-line help.
using AXIS Print Utility for Windows.
❏ AXIS Print Utility for Windows must be running when printing
in peer-to-peer mode.
46 AXIS 540/640 User’s Manual
Page 47

Section 4: Setting Up - Windows
Peer-to-Peer vs.
Client-Server Printing
All users requiring access to a network printer in peer-to-peer mode
will need to install the AXIS Print Utility for Windows software onto
their workstation. Users may then add the required network printer to
their systems and use the printer as if it was connected directly to their
workstation. Peer-to-peer printing affords the following benefits:
• You can monitor the printer status at all times and be notified
when a print job is complete.
• You do not have to rely on a server.
Client-server operation requires only one user to install the AXIS Print
Utility for Windows software onto their workstation. This user then
adds the printer to his or her workstation (the server) and shares the
printer with other users on the network. The other users (the clients)
may connect to the printer through the server via the Windows Print
Manager in Windows 3.1 and NT platforms, and the System Printers
folder in Windows 95 platforms.
The client-server mode provides a way of maintaining queue ordering
and job priority, but at a price. This is because:
• You cannot receive printer status or print job notification.
• The workstation set up as the server must be available at all times.
It must also have the capacity to handle the print jobs that pass
through it.
Notes: ❏ When using the client-server mode, other users may still install
the AXIS Print Utility for Windows software, for printing directly
to the network printer in Peer-to-Peer mode.
❏ When using the client-server mode, it is recommended that the
server is setup only on a Windows for Workgroups workstation.
Windows 3.1
In order to print to a network printer, Windows 3.1 requires the
installation of network support, such as the LAN Server or LAN
Manager Workstation software. When installed, proceed as described
under Windows for Workgroups below.
AXIS 540/640 User’s Manual 47
Page 48

Section 4: Setting Up - Windows
Windows for Workgroups
Setup for
Peer-to-Peer Printing
Follow these steps to install your AXIS 540/640 for peer-to-peer
printing at a Windows for Workgroups workstation:
1. Double-click the AXIS Print Utility icon.
2. In the Port menu, click Add.
3. In the NPS Port list, select the AXIS 540/640 port to be installed.
The port will appear as <name>.LP1, where <name> is AX
followed by last six digits of your print server number
e.g. AX100086.LP1. However, this alphanumeric name will be
superseded by any new name given to your AXIS 540/640 when
using AXIS NetPilot.
4. Accept or change the suggested Windows port name and type any
required comment in the Description field. Make a note of the
Windows port name as you will need this later, then click OK to
install the Windows port.
5. In the Port menu, click Connect... to bring up the Windows
Printers dialog.
6. Select a printer driver from the list of Installed Printers (or click
Add>> to install a new driver), then click Connect...
7. Select the Windows port name from step 4 above (this name can
be found at the bottom of the Ports list).
8. Click OK to close the Connect dialog, and Close to close Printers.
The setup is completed and you can now print through your
AXIS 540/640.
Note: ❏ AXIS Print Utility for Windows must be running when you print
through your AXIS 540/640. We strongly recommend that you
copy the AXIS Print Utility icon into your StartUp folder.
.
48 AXIS 540/640 User’s Manual
Page 49

Section 4: Setting Up - Windows
Client-Server Printing:
Server Setup
Follow these steps to install your AXIS 540/640 for client-server
printing at a Windows for Workgroups server:
1. Choose a workstation that you want to use as server for network
printing. The server must be available at all times and must have
sufficient hard disk space for spooling print jobs.
2. Make sure that the printer sharing option is enabled. (Open
Network Setup, click Sharing..., check the ‘I want to be able to
allow others to print to my printer(s)’ box).
3. Install AXIS Print Utility for Windows on the server.
4. Set up your AXIS 540/640 as described under Setup for
Peer-to-Peer Printing, on page 53.
5. Open Print Manager and select your printer.
6. In the Printer menu, select Share Printer As...
7. Type a printer name in the Share As field (this is the printer name
seen by the clients, see Client Setup below).
Check the Re-share at Startup box, then click OK.
The server setup is now completed. Set up the clients as described
below.
Note: ❏ The AXIS Print Utility for Windows must be running when you
print through your AXIS 540/640. We strongly recommend that
you copy the AXIS Print Utility icon into your StartUp folder.
AXIS 540/640 User’s Manual 49
Page 50

Section 4: Setting Up - Windows
Client-Server Printing:
Client Setup
Follow these steps to use your AXIS 540/640 for client-server printing
at a Windows for Workgroups client:
1. In the Control Panel, select Printers.
2. Select a printer driver from the list of Installed Printers (or click
Add>> to install a new driver), then click Connect...
3. Select Network...
4. In the Device Name list, select a local port (LPT1- LPT3) to
redirect to your network printer.
5. In the Show Shared Printers on list, select the server from Server
Setup above.
6. In the Shared Printers list, select the printer you want to use.
7. Click OK, OK and Close, then exit Control Panel.
The client setup is completed and you can now print through your
AXIS 540/640.
50 AXIS 540/640 User’s Manual
Page 51

Windows 95
Section 4: Setting Up - Windows
Setup for
Peer-to-Peer Printing
Follow these steps to install your AXIS 540/640 for peer-to-peer
printing at a Windows 95 workstation:
1. Double-click the AXIS Print Utility icon.
2. In the Port menu, click Add.
3. In the NPS Port list, select the AXIS 540/640 port to be installed.
The port appears as <name>.LP1, where <name> is AX followed
by last six digits of your print server number e.g. AX100086.LP1.
However, this alphanumeric name will be superseded by any new
name given to your AXIS 540/640 when using AXIS NetPilot.
4. Accept or change the suggested Windows Port name, and type
any required comment in the Description field. Make a note of
the Windows port name as you will need this later, then click OK
to install the Windows port.
5. In the Port menu, click Connect to bring up the Printers folder.
6. Double-click the Add Printer icon. The Add Printer Wizard will
then guide you through the installation. Click Next to proceed.
7. Choose Local Printer, then click Next.
8. Choose Manufacturer and Printer, then click Next.
9. Select the Windows port name from step 4, then click Next.
10. Accept or change the suggested Printer Name, then click Next.
11. Click Finish to complete the installation.
The setup is completed and you can now print through your AXIS
540/640.
Note: ❏ AXIS Print Utility for Windows must be running when you print
through your AXIS 540/640. We strongly recommend that you
establish a shortcut to the AXIS Print Utility within your StartUp
file.
AXIS 540/640 User’s Manual 51
Page 52

Section 4: Setting Up - Windows
Client-Server Printing:
Client Setup
To print in client-server mode from within a Windows 95
environment, it is necessary to setup the server on a Windows for
Workgroups workstation. Refer to Client-Server Printing: Server Setup,
on page 49.
Follow these steps to use your AXIS 540/640 for client-server printing
at a Windows 95 client:
1. Open the Network Neighborhood folder and select the server
being used by the printer. Refer to Client-Server Printing: Server
Setup on page 49.
2. Select the printer, and follow the Add Printer Wizard to setup the
printer on your client.
The client setup is completed and you can now print through your
AXIS 540/640.
52 AXIS 540/640 User’s Manual
Page 53

Windows NT
Section 4: Setting Up - Windows
Setup for
Peer-to-Peer Printing
Follow these steps to install your AXIS 540/640 for peer-to-peer
printing at a Windows NT workstation:
1. Double-click the AXIS Print Utility icon.
2. In the Port menu, click Add.
3. In the NPS Port list, select the AXIS 540/640 port to be installed.
The port appears as <name>.LP1, where <name> is AX followed
by last six digits of your print server number e.g. AX100086.LP1.
However, this alphanumeric name will be superseded by any new
name given to your AXIS 540/640 when using AXIS NetPilot.
4. Accept or change the suggested Windows Port name, and type
any comments in the Description field. Make a note of the
Windows Port name as you will need this later, then click OK to
install the Windows Port.
5. In the Port menu, click Connect to bring up Print Manager.
6. In the Printer menu, click Create Printer.
7. Type a name in the Printer Name field, select a suitable printer
driver from the Driver list, and select Other... in the Print to list.
8. In the Print Destinations dialog, select Local Port, then click OK.
9. In the Port Name field, type: C:\~\<port>
where C:\~ is your spool directory, and <port> is the Windows
Port name from step 4. Click OK.
10. Close the Print Manager.
The setup is completed and you can now print through your AXIS
540/640.
Note: ❏ AXIS Print Utility for Windows must be running when you print
through your AXIS 540/640. We strongly recommend that you
copy the AXIS Print Utility icon into your StartUp folder.
AXIS 540/640 User’s Manual 53
Page 54

Section 4: Setting Up - Windows
Client-Server Printing:
Client Setup
To print in client-server mode from within a Windows NT
environment, it is necessary to setup the server on a Windows for
Workgroups workstation. Refer to Client-Server Printing: Server Setup,
on page 49.
Follow these steps to use your AXIS 540/640 for client-server printing
at a Windows NT client:
1. Open Print Manager.
2. In the Printer menu, select Connect to Printer...
3. In the Shared Printers list, select the printer you want to use. Click
OK.
The client setup is completed and you can now print through your
AXIS 540/640.
Windows NT - LPD Printing
This section describes how to set up a Windows NT Server (ver. 3.5 or
later) for LPD printing over the TCP/IP protocol.
If you have not already done so, you should perform the TCP/IP basic
setup procedures prior to installing a printer for LPD printing. These
procedures are defined in Basic Set Up for TCP/IP, on page 25.
54 AXIS 540/640 User’s Manual
Page 55

Section 4: Setting Up - Windows
Install the TCP/IP
Protocol Stack
In the Control Panel, click the Network icon. If the TCP/IP Printing
entry appears, then TCP/IP is already installed. Close the Network
folder and skip to Installing a Printer below.
Follow these steps to install the TCP/IP protocol stack:
1. In the Control Panel, select Network.
2. Click Add Software..., select “TCP/IP Protocol and related
components” and click Continue.
3. Check the “TCP/IP Network Printing Support” and click
Continue.
4. Select path and then click Continue.
5. Click OK in the Network Settings dialog box.
Installing a Printer Proceed as follows to install a printer for LPD printing.
1. In the Control Panel, click the Print Manager.
2. In the Printer menu, select Create Printer.
3. In the Printer Name field, type a name for your printer.
4. Choose a printer driver suitable for your printer.
5. In the Print to field, select Other...
6. In the Print Destinations dialog, choose LPR Port, then click OK.
The Add LPR Compatible Printer dialog now appears.
7. In the Name or Address field, type the IP address or the alias
name of your AXIS 540/640.
Note: If you use an alias name, this must be defined in the hosts
file on your server prior to the installation. This file is normally
located in /winnt35/system32/drivers/etc/hosts.
8. In the Name of Printer on the Machine field, type the logical
printer number you want to use, e.g. pr1. Click OK.
9. Click OK to complete the installation.
AXIS 540/640 User’s Manual 55
Page 56
Section 4: Setting Up - Windows
Other Windows Configuration Methods
AXIS NetPilot After installing your printers using the AXIS Print Utility for
Windows adjustments to the AXIS 540/640 configuration can be
made at any time using the AXIS NetPilot.
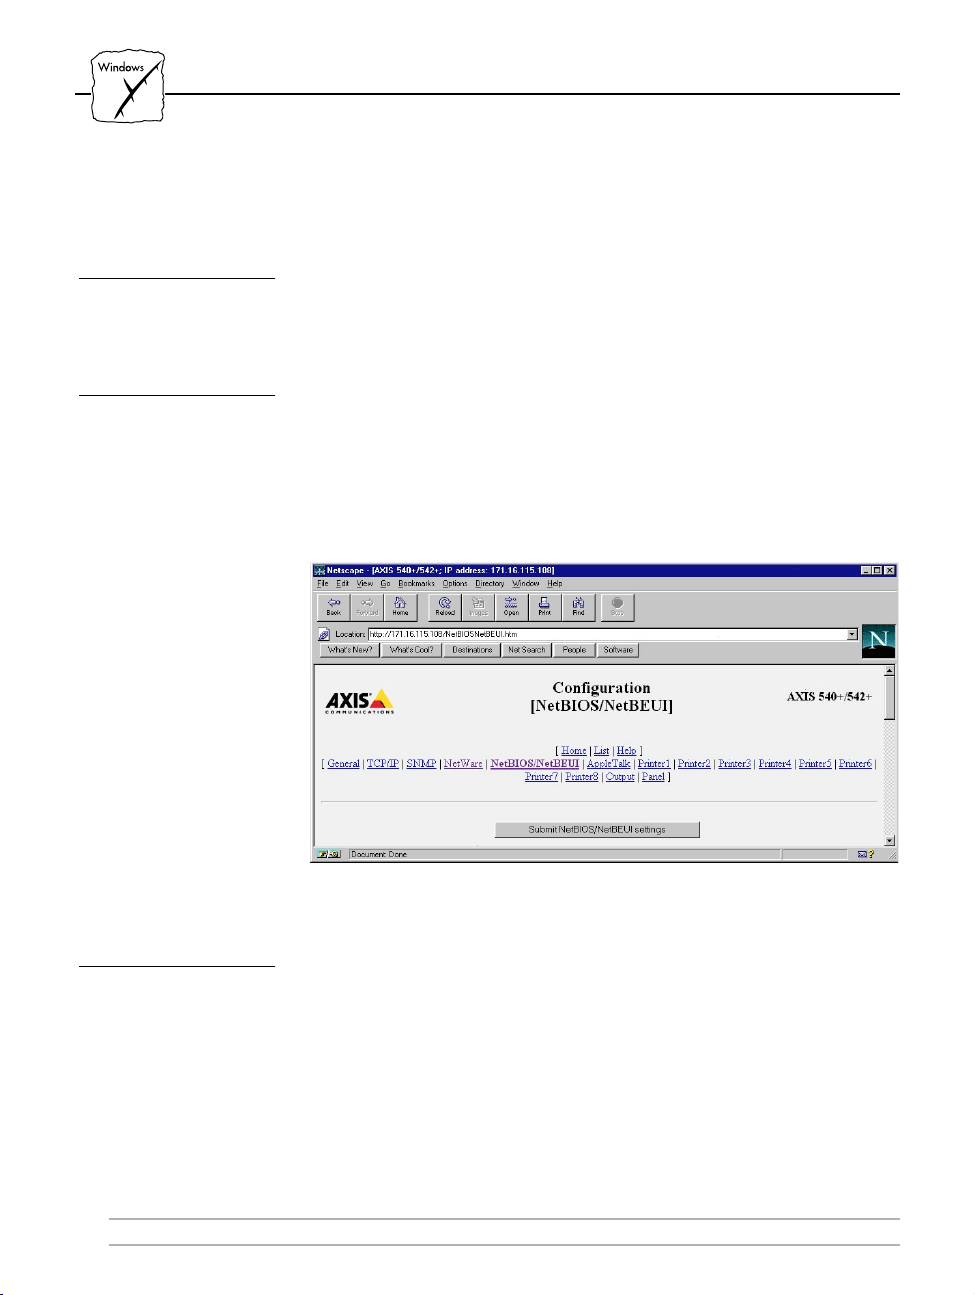
Web Browser If your network supports TCP/IP, you may alternatively configure the
AXIS 540+/542+/640 and 642 models for operation within the
Windows environment, using any standard Web browser. Any
Windows parameter in the Configuration file may be amended from
within the NetBIOS/NetBEUI Configuration Page. Refer to Section 8
- Web Based Management for further information.
The AXIS 540+/542+ NetBIOS/NetBEUI Configuration Page
FTP FTP provides another method for configuring the AXIS 540/640. For
further information refer to Editing using FTP, on page 98.
56 AXIS 540/640 User’s Manual
Page 57

Section 5: Setting Up - OS/2
Section 5 Setting Up - OS/2
Having connected the AXIS 540/640 to your network, this section
now describes how to set up your AXIS 540/640 for printing in the
OS/2 environment.
If you intend to operate your AXIS 540/640 in a multiprotocol
environment, you should also proceed to the other relevant sections in
this manual, namely:
Section 3 Setting Up - NetWare
Section 4 Setting Up - Windows
Section 6 Setting Up - Macintosh
Section 7 Setting Up - UNIX
Installation Using AXIS Print Utility for OS/2
The installation and setup operations are performed with the AXIS
Print Utility for OS/2. You should install this utility now if you have
not already done so - see the instructions on the OS/2 Utilities disk
label.
Should you require to change the default name of your AXIS 540/640
or amend any of default parameters use the AXIS NetPilot from any
Windows platform that is connected to your network, or WinOS/2
window under OS/2.
The AXIS Print Utility for OS/2 is not needed on the client platforms
when using a client-server configuration.
AXIS 540/640 User’s Manual 57
Page 58

Section 5: Setting Up - OS/2
About AXIS Print
Utility for OS/2
Note: ❏ The NetBEUI protocol must be active. If not, use MPTS/LAPS
Install the AXIS
540/640
AXIS Print Utility for OS/2 is a dual purpose application for network
printing in the OS/2 environment. Its fundamental purpose is to:
1. Install and maintain the AXIS 540/640 printer port as an OS/2
printer port.
2. Capture and monitor print jobs directed to the AXIS 540/640
port. Print jobs may be directed through a spool directory either
at your local hard disk, or at the file server. The printer port status
of your AXIS 540/640 may be monitored and pop-up notification
messages can be generated, keeping you informed of completed
print jobs or any problematic condition.
(LAN Server) or SETUP (LAN Manager) to activate it.
1. When AXIS Print Utility for OS/2 is running, click Install to
install your AXIS 540/640. It will then appear in the list as
<name>.LP1, where <name> is AX followed by last six digits of
your print server number. e.g. AX100086.LP1. However, this
alphanumeric name will be superseded by any new name given to
your AXIS 540/640 when using AXIS NetPilot.
2. Select the port that you wish to install, then click Install.
Repeat this procedure for each server using the AXIS 540/640.
Note: ❏ The AXIS Print Utility for OS/2 must be running in order to
print using your AXIS 540/640.
58 AXIS 540/640 User’s Manual
Page 59

Section 5: Setting Up - OS/2
Integrating your AXIS 540/640 into the OS/2 Environment
Create a Print Queue
(OS/2 version 1.x)
Create a Print Queue
(OS/2 version 2.x
and OS/2 Warp)
1. Double-click the Print Manager icon, click Setup, then select
Printers...
2. Click Add to make a new printer definition, then type a name of
your choice in the Name field.
3. Select \PIPE\<name>.LP1 from the Device list, then select a
printer driver suitable for your printer.
4. Click Add, then click OK to confirm the printer definition.
5. Click Setup, then select Queues...
6. Click Add to create a print queue, and type a name in the Name
field.
7. Click Add, then click OK to confirm the queue definition.
1. Double-click the Templates folder, then drag the Printer icon out
to the Workplace Shell (or into a folder) while holding the right
mouse button down.
2. Type a name of your choice in the Name field.
3. Select \PIPE\<name>.LP1 from the Port list, and select a printer
driver suitable for your printer from the Standard Printer list.
4. Click OK to confirm the printer definition.
AXIS 540/640 User’s Manual 59
Page 60

Section 5: Setting Up - OS/2
Share the Print
Queue
A print queue must be made a shared resource before it can be
accessed from other computers (clients or other servers).
Open an OS/2 window and issue the following command:
NET SHARE <queue_name> /PRINT
Where <queue_name> is the name of the queue created above.
To share a printer resource when using OS/2 Warp with IBM Peer
service, follow the steps below:
1. Click the right mouse button on the printer object.
2. Select Share and then Start sharing. In the dialogue box, enter a
Description.
3. Select the check-box Start sharing at LAN workstation startup.
4. Click OK.
To share a printer resource when using LAN server 4.0, follow the
steps below:
1. Open LAN Server Administration.
2. Open your domain and then Resource Definition.
3. Drag and drop a printer from the template.
4. Enter the Alias name, select a Server name and the previously
created Spooler Queue Name.
5. Click OK
The setup is completed and you can now print through your AXIS
540/640.
60 AXIS 540/640 User’s Manual
Page 61

Other OS/2 Configuration Methods
AXIS NetPilot After installing your printers using the AXIS Print Utility for OS/2,
adjustments to the AXIS 540/640 configuration can be made at any
time using the AXIS NetPilot.
Note: ❏ The AXIS NetPilot runs in a WinOS/2 window.
Web Browser If your network supports TCP/IP, you may alternatively configure the
AXIS 540+/542+/640 and 642 models for operation within the OS/2
environment, using any appropriate Web browser, e.g. Netscape
Navigator for OS/2 Warp. Any OS/2 parameter in the Configuration
file may be amended from within the NetBIOS/NetBEUI
Configuration Page. Refer to Section 8 - Web Based Management for
further information
Section 5: Setting Up - OS/2
The AXIS 540+/542+ NetBIOS/NetBEUI Configuration Page
FTP FTP provides another method for configuring the AXIS 540/640. For
further information refer to Editing using FTP, on page 98.
AXIS 540/640 User’s Manual 61
Page 62

Section 5: Setting Up - OS/2
62 AXIS 540/640 User’s Manual
Page 63

Section 6: Setting Up - Macintosh
Section 6 Setting Up - Macintosh
Note: ❏ Please note that this section applies only to the print servers
supporting the Apple EtherTalk environment, i.e. AXIS 540+ and
AXIS 542+.
Having connected the AXIS 540+/542+ to your network, this section
now describes how to set up your AXIS 540+/542+ for printing in the
AppleTalk environment.
If you intend to operate your AXIS 540+/542+ in a multiprotocol
environment, you should also proceed to the other relevant sections in
this manual, namely:
Section 3 Setting Up - NetWare
Section 4 Setting Up - Windows
Section 5 Setting Up - OS/2
Section 7 Setting Up - UNIX
Section 8 Web Based Management
Installation Using the Chooser Window
Basic Configuration The basic configuration in the Apple EtherTalk environment is
performed simply by opening the Chooser
printer.
Chooser: Selecting chooser from the Apple menu initiates a search
for available printers on the network. The available
printers, both physical and logical, are then subsequently
displayed with the names given them during
configuration. Default names are shown, unless they have
been modified.
AXIS 540/640 User’s Manual 63
window and selecting a
Page 64

Section 6: Setting Up - Macintosh
You may change the default name of your AXIS 540+/542+ or amend
any of default parameters if you wish. However, to access the config file
from a Macintosh you will need FTP support such as MacTCP, Fetch
or Anarchie. This is described in more detail at the back of this
section.
Choosing a Printer
Selecting a Printer The method of choosing a printer will vary depending on which
version of LaserWriter printer driver you are using.
• The LaserWriter 7.0 driver assumes that you use a standard
PostScript driver, and cannot take advantage of any printer
specific features.
• The LaserWriter 8.0 driver uses PPD files that contain printer
descriptions. This gives you full control over any features your
printer might have.
64 AXIS 540/640 User’s Manual
Page 65

Section 6: Setting Up - Macintosh
LaserWriter 7.0
Printer Driver
LaserWriter 8.0
Printer Driver
Open the Chooser window by starting the Chooser from the Apple
menu. Follow these steps to choose a printer:
1. Click the LaserWriter icon.
2. If your network has more than one zone, click on the zone you
want. If your network has no zones, this box does not appear.
3. Click the name of the printer you want.
The default AXIS 540+/542+ printer names are shown as:
AXIS<nnnnnn>_<port>, where <nnnnnn> is the last six digits of
the AXIS 540+/542+ serial number, and <port> is LPT1. For
example: AXIS100086_LPT1
4. Click the close box.
This completes the configuration and closes the Chooser.
Repeat this procedure for each Macintosh on the network using the
AXIS 540+/542+.
Open the Chooser window by starting the Chooser from the Apple
menu. Follow these steps to choose a printer:
1. Click the LaserWriter 8.0 icon.
2. If your network has more than one zone click on the zone you
want. If your network has no zones, this box does not appear.
3. Click the name of the printer you want.
The default AXIS 540+/542+ printer names are shown as:
AXIS<nnnnnn>_<port>, where <nnnnnn> is the last six digits of
the AXIS 540+/542+ serial number, and <port> is LPT1. For
example: AXIS100086_LPT1
4. Click the ‘Setup...’ button, and then the ‘Auto Setup’ button. If
the printer supports bi-directional printing and the appropriate
PPD file is available, the installation will now be performed
automatically and you should proceed directly to step 6.
However, if this is not the case, the PPD file must then be selected
manually, as described in step 5.
AXIS 540/640 User’s Manual 65
Page 66

Section 6: Setting Up - Macintosh
5. Choose the PPD file matching your printer, and click ‘OK’. If
your printer does not appear in the PPD file list, contact your
printer vendor. You may also use the Generic PPD if you do not
need any printer specific features.
6. Click ‘OK’, and then click the close box. This completes the
configuration and closes the Chooser.
Repeat this procedure for each Macintosh on the network using the
AXIS 540+/542+.
Bi-directional support The AXIS 540+/542+ allows the print-driver in the Macintosh to
directly communicate with the printer and consequently provides the
Mac-user with full access to the printer functionality, e.g. automatic
down-loading of fonts not resident in the printer. It is also able to
generate response messages to Macintosh printer queries, for older
printers without bi-directional support.
This functionality maintains backward compatibility with old printers
and Macintosh computers.
Verifying the Set Up You simply need to print a document from the Macintosh to verify
communication to the chosen printer. The basic installation can be
considered complete if the print test is satisfactory. The
AXIS 540+/542+ is now ready to use as a print server.
Note: ❏ For information on advanced EtherTalk functions such as non-
PostScript printer support, please refer to the Axis NPS Print
Server Technical Reference. You can obtain this from your dealer
or via the WWW. Refer also to Appendix E - How To Contact Axis.
ASCII, TBCP and BCP Binary Communication Protocol and Tagged Binary Communication
Protocol are communication protocols used by the serial and parallel
ports of a printer. They allow 8-bit binary data in files concurrent with
the use of some control characters, for communication and print job
control. TBCP is required for printing with a binary data stream on
some printers. e.g HP printers.
66 AXIS 540/640 User’s Manual
Page 67

Section 6: Setting Up - Macintosh
You may select either ASCII or either of these binary data protocols
for your printing within the Macintosh environment, by following the
step by step instructions below:
1. Open the Chooser.
2. Select a network printer driver, any LaserWriter will do.
3. Select the printer port that has a name ending in "_CFG".
4. Close the Chooser.
5. Open a text editor, e.g. SimpleText.
6. Write a text file containing the following:
BINARY : YES
BINARY_TYPE : TBCP
The first parameter, BINARY, can take the values YES or NO.
The second parameter, BINARY_TYPE, can take the values BCP
or TBCP. See the technical reference for more information on
these parameters.
7. Print the above text file. The settings will be stored permanently
in the print server.
8. Open the Chooser and select the printer port you wish to use for
printing documents.
9. Close the Chooser.
10. Complete.
Other Macintosh Configuration Methods
Should you wish to change the AXIS 540+/542+ default name or
amend any of its default parameters from a Macintosh host, there are a
number of configuration methods that you may wish to consider.
AXIS 540/640 User’s Manual 67
Page 68

Section 6: Setting Up - Macintosh
Web Browser If your network supports TCP/IP, you may alternatively configure the
AXIS 540+/542+ using an appropriate Web browser. Any AppleTalk
parameter in the AXIS 540+/542+ Configuration file may be amended
from within the AppleTalk Configuration Page. Refer to Section 8 -
Web Based Management for further information.
The AXIS 540+/542+ AppleTalk Configuration Page
AXIS NetPilot If you have a Windows platform connected to your network you may
wish to install and manage the AXIS 540+/542+ using the AXIS
NetPilot. Refer to Basic Set Up with AXIS NetPilot on page 22.
Using FTP FTP provides another method for configuring the AXIS 540/640.
To access the config file from a Macintosh you will need FTP support
such as MacTCP, Fetch or Anarchie. For further information refer to
Editing using FTP, on page 98.
68 AXIS 540/640 User’s Manual
Page 69

Section 7: Setting Up - UNIX
Section 7 Setting Up - UNIX
Installation in the UNIX Environment
Having performed the basic TCP/IP setup procedures as defined in
Section 2 - Basic Installation, you are now able to print in interactive
mode using FTP or Reverse Telnet protocols.
However, should you require to integrate the AXIS 540/640 into your
host spooler you will now need to use the Axis automatic installation
script axinstall. This utility software is resident on the AXIS 540/640
and can be can be up-loaded to your host using FTP, so no disks or
tapes are required. Having completed this operation the printer
connected to the AXIS 540/640 will appear as though it is directly
connected to the host printer spooler.
If you intend to operate your AXIS 540/640 in a multiprotocol
environment, you should also proceed to the other relevant sections in
this manual, namely:
Section 3 Setting Up - NetWare
Section 4 Setting Up - Windows
Section 5 Setting Up - OS/2
Section 6 Setting Up - Macintosh
Section 8 Web Based Management
Note: ❏ The script axinstall is not
models. However, this script may be uploaded from any other of
the AXIS print servers and used for configuring these models.
This script can also be downloaded from the AXIS Utilities
diskette or alternatively, obtained via the Axis WWW Home
Page, see Appendix C - Updating the Software.
AXIS 540/640 User’s Manual 69
available in the AXIS 540 and AXIS 542
Page 70

Section 7: Setting Up - UNIX
Integration into the
Host Printer Spooler
To integrate the AXIS 540/640 into the host printer spooler you will
need to use the auto installation script axinstall, resident in the AXIS
540/640. You may install this software onto your host using FTP. To
do this, login to the AXIS 540/640 with this command:
ftp <host name>
host name is the name assigned in your system host table,
where
salesdept).
(e.g.
You will be prompted for user id and password. Use the user id root,
which has the default password pass (root is the user id with the highest
priority). Up-load the script using the command
get axinstall as
shown in the example below.
Log out using the command quit, bye or exit depending on your
FTP version.
> ftp salesdept
connected to salesdept.
220 AXIS 540/640 FTP Printer Server
ready.
Name (salesdept:thomas): root
331 User name ok, need password
Password: pass
230 User logged in
ftp> get axinstall
220 PORT command successful.
150 Opening data connection for axinstal l
(192,36,253,4,13,223) (0 bytes), (mode ascii).
226 Transfer complete.
local: axinstall remote: axinst all
27545 bytes received in 4.1 seconds (6.5 kbytes/s)
ftp> bye
221 Goodbye.
>
(not visible)
Typical FTP session for collecting the axinstall script
70 AXIS 540/640 User’s Manual
Page 71

Section 7: Setting Up - UNIX
The axinstall script has now been up-loaded to your host. Execute the
script with this command:
sh axinstall
You will be guided through the installation by a step-by-step
procedure. During the installation you will be asked to select a print
method; we suggest you choose LPD or, for more functionality, use
the PROS filter or named pipe methods. Please refer to the following
pages if you need guidance on the choice of print methods.
axinstall will suggest one of the systems listed below when started. If
you do not find the suggestion appropriate, then manually select any
of the systems listed.
1....SunOS 4 (SUN BSD, Solaris 1.x)
2....SunOS 5 (SUN SYS V, Solaris 2.x )
3....AIX (IBM RS/6000, BULL DPX 20)
4....HP-UX (HP 9000)
5....BOS (BULL DPX 2)
6....DEC OSF/1 (Digital Equipment, Alpha)
7....ULTRIX (Digital Equip ment, DEC)
8....IRIX (Silicon Graphics, SGI)
9....SCO UNIX (Santa Cruz Operation)
10...FreeBSD (Berkeley UNIX)
11...Generic BSD (Berkeley UNIX)
12...Generic SYS V R3 (UNIX System V Release 3)
13...Generic SYS V R4 (UNIX System V Release 4)
Systems supported by axinstall
AXIS 540/640 User’s Manual 71
Page 72

Section 7: Setting Up - UNIX
A
A
A
Print Methods on TCP/IP Networks
The AXIS 540/640 supports several different print methods in the
TCP/IP environment. axinstall will suggest a print method suitable for
your particular UNIX system, but you might want to use another
method depending on your printing requirements (banner pages,
status logging, etc.)
The diagram below shows the alternative data paths taken by some of
the UNIX print methods. This illustrates some of the advantages and
limitations of the different methods. Use the following information to
determine which method to adopt.
File to
Print
2
DIRECT
FTP
RTELNET
Spooler
Print e r
Pri n t
RTEL NET PRO S B
Filter/
Interface
Model
LPD FTP
AXIS 540/640
PROS A
Device s
Paral lel P or t
Named Pipe
PROS prin t
daemon
Directl y
connec t e d
printer
Illustration of different UNIX print methods
LPD The Line Printer Daemon is a protocol for transferring print jobs
between hosts. This is the recommended method for UNIX systems,
but some System V versions do not support LPD.
Advantages:
Easy to set up – install the AXIS 540/640 as a remote queue in
System V, or add a remote printer to
rm and rp fields (BSD).
/etc/printcap using the
Limitations:
Spooler features, and
printcap or lpr options (BSD) such as
multiple copies, are not available.
72 AXIS 540/640 User’s Manual
Page 73

Section 7: Setting Up - UNIX
FTP The File Transfer Protocol is used for transferring files between hosts.
Advantages:
Uses industry standard network software on the host.
Limitations:
No printer status logging. In the case of BSD it may conflict with
other input or output filters and does not allow both input and
output filters. In System V no filters or interface programs can be
used.
PROS A protocol developed at Axis.
Comes in two versions; named pipe (PROS A) and filter (PROS B).
PROS A PROS A - Advantages:
The AXIS 540/640 appears as a device to the system. This makes
all filter and model options available. It provides accounting and
status logging. Supports bi-directional printing. The printer
information read back can be viewed in a log file.
PROS A - Limitations:
A ‘C’ compiler is required to build the PROS A drivers.
PROS B PROS B - Advantages:
It provides accounting and status logging. Supports bi-directional
printing. The printer information read back can be viewed in a
log file.
PROS B - Limitations:
A ‘C’ compiler is required to build the PROS B drivers and in the
case of BSD, it may conflict with other input or output filters. It
does not allow both input and output filters. Interface programs
can not be used in System V.
AXIS 540/640 User’s Manual 73
Page 74

Section 7: Setting Up - UNIX
Reverse Telnet Often used for printing via a terminal server printer port. Only
recommended if you already have a Reverse Telnet driver installed.
Advantages:
Easy to set up with previously installed Reverse Telnet drivers.
Limitations:
No status logging. Drivers are not supplied with the AXIS
540/640. Existing drivers may be slow.
Other UNIX Systems Most UNIX systems resemble either BSD or System V and so with
some ingenuity, a solution can be devised for other variants.
If the system has BSD socket type networking support, then prosbsd
(in the
point. It receives print data from
stderr . Nothing is written to stdout .
bsd directory of the AXIS 540/640) can be used as a starting
stdin, and writes a log file to
Alternatively, FTP may be used. It is a good idea to use
sysv/ftp_sysv as a starting point.
or
bsd/ftp_bsd
OS/2 Systems If you are using OS/2 version 2.x and you wish to print through
TCP/IP, we recommend that you use the IBM TCP/IP for OS/2
product. It supports the LPD and interactive FTP print methods.
IBM MVS Systems A sample JCL script, jclex, is available in the mvs directory of the
AXIS 540/640. It gives an example of how to print a file from an MVS
mainframe to an AXIS 540/640 using FTP.
IBM AS/400 Systems Axis has produced a white paper covering AS/400 printing to Axis
network print servers. It is available on Internet via the Axis WWW
Home Page at http://www.axis.com/.
Windows NT
Systems
If you are using Windows NT version 3.5 or later, you can use LPD
printing over the TCP/IP protocol. For instructions on installing the
TCP/IP protocol stack on your Windows NT platform, refer to
Windows NT - LPD Printing on page 54.
74 AXIS 540/640 User’s Manual
Page 75

Section 7: Setting Up - UNIX
Using Logical Printers
to Customise your
Printing
The AXIS 540/640 has a powerful facility for altering the print data.
This means that your desired print format can be realised on any type
of printer. The following actions may be invoked from the AXIS
540/640:
• The character set can be changed to suit the printer
• Strings can be added before and after the print data
• Strings within the print data can be substituted
• ASCII to PostScript conversion
• Hex Dump mode to assist with printing problems
If any of these actions are required a Logical Printer
is used to change
the print data before being sent to the printer port. There are eight
logical printers that can be set up to filter the print data.
Edit the parameters in the AXIS 540/640 config file to configure a
logical printer. Refer to Appendix A - The Test Button. The default
logical printers settings are such that PR1 - PR4 cause no change to
the flow of print data, while PR5 - PR8 add CR to LF control
characters:
Logical Print er Changes to data
PR1 no change
PR2 no change
PR3 no change
PR4 no change
PR5 add CR to LF
PR6 add CR to LF
PR7 add CR to LF
PR8 add CR to LF
Logical Printer: A logical printer acts as a filter between the network
and the physical printer. It appears to the user as a
normal printer with additional characteristics. For
example, a UNIX workstation may only send a line
feed (LF) to a shared printer that requires both a
carriage return (CR) and LF. The logical printer can
solve this problem by adding a CR.
AXIS 540/640 User’s Manual 75
Page 76

Section 7: Setting Up - UNIX
Character Set
Conversion
A common problem in a multiple host environment is that different
hosts use different ASCII character sets. As a result of this, language
specific characters (such as å ü ô ñ) are sometimes printed incorrectly.
The AXIS 540/640 solution to this problem is to assign a character set
conversion filter to a logical printer, and then link that logical printer
to the host causing the problem.
There are several different filters to choose from within the
PR1_CSET Character Set Conversion. Refer to Appendix A - The Test
Button. The output from the conversion filter is always IBM PC Set 2
(Code Page 437), and this is the character set the printer must be set
up for.
Example:
The Problem: Your network contains three hosts using the
character sets IBM PC Set 2, ISO 8859-2, and DEC.
The Solution: In order to direct their print jobs to the same
printer you should assign each host to a separate logical printer,
and install character set conversion filters. Edit the following
entries in your config file:
PR1_CSET. : NONE
PR2_CSET. : ISO>IBM
PR3_CSET. : DEC>IBM
The Result:
Logical printer PR1 prints data transparently without conversion.
Logical printer PR2 converts ISO 8859-2 data to IBM PC Set 2.
Logical printer PR3 converts DEC data to IBM PC Set 2.
This arrangement will produce correct printouts for all language
specific characters.
76 AXIS 540/640 User’s Manual
Page 77

Section 7: Setting Up - UNIX
Adding Strings Before
and After Print Jobs
These string functions provide a way to send printer control
commands before and after each print job. They may be specified
individually for each logical printer.
All strings are entered as hexadecimal byte values.
Example 1:
Assume that the logical printer PR5 is configured as a PostScript
printer. To append the PostScript End of File character
(Ctrl-D, hex
04) after each print job, edit the following entry in
your config file:
PR5_AFT. : 04
Example 2:
You have an HP LaserJet printer with dual input bins, and want
to print on pre-printed forms when using the logical printer PR4.
The standard forms are taken form bin 1, and the pre-printed
forms are taken from bin 2. The strings before and after print jobs
E
should then contain commands to select bin 2 (
E
bin 1 (
&l1H) respectively. Edit the following entries in your
C
&l 4H) and
C
config file:
PR4_BEF. : 1B 26 6C 34 48
PR4_AFT. : 1B 26 6C 31 48
AXIS 540/640 User’s Manual 77
Page 78

Section 7: Setting Up - UNIX
String Substitutions The string substitution function performs search and replace
operations on the print data. The primary application is to replace
printer control commands. Up to 20 string substitutions may be
specified individually for each logical printer.
All strings must be entered as hexadecimal byte values, and each match
and substitute string must be preceded by a count byte.
See Appendix A, PR1_STR String Substitutions.
Example 1:
To replace the UNIX New Line (hex
0D 0A) for logical printer PR1, edit the following entry in
(hex
0A) with an ASCI I NewLine
your config file:
PR1_STR. : 01 0A 02 0D 0A
01 is the match string count byte (length of the match string),
0A is the match string,
02 is the substitute count byte, and
0D 0A is the substitute string.
This is the default setting for logical printers PR5 through PR8.
Example 2:
To replace the UNIX New Line (hex
0D 0A), and the printer command
(hex
E
Y (h ex 1B 59) for logical printer PR2, edit the following entry
C
0A) with an ASCI I NewLine
E
G1 (hex 1B 47 31) with
C
in your config file:
PR2_STR. : 01 0A 02 0D 0A 03 1B 47 31 02 1B 59
Note: ❏ Extensive use of string substitutions will naturally decrease the
throughput rate of the AXIS 540/640.
78 AXIS 540/640 User’s Manual
Page 79

Section 7: Setting Up - UNIX
ASCII to Postscript
Conversion
The AXIS 540/640 logical printers can translate ASCII print data into
PostScript format. This makes it possible to print with a PostScript
printer from a host that does not support PostScript. The conversion
is selected by activating a filter that converts ASCII data into
Postscript. This filter may be activated individually for each logical
printer.
Example:
The following entries in your config file will allow print data
applied to PR1 to pass without changes, print data applied to PR2
will be converted from ASCII to PostScript, and PR3 data will be
searched - any ASCII data will be converted to PostScript, while
PostScript data will be allowed to pass without change.
PR1_FILT. : NONE
PR2_FILT. : POSTSCR
PR3_FILT. : AUTO_PS
AUTO_PS configuration is used when you are not sure if the print
The
data is ASCII or PostScript.
When a logical printer is set for PostScript conversion it needs to
know the page size, page orientation, page formats and which font is
to be used. The default page size is A4 and the default page orientation
is Portrait, while the page format parameters are:
Page Format Parameter Default Value
Lines per page 66
Characters per line 0 0=disable line wrap
Characters per inch 10.0
Lines per inch 60 60 = 60 lines per inch
Left margin 30 30 = 3. 0 mm
Top margin 50 50 = 5.0 mm
AXIS 540/640 User’s Manual 79
Page 80

Section 7: Setting Up - UNIX
The PostScript font can be any font that is installed in the printer; if
no font is specified, Courier will be used.
Example:
The following entries are needed in your config file to set up
logical printer number 2 for ASCII to PostScript conversion with
the stated printing characteristics.
PR2_FILT.:POSTS CR (PostScript conversion on)
PR2_SIZE.:LETTE R (page size = letter)
PR2_ORNT.:LANDS (orientation = landscape)
PR2_FORM.:48
PR2_FONT.:Helve tica (font = Helvetica)
0 120 60 30 50 (48 LPP, 0 CPL, 12 CPI, 6 LPI,
3 mm left margin, and
5 mm top margins)
80 AXIS 540/640 User’s Manual
Page 81

Section 7: Setting Up - UNIX
Read-back of
information
Debugging using the
Hex Dump Mode
The AXIS 540/640 supports bi-directional printing. The information
from the printer is read back on the parallel port when the parameter
PRx_IN has the default setting of AUTO. However, it is required that
the printer also supports bi-directional printing. Through the
parameter PRx_IN the communication can be disabled.
Example:
The following entry is needed in your config file to disable the bidirectional communication:
PR1_IN. : NONE (Read-back of information)
When hex dump mode is activated, the print data is printed as
hexadecimal byte values rather than characters; printer control
commands are also printed as hex values. This allows you to inspect
what control and print characters are being sent to the printer, which
is a useful debugging facility for the more difficult printing problems.
Example:
The following is an example of the entries needed in your config
file to activate the hex dump mode for PR3:
PR3_DUMP.:YES (switch on hex dump mode for PR 3)
Note: ❏ The page length for hex dump printouts is determined by the
lines per page value of the PostScript page format parameter.
AXIS 540/640 User’s Manual 81
Page 82

Section 7: Setting Up - UNIX
Using Telnet with the AXIS 540/640
The Telnet support makes it possible to log in to the AXIS 540/640
and execute various commands as shown in the example below. Use
the following command to log in:
> telnet salesdept
Trying 192.36.253.96. ..
Connected to salesdept.
Escape character is ‘^]’.
AXIS 540/640 TELNET Printer Server
AXIS 540/640 network login: root
Password: pass
AXIS 540/640 TELNET Printer Server
Root> help
Commands may be abbreviated:
logout logout from TELNET
version print current software version
help print this list
status show current printing status
account show current account file
softreset prot ocol restart of AXIS 540/640
hardreset reboot of AXIS 540/640
defaults set default parameters in AXIS 540/640
Root> l ogout
Goodbye!
Connection closed by foreign host.
>
Typical Telnet session to display available commands
(not visible)
telnet <host name>
Telnet support: Telnet is a TCP/IP command that allows you to
manage a remote system, in this case the AXIS
540/640. The AXIS 540/640 has a number of built in
commands that can be executed via Telnet. Recent
firmware updates may have changed the commands
that are available, so use the help command (as shown
above) to list the Telnet facilities in your print server.
82 AXIS 540/640 User’s Manual
Page 83

Section 7: Setting Up - UNIX
Viewing AXIS
540/640 Accounting
File using Telnet
The accounting file contains data concerning the ten last print jobs. It
specifies an internal job number, the user that initiated the job, the
protocol and logical printer that was used, current status (Completed,
Offline, or Printing), number of bytes printed, elapsed time and off
line time. The file can be accessed using FTP or Telnet.
> telnet salesdept
Trying 192.36.253.96. ..
Connected to salesdept.
Escape character is ‘^]’.
AXIS 540/640 TELNET Printer Server
AXIS 540/640 network login: root
Password: pass
AXIS 540/640 TELNET Printer Server
Root> account
Current account file:
JOB USER PROT LPR S BYTES ETIME OTIME
1 Thomas FTP pr2 C 1885 2 0
2 Joe LPT pr1 C 23074 4 0
3 RICHARD PSERVER pr2 C 43044 5 0
4 MacUser APPLE pr1 C 6717 2 0
5 LSLM_user NetBIOS pr2 C 36995 3 0
6 patrick PROS pr5 P 83208 9 0
Root>
(not visible)
Typical Telnet session to view the Accounting File
Note: ❏ Since the print server supports HTTP, the accounting of the
AXIS 540/640 may also be viewed using a Web browser. Click
Account on the AXIS 540/640 Home Page to examine the status
of any recent print jobs.
AXIS 540/640 User’s Manual 83
Page 84

Section 7: Setting Up - UNIX
Viewing the
AXIS 540/640s
Status using Telnet
The status command shows which printer port the logical printers are
assigned to, and their current status.
> telnet salesdept
Trying 192.36.253.96. ..
Connected to salesdept.
Escape character is ‘^]’.
AXIS 540/640 TELNET Printer Server
AXIS 540/640 network login: root
Password: pass
AXIS 540/640 TELNET Printer Server
Root> status
Current printer status:
Printer Port Status Bytes printed Commen ts
pr1 LPT1 Prin ting 20916 Ready
pr2 LPT1 Occu pied Ready
pr3 LPT1 Occu pied Ready
pr4 LPT1 Occu pied Ready
pr5 LPT1 Occu pied Ready
pr6 LPT1 Occu pied Ready
pr7 LPT1 Occu pied Ready
pr8 LPT1 Occu pied Ready
(not visible)
Root>
Typical Telnet session to view logical printer status
Note: ❏ Since the print server supports HTTP, the accounting of the
AXIS 540/640 may also be viewed using a Web browser. Click
Status on the AXIS 540/640 Home Page to view logical printer
status.
84 AXIS 540/640 User’s Manual
Page 85

Section 7: Setting Up - UNIX
Using SNMP for Remote Monitoring
You may use SNMP (Simple Network Management Protocol) for
remote monitoring of the AXIS 540/640. All major functions
applicable to print servers are supported.
General Information SNMP actually refers to a set of standards for network management,
including a protocol, a database structure specification, and a set of
data objects. The AXIS 540/640 SNMP implementation runs in the
TCP/IP environment.
The actual management is handled by an NMS (Network
Management System) software running on a host on your network.
The NMS software communicates with network devices by the means
of messages, which are references to one or more objects.
A message can be a question or an instruction to a device, or an alarm
triggered by a specific event in a device. Objects are contained in data
bases called MIBs (Management Information Base), where MIB-II is a
standard database.
The AXIS 540/640 supports all relevant parts of MIB-II. It also
includes a private enterprise MIB. The AXIS MIB is described later in
this section.
AXIS 540/640 User’s Manual 85
Page 86

Section 7: Setting Up - UNIX
System Requirements
for SNMP
Note: ❏ The AXIS MIB is not
The following requirements must be fulfilled in order to make full use
of the AXIS 540/640 SNMP support:
• An NMS software that allows you to install private enterprise
MIBs.
• A host that supports FTP on which to run the NMS software.
Follow these steps to add the AXIS MIB to your NMS software:
1. Log in to the AXIS 540/640 using FTP.
2. Up-load the MIB file /snmp/axis.mib to the NMS host.
3. Install the AXIS MIB according to instructions in your NMS
software documentation.
available in the AXIS 540 and AXIS 542
models. However, this can be uploaded from any other of the
AXIS print servers and used for configuring these models. This
file may also be downloaded from the AXIS Utilities diskette or
alternatively, obtained via the Axis WWW Home Page, see
Appendix C - Updating the Software.
The AXIS MIB The AXIS MIB contains a large number of objects which may be
categorised as follows:
• Menu objects - used for viewing and changing the AXIS 540/640
configuration from the NMS program.Refer to Appendix A - The
Test Button.
• Printer status and unit administration objects - used for
monitoring AXIS 540/640 print jobs and storing parameter
changes permanently.
• Trap objects - used for alarms at various error conditions.
For technical details, you can view the MIB file (axis.mib) with any
text editor.
86 AXIS 540/640 User’s Manual
Page 87

Other UNIX Configuration Methods
Web Browser You may alternatively configure the AXIS 540+/542+/640 and 642
models for operation within the TCP/IP environment, using an
appropriate Web browser. Any TCP/IP parameter in the AXIS
540/640 Configuration file may be amended from within the TCP/IP
Configuration Page. Refer to Section 8 - Web Based Management for
further information.
Section 7: Setting Up - UNIX
The AXIS 540+/542+ TCP/IP Configuration Page
FTP FTP provides another method for configuring the AXIS 540/640. For
further information refer to Editing using FTP on page 98.
AXIS 540/640 User’s Manual 87
Page 88

Section 7: Setting Up - UNIX
88 AXIS 540/640 User’s Manual
Page 89

Section 8: Web Based Management
Section 8 Web Based Management
Having established TCP/IP communication as described in Section 2 Basic Installation, you are now able to access AXIS 540/640 series of
Network Print Servers from any standard Web browser.
Furthermore, the enhanced HTTP support available in the AXIS
540+/542+ and Token Ring models includes a quick and easy
management tool for performing all print server configuration tasks,
within all supported networking environments. Whether printing
from within a NetWare, UNIX, Windows, OS/2, Macintosh or a
mixed networking environment, you will find the ease with which you
can amend configuration parameters using HTTP, a considerable
benefit.
The information provided within this section will provide an
informative and valuable supplement to previous sections of this
manual that are relevant to your network. It describes how you may
access the Home Page of the AXIS 540/640 and also explains how the
unit may be configured for use within your local networking
environment.
Internet
Windo ws
After successfully navigating your way around the AXIS 540/640 Web
Pages you may proceed to one or more of the following sections, as
appropriate to your type of network.
Section 3 Setting Up - NetWare
Section 4 Setting Up - Windows
Section 5 Setting Up - OS/2
Section 6 Setting Up - Macintosh
Section 7 Setting Up - UNIX
AXIS 540/640 User’s Manual 89
Page 90

Internet
Window s
Section 8: Web Based Management
Accessing the Web Pages
Preparation To access the AXIS 540/640 Home Page the Internet Address must be
set, as described in Basic Set Up for TCP/IP, on page 25.
Accessing the
Configuration Pages
Follow the steps below to access the Home Page of the AXIS 540/640.
The browser used in the following example is Netscape Navigator 2.0.
1. Start the Netscape Navigator.
2. From the File menu, select Open Location...
3. Enter the Internet Address of the AXIS 540/640 as a URL in your
browser, as detailed below:
4. If you have assigned a host name, you may refer directly to the
host name instead:
5. The Home Page of your AXIS 540/640 will now be displayed in
your browser.
Note: ❏ The Home Page for the AXIS 540/542 models will differ from
that of the AXIS 540+/542+ and Token Ring models. This is due
to the enhanced HTTP support features that are provided in the
latter.
90 AXIS 560/660 User’s Manual
Page 91

Internet
Section 8: Web Based Management
The AXIS 540/542 Home Page
Windo ws
From within the AXIS 540/542 Home Web Page you may view the
latest print jobs, printer port status and examine the current parameter
list, or default settings. Links to the AXIS Home and Product Pages
are also provided.
The AXIS 540+/542+ Home Page
The enhanced HTTP support features included in the AXIS
540+/542+ and Token Ring models are further described below.
AXIS 540/640 User’s Manual 91
Page 92

Internet
Window s
Section 8: Web Based Management
Enhanced HTTP Management Services
Links to the following services are available from the Home Page of
the AXIS 540+, 542+, 640 and 642 models:
• Configuration
• Management
• Status
• Account
•Help
You can also visit Axis on the net, take a company tour and access any
of the Axis Network Print Server on-line services; including, manuals,
software updates, and technical support. You may also join the Axis
UserGroup for extended warranty and other valuable benefits.
Services Summary A summary of the enhanced services available from the AXIS
540+/542+/640/642 Home Page follows:
From within the Configuration pages you may:
• modify configuration parameters of the AXIS
540+/542+/640/642.
A complete list of these parameters is contained in Appendix B -
The Parameter List.
• enable and disable any of the available networking protocols and
modify their operation from appropriate configuration pages.
• change the node address
• amend the root password
Note: ❏ When clicking on either Management or Configuration for the
first time, you will be asked to provide a username and password.
root and pass, respectively.
Caution
By default these are set to
M
Any network configuration should involve the Network
Administrator.
92 AXIS 560/660 User’s Manual
Page 93

Internet
Section 8: Web Based Management
Windo ws
The Management Page allows you to reset the print server and set the
parameters to the factory default values. You may also view basic
information about your the AXIS 540+/542+/640/642, i.e. the
current software version, ethernet address, serial number, base URL
address, enabled networking protocols.
User-friendly links to other services are also provided, including
Change root password.
You may view the status of the connected printer ports from the Status
Page, examine the number of bytes printed, etc.
Maintains and displays a historical record of print jobs that also
defines the user, logical printer, protocol, file size, elapsed time and
offline time.
The AXIS NetPilot Help utility is primarily designed to assist users
with the use of the AXIS NetPilot. However, the information
contained in this help utility is equally relevant to network
configuration and management activities that can be performed via
the internal Web Pages of the AXIS 540+/542+/640/642. An HTTP
version of the AXIS NetPilot Help facility is therefore made available
to assist you to with any of the operations detailed above.
AXIS 540/640 User’s Manual 93
Page 94

Internet
Window s
Section 8: Web Based Management
94 AXIS 560/660 User’s Manual
Page 95

Appendix A: The Test Button
Appendix A The Test Button
The Test Button is located on the front right hand side of the AXIS
540/640. By depressing this button you are able to:
• Print a test page, to check the connection to the printer.
• Print a parameter list, to define the current settings within your
AXIS 540/640.
• Reset the AXIS 540/640 parameters to the original factory default
settings.
The functionality of the Test Button is determined by the power
status of the AXIS 540/640 and the number of times the button is
depressed.
A description of these functions complete with instructions for their
implementation, are detailed in the following sections of this
appendix.
The Test Page After connecting your printer to the port of your AXIS 540/640, it is
recommended that you print out a test page to verify that the cable
interface is functioning correctly. The simplest way to do this, is to
simply depress the Test Button once. The printed Test Page contains
basic information about the AXIS 540/640.
The Parameter List By simply double clicking on the Test button, the current parameter
settings installed in your AXIS 540/640 print server can be output to
the connected printer.
This list provides comprehensive details of all of the parameters and
their current status. The parameters may be changed according to your
requirements using the AXIS NetPilot software.
Note: ❏ Some of the parameters require that the AXIS 540/640 is restarted
before becoming effective.
AXIS 540/640 User’s Manual 95
Page 96

Appendix A: The Test Button
Factory Default
Settings
Note: The Node address parameter NODE_ADDR will remain unchanged,
Should you wish to reset the AXIS 540/640 to the factory default
settings, the best way to do this is to use the Test button. This
procedure involves switching the AXIS 540/640 off and on.
1. Remove the power cord to switch off the AXIS 540/640.
2. Press and hold down the Test button. Whilst continuing to press
the Test button, simultaneously switch on the AXIS 540/640 by
replacing the power cord. Keep the Test button pressed for at least
20 seconds after restoring power until the Network indicator
flashes at one second intervals.
3. Release the Test button and wait at least five seconds (five
indicator flashes).
4. Press and hold the Test button again for at least five seconds until
the Network indicator remains constantly lit.
The AXIS 540/640 is now reset to factory default settings. Restart the
AXIS 540/640 by switching it off and on.
but all other parameters are reset. Should you wish to change the
Node address, you may do so via the General Property page, using
AXIS NetPilot.
96 AXIS 540/640 User’s Manual
Page 97

Appendix B: The Parameter List
Appendix B The Parameter List
This appendix provides an overview of the AXIS 540/640 parameters
and describes how they may be edited. A sample parameter list is also
included. However, please note that because of recent print server
software updates, some differences may exist between the parameters
installed on your print server and those that are described within this
document.
Please refer to the AXIS Network Print Server Technical Reference for
a complete description of the parameters. Alternatively, you may wish
to access the Axis WWW Home Page at http://www.axis.com/, where
you can down-load the latest technical information. For details of the
appropriate WWW address in your region, please refer to Appendix E -
How To Contact Axis.
Editing the Configuration Parameters
Editing using
AXIS NetPilot
Editing using a
Web browser
AXIS 540/640 User’s Manual 97
All parameter settings are stored in the AXIS 540/640 config file,
which may be edited via the Property Pages of the AXIS NetPilot
software. Each Property Page comprises an array of selection tabs that
are appropriate to your operating environments. Each parameter may
be defined by using the relevant box. For further information on the
Property Pages, please refer to Section 3 - Setting Up - NetWare.
If your network supports TCP/IP you may view and edit the AXIS
540/640 parameter list using any standard Web browser.
Page 98

Appendix B: The Parameter List
Editing using
FTP
UNIX, Windows and
OS/2 Workstations
Notes: ❏ It is important that the edited filename is specified in block
The File Transfer Protocol provides another alternative for changing
the parameter settings.
Follow the step-by-step procedure below to edit the config file from
UNIX, Windows and OS/2 workstations, using FTP:
1. Log in to the AXIS 540/640 by typing the command:
ftp <host name>↵
2. Enter root as user id and pass as password.
3. Up-load the config file by typing:
get config↵
4. Edit the file using your preferred text editor.
5. Down-load the config file by typing:
put config CONFIG↵
capitals. Otherwise, the edits are regarded as temporary and will
be lost once the AXIS 560/660 has been powered down.
❏ The method for performing file transfers using FTP can vary,
dependent upon which FTP application you are using.
Editing from a
Macintosh
To edit the config file from a Macintosh you will need FTP support
such as MacTCP, Fetch or Anarchie. The procedure for doing this is
the same as described for UNIX above.
Printing parameters
on the printer
98 AXIS 540/640 User’s Manual
The current parameter list may output to a printer connected to the
AXIS 540/640 by double-clicking the Test button.
Page 99

The Config File
--- CONFI G MENU
NODE_ADDR. : 00 40 8C 1 0 00 86
BASE URL. : WWW.AXIS.C OM
ROOT_PWD. : pass
USERS. :
S_ROUTE. : auto
Appendix B: The Parameter List
The remainder of this appendix contains the complete AXIS 540/640
parameter list. The left-hand column shows the parameters and their
default values as they appear in the config file, and the right column
contains brief descriptions of the parameters.
Most parameters will take effect in the print server for the next
incoming print job after being changed. However, those parameters
marked (Requires Restart), will require the print server to be restarted
before the new parameter setting can take effect. Restart is also
required when the Ring Speed Switch is changed on the AXIS 640.
Please note that the password relates to parameters, e.g. ROOT_PWD
and PROS_PWD will only be shown when logged in as root, i.e. not
when printing the parameters using the Test button.
Node Address
Default Base URL Address (AXIS 540+/640+ only)
Root Password
User Auth ority and Print er Access
Token Ring Source Routing Mode (Only AXIS 640/642)
--- TCP/IP MENU
TCP_ENB. : YES
INT_ADDR. : 192 36 253 80
DEF_ROUT. : 0 0 0 0
NET_MASK. : 0 0 0 0
PROS_PRT. : 35
PROS_PWD. : netprinter
LPD_BANN. : NO
DHCP_ENB. : NO
BOOTP_ENB. : YES
RARP_ENB. : YES
RTN_OPT. : YES
RTEL_PR1. : 0
RTEL_PR2. : 0
RTEL_PR3. : 0
RTEL_PR4. : 0
RTEL_PR5. : 0
RTEL_PR6. : 0
RTEL_PR7. : 0
RTEL_PR8. : 0
TCP/IP Protocol Enabled
Internet Address
Default Router Addres s (0.0.0.0 for no router)
Net Mask (e.g. 255.255.255.0 for cl ass C, 0.0.0.0 for auto-sense)
PROS TCP Port Number
PROS Protocol Password
LPD Ban ner Page Disabled
DHCP Protocol Enabl ed
BOOTP Protocol Enabled
RARP Protocol Enabled
Reverse Telnet Options Enabled
PR1 Reverse Telnet TCP Port Number (0 for Disabled)
PR2 Reverse Telnet TCP Port Number (0 for Disabled)
PR3 Reverse Telnet TCP Port Number (0 for Disabled)
PR4 Reverse Telnet TCP Port Number (0 for Disabled)
PR5 Reverse Telnet TCP Port Number (0 for Disabled)
PR6 Reverse Telnet TCP Port Number (0 for Disabled)
PR7 Reverse Telnet TCP Port Number (0 for Disabled)
PR8 Reverse Telnet TCP Port Number (0 for Disabled)
AXIS 540/640 User’s Manual 99
Page 100

Appendix B: The Parameter List
--- SNMP MENU
READ_COM. : public
WRT_COM. : pass
TRAPADDR. : 0 0 0 0
TRAP_COM. : public
SYS_CONT. :
SYS_NAME. :
SYS_LOC. :
SNMP_AUT. : DISABLE (DISAB LE, E NABLE)
TRAP_PRT. : DISABLE (DISAB LE, E NABLE)
--- NETWA RE MEN U
NETW_ENB. : YE S
PS_NAME. : AXIS100086
JOB_CHECK_ DELAY. : 5
CONF_CHECK _DELAY . : 300
FR_802_3. : YE S
FR_ETH_2. : YE S
FR_802_2. : YE S
FR_SNAP. : YES
NCP_BURST_ MODE. : YES
PSERVER_ND S. :
PSERVER_BI NDERY1 . :
PSERVER_BI NDERY2 . :
PSERVER_BI NDERY3 . :
PSERVER_BI NDERY4 . :
PSERVER_BI NDERY5 . :
PSERVER_BI NDERY6 . :
PSERVER_BI NDERY7 . :
PSERVER_BI NDERY8 . :
PSERVER_BI NDERY9 . :
PSERVER_BI NDERY1 0. :
PSERVER_BI NDERY1 1. :
PSERVER_BI NDERY1 2. :
PSERVER_BI NDERY1 3. :
PSERVER_BI NDERY1 4. :
PSERVER_BI NDERY1 5. :
PSERVER_BI NDERY1 6. :
NPRINTER1. :
NPRINTER2. :
NPRINTER3. :
NPRINTER4. :
NPRINTER5. :
NPRINTER6. :
NPRINTER7. :
NPRINTER8. :
Read-Only Community Name
Read-Write Community Name
SNMP Trap Internet Address
SNMP Trap Community Name
System Contact
System Name
System Location
Authentication Failure Traps
Printer Traps
NetWare Protocol Enabled
Print Server Name (100086 are the last six digits of the serial number)
Print Server queue polling interval
Interval between automatic configuration checks
IEEE 802.3 F rame Type Enabled
Ethernet II Frame Type Enabled
IEEE 802.2 F rame Type Enabled
SNAP Frame Type Enabled
NetWare Burst Mode Enabled (Requires Restart)
File server & Name of p rint server (including cont ext)
Bindery file server name
Bindery file server name
Bindery file server name
Bindery file server name
Bindery file server name
Bindery file server name
Bindery file server name
Bindery file server name
Bindery file server name
Bindery file server name
Bindery file server name
Bindery file server name
Bindery file server name
Bindery file server name
Bindery file server name
Bindery file server name
Print Server name. Slot
Print Server name. Slot
Print Server name. Slot
Print Server name. Slot
Print Server name. Slot
Print Server name. Slot
Print Server name. Slot
Print Server name. Slot
100 AXIS 540/640 User’s Manual
 Loading...