

Page 1
Geocalla G3-3D gimbal
User Manual
2014.12.01
V1.0
Page 2

Warning & Disclaimer
G3-3D gimbal is calibrated before delivery, no adjustment or
modification to the gimbal is allowed.
Ensure the camera is mounted to the gimbal before powering the
aircraft.
G3-3D gimbal is finely calibrated according to the specified camera model and
lens before the delivery. User does not need to perform extra calibration. Do
not attempt to modify the g imbal or mount extra component/device (such as
filter, lens hood, etc.) to the camera; be sure to use our approved battery;
otherwise it may affect the performance of the gimbal.
Make sure the flight control system is operating in the safest manner. We
strongly recommend customers to use power supply from R/C system or flight pack
battery, and keep children when calibrating and configuration the gimbal.
Observe the procedures contains in this manual to mount and connect gimbal on
your aircraft. User of this product shall respect the AMA’s National Model
Aircraft safety Code.
Our Innovations has no control over use, setup, final assembly, modification
or misuse, no liability shall be assumed nor accepted for any resulting damage
or injury. By the act of use, setup or assembly, the user accepts all resulting
liability. Our assumes no liability for damage(s), injuries or legal
responsibilities incurred directly or indirectly from the use of this product.
No part of this product or manual shall be reproduced in any form without the
prior written consent or authorization of Our Innovations. No patent liability
is assumed with respect to the use of the product or information contained
herein.
Page 3
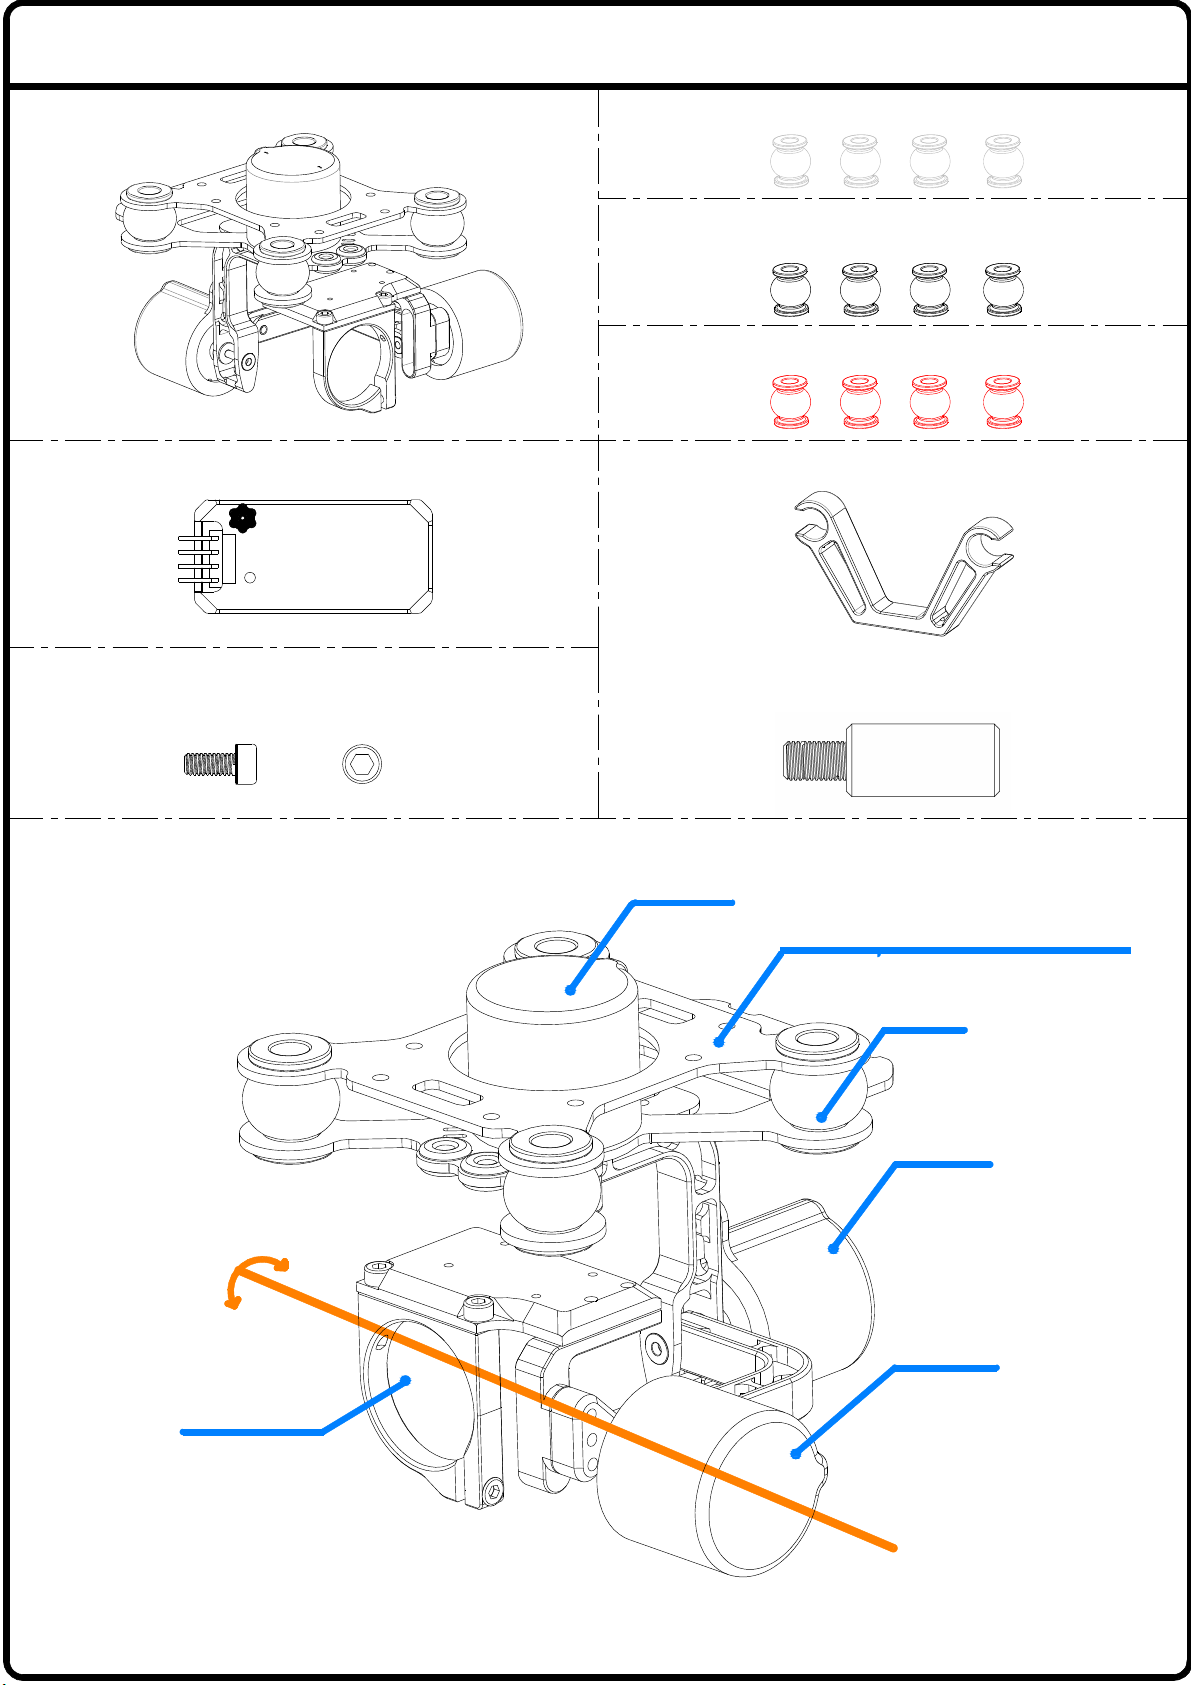
In The Box:
Gimbal X 1
Gimbal Control Unit, GCU X 1
M
s
HK-3D
-
Gimbal Control system
Cup head hex socket screws (M2.5x5)X8
Vibration Absorbers 30 °X 4 (Grey)
Vibration Absorbers 40 °X 4 (Black)
Vibration Absorbers 50 °X 4 (Red)
Camera securing bracket X 2
Screw for Gopro4 X 1
Gimbal Description:
Tilt:-100°
+10°
Camera fixed frame
Yaw servo driver module
Upper plate of damping unit
Vibration Absorbers
Roll servo driver
module
Tilt servo driver
module
Page 4

GCU Description:
Input Voltage Range:
LiPo
(3 S~5S,10V~2 3V)
Receiver knob
channel (Don't
need to be the same
frequency with
receiver)
Signal output
Indicator light
Indicator light feedback signal:
Calibrating:
Working:
Failure:
Pitch
YAW
GND
M
s
HK-3D
-
GUI
Gyroscope signal socket(4P) Encoder signal socket(4P) Motor signal socket(6P)
Gimbal Control system
!
JST Power Plug
Do not use the excess of the
CAUTION
注 意
prescribed scope power
supply,or else will cause the
controller to burn out.
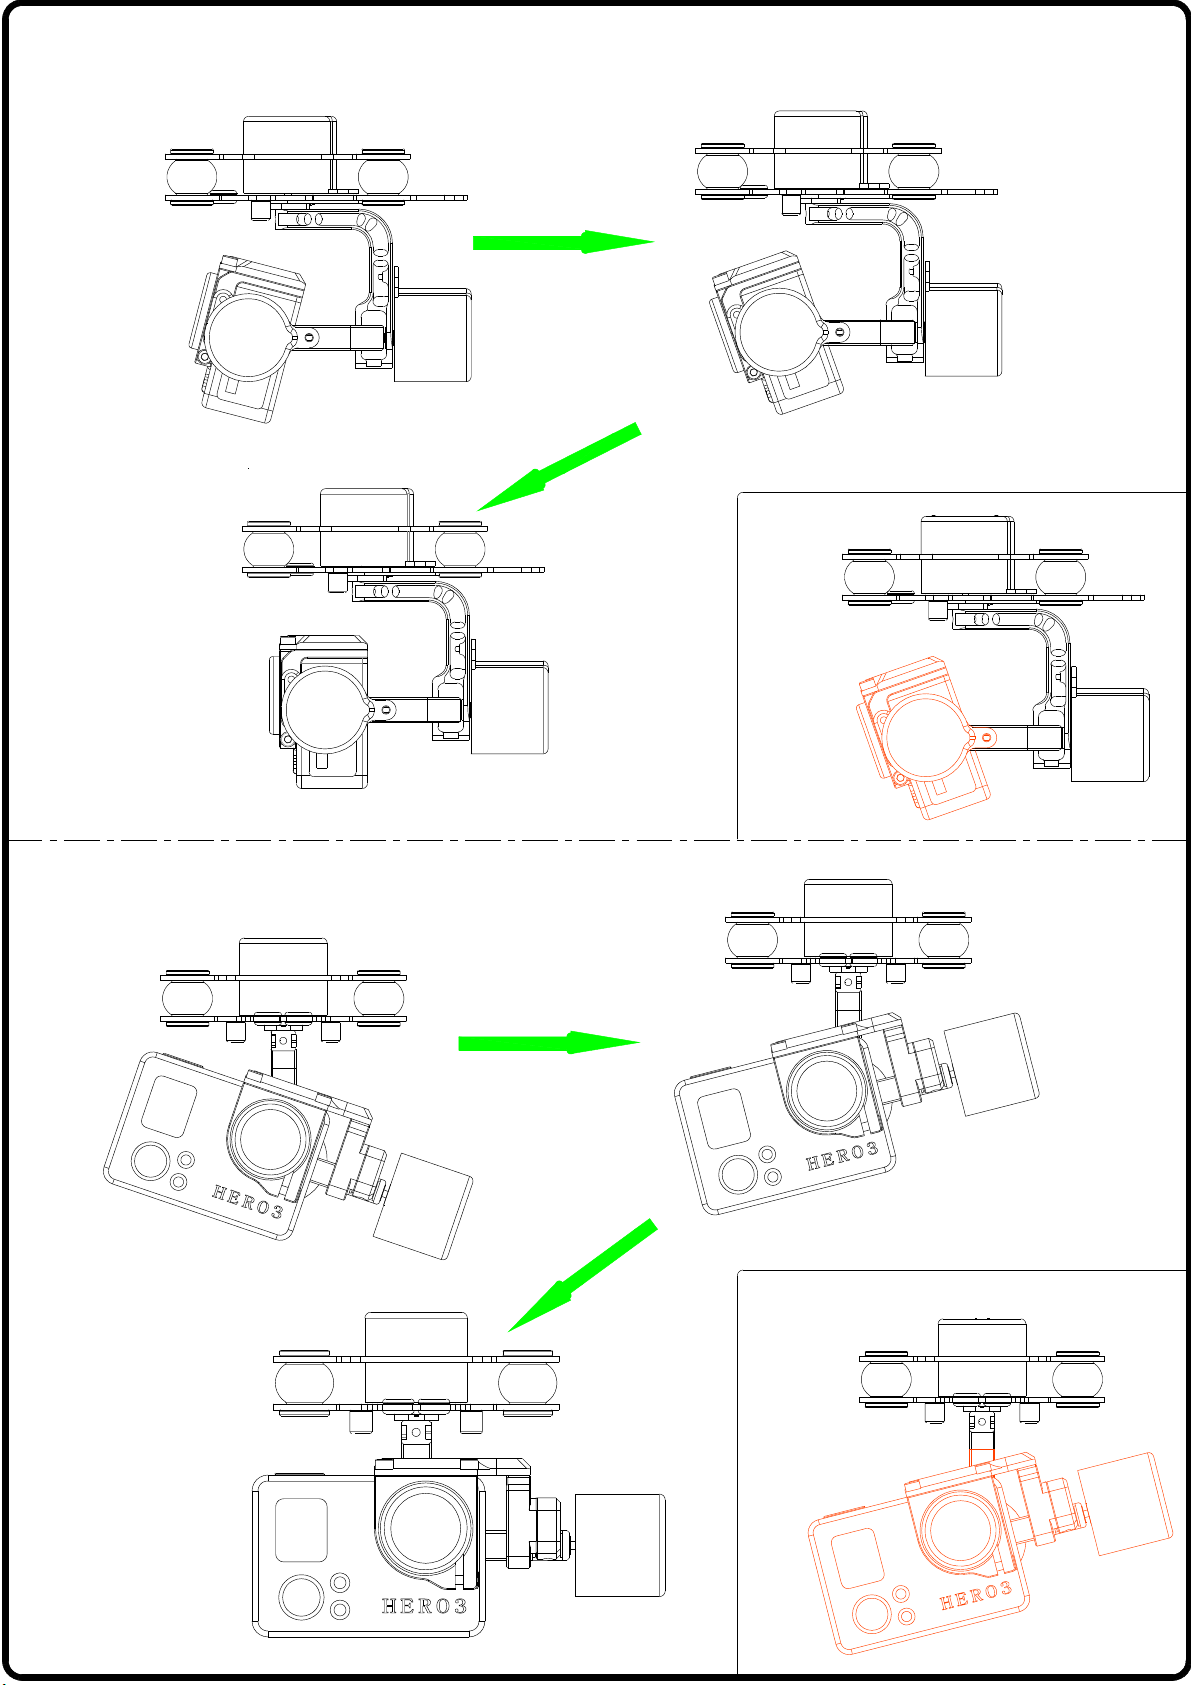
Install camera securing bracket
Install camera
Cup head hex socket screwsp
(M2.5x5)
1.Camera embeds into the lens frame;
2.Adjust and screw down the
screws. Caution:When install the
camera,You need to use a certain strength
to push the camera lens into the camera
fixed frame.Don't too hard so as not to
damage the lens.
Cup head hex
socket screwsp
(M2.5x5)
Page 5
Gimbal automatic calibration status:
OK
OK
NG
NG
Page 6

OK
NG
Gimbal control:
1. G3-3D support pitch aixs control.
Please connect the receiver with gimbal controller according to the
picture showing above. Power on the gimebal,
when gimbal indicator light flashing, wait for 3 seconds,then we can
control pitch angular velocity of the movement through the stick.
2. Gimbal roll axis level calibration
If the roll axis is not level after power on, you can correct
the position by following these steps:
a.Connect the gimbal with receiver gas channel, electrify the recerver
and turn on the transmitter then push the gas to maximum.
b.Adjust the camera and let it be on the level position, electrify the
gimbal when gimbal indicator light flashing, wait for 3 seconds this
operation can be done.
Page 7

Specifications
General
Features
1.3-axis high performance gimbal.
Peripheral
Supported Camera
GoPro3, GoPro3+ Black and Sliver and GoPro 4
GCU Input Power
Mechanical &
Electrical
Gimbal Operating Current
Static current: 100mA (@17.4V)
Dynamic current: 300mA (@7.4V)
Gimbal Input Power
Operating Temperature
0°C ~ 60°C
Gimbal Weight
166g
Gimbal Dimensions(With Damping
Unit)
94mm X 105mm X 90mm
GCU Weight
12g
GCU Dimensions
44mm X 21.5mm X 9.3mm
Performance
Controlled Angle Accuracy
Tilt/Roll: ±0.05°;
Yaw: ±0.05°
Controlled Rotation Range
Tilt axis control: -100 ~ +10°
2.Effortless Setup.
3.Solo used.
4.Totally-enclosed motor, is not affected by iron
filings, sand and dust.
5.When charging, change SD card or battery
you don't have to remove the camera.
6.Wide range of voltage, from 23V to 10V.
3S~5S LiPo (10V~23V)
10
10
10
10
3S~5S LiPo (10V~23V)
 Loading...