

AXA Niteline T4-R Service Manual
PRODUCT INFORMATIE/PRODUCT INFORMATION
Productwijzigingen voorbehouden/Product modication reserved
Niteline T4-R
AAN/UIT
ON/OFF
• Door 1 maal kort op de knop te drukken en weer los te laten
kan de Niteline worden aangezet. De Niteline heeft meerdere
standen waartussen geschakeld kan worden.
1 LED voorlicht ‘’to see’’
- kort drukken Medium Steady aan
- kort drukken High Steady aan
- kort drukken Medium Pulse
- kort drukken High Steady-Pulse
- lang drukken uit (kan in iedere stand)
4 LED achterlicht ‘’to be seen’’
- kort drukken Low Steady aan
- kort drukken High Steady aan
- kort drukken Low Flash aan
- kort drukken High Pulse aan
- lang drukken uit (kan in iedere stand)
Als de verlichting uitgezet wordt, onthouden deze de stand
waarin ze uitgezet zijn en wanneer de verlichting aangezet
wordt zal de verlichting op deze stand weer aangaan.
• The Niteline light is switched on by briey pressing the
button. The Niteline has dierent modes between which can
be switched
1 LED head light ‘’to see’’
- Briey press: Medium Steady on
- Briey press: High Steady on
- Briey press: Medium Pulse on
- Briey press: High Steady-Pulse on
- Long press: o (is possible in every mode)
4 LED rear light ‘’to be seen’’
- Briey press: Low Steady on
- Briey press: High Steady on
- Briey press: Low Flash on
- Briey press: High Pulse on
- Long press: O (is possible in every mode)
When the lights are turned o they will remember the mode
they were on last and turn back on at that mode.
BATTERIJ INDICATOR
BATTERY LOW INDICATOR
• Als de verlichting minder dan 20% batterij heeft zal een licht
indiactor gaan branden. Bij het USB ‘to see’ voorlicht zit de
rode licht indicator in de aan/uit knop. Bij de USB 4 LED
achterlicht zit de rode licht achter de rode lens aan de ander
kant van de USB oplaadpoort.
• When the light batteries are at 20% power or less, a light
indicator will illuminate. For the USB to see front a red light
indicator is located on the power button. For the USB 4 Led
rear a red light indicator is located behind the red glass lens on
the opposite side the USB charging port.
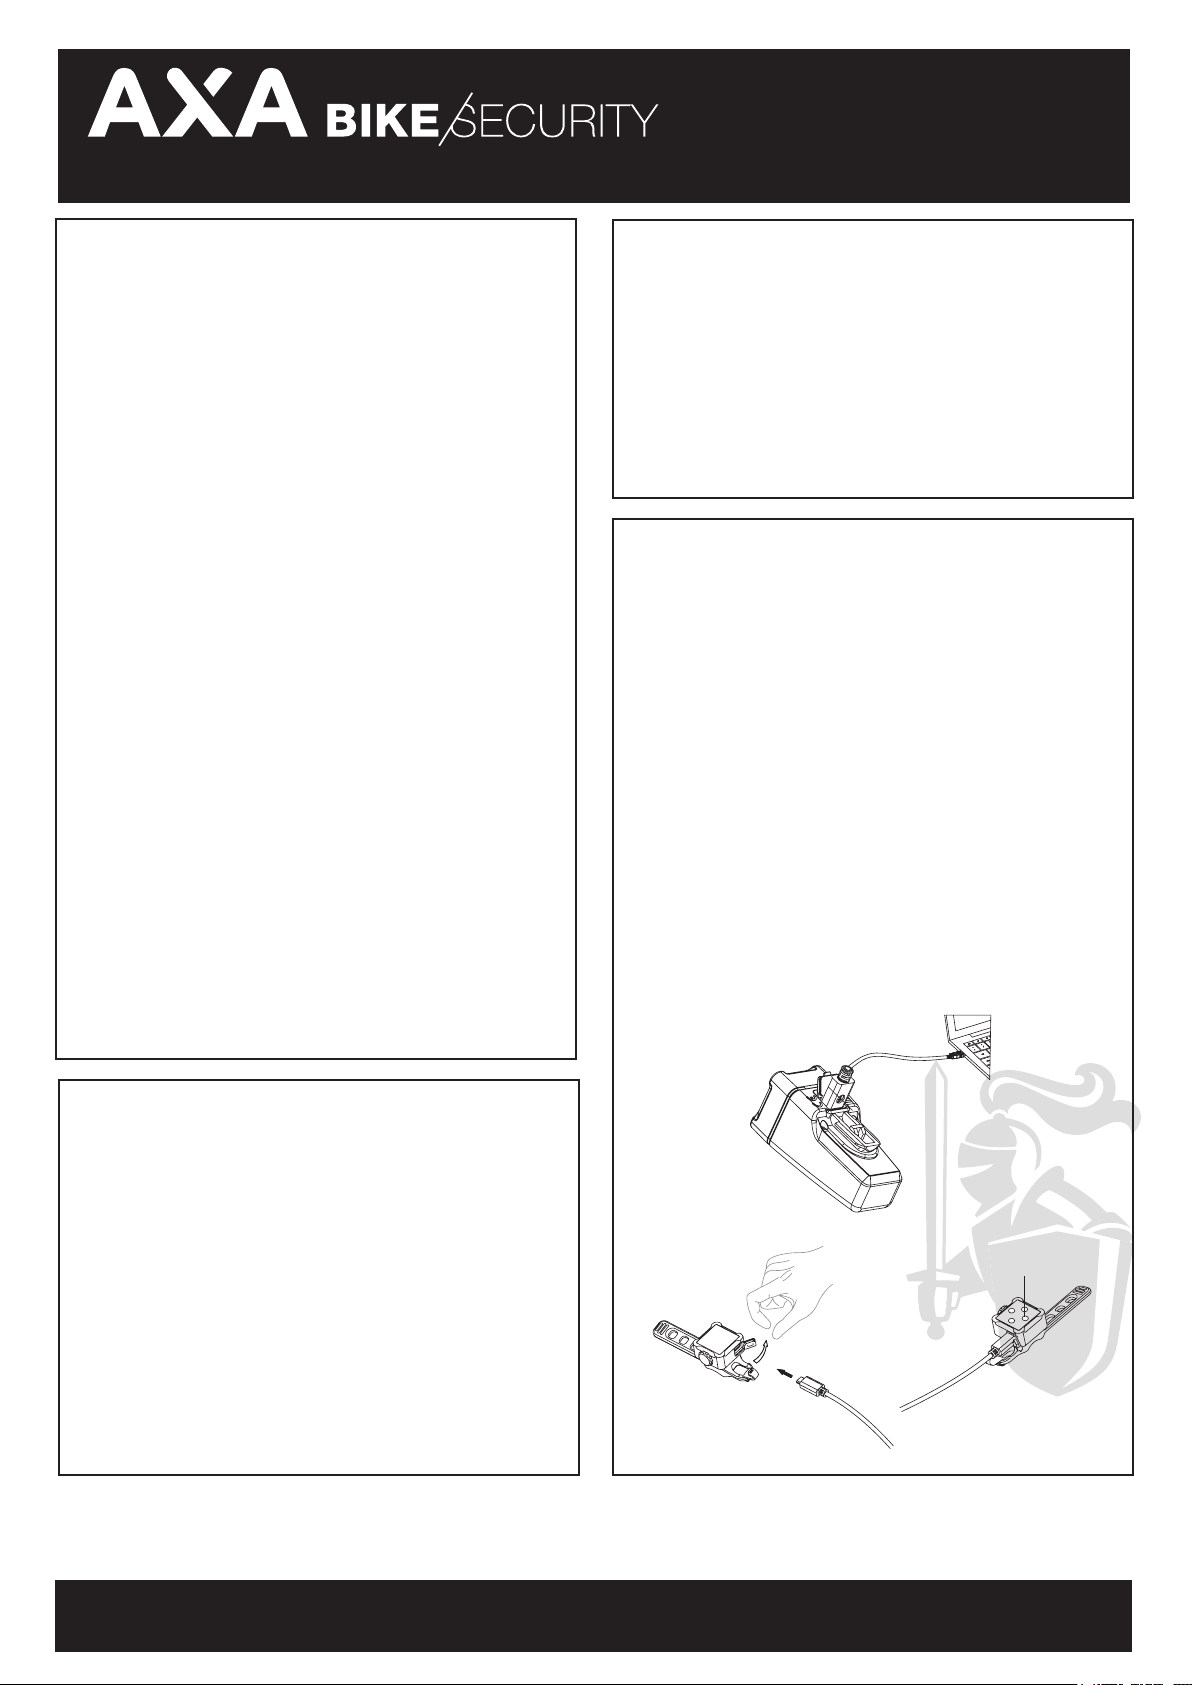
OPLADEN BATTERIJ
CHARGING BATTERY
• Aan de onderkant van de verlichting is de USB oplaad poort.
Open de USB bedekking en stop de USB kabel in de oplaad
poort. Verbind het grotere eind van de USB kabel aan een
stroombron (niet inbegrepen). Druk de USB bedekking terug na
gebruik.
Wanneer de lamp aan het opladen is kleurt de indicator groen.
Bij de USB ‘to see’ voorlicht zit deze indicator in de aan/uit
knop. Bij het 4 LED achterlicht zit deze indicator achter de rode
lens aan de andere kant van de aan/uit knop. Wanneer de lamp
volledig opgeladen is gaat de licht indicator uit.
• The lights have an USB charging port located at the bottom
of the light. To open the USB cover, pull open from the tab side.
Insert the USB cable into the charging port. Connect larger end
of USB cord to a power source like a computer or USB block
(not included). Push and seal USB cover properly to ensure dirt
and grime does not get into the charging port.
To ensure that the lights are charging, look for a green indica-
tor on the power button on the USB to see light and behind the
red glass lens on the opposite side of the power button for the
4 LED rear. Once fully charged, the indicator light will turn o.
GARANTIE
WARRANTY
• AXA garandeert de eerste koper een garantietermijn van
2 jaar na aankoopdatum. Schade door oneigenlijk gebruik,
(zoals vallen van de lamp, onderdompelen in het water), is
van de garantie uit gesloten.
AXA Nederland
Energiestraat 2 - 3903 AV Veenendaal - Nederland
T: +31 318 536 220 - www.axabikesecurity.com
• AXA extends a 2-year limited warranty to the original user
of the lights against defects in material and workmanship.
Damage which is caused by improper use (dropping the light,
immersion in water) shall be excluded from the warranty.
AXA Netherlands
Energiestraat 2 - 3903 AV Veenendaal - Nederland
T: +31 318 536 220 - www.axabikesecurity.com
AXA Bike Security P.O. Box 47 NL-3900 AA Veenendaal www.axabikesecurity.com
Charge indication
Pull
Micro USB
PRODUCT INFORMATIE/PRODUCT INFORMATION
Productwijzigingen voorbehouden/Product modication reserved
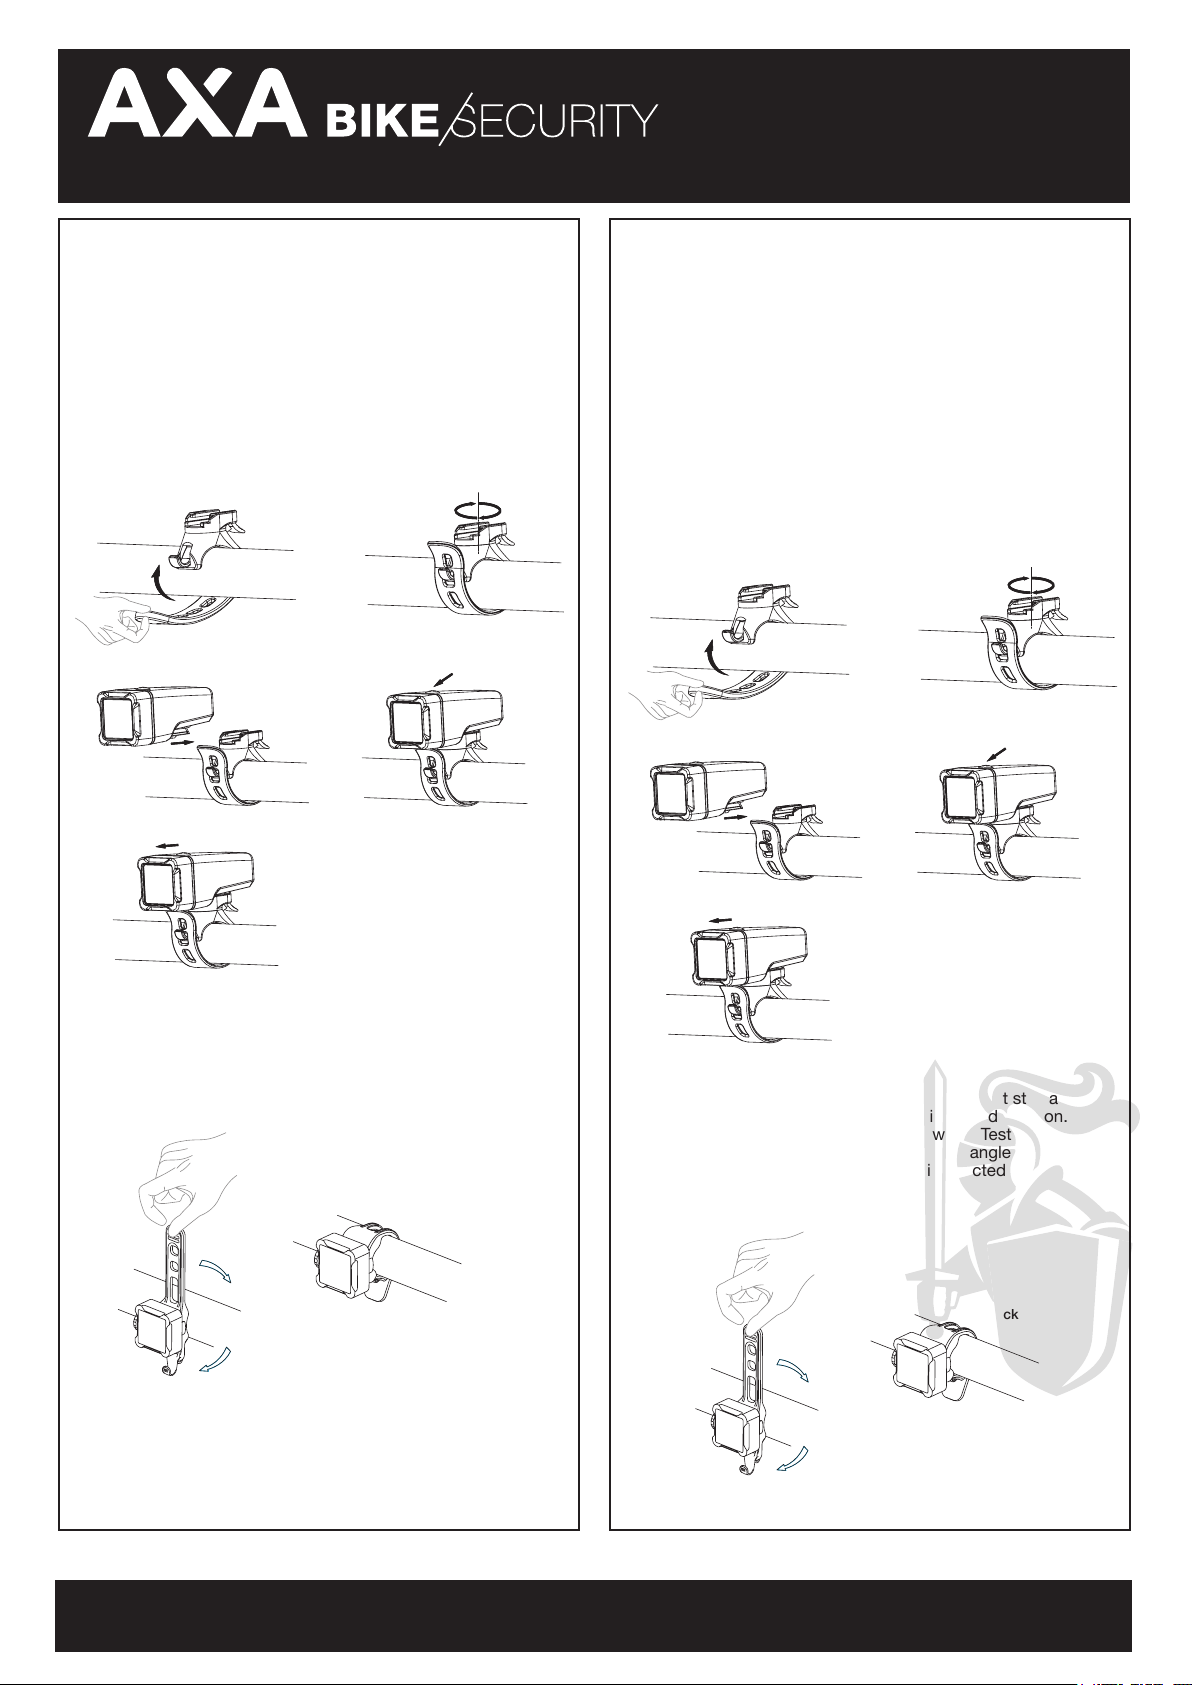
MONTEREN MOUNTING
Voorlicht
Splits de lampkop van de houder door op de hefboom te
drukken die onder de lampkop zit en trek het licht richting de
hefboom. Pak de houder en maak de rubberen band vast om
de stuurstang en plaats de haak door het gat in de rubberen
band. Om het licht vast te maken druk de hefboom op de
houder in en schuif de lamp op de houder. Stel de stuurbevestiging zo in dat de lamp op de grond gericht staat.
Head light
Separate the light and bracket by pressing down on the lever
located underneath the light head. While pressing the lever
down, pull the light towards the lever until it is removed from
the bracket. Take the bracket and wrap the rubber fastening
strap around the handlebar. Insert the hook through a hole in
the rubber strap so that it is snug. To attach the light, push the
lever down on the bracket, and slide the mounting base of the
light into the bracket with the back of the light passing over the
Om de lamp te verwijderen druk op het zwarte hendeltje en
schuif de lamp naar voren.
lever side rst. Test the light to ensure that it is positioned at
your desired angle. The light should be mounted so the light’s
beam is directed to the ground.
Rotate
1 2
To remove the light press the lever on the rear side and move
the light forward.
Niteline T4-R
Lock
3
Lock
5
Remove
4
Power button
Achterlicht
Rek de rubberen band om de zadelpen/achtervork en maak
het vast aan de S-klip, met de S-klip naar boven/zijwaarts.
Stel de stuurbevestiging zo in dat
de lamp op de grond gericht staat.
Lock
Pull
Rotate
1 2
Lock
3
Lock
5
Remove
4
Power button
Rear light
Wrap the rubber strap around the seatpost or seat stay and
fasten it to the S-clip, securing the light in a xed position.
Make sure the S-clip is facing up or sideways. Test the light
to ensure that it is positioned at your desired angle. The light
should be mounted so the light’s beam is directed to the
ground.
Lock
Pull
AXA Bike Security P.O. Box 47 NL-3900 AA Veenendaal www.axabikesecurity.com
 Loading...