

Page 1

AWEA SP/LP SERIES PROGRAMMER'S AND OPERATOR'S MANUAL (FANUC 18iMB) NO. SPEMFI13 DATE:2006/09/06
Page 2
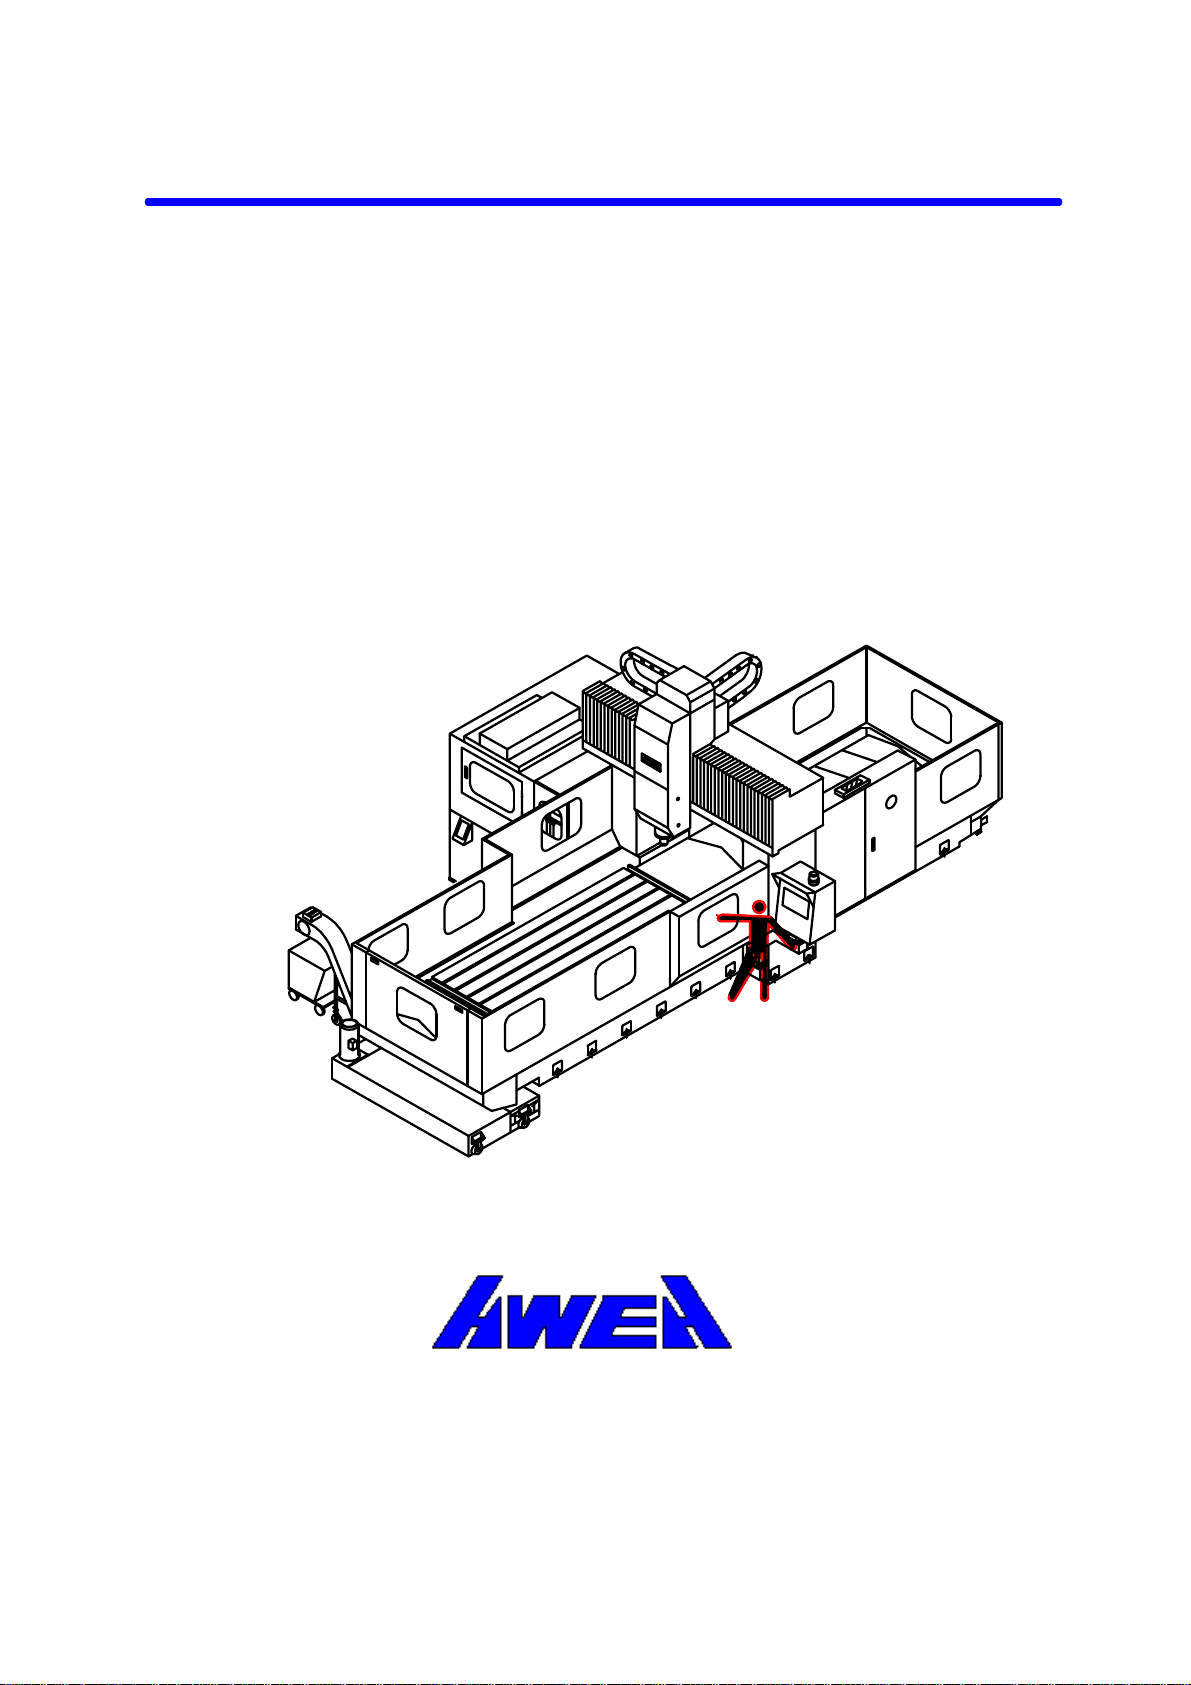
CNC DOUBLE COLUMN VER TICAL MACHINING CENTER
MODEL : SP2016/SP3016/SP4016
LP3021/LP4021/LP5021
LP4025/LP5025/LP6025
PROGRAMMER'S AND
OPERATOR'S MANUAL
VER. No.: SPEMFI13
AWEA MECHANTRONIC CO., LTD.
Page 3
AWEA
DOUBLE COLUMN
VERTICAL MACHINING CENTER
Page 4

PROGRAMMER'S AND OPERATOR'S
AWEA
MANUAL
VERSION : NO. SPEMFI13
EDITOR : Eric, Wei-Shinn LOO
MACHINE MODEL : SP/LP SERIES
CONTROLLER TYPE : F ANUC 18 iMB
NAME OF CUSTOMER :
MACHINE SERIAL NUMBER :
DATE OF MANUFACTURED :
At the time of writing, the book was completely up-to-date. However, due to continual
improvements in design, it is possible that descriptions contained herein may vary to a slight extent
from the machine delivered to you. This merely implies that the machine has been improved to
better fulfill your requirements. If there are any questions, you are encouraged to contact the nearest
AWEA representative for clarification.
Patents Notice:
The machines and attachments and parts thereof illustrated and described in this book are
manufactured under and protected by issued and pending local and foreign Patents and copyright is
reserved in any original design features thereof and in the contents of this manual and every part
thereof.
Page 5

AWEA
AWEA SP/LP series, Manual-Content
CONTENTS
1. SAFETY RECOMMENDATIONS: ............................................................................1-1
1.1 SAFETY INSTRUCTIONS:................................................................................. 1-2
1.2 SAFETY LABELS EXPLANATION .....................................................................1-5
2. INSTRUCTION.........................................................................................................2-1
2.1 DESCRIPTION OF MACHINE DESIGN AND CONSTRUCTION ...........................................2-1
2.1.1 Machine bed................................................................................................2-2
2.1.2 The bridge................................................................................................... 2-2
2.1.3 The table ..................................................................................................... 2-2
2.1.4 The spindle head.........................................................................................2-2
2.1.5 The feed system.......................................................................................... 2-3
2.1.6 The ATC and Magazine...............................................................................2-3
2.2 C
2.3 S
2.4 OPERATOR’S CONTROL PANEL .............................................................................2-13
3. POWER UP AND POWER DOWN ..........................................................................3-1
3.1 INSPECTION BEFORE OPERATION ...........................................................................3-1
3.2 POWER DOWN...................................................................................................... 3-3
3.3 P
3.4 P
4. OPERATION INSTRUCTION................................................................................... 4-1
4.1 MODE SELECT OPERATION ....................................................................................4-1
4.2 M
4.3 MDI OPERATION .................................................................................................4-13
4.4 AUTOMATIC OPERATION ......................................................................................4-18
OORDINATION..................................................................................................... 2-4
PECIFICATIONS ...................................................................................................2-6
2.3.1 Technical Data............................................................................................. 2-6
2.3.2 Control function (Standard) .......................................................................2-10
2.4.1 LCD/MDI panel.......................................................................................... 2-13
2.4.2 Machine control panel ............................................................................... 2-18
3.1.1 Checking before Power Up .........................................................................3-1
3.1.2 Power Up ....................................................................................................3-2
3.1.3 Checking After Power Up ............................................................................ 3-2
3.2.1 Emergency Stop..........................................................................................3-4
3.2.2 Other Stops ................................................................................................. 3-4
3.2.3 Power Down................................................................................................3-7
OWER ON PROCEDURE LIST ................................................................................3-7
OWER DOWN PROCEDURE LIST............................................................................ 3-7
ANUAL OPERATION .............................................................................................4-3
4.2.1 Reference Point Return............................................................................... 4-3
4.2.2 JOG Feedrate Operation
4.2.3 HANDLE Wheel Operation..........................................................................4-6
4.2.4 Manual operation of the Spindle.................................................................. 4-7
4.2.5 Spindle Tool Loading and Unloading ........................................................... 4-8
4.2.6 Tool magazine operation instruction and trouble shooting ........................ 4-10
4.3.1 MDI Instruction .......................................................................................... 4-13
4.3.2 Tool Number Initial and Command ............................................................ 4-15
4.3.3 Magazine Tool Loading and Unloading .....................................................4-17
4.4.1 Executing Automatic Operation ................................................................. 4-18
4.4.2 Block Skip .................................................................................................4-19
4.4.3 Manual Absolute........................................................................................ 4-20
4.4.4 Program Restart........................................................................................ 4-25
.............................................................................4-4
I
Page 6

AWEA
4.4.5 3D work coordinate rotating command format (Optional function on multi-head) 4-28
4.4.6 Rigid tapping operation for the multi-head.................................................4-28
4.4.7 Manual tool movement in axial and radial dire
4.4.8 Spindle multi-head operation instruction ................................................... 4-30
4.4.9 Three axes MPG operation ....................................................................... 4-34
4.4.10 Memory card operation .............................................................................4-36
4.4.11 Manual Guide i Editing operation ..............................................................4-38
4.5 PROGRAM CHECK AND TEST ................................................................................4-40
4.5.1 Machine Lock ............................................................................................4-40
4.5.2 Z Axis Cancel ............................................................................................4-40
4.5.3 MST Function Lock ...................................................................................4-40
4.5.4 Dry Run..................................................................................................... 4-41
4.5.5 Cutting Feedrate Override......................................................................... 4-41
4.5.6 Rapid Feedrate Override........................................................................... 4-41
4.5.7 Spindle Speed Override ............................................................................4-42
4.6 A
4.7 A
5. TROUBLE SHOOTING ............................................................................................5-1
5.1 TROUBLE SHOOTING GUIDE................................................................................... 5-1
5.2 OPERATION MESSAGE......................................................................................... 5-18
5.3 RESET OF OVER TRAVEL......................................................................................5-22
5.4 REMEDY METHOD IN AUTO TOOL CHANGING TROUBLE...........................................5-23
5.5 DOOR INTERLOCK SAFETY REGULATION (CE VERSION) OPTION............................... 5-25
6. MAINTENANCE .......................................................................................................6-1
6.1 P
6.2 G
6.3 ADJUSTMENT FOR SLIP CLUTCHES (TORQUE LIMITING OVERLOAD) ON EACH AXIS........6-5
6.4 LUBRICATION ........................................................................................................6-6
6.5 COOLANT FACILITIES ............................................................................................. 6-7
6.6 PNEUMATIC SYSTEM ..............................................................................................6-9
6.7 SPINDLE TEMPERATURE CONTROL SYSTEM (OPTION)........................................... 6-11
6.8 HYDRAULIC POWER UNIT ..................................................................................... 6-14
UTOMATIC TOOL CHANGE (ATC) ......................................................................... 4-43
UTOMATIC TOOL LENGTH MEASUREMENT (ATLM) (G37 OR M137) (OPTION) ........ 4-48
5.1.1 Alarm message ...........................................................................................5-2
5.1.2 Remedial Measures ....................................................................................5-4
5.3.1 Soft Limit Over travel................................................................................. 5-22
5.3.2 Hard Limit Over travel ...............................................................................5-22
5.5.1 Operator door safety door interlock instruction:.........................................5-25
5.5.2 Magazine door interlock instruction:.......................................................... 5-25
5.5.3 Safety regulation rule: ...............................................................................5-25
REVENTIVE MAINTENANCE. ..................................................................................6-1
6.1.1 Daily inspection ...........................................................................................6-1
6.1.2 Weekly
6.1.3 Monthly maintenance (480 hours)
6.1.4 Maintenance every six months....................................................................6-2
6.1.5 Maintenance Chart...................................................................................... 6-2
IB ADJUSTMENT. .................................................................................................6-4
6.7.1 General ..................................................................................................... 6-11
6.7.2 Lubrication ................................................................................................ 6-11
6.7.3 Setting temperature................................................................................... 6-12
6.7.4 Maintenance and inspection .....................................................................6-12
6.7.5 Failure and countermeasure .....................................................................6-13
6.8.1 Description ................................................................................................6-14
6.8.2 Hydraulic unit specification........................................................................ 6-15
maintenance (120 hours)................................................................ 6-2
AWEA SP/LP series, Manual-Content
ction................................... 4-29
...............................................................6-2
II
Page 7

AWEA
6.9 CHIPS CONVEYOR AND CHIPS COLLECTOR ............................................................. 6-16
6.10 C
6.11 CLAMPING AND UNCLAMPING DEVICE (OPTIONAL FOR THRU SPINDLE COOLANT) ....... 6-16
7. INSTALLATION ........................................................................................................7-1
7.1 GENERAL .............................................................................................................7-1
7.2 THERMAL EXPANSION ............................................................................................7-1
7.3 HEAT RADIATION ...................................................................................................7-1
7.4 MACHINE SERIAL NUMBER......................................................................................7-2
7.5 CNC CONTROL SERIAL NUMBER .............................................................................7-2
7.6 CHOOSING THE FINAL LOCATION ............................................................................. 7-2
7.7 F
7.8 P
7.9 AIR CONNECTION ..................................................................................................7-9
7.10 POWER CONNECTION............................................................................................ 7-9
7.11 EARTH GROUND..................................................................................................7-10
7.12 S
7.13 P
7.14 CLEANING MACHINE ............................................................................................ 7-13
7.15 COOLANT THROUGH SPINDLE CONNECTION (OPTION)............................................ 7-13
8. ASSEMBLY DRAWING (SPARE PART)...................................................................8-1
8.1 STANDARD PARTS LIST: ..........................................................................................8-1
8.A-1 SPINDLE ASSEMBLY WITH 2 STEP GEAR, 30/35 HP MOTOR .................................... 8-2
8.A-2 SPINDLE ASSEMBLY WITH TRANSMISSION SHAFT(GEAR BOX) ...........................8-8
8.A-3 SPINDLE PAWL DRAW BAR ASSEMBLY ...............................................................8-12
8.A-4 TOOL HOLD CONFIGURATION DIAGRAM .............................................................8-18
8.A-5 SPINDLE HEAD WITH HEAD CHANGEABLE INTERFACE (OPT)................................ 8-22
8.A-6 HYDRAULIC COUNTER BALANCE CYLINDER ON SPINDLE HEAD .............................. 8-28
8.B-1 OVERLOAD CLUTCH FOR FEED SYSTEM.............................................................8-30
8.B-2 X AXIAL FEED SYSTEM ASSEMBLY ..................................................................... 8-32
8.B-3 FEED SYSTEM - TAIL SUPPORT BLOCK ON Y AXIS................................................. 8-36
8.B-4 Z
8.C-1 ATC
8.C-2 ATC
8.D-1 T
9. APPENDIX............................................................................................................... 9-1
9.A-1 G
9.A-2 M
9.A-3 MACHINE DIMENSION:........................................................................................ 9-5
9.A-4 RECOMMENDED FOUNDATION DRAWING:............................................................. 9-9
9.A-5 TABLE DIMENSION : .........................................................................................9-19
9.A-6 TOOL SHANK AND STUD DIMENSIONS:................................................................ 9-22
9.A-7 SLIDES TRAVEL LIMIT: ......................................................................................9-23
9.A-8 HYDRAULIC CIRCUIT DIAGRAM AND PARTS LIST:................................................. 9-30
9.A-9 PNEUMATIC CIRCUIT DIAGRAM AND PARTS LIST:................................................. 9-32
9.A-10 HEAVY-MEDIUM WAY OIL P-67....................................................................... 9-33
9.A-11 SPINDLE POWER CHART: .................................................................................9-38
9.A-12 T
OOLANT PUMP ..................................................................................................6-16
OUNDATION FOR MACHINE....................................................................................7-3
RE-INSTALLATION ................................................................................................ 7-4
YSTEM GROUNDING........................................................................................... 7-11
OWER REQUIREMENT ........................................................................................ 7-12
AXIAL FEED SYSTEM......................................................................................8-38
SYSTEM - ARM ROTATION UNIT...................................................................8-40
SYSTEM - TOOL MAGAZINE ASSEMBLY ........................................................8-46
HROUGH THE SPINDLE COOLANT SYSTEM (OPTION).......................................... 8-48
CODE LIST FOR SP SERIES:............................................................................ 9-1
ISCELLANEOUS FUNCTION LIST ( M CODE ) : .....................................................9-3
9.A-8.1 For the machine equipped with gear head: ...........................................9-30
9.A-8.2 For the machine without gear head(opt) : ........................................9-31
9.A-11.1 For the machine equipped with gear head ............................................9-38
9.A-11
.2 For the machine without gear head(OPT) :......................................9-38
HRU SPINDLE COOLANT SYSTEM (AS OPTION) :................................................ 9-39
III
AWEA SP/LP series, Manual-Content
Page 8

AWEA
9.A-13 PNEUMATIC CIRCUIT DIAGRAM AND PARTS LIST: .................................................. 9-40
9.A-14 90
9.A-15 35 DEGREE MILLING HEAD (OPT): ................................................................... 9-43
9.A-16 EXTENSION MILLING HEAD (OPT): ....................................................................9-45
9.B-1. SAFETY CHECKING LIST: ...........................................................................9-47
9.B-1.1. Reference point return........................................................................... 9-47
9.B-1.2. SAFELY PROTECTING TEST: .............................................................. 9-49
9.B-1.3. Overtravel protection : ...........................................................................9-51
9.B-1.4. Manual operation test : .......................................................................... 9-53
9.B-1.5. Spindle rotation and stop .......................................................................9-56
9.B-1.6. Automatic tool change : ( the MACHINE LOCK button is released)
9.B-1.7. Safe interlock during all axes movement ...............................................9-62
9.B-2. W
9.B-3. TEST PROGRAM ( ALL TEST DIMENSION ARE IN METRIC SYSTEM) .....................9-66
9.B-3.1. MAIN PROGRAM FOR FUNCTION TEST ............................................ 9-66
9.B-3.2. AXES'S STROKE TEST ........................................................................ 9-66
9.B-3.3. TOOL
9.B-3.4. CANNED
9.B-3.5. DRILLING AND RIGID TAPPING ..........................................................9-68
9.B-3.6. AUTOMATIC TOOL CHANGE ............................................................... 9-69
9.B-3.7. Face Milling ...........................................................................................9-70
9.B-3.8. Automatic tool length measurement ......................................................9-72
9.C-1 UPDATE INFORMATION .....................................................................................9-73
DEGREE ANGULAR HEAD (OPT):................................................................. 9-41
ARM UP PROGRAMMING .............................................................................. 9-64
COMPENSATION TEST .............................................................9-67
CYCLE TEST PROGRAM ..................................................... 9-67
AWEA SP/LP series, Manual-Content
...... 9-60
IV
Page 9

AWEA
AWEA SP/LP series, Manual-Content
FIGURE CONTENTS
Figure 1-1 ......................................................................................................................... 1-5
Figure 1-2 ......................................................................................................................... 1-5
Figure 1-3 ......................................................................................................................... 1-5
Figure 1-4 ......................................................................................................................... 1-6
Figure 1-5 ......................................................................................................................... 1-6
Figure 1-6 ......................................................................................................................... 1-6
Figure 1-7 Safety Instruction Plate ...................................................................................1-7
Figure 2-1Over V
Figure 2-2 Machine
Figure 2-3 Maximum Travel Limit .....................................................................................2-5
Figure 2-4 LCD/MDI panel..............................................................................................2-13
Figure 2-5 Software Operator's Panel ............................................................................2-15
Figure 2-6 Machine Control Panel .................................................................................. 2-18
Figure 2-7 M.P.G. control panel ...................................................................................... 2-27
Figure 3-1 Location of E-Stop button................................................................................ 3-4
Figure 4-1 Operation panel at magazine side................................................................. 4-10
Figure 6-1 Feed system on each axes .............................................................................6-5
Figure 6-2 Detail drawing on Overload slip clutch ............................................................6-5
Figure 6-3Lubricating circuit layout................................................................................... 6-6
Figure 6-4 Coolant piping .................................................................................................6-8
Figure 6-5 Coolant supply.................................................................................................6-8
Figure 6-6 Pneumatic circuit diagram ............................................................................... 6-9
Figure 6-7Pneumatic combination units............................................................................6-9
Figure 6-8 Location of pneumatic control valve ..............................................................6-10
Figure 6-9 Control range of the spindle temperature control .......................................... 6-11
Figure 6-10 Hydraulic circuit diagram ............................................................................. 6-14
Figure 7-1 Machine name plate ........................................................................................... 7-2
Figure 7-2 Recommended lifting method on SP series.....................................................7-4
Figure 7-3 Lift
Figure 7-4 Lift
Figure 7-5 Lifting method on the conveyor .......................................................................7-5
iew of SP type Machine layout ..............................................................2-1
Axis Orientation................................................................................. 2-4
ing method on the magazine ......................................................................7-4
ing method on Coolant tank........................................................................7-5
I
Page 10
AWEA
AWEA SP/LP Series Manual - Chapter 1. SAFETY RECOMMENDATIONS:1-1
1. SAFETY RECOMMENDATIONS:
THESE SAFETY RECOMMENDATIONS FOR THIS AWEA MACHINE HAVE
BEEN PREPARED TO ASSIST THE OPERATOR AND MAINTENANCE
PERSONNEL IN PRACTICING GOOD SHOP SAFETY PROCEDURE.
OPERATOR AND MAIN-TENANCE PERSONNEL MUST READ AND
UNDERSTAND THESE PRE-CAUTIONS COMPLETELY BEFORE OPERATING,
SETTING UP, RUNNING OR PERFORMING MAINTENANCE ON THE MACHINE.
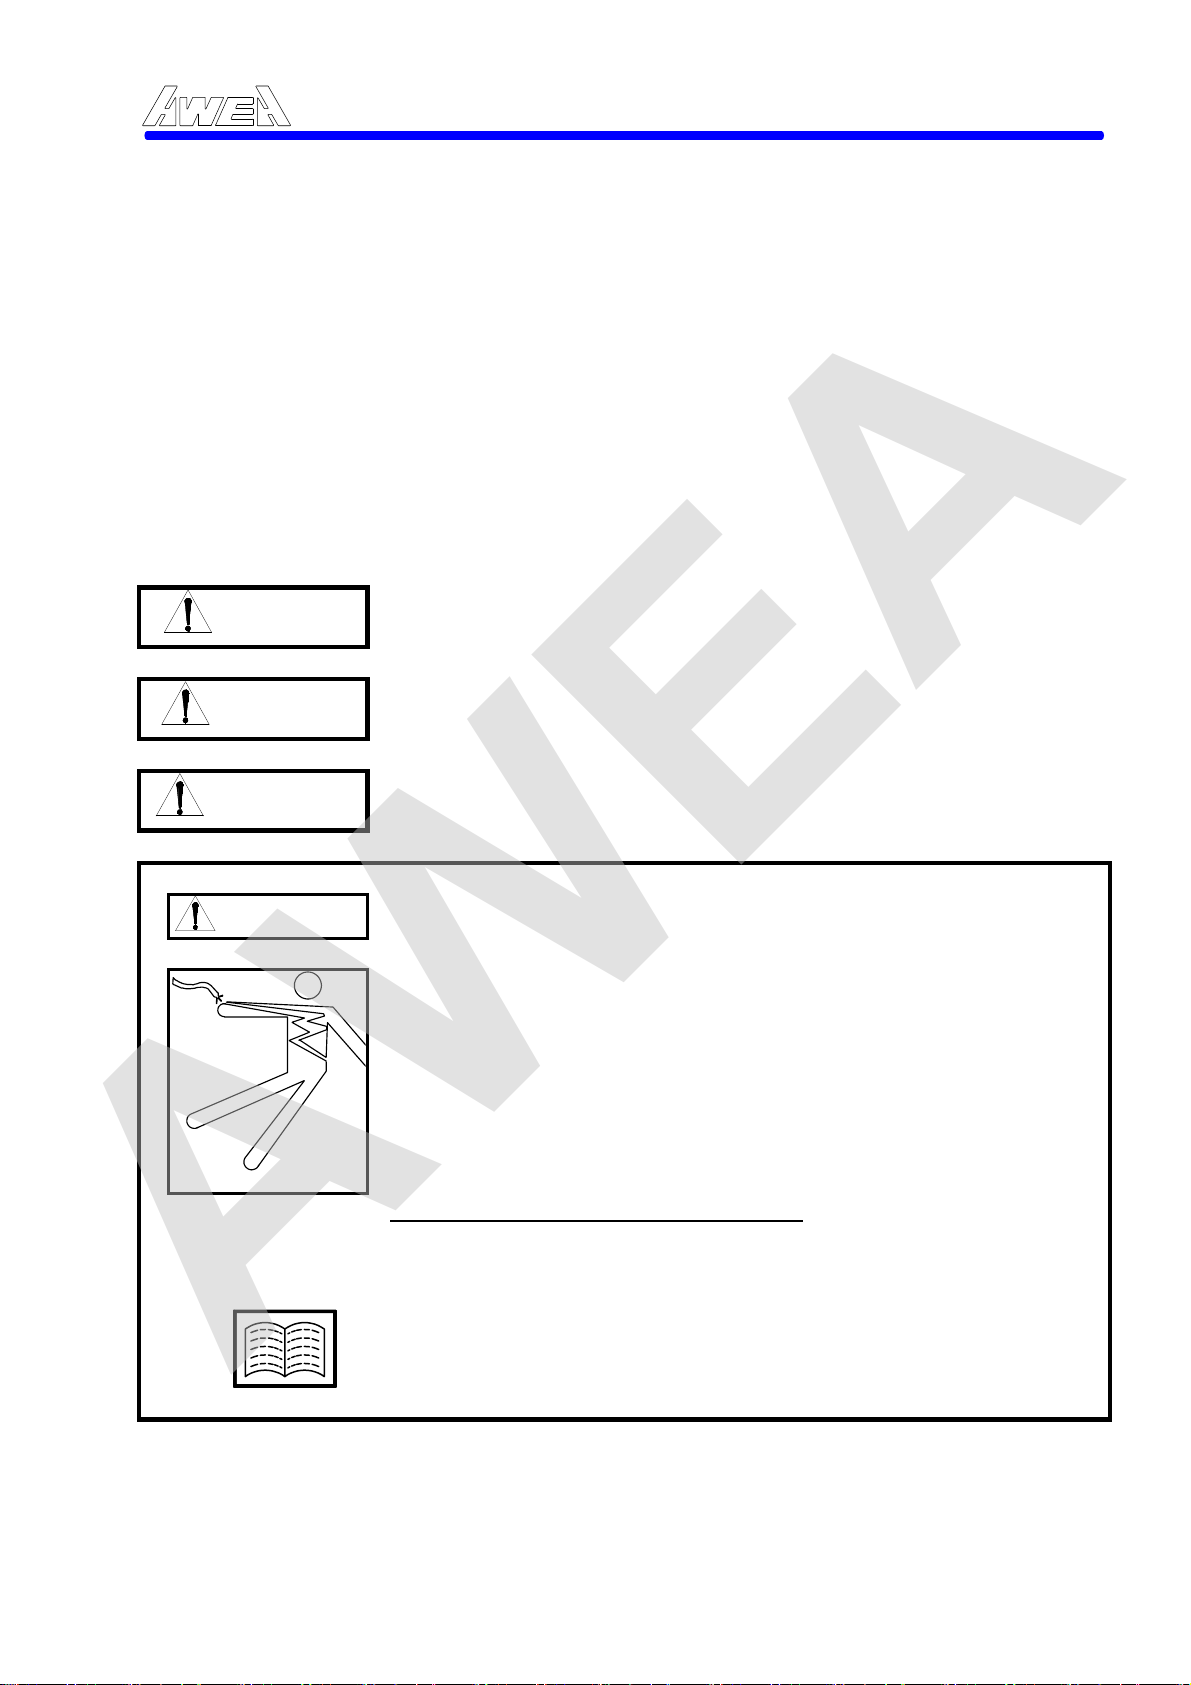
THERE ARE THREE WARNING LABELS ATTACHED TO THE MACHINE. NEVER
REMOVE OR DISFIGURE ANY LABELS OR INSTRUCTION PLATES FROM THE
MACHINE.
INDICATES FAILURE TO DO SO WILL RESULT IN SERIOUS
DANGER
WARNING
CAUTION
‧Indicates points to be followed.
DANGER
INJURY OR DEATH.
INDICATES FAILURE TO DO SO COULD RESULT IN SERIOUS INJURY OR DEATH.
INDICATES FAILURE TO DO SO MAY RESULT IN SERIOUS INJURY OR DEATH.
Shows to follow safety instructions.
‧(same as above)
‧
‧
1.(Indicates: refer to the points below)
2.________________________________________
3.________________________________________
(Indicates manuals, chapters or sections to
be searched for)
1-1
Page 11

AWEA
1.1 SAFETY INSTRUCTIONS:
READ COMPLETE INSTRUCTIONS CAREFULLY BEFORE OPERATING MACHINE
When this instruction manual was printed, the information given was current.
However, since we are constantly improving the design of our machine tools, it is
possible that the illustrations and descriptions may vary from the machine you
received. This means that the machine you received is the latest improved model to
better fulfill your requirements.
Your AWEA machine is designed and built for maximum ease and safety of
operation. However, some previously accepted shop practices may not reflect
current safety regulations , environment protection and procedures, and should be
re-examined to insure compliance with the current safety, environment protection,
resources recycling and health standards.
We recommend that all shop supervisors, maintenance personnel, machine and
tool operators be advised of the importance of safety maintenance, environment
protection, setup and operation of AWEA built equipment. Our recommendations
are described below.
PLEASE READ THESE SAFETY RECOMMENDATIONS BEFORE
PROCEEDING ANY FURTHER. (“*” indicated: safety item, “+” indicated
environment protection items)
* ALLOW ONLY AUTHORIZED PERSONNEL to have access to enclosures
containing electrical equipment.
* READ APPROPRIATE MANUAL OR INSTRUCTIONS before attempting
operation or maintenance of machine. Make sure you understand all
instruction.
* CONSULT YOUR SUPERVISOR when in doubt as to the correct way to do a
job.
* DO NOT OPERATE EQUIPMENT unless proper maintenance has been
regularly performed and the equipment is known to be in good wor
* DO NOT OPERATE EQUIPMENT in the possible environment of air explosive.
+ DO NOT CUT THE FLAMMABLE MATERIAL (like Magnesium base) by
operating of the machine to avoid any possibility of fire.
* BEFORE OPERATING THE MACHINE check that all protective components
and interlocks work properly. If not immediately contact your local distributor.
* DO NOT REMOVE ANY WARNING or INSTRUCTION TAGS from machine.
* DO NOT OPERATE MACHINE if unusual or excessive noise or vibration
occurs. Report any excessive or unusual vibration, sounds, smoke, or heat as
well as any damaged parts.
* MAKE SURE MACHINE IS PROPERLY GROUNDED. CONSULT NATIONAL
ELECTRIC CODE and all local code.
* KEEP AREA AROUND MACHINE well light and dry.
* KNOW WHERE ALL stop push buttons are located in case of an emergency.
* DO NOT REACH into any control or power cases area unless electrical power
is OFF.
* DO NOT TOUCH ELECTRICAL EQUIPMENT when hands are wet or when
standing on a wet surface.
AWEA SP/LP Series Manual - Chapter 1. SAFETY RECOMMENDATIONS:1-2
king order.
1-2
Page 12

AWEA
+ DO NOT USE a toxic or flammable substance as a solvent cleaner or coolant.
* DO NOT ALTER THE MACHINE to bypass any interlock, overload,
dis-connect or other safety device.
* KEEP CHEMICAL AND FLAMMABLE MATERIAL away from electrical or
operating equipment.
* DO NOT OPEN GUARD DOORS while any machine component is in motion.
* MAKE SURE PROPER GUARDING is in place and all doors are closed and
secured.
* MAKE SURE fixture plates and all other spindle-mounted tool holding devices
are properly mounted and secured before starting machine.
* REMOVE ANY LOOSE PARTS OR TOOLS left on machine or in the work area
before operating machine. Always check machine and work area for loose
tools and parts especially after work had been done by maintenance personal.
* CHECK LUBE LEVEL and status of indicator lights before operating machine.
* MAKE CERTAIN that all guards are in good condition and are functioning
properly before operating machine.
* DISCONNECT MAIN ELECTRICAL POWER before attempting repair or
maintenance.
* REPLACE BLOWN FUSES with fuses of the same size and type as originally
furnished.
* ASCERTAIN AND CORRECT cause of a shutdown caused by overload
heaters before starting machine.
* WEAR SAFETY GLASSES AND PROPER FOOT PROTECTION at all times.
When necessary, (example: remove the workpieces from the table, tools from
the spindle, clean the table, replacing the liquid or maintain the equipment)
wear respirator, helmet, gloves and ear muffs or plugs.
* DO NOT WEAR GLOVES if you are operating the control panel or the chip
conveyor
* HAVE CORRECT TYPE OF FIRE EXTINGUISHER handy when machining
combustible material and keep chips clear of working area.
* BEFORE PRESSING CYCLE START PUSH-BUTTON, make
proper functions are programmed and that all controls are set in desired
modes.
* CHECK SETUP, TOOLING AND SECURITY OF WORKPIECE if machine has
been off for any length of time.
* DRY CYCLE a new setup to check for programming errors.
* DO NOT REMOVE CHIPS with hands. Use a hook or similar device and make
certain that all machine movements have ceased.
* BE CAREF
* DO NOT REMOVE OR LOAD workpieces while any part of the machine is in
motion.
* DO NOT CHECK finishes or dimensions of workpiece near running spindle or
moving slides.
* DO NOT ATTEMPT to brake or slow the machine with hands or any makeshift
device.
* USE CAUTION around exposed mechanisms and tooling especially when
setting up. Be careful of sharp edges on tools.
* DO NOT USE worn or defective hand tools. Use proper size and type for job
being performed.
* USE ONLY a soft-faced hammer on tools and fixtures.
* DO NOT USE worn or broken tooling on machine.
AWEA SP/LP Series Manual - Chapter 1. SAFETY RECOMMENDATIONS:1-3
certain that
UL of sharp edges when handling newly machined workpieces.
1-3
Page 13

AWEA
* MAKE CERTAIN that all tool mount surfaces are clean before mounting tools.
* INSPECT ALL CLAMPING DEVICES daily to make sure they are in good
operating condition. Replace defective clamper before starting machine.
* USE LIGHTER THAN NORMAL feedrate and depth of cut when machining a
workpiece size that is larger than the WORKING CAPACITY.
* DO NOT EXCEED rated capacity of machine.
* DO NOT LEAVE machine unattended while it is operating.
* DO NOT CLEAN machine with an air hose.
* RECYCLING all replaced parts and chips to save the resources.
* MAKE SURE that the waste are well disposed to conform to the environmental
protection regulations. (like wasted oil, coolant etc.)
* DO NOT LEAVE the leaking oil unattended, recycling the leaking oil by
wooden chip.
AWEA SP/LP Series Manual - Chapter 1. SAFETY RECOMMENDATIONS:1-4
1-4
Page 14
AWEA
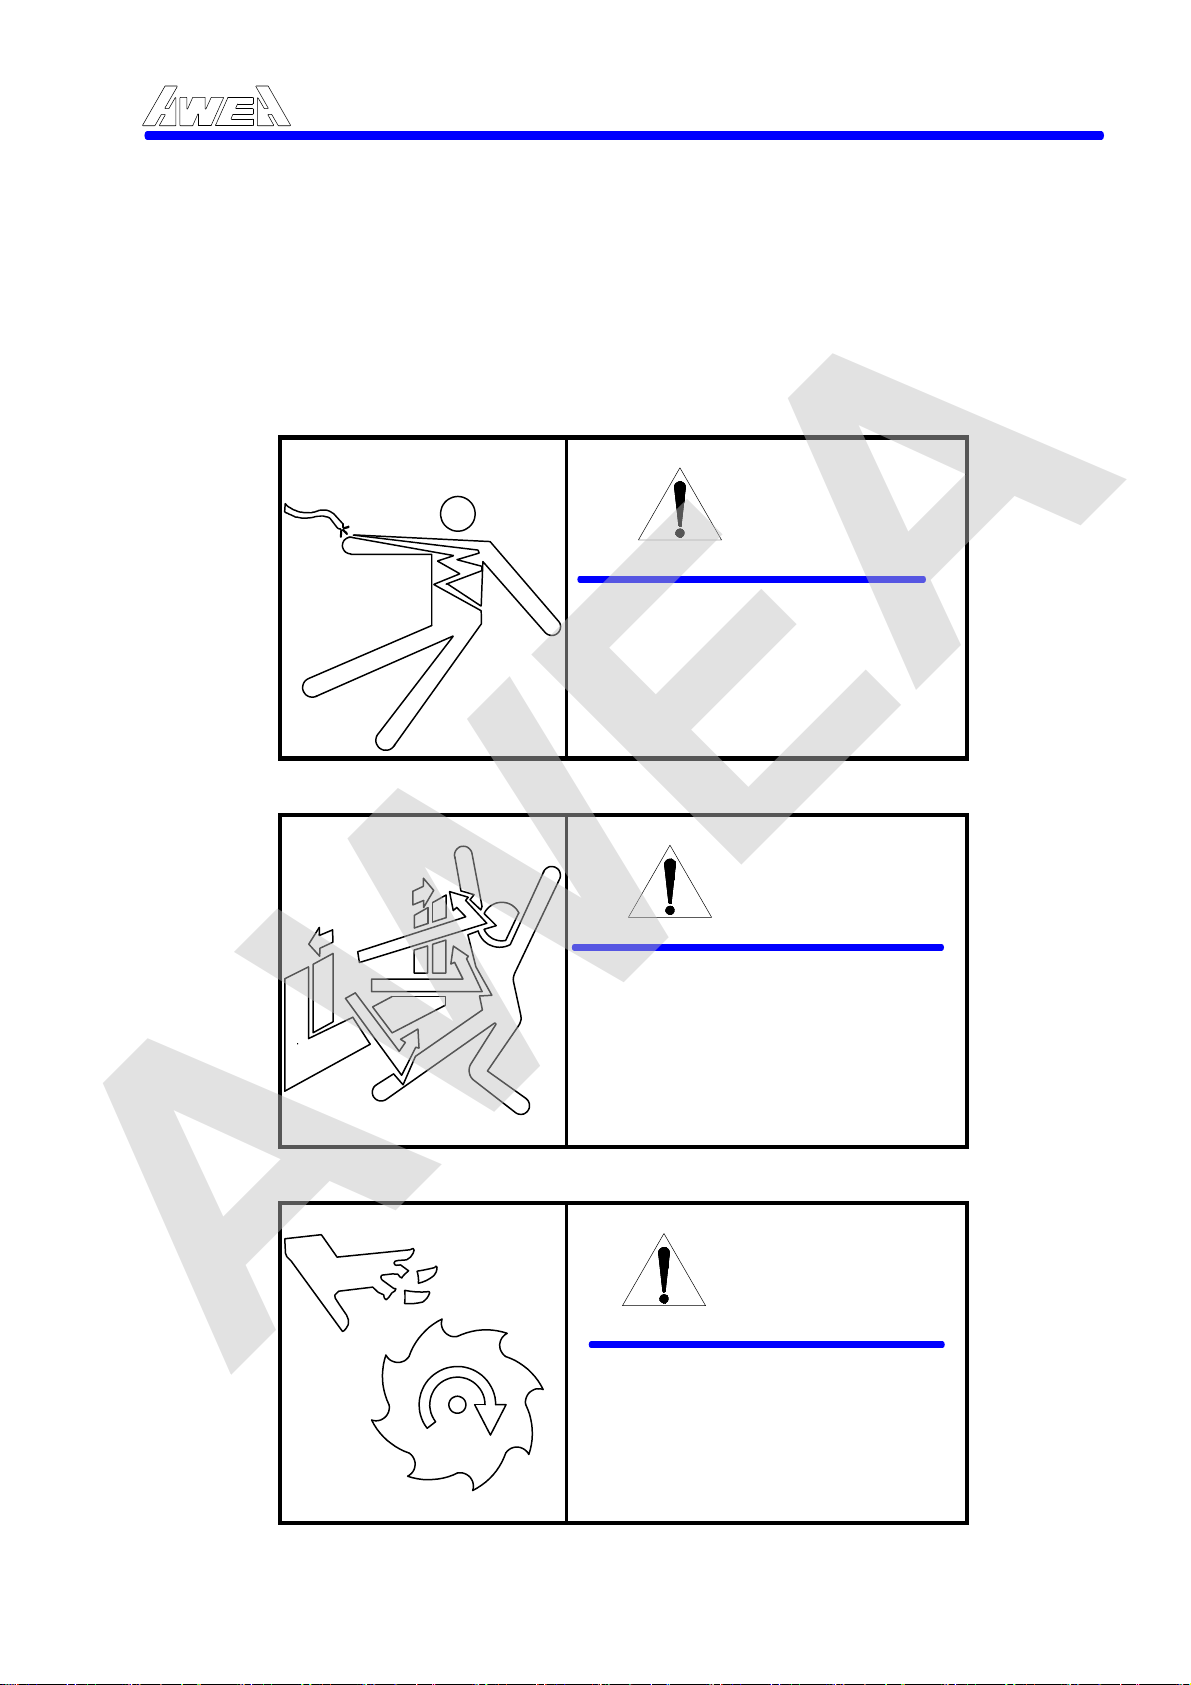
1.2 SAFETY LABELS EXPLANATION
The following warning labels and an instruction plate are attached to the machine.
Read and make sure you understand the warnings before operation. If any label is
damaged or becomes illegible, contact your local distributor. A new one will be
supplied immediately.
NEVER REMOVE OR DISFIGURE ANY WARNING LABEL OR INSTRUCTION PLATE.
AWEA SP/LP Series Manual - Chapter 1. SAFETY RECOMMENDATIONS:1-5
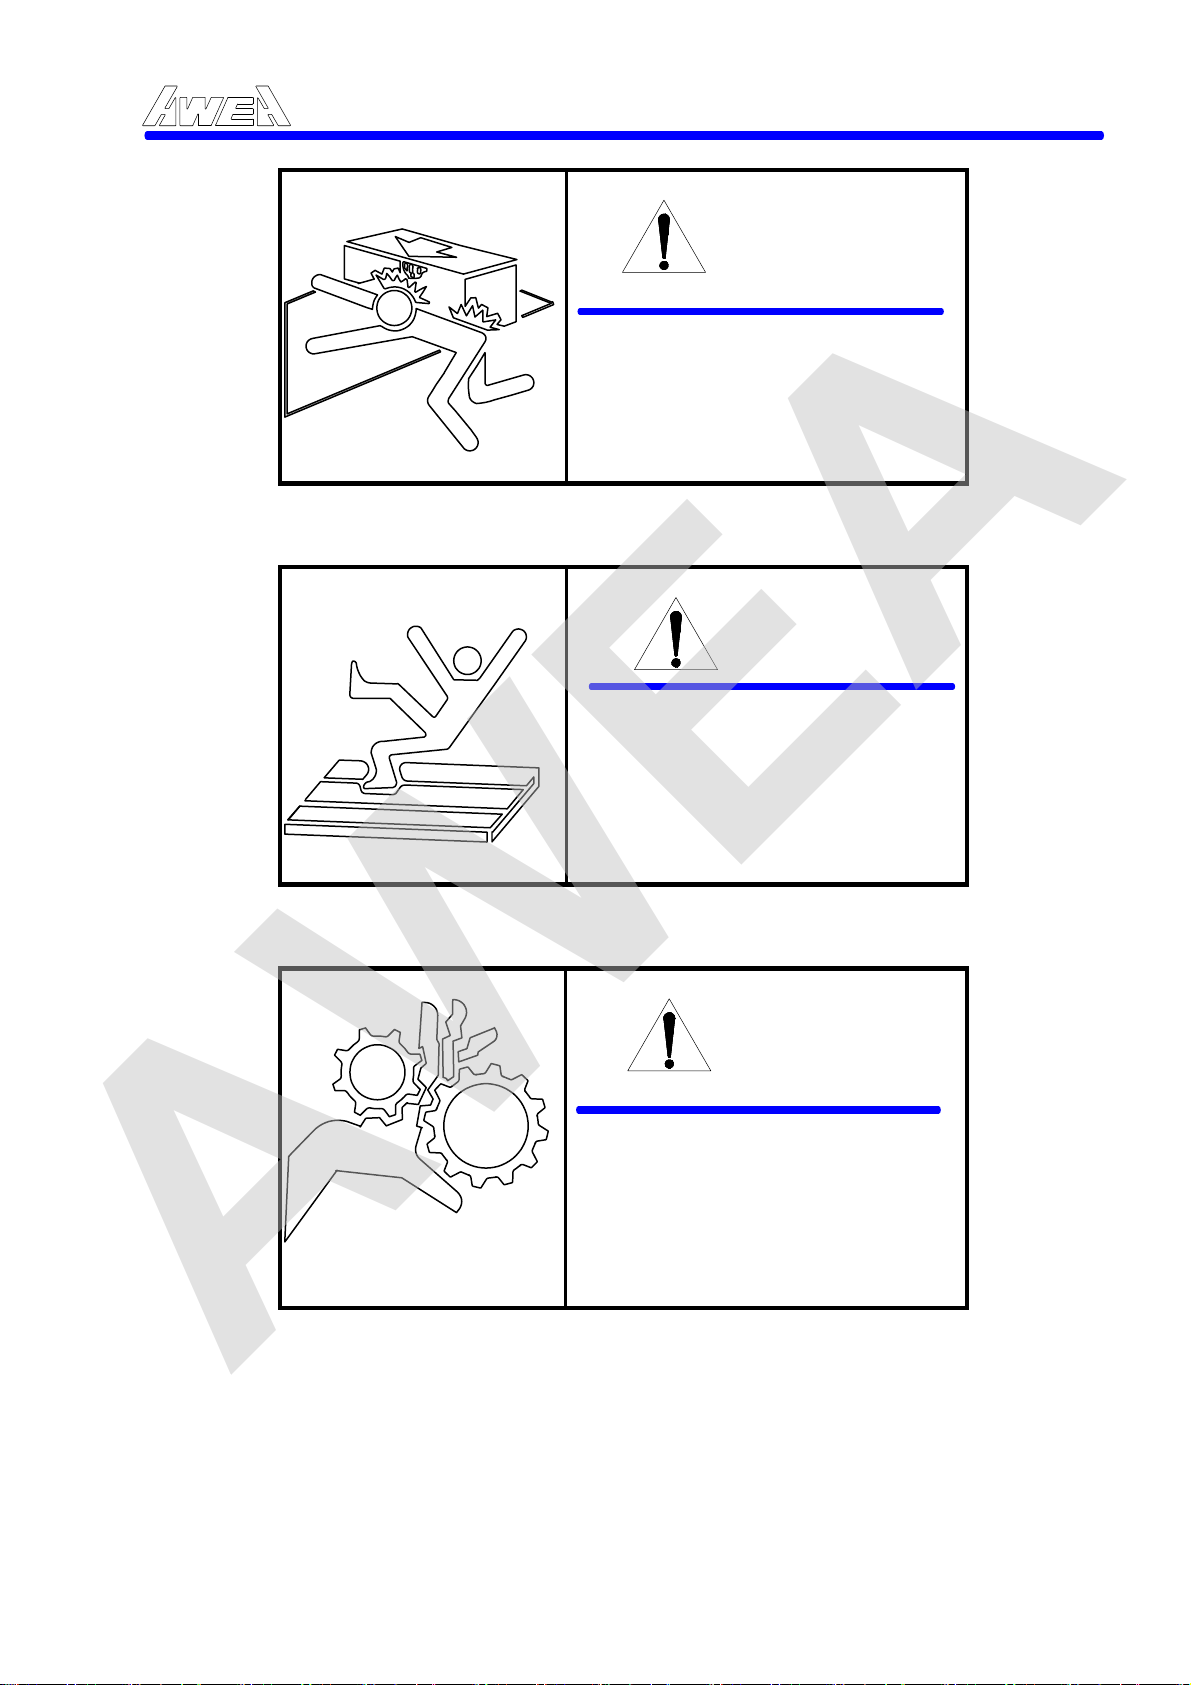
DANGER
ONLY qualified personnel are authorized to service electric cabinet. Failure to do so will result in serious injury or death.
Figure 1-1
WARNING
NEVER open the door during AUTO operation.
Figure 1-2
WARNING
ALWAYS keep away from spindle or tool in motion. Shut power OFF before access to spindle for servicing.
Figure 1-3
1-5
Page 15
AWEA
AWEA SP/LP Series Manual - Chapter 1. SAFETY RECOMMENDATIONS:1-6
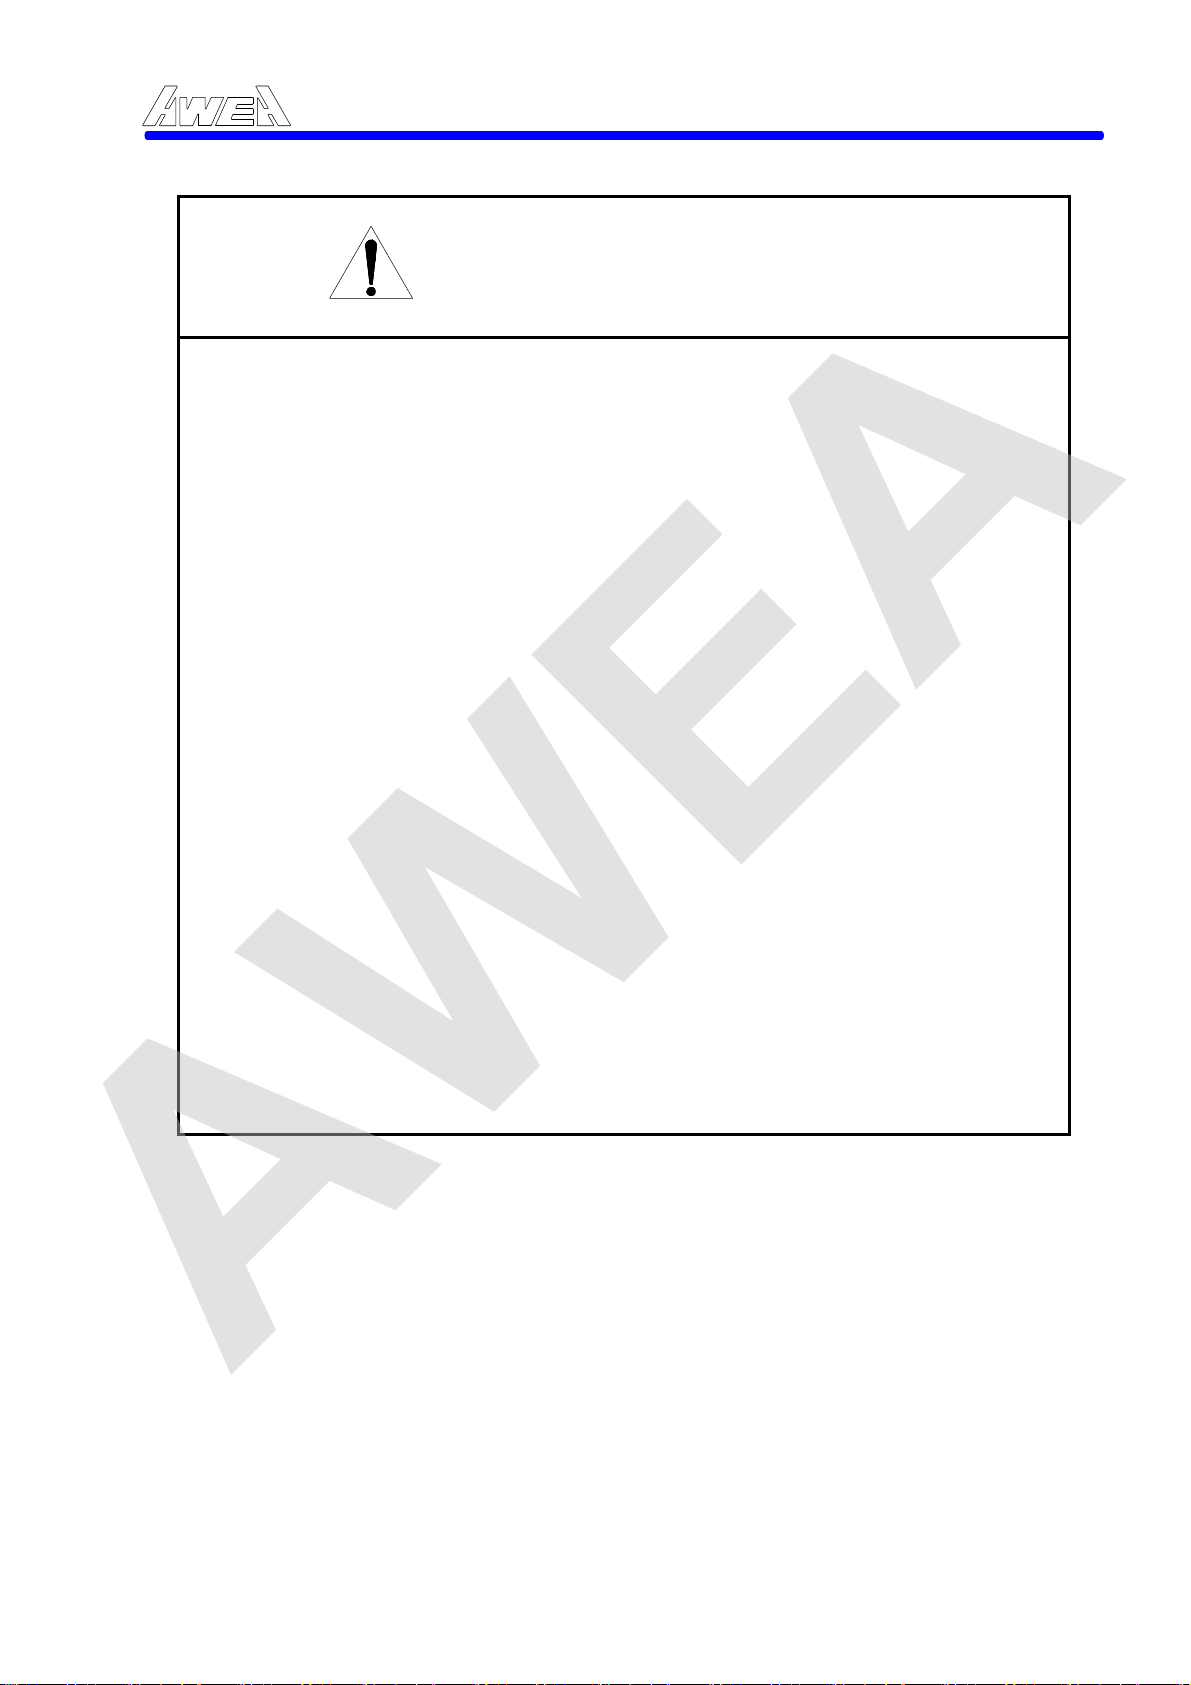
WARNING
KEEP AWAY from movable
area during operation.
Shut machine OFF for
servicing.
Figure 1-4
WARNING
WEAR HELMET and proper
foot protection to setup and
service.
Shut machine OFF when
step in/on machine.
Figure 1-5
WARNING
NEVER open the cover, only qualified person is authorized to service. Shut the machine OFF before servicing.
Figure 1-6
1-6
Page 16
AWEA
Follow instructions written on labels, Removal and / or damage to labels
is prohibited.
1. BEFORE operation of machine, READ operator's manual and safety
instructions.
2. ONLY trained and qualified personnel are to operate this machine.
3. ALL GUARDS MUST remain in place during machine operation.
4. MANDATORY wearing of hard hat for set-up and service. Clothing
suitable for operation of machine a MUST. (safety shoes, goggles,
protection cap, etc.)
5. Proper use, knowledge and location of EMERGENCY STOP BUTTON is
imperative.
AWEA SP/LP Series Manual - Chapter 1. SAFETY RECOMMENDATIONS:1-7
SAFETY INSTRUCTIONS
6. SHUT OFF POWER before servicing.
7. ONLY TRAINED AND QUALIFIED personnel may service this machine.
8. STAND CLEAR of machine while in operation. KEEP hands free of
movable areas.
9. SECURE ALL tools and workpiece safely. Check that nothing will
interfere with machine motions.
10. ONLY USE WATER-BASE coolant to prevent fire during unmanned
operation.
Failure to follow the above instructions may result in serious personal
y or death. If any questions or doubt exist regarding the instruction or
injur
operation procedures, contact your local distributor.
Figure 1-7 Safety Instruction Plate
1-7
Page 17
AWEA
2. INSTRUCTION
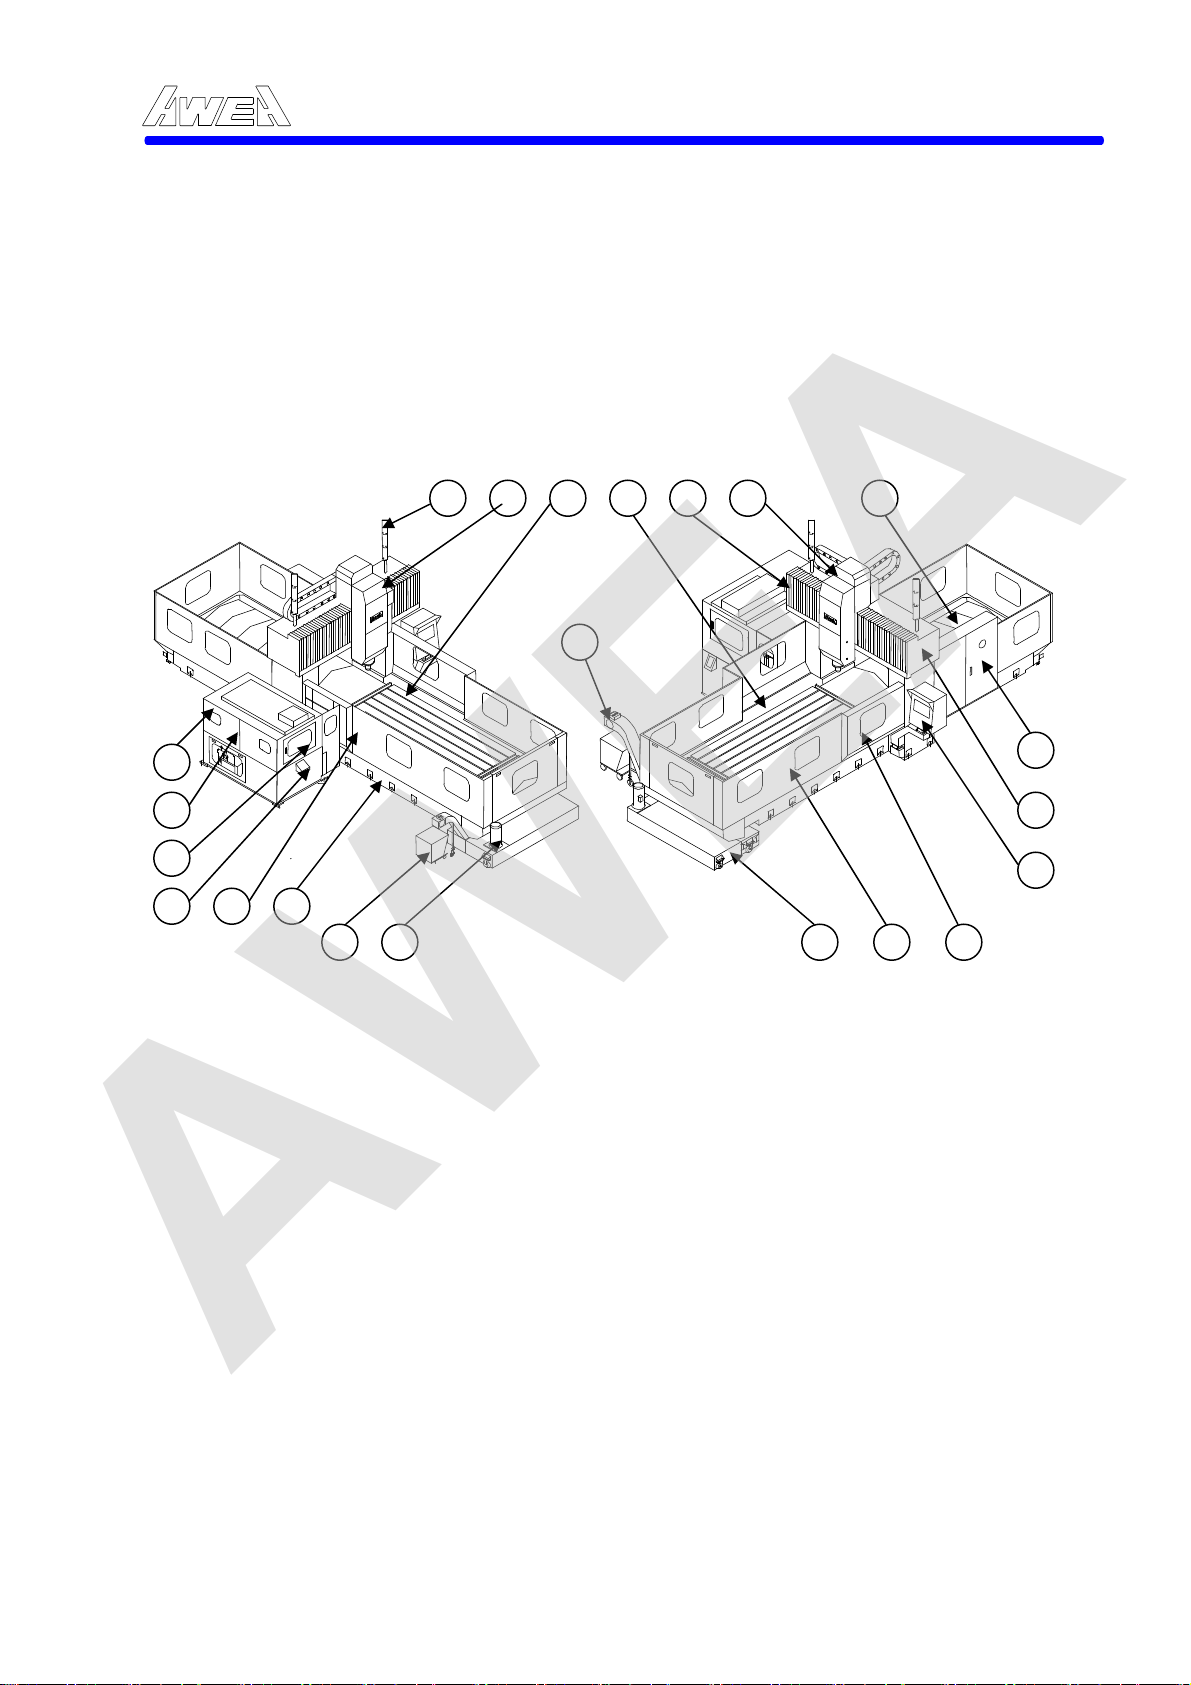
2.1 Description of machine design and construction
The basic machine consists of the Machine bed, Table, The bridge, Saddle, Spindle
Carrier, Dual hydraulic counter balance system and Auto tool changing system.
(Refer to Figure 2-1). All of which are designed to give high precision for long term
and heavy duty cutting performance over many years of machining operation. All of
which are described as below:
9 10 11 12 13 14 15
AWEA SP/LP Series Manual - Chapter 2. INSTRUCTION 2-1
22
1
2
3
4 5 6
7 8
Figure 2-1Over View of SP type Machine layout
The main components of the machine are as below:
1. Tool magazine 12. Chip and coolant through
2. Magazine sheet metal 13. Y axial way cover
3. Magazine operator door 14. Carriage
4. ATC operation panel 15. X axial way telescopic cover
5. ATC automatic door 16. Main electric cabinet
6. Machine bed 17. The Bridge
7. Chip bucket 18. Operator panel
8. Coolant pump 19. Main operator door
9. Finish, alarm & operation lamp 20. Splash guard
10. Spindle head 21. Coolant tank
11. Table
19 20 21
16
17
18
2-1
Page 18

AWEA
2.1.1 Machine bed
The machine bed is the foundation of the machining center structure. In addition to providing rigidity and support for the sliding members, machine alignment is maintained through the precision leveling of this structure.
2.1.2 The bridge
The bridge is made of one piece, which means columns and beam in one piece.
The thick walls and reinforcement ribs give the machining unsurpassed rigidity and
prevent any bending or twisting that may affect machining accuracy. The bridge is
bolted to the side of the machine bed. The upper linear way bearing is located 75
mm (2.9") behind the lower linear bearing. This step design greatly reduces
headstock overhang for added stability and helps maintain machining accuracy
during heavy cutting operations. The column is bolted to the side of the table base
to ensure the best accuracy alignment and squareness and to allow for maximum
rigidity. The double column construction supports the cutting load symmetrically;
thus bending movement and thermal deflection is minimized.
AWEA SP/LP Series Manual - Chapter 2. INSTRUCTION 2-2
2.1.3 The table
The largest table size not only allows for the machining of large parts but also
increases the productivity of small to medium sized parts as they can be set up and
processed at one time. The wide distance between the columns all allows for extra
clearance for larger work pieces.
2.1.4 The spindle head
The large front bearing to assure efficient power transmission to the spindle nose
and to enable heavy duty machining supports the spindle. For rigidity, a
square-shaped cross section headstock was designed. In addition, with only 90 mm
from the spindle centerline to Z axis, so rigidity is unsurpassed. A floating hydraulic
cylinder keeps the spindle bearing from being pushed during tool change cycle.
This assured long term machine accuracy and spindle life. The counter-balance
system for the headstock consists of two hydraulic cylinders, which are arranged to
perfectly balance the distribution of the weight of the headstock. The twin hydraulic
cylinders are symmetrically placed to ensure equal lading to the way area and to
maintain sensitivity and accuracy to the cutting area.
The spindle temperature is kept constant by use of oil recirculating heat exchanger,
which reduces heat generation. Harmonized temperature between spindle head
and machine body assures minimum spindle expansion at high speeds rotation in
long time continuous use.
2-2
Page 19

AWEA
2.1.5 The feed system
A custom designed safety device is used on all feed systems to protect the machine
from damage caused by accidental, incorrect programming or accidental operator
error. If tool head interference occurs, a unique torque limiter clutch protects the
machine from major damage. Operations are then restored quickly and easily with
a simple manual realignment of the clutch. Use of low friction linear bearing (X and
Y axes) and Turcite B (Z axis) which has outstanding vibration dampening
characteristics, This allows for high efficiency, high stability, high accuracy for long
term machining and machine life.
The guide ways and ball screw are automatically lubricated. The lubricant is
collected in a reservoir. So that the area keep clean and also extends the life of the
coolant. The entire guide way is fully covered by telescopic covers and coolant
recovery is ensured. Build-in spiral chip conveyor and flood coolant flushing
minimized cleaning time.
2.1.6 The ATC and Magazine
AWEA SP/LP Series Manual - Chapter 2. INSTRUCTION 2-3
Unique ATC assures safe and easy tool storage and construction assures
interference free work setting and trouble-free operation. A standard magazine can
store 32 tools (60 option) of maximum size Φ125 mm X 350 mm ( Φ50" X 13.8")
and weight 20 kg (44 LB) ATC time, tool to tool : 8 seconds. Tools are always
protected from coolant, chips and dust by the automatic tool magazine door. The
door is automatically opened and closed by program command when changing
tools.
Especially design lock pin mechanisms are used to prevent the gripper failure while the arm is rotating. A unique hydra-pneumatic cylinder is used to limit the transfer force, which prevents damage if any malfunction occurs.
Microcomputer controlled random pot coding assures tool selection from magazine
in the shortest bi-direction tool path. The control p
the front side of the cabinet along with the foot release switch. The operator can
manually exchange tools with ease.
anel for the tool magazine is at
2-3
Page 20
AWEA
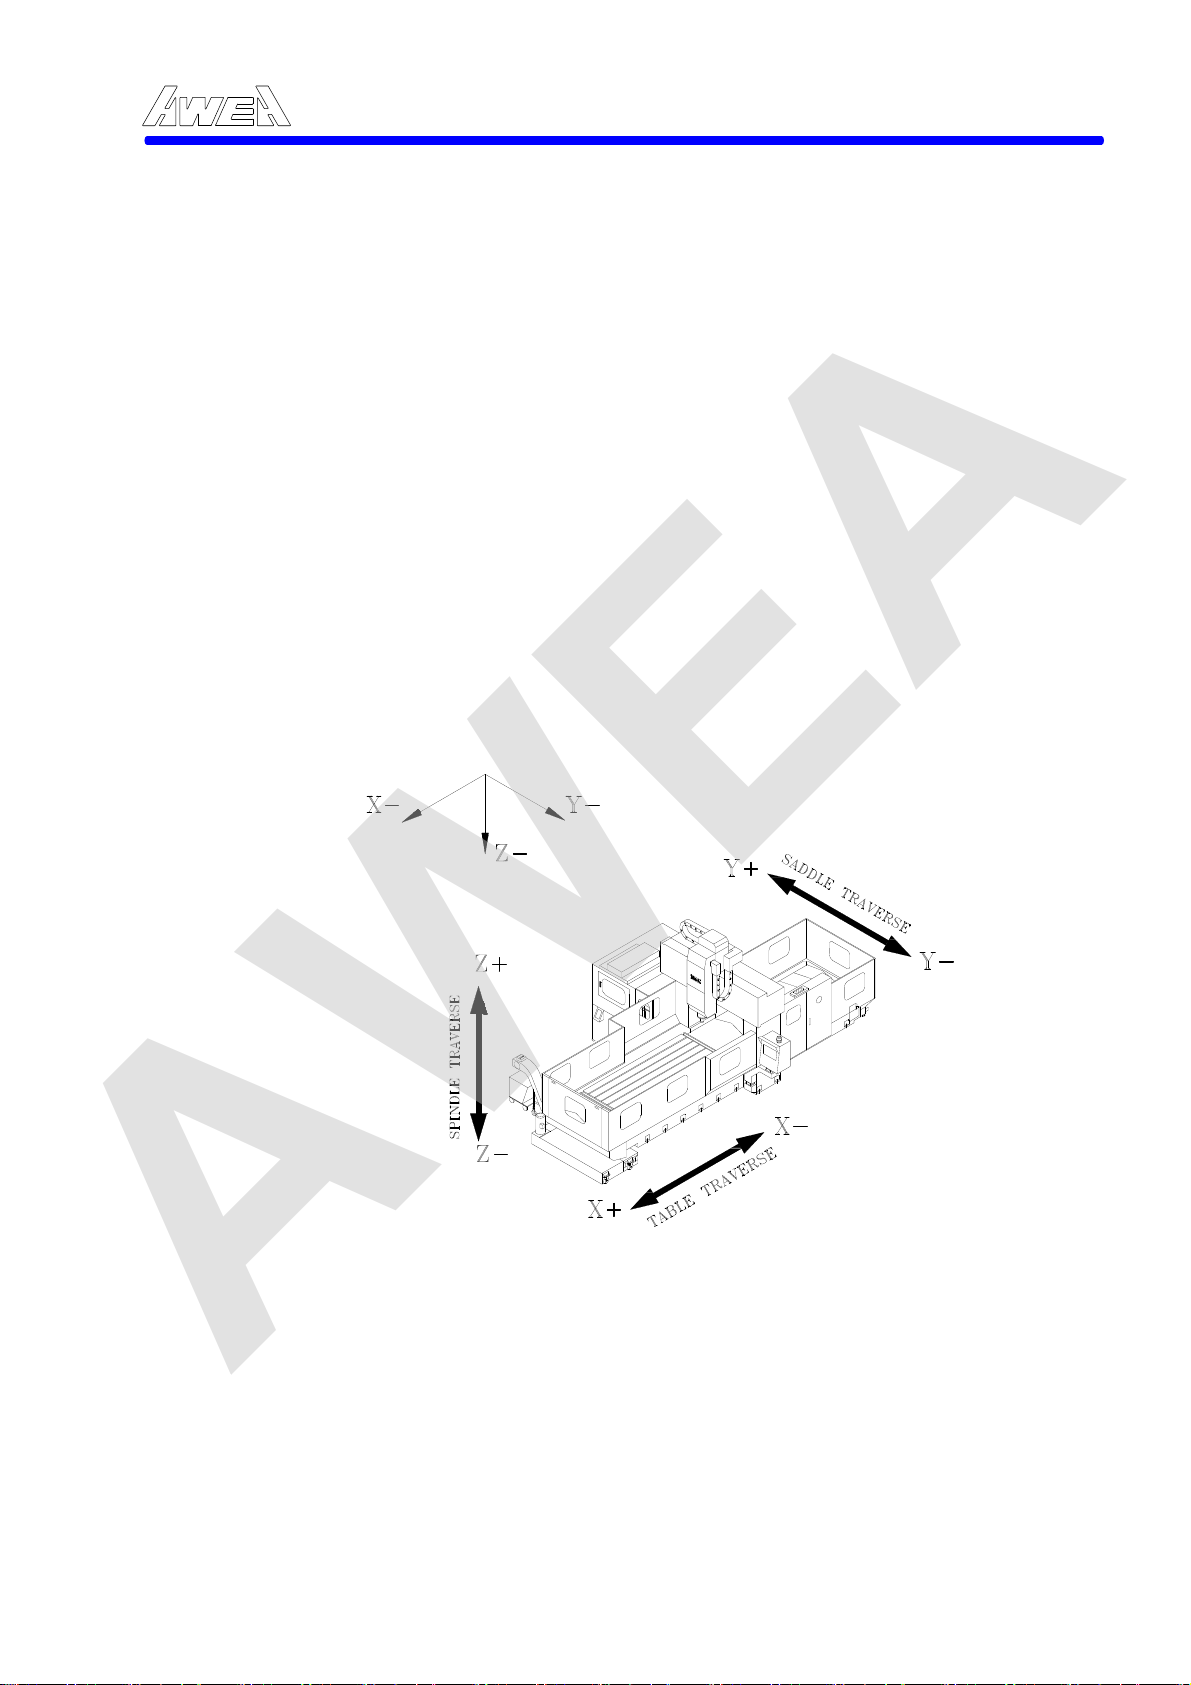
2.2 Coordination
Machining centers use the right-hand co-ordinate system to describe the
relationship of the axes. This relationship is in accordance with E.I.A. RS-267-A and
I.S.O. R841 Axis and Motion Nomenclature. The right-hand co-ordinate system
also establishes the direction of cutter motion with respect to the workpiece. The
programming exercise depends on the programmer visualizing the workpiece to be
fixed, and that the cutter does all the moving, (theoretical cutter motion). It is also
essential that the programmer view the workpiece from the normal operator
position, looking through the tool from the machine spindle. A theoretical cutter
motions to the back of current position in the Y axis origin which is created by a
similar movement of the table to the front of current position.
AWEA SP/LP Series Manual - Chapter 2. INSTRUCTION 2-4
X axis:
Y axis:
Z axis:
Table travel left in "+" direction and travel right in "-" direction.
Spindle head travel out in "+" direction (approach to the Magazine) and travel in in "-" direction (leave from the Magazine).
Spindle carrier travel up in "+" direction and travel down in "-" direction.
Figure 2-2 Machine Axis Orientation
2-4
Page 21
AWEA
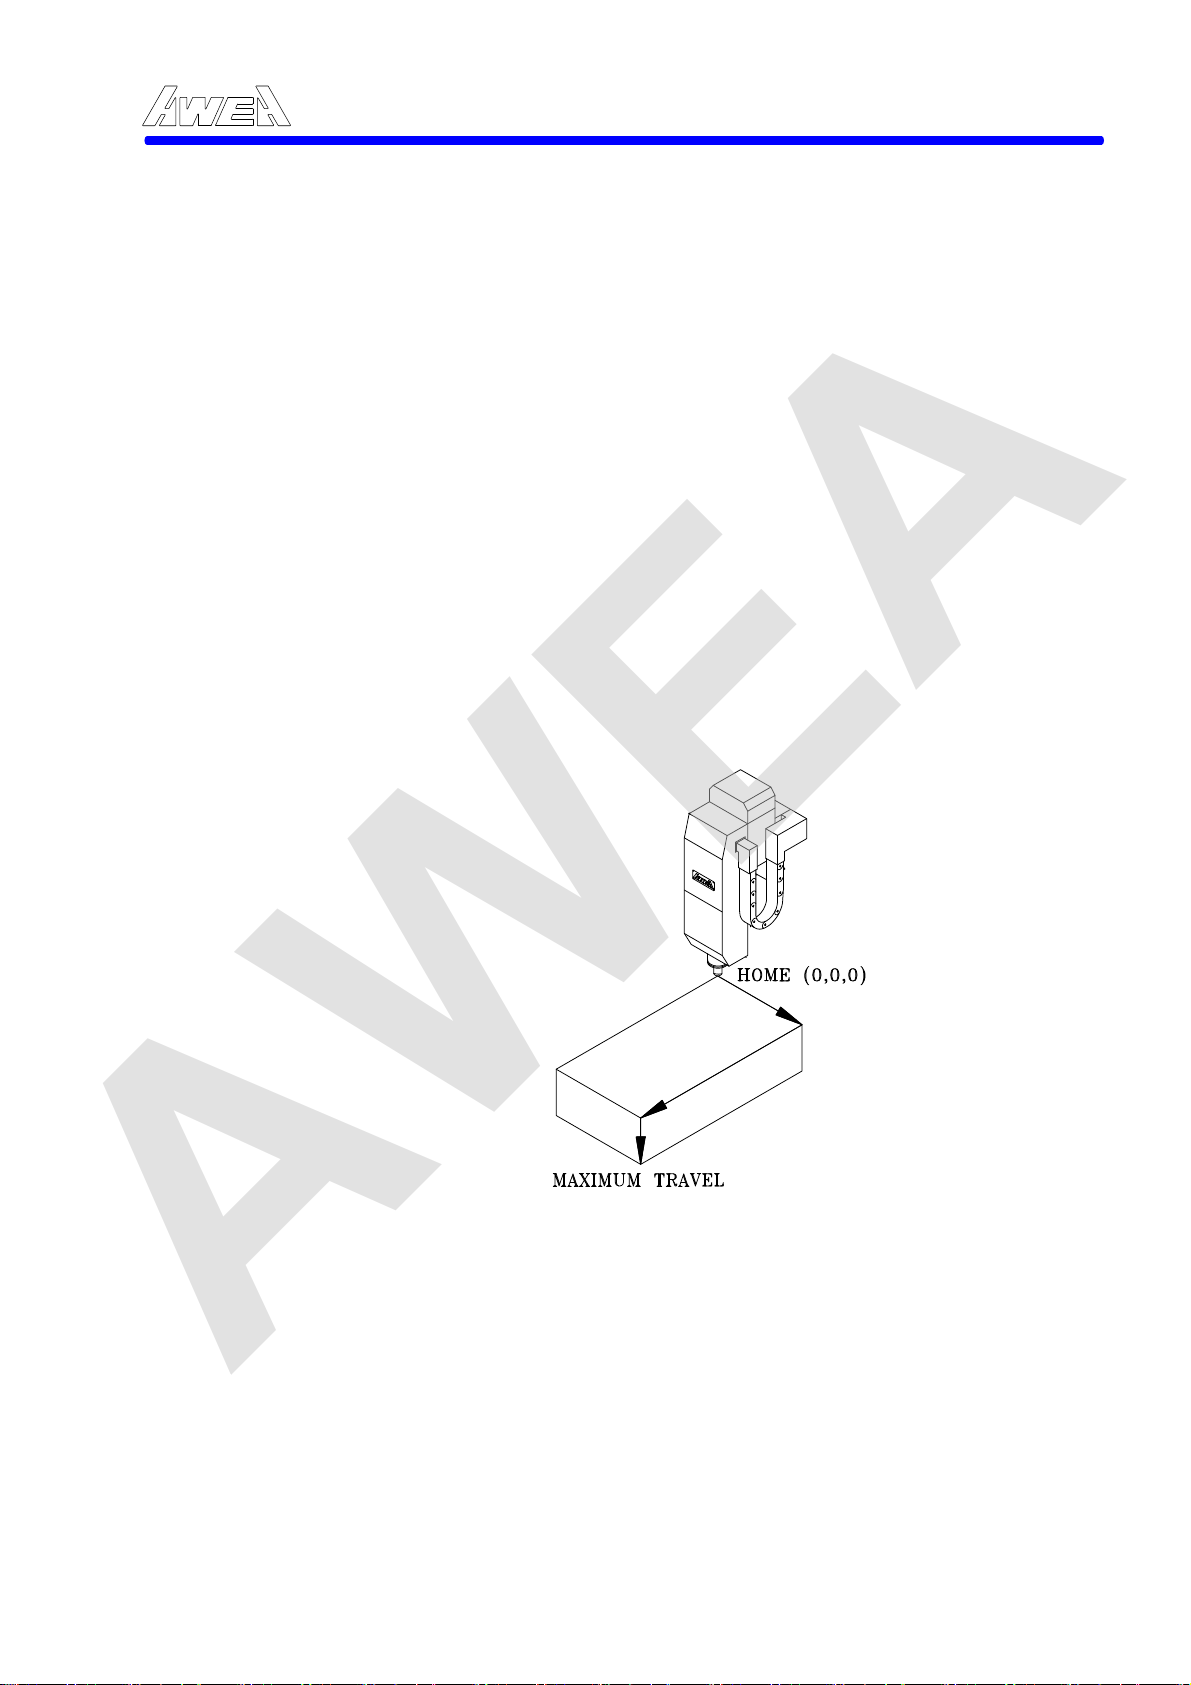
When the origin Point of this co-ordinate system agree with the mechanical 0-0-0
reference point of the machine, all coordinate dimensions will be as mentioned
above drawing, (from center of spindle) The maximum of all axial stroke shown as
mentioned below:
Axis and Machine model SP2016 SP3016 SP4016
X axis 2100(82.7") 3000(120.5") 4000(157.5") Y axis 1600(63") 1600(63") 1600(63") Z axis 760(30") 760(30") 760(30")
Axis and Machine model LP3021 LP4021 LP5021
X axis 3000(118.1") 4000(157.5") 5000(196.8") Y axis 2100(82.6") 2100(82.6") 2100(82.6") Z axis 760(30") 760(30") 760(30")
Axis and Machine model LP3025 LP4025 LP5025 LP6025
X axis 3000(118.1") 4000(157.5") 5000(196.8") 6000(236.2) Y axis 2500(98.4") 2500(98.4") 2500(98.4") 2500(98.4") Z axis 760(30") 760(30") 760(30") 760(30")
AWEA SP/LP Series Manual - Chapter 2. INSTRUCTION 2-5
Figure 2-3 Maximum Travel Limit
2-5
Page 22
AWEA
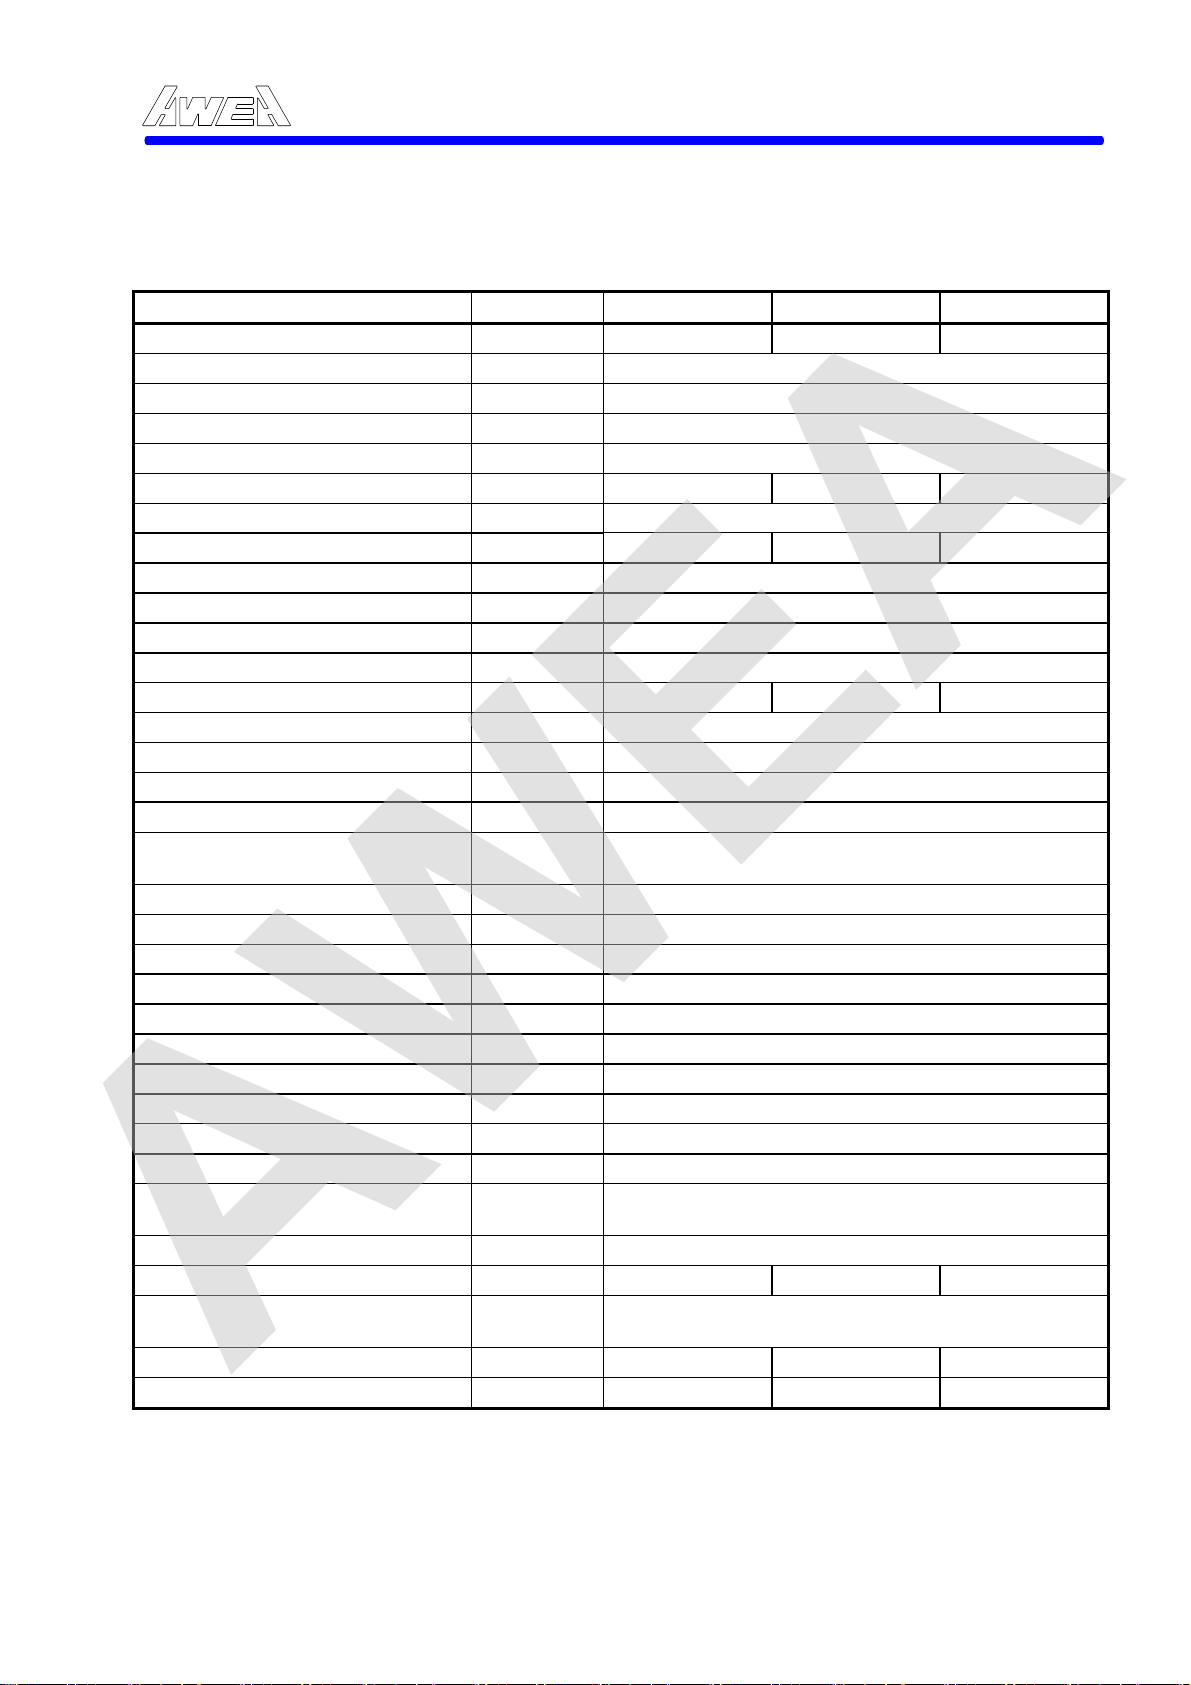
2.3 Specifications
2.3.1 Technical Data
AWEA SP/LP Series Manual - Chapter 2. INSTRUCTION 2-6
Item unit
X axis travel mm (inch) 2100 (82.7) 3060 (120.5) 4000 (157.5) Y axis travel mm (inch) 1600 (63.0) Z axis travel mm (inch) 760 (30.0) Distance from spindle to table mm (inch) 240-1000 (9.4-39.4) Distance between columns mm (inch) 1700 (66.9) Table size in X direction mm (inch) 2310 (90.9) 3260 (128.3) 4200 (165.4) Table size in Y direction mm (inch) 1500 (59.0) Table load capacity kg (lb.) 8000 (17600) 10000 (22000) 12000 (26400) Spindle motor (cont./30 min) kW (HP) 22/26 (30/35) Spindle speed rpm Two steps geared spindle 10-6000 Spindle taper BT#50 (ISO50) Pull-stud MAS403P50T-1 (45Deg.) / DIN69782 Rapid traverse rate X axes mm(in)/min. 20,000 (787.4) 20,000 (787.4) 15,000 (590.6) Rapid traverse rate Y axes mm(in)/min. 20,000 (787.4) Rapid traverse rate Z axis mm(in)/min. 10,000 (393.7) Cutting feed rate (max.) mm(in)/min. 1 – 1,0000 (0.04 – 393.7) Tool magazine capacity Max. tool diameter/ adjacent
pocket empty Max. tool length mm (in) 350 (13.8) Max. tool weight kg (lb.) 20 (44.1) Tool change time (T to T) sec 8 Position accuracy (JIS B6338) mm (in) ±0.01 (0.004) / full travel Position accuracy (VDI 3441) mm (in) P=0.030 (0.0012) Repeatability (JIS B6338) mm (in) ±0.003 (0.0001) Repeatability (VDI 3441) mm (in) Ps=0.024(0.001) Total required power 60 KVA / AC220V ±10%, 3 Phase, 60 Hz/50Hz Air resource Hydraulic tank capacity liter (gallon) 120 with 10HP (31.8)
Lubrication oil tank capacity
Coolant tank capacity liter (gallon) 420 (110) at 1.5HP Floor space requirement, L mm (in) 6,690 (263.3) 8,680 (341.7) 10,680 (420.5)
Floor space requirement, WxH mm (in)
Machine weight kg (lb.) 23,000(50700) 27,000(59500) 30,000 (66100) CNC controller FANUC 18 iMB FANUC 18 iMB FANUC 18 iMB
mm (in)
kg/c㎡
Liter
(gallon)
SP2016 SP3016 SP4016
32 (60,120 Option)
127/215 (5.0/8.5)
5
6 (1.6)
4700 x 3980
(185 x 156.7)0
2-6
Page 23
AWEA
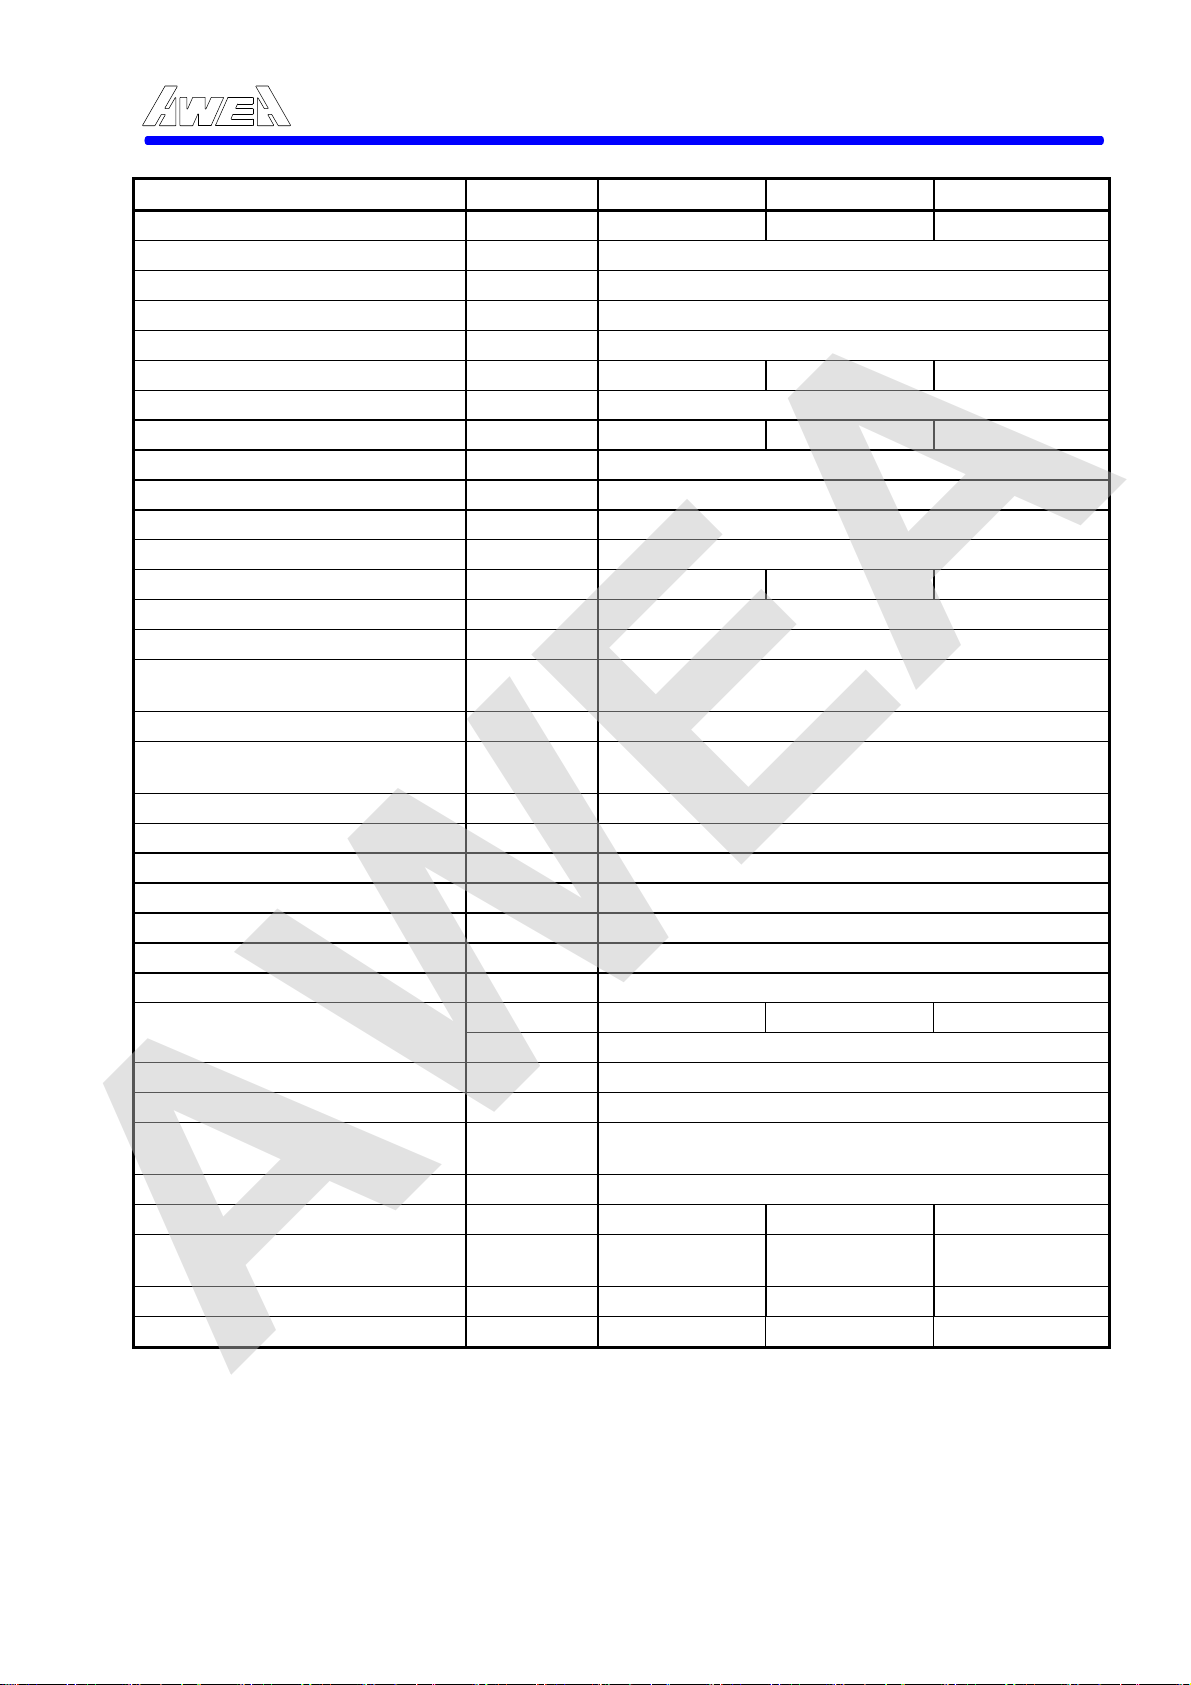
Item
X axis travel mm (inch) 3000 (118.1) 4000 (157.5) 5000 (196.8) Y axis travel mm (inch) 2100 (82.6) Z axis travel mm (inch) 760 (30.0) Distance from spindle to table mm (inch) 240-1000 (9.4-39.4) Distance between columns mm (inch) 2300 (90.5) Table size in X direction mm (inch) 3020 (118.9) 4020 (158.3) 5020 (197.6) Table size in Y direction mm (inch) 2010 (79.1) Table load capacity kg (lb.) 10000 (22000) 12000 (26450) 15000 (33000) Spindle motor (cont./30 min) kW (HP) 22/26 (30/35) Spindle speed rpm Two steps geared spindle 10-6000 Spindle nose configuration BT#50 (ISO50) DIN69871A Pull-stud MAS403P50T-1 (45Deg.) / DIN69782 Rapid traverse rate X axes mm(in)/min. 15,000 (590.0) 15,000 (590.0) 10,000 (393.7) Rapid traverse rate Y axes mm(in)/min. 15,000 (590.0) Rapid traverse rate Z axis mm(in)/min. 10,000 (394)
Cutting feedrate (max.) mm(in)/min.
Tool magazine capacity 32 (60 , 120 Option) Max. tool diameter/ adjacent
pocket empty Max. tool length mm (in) 350 (13.8) Max. tool weight kg (lb.) 20 (44.1) Tool change time (T to T) sec 8 Position accuracy (JIS B6338) mm (in) ±0.015 (0.006) / full travel Position accuracy (VDI 3441) mm (in) P=0.035 (0.0014) Repeatability (JIS B6338) mm (in) ±0.003 (0.0001) Repeatability (VDI 3441) mm (in) Ps=0.028(0.001) Total required power KVA 60 70 70 220 ±10% Vac, 3 Phase, 60 / 50Hz Air resource Hydraulic tank capacity liter (gallon) 120 with 10HP (31.8)
Lubrication oil tank capacity
Coolant tank capacity liter (gallon) 650 (170) at 1.5HP Floor space requirement, L mm (in) 8580 (337.8) 10580 (416.5) 12680 (499.2)
Floor space requirement, WxH mm (in)
Machine weight kg (lb.) 33000 (72750) 38000 (83700) 45000 (99200) CNC controller FANUC 18 iMB FANUC 18 iMB FANUC 18 iMB
mm (in)
kg/c㎡
Liter
(gallon)
AWEA SP/LP Series Manual - Chapter 2. INSTRUCTION 2-7
unit LP3021 LP4021 LP5021
1 - 10000
(0.04-393.7)
127/215 (5.0/8.5)
5
6 (1.6)
5240 x 4000
(206.3 x 157.5)
5240 x 4000
(206.3 x 157.5)
5240 x 4000
(206.3 x 157.5)
2-7
Page 24
AWEA
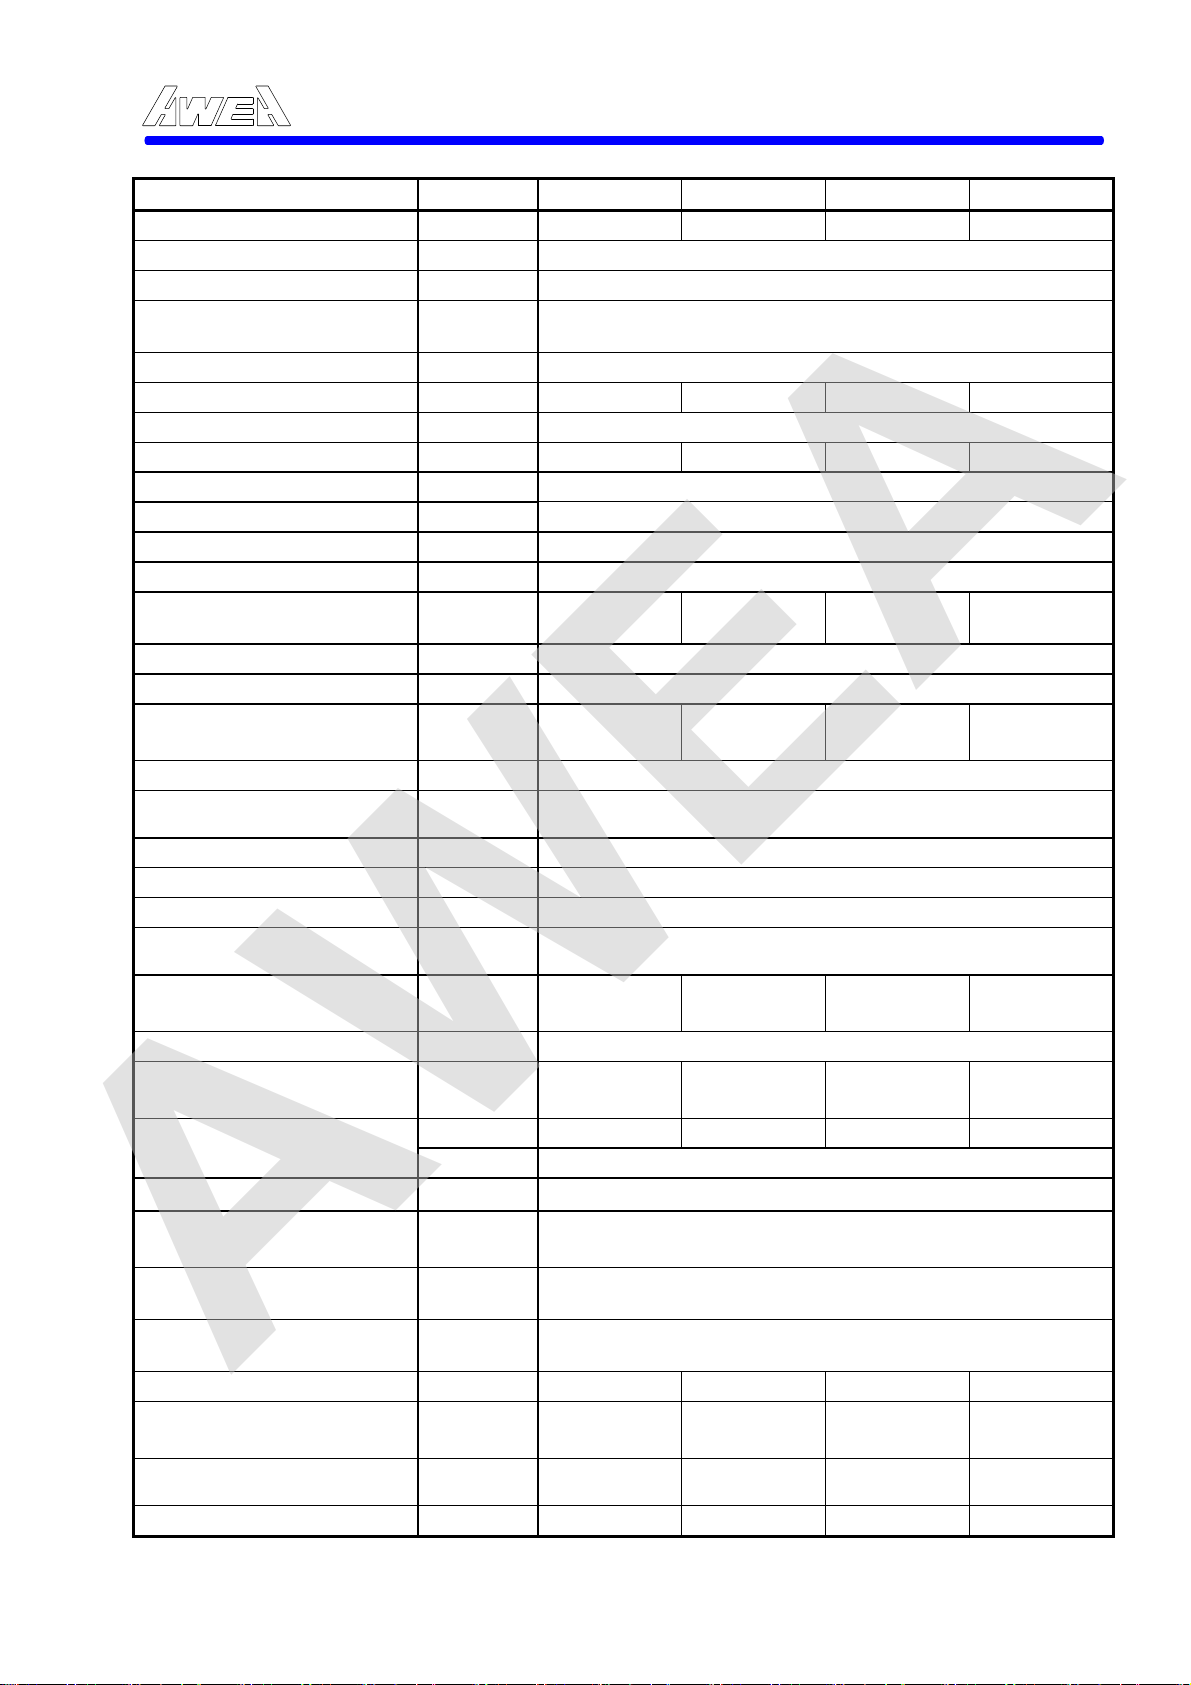
Item unit LP3025 LP4025 LP5025 LP6025 X axis travel Y axis travel Z axis travel
Distance from spindle to table
Distance between columns
Table size in X direction
Table size in Y direction
Table load capacity
Spindle motor (cont./30 min)
Spindle speed
Spindle nose configuration
Pull-stud MAS403P50T-1 (45Deg.) / DIN69782
Rapid traverse rate X axes
Rapid traverse rate Y axes
Rapid traverse rate Z axis
Cutting feed rate (max.)
Tool magazine capacity
Max. tool diameter/ adjacent pocket empty
Max. tool length
Max. tool weight
Tool change time (T to T)
Position accuracy (JIS B6338)
Position accuracy (VDI
3441)
Repeatability (JIS B6338)
Repeatability (VDI 3441)
Total required power KVA 60 70 70 80 220 ±10% Vac, 3 Phase, 60 Hz / 50Hz Air resource
Hydraulic tank capacity
Lubrication oil tank capacity
Coolant tank capacity
Floor space requirement, L
Floor space requirement, WxH
Machine weight
CNC controller
mm (inch) 3000 (118.1) 4000 (157.5) 5000 (196.8) 6000 (236.2)
mm (inch) 2500 (98.4)
mm (inch) 760 (30.0)
mm (inch) 240-1000 (9.4-39.4)
mm (inch) 2700 (106.3)
mm (inch)
mm (inch) 2400 (94.5)
kg (lb.) 12000 (26400) 15000 (33000) 18000 (39680) 20000 (44000)
kW (HP) 22/26 (30/35)
rpm Two steps geared spindle 10-6000
mm(in)/min.
mm(in)/min.
mm(in)/min.
mm(in)/
min.
mm (in)
mm (in) 350 (13.8)
kg (lb.) 20 (44.1)
sec 8
mm (in) ±0.015 (0.006) / full travel
mm (in)
mm (in) ±0.003 (0.0001)
mm (in)
kg/c㎡
Liter
(gallon)
Liter
(gallon)
liter
(gallon)
mm (in) 8600 (338.5) 10600 (417.3) 12600 (496) 14600 (574.8)
mm (in)
kg (lb.)
AWEA SP/LP Series Manual - Chapter 2. INSTRUCTION 2-8
3020 (118.9) 4020 (158.3) 5020 (197.6)
BT#50 (ISO50) DIN69871A
15,000 (590.0)
1-10000
(0.04-393.7)
P=0.035
(0.0014)
Ps=0.028
(0.0011)
5630 x 4000
(221.7 x 157.5)
36000 (79400) 40000 (88100) 44000 (97000)
FANUC 18 iMB FANUC 18 iMB FANUC 18 iMB FANUC 18 iMB
2-8
10,000 (393.7)
15,000 (590.0) 10,000 (393.7)
1-10000
(0.04-393.7)
32 (60 , 120 Option)
127/215(5.0 / 8.5)
P=0.035
(0.0014)
Ps=0.028
(0.0011)
120 with 10HP (31.8)
6 (1.6)
750 (198) at 1.5HP
5630 x 4000
(221.7 x 157.5)
10,000 (393.7)
1-10000
(0.04-393.7)
P=0.045
(0.0018)
Ps=0.028
(0.0011)
5
5630 x 4000
(221.7 x 157.5)
6020 (237)
7500 (295.3)
1-5000
(0.04-196.9)
P=0.055
(0.002)
Ps=0.045
(0.0018)
5630 x 4000
(221.7 x 157.5)
48000
(105800)
Page 25

AWEA
A. Standard Accessories :
1. Spindle temperature control system
2. Spindle lubricating monitoring system
3. Two step gear head
4. Adjustable torque-limiting overload clutch (3 axes).
5. External pulse coder installed on end of ball screw, 3axes
6. Centralized automatic lubricating system
7. Flood coolant system
8. Recycling lubricating oil collector for all axes
9. Full splash guard - 1700 mm (66.9")
10. Foot switch for tool clamping (operator and magazine sides).
11. Remote hand wheel control.
12. Work light.
13. Operation cycle finish and alarm lights.
14. RS-232 interface.
15. Foundation bolt kit.
16. Tool box
17. Operation and maintenance manual
B. Optional accessories.
1. Rigid tapping
2. 8000 rpm spindle (30/35 HP, direct driven)
3. Linear scale feedback system for X, Y axes.
4. 60 tools magazine.
5. Angular head indexing in 4 position (Max. speed up to 1500 rpm)
6. Dual screw type chip conveyor
7. Caterpillar type chip conveyor and chip bucket
8. Automatic tool length measurement
9. Automatic workpieces measuring system (Renishaw MP10)
10. 10. Scanning system for mold and die.
11. CNC rotary table
12. Coolant thru the tool adaptor
13. Coolant thru the spindle with filtering system (Form 1 or 2).
AWEA SP/LP Series Manual - Chapter 2. INSTRUCTION 2-9
2-9
Page 26

AWEA
2.3.2 Control function (Standard)
01. Controlled axes 3 Axes 3 Axes
02. Simultaneous controllable axes 3 Axes 3 Axes
03. Least input increment
04. G20 Inch/ G21 metric conversion
05. Interlock
06. Machine lock
07. Emergency stop
08. Stored stroke check
09. Backlash compensation
10. Stored pitch error compensation
11. Automatic operation (memory)
12. DNC operation
13. MDI operation
14. Program number search
15. Sequence number search
16. Dry run
17. Single block
18. JOG feed
19. Manual reference position return
20. Manual handle feed
21. Incremental feed
22. G00 Positioning (G01 type positioning is possible)
23. G61 Exact stop mode
24. G09 Exact stop
25. G01 Linear interpolation
26. G02, G03 Circular interpolation
27. Dwell
28. G31 Skip function
29. G28 Reference position return
30. G27 Reference position return check
31. 2nd reference position return
32. Rapid traverse rate
33. Rapid traverse override Fo,25,50,100%
34. Automatic acceleration/deceleration (Rapid traverse:linear, Cutting feed:exponential)
35. Feedrate override
36. Override cancel
37. EIA/ISO Automatic recognition
38. Label skip
39. Optional block skip
40. Program number O4-digit
41. Sequence number N5-digit
42. G90 Absolute/G91 incremental programming
43. Decimal point input
44. Pocket calculator type decimal point input
AWEA SP/LP Series Manual - Chapter 2. INSTRUCTION 2-10
:
.001mm/0.00001inch
x1,x10,x100
2-10
Page 27
AWEA
45. Plane selection G17,G18,G19
46. Coordinate system setting
47. Automatic coordinate system setting
48. Workpiece coordinate system
49. Manual absolute on/off
50. Rigid tapping
51. Sub program call: 4 folds nested
52. Custom macro B
53. Canned cycles for drilling
54. Circular interploation by R programming
55. Miscellaneous function
56. Miscellaneous function lock
57. S code
58. Spindle speed override
59. Spindle orientation
60. T code
61. Tool offset memory
62. Tool length compensation
63. Cutter cpmpensation C
64. Part program storage length
65. Registered programs
66. Part program editing
67. Program protect signal
68. Status display
69. Clock function
70. Current position display
71. Program display (Program name 31 characters)
72. Parameter setting and display
73. Self-diagnosis function
74. Alarm display
75. Alarm history display
76. Tool offset
77. Help function
78. Run hour and parts count display
79. Actual cutting feedrate display
80. Servo setting screen
81. English display
82. Data protection key 3 types
83. Erase CRT screen display
84.
85. Chinese/English display
86. RS232-C interface
87. Input power supply 220 Vac ±10%
88.
89. Mirror image
90. Program restart
Setting and display unit 10.4" color LCD/MDI
(standard size)
AWEA SP/LP Series Manual - Chapter 2. INSTRUCTION 2-11
G52、G53、G54~G59
:
99 sets
:
160 Meter
:
63
50~60Hz±3Hz
2-11
Page 28

AWEA
91. Manual handle interruption
92. Single direction positioning
93. Programmable data input
94. 2D coordinate rotation
95. Manual guide
96. Background editing
97. Playback
98. Scaling
AWEA SP/LP Series Manual - Chapter 2. INSTRUCTION 2-12
2-12
Page 29
3、So
AWEA
2.4 Operator’s Control Panel
2.4.1 LCD/MDI panel
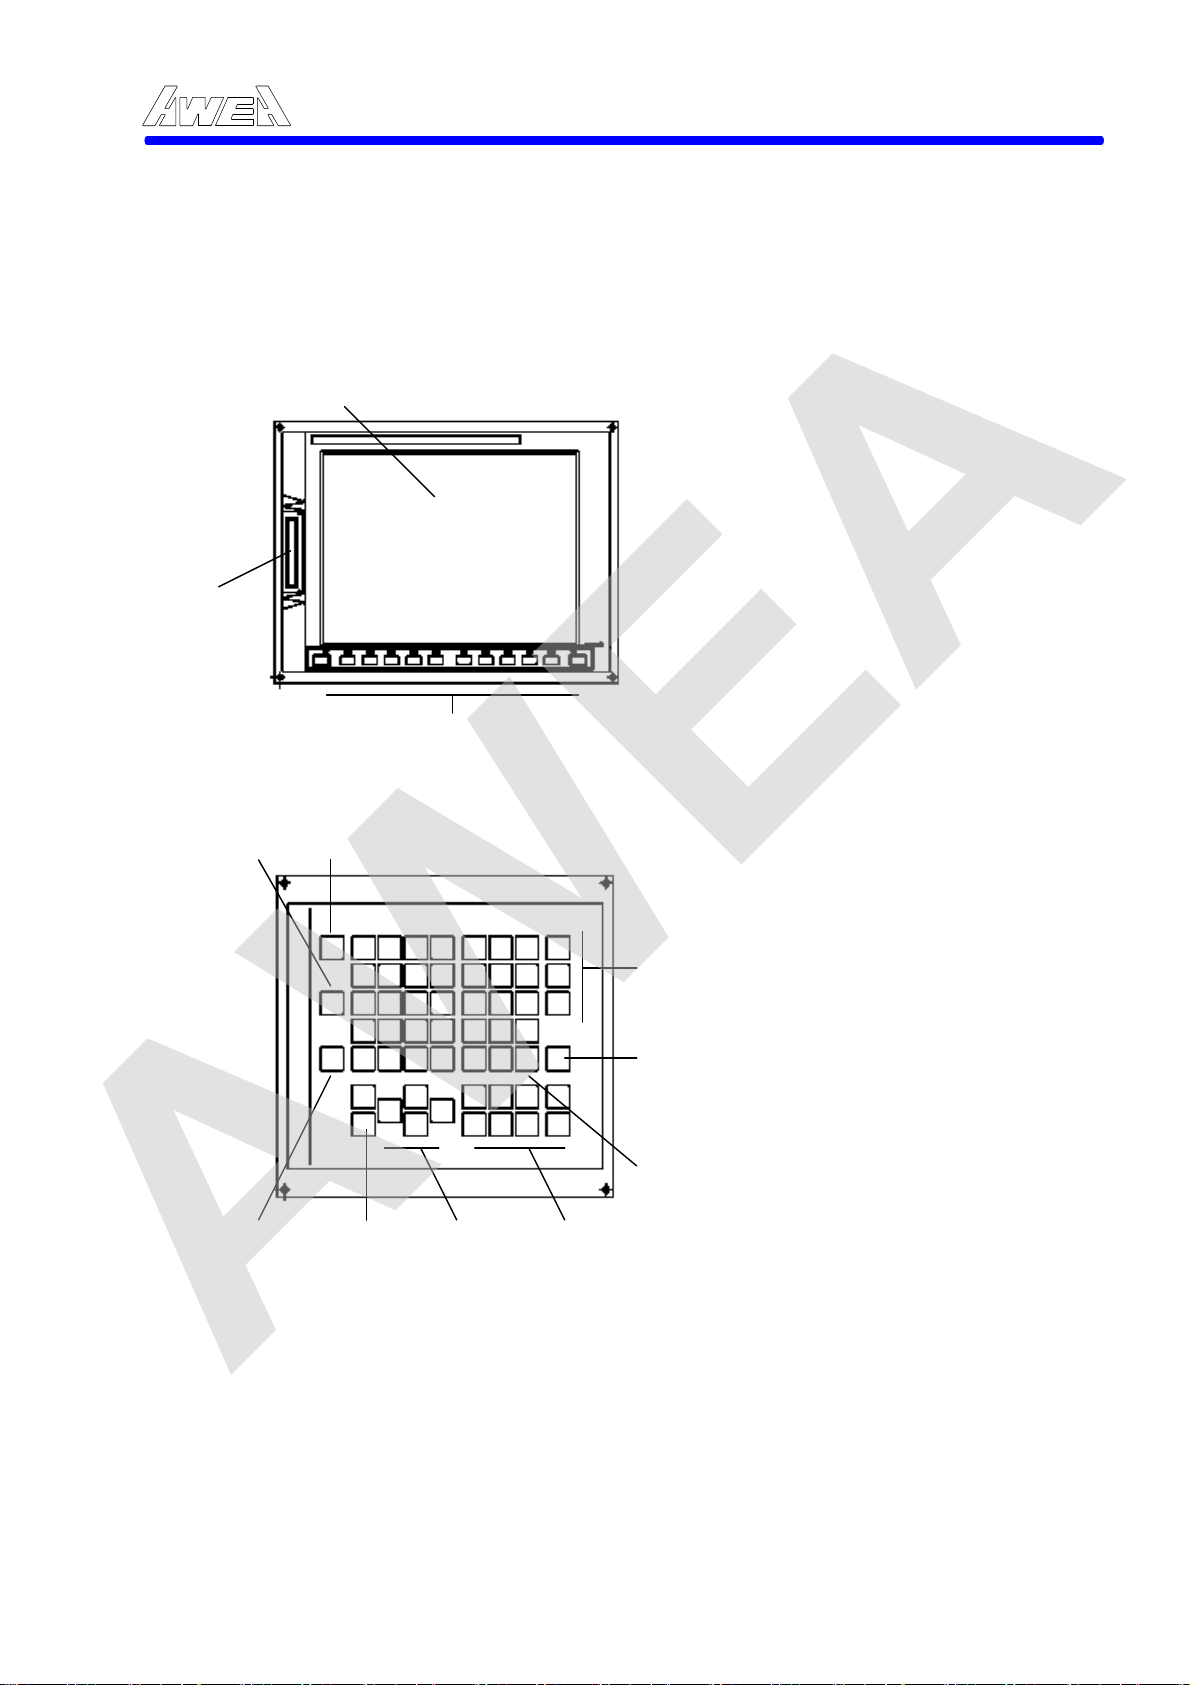
LCD/MDI consisted of LCD (10.4” color display) and keyboard, shown as Figure 2-4.
【LCD unit】
1、Liquid-crystal display
AWEA SP/LP Series Manual - Chapter 2. INSTRUCTION 2-13
1、10.4 LCD 2、Memory card interface
2、Memory card interface
【MDI unit】
4、Help key
5、Reset key
ft key switch
6、Edit key
7、Cancel key
8、Input key
3、Soft key switch
4、Help key
5、Reset key
6、Edit key
7、Cancel key
8、Input key
9、Function keys
10、Cursor keys
11、Page-Up/Down keys
、Shift key
12
12、Shift key
11、Page-Up/Down keys
10、Cursor keys
Figure 2-4 LCD/MDI panel
9、Function keys
2-13
Page 30
AWEA
A. Key function:
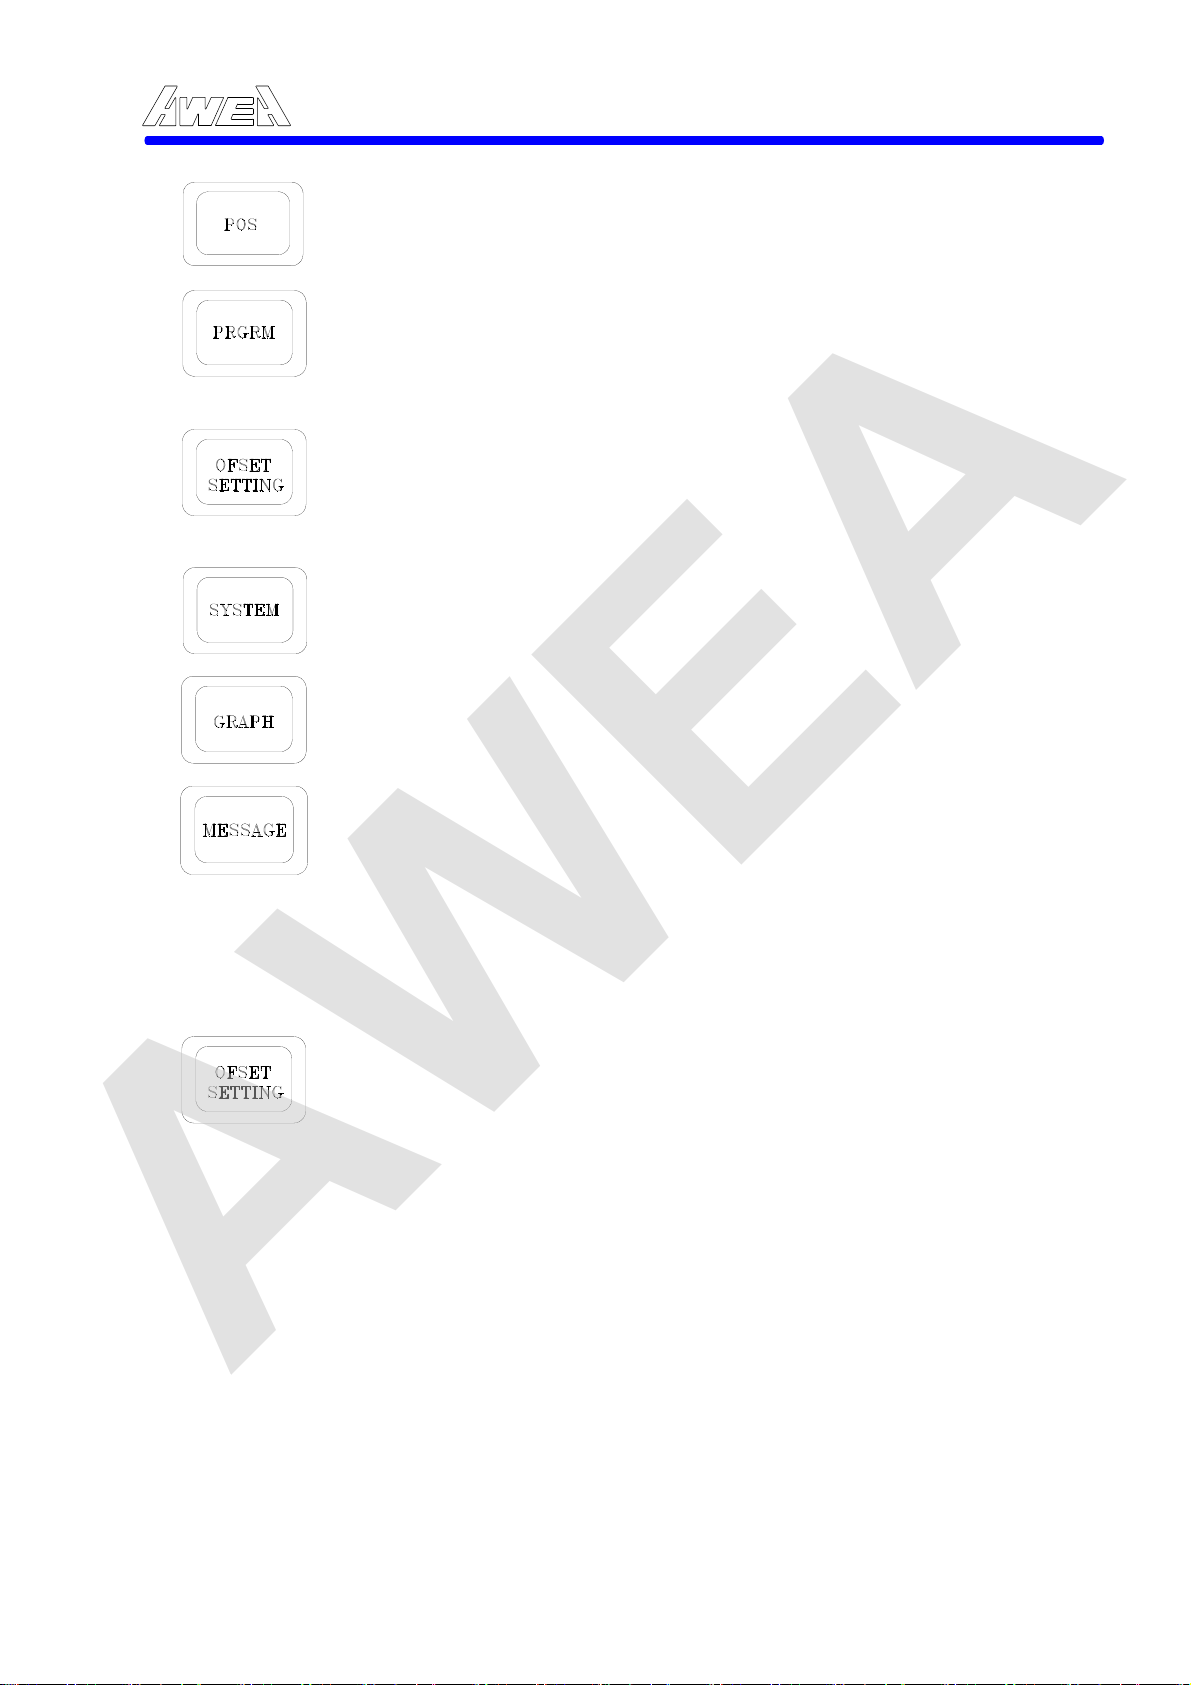
The position push-button indicates the current position of the slides. The information is spread over pages.
In "EDIT" mode the cursor can be moved the any desired command by
using the Cursor Forward or Reverse.
In "MDI" mode the cursor can be input data to the buffer memory.
In "AUTO" mode the cursor can be displayed current commends.
The OFFSET push-button displays either the offset chapter or work shift chapter. Repeatedly pressing "OFFSET" push-button will alternately display on chapter or the other.
The button displays setting of the System Diagnostic data and System parameter data.
The button displays Alarm messages of interest to the operator in two chapter.
The software operator's manual shown as following figure which can be determined by the following procedure:
1. Press the Offset & Setting button.
AWEA SP/LP Series Manual - Chapter 2. INSTRUCTION 2-14
Î
OPR 3. Select the OPR soft
2. Select the manual by pressing this button which located under the CRT
-key by pressing the button located under the CRT
4. Press the page button down, then the following picture will be displayed.
2-14
Page 31

AWEA
OPERATOR'S PANEL O0000 N0000
OP STOP : ■ OFF ON
MAN-ABS : ■ OFF ON
PLAY BACK : ■ OFF ON
MST LOCK : ■ OFF ON
AXES ILK : ■ OFF ON
Z CANCEL : ■ OFF ON
TL SKIP : ■ OFF ON
PGM RSTA : ■ OFF ON
ACTUAL POSITION (ABSOLUTE)
X 2000.000 Y 500.000
Z 100.000
14:32:15 MDI
【MACRO】【MENU】【OPR】【TOOL LF】【 】
AWEA SP/LP Series Manual - Chapter 2. INSTRUCTION 2-15
Figure 2-5 Software Operator's Panel
OP STOP :
MAN-ABS :
PLAY BACK: "ON" means teach in function will be effective.
MST LOCK :
AXES ILK: "ON" means machine lock is active.
Z CANCEL: "ON" means Z axis travelling will be cancelled.
TL SKIP
"ON" Optional stop function will be active that causes the control to
stop execution of a part program after completing a block containing an
M01 code. The function is active when the push-button is illuminated.
An M01 code is ignored when the push-button is not illuminated. The
push-button can be activated before or during a block containing an
M01 code. When a block containing an activated M01 is completed, all
slide motion and spindle rotation ceases, coolant pump turns OFF,
Feed Hold push-button is illuminated and Optional Stop push-button
flashes. The push-button is active in Dry Run and Machine Lock
modes.
Warning: It is the part programmer's responsibility that to program
M03, M04, M13 or M14 to restart the spindle and coolant af
the part program is resumed.
Pressing Cycle Start button will cause program to resume.
Feed Hold light will turn OFF. The Optional St
must be pressed a second time to be deactivated.
"ON" the amount of manual movement is to be added to the absolute
value.
When M.S.T.LOCK mode is active, M.S.T. function operations are locked.
: When TL SKIP is active, the currently tool w
ill be removed.
ter
op push-button
2-15
Page 32
AWEA
PGM RSTA:
Several pages are included in the chapter selected with each function button. The page is selected with PAGE button.
NOTE: The data displayed on the screen disappears when one of the function
B. Keyboard functions
C. Cursor shift keys:
When Auto Power Off function is active, machine will be OFF
automatically in preset timing. This function specifies sequence No. of
a block to be restart when a tool is broken down or when it is desired to
restart machining operation after a day off, and restart the machining
operation from that block.
buttons and the "CAN" key are pressed. Thereafter, when either function
button is pressed, the corresponding screen is displayed again. When the
unit is not used with the power turned on for long time, turn off the screen.
This is effective to prevent the image quality from deteriorating.
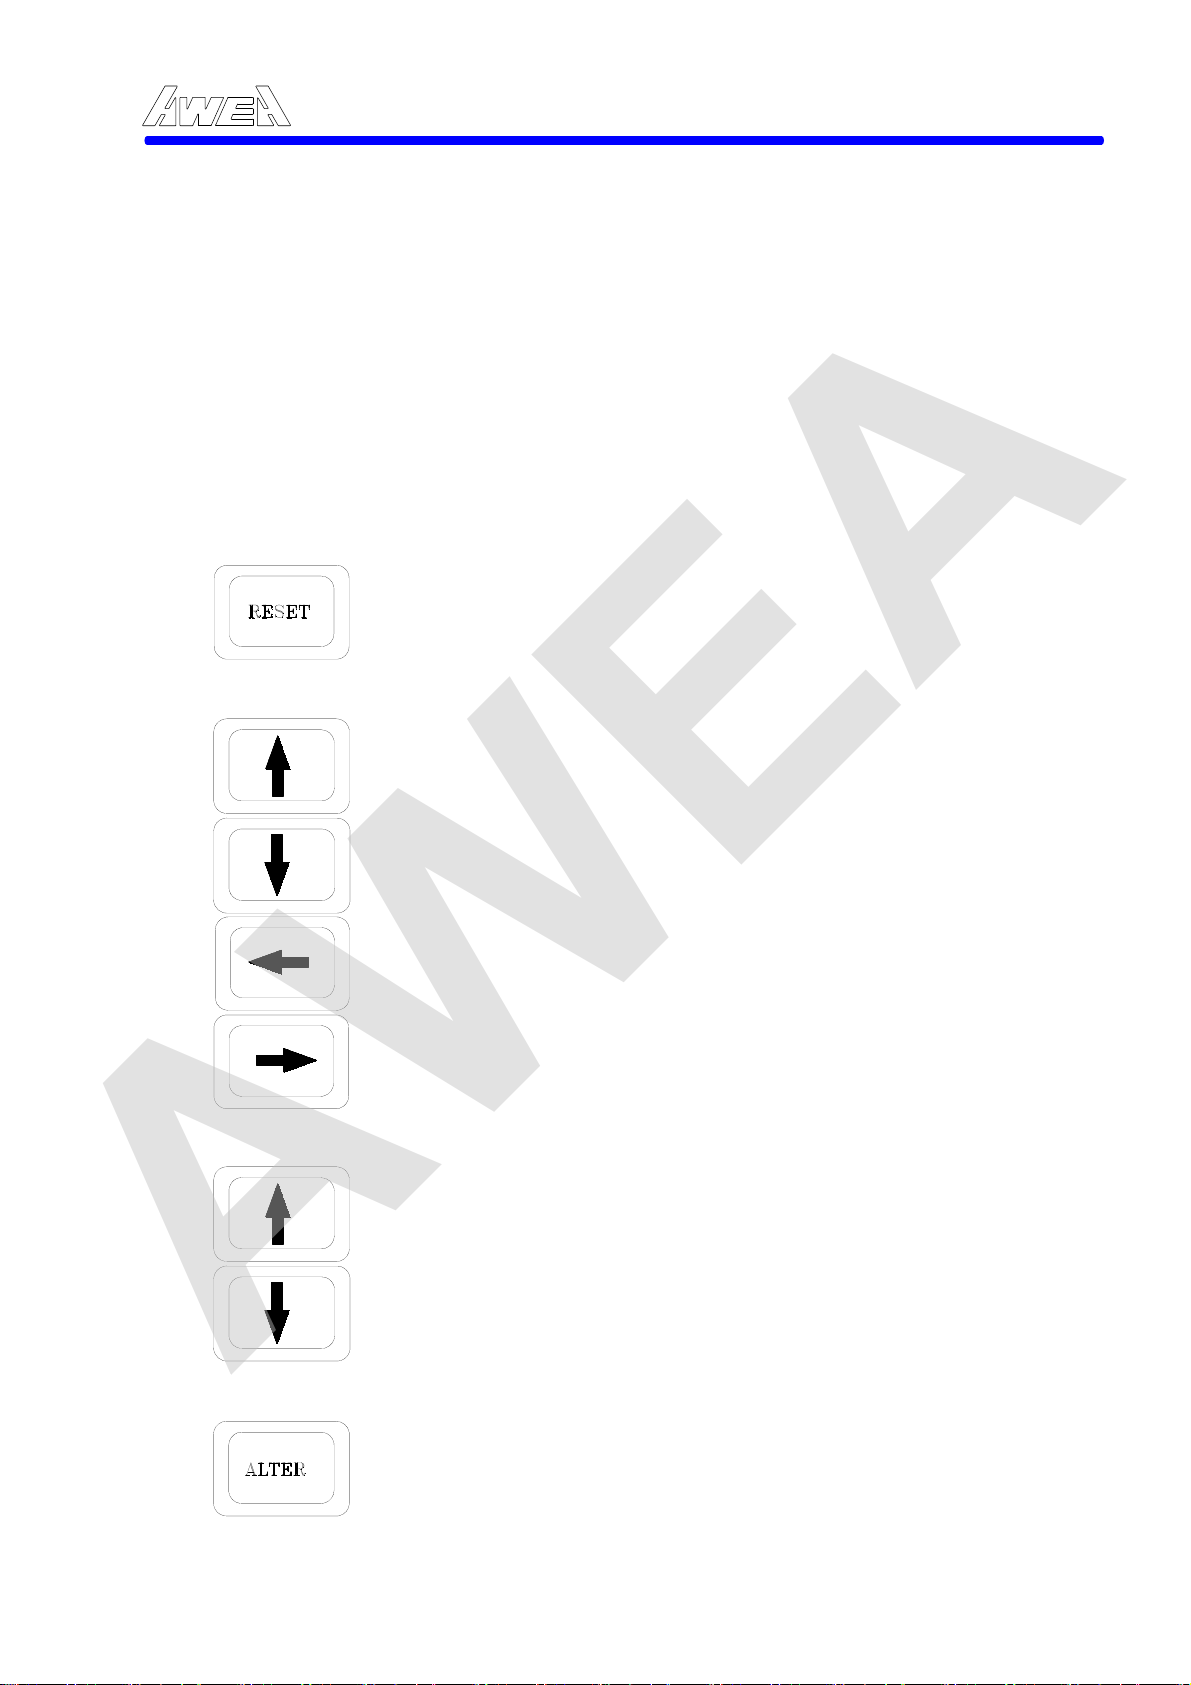
Press this key to reset the CNC, to cancel an alarm etc.
1. This key is used to shift the cursor a short distance in the reverse direction.
2. This key is used to shift the cursor a short distance in the forward direction.
AWEA SP/LP Series Manual - Chapter 2. INSTRUCTION 2-16
D. Page shift keys:
This key is used to changeover the page on the CRT screen in
E. Program Editing Key:
the reverse direction.
This key is used to changeover the page on the CRT screen in the forward direction.
This button is used in Edit mode to alter a data word in an enabled program stored in memory.
2-16
Page 33
AWEA
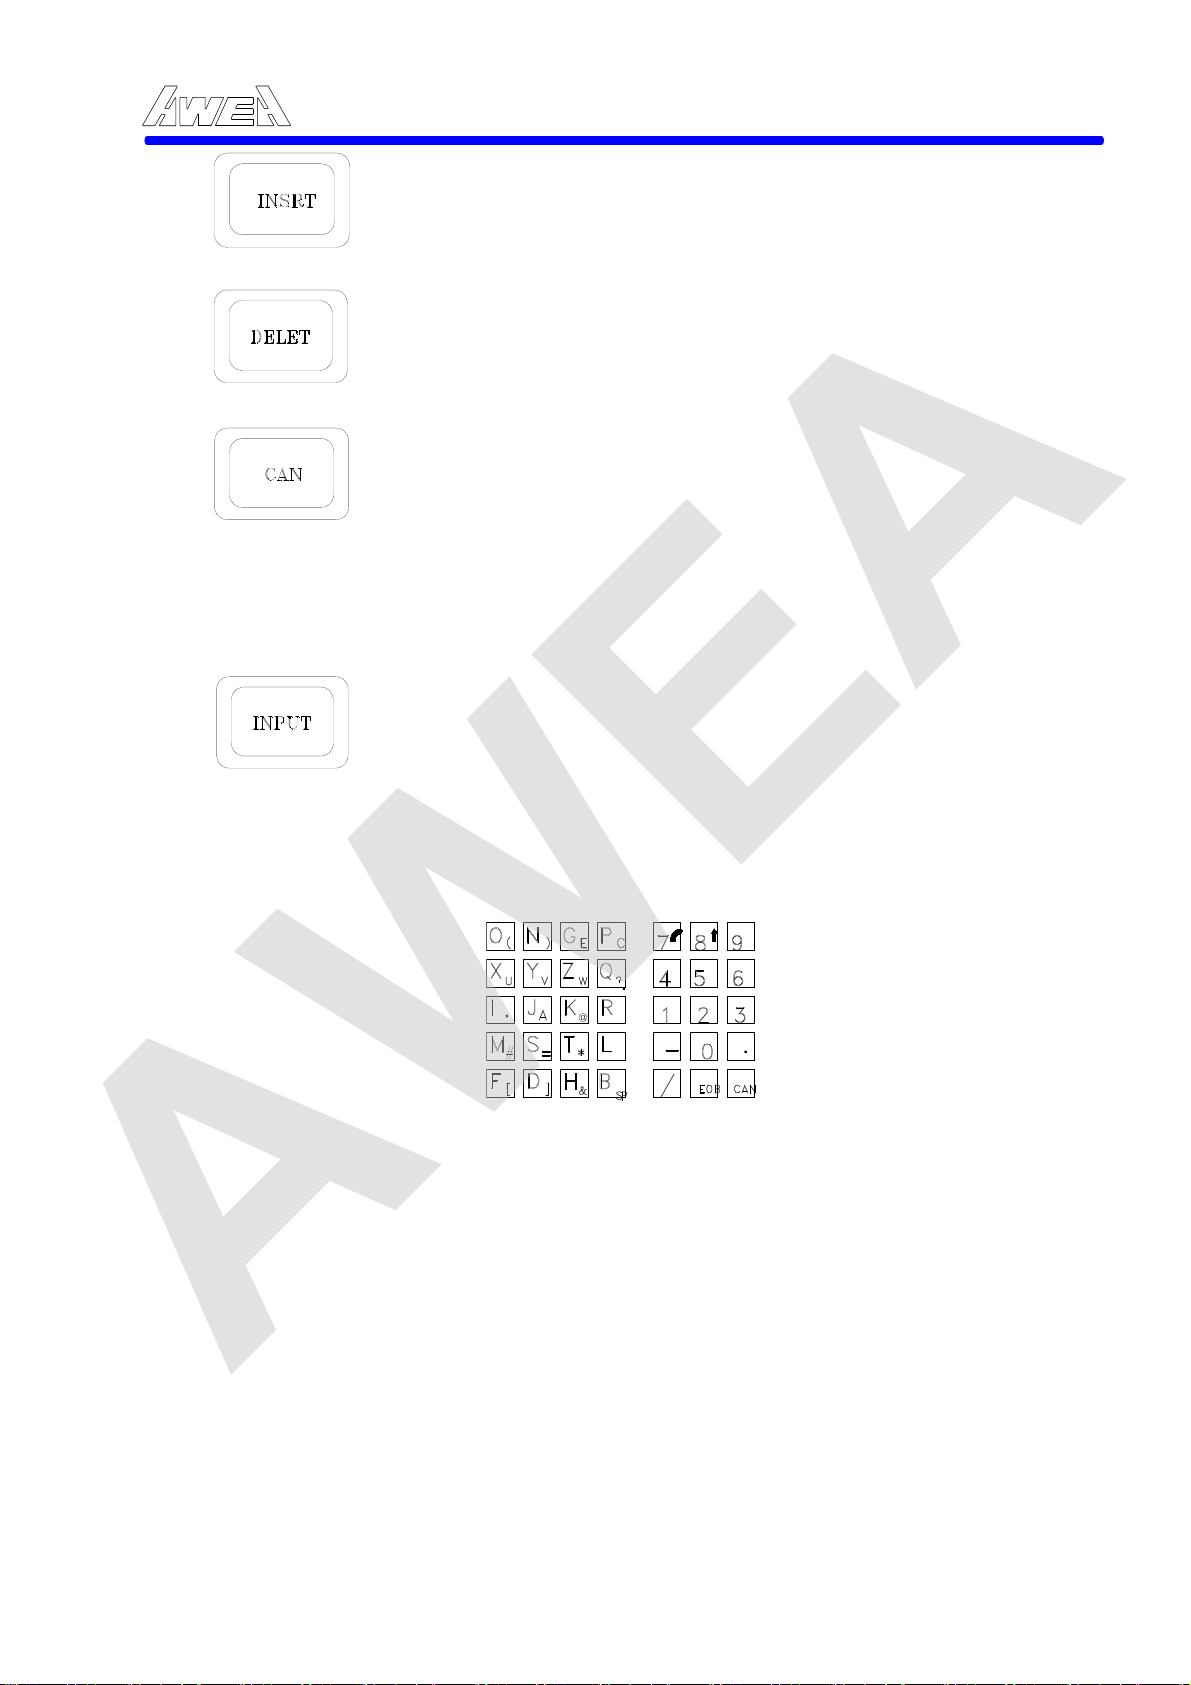
The "Insert" button is used in Edit mode to insert data words, an
entire block or several blocks of data, into an enabled part
program stored in memory. It is also used when entering a part
F. Symbols & alphabets keys:
program into memory from the MDI keyboard.
The "Delete" button is used in edit mode to delete a data word, an entire block, or several blocks of data, from an enabled part program stored in memory. It is also used to delete a complete part program from the program Directory.
The "Can" button is used to erase incorrect data entered on the
MDI keyboard before "Insert" button is pressed. Character are
erased singularly each time the button is pressed starting with
the last character entered. That means when the address key or
the numerical key is pressed next, the position where the
alphabet or the numeral is inserted next is indicated by "-".
When the cancel key is pressed, the character immediately
before the "-" is canceled.
The button is used when entering information from the MDI
keyboard. When an address or numerical key is pressed, the
alphabet or the numeral is input once to the key input buffer,
and it is displayed on the CRT screen. To set the data input to
the key input buffer in the offset register, etc., press the Input
key.
AWEA SP/LP Series Manual - Chapter 2. INSTRUCTION 2-17
2-17
Page 34
AWEA
2.4.2 Machine control panel
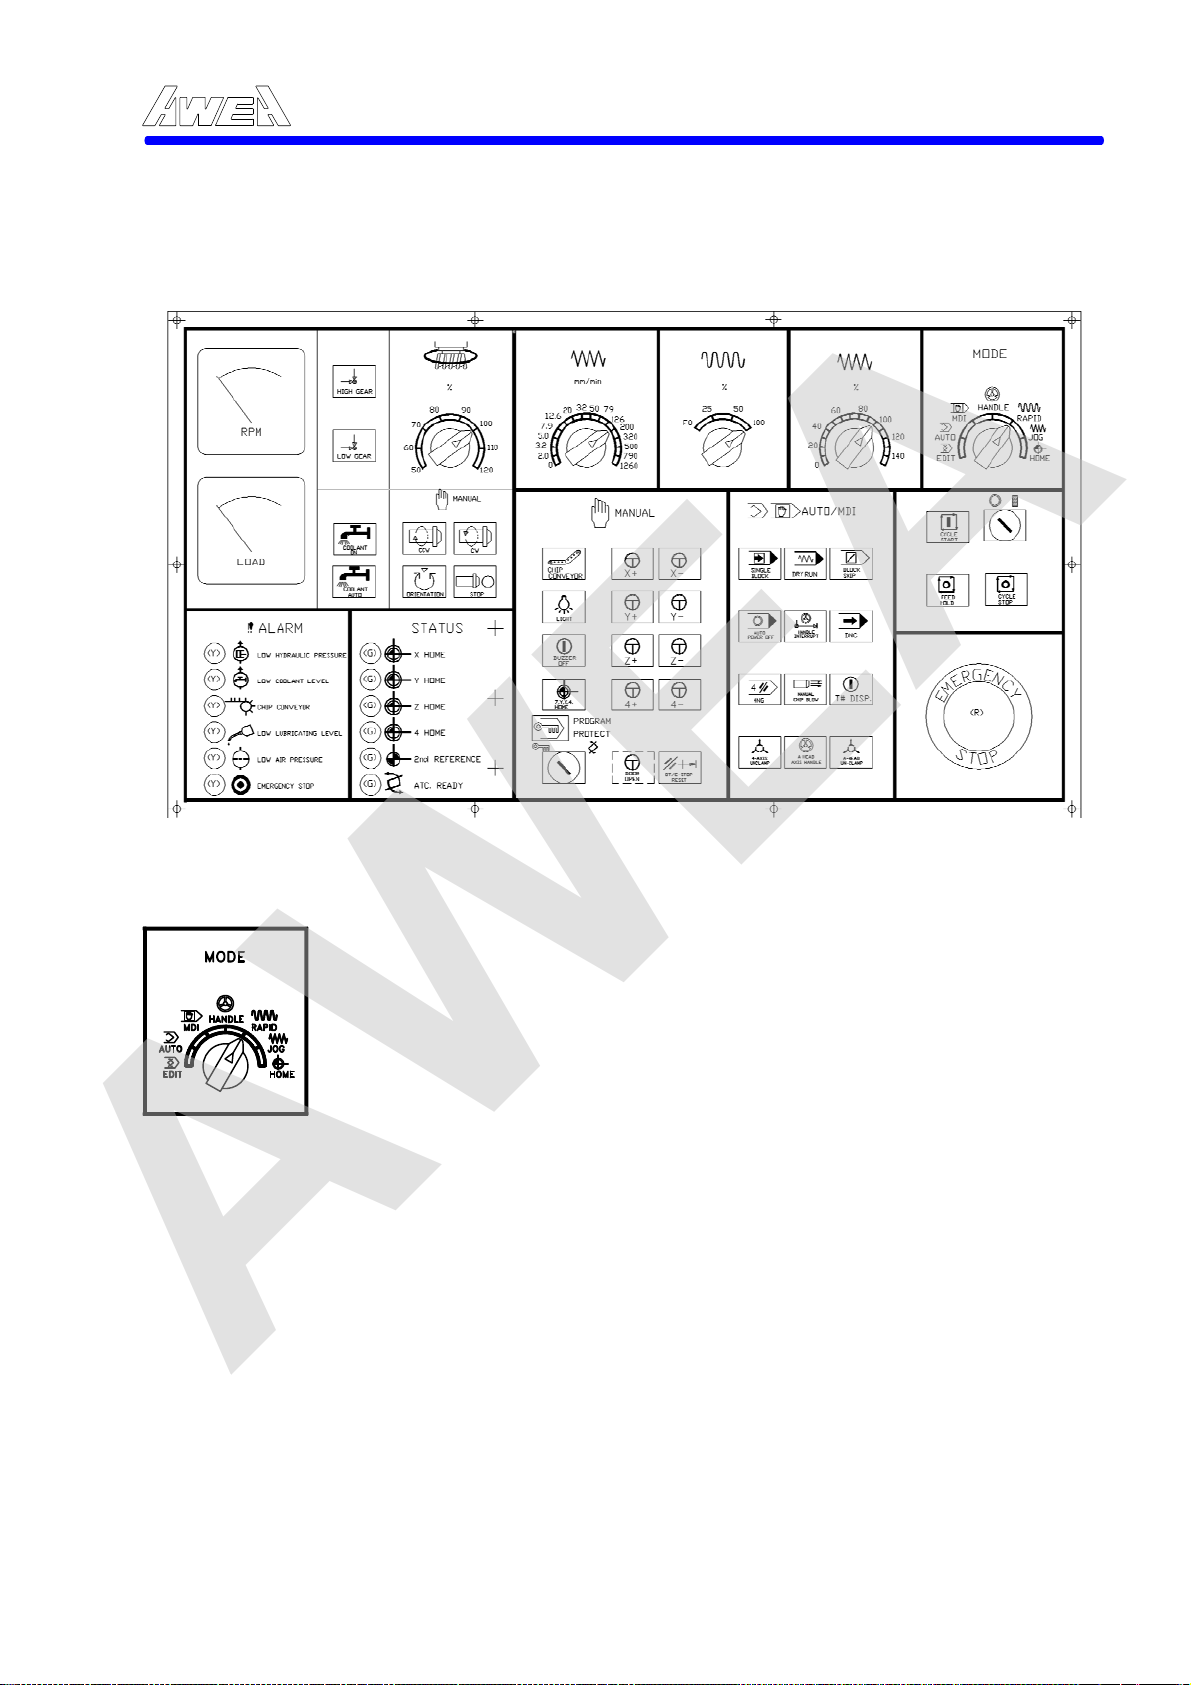
The description of Machine control panel will be as below:
AWEA SP/LP Series Manual - Chapter 2. INSTRUCTION 2-18
Figure 2-6 Machine Control Panel
A. Rotary Switches:
1. MODE selector:
There are seven modes available on this selector which are as below:
EDIT is used when editing a part program stored in memory; to add
data to memory; to delete data from memory and to modify data in
memory. To use this mode, Program Protect switch must in "OFF"
position.
AUTO Press the cycle start button of the operating panel. The
program in the AUTO operation memory will be executed. When
pressed, automatically operation begin and cycle start lamp lights.
MDI the common of the multiple blocks can be input from the
CR
T/MDI panel to the MDI operation buffer memory. The program
in the MDI operation buffer memory can be edited in the same
method as that for the program registered in the memory. Press the
START key of the operating panels the program in the MDI
operation buffers memory will executed.
HANDLE can be used to move all axes manually. Select the axis to
be moved by the axial selector, the selected axis can be moved by
Manual Pulse Generator. Handle Multiplication can be set by
actuating one of the three steps X1, X10, X100.
2-18
Page 35
AWEA
RAPID
be moved. The selected axis moves in its direction ( X+, X-,Y+,Y-, Z+, Z-).
Feedrate can be set by Rapid override switch. Actuate and hold the
corresponding axis key, the machine axis moves continuously at the
setting traverse rate. Release the axis key held so far, the traverse
movement will stop.
JOG operation can be moved selected axis and moves in its
directions (X+,X-,Y+,Y-,Z+,Z-), Feedrate can be set by Jog feedrate
override switch. Actuate and hold the corresponding axis key, the
machine axis moves continuously at the set traversing rate.
Release the axis key held so far, the traverse movement will stop.
HOME set to the Home position, press the selected axis to be the
reference point. The machine stops at the reference point return,
lighting the Axes Home position LED. If 3 axes are selected
simultaneously by three switches, three axes moves are allowed at
the same time.
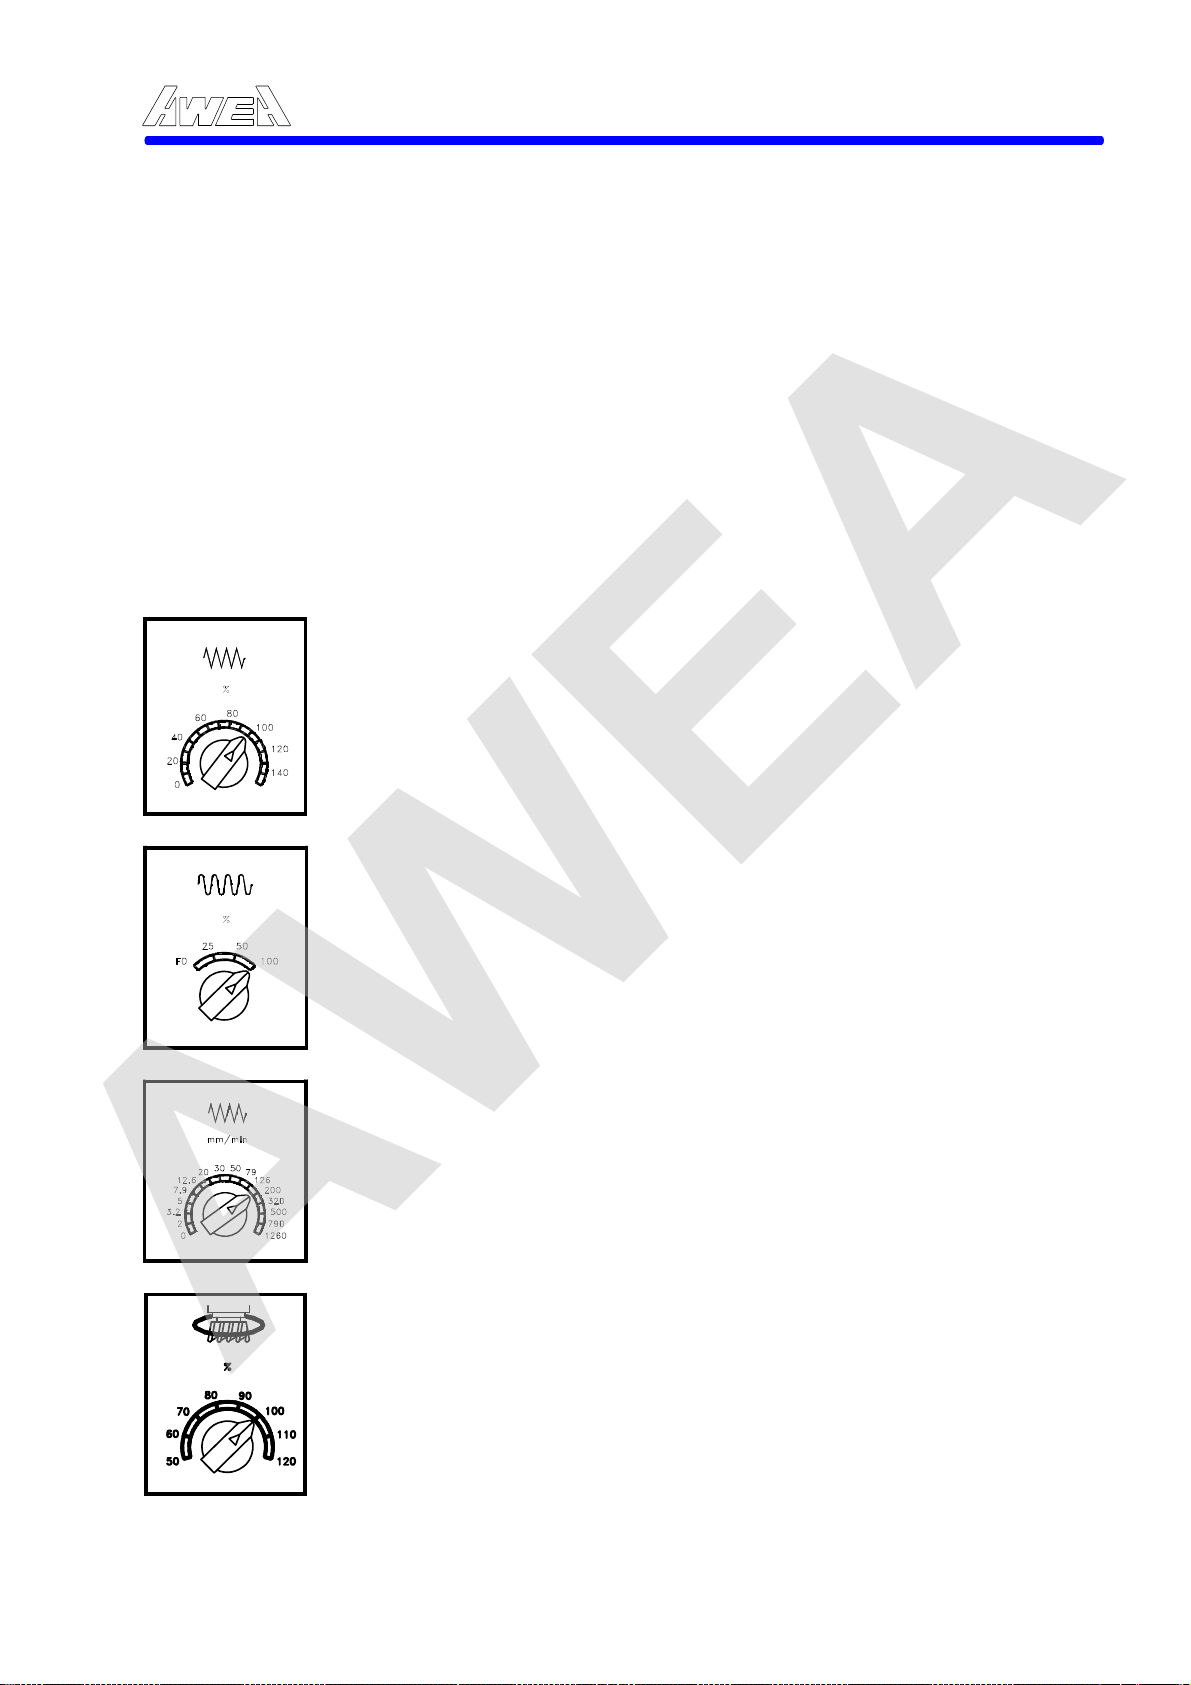
2. Cutting Feedrate Override
With this dial, it is possible to override the feedrate designated by
the program. An override of 0 to 150 % divide to 16 step, this switch
provides to the feedrate of G01, G02, G03 and other G code which
may using this feedrate for cutting.
push-button can be moved the machine axes. Select the axis to
AWEA SP/LP Series Manual - Chapter 2. INSTRUCTION 2-19
3 Rapid Feedrate Override
The Rapid Override switch of 100%, 50%, 25% and F0 is provided,
when the rapid traverse rate is 20 m/min. and this dial is set to 50%,
actual rate becomes 10 m/min. F0 is a constant value specified by
the parameter. Rapid override is effective by the following functions:
(1) by G00. (2) during canned cycle. (3) in G27 and G28. (4) Manual
rapid traverse.
4. Jog Feedrate Override
With this dial, it is possible to override the feedrate designated by
the program. An override of 0 to 1260 mm/min. divide to 16 step,
this switch provides to the JOG feedrate switch.
5. Spindle Speed Override
The spindle speed override switch allows the operator to modify
programmed spindle speeds in steps of 10% from 50% to 120%.
The actual spindle speed what you commended can be seen on the
and displays current block "S". The switch is active in AUTO,
CRT
MDI or Dry Run modes.
2-19
Page 36
A
AWEA
B. Push-buttons:
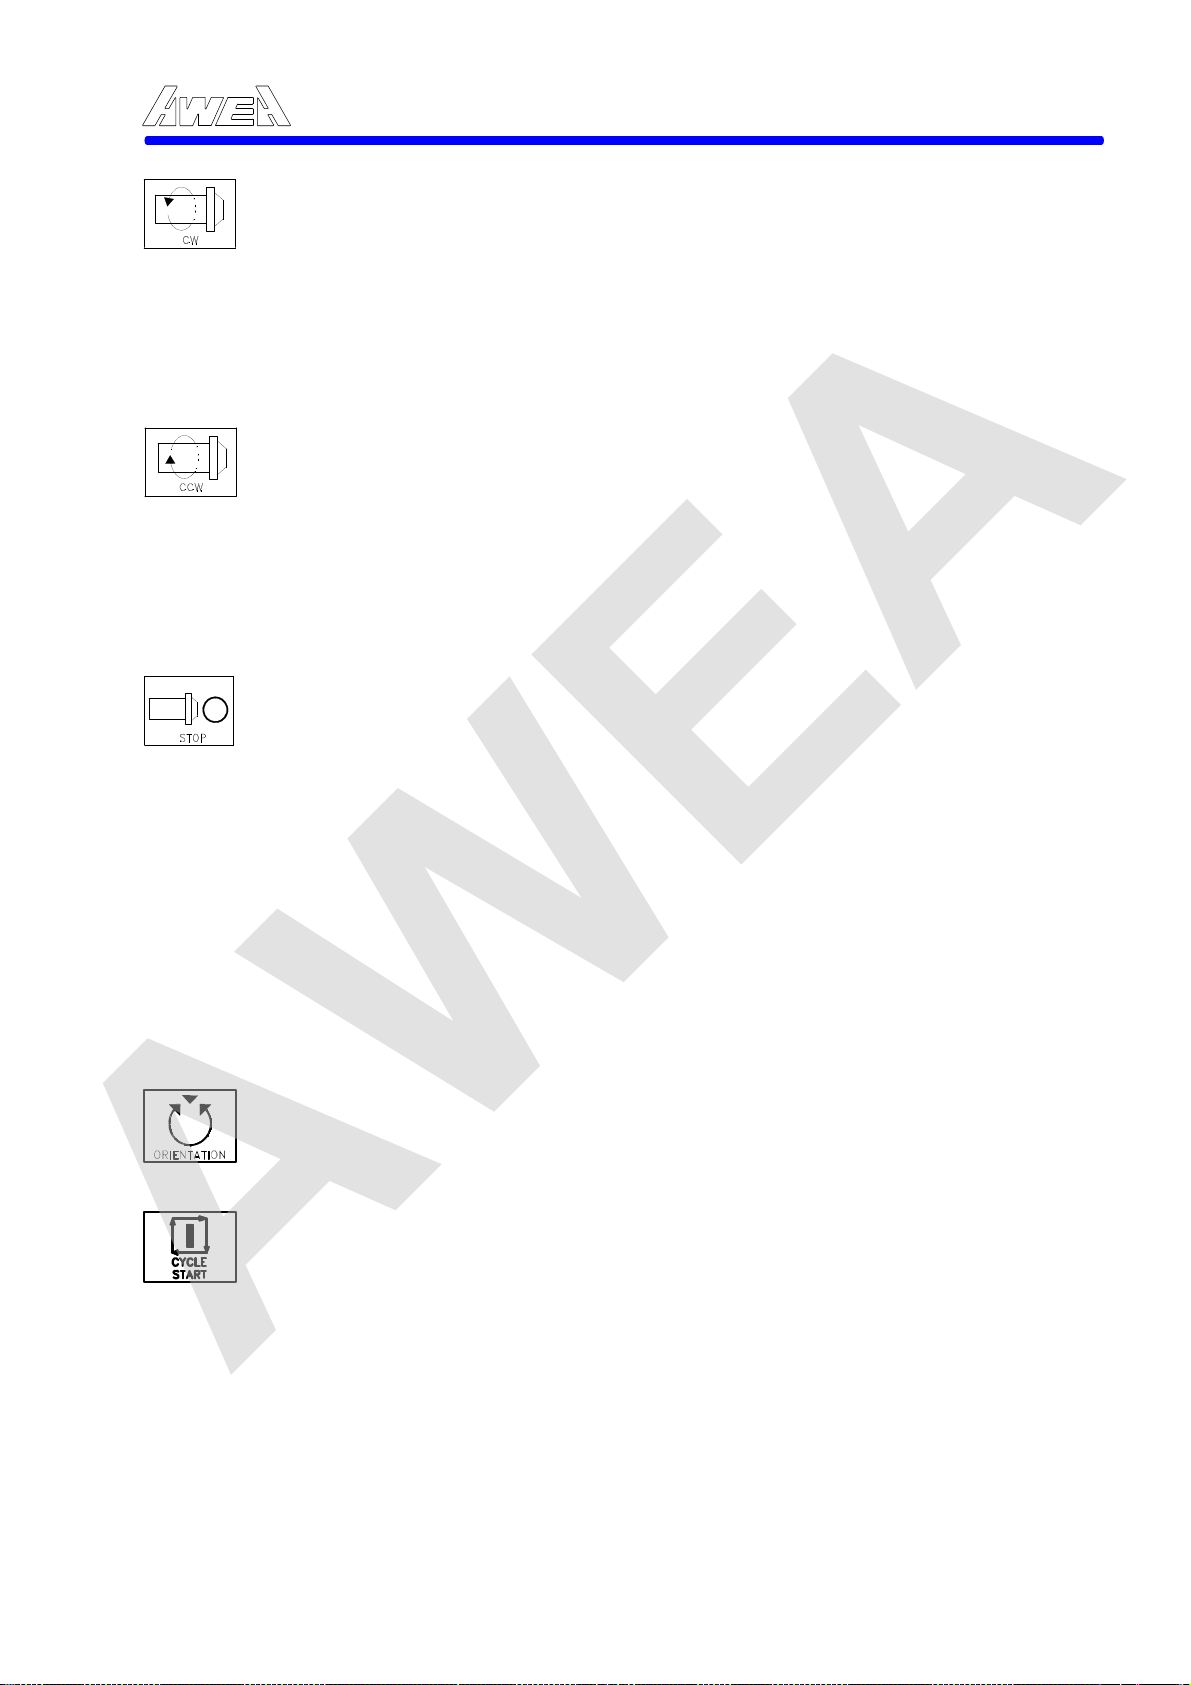
1. Spindle CW
push-button
(included lamp):
2. Spindle CCW
push-button
(included lamp):
3. Spindle Stop
push-button:
4. Spindle
Orientation
push-button
AWEA SP/LP Series Manual - Chapter 2. INSTRUCTION 2-20
The spindle CW push-button is an illuminating,
momentary type, push-button. The light must be "OFF" for
spindle CCW mode operation. Effective by mode selected
in Handle position (push-button illuminated). Spindle
rotates in clockwise direction.
Note: After machine "ON", spindle speed must be keyin in
the memory by MDI mode, then this button is
effective for pressing.
The spindle CCW push-button is an illuminating,
momentary type, push-button. The light must be "OFF" for
spindle CW mode operation. Effective by mode selected
in Handle position (push-button illuminated). Spindle
rotates in clockwise direction.
Note: After machine "ON", spindle speed must be keyin in
the memory by MDI mode, then this button is
effective for pressing.
The spindle can be stop during machine in AUTO / MDI
mode. Press Feed Hold button, then press Spindle Stop
button to stop the spindle. Spindle Stop will be lights up.
The cycle can be restart by press Cycle Start button,
spindle will be rotated immediately, axes will be feeding
1.5 sec. later. In JOG/RAPID/HANDLE mode, spindle
stops immediately. The light must be "OFF" for spindle
CW or CCW mode operation. The other function for this
button is for unclamping the tool from spindle manually.
To press this button once, then this button will light up and
flashing for about 30 second, in the mean time, press the
Tool release foot switch to release the tool from the
spindle in 30 second. Pressing the reset button on the
controller panel can reset it.
The "Spindle Orientation" push-button is used to stop spindle at its tool change position in Handle mode. The light must be "ON" for Spindle Orientation operation.
5. Cycle Start
push-button:
The Cycle Start push-button is used to initiate programs in
UTO, MDI, Dry Run, and Machine Lock modes. It is
illuminated while a data block is being executed. When
control is in an End of Block, Feedhold or MDI condition,
the button will not be illuminated. If Feedhold push-button
is pressed during execution of a part program, Cycle Start
light will turn "OFF".
2-20
Page 37
CYCLE
AWEA
STOP
6. Cycle Stop
push-button
7. X + push-button: The X+ push-button is momentary type switch that allows
8. X - push-button: The X- push-button is momentary type switch that allows
9. Y + push-button: The Y+ push-button is momentary type switch that allows
10. Y - push-button: The Y- push-button is momentary type switch that allows
11. Z + push-button: The Z+ push-button is momentary type switch that allows
12. Z - push-button: The Z- push-button is momentary type switch that allows
13. 4th + push-button: The 4th + push-button is momentary type switch that
14. 4th push-button:
The button allows the operator to stop all axial motion
during execution of an enabled part program. It is active in
memory AUTO, MDI (Block by Block), Dry Run and
Machine Lock modes. It is illuminated when active. It has
no effect on active spindle speed. At M.S.T. operation
continues up to the end of the block. Cycle Start light and
Spindle CW or CCW button light will turn "OFF" when
feedhold is activated. Normal operation maybe resumed
by pressing Cycle Start push-button.
the operator to jog the X axis in plus X direction. It is
enabled when mode is selected in JOG position. Press
the push-button to return to the reference point by mode
selector in "HOME" position.
the operator to jog the X axis in minus X direction. It is
enabled when mode is selected in JOG position.
the operator to jog the Y axis in plus Y direction. It is
enabled when mode is selected in JOG position. Press
the push-button to return to the reference point by mode
selector in "HOME" position.
the operator to jog the Y axis in minus Y direction. It is
enabled when mode is selected in JOG position.
the operator to jog the Z axis in plus Z direction. It is
enabled when mode is selected in JOG position. Press
the push-button to return to the reference point by mode
selector in "HOME" position.
the operator to jog the Z axis in minus Z direction. It is
enabled when mode is selected in JOG position.
allows the operator to jog the 4th axis in CW 4th axis
direction. It is enabled when mode is selected in JOG
position. Press the push-button to return to the reference
point by mode selector in "HOME" position.
The 4th - push-button is momentary type switch that allows the operator to jog the 4th axis in CCW direction. It is enabled when mode is selected in JOG position.
AWEA SP/LP Series Manual - Chapter 2. INSTRUCTION 2-21
2-21
Page 38
A
AWEA
15. Overtavel
Release
push-button:
16. Coolant On
push-button:
17. Coolant Auto
push-button:
18. 4th Axis Neglect
push-button:
(option)
19. Chip Conveyor
push-button:
20. Home Position
Return
push-button
21. Work Lamp
push-button:
22. Door open
push-button:
When the axes overtravel, set the mode selector in Handle position, press Overtravel button, in the mean time, release the axes by Manual Handwheel. (M.P.G.)
The push-button is an illuminating, latching type
push-button. The coolant motor ON is active, when the
button is illuminated. The Coolant pump is always ON
regardless of operating mode. When the button is pressed
a second time, the coolant pump is OFF regardless of
operating mode. The coolant pump can be controlled by
coolant ON push-button is pressed or released, M08,
M13, M14, M28, M33, M44, M51 must be programmed in
memory or tape to turn coolant pump ON and M05 or M09
to turn pump OFF.
The push-button is an illuminating, latching type
push-button. Press the button, coolant will be distributed
in accordance with M08, M13, M14, M28, M33, M44,
M51 command in Automatic operation. When coolant is
being distributed in Automatic operation, depressing this
button to OFF will stop coolant flow. Setting to Auto ON
will cause resumption of coolant flow.
This function is optional available. Its function are as below:
1) To cancel 4th axis function, release the
2) If 4th axis is effective, to clamp the 4th axis by
The chip conveyor “ON” is active when the push-button is illuminated. When the push-button pressed a second time, the chip conveyor is always “OFF” regardless of operating mode.
Press the push-button (push-button light will come on), Z axis will move to its home position automatically. After Z axis is at its home position, Y axis will follow the Z axis procedure, and then the X axis.
The push-button is an illuminating latch type push-button. Work Lamp lights by pressing the button. button lamp will lights up.
The push-button is an illuminating momentary type
push-button. Press this button while the machine is
stationary,
AWEA SP/LP Series Manual - Chapter 2. INSTRUCTION 2-22
UTO mode being selected. In this position, whether the
push-button before machine power "ON".
release the button, unclamp the 4th axis by depress
the button.
the operator door will be opened.
2-22
Page 39
A
AWEA
23. Buzzer OFF
push-button:
24. Single Block
push-button:
25. DNC push-button:
26. Block Skip
push-button:
27. Dry Run push
button:
28. Manual Air blow
push button:
29. Auto power OFF
push button:
30. Handle
Interruption push
button:
AWEA SP/LP Series Manual - Chapter 2. INSTRUCTION 2-23
When machine alert, buzzer will comes "ON" and the lamp lights up. To turn the buzzer "OFF" by pressing the button and the lamp will flash.
The Single Block push-button is an illuminating, latch type
switch push-button used to initiate AUTO, MDI, Dry Run
and Machine Lock modes. It is illuminated while the
push-button is being pressed. One block of the program is
executed, and then the execution is stopped. If the cycle
start button is pressed, the next block is executed and
then the execution is stopped again. The Single Block
push-button must be pressed a second time to be
de-activated.
The DNC button is an illuminating, latch type switch push-button used to active the DNC operating modes. The lights ON means DNC mode is active.
The Block-Skip push-button is an illuminating, latching
type that causes the control to ignore any block containing
a Slash code ( / ). The function is active when the
push-button is illuminated. When the push-button is not
illuminated, the data block is executed. If the slash code is
the first character in the block, all data to the EOB
character will be ignored when the push-button is active. If
the slash code is placed in the middle of a block, only data
from the slash code to the EOB character will be ignored;
while data proceeding the slash code will be executed. To
exit from Block Skip, press push-button a second time.
The push-button is active in Dry Run and Machine Lock.
The Dry Run button is an illuminating, latch type switch
push-button used to active the Dry Run operating modes.
ll axes movement will be travelling in JOG override
feedrate. The lights ON means Dry RUN mode is active.
The Manual Air Blow button is an illuminating, momentary type button used to active for manual air blowing to the working area. To cancel this function is by press the button once again. The lights ON means the function is active.
The button is an illuminating, latch type button which will be active when the program executing M02 or M30, the machine power will be turned OFF after a while. The light ON means this function is active.
The button is an illuminating, latch type button used to active the Handle Interruption function. The lights ON means the function is active.
2-23
Page 40
A
AWEA
31. Tool Number
Display
push-button:
32. Feed Hold
push-button:
33. Program Protect
switch
34. Key switch for
Manual mode
35. 4th axis
unclamping push
button: (OPTION)
36. Axes
synchronized
movement for the
uto head button:
(OPTION)
37. Angular Head
unclamping push
button: (OPTION)
The push-button is an illuminating, latching type push-button. When Tool No. Display mode is active (push-button illuminated), the CRT can display current tool number on the spindle or ATC arm.
The button allows the operator to stop all axial motion
during execution of an enabled part program. It is active in
memory AUTO, MDI (Block by Block), Dry Run and
Machine Lock modes. It is illuminated when active. It has
no effect on active spindle speed. At M.S.T. operation
continues up to the end of the block. Cycle Start light will
turn "OFF" when feedhold is activated. Normal operation
maybe resumed by pressing Cycle Start push-button.
The Program Protect key-switch should be turned to the
ON or EDIT position and key removed except when part
program editing is required. Part program can be deleted
from memory or modified in any way when switch is in the
OFF position. With this control, it can be operated by
following process:
1) The program registered in memory and modified.
2) Re-setting the coordinate system.
3) Keying machine parameter by manual.
4) Setting the PC parameter and timer parameter.
The key switch must in the “ON” position when the mode selector is in “Manual mode” position. Machine will be getting alarm while machine is in Auto mode position and the Key switch is turn “ON”.
The 4thaxis unclamp push button is an white color
illuminating latch type button which is provide to unclamp
the 4
clamping device is unclamped. The lights ON means 4
axis is unclamped.
The axes synchronized movement button is an while color illuminating latch type with protect cover button which is enable to move all axes by MPG synchronizing movement as commended. The light ON means this function is active.
The Angular head unclamp push button is an white color
illuminating latch type button which is provide to unclamp
the angular head. The angular head then can be indexing
only by MPG when the clamping device is unclamped.
The lights ON means 4th axis is unclamped.
AWEA SP/LP Series Manual - Chapter 2. INSTRUCTION 2-24
th
axis. The 4thaxis can be rotated only when the
th
2-24
Page 41
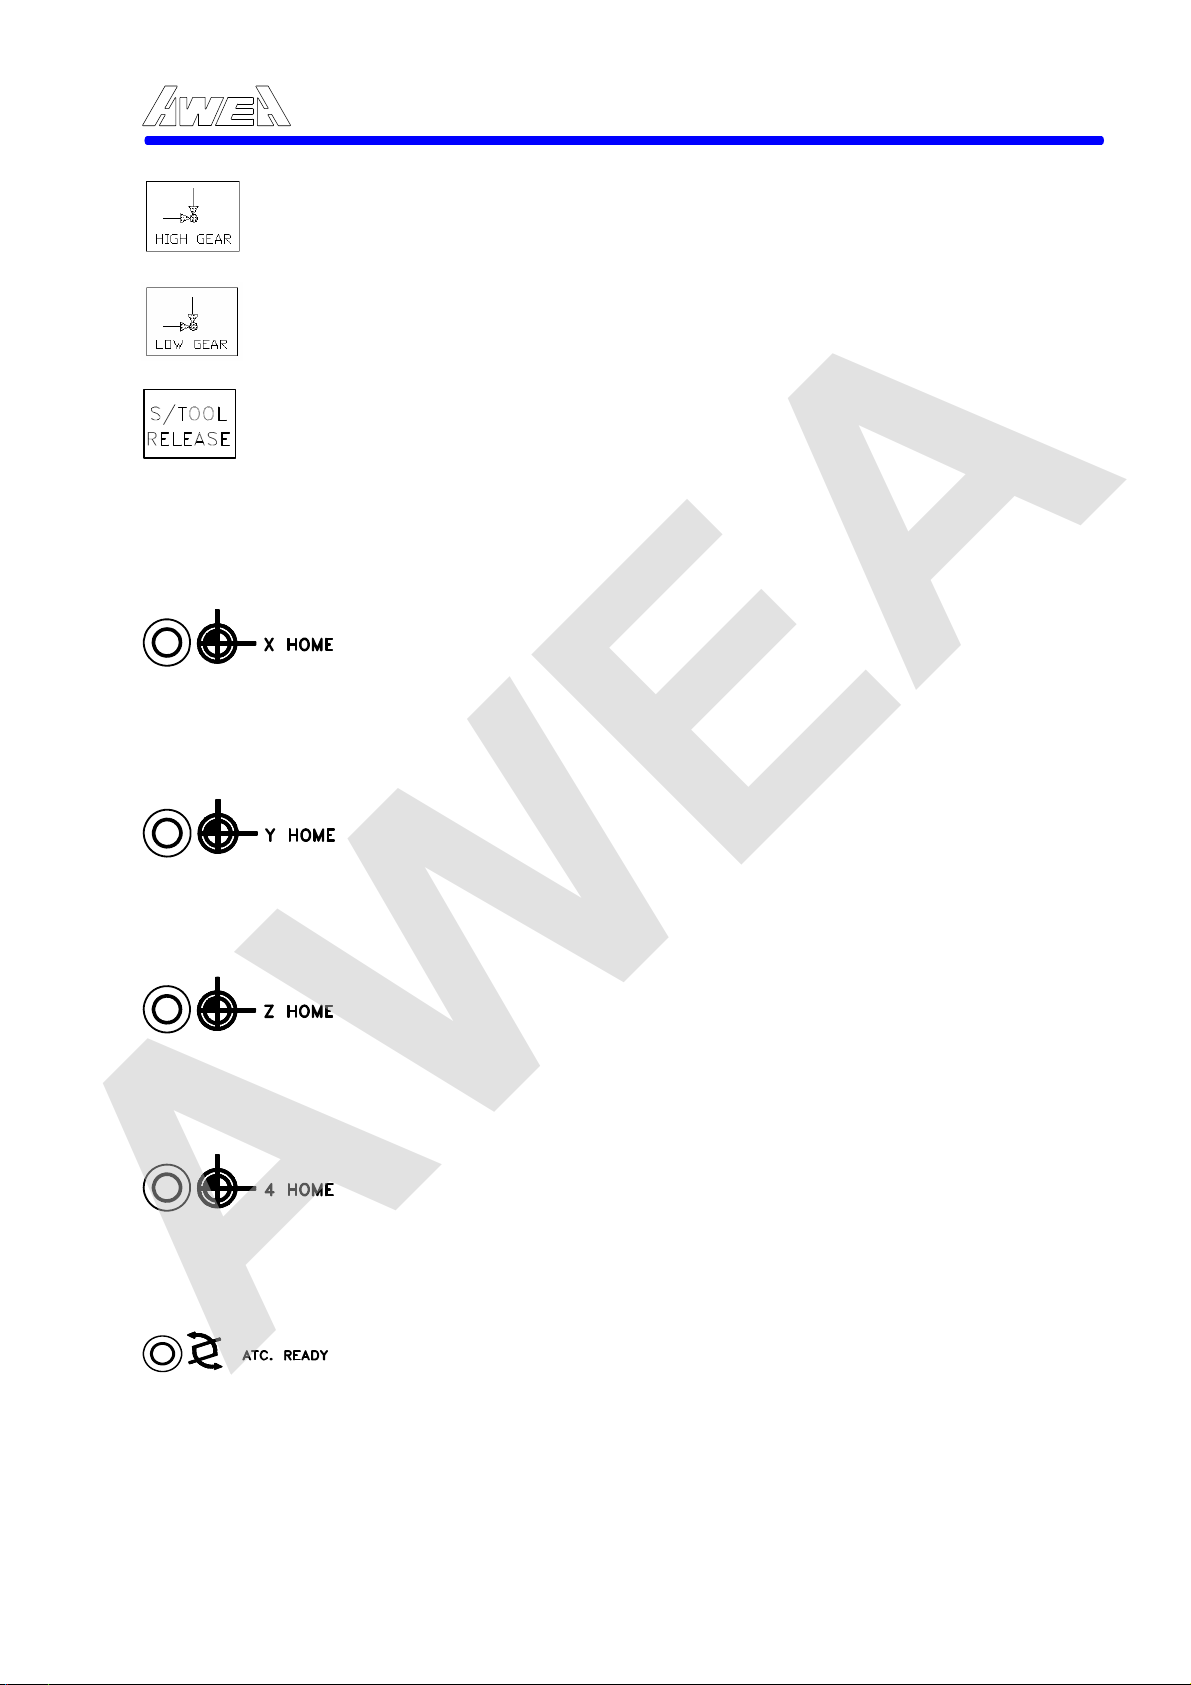
AWEA
C. Spindle status: (White Light)
Spindle high gear
1.
Lamp:
Spindle low gear
2.
Lamp:
Tool Release
3.
Foot switch:
D. L.E.D. Lamps:
X Axis Home position L.E.D.
1.
The X axis Home position light will flash whenever the X axis is moving to the reference points and will be lights up when the X axis is at the HOME position.
When the lights ON, means the spindle gear at the high gear shift.
When the lights ON, means the spindle gear at the low gear shift.
Tool release from spindle effective by mode selected in
Handle position and press Spindle stop button. If you take
out the tool from the spindle by using of this button, when
there is no tool No. on the spindle, machine will alert you
and this function will be ineffective.
AWEA SP/LP Series Manual - Chapter 2. INSTRUCTION 2-25
Y Axis Home position L.E.D.
2.
The Y axis Home position light will flash whenever the Y axis is moving to the reference points and will be lights up when the Y axis is at the HOME position.
Z Axis Home position L.E.D.
3.
The Z axis Home position light will flash whenever the Z axis is
moving to the reference points and will be light
axis is at the HOME position.
4th Axis Home position L.E.D. (option)
4.
The 4th axis Home position light will flash whenever the 4th axis is moving to the reference points and will be lights up when the 4th axis is at the HOME position.
ATC ready L.E.D.
5.
s up when the Z
The ATC Ready L.E.D. will light when ATC is ready for To
Change.
2-25
ol
Page 42
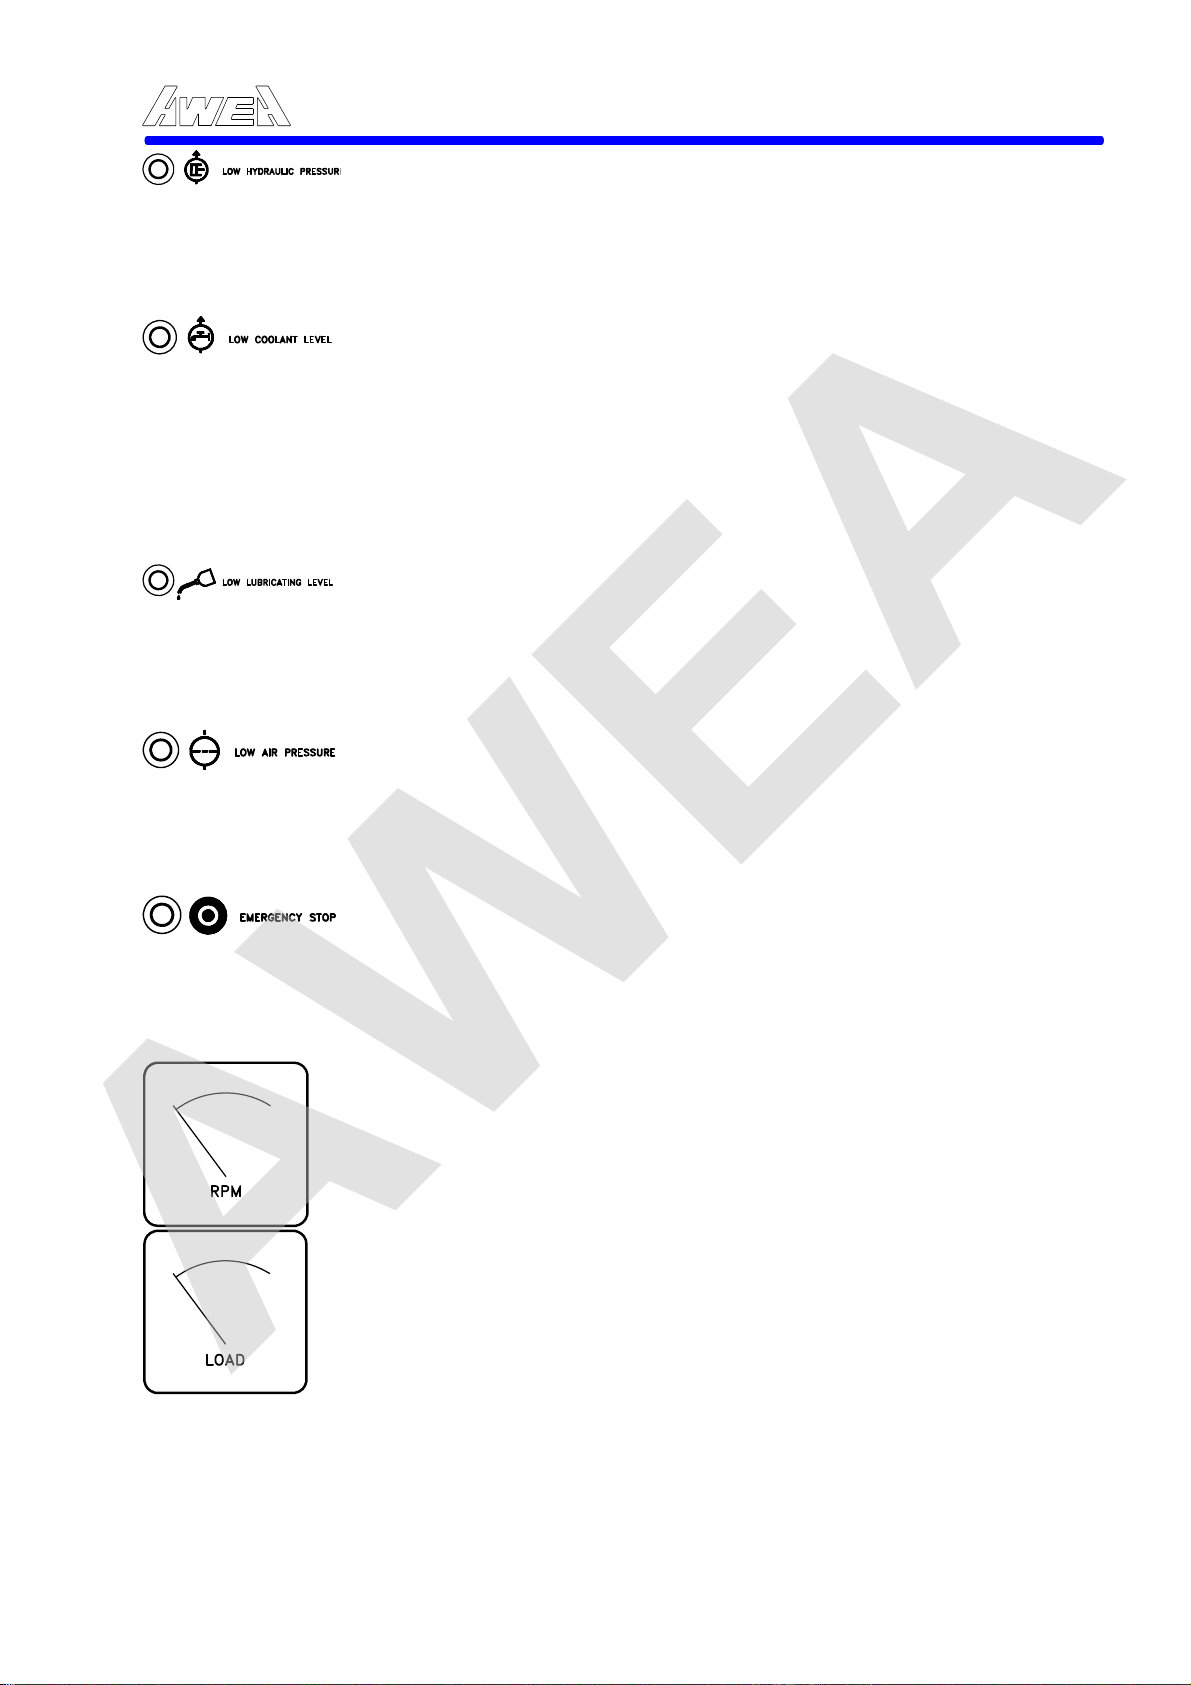
AWEA
6.
Low Hydraulic Pressure Light
E. Meters:
The Low Hydraulic Pressure Light will turn ON whenever the hydraulic system pressure at the pump drops below 600 psi, an Emergency Stop will be forced, and the message "Low Hydraulic Pressure" will be displayed on the CRT screen.
7.
Low Coolant Level Light
The Low Coolant Level Light indicates a coolant low condition as
detected by a level sensor in the coolant reservoir. How the
control treats the coolant low condition depends on the setting of
coolant selector switch. If coolant low condition is present and
coolant selector is set at OFF, low coolant level light will be ON
but will not flash. If coolant low condition is present and coolant
switch is set at ON or AUTO, low coolant level light will flash.
8.
Low Lubricating Level Light
The Low Lubricating Level Light will turn ON whenever the level
of lubricant in reservoir falls below minimum operating level. The
message "Low Lub. Level" will be displayed on the CRT screen.
An Emergency Stop will be forced if machine is in AUTO mode.
9.
Low Air Pressure Light
The Low Air Pressure Light will turn ON whenever incoming air
supply to the machine drops below 5 bar ( 5 kg ), an Emergency
Stop will be forced, and the message "Low Air Pressure" will be
displayed on the CRT screen.
10.
Emergency Stop
If you press the Emergency Stop button on the machine, this
light will light up.
Spindle
1.
Speed Meter:
AWEA SP/LP Series Manual - Chapter 2. INSTRUCTION 2-26
This meter indicates the currently active spindle speed in unit of RPM.
Load Meter:
2.
The spindle load meter displays the percent of full
load current available at the operation speed. The
150% level is peak current operation in the
100-150% range must be limited to the
in the vicinity of 150% has a maximum ON time of
30 min. During any work period motor RMS value
must be less than 100%.
2-26
duty cycle
Page 43
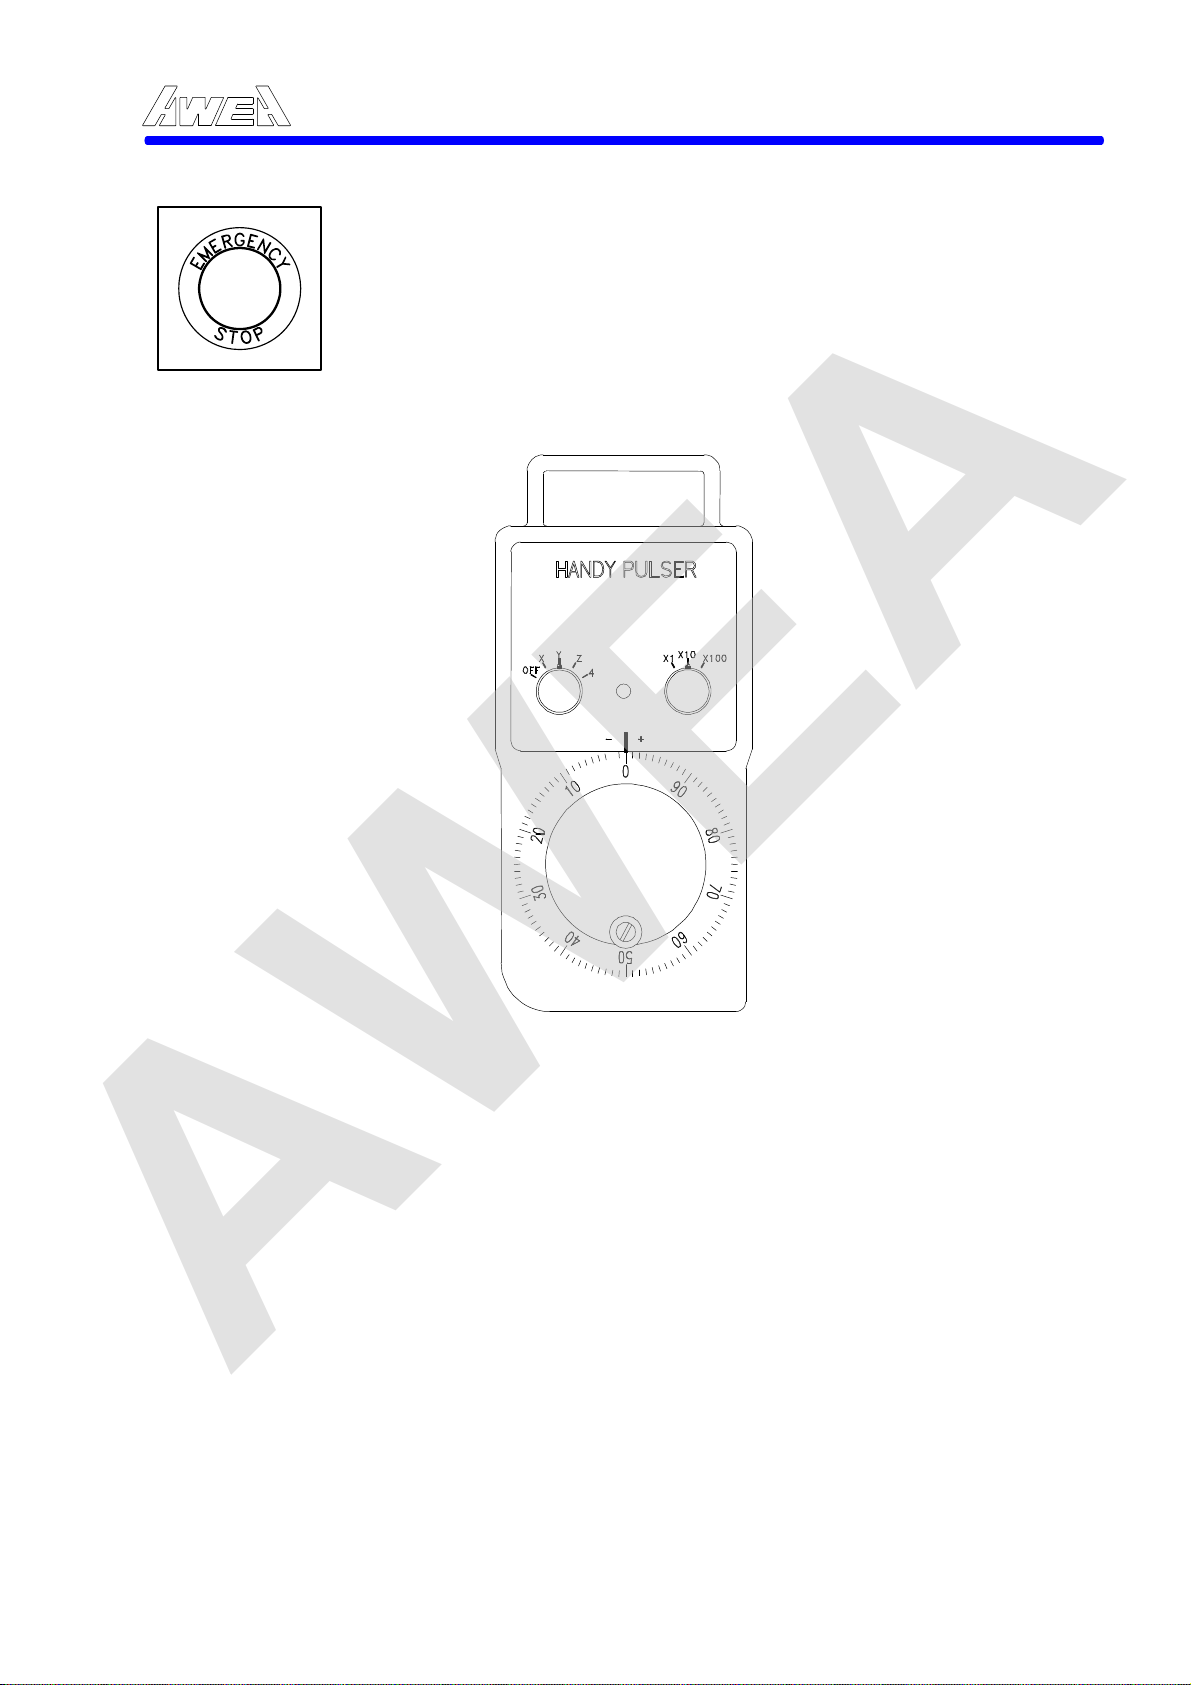
AWEA
F. Emergency Stop Buttons:
Emergency
Stop
push-button:
G. Manual Pulse Generator (M.P.G.) Control Panel:
AWEA SP/LP Series Manual - Chapter 2. INSTRUCTION 2-27
If you press the Emergency Stop button on the
machine operator's panel, the machine movement
stops in a movement, mechanical reference point
will disappear. Spindle stops rotating
automatically. The button is locked when pressed.
The button can be unlocked by twisting it.
1. Axial position selector:
2. Handle Multiplication
Switch:
3. Manual Pulse
Generator :
Figure 2-7 M.P.G. control panel
Selecting which axis you want to move. (X,Y,Z,4th)
X1: When switch is placed at
the M.P.G
X10: When switch is placed at X1 position each
graduation the M.P.G
X100:When switch is placed at X1 position each
graduation the M.P.G
The feedrate can be adjusted precisely by using the Manual
Pulse Generator. The incremental Jog handwheel allows the
operator to jog a slide in increments when Mode Select
Switch is in Handle position. The value of each handwheel
increment depends on the setting of Handle Multiplication
switch and the axis to be jogged depends on the setting of
Axial Position Selector.
. represents 0.001 mm.
X1 position each graduation
. represents 0.010 mm.
. represents 0.100 mm.
2-27
Page 44
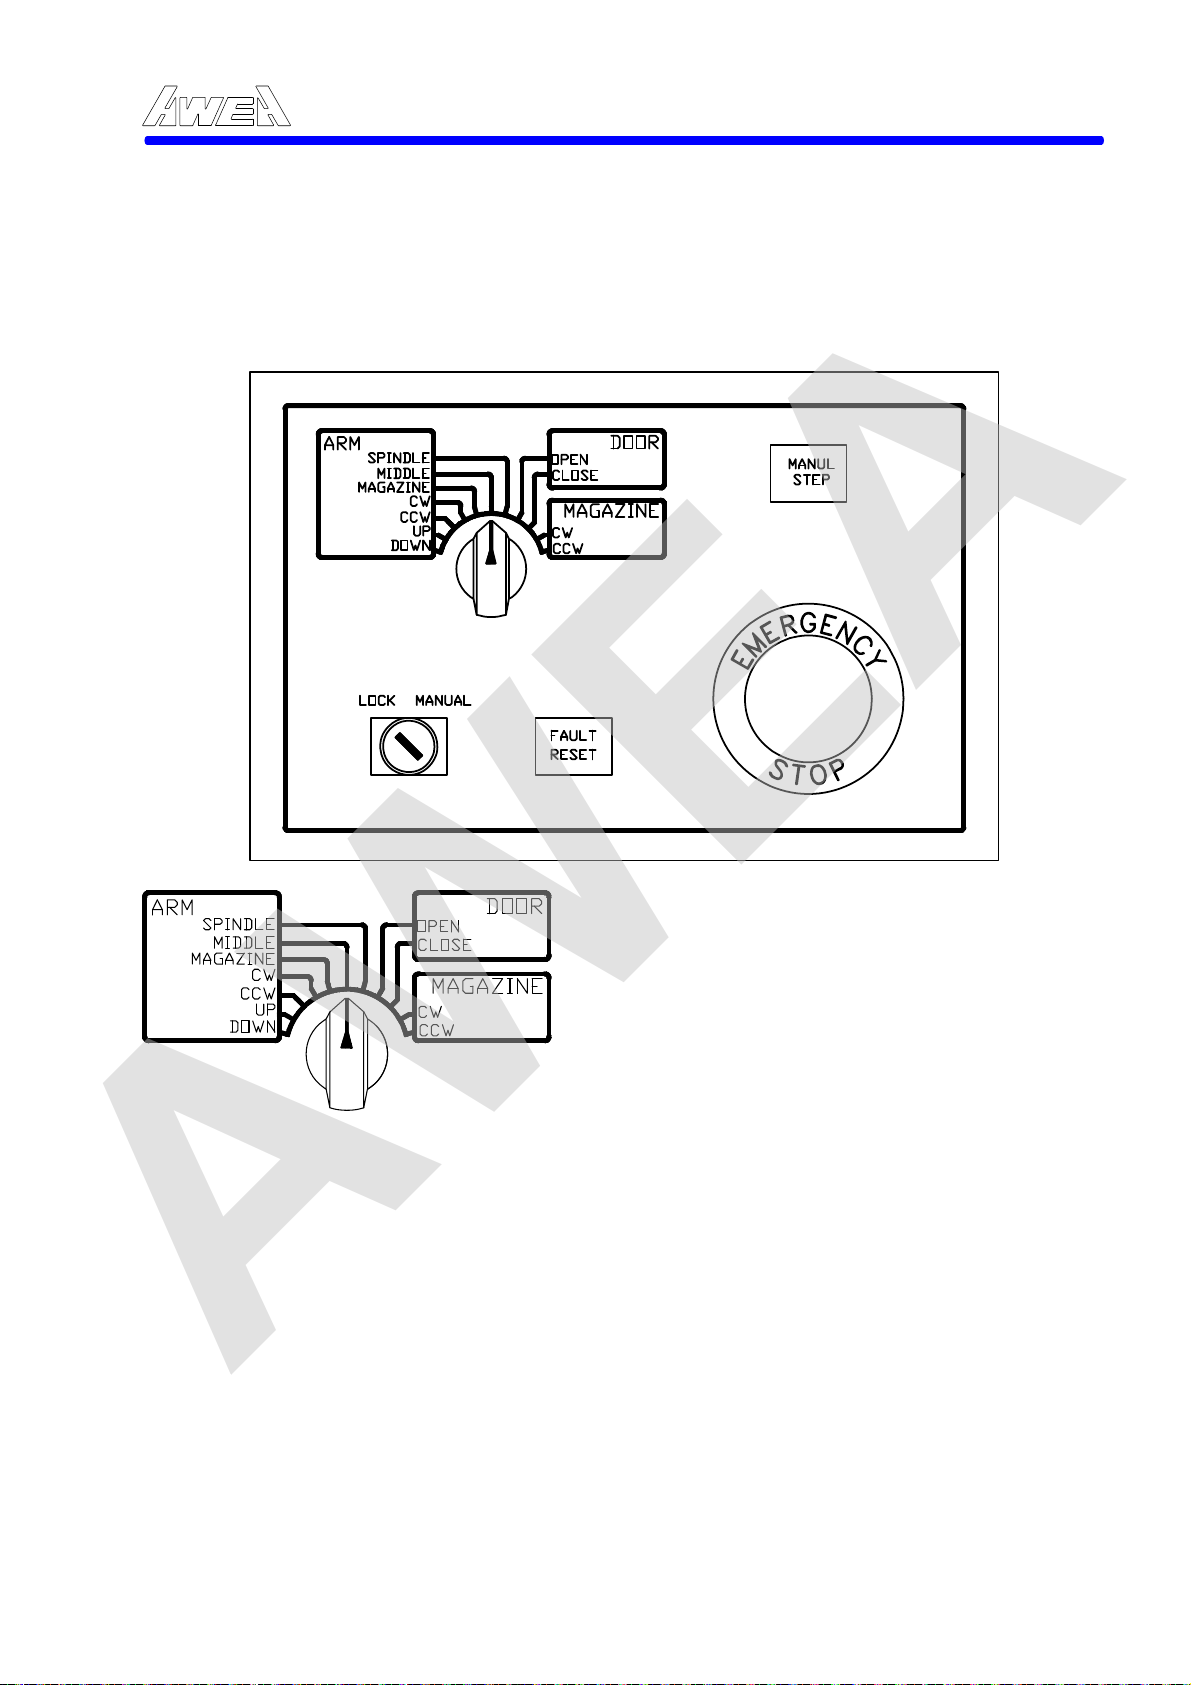
A
A
AWEA
H. Magazine's control panel
This control panel (Figure 2-8) is located on the Tool magazine side and only
available on the mode selector of the machine control panel which is selected in
handle position and the key-switch of the magazine control panel is in manual
position. This design concept is prepared for customer service in trouble shooting
and tool loading and unloading. The description of Magazine control panel will be
as below:
AWEA SP/LP Series Manual - Chapter 2. INSTRUCTION 2-28
※ ARM section: When Mode selector is in this section, its function will be effective
a. Spindle:
b. Middle:
as following procedures.
1. MODE selector:
There are eleven modes available on this selector which are also divided in three sections. These three sections are ARM, DOOR and MAGAZINE. Its descriptions are as below:
TC arm can be moved toward the spindle. The function is active when the
Mode selector is in Handle, Rapid or Jog position of the machine control
panel and key-switch is in manual position. Once the magazine door is
opened, ATC arm will be moved toward the spindle by pushing Manual step
push-button.
TC arm must be stand by in the middle position when machine is ready for
the operation. In case of any trouble shooting that the ATC arm is out of this
position, operator must return the ATC arm to the middle position.
2-28
Page 45

c. Magazine:
A
A
A
A
A
A
AWEA
d. CW:
e. CCW:
f. Up:
g. Down:
※ DOOR section: When Mode selector is in this section, its function will be
a. Open:
b. Down:
a. CW:
b. CCW:
effective as following procedures.
※ MAGAZINE section: When Mode selector is in this section, its function will be
effective as following procedures.
TC arm can be moved toward the magazine when ATC arm is in down
position. The function is active when the Mode selector is in Handle, Rapid
or Jog position of the machine control panel, key-switch is in manual position,
TC arm is in down position and magazine door is opened. Some status can
not be used, due to the safety regulation forced.
TC arm can be rotated CW in its middle position. The function is active
when the Mode selector is in Handle, Rapid or Jog position of the machine
control panel, key-switch is in manual position, ATC arm is in down position
and magazine door is opened.
TC arm can be rotated CCW in its middle position. The function is active
when the Mode selector is in Handle, Rapid or Jog positions of the machine
control panel, key-switch is in manual position, ATC arm is in down position
and magazine door is opened.
TC arm must be stand by in the UP and Middle positions when machine is
ready for the operation. In case of any trouble shooting that the ATC arm is
out of this position, operator must return the ATC arm to the up position.
ATC arm can be moved down in Middle position. The function is active when
the Mode selector is in Handle, Rapid or Jog position of the machine control
panel, magazine door is opened and key-switch is in manual position.
Magazine door can be opened during machine in Manual mode. The function is active when the Mode selector is in Handle, Rapid or Jog position of the machine control panel and key-switch is in manual position.
TC arm can be moved down in Middle position. The function is active when
the Mode selector is in Handle, Rapid or Jog position of the machine control
panel, magazine door is opened and key-switch is in manual position.
The magazine can be indexed for tool loading and unloading by manual
mode at any time. The function is active when the key-switch is in manual
position whatever machine is in Auto mode or Manual mode. The magazine
can be indexed in CW direction by pressing the Manual step push-button.
The magazine can be indexed for tool loading and unloading by manual
mode at any time. The function is active when the key-switch is in manual
position whatever machine is in Auto mode or Manual mode. The magazine
can be indexed in CCW direction by pressing the Manual step push-button.
AWEA SP/LP Series Manual - Chapter 2. INSTRUCTION 2-29
2-29
Page 46
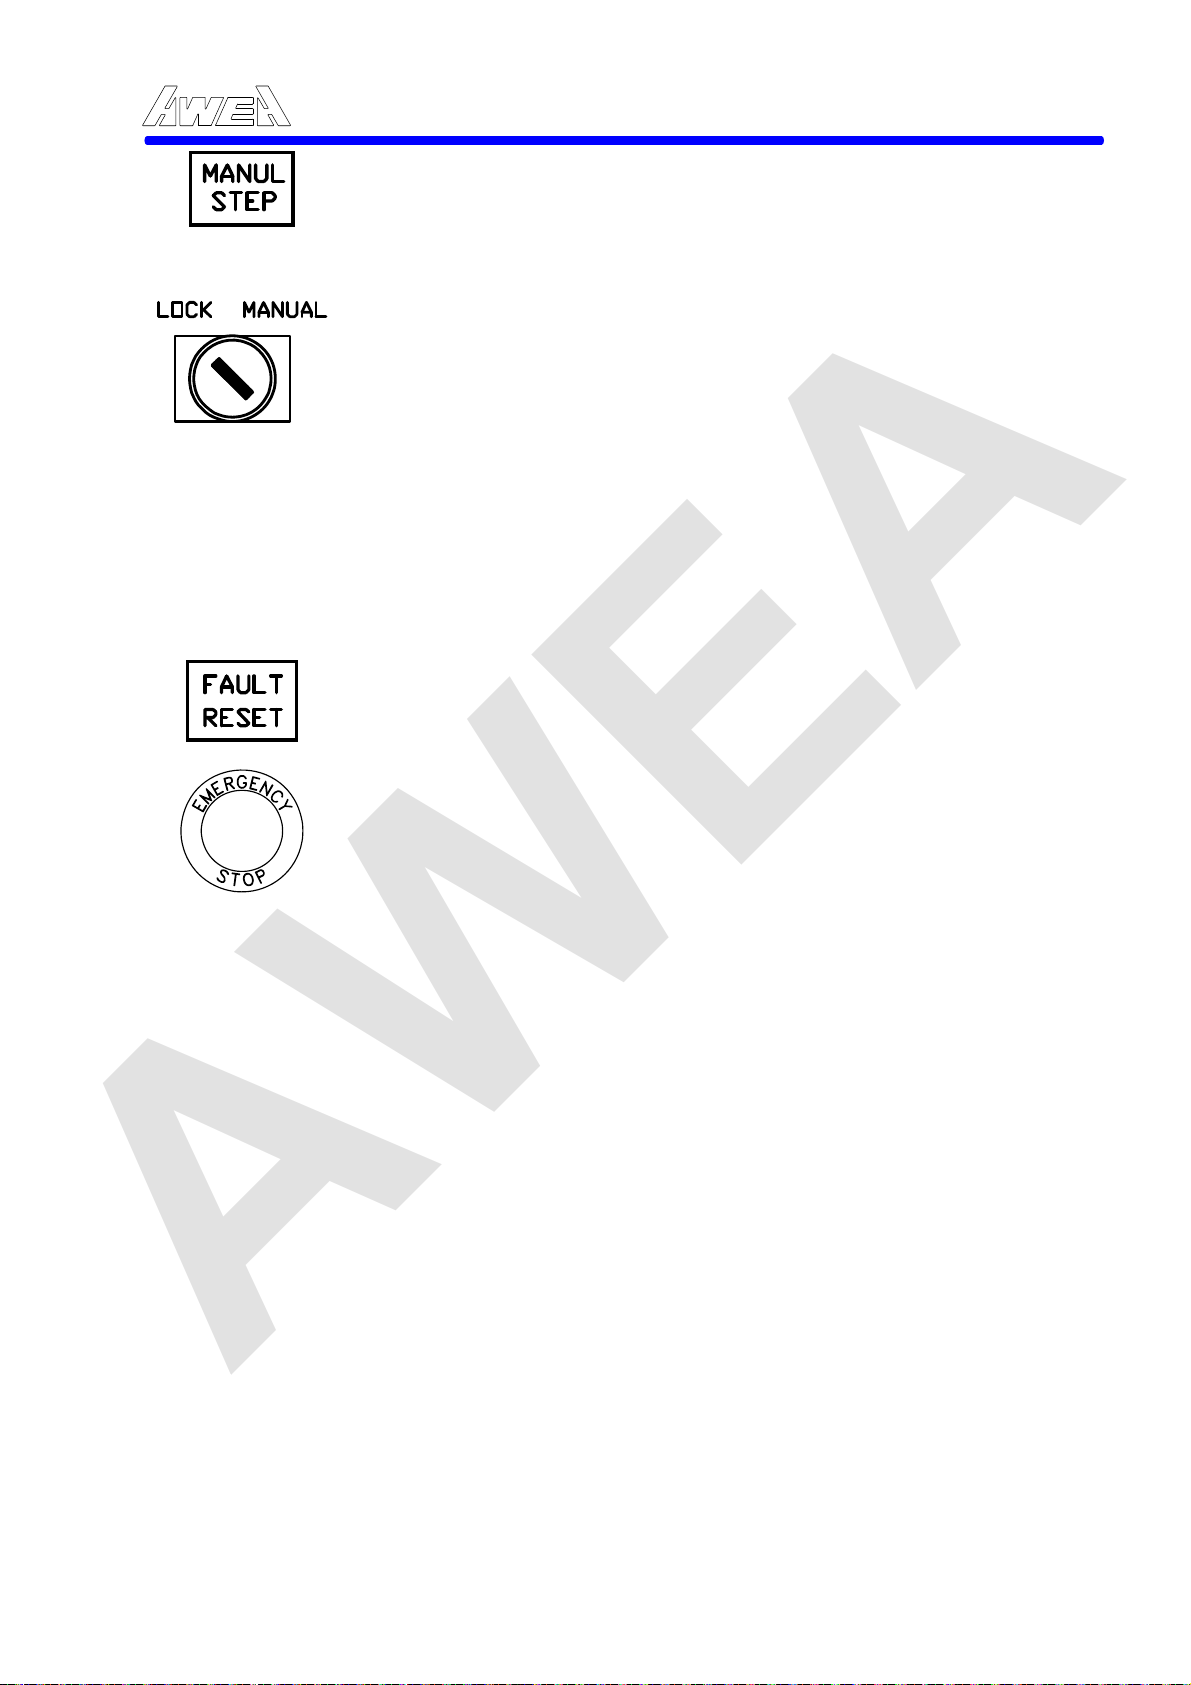
AWEA
2. Manual step button: The manual step push-button is momentary type switch that allows the operator to jog the tool magazine in motion when the magazine selector is in certain position.
3. Key-switch: The tool magazine protect key-switch should be turned to the Lock position when machine is ready for operation or in Auto mode and key removed except when jog the tool magazine is required. If machine mode is selecting in Auto or Edit mode when switch is in the Manual position, machine will be alert. With this control, it can be operated for the following purposes:
1) Additional tool is loading or unloading without interrupt
machine operation in Auto mode.
2) Jog the ATC or magazine single motion for trouble shooting
in Manual mode. (Machine mode must be selected in Handle,
Jog or Rapid mode position.)
4. Fault reset: Pressing this button can reset machine alarm.
5. Emergency Stop: If you press the Emergency Stop button on the machine operator's panel, the machine movement stops in a movement, mechanical reference point will disappear. Spindle stops rotating automatically. The button is locked when pressed. The button can be unlocked by twisting it.
AWEA SP/LP Series Manual - Chapter 2. INSTRUCTION 2-30
2-30
Page 47
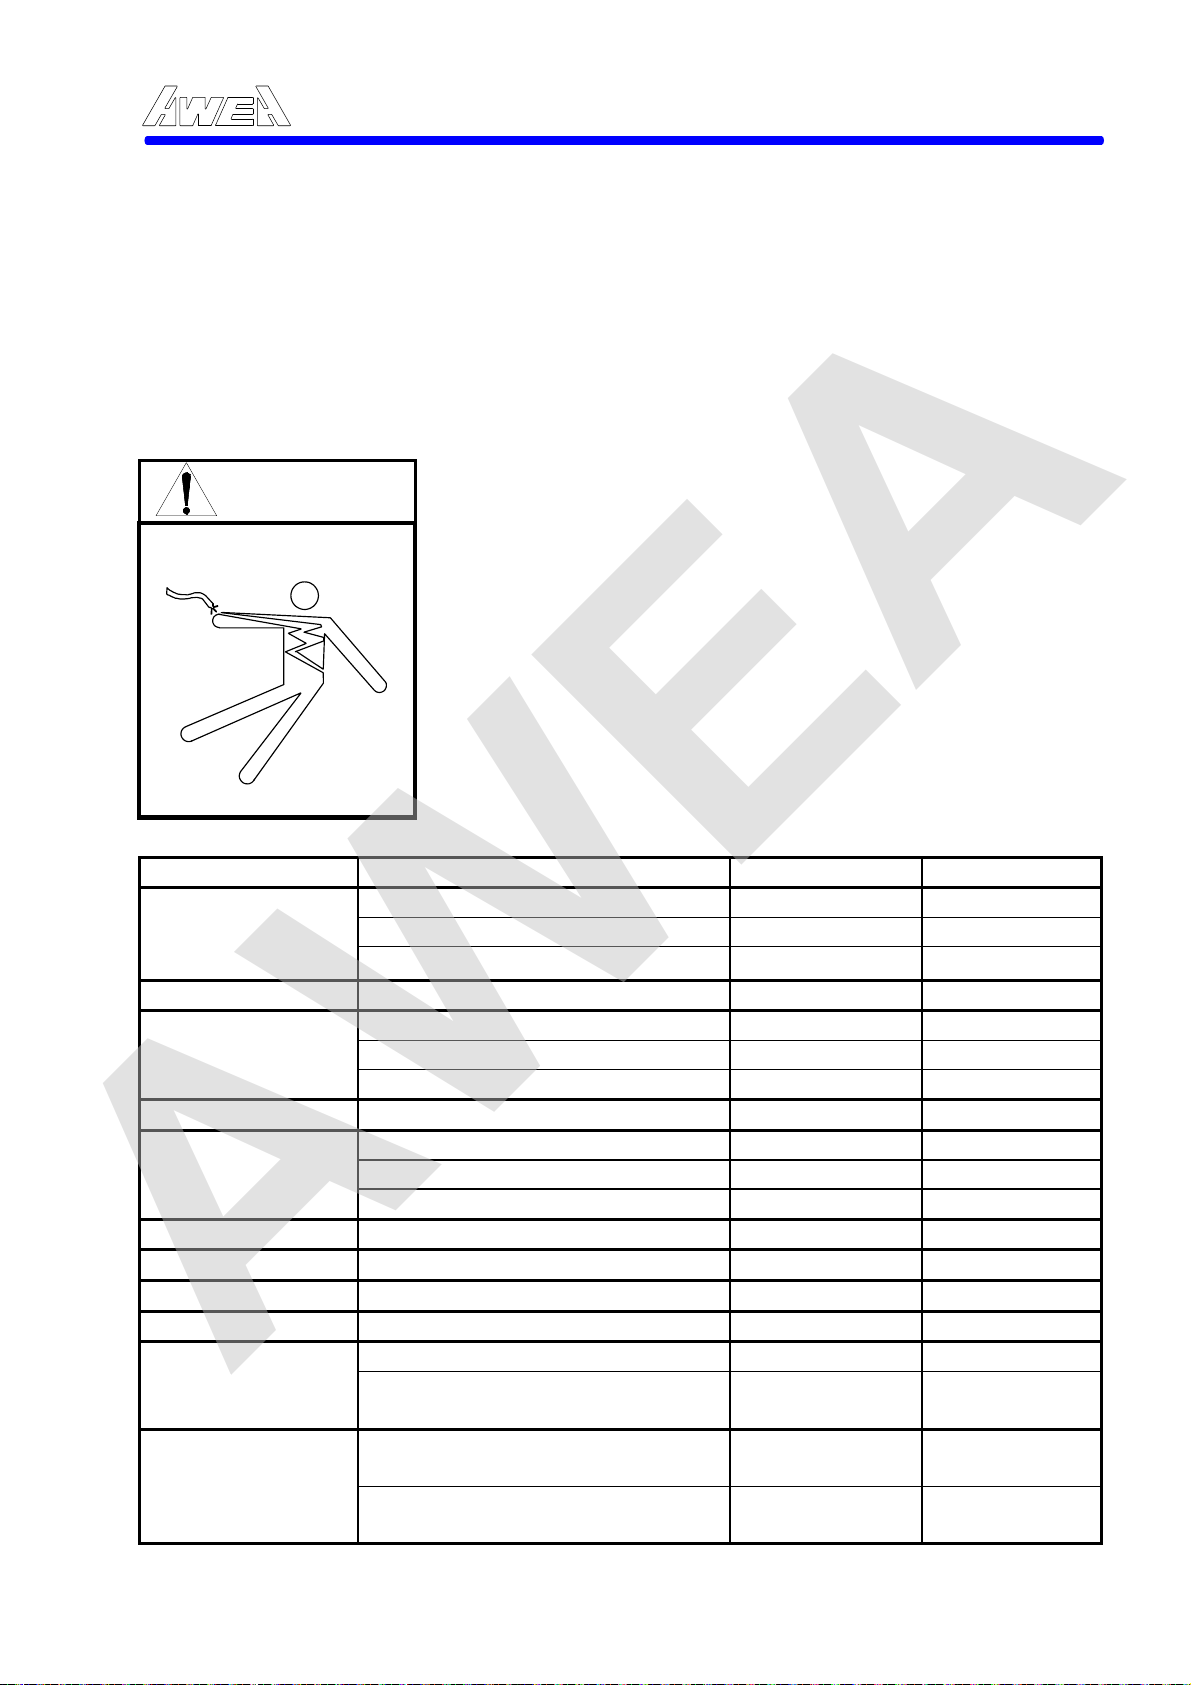
AWEA
AWEA SP/LP Series Manual - Chapter 3. POWER UP AND POWER DOWN 3-1
3. POWER UP AND POWER DOWN
3.1 Inspection before Operation
Checking List to be followed before operation of the machine is as follows:
3.1.1 Checking before Power Up
‧Air filter unit
2. Any lub. oil in reservoir ? Check visually
3.
‧Hyd. Oil Tank
‧
2. Oil sufficient? Check visually
3. Any leakage? Check visually
‧Chip conveyor
‧Coolant Tank
2. Coolant sufficient? Check visually
3. Any leakage? Check visually
‧Slide cover
‧Magazine door
‧Table
‧Spindle
‧Electric cabinet
2. No damage or disconnection
‧General
2. No looseness of bolts on
DANGER
Check point Check item Method Remark
Spindle Oil Cooler
The electric box, motor, transformer and relay
boxes with a high-voltage mark have terminals of
lethal voltage. Only electrical experts with official
qualification are authorized to open their covers
and doors. Cable and wire with damaged film can
cause electric leakage or shock. Double-check
that there is no damage on cable and wire. Failure
to follow this warning will result in serious
personal injury or death from electric shock.
1. Drain the water in reservoir? Check visually
Air pressure 5-7 kg/c㎡ ?
1. Hydraulic oil sufficient? Check visually
1. Temperature setting value? Check visually
1. Chips removed? Check visually
1. Chips removed? Check visually
1. Any chips accumulated? Check visually
1. Any chips accumulated? Check visually
1. Any chips accumulated? Check visually
1. Spindle taper clean? Check visually
1. Door closed? Check visually
on external wiring or cable?
1. Machine environment well
sorted out?
cover, etc.?
3-1
Check visually
Check visually
Check visually
Check visually
Page 48
3.1.2 Power Up
AWEA
DANGER
CAUTION
Power-up procedure is a systematic method of safely turning on the control and
readying the machine for operation. The following is a comprehensive description
of the 3 axial procedure:
A. Turn MAIN SWITCH and AIR SWITCH "ON".
B. Press POWER ON push-button.
When buzzer has beeped, that indicates that the control is in an EMERGENCY STOP condition. Turn EMERGENCY STOP push-button in clockwise direction to make certain it is released; beep will be disappeared. Machine is ready for operation.
C. To Zero axes:
(1) Set Mode Selector at HOME position.
Set Rapid Override Switch at 50%.
Press Home position return push-button (push-button light will come on). The Z axis
will move to the Home position (pos
lights up, the Z axis is at the reference zero position. The Y axis will follow up the Z axis
procedure, and move to the Home position automatically until all axes Home position
L.E.D.'s light up indication that all the axes are at their reference zero position.
(c) procedure can be operated by the manual push-button of each axes.
Press and release X+ push-button, X axis will move to the positive side of Home
position.
After X+ push-button light is out and X Home position L.E.D. lights up indicating that
the X axis is at it
the slides arrive at their reference zero position, Y+ and Z+ push-button lights will be
out and Home position L.E.D. Y and Z will light up.
Turn Rapid Override Switch to 100% and try (e) procedure again, to be sure this
function is O.K.
AWEA SP/LP Series Manual - Chapter 3. POWER UP AND POWER DOWN 3-2
‧DO NOT touch any switches or buttons when hand are wet.
‧CHECK the machine environment is clean so that
convenient for operation.
‧CHECK hydraulic oil, coolant and pneumatic pressure
are sufficient to work.
‧WARM UP the machine for approx. 15 minutes after
turning the power ON
‧WHEN setting the spindle speed above 3000 rpm, pay the
closest attention.
s reference zero position, press the Y+ and Z+ push-buttons. When
itive direction). After Z axis Home position L.E.D.
3.1.3 Checking After Power Up
Check Point Check item Method Remark
‧Motor
‧Air unit
2. Hose leakage? Check visually
‧Coolant unit
‧Hydraulic unit
‧CRT screen
‧Operation panel
1. No abnormal sound or heat?
1. Air pressure (5-7kg/c㎡)?
1. Pump running perfect? Check visually
1. System pressure (40 kg/c㎡)?
1. No alarm displayed? Check visually
1. Warning lamp lights? Check visually
3-2
Check visually Check visually
Check visually
Page 49
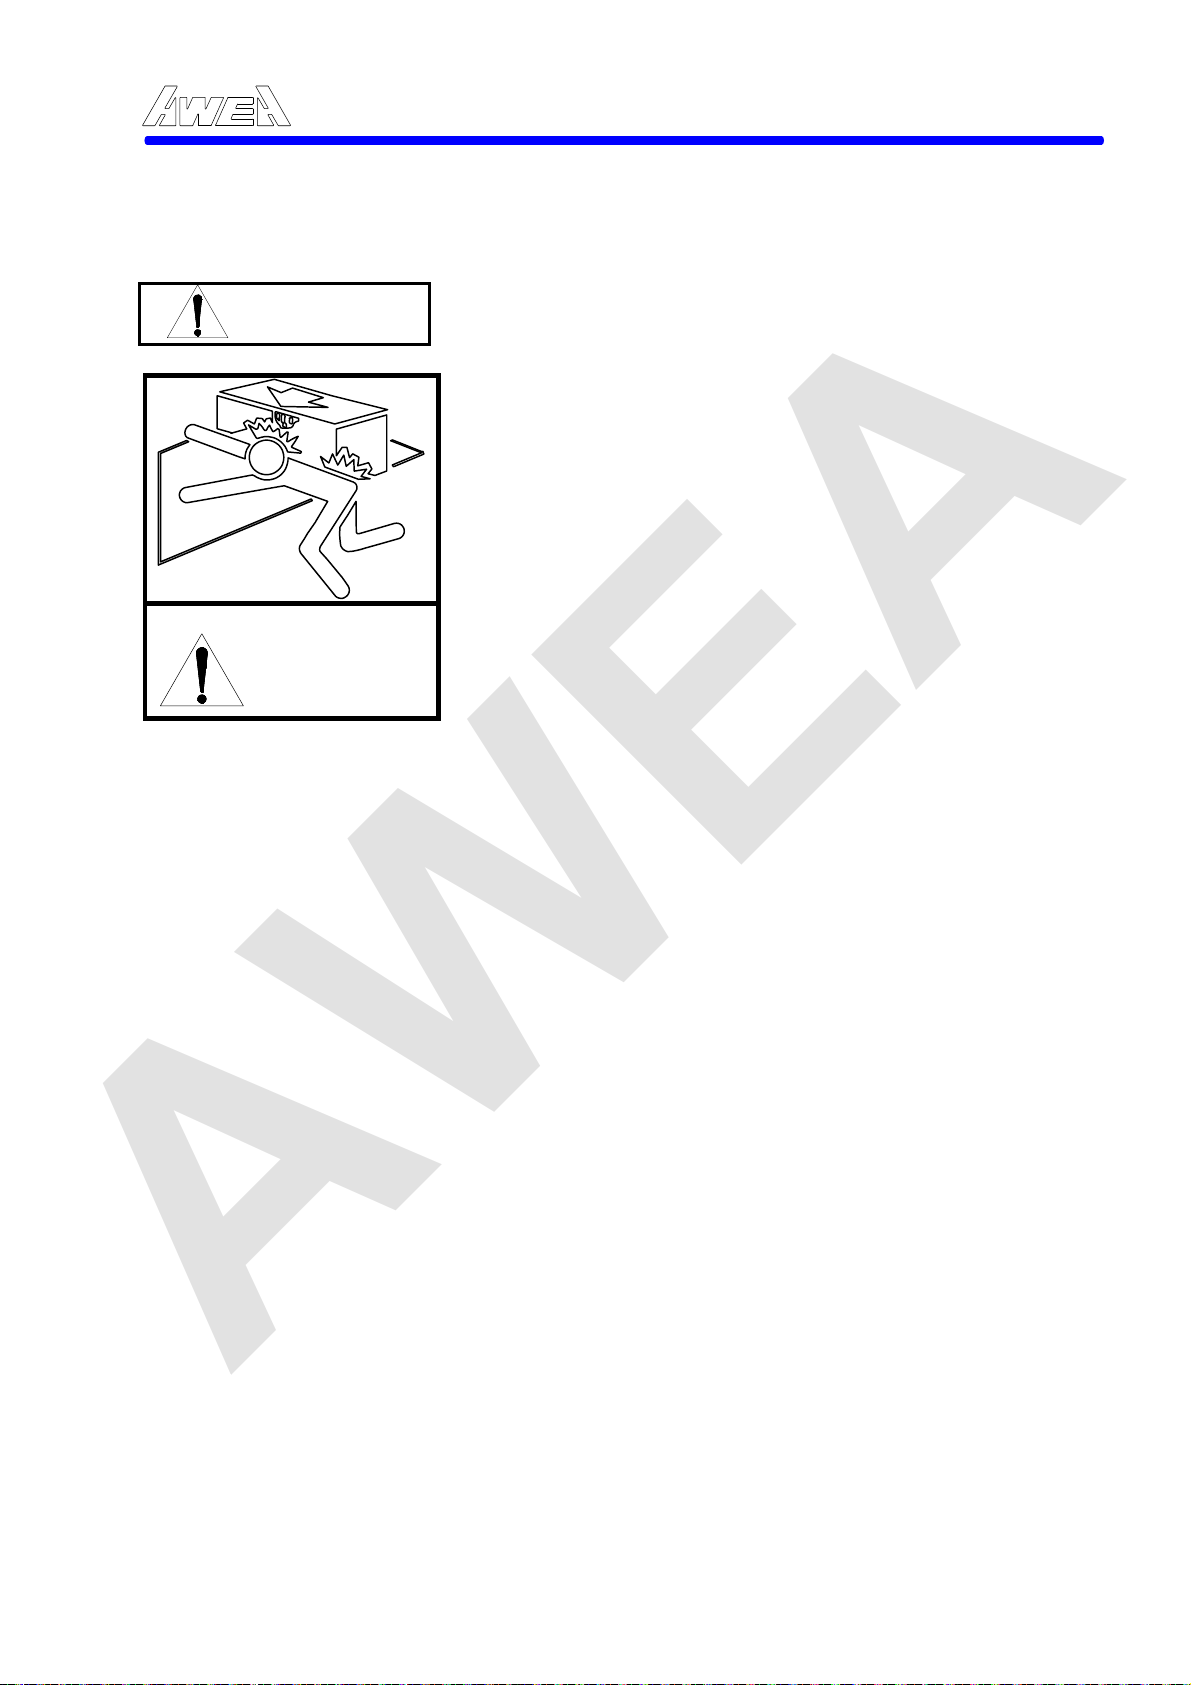
AWEA
3.2 Power Down
AWEA SP/LP Series Manual - Chapter 3. POWER UP AND POWER DOWN 3-3
CAUTION
CAUTION
To prevent damage to control, machine tool or drives during shut down, follow the
Power-Down procedure listed below:
A. Establish a condition that ensures that the machine tool will not be damaged
when control is shutdown. Ideally, establish an end-of-program condition with
all axes at Home position. If this can not be accomplished, a cycle stop is
adequate, but try to position the axes clear of the workpieces.
B. Press Emergency Stop push-button. If rotating, spindle will dynamically brake
to a stop. Any axis motion will also cease. Power is removed from axes drive
motors and spindle driving motor, thus disabling axes and spindle.
C. Press Power OFF push-button.
D. Turn disconnect switch OFF and turn Air switch OFF.
Note: The machine is placed in E-Stop before the control is turned OFF is to
remove power in two distinct steps; first from the drive motor, then from the drives.
Removing all power at once can damage the machine.
All personnel must know the location of Emergency Stop buttons and how to use them in case of Emergency.
‧ALWAYS lock the Main Switch by locker to protect
unauthorized personnel.
‧DO NOT leave keys on the switches or lockers after
machine is turn off.
3-3
Page 50
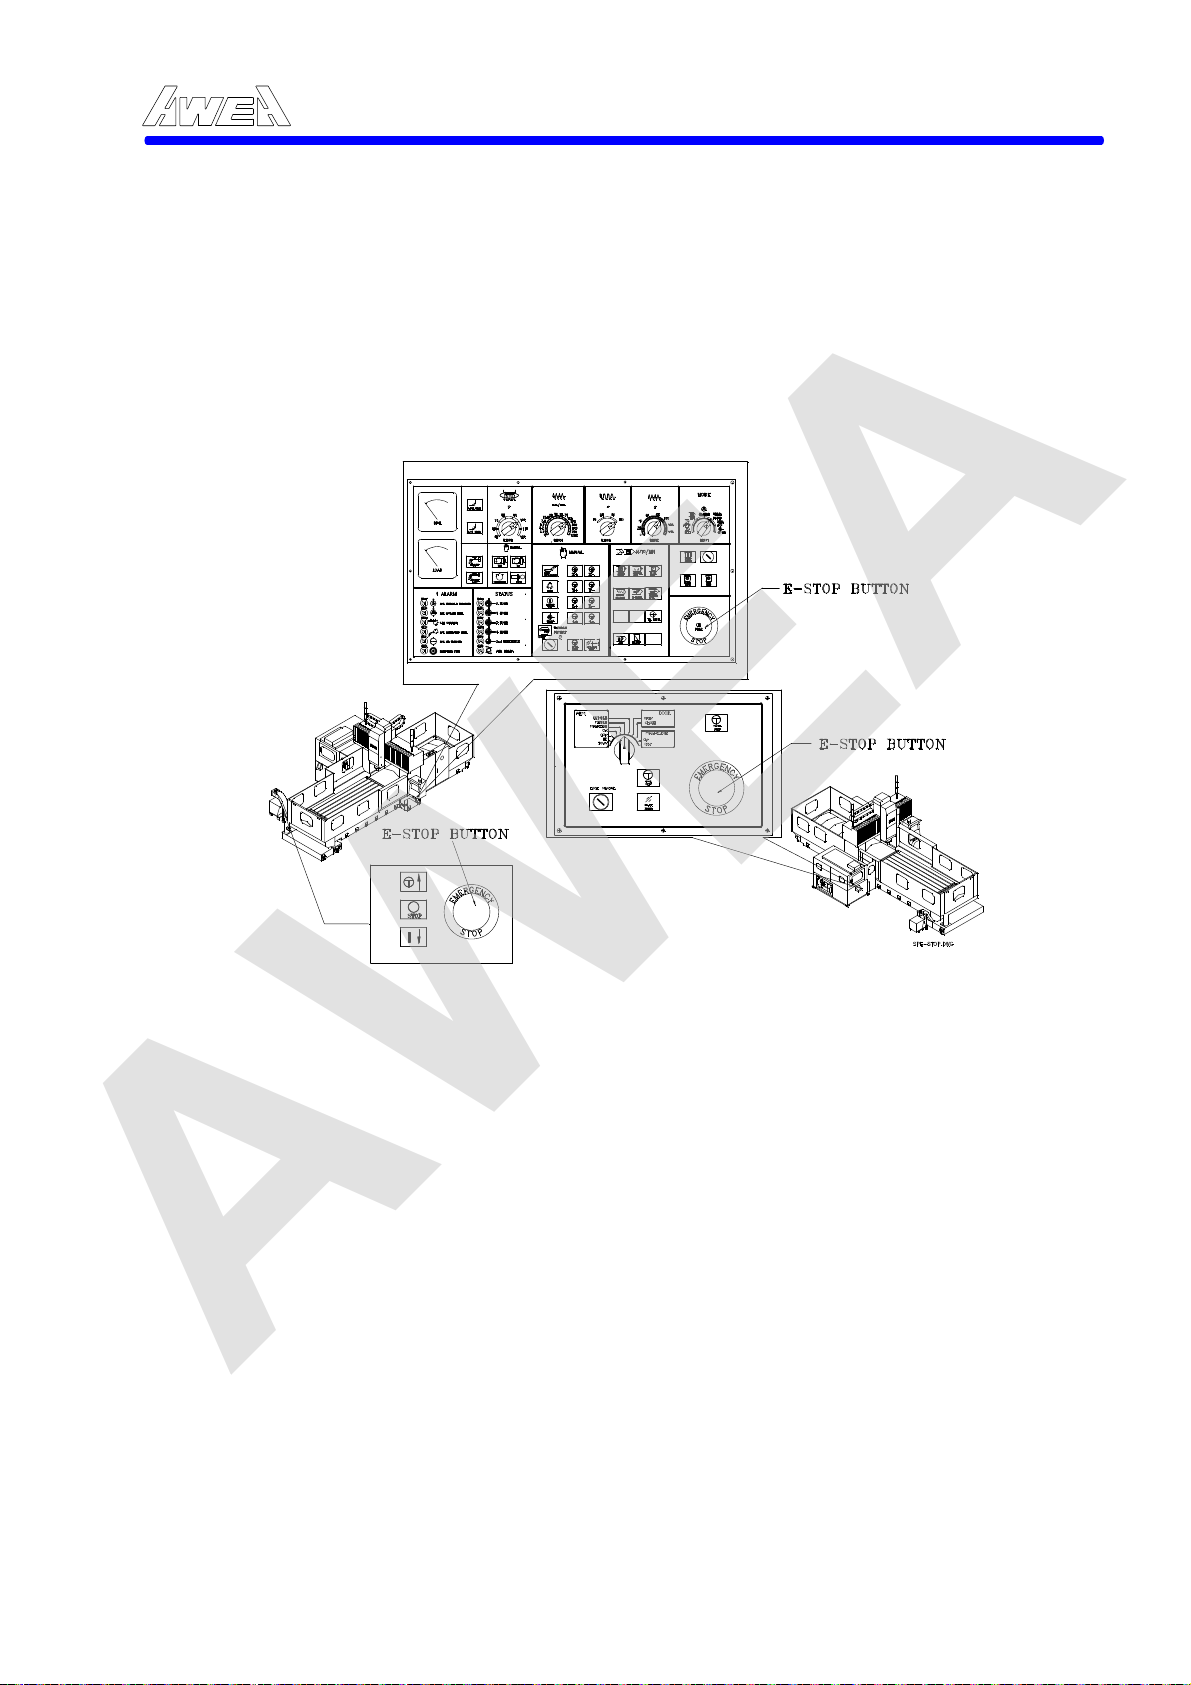
AWEA
3.2.1 Emergency Stop
In case of any emergency cases, press the button, which is nearest button as soon
as possible. Machine will be stopped immediately. CRT screen will display the
alarm message " Not ready ". After the emergency situation has solved, turn the
switch clockwise to release the push-button.
Locations of Emergency Stop push-button:
AWEA SP/LP Series Manual - Chapter 3. POWER UP AND POWER DOWN 3-4
3.2.2 Other Stops
There are several methods to stop machine during machine in AUTO or MDI operation. The descriptions are as below:
A. Program Stop ( M00 )
Stop program, stops spindle, turns coolant OFF, "Tool release" push-button is activated.
"Feedhold" light flashes intermittently.
Cycle operation is stopped after a block containing M00 is executed. When the
program is stopped, all existing modal inform
block operation. Specifying CNC start can restart the cycle operation.
It is the programmer's responsibility to program an M03, M04, M13, or M14 to restart
spindle and
Figure 3-1 Location of E-Stop button
turn coolant on when rest
arting the program after an M00 program stop.
3-4
ation remains unchanged as in single
Page 51
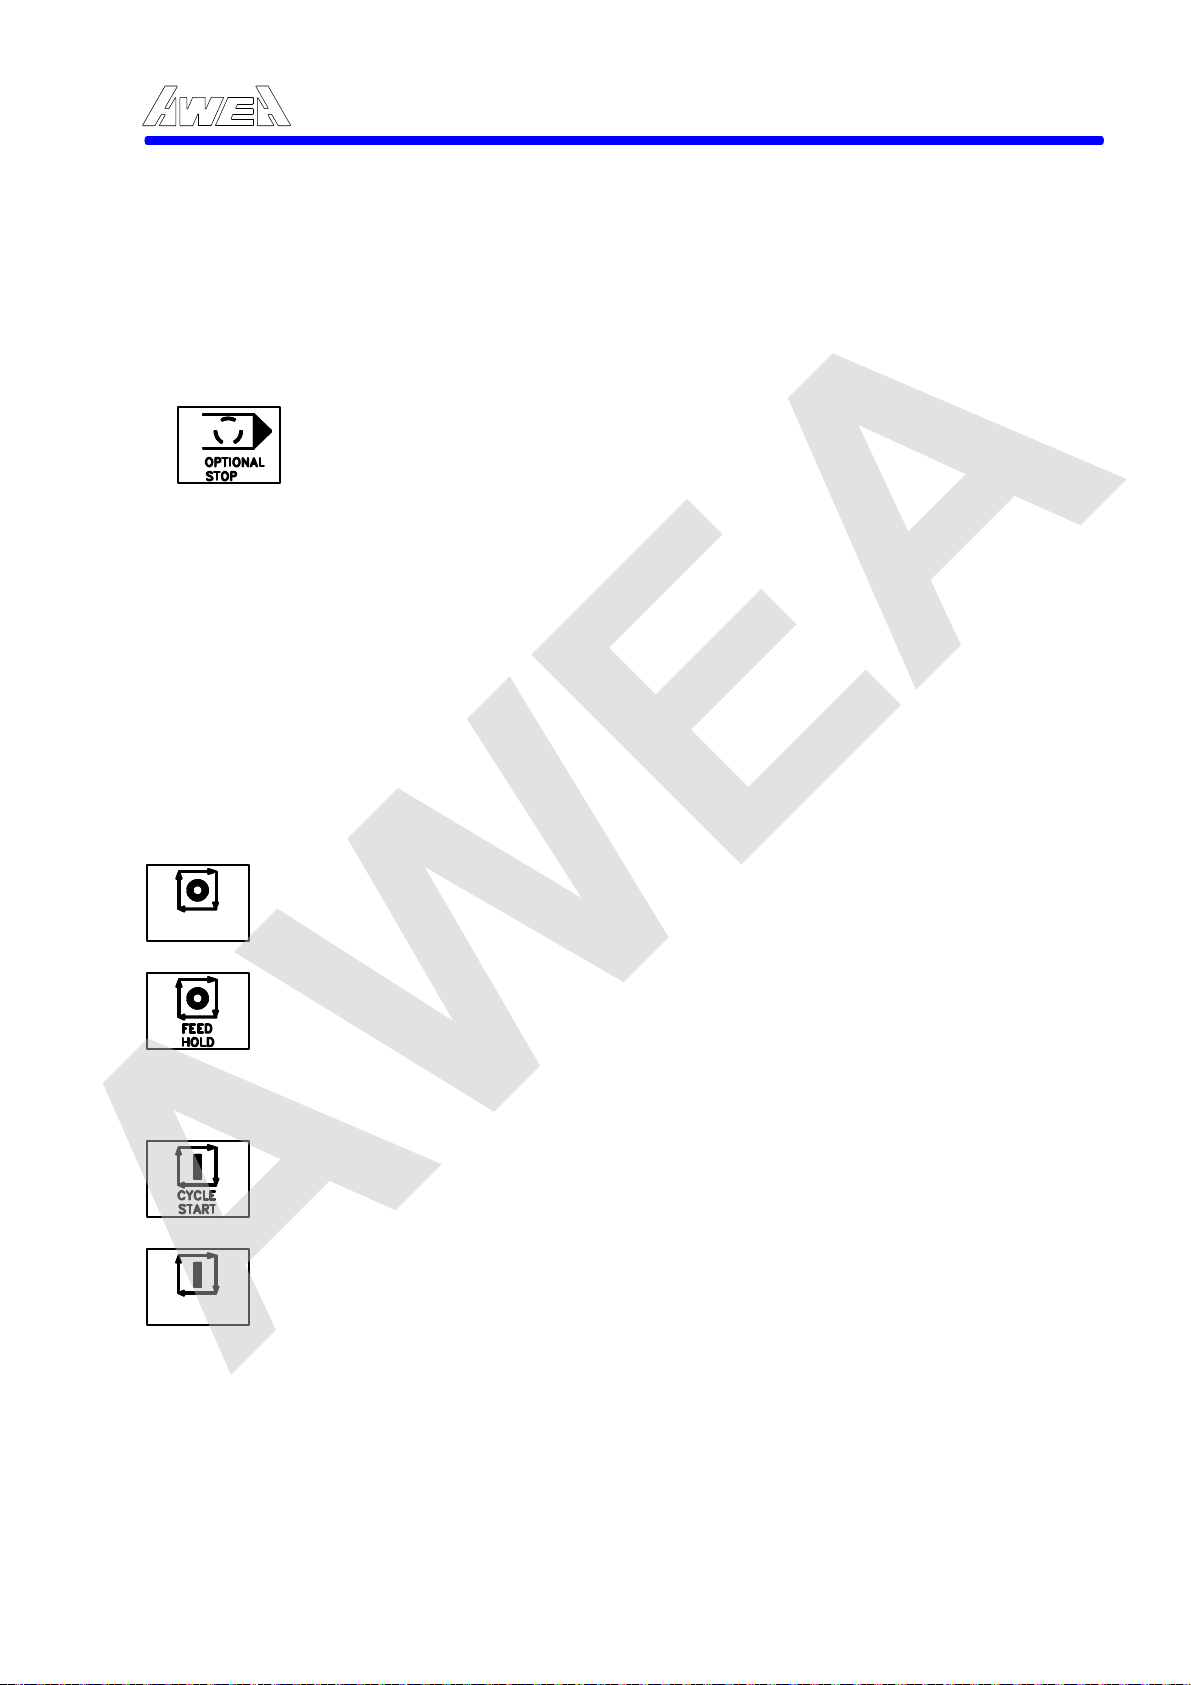
B. Optional Stop ( M01 )
AWEA
C. End Of Program ( M02, M30 )
D. Feed Hold or Cycle Stop push-buttons
CYCLE
STOP
or
or
Performs the same function as M00 but will not stop the cycle unless "Optional Stop"
push-button is activated (illuminated) before the block containing the M01 is read by
the control. If "Optional Stop" is not activated, the cycle will continue without stopping.
When active, the "Cycle Start" light goes out, "Optional Stop" lights up and "Feed Hold"
light is illuminated. This function is useful when it is necessary to gauge the workpiece
during setup. Pushing "Cycle Start" push-button allows program to continue. It is the
programmer's responsibility to program an M03, M04, M08, M13 or M14 to restart
spindle and turn coolant on when restarting program after an M01 Optional Stop.
ON : Press the button, button lamp will lights up.
Machine will be stopped after the block containing the M01 is
Machine will continue without stopping after the block
The M02 or M30 is used at the end of the program. It is usually the last block
programmed. It stop the spindle, and turns coolant off. "Cycle Start" light goes out and
Feedhold light flashes intermittently. When entering a program in memory from MDI
keyboard, placing M30 at end of Program will cause program to automatically return to
stop when M30 is encountered in the enabled program.
The Feed-Hold push-button allows the operator to stop all slide motion
during execution of an enabled part program. It is active in memory AUTO,
MDI, Dry Run and Machine Lock modes. It is illuminated when active. It has
no effect on active spindle speed. The following steps take place after all
interpolation has been completed:
(1) At M.S.T. or B, operation continues up to the end of block.
(2) Cycle Start light will turn OFF when Feed hold is activated.
(3) It will be stopped in G04 when Feed hold is activated.
Normal operation may be resumed by pressing Cycle-Start or Feed-Start push-buttons.
AWEA SP/LP Series Manual - Chapter 3. POWER UP AND POWER DOWN 3-5
read by the control. Machine will be restarted after release the
Optional Stop push-button.
OFF : Release the button, button lamp will goes out.
containing the M01 is read by the control.
FEED
START
3-5
Page 52
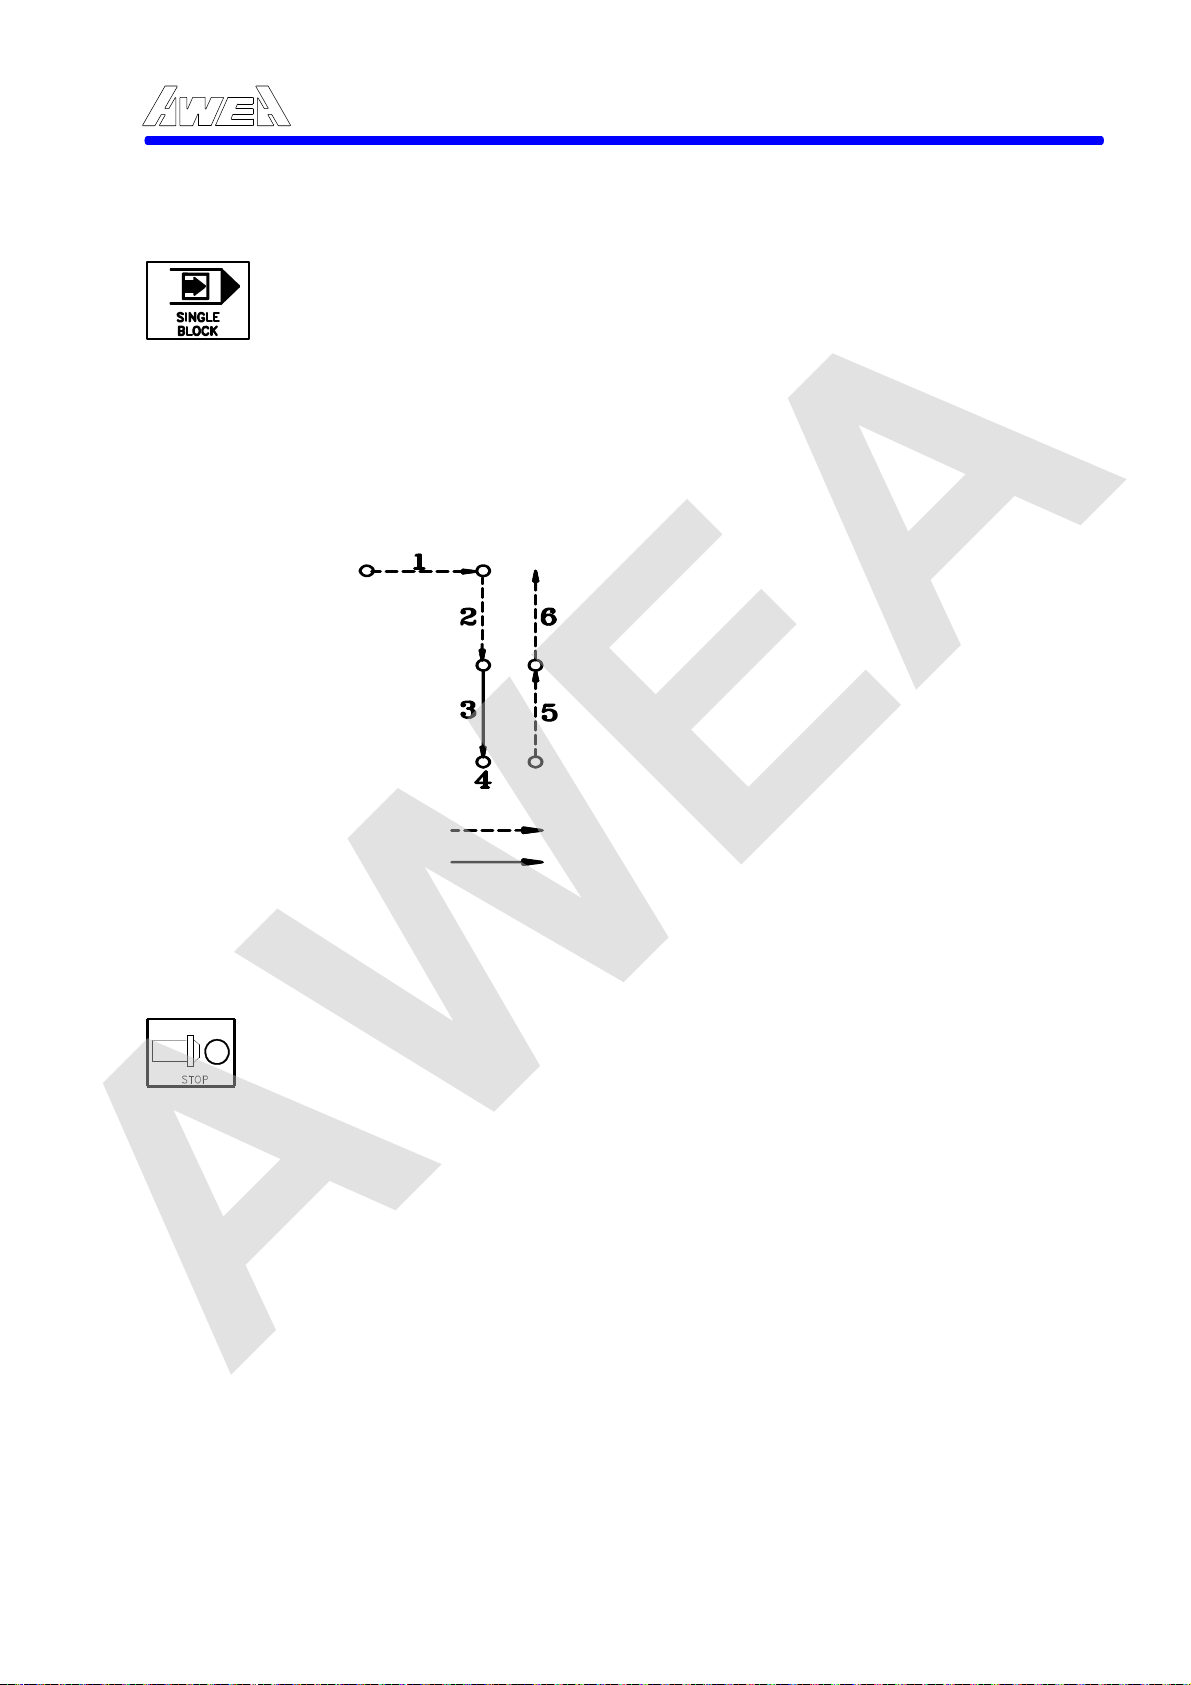
Note 1:
AWEA
Note 2:
E. Single Block
It is illuminated while the push-button is being pressed. One block of the program is executed, then machine will be hold on, the execution is stopped.
ON: It will be illuminated while the push-button is being pressed.
One block of the program is executed, and then the execution is stopped. If the
Cycle Start
is stopped again. At the end of each program block, the machine is placed in a
Feed Hold condition.
OFF: It will be de-activated while the bush-button is being released.
When G28 & G30 are in the same block, the execution will stopped in G28 or
G30 whatever which G code is executed.
In Canned cycle, machine will stopped at the end of point 1, 2 and 6 during
Single Block is activated.
AWEA SP/LP Series Manual - Chapter 3. POWER UP AND POWER DOWN 3-6
button is pressed, the next block is executed and then the execution
Note 3:
Rapid Traverse
Feedrate Traverse
When Single Block is activated, machine will not be executed during a block containing an M98P__; M99; and G65. But machine will be executed during a block containing an address other than O, N or P, and M98__, or M99.
F. Spindle Stop
The spindle can be stopped during machine in AUTO operation. Press Feed
Hold button, machine will stopped, then push Spindle Stop button, the
push-button will be illuminated. The spindle will be restarted after pressing
Cycle Start button, all axes movement will be executed 1.5 sec. later on.
The Spindle stop push-button can also be used to manually release the tool
holder from the spindle, once pressed the button, the button light will be
flashed then push the footswitch for tool unclamping which is located in front
of the operator‘s door. The drawbar will stay in the open position as long as
the button is held depressed. The button light will be flashed in 30 seconds
valid for tool unclamping from Spindle. The spindle unclamping function will
be invalid once light flashing stopped. This push-button is available only
when spindle rotation is stopped and machine is out of cycle.
3-6
Page 53
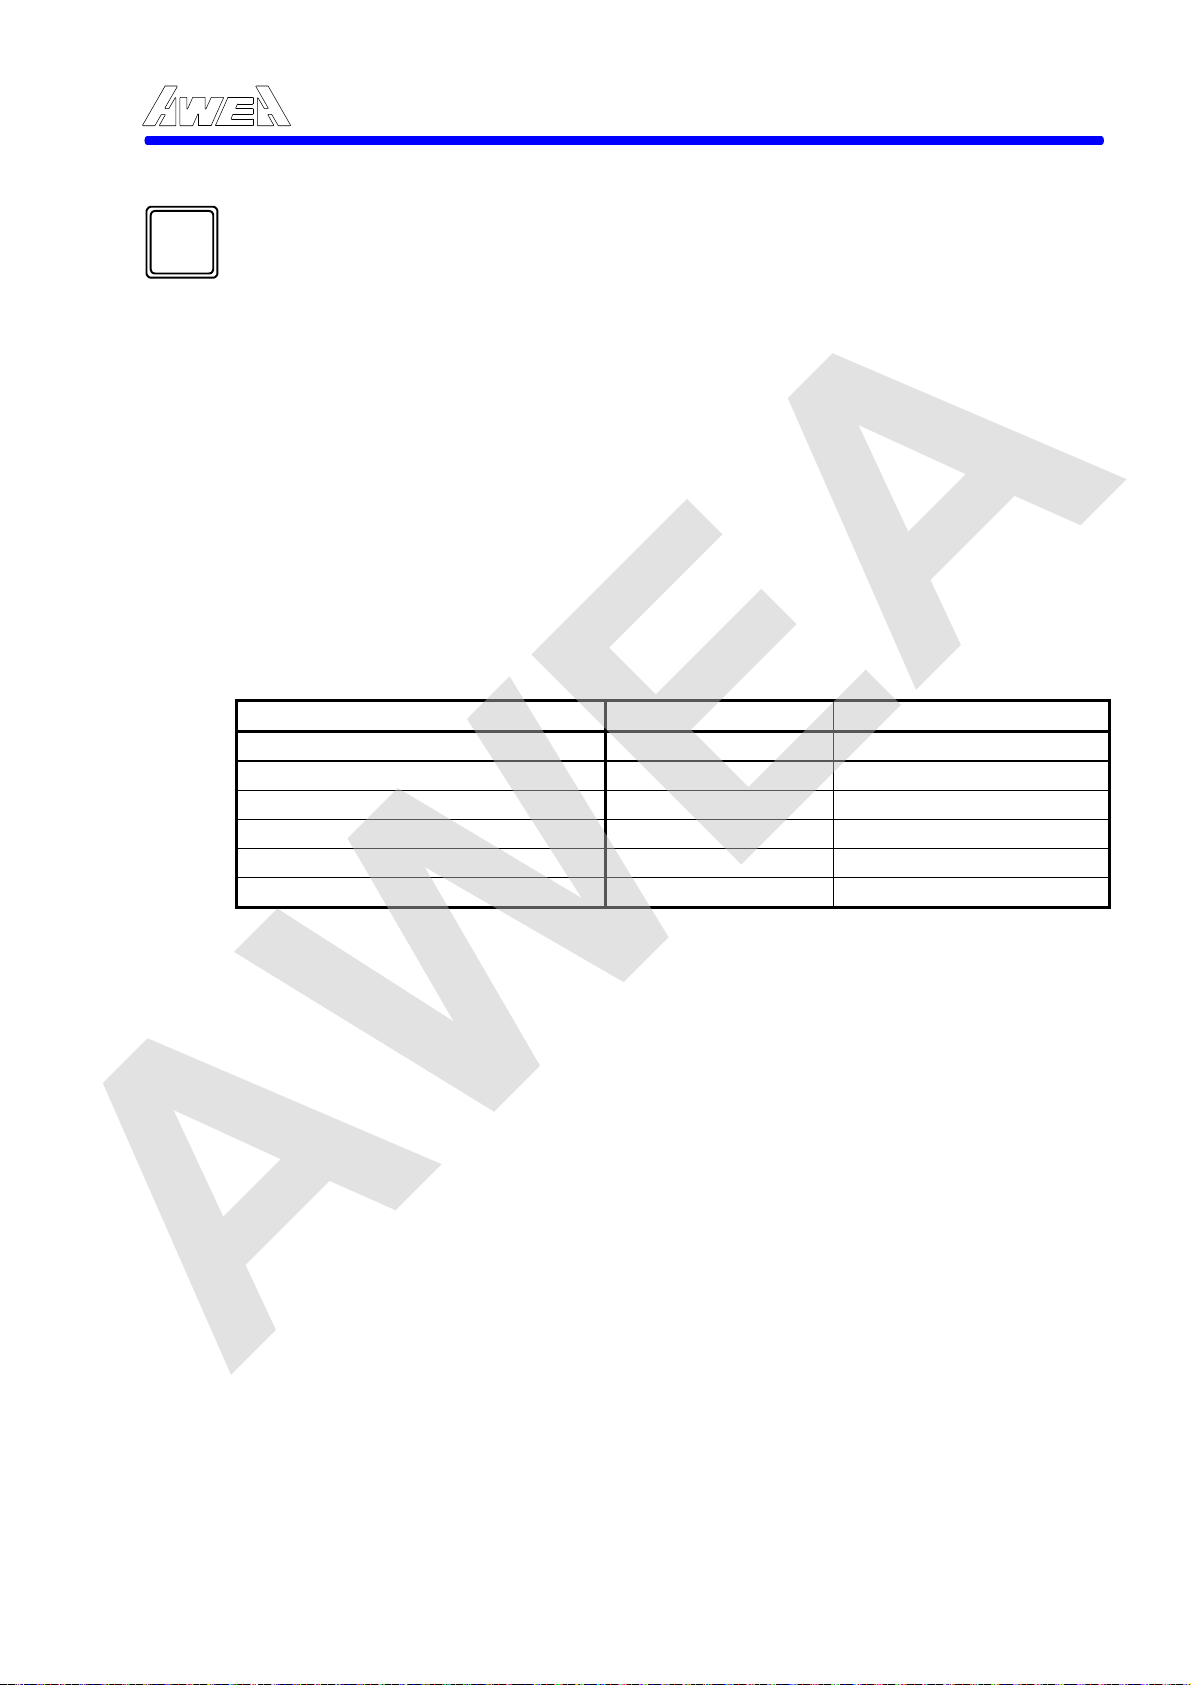
AWEA
G. Reset
RESET
3.2.3 Power Down
When the control loses power, either because of a power fail or because the Power
Off push-button has been pressed, the control system disables all outputs,
including the machine power permission control relay. If the control power is lost
during any data entry operation, the correctness of the data being entered cannot
be guaranteed and should be verified. All information previously entered into the
system is retained; active information such as an operator entered MDI block is lost.
There is some mechanical safety devices on the machine, which can protect the
operator or third party. a list is as below:
The Reset push-button is active anytime control is ON. It cancels active
spindle speeds and slides motions, resets G and M codes to start-up
conditions and cancels active offsets. If Tool Change is progressing when
"Reset" is pressed, ATC will progress continuously until "Reset" is held
depressed. "Reset" is also used to clear an alarm State after fault has been
corrected. To return a program in memory to the beginning, press "Program"
push-button.
Spindle Tool Power Drawbar Clamp Clamp Spindle Tool Power Drawbar Unclamp Clamp Spindle Motor Rotating Stop All Axes Movement Moving Stop Z Axial Brake Unclamp Clamp Controller Power Unit On Off
AWEA SP/LP Series Manual - Chapter 3. POWER UP AND POWER DOWN 3-7
Safety Items Power ON Power Lost
3.3 Power on Procedure List
A. Turn ON Air Switch.
B. Turn ON the Main Power Switch.
C. Press the Power On push-button.
D. Release the Emergency Stop button.
E. Set the Mode Selector in HANDLE position.
F. Move all axes away 200mm from Home position by M.P.G.
G. Set the Mode Selector in HOME position.
H. Set Rapid Override Switch at 50%.
I. Press HOME Position Return push-button.
J. All axes will move to the Home position individual.
3.4 Power down Procedure List
A. Set the Mode Selector in HOME position.
B. Set Rapid Override Switch at 50%.
C. Press HOME Position Return push-button.
D. All axes will move to the Home position individual.
E. Depress the Emergency Stop button.
F. Press the Power Off push-button.
G. Turn OFF the Main Power Switch.
H. Turn OFF Air Switch.
3-7
Page 54

AWEA
4. OPERATION INSTRUCTION
4.1 Mode select Operation
According to the operating safety regulation, all the activities must be stop whenever the mode is selecting. When the mode is exchanging between AUTO/MDI and HANDLE/RAPID/JOG/HOME, the spindle, feed system will be stopped.
* To remain the AUTO mode, then press the CYCLE START button again.
* To remain the HANDLE mode, then follow the operating instruction.
) When the mode is selected, it must be reconfirmed by MODE key, the mode
changed will be then effective.
Mode Key confirmation instruction must be Î ON Î OFF Î ON (For CE
regulation)
AWEA SP/LP Series Manual - Chapter 4. OPERATION INSTRUCTION 4-1
WARNING
If the operation is Stop or hold ON while at Auto execution, please follow the
operation method here under instruction to avoid change the mode without any
notice.
A. Terminate the further execution:
(1) Press the E-Stop button.
(2) Press the RESET button.
B. Pause the execution:
(1) Feed system stop temperary:
Press the FEED HOLD button, to feeding again by pressing CYCLE START.
(2) Stop the feed systen, then spindle speed:
(i) Press the FEED HOLD button, feed system will be stopped, feed
system stop, then press the SPINDLE STOP button, then spindle
will be stopped. If the SPINDLE STOP button is pressing under the
feed system is working, then the spindle will not be stopped.
(ii) Press the CYCLE STOP button, the feed system stop, then the
spindle will be stopped. To remain the spindle rotate, then press the
CYCLE START button. The spindle will be rotating at the previous
spindle speed, then feed system is active.
* Mode selecting back to AUTO mode, execute the previous
program, the controller will remain the previous spindle
speed rotating direction and speed.
* Turn the mode to the MANUAL mode to move each axis
during the controller is runing the program under AUT O
mode, the machine position will be displaced.
4-1
Page 55
AWEA
O0000;
M03 S300;
%
O0000;
M03 S500;
X500.;
Z-300.;
X-500.;
Z300.;
%
WARNING
IF the mentioned above instruction is not followed, the the following condition could be happened.
At MDI mode:
AWEA SP/LP Series Manual - Chapter 4. OPERATION INSTRUCTION 4-2
AT the end of program, M02 or M30 must be putting . To clear the Data in the RAM, must be pressing the Reset button in order to avoid any reaction later on.
z Press the CYCLE START button, then spindle will be running
at 300 rpm CW,.
z The mode selection at HANDLE mode position is selected,
the spindle will be stopped.
z When the mode turns back to MDI, press the CYCLE START,
then the spindle will remain to STOP.
z Press the RESET button to finish all activity.
z Press the CYCLE START button, then the spindle will be
running at 500 rpm CW and feeding.
z The mode selection at HANDLE mode position is selected,
the feed system will then stop and spindle stop. The display
will remain without change.
z When the mode turns back to MDI, press the CYCLE START
button, then the spindle remain to run at 500 rpm CW, then
feed system will be active later. When the program is finished,
the spindle speed will remain at 500 rpm, because there is no
M05 or M02 or M30 at the end of program.
z Press the RESET button to finish all action.
4-2
Page 56
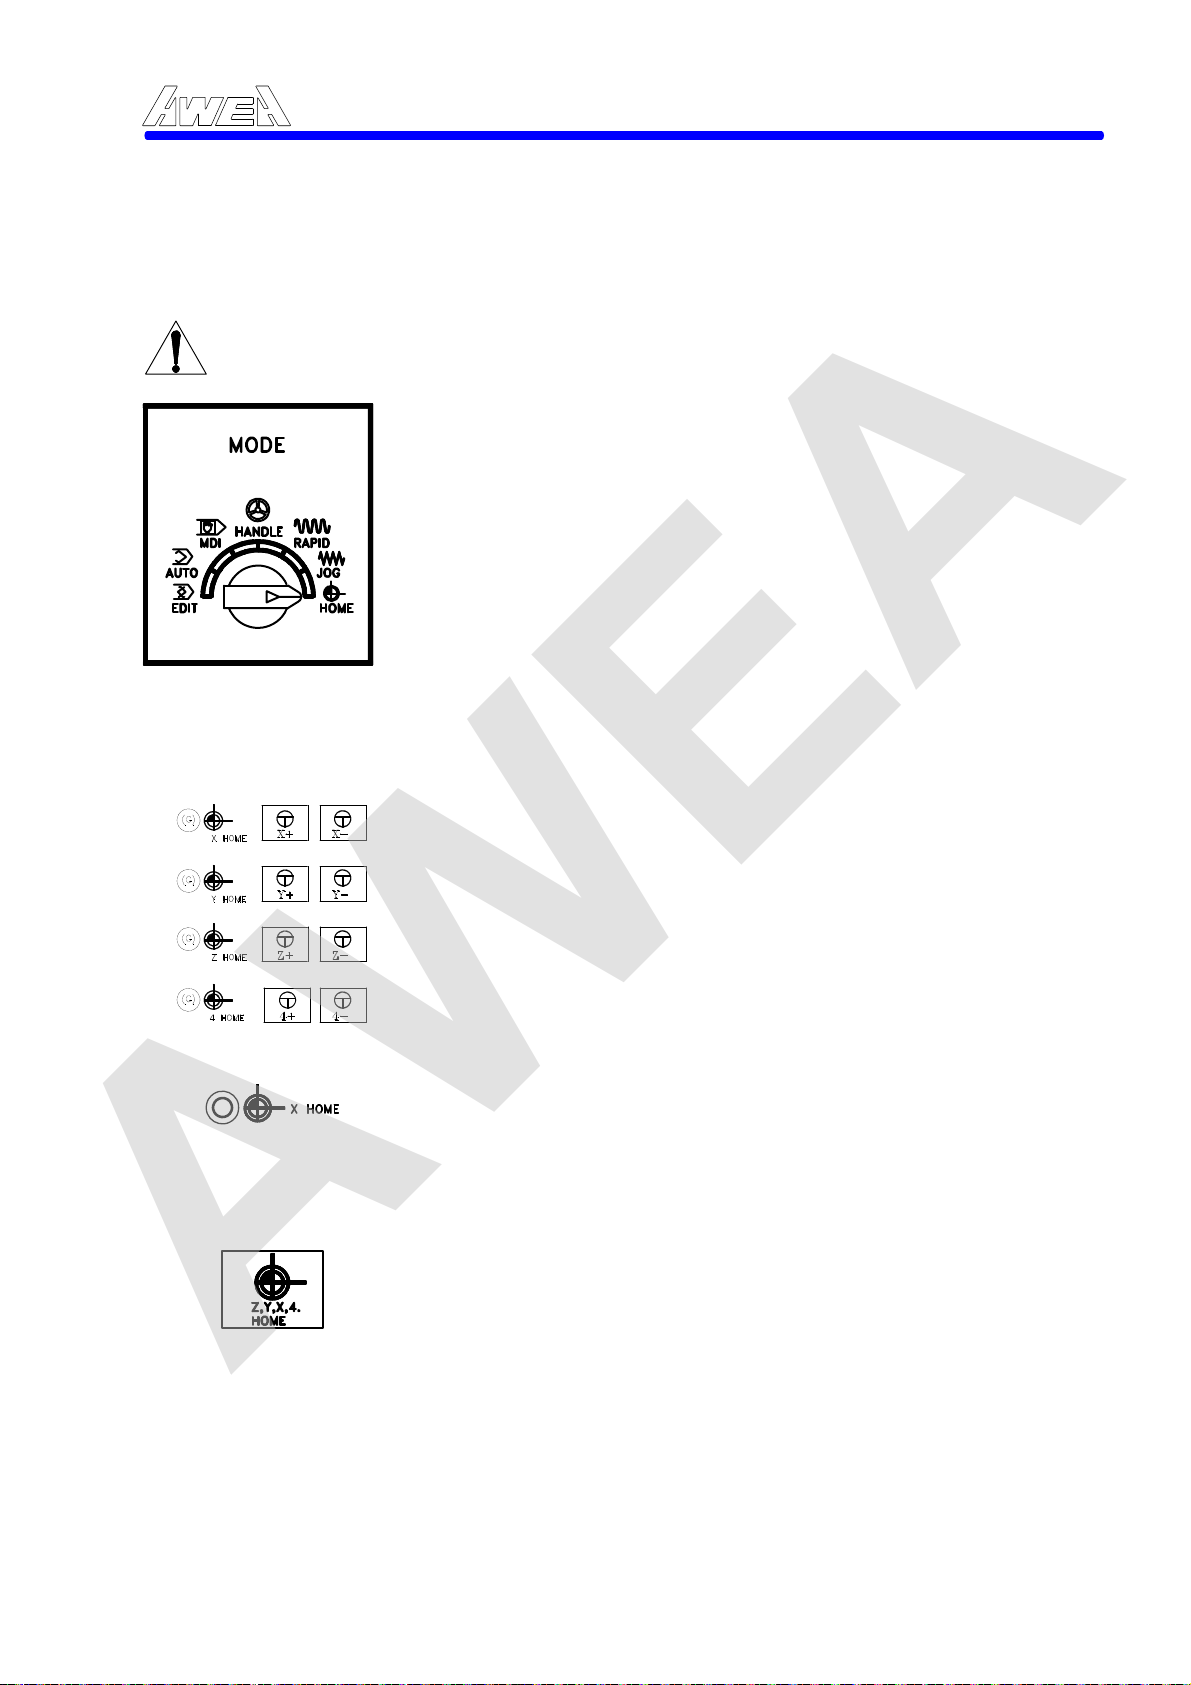
AWEA
4.2 Manual Operation
4.2.1 Reference Point Return
WARNING
AWEA SP/LP Series Manual - Chapter 4. OPERATION INSTRUCTION 4-3
Before return to HOME position, move all axes away from HOME position at minimum 200mm.
Set the Mode selector in HOME position.
1.
Home mode is selected, if X,Y,Z, or 4th are selected
simultaneously by three or four push-buttons (X+, Y+, Z+ ,or
4th+), three or four axes moves are followed at the same
time. If press the HOME position return push-button, Z axis
will move to its home position. After Z axis is at its home
position, Y axis will follow the Z axis procedure, and then the
X axis, 4th axis.
Note:Before Home return positioning, move away min. 200
mm from Home position by using M.P.G. handwheel.
1.1 Press this push-button that allow the operator to jog the X
2.
1.2 The X axis Home position L.E.D. will flash whenever the X
3.
When NC mode is exchanging, Mode Key must be
confirmed as the following instruction: press button
ON Î OFF Î ON (For CE regulation).
axis in the plus X direction.
There are three possibilities to interrupt the home return
function:
1) Press the Reset push-button on CRT/MDI panel.
2) Turn the mode selector away from HOME position.
3) Press the Emergency Stop button.
axis moves to the reference points and will light when the X
axis returns to the HOME position. The coordinate system of
X axis will set to 0 automatically.
Y, Z, 4th axes movements will follow X axis procedure.
Press the push-button (push-button light will come on), Z
axis will move to its home position. After Z axis is at its home
position, Y axis will follow the Z axis procedure, and then the
X axis. All axial L.E.D. will come on.
There are three possibilities to interrupt the home return
function:
1) Press the Reset push-button on CRT/MDI panel.
2) Turn the mode selector away from HOME position.
3) Press the Emergency Stop button.
4-3
Page 57
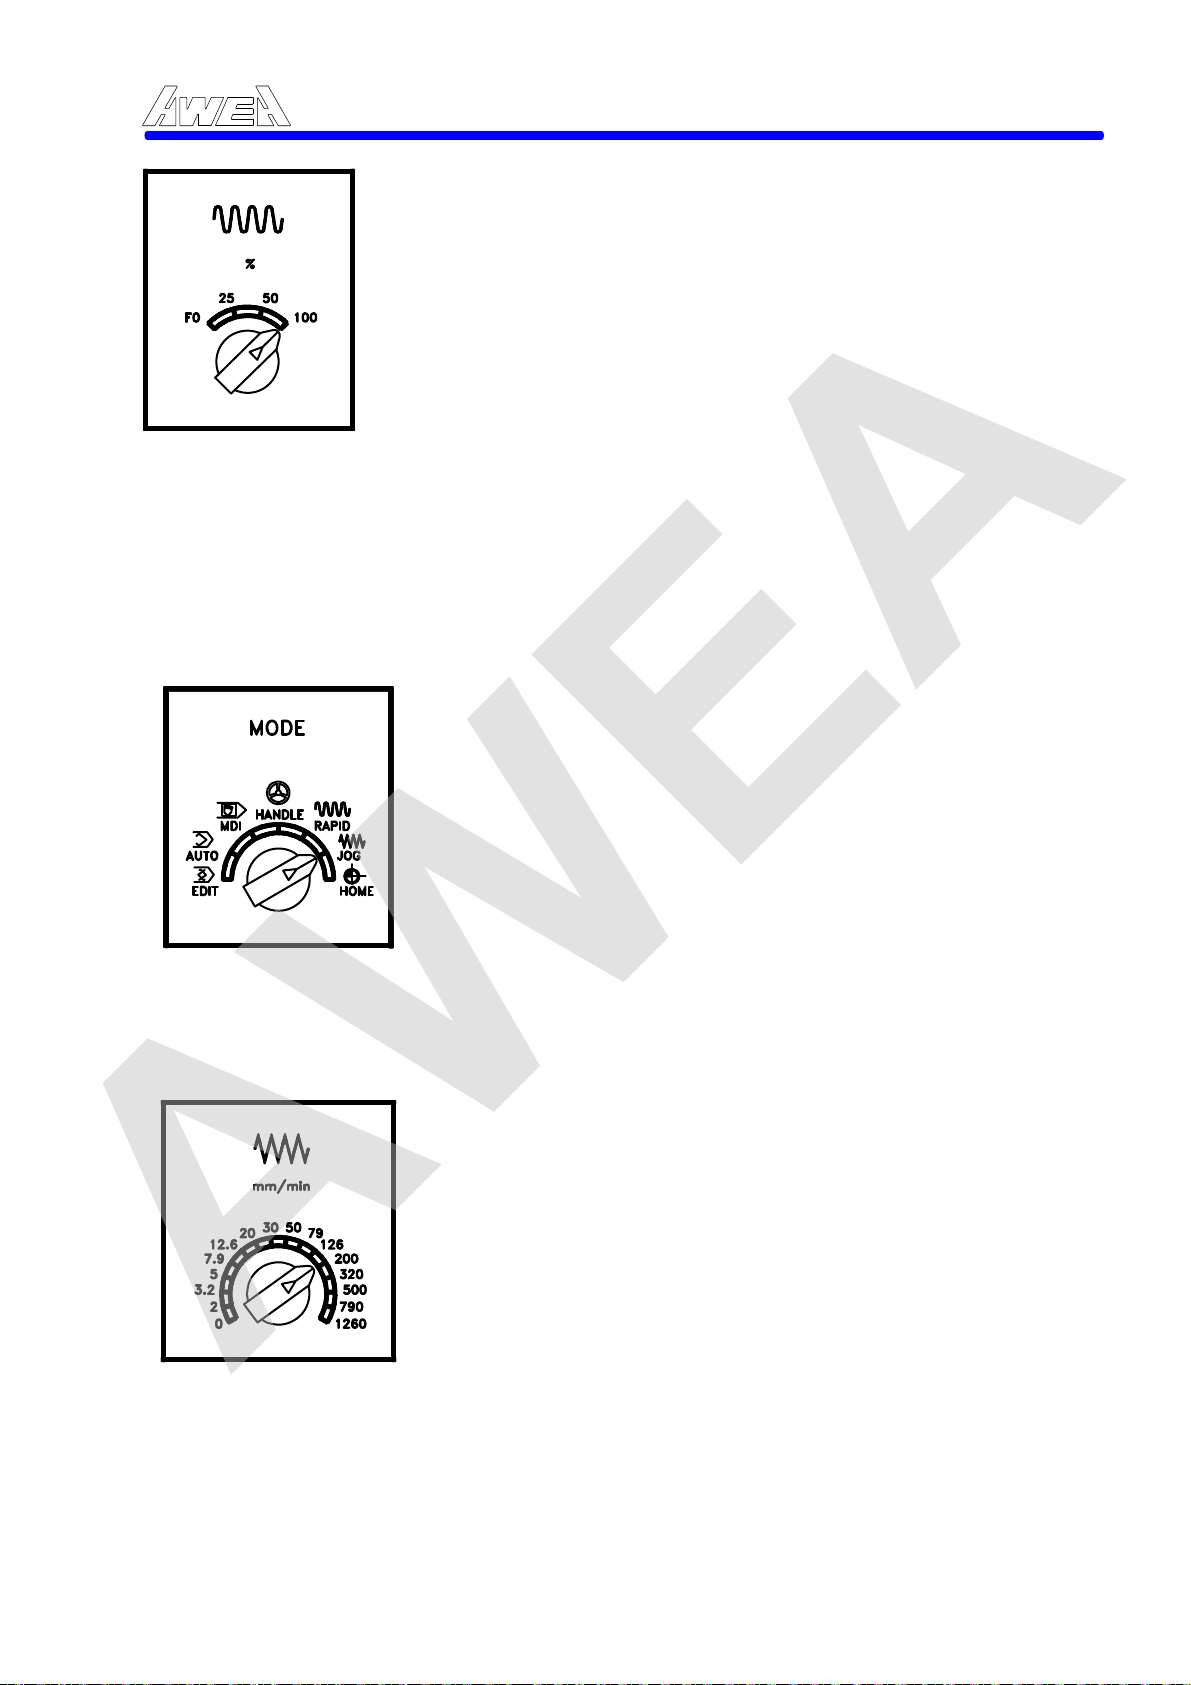
AWEA
4.2.2 JOG Feedrate Operation
AWEA SP/LP Series Manual - Chapter 4. OPERATION INSTRUCTION 4-4
This Switch of four positions by the operator to manually
4.
change feedrate from 0 to 100% during axes motion in
Home position return. Without Home position return, axial
Rapid override switch is ineffective during machine is in
Manual mode or AUTO mode.
Machine Rapid Override Switch is effective in Home position
return will be defined by the parameter No. 1005, bit 0, its
definition is as below:
: Rapid Override Switch is ineffective, before all axes are
0
Reference Point Return to its Home position.
: Rapid Override Switch is effective, whatever machine is
1
Reference point returned or not.
A. JOG mode:
1. Set the mode selector in JOG position.
JOG mode is selected, X axis can be moved by pressing
X+ momentary push-button (button is illuminated) that
allows the operator to jog the X axis in the plus X direction
with its Jog Override Feedrate. Axial movement will
stopped by released the push-button. Depress Xpush-button (button is illuminated) that allows the
operator to jog the X axis in the minus X direction with its
Jog Override Feedrate. Y, Z, 4th axes are the same as X
axis procedure.
When NC mode is exchanging, Mode Key must be
confirmed as the following instruction: press button ON
OFF Î ON (For CE regulation).
Î
2. Select JOG feedrate override switch
With this dial, it is possible to override the feedrate
designated by the program. An override of 0 to 1260
mm/min. divide to 16 step, this switch provides to the JOG
feedrate switch.
4-4
Page 58
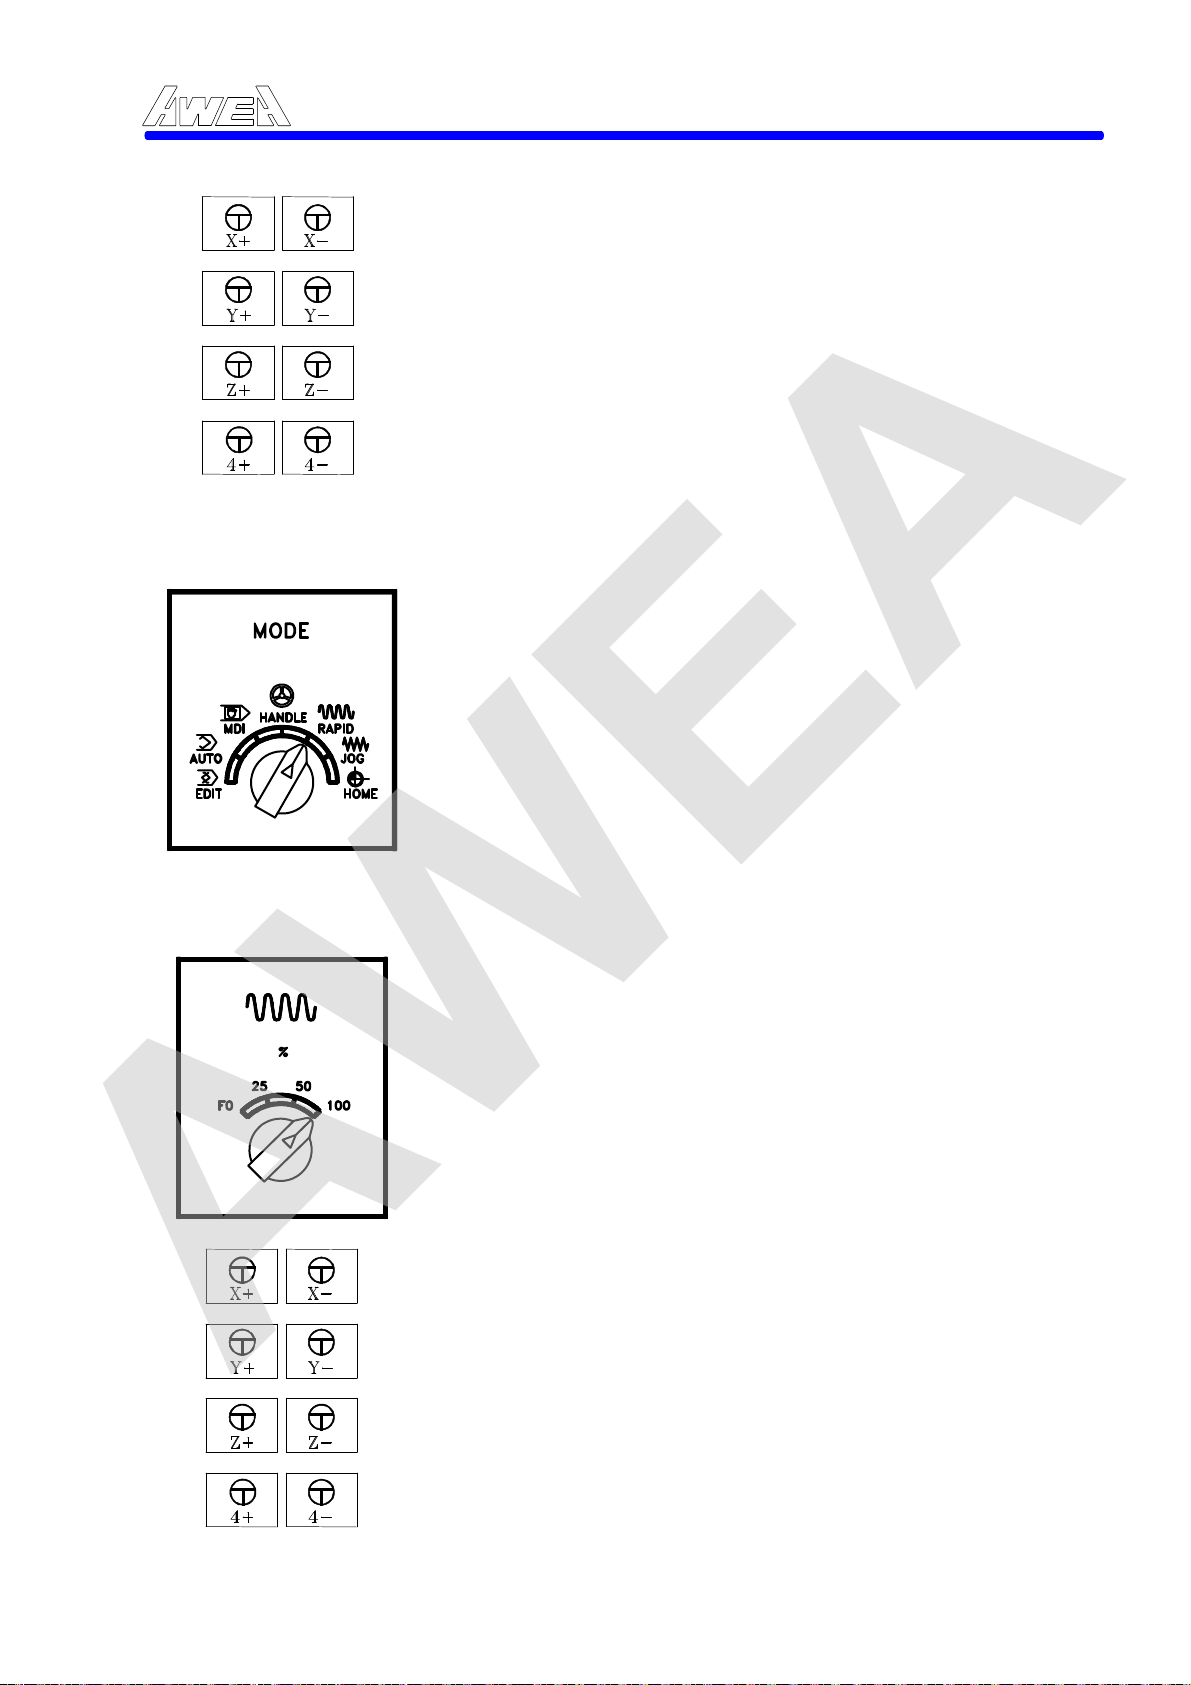
AWEA
B. RAPID override mode:
AWEA SP/LP Series Manual - Chapter 4. OPERATION INSTRUCTION 4-5
3. Select the axis what you want to move.
JOG or RAPID mode is selected, all axis can be moved by
pressing X+,X- or Y+, Y-, etc. momentary push-button
(button is illuminated) that allows the operator to jog the X
axis in the plus or minus X direction with its Jog Override
Feedrate. Axial movement will stopped by released the
push-button.
1. Set the mode selector in RAPID position.
RAPID mode is selected, X axis can be moved by pressing X+
momentary push-button (button is illuminated) that allows the
operator to move the X axis in the plus X direction with its
Rapid Override Feedrate. Axial movement will stopped by
released the push-button. Depress X- push-button (button is
illuminated) that allows the operator to move the X axis in the
minus X direction with its Rapid Override Feedrate. Y, Z, 4th
axes are the same as X axis procedure.
2. Select the RAPID override switch .
3. Select the axis what you want to move.
When NC mode is exchanging, Mode Key must be
confirmed as the following instruction: press button ON
OFF Î ON (For CE regulation).
Î
The Rapid Override switch of 100%, 50%, 25%, and F0 is
provided, when the Rapid traverse rate is 20 m/min. and this
dial is set to 50%, actual rate becomes 10 m/min., F0 is a
constant value specified by the parameter. F0 =1,000 mm/min
100% : X Axis = 20,000 mm/min
Y Axis = 20,000 mm/min
Z Axis = 12,000 mm/min
JOG or RAPID mode is selected, all axis can be moved
by pressing X+,X- or Y+, Y-, etc. momentary push-button
(button is illuminated) that allows the operator to move
the X axis in the plus or minus X direction with its Rapid
Override Feedrate. Axial movement will stopped by
released the push-button.
;
4-5
Page 59
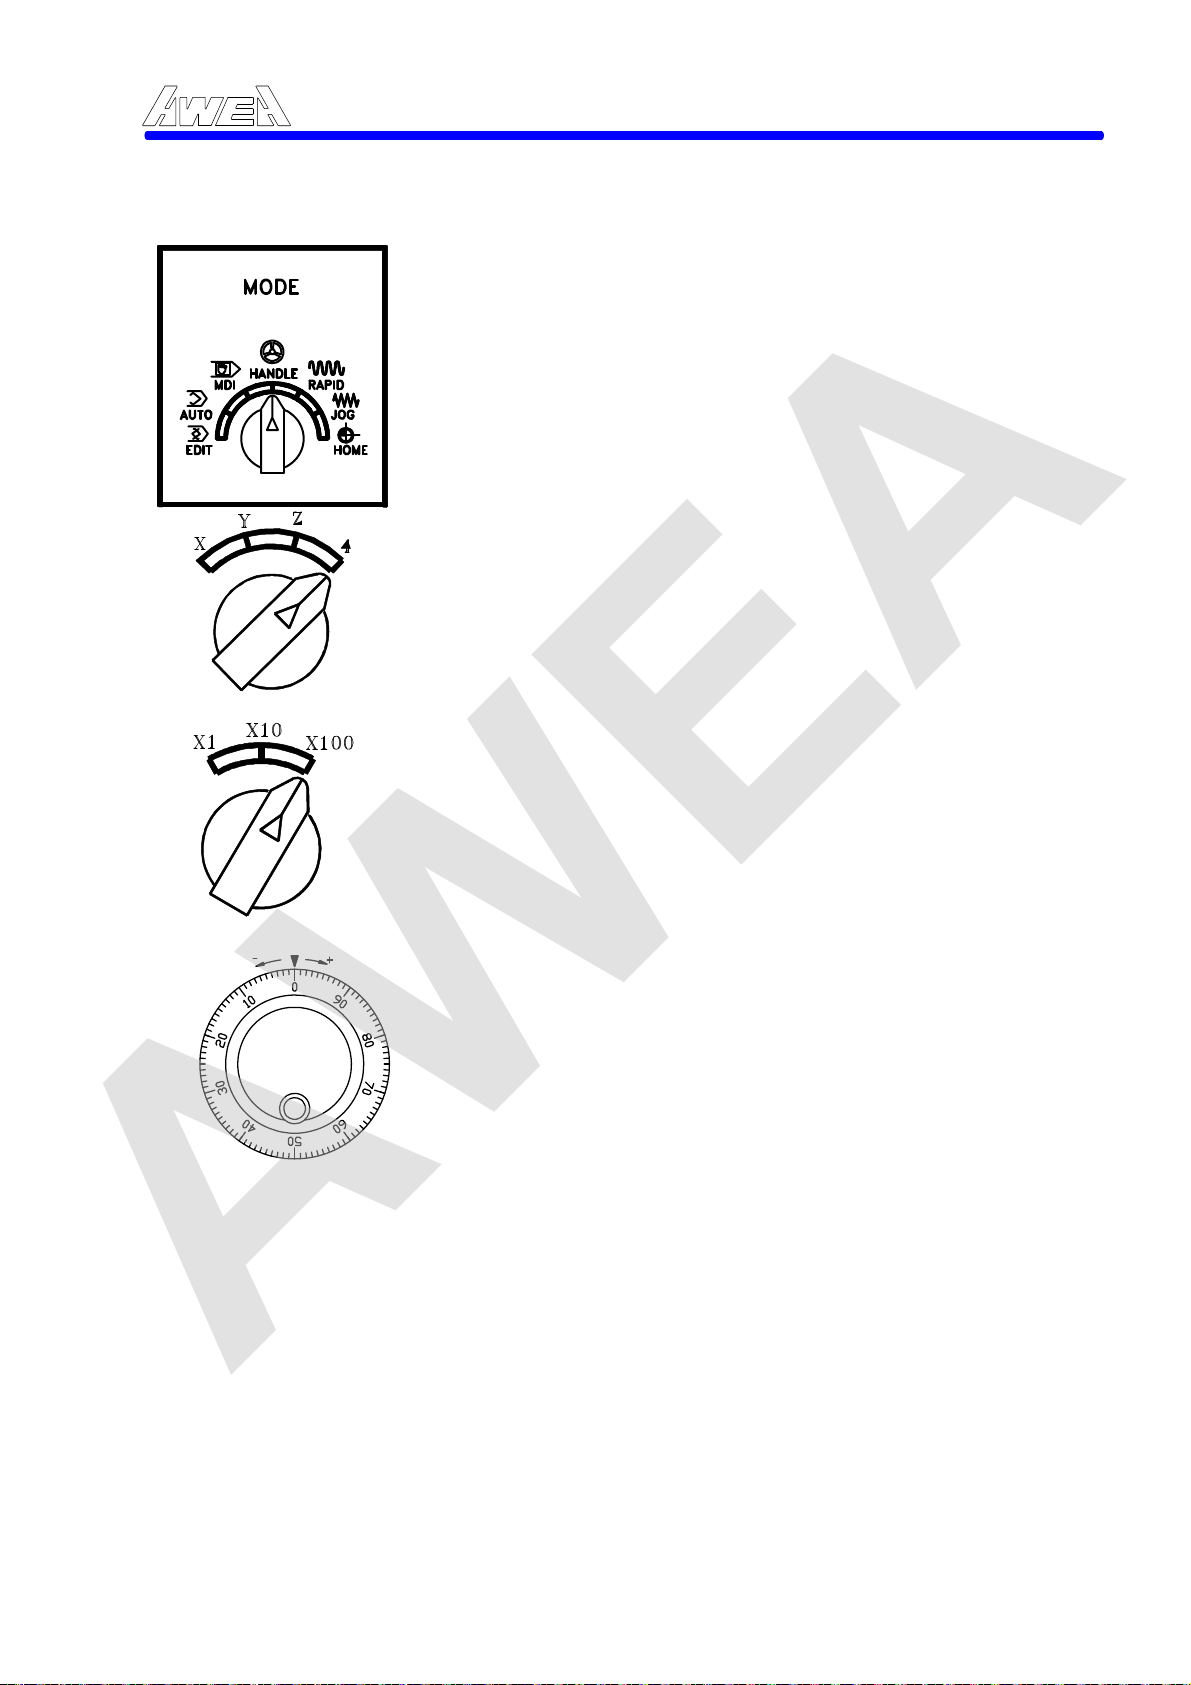
j
AWEA
4.2.3 HANDLE Wheel Operation
AWEA SP/LP Series Manual - Chapter 4. OPERATION INSTRUCTION 4-6
1. Set the mode selector in HANDLE position.
Select the axis to be moved by the axes selector, the
selected axis can be moved by Manual Pulse Generator
(M.P.G.). Handle Multiplication can be set by actuating one
of the three steps X1, X10, X100.
When NC mode is exchanging, Mode Key must be
confirmed as the following instruction: press button ON
Î
2 Set the Axis select mode
The axis to be moved is selected by setting of Axis select mode. The Handle wheel allows the operator to move a slide in increments when Mode Select Switch is in X, Y, Z or 4th position.
3. Set the Handle Multiplication Switch
The value of each hand wheel increment depends on the
setting of Handle multiplication switch and the axis to be
ogged depends on the setting of Axis select Mode. A list
of movement amount per degree is as below:
Input system X 1 X 10 X 100
Metric input (mm) 0.001 0.010 0.100
Inch input (inch) 0.0001 0.0010 0.0100
4. The Feedrate can be adjusted precisely by using of Manual Pulse Generator.
The increment
a slide in increments when Mode Select switch is in X, Y, Z
or 4th axis position. The Handle multiplication switch
defines the value of each graduation on Manual Pulse
Generator:
X1: When switch is placed at X1 position each graduation
X10:When switch is placed at X1 position each graduation
X100: When switch is placed at X1 position each
Note: 1. If the Handle is rotated in excess of 5 turns /sec,
OFF Î ON (For CE regulation).
al jog handwheel allows the operator to move
the M.P.G. represents 0.001 mm.
the M.P.G. represents 0.01 mm.
graduation the M.P.G. represents 0.1 mm.
there is a difference between the Handle rotation
amount and the machine movement distance.
2. Rotating the Handle too fast when X100 is selected, moves the tool or table at a rate as fast as the rapid traverse rate. A sudden stop gives the machine tool a shock.
4-6
Page 60
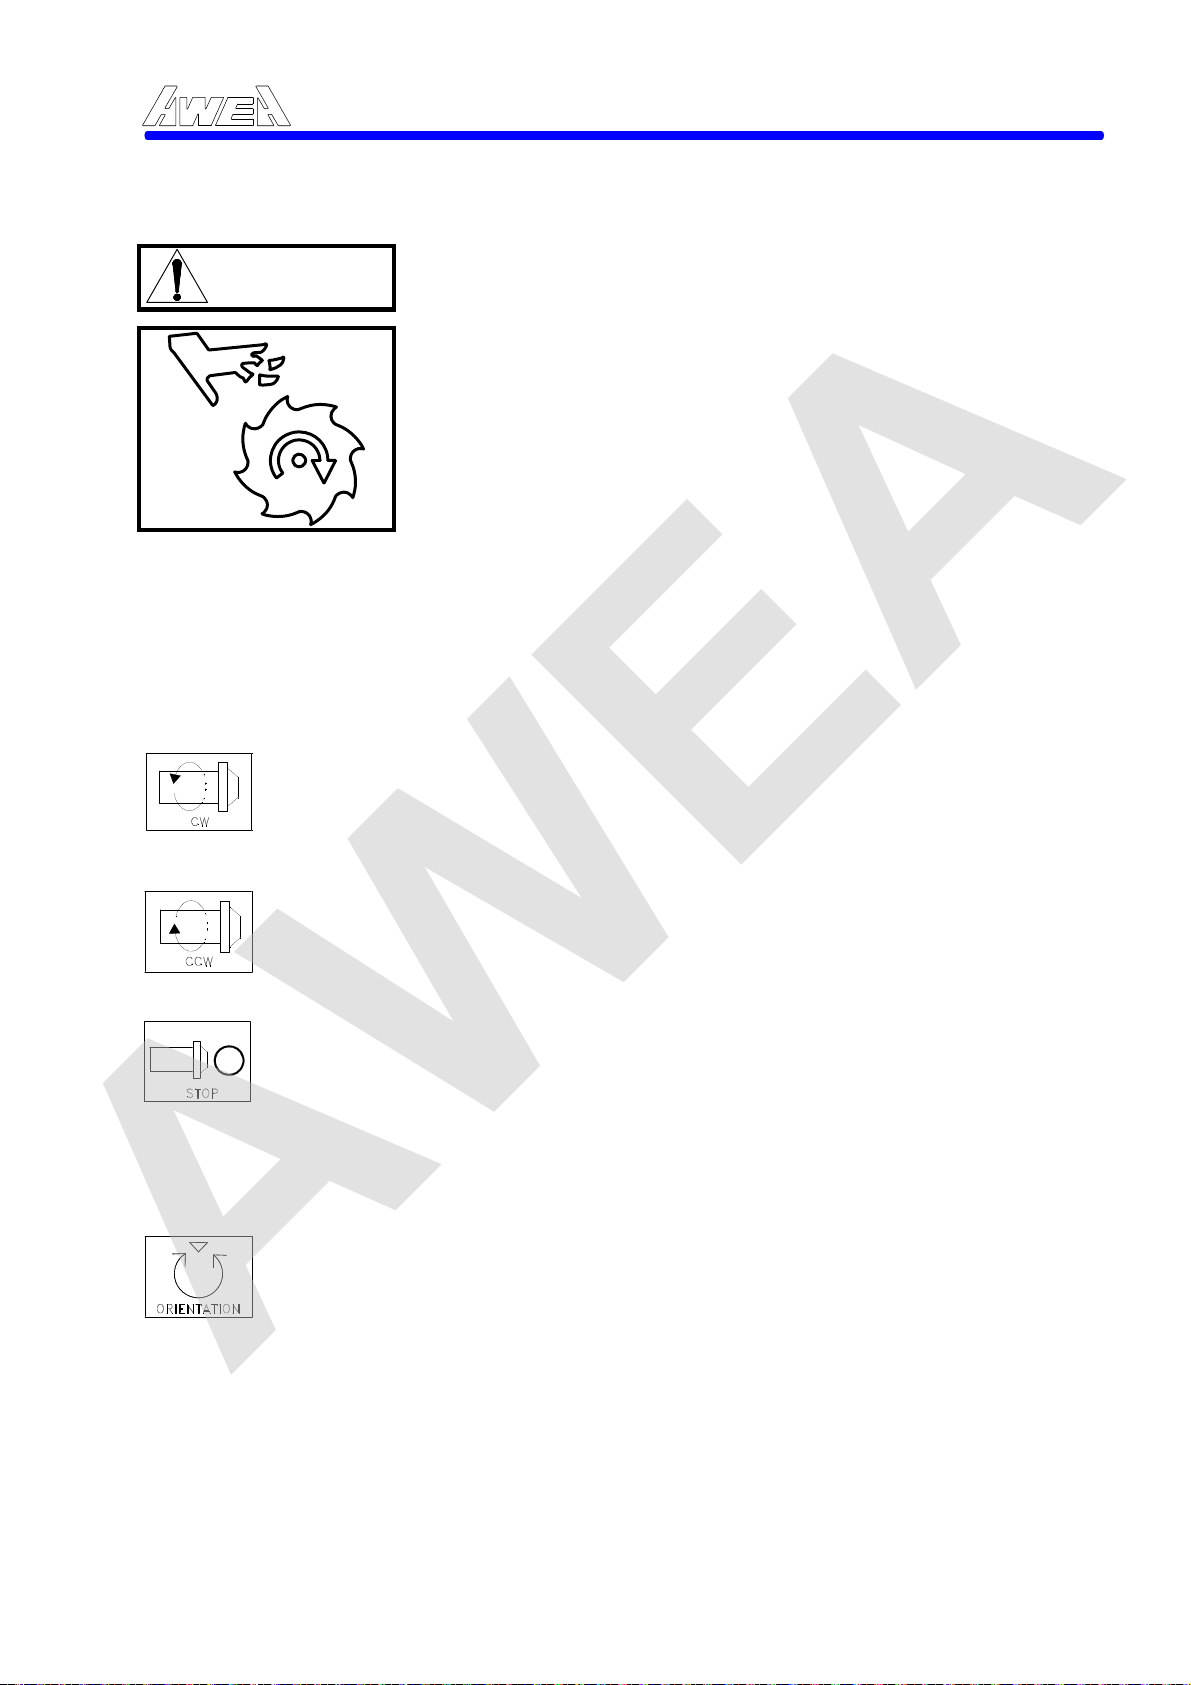
AWEA
4.2.4 Manual operation of the Spindle
DANGER
Note:Before starting the spindle revolution manually , the spindle speed must
have been commanded already to NC by S code. When the power is turned
ON, S code is set to 0 (zero), if you wish to run the spindle, the spindle does
not rotate though the button illuminated.
The spindle can be rotated in the modes of HANDLE, RAPID, JOG, HOME by
pressing the following push-buttons. S
any interruption of Mode selector's changing.
Spindle Clockwise (CW) push-button.
The spindle CW push-button is an illuminating, momentary type push-button.
The light must be OFF for spindle CCW mode operation. Effective by mode
selected in Handle position, press the CW push-button. Spindle rotates in
clockwise direction.
Spindle Counter Clockwise (CCW) push-button.
The spindle CCW push-button is an illuminating, momentary type push-button. The light must be OFF for spindle CW mode operation. Effective by mode selected in Handle position, press the CCW push-button. Spindle rotates in counter clockwise direction.
Spindle Stop push-button.
Spindle can be stopped by the following methods:
1.
2. Commanded M05 when mode selector is in AUTO position.
3.
The CW & CCW push-buttons will light out when spindle is stopped.
Spindle Orientation push-button.
The spindle Orientation push-button is used to stop spindle at its tool change
position in manual mode. The execution is the same as a M19 commanded in MDI
or AUTO mode. When the spindle stopped in its position, the button will light up. To
release the Spindle Orientation can be canceled by the method as below:
1. Commanded M3 or M4 in AUTO or MDI mode.
2. Press the spindle CW or CCW push-button when mode selector is in
3. Press the EMERGENCY STOP
Press the Reset button in Handle mode, spindle will be stopped immediately. The
push-button will be illuminated whenever spindle is not in running.
Press the push-button on the programmer's panel or Emergency stop button.
HANDLE mode.
AWEA SP/LP Series Manual - Chapter 4. OPERATION INSTRUCTION 4-7
DO NOT approach the spindle while its running.
SHOULD have the power been turned off before
servicing the spindl
CHECK AND MAKE SURE that the tool is clamped and
no any interference envi
spindle.
e unit.
ronment before turn on the
pindle speed will be rotated continue without
push-button.
4-7
Page 61
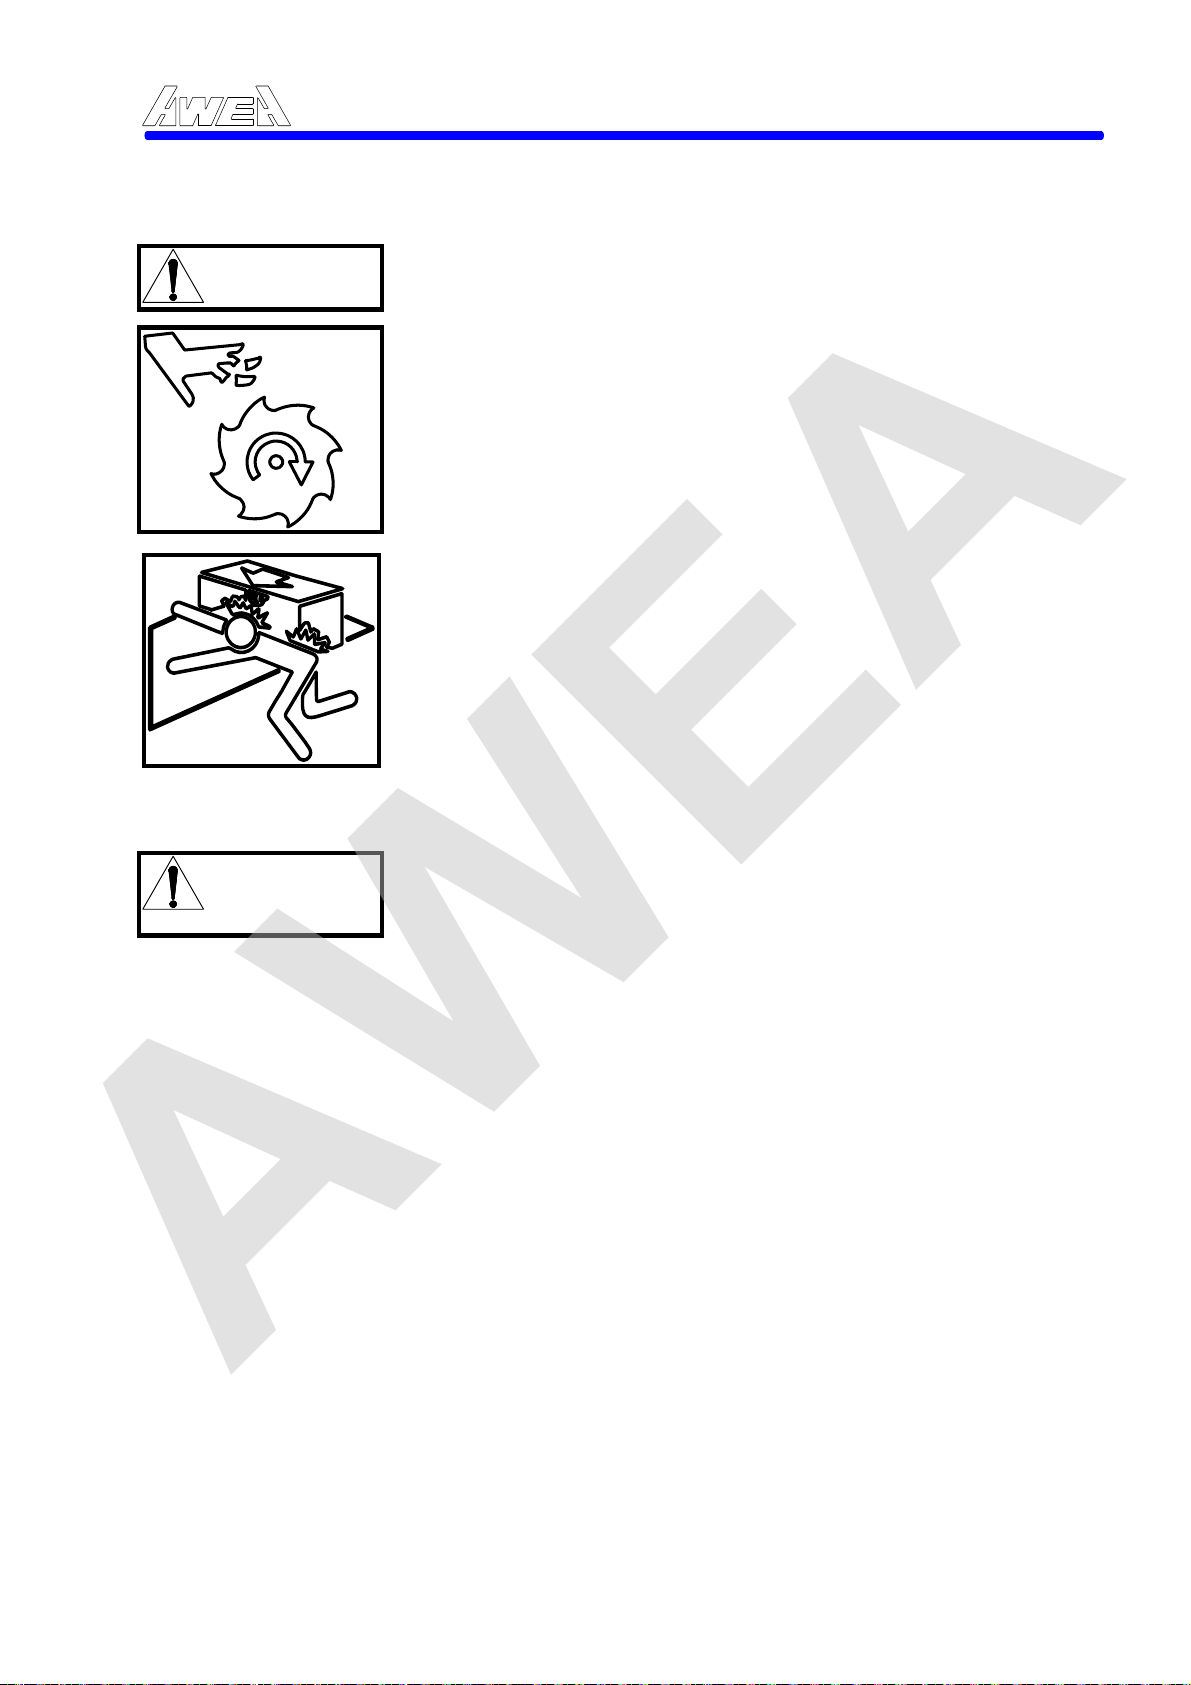
AWEA
4.2.5 Spindle Tool Loading and Unloading
DANGER
AWEA SP/LP Series Manual - Chapter 4. OPERATION INSTRUCTION 4-8
DO NOT approach the spindle while its running.
SHOULD have the power been turned off before
servicing the spindl
CHECK AND MAKE SURE that the spindle is stopped
while cleaning the spindle taper.
e unit.
WARNING
MUST STOP the axial movement while in spindle tool loading and unloading.
◎
BE SURE that the tool number in the spindle and
magazine are relati
◎
MAKE SURE that there is no tool in the tool pocket of
the magazine of whatever number is occupied on the
spindl
◎
IF the spindle has been occupied by a tool, DO NOT
modify the spindle tool number at the value of "0".
◎
The tool must be performed by dimension check,
clean and tightened pull stud before spindle loading.
◎
The tool to be mounted must meet the specified
specifications as below:
Max. tool Dia. (full
215 mm (8.4")
Max. tool Length = 350 mm (13.8")
Max. tool Weight = 20 kg (44 lb)
e.
/ adjacent empty) = 127 mm (4.9") /
ve to each other.
4-8
Page 62
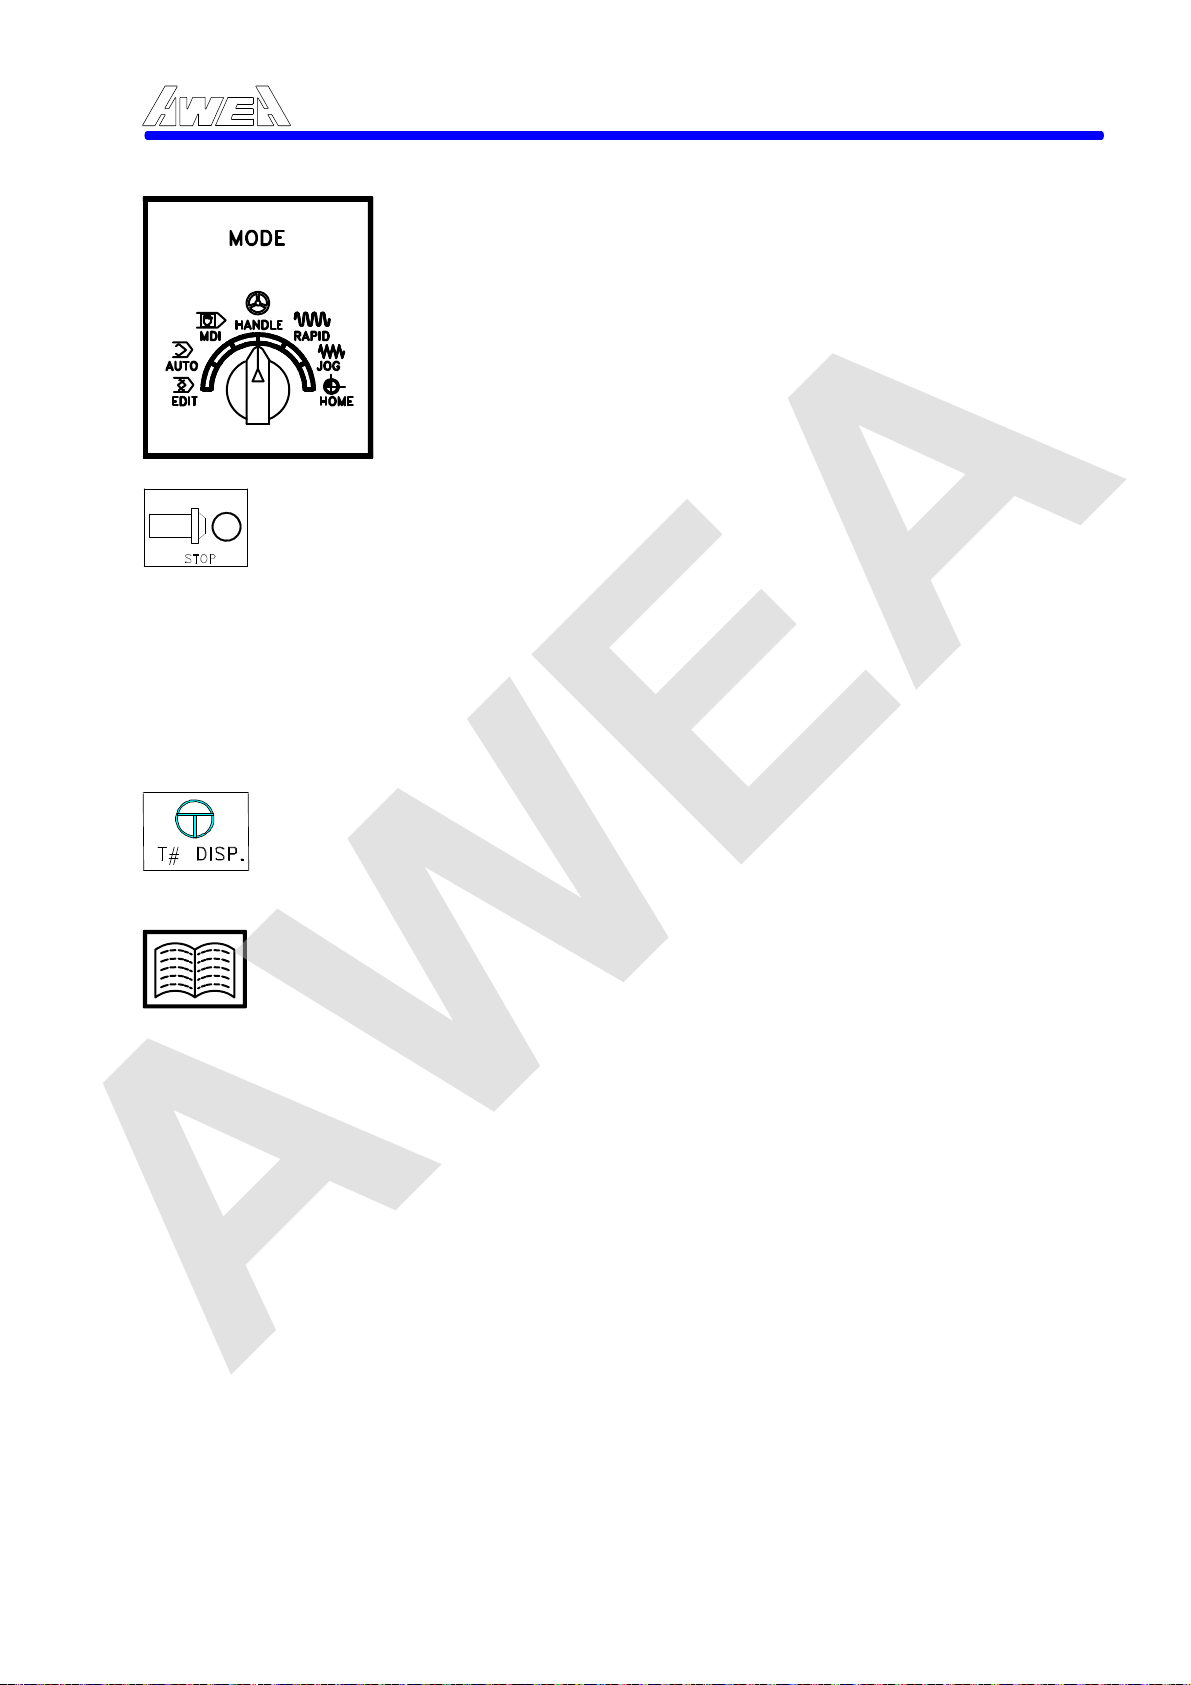
AWEA
NOTE: 1.The tool to be mounted must meet the specified specifications as below:
Max. tool Dia. (full / adjacent ) = 127 mm (4.9") / 215 mm (8.4")
Max. tool Length = 350 mm (13.8")
Max. tool Weight = 20 kg (44 lb)
2.Machine will be alert when you press the tool unclamp push-button while tool no. display is T=0.
AWEA SP/LP Series Manual - Chapter 4. OPERATION INSTRUCTION 4-9
Set the mode selector in HANDLE position.
Select the axis to be moved by the axes selector, the selected
axis can be moved by Manual Pulse Generator (M.P.G.). Handle
Multiplication can be set by actuating one of the three steps X1,
X10, X100.
When NC mode is exchanging, Mode Key must be confirmed as
the following instruction: press button ON Î OFF ÎON (For
CE regulation).
Spindle tool holder releasing function switches
Press the Sp
holder from the spindle, then push the footswitch for tool
unclamping which is located in front of the operator‘s door. The
drawbar will stay in the open position as long as the footswitch is
held depressed. The button light will be flashed in 30 seconds
valid for tool unclamping from Spindle. The spindle unclamping
function will be invalid once light flashing stopped. This
push-button is available only when spindle rotation is stopped
and machine is out of cycle.
Tool Number Display push-button.
The tool No. Display push-button is an illuminating latching type
push-button. When Tool No. Display mode is active, the CRT can
display current tool number on the spindle or magazine side.
To initial the tool number, please refer to the description on
chapter 4.2.2.
indle stop push-button to manually release the tool
4-9
Page 63
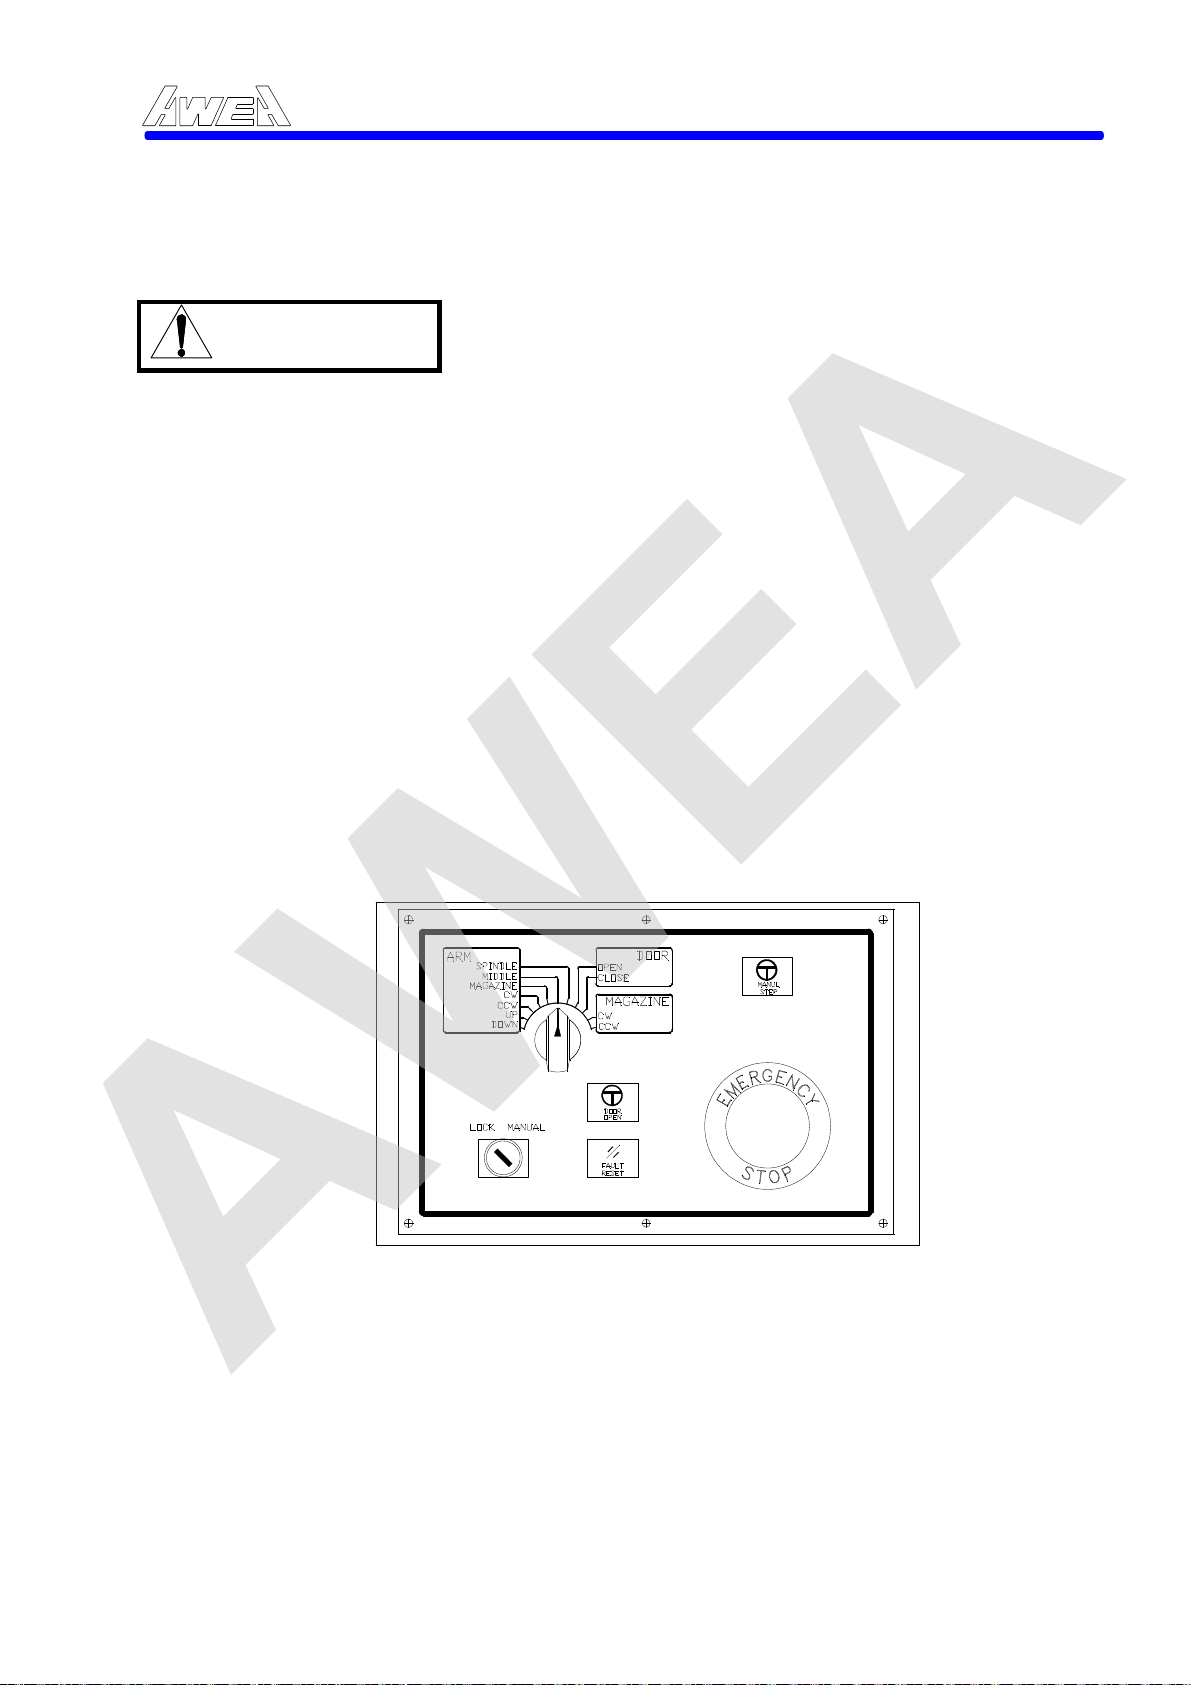
AWEA
4.2.6 Tool magazine operation instruction and trouble shooting
WARNING
(1) Before your requested tools are put into the magazine,
(2) The tool to be mounted should meet the specified
Max. tool diameter = 130 mm (5.1") Max. tool length = 350 mm (13.8") Max. tool weight = 20 kg (44 lb)
(3) During mounting of your requested tools in the
(4) During machine operation in AUTO mode and mounting
AWEA SP/LP Series Manual - Chapter 4. OPERATION INSTRUCTION 4-10
MAKE SURE all items as mentioned below before tool loading at magazine.
pre-check tool tips are in good condition and tighten and
clean the tool holder.
specifications as follows:
magazine, Make sure that your expected tool pocket
numbers are assigned by the controller.
of your requested tools in the magazine at magazine
side, DO NOT set anywhere in ATC arm positions. ONLY
magazine CW & CCW is permitted.
Figure 4-1 Operation panel at magazine side.
4-10
Page 64
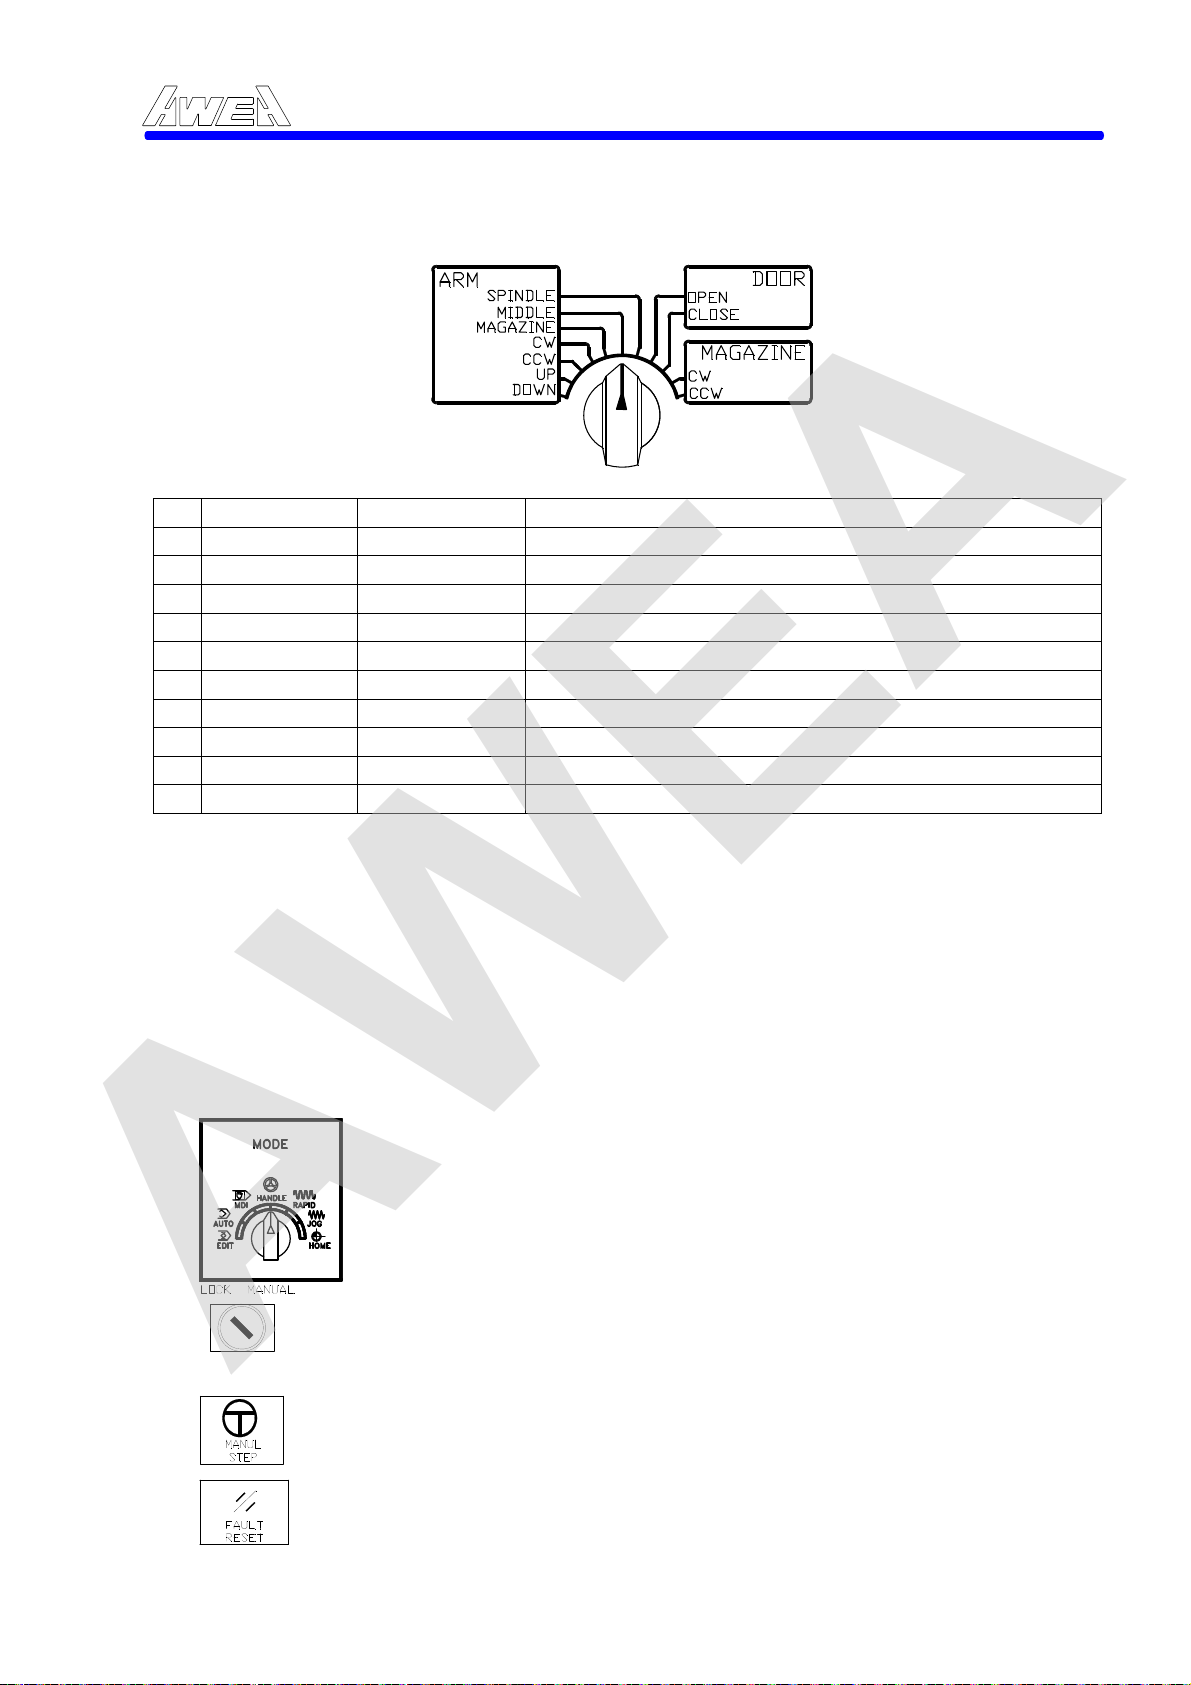
AWEA
A. Operation instruction on the magazine:
a. ARM SPINDLE: ARM move to Spindle side b. ARM MIDDLE: ARM move to Neutral position c. ARM MAGAZINE: ARM move to Magazine side d. ARM CW: ARM rotate in CW direction e. ARM CCW: ARM rotate in CCW direction
f. ARM UP: ARM move up g. ARM DOWN: ARM move down h. DOOR OPEN: Magazine door open
i. DOOR CLOSE: Magazine door close j. MAGAZINE CW: Tool magazine rotating in CW direction
k. MAGAZINE CCW: Tool magazine rotating in CCW direction
) Tool Magazine manual operation effective condition:
When the tool magazine key switch turn to MANUAL position while the ATC is not in Auto Tool Changing process; The tool magazine manual operation effective only when the ATC processing has been finished.
) Tool Magazine manual operation mode cancellation:
When the tool magazine key switch turn to LOCK position, press the FAULT
RESET button and the button lights out, the Tool Magazine manual operation
mode will be cancelled. If the cancellation can not be done, means ATC
mechanism is not in the initial condition, then to cancel all condition must be
pressed the FAULT RESET button.
(1)
Set the mode select switch to the HANDLE, RAPID or JOG position.
AWEA SP/LP Series Manual - Chapter 4. OPERATION INSTRUCTION 4-11
(2)
(3)
(4)
Turn the key-switch from LOCK to MANUAL, which is located on the operation panel of the Tool Magazine.
Press this button to operate the magazine manually.
Whenever miss operating the magazine, the magazine will be getting
alarm.
The lights up means Tool Magazine is in manual operation mode.
The light flashing means Tool magazine is abnormal or mis-operation.
4-11
Page 65
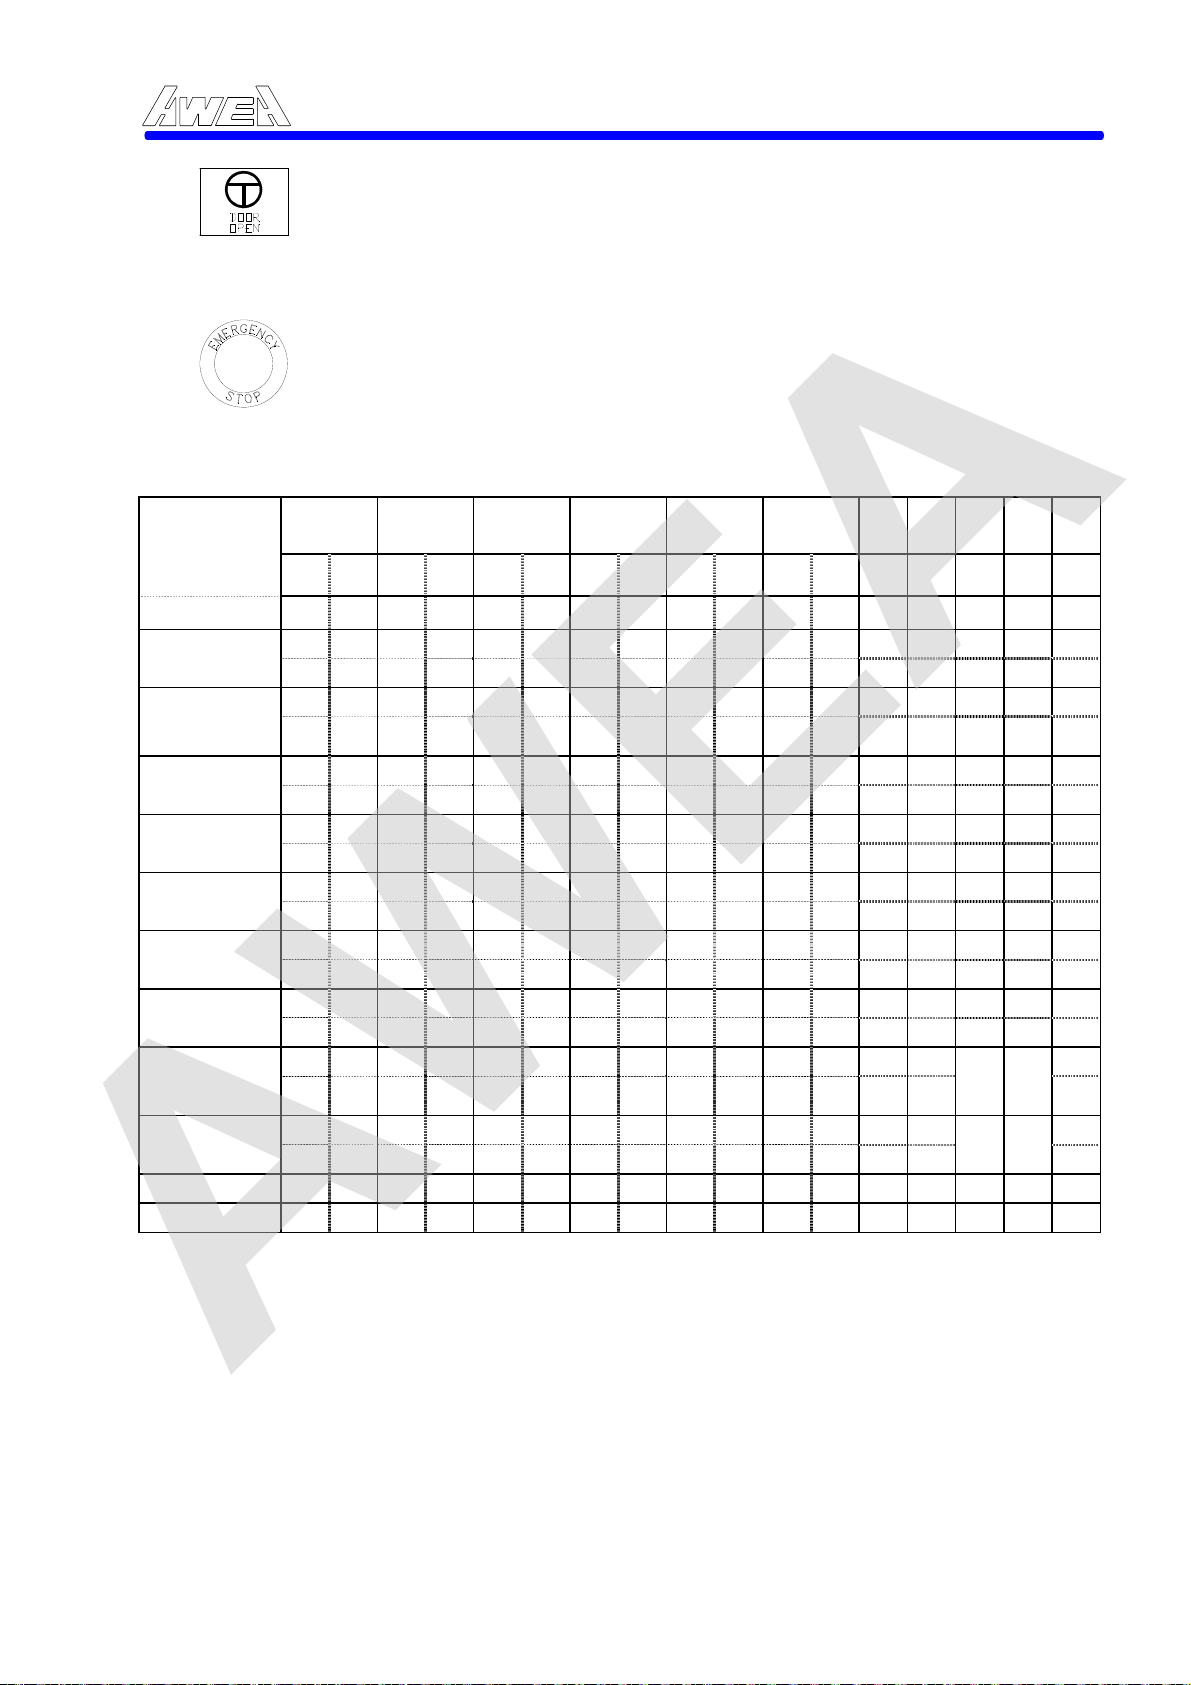
AWEA
(5)
[For CE version only]
(6)
If the machine is equipped with CE version, then the magazine door
B. Operation instruction on the magazine:
must be opened only by pressing the DOOR open button under the
Manual mode. When the door is open, the magazine chain will not be
rotating.
Push this button, machine will be in Emergancy status and reset all NC
data in the RAM. To terminate this E-stop status, turn the E-stop button
in right hand direction to release the button, then push the OT Stop
release push button to clear the E-stop status.
AWEA SP/LP Series Manual - Chapter 4. OPERATION INSTRUCTION 4-12
ATC status
Activity
Spindle Clp
Spindle Rls.
Arm up
Arm down
Arm
rotate
Door open
Door Close
Pocket Swing up
Pocket Swing dwn.
Pocket Ind.
Pocket Stp.
Spindle Mgz.
door
Clam
RLS
X1008.1 X1008.2 X1006.5 X1006.4 X1012.1 X1012.2 X1011.4 X1011.5 X1011.6 X1011.7 X1006.1 X1006.0 X1006.1 X1006.0 D130 X1006.
1 0 - - - - 1 - 0 1 - - - - - - 1 0 - - - - 1 - 1 0 - - - - - - 0 1 - - - - 1 - 0 1 - - - - - - 0 1 - - - - 1 - 1 0 - - - - - - -
- - - - - 1 0 1 0 1 - - - - - - -
- - - - - 1 0 1 1 0 - - - - - - -
- - - - - - 1 0 0 1 - - - - - - -
- - - - - - 1 0 1 0 - - - - - - -
- - 1 0 - - 0 1 0 1 - - - - - - -
- - 1 0 - - 0 1 1 0 - - - - - - -
- - 0 1 - - - - 0 1 - - - 0
- - 0 1 - - - - 1 0 0
- - 1 0 - - - - 0 1 1 0 - - - - 0
- - 1 0 - - - - 1 0 1 0 - - - - 0
- - - - 0 1 1 0 - - - - 0 1 -
- - - - 0 1 0 1 - - - - 0 1
- - - - 1 0 1 0 - - - - 0 1 -
- - - - 1 0 0 1 - - - - 0
- - - - 1 0 (1) - - - - - - 0
- - - - 1 0 - - - - - - 0 1
Open Close Hori. Vert. Up Down CW CCW In Out Enb In. Mz. Arm PX
p
Pocket
ind.
ATC arm
ATC
arm
ATLM Mg
z.
Pin P# A# M6
P
2
=A#=M
- 0
D131
-
#
-
4-12
Page 66
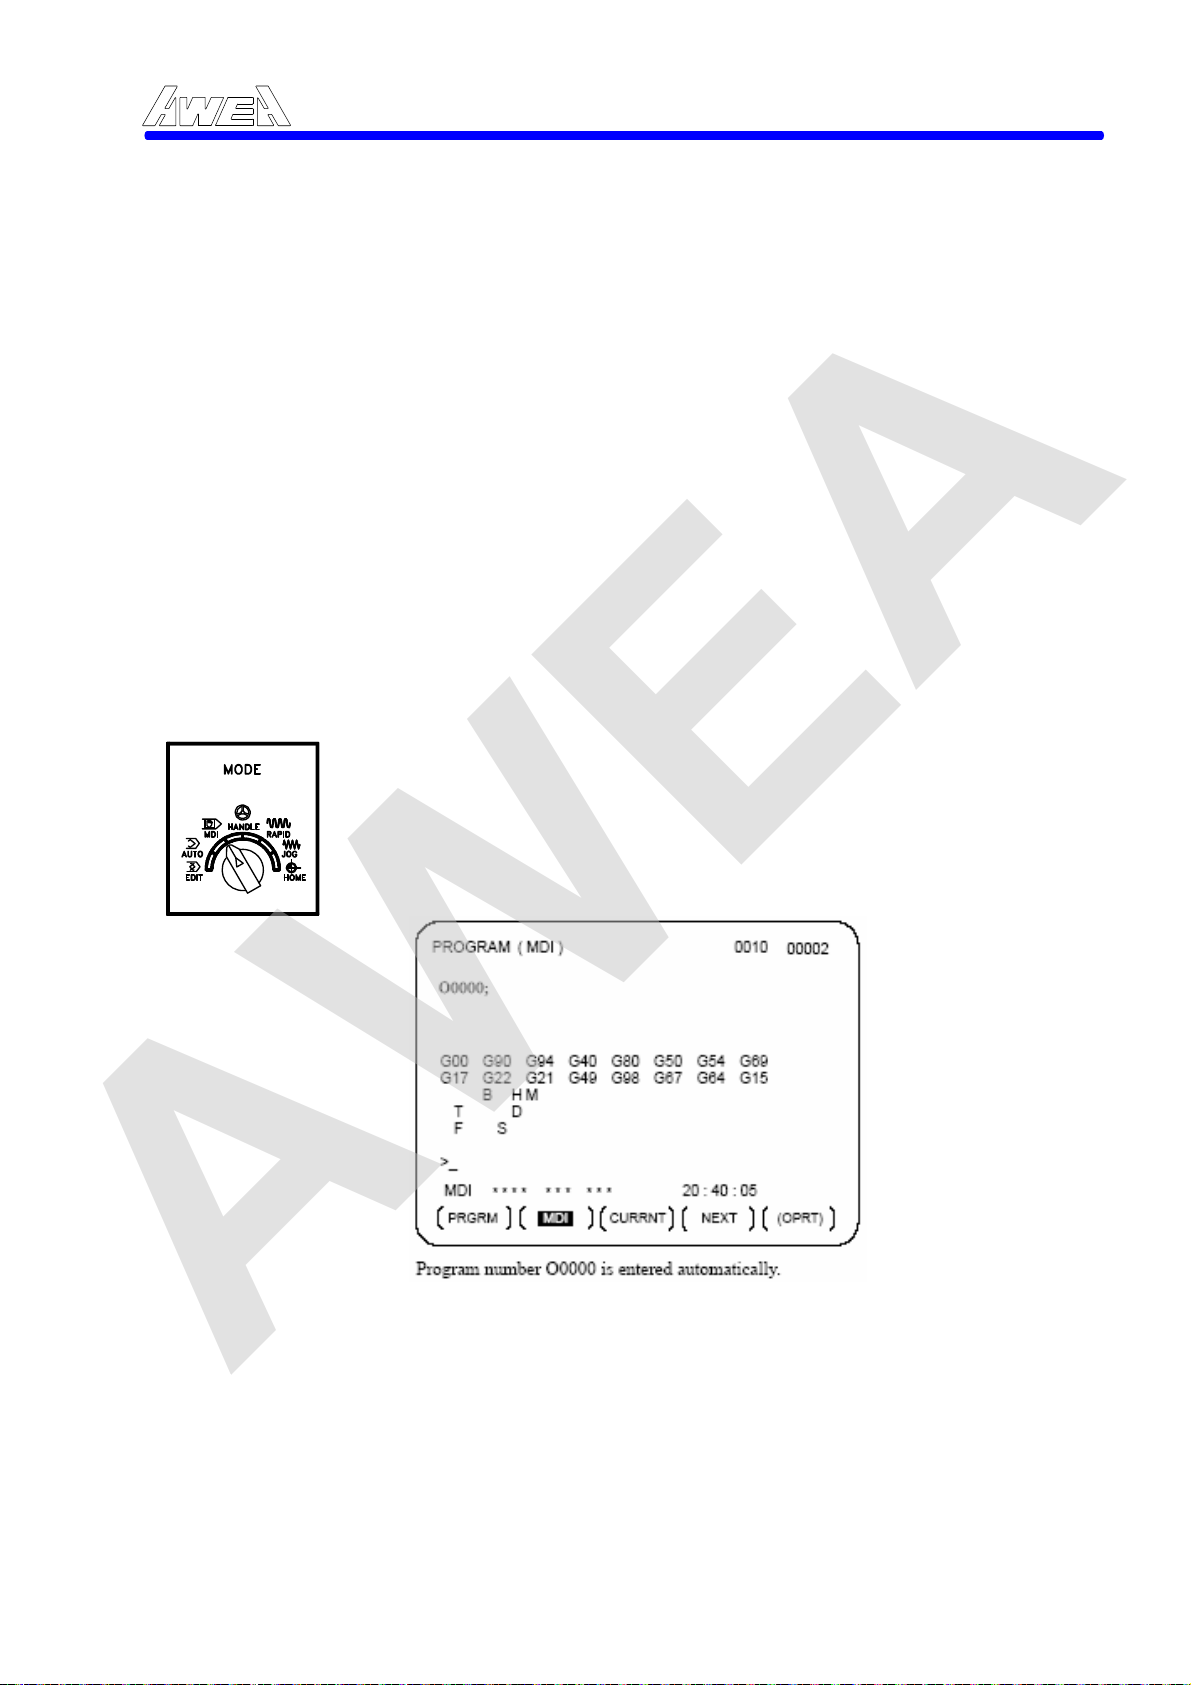
AWEA
4.3 MDI operation
4.3.1 MDI Instruction
The MDI mode provides the operator with the means to manually enter and
execute program information one block of information at a time. MDI blocks are
executed independent of the Active NC program. Each MDI block is completely
executed before the next MDI block can be entered.
The MDI mode is terminated by depressing one of the other mode keys. If an MDI
block is disp
the block is erased. The control state which was active when the MDI mode was
entered is retained when the MDI mode is terminated, unless the state is changed
from end of block to end of program while in the MDI mode, in which case the end
of program state is retained.
Note: The MDI mode can not be terminated if the cycle of an MDI block has
been started and has not been completed (in cycle or suspended in the
middle of the block).
A. Programming
AWEA SP/LP Series Manual - Chapter 4. OPERATION INSTRUCTION 4-13
layed in the MDI Block entry area when the MDI mode is terminated,
Set the mode selector in MDI position. Press the PRGRM push-button, the CRT screen will displayed as below:
․ The program No. O0000 will inserted automatically. To program in MDI mode is
the same as program editing.
․ The length of a program which can be prepared is limited to one page of a CRT
screen. In the above case, the longest program is 6 lines with specification of
the parameter, if the mode is switched to that of no modal information display,
up to 10 lines of program can be prepared. If the number of lines of program
exceeds the limit, % will disappear and insertion and modification operation will
become impossible.
․ To delete a program by press the RESET push-button (when parameter no.
057 is set as MBCLR=1) or O「DELETE」.
4-13
Page 67
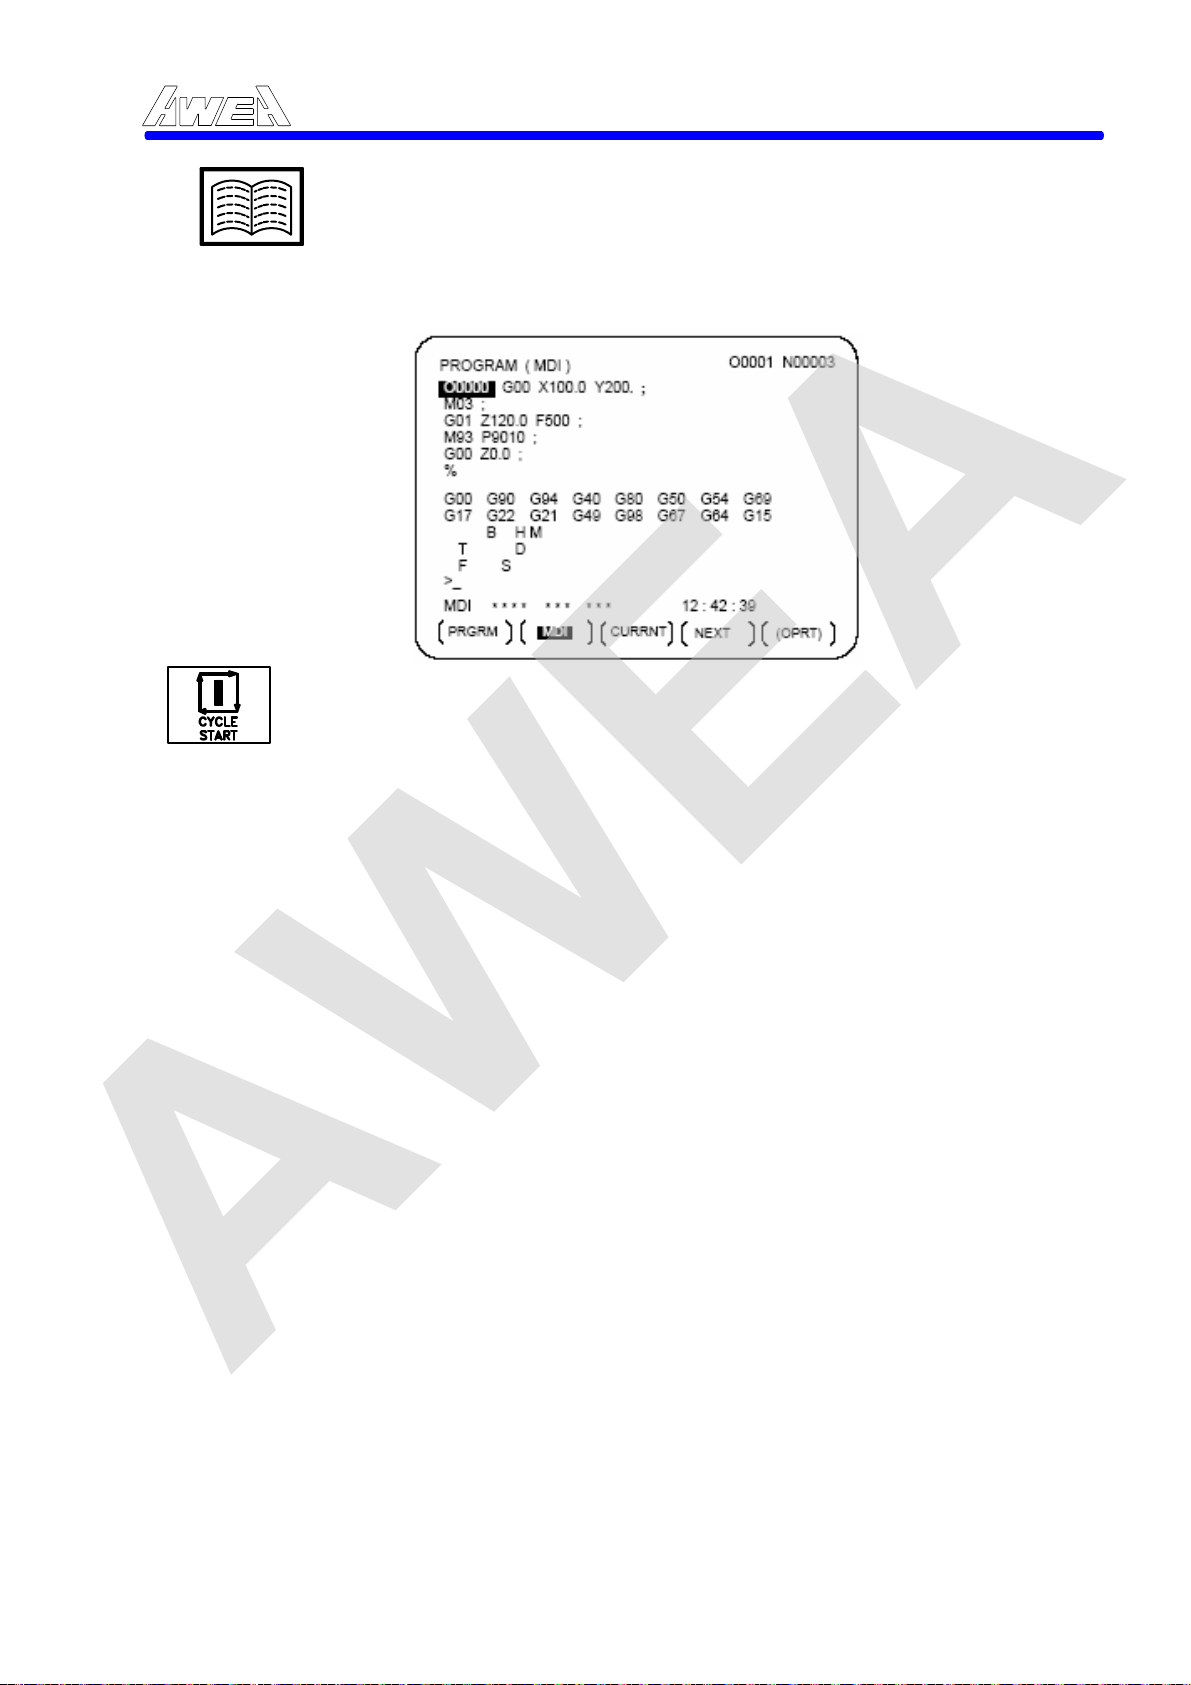
AWEA
Program editing, please refer to FANUC operation manual.
B. Program Execution
Set the cursor on the head of the program. (Start from an intermediate point
is possible) Press the START push-button on the FANUC Panel or Cycle
Start push-button on the Control Panel. Machine will start to run. When the
C. Cautions and others:
program end (M02, M30) or % is executed, the program will be erased
automatically and the operation is end. By command of M99, return to the
head of the program is performed.
(1) Programs registered in the program memory can be called as
subprogram. In this case, the nest of subprogram is up to 2-loops
combined with automatic operation (AUTO) program. (If a caution macro
option is provided, up to 4-loops combined is possible.)
(2) If the custom macro option is provided, even in the MDI mode, custom
macro program preparation and execution is possible.
macro program which call another macro program, macro call is not
possible.
(3) A program to be prepared in the MDI mode uses program memory vacant
area. If there is no vacancy in the program memory, p
in the MDI mode is not possible.
(4) Program prepared in the MDI mode will be erased in the following cases:
(i) In MDI operation, if M02, M30 or % is executed.
(i) In AUTO mode, if memory operation is performed.
(ii) In EDIT mode, if any editing is performed.
(iii) Background editing is performed.
(5) The editing operation during the stop of MDI operation will start from the
cursor position which makes start, but not from the current cursor position.
AWEA SP/LP Series Manual - Chapter 4. OPERATION INSTRUCTION 4-14
However, when a
rogram preparation
4-14
Page 68

AWEA
4.3.2 Tool Number Initial and Command
AWEA SP/LP Series Manual - Chapter 4. OPERATION INSTRUCTION 4-15
WARNING
MAKE SURE ALL FOLLOWING ITEMS MUST BE CORRECTED BEFORE TOOL NO. CHANGE.
A. Procedure to initial Spindle Tool Number: (Display in vertical status)
Operation MESSAGE 09000 N9000
(MAGZ T#) (ATC Arm T#) (SPDL T#)
S T
MDI
[ ALARM ] [MESSAG ] [ ] [ ]
BE SURE that the tool number in the spindle and magazine are ◎
relative to each other.
MAKE SURE that there is no tool in the tool pocket of the ◎
magazine of whatever number is occupied on the spindle.
IF the spindle has been occupied by a tool, DO NOT modify the ◎
spindle tool number at the value of "0".
The tool must be perf◎ ormed by dimension check, clean and
tightened pull stud before spindle loading.
The tool to be mounted must meet the specified specifications ◎
as below:
Max. tool Dia. (full / adjacent empty) = 130 mm (5.1") / 215 mm
(8.4")
Max. tool Length = 350 mm (13.8")
Max. tool Weight = 20 kg (44 lb)
MAZ=#01 ARM=#02 SPD=#03
4-15
Page 69
AWEA
B. Procedure to initial Spindle Tool Number: (Display in Horizontal status)
(OPT)
․ Spindle current status:「EMPTY」, machine operation is prohibited.
․ Spindle current status:「COVER」, machine is in vertical operation.
․ Spindle current status: 「HEAD」, machine is ins horizontal operation.
․ C axis current status: by means of tilting head information.
․ While the spindle status is in horizontal status, Y axis can only be returned
to HOME position when the C axis is in 270 degree.
OPERATION MESSAGE 09000 N9000
(MAGZ T#) (ATC ARM T#) (SPDL T#)
(SPDL CURRENT STATUS)
(C AXIS CURRENT STATUS)
S T
MDI
[ ALARM ] [MESSAG ] [ ] [ ]
AWEA SP/LP Series Manual - Chapter 4. OPERATION INSTRUCTION 4-16
MAZ=#01 ARM=#02 SPD=#03
SPD=2 : 1.EMPTY 2.COVER 4.HEAD
C AXIS ANGLE=3 : 3.0DEG 4.90DEG 5.180DEG 6.270DEG
In MDI mode
C. Procedure to initial Tool Number:
(1) Key-in M96T__ k1; (for the T number at the Tool magazine side)
Key-in M96T__ k2; (for the
Key-in M96T__ k3; (for the T number at the Spindle side)
(T__=T1 - T max. Tmax=32 for 32 tool magazine)
(2)
(3)
* If the operator key-in the T n ≠ T1 - T max., machine will alert. Tn=T0
Press CYCLE START push-button, M95T__; on the screen will be disappeared.
Check the tool number by pressing T#DISPLAY push-button, to see whether it is corrected.
can be accepted by the control, it means there is no Tool No. on the
spindle. M96T__k3 is only available for changing the Tool no. on the
spindle.
T number at the ATC arm)
4-16
Page 70

AWEA
** Before pressing CYCLE START push-button to initial the tool no. on
the spindle, make sure that AXES ILK key has been selected,
otherwise machine will alert.
(4) MACRO Program:
:9024(CHANGE TOOL NO.)
IF[#20NE#0]GOTO10
#3000=30(T CODE ERROR)
N10
IF[#6EQ1]GOTO100
IF[#6EQ2]GOTO200
IF[#6EQ3]GOTO300
#3000=31(K CODE ERROR)
N100
IF[#20NE0]GOTO150
#3000=30(T CODE ERROR)
N150
#1133=ABS[#20]
M93
GOTO900
N200
#1133=ABS[#20]
M94
GOTO900
N300
#1133=ABS[#20]
M95
N900
G4X1.
#1133=0
M99
AWEA SP/LP Series Manual - Chapter 4. OPERATION INSTRUCTION 4-17
Spindle Loading and Unloading procedure, please refer to the chapter 4.3.3.
4.3.3 Magazine Tool Loading and Unloading
Operation procedure to unload the tools in the magazine is as below:
A. Set the mode select switch to the HANDLE position.
B. Turn the key-switch from LOCK to MANUAL, which is located on the operation
panel of the Tool Magazine.
C. Unload the tool by pulling the tool.
D. Select the Magazine mode at CW or CCW and press the Manual Step
push-button once a pocket to change to the other pocket position.
E. Turn the key-switch from MANUAL to LOCK. This is complete tool loading
procedure.
4-17
Page 71
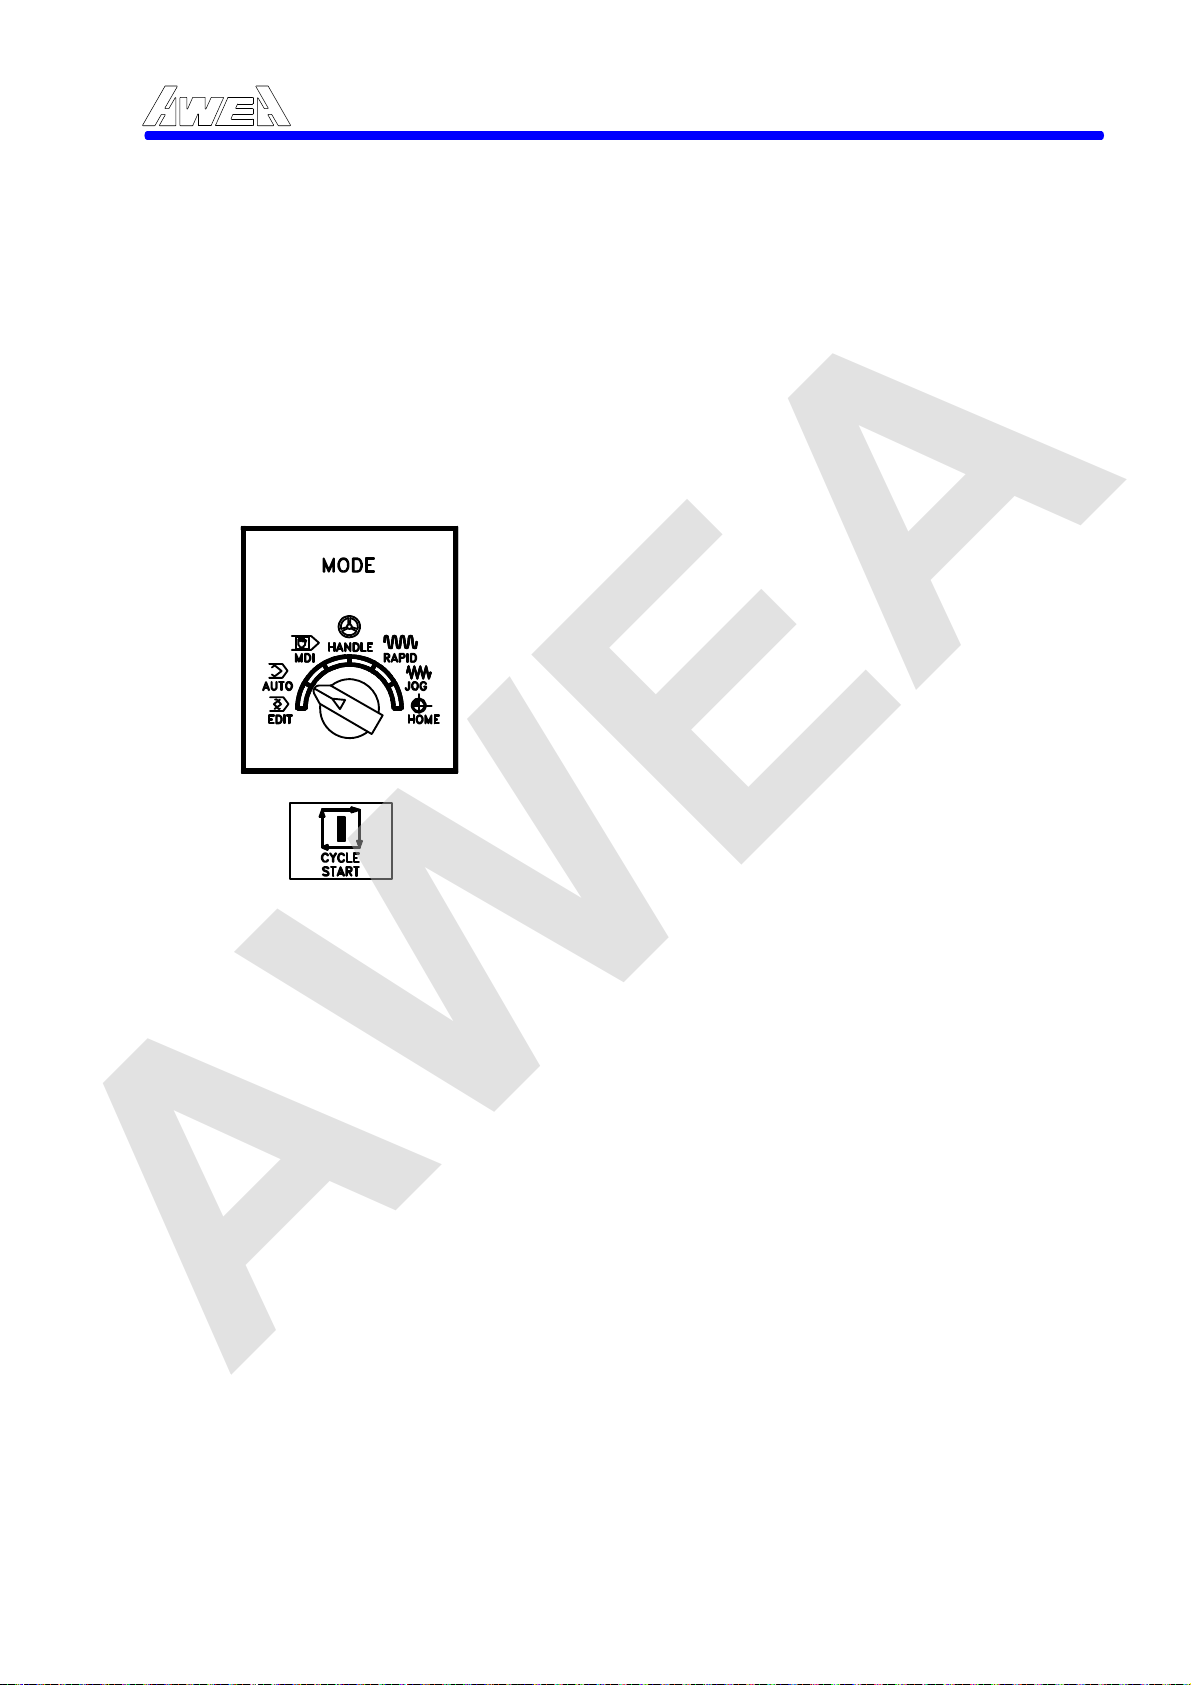
AWEA
4.4 Automatic Operation
4.4.1 Executing Automatic Operation
The program which stored in memory can be executed in AUTO mode, only one
program can be perform at the same time. To search the program number and
enable it as follows:
A. Load the program to the memory.
B. Select the program to be operated.
C. Select the mode in AUTO position.
D. Press CYCLE START push-button to run the program.
After automatic operation is started, the following are executed:
A. A one-block command is read from the specified program.
B. The block command is decoded.
C. The command execution is started.
D. The command in the next block is read.
E. Buffering is executed. That is, the command is decoded to allow immediate
F. Immediately after the proceeding block is executed, execution of the next block
G. Hereafter, automatic operation can be executed by repeating the steps (4) to (6).
execution.
can be started. This because buf
AWEA SP/LP Series Manual - Chapter 4. OPERATION INSTRUCTION 4-18
(1) Set the mode selector in EDIT position. When once a
expected program is selected, load the program by
pressing the RESET push-button on the F
operator's panel.
(2) Set the mode selector in AUTO position.
(3) Press the CYCLE START push-button, the button
light will come on.
ANUC
fering has been executed.
4-18
Page 72
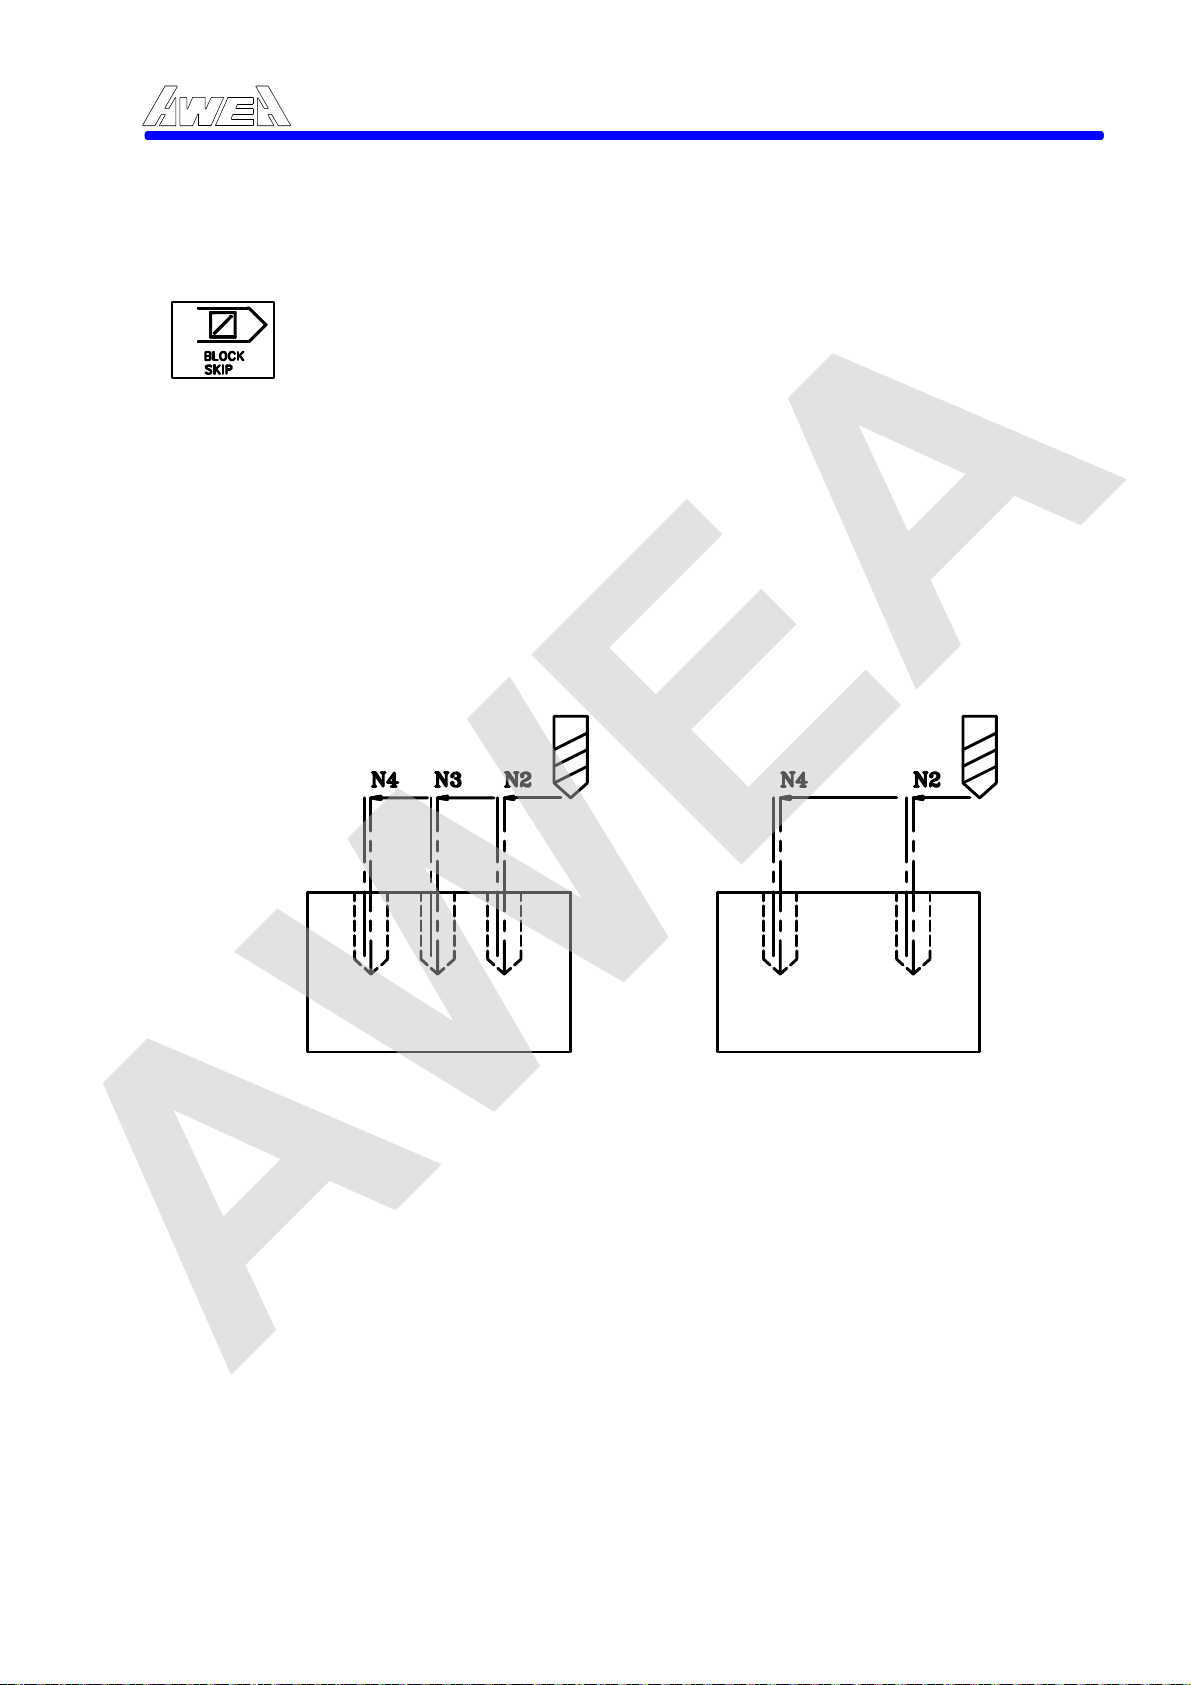
AWEA
4.4.2 Block Skip
(1) ON: Depressed the push-button, button light will come ON.
The function is active when the push-button is illuminated. The
/ N3 X30.; ( Slash code is in front of the block )
control will ignore any block containing a Slash code ( / ) when
mode selector is in AUTO or MDI position.
(2) OFF: Released the push-button, button light will turn OFF.
When the push-button is not illuminated, the data block is executed, even any block containing a Slash code ( / ).
For example:
N1 G54;
N2 G90 G81 X50 .Z-20. R3 .F100;
N4 X10.;
N5 G80;
M30;
AWEA SP/LP Series Manual - Chapter 4. OPERATION INSTRUCTION 4-19
BLOCK SKIP button is ON BLOCK SKIP button is OFF
4-19
Page 73
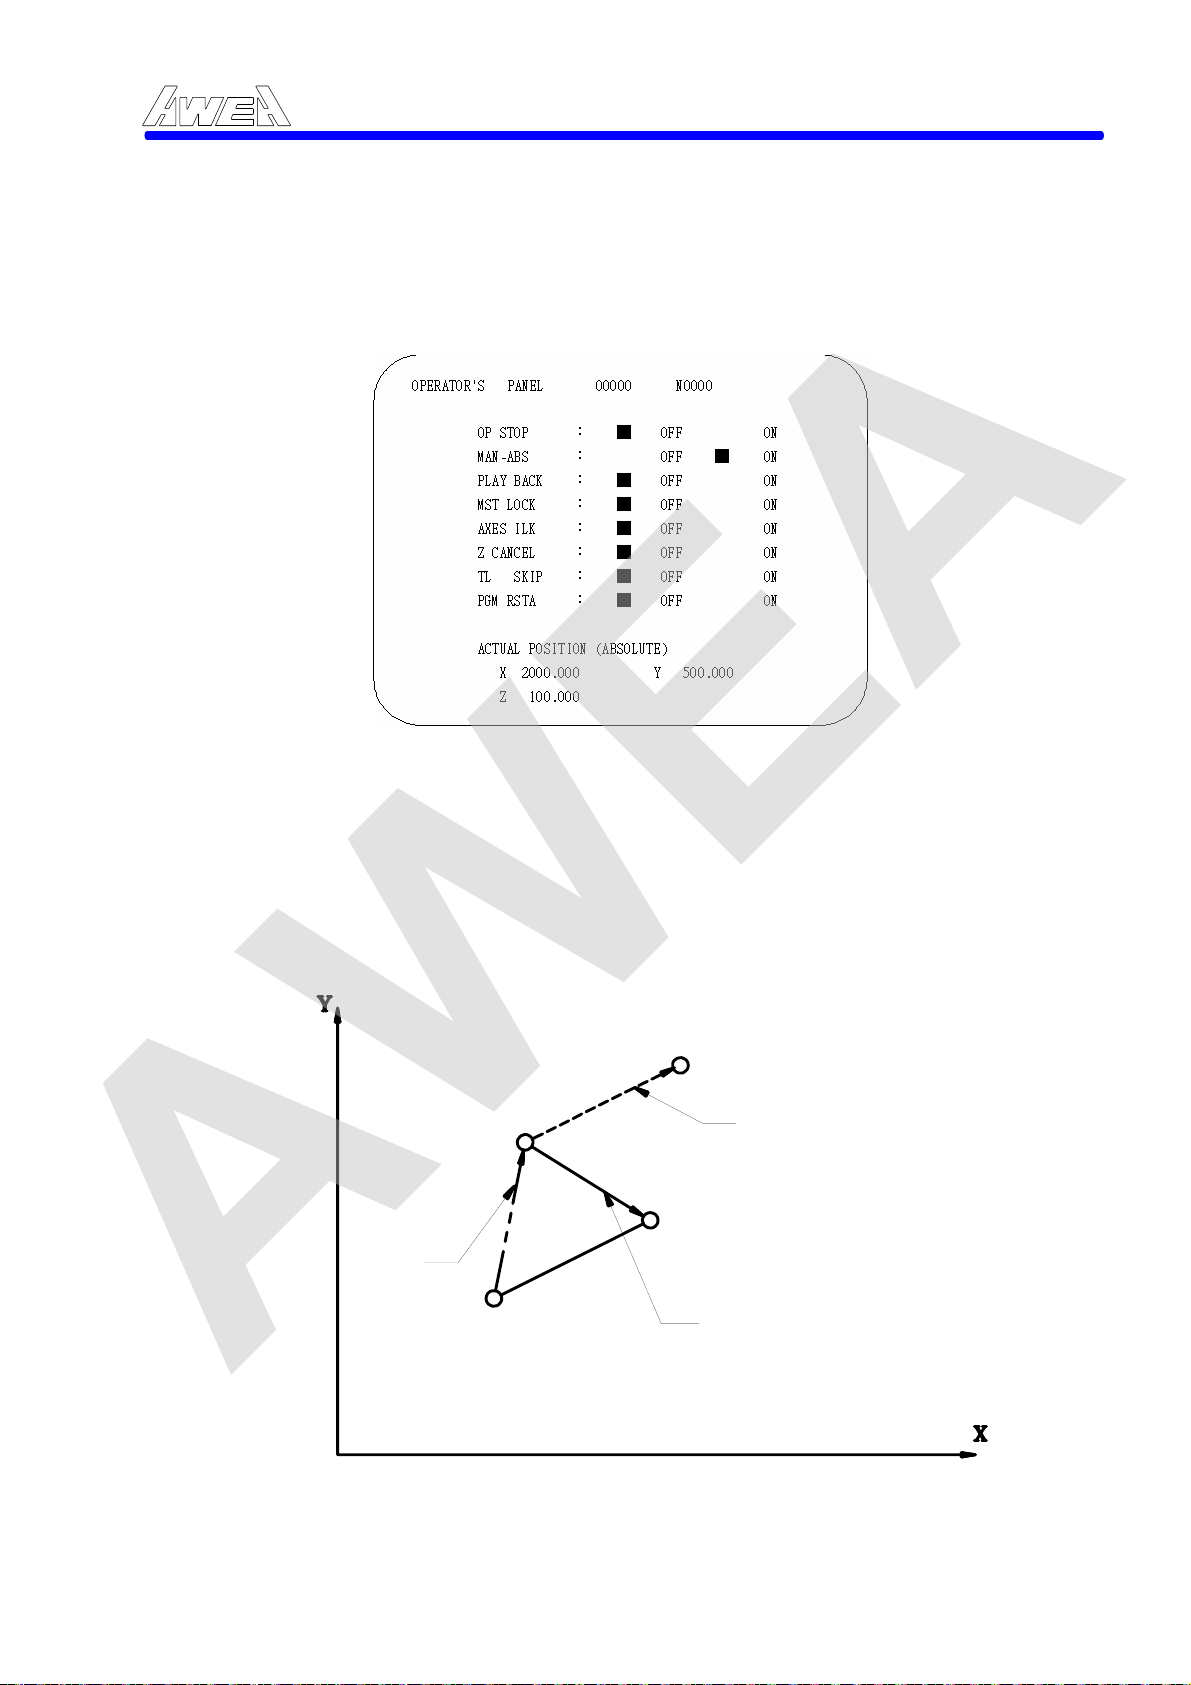
AWEA
4.4.3 Manual Absolute
This soft-key ON/OFF selects whether the amount of manual movement is to be added to the absolute value.
AWEA SP/LP Series Manual - Chapter 4. OPERATION INSTRUCTION 4-20
For example :
:
:
N001 G01 G90 X100.0 Y100.0 F1000 ;
N002 X200.0 Y150.0;
N003 X300.0 Y200.0;
A. When block N002 has been executed after manual operation ( X axis +
20.0, Y axis +100.0 ) at the end of movement of block N001.
( 220, 250 )
( 120, 200 )
( 200, 150 )
Manual
Operation
Manual Absolute is OFF
( 100, 100 )
4-20
Manual Absolue is ON
Page 74
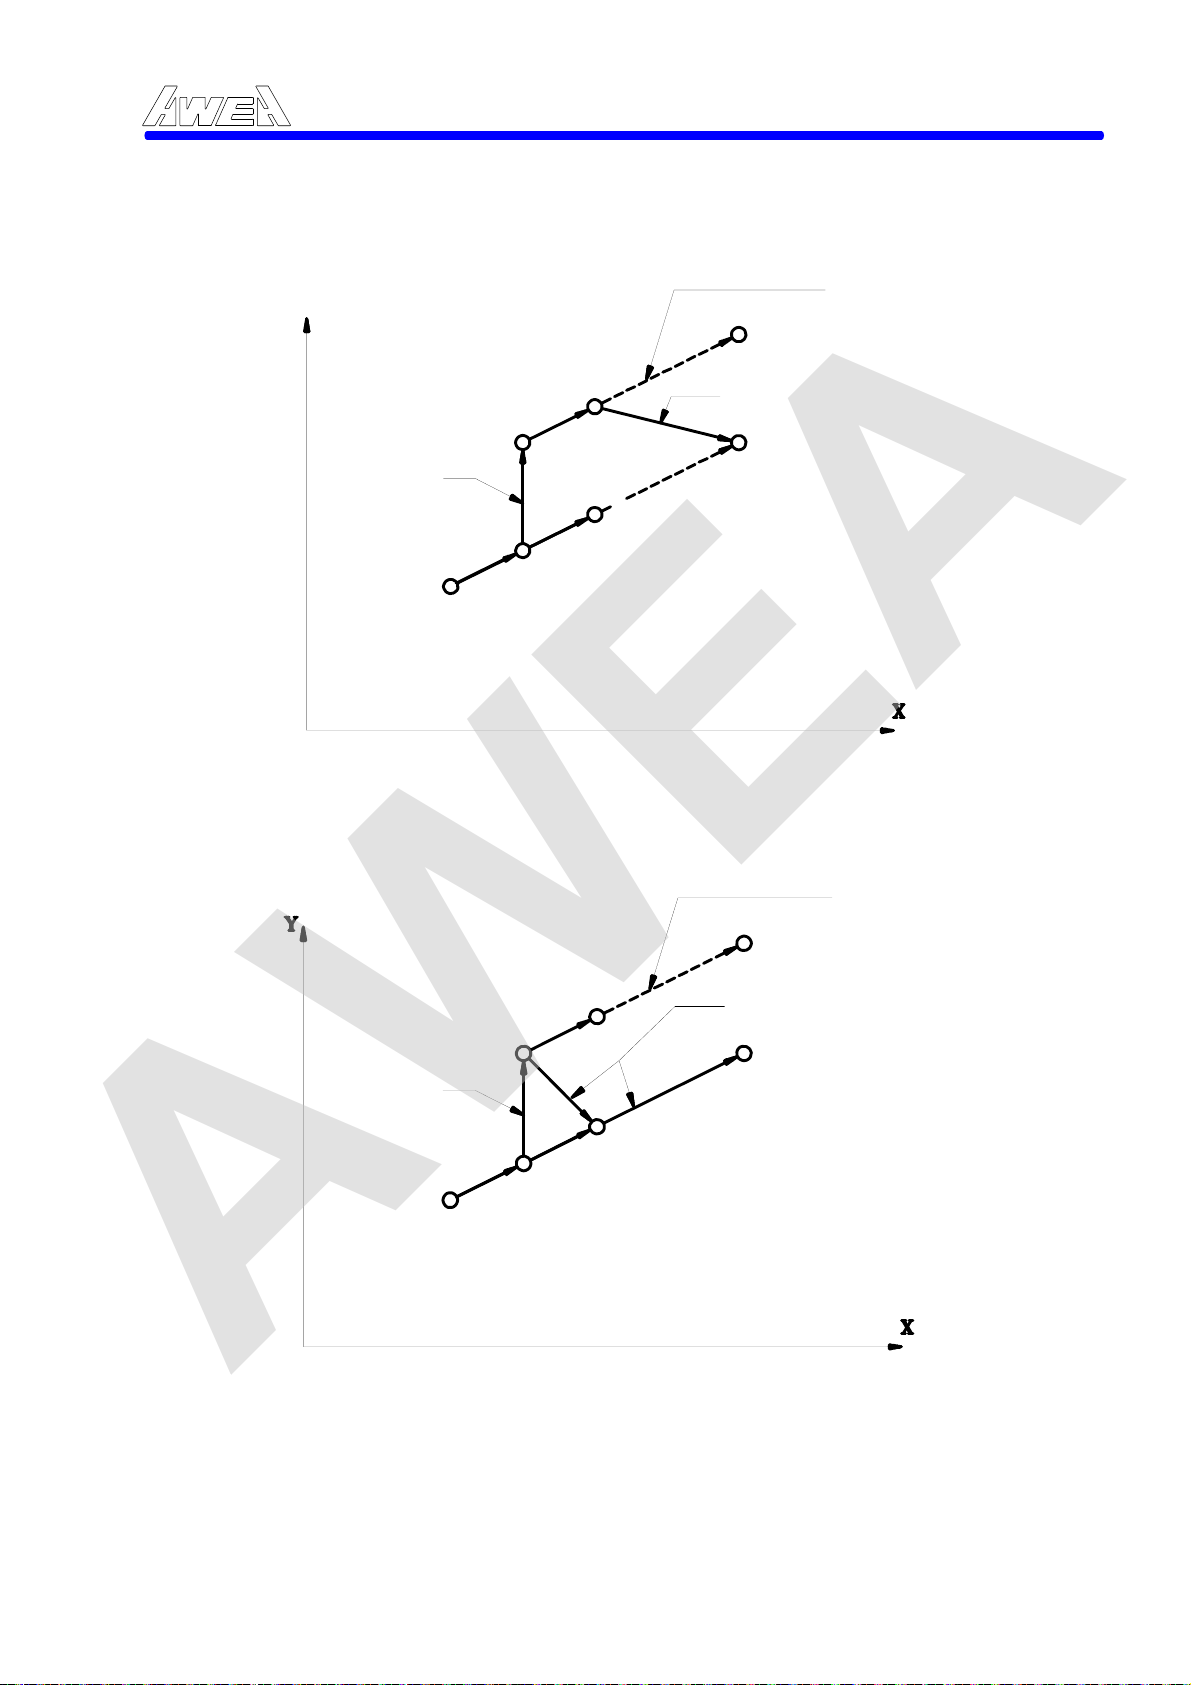
(
)
(
)
AWEA
B. When the Feed Hold button is pressed while block N002 is being
executed, manual operation (Y axis +75.0) is performed, and the cycle
start button is pressed and released.
Y
AWEA SP/LP Series Manual - Chapter 4. OPERATION INSTRUCTION 4-21
Manual Absolute is OFF
300, 275
200, 225
(150, 200 )
Manual Operation
(200, 150)
(150, 125)
(100, 100)
C. When the Feed Hold button is pressed while block N002 is being
executed, manual operation ( X axis +75.0 ) is performed, the control unit
is reset with RESET button, and block N002 is read again.
Manual Absolute is ON
(300, 200)
Manual Absolute is OFF
( 300, 275 )
( 200, 225 )
( 150, 200 )
Manual Operation
( 200, 150 )
( 100, 100 )
Manual Absolute is ON
( 300, 200 )
4-21
Page 75
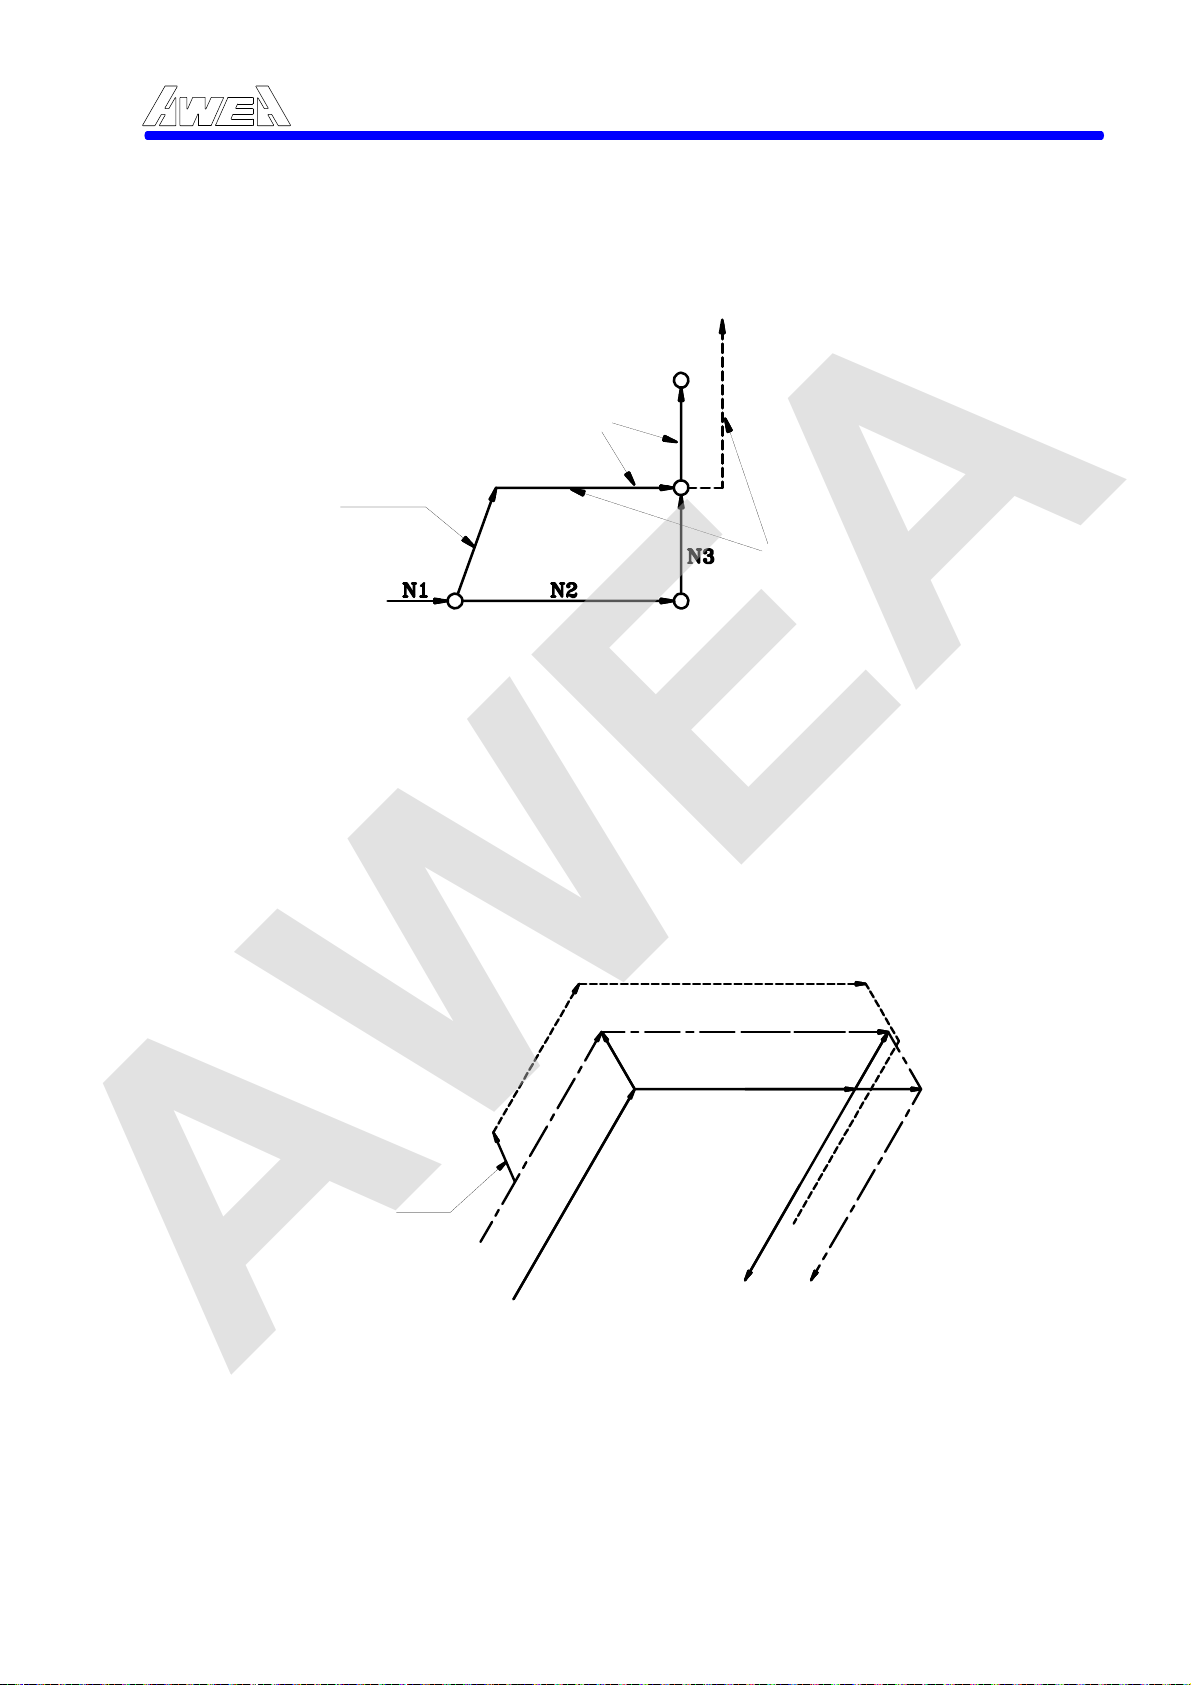
AWEA
D. When there is only one axis in the following command, only the
commanded axis returns.
N1 G01 G90 X100.0 F500 ;
N2 X200.0 ;
N3 Y150.0;
Manual
Operation
E. When the follow ing commands are incremental commands, operation is
the same as when the MANUAL ABSOLUTE push-button is OFF.
NOTE:The following conditions will be happened when manual operation is
performed during cutter radius compensation.
A. The MANUAL ABSOLUTE push-button is OFF and cutter compensation is being
performed.
After manual operation is performed with the Manual Absolute push-button in OFF
position
moves parallel to the movement that would have been performed. if manual movement
had not been performed. The amount of separation equals to the amount that was
performed manually.
during cutter compensation, automatic operation
AWEA SP/LP Series Manual - Chapter 4. OPERATION INSTRUCTION 4-22
Manual absolute is ON
Manual Absolute is OFF
is restarted then the tool
Manual Absolute is OFF - Tool Path
Tool Path
Program Path
Manual
Operation
4-22
Page 76
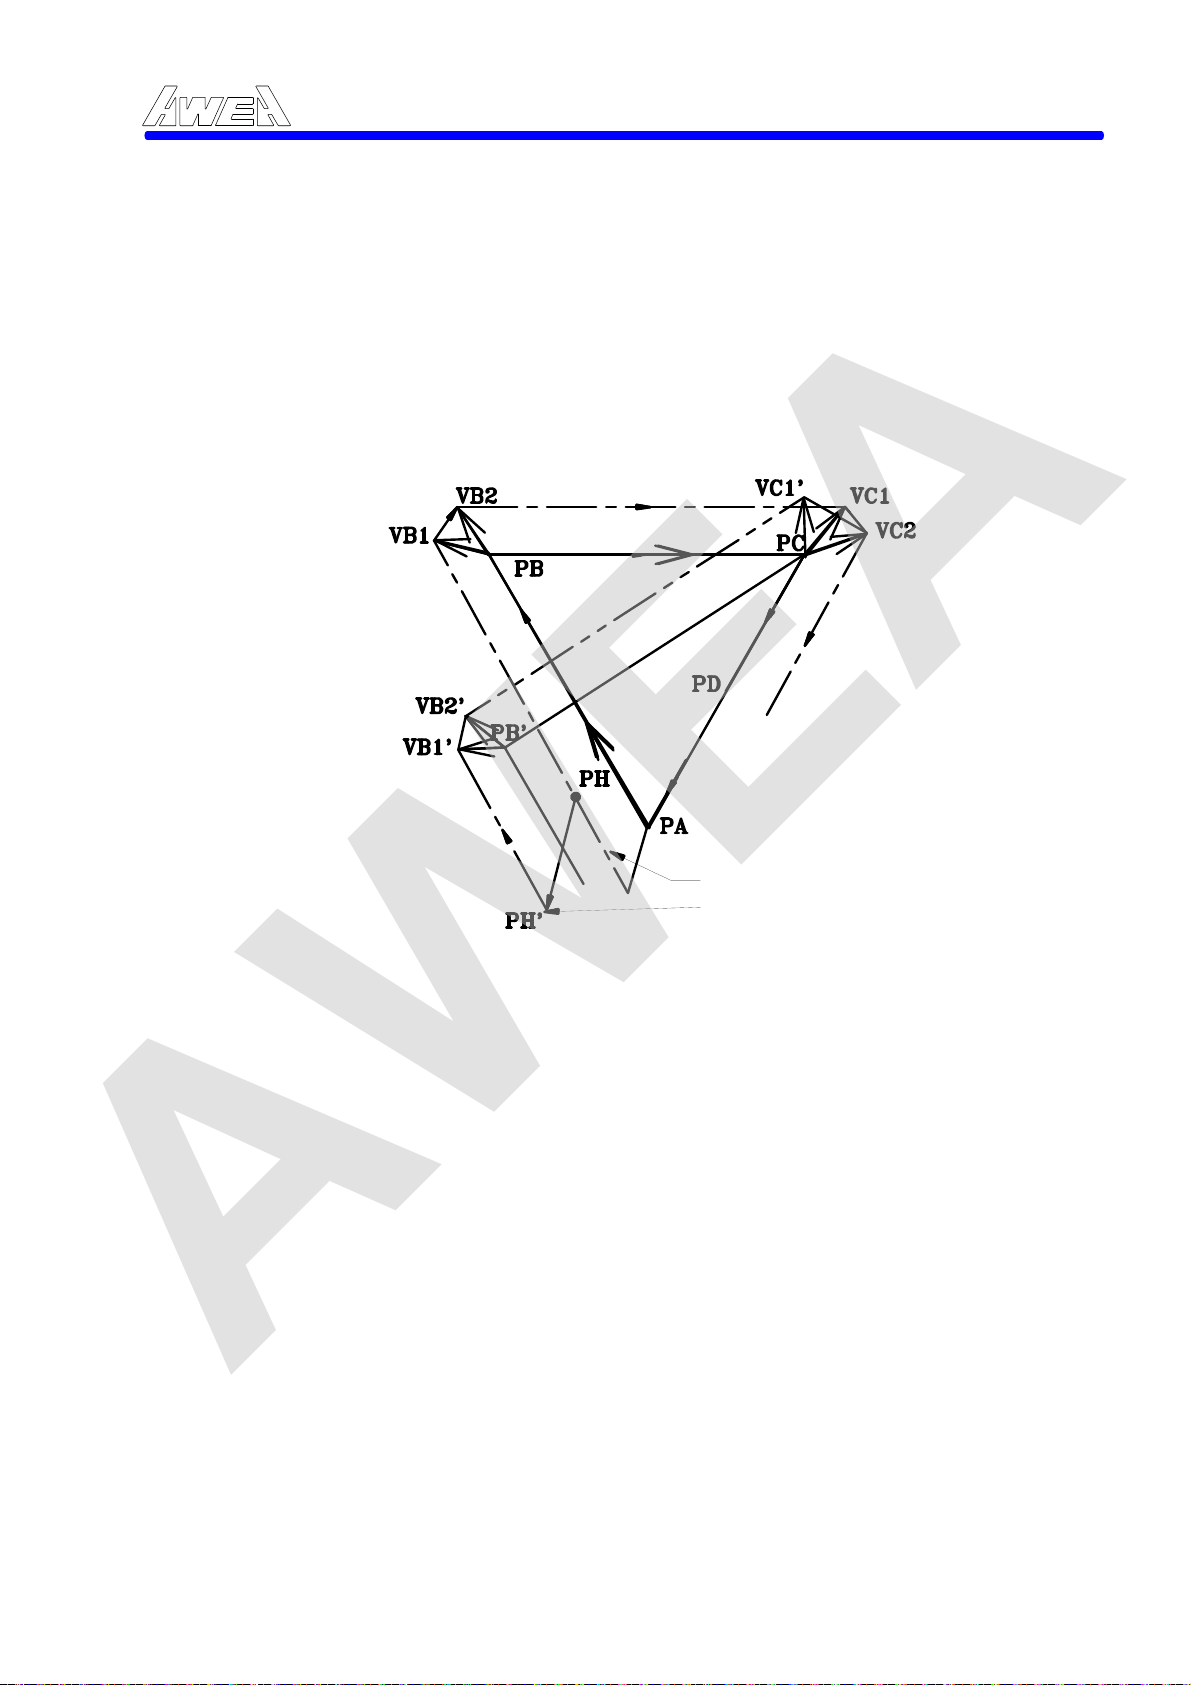
AWEA
B. The MANUAL ABSOLUTE push-button is ON and cutter radius compensation is being
performed.
Machine operation upon return to automatic operation after manual intervention with
the manual absolute push-button in
command program in the cutter radius mode will be described. The vector, the
remaining part of the current block and the beginning of the next block is shifted in
parallel the amount of manual movement performed is included in the calculations of
the vectors of the two blocks subsequent to the current block. This also applies when
manual operation is performed during cornering.
(1) During block execution
Example 1:
AWEA SP/LP Series Manual - Chapter 4. OPERATION INSTRUCTION 4-23
ON position during execution with an absolute
Program path
(Absolute command)
Tool Path
(before manual operation)
Manual Operation
Assume that the Feed Hold was applied at point PH while moving from PA
to PB of programmed path PA, PB, and PC and that the tool was manually
moved to PH'. The block end point PB moves to the point PB' by the
amount of manual movement, and vectors VB1 and VB2 at PB also move
to VB1' and VB2'. Vectors VC1 and VC2 between the next two blocks PB PC and PC - PD are discarded and new vectors VC1' and VC2' ( VC2' =
VC2 in the example above ) are produced from the relation between PB' PC and PC - PD. However, since VB2' is not a newly calculated vector,
correct offset is not performed at block PB' - PC. Offset is correctly
performed after PC.
4-23
Page 77
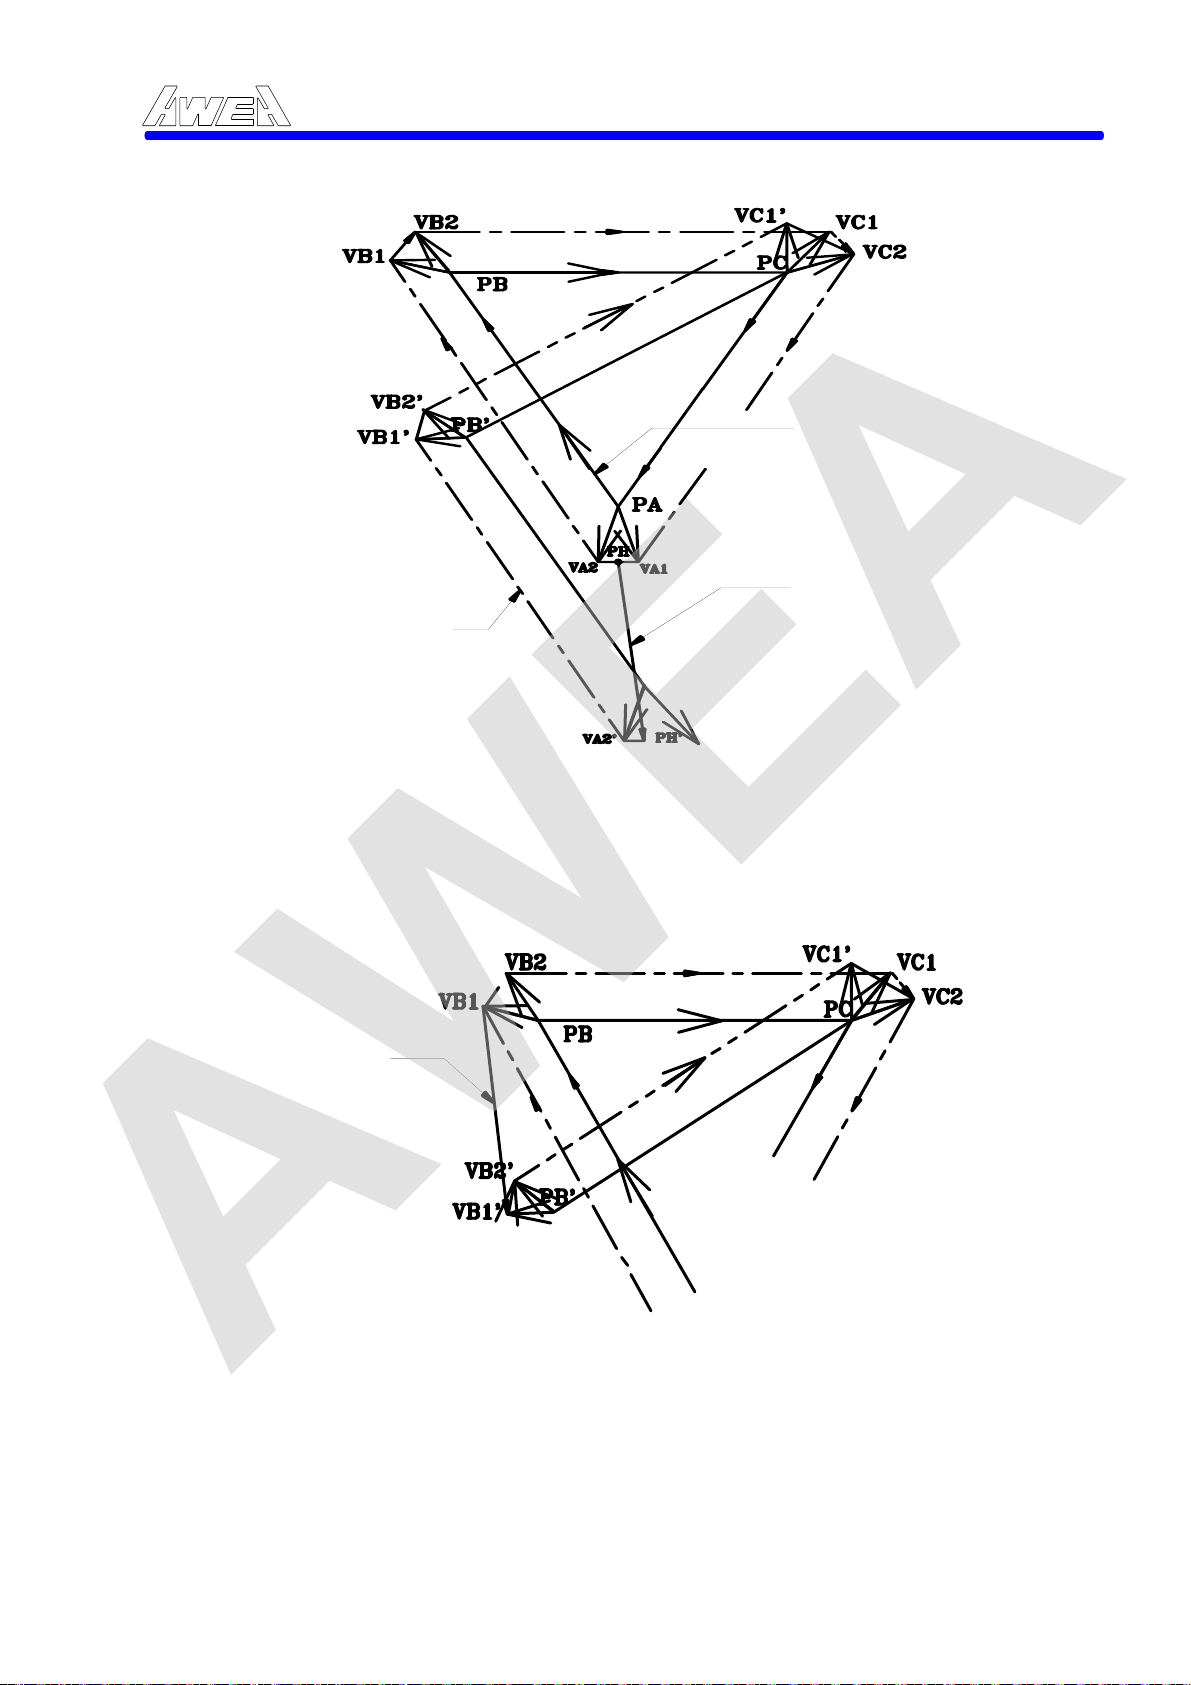
AWEA
Example 2:
AWEA SP/LP Series Manual - Chapter 4. OPERATION INSTRUCTION 4-24
Program Path
(Absolute Command)
Manual Operation
Tool Path
This is an example when manual operation is performed during cutter radius
cornering. VA2', VB1', and VB2' are vectors moved in parallel with VA2, VB1 and
VB2 by the amount of manual movement. The new vectors are calculated from
VC1 and VC2. Then correct cutter radius is performed for the blocks following PC.
(2) Manual operation was performed when execution of a block was
terminated by single block stop.
Manual
Operation
Tool Path
Vectors VB1 and VB2 are shifted by the amount of manual operation. Sub-sequence processing is the same as case (a) described above.
An MDI operation can also be intervened as well as manual operation. The movement is the same as that by manual operation.
VA1'
Program Path
(Absolute Command)
4-24
Page 78

AWEA
4.4.4 Program Restart
This function specifies Sequence No. of a block to be restarted when a tool is
broken down or when it is desired to restart machining operation after a day off, and
restart the machining operation from that block. It can also be used as a high speed
tape check function. Please check the following parameters: #124 > X axis = 1,
#125 > Y axis = 2, #126 > Z axis = 3. #910.0 = 1.
A. When a tool is damaged ( P type ):
(1) Press Feed Hold to escape the tool, and replace it with a new one. Modify
the offset amount if it varies.
(2) Press PRGRM to display the present program.
(3) Turn the Mode selector in “Handle” or “Rapid” position in order to move Z,
Y, or X axis to change the tool.
(4) Depressed the Program Restart push-button on the machine control
panel. The button light will come on.
(5) Find the program head, press RESET push-button during memory
operation. Selected AUTO mode position and press O and ↑.
(6) Press P Sequence No. ↓, and search the block with Sequence No. to be
restarted. When the same sequence No. appears many times, for
example, when the subprogram is accessed several times in searching
Sequence No. in the subprogram, specify the frequency of a block with its
sequence No. in upper 4 digits, and specify Sequence No. in lower 4
digits as illuminated below.
P 1 2 3 4 0 1 2 3 【↓】 └───┘└───┘ Frequency Sequence No.
When the block is the first time, the upper 4 digits can be omitted. Further,
the leading zero can be omitted expect Sequence No. when the
frequency is specified.
(7) After completion of block search, the CRT screen is changed to the
program rest
(DESTINATION) shows the position where the machining operation is restarted.
(DISTANCE TO GO) shows the distance between the current tool position and
the machining restart position.
the order (parameter setting) described later when the tool moves to the restart
position.
M ..... Shows M code commanded recently 35 times in the past.
T ..... Shows T code commanded recently 2 times in the past.
S ..... Shows S code command in the last.
B ..... Shows B code command in the last.
Display the most previously commanded code in the head. Each code is cleared
with the program restart command and the cycle st
conditions.
(8) Released Program Restart push-button, button light will turn off. At this
time, the figure at the left side of axis name (DISTANCE TO GO) flickers
as well as Restart message at the right side.
AWEA SP/LP Series Manual - Chapter 4. OPERATION INSTRUCTION 4-25
art screen. Please refer to the screen as below.
The figure at the left side of the axis name shows
art command in reset
4-25
Page 79

AWEA
(9) Check the screen, and if M, S, T or B code should be output, select the
MDI mode and output M, S, T or B code from MDI. Each code in this case
is not displayed on the program restart screen.
Selected “Handle” mode, push Spindle CW button to rotate which speed
will be following the spindle speed executed by last block.
(10) During memory operation, select AUTO mode and check that the distance of
DISTANCE TO GO is correct, and the tool does not hit the workpiece or others. If
it is about to collide with an obstacle, move the tool manually to the location
where it does not collide, then press CYCLE START button. At this time, the tool
moves to the machining restart position in the Dry Run mode by one axis in the
order set to the parameters No. 0124 to 0127, thus restarting machining
operation in succession.
Manual Absolute button must be depressed all the time.
PRPGRAM RESTART O0500 N0010
(DESTINATION) M033 010 011 020 015
(DISTA
2 X
3 Y 1
4 Z
1 A
14:32:15 AUTO RSTR
【PRGRM】【CURRNT】
B. When restarting machining operation after the following cases (Q type)
(1) When power is turned OFF once
(2) When the emergency stop button is depressed once.
(3) When the coordinate system is changed after automatic operation is
previously stopped.
For example:
(i) When G92 was set from MDI.
(i) When the coordinate system was shifted.
(ii) When the automatic coordinate system was set by the reference
(iii) When the coordinate system was modified by " RESET ".
(1) When power is turned ON or emergency stop is released, perform all
necessary operations at that time, including the reference point return.
(2) Move the tool manually to the program starting point (machining start
point), and keep the modal data and coordinate system in the same
conditions as at the machining start.
(3) If necessary, set and modify the offset amount.
(4) Pressed the Program Restart push-button on the machine operator's
panel. button light will come ON.
(5) Press PRGRM to display the program. When it is not the specified one,
search the specified program.
(6) Find the program head block. Press RESET During memory operation,
select AUTO mode, and press O ↑.
AWEA SP/LP Series Manual - Chapter 4. OPERATION INSTRUCTION 4-26
X 100.000 019 034 056 050 044
Y 100.000 065 068 070 080 085
Z 100.000 077 082 092 022 015
A 0.000 032 044 040 055 ***
*** *** *** *** ***
NCE TO GO) *** *** *** *** ***
108.864
03.001 T 0101 0202
82.082 S 02000
0.000 B ******
【 NEXT】【CHECK】【RSTR】
point return.
4-26
Page 80

AWEA
(7) Press Q "sequence NO." ↓ and search a block with Sequence No. to be
re-started. When the same sequence No. appears many times, specify
the frequency of a block with its sequence No. in upper 4 digits, and
specify Sequence No. in lower 4 digits.
(8) Upon complete of block searching, the display on the CRT screen is
changed to the Program Restart screen.
(9) Release the Program Restart push-button, this function will be
ineffective. At this time, the figure at the left side of axis name
(DISTANCE TO GO) blinks.
(10) Check the screen, and select the MDI mode if there are M, S, T or B
codes to be specified, and output M, S, T or B codes from MDI, In this
cases, each code is not displayed on the program restart screen.
(11) During memory operation, return the operation mode to " AUTO mode,
check that the distance (DISTANCE TO GO) is correct, and that the tool
does nor hit against a work and others when moving to the machining
restart position. If it is likely to hit against an obstacle, move the tool
manually to the position where it does not collide, then press the CYCLE
START button, At this time, the tool moves to the machining re-start
position in the DRY RUN mode by one axis in the order preset to the
parameters (No.0124 to 0127).
AWEA SP/LP Series Manual - Chapter 4. OPERATION INSTRUCTION 4-27
4-27
Page 81

AWEA
4.4.5 3D work coordinate rotating command format (Optional function on multi-head)
Horizontal direction work coordinate rotation:
3D work oordinate rotation: M58 W## Cxx H_A_X_Y_Z_
Code Description
W##
C xx
H_
A_
X_Y_Z_
Assigned work coordinate system
C axis rotate degree
Tool length compensation number
A axis rotating angle value
Moving value
AWEA SP/LP Series Manual - Chapter 4. OPERATION INSTRUCTION 4-28
Sample explanation
W54 means G54 work coordinate system, if no
assignment, regular code in the MACRO will be
G54.
If no indicate, setting value for current machine
work coordinate will be current C axis position.
If no assignment has been made, means no tool length compensation.
If the head is standard 90 angular head, then
A=90.
If the head is 35 degree head, then A=35.
If the head is Universal head, then A value must
be refer to the actual rotating value.
W##: absolute original position assign for the
work coordinate position, moving value in
X_Y_Z_.
4.4.6 Rigid tapping operation for the multi-head
A. Use purpose:
Whenever the machine in operation in 2 D to use the rigid tapping function and
machine got alarm cause the tapping t
moved our by using MPG with this function.
B. Execution:
M29Sxxx;
G91G84Z0.Fxxxx;
When the spindle under rigid tapping condition, Turn the mode selection to
HANDLE position, select the Z axis and move out the tapping tool by using of MPG.
The moving ratio between Spindle tilting angle value and Z axis must be equal the
proportion of Sxxxx and Fxxxx.
If the rigid tapping function is on X, Y axes, it must be assign G18, G19
beforeM29Sxxxx, also MPG in X, Y axes was selected, moving the MPG can be
move out the tapping tool.
ool stop in the thread hole, it can be
4-28
Page 82
AWEA
4.4.7 Manual tool movement in axial and radial direction
A. When the drilling function failed in some where on the multi-head angle, it is
necessory to draw out by HAMDLE mode, it was called manual tool axial
movement.
B. Its operation instruction is as below:
(1) Under G69 code, HANDLE mode and spindle in Horizontal direction
status.
(2) MPG operation.
․ Single axis MPG using purpose: select Z axis.
․ 3 axes MPG use:
Axis select X axis select key Y axis select key Z axis select key
X 1 0 0
Y 0 1 0
Z 0 0 1
(3) Execute the current 3D work coordinate rotating command for the
Horizontal angle.
(4) Press the 【A-Head axis Handle PB】button, draw out the tool by using the
MPG.
(5) After draw back the tool, cancel the 【A-Head axis Handle PB】, otherwise
when 【A-Head axis Handle PB】=1, 3 axes MPG function will be shifted
to single axial MPG.
C. Operation sample:
(1) Make sure to execute M58 work coordinate rotating and 3D MPG
functions 【A-Head axis Handle PB】.
(2) Check C=90 °, A=0 ° on the 3D MPG operation:
․ Execute M58C90.A.
․ Mode turn to HANDLE position.
․ Press 【A-Head axis Handle PB】
․ Use the MPG to move Z axis, commanded axial and actual direction will not
․ Press the Reset push button【RST
(3) Check C= 90°, A= 90° on the 3D MPG operation:
․ Execute M58C90.A90.
․ Shift to HANDLE mode position.
․ Press the 【A-Head axis Handle PB】
․ Use the MPG to move Z axis, commanded axial and actual direction will be
․ Press the Reset push button【RST
AWEA SP/LP Series Manual - Chapter 4. OPERATION INSTRUCTION 4-29
Manual tool axial, radial moving function, FANUC does not support the 3 axial MPG. Therefore there is only one axis MPG available.
button.
be changed. To move the X axis, commanded axis will actually be changed
to Y axis direction. To move the Y axis, commanded axis will actually be
changed to X axis direction.
PB】, Work coordinate rotate will b
deleted.
changed to X axis. To move the X axis, commanded axis will actually be
changed to Y axis direction. To move the Y axis, commanded axis will
actually be changed to Z axis direction.
PB】, Work coordinate rotate will b
deleted.
4-29
e
e
Page 83

AWEA
4.4.8 Spindle multi-head operation instruction
A. Spindle multi-head operation condition:
Make sure the spindle status is under the following actual status:
Head storage
style
Spindle
Horizontal
AWEA SP/LP Series Manual - Chapter 4. OPERATION INSTRUCTION 4-30
status
nd
2
head storage position = 0 or 3rd head storage
position = 0, means current spindle is Horizontal Head.
Status description
Auto head
storage
Swing arm
type head
storage
Manual head
storage box
Head cover
Empty
Horizontal
Cover
Empty
Horizontal
Head
Cover
1sthead storage position = 0, means current spindle is Head Cover. (in vertical direction only)
When 3rd head storage position = 1, means current spindle is Empty.
When the head storage sensor = 0, C axis clamping LS =1, means current spindle is Horizontal Head.
When the head storage sensor = 1, C axis clamping LS =1, means current spindle is Head Cover.
When the head storage sensor = 1, C axis clamping LS =0, means current spindle is Empty.
There is no sensor on the manual head storage box,
therefore when the【Manual Head enable PB】=1, button
lamp comes up, C axial clamping LS=1, means current
spindle status is Horizontal Head.
When 【Manual Head enable PB】=0(The lamp light s out
on the panel), C axial clamping LS=1, means current
spindle status is Head Cover.
When 【Manual Head enable PB】=0(The lamp light s out
Empty
B. Spindle clamping & unclamping in Auto program mode condition:
(1) Execute M73 to exchange the head.
(2) Execute M74 to rotate the Angular Head.
(3) Under I/O by pass.
C. Spindle clamping & unclamping command:
M112: Spindle head unclamping.
M111: Spindle head clamping.
D. Executing manual spindle head clamping & unclamping condition:
(1) HANDLE mode.
(2) SERV
(3) Spindle stop.
(4) No flood coolant & air blow.
O axes (X, Y, Z) stop.
on the panel), C axial clamping LS=0, means current
spindle status is Empty.
4-30
Page 84

AWEA
(5) Spindle clamping cylinder signal at clamping status.
(6) Press “ A-HEAD UNCLAMP ” button, to exchange the spindle clamping &
unclamping.
E. When the “A-HEAD UNCLAMP ” button lamp lights up, means spindle head is
under unclamping status.
F. When the spindle head is under unclamping status, the operator can only be
moving the servo axes by MPG or by NC command to move the servo axis.
G. Horizontal Head must be at 270° position, Y axis then can be returned to the
HOME position.
H. When the spindle head is under unclamping status, the spindle can not be
rotated, gear shifting or orientation etc. activities.
I. If the clamping & unclamping mechanism of the spindle head is indexing in
every 90° or 5°, when Cs axis coordinate system is not the multiply of 90 or 5,
it is not possible to clamping the spindle head manually, but the PLC can be
set the permitted error value.
J. Manual instruction for loading the Horizontal Head & Head Cover:
Clamping the Head:
(1) C indexing the Head to the correct position.
(2) Return the Cs to the HOME position.
(3) Unclamping the spindle head.
(4) Release the Head.
(5) Z axis move to the Head exchange position.
(6) Hold the spindle Head.
(7) Move toward to Z+, moving away from Head Storage.
(8) Hold and Clamping the Head.
Returning the Head:
(1) C indexing the Head to the correct position.
(2) Return the Cs to the HOME position.
(3) Unclamping the spindle head.
(4) Release the Head.
(5) Z axis move to the Head exchange position.
(6) Hold the spindle Head.
(7) Move toward to Z+, moving away from Head St
(8) Hold and Clamping the Head.
Clamping the Head Cover:
(1) Z axis move to the suitable position.
(2) Hold the spindle Head Cover.
(3) Unclamp the clamping device.
(4) Remove the Head Cover.
Unclamping the Head Cover:
(1) Z axis move to the suitable position.
(2) Unclamp the clamping device.
(3) Hold the spindle Head Cover.
(4) Holding Head Cover.
AWEA SP/LP Series Manual - Chapter 4. OPERATION INSTRUCTION 4-31
orage.
4-31
Page 85
AWEA
K. Operation instruction procedure for the Horizontal head exchange:
Procedure Standard process Remark
Clamping
Head
Return the
Head
AWEA SP/LP Series Manual - Chapter 4. OPERATION INSTRUCTION 4-32
◎ Spindle status must be at Horizontal
◎ Before clamping the Head, return the vertical tool.
◎ Remove the Head cover before clamping the Head.
◎ Cs axis return to HOME position before clamping the
Head.
◎ Swing Arm move into the head exchange position
before clamping the Head.
◎ After clamping the Head, assembly the oil lubricating
pipe.
◎ Swing Arm move out to Home position after clamp the
Head.
◎ Make sure all spindle status is match.
◎ Spindle status must be at Horizontal
◎ Cs axis return to HOME position before return the
Head.
◎ Swing Arm move into the Head exchange position
before return the Head.
◎ Remove the oil lubriation pipe before return the Head.
◎ Swing Arm move out to the HOME position after
return the Head.
◎ Hold the Head Cover.
◎ Make sure all spindle status is match.
◎ Spindle status must be at Horizontal.
Use K0 command, indexing radiu must be
Index
A. Message Notice:
During the machine indexing procedure by the program, machine will be stop
temperory to warning the operator to remove the oil lubrication pipe. After this
action has been done, press the【Cycle start PB】, then machine will be moving
continuously.
B. Operation instruction for the Universal Head:
◎ Universal Head executing to rotate the C axis.
(i) Before use the K0 command, to be sured the indexing radiu will not
(ii) If the spindle head travel is less than 760 nn, then the oil lubricating
◎ Universal Head executing to clamp or returning command.
(i) When the Swing arm or none head storage was used, the M73
interrupt anything. (K0: indexing the C axis at
origin position)
◎ Remove the oil lubrication pipe before index.
◎ Replace the oil lubrication pipe after index.
be interrupted any of the machine pa
pipe must be removed before index.
command will be automatically indexing to 0° and then X, Y axes
move to the Head exchange position. Machine will be then stop to
wait for the manual operation by the operator to move the Z axis to
execute the clamping & unclamping activities.
4-32
rts.
Page 86

AWEA
(ii) Before returning back the Universal Head, make sure the A axis
(iii) When the spindle travel with 760 mm is used, after Universal Head
C. Command format:
(1) M73 (Horizontal Head Exchange)command formet:
(i) Automatic Multi-Head storage specfication: M code full automatic
(ii) Manual Multi-Head storage specification: Operator exchange the
(iii) Regular head storage will not be equipped with M73 function.
(iv) Manual Multi-Head on Swing arm storage: M code semi-exchange
(2) M74 ( C axis rotation):
Execution format: M74 C xx (means expecting degree to be indexed)
(Z returned to the Home position, move Y axis in the middle of Y travel,
then execute C axis rotation)
Add on K0 command: To index the C axis at origin. (Operator must check
if indexing range could be interrupt something nearby)
※Use 760 mm of Z travel spindle, while the head is processing that will
be stop temporary to show message to mention the operator to be sured
the lubrication pipe is removed.
(3) M75 (Head cover open), M76 (Head cover close) command, only
available on Auto head storage unit.
AWEA SP/LP Series Manual - Chapter 4. OPERATION INSTRUCTION 4-33
head tool # is empty, A axial angle value whether is 0°, Oil lubricating
pipe remove or not etc.
has been clamped, make sure the oil lubrication pipe is replaced.
When the Universal Head has been used, make sure the tool
clamping screw is tighten deeply to avoid any interruption of the C
axis in indexing.
Head exchange.
․ Returning Head Cover/Horizintal Head: M73 K0.
․ Clamping the Head Cover at 1st position: M73 K1.
․ Clamping the Head at 2nd position: M73 K2.
․ Clamping the Head at 3rd position: M73 K3.
․ Caution: the K value must be added “point” behind the number.
Head manually.
head.
Execute M73 (without K value), which will be evaluated whether no
tool in vertical or C axis in 0 degree position, Z axis will be returning
at Home position and X,Y axes moving to the exchange position,
then Cs axis will be returning to its Home position, then stop there.
Operator must be operating the Z axis and manual clamping &
unclamping operation on the head exchange. It is complete Manual
Multi-Head exchange procedure.
4-33
Page 87
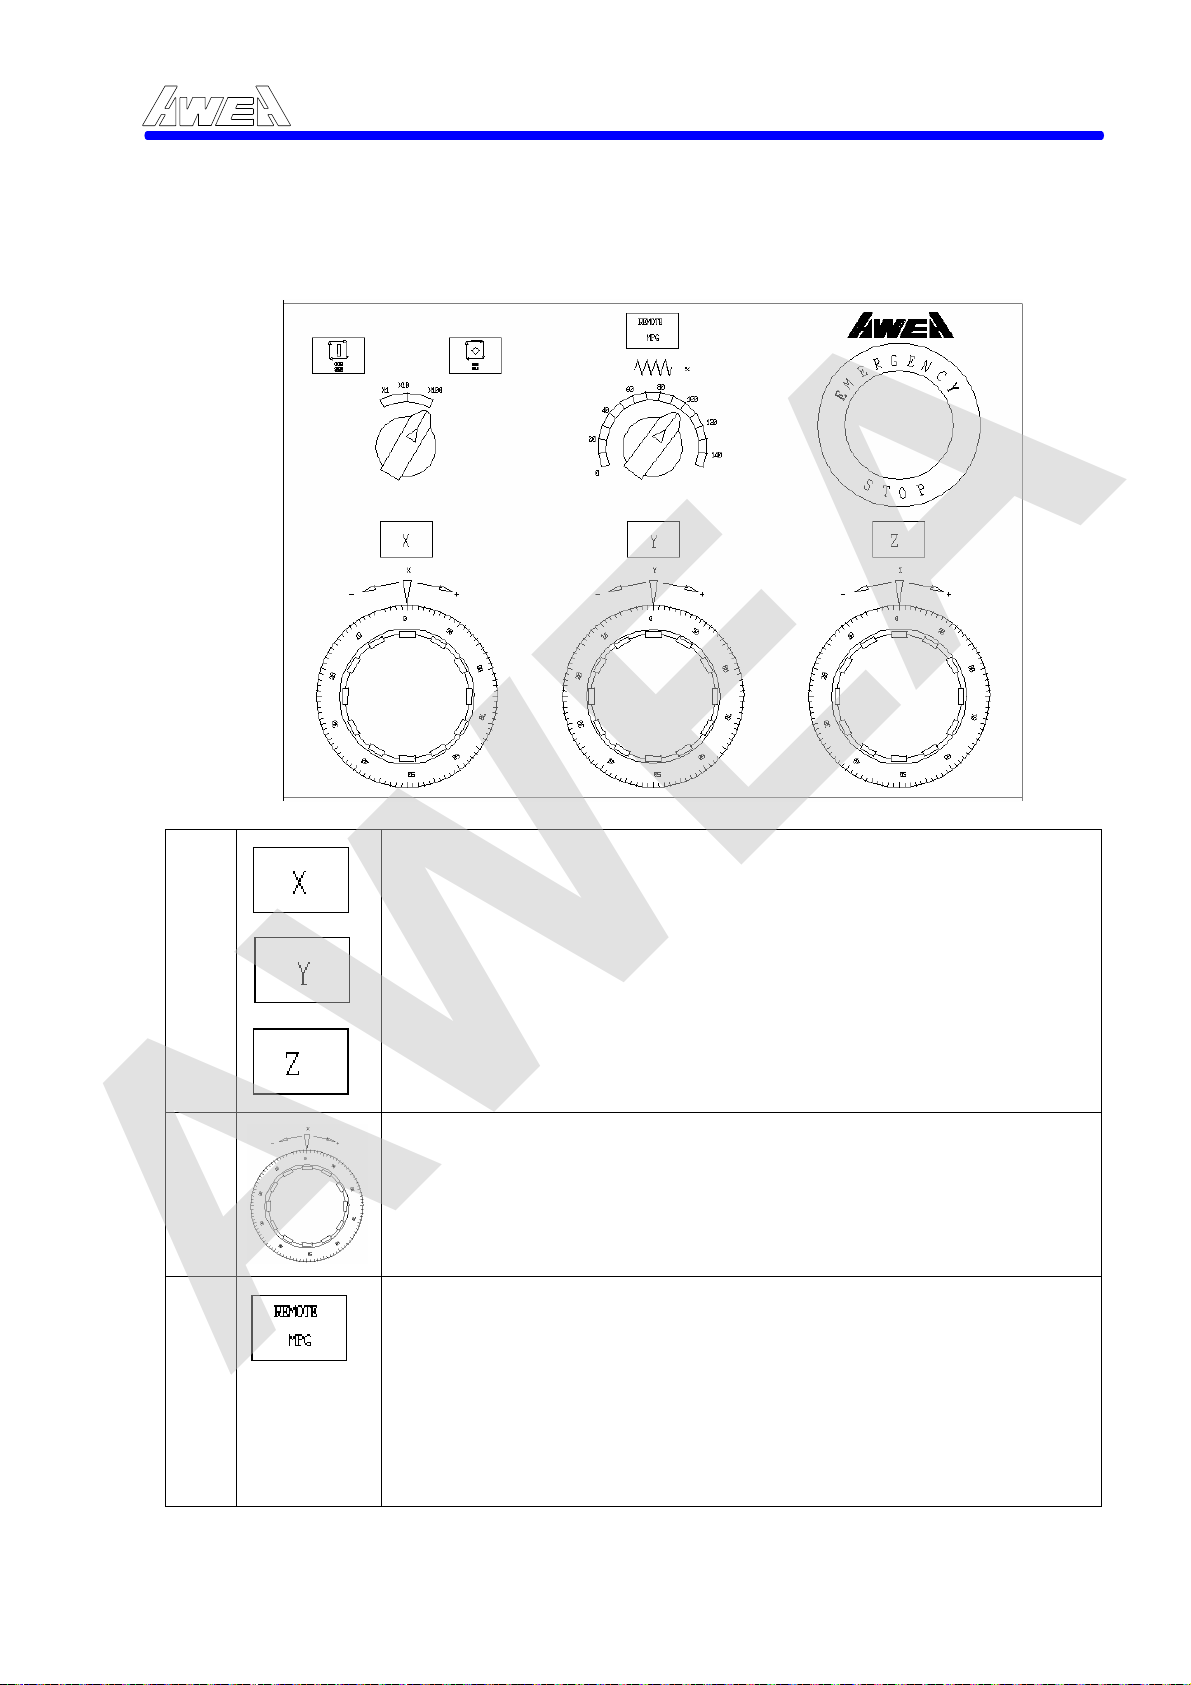
AWEA
4.4.9 Three axes MPG operation
A. 3 axes MPG operator panel
AWEA SP/LP Series Manual - Chapter 4. OPERATION INSTRUCTION 4-34
B. 3 axes MPG switches box:
1.
2. Rotate to move the axis.
3.
MPG axial selection button:
z Light ON: MPG available.
z Light OFF: MPG not available.
MPG remote button: (Operation shifter)
Light ON: Means Cycle Start, Feedhold, Feedrate override
buttons on the MPG panel are available, reflective that those
button on the main operator panel is not available.
Light OFF: Means Cycle Start, Feedhold, Feedrate override buttons on the MPG panel are not available, reflective that those button on the main operator panel is available.
4-34
Page 88
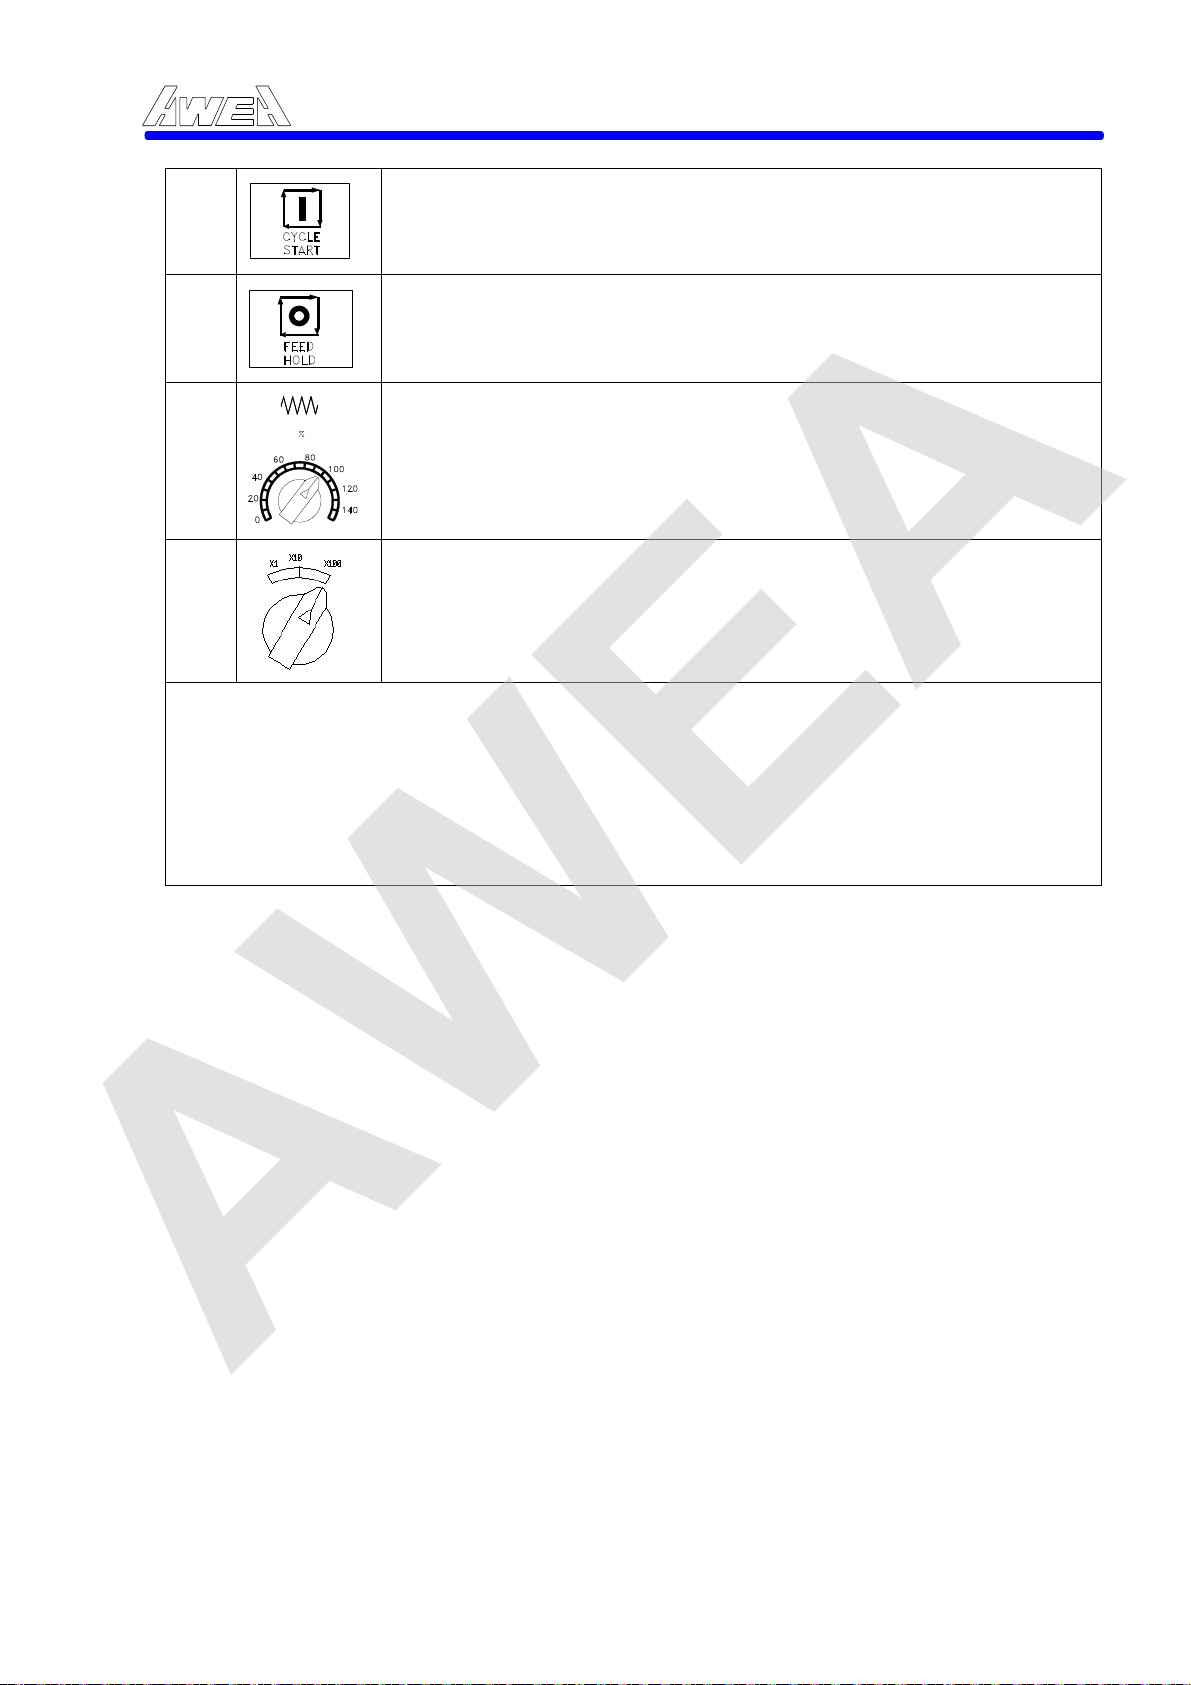
AWEA
AWEA SP/LP Series Manual - Chapter 4. OPERATION INSTRUCTION 4-35
4.
5.
6.
7.
CAUTION: 1. The remote MPG push button will be caused the operating function fault.
It is a MUST to press it OFF to avoid any mis-operation.
At AUTO/MDI mode, if the button does not press, then the
button must be OFFÆONÆ OFF, NC then start to execute.
When the button is in processing, the button light will be ON.
At AUTO/MDI mode, if the button has been pressed, then all axes will be stop. The button light will be OFF.
Feedrate Override switch: Its function will be the same as Main operator’s panel.
MPG incremental unit select switch: please refer to the chapter 2 for more detail.
2. Manual axial or radial movement function is only available on single MPG mode. Its function is different than the 3 axes MPG operation. Please refer to the chapter 4.4.7.
4-35
Page 89
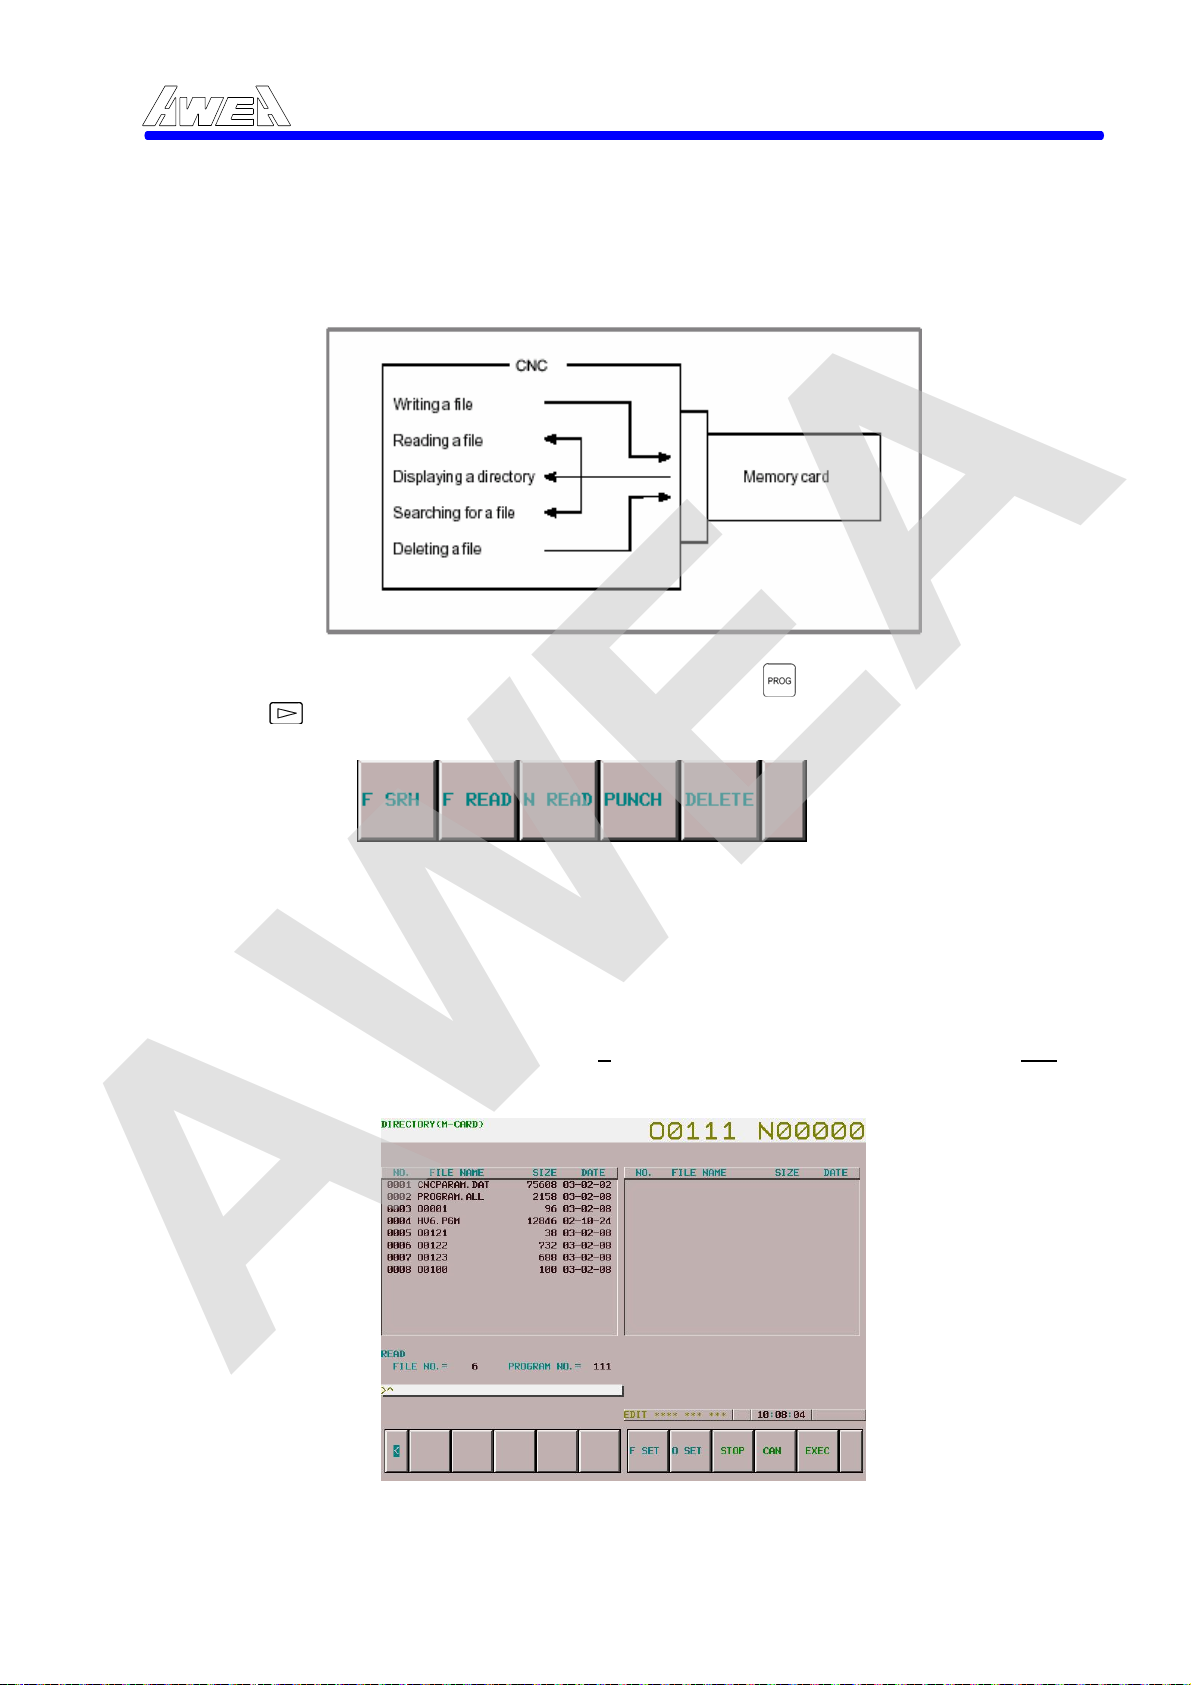
AWEA
4.4.10 Memory card operation
Use the memory card at the left side of the LCD, the I/O channel (Parameter No. 20) setting in “4”, which can be used for executing DNC operation and transfer the program etc. data.
Operation instruction:
Under the mode selection of EDIT, press the function key, and then press
, select the 【CARD】 softkey, the screen will be displayed as the following
softkeys.
AWEA SP/LP Series Manual - Chapter 4. OPERATION INSTRUCTION 4-36
A. File search: (1) F SRH: Keyin the file name is being searching.
(2) EXEC: Execution.
B. File copy: Read the program from memory card and copy to RAM.
Method I : Use the program number of the memory card.
(1) ”F READ”
(2) At FILE NO column to keyin the program No., then press F SET, keyin
Program NO. to read the program from RAM.
Ex. : FILE NO. = 6 PROGRAM NO. = 111
Program # in Memory card File name in the RAM
(3) EXEC to execute.
Method II : Use the program file name.
(1) ”N READ”
READ
4-36
Page 90
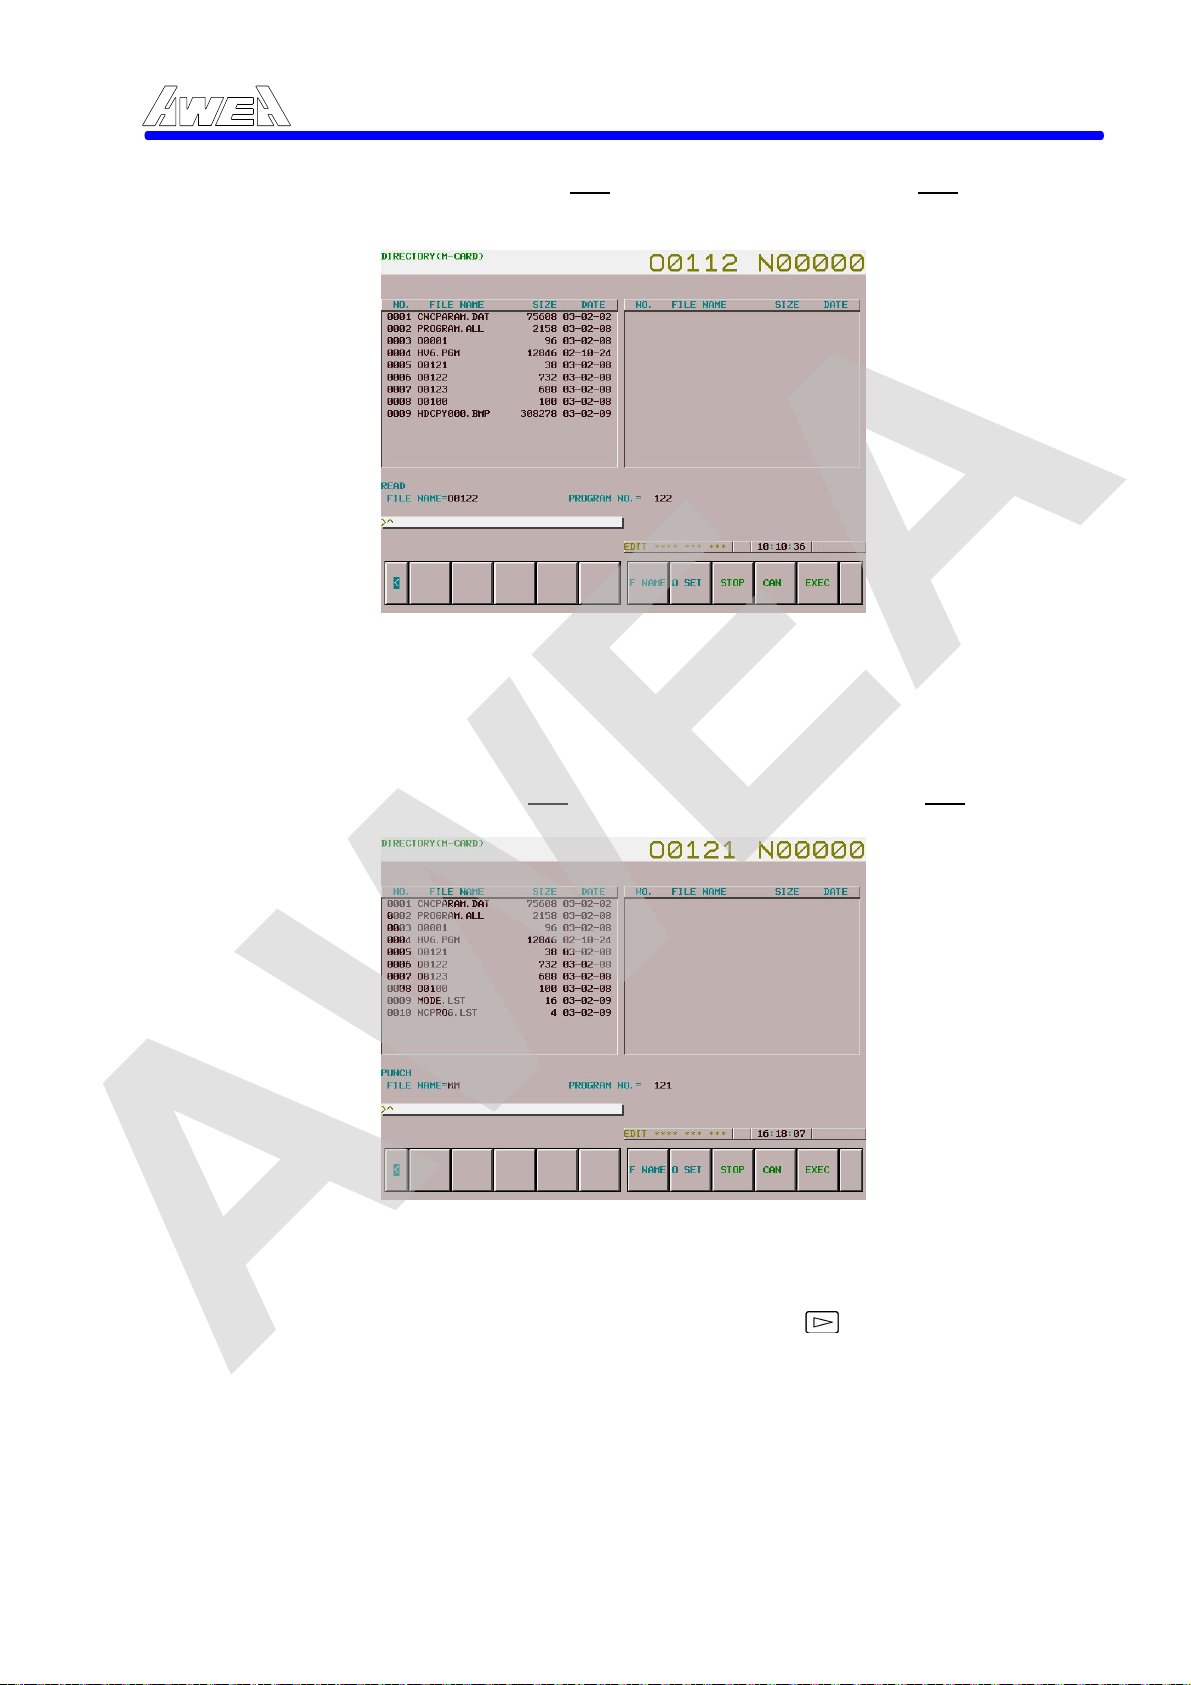
AWEA
FILE NAME =122 PROGRAM NO. = 122
Program # in Memory card File name in the RAM
(2) EXEC to execute.
C. File storage: Store the program from RAM to Memory card.
For example: send the program O 0121 to the memory card in the name of
“MM”.
(1) CARD Æ DIR+ Æ OPRT Æ PUNCH, keyin ”121” Æ O SET
“MM” Æ F NAME
(2) As picture Î EXEC Î PUNCH
FILE NAME = MM PROGRAM NO. = 121
AWEA SP/LP Series Manual - Chapter 4. OPERATION INSTRUCTION 4-37
(3) File delete: Keyin program number in the memory card, press F SET Æ
EXEC Æ Finish.
(4) Use memory card to execute DNC:
(i) Shift to RMT mode.
(ii) Press 【PROGRAM】function key Æ Æ Display【DNC-CD】
softkey.
(iii) Keyin the expected program name, then press【DNC- ST】softkey, it
is complete setting procedure.
(iv) Press【Cycle Start PB】to execute the program.
4-37
Page 91
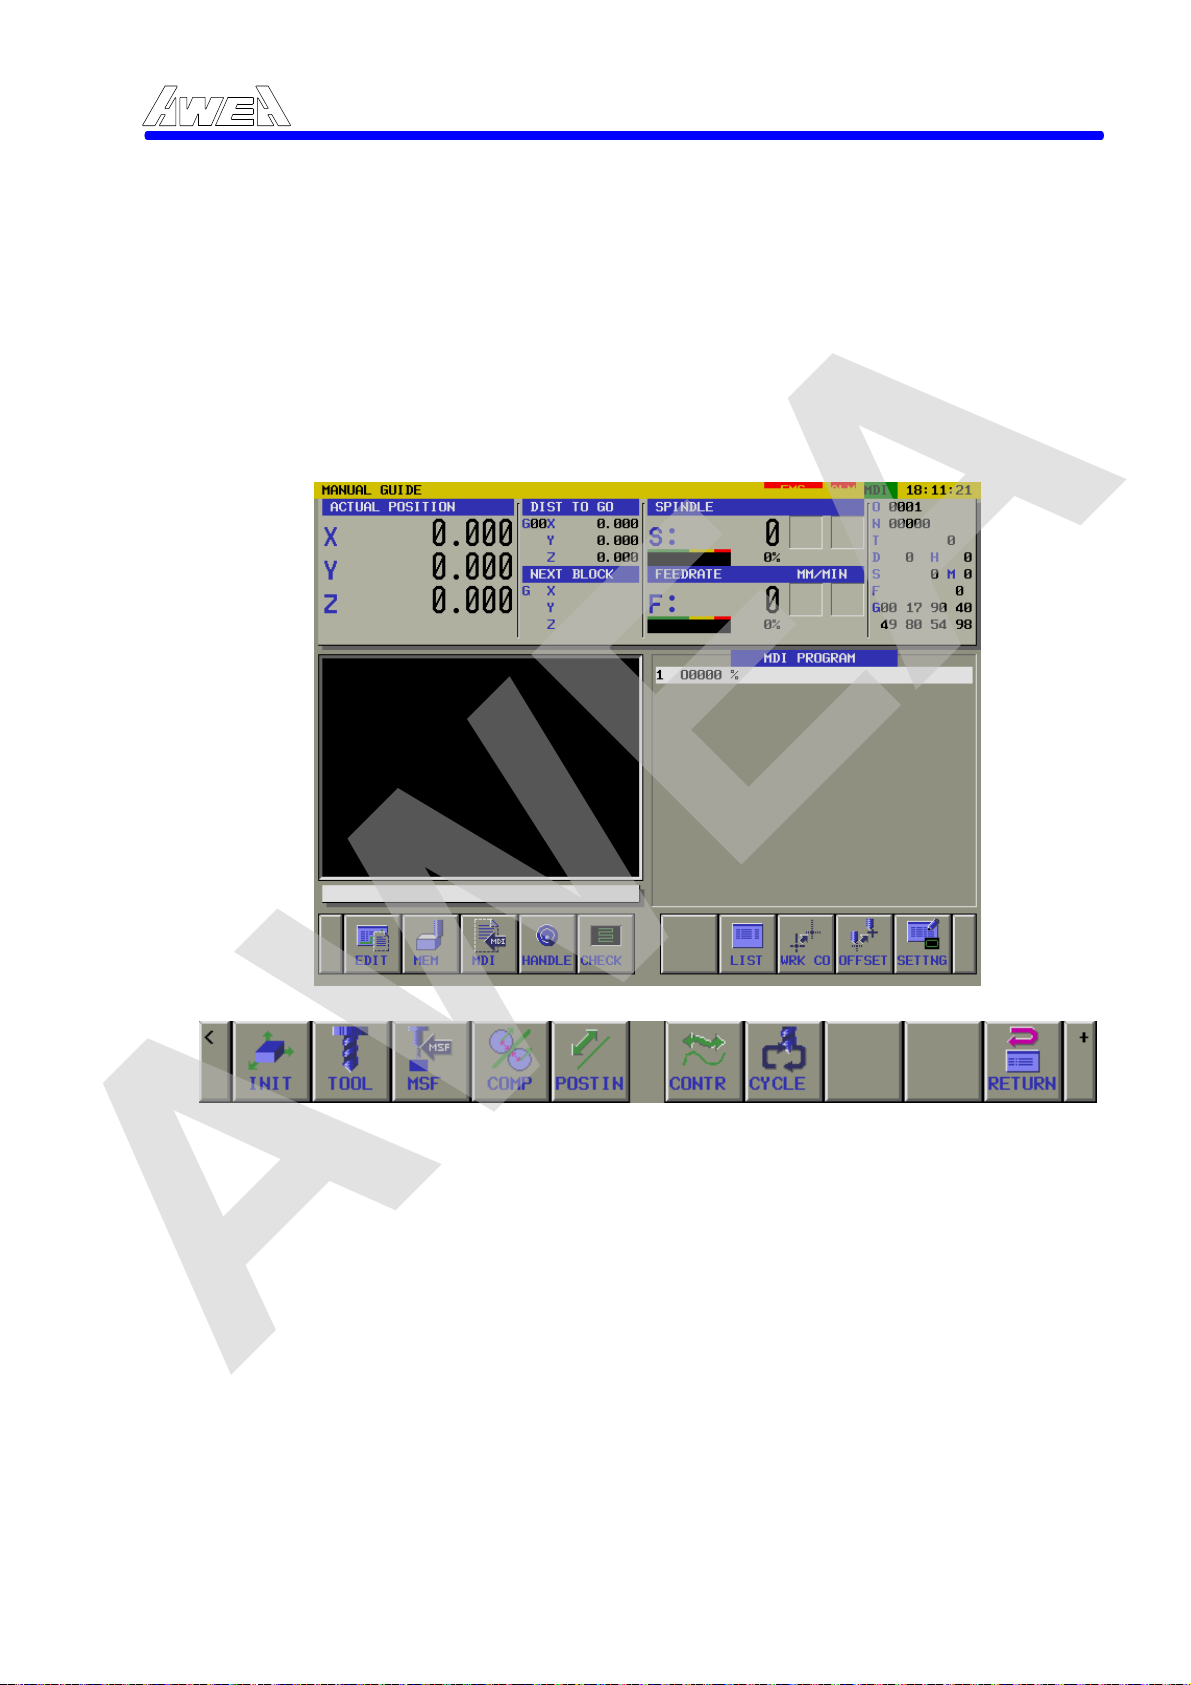
AWEA
4.4.11 Manual Guide i Editing operation
※『The entired Manual Guide I operation instruction, please refer to the Fanuc
Manual Guide Operator's Manual B-63424EN』
【To Start the Manual guide program editing operation】
When the display is at PROGRAM, press 【MANUAL GUIDE】 key, then Manual
guide editing function is available to operate. The operation display will be
showing as following figure.
【Manual guide display】
AWEA SP/LP Series Manual - Chapter 4. OPERATION INSTRUCTION 4-38
【MANUAL GUIDE conversational function description】 A. Fixed cutting cycle:
(1) Drill (7 shape)
(2) Drill matrix cutting cycle. (8 shapes)
(3) Pocket cutting cycle. (fixed 18 shapes)
(4) Surface cutting cycle. (fixed 4 shapes)
(5) Key slot cutting cycle. ( fixed 6 shapes)
B. (B) Profile programming:
(1) Powerful profile calculating function with maximum
second.
(2) The profile program can be reconfirmed by the display.
(3) With 11 auxiliary calculation for easy keyin.
C. G code and M code auxiliary description: Explanation text and figure both can
displayed at the same time.
of 10 block per
4-38
Page 92

AWEA
【MANUAL GUIDE conversational programming functions】 A. All operationa are on the same display.
B. Easy to confirm the machnism status: Can display necessory mechnism status,
ex. Currently position, actual speed and motor load .. etc.
C. Easy to confirm the program: provide 3 D cutting simulation.
D. Direct selecting function with ease: Select the softkey with symbol figure.
E. Easy to programing: Basic on the ISO programing format, complex cutting
program can be keyin by symbol selection.
F. Connection with CAD/CAM: CAD/CAM ISO programming format can be used
directly.
AWEA SP/LP Series Manual - Chapter 4. OPERATION INSTRUCTION 4-39
4-39
Page 93
AWEA
AWEA SP/LP Series Manual - Chapter 4. OPERATION INSTRUCTION 4-40
4.5 Program Check and Test
4.5.1 Machine Lock
This function is used to check a program.
When Machine Lock mode is active (push-button is illuminated), move
command pulses are inhibited. Consequently the position display is
updated as specified by the program, but the tool does not move. The
M, S, and T are executed.
Note: When a G27, G28 or G30 command is specified, the tool does not go to the reference point and the reference point return completion led does not go on.
4.5.2 Z Axis Cancel
When the Z axis Cancel push-button is pressed, button is illuminated, an Z
axis command can be ignored during Manual or AUTO operation. Position
display updates as if the axis were moving. To exit Z axis cancel, press
push-button a second time, button lamp will lights out.
4.5.3 MST Function Lock
When the auxiliary function lock Soft key ( MST Lock) is turned “ON” on the screen as following Figure, M, S, and T function operation are locked. This Soft key is used to check a program.
Note: M00, M01, M02, M30, M98 and M99 are executed, even if the Soft key is ON.
OPERATOR'S PANEL O0000 N0000
PLAYBACK : □ OFF
MST LOCK : OFF □ ON
DNC INPUT : □ OFF
DOOR BPS : □ OFF
A-PWR-OF : □ OFF
ACTUAL POSITION (ABSOLUTE)
X 20
Z
14:32:15 MDI 【ALARM】【OPR 】
: □ OFF ON
MAN-ABS : □ OFF
H/INTRUP : □ OFF
00.000 Y 500.000
100.000
【MSG 】【 】【 】
ON
ON
ON
ON
ON
ON
4-40
Page 94
AWEA
4.5.4 Dry Run
When the Dry Run push-button is pressed (button is illuminated) during
in MDI or AUTO position, the Feedrate specified by the program is
ignored. G00 will kept the same as Rapid Feedrate, G01 will becomes as
Max. Jog Feedrate by JOG Feedrate override switch control. To exit this
function, press the push-button a second time, button lamp will lights
out.
4.5.5 Cutting Feedrate Override
AWEA SP/LP Series Manual - Chapter 4. OPERATION INSTRUCTION 4-41
With this dial, it is possible to override the Feedrate designated
by the program in MDI or AUTO mode. An override of 0 to 150
% can be applied to override all axes in G01 command. M48,
M49 or Rigid Tapping function are always override 100 %, this
dial is not available.
.
4.5.6 Rapid Feedrate Override
The Rapid Override switch of 100%, 50%, 25% and F0 is
provided, when the rapid traverse rate is 20 m/min. and a
G00 is commanded in MDI or AUTO mode, this dial is set
to 50%, actual rate becomes 10 m/min. F0 is a constant
value specified by the parameter. Rapid override is
effective by the following functions:
(1) by G00.
(2) during canned cycle.
(3) in G27 and G28.
(4) Manual rapid traverse.
(5) Rapid traverse in manual reference point return.
4-41
Page 95
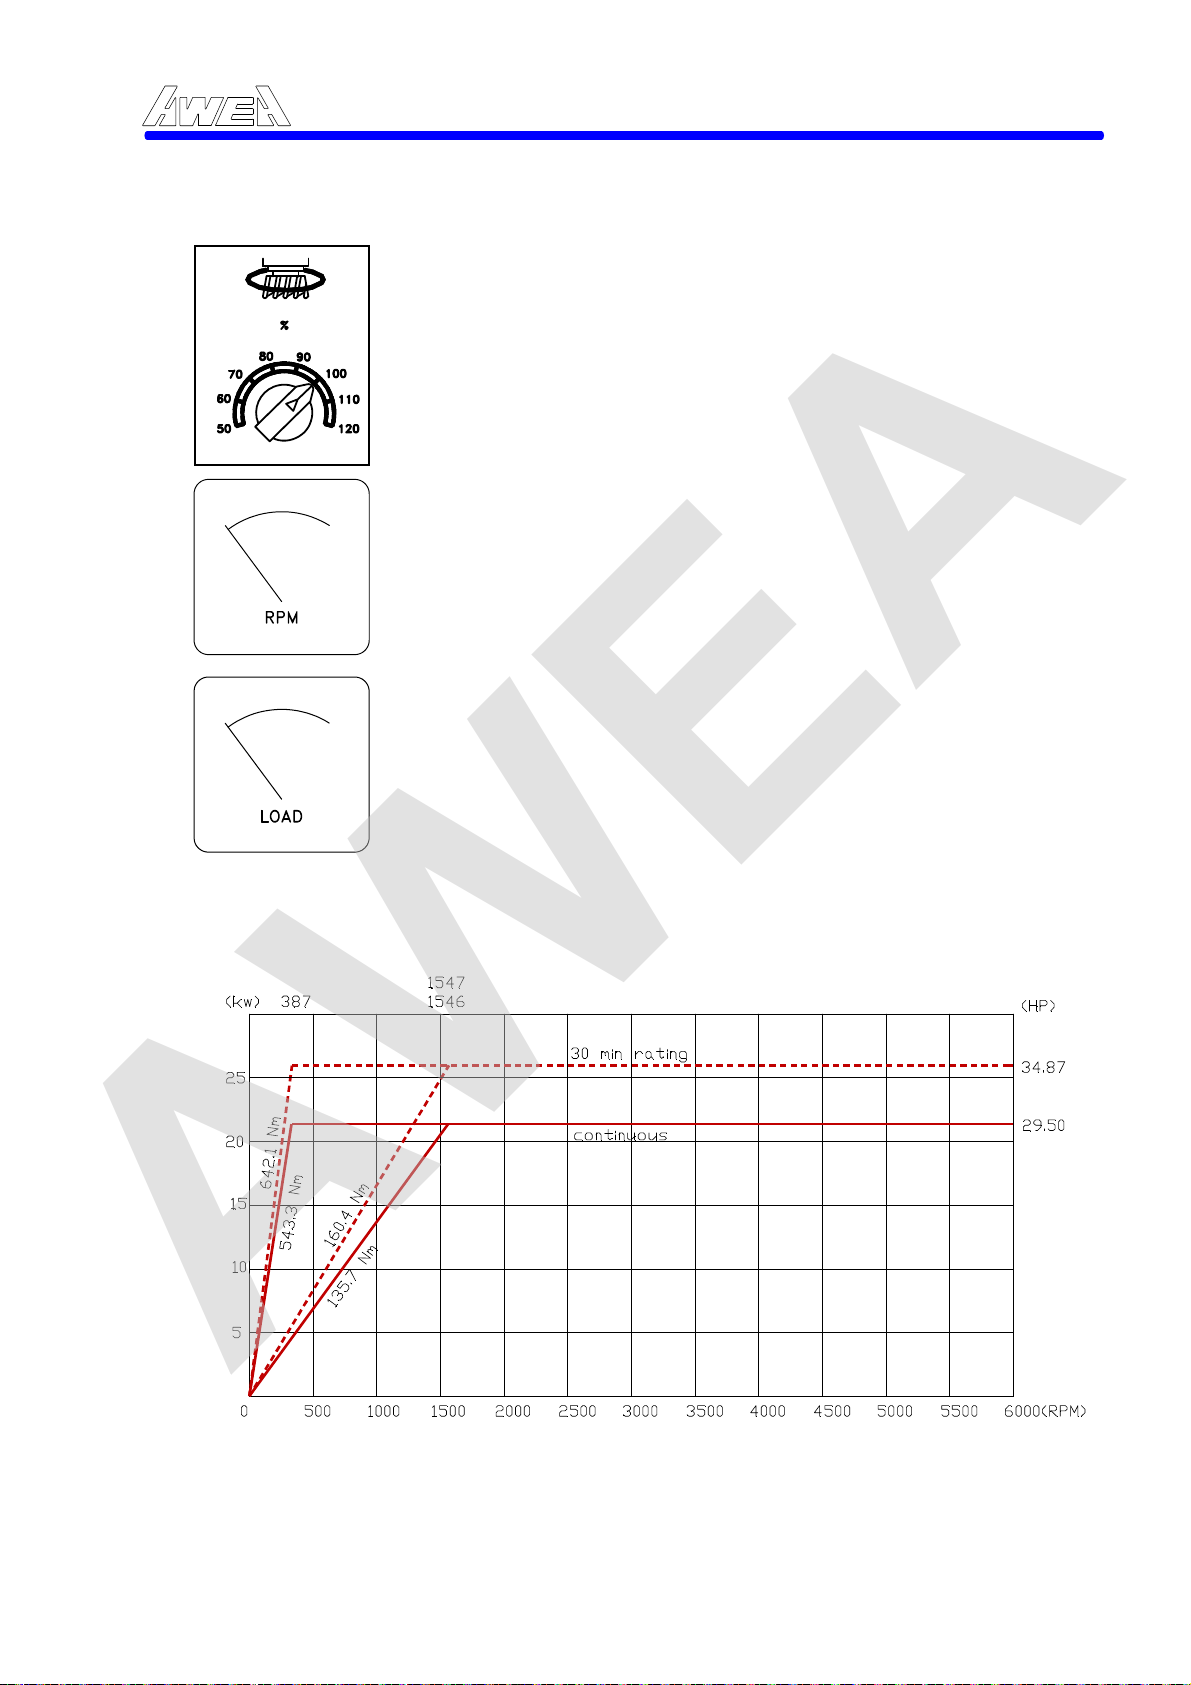
AWEA
4.5.7 Spindle Speed Override
The Spindle power chart for SP series machine are as following which equipped with 2 steps Gear head as a standard and direct belt drive as an option.
AWEA SP/LP Series Manual - Chapter 4. OPERATION INSTRUCTION 4-42
The Spindle Speed Override switch allows the operator to
modify programmed spindle speeds in steps of 10% from 50%
to 120% during machine in MDI, AUTO or Dry Run mode. The
actual spindle speed what you commanded can be seen on the
CRT screen and displays current spindle speed at Spindle
Speed meter. If commanded spindle speed is 2000 RPM, set
the Spindle Speed Override at 50%, the actual Spindle speed
will be 1000 RPM.
This meter indicates the currently active spindle speed in unit of
RPM.
The Spindle Load meter displays the percent of full load current
available at the operation speed. The 150% level is peak
current operation in the 100 - 150% range must be limited to
the duty cycle in the vicinity of 150% has a maximum on time of
30 min.
100%: 7.5 kW(10 HP) continuous rated output.
150%: 10 kW(15 HP) 30 min. rated output.
4-42
Page 96
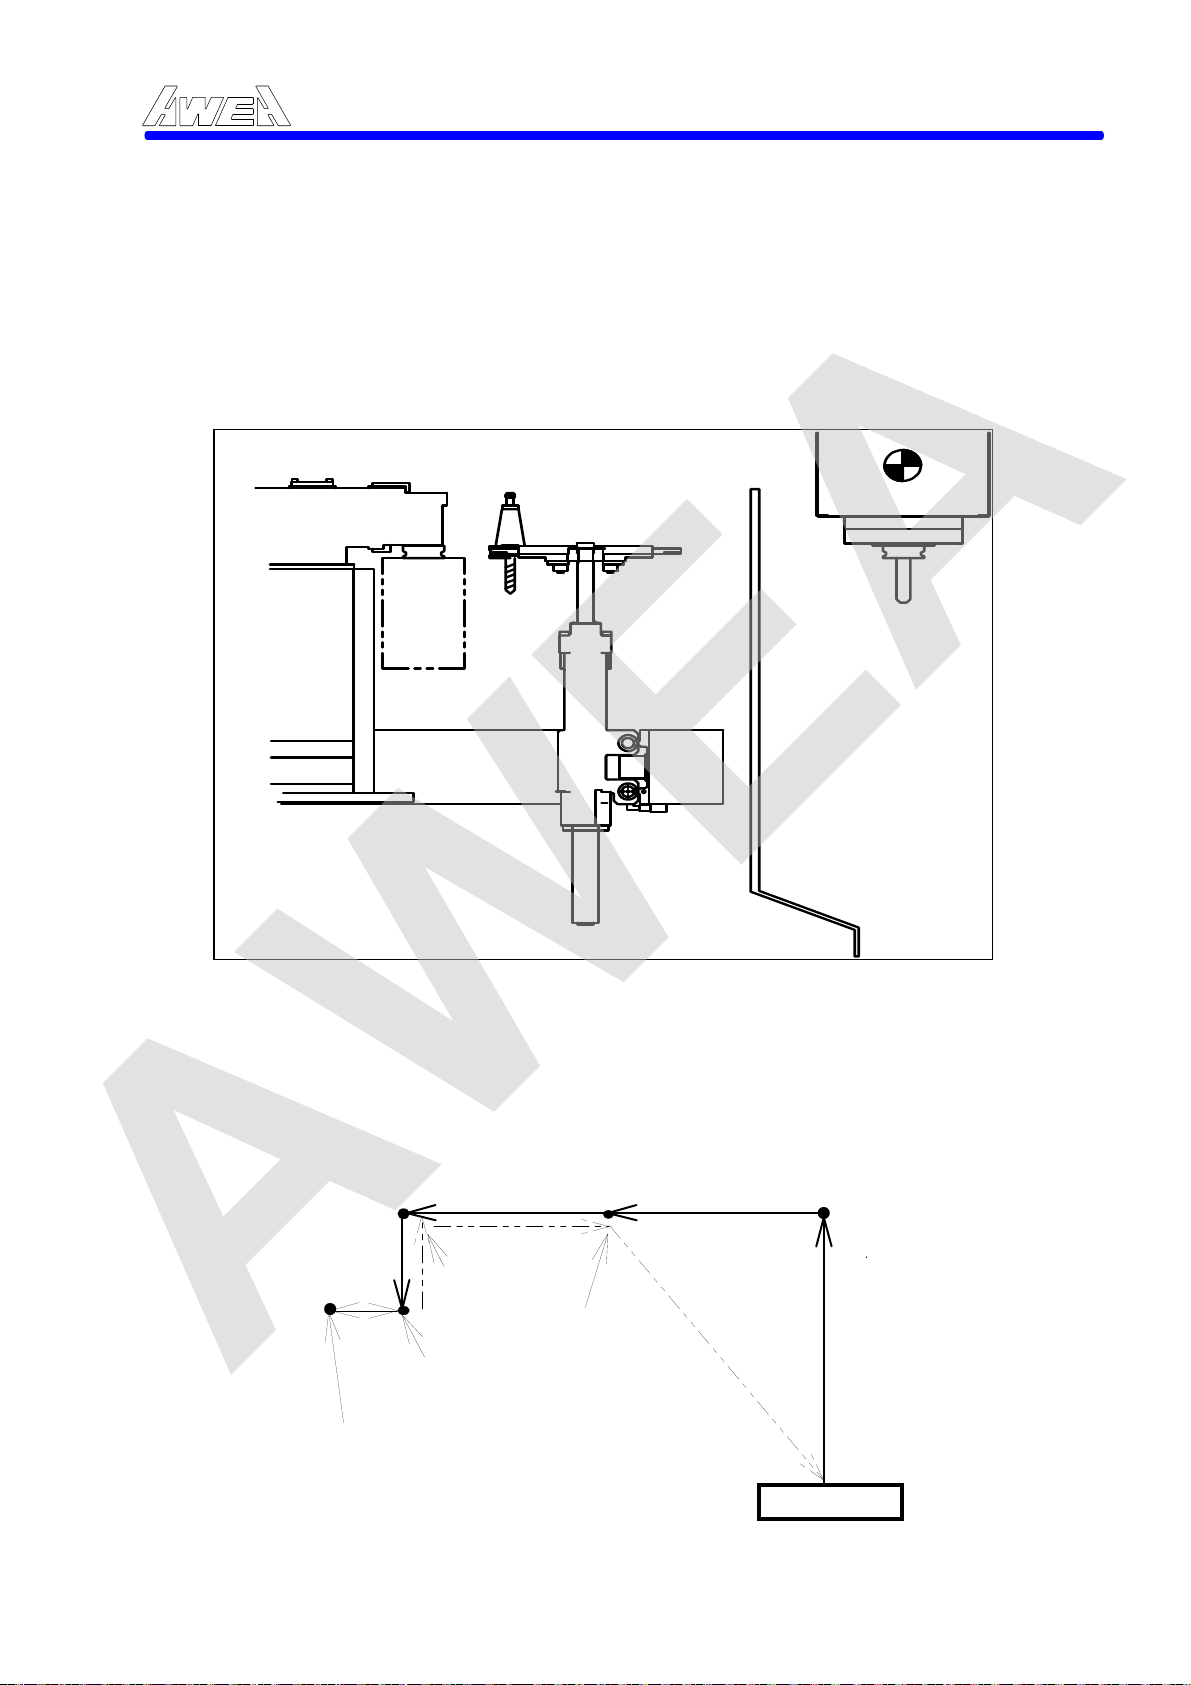
AWEA
4.6 Automatic tool change (ATC)
The ATC unit occupies a wide working range and its runs at a high speed. It is very dangerous to remove the cover or to enter the working range before maintenance. Be sure to switch off the power.
The ATC consist of the following items and the configuration is as below:
Tool magazine
AWEA SP/LP Series Manual - Chapter 4. OPERATION INSTRUCTION 4-43
Tool holder
ATC arm
Spindle
Gripper
Magazine door
1. Spindle 2. ATC arm
3. Gripper 4. Magazine door
5. Tool magazine
The figure following illustrates the relations between the ATC unit and the Magazine.
3
5
4
Tool change
position
2nd reference
point
Y axis zero
point
2
Z axis zero point
6
1
Z stroke
retract
ATC arm
neutral position
Workpiece
4-43
Page 97
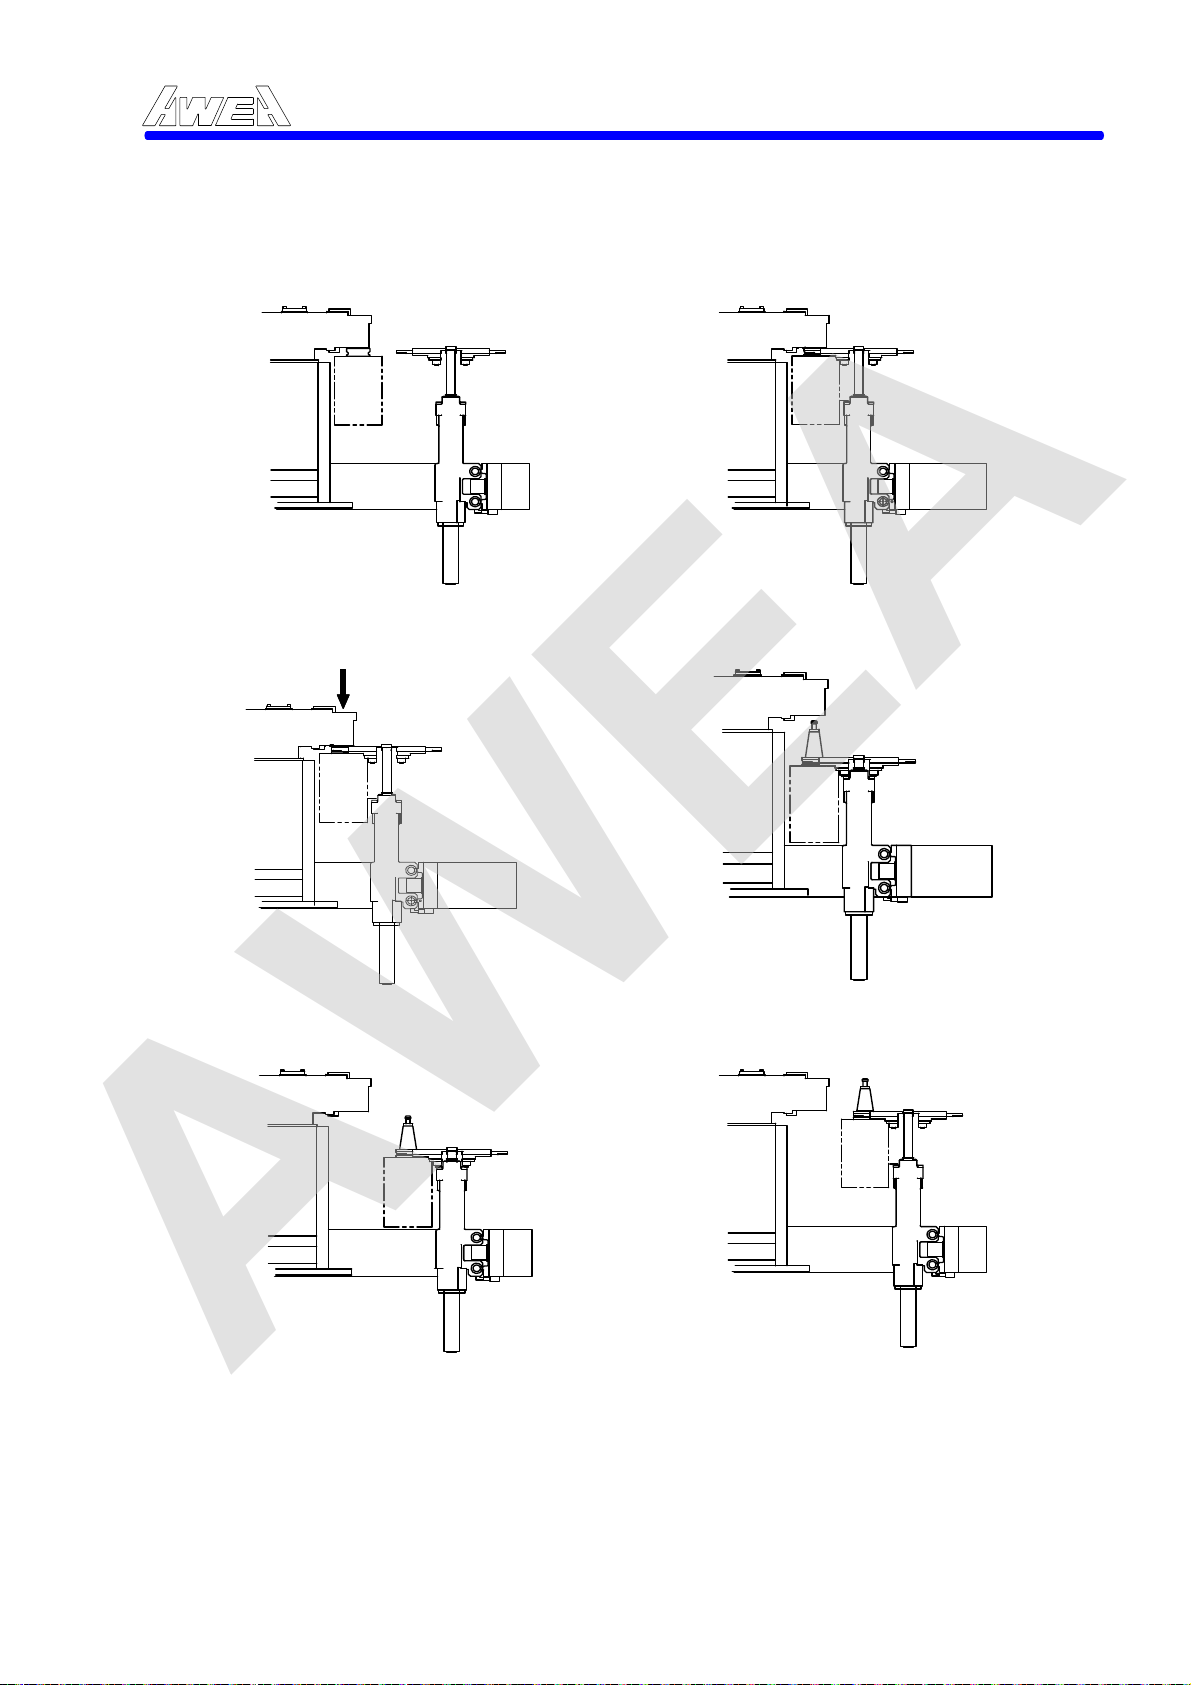
AWEA
A. T __ Code operating procedure.
By use of this code, the arm picks up the next processing tool from the
magazine and gets back to the primary. If T code is commanded, the tool
magazine operating procedure will be shown as listed:
AWEA SP/LP Series Manual - Chapter 4. OPERATION INSTRUCTION 4-44
1. The tool magazine will select the tool No. XX that you have commanded.
Tool unclamping cylinder
3. The tool gripper pick up the tool.
2. The ATC arm gripper moves toward the tool pocket.
4. The tool gripper moves down .
5. The ATC arm moves back to the
neutral position.
6. The tool gripper moves up.
4-44
Page 98
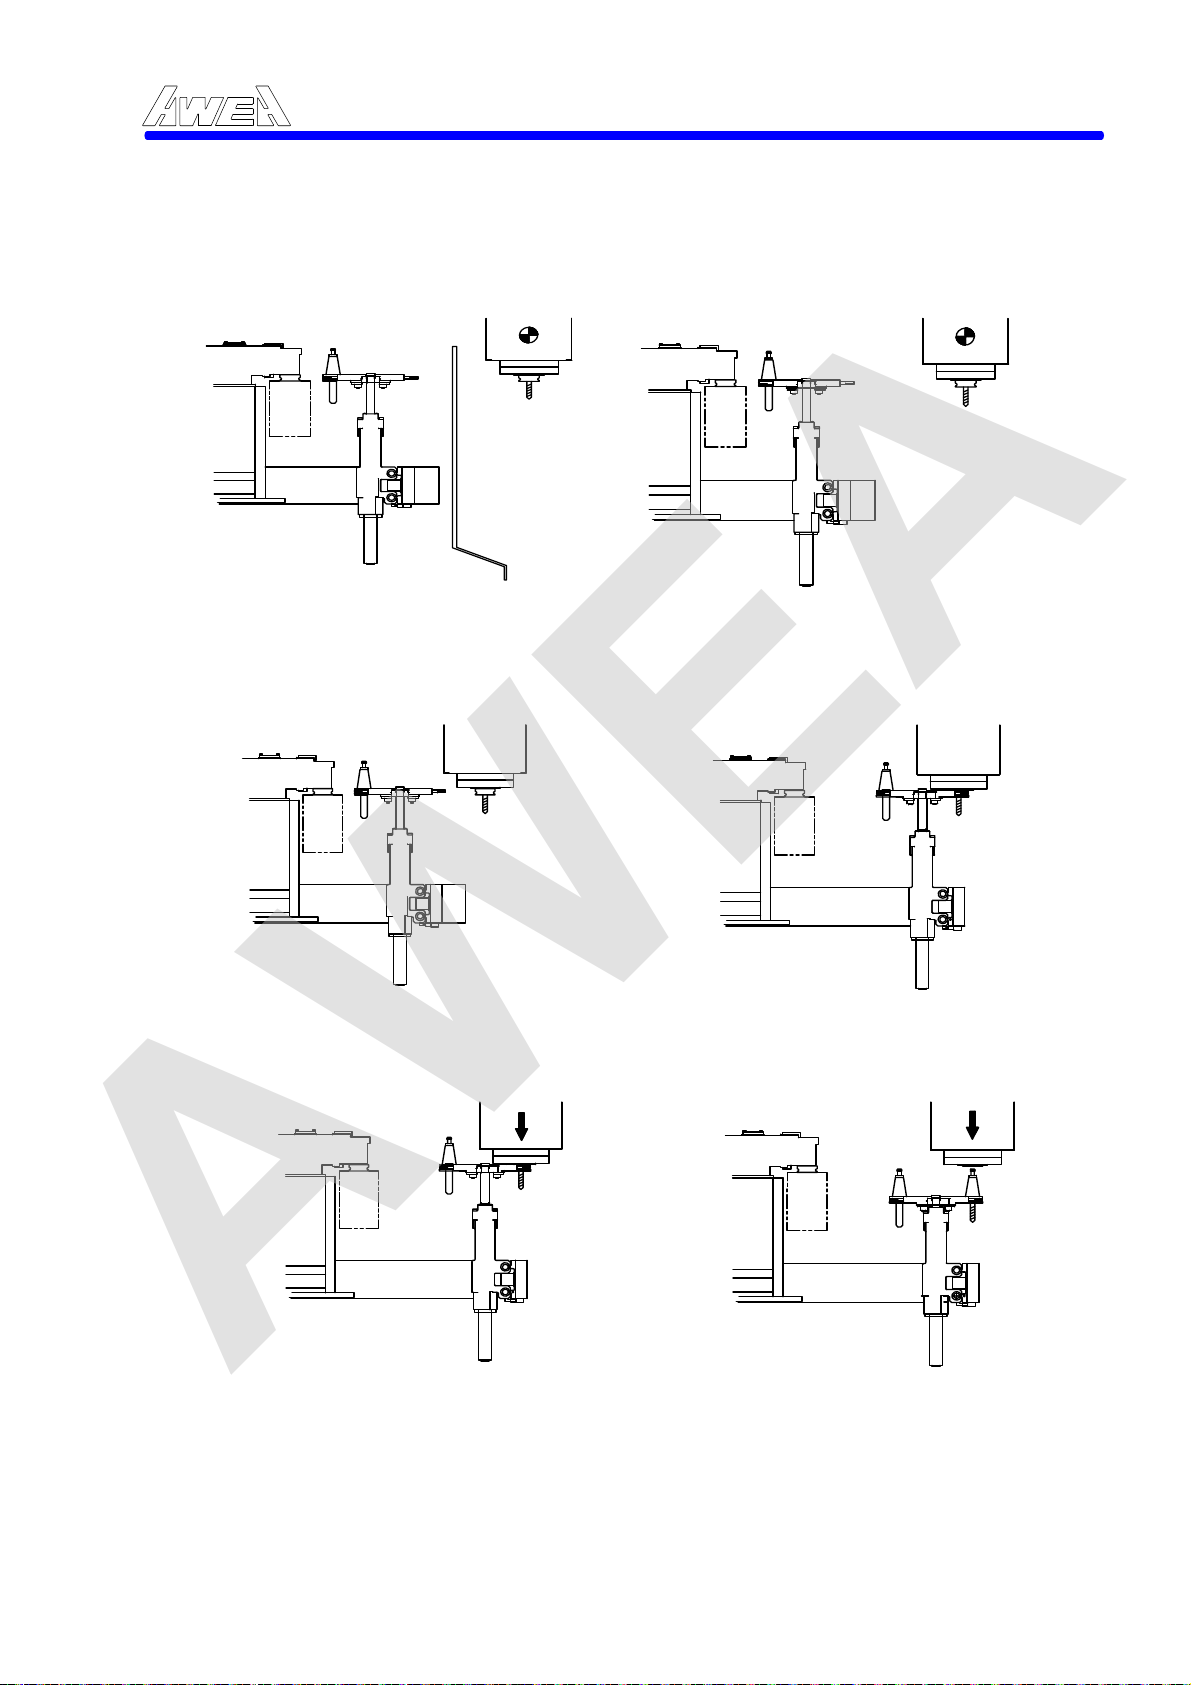
AWEA
B. M6 Code operating procedure.
By using this code, the tool on the spindle is replaced with the one on the tool
gripper. After putting back the replaced tool in its pocket in the magazine, ATC
comes back to the primary state. If M6 code is commanded, the ATC operating
procedure will be shown as listed here:
AWEA SP/LP Series Manual - Chapter 4. OPERATION INSTRUCTION 4-45
The spindle orientation and spindle
1.
head moves to the second reference
point in the mean time opens the
magazine door by pneumatic cylinder.
3. The ATC arm will moves to the tool
change position.
2. The magazine door is opened.
4. The spindle head will moves to the pick up position of the ATC arm gripper.
5. The spindle unclamps the tool.
6. The ATC arm moves down.
4-45
Page 99
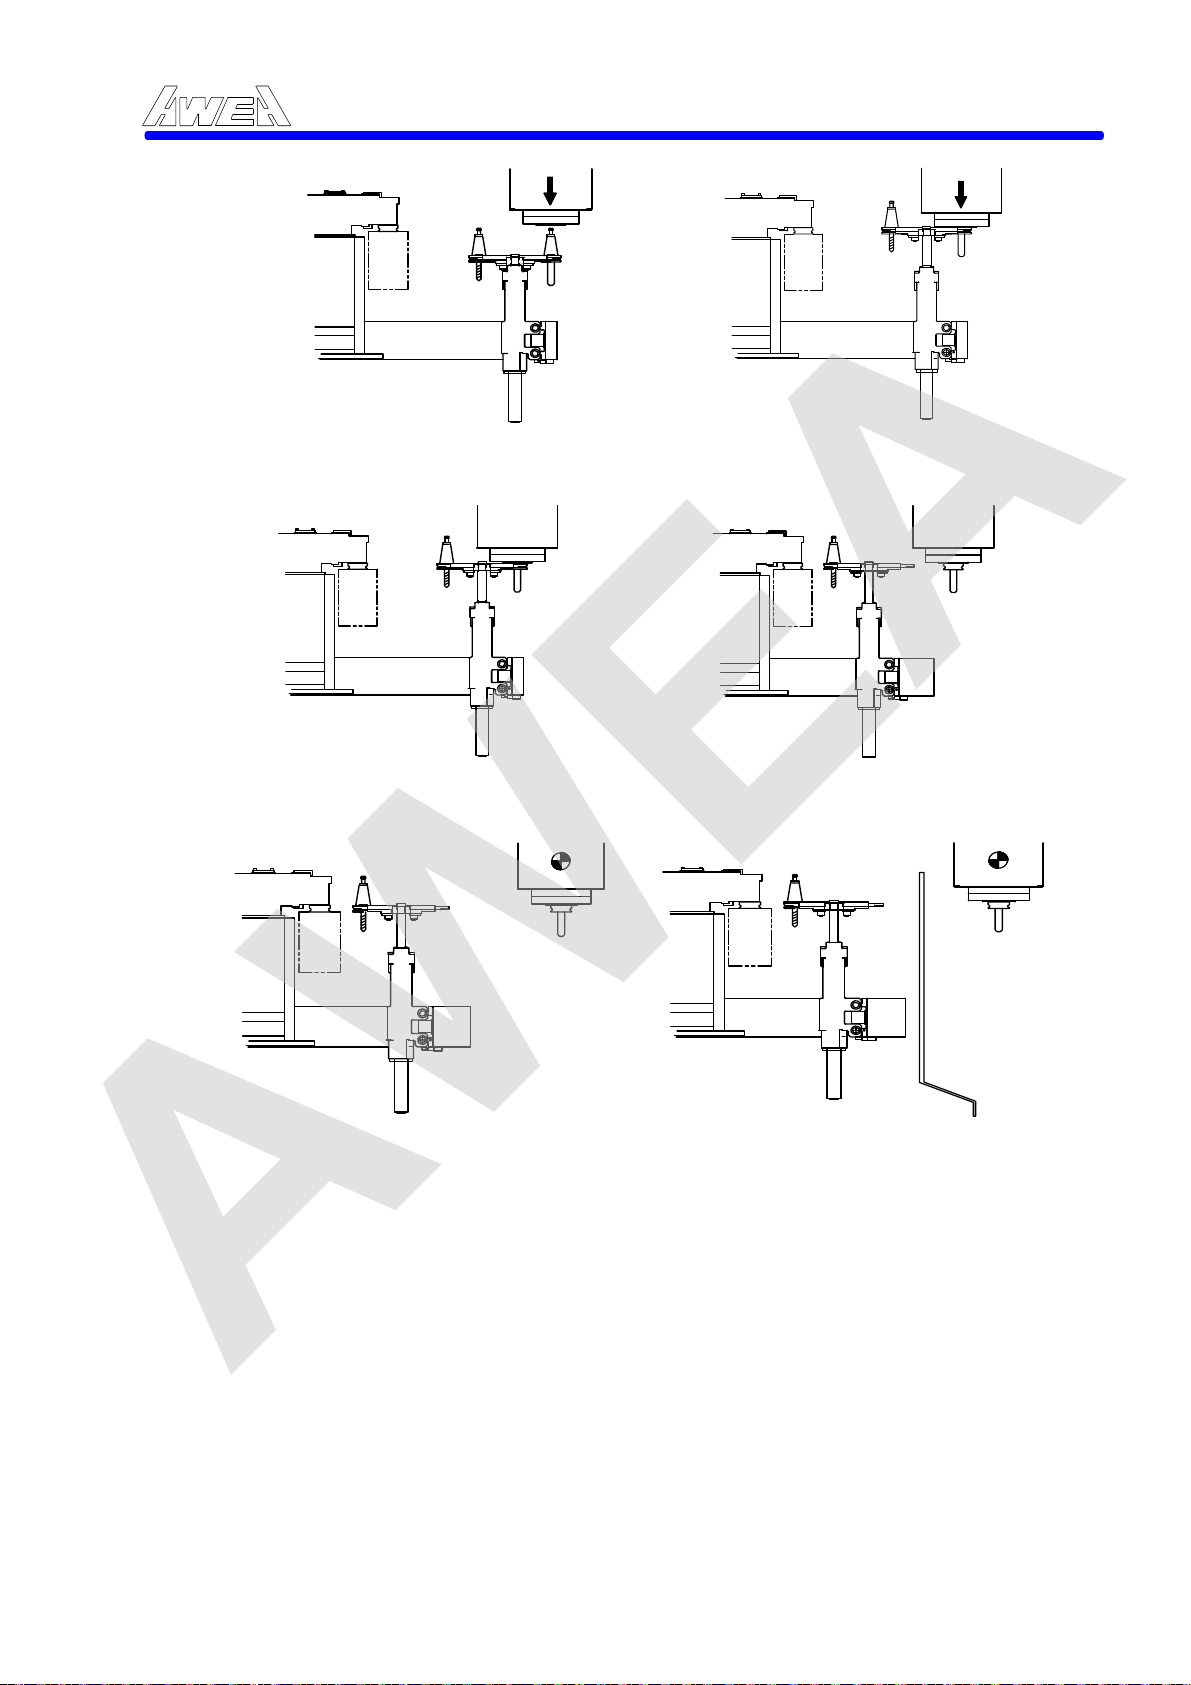
AWEA
AWEA SP/LP Series Manual - Chapter 4. OPERATION INSTRUCTION 4-46
7. The ATC arm rotates 180 deg.
9. The spindle clamp the tool.
8. The ATC arm moves up , inserts the appointed tool into the spindle.
10. The ATC arm moves back to the neutral position.
11. Moves the spindle head away from second reference point to the Home position, Door will close mechanically cam by the spindle head moving control itself.
12. The magazine door will close by pneumatic cylinder.
4-46
Page 100
AWEA
C. Tool Returning Procedure:
Machine Spindle T# after End Of Block
Program Activity (Currently Status) 10 7 5 N01 T10;
N02 M06 T10;
N03 T07;
N04 M06 T07;
N05 T05 ;
N06 M06 T05;
N07 T9;
N08 M06 T9;
N09 T00;
N10 M06 T00;
D. Note for ATC programming
%
:9001(CV+SPD TOOL CHANGE)
IF[#1000EQ0]GOTO9999
IF[#1012NE1]GOTO100
#3000=1100(SPINDLE IS HEAD)
N100
IF[#1002EQ1]GOTO200
#3000=100(SPINDLE IS EMPTY)
N200
G49G40G80G50.1
#147=#4003
M70
G4X0.1
G91G28Z0.M19
G91G30Z0.M65
G91G30Y0.
M06
G91G28Y0.M66
G91G28Z0.
G#147
N9999
M69
M99
%
None 10 7 5 None 10 7 5
None 10 7 5 Tool Exchange 7 10 5
T# Selective procedure:
a. T#10 return to the tool pocket.
b. ATC arm pickup T#5
Tool Exchange 5 7 5
T# Selective procedure:
a. T#7 return to the tool pocket.
b. ATC arm pickup T#9
Tool Exchange 9 5 9
Return T#5, ATC arm gripper is empty.
Tool Exchange 0 9 5
(1) It is recommended that T code is commanded well before M6 in order to
cut down the machining time, because the T code can be carried out while
machining still goes on.
(2) Program for ATC is already for work after you operate ATC by M6 Code.
The sub-program for ATC is put into the user macro B, protected by a
secret code. The user can not edit by any method. The contents of this
program for your reference are the following descriptions:
AWEA SP/LP Series Manual - Chapter 4. OPERATION INSTRUCTION 4-47
SPDLE T# ATC T# MGZN T# Remark
7 5 5
5 9 9
9 0 5
Check whether required T# = SPDL T#
Erase “CANNED CYCLE” status
Stored G90 or G91 status
Return Z home and SPDL orient
Auto tool change mode start
Z moves to ATC position / door open
Y moves to ATC position (PRM 1241)
ATC process
Y moves to Home / door close
Z moves to Home
Restore G90 or G91 status
Auto tool change mode finish
Return to main program
Parameter setting for ATC program:
P6071 = 6 (for ATC program)
Parameter #1241 = Y ATC position
Parameter #1241 = Z ATC position
4-47
 Loading...