

Page 1
AD-100
1U DAB/FM Tuner
Item ref: 952.979UK
User Manual
Page 2

Caution: Please read this manual carefully before operating
Damage caused by misuse is not covered by the warranty
Introduction
Thank you for choosing the Adastra AD-100 DAB/FM Tuner as part of your public address system.
This unit can receive either Digital Audio Broadcast or analogue FM radio stations for background
music and events coverage. Please read this manual fully and follow the instructions to achieve the
best results with your new purchase and to avoid damage through misuse.
Warning
To prevent the risk of fire or electric shock, do not expose any components to rain or moisture.
If liquids are spilled on the casing, stop using immediately, allow unit to dry out and have checked by
qualified personnel before further use. Avoid impact, extreme pressure or heavy vibration to the case
No user serviceable parts inside – Do not open the case – refer all servicing to qualified service
personnel.
Safety
Check for correct mains voltage and condition of IEC lead before connecting to power outlet
Placement
Keep out of direct sunlight and away from heat sources
Keep away from damp or dusty environments
For rack-mounting, ensure adequate support for the weight of the unit
Ensure adequate air-flow and do not cover cooling vents at the front and rear of the amplifier
Ensure adequate access to controls and connections
Where reception is poor, connect an outdoor aerial in place of the rear antenna on F connector.
Cleaning
Use a soft cloth with a neutral detergent to clean the casing as required
Use a vacuum cleaner to clear ventilation grilles of any dust or debris build-ups
Do not use strong solvents for cleaning the unit
952.979UK User Manual
Page 3

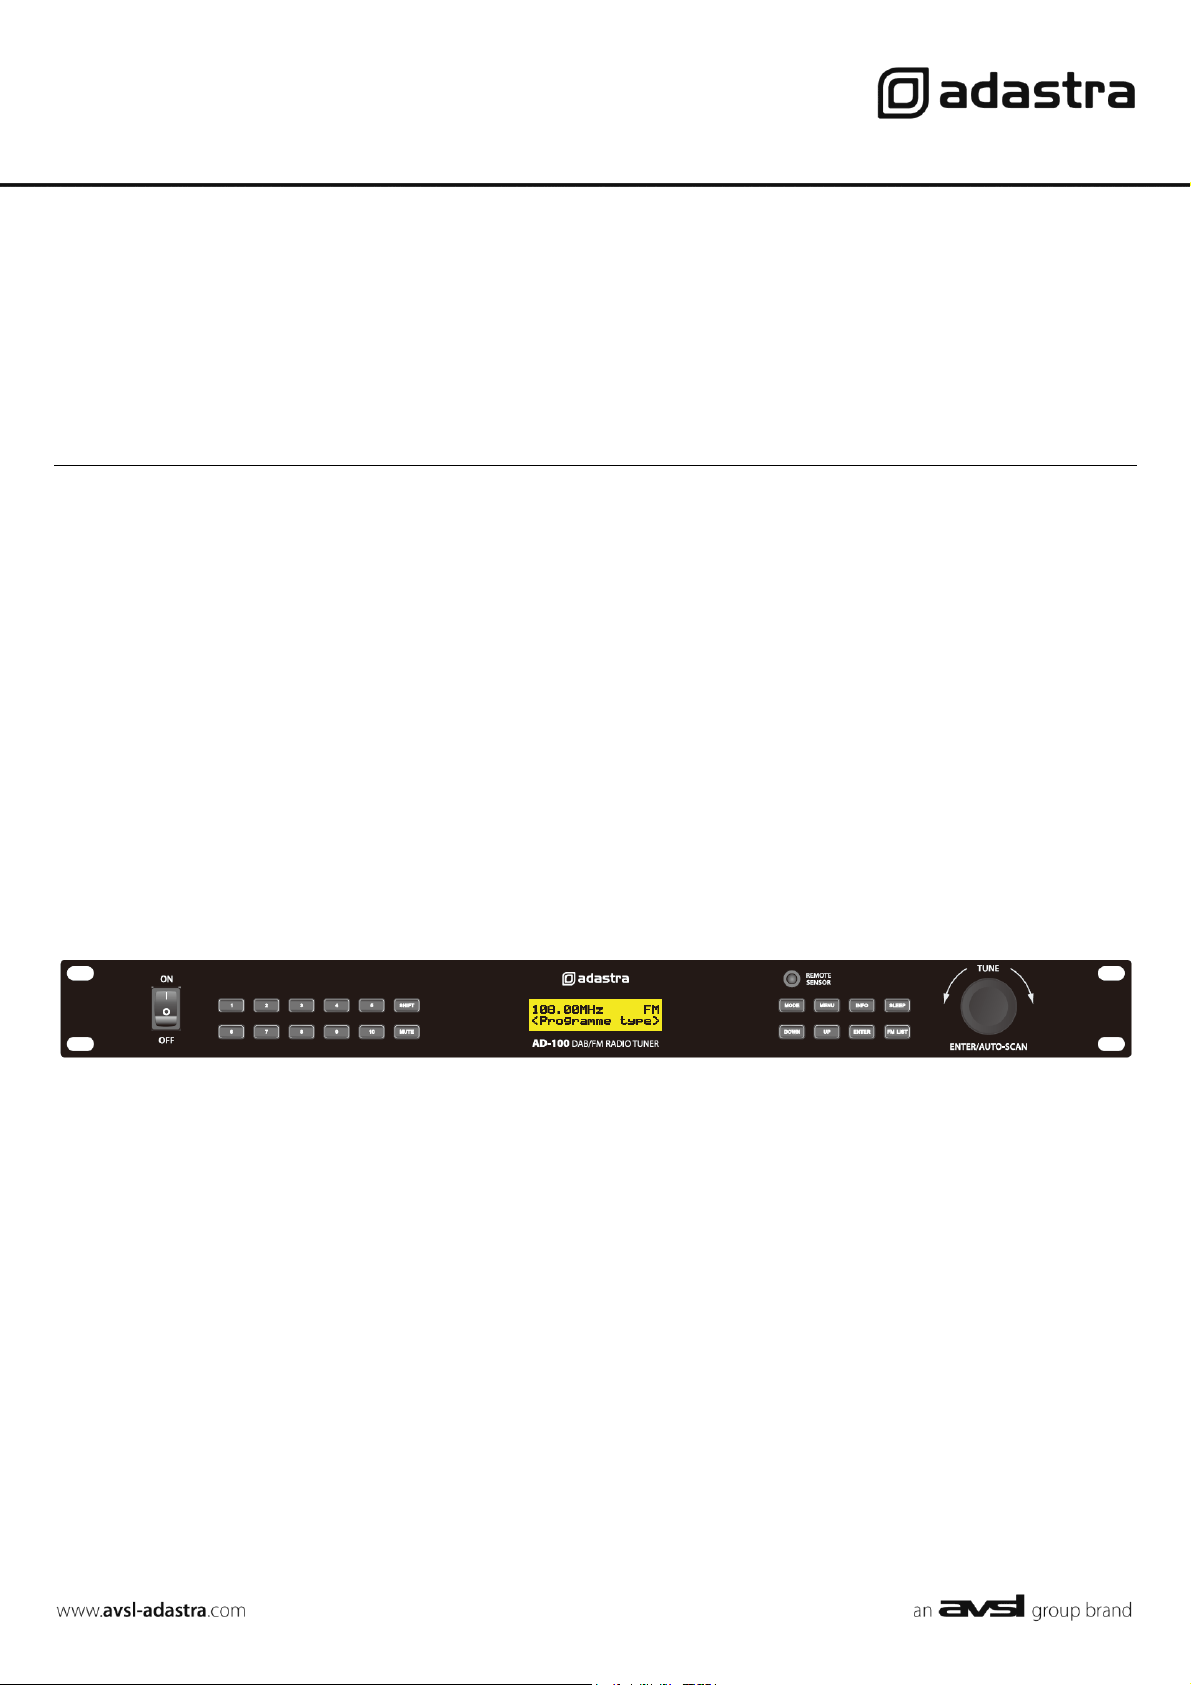
Front panel
1.
Power switch
Rocker switch for main power on/off
2.
Preset memory buttons
Press to access programmed stations
3.
SHIFT
Press to jump preset by 10, press and hold for FM scan list
4.
MUTE
Press to mute output, press again to un-mute
5.
LCD display
Shows frequency and/or station information
6.
MODE
Toggles between DAB and FM modes
7.
Remote sensor
Receives control signal from the handheld remote
8.
DOWN
Press to manually tune to lower channels, press and hold to auto-scan
9.
MENU
Changes menu options for on-screen editing
10.
UP
Press to manually tune to higher channels, press and hold to auto-scan
11.
INFO
In FM mode, changes RDS options. In DAB mode, changes LCD display
12.
ENTER
Press to confirm selection
13.
SLEEP
Press to enter sleep mode and then use UP/DOWN keys to set sleep time
14.
FM LIST
Press to display the list of FM stations scanned
15.
Rotary tuner
Rotate to manually tune stations, press to select, hold for auto-scan
16.
Antenna
Telescopic removable antenna on F connector
17.
Output R + L
Twin RCA connectors for audio output
18.
Mains inlet
Combined IEC and fuse holder for mains power connection
Rear panel
952.979UK User Manual
Page 4

Connection and setup
Connect the rear outputs (17) to a line input on the mixer or mixer-amp using a twin RCA lead.
Extend the rear antenna (16) or in places of poor reception, replace this with an F connector lead to
a well sited aerial for better reception.
Connect the rear IEC inlet (18) to the mains using the supplied mains lead (or an equivalent
approved type). Ensure that the voltage is correct and that the mains outlet is switched on.
Press the power switch (1) to the ON position.
Select either DAB or FM mode (whichever preferred) using the MODE button (6) and press and hold
the centre of the rotary tuner (15) to initiate auto-scanning of available stations.
Access these stations using the preset memory keys (2)
Pressing the SHIFT key (3) increments the preset by +10
The rotary tuner can be used to manually tune frequencies and stations. This function is also
available using the UP/DOWN keys.
Pressing the centre of the rotary tuner confirms the current tuning selection, whilst pressing the
centre and holding initiates auto-scanning.
In FM mode, the stored stations can be listed in the LCD display by pressing the FM LIST button (14)
In DAB mode, the station information is carried along with the digital audio signal.
In FM mode, radio station information is carried by the Radio Data System (RDS).
The information shown in the LCD display can be changed using the INFO button (11)
The audio output may be muted indefinitely by pressing the MUTE button (4) and pressing this
button again will cancel the mute function.
Alternatively, the unit can be placed in sleep mode for a fixed period of time by pressing the SLEEP
button and using UP/DOWN keys to set the duration, after which the unit will automatically “wake”.
952.979UK User Manual
Page 5

Remote control
1.
Preset buttons
Press to access programmed stations
2.
AUTO SCAN
Press to auto-scan for available stations
3.
MODE
Toggles between DAB and FM modes
4.
MENU
Changes menu options for on-screen editing
5.
INFO
In FM mode, changes RDS options
In DAB mode, changes LCD display
6.
ENTER
Press to confirm selection
7.
UP
Press to manually tune to higher channels, press and
hold to auto-scan
8.
PRESET
Press to select preset station
9.
DOWN
Press to manually tune to lower channels, press and
hold to auto-scan
10.
SLEEP
Press to enter sleep mode and then use UP/DOWN
keys to set sleep time
11.
SHIFT
Press to jump preset by 10, press and hold for FM
scan list
12.
MUTE
Press to mute output, press again to un-mute
13.
FM LIST
Press to display the list of FM stations scanned
Most of the front panel features are duplicated on the supplied handheld remote control for
operation away from the main unit.
952.979UK User Manual
Page 6

Specifications
Power supply
230Vac, 50Hz (IEC)
FM : Tuning range
87.5 - 108MHz
DAB frequency range
174.928 - 239.2MHz
Sensitivity
10uV emf
THD
0.30%
Audio stereo separation
30dB
Audio output voltage
400mV
Audio (S+N)/N
50dB
FM step frequency
50kHz
Adjacent channel selectivity
31dB
Far-off selectivity
49dB
Dimensions
482 x 185 x 44mm
Weight
2.35kg
No output and no LCD backlight
Ensure IEC lead is in good condition and connected properly
Ensure POWER switch is on and check mains inlet fuse
LCD backlight is on but no output
Check that mixer/amplifier channel is turned up
Check that the output from AD-100 is connected properly
Looking at the LCD display, check that a station is tuned properly
Interference or hiss in FM mode
Check that the antenna is connected, extended and angled correctly
Re-try auto scan and manually tune if necessary
If still poor reception, connect an outdoor aerial in place of antenna
Intermittent audio in DAB mode
Check that the antenna is connected, extended and angled correctly
Re-try auto scan function
If still poor reception, connect an outdoor aerial in place of antenna
Not responding to remote control
Check that remote can be “seen” by main front panel
Check batteries in remote handset and replace if necessary
Disposal: The “Crossed Wheelie Bin” symbol on the product means that the product is classed as Electrical or
Electronic equipment and should not be disposed with other household or commercial waste at the end of its useful life.
The goods must be disposed of according to your local council guidelines.
Troubleshooting
Errors and omissions excepted.
Copyright© 2014. AVSL Group Ltd.
952.979UK User Manual
 Loading...