

Page 1

Avigilon™ Control Center
Player User Guide
Version 5.2.2
Page 2

©2006 - 2014 Avigilon Corporation. All rights reserved. Unless expressly granted in writing, no license is granted
with respect to any copyright, industrial design, trademark, patent or other intellectual property rights of Avigilon
Corporation or its licensors.
AVIGILON, CAPTURE IT WITH CLARITY, HDSM, HIGH DEFINITION STREAM MANAGEMENT (HDSM), THE BEST
EVIDENCE, LIGHTCATCHER and the ACC logo are registered and/or unregistered trademarks of Avigilon
Corporation in Canada and other jurisdictions worldwide. Other product names mentioned herein may be the
unregistered and/ or registered trademarks of their respective owners. ™ and ® are not used in association with
each trademark in this document.
This manual has been compiled and published covering the latest product descriptions and specifications. The
contents of this manual and the specifications of this product are subject to change without notice. Avigilon
reserves the right to make changes without notice in the specifications and materials contained herein and shall
not be responsible for any damages (including consequential) caused by reliance on the materials presented,
including but not limited to typographical and other errors relating to the publication.
Avigilon Corporation
http://www.avigilon.com
Revised: 2014-07-21
PDF-PLAYER5-C-Rev2
2
Page 3

Table of Contents
What is the Avigilon Control Center Player? 5
For More Information 5
Avigilon Training Center 5
Support 5
Upgrades 5
Feedback 5
Starting Up and Shutting Down the Avigilon Control Center Player 6
Starting Up the Player 6
Shutting Down the Player 6
Authenticating Video 7
What are Views? 8
Making a View Full Screen 8
Ending Full Screen Mode 8
Selecting a Layout for a View 8
Editing a View Layout 9
Video 12
Adding and Removing Cameras in a View 12
Adding a Camera to a View 12
Removing a Camera from a View 12
Playing Back Recorded Video 12
Zooming and Panning in a Video 14
Using the Zoom Tools 14
Using the Pan Tools 14
Maximizing and Restoring an Image Panel 14
Maximizing an Image Panel 14
Restoring an Image Panel 14
Listening to Audio 14
Reviewing Recorded POS Transactions 15
Video Display 15
Adjusting Video Display 15
Displaying Analog Video in Deinterlaced Mode 16
Looping Playback 16
Displaying Image Overlays 16
Changing Display Quality 17
Making Image Panel Display Adjustments 17
3
Page 4

Camera Properties 18
Search 20
Performing an Alarm Search 20
Viewing Alarm Search Results 21
Performing an Event Search 21
Viewing Event Search Results 22
Performing a License Plate Search 23
Viewing License Plate Search Results 24
Performing a Pixel Search 24
Viewing Pixel Search Results 26
Performing a POS Transaction Search 26
Viewing POS Transaction Search Results 27
Performing a Thumbnail Search 28
Viewing Thumbnail Search Results 29
Export 30
Exporting Native Video 30
Exporting AVI Video 32
Exporting a Print Image 36
Exporting a Snapshot of an Image 37
Exporting Still Images 40
Exporting WAV Audio 41
4
Page 5

What is the Avigilon Control Center Player?
The Avigilon Control Center Player is the video player for Avigilon Native Video Export (AVE) files and Avigilon
Backup (AVK) files.
The Player displays video in image panels, and allows you to control their playback through the Timeline. The
Player is able to authenticate video files against tampering, and can be used to re-export video into other
formats. Both AVE and AVK video include event data embedded in the file, so you are also able to search for
specific alarms, POS transactions, and other events that are linked to the video.
A copy of the Player can be downloaded from the Avigilon website, or exported with the AVE file from the
Avigilon Control Center Client software (see the Avigilon Control Center Client User Guide for more information).
For More Information
Visit Avigilonat http://www.avigilon.com/ for additional product documentation.
Avigilon Training Center
The Avigilon Training Center provides free online training videos that demonstrate how to set up and use the
Avigilon Surveillance System. Register online at the Avigilon Partner Portal site to begin:
http://avigilon.force.com/login
Support
For additional support information, visit http://avigilon.com/support-and-downloads/. The Avigilon Partner Portal
also provides self-directed support resources - register and login at http://avigilon.force.com/login.
Regular AvigilonTechnical Support is available Monday to Friday from 12:00a.m. to 6:00p.m. Pacific Standard
Time (PST):
l North America: +1.888.281.5182 option 1
l International: +800.4567.8988 or +1.604.629.5182 option 1
Emergency Technical Support is available 24/7:
l North America: +1.888.281.5182 option 1 then dial 9
l International: +800.4567.8988 or +1.604.629.5182 option 1then dial 9
E-mails can be sent to: support@avigilon.com.
Upgrades
Software and firmware upgrades will be made available for download as they become available. Check
http://avigilon.com/support-and-downloads/ for available upgrades.
Feedback
We value your feedback. Please send any comments on our products and services to feedback@avigilon.com
What is the AvigilonControl Center Player? 5
Page 6

Starting Up and Shutting Down the Avigilon Control Center Player
The Avigilon Control Center Player can be started up or shut down at any time.
Starting Up the Player
The Player can be opened in any of the following ways:
l
Double-click the shortcut icon on the desktop.
l In Windows, select All Programs or All Apps > Avigilon > Avigilon Control Center Player > Avigilon Control
Center Player.
When the application first opens, you will be prompted to open an AVE or AVK file.
l Double-click an Avigilon Native Video Export (AVE) file or Avigilon Backup (AVK) file. The Player will open
and display the video file.
Shutting Down the Player
l
In the Avigilon Control Center Player software, select > Exit.
6 Starting Up and Shutting Down the Avigilon Control Center Player
Page 7
Authenticating Video
All Avigilon Native Video Export (AVE) and Avigilon Backup (AVK) files contain an encrypted digital signature
that is used to confirm that exported images have not been tampered with.
l
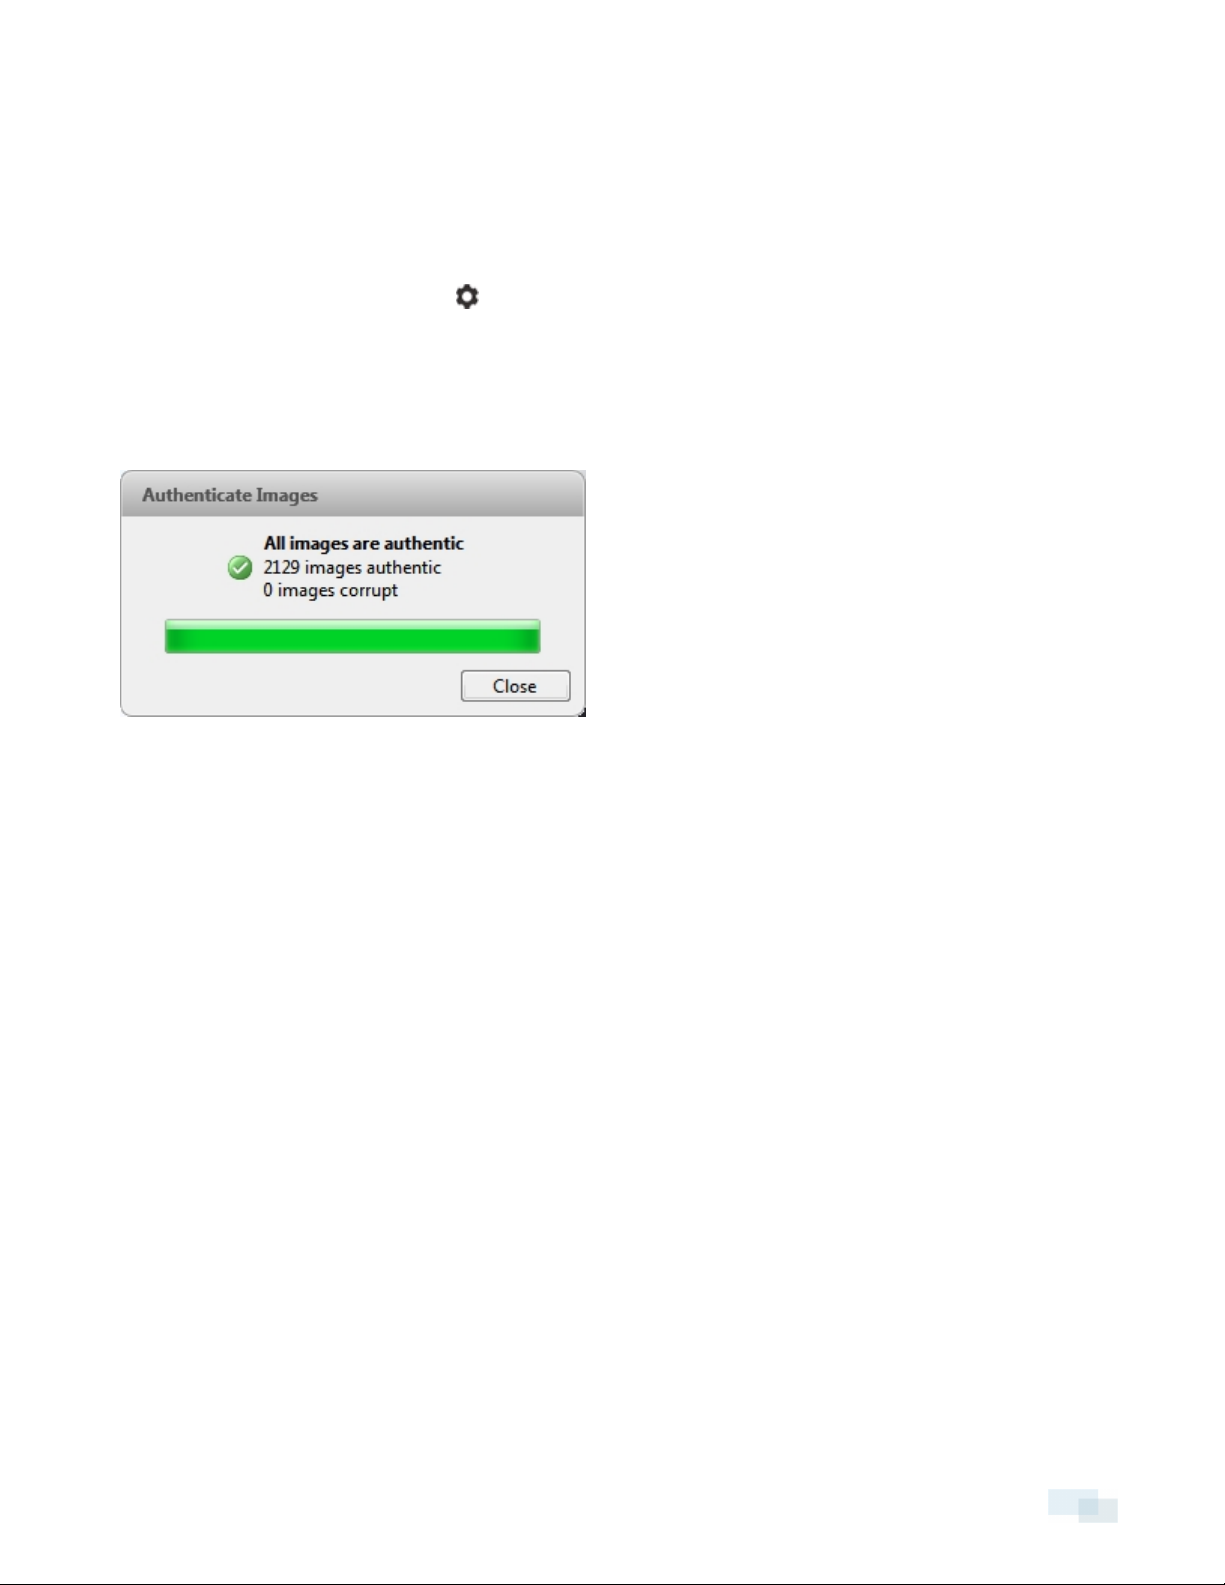
To authenticate a video, select > Authenticate Images....
The Authenticate Images dialog box appears and displays the progress as the application checks all the
video images for tampering.
When the process is complete, the Authenticate Images dialog box displays the number of images that are
authentic and the number of images that have been corrupted.
Figure 1: Authenticate Images dialog box
AuthenticatingVideo 7
Page 8

What are Views?
A View tab is where you watch camera video. Inside the View tab is a set of image panels that allows you to
organize how video is displayed.
You can arrange image panels into different layouts to take advantage of different camera angles and save View
layouts that you like.
Making a View Full Screen
You can maximize a View to fill an entire monitor screen.
l
On the toolbar, click .
Ending Full Screen Mode
l
While the View is in full screen mode, click .
Selecting a Layout for a View
You can organize how video is displayed by selecting a View layout. The figure below shows the default View
layouts.
8 What are Views?
Page 9

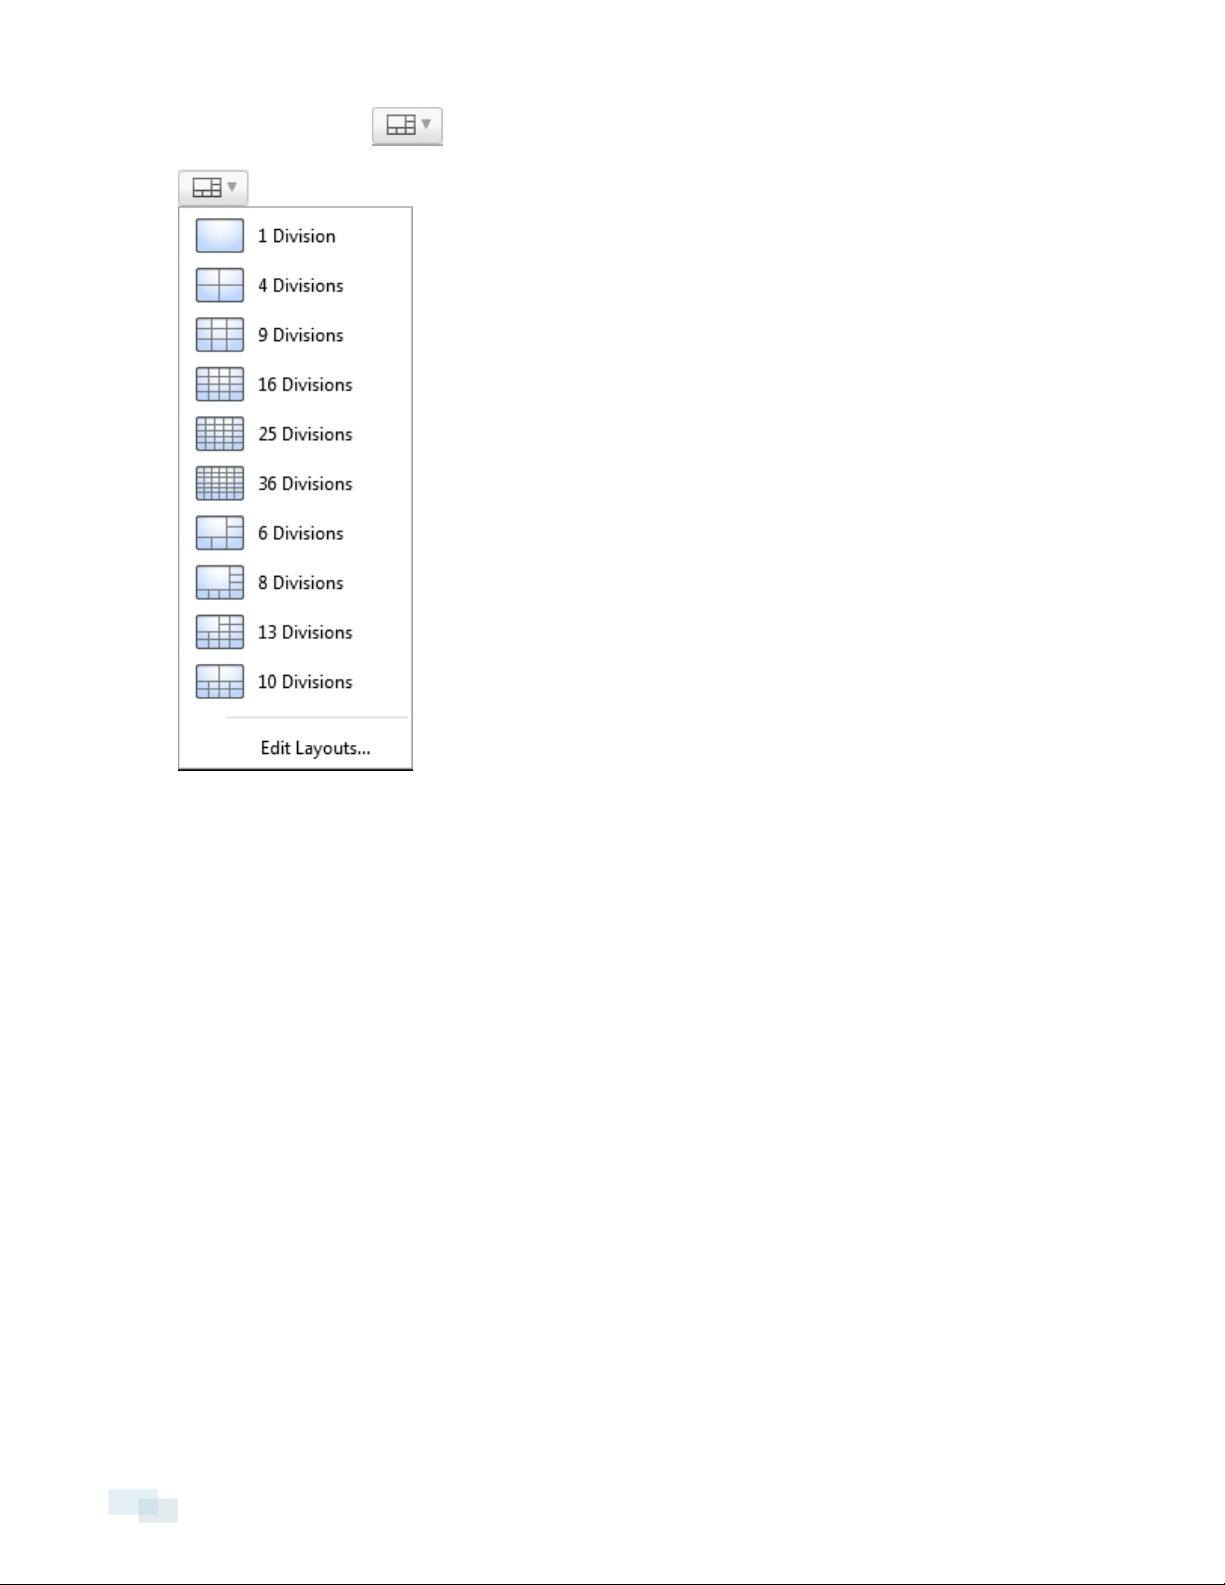
l
On the toolbar, select , then select one of the following layout options.
Figure 2: Layouts in the toolbar
Editing a View Layout
If the default View layouts do not fit your surveillance requirements, you can customize a View layout.
Editing a View Layout 9
Page 10
1.
On the toolbar, select >Edit Layouts....
Figure 3: Layouts in the toolbar
2. In the Edit Layouts dialog box, select the layout you want to change.
3. Enter the number of Columns: and Rows: you want in your layout.
10 Editing a View Layout
Page 11
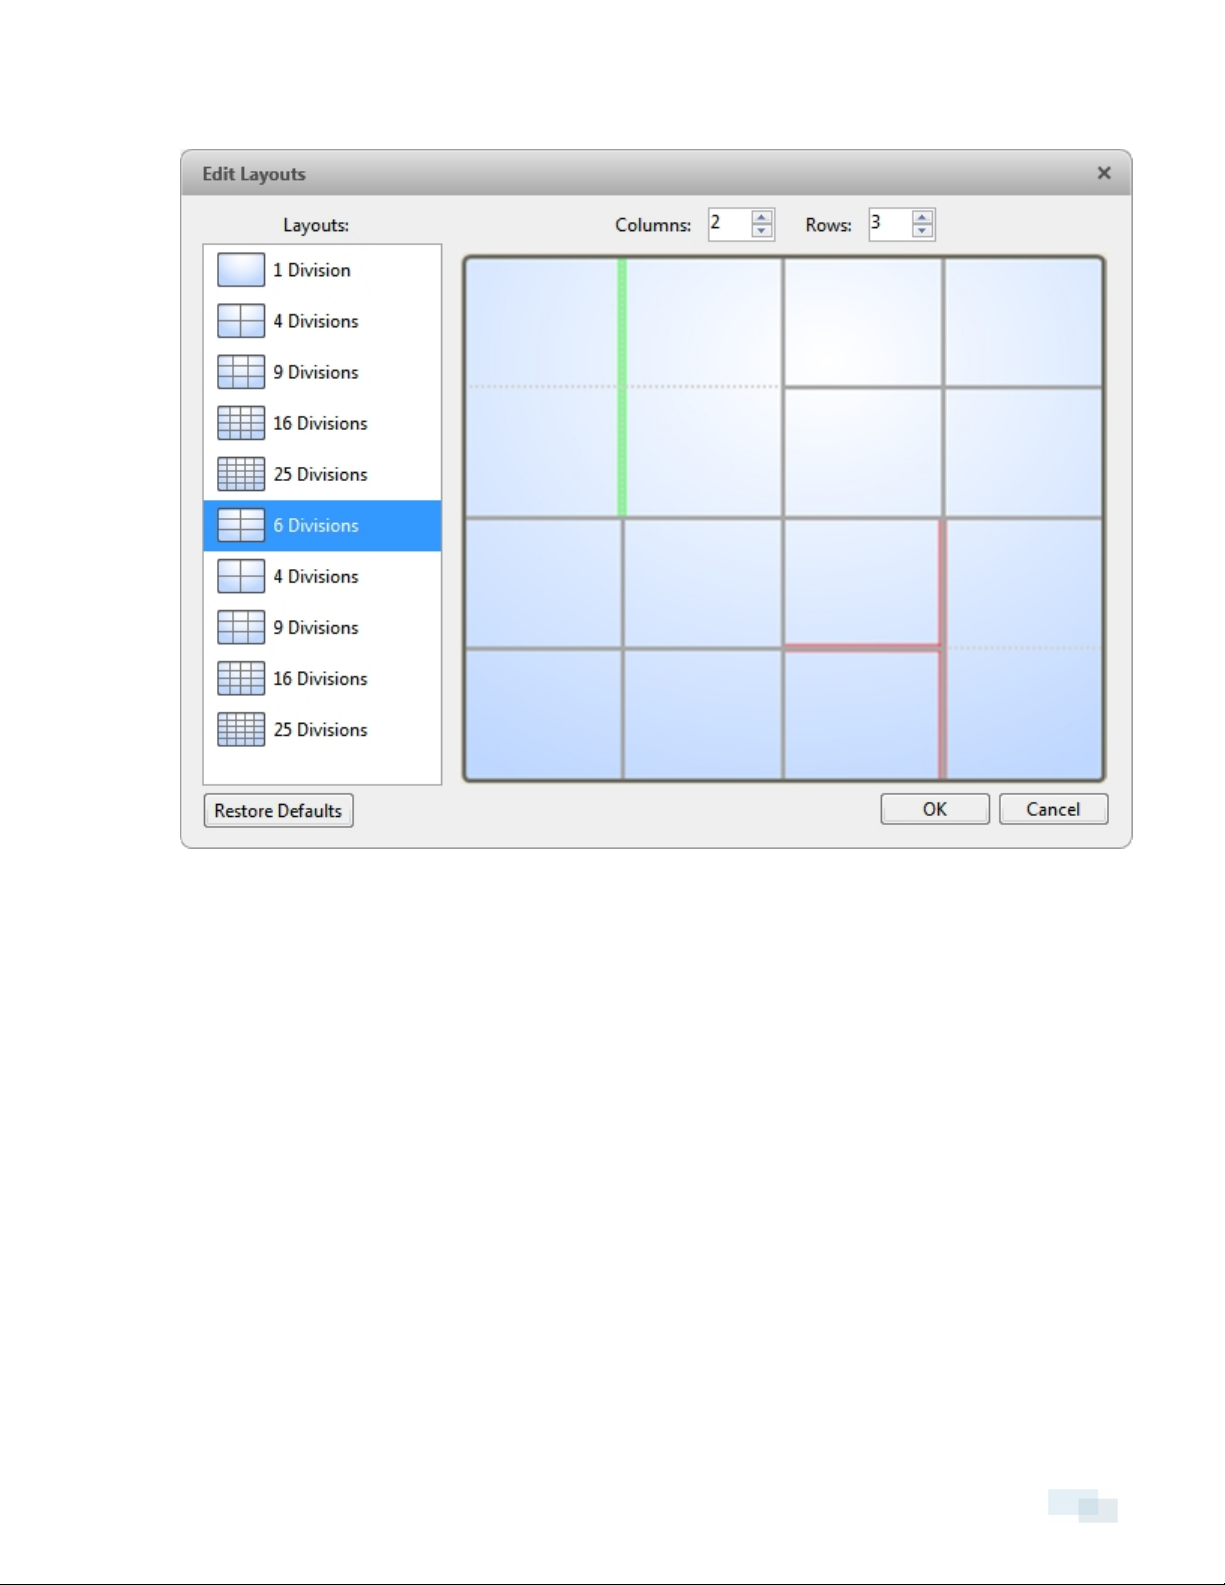
4. In the layout diagram, do any of the following to further customize the layout.
Figure 4: Edit Layou ts dialog box
l To create a larger image panel, select a gray line to delete the border between two image panels.
When a line is highlighted in red, the line can be deleted.
l To restore an image panel, select a dotted line to divide a larger image panel into two. When a
dotted line is highlighted in green, the line can be restored.
l To restore all default View layouts, click Restore Defaults. All custom layouts in the Layouts: list will
be replaced.
NOTE: You can only add or subtract lines to create a rectangular shape.
5. Click OK to save your changes. The previous View layout has been replaced with your customized
layout.
Tip: The keyboard commands used to access View layouts are linked to the layout's position in the Layouts: list.
For example, if your custom layout is placed at the top of the Layouts: list (layout 1), you can press Alt + 1 to use
that layout.
Editing a View Layout 11
Page 12

Video
The Avigilon Control Center Player allows you to watch exported Avigilon Native Video Export (AVE) video and
Avigilon Backup (AVK) video in View tabs, similar to the Avigilon Control Center Client software.
If the video file contains video from multiple cameras, the video can be displayed in multiple image panels. You
can zoom and pan the exported video images, and use the Timeline to control the playback of the recorded
video.
Adding and Removing Cameras in a View
You can add and remove cameras from the View to focus on specific parts of the video file.
Adding a Camera to a View
Do one of the following:
l Drag the camera from the System Explorer to an empty image panel in the View tab.
l Double-click a camera in the System Explorer.
l In the System Explorer, right-click the camera and select Add To View.
The camera is added to the next empty image panel in the View layout.
Tip: You can drag the same camera to multiple image panels to watch the video at different zoom levels.
Removing a Camera from a View
Do one of the following:
l Right-click the image panel and select Close.
l
Inside the image panel, click .
Playing Back Recorded Video
The Timeline displays when video was recorded and lets you control video playback.
The colored bars on the Timeline show the camera's recording history:
l A red bar shows the camera has recorded a motion event.
l A blue bar shows the camera has recorded video.
l White areas show periods of time during which the camera has not recorded any video.
l An yellow bar is a bookmark in the camera's recording history.
12 Video
Page 13
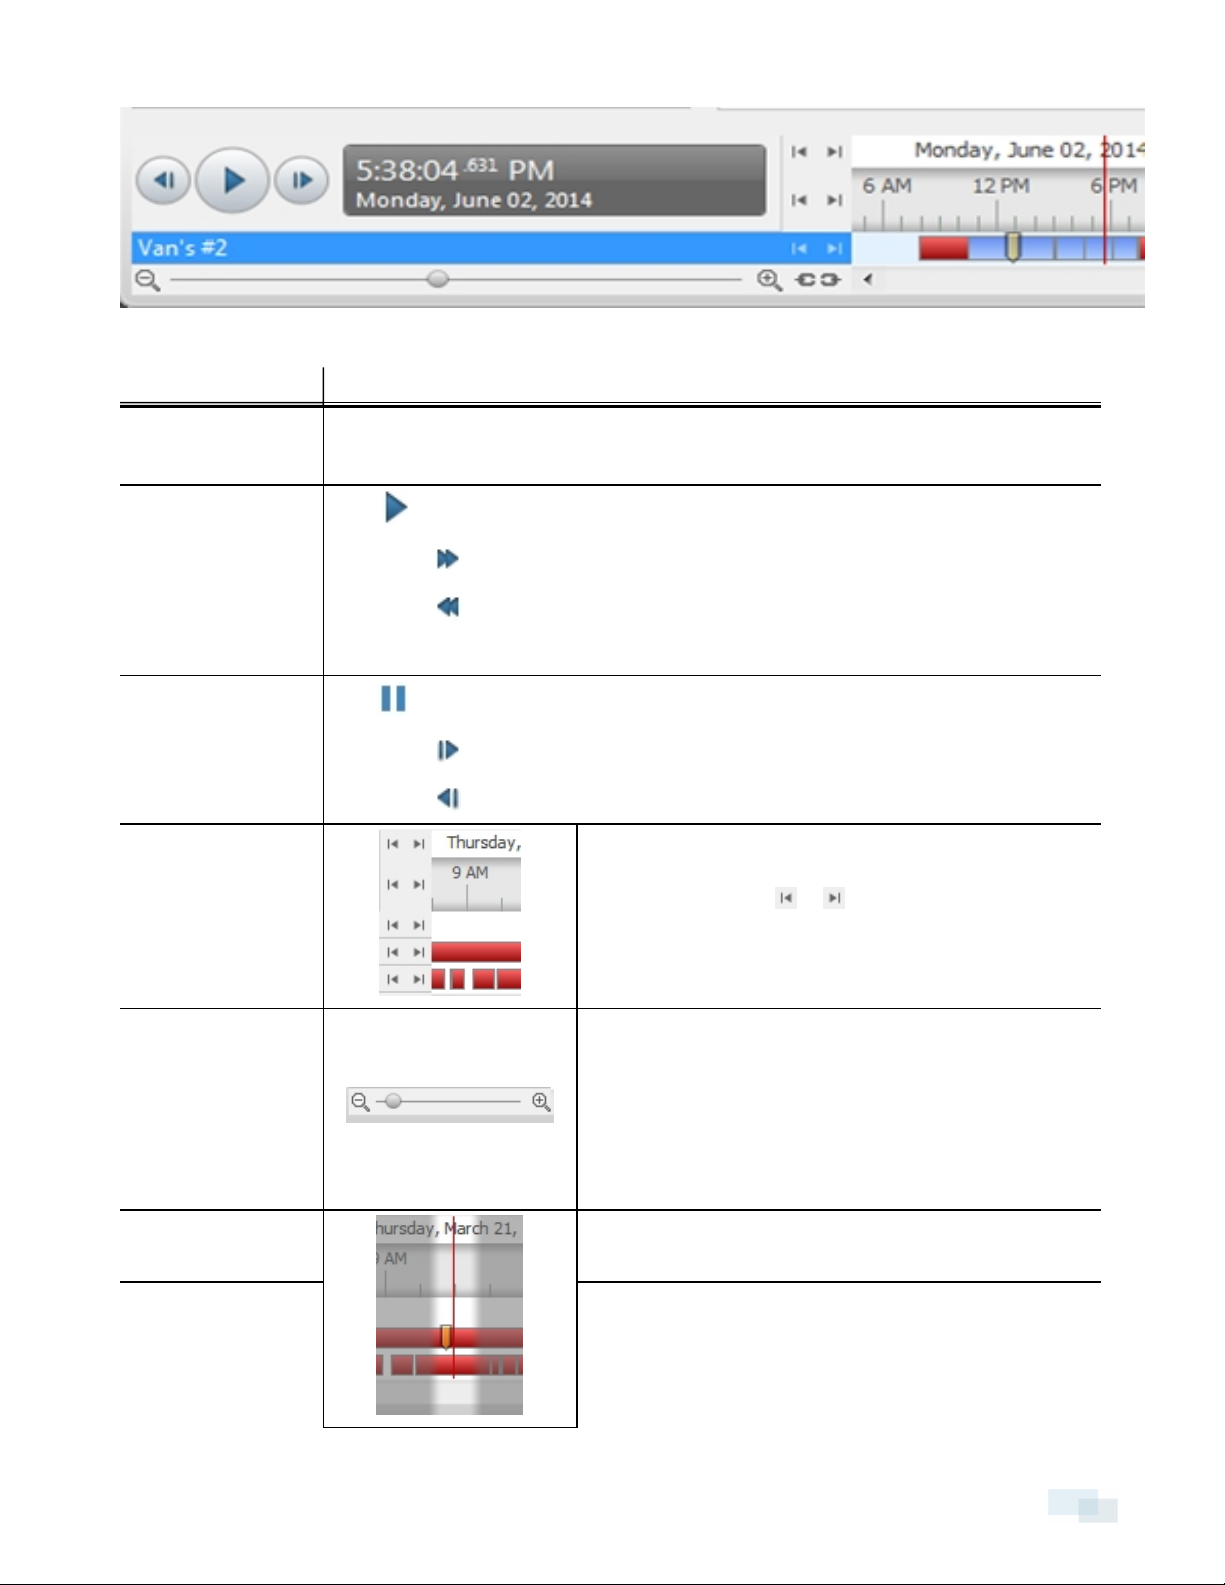
Figure 5: Playback con trols on the Timeline
To... Do this...
Select a playback
time
Start playback
Stop playback
Jump forward or
backward on the
Timeline
l Click the dark gray date display and select a specific date and time.
l Click a point on the Timeline.
Click .
l
Click to fast forward. Tap the arrow again to increase the playback speed.
l
Click to rewind. Tap the arrow again to increase the playback speed.
You can play the video up to eight times the original speed.
Click .
l
Click to step forward one frame.
l
Click to step backward one frame.
On the Timeline, click or to move to set points on the
Timeline.
l Move the slider on the bottom left to zoom in or out
on the Timeline.
Zoom in or out of the
Timeline
l Place your mouse over the Timeline and use the
scroll wheel to zoom in or out on the Timeline.
You can zoom in to a quarter of a second, and zoom out to
see years if recorded video exists.
Center the Timeline
on the time marker
Right-click the Timeline, and select Center on Marker.
l Click and drag the time marker through the
Timeline.
Pan the Timeline
l Move the horizontal scroll bar under theTimeline.
l Right-click and drag the Timeline.
Playing Back Recorded Video 13
Page 14

Zooming and Panning in a Video
Use the zoom and pan tools to focus on specific areas in the recorded video stream.
Using the Zoom Tools
There are two ways to digitally zoom in and zoom out of a video image:
l Move your mouse over the video image, then rotate your mouse wheel forward and backward.
l
On the toolbar, select or , then click the image panel until you reach the desired zoom depth.
Using the Pan Tools
There are two ways to pan through the video image:
l Right-click and drag inside an image panel
l
On the toolbar, select , then left-click and drag the video image in any direction inside the image
panel.
Maximizing and Restoring an Image Panel
You can maximize an image panel to enlarge the video display.
Maximizing an Image Panel
Do one of the following:
l Right-click an image panel and select Maximize.
l
Inside the image panel, click .
l Double-click the image panel.
Restoring an Image Panel
In a maximized image panel, do one of the following:
l Right-click the maximized image panel and select Restore Down.
l
Inside the image panel, click .
l Double-click the image panel.
Listening to Audio
If audio was included in the video file, you can listen to it through the video image panel. The audio is muted by
default.
To control audio playback, do any of the following:
14 Zooming and Panning in a Video
Page 15

l
In the lower-right corner of the image panel, click to mute or activate the audio.
l Move the slider to change the volume.
Reviewing Recorded POS Transactions
While you watch recorded video, you can review POS transactions that occur at the same time.
1. Select a camera that is linked to the POS transaction source and display the camera's recorded video
2.
In the image panel, click .
If there is more than one POS transaction source linked to the camera, you will be prompted to select
one. The POS transactions are displayed in the next image panel.
l Each transaction is separated by date and time.
l When you select a transaction, the video jumps to that event on the Timeline.
l Scroll up or down to see other recorded POS transactions.
3.
To display cameras that are linked to the POS transaction source, click in the POS transaction image
panel.
If multiple cameras are connected to the POS transaction source, you will be prompted to select one.
4. Use the Timeline to review the video in more detail.
For more information about Timelines, see Playing Back Recorded Video.
If you want to find a specific POS transaction, see Performing a POS Transaction Search.
Video Display
You can adjust how video is displayed on your monitor. The settings only affect how video is displayed on your
monitor and will not affect the contents of the video file.
Adjusting Video Display
You can adjust the Display settings to improve how video is displayed on your monitor.
Reviewing Recorded POSTransactions 15
Page 16

1.
In the top-right corner of the Player, select > Player Settings....
Figure 6: Player Settings... dialog box
2. Perform any of the following procedures to adjust how video is displayed in image panels.
Displaying Analog Video in Deinterlaced Mode
Select the Display Deinterlaced Images check box if the analog video you are watching is showing interfacing
artifacts. This setting will help improve video image and smooth out some of the artifacts.
Looping Playback
If you want the Player to automatically repeat the video it is playing, select the Loop Playback check box.
Displaying Image Overlays
Select any of the Image Overlays: options to set the type of information that is displayed over video.
16 Displaying AnalogVideo in Deinterlaced Mode
Page 17

Overlay Description
Camera Name Displays the name assigned to the camera.
Camera Location Displays the location assigned to the camera.
Playback Timestamp (Recorded video only) Displays the exposure timestamp for the video.
Live Timestamp (Live video only) Displays the current system date and time to the millisecond.
Motion Activity Highlights motion in red.
Bounding boxes outline objects detected in the video. The color of the bounding box
identifies the object type:
l Red - a person
l Blue - a vehicle
Video Analytics Activity
l Yellow - a suspicious object
The Video Analytics Activity overlay is only activated for video from cameras that are
connected to a Rialto device.
NOTE: If both the Motion Activity overlay and the Video Analytics Activity overlay are
enabled, for cameras connected to a Rialto device the system will only display
bounding boxes, and will not display the red motion activity overlay.
Changing Display Quality
If your computer does not have enough network bandwidth or processing power, you may not be able to watch
video at its full image rate and quality. You can configure the image panels to display video in high quality and
low frame rate, or low quality and high frame rate.
Select a higher display quality setting if you need to see specific details or faces in the scene. Select a lower
display quality setting if it's more important to see moving events as they occur.
The Change Display Quality: settings only affect the image panel display and do not affect the actual video
quality or image rate between the camera and the server. Therefore, you can review recorded footage later to
confirm what you saw in the image panel.
In the Change Display Quality: area, select one of the following options:
l Maximum: displays video at full resolution with the lowest image rate.
l High (Default): displays video at 1/4 resolution.
l Medium: displays video at 1/16 resolution.
l Low: displays video at 1/64 resolution with the highest image rate.
Making Image Panel Display Adjustments
You can change the image panel display settings to bring out video details that are hard to see with the image
panel's default settings.
Changing Display Quality 17
Page 18

1. Right-click an image panel and select Display Adjustments....
Figure 7: Display Adjustmen ts... panel
The Display Adjustments... settings are displayed in a floating pane immediately beside the image panel.
2. Move the sliders to adjust the Gamma:, Black Le vel: and White Level:.
The image panel displays a preview of your changes.
3. Click Restore Defaults to clear your changes.
Camera Properties
To see detailed information about any camera in the AVE file, you need to access the camera properties.
l In the System Explorer, right-click a camera and select Properties....
Figure 8: Camera Properties dialog box
The Camera Properties dialog box displays the following information about the camera:
l Camera Name
l Model number
18 Camera Properties
Page 19

l Firmware Version:
l Location:
l MAC Address:
l Serial Number:
l Resolution:
Camera Properties 19
Page 20

Search
AVE and AVK files have embedded event data, so you can quickly search for events or motion that occur within
the video file.
NOTE: If your video file does not contain a specific type of data, that search option will not be available.
Performing an Alarm Search
If the video is linked to an alarm, you can search for specific alarm triggers in the video file.
1.
In the New Task menu, under Search, click .
The Search: Alarms tab is displayed.
Figure 9: Search : Alarms tab
2. In the Alarms to Search: list, select all the alarms you would like to include in the alarm search.
3. In the Time Range to Search: area, set the date and time range of your search. The time range is
highlighted on the Timeline by the black time range markers. You can also drag the time range markers to
20 Search
Page 21

modify the time range.
4. Click Search.
Viewing Alarm Search Results
1. In the Search Results area, select a search result. The event is highlighted on the Timeline and the video
is displayed in the image panel. Details about the search result are displayed to the right.
2. Use the Timeline controls to review the event.
See Playing Back Recorded Video for more information.
3. If the search result is linked to multiple cameras, select a camera from the drop-down list above the
image panel to change the video that is displayed.
4. Click Export this event to export the selected event video.
See Export for more information.
5. To export all listed search results, click Export results to a file and save the file. The search results can be
saved as either a CSV or Text file.
Performing an Event Search
The Event Search allows you to search for specific motion events and digital input events.
1.
In the New Task menu, click
The Search: Event tab is displayed.
Viewing Alarm Search Results 21
Page 22

Figure 10: Search: Event tab
2. In the Camera(s) to Search: area, select all the cameras you want to include in the search.
3. In the Time Range to Search: area, set the date and time range of your search. The time range is
highlighted on the Timeline by the black time range markers. You can also drag the time range markers to
modify the time range.
4. In the Events to Search For: area, select the types of events to include in the search.
5. Click Search.
Viewing Event Search Results
1. In the Search Results area, select a search result. The event is highlighted on the Timeline and the video is
displayed in the image panel. Details about the search result are displayed to the right.
2. Use the Timeline controls to review the event.
See Playing Back Recorded Video for more information.
3. Click Export this event to export the selected event video.
See Export for more information.
4. If you want to further refine your search, click Perform a pixel search on this event. You can now search for
pixel changes in the selected search result.
See Performing a Pixel Search for more information.
22 Viewing Event Search Results
Page 23

5. To export all listed search results, click Export results to a file and save the file. The search results can be
saved as either a CSV or Text file.
Performing a License Plate Search
The License Plate Search allows you to search for license plates that were detected in the exported video.>
1.
In the New Task menu, under Search, click
The Search: License Plates tab is displayed.
Figure 11: Search: License Plates tab
2. In the Camera(s) to Search: area, select all the cameras you want to include in the search.
3. In the Time Range to Search: area, set the date and time range of your search. The time range is
highlighted on the Timeline by the black time range markers. You can also drag the time range markers to
modify the time range.
4. In the License Plate Search Options: area, enter the license plate you want to find and a minimum
confidence of a match.
5. Click Search.
Performing a License Plate Search 23
Page 24

Viewing License Plate Search Results
1. In the Search Results area, select a search result. The event is highlighted on the Timeline and the video is
displayed in the image panel. Details about the search result are displayed to the right.
2. Use the Timeline controls to review the event.
See Playing Back Recorded Video for more information.
3. If the search result is linked to multiple cameras, select a camera from the drop-down list above the image
panel to change the video that is displayed.
4. Click Export this event to export the selected event video.
See Export for more information.
5. To export all listed search results, click Export results to a file and save the file. The search results can be
saved as either a CSV or Text file.
Performing a Pixel Search
The Pixel Search allows you to search for tiny pixel changes in specific areas in the camera’s field of view.
1.
In the New Task menu, click
The Search: Pixel tab is displayed.
24 Viewing License Plate Search Results
Page 25

Figure 12: Search: Pixe l tab
By default, the entire search image panel is highlighted in green.
2. In the Camera to Search: area, select a camera.
3. In the Time Range to Search: area, set the date and time range of your search. The time range is
highlighted on the Timeline by the black time range markers. You can also drag the time range markers to
modify the time range.
4. Define the pixel search area by using the motion detection tools above the image panel.
Tip: If you are looking for something very specific, limit the green area to a dot to find what you're looking
for more quickly.
5. In the Pixel Search Options: area, drag the Threshold: slider to select the amount of motion required to
return a search result.
A high threshold requires more pixels to change before results are found.
6. Enter a number in the Join results less than field to set the minimum number of seconds between
separate search results. You can enter any number between 1-100 seconds.
7. Click Search.
Performing a PixelSearch 25
Page 26

Viewing Pixel Search Results
1. In the Search Results area, select a search result. The event is highlighted on the Timeline and the video is
displayed in the image panel. Details about the search result are displayed to the right.
2. Use the Timeline controls to review the event.
See Playing Back Recorded Video for more information.
3. Click Export this event to export the selected event video.
See Export for more information.
4. To export all listed search results, click Export results to a file and save the file. The search results can be
saved as either a CSV or Text file.
Performing a POS Transaction Search
The POS Transaction Search allows you to search for specific transactions in the video file.
1.
In the New Task menu, click .
The Search: POS Transactions tab is displayed.
26 Viewing PixelSearch Results
Page 27

Figure 13: Search: POS Tran sactions tab
2. In the POS Transaction Sources to Search: area, select all the POS transaction sources you would like to
include in the search.
3. In the Time Range to Search: area, set the date and time range of your search. The time range is
highlighted on the Timeline by the black time range markers. You can also drag the time range markers to
modify the time range.
4. In the Search Text: area, enter any text that will help you filter the search results. For example, you can
enter product names or transaction values.
Use the Wildcards and Regular expressions search methods to find a range of results. Leave the Text:
field blank to find all transactions.
5. Click Search.
Viewing POS Transaction Search Results
1. In the Search Results area, select a search result. The event is highlighted on the Timeline and the video
is displayed in the image panel. Details about the search result are displayed to the right.
2. Use the Timeline controls to review the event.
See Playing Back Recorded Video for more information.
Viewing POS Transaction Search Results 27
Page 28

3. If the search result is linked to multiple cameras, select a camera from the drop-down list above the image
panel to change the video that is displayed.
4. Click Export this event to export the selected event video.
See Export for more information.
5. To export all listed search results, click Export results to a file and save the file. The search results can be
saved as either a CSV or Text file.
Performing a Thumbnail Search
The Thumbnail Search is a visual search that displays search results as a series of thumbnail images.
1.
In the New Task menu, click .
The Search: Thumbnails tab is displayed.
Figure 14: Search: Thumbnails tab
2. In the Camera to Search: area, select a camera.
3. In the Time Range to Search: area, set the date and time range of your search. The time range is
28 Performing a Thumbnail Search
Page 29

highlighted on the Timeline by the black time range markers. You can also drag the time range markers to
modify the time range.
4. In the image panel, move or drag the edges of the green overlay to focus the search on one area in the
video image. Only the area highlighted in green will be searched.
5. Click Search.
Viewing Thumbnail Search Results
The search results display thumbnails at equal intervals on the Timeline.
1. To change the size of the search result thumbnails, select Large Thumbnails, Medium Thumbnails, or
Small Thumbnailsfrom the menu above the search results.
Figure 15: Search: Thumbnails results tab
2. Select a thumbnail to highlight the video on the Timeline.
3. Click Step In, or double-click the thumbnail to perform another search around the thumbnail.
Click Step Out to return to the previous results page.
4. Click Open In View(after selecting a thumbnail) to open the recorded video in a new View.
5. Click Change Search to change the search criteria.
Viewing Thumbnail Search Results 29
Page 30

Export
You can export video in multiple video and image formats. The Export tab can be accessed from bookmark
options, the New Task menu, and any Search tab.
You can also export snapshots of an image panel as you monitor video.
Exporting Native Video
The Native (AVE) format is the recommended format for exporting video. You can export video from multiple
cameras in a single file, and the video maintains its original compression.
If there is audio linked to the video, the audio is automatically included in the export.
1.
In the New Task menu, click . The Export tab opens.
Figure 16: Export tab for AVE export
2. In the Format: drop-down list, select Native.
3. In the System Explorer, select the camera video you want to export.
4. To automatically divide the export into separate files, select the Split file into sizes of: check box, then
30 Export
Page 31

select one of the options from the drop-down list, or manually enter the size of each file in MB.
This option allows you to export smaller files for storing in a flash drive or on optical media.
This setting is automatically disabled if you choose to burn the export to disc because the system autodetects the disc size.
5. Enter the Time Range you want to export. The Time Range is highlighted on the Timeline by black time
range markers. You can also drag the time range markers to modify the time range.
6. Set the export image rate:
Option Description
Select this option to control how many
images per second are exported.
Export at _ image rate
Export one image every _ min _sec
7. Click one of the following:
l Start Export: to save the file locally.
l In the Save As dialog box, name the export file and click Save.
l Burn to Disc: to burn the file directly to disc media.
For example, the video is streaming at 30
images per second. If you select 1/2, only
15 images for that second will be exported.
Select this option to control the time
between each exported video image.
For example, if you enter 5 min. 0 sec., only
one image will be exported for every 5
minutes of video.
Exporting Native Video 31
Page 32

Figure 17: Burn to Disc Dialog Box
a. When the dialog box appears, insert a disc and select the media burning drive.
b. Name the export file. The file name is automatically given a numbered suffix to help identify
which file you are playing if the export spans multiple discs.
c. Click Burn to Disc to start the export. If this button is disabled, the disc may be corrupt or full.
d. Monitor the export progress to see if extra discs are required. When a disc is full, the export
automatically pauses and you are asked to insert a new disc. After you insert a new disc,
click Resume Export.
The number of discs required to export a video varies widely depending on the type of camera and disc
used. Video is stored on the server with minimal compression to maximize the function of Avigilon's
HDSM™technology, so the size of an export can be quite large due to the camera's high megapixel
resolution and frame rate.
Generally, if you export a 2 minute video from a 2MP H.264 HD camera into AVE format, you will export a
93 MB file. To reduce the number of discs required, you can lower the frame rate or use a disc type with a
larger capacity. Be aware that reducing the frame rate too much may cause the exported video to be
jerky or missing data.
8. When the export is complete, click OK.
Exporting AVI Video
Video exported in Audio Video Interleave (AVI) format can be played in most media players. Be aware that you
can only export one video at a time in this format.
32 Exporting AVI Video
Page 33

1.
In the New Task menu, click . The Export tab opens.
Figure 18: Export tab for AVI export
2. In the Format: drop-down list, select AVI video.
3. In the System Explorer, select the camera video you want to export.
4. In the Encoder: field, select the compression used. The VC-1 (Windows Media Video) compression is
included by default because it is tailored for high-resolution AVI encoding.
If you are planning to burn the export to disc, it is important to select a compression method to help
reduce the export size and maintain video quality.
5. In the Quality: drop-down list, select the exported image quality level.
6. In the Resolution: field, select a resolution for the video image. You can manually enter the resolution or
click the drop down arrow to select a standard resolution.
NOTE: The Resolution: field automatically maintains the image aspect ratio.
7. To automatically divide the export into separate files, select the Split file into sizes of: check box, then
select one of the options from the drop-down list, or manually enter the size of each file in MB.
This option allows you to export smaller files for storing in a flash drive or on optical media.
Exporting AVI Video 33
Page 34

This setting is automatically disabled if you choose to burn the export to disc because the system autodetects the disc size.
8. Select the Skip recording gaps check box to avoid pauses in the video caused by gaps in the recording.
9. Select the image overlays you want: Timestamp, Camera name, and Camera location.
10. Enter the Time Range you want to export. The Time Range is highlighted on the Timeline by black time
range markers. You can also drag the time range markers to modify the time range.
11. Set the export image rate:
Option Description
Select this option to control how many
images per second are exported.
Export at _ image rate
For example, the video is streaming at 30
images per second. If you select 1/2, only 15
images for that second will be exported.
Select this option to control the time
between each exported video image.
Export one image every _ min _sec
For example, if you enter 5 min. 0 sec., only
one image will be exported for every 5
minutes of video.
12. Click Change Image Region... to only export part of the video image. In the Change Image Region... dialog
box, move and resize the green overlay to select the region you want to export, then click OK. Only areas
highlighted in green will be exported.
13. Click Display Adjustments... to adjust the Gamma:, Black Level: and/or White Level:.
14. Click one of the following:
l Start Export: to save the file locally.
l In the Save As dialog box, name the export file and click Save.
l Burn to Disc: to burn the file directly to disc media.
34 Exporting AVI Video
Page 35

Figure 19: Burn to Disc Dialog Box
a. When the dialog box appears, insert a disc and select the media burning drive.
b. Name the export file. The file name is automatically given a numbered suffix to help identify
which file you are playing if the export spans multiple discs.
c. Click Burn to Disc to start the export. If this button is disabled, the disc may be corrupt or full.
d. Monitor the export progress to see if extra discs are required. When a disc is full, the export
automatically pauses and you are asked to insert a new disc. After you insert a new disc,
click Resume Export.
The number of discs required to export a video varies widely depending on the type of camera and disc
used. Video is stored on the server with minimal compression to maximize the function of Avigilon's
HDSM technology, so the size of an export can be quite large due to the camera's high megapixel
resolution and frame rate.
Generally, if you export a 2 minute video from a 2MP H.264 HD camera into uncompressed AVI format,
you will export a 2.7 GB file. If you select an Encoder: format and compress the video, you can export a
224 MB video at high quality. It is recommended that you always select an Encoder: format for AVI export
to help significantly reduce the file size.
To further reduce the file size you can select a lower quality setting, lower the export frame rate, reduce
the video resolution, or focus the export on a specific image region. Be aware that reducing each of the
available settings too much may cause the export to be blurry or missing frames.
If it is important to have a high quality and full frame rate export, it is recommended that you use the AVE
export format instead. AVE export intelligently compresses the video to create a smaller export file while
maintaining video data so that you can search, re-export video, and authenticate the video against
tampering through the Avigilon Control Center Player software.
15. When the export is complete, click OK.
Exporting AVI Video 35
Page 36

Exporting a Print Image
You can export a frame of video directly to your printer or as a PDF, and include notes related to the image.
To print a photo of the video you are currently watching, take a snapshot. For more information, see Exporting a
Snapshot of an Image.
1.
In the New Task menu, click . The Export tab opens.
Figure 20: Export tab for print image export
2. In the Format: drop-down list, select Print image or PDF file.
3. In the System Explorer, select the camera video you want to export.
4. (Print Image Only) Click Printer Settings... to change the printer and paper size that the image is printed on.
5. Select the image overlays you want: Timestamp, Camera name, and Camera location.
6. Click Add Export Notes... to add notes about the exported image. The notes are added below the image.
7. In the Time Range box, enter the exact date and time of the video image you want to export.
8. Click Change Image Region... to only export part of the video image. In the Change Image Region... dialog
box, move and resize the green overlay to select the region you want to export, then click OK. Only areas
highlighted in green will be exported.
9. Click Display Adjustments... to adjust the Gamma:, Black Level: and/or White Level:.
36 Exporting a Print Image
Page 37

10. Click Start Export.
l If you are exporting a Print image, the image is sent to the printer.
l If you are exporting a PDF file, save the image.
The Preview area displays the video you are exporting.
11. When the export is complete, click OK.
Exporting a Snapshot of an Image
You can export a snapshot of any image panel with video. When you export a snapshot, you are exporting what
the image panel is currently displaying.
1. To export a snapshot, do one of the following:
l
In the image panel, click .
l Right-click the image panel and select Save Snapshot.
The snapshot Export tab is opened, and the image you want to export is displayed.
Exporting a Snapshot of an Image 37
Page 38

Figure 21: Export tab for sn apsh ot export
2. In the Format: drop-down list, select an export format.
3. For the selected export format, define your preferences:
Format Export options
Native
NOTE: The Native format requires the
Avigilon Control Center Player to view.
PNG image
38 Exporting a Snapshot of an Image
This is the recommended export format because the exported
image maintains its original compression and can be
authenticated against tampering in the Avigilon Control Center
Player.
1. In the Resolution: field, select a resolution for the video
image. You can manually enter the resolution or click the
drop down arrow to select a standard resolution.
NOTE: The Resolution: field automatically maintains the
image aspect ratio.
2. Select the image overlays you want: Timestamp, Camera
name, and Camera location.
Page 39

Format Export options
3. Click Change Image Region... to only export part of the
video image. In the Change Image Region dialog box,
move and resize the green overlay, then click OK. Only
areas highlighted in green are exported.
4. Click Display Adjustments... to adjust the Gamma:, Black
Level:, and/or White Level:.
1. In the Quality: drop-down list, select the exported image
quality level.
2. Set the image Resolution:.
JPEG image
TIFF image
Print image
3. Select the image overlays you want.
4. Click Change Image Region... to only export a part of the
video image.
5. Click Display Adjustments... to modify the image quality.
1. Set the image Resolution:.
2. Select the image overlays you want.
3. Click Change Image Region... to only export a part of the
video image.
4. Click Display Adjustments... to modify the image quality.
1. Click Printer Settings... to change the selected printer and
paper size.
2. Select the image overlays you want.
3. Click Add Export Notes... to add notes about the
exported image. The notes are printed below the image.
4. Click Change Image Region... to only export a part of the
video image.
5. Click Display Adjustments... to modify the image quality.
1. Select the image overlays you want.
2. Click Add Export Notes... to add notes about the
exported image.
PDF file
3. Click Change Image Region... to only export a part of the
video image.
4. Click Display Adjustments... to modify the image quality.
4. Click Start Export.
5. In the Save As dialog box, name the export file and click Save. If you are printing the snapshot, the image
is sent to your printer instead.
The Preview area displays the snapshot you are exporting.
6. When the export is complete, click OK.
Exporting a Snapshot of an Image 39
Page 40

Exporting Still Images
Video can be exported as a series of still PNG images, JPEG images, or TIFF images. When you export a series
of still images, you are exporting each frame of video as an independent file.
If you only want one photo of the video you are watching, take a snapshot. See Exporting a Snapshot of an
Image for more information.
1.
In the New Task menu, click . The Export tab opens.
Figure 22: Export tab for still image export
2. In the Format: drop-down list, select PNG images, JPEG images, or TIFF images.
3. In the System Explorer, select the camera video you want to export.
4. (JPEG only) In the Quality: drop-down list, select the exported image quality level.
5. In the Resolution: field, select a resolution for the video image. You can manually enter the resolution or
click the drop down arrow to select a standard resolution.
NOTE: The Resolution: field automatically maintains the image aspect ratio.
6. Select the image overlays you want: Timestamp, Camera name, and Camera location.
7. Enter the Time Range you want to export. The Time Range is highlighted on the Timeline by black time
range markers. You can also drag the time range markers to modify the time range.
40 Exporting StillImages
Page 41

8. Set the export image rate:
Option Description
Select this option to control how many
images per second are exported.
Export at _ image rate
Export one image every _ min _sec
9. To limit the number of images that are exported, select the Export at most _ images check box and enter
a number.
10. Click Change Image Region... to only export part of the video image. In the Change Image Region...
dialog box, move and resize the green overlay to select the region you want to export, then click OK.
Only areas highlighted in green will be exported.
11. Click Display Adjustments... to adjust the Gamma:, Black Level: and/or White Level:.
12. Click Start Export.
13. In the Save As dialog box, name the export file and click Save.
The Preview area displays the video you are exporting.
14. When the export is complete, click OK.
For example, the video is streaming at 30
images per second. If you select 1/2, only
15 images for that second will be exported.
Select this option to control the time
between each exported video image.
For example, if you enter 5 min. 0 sec., only
one image will be exported for every 5
minutes of video.
Exporting WAV Audio
If you want to export audio with video, simply export the video in Native or AVI format. Any audio that is linked to
the video is automatically included in the export file.
This procedure exports the audio alone.
Exporting WAV Audio 41
Page 42

1.
In the New Task menu, click . The Export tab opens.
Figure 23: Export tab for audio export
2. In the Format: drop-down list, select WAV audio.
3. In the System Explorer, select the camera that the audio is linked to.
4. Enter the Time Range you want to export. The Time Range is highlighted on the Timeline by black time
range markers. You can also drag the time range markers to modify the time range.
5. Click Start Export.
6. In the Save As dialog box, name the export file and click Save.
The Preview area displays the video linked to the audio you are exporting.
7. When the export is complete, click OK.
42 Exporting WAV Audio
 Loading...