

Page 1

User Guide
Avigilon™ Control Center Mobile
Version 1.4.0.2 for iOS
Page 2

© 2011 -2014 Avigilon Corporation. All rights reserved. Unless expressly granted in writing, no license is granted
with respect to any copyright, industrial design, trademark, patent or other intellectual property rights of Avigilon
Corporation or its licensors.
AVIGILON is a registered and/or unregistered trademarks of Avigilon Corporation in Canada and other
jurisdictions worldwide. Other product names mentioned herein may be the unregistered and/ or registered
trademarks of their respective owners. ™ and ® are not used in association with each trademark in this document.
This manual has been compiled and published covering the latest product descriptions and specifications. The
contents of this manual and the specifications of this product are subject to change without notice. Avigilon
reserves the right to make changes without notice in the specifications and materials contained herein and shall
not be responsible for any damages (including consequential) caused by reliance on the materials presented,
including but not limited to typographical and other errors relating to the publication.
Avigilon Corporation
http://www.avigilon.com
Revised: 2014-05-15
UG-ACCMOBILE-iOS-D_Rev1
ii
Page 3

Table of Contents
Introduction 1
Device Requirements 1
System Requirements 1
Getting Started 2
Adding a Gateway 2
Logging in to a Site 3
Accessing Cameras and Saved Views 6
Video 7
Adding and Removing Cameras 7
Opening a Saved View 8
Changing View Layouts 9
Switching Views 9
Maximizing an Image Panel 10
Zooming and Panning 10
Taking Snapshots 10
Using PTZ 11
Playing Back Recorded Video 12
Settings 14
Editing Gateways 14
Editing Site Login 14
Changing Display Settings 15
Troubleshooting & Support 16
Notification Icons 16
Gateway Notification Icons 16
Site Notification Icons 16
Contacting Avigilon Support 16
iii
Page 4

Introduction
The Avigilon™ Control Center Mobile app gives you access to live and recorded video from the Avigilon™ Control
Center sytem on your mobile devices.
Device Requirements
l iPad with iOS 6 or 7
l iPhone with iOS 6 or 7
l iPod Touch with iOS 6 or 7
NOTE: Depending on your iOS version and type of mobile device, the screenshots in this document may look
different from what is displayed on your device.
System Requirements
You must have access to the following software in your Avigilon Control Center system.
l Control Center Gateway
l Control Center Server
To make sure you have a secure connection, it is recommended that you only connect to the Gateway via
HTTPS.
Consult with your System Administrator for more information.
If you are running Avigilon Control Center 5.2 or later, you will have access to all of the features described in this
document.
If you are running Avigilon Control Center 4 or 5.0, you will not have access to Saved Views.
1 Introduction
Page 5

Getting Started
Once you’ve downloaded and installed the Control Center Mobile app, you can access the software by tapping
the app icon on your Home screen.
Before you can watch video in the app, you need to set up the Control Center Mobile app to communicate with
your Avigilon Control Center system.
Adding a Gateway
When you open the app for the first time, you are automatically taken to the Settings screen.
Notice that beside Gateways is the number 0. You must add at least one Control Center Gateway. The Gateway
is required to link your mobile device to your Avigilon Control Center system.
Ask your System Administrator for the Gateway’s IP address and port number.
A username and password is required to access the Gateway and will be provided by your System
Administrator. This may be different from the username and password used to access Sites in the Avigilon
Control Center system.
NOTE: The default Gateway username is operator with no password.
Getting Started 2
Page 6
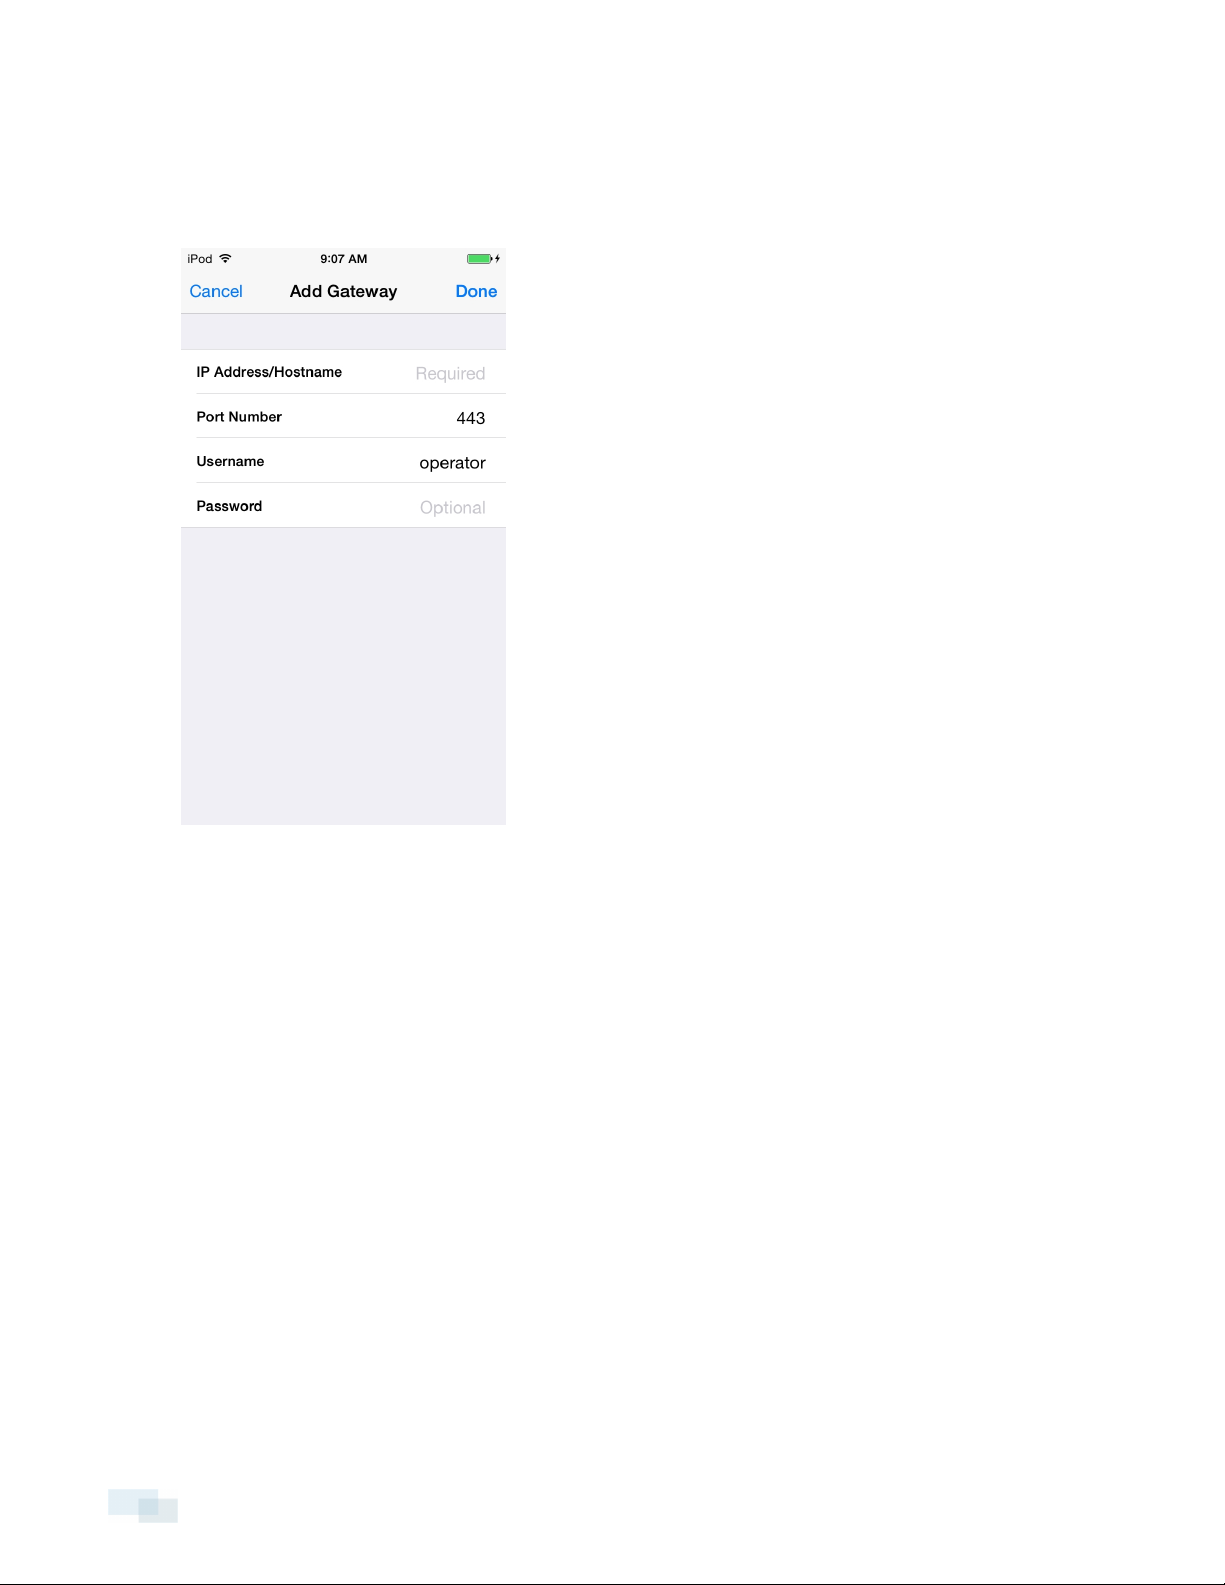
1. Tap Gateways. Since there are currently no Gateways, you are automatically taken to the Add Gateway
screen.
If a Gateway has already been added, you would be taken to the Gateways screen where all the
configured Gateways are listed. Tap Add Gateway to add a Gateway.
2. Enter the Gateway IP Address/Hostname.
3. Enter the Gateway’s Port Number. The port number is 443 by default.
NOTE: The app always tries to make a secure connection to the Gateway via HTTPS. If that fails, it will
attempt an HTTP connection. If the app is able to connect via HTTP, you will see an error message
advising you that you are making an unsecured connection.
By default, the Gateway uses port 443 for all HTTPS connections, and port 80 for all HTTP connections.
4. Enter your username and password for the Gateway.
5. Tap Done.
Logging in to a Site
On the Gateways screen, you have access to the Sites that are connected to the Gateway.
NOTE: If you are running Control Center 4, enter your server details when the app refers to a Site.
3 Logging in to a Site
Page 7

1. Tap a Gateway on the list.
NOTE: If you tap you will be taken to the Edit Gateway screen.
2. Tap the Site you want to log in to. If you have not provided a username and password to any Sites, the
Log In screen is automatically displayed.
Logging in to a Site 4
Page 8

3. Enter your username and password.
4. Tap Done. The app logs into the selected Site.
5 Logging in toa Site
Page 9

The icon shows that you are logged into that Site. Under the Site name is the number of cameras
connected to that Site.
If you tap , you will be taken to the Site Log In screen again. Your Site log in information is remembered.
Accessing Cameras and Saved Views
Once you’ve logged in to a Site, you can access the cameras and Saved Views from the Site.
NOTE: If you are running Control Center 4 or 5.0, the Saved Views option may be displayed, but the list will be
empty.
1. On the Sites screen, tap a Site.
2. On the following screen, select either Cameras or Saved Views.
3. Tap a listed camera or Saved View to open it in the View screen.
Accessing Cameras and Saved Views 6
Page 10

Video
After you’ve set up the Gateway and Site access, you will automatically be taken to the View screen each time
you open the Control Center Mobile app.
Like the Control Center Client software, video is displayed in a View and is organized by image panels.
Adding and Removing Cameras
In Accessing Cameras and Saved Views on page6, you learned how to add cameras to a View through the
Settings screen. For easy access, you can also add and remove cameras directly from a View.
1. On the View screen, tap the screen once to display the menu bar.
7 Video
Page 11

2.
Tap . The Edit View screen is displayed.
3.
To add a camera, tap then select the camera you want to add from the camera list.
4.
To remove a camera, tap .
5. Tap Done when you are finished.
6. Tap the View screen once to hide the menu bar, otherwise the menu bar auto-hides after a few seconds.
Opening a Saved View
If your Site has Saved Views set up, you can open any Saved View through the app.
NOTE: If you are running Control Center 4 or 5.0, the Saved View option may be displayed but you will not have
access to the Saved Views in your system.
1. On the View screen, tap the screen once to display the menu bar.
2.
Tap . This will open the Saved Views list.
3. Select a Saved View and it will open in the View screen.
NOTE: If you change the Saved View in the app, you cannot save your changes. Next time you open the Saved
View from the Saved Views list, it will display the version that is stored on the Site.
Opening a Saved View 8
Page 12

Changing View Layouts
You can change the View layout to customize how video is displayed.
1. On the View screen, tap the screen once to display the menu bar.
2.
Tap .
3.
On the Edit View screen, tap to display the available View layout options.
4. Tap the View layout that you want to use. The View changes to the selected layout.
5. To move image panels, drag an image panel to a different position in the View layout.
6. When you have completed your View layout changes, tap Done.
Switching Views
The number of dots at the bottom of the screen show the number of Views that are open.
l To switch Views, flick left or right.
l To switch to a new View, flick left until you reach the last View.
Each time you add a camera to an empty View, a new View is automatically added to the right of all
available Views.
NOTE: There can be no more than eight Views.
9 Changing View Layouts
Page 13
Maximizing an Image Panel
l To maximize an image panel, double-tap an image panel.
l To restore an image panel, double-tap a maximized image panel.
Zooming and Panning
You can digitally zoom and pan video from any camera.
1. Double-tap to maximize the video image panel.
2. Place two fingers on the image panel and pull apart to zoom in.
3. While zoomed in, drag the screen to pan across the video image.
4. Place two fingers on the image panel and push together to zoom out.
Taking Snapshots
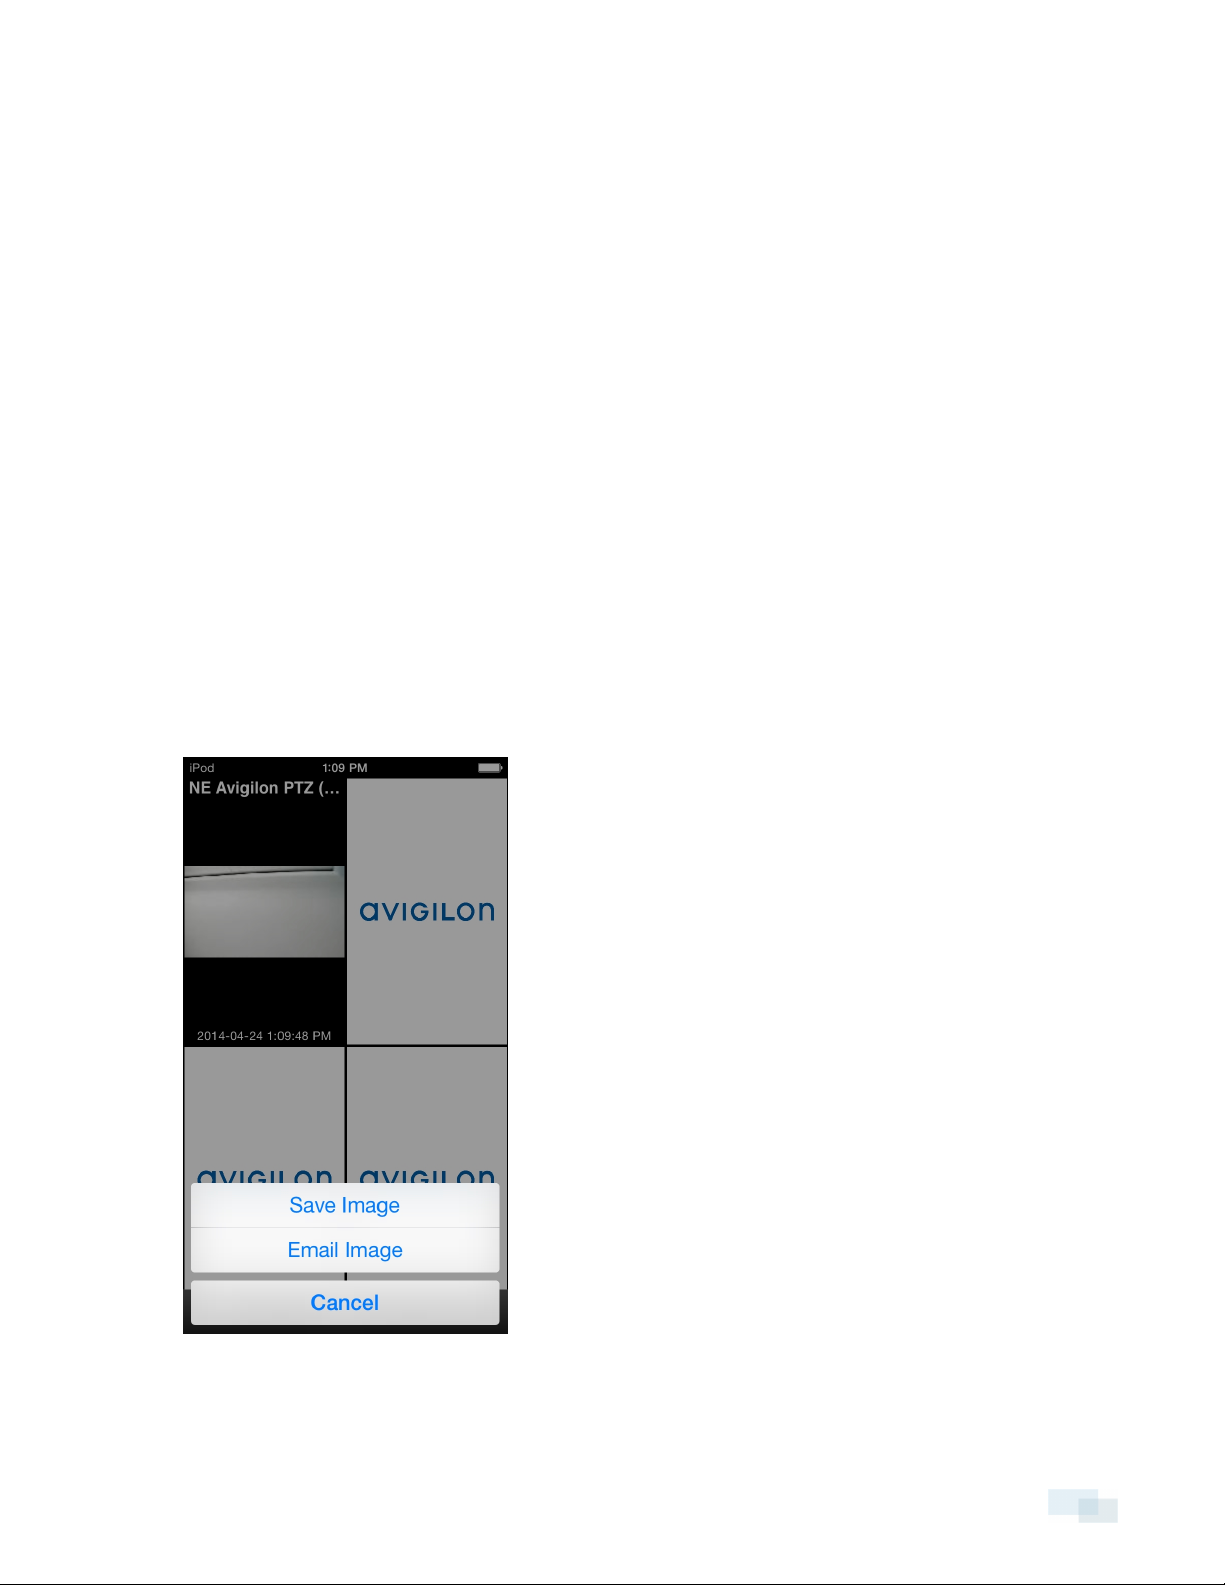
A snapshot allows you to save or email any image that is displayed in an image panel.
1. Touch and hold the image panel that currently displays your snapshot.
2. When the snapshot menu appears, select one of the following:
Maximizing an Image Panel 10
Page 14

l Tap Save Image to save a copy of the snapshot on your mobile device. The image is saved in
JPEG format and is stored in your photo gallery.
l Tap Email Image to email a copy of the snapshot. The image is automatically attached to an email
message. This option is only available if you have email set up on your mobile device.
Using PTZ
If you are watching live video from a pan, tilt and zoom (PTZ) camera, you can control the camera’s PTZ features
from the app.
1. Double-tap to maximize the video image panel.
2. Tap once to display the menu bar if it is hidden.
3.
Tap .
The camera’s PTZ controls are displayed.
l To move the camera, perform one of the following:
l If the camera supports Click to Center, tap anywhere on the video image to center the
camera to that point
l Otherwise, tap and hold an arrow that is displayed on the screen to move the camera in that
direction. Release the arrow when you want the camera to stop.
l
To zoom in and out, tap and hold or at the bottom of the screen.
l If the camera supports Drag to Zoom, drag your finger in any direction to create a box. When you
release your finger from the screen, the camera zoom and centers on the selected area. Tap 1x to
zoom out in full.
11 UsingPTZ
Page 15

l
To have the camera perform preset movements, tap then select the preset you want to use.
The presets are configured in the Control Center Client software.
4. Tap Done to hide the PTZ controls.
Playing Back Recorded Video
You can watch recorded events from any camera that you have access to on the app.
1. Double-tap to maximize the video image panel.
2. Tap once to display the menu bar if it is hidden.
3. Tap Recorded to display the Playback screen.
4.
To watch video from the specific time, tap .
a. Scroll the calendar to select the date, hour and minute of the video you want to find. Tap Current
Time to reset the calendar to the current time.
Playing BackRecorded Video 12
Page 16

Events that occur within 15 minutes of (or overlap) the selected time are displayed at the top of the
screen.
b. Select an event from the list, or tap Done. The video is displayed on the Playback screen.
5.
To play the recorded video, tap .
l
To fast forward, tap . Tap the icon again to increase the playback speed. You can play the
video up to eight times the original speed.
l
To rewind, tap . Tap the icon again to increase the playback speed. You can play the video up
to eight times the original speed.
6.
To stop the recorded video, tap .
l
To step forward one frame in the video, tap .
l
To step backward one frame in the video, tap .
7. When you have finished reviewing the recorded video, tap Done to return to the camera’s live video
stream.
13 Playing Back Recorded Video
Page 17

Settings
Editing Gateways
You may need multiple Gateways to connect to all the Sites and cameras in your surveillance system. You can
add, edit or delete Gateways as needed.
1. On the View screen, tap the screen once to display the menu bar.
2.
Tap .
3. On the Settings screen, tap Gateways.
4. On the Gateways screen, perform any of the following:
l To add a Gateway, tap Add Gateway then enter the new Gateway information.
l
To edit a Gateway, tap beside the Gateway you want to edit then make the required
changes.
NOTE: If you are editing the Gateway port number, it is recommended that you only use ports
assigned to a secure HTTPS connection. If you choose to use an HTTP port number, you will
receive an warning message advising you that you are making an unsecured connection.
l To delete a Gateway, perform one of the following:
o
Tap beside the Gateway then tap Delete Gateway.
o
Swipe left over the Gateway then tap Delete.
5. When you've completed your changes, tap Done.
Editing Site Login
If your password changes, you will need to update your Site password in the app.
NOTE: If you are running Control Center 4, you will use this procedure to edit your server details.
1. On the View screen, tap the screen once to display the menu bar.
2.
Tap .
3. On the Settings screen, tap Gateways.
4. Tap the Gateway the Site is linked to.
5.
Tap beside the Site you want to edit.
6. Enter your updated password or username.
7. Tap Done.
Settings 14
Page 18
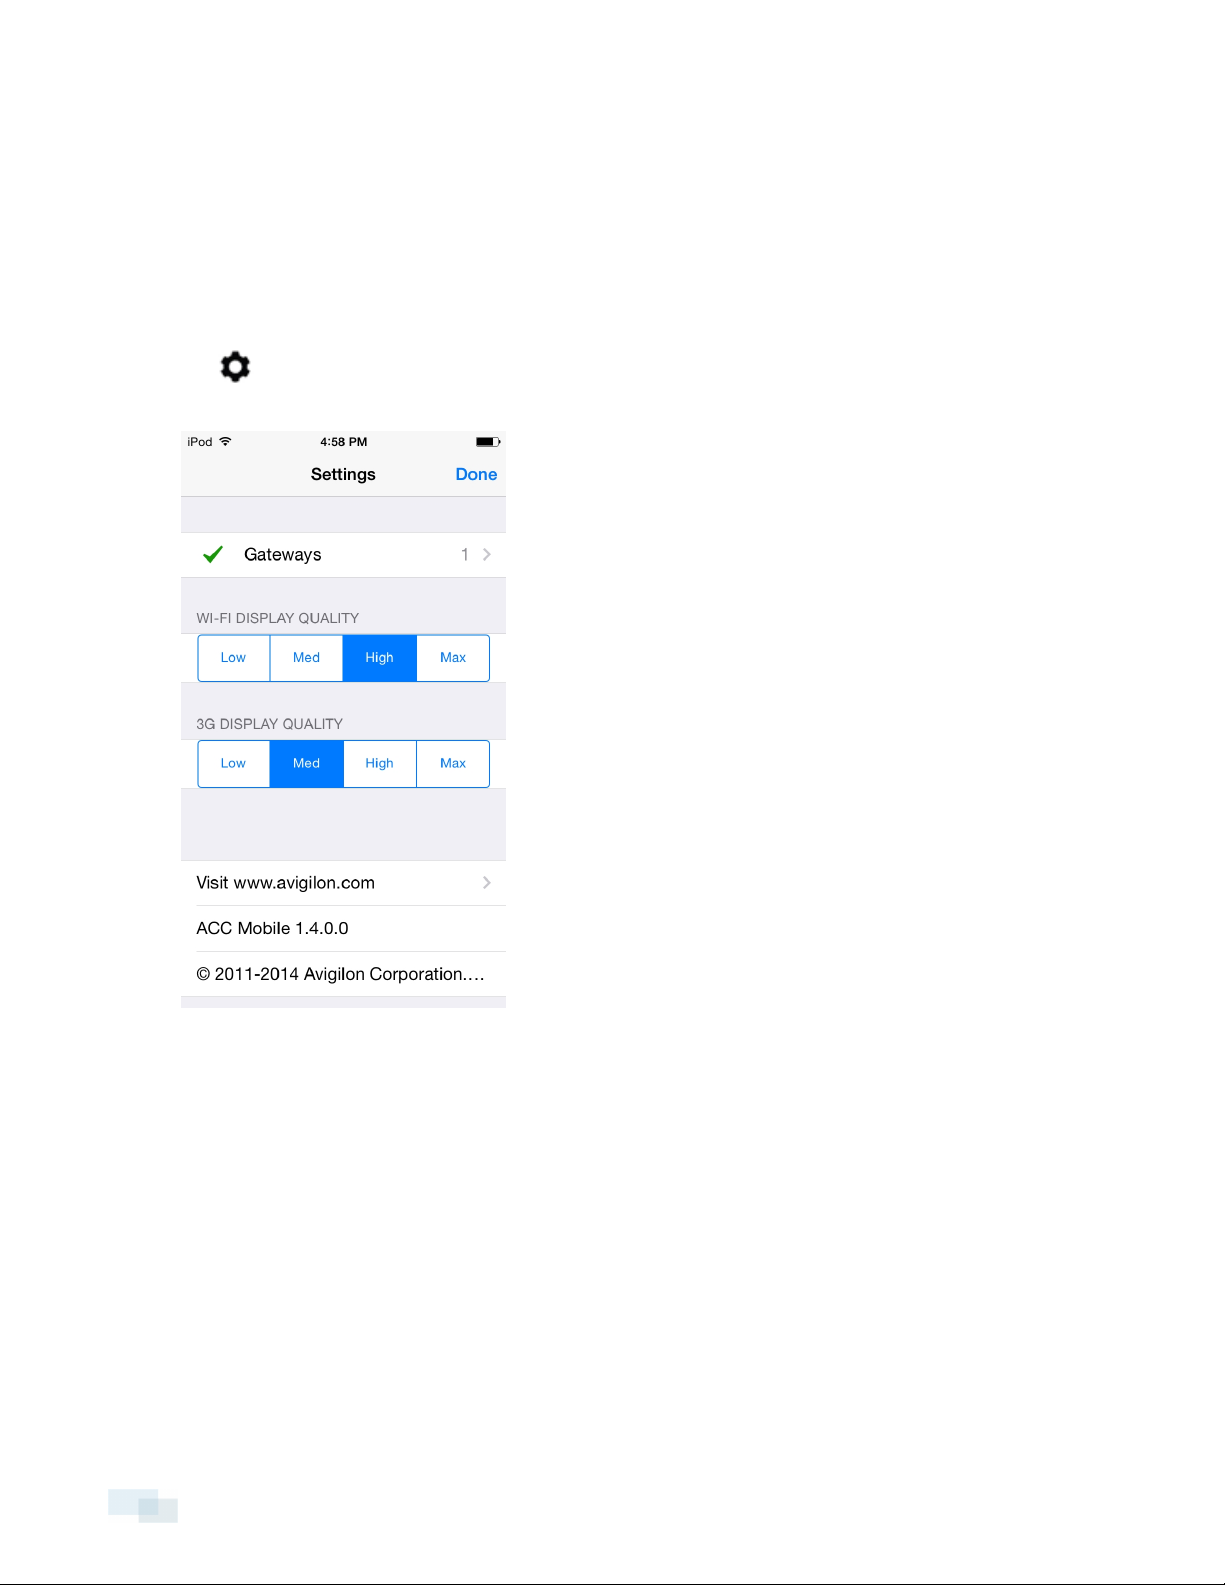
Changing Display Settings
To control the bandwidth used by the app, you can set the display quality according to the type of wireless
network you are connected to.
The higher the display quality, the less compression is used on the video stream. This produces a better image
but uses more bandwidth.
1. On the View screen, tap the screen once to display the menu bar.
2.
Tap .
3. On the Settings screen, select a display quality option.
l Wi-Fi Display Quality is the setting used when you are connected to a local wi-fi network. High is
selected by default.
l 3G Display Quality is the setting used when you are connected to a mobile network. Med is
selected by default.
4. Tap Done.
15 Changing Display Settings
Page 19
Troubleshooting & Support
Notification Icons
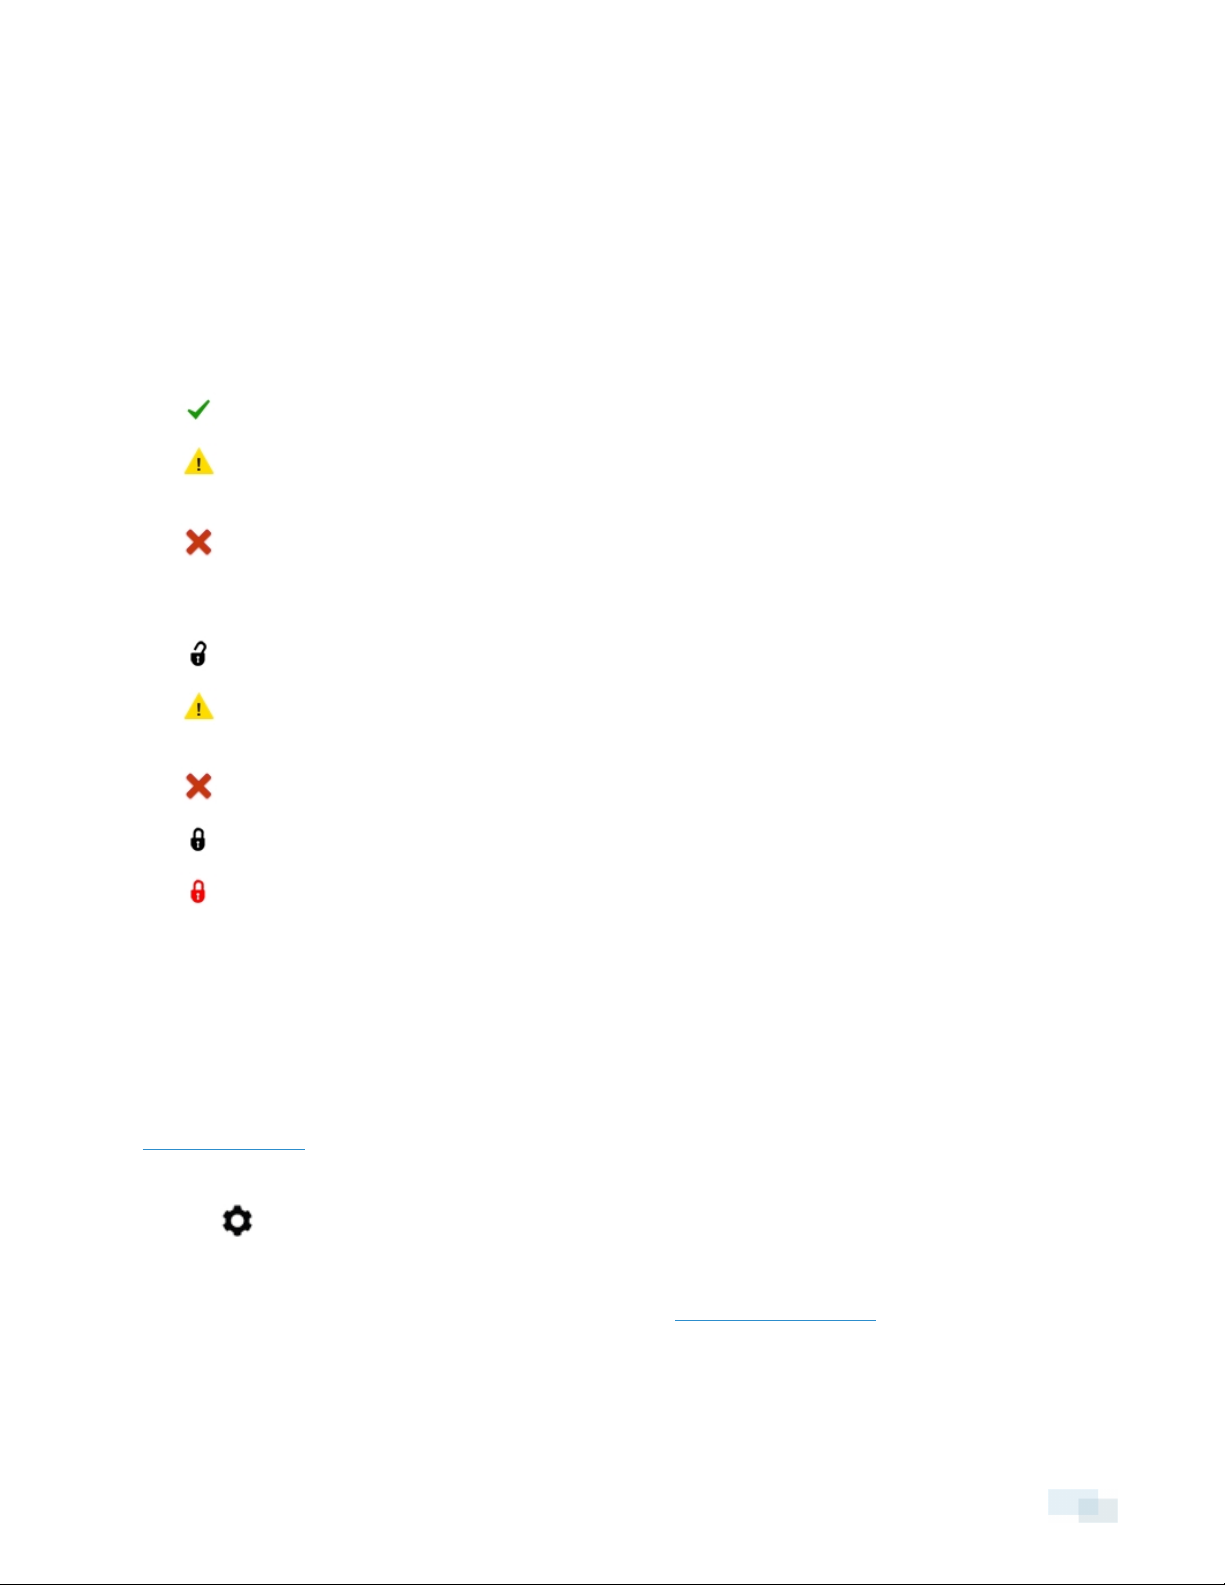
Gateways and Sites have a set of notification icons to tell you their connection status.
Gateway Notification Icons
l
— You are connected to the Gateway and all Sites are accessible.
l
— You are connected to the Gateway but the connection requires your attention. Some Sites may be
disconnected.
l
— You are disconnected from the Gateway.
Site Notification Icons
l
— You are connected and logged in to the Site.
l
— You are connected and logged in to the Site, but there may be a license issue. Contact your
System Administrator.
l
— You are disconnected from the Site.
l
— You are not logged in to the Site.
l
— You provided an incorrect username or password.
Contacting Avigilon Support
If you encounter an issue while using the app, you have the option of sending Avigilon Technical Support an
email directly from your mobile device.
NOTE: You must have email setup on your mobile device or this option is not displayed. You can choose to go
to www.avigilon.com instead.
1. On the View screen, tap the screen once to display the menu bar.
2.
Tap .
3. On the Settings screen, tap E-mail Support.
4. You will automatically be taken to the new email screen. Support@avigilon.com is automatically entered
as the recipient and ACC Mobile <version #> is entered in the subject line.
5. Enter details about your issue then tap Send.
Troubleshooting & Support 16
 Loading...