

Page 1

Avigilon™ Gateway Web Client
User Guide
Version: 5.2
PDF-GATEWAYWC-A-Rev1
Page 2

Page 3

© 2013 - 2014 Avigilon Corporation. All rights reserved. Unless expressly granted in writing, no license is granted with respect to any
copyright, industrial design, trademark, patent or other intellectual property rights of Avigilon Corporation or its licensors.
AVIGILON, CAPTURE IT WITH CLARITY, HDSM, HIGH DEFINITION STREAM MANAGEMENT (HDSM), THE BEST EVIDENCE,
LIGHTCATCHER and the ACC logo are registered and/or unregistered trademarks of Avigilon Corporation in Canada and other
jurisdictions worldwide. Other product names mentioned herein may be the unregistered and/or registered trademarks of their
respective owners. ™ and ® are not used in association with each trademark in this document.
This manual has been compiled and published covering the latest product descriptions and specifications. The contents of this
manual and the specifications of this product are subject to change without notice. Avigilon reserves the right to make changes
without notice in the specifications and materials contained herein and shall not be responsible for any damages (including
consequential) caused by reliance on the materials presented, including but not limited to typographical and other errors relating to
the publication.
Avigilon Corporation
http://www.avigilon.com
Revised 2014-04-08
Page 4

Page 5

Table of Contents
Introduction ........................................................................................................................................................ 1
Installation .............................................................................................................................................................. 1
For More Information ......................................................................................................................................... 2
Avigilon Training Center .............................................................................................................................. 2
Support ............................................................................................................................................................. 2
Upgrades .......................................................................................................................................................... 2
Feedback ......................................................................................................................................................... 3
Accessing the Gateway Web Client ............................................................................................................. 5
Logging Into and Out of a Site ........................................................................................................................ 7
Adding and Removing Cameras ................................................................................................................... 9
Adding a Camera to a View ............................................................................................................................. 9
Removing a Camera From a View ................................................................................................................. 9
Live and Recorded Video ............................................................................................................................... 11
Controlling Recorded Video ......................................................................................................................... 13
Zooming and Panning in a Video ................................................................................................................. 15
Using the Zoom Tools ...................................................................................................................................... 15
Using the Pan Tools .......................................................................................................................................... 15
Changing View Layouts ................................................................................................................................. 17
Maximizing an Image Panel........................................................................................................................... 19
Maximizing an Image Panel ............................................................................................................................ 19
Restoring an Image Panel ............................................................................................................................... 19
v
Page 6

Avigilon Gateway Web Client
Taking Snapshots ............................................................................................................................................ 21
Controlling PTZ Cameras.............................................................................................................................. 23
Adjusting Image Quality ................................................................................................................................ 25
vi
Page 7
Introduction
The Avigilon™ Gateway Web Client works with the Avigilon™ Control Center Gateway to give
users remote access to your Avigilon™ Control Center System. The Gateway Web Client is a
simplified web browser version of the Avigilon Control Center Client software that gives you
access to Sites and cameras configured by the Gateway.
The Gateway Web Client differs from the Avigilon Control Center Web Client in that the Gateway
Web Client accesses the Avigilon Control Center system through the Gateway to protect the
security of the server. The Avigilon Control Center Web Client requires direct access to the
server and may not be accessible outside of your local area network.
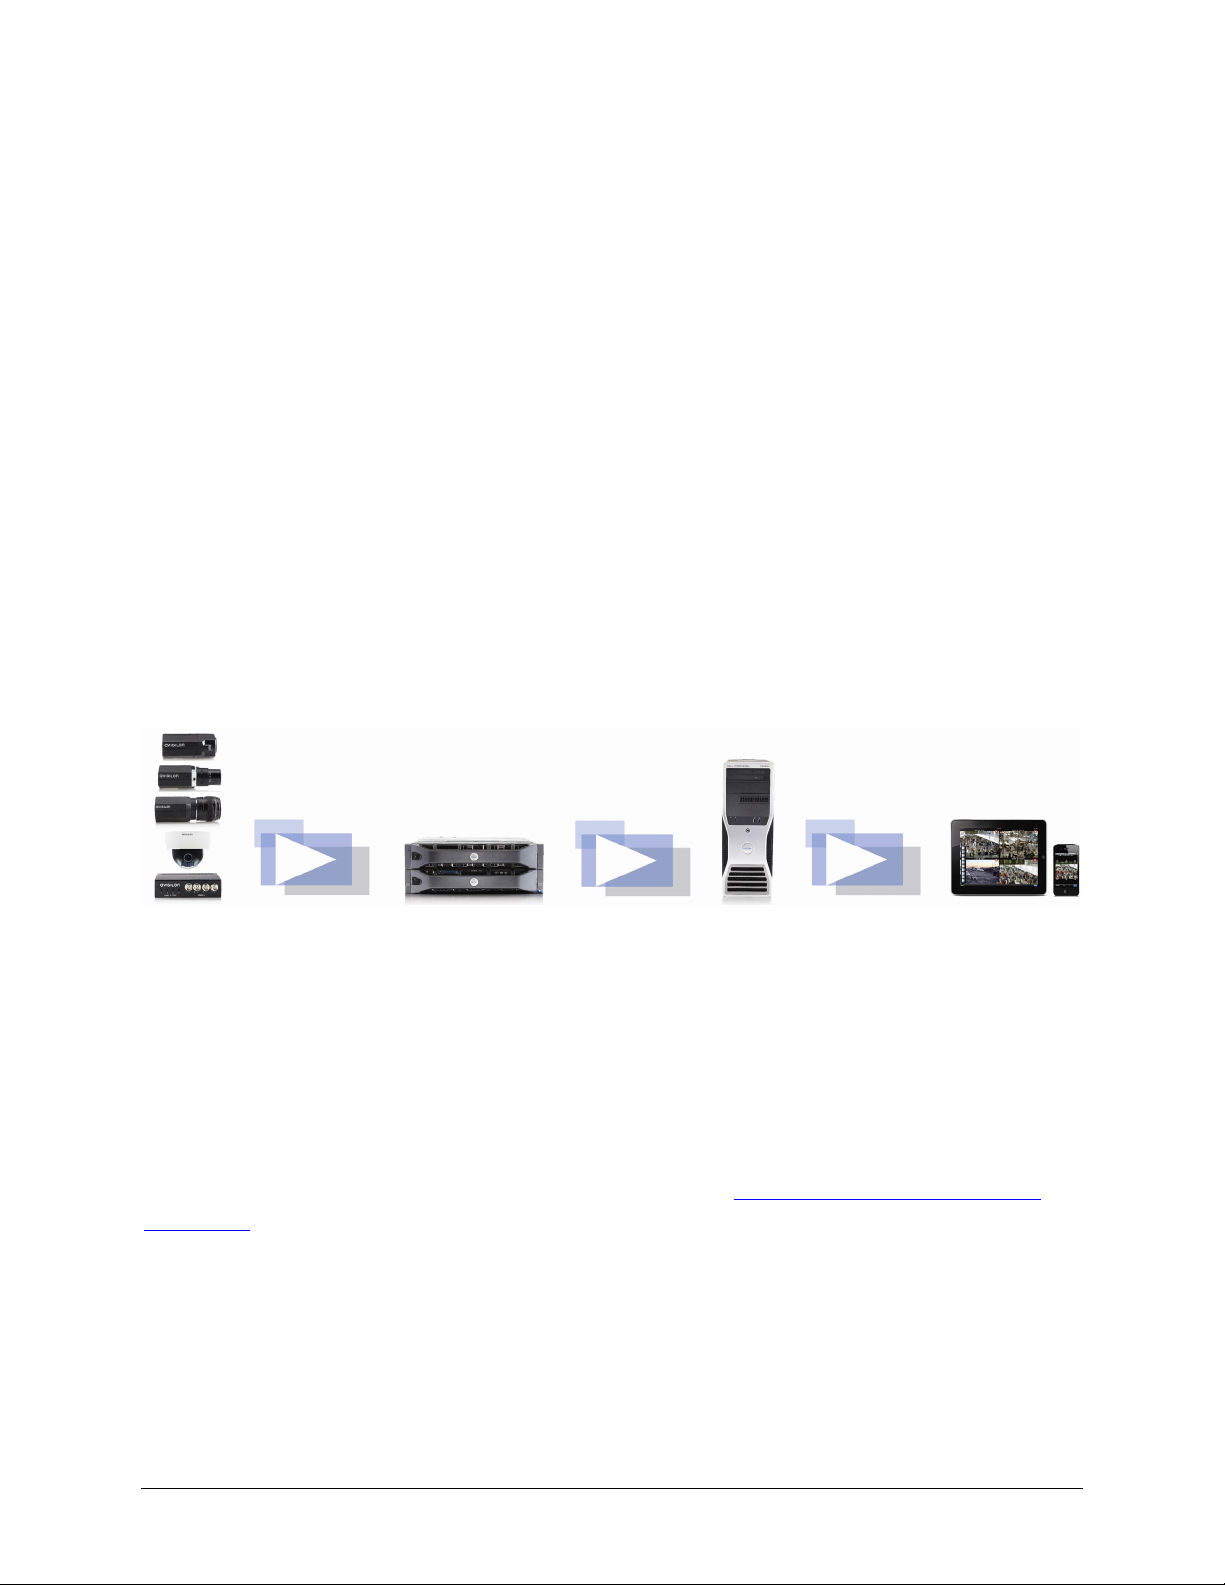
Figure A. Control Center system workflow
Installation
The Gateway Web Client is part of the Gateway and is automatically installed together. The
Gateway is available for download from the Avigilon website:
downloads.
The Gateway must be installed on a computer that has network access to your Avigilon Control
Center System. See the Avigilon Control Center Gateway User Guide for more information.
http://avigilon.com/support-and-
1
Page 8

Avigilon Gateway Web Client
For More Information
Visit Avigilon at http://www.avigilon.com/ for additional product documentation.
Avigilon Training Center
The Avigilon Training Center provides free online training videos that demonstrate how to set up
and use the Avigilon Surveillance System. Register online at the Avigilon Partner Portal site to
begin: http://avigilon.force.com/login
Support
For additional support information, visit http://avigilon.com/support-and-downloads/.
The Avigilon Partner Portal also provides self-directed support resources - register and login at
http://avigilon.force.com/login.
Regular Avigilon Technical Support is available Monday to Friday from 12:00 a.m. to 6:00 p.m.
Pacific Standard Time (PST):
North America: +1.888.281.5182 option 1
International: +800.4567.8988 or +1.604.629.5182 option 1
Emergency Technical Support is available 24/7:
North America: +1.888.281.5182 option 1 then dial 9
International: +800.4567.8988 or +1.604.629.5182 option 1 then dial 9
E-mails can be sent to: support@avigilon.com
.
Upgrades
Software and firmware upgrades will be made available for download as they become available.
Check http://avigilon.com/support-and-downloads/
2
for available upgrades.
Page 9

Feedback
We value your feedback. Please send any comments on our products and services to
feedback@avigilon.com
Introduction
3
Page 10

Page 11

Accessing the Gateway Web Client
The Gateway Web Client allows you to access your Control Center System from any web
browser.
To access the Web Client, you will need the IP address, username and password of the Gateway
software, and have a user account in the Control Center system.
1. In a web browser, enter the Gateway IP address in this format: http://<Gateway IP
Address>/acc
2. The browser will prompt you to enter the Gateway username and password.
After you log in, the System Explorer will list all the Sites that are connected to the
Gateway.
3. Right-click a Site and select Log In...
4. In the following dialog box, enter your username and password for the Site then click Login.
All the cameras in the Site are listed in alphabetical order. You can control video like you would in
the Control Center Client.
5
Page 12

Avigilon Gateway Web Client
6
Page 13

Logging Into and Out of a Site
After you log in to the Gateway, you will see a list of all the Sites that you have access to through
the Web Client.
To log in to a Site, right-click the Site in the System Explorer and select Log In.
To log out of a Site, right-click the Site and select Log Out.
If you choose to close the tab or the web browser rather than log out, be aware that you are still
logged into the Site. The session automatically times out after 5 minutes, but you will still be able
to access your last session through the web browser history until then.
7
Page 14

Page 15

Adding and Removing Cameras
Adding a Camera to a View
Perform one of the following:
Drag the camera from the System Explorer to an empty image panel in the View.
Double-click a camera in the System Explorer.
In the System Explorer, right-click the camera and select Add to View.
The camera is added to the next empty image panel in the View layout.
Tip:
You can drag the same camera to multiple image panels to watch the video at different
zoom levels.
Removing a Camera From a View
Perform one of the following:
Right-click the image panel and select Close.
Inside the image panel, click .
9
Page 16

Page 17

Live and Recorded Video
When you monitor video, you can choose to watch live or recorded video. By default, live video is
displayed.
To switch between live and recorded video, click either Live or Recorded.
To switch individual image panels between live and recorded video, right-click the image panel
and select either Live or Recorded.
11
Page 18

Page 19

Controlling Recorded Video
The Timeline is displayed when you watch recorded video.
The colored bars on the Timeline show the camera's recording history:
A red bar shows the camera recorded a motion event.
A blue bar shows the camera recorded video.
White areas show that the camera did not record any video.
13
Page 20

Avigilon Gateway Web Client
Figure A. Recorded video and Timeline
To control recorded video, perform any of the following:
To select a playback time, click on a point in the Timeline.
To start playback, click
To stop playback, Click
Click to step forward one frame.
Click to step backward one frame.
To zoom in or out on the Timeline, place your mouse over the Timeline and use the scroll
.
.
wheel to zoom in or out. You can zoom in to a quarter of a second, and zoom out to see
years.
To pan the Timeline:
Click and drag the red time marker through the Timeline.
Right-click and drag the Timeline.
14
Page 21

Zooming and Panning in a Video
You can digitally zoom and pan video inside an image panel.
Using the Zoom Tools
Move your mouse over the video image then rotate your mouse wheel forward and back.
Using the Pan Tools
There are two ways to pan through the video image:
Right-click and drag inside an image panel
On the toolbar, select
image panel.
then left-click and drag the video image in any direction inside the
15
Page 22

Page 23

Changing View Layouts
You can change the View layout by selecting one of the layout options on the top toolbar.
Figure A. Layout options
17
Page 24

Page 25

Maximizing an Image Panel
You can maximize an image panel to enlarge the video display.
Maximizing an Image Panel
Perform one of the following:
Right-click an image panel and select Maximize.
Inside the image panel, click .
Double-click the image panel.
Restoring an Image Panel
In an maximized image panel, perform one of the following:
Right-click the maximized image panel and select Restore Down.
Inside the image panel, click .
Double-click the image panel.
19
Page 26

Page 27

Taking Snapshots
A snapshot allows you to save any image that is displayed in an image panel.
In the image panel, click .
The current image in the image panel is immediately downloaded through your browser.
21
Page 28

Page 29

Controlling PTZ Cameras
If you have a pan, tilt, zoom camera connected to your Site, you can control the PTZ camera by
using the onscreen controls in the image panel.
To display the PTZ onscreen controls, click
In the image panel, drag your mouse from center to move the camera in that direction. The
farther the cursor is from the center of the image panel, the faster the camera will move.
.
If the camera supports Click to Center, click anywhere in the image panel to center the camera to
that point.
If the camera supports Drag to Zoom, click and drag to create a green box to define the area you
want to zoom in and see.
23
Page 30

Page 31

Adjusting Image Quality
If the video is not as clear as you’d like, you can adjust the image quality.
In the image panel, right-click and select Image Quality then select a setting number.
Image quality setting of 1 will produce the highest quality video and require the most bandwidth.
The default setting is 5.
25
 Loading...