

Avaya MasterDirectory, MasterDirectory 4.3 User Manual

MasterDirectory
Version 4.3
User's Guide
Data Manager
March 2002

Information in this document is subject to change without notice and does not represent a commitment on
the part of Avaya Inc. The software described in this document is furnished under a license agreement or
non-disclosure agreement. The software may be used or copied only in accordance with the terms of the
agreement. It is against the law to copy the software on any medium except as specifically allowed in the
license or non-disclosure agreement. No part of this manual may be reproduced or transmitted in any form
or by any means, electronic or mechanical, including photocopying and recording, for any purpose without
the expressed written permission of Avaya Inc.
Copyright 2002, Avaya Inc. All rights reserved.
PhoneLine is a registered trademark, and Softconsole, the MasterDirectory logo, and the PhoneLine logo are trademarks
of Avaya Inc.
Microsoft, Windows NT, MS-DOS, and Microsoft Mail are registered trademarks of Microsoft
Corporation.
NetWare and NetWare Telephony Services are trademarks of Novell, Inc.
Portions of the imaging technology of this product are copyrighted by Lead Technologies, Inc.
All other companies and product names are trademarks or registered trademarks of their respective holders.

Contents
Chapter 1: Introduction ................................................................................................................1
What is MasterDirectory?..................................................................................................................... 1
Organization of this User's Guide ........................................................................................................3
User Responsibilities .............................................................................................................................. 4
Conventions ............................................................................................................................................4
Getting Help ...........................................................................................................................................4
Chapter 2: Getting Started..........................................................................................................5
Overview.................................................................................................................................................5
Starting MasterDirectory......................................................................................................................6
MasterDirectory Components ..............................................................................................................6
The Toolbar........................................................................................................................................6
Chapter 3: Working with Directories....................................................................................9
Overview.................................................................................................................................................9
Managing Directories ..........................................................................................................................10
Creating a New Directory ...............................................................................................................10
Opening an Existing Directory .......................................................................................................15
Viewing the Log of a Directory....................................................................................................... 16
Viewing an Entry in a Directory.....................................................................................................17
Viewing Similar Entries in a Directory (Querying) ...................................................................... 18
Adding an Entry to a Directory......................................................................................................22
Modifying an Entry in a Directory.................................................................................................23
Modifying Multiple Entries in a Directory ....................................................................................23
Modifying All Entries in a Directory..............................................................................................25
Deleting an Entry from a Directory ...............................................................................................26
Deleting Multiple Entries from a Directory...................................................................................27
i

Contents
Deleting All Entries from a Directory ............................................................................................ 28
Finding an Entry in a Directory ..................................................................................................... 29
Modifying the Database Structure of an Existing Directory........................................................29
Packing the Directory......................................................................................................................33
Re-Indexing a Directory..................................................................................................................34
Printing a Directory......................................................................................................................... 35
Modifying the Directory Settings .......................................................................................................39
Setting the Title of a Directory .......................................................................................................39
Setting the ODBC Driver Name for a Directory........................................................................... 40
Setting the Format of the Timestamp Field for a Directory......................................................... 41
Changing the Parameters of the Fields in a Directory..................................................................42
Creating Indexes ..............................................................................................................................44
Setting the Display Sort Order .......................................................................................................46
Setting the Fields Displayed in the MasterDirectory Window.....................................................46
Managing the Directory Bar ............................................................................................................... 48
Viewing Directory Shortcuts........................................................................................................... 48
Creating a Directory Shortcut ........................................................................................................48
Modifying a Directory Shortcut .....................................................................................................49
Changing the Shortcuts Display Order.......................................................................................... 50
Deleting a Directory Shortcut ......................................................................................................... 50
Chapter 4: Importing Data.........................................................................................................51
Overview...............................................................................................................................................51
Creating Import Maps......................................................................................................................... 52
Creating an Import Map for a PhoneLine Source File.................................................................53
Creating an Import Map for a Text Delimited Source File..........................................................59
Creating an Import Map for a Text Fixed Record Length Source File ......................................65
Creating an Import Map for a dBASE Source File ......................................................................71
ii

Contents
Creating an Import Map for a Microsoft Access Source File ...................................................... 77
Creating an Import Map for an SQL Server Source File.............................................................82
Creating an Import Map for an LDAP Source File......................................................................88
Creating an Import Map for an ODBC Source File .....................................................................94
Creating an Import Map for an ACP Server via a DCP Connection........................................ 100
Creating an Import Map for an ACP Server via an IP Connection..........................................106
Modifying an Import Map ................................................................................................................113
Setting the Import Maps....................................................................................................................114
Importing a Source File..................................................................................................................... 116
Chapter 5: Exporting Data to Directories ......................................................................119
Overview.............................................................................................................................................119
Creating Export Maps.......................................................................................................................120
Creating an Export Map for a PhoneLine File ...........................................................................121
Creating an Export Map for a dBASE File .................................................................................125
Creating an Export Map for a Microsoft Access File.................................................................128
Creating an Export Map for an SQL Server File .......................................................................131
Creating an Export Map for a Text File...................................................................................... 135
Creating an Export Map for an LDAP File................................................................................. 139
Creating an Export Map for an ODBC File ................................................................................ 143
Creating an Export Map for a Enterprise Directory Gateway
Reference Table File ..............................................................................................................146
Creating an Export Map for a PhoneticOperator File ............................................................... 149
Modifying an Export Map ................................................................................................................152
Setting the Export Maps.................................................................................................................... 153
Exporting a Directory File ................................................................................................................154
iii

Contents
Chapter 6: Transferring Data ................................................................................................157
Overview.............................................................................................................................................157
Creating Transfer Maps....................................................................................................................157
Creating an FTP Transfer Map....................................................................................................158
Creating an SMTP Transfer Map ................................................................................................ 160
Creating a File Copy Transfer Map.............................................................................................162
Setting the Transfer Maps.................................................................................................................164
Running a Transfer Map................................................................................................................... 165
Chapter 7: Performing Builds and Scheduling..........................................................167
Overview.............................................................................................................................................167
Performing Builds..............................................................................................................................168
Scheduling...........................................................................................................................................169
Chapter 8: Configuring SMTP...............................................................................................173
Overview.............................................................................................................................................173
Configuring the SMTP Settings........................................................................................................173
Chapter 9: Configuring LDAP...............................................................................................175
Overview.............................................................................................................................................175
Configuring the LDAP Settings ........................................................................................................ 175
Managing LDAP ................................................................................................................................ 176
Adding a Group .............................................................................................................................176
Deleting a Group............................................................................................................................177
Renaming a Group.........................................................................................................................178
iv

Contents
Chapter 10 Configuring MDAccess...................................................................................181
Overview.............................................................................................................................................181
Setting the Fields in MDAccess.........................................................................................................182
Setting the Fields Displayed in MDAccess ....................................................................................... 184
Setting the Detail Fields Displayed in MDAccess............................................................................186
Chapter 11: Configuring PhoneticOperator.................................................................189
Overview.............................................................................................................................................189
Configuring the PhoneticOperator Settings ....................................................................................189
Appendix A: Troubleshooting ..............................................................................................191
Overview.............................................................................................................................................191
Using the Scheduler ...........................................................................................................................192
Working with Directories..................................................................................................................193
Setting the Fields Displayed in the MasterDirectory Window...................................................193
Modifying Entries in a Directory..................................................................................................193
Index Settings .................................................................................................................................194
Opening an Existing Directory ..................................................................................................... 194
Packing the Directory....................................................................................................................194
Re-Indexing Directories.................................................................................................................195
Importing Data...................................................................................................................................197
Exporting Data...................................................................................................................................199
Index.....................................................................................................................................................203
v


Chapter 1:
Introduction
What is MasterDirectory?
MasterDirectory™ is a data management application that consolidates and synchronizes data from all types
of sources to create a comprehensive database.
Using MasterDirectory, you can:
• gather data from various source files
• manage the consolidated data
• create directory replicas at pre-defined destinations
MasterDirectory enables you to take specific data from a single data source or multiple data sources and
create one master database. For example, maybe all the information comes from a single source (such as the
Human Resources database), but the phone numbers must be maintained manually by the phone operators.
MasterDirectory can import all the desired fields without the phone number field, and choose an import
mode that will update existing records and append new ones.
If your company uses multiple data sources, you can use MasterDirectory to consolidate the data from these
sources, with each source contributing different fields. For example, you can get several fields from the
Human Resources database, the phone number from a Telecom database, and the email address from the
email system. The result is a complete directory containing the information you specified.
Creating directories with MasterDirectory consists of the following steps:
1. Create a new MasterDirectory file (Chapter 3).
In this step, you define the structure of the directory (that is, how may fields the directory will contain,
the name of each field, and the length of each field).
2. Set the fields you want to use as indexes (Chapter 3).
The index fields are used for sorting and searching information procedures and may be used as the Key
fields in the directory. Key fields are the fields in a data record that contain information that is unique
to that record (for example, a social security number or employee ID number). Key fields are important
when you import data from source files into the MasterDirectory file.
3. Create the import map(s) for the directory (Chapter 4).
The import maps define the data import procedures from the source files into the directory. When
creating import maps, you specify the source file that contains the data you want to import into the
directory, the format of the source file, the fields that contain the data you want to import, and the fields
in the MasterDirectory file that will receive the data to be imported. You actually "map" the
information from the fields in the source files to fields you specify in the directory and specify the
import mode you want MasterDirectory to use when comparing records from the source files with
existing records in the directory. You can have multiple import maps.
4. Import data from the source file(s) into the directory (Chapter 4).
Once you create the import map(s), import the data from the source files into the directory. You can
import the data manually (Chapter 4) or schedule the data to be imported automatically at a specified
time (Chapter 7).
5. After the data is imported into the directory, you may modify the data (Chapter 3).
1

MasterDirectory User's Guide
With MasterDirectory, you can add, modify or delete records in the directory and change the settings
associated with the directory (for example, change the title of the directory and specify the indexes for
the file).
6. Create the export map(s) for the directory (Chapter 5).
The export maps define the data export procedures from the directory file to the destination file(s).
When creating export maps, you specify the destination file that will receive the data from the
directory, the format of the destination file, the data that will be exported from the directory, and the
fields that will contain the data you want to export. You actually "map" the information from the fields
in the directory file to fields you specify in the destination file. You can have multiple export maps.
7. Export the data from the directory to the destination file(s) (Chapter 5).
Once you create the export maps, export the data from the directory to the destination file(s). You can
export the data manually (Chapter 5) or schedule the data to be exported automatically at a specified
time (Chapter 7).
2

Chapter 1: Introduction
Organization of this User's Guide
This user's guide consists of ten chapters, one appendix, and an index. Each section of this manual is
described below:
• Chapter 1: Introduction
Chapter 1 provides an overview of MasterDirectory and describes the structure and content of this
user's guide.
• Chapter 2: Getting Started
Chapter 2 describes the components of the MasterDirectory window.
• Chapter 3: Working with Directories
Chapter 3 describes how to create, open, and modify directories and manage the Directory Bar in the
MasterDirectory window.
• Chapter 4: Importing Data
Chapter 4 describes how to import data into MasterDirectory.
• Chapter 5: Exporting Data to Directories
Chapter 5 describes how to export data to directories.
• Chapter 6: Transferring Data
Chapter 6 describes how to create transfer maps to send, receive, or copy files.
• Chapter 7: Performing Builds and Scheduling
Chapter 7 describes how to perform builds of directories and schedule MasterDirectory to import,
export, or build a directory automatically at a specific time of day.
• Chapter 8: Configuring SMTP
Chapter 8 describes how to configure the SMTP settings in MasterDirectory.
• Chapter 9: Configuring LDAP
Chapter 9 describes how to configure the LDAP settings in MasterDirectory and manage LDAP groups
from MasterDirectory.
• Chapter 10: Configuring MDAccess
Chapter 10 describes how to modify the settings for MDAccess, which is an application programming
interface (API) that provides other software applications, such as Avaya Softconsole, with an integrated
interface to directories.
• Chapter 11: Configuring PhoneticOperator
Chapter 11 describes how to configure the PhoneticOperator settings in MasterDirectory so that you
can create export maps to build PhoneticOperator files.
• Appendix A: Troubleshooting
Appendix A provides MasterDirectory error messages and instructions for troubleshooting
MasterDirectory.
3

MasterDirectory User's Guide
User Responsibilities
Before using MasterDirectory, you should be familiar with basic Windows functions and procedures. If you
are not, consult your Microsoft Windows User's Guide.
Also, you should be familiar with Local Area Networks (LANs), DOS, and Windows.
Be sure to review the Readme file to find out about any late-breaking changes.
Conventions
The following typographic conventions are used in this guide:
• Text you must type exactly appears in this style of type.
• Key names that are located on your PC keyboard appear in all capital letters (for example, ENTER).
Getting Help
If you have any questions about or problems with MasterDirectory that this user's guide does not resolve,
call Avaya Inc. or your local authorized Avaya Inc. dealer.
4

Chapter 2:
Getting Started
Overview
This chapter provides the following information:
• how to run MasterDirectory
• the components of the MasterDirectory window
5
MasterDirectory User's Guide
Starting MasterDirectory
To start MasterDirectory:
1. Choose the Start button.
The Start menu appears.
2. Select Programs.
3. Select MasterDirectory.
The MasterDirectory window appears.
MasterDirectory Components
The MasterDirectory window consists of four areas:
• Toolbar, located at the top of the window, contains buttons that allow you to use and maintain the
master directory and its contents.
• MasterDirectory display, in the center of the window, contains the directory's entries.
• Directory Bar and Directory Admin Bar, located on the left side of the window, enable you to create
and use shortcuts to open directories. Using the Directory Admin Bar, you can create, modify, and
delete shortcuts to open directories, and change the order in which the shortcuts are displayed in the
Directory Bar. The Directory Bar displays the shortcuts you created. By clicking on a directory
shortcut, you can open the associated directory.
• Search box, located beneath the MasterDirectory display, enables you to specify a search value.
• Sort By box, located next to the Search box, enables you to specify the field you want to search and
sort by.
• Status bar, at the bottom of the window, contains a count of all the entries in the directory. It also
displays an explanation of each highlighted submenu option appearing under the toolbar menu options.
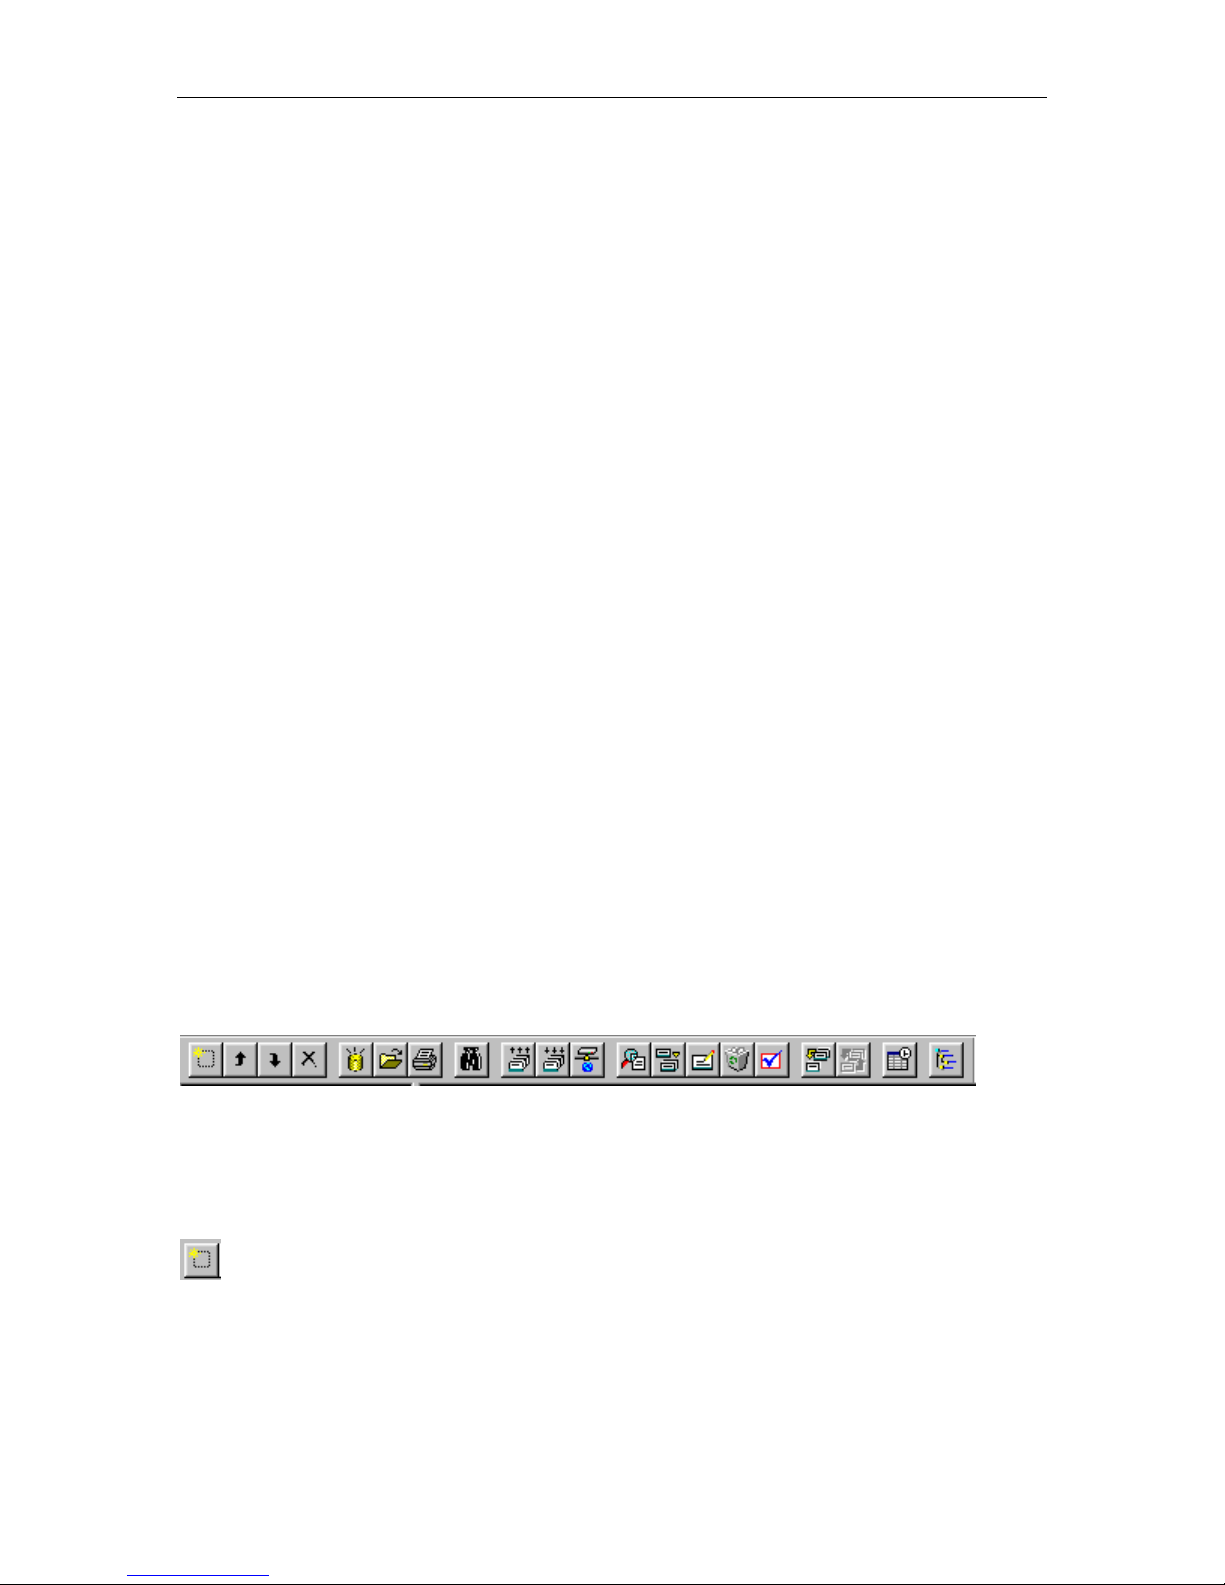
The Toolbar
The toolbar contains twenty buttons. As the mouse pointer moves across each toolbar button, a “tooltip”
label is displayed identifying the button function. The toolbar is displayed below.
Note: The toolbar and tooltips are displayed by default. You can hide the toolbar by selecting the Toolbar
command from the View menu on the toolbar. You can turn off the tooltip display by selecting the Tooltip
command from the View menu.
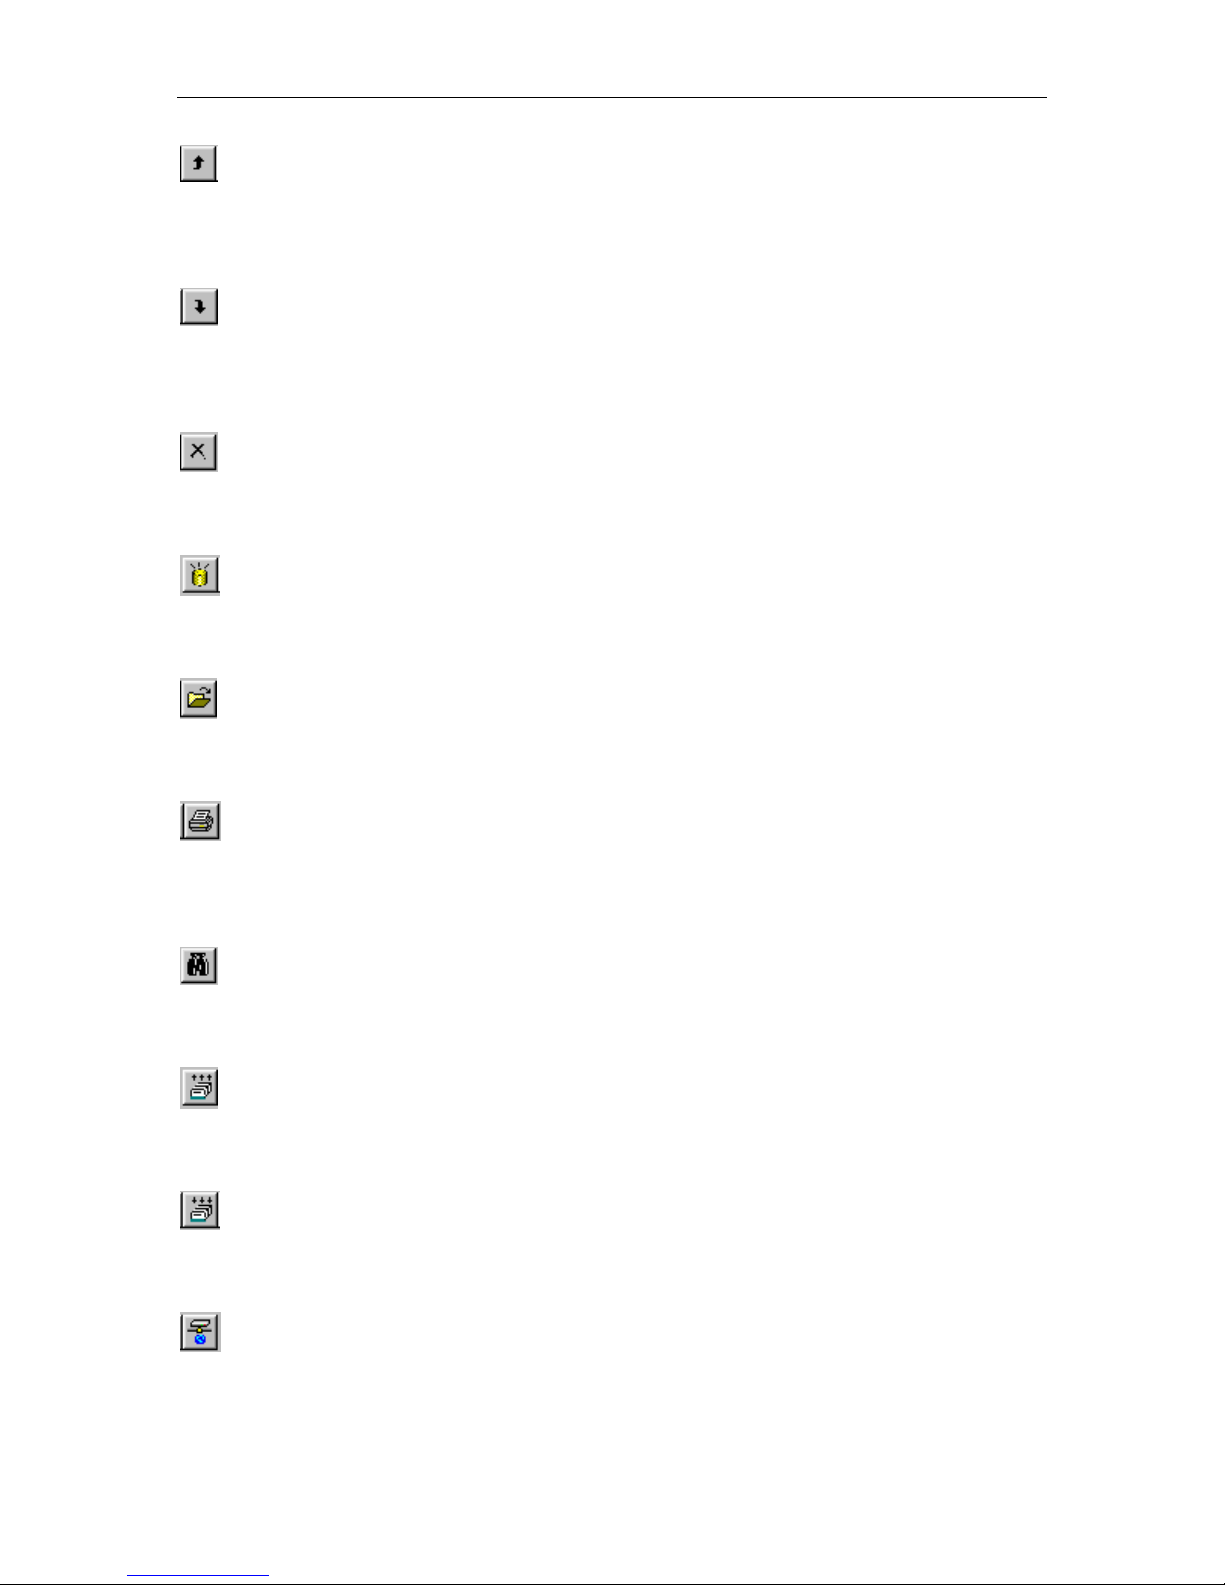
Add new Directory Bar path: Allows you to create a shortcut to open a directory .
6
Chapter 2: Getting Started
Move directory up in Directory Bar: Allows you to change the order (that is, move the selected shortcut
up) in which shortcuts are displayed in the Directory Bar.
Move directory down in Directory Bar: Allows you to change the order (that is, move the selected
shortcut down) in which shortcuts are displayed in the Directory Bar.
Delete directory from Directory Bar: Allows you to delete a directory shortcut from the Directory bar.
New: Allows you to create a new master directory.
Open: Opens an existing master directory.
Print: Prints information from the directory. MasterDirectory enables you to specify the information that
you want printed.
Search Entry: Allows you to search for a specific entry.
Export: Exports data from the directory.
Import: Imports data to the directory.
Transfer: Sends, receives, or copies the specified file(s).
7

MasterDirectory User's Guide
View Entry: Allows you to view the selected entry.
Add Entry: Allows you to add a new entry to the directory.
Modify Entry: Allows you to change the selected entry.
Delete Entry: Deletes the selected entry.
Tag/Untag: Allows you to select specific entries. Once one entry or multiple entries are “tagged,” you can
modify or delete those entries.
Query: Allows you to query the directory.
Toggle Query: Allows you to view the query directory.
Schedule: Allows you to set the time when you want to perform import operations, export operations
transfer operations, advanced queries, and/or the build command.
LDAP Tree Mgmt: Allows you to modify the LDAP settings.
8

Chapter 3:
Working with Directories
Overview
MasterDirectory enables you to create, open, and modify directories. With MasterDirectory, you can import
data from multiple sources (Chapter 4), and then export the data to create and update corporate directories
(Chapter 5).
Each directory is associated with a configuration file (.md), a database file (.dbf) and an index file (.cdx).
The database and index files contain the actual directory data. The configuration file contains settings
describing the layout of the database and functional options.
This chapter describes how to:
• manage the data in directories
• modify the settings for directories
9

MasterDirectory User's Guide
Managing Directories
This section describes how to:
• create new directories
• open existing directories
• view the log of a directory
• view entries in directories
• view a group of entries that match criteria you specify
• add entries to directories
• modify entries in directories
• delete entries from directories
• search for a specific entry in a directory view
• modify the database structure of an existing directory
• pack the records in directories
• re-index directories
• print the data in directories
Creating a New Directory
The layout of the database is saved in a configuration file (.md). Once the layout is saved, you can modify
the field titles, but you cannot modify the field lengths. Also, the maximum number of fields is 128, and the
maximum field length is approximately 250 characters.
Before creating a new directory, you must determine the following information for the directory:
• the number of fields you want in the directory
• the name of each field in the directory
• the maximum length of each field in the directory
• the order in which the fields appear in the directory
• the file name for the directory
NOTE:
By default, MasterDirectory uses field1 and field2 automatically as a combined index for sorting records.
As a result, be sure to define the appropriate fields (for example, NAME and PHONE NUMBER) as field1
and field2.
10
Chapter 3: Working with Directories
To create a new directory:
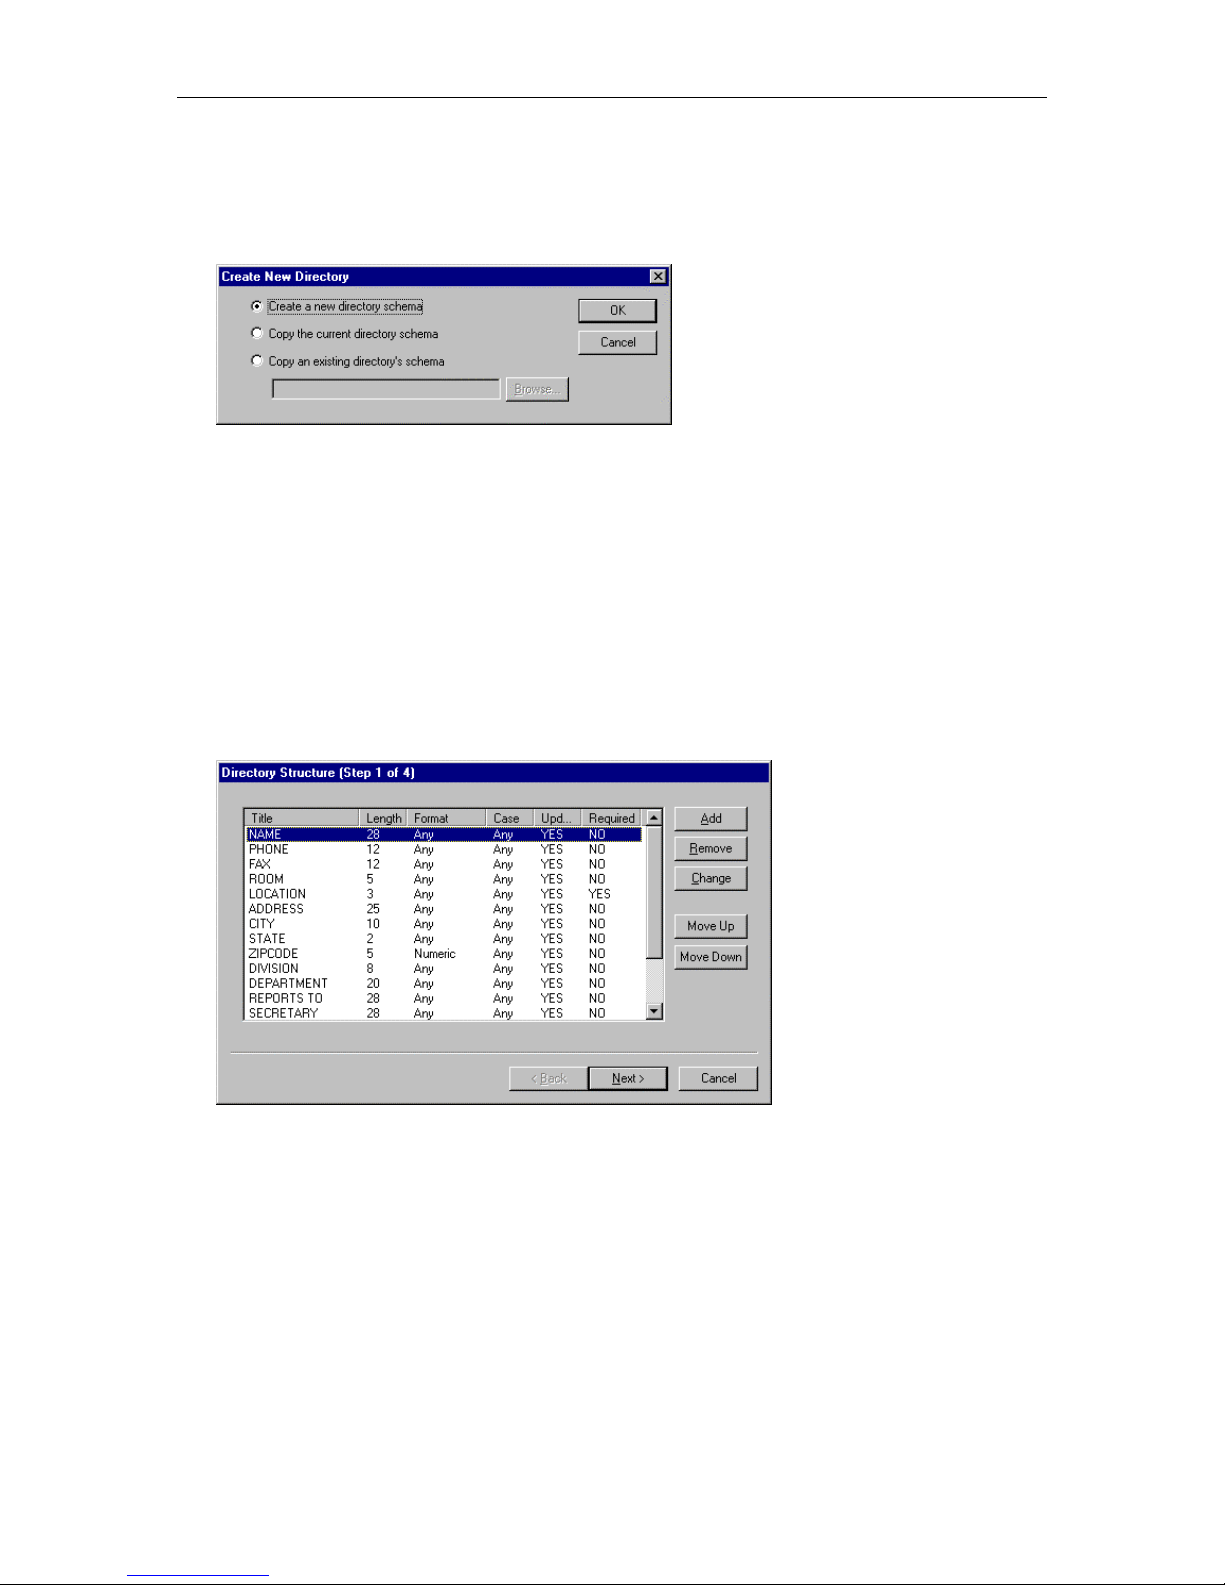
1. From the File menu, choose New.
The Create New Directory dialog box appears.
2. Perform one of the following steps:
• If you do not want the new directory to have the same structure as an existing directory, choose the
Create a new directory schema option button, and then choose the OK button.
• If you want the new directory to have the same structure as the directory that is currently open,
choose the Copy the current directory schema option button, and then choose the OK button.
• If you want the new directory to have the same structure as an existing directory, choose the Copy
an existing directory’s schema option button, enter the name of the file whose structure you want
to use, and then choose the OK button.
The Directory Structure (Step 1 of 4) dialog box appears. This dialog box will be empty if you selected
the Create a new directory schema option button.
11

MasterDirectory User's Guide
Using this dialog box, you specify the following information for the new directory:
• the name of each field
• the size of each field
• the format of each field
• the case of each field
• whether this field can be updated
• whether this field is required
• whether the values are from a pick list
• the order of the fields
To define the field parameters, use the following buttons:
• Add, which adds a field after the last field displayed in the in the Directory Structure dialog box.
• Remove, which deletes the field that is currently selected in the Directory Structure dialog box.
• Change, which enables you to modify the name or length of the selected field.
• Move Up/Move Down, which moves the field that is currently selected in the Directory Structure
dialog box up or down the list.
3. Perform one of the following steps:
• If you want add a field, proceed to Step 4.
• If you want to change an existing field, proceed to Step 12.
• When you are finished adding and changing fields, proceed to Step 16.
4. To add a field to the directory, choose the Add button.
The Field Parameters dialog box appears.
5. In the Title box, enter the title for the first field in the directory you want to create.
6. In the Length box, enter the maximum number of characters that will appear in this field. The minimum
number of characters that a field may contain is 1, and the maximum number of characters a field may
contain is 65.
7. In the Format box, select the type of characters that can be entered in this field.
8. In the Case box, select the case for the characters that can be entered in this field.
12
Chapter 3: Working with Directories
9. In the Advanced Settings area, perform the following steps:
a. If you want this field to be updated, select the Allow Update check box.
b. If you want this field to be required, select the Required Field check box.
c. If you want the values of this field to be selected from a Pick-List, select the Values come from
Pick-List check box.
10. Choose the OK button.
The information for the field appears in the Directory Structure (Step 1 of 4) dialog box.
11. Repeat step 3. When you are finished adding and modifying fields, proceed to Step 16.
12. To modify an existing field, select the field you want to modify, and then choose the Change button.
The Field Parameters dialog box appears, displaying the information for the selected field.
13. Make your changes.
14. When you are finished modifying the selected field, choose the OK button.
The information for the field appears in the Directory Structure (Step 1 of 4) dialog box.
15. Repeat Step 3. When you are finished adding and modifying fields, proceed to Step 16.
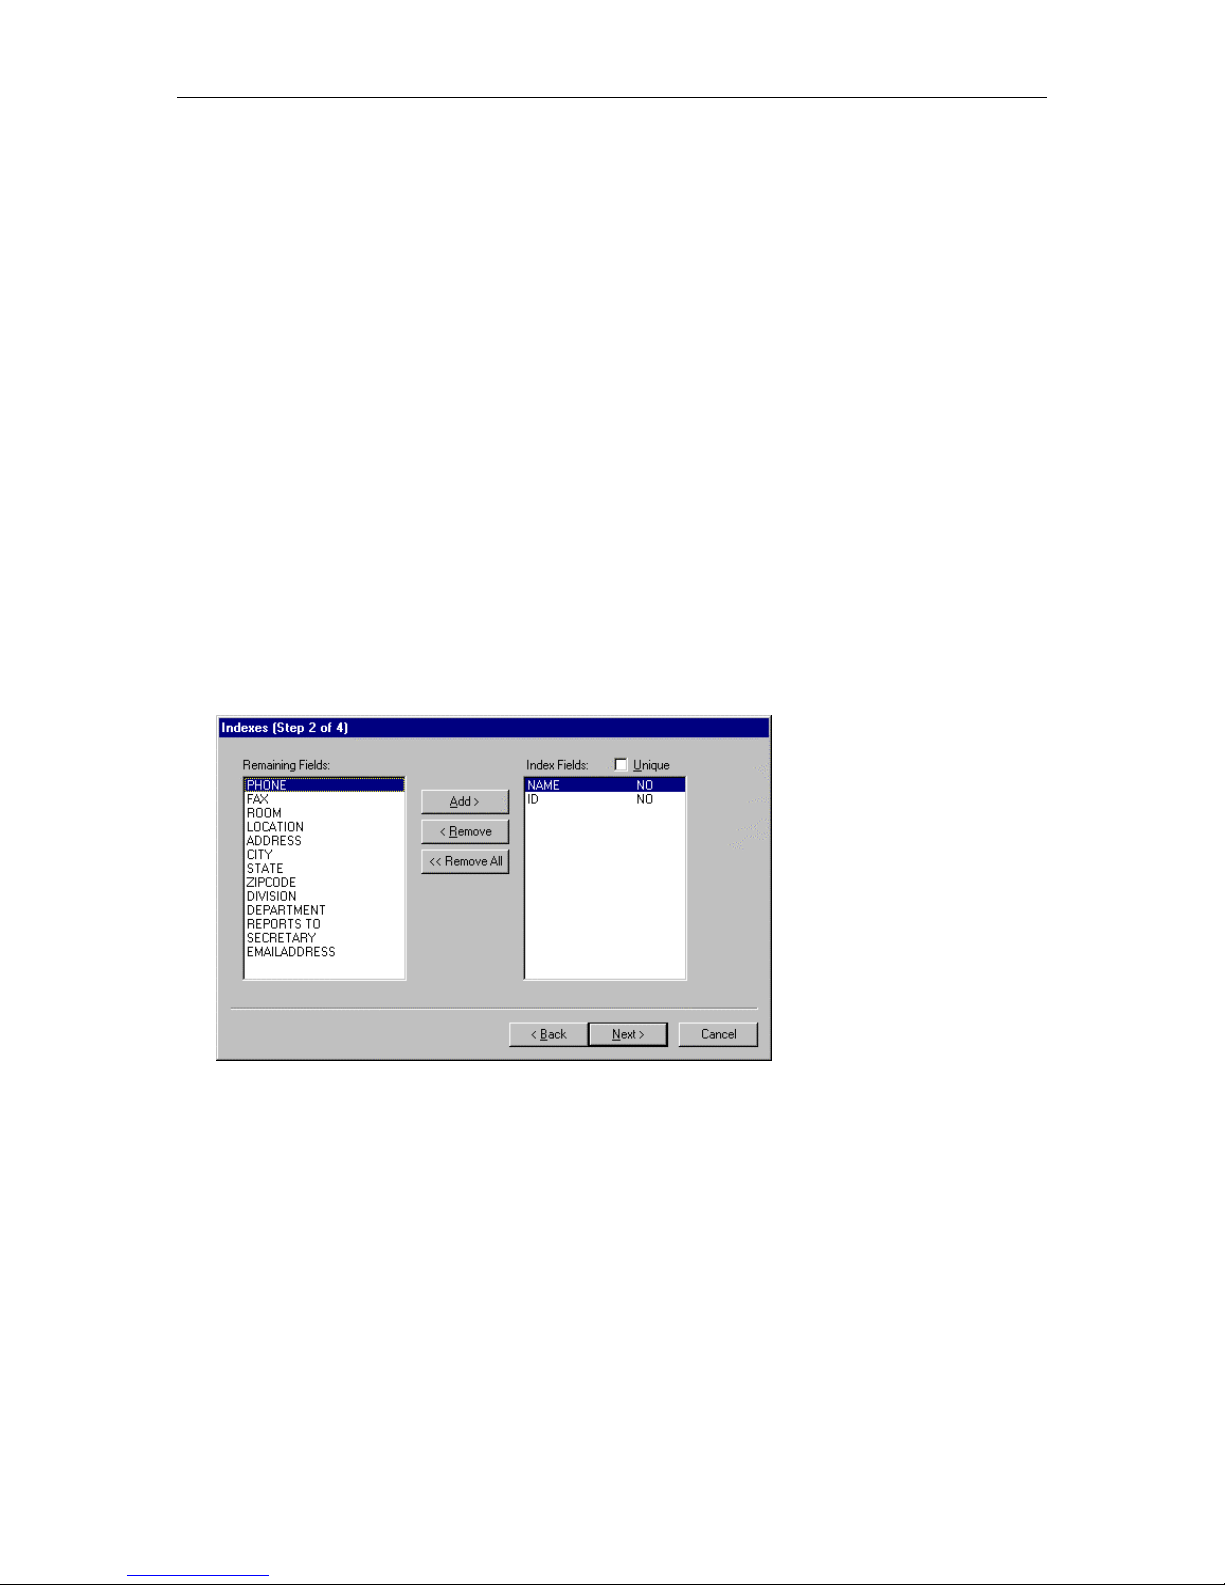
16. When you are finished adding or modifying the directory fields, choose the Next button.
The Indexes (Step 2 of 4) dialog box appears. The Index Fields box displays the index fields.
17. If you want to specify the Index fields, perform Steps 18 to 20. Otherwise, proceed to Step 21.
18. In the Remaining Fields box, select the field you want to use as an index, and choose the Add button.
The selected field appears in the Index Fields box.
19. If you want an index field to be unique, select the appropriate index field, and select the Unique check
box.
"YES" appears for the selected index field, indicating that the Index field is unique.
20. Repeat steps 18 and 19 if you want to add other index fields. When finished, proceed to Step 21.
13
MasterDirectory User's Guide
21. When finished setting the index fields, choose the Next button.
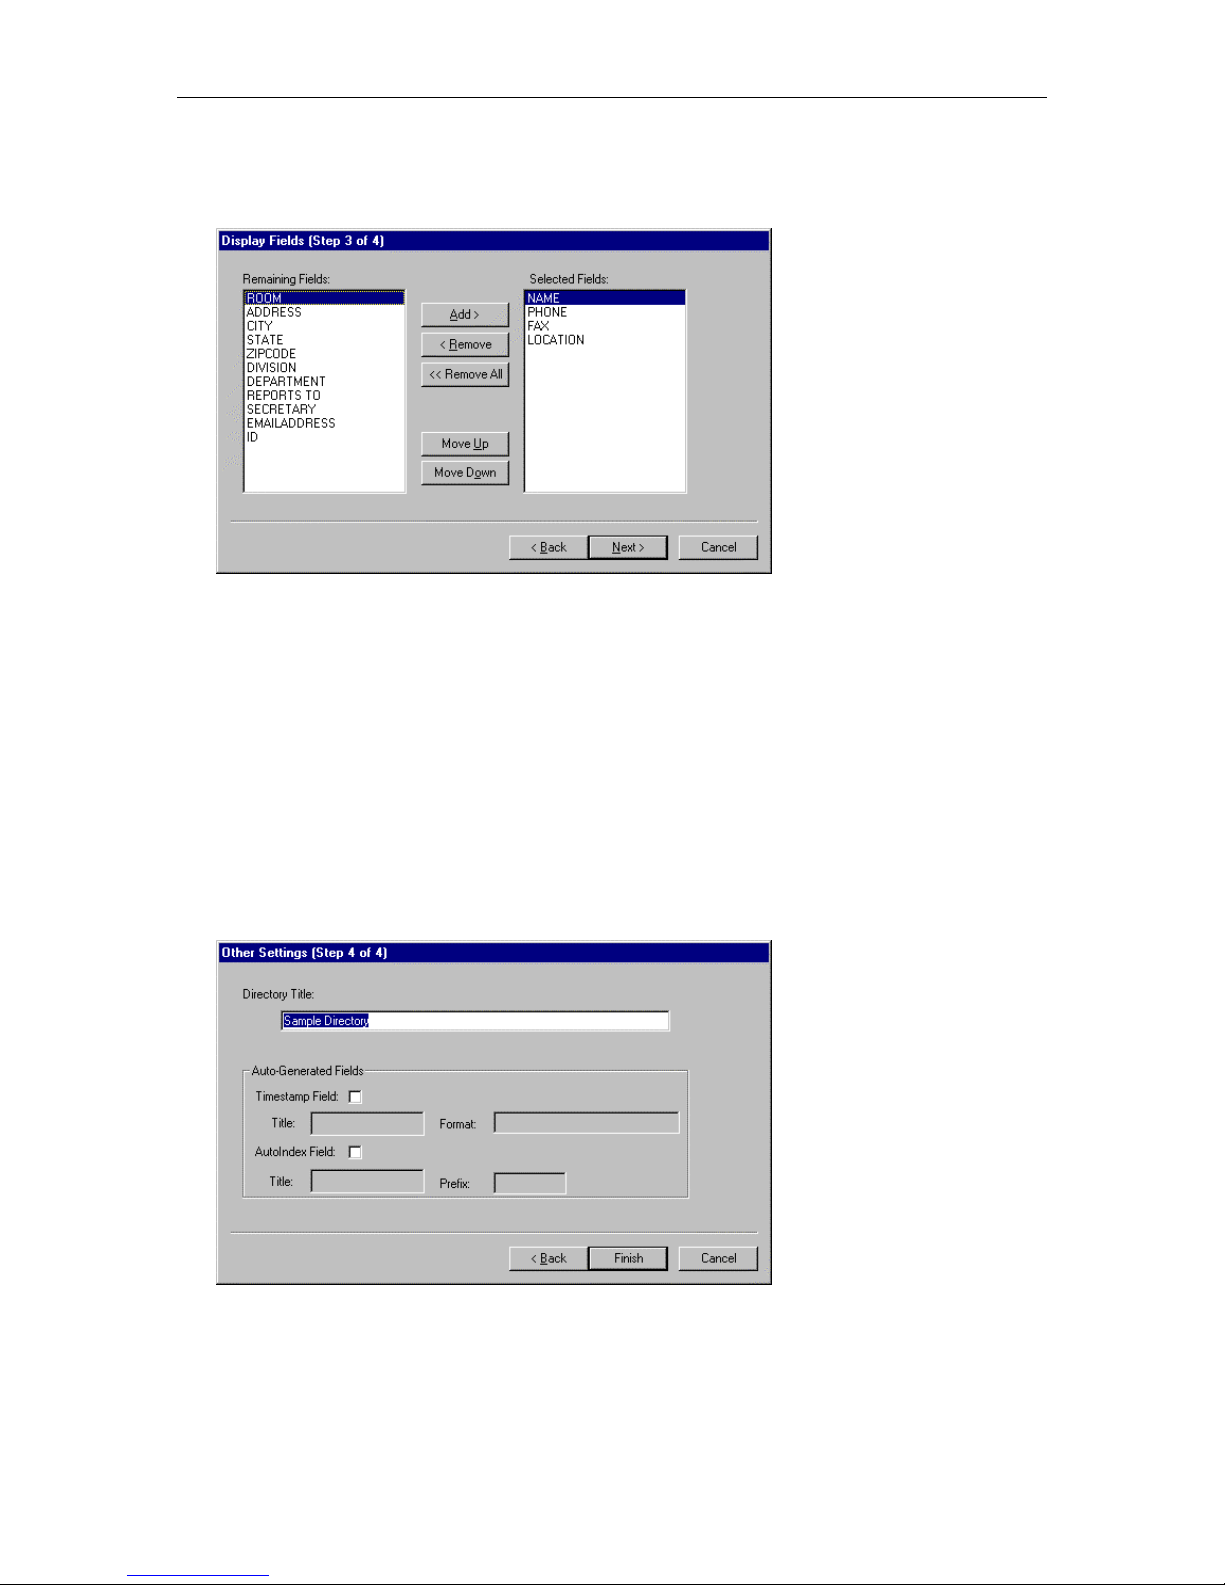
The Display Fields (Step 3 of 4) dialog box appears.
The Selected Fields box displays the fields that will be displayed in the MasterDirectory window.
22. If you want a field to be displayed in the MasterDirectory window, perform Steps 23 to 24. Otherwise,
proceed to Step 25.
23. In the Remaining Fields box, select the field you want displayed in the MasterDirectory window, and
choose the Add button.
The selected field appears in the Selected Fields box. Use the Move Up and Move Down buttons to
change the location of the selected field.
24. If you want another field to be displayed in the MasterDirectory window, repeat Step 23. When
finished, proceed to Step 25.
25. When finished setting the fields displayed in the MasterDirectory window, choose the Next button.
The Other Settings (Step 4 of 4) dialog box appears.
26. In the Directory Title box, enter the title for the directory.
27. If you want to create a timestamp field in this directory, select the Timestamp Field check box.
28. In the Title box, enter the title for the Timestamp field. (The default is MDTS.)
29. In the Format box, enter the time and date format you want MasterDirectory to use.
14
Chapter 3: Working with Directories
30. If you want to create an auto-index field with a prefix in this directory, select the AutoIndex Field
check box, and enter the prefix in the associated box.
31. In the Title box, enter the title for the AutoIndex field. (The default is MDID.)
32. In the Prefix box, enter the prefix for the AutoIndex field.
33. When you are finished, choose the Finish button.
The Save New Directory As dialog box appears.
34. Type the name for this directory, and then choose the Save button.
MasterDirectory will create a new directory with the given name. This process will result in creating
the database index and configuration files with the given name and the appropriate extensions. The
newly created directory is opened, with the display including by default the first four fields. The new
directory is empty, so no entries are displayed.
Refer to "Modifying the Settings for Directories" later in this chapter to specify which fields are
displayed, the directory title, and other display options. The full set of fields as defined in the layout of
the directory will be displayed when an entry is selected.
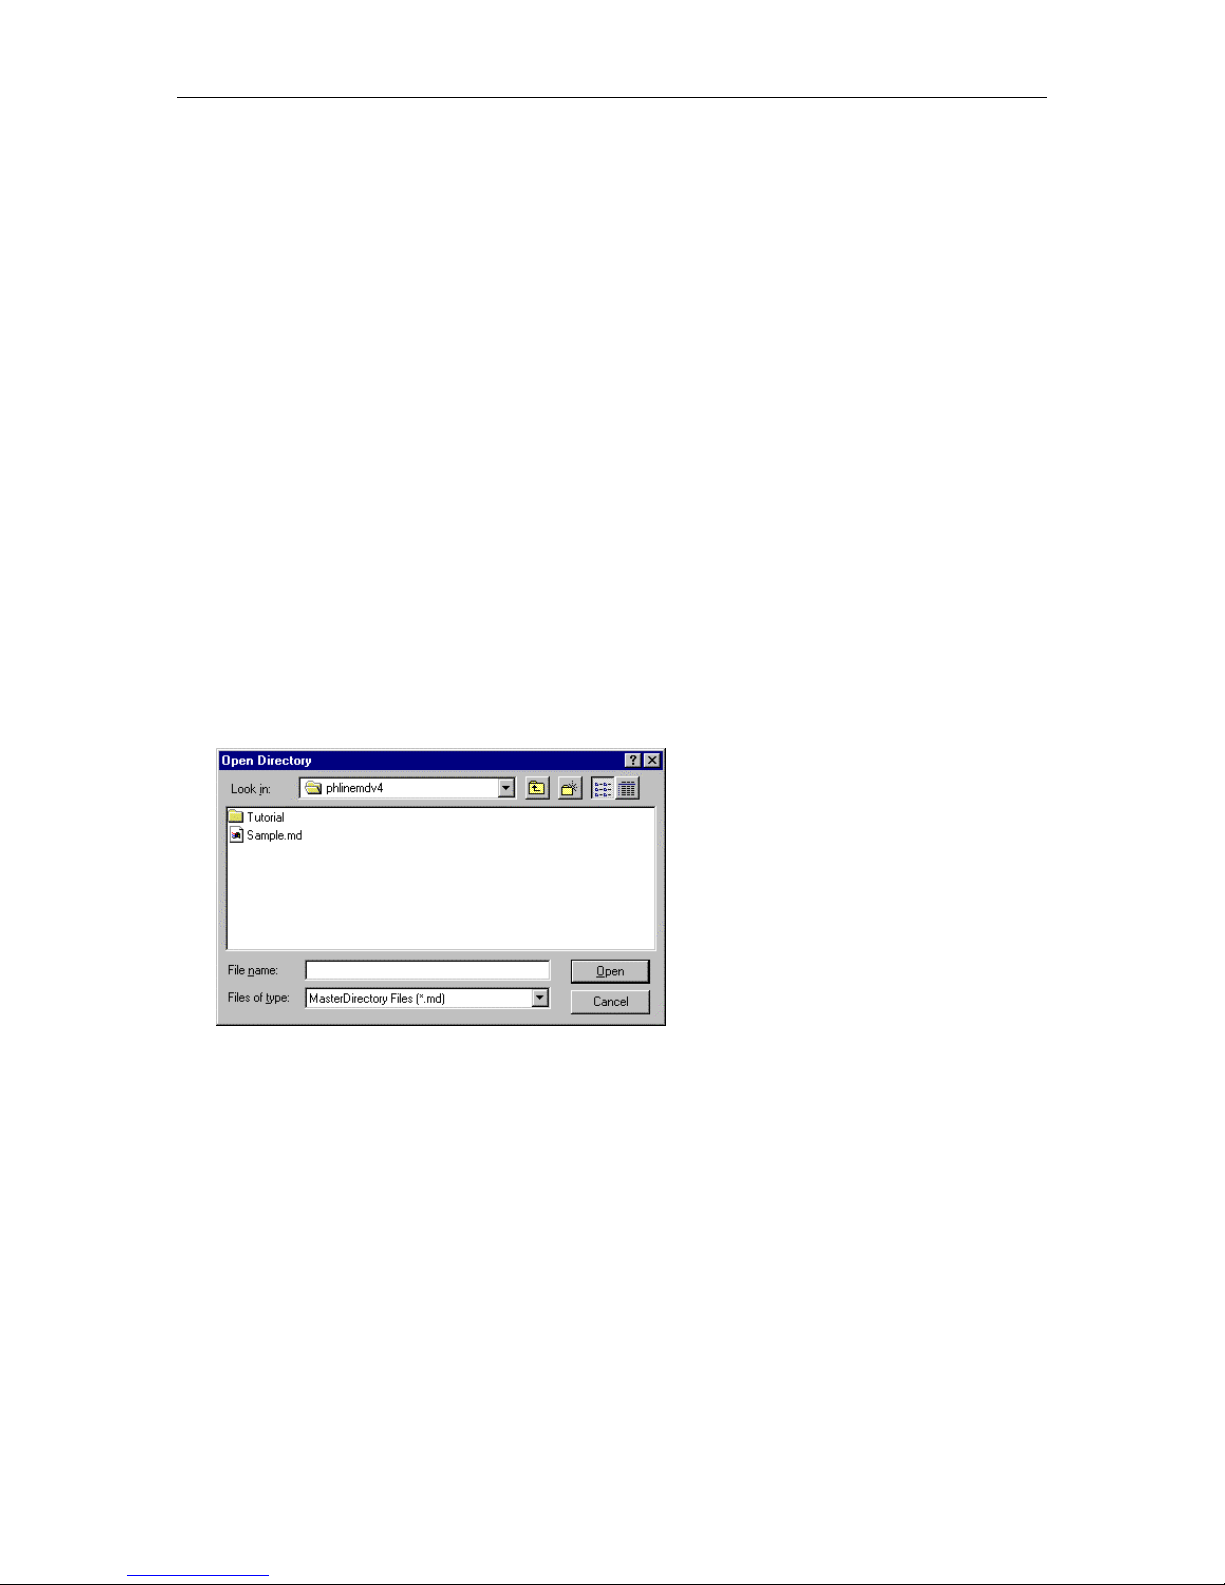
Opening an Existing Directory
To open a directory:
1. On the toolbar, click the Open button.
The Open Directory dialog box appears.
2. Select the directory database you want to open, and then choose the Open button.
The entries in the selected directory appear.
15
MasterDirectory User's Guide
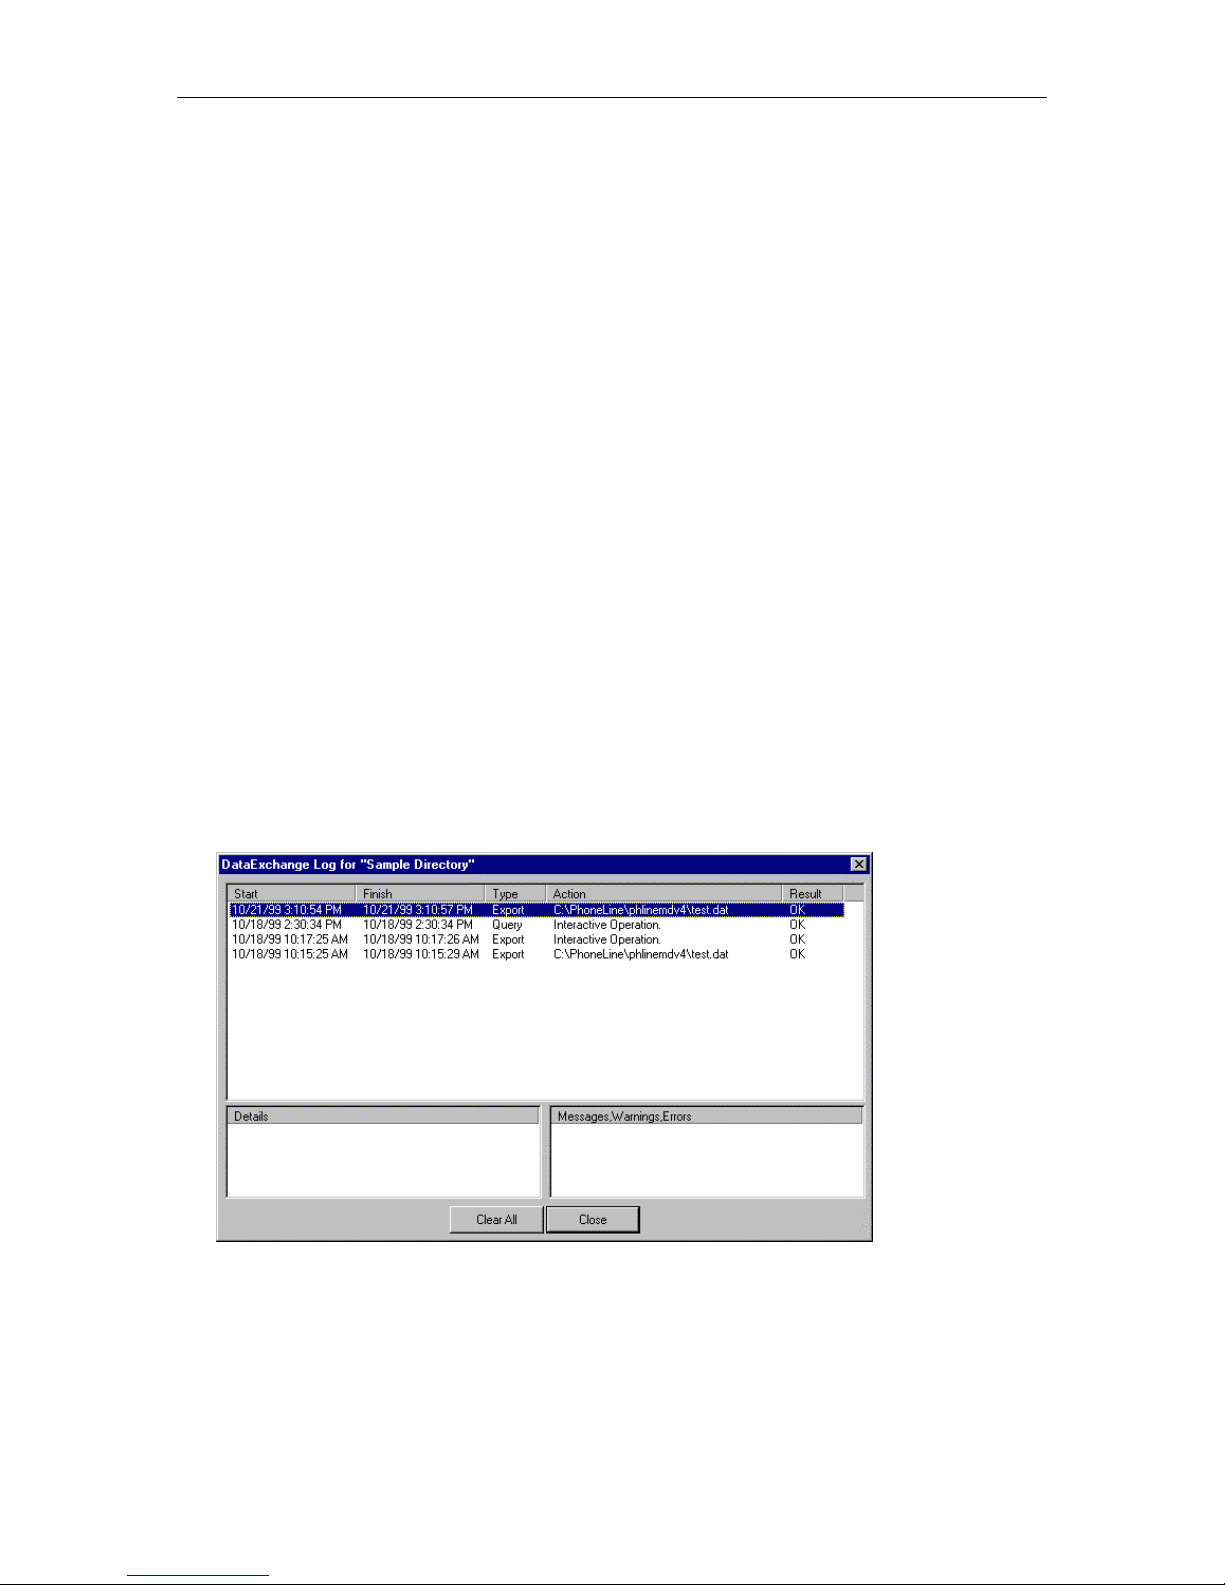
Viewing the Log of a Directory
This procedure enables you to view the log of a directory. The directory log contains records of all actions
that occurred in the associated directory. Each record contains the following information:
• The time the action started
• The time the action completed
• The type of action that occurred
• A description of the action
• The result of the action
You can select a record to view the details of the action.
To view the log of a directory:
1. From the View menu, select Log.
A submenu appears.
2. Perform one of the following steps:
• If you want to view the log of the directory that is currently open, select Current.
The Log dialog box appears.
• If you want to view the log of another directory, select Open.
The Open dialog box appears.
Select the appropriate directory, and then choose the Open button.
The Log dialog box appears.
If you want to view the details of a record, select the record. The details of the record appear in the
Details area. If the selected record was a message, warning, or error, the details of the record appear in
the Messages, Warnings, Errors area.
If you want to clear all of the records in the log, choose the Clear All button.
3. When you are finished, choose the Close button.
16

Chapter 3: Working with Directories
Viewing an Entry in a Directory
To view the information for an entry in a directory:
1. Click on the database entry that you want to view.
2. On the toolbar, click the View Entry button.
The View Directory Entry dialog box appears, showing the information for the selected entry. The
following figure shows a sample View Directory Entry dialog box.
3. When you are finished, choose the OK button.
Shortcut:
Double-click on the database entry that you want to view.
17
MasterDirectory User's Guide
Viewing Similar Entries in a Directory (Querying)
The Query feature enables you to view entries that match the criteria you specify. These entries are a subset
of the contents of the directory.
MasterDirectory supports two types of queries:
• Simple query
In a simple query, you enter the criteria in which you are interested, and MasterDirectory displays the
directory entries that match the criteria you specified.
• Advanced query
In an advanced query, you create and save queries that may contain multiple operations and use
boolean operators (AND/OR). You can then run these queries immediately or run them at a later time
either manually or via the Scheduler.
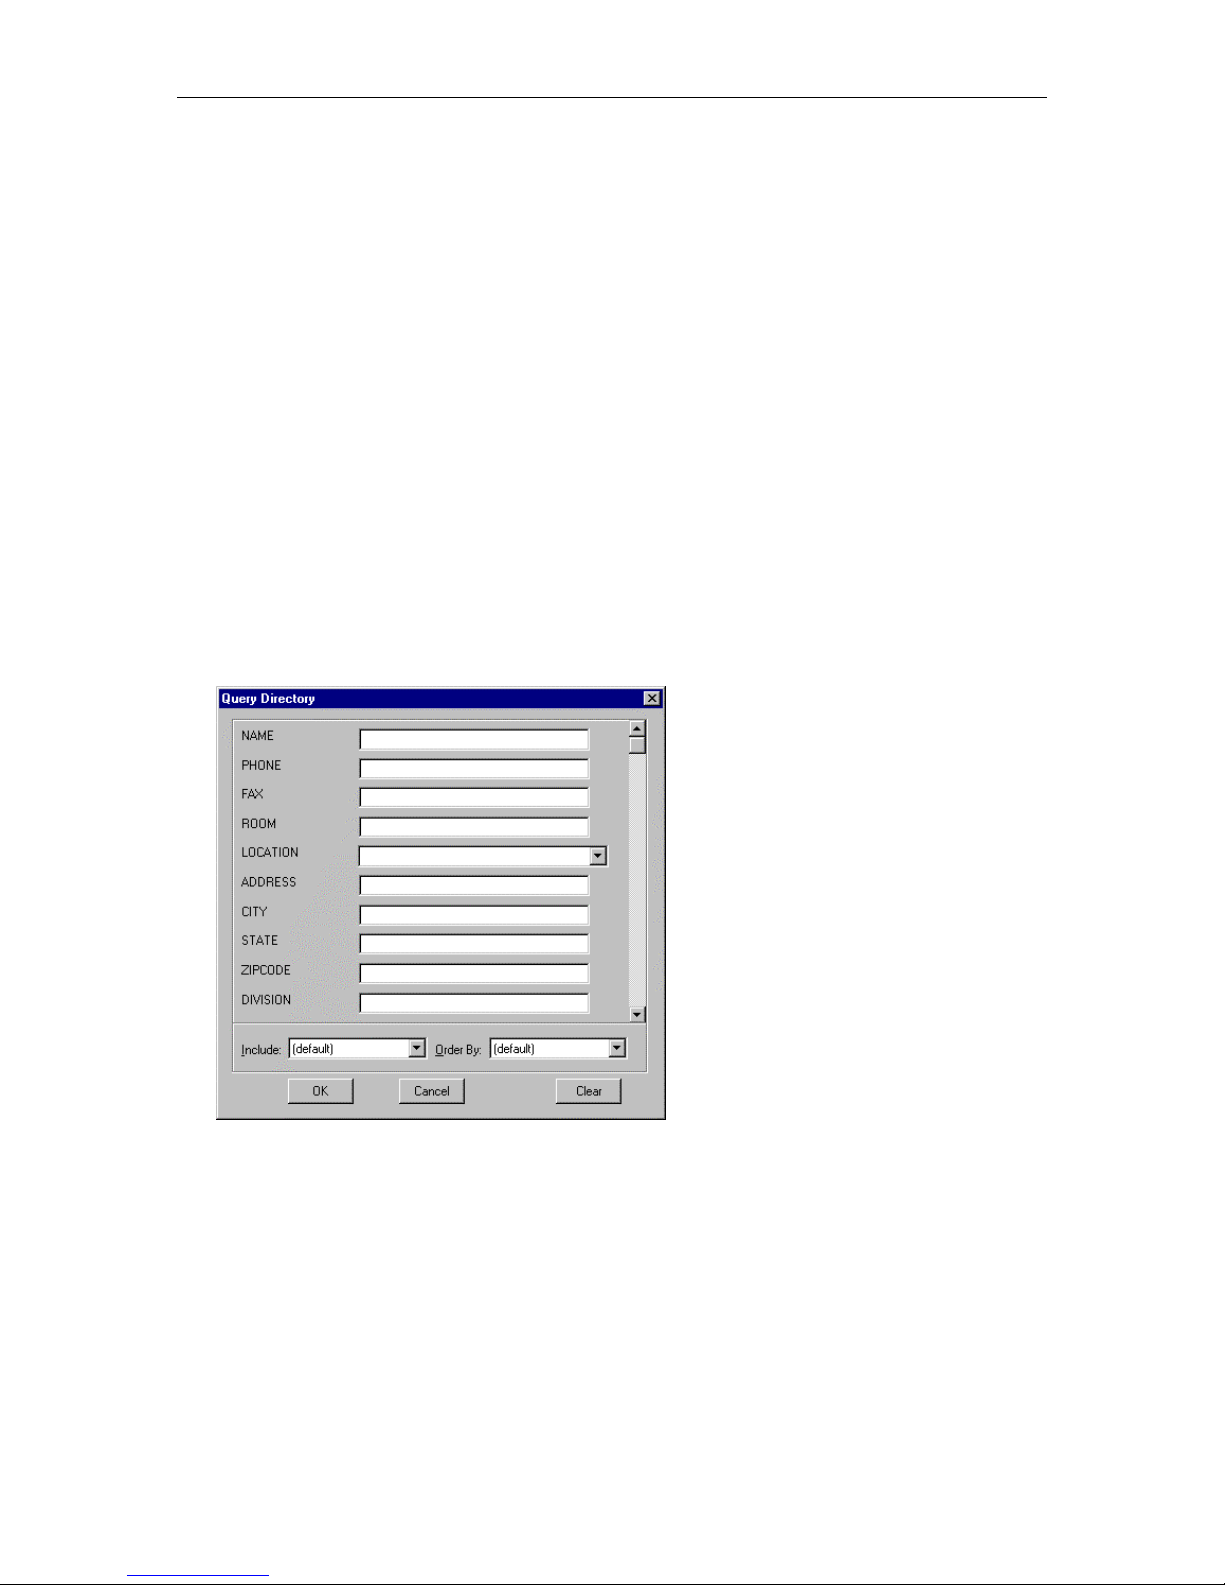
Performing a Simple Query
To view entries that match the criteria you specify:
1. On the toolbar, click the Query button.
The Query Directory dialog box appears.
2. Enter the information you want to find.
3. From the Include box, select the records you want to query. You can query the following records:
active records only, deleted records only, or both active and deleted records.
4. From the Order By box, select the field you want to sort by.
5. When you are finished, choose the OK button.
The entries that match the criteria you entered are displayed. These entries are a subset of the contents
of the directory. The title bar for the MasterDirectory window displays "[QUERY]," indicating that you
are viewing a query directory. To toggle between the Query directory and all of the records in
MasterDirectory, choose the Toggle Query button on the toolbar or choose the Display Query Results
command from the Query menu.
18
Chapter 3: Working with Directories
Using Advanced Queries
Unlike a simple query, advanced queries enable you to create and save queries that may contain multiple
operations and use boolean operators (AND/OR). You can then run these queries immediately or run them
at a later time either manually or via the Scheduler. The entries that are displayed as the result of a query are
a subset of the contents of the directory.
Create an Advanced Query
To create an advance query:
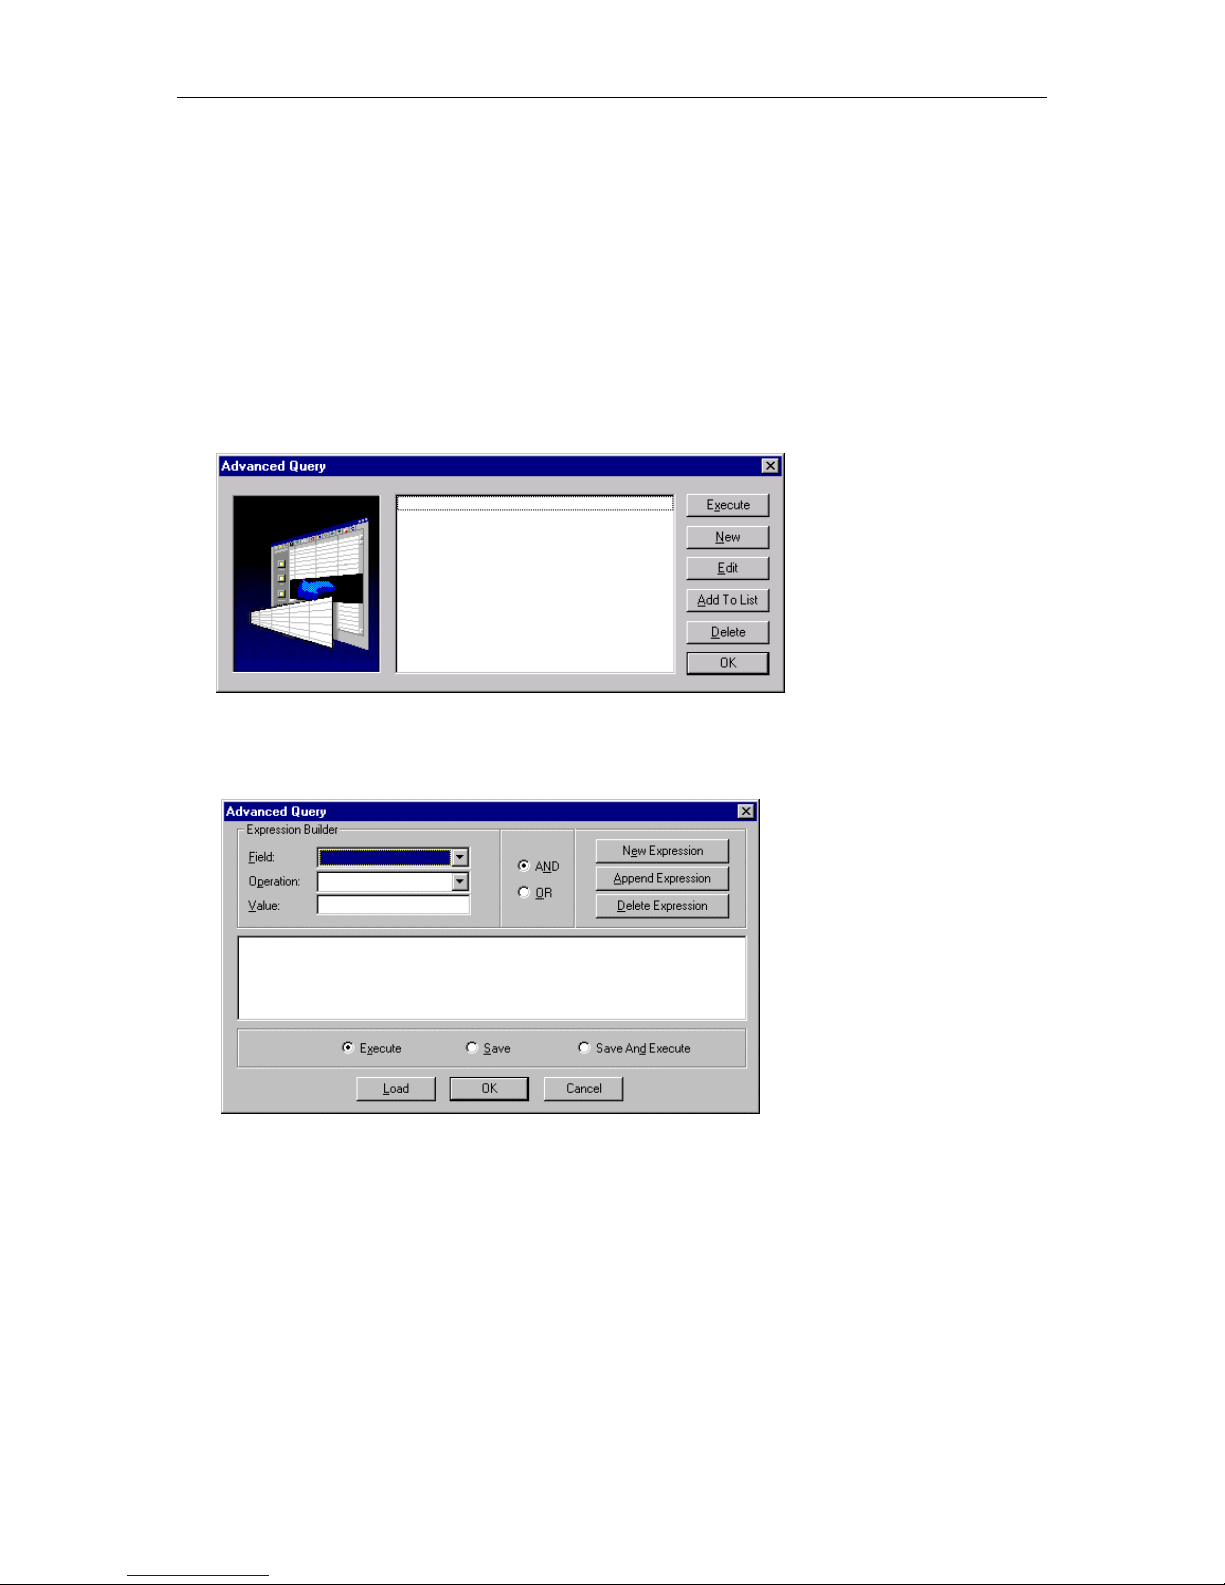
1. From the Query menu, choose Advanced.
The Advanced Query dialog box appears.
2. Choose the New button.
The Advanced Query dialog box appears.
3. In the Field box, select the field you want to query.
4. In the Operation box, select the query operation you want to perform.
5. In the Value box, enter the value you to query (if any).
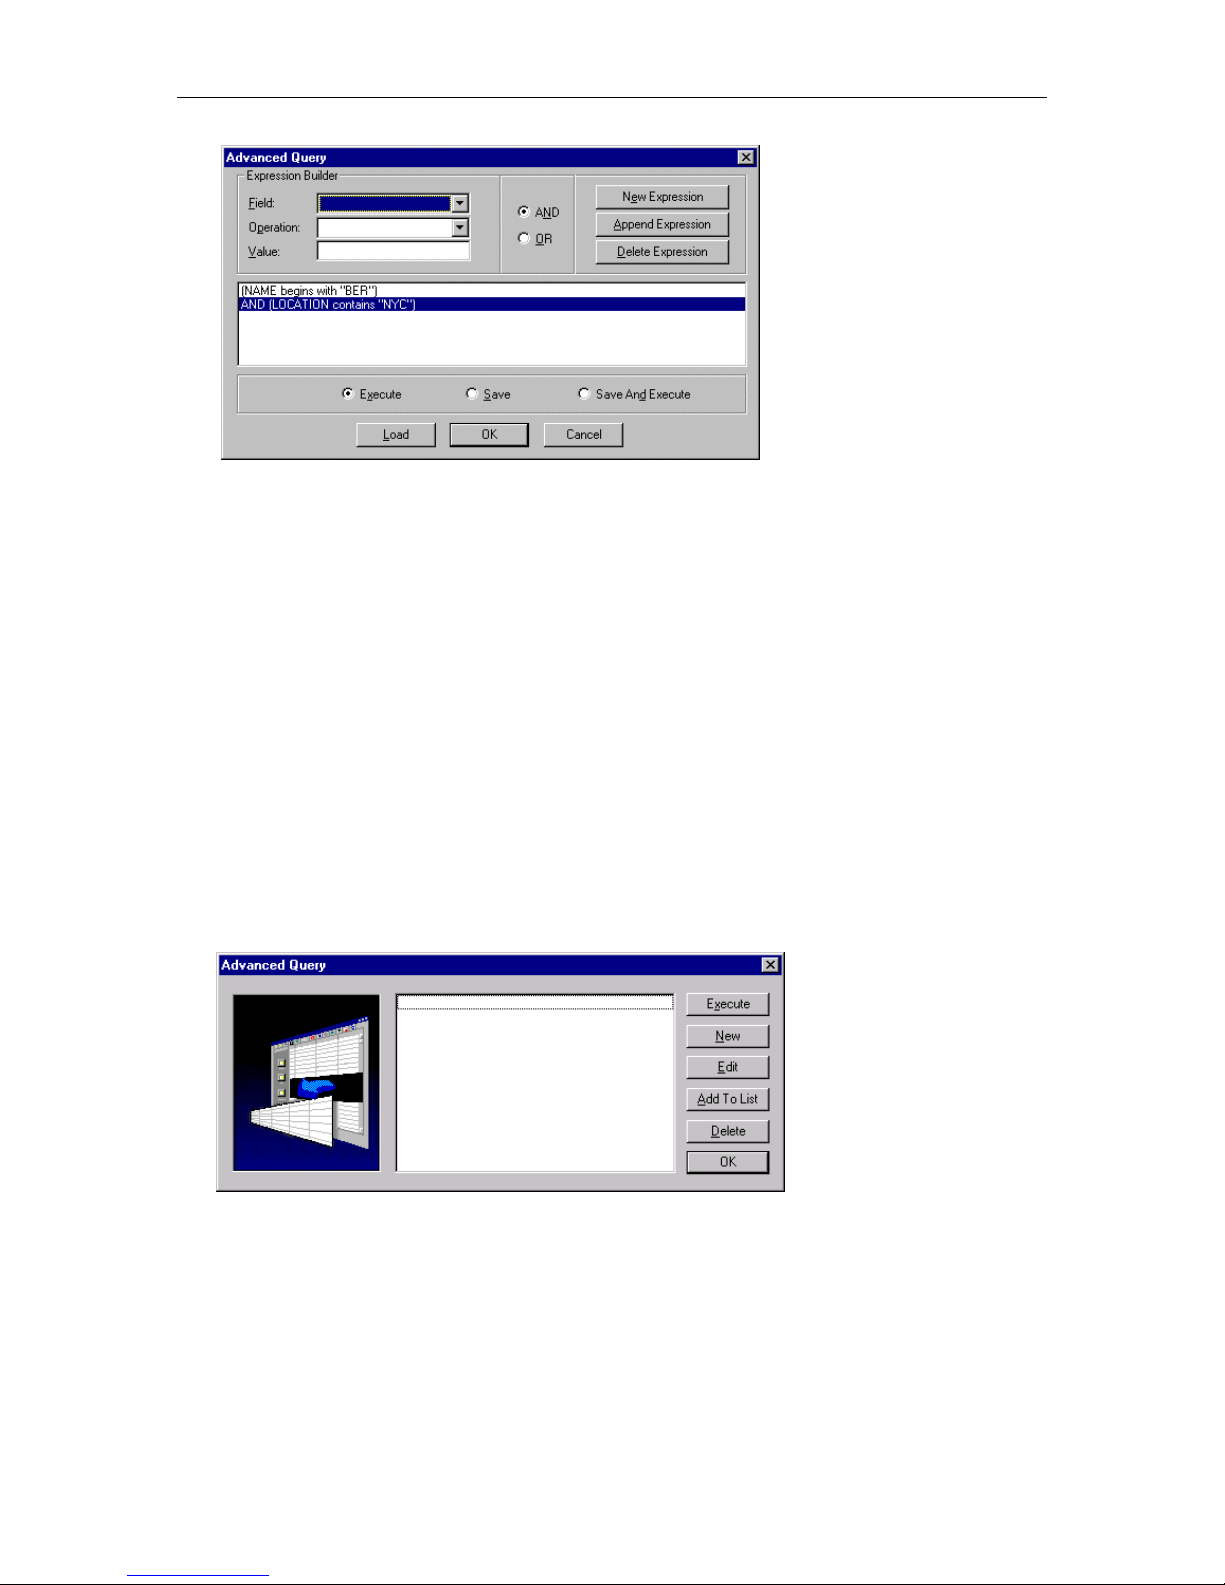
6. Choose the New Expression button.
The query operation you created appears.
19
MasterDirectory User's Guide
7. Perform one of the following steps:
If you are finished with this query, proceed to step 8.
If you want to add another operation to this query:
a. In the Field box, select the field you want to query.
b. In the Operation box, select the query operation you want to perform.
c. In the Value box, enter the value you want to query.
d. Specify whether this is an AND or OR operation. (Click the AND option button or the OR option
button.)
e. Specify whether you want to add this operation as a separate query operation or append it to the
selected query operation. (Click the New Expression button or the Append Expression button.)
f. Repeat steps a to e to create more operations for this query. When you are finished, proceed to
step 8.
8. Choose the Save option button and then choose the OK button.
The Save As dialog box appears.
9. Enter the path and file name for this query, and then choose the Save button.
10. Choose the OK button.
The new query appears in the Advanced Query dialog box.
11. Choose the OK button to close the Advanced Query dialog box.
12. Proceed to "Run an Advanced Query" later in this chapter to run the Advanced Query you created.
Modify an Existing Advanced Query
To modify an existing advanced query:
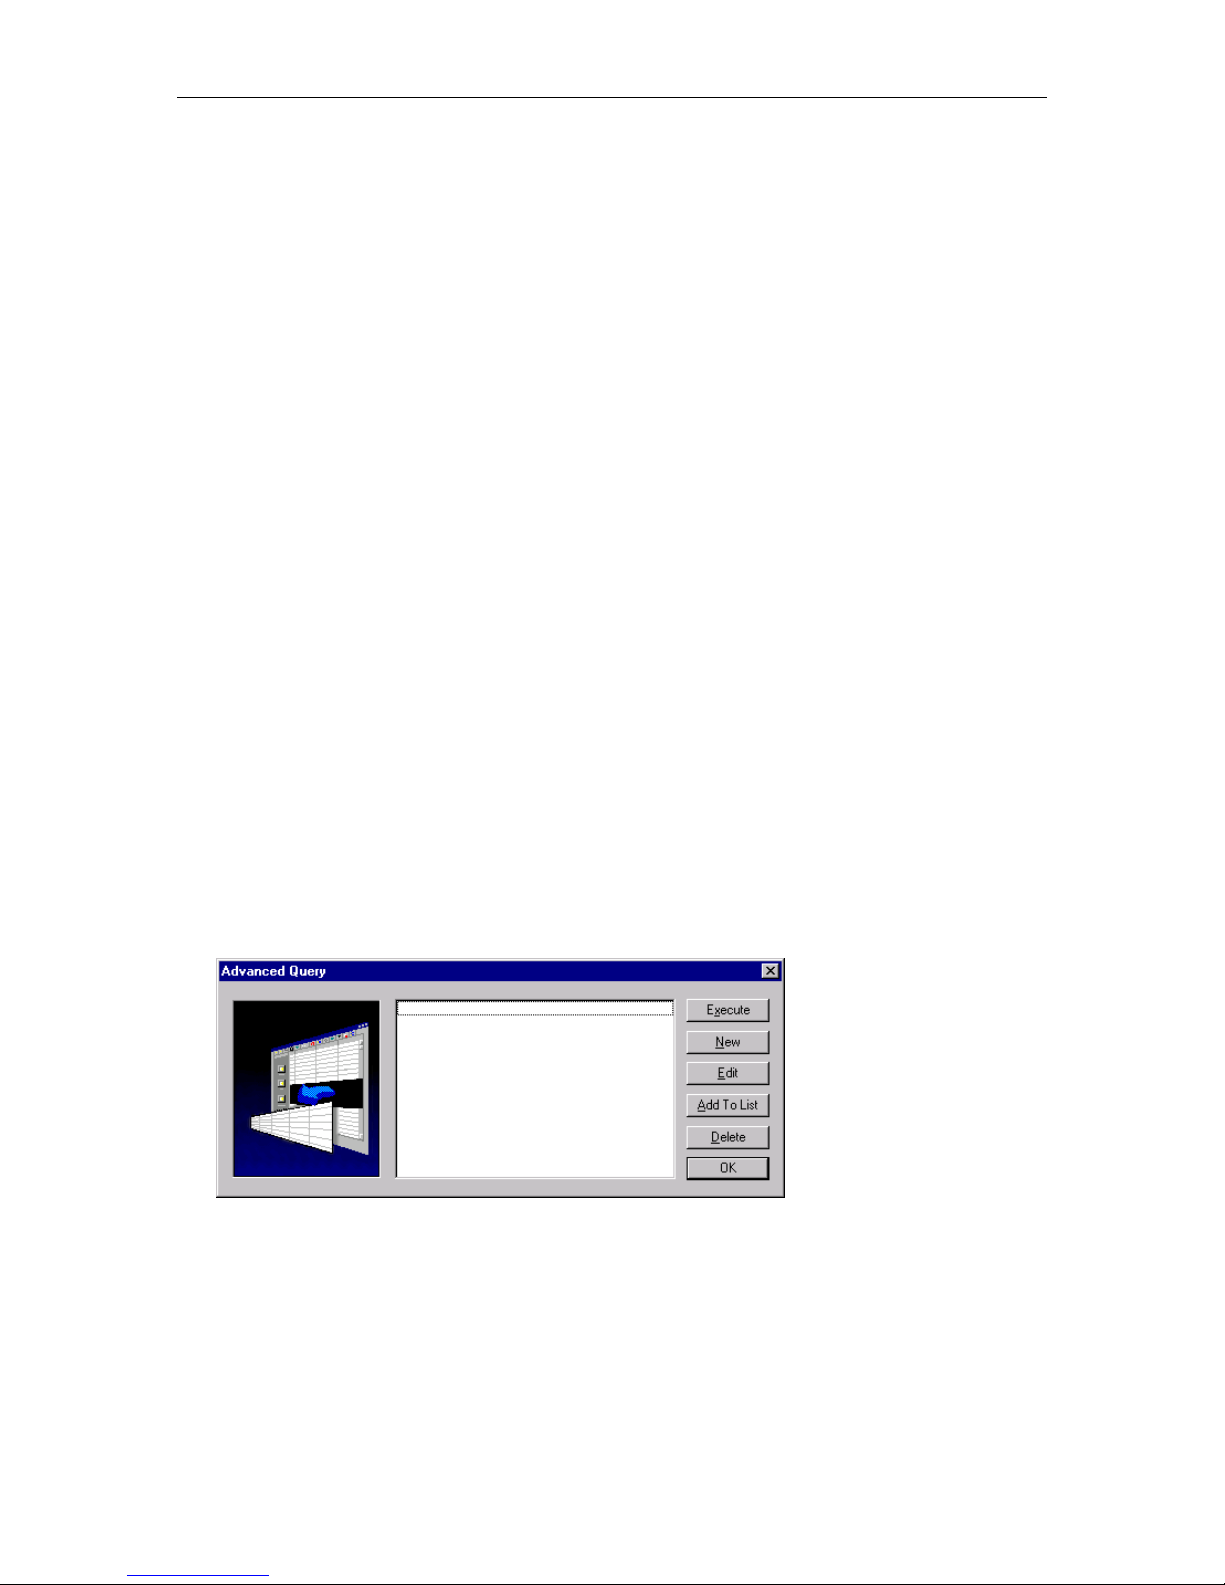
1. From the Query menu, choose Advanced.
The Advanced Query dialog box appears, displaying the advanced queries for this directory.
2. Select the query you want to modify, and then choose the Edit button.
The Advanced Query dialog box appears, displaying the operations for the selected query.
20
Chapter 3: Working with Directories
NOTE:
If you want to modify an advanced query that you created for another directory, use the Add to List
button to access this query.
3. Make your changes to the query.
4. When you are finished, choose the Save option button and then choose the OK button.
The Save As dialog box appears.
5. Enter the path and file name for this query, and then choose the Save button.
The modified query appears in the Advanced Query dialog box.
6. Choose the OK button to close the Advanced Query dialog box.
Run an Advanced Query
To run an advanced query:
1. From the Query menu, choose Advanced.
The Advanced Query dialog box appears, displaying the advanced queries for this directory.
2. Select the query you want to run, and then choose the Execute button.
The entries that match the criteria you entered are displayed. These entries are a subset of the contents
of the directory. The title bar for the MasterDirectory window displays "[QUERY]," indicating that you
are viewing a query directory.
To toggle between the Query directory and all of the records in MasterDirectory, choose the Toggle
Query button on the toolbar or choose the Display Query Results command from the Query menu.
21
MasterDirectory User's Guide
Delete an Advanced Query
To delete an advanced query:
1. From the Query menu, choose Advanced.
The Advanced Query dialog box appears, displaying the advanced queries for this directory.
2. Select the query you want to delete, and then choose the Delete button.
The selected query is deleted.
3. Choose the OK button to close the Advanced Query dialog box.
Adding an Entry to a Directory
To add an entry to a directory:
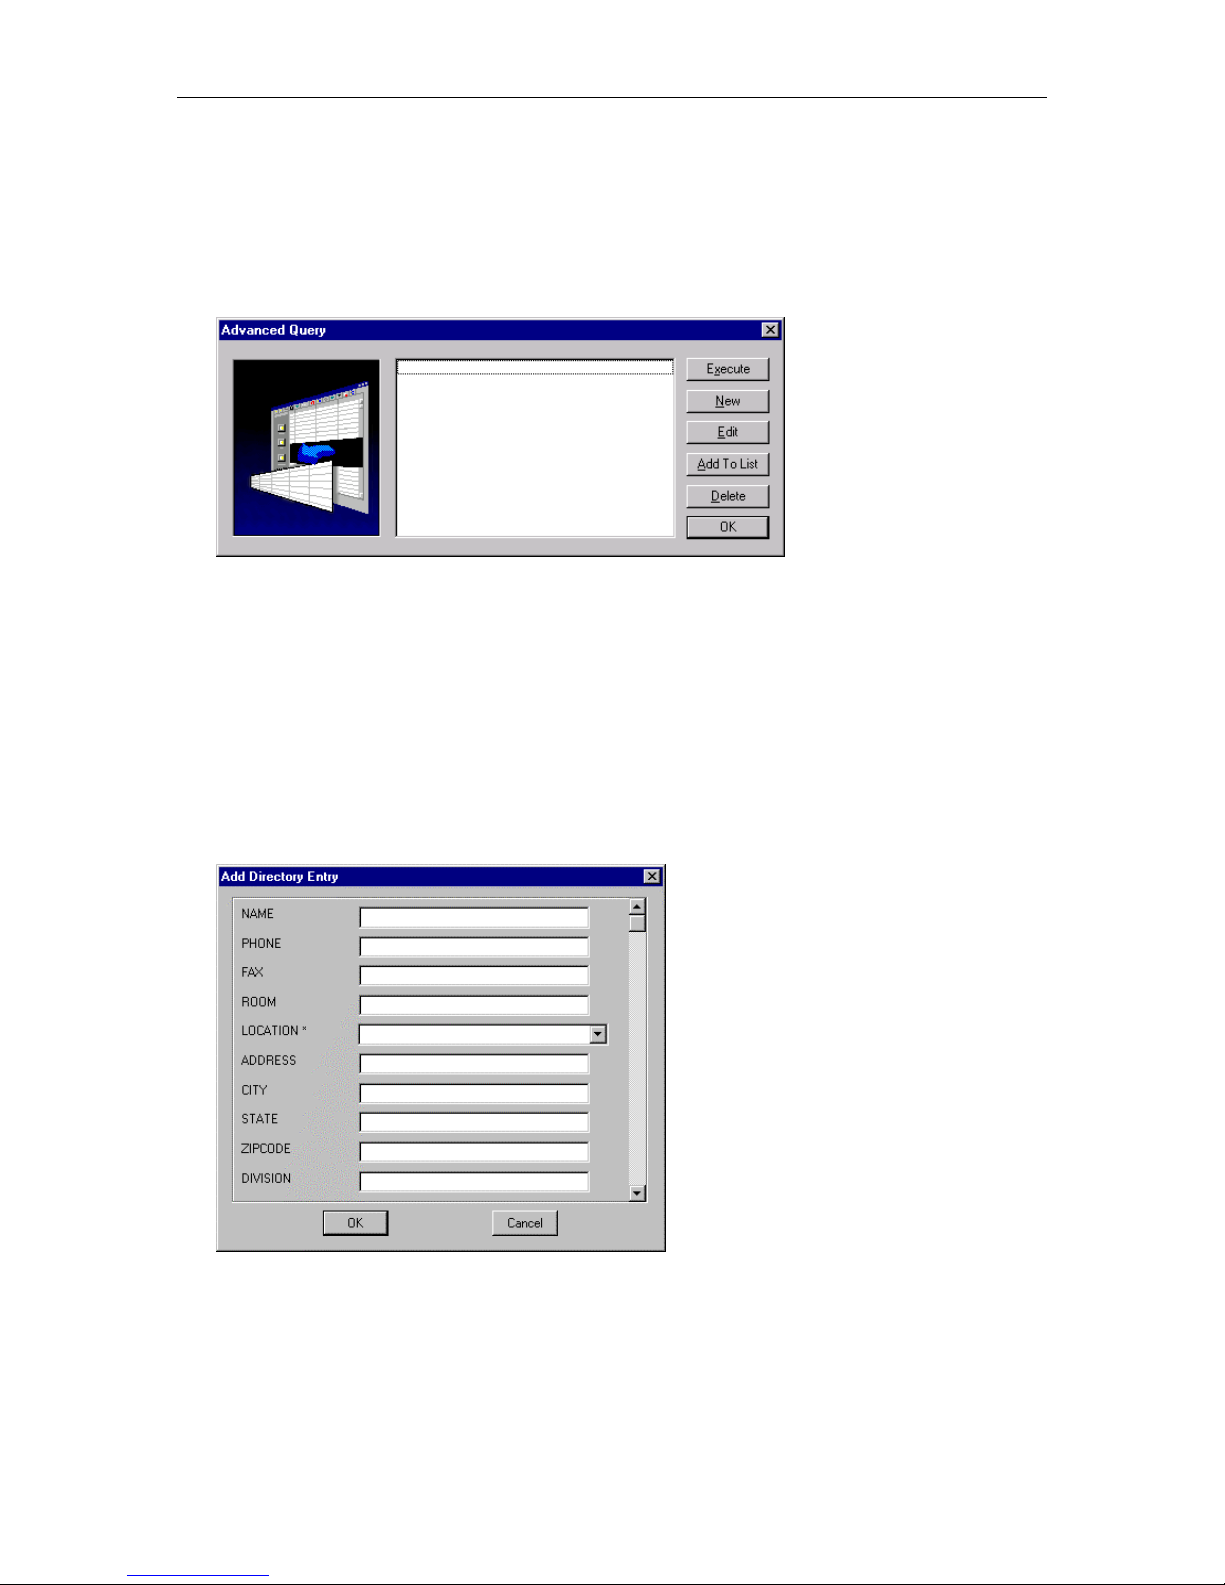
1. On the toolbar, click the Add Entry button.
The Add Directory Entry dialog box appears.
2. Enter the information for the new database entry.
3. When you are finished, choose the OK button.
The new entry is added to the directory.
22
 Loading...