

Page 1

4406D+, 4412D+. 4424D+,
and 4424LD+ Telephones
User’s Guide
Back Panels:
Programming and
Feature Codes
Displays
555-710-127
Comcode 108493370
Issue 2
January 2000
To order additional
4460D+, 4412D+, 4424D+ and 4424LD+
Telephone User’s Guides, please call 800457-1235
Front Panels:
Your Telephone
Call Handling
Using Features
Programming and
Feature Codes
Copyright 2000
Avaya Inc.
All Rights
Page 2
Your Telephone
Line Buttons
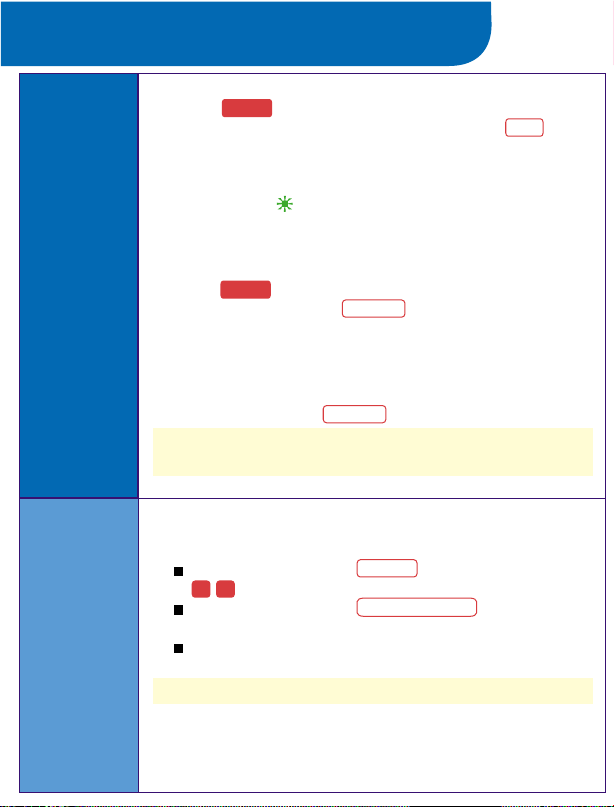
In this User Guide, fixed buttons on your telephone are
indicated by a solid red background ( ). Buttons you
label and program are represented by red letters on a white
background ( ).
Line buttons are buttons used to make or receive inside or
outside calls. Line buttons are labeled differently depending
on how your system is configured. For example, you may
have line buttons that provide you with direct access to an
outside line, Pool buttons that provide you with access to an
outside line after dialing an access code (usually a 9), Shared
buttons that allow lines to be shared among co-workers, or
Intercom buttons that provide you with access to internal dial
tone.
In addition, line buttons may be labeled with an "R" (for Ring),
"V" (for Voice), or "OO" (for Originate Only):
Ring Buttons - Calls you make arrive as ringing calls.
Voice Buttons - Calls you make arrive as voice-announced calls.
Originate Only - Line button can only be used to make (not
In this guide, represents a button that is labeled with an
outside line number and represents a button that may
be labeled with an extension number or an Intercom number.
CampOn
receive) calls.
LINE
EXT
Spkr
Page 3
Your Telephone
Using
the
Speakerphone
Line Button Lights
To use the speakerphone, press .
To mute, press . The Speakerphone / Mute LED flashes
continuously, indicating that the call has been muted. To
return to normal operation, press again. The
Speaker / Mute LED returns to steady.
Use the following guidelines to get the best performance from
your speakerphone:
Place your telephone at least one foot from any wall.
Avoid placing your telephone in a partly enclosed area,
such as underneath a low shelf over your desktop.
Place your telephone as far as possible from interfering
noises, such as your PC or a fan.
Place your telephone on a hard, flat surface.
The microphone is located on the right side of the
telephone. Allow at least one inch of clearance.
Your speakerphone performs better when the volume is set
in the middle or lower range because you can more easily
break into the conversation than when the speakerphone is set
at maximum.
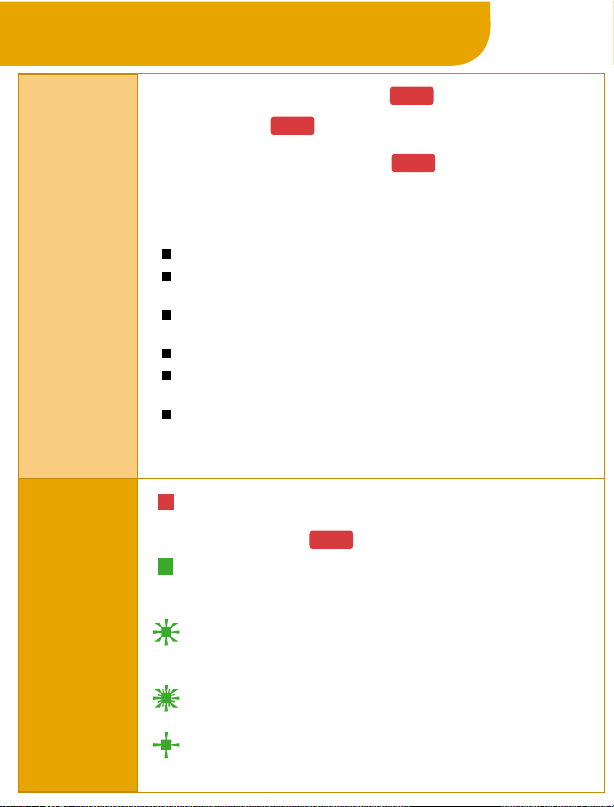
Steady red
The line you are using or will use when you lift the
handset or press .
Steady green
The line is in use, or the feature programmed onto the
line button is on.
Flashing green
An incoming call is ringing on this line button, or a call
you transferred is returning on this line button.
Fast-flashing green
You have put a call on hold on this line button.
Slow-flashing green
Someone else has put a call on hold on this line button.
Mute
Spkr
Spkr
Mute
Page 4
Your Telephone
Tones
Rings
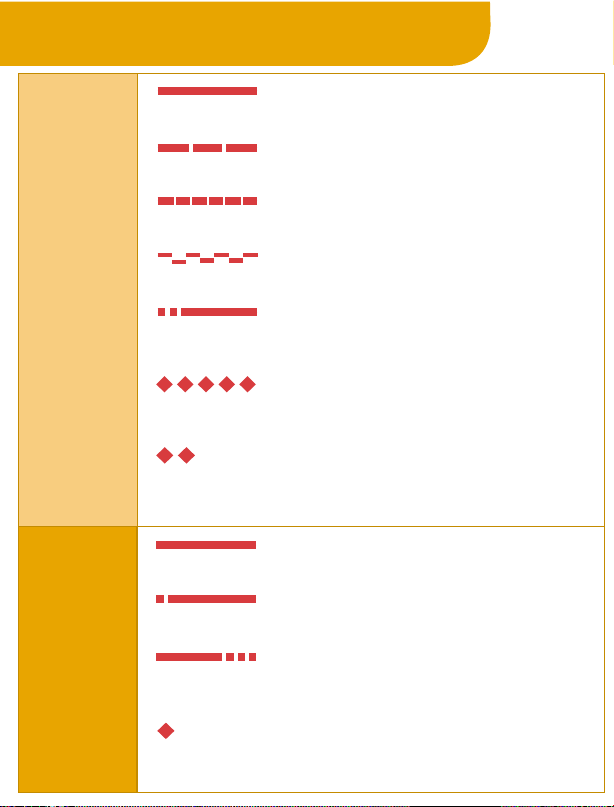
Dial tone (steady tone)
You can make a call.
Busy (slow repeating tone)
The phone you are calling is busy.
Fast busy (fast repeating tone)
No lines are available.
Error (alternating high-low tones)
You dialed or used a feature incorrectly.
Confirmation (double break in dial tone followed by steady
tone)
You used a feature correctly.
Callback (5 short beeps)
A line or pool you selected, or an extension you called, is busy
and the system is putting your call into the callback queue.
Call Waiting (1 or 2 beeps)
You have an inside call (1 beep) or an outside call (2 beeps)
waiting for you.
1 long ring
Inside call.
1 short ring and 1 long ring
Outside call.
1 long ring and 3 short rings
Outside call transferred to you or a call you transferred
returning to you.
1 beep each minute
Call on hold reminder tone.
Page 5
Call Handling
Make a Call
Answer a Call
To make an outside call:
1: Press the button.
2: Do one of the following:
If required, dial the dial-out code, usually 9 .
To make an inside call:
1: Press .
2: Do one of the following:
3: Dial the extension.
To answer an outside or inside call, do one of the following:
Press .
Lift the handset.
Use the headset.
To enable Hands-Free Answer on Intercom:
Press a programmed button, which allows you to
respond to voice-signaled (not ringing) intercom calls without
having to lift the handset or press any buttons.
Line
Spkr
Press .
Lift the handset.
Use the headset.
EXT
Spkr
Press .
Lift the handset.
Use the headset.
Spkr
9
HFAI
Page 6
Call Handling
Transfer a Call
Transfer a Call to a Voice Mailbox
To transfer a call using the dialpad:
1: Press .
2: Dial the extension or outside number.
3: Announce the call (optional).
4: Hang up.
To transfer a call using one-touch manual transfer:
1: Press .
2: Press the programmed button.
3: Announce the call (optional).
4: Hang up.
To transfer a call using one-touch auto transfers, if
available:
Press the programmed button.
Check with your System Manager to see if you have one-touch
manual transfer or one-touch auto transfer.
To transfer a call to a voice mailbox:
1: Do one of the following:
You cannot select features from the 4406D+ display.
2: Dial the extension number.
3: Hang up.
Trnsfr
The system puts the call on hold and selects an
button.
To cancel or return to the call on hold, press the button next
to the flashing Green Light
Trnsfr
Press the programmed button, and press
.
56
Press the programmed button (see
"Direct Voice Mail" under "Covering Calls Features").
Select Direct Voice Mail from the display (DicVM or Direct
VM).
.
AutoDial
AutoDial
Feature
Direct Voice Mail
EXT
Page 7
Call Handling
Place a Call on Hold
Make a Conference Call
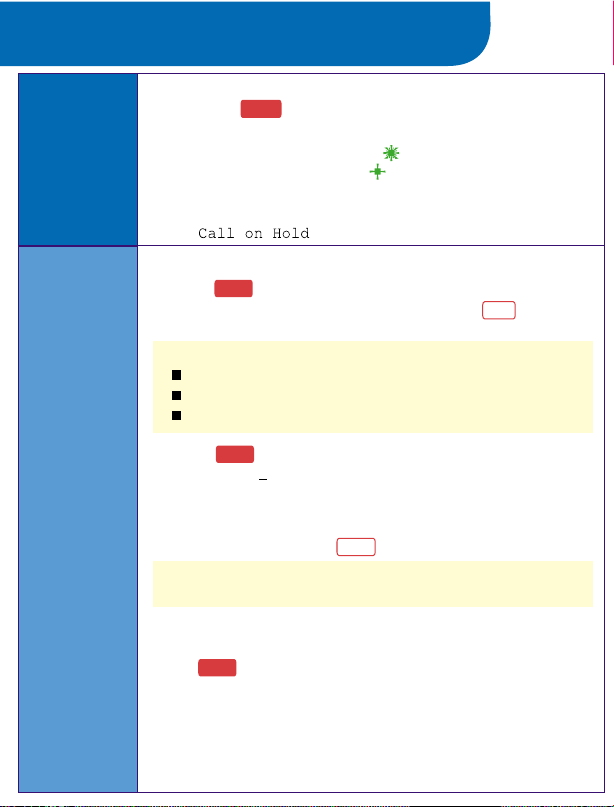
To place a call on hold:
1: Press the button.
2: To retrieve the call (or conference) on hold, press the line
button next to the fast-flashing Green Light (a call you put
on hold) or the slow-flashing Green Light (a call put on
hold at another extension).
When a call is on hold, the telephone beeps once each minute
and
While connected to the first party:
1: Press .
The system puts the call on hold and selects an button.
2: Connect with the next party.
You can connect to the next party by:
3: Press again. Calls are now conferenced.
Repeat Steps 1
(not including yours) parties.
To drop a participant:
1: Press the programmed button.
The 4400-Series telephones do not have a fixed Drop button;
you must program a Drop button onto a button.
2: Press the line button of the party that you want to drop.
To put the conference on hold:
Press .
To return to the conference:
Press any line button used to connect a participant.
Hold
appears on the display.
Conf
EXT
Dialing an outside telephone number or an extension.
Retrieving a call on hold.
Answering an incoming call.
Conf
3 to add up to a total of 2 outside and 2 inside
Drop
Hold
To end the conference:
Hang up.
Page 8

Using Features
Use a Feature
Program a Feature Button
Program a Feature onto a Button
To use a feature, do one of the following:
Feature
Press and then select the feature from the display
(not for the 4406D+ telephone).
Press to move to the next screen of features.
Press to return to the previous screen of features.
Feature
Press and then dial the feature code.
Press the line button programmed with the feature.
EXT
EXT
#
Feature
0 0#
20
0 0#
0 0
0 0#
To program a button:
1: Label a button as "Feature."
2: Press .
3: Lift the handset.
4: Enter programming mode by pressing .
5: Press the button you labeled.
6: Press .
7: Exit programming mode by pressing .
To program features, extensions, and phone numbers:
1: Label the button.
2: Press .
3: Lift the handset.
4: Press .
5: Press the button you labeled.
6: Dial the appropriate programming code (see the following
pages). Dial any additional numbers (such as extensions) if
needed.
7: To program another button, repeat steps 1, 5, and 6; or exit by
pressing .
Page 9

Using Features
Special Characters
Headsets
Features that dial numbers automatically may need special
characters to allow for correct dialing or system response.
Inserts 1 5 second pause in the dial sequence.
Hold
Consecutive pauses are allowed. P appears on the display.
Conf
Sends switchhook flash. Must be first entry in
sequence. F appears on the display.
# #
Used to signal end of dialing sequence for Auto Dial
buttons or to separate grouped digits. The ## appears
on the display.
Trnsfr
Headsets for 4400-Series telephones allow one-touch operation,
hands-free. The headset plugs into the headset jack. Two
buttons are used for headset operation:
Headset Status. Press to switch between
headset and handset operation.
To program: + lift handset + + +
+ .
Headset Hangup. Press to disconnect a call.
The Headset/Hangup button is programmed by your System
Manager.
. Halts dialing sequence to allow for system
Stop
response. (Requires manual restart.)
Headset Status
782
EXT
0 0#
Headset /Hangup
#
0 0
Headset Status
Page 10

Programming and Feature Codes
Call Handling Features
Call Waiting
Camp-On
Drop
HFAI
When Call Waiting is turned on at an extension and you are
already on a call, you hear one tone for inside calls or two tones
for outside calls when a second call arrives at that extension.
To turn on Call Waiting at your extension:
press .
To turn off Call Waiting at your extension:
press .
To pick up a Call Waiting call:
or press (or )+ .
Camp-On allows you to complete a transfer to a busy extension.
The call is put on hold until the extension can receive a call; then
it rings automatically and you hear a priority ring (1 long ring and
3 short rings).
To use with the feature code:
Feature
You must program a Drop button onto a button. Use to
drop a participant from a conference call.
The display shows 4400-Drop.
To program a Drop button:
Drop
+ + .
To use Hands-Free Answer Intercom (HFAI), you must program
an HFAI button onto a button. When you press , you can
talk to a person who calls you on an intercom call without lifting
the receiver.
To program an HFAI button:
+ + .
1 1
Feature
(or )+ .
0 0#
1 1
#
7 78
7 97
hang up and the waiting call rings,
#
8 7
To program onto a button:
5 7
+ lift handset +
++ +
EXT
+ lift handset + +
EXT
+ lift handset + +
lift the handset and
lift the handset and
EXT
Camp-On
0 0#
0 0#
0 0#
0 0#
5 7
.
Drop
0 0#
HFAI
HFAI
Page 11

Programming and Feature Codes
Call Handling Features (continued)
Paging
Group Paging
Loudspeaker Paging
Park
There are two types of paging:
Group, where you can broadcast an announcement through the
speakerphones of telephones on extensions that are placed into
paging groups.
Loudspeaker, where you can broadcast an announcement over a
loudspeaker connected to the system.
To broadcast an announcement to a paging group, lift the
handset and dial the extension of the paging group. You can
also program a button with a paging group extension by using
the Auto Dial feature (see "Auto Dial" under "Dialing Features").
Pages over a loudspeaker paging system are heard everywhere
in the building or only in a particular area, depending on whether
or not the loudspeaker system is a multizone paging system.
To broadcast an announcement over a loudspeaker, press the
button labeled for "Loudspeaker Paging." If you do not have this
button on your telephone, see your System Manager.
Park places a call on hold at your extension so that it can be
picked up from any extension in the system. You pick up a
parked call by using the Pickup feature.
To use without programming
a Park button:
1. While on the call, press
Trnsfr
.
2. Dial your own extension.
You hear a busy tone.
3. Press .
Trnsfr
To program onto a button:
EXT
+ lift handset +
Park
+ + +
0 0#
.
8 6
0 0#
Page 12

Programming and Feature Codes
Call Handling Features (continued)
Pickup
Individual Pickup
General
Extension
Line
Group Pickup
Pickup allows you to answer calls that are ringing, parked, or on
hold anywhere in the system. There are two types of Pickup:
Individual and Group. Use Individual Pickup to pick up a call for
one specific extension. Use Group Pickup to answer calls ringing
at extensions in your Pickup group.
There are three types of Individual Pickup: General, Extension,
and Line. Use Extension to pick up a parked call.
To use with a programmed
General Pickup button:
+ ext. number (or
Pickup
line number).
To use with the feature code:
Feature
(or )+ + ext.
9
#
number.
To use with the feature code:
Feature
(or )+ + line
9
#
number.
To use with the feature code:
Feature
(or )+ .
#
8 8
To program onto a button:
EXT
+ lift handset +
Pickup
+++
0 0#
9
.
0 0#
To program onto a button:
EXT
+ lift handset +
Pickup
+ + + ext.
9
number + .
0 0#
0 0#
To program onto a button:
EXT
+ lift handset +
Pickup
+ + + line
number + .
0 0#
9
0 0#
To program onto a button:
EXT
+ lift handset +
Pickup
++ +
0 0#
.
0 0#
8 8
Page 13

Programming and Feature Codes
Covering Calls Features
Coverage
Coverage Off
Coverage Inside Off/On
Coverage VMS Off
Coverage allows a call ringing at one extension (a sender) to
ring at another extension (a receiver) at the same time, and to
be answered at either extension.
There are two types of Coverage: Individual and Group.
Individual Coverage can be Primary or Secondary Coverage.
With Primary and Secondary Coverage, a call not answered at a
sender’s extension rings first at the Primary Coverage extension
and later, after a ring delay interval, at the Secondary Coverage
extension. See your System Manager for details.
Coverage Off turns off all coverage, both inside and outside
calls.
To program a Coverage Off button:
Coverage Inside Off/On prevents or allows coverage of inside
calls. If you activate Coverage Inside Off, you can cover only
outside calls. If you activate Coverage Inside On, you can cover
both outside and inside calls.
To activate Coverage Inside Off:
+ + + .
To activate Coverage Inside On:
+ + + .
Coverage VMS Off prevents outside calls from being sent to the
voice messaging system.
This feature should be programmed on a button with LEDs.
To program a Coverage VMS OFF button:
EXT
+ lift handset + + +
+++.
0 0#
Coverage Off
EXT
EXT
4 8
4 8
0 0#
+ .
4 6
0 0#
EXT
+ lift handset +
4 9
+ lift handset +
EXT
0 0#
+ lift handset +
EXT
0 0#
Coverage VMS Off
0 0#
0 0#
0 0#
Page 14

Programming and Feature Codes
Covering Calls Features (continued)
Direct Voice Mail
Follow Me
Forward
Direct Voice Mail allows you to place or transfer a call directly to
another person
telephone.
To use with the feature code:
Feature
extension number (or
Auto Dial
Use Follow Me to have calls arriving at your extension sent to
another extension where you are working. Activate Follow Me
from the extension where you want to receive calls.
To activate Follow me:
extension’s number.
To cancel Follow Me:
under Forward.
Use Forward to send calls arriving at your extension to another
number. This number can be an inside extension, an extension
on another system in a private network, or an outside number.
Turn on forward from your extension.
To send calls to an extension:
extension number.
To send calls to an outside number:
code (usually 9)+ the outside number + .
Check with your System Manager to see if you are allowed to
send calls to outside numbers.
s voice mail without ringing that person s
To program onto a button:
(or )+ +
#
5 6
).
Feature
see "Cancelling Follow Me and Forward"
EXT
+ lift handset +
DVM
+ + +
.
0 0#
3 4
#
(or )+ + the sending
Feature
(or )+ + the
Feature
(or )+ +
# #
0 0#
5 6
3 3
#
3 3
#
Page 15

Programming and Feature Codes
Covering Calls Features (continued)
Canceling Follow Me and Forward
You can cancel Follow Me and Forward from the sending or
receiving telephone.
If you forward your calls to an outside number, you can cancel
from your extension or from a remote location by using Remote
Access. Check with your System Manager.
To cancel from the sending telephone:
To cancel from the receiving telephone:
To cancel Follow Me or Forward calls from one extension:
(or ) + +
Feature
To cancel Follow Me or Forward calls from all extensions:
(or )+ .
Feature
Dialing Features
Account Code Entry
Authorization Code
Use Account Code Entry to enter account codes for outside
calls, both incoming and outgoing. These codes are used for
billing, cost-accounting, or project tracking.
To use with the feature code:
Feature
code + .
The Authorization Code feature allows you to pick up someone
else
call with the restrictions that apply to your own telephone.
To use with the feature code:
Feature
code + .
(or ) +
+ your extension.
33
#
#
#
(or ) + +
#
s telephone, enter your authorization code, and complete a
(or ) + +
#
#
3 4
3 4
8 2
8 0
Feature
sending extension number.
To program onto a button:
+ lift handset +
EXT
+ + +
ACE
.
0 0#
To program onto a button:
EXT
+ lift handset +
Auth Code
+ + +
0 0#
.
#
0 0#
8 2
0 0#
8 0
Page 16

Programming and Feature Codes
Dialing Features (continued)
Auto Dial
Saved Number Dial
Use Auto Dial buttons for one-touch dialing of frequently called
telephone numbers. You can program two types of Auto Dial
buttons: Inside and Outside. On the 4406D+ telephone, use
Personal Speed Dial instead of Auto Dial buttons.
To program an Inside Auto Dial button:
To program an Outside Auto Dial button:
Saved Number Dial allows you to save a dialed number and to
call it again without manually redialing.
To program a Saved Number Dial button:
+ + + + .
+ + + the extension number.
0 0#
0 0#
AutoDial
AutoDial
+ + + the number.
0 0#
Save #
2 2
2 1
8 5
Directory and Speed Dialing Features
Directory
Extension and System Directory
The Directory feature is a built-in, interactive telephone book that
stores listings of names and telephone or extension numbers. If
you have a 4412D+, 4424D+, or 4424LD+ telephone, you can
dial numbers by selecting listings from the display. There are
three Directories on the system: Extension, Personal, and
System. Your System Manager programs the Extension and
System Directories.
Use the Extension Directory and System Directory with 4412D+,
4424D+, and 4424LD+ telephones.
The Extension Directory and System Directory are created by the
System Manager. Use the Extension Directory to dial inside
numbers. The System Directory consists of three-digit System
Speed Dial codes for commonly called numbers of outside contacts
(such as clients and suppliers).
To use: Press + Directory (Dir) + Ext Dir (or System
Dir) + Select range, then press the button next to the listing to dial.
Menu
EXT
+ lift handset +
EXT
+ lift handset +
EXT
+ lift handset
0 0#
Page 17

Programming and Feature Codes
Directory and Speed Dialing Features (continued)
Personal Directory
If you have a 4424LD+ telephone, you can create your own
personalized list of names.
To add listings:
+ Directory + Personal Dir + Enter New + Type
Menu
up to an 11-character name (Select A-F from the display and
letters G-Z are shown under the faceplate of your telephone) +
Enter + Enter the number using the dialpad + Enter +
Respond to the number display prompt + Enter + .
Exit
To change personal directory listings:
Menu
+ Directory + Personal Dir + Edit Dir + Choose
item to be changed (Replace Name changes name, Replace
Num changes number, Replace Tag displays or conceals
number on the display) + Select entry to be changed + Enter
new information+ Enter + .
Exit
To delete listings:
Menu
+ Directory + Personal Dir + Put on Home +
Select range of + Select entry to be deleted + Select Delete to
delete entry (Cancel exits without change) + .
Exit
To assign listings to your Home screen:
Menu
+ Directory + Personal Dir + Put on Home +
Select range of letters + Select entry to display in the directory
+ Select Home screen location + Select Continue for another
entry + .
Exit
To dial listing on Home screen:
Directory + Press the button next to the listing to dial.
To dial listing not on Home screen:
From the Home screen: + Next Page twice + Select
Menu
letter range + Press appropriate line button + Press button next
to the listing to dial.
Page 18

Programming and Feature Codes
Directory and Speed Dialing Features (continued)
Personal Speed Dial
Use Personal Speed Dial on a 4406D+ telephone to program up
to 24 numbers that can be dialed by using a two-digit code.
To prevent the loss of programming on your buttons, do not
use Personal Speed Dial on a 4412D+, 4424D+, or 4424LD+
telephone.
To program your Personal Speed Dial numbers, make a list of
your telephone numbers/extensions numbered 1 to 24, then:
EXT
+ lift handset + + + list number (01
2 1
+ the number + .
To use Personal Speed Dial:
1: Press .
2: Press .
3: Dial the two-digit code (01 24).
EXT
Feature
0 0#
#
0 0#
24) +
Page 19

Programming and Feature Codes
Language Features
Language Choice
You can change the language on your display screen to English,
Canadian French, or Latin American Spanish.
To change the language for your display:
1: Press the programmed button.
2: Dial one of the following:
For English: .
For Canadian French: .
For Latin American Spanish: .
Privacy Functions
Do Not Disturb
Privacy
Do Not Disturb prevents calls from ringing and prevents paging
over a speakerphone. You must program a Do Not Disturb
button to use this feature.
This feature should be programmed on a button with LEDs.
To program a Do Not Disturb button:
EXT
+ lift handset + + + +
0 0#
Privacy prevents other people from joining calls on shared line
buttons. Privacy also prevents Barge-In from being used to join a
call.
To turn Privacy on:
To turn Privacy off:
This feature should be programmed on a button with LEDs.
To program a Privacy button:
EXT
+ lift handset + + + +
0 0#
Feature
97 0
97 1
97 2
0 0#
.
Feature
Feature
.
DND
(or ) + .
#
(or ) + .
#
Privacy
0 0#
4 7
3 1
3 1
3 1
Page 20

Programming and Feature Codes
Programming Functions
Inspect
Inspect allows you to see information about an incoming call that
is ringing, alerting, or on hold or to see what is programmed on a
button. To use the Inspect feature, you press the programmed
Inspect
button and then the line button for the incoming call.
To program an Inspect button:
0 0#
++ + .
Ringing Options
Personalized Ring
By using the Personalized Ringing options, you can select one
of eight different ringing patterns for your telephone, making it
easier to distinguish its ring from those of other telephones.
To select a ring pattern for your telephone:
0 0#
+ + + ring (
The last ring you hear is the ring you selected.
Scheduling Features
Posted Message
You can post a message to provide information to co-workers
with display telephones
are when not answering the telephone or why you do not want to
be disturbed. When you call a co-worker who has a message
posted, the posted message is shown on your display (even if
the call is answered).
Up to 20 different messages can be posted. 11
custom settings (see your System Manager). The factory-set
messages are:
01 DO NOT DISTURB 06 IN A CONFERENCE
02 OUT TO LUNCH 07 WITH A CLIENT
03 AT HOME 08 WITH A CUSTOMER
04 OUT SICK 09 AWAY FROM DESK
05 IN A MEETING 10 OUT ALL DAY
Inspect
EXT
EXT
+ lift handset +
7 87
3 2
for example, to tell callers where you
1 8
0 0#
EXT
+ lift handset +
) + .
20 are for
0 0#
Page 21

Programming and Feature Codes
Scheduling Features
Posted
Message
(continued)
Reminders
To use the Posted Message feature:
For 4412D+, 4424D+, or 4424LD+ telephones:
To post a message:
the message from the display.
To cancel a posted message:
Cancel + .
For 4406D+ telephones:
To use posted messages, you must program a Posted
Message button. Posted Message should be programmed on
a button with LEDs.
To program a Posted Message button with LEDs (for 4406D+
telephones only):
Posted Message
To post a message:
message you want (01
To cancel a posted message:
With Reminder service, you can arrange for the system to make
reminder calls at preset times.
To set a reminder: (or ) +
A.M. or for P.M.
Enter the time in four digits, for example, 0130.
To cancel a reminder: (or ) + .
You hear a priority ring (1 long ring and 3 short rings) to
indicate a Reminder Call.
Exit
7
Menu
+ Posted Msg (Post) + Select
Menu
+ Posted Msg (Post) +
EXT
+ lift handset + +
7 15
+ + .
+ dial the code for the
Posted Message
20).
Posted Message
+ dial
Feature
Feature
#
#
0 0#
0 0#
8 1
+ time + for
8 1
0 0
2
Page 22

Displays
Display Appearances
Feature names appear differently on the multiline 4400-Series
telephones, depending on whether the display is a 2-line display
(4406D+, 4412D+, and 4424D+ telephones) or a 7-line display
(4424LD+ telephone).
Feature 2-Line Display 7-Line Display
Account Code Entry
Authorization Code
Auto Dial
Inside
Outside
Call Waiting
Camp-On
Conference
Coverage
Direct Voice Mail
Directories
Extension Directory
Personal Directory Not Applicable
System Directory
Do Not Disturb
Drop
Feature Button
Follow Me
Forward
HFAI Button
Inspect Button
Paging
Group Paging
Loudspeaker Paging
Park
Personalized Ringing
Pickup
Posted Message
Privacy
Reminder
Saved Number Dial
Transfer
Page 23

Displays
4406D+
4412D+ and 4424D+
4406D+ Display
The 4406D+ telephone’s 2-line by 16-character display is
used primarily for visual feedback. You cannot select features
by using the 4406D+ display, but you can enter a feature
code after pressing or .
Feature
#
4412D+ and 4424D+ Displays
2-line by 24-character.
Menu
Takes you to MENU MODE screen
(see figure).
button Takes you to next screen.
button Takes you to previous screen.
Exit
Takes you to Home screen showing date and
time.
Four softkeys Use to select items from display.
Menu
Exit
Page 24

Displays
4424LD+
4424LD+ Display
7-line by 24-character.
Menu
Takes you to MENU MODE screen (see figure
below).
button Takes you to next screen.
button Takes you to previous screen.
Takes you to Home screen showing date and
Exit
time.
Ten softkeys Use to select items from display.
Exit
Menu
When you press , a screen like the following
appears with features to be selected.
Exit
Menu
Feature
 Loading...