

Page 1
FREEZER/CONGELADOR
INSTRUCTION MANUAL/MANUAL DE INSTRUCCIONES
Model Number/Número de Modelo:
CF211G / CF268G
BEFORE USE, PLEASE READ AND FOLLOW ALL SAFETY RULES AND OPERATING
INSTRUCTIONS.
La sección en español empieza en la página 16.
Avanti has a policy of continuous improvement on its products and reserves the right to change materials and
specifications without notice.
Avanti Products, A Division of The Mackle Co., Inc.
P.O. Box 520604 - Miami, Florida 33152
www.avantiproducts.com
1
Page 2

Chest Freezer Safety
3
Important Safeguides
4
Help Us Help You
5
Parts and Features
6
Important Safety Instructions
7
Installation Instructions
7
Before Using Your Appliance
7
Installation of Your Appliance
7
Electrical Connection
8
Operating Your Appliance
9
Temperature Control
9
Temperature Control Panel Cover
9
Defrosting Your Appliance
10
The Freezer Compartment
10
Door Lock
10
Care and Maintenance
11
Cleaning Your Appliance
11
Maintenance of Your Appliance
11
Energy Saving Tips
11
Troubleshooting Guide
12 – 13
Service for Your Appliance
14
Wiring Diagram
14
Your Avanti Products Warrant y
15
Instrucciones en Español
16-22
Registration Information and Registration Card
23
TABLE OF CONTENTS
2
Page 3
CHEST FREEZER SAFETY
Your safety and the safety of others ar e very important.
We have provided many important safety messages in this manual and on your appliance. Always
read and obey all safety messages.
This is the Safety Alert Symbol. This symbol alerts you to potential hazards that
can kill or injure you and others. All safety messages will follow the Safety
Alert Symbol and either the wards” DANGER”, “WARNING” or “CAUTION”.
Danger means that failure to heed this safety
statement may result in severe personal
injury or death.
Warning means that failure to heed this
safety statement may result in extensive
product damage, serious personal injury, or
death.
Caution means that failure to heed this
safety statement may result in minor or
moderate personal inj ury, or property or
equipment damage.
All safety messages will alert you to what the potential hazard is, tell you how to reduce the chance of
injury, and let you know what can happen if the instruc tions ar e not foll o wed.
3
Page 4
IMPORTANT SAFEGUARDS
Before the chest freezer is used, it must be properly positioned and installed as
described in this manual, so read the manual carefully. To reduce the risk of fire,
electrical shock or injury when using the chest freezer, follow basic precautions,
including the following:
• Plug into a grounded 3-prong outlet, do not remove grounding pr o ng, do not use an adapter, and do
not use an extension cord
• Replace all panels before operating
• It is recommended that a separate circuit, serving only your chest freezer, be provided. Use receptacles
that cannot be turned off by a switch or pull chain
• Never clean chest freezer parts with flammable fluids. These fumes can create a fire hazard or
explosion. And do not store or use gasoline or other flammable vapors and liquids in the vicinity of this
or any other appliance. The fumes can create a fire hazard or explosion.
• Before proceeding with cleaning and maintenance operations, make sure the power line of the unit is
disconnected.
• Do not connect or disconnect the electric plug when your hands are wet
• Unplug the chest freezer or disconnect the power before cleaning or servicing. Failure to do so can
result in electrical shock or death.
• Do not attempt to repair or replace any part of your chest freezer unless it is specifically recommended
in this material. All other servicing should be referred to a qualified technician.
• Use two or more people to move and install the chest freezer. Failure to do so can result in back or
other injury.
• To ensure proper ventilation for your chest freezer, the unit must be completely unobstructed. Choose a
well-ventilated area with temperatures above 55
0
F (130C) and below 900F (32 0C). This unit must be
installed in an area protected from the elements, such as wind, rain, water spray or sunlight.
• The chest freezer should not be located next to ovens, grills or other sources of high heat.
• The chest freezer must be installed with all electrical, water and drain connections in accordance with
state and local codes. A standard electrical supply (115 V AC only, 60 Hz), properly grounded in
accordance with the National Electrical Code and local codes and ordinances is required.
• Do not kink or pinch the power supply cord of the chest freezer.
• The fuse (or circuit breaker) size should be 15 amperes.
• It is important for the chest freezer to be leveled in order to work properly. You may need to make
several adjustments to level it.
• All installation must be in accordance with local plumbing code requirements.
• Make certain that the pipes are not pinched or kinked or damaged during installation.
• Check for leaks after connection.
• Never allow children to operate, play with or crawl inside the chest freezer
• Do not use solvent-based cleaning agents or abrasives on the interior. These cleaners may damage or
discolor the interior.
• Do not use this apparatus for other than its intended purpose.
4
Page 5
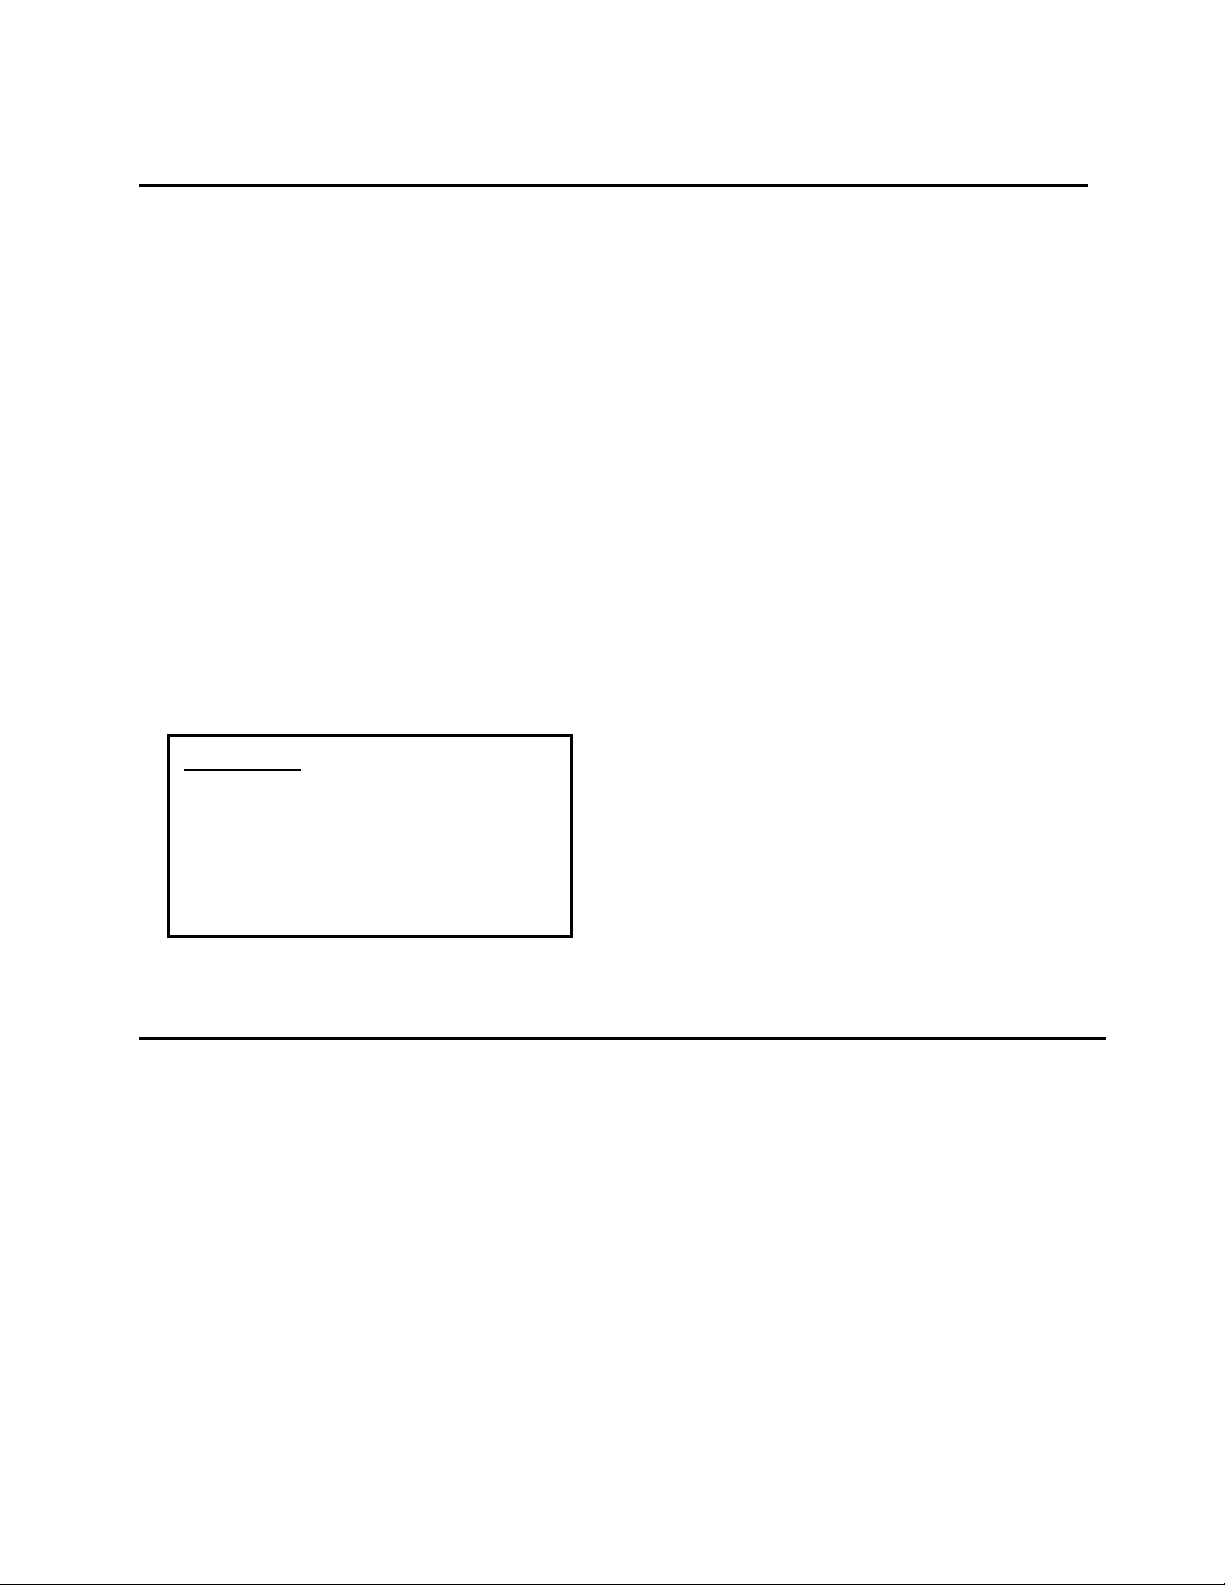
CAUTION:
Read this guide carefully.
It is intended to help you operate and maintain
your new freezer properly.
Keep it handy to answer your questions.
If you don't understand something or you need
more help, please call:
Avanti Customer Service
800-220-5570
Keep proof of original purchase date (such as
your sales slip) with this guide to establish the
warranty period.
THIS APPLIANCE IS NOT
DESIGNED FOR THE STORAGE
OF MEDICINE OR OTHER
MEDICAL PRODUCTS.
IF YOU NEED SERVICE
We're proud of our ser vice and want you to be
pleased. If for some reason you are not happy
with the service you receive, here are some
steps to follow for further assistance.
FIRST, contact the people who serviced your
appliance. Explain wh y you are not pleased. In
most cases, this will solve the problem.
HELP US HELP YOU...
Write down the model and serial numbers.
You'll find them on a p late located on the re ar
outside wall of the freezer.
Please write these numbers here:
_____________________________________
Date of Purchase
_____________________________________
Model Number
_____________________________________
Serial Number
Use these numbers in any correspondence or
service calls concerning your freezer.
If you received a damaged freezer, im mediatel y
contact the dealer (or builder) that sold you the
freezer.
Save time and money. Before you call for
service, check the Troubleshooting Guide. It
lists causes of minor operating problems that
you can correct yourself.
NEXT, if you are still not pleased, write all the
details, including your telephone number, and
send it to:
Customer Service
Avanti Products
10880 NW 30 Street
Miami, FL 33172 USA
5
Page 6
9
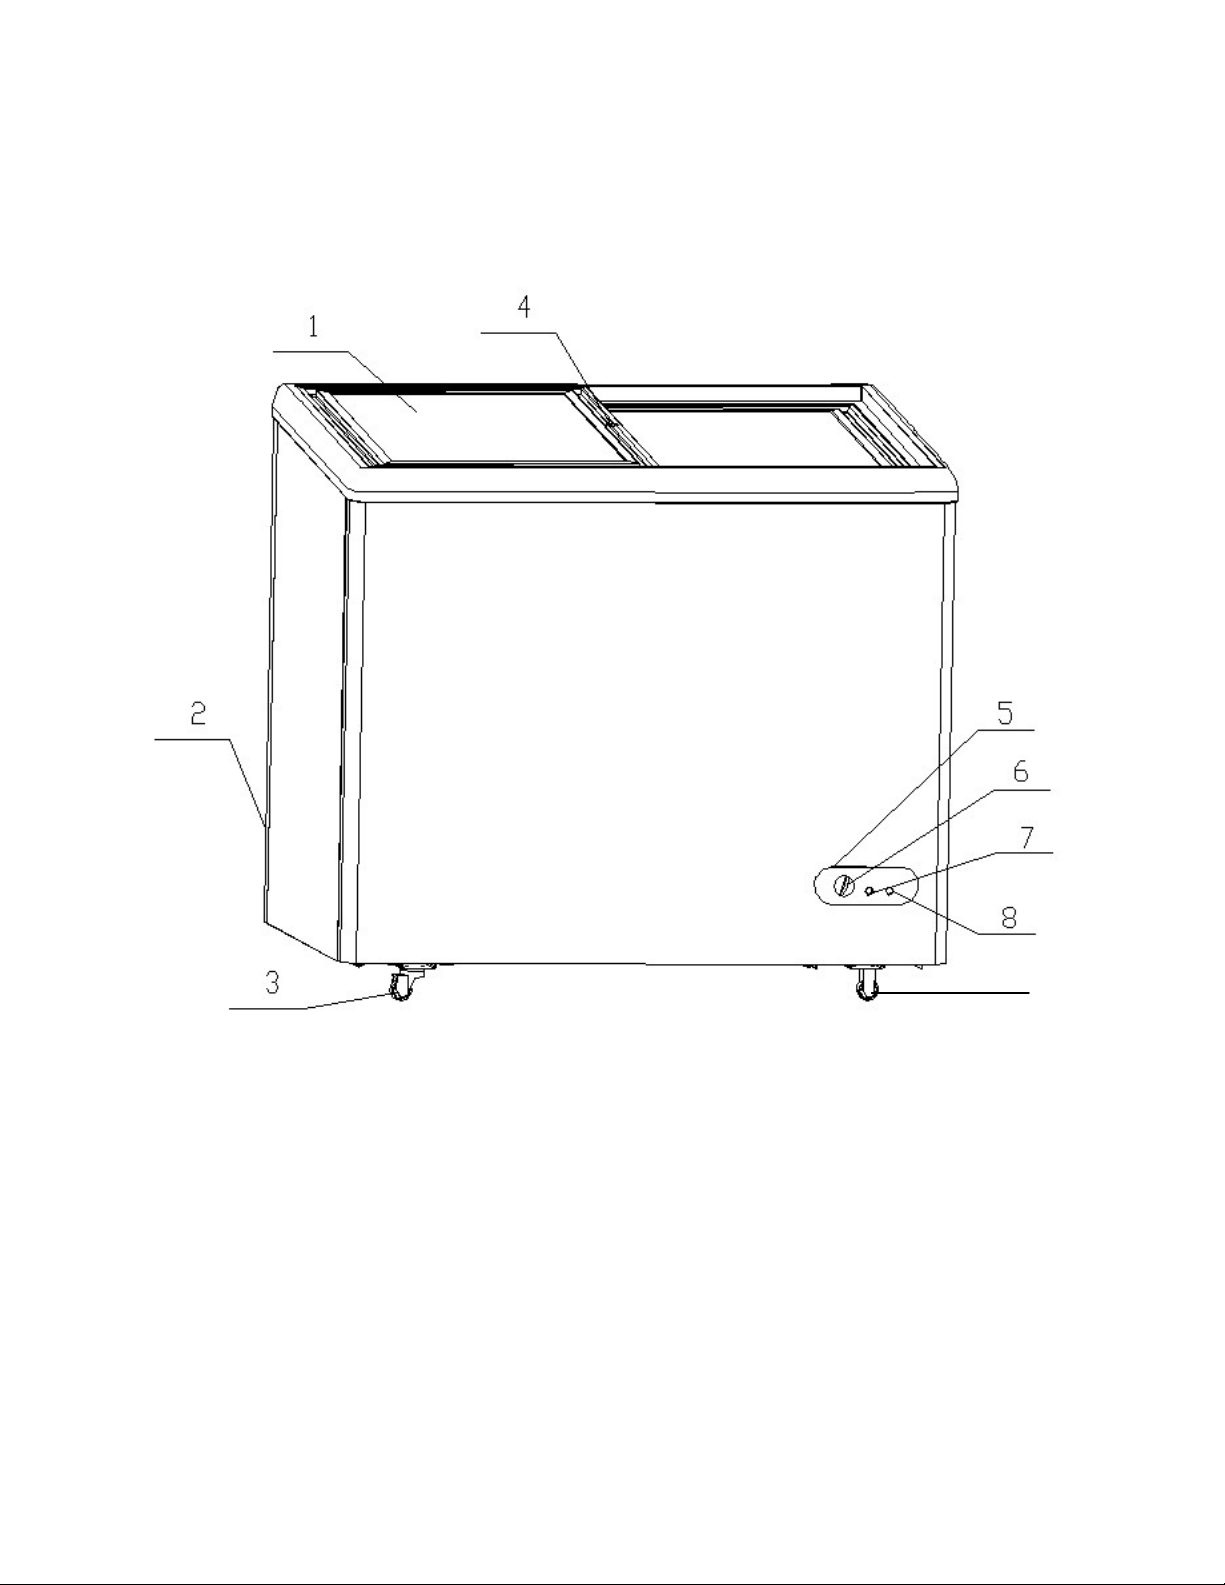
PARTS AND FEATURES
1. SLIDING GLASS LIDS (TOTAL 2)
2. DRAIN PLUG(not shown)
3. CASTERS (TOTAL 2)
4. LOCK ASSEMBLY
5. CONTROL PANEL
6. THERMOSTAT CONTROL KNOB
7. POWER INDICATOR LIGHT
8. COMPRESSOR ON INDICATOR LIGHT
9. ROLLERS (TOTAL 2)
6
Page 7
To reduce the risk of fire, electrical shock, or
basic precautions:
• Read all instructions before using the freezer.
Do not store or use gasoline or any other flammable vapors and liquids in the vicinity of
-Save these instructions-
CF211G
CF268G
3
Storage Baskets
4
Storage Baskets
2
Keys
2
Keys
1
Instruction Manual
1
Instruction Manual
1
Plastic Scraper
1
Plastic Scraper
IMPORTANT SAFETY INSTRUCTIONS
WARNING
• DANGER or W ARNING: Risk of child entrapment.
Child entrapment and suffocation are not problems of the past. Junked or
abandoned appliances are still dangerous, even if they will “just sit in the garage a
few days.”
• Before you throw away your old freezer: Take off the doors. Leave the shelves in
place so that children may not easily climb inside.
• Never allow children to operate, play with, or crawl inside the appliance.
• Never clean appliance parts with flammable fluids. The fumes can create a fire hazard
or explosion.
•
this or any other appliance. The fumes can create a fire hazard or explosion.
injury when using your freezer, follow these
INSTALLATION INSTRUCTIONS
Before Using Your Freezer
· Remove the exterior and interior packing.
· Check to be sure you have all of the following parts:
·
Before connecting the freezer to the power source, let it stand upright for approximately 2 hours.
This will reduce the possibility of a malfunction in the cooling system from handling during
transportation.
· Clean the interior surface with lukewarm water using a soft cloth.
Installation of Your Freezer
· This appliance is designed to be free standing only, and should not be recessed or built-in.
·
Place your applianc e on a floor that is strong enough to sup port the appliance when it is full y
loaded.
· Allow 5 inches of space bet ween the back and s ides of the ap pliance , which allo ws the pr oper air
circulation to cool the compressor and condenser.
· Locate the freezer a way from direct sunlight and sources of heat (stove, heater, radiator, etc.).
Direct sunlight ma y affect the acrylic coat ing and heat sources ma y increase electric al consumption.
Extreme cold ambient temperatures may also cause the freezer not to perform properly.
· Avoid locating the ap pliance in mois t areas. Too much m oisture in the air will c ause frost to form
quickly on the evaporator requiring more frequent defrosting of the freezer.
· Plug the appliance into an exclusive properly installed grounded wall outlet. Do not under any
circumstances cut or remove the third (ground) prong from the power cord. Any questions
concerning power and or groundin g sho uld b e direc ted to ward a certif ied e lectrici an or an authori zed
Avanti Products service center.
7
Page 8

· After plugging the appli ance into a wall outlet, allow the unit to cool down f or 2~3 hours before
placing food in the freezer compartment.
8
Page 9

Warning
Electrical Connection
Improper use of the grounded plug can result in the risk of electrical shock. If the power
cord is damaged, have it replaced by an authorized Avanti Products service center.
This appliance should be properly grounded for your safety. The power cord of this appliance is equipped
with a three-prong plu g which mates with st andard three prong wall outlets to m inimize the possibilit y of
electrical shock.
Do not under any circumstances cut or remove the third ground prong from the power cord supplied.
This freezer requires a standard 115Volts~/60Hz electrical outlet with three-prong ground.
The cord should be secur ed behind the freezer an d not left exposed or dangling to prevent acc idental
injury.
Never unplug the f reezer by pul ling the po wer cord. Alwa ys grip the plu g firml y and pull straig ht out fr om
the receptacle.
Do not use an extens ion cor d with this freezer. If the power cor d is too s hort, have a qualified electrician
or service technician install an outlet near the freezer.
The “POWER” light indicates that the freezer is properly connected to the electrical power. The light
indicates power supply, and will glow even if the temperature control dial is turned to “OFF”, or the
compressor has failed to work and the compartment is not being cooled.
Extension Cord
Because of potential safety hazards under certain conditions, it is strongly recommended that you do not
use an extension cord with this unit. However, if you must use an extension cord it is absolutely
necessary that it be a UL/CUL-Listed, 3-wire grounding type appliance extension cord having a grounding
type plug and outlet and that the electrical rating of the cord be 115 volts and at least 10 amperes.
SURGE PROTECTOR
Most electrical appliances use a series of electric control boards to operate. These boards are very
susceptible to power surges and could be damaged or destroyed.
If the appliance is going to be used in an area or if your city / country is prone to power surges / outages;
it is suggested that you use a power surge protector for all electrical devices / appliances you use. The
surge protector that you select must have a surge block high enough to protect the appliance it is
connected to. If you have any questions regarding the type and size of surge protector needed contact a
licensed electrician in your area.
Damages due to power surges are not considered a manufacturer covered defect and will void your
product warranty.
9
Page 10

OPERATING YOUR FREEZER
Temperature Control
• Your freezer has one control for regulating the temperature. The temperature control is located on
the lower right hand corner.
• The first time you turn th e unit on, turn the tem perature control knob in a clock wise direction to
the maximum setting "7" and run for at least 2 hours before putting frozen foods inside.
This will ensure the cabinet is thoroughly chilled before food is put in.
• The range of the tem perature control is from position "1" the warm est to "7" the coldest. Adjust
the temperature control to the setting that best suits your needs. The setting of “4” should be
correct for home or office freezer use.
• To turn the freezer off, turn the temperature control to "OFF".
NOTE:
• Turning the temperature c ontrol to "OFF" position stops the coo ling cycle but does not shut
off the power to the freezer.
• If the unit is unplugged , lost power, or turned off; you must wait 3 to 5 minutes before
restarting the unit. If you attempt to restart before this time delay, the freezer will not start.
• Large amounts of food will lower the cooling efficiency of the appliance.
• If you choose to change the thermostat setting, adjust thermostat control by one
numerical increment at a time. Allow several hours for temperature to stabilize between
adjustments.
10
Page 11

Defrosting Your Freezer
• When? For the most efficient operation and minimum energy consumption, defrost the freezer
when the frost on the freezer walls is excessive or ¼ to ½ inch thick.
• Choose a time when the stock of frozen food is low.
CAUTION
Do not use boiling water because it may damage the plastic parts. In addition, never use a sharp
or metallic instrument to remove frost as it may damage the cooling coils and will void the
warranty. We recommend using the pla stic scraper provided with your unit.
• Remove the frozen food from the freezer and place it in a cooler to protect the food.
• Turn the thermostat knob to “OFF”.
• Unplug the freezer.. The Power Supply light should be OFF.
• During the defrost process, the ice melts into the cabinet.
• Remove the drain plug on the inside floor of the freezer by screwing out.
• Place a shallow pan outside drain outlet. The defrost water will drain out.
• Check the pan occasionally so the water does not overflow.
• Clean the interior of the freezer.
• Replace the plug on the inside floor, The Power Supply light should be ON.
• Reset the thermostat to desired setting.
• Allow the cabinet to cool for one hour.
• Turn the temperature control knob in a clockwise direction to the maximum position “7” for a
minimum of 2 hours.
• Return food to the freezer.
HELPFUL HINT:
Defrosting usually tak es a few hours. Le aving the door open will help speed t he process. Also ,
pouring warm water (not boiling) on the ice/frost will help speed melting. If you must use a
scraper- please use caution - it is ver y easy to damage the freezer com partment and void your
warranty.
The Freezer Compartment
• This compartment is designed for the long term s torage of frozen food. Storage time is up to
three months.
• The storage life of frozen foods varies and the recommended storage time should not be
exceeded. The instructions regarding the care of frozen foods should be followed when
defrosting the freezer.
• Pre-packed commercially frozen food should be stored in accordance with the frozen foods
manufacturer’s instructions for a three star frozen food storage compartment or home freezer.
• Place frozen food i nto the fr eezer as quick ly as possible after purchas e. If there are instructions
on the packet, carefully follow these instructions regarding storage times.
• The freezer door is susceptible to breaking due to excessive ice build up. Be sure t o defrost
when the ice reaches ¼ to ½ inch thick.
• Storage baskets are provided for the organization of odd-shaped items. To reach other packages
in the freezer, just slide the baskets to one side, or lift it out.
Door Lock
Your unit is provided with a lock and key combination. The keys are located inside the plastic bag that
contains the User's Guide. I ns ert the k ey into the lock and turn it clockwise to unlock the door. T o lock
the door do the revers e o p er atio n making sure metal pin is en gag ed completely. Rem ove the key and
place it in a secure place for safekeeping.
11
Page 12

CARE AND MAINTENANCE
Cleaning Your Freezer
• Upon installation of your new applianc e, it is recom mended that it be cleaned thoroughl y.
• Turn the temperature control to "OFF", unplug the freezer, remove the food and storage baskets.
• Wash the inside with a damp warm cloth containing a water and baking soda solution. The
solution should be about 2 tablespoons of baking soda to a quart of water.
• Wash the storage baskets with a mild detergent solution.
• Be sure to keep the door gasket (seal) clean to keep the unit running efficiently.
• The outside of the freezer should be cleaned with mild detergent and warm water.
• Dry the interior and exterior with a soft cloth.
• The condenser coils should be vacuumed when they are dusty or dirty.
• It is recommended that t he unit be cleaned each time it is def rosted to help keep the unit odor
free and running efficiently.
Vacation Time
• Use extreme caution in the case of children. The unit should not be accessible to child’s play.
• Short vacations: Leave the freezer operating during vacations of less than three weeks.
• Long vacations: If the appliance will not be used for several months, remove all food and unplug
the power cord. Clean and dry the interior thoroughly. To prevent odor and mold growth, leave
the door open slightly: blocking it open if necessary or have the door removed.
Moving Your Freezer
• Remove all the food.
• Securely tape down all loose items inside your freezer.
• Remove the rollers to prevent damage
• Tape the doors shut.
• Be sure the freezer stays in the upright position during transportation.
Energy Saving Tips
• The freezer should be located in the coolest area of the room, away from heat producing
appliances or heating ducts, and out of the direct sunlight.
• Let hot foods cool to room temperature before placing in the freezer. Overloading the freezer
forces the compressor to run longer. Foods that freeze too slowly may lose quality, or spoil.
• Be sure to wrap foods properly, and wipe containers dry before placing them in the freezer. This
cuts down on frost build-up inside the freezer.
• Freezer storage bin should not be lined with aluminum foil, wax paper, or paper toweling. Liners
interfere with cold air circulation, making the freezer less efficient.
• Organize and label food to reduce door openings and extended searches. Remove as many
items as needed at one time, and close the door as soon as possible.
12
Page 13

PROBLEM
POSSIBLE CAUSE
Freezer does not operate.
Not plugged in.
The freezer temperature control is set at "OFF".
Compressor turns on and off frequently.
The room temperature is hotter than normal.
freezer to cool down completely.
Temperature inside the freezer is too warm.
Temperature control is set too warm. Turn the
freezer to cool down completely.
Temperature inside the freezer is too cold.
Temperature control is set too cold. Turn the
temperature control.
Temperature of external freezer surface is warm.
The exterior freezer walls can be as much as
heat from inside the freezer cabinet.
Popping or cracking sound when compressor
Metal parts undergo expansion and contraction,
level off or disappear as freezer continues to run.
Bubbling or gurgling sound, like water boiling.
Refrigerant (used to cool freezer) is circulating
throughout the system. This is normal.
PROBLEMS WITH YOUR FREEZER ?
You can solve man y common free zer problems easily, saving you the cost of a possible s ervice c all. Try the suggestions below to see if you can solve the problem before calling the servicer.
TROUBLESHOOTING GUIDE
The circuit breaker tripped or blown fuse.
A large amount of food has been added to the
freezer.
The door is opened too often.
The door is not closed completely.
The temperature control is not set correctly.
The door gasket does not seal properly.
The freezer does not have the correct
clearances.
The freezer has recently been disconnected for a
period of time. Four hours are required for the
comes on.
control to a cooler setting and allow several hours
for the temperature to stabilize.
Door is kept open too long or is opened too
frequently. Warm air enters the freezer every
time the door is opened. Open the door less
often.
The door is not closed completely.
The door gasket does not seal properly.
A large amount of warm or hot food might have
been stored recently. Wait until the freezer has
had a chance to reach its selected temperature.
The freezer has recently been disconnected for a
period of time. Four hours are required for the
control to a warmer setting and allow several
hours for the temperature to stabilize.
Switch on the "7", This causes continuous
running of the compressor and bypasses the
30οF warmer than room temperature. This is
normal while the compressor works to transfer
as in hot water pipes. This is normal. Sound will
13
Page 14

Vibrations.
Check to assure that the fr eezer is not on a level
See “Installation Instructions”
Moisture forms on inside freezer walls.
Weather is hot and humid, which increases
The door is not sealed properly.
Moisture forms on outside of freezer.
Door is slightly open, causi ng cold air from inside
the freezer to meet warm moist air from outside.
The door will not close properly.
The freezer is not on a level surface.
The storage baskets are out of position.
surface.
Floor is uneven or weak. Freezer rocks on the
floor when it is moved slightly. Be s ure floor can
adequately support f reezer. Level the free zer by
putting wood or metal shims under part of the
freezer.
The freezer is touching the wall. Re-level the
freezer and move it from the wall.
internal rate of frost build-up. This is normal.
Door is slightly open.
Door is kept open too long, or is opened too
frequently. Open the door less often.
The gasket is dirty.
14
Page 15

800-323 5029
help is available.
money order, Master Card, or Visa.
know your freezer inside and out.
SERVICE FOR YOUR FREEZER
We are proud of our custom er service organization and the network of professional service technic ians
that provide service on your Avanti appliances. W ith the purchase of your Avanti free zer, you can have
the confidence that if you ever need additional informat ion or assistance the Avanti Products Custom er
Service team will be here for you. Just call us toll-free.
AVANTI PRODUCTS CUSTOMER SERVICES
Product Information
Whatever your questions are about our products,
Part Orders
800-220 5570
In-Home Repair Service
800-220 5570
You may order parts and accessories that will be
delivered directly to your hom e.
You may order these items by personal check,
An Avanti Products authorized service center will
provide expert repair service, scheduled at a time
that is convenient for you. Our trained servicers
WIRING DIAGRAM
15
Page 16

Staple your sales receipt here. Proof of original
warranty.
WHAT IS COVERED – LIMITED ONE-YEAR WARRANTY
or less must be brought/sent to the appliance service center for repair.
LIMITED SECOND THROUGH FIFTH YEAR WARRANTY
to the service center and back to the user’s home, as maybe required, are the user’s responsibility.
WARRANTY EXCLUSIONS / WHAT IS NOT COVERED:
Products, including without limitation, one or more of the following:
•
power surges, structural failures surrounding the appliance, and acts of God.
•
• Shipping and handling costs associated with the
In no event shall Avanti Products have any liability or responsibility whatsoever for damage to surrounding property,
well as the resetting of breakers or fuses.
OUT OF WARRANTY PRODUCT
pro-rates, or product replacement, once this warranty has expired.
WARRANTY – REFRIGERATION - COMPRESSOR
YOUR AVANTI PRODUCTS
WARRANTY
Avanti Products warrants that the product is free from defects in materials and/or workmanship for a period of twelve
(12) months from the date of purchase by the original owner. The foregoing timeline begins to run upon the date of
purchase, and shall not be stalled, tolled, extended, or suspended for any reason whatsoever unless described in
detail in the warranty document. For one year from the date of purchase by the original owner, Avanti products will,
at its option, repair or replace any part of the product which proves to be defective in material or workmanship under
normal use. Avanti Products will provide you with a reasonably similar product that is either new or factory
refurbished. During this period Avanti Products will provide all parts and labor necessary to correct such defects free
of charge, so long as the product has been installed and operated in accordance with the written instructions in this
manual. In rental or commercial use, the warranty period is 90 days. All Avanti appliances of 4.2 cubic feet capacity
For the second through the fifth year from the date of original purchase, Avanti Products will provide a replacement
compressor free of charge due to a failure. You are responsible for the service labor and freight charges. In rental or
commercial use, the limited compressor warranty is one year and nine months. Costs involved to move the product
The warranty coverage described herein excludes all defects or damage that are not the direct fault of Avanti
A failure to comply with any applicable state, local, city, or county electrical, plumbing and/or building codes,
regulations, or laws, including failure to install the product in strict conformity with local fire and building codes and
regulations.
purchase date is needed to obtain service under
• Any external, elemental and/or environmental forces and factors, including without limitation, rain, wind, sand,
floods, fires, mud slides, freezing temperatures, excessive moisture or extended exposure to humidity, lightning,
Content losses of food or other content due to
spoilage.
• Incidental or consequential damages
Parts and labor costs for the following will not be
•
considered as warranty:
Evaporator doors, door springs, and/or frames.
•
Inner door panels, door shelves, door rails, and/or
•
door supports.
Chest freezer lid liners.
•
Vegetable crispers.
•
Light bulbs and/or plastic housing.
•
Plastic cabinet liners.
•
Punctured evaporator that voids the warranty on
•
the complete sealed system.
including cabinetry, floors, ceilings, and other structures and/or objects around the product. Also excluded from this
warranty are scratches, nicks, minor dents, and other cosmetic damages on external surfaces and exposed parts;
Products on which the serial numbers have been altered, defaced or removed; service visits for customer education,
or visits where there is nothing wrong with the product; correction of installation problems (you are solely responsible
for any structure and setting for the product, including all electrical, plumbing and/or other connecting facilities, for
proper foundation/flooring, and for any alterations including without limitation cabinetry, walls, floors, shelving etc., as
Avanti Products is under no obligation, at law or otherwise, to provide you with any concessions, including repairs,
replacement of the unit.
• Repairs performed by unauthorized servicers.
• Service calls that are related to external problems,
such as abuse, misuse, inadequate electrical power,
accidents, fire, floods, or any other acts of God.
• Failure of the product if it is used for other than it
intended purpose.
• The warranty does not apply outside the Continental
USA.
• Surcharges including but not limited to, any after hour,
weekend, or holiday service calls, tolls, ferry trip
charges, or mileage expense for service calls to
remote areas.
16
Page 17

PRECAUCION
Para reducir el riesgo de incendio, descarga
precauciones.
• Lea todas las instrucciones antes de usar su electrodoméstico.
- Guarde estas instrucciones.-
INSTRUCCIONES EN ESPAÑOL
• Peligro o Precaución: Existe el riesgo que los niños queden atrapados.
• Niños atrapados o s of ocamiento no son un pr ob lema del pasado. L os e lec trodomésticos
son peligrosos aún si sólo los deja en el garaje por un par de días.
• Antes de desechar su congelador o refrigerador usado: quítele las puertas. Deje las
repisas en su lugar para evitar que los niños se queden atrapados.
• No permita que los niños manejen, jueguen o entren dentro del electrodoméstico.
• No limpie su electrodoméstico con líquidos inflamables. Los gases pueden ocasionar
fuego o una explosión.
• No guarde ni use gaso lina u otros líquidos inf lamables cerc a de este o de c ualquier otro
electrodoméstico. Los vapores pueden ocasionar fuego o explosión.
INSTRUCCIONES PARA LA INSTALACION
Antes de Usar su Artefacto
• Retire la envoltura interna y externa.
• Verifique que tenga las siguientes partes:
CF211G: 3 canastas de almacenaje , un manual de instruc c iones, y una espátul a de pl ás tico y 2
llaves
CF268G: 4 canastas de almacenaj e , u n manual de instrucc iones , y una espátula de pl ás tico y 2
llaves
• Antes de conectar su elect rodoméstico a la corrie nte eléctrica, ubíquelo e n una superficie plana
por lo menos por 2 horas. Es to reducirá la posibilidad de malfunc ionamiento en el sistema de
enfriamiento por la manipulación durante el transporte.
• Limpie la superficie interior con agua tibia usando un paño suave.
Instalación de su Congelador
• Ubique su congelador en un piso que sea lo suficientem ente fuerte para soportar su pes o cuando
esté totalmente lleno o cargado.
• Deje aproximadamente 5 pulgadas de espacio entre la parte trasera y los costados de su
electrodoméstico, así permitirá la circulación de aire necesaria para enfriar el compresor.
• Mantenga su congelad or alejado del aire caliente, va por o líquidos que puedan salpic arlo, ya que la
unidad podría averiarse.
• Los rayos solares direc tos pueden d añar la c apa ac ríli ca, y las fuentes de cal or p ueden ocas ionar u n
aumento en el consum o eléctrico. Manténg alo lo más alejad o posible del agua par a prevenir algún
choque eléctrico. Evite los sitios húm edos y los ambientes ex trem adamente fríos ya que esto puede
afectar la eficiencia del enfriamiento de su congelador.
• Evite ubicar su congelador en áreas mojadas o muy húmedas. Mucha hum edad en el aire puede
causar la formación de escarcha rapidamente y necesitará descongelar su congelador más
frecuentemente.
• Conecte el congelador a un enchufe de pared exclus ivo e instale el cable de tierra. Baj o ninguna
razón se debe retir ar l a ter cer a punta del enchufe. C ualquier consu lta c on res pec to a la en ergía y/o
cable de tierra debe s er dirigida a un electric ista certificado o autor izado por el Servicio Técnico de
Avanti Products.
eléctrica, o daño cuando use su
electrodoméstico, siga las s iguient es
17
Page 18

ADVERTENCIA
Conexión Eléctrica
EL USO INAPROPIADO DEL ENCHUFE A TIERRA PUEDE OCASIONAR RIESGO DE UN
CHOQUE ELECTRICO. SI EL CORDON SE DAÑASE, LLEVELO A UN CENTRO DE
SERVICIO AUTORIZADO POR AVANTI PRODUCTS PARA QUE SE REEMPLACE.
• Para su seguridad, esta máquina de hacer hielo debe estar apropiadamente conectada a tierra. El cordón
eléctrico de esta máquina de hacer hielo esta equipado con un enchufe de tres puntas, el cual encaja
perfectamente en los receptáculos/enchufes de pared de tres puntas estándar, para minimizar la posibilidad de
un choque eléctrico.
• Bajo ninguna circunstancia corte o retire la tercera punta (cable a tierra) del enchufe del cordón
eléctrico.
• Nunca use un cable de extensión para conectar la unidad a la electricidad.
• Nunca use un adaptado con enchufe de solo 2 puntas.
• Si solo puede conec tar la máquina de hacer h ielo a un receptáculo/enc hufe de pared de 2 puntas ,
comuníquese con un electricista calificado para que reemplace ese receptáculo/enchufe de pared
por uno de 3 puntas, de acuerdo con los códigos de electricidad aplicables.
• Esta máquina de hacer hie lo requiere un receptáculo/enc hufe de pared de tres puntas est ándar de
115/120 voltios a.c.~/60hz.
• Para prevenir cualqu ier daño físico o lesión, el cordó n debe ser asegura do detrás de la m áquina de
hacer hielo y no estar expuesto o colgando.
Cable de Extensión
Debido al posible ri esgo de seguridad causado bajo ciertas circunstancias, se recom ienda firmemente
que no use un cable de extensió n para este e lectrodo méstico. Sin em bargo, si n o tiene otra opc ión mas
que usar un cable de exte nsión, asegúrese que es te sea un cable de extens ión para electrodom ésticos
que este listado baj o UL/CUL, que tenga enchufe y r eceptáculo para enchufe de tres punt as (cable a
tierra) y que la capacidad del cordón eléctrico sea de 115 voltios y no menos de 10 amperios.
Protector contra variaciones de corriente eléctrica (Surge Protector).
La mayoría de electrodom ésticos utilizan una series de pa neles de control para operar. Estos paneles
son muy susceptibl es a las variaciones de corriente eléctrica, las cuales causan que es tos se dañen o
destruyen.
Si vive en un áre a o ciudad d one hay muchas variaciones de corriente o apagones, se r ecomienda que
utilice un protector contra variaciones de corriente para todos los electrodomésticos y aparatos eléctricos.
El protector que elija debe bloquear una variación de electricidad alta para poder proteger el
electrodoméstico al cual está conectado. Por favor contáctese con un electricista licenciado en su área si
tuviera preguntas en referencia al tipo y tamaño de protector que necesita.
Daños debido a variaciones de electricidad no se consideran un defecto del fabricante y podrían anular la
garantía.
18
Page 19

USANDO SU CONGELADOR
Control de Temperatura
• Su congelador tiene un con trol qu e regu la la tem peratura. El control d e tem peratur a está ubic ado en
la esquina inferior a mano derecha.
• La primera vez que encienda el co ngelador, g ire el control de temper atura hacia la derecha hasta la
posición máximum “7”, déjelo ence ndido por lo menos 2 horas ant es de coloc ar alim entos dentro de
su congelador. Esto asegurará que la cabina esté completamente fría antes de colocar los
alimentos.
• El control de tem peratura va desde lo más calient e “1” hasta lo más frío “7” t ambién tiene “OFF”.
Ajuste el control de tem peratura al nivel que usted ne cesite. El nivel “4” es el m ás adecuado para
uso en la casa u oficina.
• Para detener el enfriamiento de su congelador, mueva el control de temperatura a la posición “OFF”
NOTA:
• Si gira la temperatura a la posic ión “OFF ” dete ndrá el cic lo de enf riam iento, es to no sig nifica que
apagará el congelador.
• Si la unidad se desc onec ta, pi erde c orrient e o s e apa ga la llave pr inci pal, te ndrá que esp erar 3 a
5 minutos para vo lver a reiniciar la unidad. Si usted intenta reinic iar antes de este tiempo su
congelador no encenderá.
Descongelando
• Cuando descongelar? Para el mejor funcionamiento y consumo mínimo de energía de su
congelador, desconge le cuando las pare des internas estén llenas de es carcha o tengan un espesor
de ¼ a ½ pulgada.
• Escoja un momento cuando no tenga muchos alimentos en el congelador.
• Cómo descongelar? Siguiendo estas indicaciones:
ADVERTENCIA
No use agua hirviendo porque dañará las partes de plástico. Tampoco use puntas o
instrumentos metálicos para retirar la escarcha ya que dañará el espiral de enfriamiento y
cancelará la garantía. Le recomendamos usar la espátula de plástico incluída con esta unidad.
• Retire los alimentos del congelador y colóquelos en una caja térmica para conservarlos y
protegerlos.
• Gire el termostato a la posición “OFF”.
• Desconecte el congelador. La luz indicadora de suministro de energía se apagará (luz roja apagará).
• Durante el descongelamiento, el hielo se derrite dentro de la cabina.
• Para drenar el líquido retire la tapa de drenaje situada en la pared trasera.
• Coloque una bandeja afuera de la pared trasera para que drene.
19
Page 20

• Vigile la bandeja de vez en cuando para que no se desborde.
• Limpie el interior de su congelador.
• Coloque la tapa de drenaje dentro del congelador y fuera del gabinete.
• Reconfigure el termostato según lo deseado.
• Deje que la cabina se enfríe por dos horas, luego coloque los alimentos.
INFORMACION ADICIONAL:
El descongelamiento toma pocas horas. Le ayu d ará, dejar abierta la puerta del conge lado r para
apresurar el proceso de descongelamiento. Para acelerar el descongelamiento, eche agua
caliente (no hirviendo), al hiel o y la escarcha. Tenga mucho cuidado si usa la espátula para
raspar el hielo, si lo hace muy fuerte puede dañar el compartimiento de su congelador y anular la
garantía.
Compartimiento de su Congelador
• Este compartimiento está diseñado para un período largo (3 meses) de almacenamiento de
alimentos congelados.
• El tiempo de almac enam iento de los alim entos congelados varía y se rec om ienda alm acenar no m ás
del tiempo recomendado. Cuando descongele su congelador deberá seguir cuidadosamente las
instrucciones.
• Alimentos congelados preenvasados comercialmente deben ser almacenados de acuerdo con las
indicaciones de su fabricante.
• Coloque los alimentos congelados dentro de s u congela dor inmediat amente des pués de com prarlos .
Si hay indicaciones en el envase, sígalas cuidadosamente considerando el tiempo de
almacenamiento.
• La puerta del congelador pued e quebrarse cuando hay mucho hielo. Asegúres e de descongelarlo
cuando el hielo haya excedido de ¼ a ½ pulgada de espesor.
• La canasta de alm acenaj e está dis eñada p ara or gani zar toda c lase de alim entos . Para c olocar otros
paquetes en su congelador, mueva la canasta a un lado o sáquela.
Cerradura de la puerta
Su unidad viene equipada con una combinación de cerradura y llave.
Las llaves (2) están dentro de la bolsa plástica junto al manual de instrucciones.
Introduzca la llave en la cerradura y gírela hacia la izquierda para cerrar la puerta .
Para abrirla, gire la llave hacia la derecha.
Quite la llave y colóquela en un lugar seguro para evitar que se pierda.
20
Page 21

CUIDADO Y MANTENIMIENTO Limpiando su Congelador
• Después de instalar su congelador, se le recomienda que este sea limpiado a fondo.
• Gire el control de temperatur a a “ OFF”/”APAGADO”, desconec te el cong elador y retir e los alim entos
y la canasta de almacenaje.
• Lave el interior c on agua tibia y un trapo suave r emojado en una so lución de bi carbonato de sodio.
La solución consiste en dos cucharadas de la referida sal en un litro de agua.
• Lave las canastas de almacenaje con un detergente suave.
• Asegúrese que la puerta quede hermeticamente cerrada para que su congelador funcione
eficientemente.
• Las partes externas de su congelador deben ser limpiadas con un detergente suave y agua tibia.
• Seque el interior y el exterior con un paño suave.
• Se recomienda que la unid ad sea lim piada en el m omento en que se d escongela , con la finalid ad de
que quede libre de mal olor y operando eficientemente.
Si usted sale de Vacaciones
• Retire todos los alimentos
• Desconecte su congelador
• Limpie su congelador
• Deje la puerta de su congelador ligeramente abierta para evitar la formación de mal olor, moho.
• Sea extremadamente cuidadoso si hay niños. El congelador no debe ser accesible a los niños.
• En el caso de ser un largo tiempo de almacenamiento, la puerta deberá ser sellada con cinta
adhesiva para que no se abra o se deberá retirar la puerta.
Para mover su Congelador
• Retire los alimentos
• Asegúrese de colocar cinta adhesiva a todo lo que se puede caer dentro de su congelador.
• Retire las ruedillas para prevenir accidentes.
• Selle las puertas con cinta adhesiva.
• Asegúrese que el congelador se mantenga parado durante el traslado.
Consejos Para Ahorrar Energía
• Su congelador debe est ar ubica do en e l área m ás fría de la h abitac ión, alejado de el ectrodomésticos
que produzcan calor o conductos de aire caliente y lejos de los rayos solares.
• Deje enfriar los alimentos de acuerdo a la temperatura ambiental antes de colocarlos dentro del
congelador. Si sobrecar ga su congelador forzará a l compresor a funcionar más tiempo del normal.
Los alimentos que se congelan lentamente pierden calidad y se descomponen.
• Asegúrese de envolver adecuadamente los alimentos y de secar los empaques o contenedores
antes de colocarlos dentro del congelador. Colocarlos mojados ocasiona escarcha en el
congelador.
• La canasta de almacenaj e de su conge lador no deb e ser forrada con pap el alum inio, p apel de cer a o
papel toalla ya que esto interfiere con la circulación del aire frío restando eficiencia a su congelador.
• Organice y coloque etiquet as en los envases d e los alimentos c on la finalidad de abrir el congelador
lo menos posible y encontrar rápidamente lo que usted est á buscando. Retire la mayor cantidad
posible de cosas que necesita a la vez y cierre la puerta del congelador tan pronto le sea posible.
21
Page 22

PROBLEMA
SOLUCION
Su electrodoméstico no funciona
No está conectado a la corriente eléctrica.
El control de temperatura está en “OFF/ APAGADO”
El compresor se enciende y se apaga
La temperatura de la habitación es más caliente de lo normal.
La temperatura dentro del congelador
La temperatura está programada muy caliente. Baje la
enfriarse por cuatro horas.
La temperatura dentro del congelador
El control de temperatura está programado muy frío. Suba la
temperatura se estabilice.
La temperatura de la superficie externa
La pared externa del congelador puede estar 30º Fahrenheit
calor dentro de la cavidad del congelador.
Ruido fuerte cuando el congelador
Los congeladores modernos tienen más capacidad de
compresor cuando no hay ruido alrededor.
Ruido fuerte cuando comienza a trabajar
Esto es normal. Cuando el congelador funciona con
avanzando el congelamiento.
PROBLEMAS CON SU CONGELADOR
Usted puede resolver muchos problemas comunes de su electrodoméstico fácilmente, ahorrándole el
gasto de una posible visita del servicio técnico.
Pruebe las siguientes sugerencias para verificar si usted puede resolver el problema antes de llamar al
servicio técnico.
GUIA PARA SOLUCIONAR PROBLEMAS
El interruptor saltó o se quemó un fusible
frecuentemente
está muy caliente.
Colocó una cantidad muy grande de alimentos en el
congelador.
La puerta permanece abierta mucho tiempo.
La puerta no quedó completamente cerrada.
El control de temperatura no está funcionando correctamente.
La empaquetadura de la puerta no la está sellando
adecuadamente.
El congelador no tiene el suficiente espacio libre.
El congelador recientemente fue desconectado.
Para que el congelador esté completamente frío necesitará
enfriarse por cuatro horas.
temperatura con el control y espere unas horas hasta que se
estabilice.
Ha dejado la puerta abierta frecuentemente. El calor entra en
el congelador cada vez que se abre la puerta. Abra la puerta
lo menos posible.
La puerta no está cerrada completamente.
La empaquetadura de la puerta la está sellando
adecuadamente.
Probablemente colocó alimentos calientes recientemente
El congelador recientemente fue desconectado.
Para que el congelador esté completamente frío necesitará
está muy fría.
está caliente.
funciona.
el compresor.
temperatura con el control y espere unas horas hasta que la
más alta que la temperatura de la habitación.
Esto es normal mientras el compresor funciona para transferir
almacenaje y la temperatura es más uniforme. Estos
requieren compresores más eficientes. Ud. puede oír el
presiones altas durante el ciclo de encendido. El sonido se
acabará e irá desapareciendo de acuerdo a como vaya
22
Page 23

Sonidos similares a crujidos y estallidos
compresor
Las partes metálicas, como los ductos de agua caliente, se
paulatinamente.
Burbujeo o gorgoteo, como agua que
hierve.
Esto es normal. Es el refrigerante (usado para enfriar el
congelador) que está circulando a través del sistema.
Vibración.
Asegúrese que el congelador esté nivelado. El piso puede
totalmente plano.
Formación de humedad dentro del
Esto es normal. Cuando el clima es húmedo y caliente, la
adecuadamente
Formación de humedad fuera del
congelador.
La puerta no está cerrada completamente. El calor entra en
el congelador cada vez que se abre la puerta.
La puerta no cierra completamente
El congelador no está totalmente nivelado.
obstaculizando el cierre de la puerta.
Información del Producto
800-323-5029
Estamos dispuestos a ayudarlos si tiene dudas
o preguntas acerca de nuestros productos.
Para solicitud de Partes
Usted debe solicitar las partes y accesorios
o Visa.
Servicio de Reparación a domicilio
Avanti Products autoriza al Centro de Servicio
tanto por dentro como por fuera.
cuando empieza a funcionar el
congelador.
SERVICIO TECNICO PARA SU ELECTRODOMESTICO
Estamos orgullosos de nuestro servicio de atención al c liente y servicio que brindan nuestr os técnicos
profesionales en sus electrodomésticos Av anti. Con la compra de s us electrodomés ticos Avanti, usted
puede confiar pues si usted nec esita información adic ional o asistencia, el equipo del Dep artamento de
Servicio al Cl iente de Avanti Products, estará con us ted para responder cualquier consulta o inqu ietud
que usted tenga. Sólo llámenos gratis a los siguientes números telefónicos.
SERVICIO AL CLIENTE DE AVANTI PRODUCTS
dilatan y contraen. Esto es normal. El sonido desaparecerá
estar desnivelado. El congelador se puede estar meciendo.
Asegúrese que la superficie donde tiene el congelador
aguante el peso de este. Nivele el congelador colocando un
pedazo de madera o de metal por debajo.
Asegúrese que el electrodoméstico esté ubicado en un lugar
acumulación de escarcha aumenta. Se ha dejado la puerta
frecuentemente abierta. El calor entra en el congelador cada
vez que se abre la puerta. Abra la puerta lo menos posible.
La puerta no está cerrada completamente.
La empaquetadura de la puerta no está sellando
El sellador de la puerta está sucio.
La canasta de almacenaje está fuera de su sitio,
800-220-5570
800-220-5570
que necesite y nosotros se los enviarem os
directamente a su domicilio.
Usted puede solocotar lo que necesite y pagar
con cheques personales, efectivo, Master Card
para brindarle un servicio experto de
reparación, adecuándose al horario que usted
encuentre conveniente. Nuestros técnicos
conocen perfectamente nuestros productos
23
Page 24

-------------------------------------------------------(detach here)-----------------------------------------------------------------
Name
Model # Serial #
Address
Date Purchased Store / Dealer Name
City State Zip
E-mail Address
Area Code Phone Number
Occupation
Did You Purchase An Additional Warranty
As your Primary Residence, Do You:
Extended
Own Rent
None
Your Age:
Reason for Choosing This Avanti Product:
product:
under 18 18-25 26-30
Married Single
Price
Other: _____________ ____ __
Comments:
Registration Information
Thank you for purchasing this fine Avanti product. Please fill out this form and return it to the following
address within 100 days from the date of purchase and receive these important benefits:
Avanti Products, A Division of The Mackle C o ., Inc.
P.O.Box 520604 – Miami, Florida 33152
Protect your product:
We will keep the model number and date of purchase of your new Avanti product on file to help
you refer to this information in the event of an insurance claim such as fire or theft.
Promote better products:
We value your input. Your responses will help us deve lop produc ts desig ned to bes t m eet your
future needs.
Avanti Registration Card
Please indicate the most important factors
That influenced your decision to purchase this
Product Features
Avanti Reputation
Product Quality
Salesperson Recommendation
Other: _____________ ____ __
Friend / Relative Recommendation
Warranty
31-35 36-50 over 50
Marital Status:
Is This Product Used In The:
Home Business
How Did You Learn About This Product:
Advertising
In-Store Demo
Personal Demo
24
Page 25

VER 2011-01-26
PRINTED IN CHINA
25
 Loading...